How to Create an Amazing Sewing Space in Tight Quarters
Do you love to pin amazing sewing spaces? Do you dream of a BEAUTIFUL, ORGANIZED, SPACIOUS, and DEDICATED place to create? Those last two can be a sticking point for many of us who don’t have the luxury of a creative space to call our own. But beautiful and organized? Absolutely.

In this post, I will help you to create an amazing sewing space in tight quarters. We’ll tackle these in reverse order from most challenging to most fun! After each step, I will give you my example of how I walked through these steps to create a sewing space I love.
Note: I am modeling my steps after what I have learned by following Myquillyn Smith, aka “The Nester”, and her Cozy Minimalist approach to making a house a home. Here’s an overview of her process.
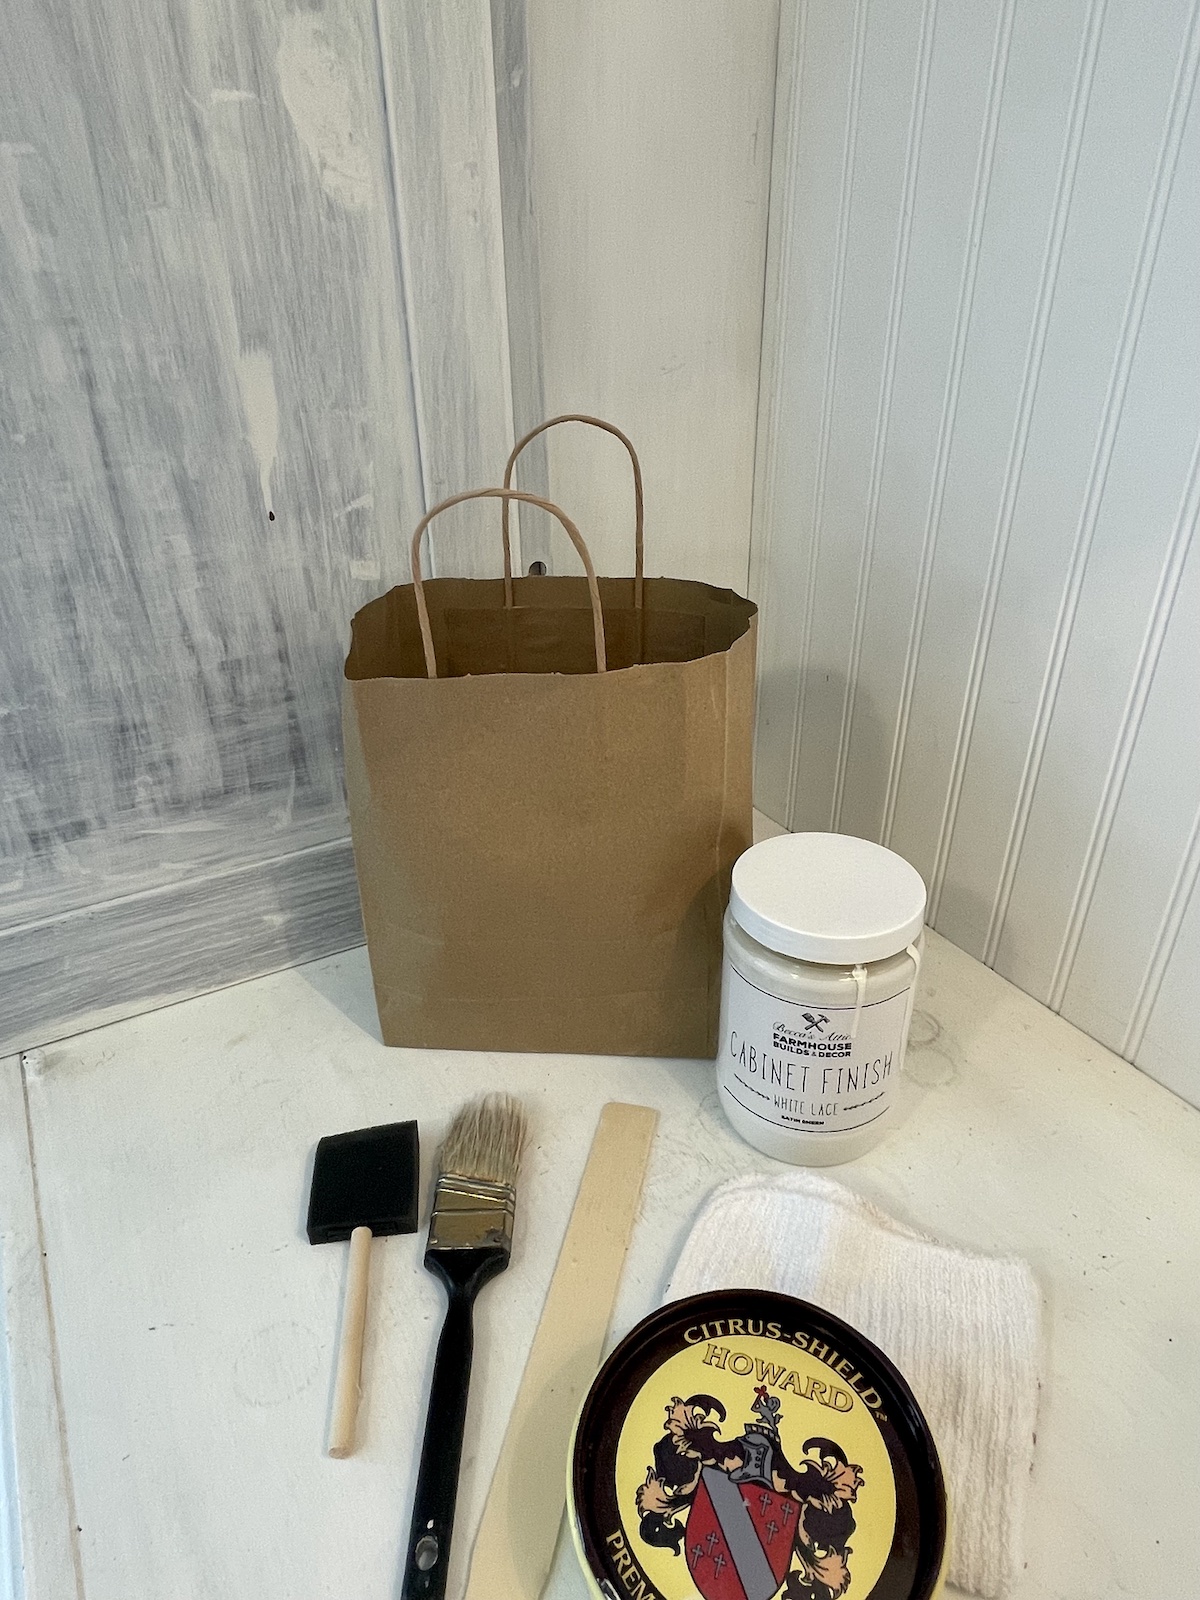
Materials to Create an Amazing Sewing Space in Tight Quarters
- Pinterest Board with ALL the ideas, big and small.
- Cleaning supplies
- Fabric and Paint swatches/supplies/chalk paint (optional- I used the color “white lace” for my new to me TV turned sewing cabinet)
- Furnishings and decor (currently in room, shopped from house, thrifted, or purchased)
- Temporary containers for sorting (shoeboxes work great for the small stuff)
- Storage solutions to suit your style and needs (currently in room, shopped from house, thrifted, or purchased)
Part One: 10 Steps to Create an Amazing Sewing Space in Tight Quarters
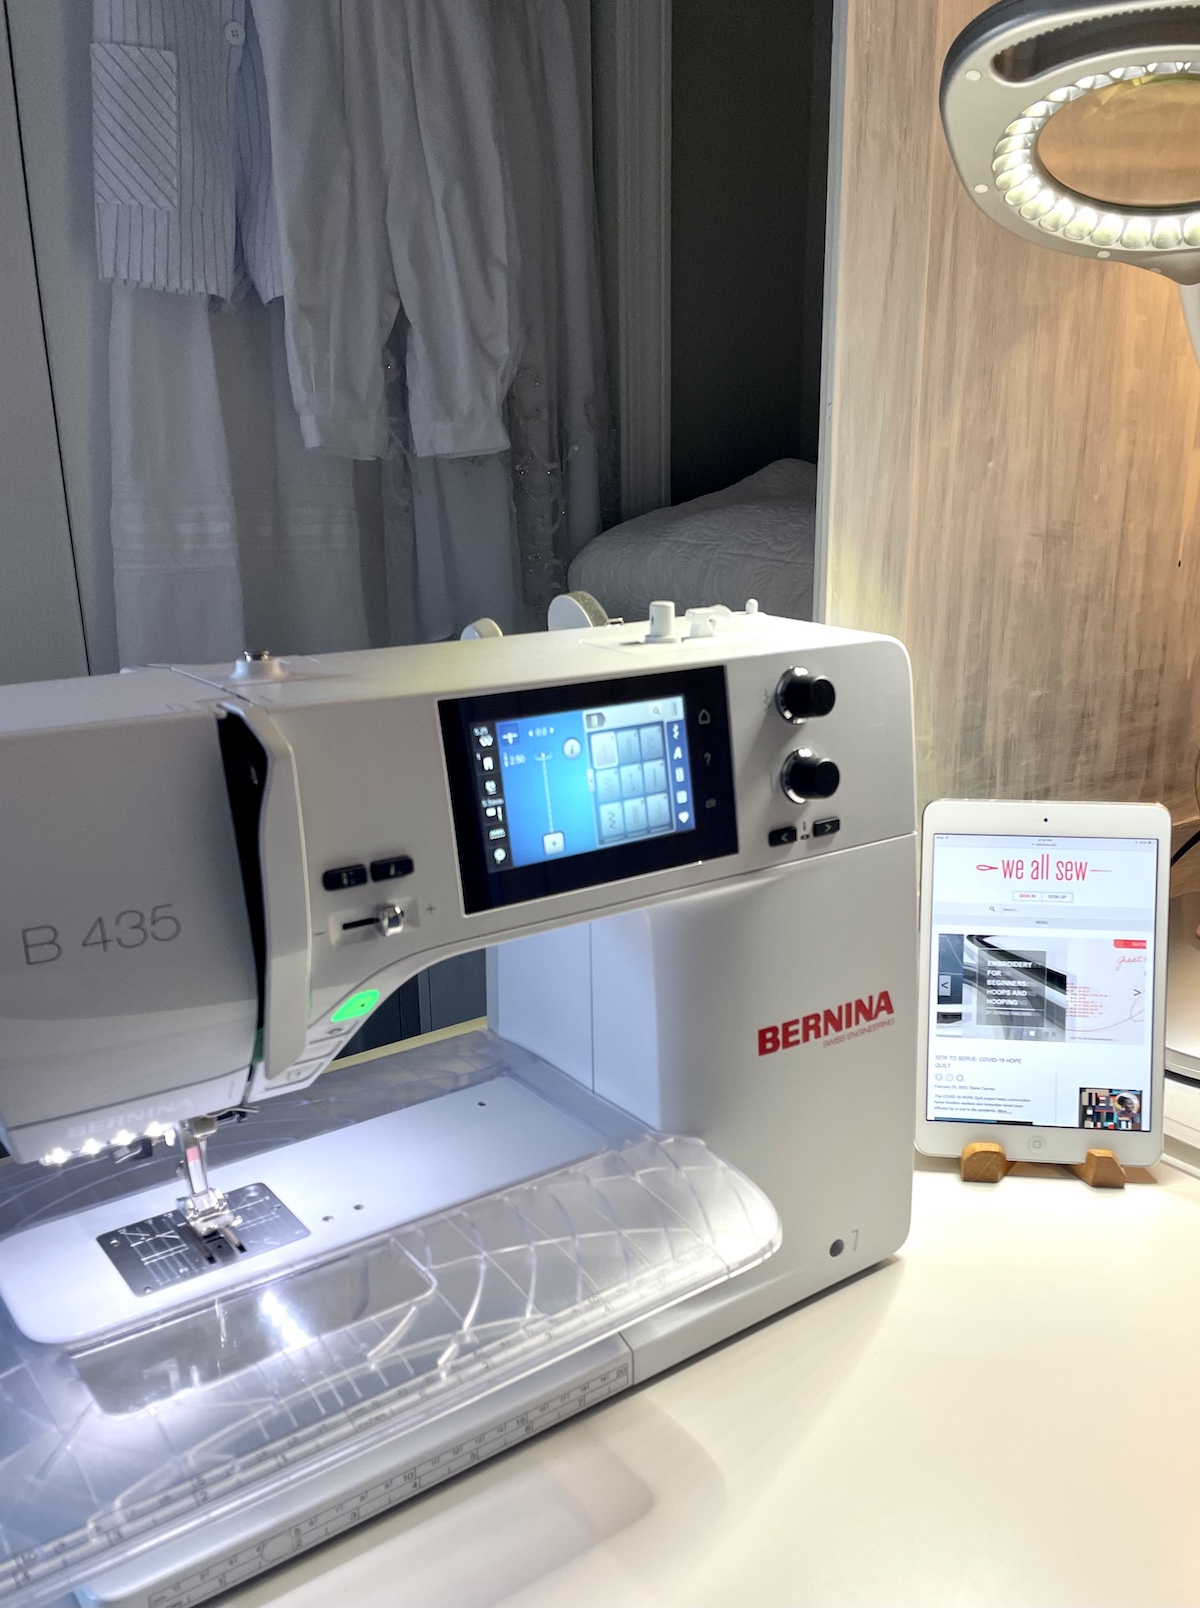
I’ve always dreamed of having my own room. Sewing room, that is! While awaiting the arrival of my new BERNINA 435 sewing machine, I felt like a new mom wanting to create the perfect nursery. As I tracked the anticipated arrival to Gina’s BERNINA here in Knoxville, I pictured a large bright room with lots of surfaces to create and not have to put everything away after each sewing session. Maybe someday, but not yet. What I do have, and am so grateful for, is a guest room that is not used by guests very often. And one of the features I love most about my new B435 is that it is so portable. I can easily set it up in a different location in my house or even travel with it. Whether you have a guest room, a playroom, or a family room to work in, I have some ideas that might help you to love your space more.
A Note About Pinning
A tip I learned from the Nester is to pin whole rooms, decorating and storage ideas. Don’t worry about whether it is realistic, affordable, or if it will actually work in your space. Be careful not to pin specific items like a shopping list, but whole rooms to get a feel for what speaks to you. The Nester recommends at least 50 pins in order to start seeing patterns emerge. Do you like vibrant and fun colors? Soft vintage pastels? Relaxing and natural earth tones? These things will rise to the surface in your pins and be super helpful later on. Here’s the link to my pinboard if you’d like to check it out 🙂
Step 1. Choose Your Space
Don’t BUY anything yet! Buying comes in the LAST step and maybe isn’t even necessary!
You are creative. And you love to sew. You DESERVE a place to do this. Remind yourself (and your family) of this. Ask yourself questions:
- How often do I (or would I like to) sew?
- Do I have a space in my home which is used less often than this?
- What kind of lighting and colors make me feel the most inspired and creatively energized?
- Is there a space where I can work without distraction if needed?
- Is there a space where I can take a break and close the door without having to put everything away?
- Is there a space coming to mind I might consider for my creative work zone?
Continue asking yourself these questions and others that may come to mind. Sit with it for a bit. Don’t rush this process. Take it one step at a time.
Talk with your family about your wishes to have a creative place and they may surprise you with their willingness to give up some of their space for you. For example, if you have a playroom, can the toys be organized in a family room or bedroom in order to make space for you?
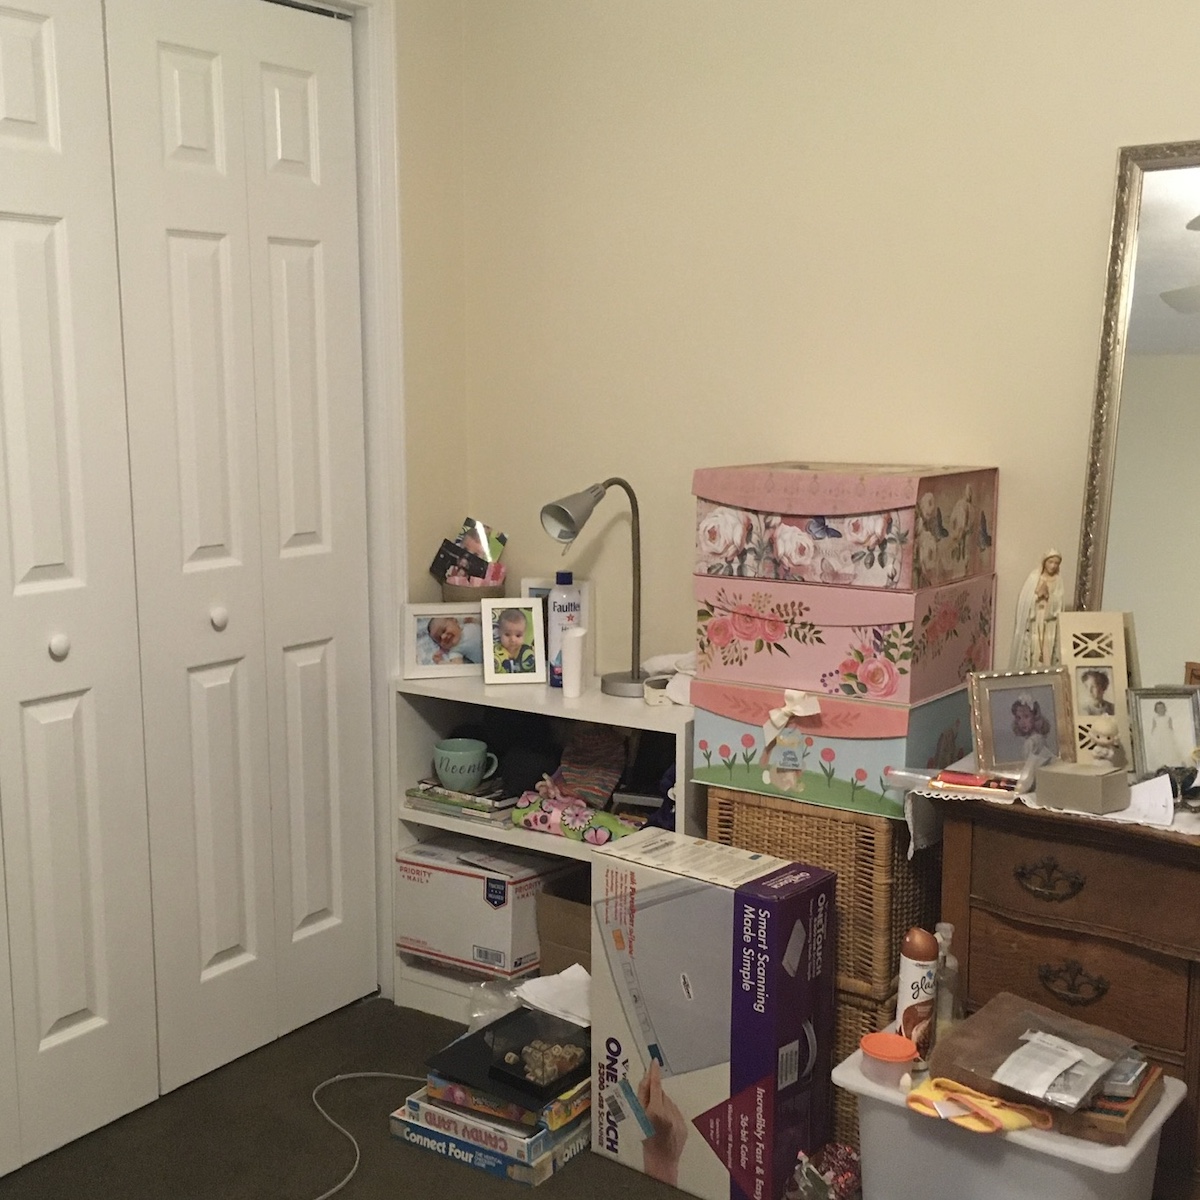
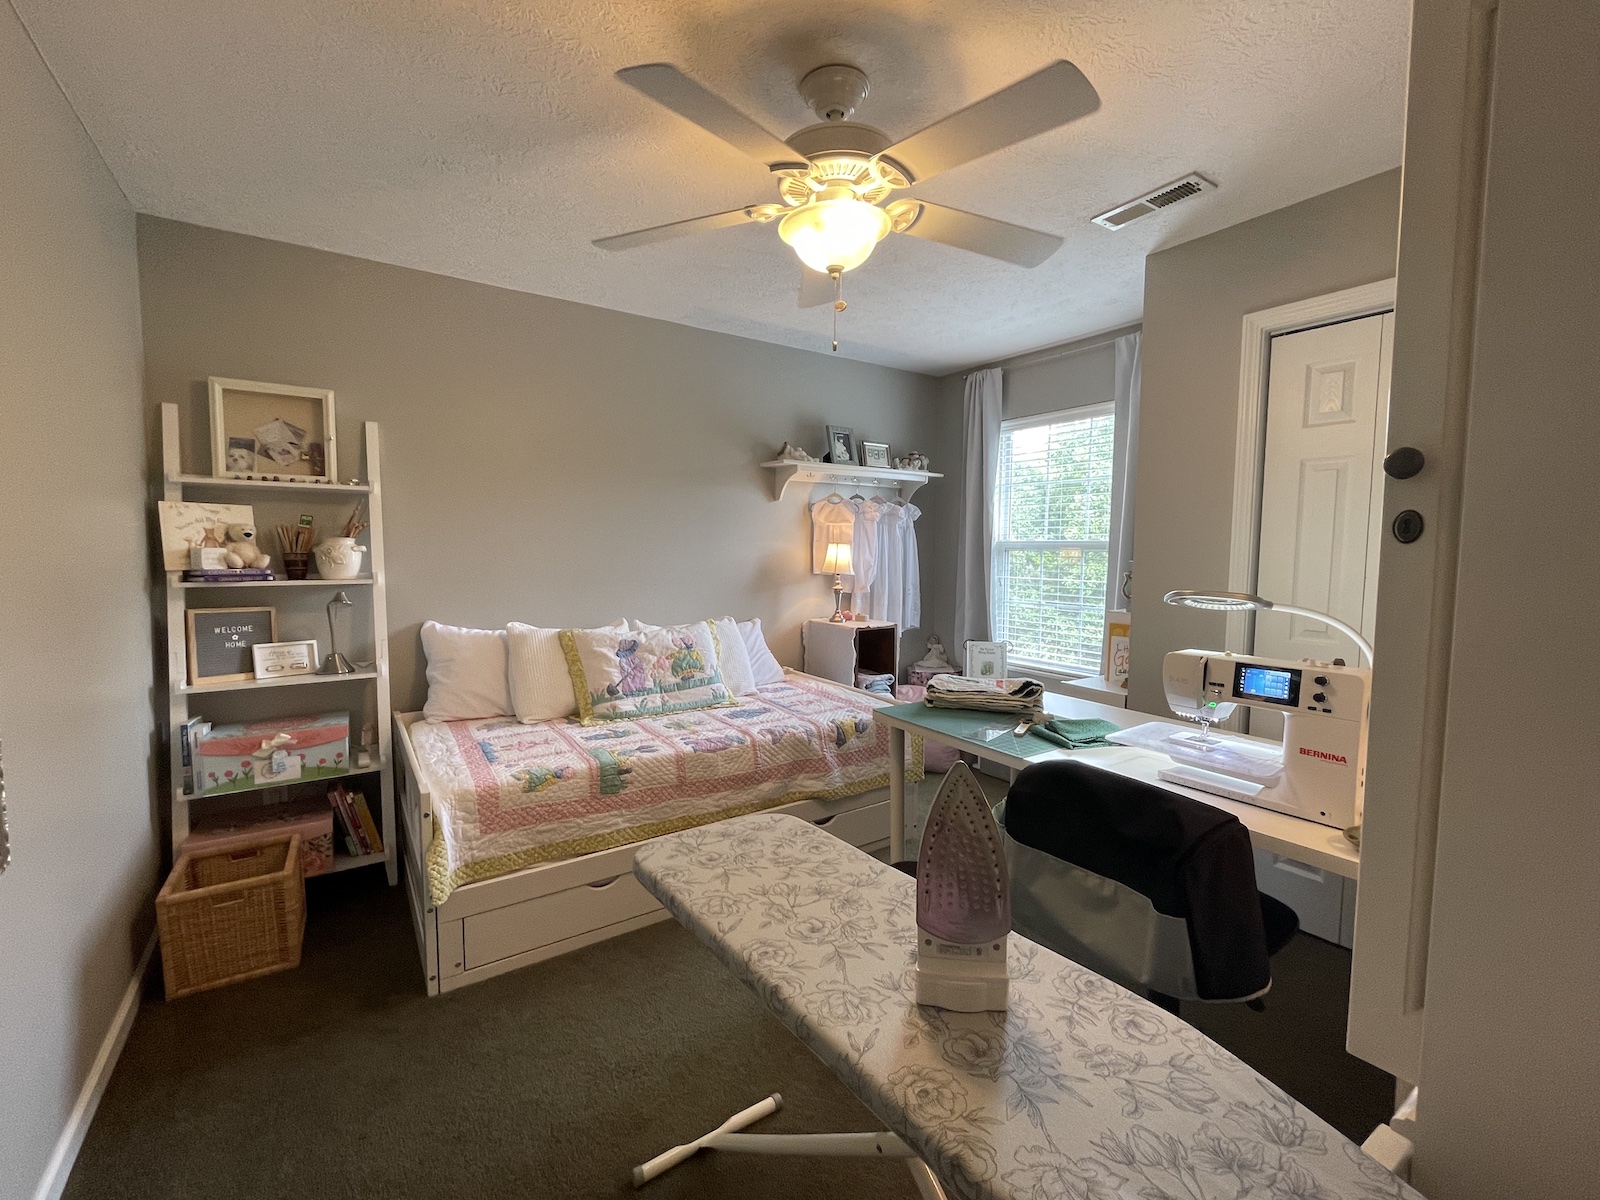
My Example: We are empty nesters with four adult children and their families, including four beautiful grandchildren. They aren’t all “home” at the same time often, but when they are, we need every square inch of our house. I decided to use the smaller of the two extra bedrooms to create a dual-purpose sewing room/guest room. I chose the smaller of the two because the main guest room has room for a pack & play, rocking chair, etc. And, with that being the primary guest room, I can just close the door to the smaller room if we only have one set of guests.
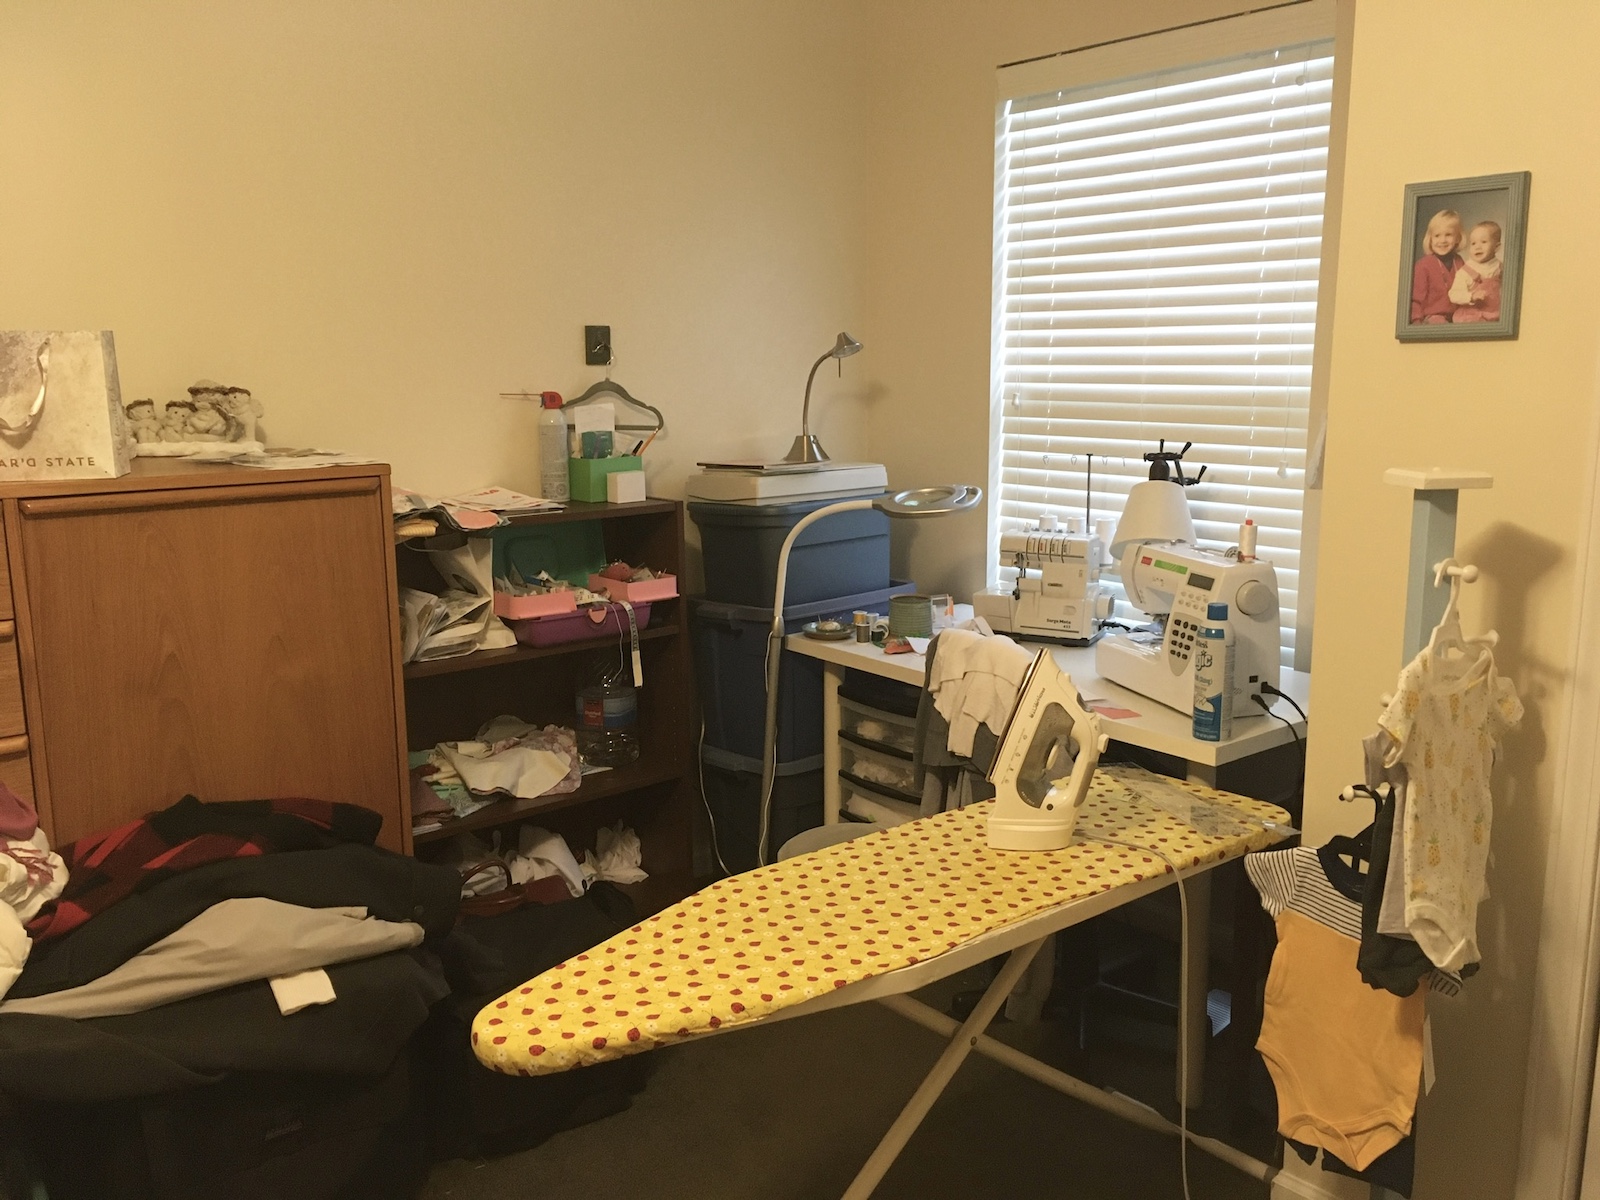
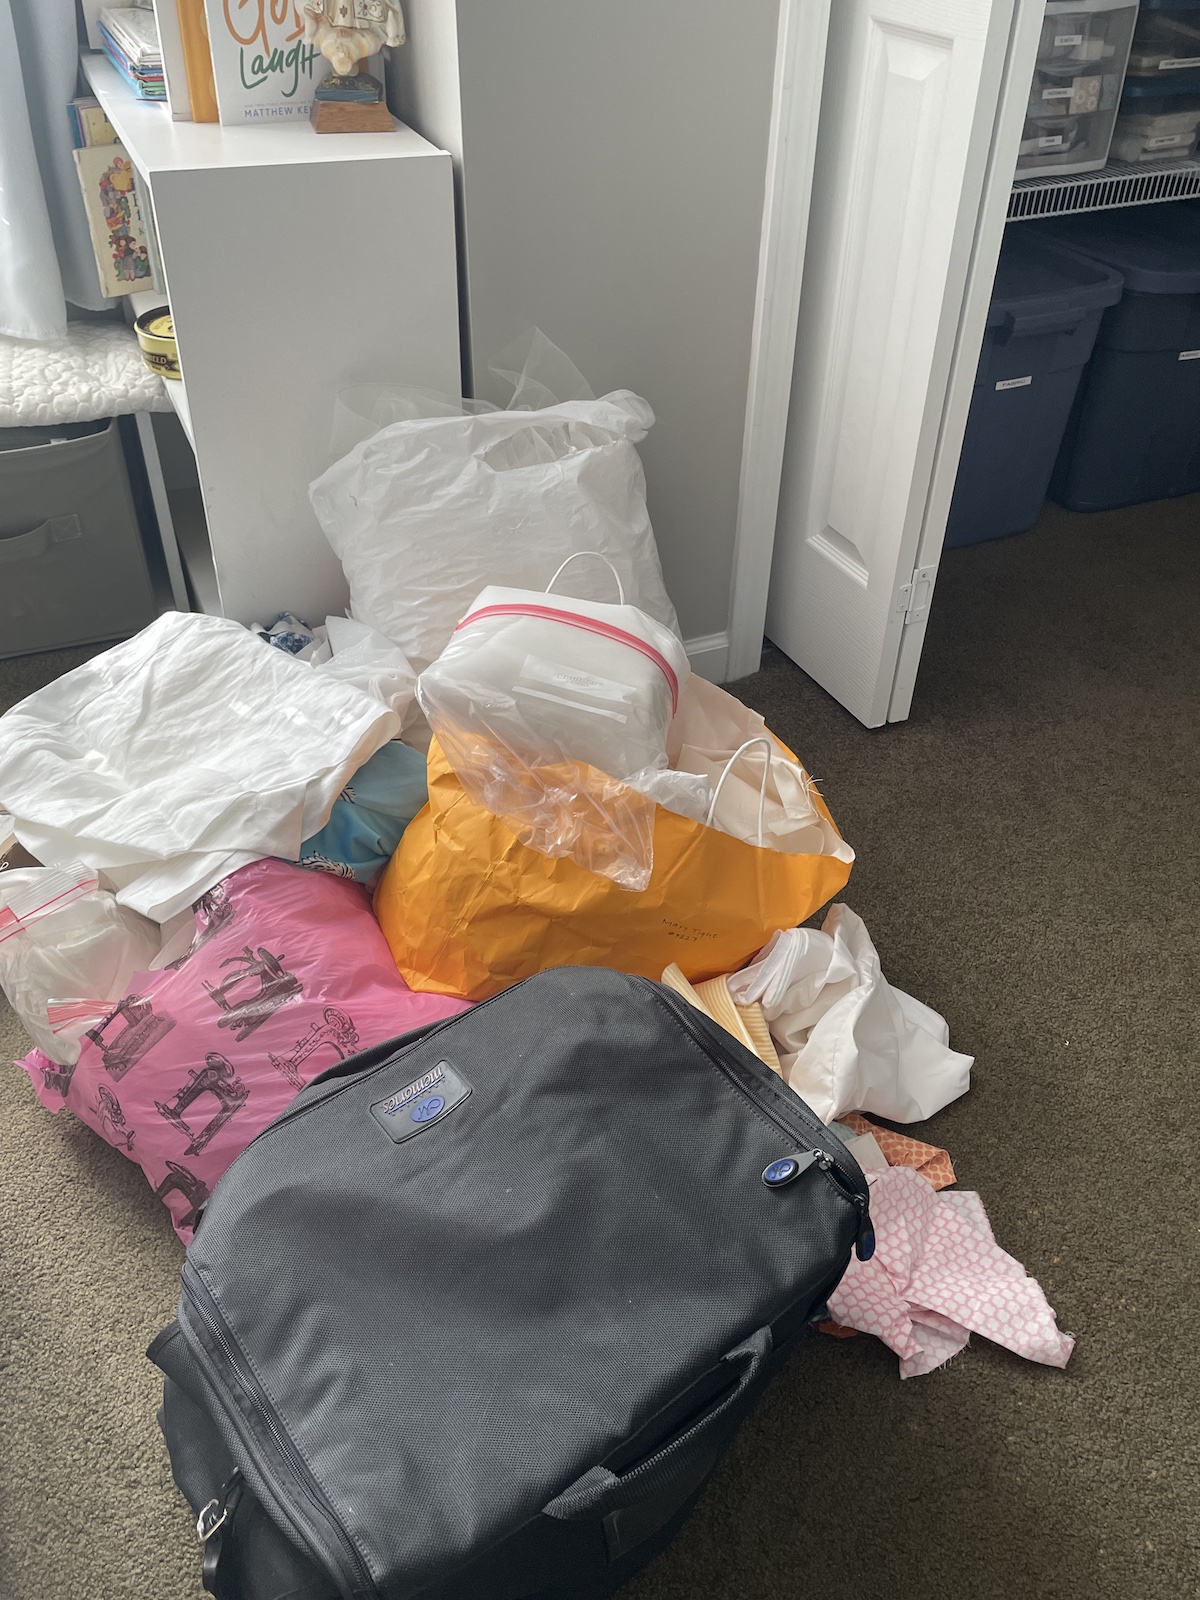
Well, this is embarrassing.
You can see why I chose this room for a makeover!
Step 2. Identify All Ways This Space Will Be Used
Once you choose your space, ask yourself the following questions:
- Will the space be shared some, most, or all of the time?
- Who will be sharing the space? (How you proceed will vary greatly depending on who this is. Your toddler and your husband will have a totally different impact on how you set things up!)
- What are all the activities that will happen in this space? (If it is shared, ask your family to help identify how they like to use the space.)
Ask yourself these and other questions to help you create a vision for how you and your creative dreams can fit within the space you have chosen. Remember, YOUR needs matter and get to count!
My Example: Since I am using the smaller bedroom, it is usually our preschool-aged granddaughter who stays in what she has adopted as “her” room. The activities I have identified for this room are:
- Sewing
- Sleeping
- Reading
- Playing
Step 3. Completely Empty the Space (Except for Large Furniture)
Warn your family that some other parts of your home are going to look like a disaster for a few days. This is an important step. Please don’t skip it. The Nester calls this “quieting” your space. I love this so much. You don’t need to take out the large pieces of furniture, but if you can completely empty the room, even better! Rugs, drapes, wall art- all of it. And if you need a lamp or two, use your judgment. (Note: to avoid distraction, feel free to leave any closets alone for now.)
Even if you just leave the large pieces you know will stay, an otherwise empty room will help you determine furniture placement in (wait for it) STEP 6! (Now, don’t jump ahead- no cheating allowed!) It’s amazing how a completely empty room (think: moving into a new place) can invite you to think differently about everything from furniture placement to room function and home decor preferences. I love this step!
My Example: We used to have bulky cabinets and shelves lining the walls to hold all the things. I had a folding table for sewing, which I hardly ever did because the space just didn’t work for me. Then we’d stash the stuff, take down the table and throw an air mattress on the floor for overflow guests. And that’s pretty much what they felt like: overflow. Not very welcoming. It was a welcome relief to empty a room we and our guests avoided.
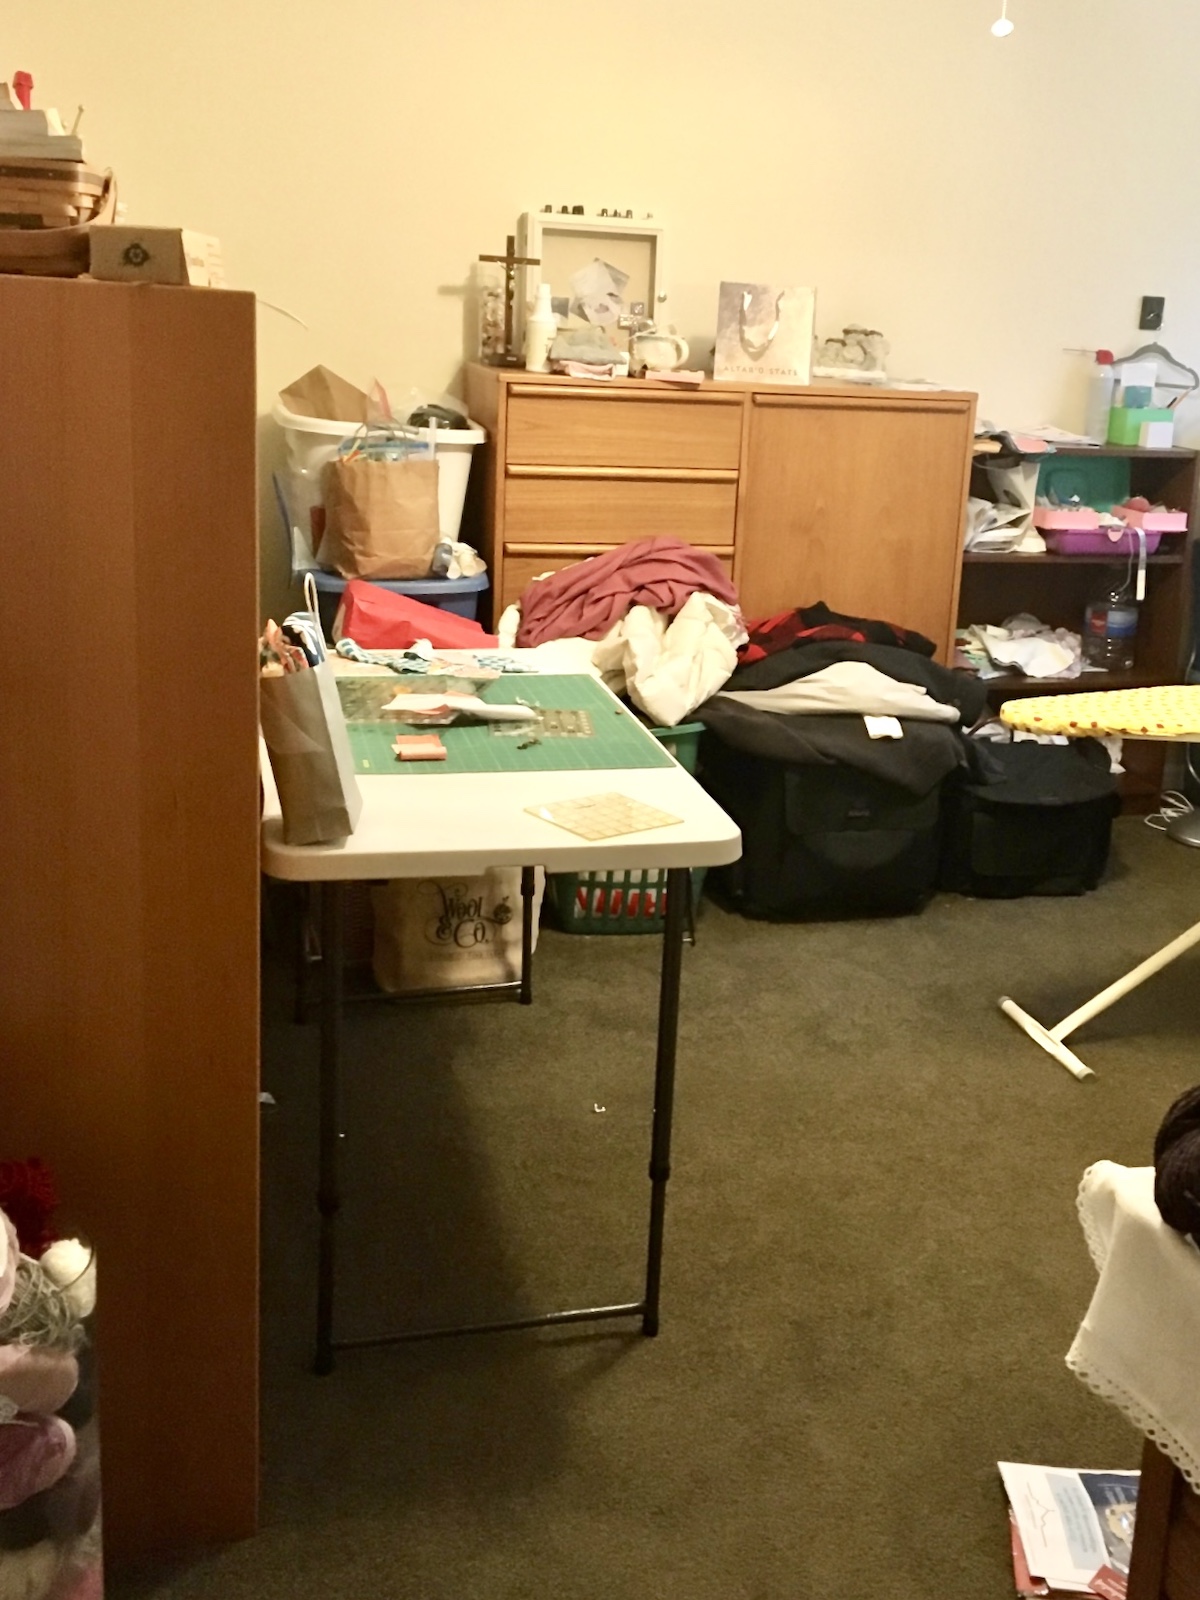
Before (obviously!)

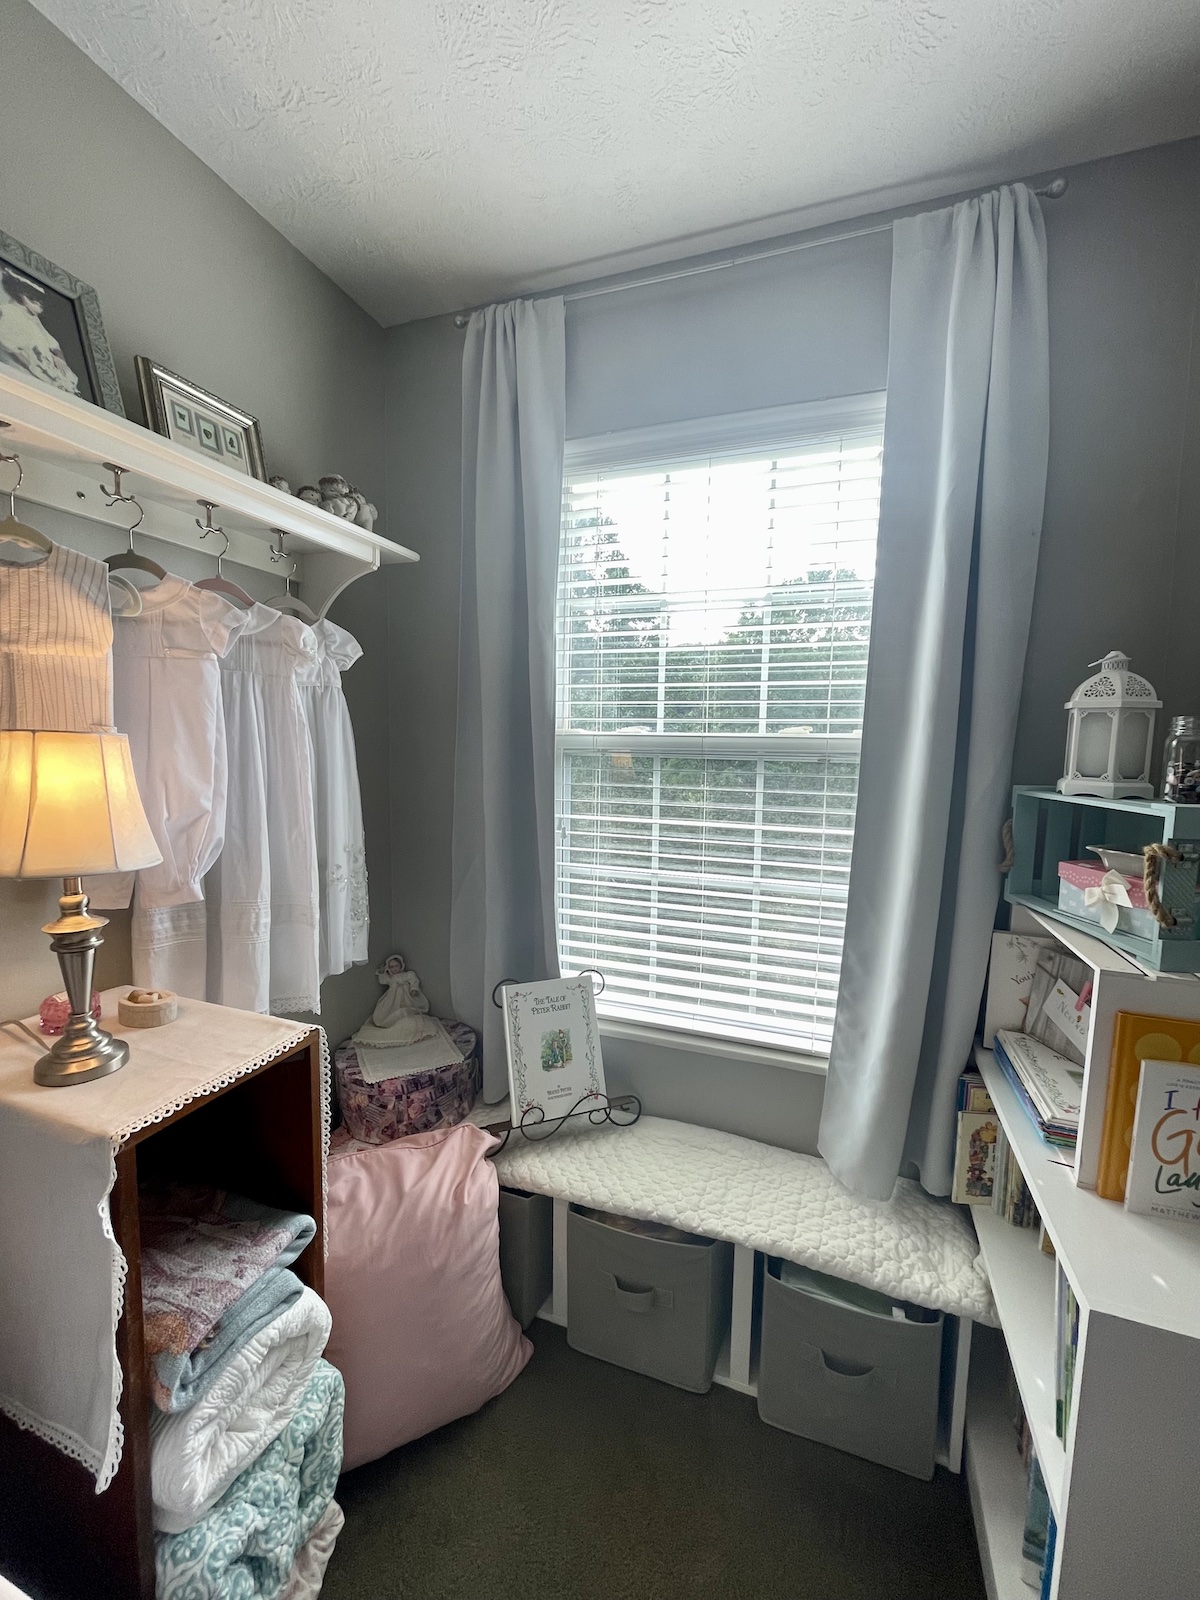
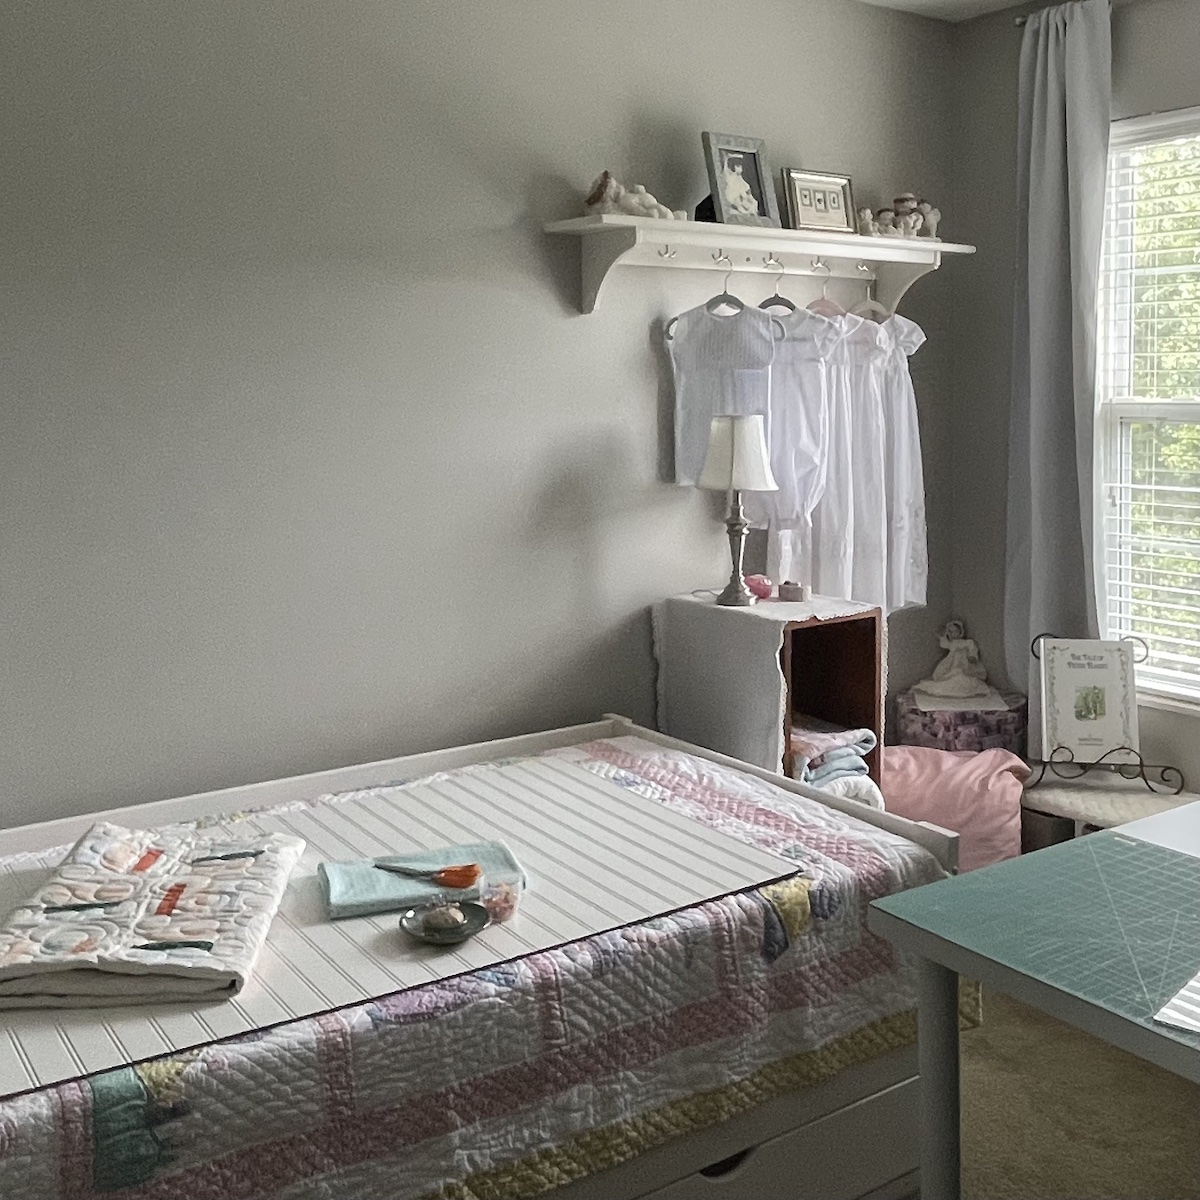
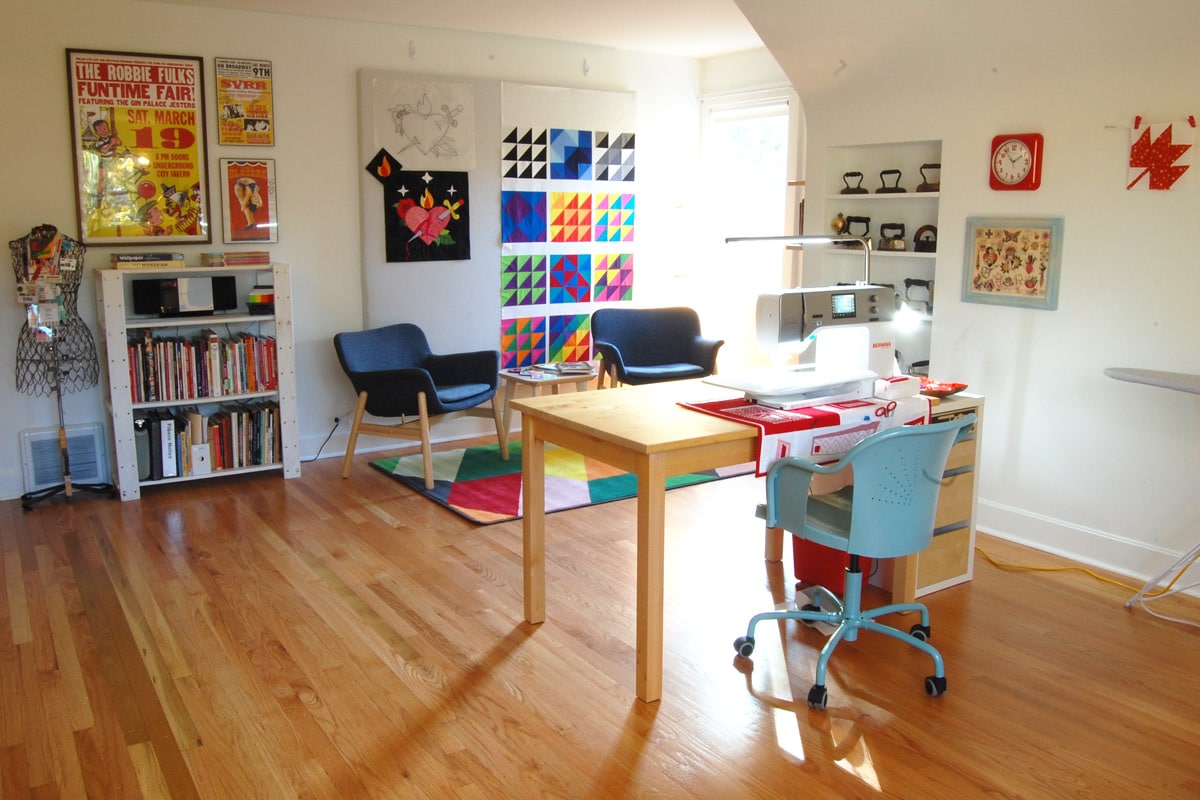
After: Everything about this is better: Paint, Furniture, Organization!
Step 4: Clean and Paint (Optional)
Clean means removing dirt, not organizing. Now is not the time to get distracted and start sorting your pins and needles. Ask me how I know to warn you of this trap. I know things will are starting to feel overwhelming here, but trust me. THIS IS FUN! Just get out your Swiffer, vacuum, and toothbrush if needed and give the room a good spring cleaning. And you might decide you’d like to paint. Now is the time to do it! Go back to your pinboard to help you decide what color to paint!
My Example: Once we emptied this room, we realized how much we really didn’t like the wall color we’d inherited and had never been changed since we bought our house. We decided to use a neutral “greige”, Mindful Gray, to help create a calm backdrop for the ways this room would be used. What a difference it made and made the room feel larger just by changing the color! And the green carpet we also inherited and will replace someday looks better too. Bonus!
Step 5. Determine Furniture Needs
If you chose to leave some of the bigger pieces of furniture in Step 3, make a list of any other pieces you might need to make your room serve the purposes you identified in Step 2. Don’t overdo it and assume you have to cram everything needed for each purpose in the room. For example, if you’re claiming a spot in a family room, you don’t need to store your whole fabric stash and bins of unfinished projects there. C’mon, you know you have them and I do too. But who wants to look at that all the time? Not me, and I’m guessing not you either. For the love of all that is creative, let yourself breathe.
My Example: After quieting, cleaning and painting the space and looking at the list of activities from step 2, we decided we needed the following pieces of furniture:
- Bed
- We knew when the whole family was home, a couple would need to sleep in this room, so we chose to purchase a twin to king daybed. These are pretty cool and can be found at all different price points. Here is the one we purchased.
- Bedside Surfaces
- I found a leaning wall shelf at ALDI for around $60 that serves as one of our bedside surfaces. It is used for storage, room decor, and holds a reading lamp and charging station. The other bedside surface is a temporary fix, but it works and is a cute place to store our small quilts and baby blankets.
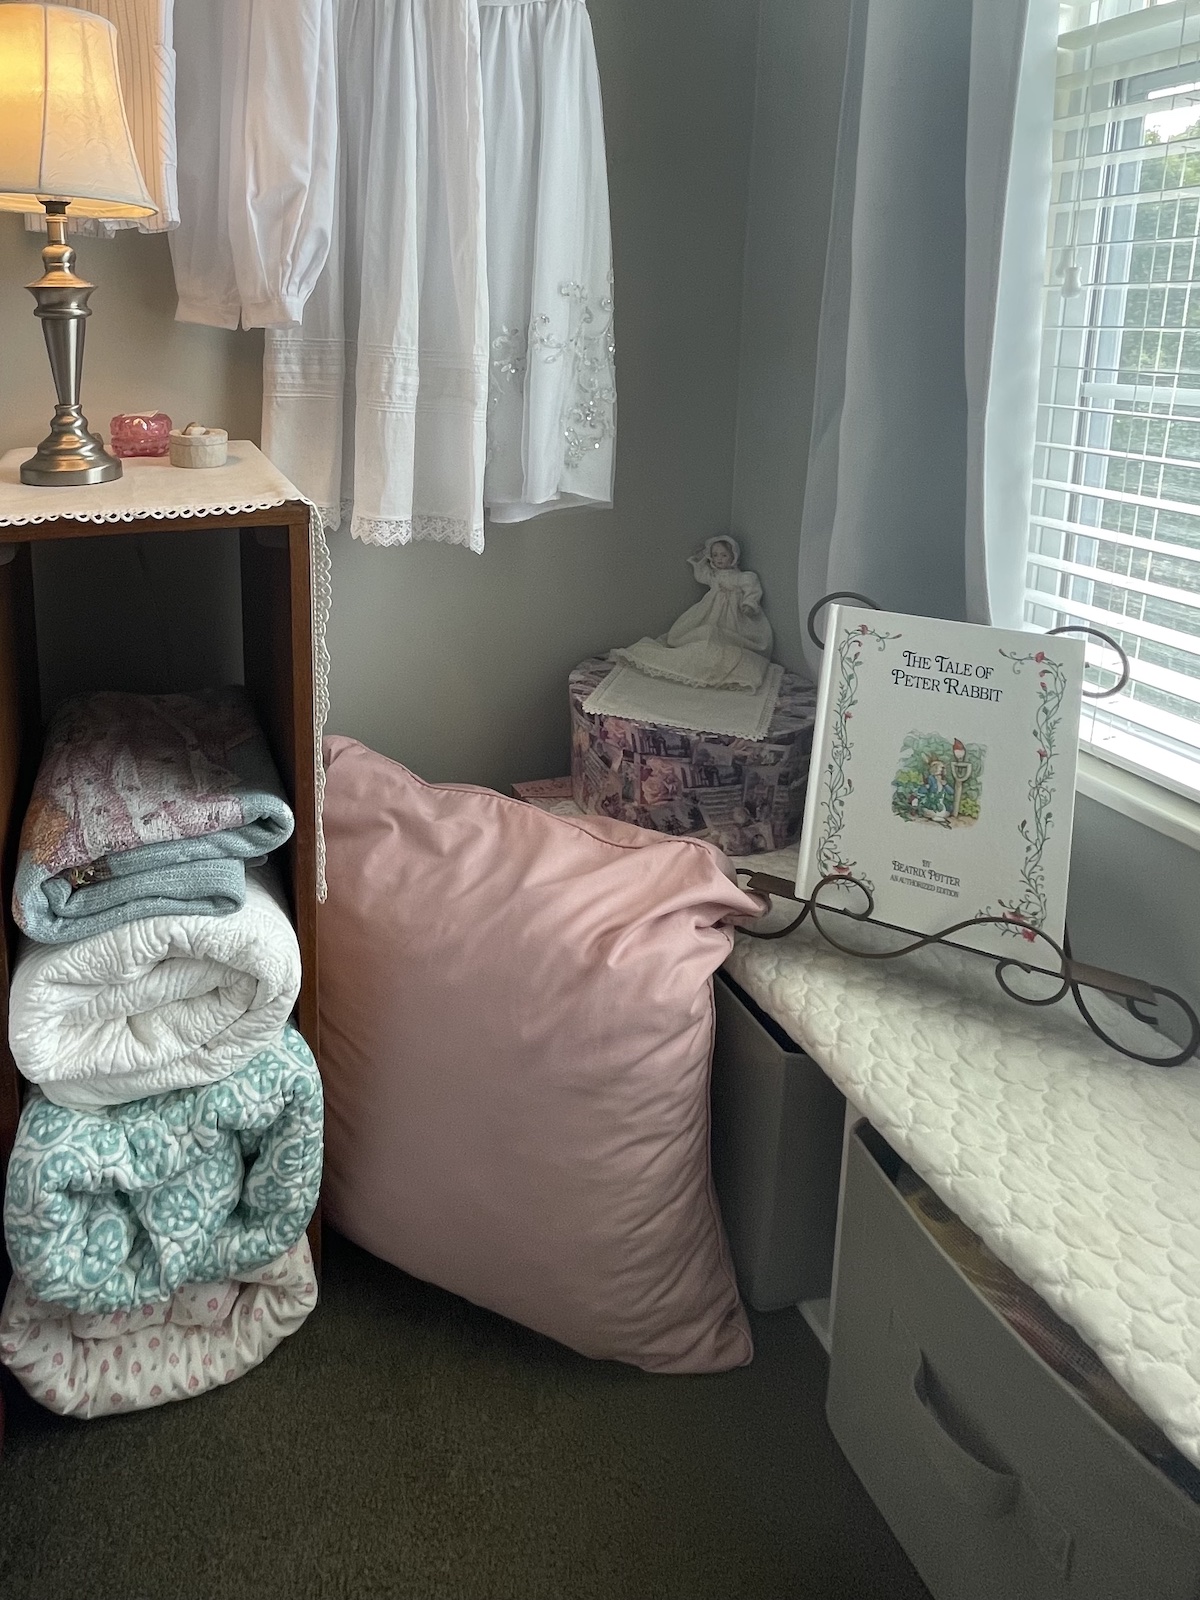
- Books/Toy storage
- We shopped our house and had a small white laminate shelf we decided to use to store the children’s books near the window. Also shopped from home was the 3 cube storage unit from IKEA. We put it on it’s side to form a small window seat in what would become a reading/quiet play nook.
- Sewing Cabinet
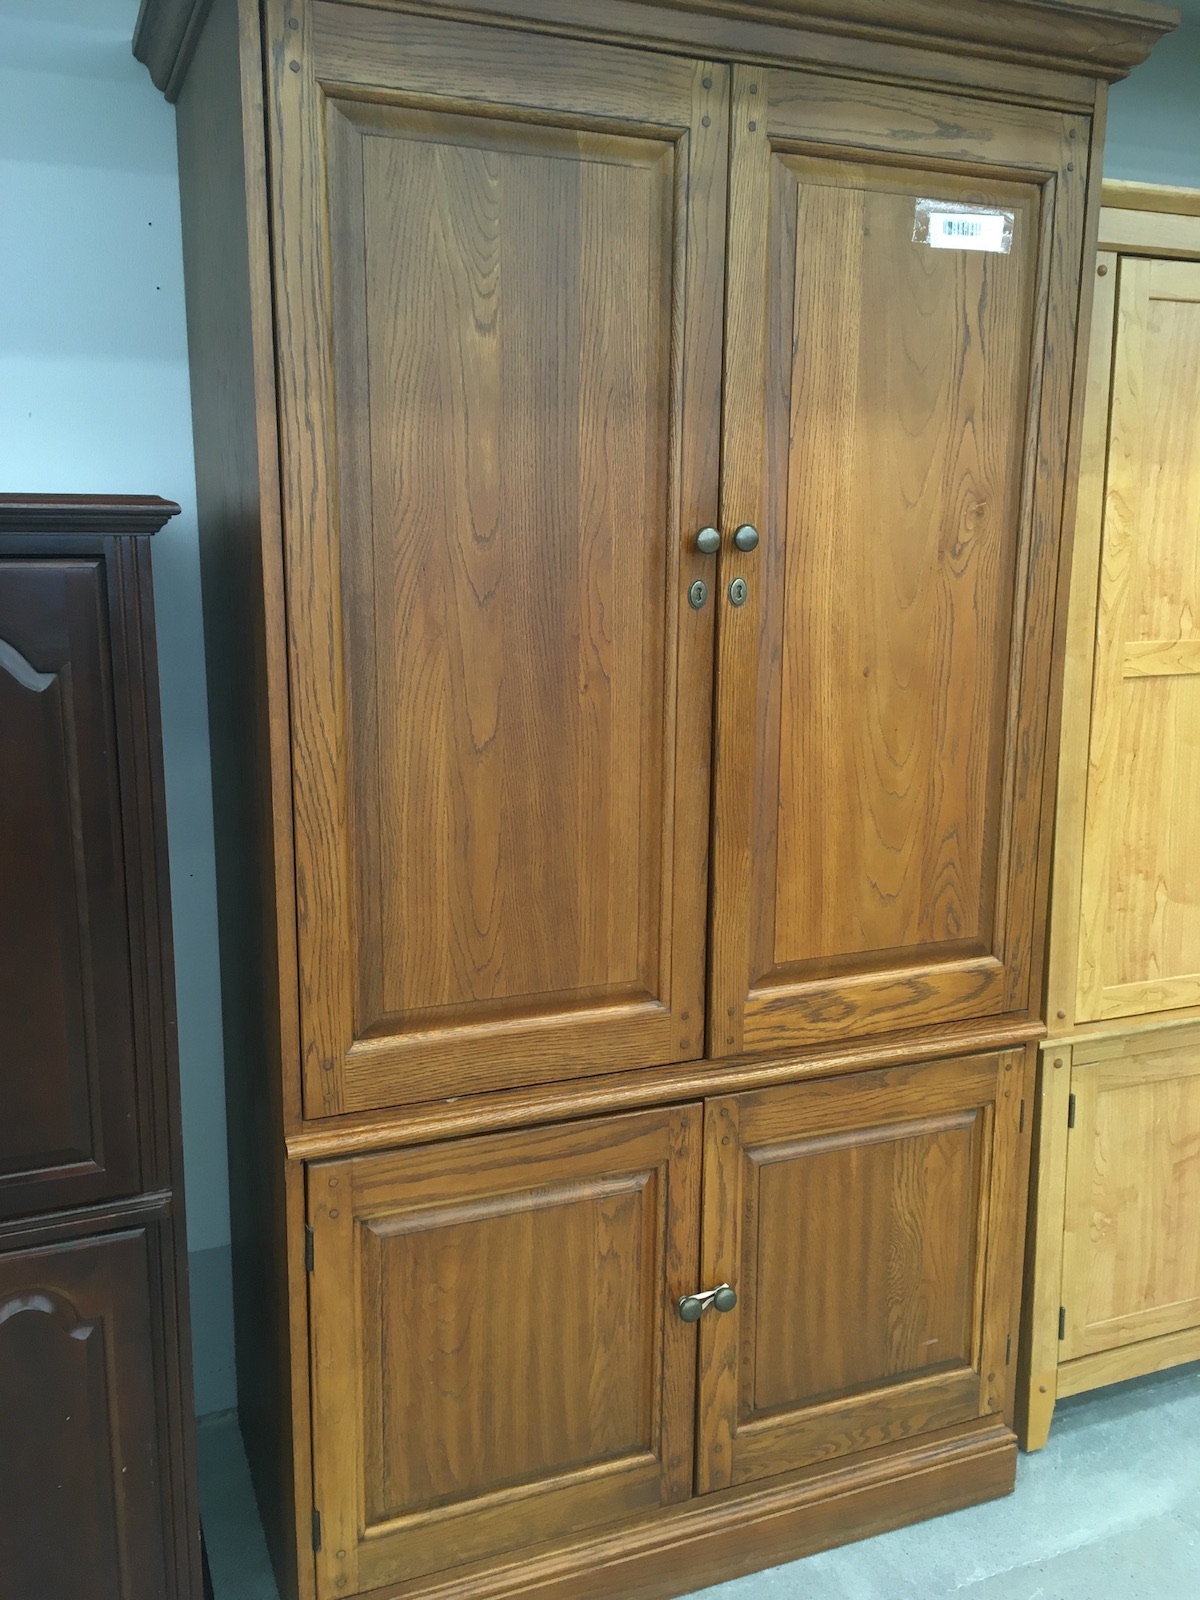
- The biggest decision for me was a sewing cabinet. I looked at a lot of options and nothing seemed just right (or were within our budget), until I saw a used TV Cabinet with pocket doors and slide-out storage shelves at our local Habitat for Humanity Re/Store. I convinced my husband to drag it home, heft it up the stairs, chalk paint it, and put a new bead-board panel on the back to make it look pretty. All for under $100. My husband is the best!
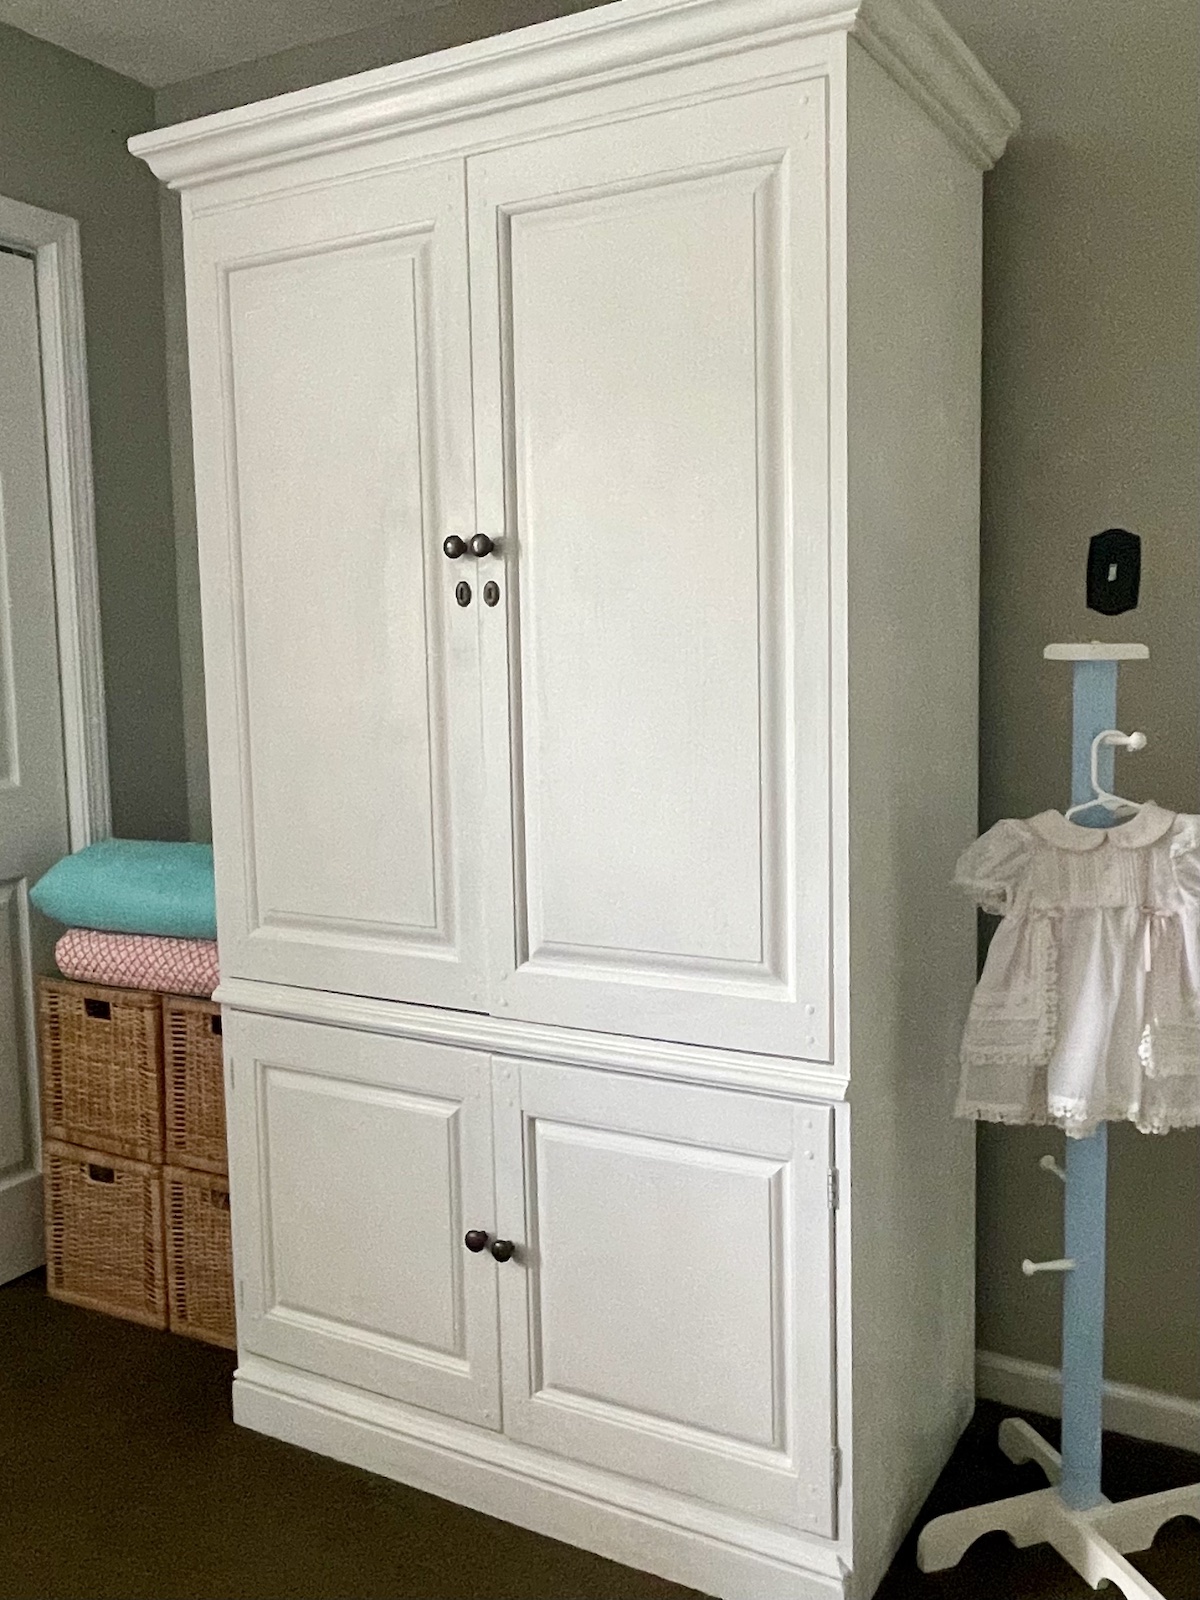
An added bonus is that it has a four-outlet power strip built into the unit, so we only have to plug it into the outlet behind the unit and I can use the strip to switch out between machines, task lighting, and use my iron right there where I am working!
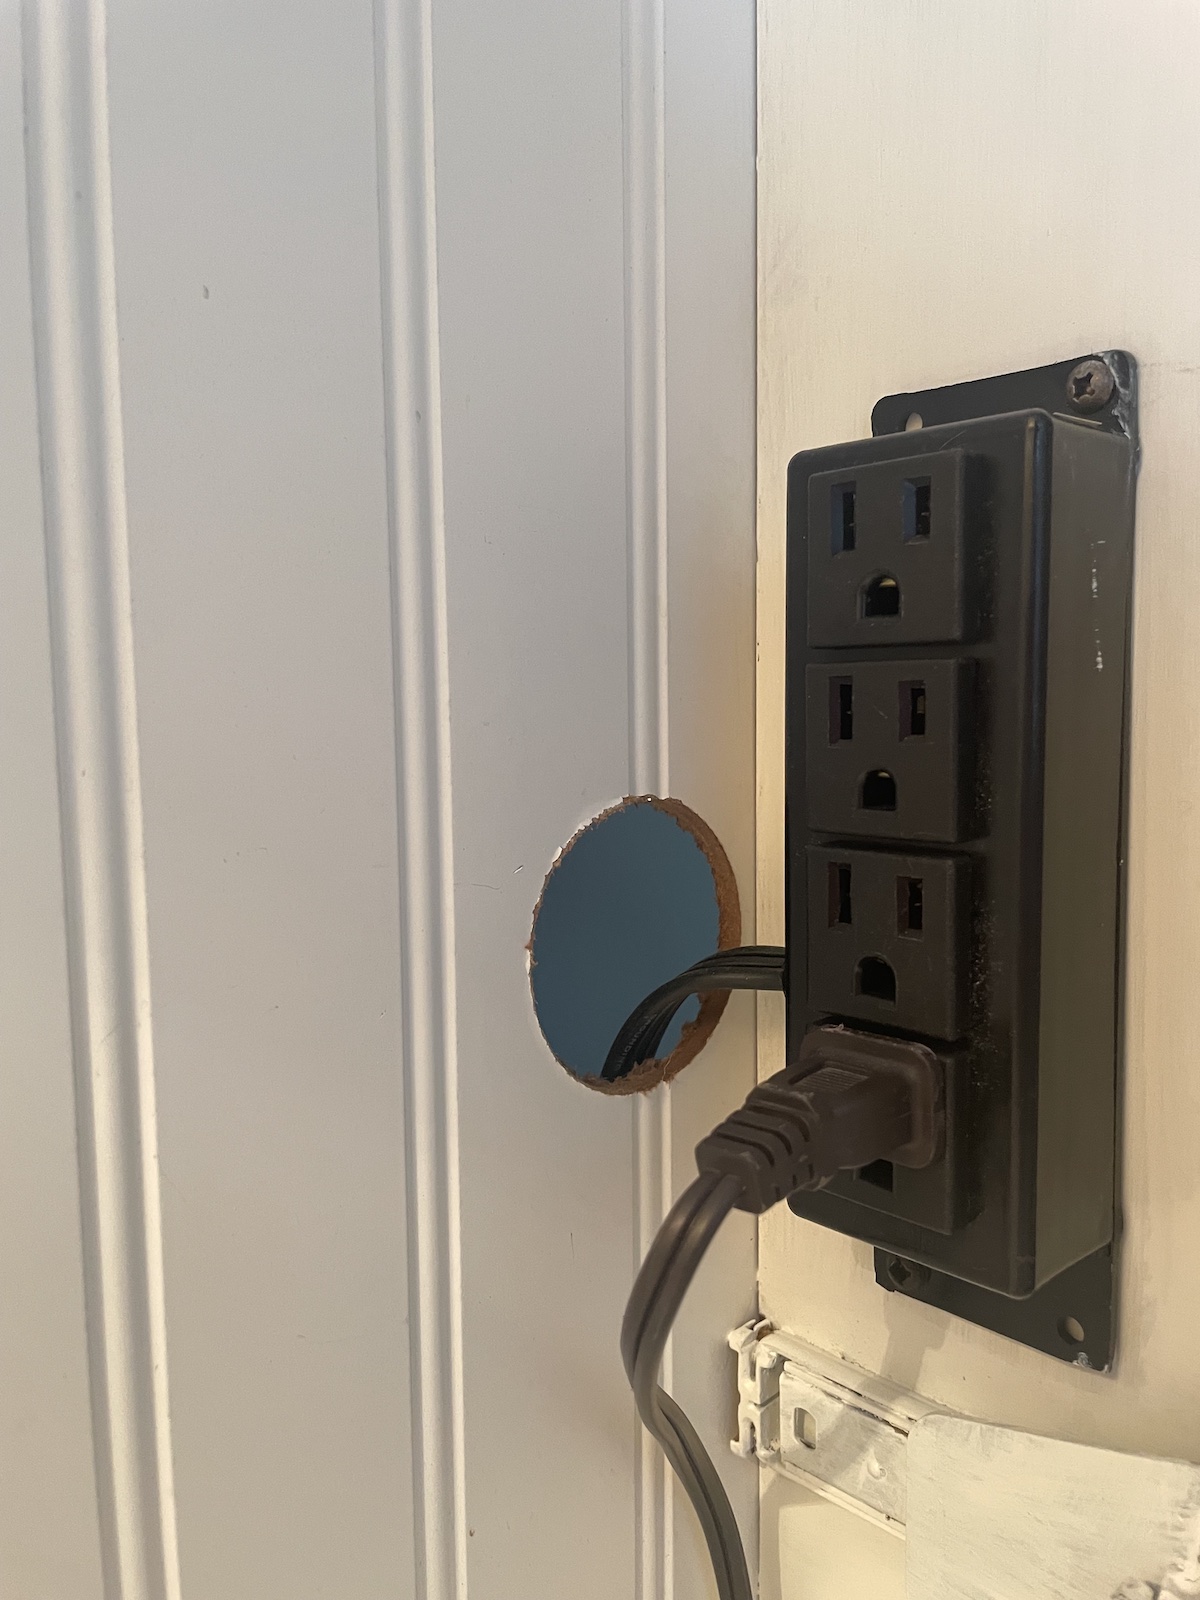
My amazing husband cut a hole for the cord. We could’ve added a grommet to finish out the hole, but didn’t think of it soon enough. I didn’t want to push my luck and this works just fine.
Step 6. Place Furniture
To a certain extent, your room will dictate where the furniture will be placed. If you do have some flexibility, choose a layout that gives you the best natural light, traffic patterns and comfort for the activities that will be taking place in the room. If you have more than one option, try it out for a few hours or days. Invite your family’s input if this is a shared space. Don’t be afraid to try a few arrangements or to place items at an angle or unexpected placement (i.e. “floating” a sofa instead of placing it against a wall.) Also consider the “first impression” when viewing the room from the doorway.
My Example: Because my room is small, there was only one wall which made sense for the bed since it is important to me to have a surface next to the bed on each side. We also needed to consider how much space would be needed when the bed is extended out into a king size. The area by the window was a perfect place for the reading and play nook, since it is too small for any of the other furniture. I also liked not having the sewing center across from the door, so my works in progress wouldn’t be adding any visual clutter from the hallway.
Step 7. Let the Room “Rest”
You could probably use a rest too!
Now that you have the furniture placed, and if the extra stuff hanging out in the rest of your house isn’t driving you too crazy yet, just let that room sit in the quiet and see how you feel about it. Revisit your pinboard and start to allow the new personality of the space to come to life. Grab a cup of tea and breathe. You’re doing a great job! This step can take a few minutes, a few hours, or a few days. It’s important not to quit now because, you know…all that stuff! But don’t worry. We’re getting to that soon!
My Example: My husband is used to my “chaos before the calm” method for much of my life. He gets me. Hopefully, this step isn’t too uncomfortable for you or your family!
Step 8. Return Only the Absolutely Necessary Items to the Room
Don’t return your sewing stuff just yet!
This is the step where you see your room start to take shape and become the amazing sewing space you’ve been daydreaming about. Be careful not to just mindlessly start loading up the space with all the things just because you have all the things. Bring in ONLY what you need AND USE on a daily or weekly basis. The rest is not gone forever, it just needs to be brought back in with intentionality and purpose.
I brought things back into my room based on the list of activities created in Step 2. You can choose the order. Sometimes I use the “snowball effect” and start with what is easy and obvious. This helps me gain momentum to tackle the hard stuff. You might choose to start with what you love the most. Do what works for you. See my example below about how I decided what to bring back in my room.
My Example: I chose to go in the order of my original list.
- Sewing (JUST what I needed for my current project!)
- Sewing Machine and accessories
- Basic Sewing supplies (what fit in my sewing box)
- My current (and only my current) project. Yes, you can bring one bobbin and one spool of thread. Just kidding. You get my point.
- Sleeping
- Bed Linens (just one set)
- Items for bedside surfaces (lamps, charging station(s), decorative items in keeping with the newly determined personality of your space. Less is more. Scale is key to avoiding too many knickknacks. The Nester talks about this is one of her lessons*. Such a great principle! *The Cozy Community is a paid membership where I watched her teaching on Scale. Life-changing. I digress.
- Reading
- Children’s books. Prior to this, we had them stuffed onto other bookshelves throughout the house along with everything else. I didn’t love the look of that and the littles weren’t really invited to help themselves. Now it is a cozy, welcoming space for them to browse, reshelve (or not) as they wish with no harm done to any actual grown-up books. Shew. Grandma win!
- Playing
- We don’t have all the toys and games in this room. While it occasionally gets out of hand and needs to be reorganized, the goal is to have three bins of small toys and activities for littles from infant to preschool. Everything else is in a dedicated toy area in the basement.
Step 9. Make Necessary Furniture Placement Changes and Repeat Steps 7 & 8 As Needed
Please resist the urge to start filling the room with stuff. Your creative self will thank you later. As the saying goes, “Clutter is the thief of creativity.” Or something like that. Once you are happy with the furniture placement and the necessary items, you can have fun with personalizing your space with window treatments (maybe SEW some new ones!), wall art, and a few accessories, but only if you love them.
My Example: I didn’t have much flexibility with furniture placement, so this step wasn’t really necessary for me. And when I’ve done all the work to get to this step in the process, deciding on what to bring back and what to leave out isn’t too difficult for me. I LOVE the feeling of a well-organized uncluttered space. I hope you will too!
Step 10. Decision Time
You knew it was coming. That stuff you didn’t bring back in the room yet. Here’s the deal: If it isn’t directly needed to do one of the activities in Step 2, it belongs somewhere else. I’ll stick to advice on the sewing stuff, but if you need help with the rest, check out some of these resources to get you motivated.
- Minimalism: The Minimalists
- Organizing: Marie Kondo
- Creating Beautiful Simple Spaces: Cozy Minimalist Home
Part Two: Five Steps to Set up a Sewing Center in a Small Space
Step 1. Set Up Zones
Admit it, sewing is not your only craft. You need to decide if this space will be home to all your crafts. Maybe you knit in the living room, make cards in the office, and sew in the guest room. Great! Whatever works for you, but make sure you have the tools and plan in place. It’s also ok to let go of a craft medium you’re not using anymore. I recently gifted my jewelry-making supplies to a young mom I know and she now makes really great beaded earrings. #winwin
Since sewing is my main craft, I need the majority of my space to be dedicated to that.
This repurposed sewing cabinet is the key to my small space dilemma. I’ll share a series of photos to show my secrets for the transformation process from Guest Room ➡ Small Scale Sewing Space ➡ Large Scale Sewing Room.
Guest Room
Transformation to Small Scale Sewing Space
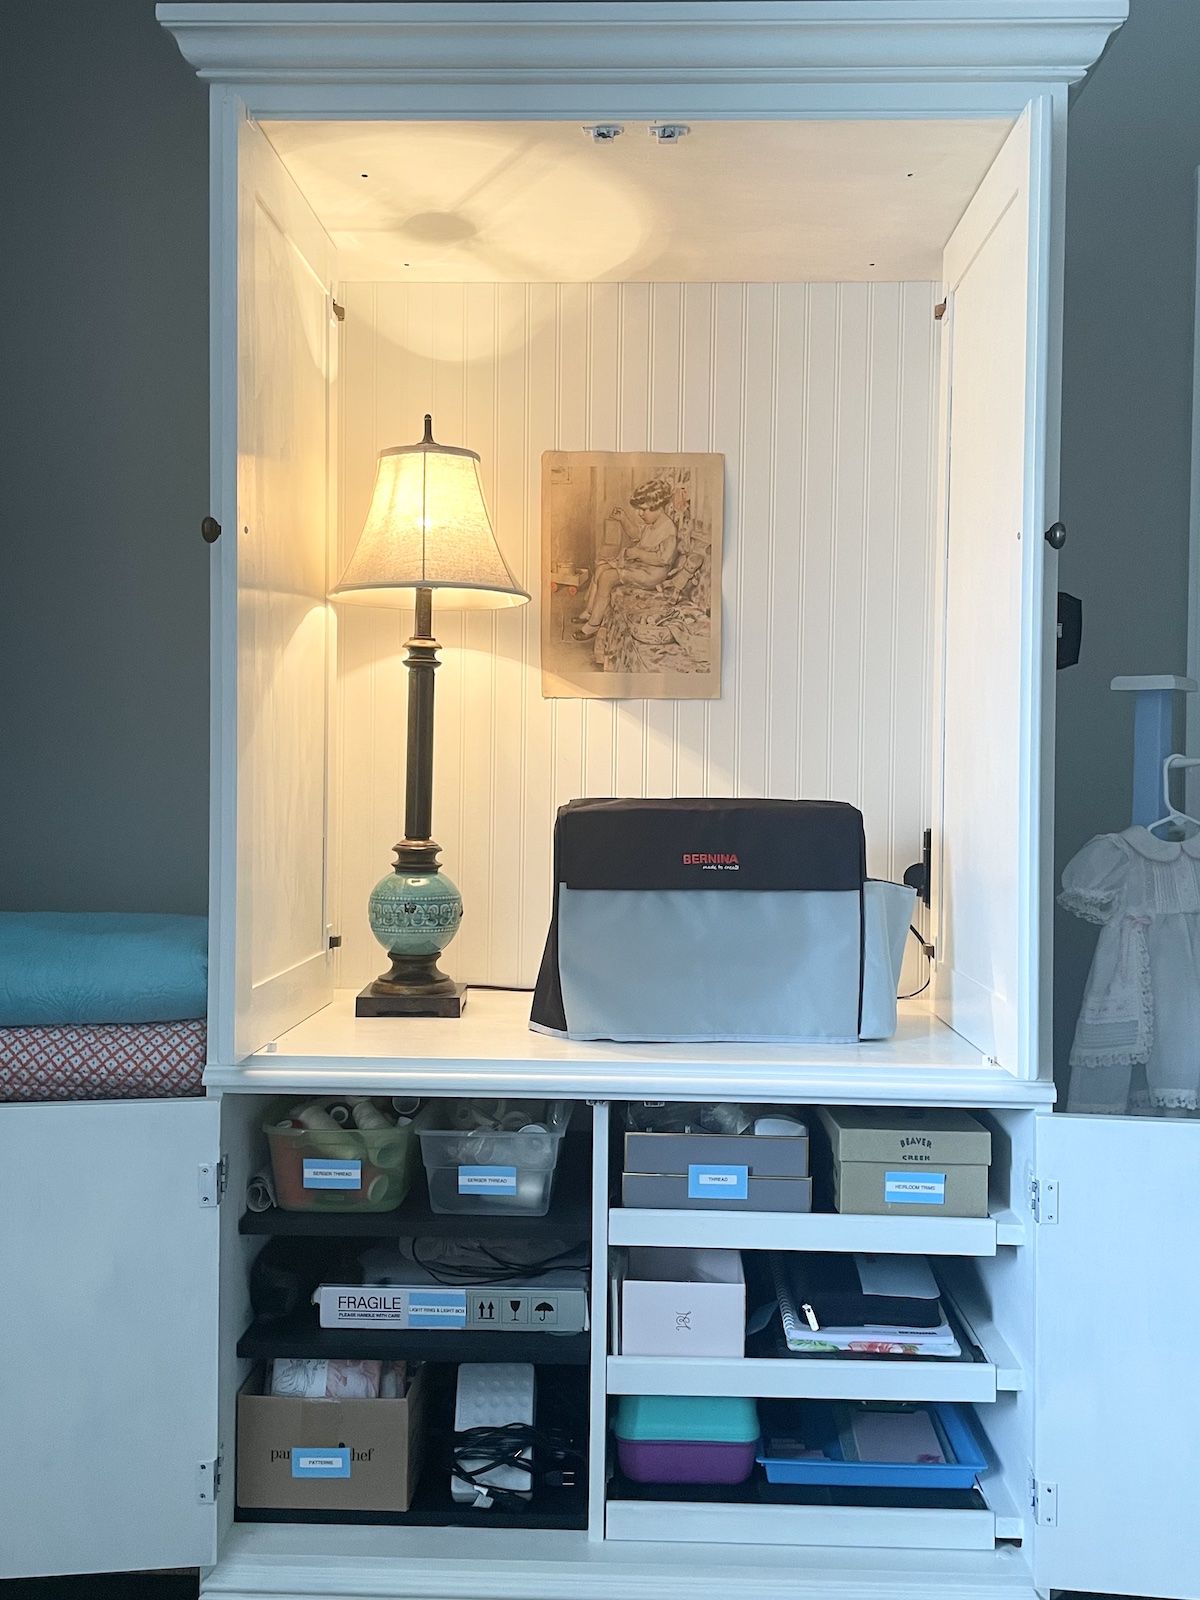
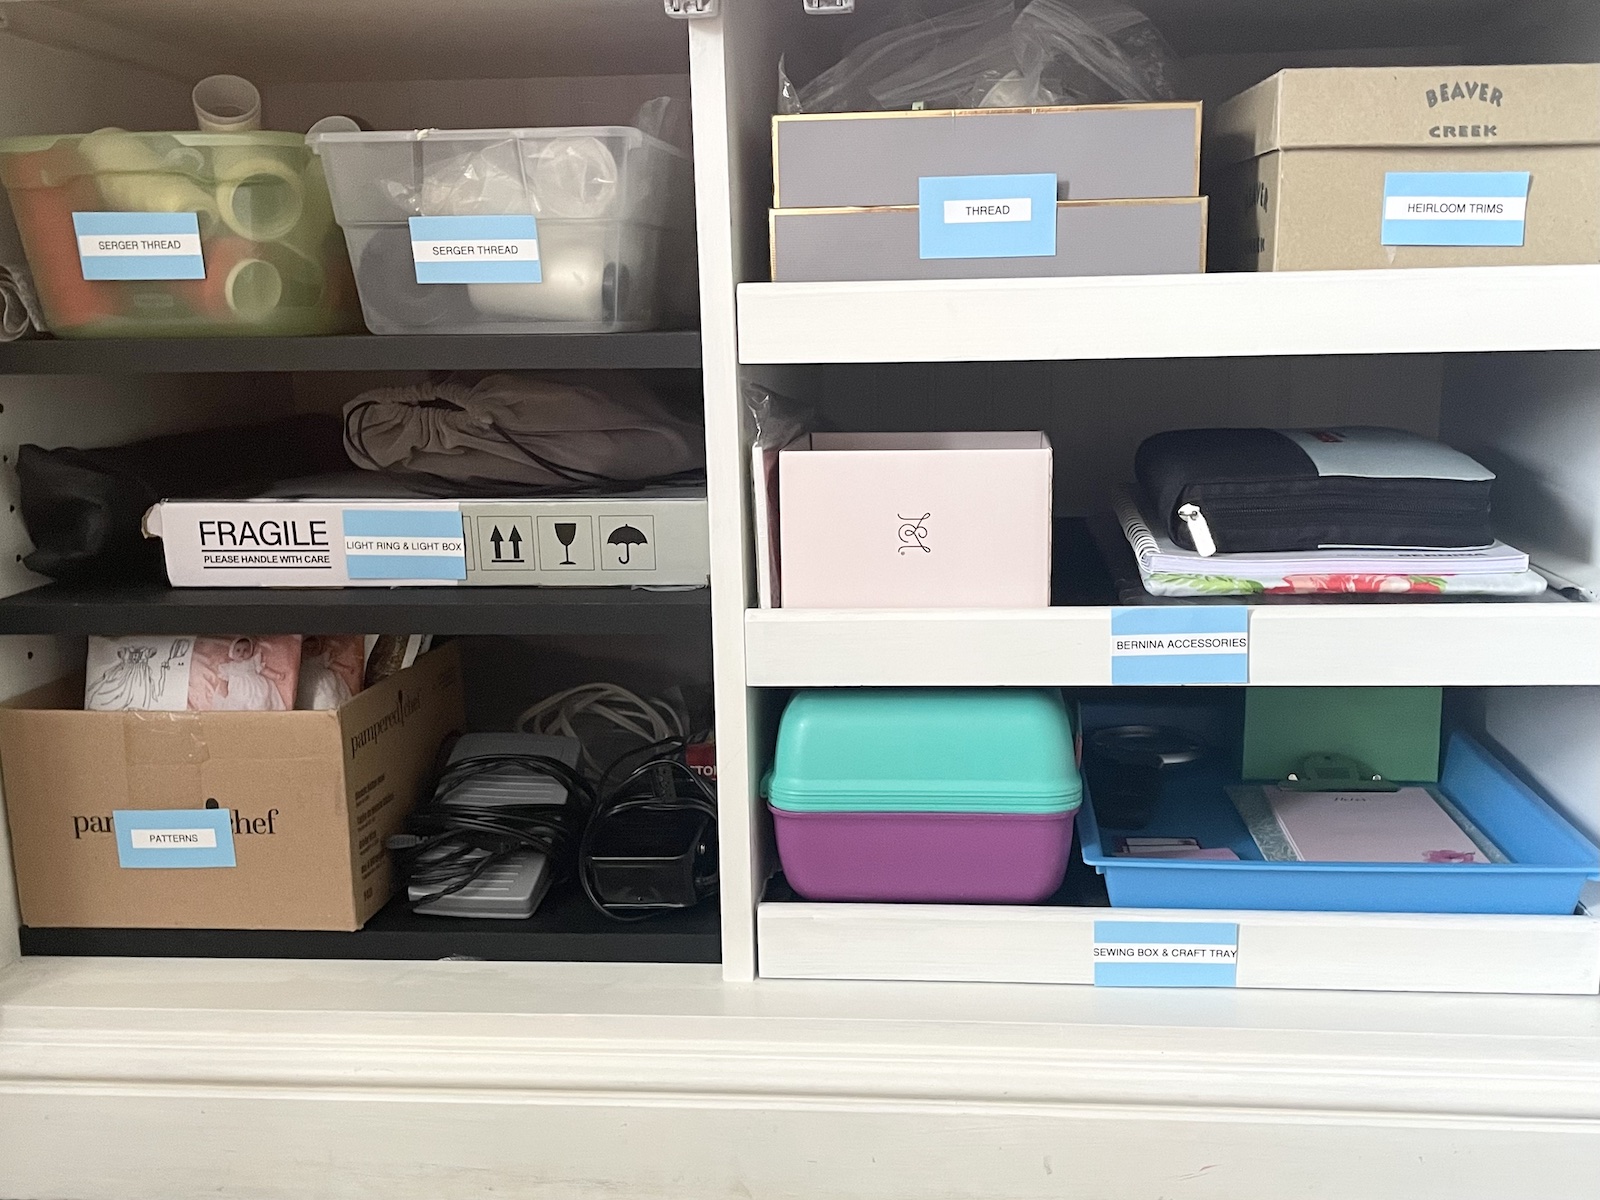
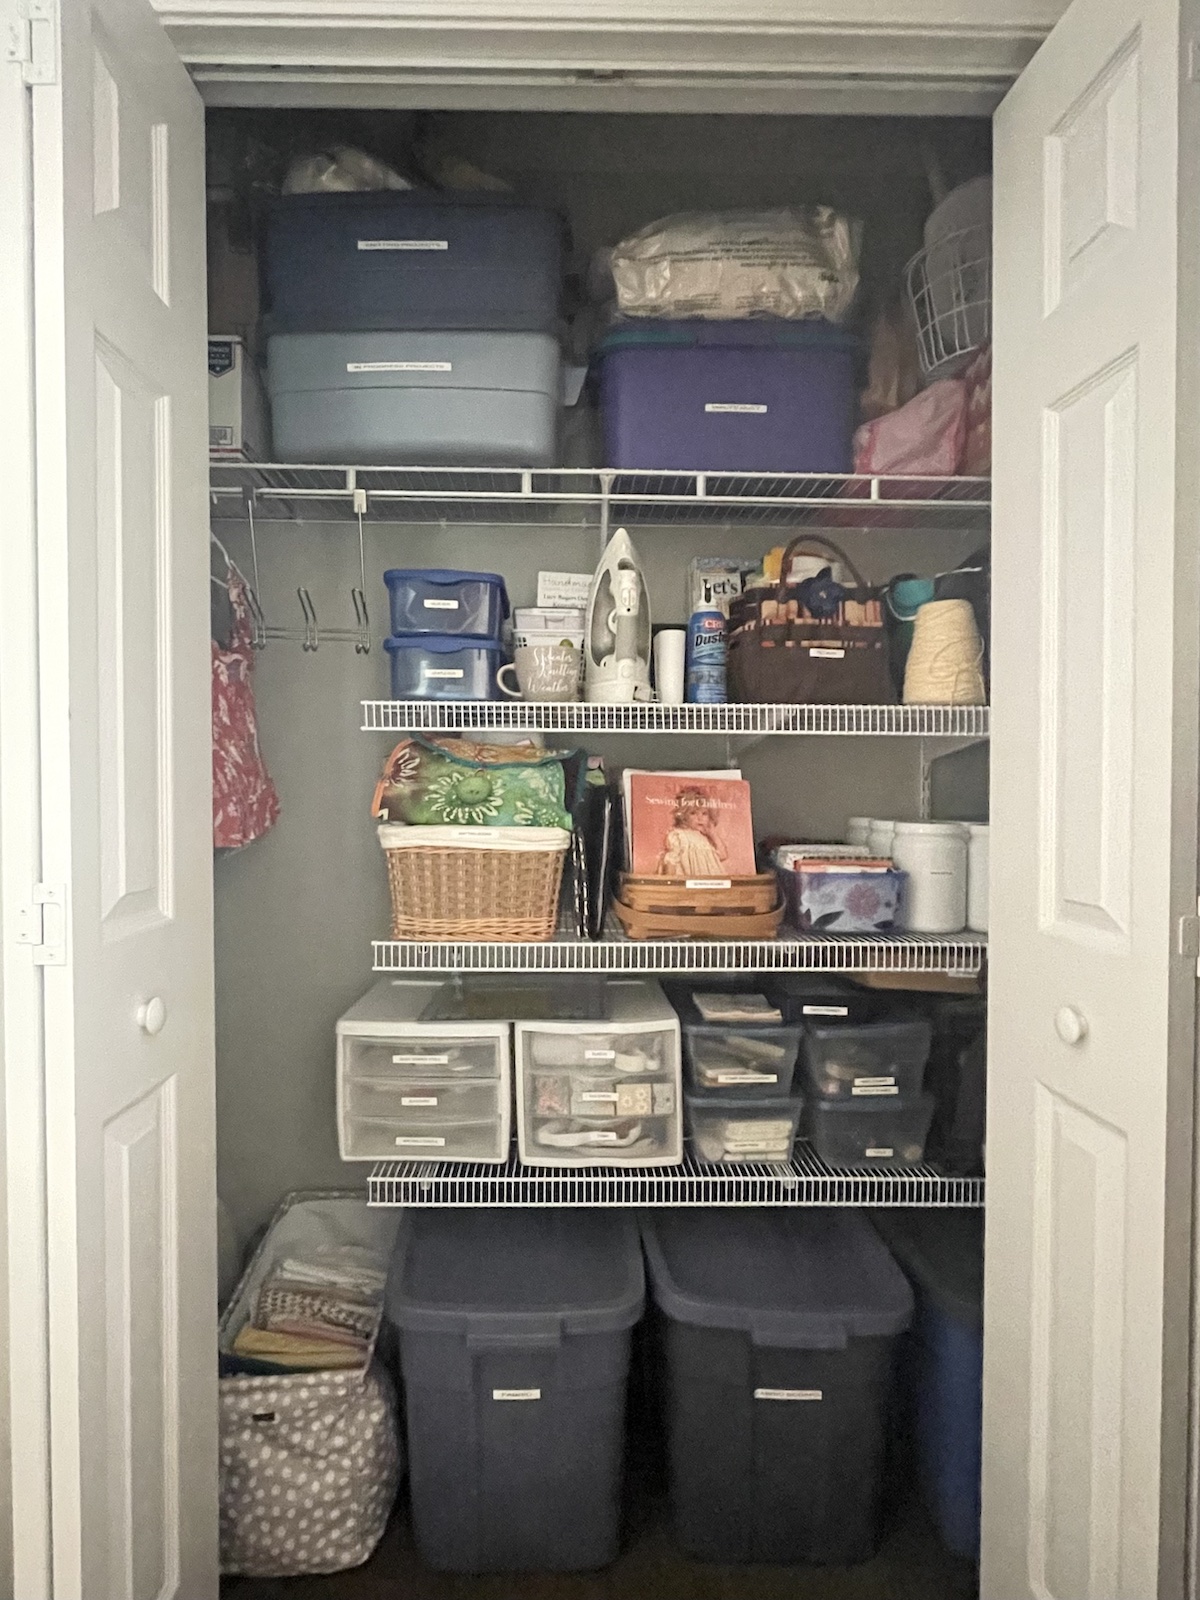
There is amazing storage at the bottom of this cabinet (with pull-out shelves on the right side) and my Home Base drawer bins are pictured below. The only other items I need to store are my fabric stash, iron/board, and in-progress projects. These fit nicely in the closet to the left of the cabinet. When we have guests, I hang a clothing rack on the outside of the closet door and let them put a suitcase on the set of IKEA wicker baskets currently holding my yarn stash.
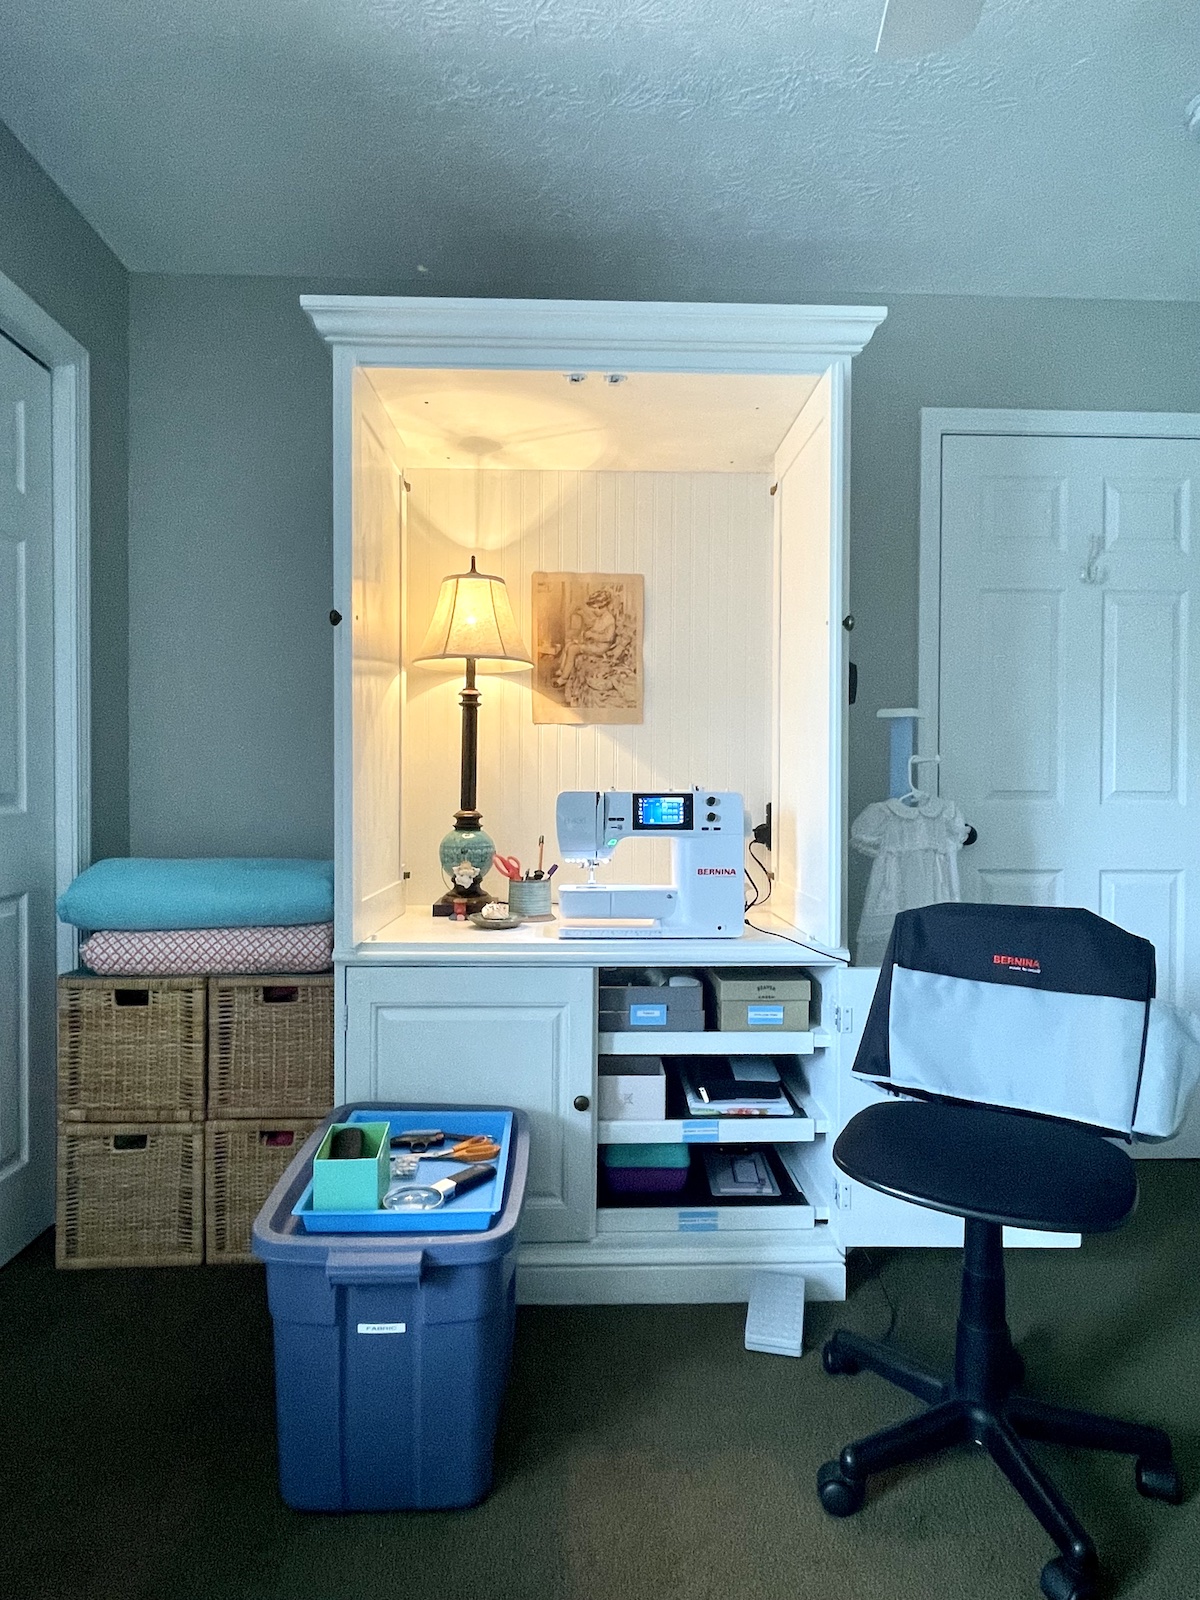
This is my “small scale” setup. I use this when I have a quick job to do such as mending, or a small project where I don’t need much room for fabric. I pull out a fabric bin to hold my tray of tools and I’m all set. This setup is only comfortable for a short time, but it works for me. It is quick to set up and quick to take down.
Transformation to Large Scale Sewing Room
For this step of the transformation, I take the IKEA table top I have secretly stashed behind the door (true) and the IKEA table legs I have secretly stashed behind my yarn stash baskets (also true) and magically create a sewing table worthy of any project I might want to create. From Christening Gowns to the King-Sized Double Wedding Ring Quilt I started in 1987 (you feel better now, don’t you?) Now my space can handle it all.
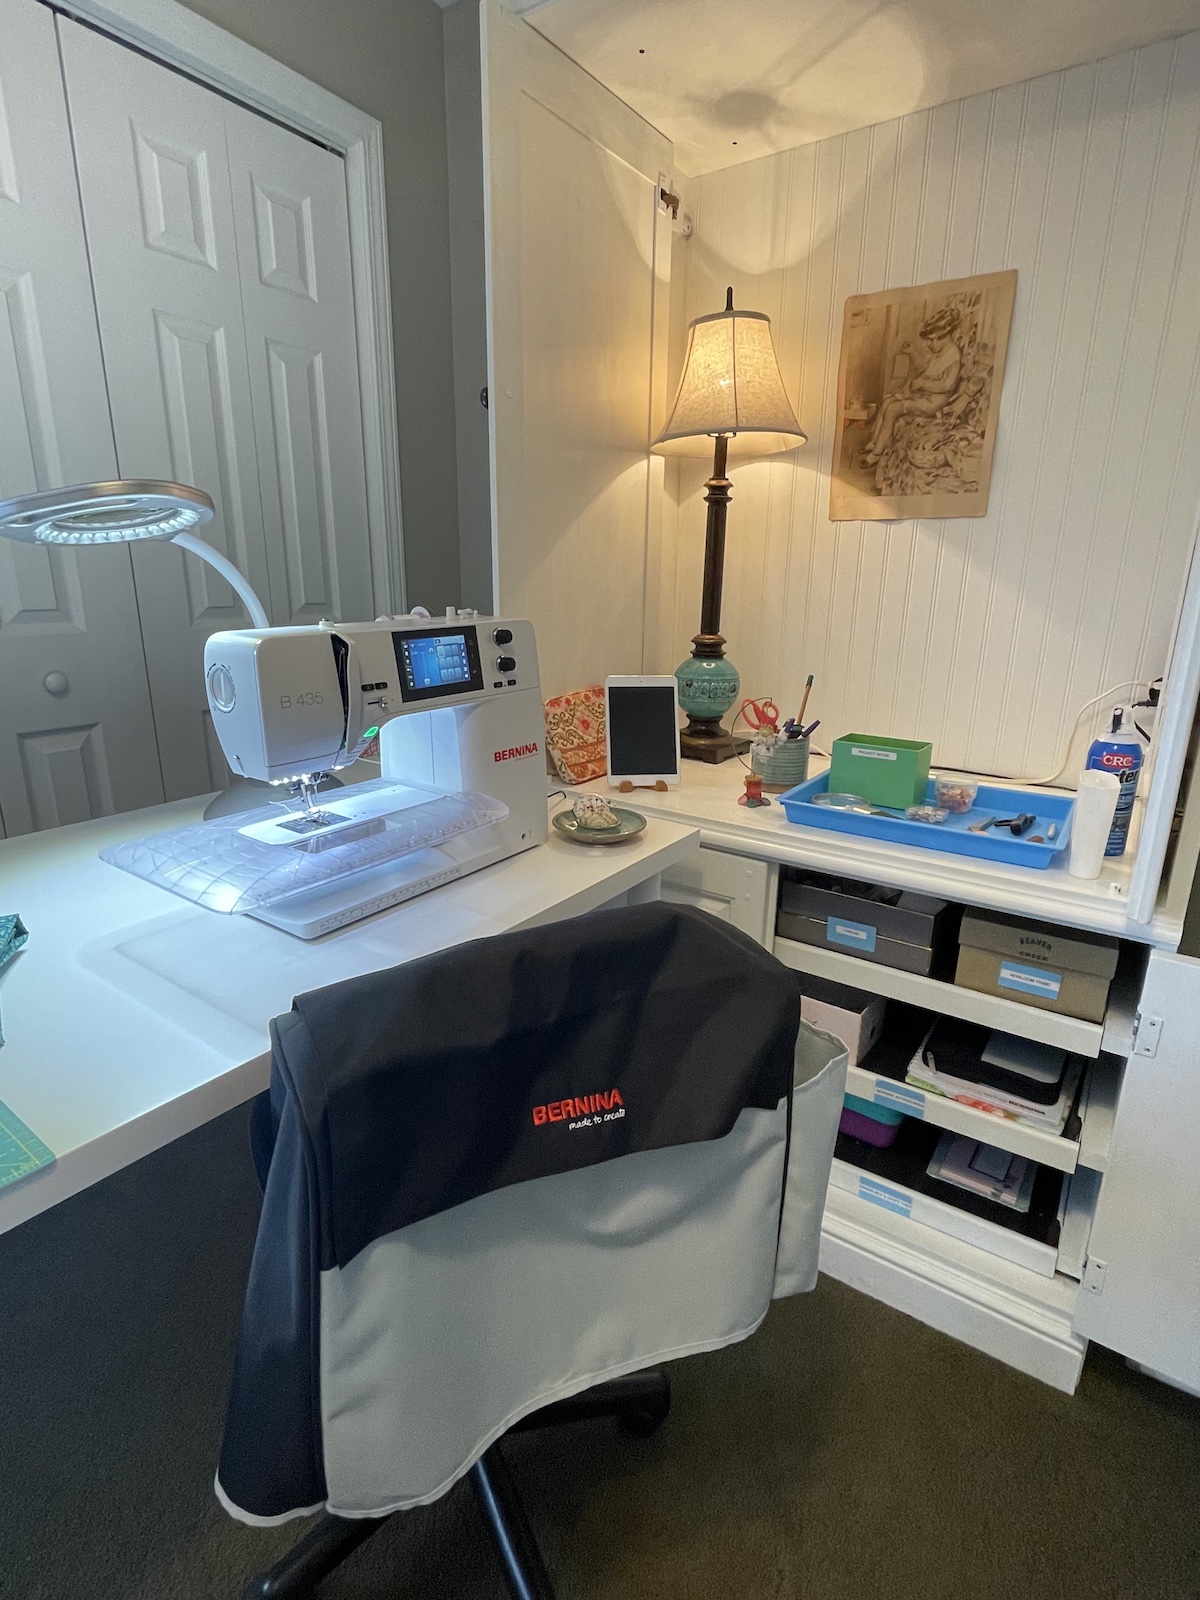
Next, I like to set up my ironing board behind my chair so I can swivel back for a quick press. Notice the new ironing board cover. It was time.

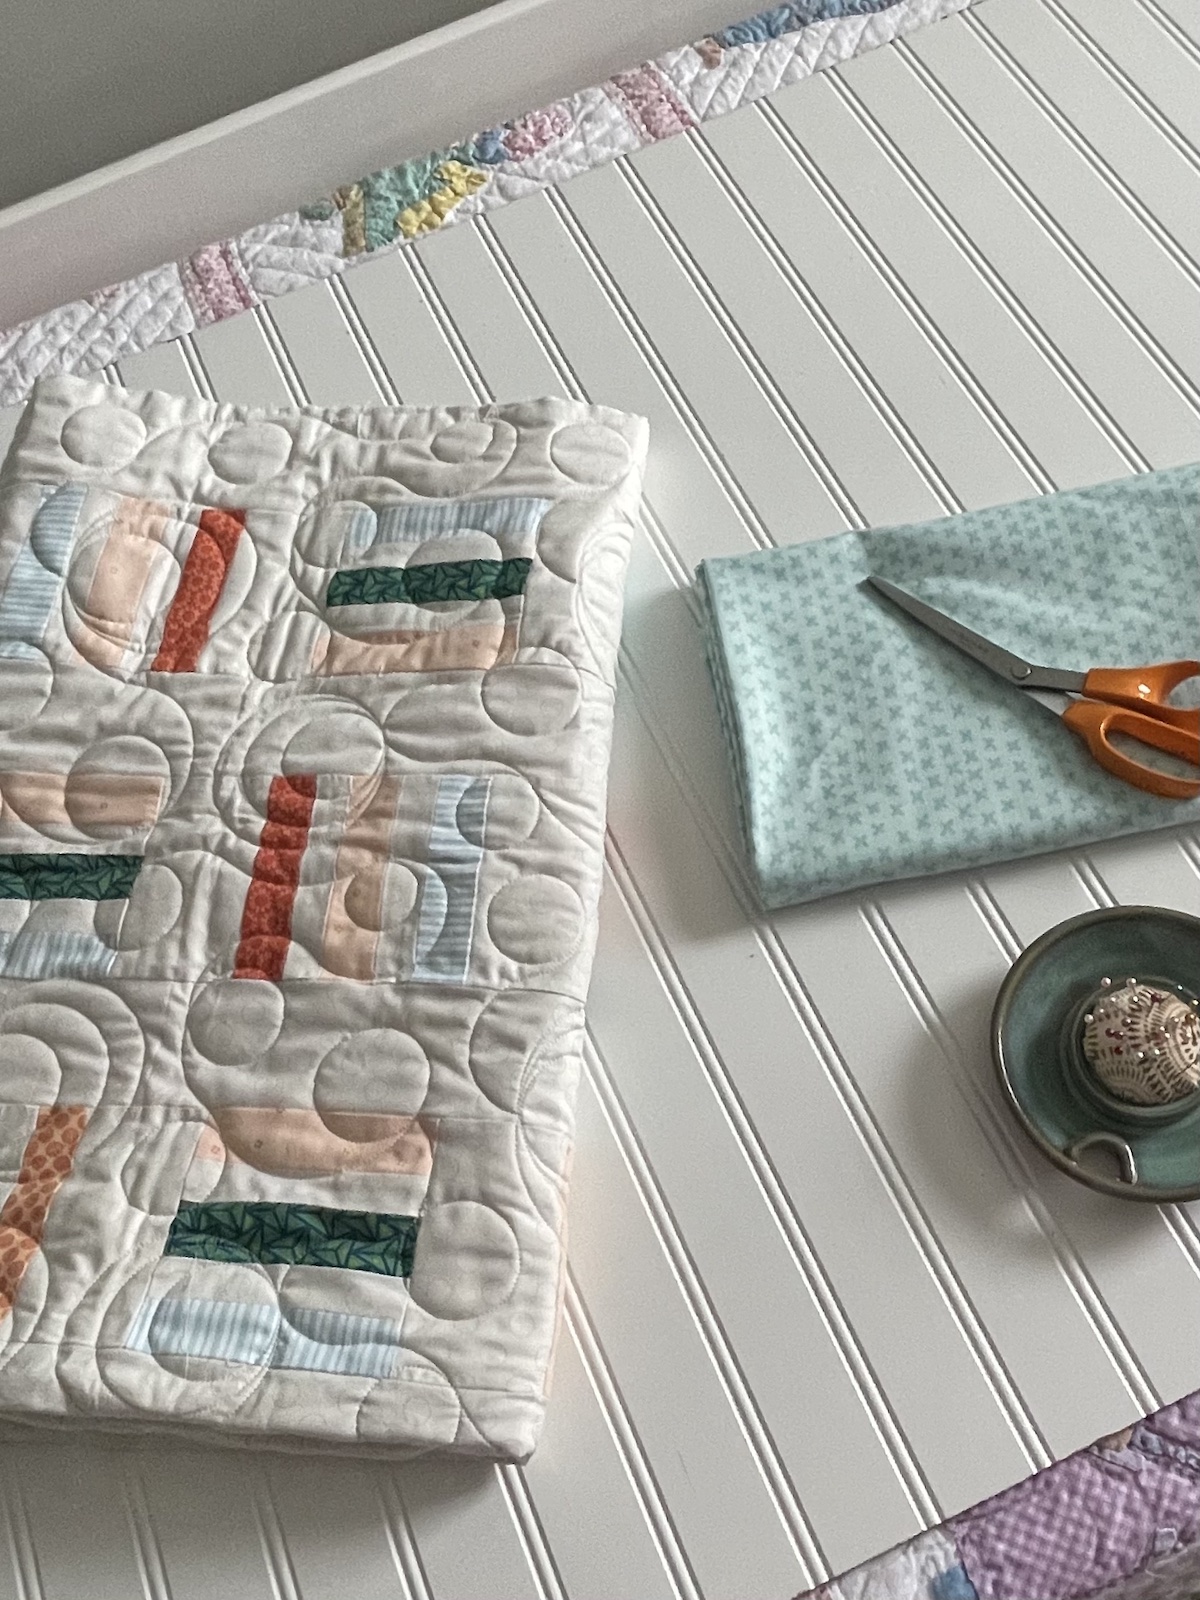
A final step is to pull out a sheet of bead board I keep tucked away under the mattresses of the daybed (seriously, you can’t make this stuff up!) I do this when I need a little larger work space and I actually love the grooves for helping me line up and cut fabric. If I’m cutting out a pattern, I usually flip it over so the smooth side is on top. And, I use this same board as the background most of the photos for my product and blog posts. If you want to check out some of my previous posts, you’ll now now the secrets behind the scenes!
Step 2. Choose Basic Tools and Supplies
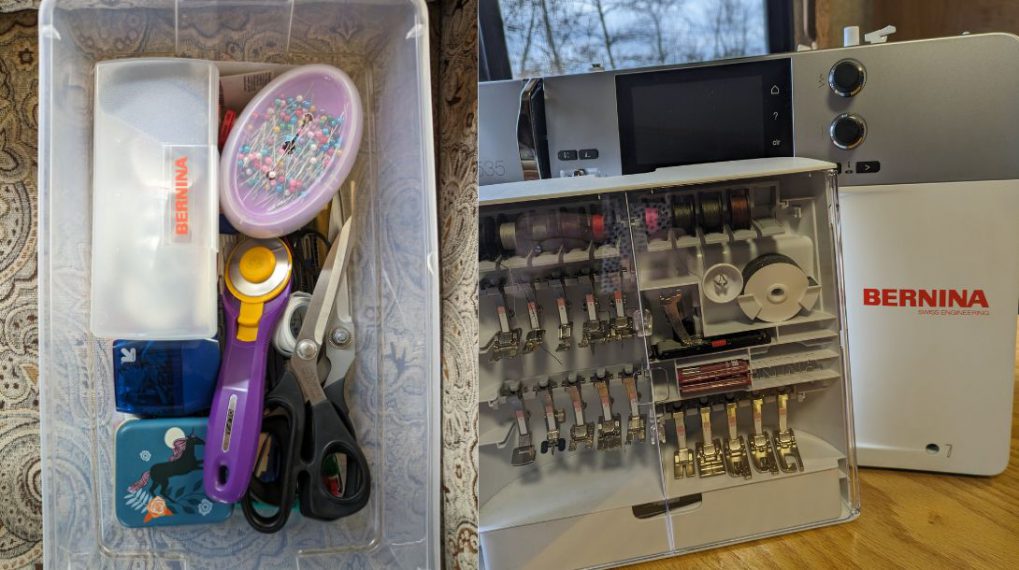
Figure out which tools and supplies you use every time you sew. I picked up this handy craft tray at the Target Dollar Spot and I “mis en place” my tools for a project before I begin. I keep all the other supplies I won’t be using on my current project organized in my Home Base drawer bins (pictured below).
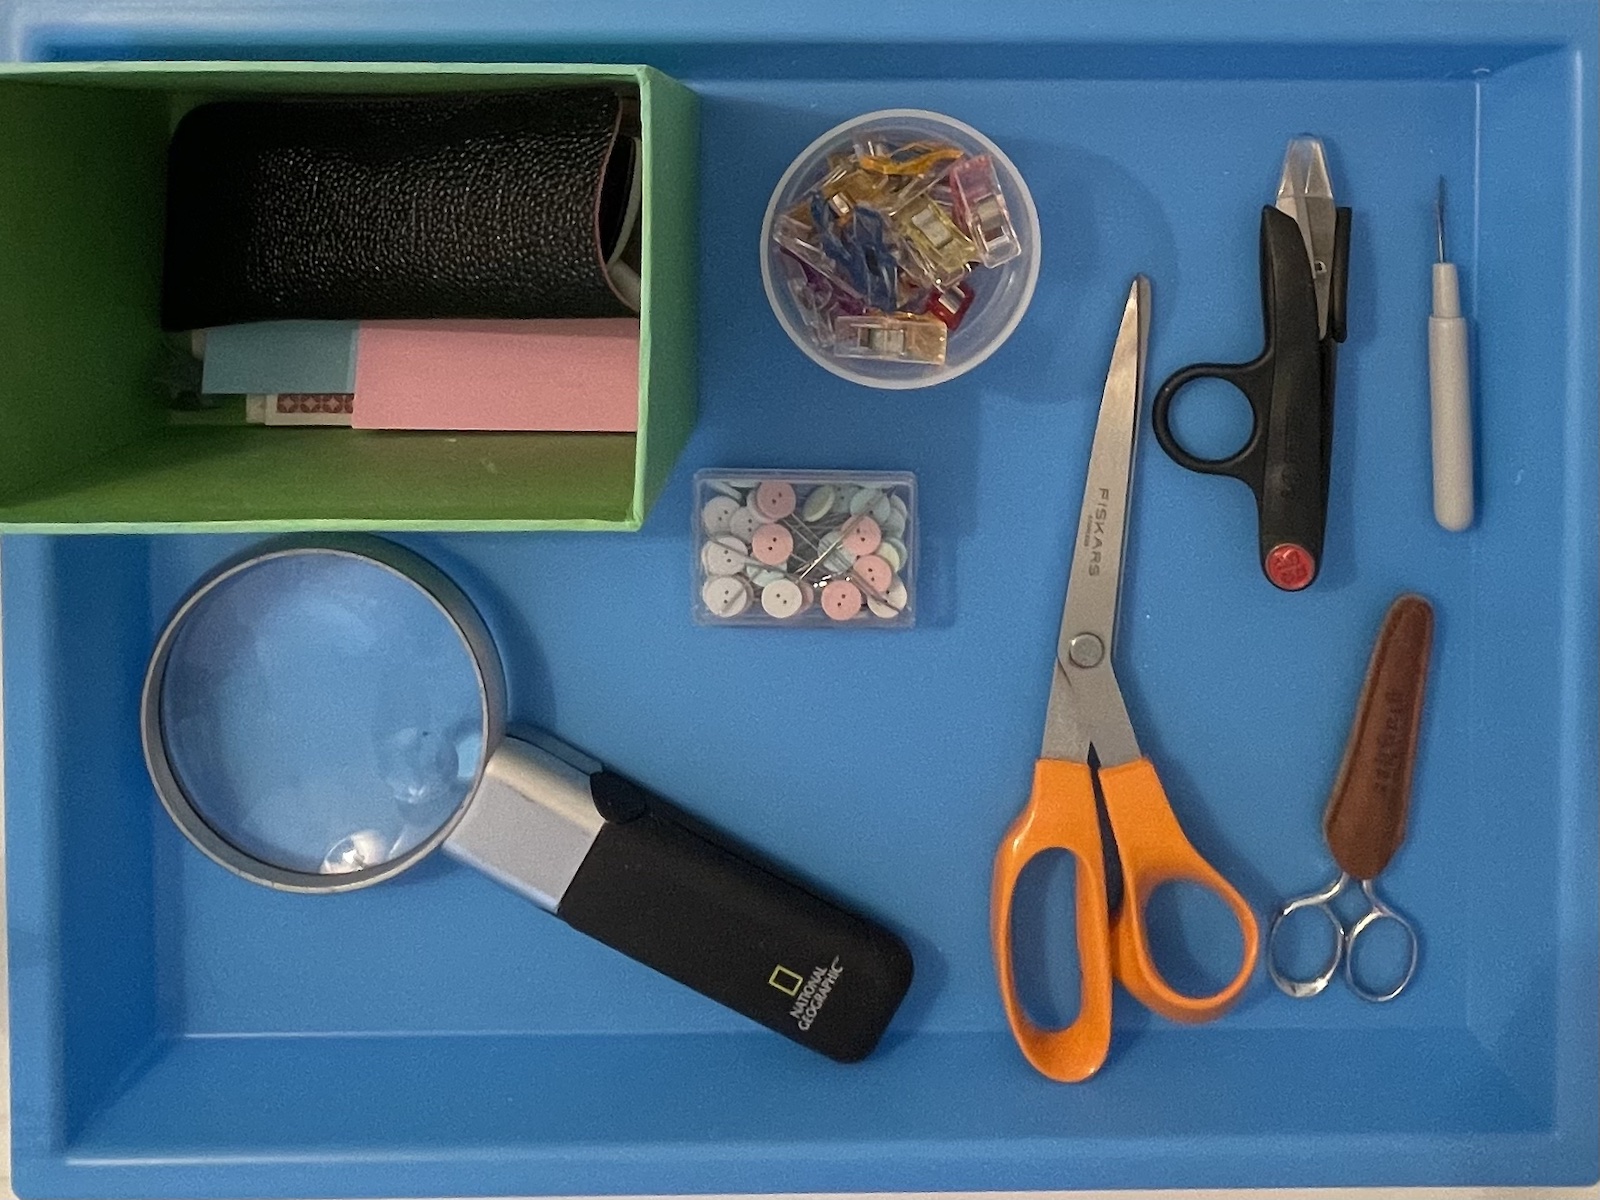
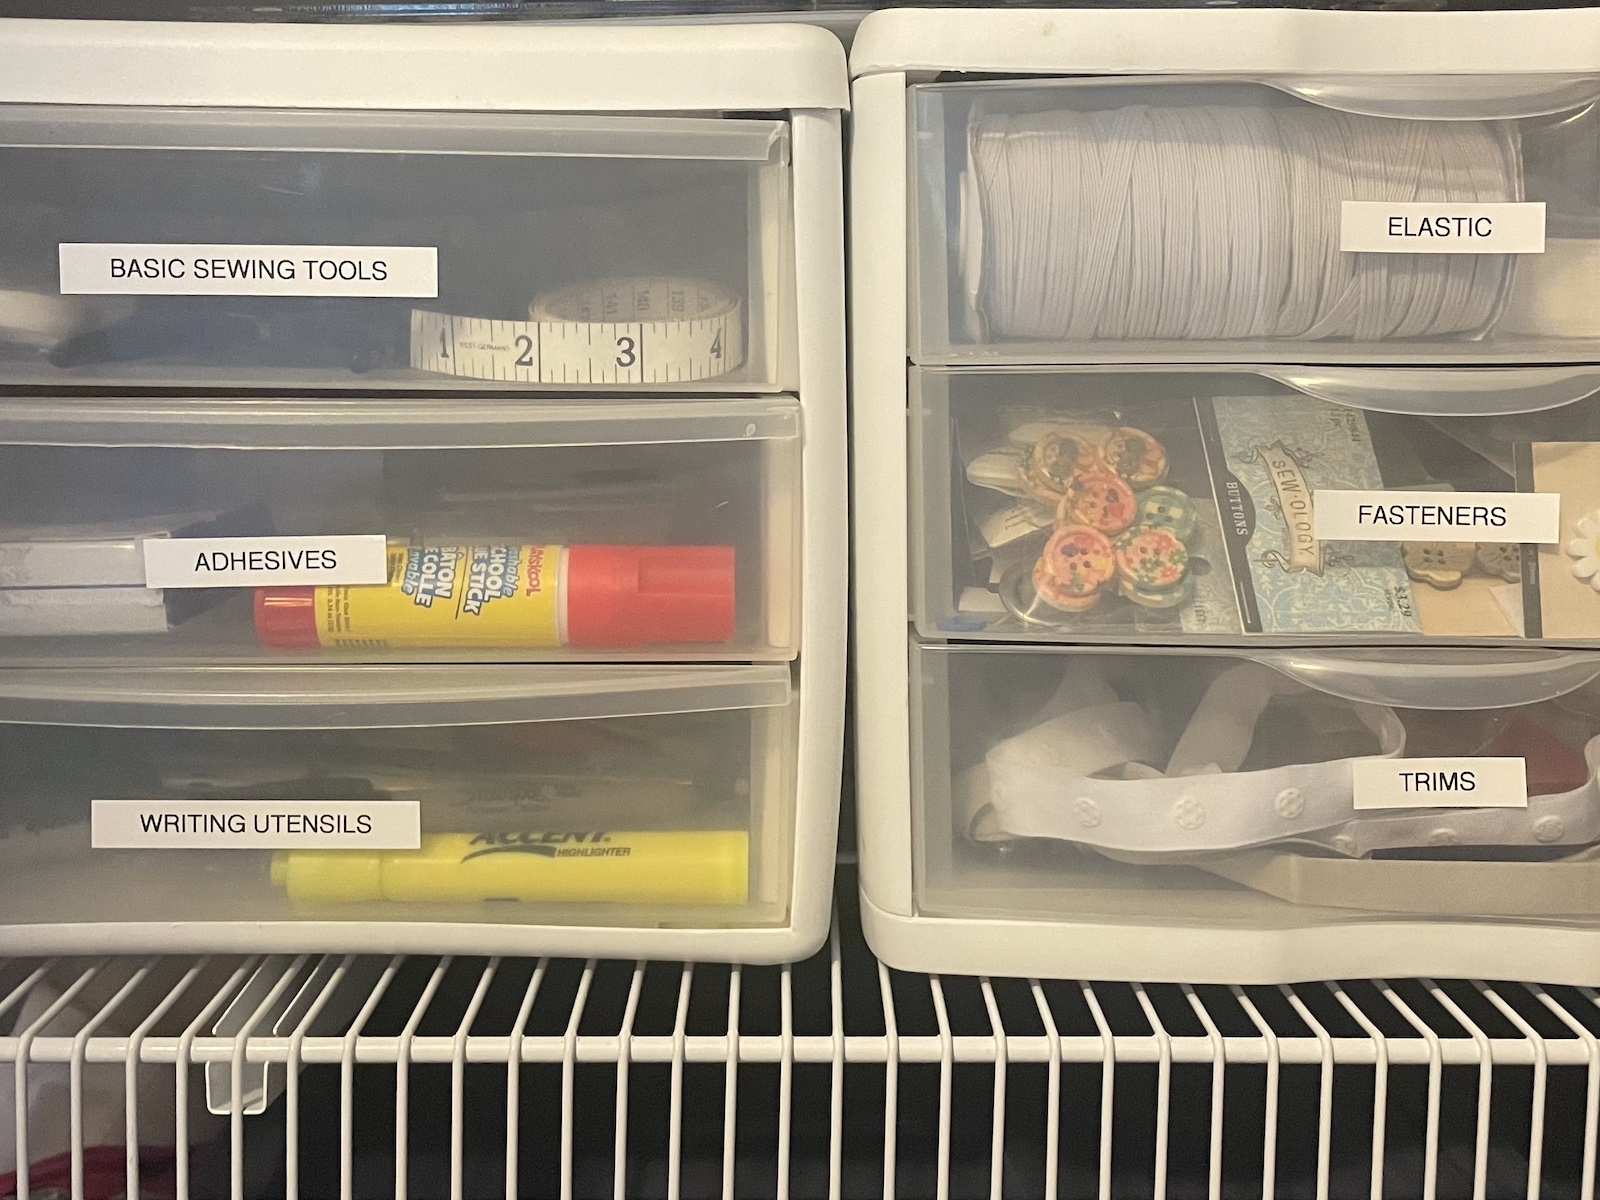
Step 3. Create a Home Base
The tray I use for my tools and supplies is basically my home base, but I love the sets of drawers where I have all my “not every time, but a lot of the time” types of items. After each project, I put all the items back where they go and reset my tray for the next project. Or at least that’s the goal. My future self always thanks me when I stick to this practice. There’s nothing worse than being excited to begin a new project and not being able to find your stuff.
Step 4. Queue Up Your Next Few Projects
If you’re like me, you have multiple projects going on at once. And possibly a few long-lost unfinished ones. Just pick a few you really want to do and give yourself some grace. Here’s my next project: binding the quilt for our new grandson. ?
Step 5. Organize the Rest
The rest? You get to decide. Pitch some, donate some, and make a list of your second-round project queue. Here’s the key. You don’t need “the rest” staring at you with those accusing eyes making you feel guilty for working on something else. Make a list of all the projects you’ll put in storage and keep it handy. Then pack it all up and put it away for now. Get some bins, borrow a label-maker if you don’t have one, and enjoy being the boss of your stuff.
Part Three: 3 Steps to Organize Your Sewing Space Without Going Crazy
Sewing Cabinet Storage
Sewing Closet Storage
Step 1. Categorize
You know how to do this. Create GENERAL Categories and then get more specific. Sort of like your filing cabinet: Bills, then Utilities, then Electric, Water, Internet. You get the idea.
Step 2. Sort
Once you have your categories identified, start sorting your stuff into those categories. Instead of file folders, you’ll have shoe boxes, bins, mixing bowls (yes, I have been known to get them all out for a micro-sorting session of all the things.)
Step 3. Decide (Use, Store, Forward, Delete)
As I mentioned above, you get to be the boss. But BE the BOSS and make decisions:
If you will USE it, great! Make a spot for it. If you will use it, but just not right now, STORE it. Just be honest with yourself. If you haven’t used it in the last decade or so, maybe it’s time to FORWARD it on and bless someone else with it. (I told you already about my jewelry supplies. Next to go are the rubber stamps. That ship has sailed for me, but I bet there is someone who would love to try a new hobby!) The hardest one is DELETE. Trust me, if you wouldn’t buy it at a local thrift store or yard sale, no one else will either. Think of the square footage you’re creating…your sewing room just got bigger!
Finally: ONE Last Step to make your space beautiful, Dorothy
This is the part where the Wizard draws back the curtain and announces that you had the answer all along. Only YOU know what brings JOY, sparks CREATIVITY and adds BEAUTY to your life.
10 Bonus Tips for Organizing and Beautifying
- When in doubt, review your inspiration pinboard.
- Create a pinboard dedicated to organizing sewing supplies.
- If you don’t love something, delete it.
- If you love it, display it.
- If you’re unsure, store it somewhere else and decide later.
- If you’re still unsure, try to think about how you can bless someone else with it.
- Think OUTSIDE the box (or bin).
- Cute fabric remnants? Fold them and display them in a cute basket.
- I use my empty shake mix containers to store each color of ribbon and my bow-making supplies.
- I use vacuum storage bags to reduce the space used to store wedding to Christening gown fabric. Turns out tulle takes up lots of space!
- Hang something beautiful directly in your line of sight in your creative space.
- See the vintage print hanging on the back wall of my sewing cabinet? My late mother-in-law gave that to me years ago. Now I have a place where I can enjoy it and think of her.
- Burn a favorite candle and place a few flowers in a vase.
- Play your favorite creativity-inducing music.
- Sometimes I listen to podcasts and audiobooks while I sew, which is totally fine. When I start to feel like I’m multitasking and not present in my creative moment, music helps me “be where my feet (and hands) are.”
- My favorite Pandora stations to listen to are: James Taylor, Audrey Assad, and The Wailin Jennys. (You may want to mute your device before clicking the links because the music might start automatically. Ask me how I know to recommend this. ??♀️)
Enjoy!
I hope you’ve enjoyed seeing behind the scenes of my little sewing room in Knoxville, TN. It’s been a work in progress, but I love the transformation. I’d love to hear about how you Create an Amazing Sewing Space in Tight Quarters!
Used Products

What you might also like


4 comments on “How to Create an Amazing Sewing Space in Tight Quarters”
-
-
I’m so glad you were inspired! ❤️ I appreciate your kind words and wish you lots of fun and creativity if you decide to do a sewing room makeover!
Blessings!
Christina ? -
Thank you! Great inspiration and ideas. My sewing space is large and I have ended up filling my project bins with the scraps from past projects and now new projects occupy the floor space ? it’s time for FALL cleaning. I’ve been thinking about it and this is the push I needed. Thank you
-
I’m so glad you were inspired- I can totally relate to the bins of scraps! It’s always a work in progress for me. I just have to resolve myself to the fact that I’m a “messy creative” and I need to reorganize after each project! ? Good thing I love organizing- it’s part of the fun! Good luck with your Fall projects! ??
-
-
Leave a Reply
You must be logged in to post a comment.

This post is absolutely inspirational!!. You said it, I know what I need to do, it’s just making the decision to let go of some stuff. Sewing your room makeover shows that you haven’t lost anything but gained much. I was thinking the other day how much more productive I was when all I had was an old kitchen cabinet for my machine and all my fabric was stored underneath. I had just the tools I always used, not every gadget available,(something I have a weakness for). I also miss the guest bed I used to have in my sewing room, love the bed you have, such a great idea.