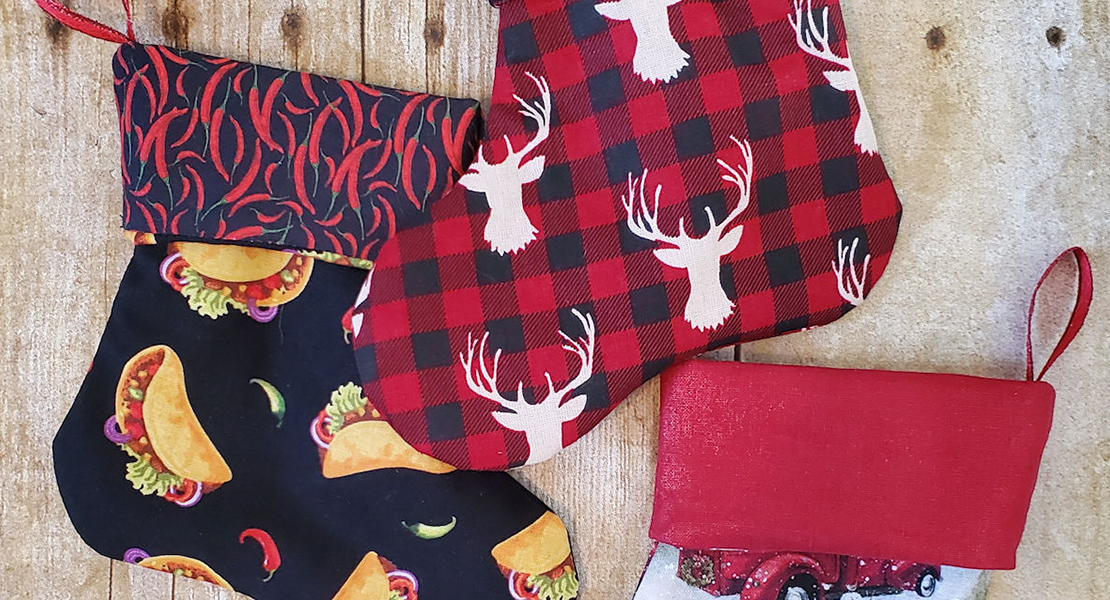
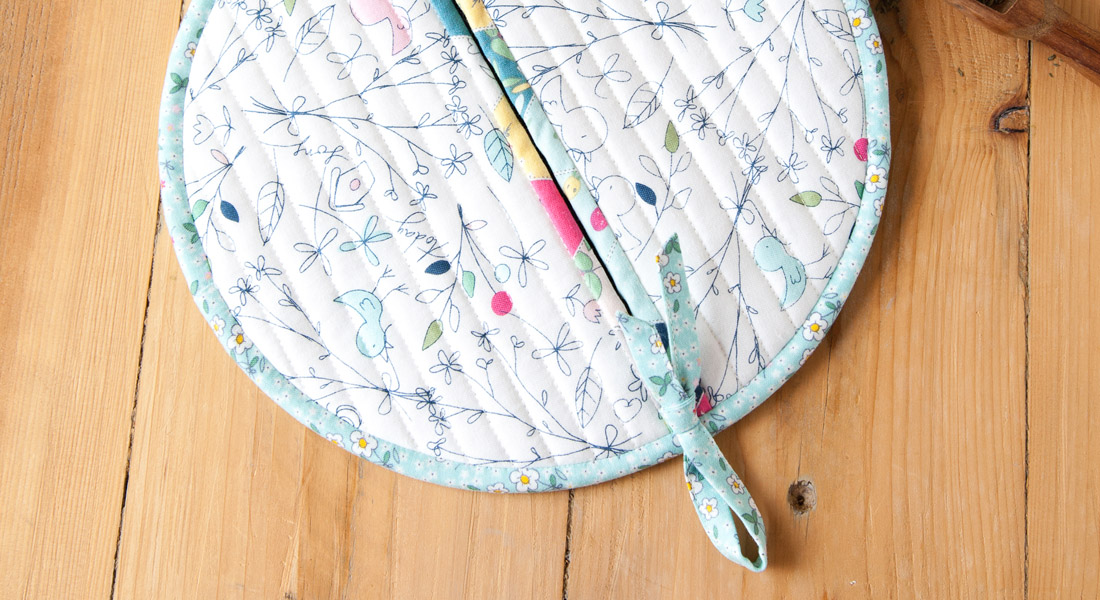
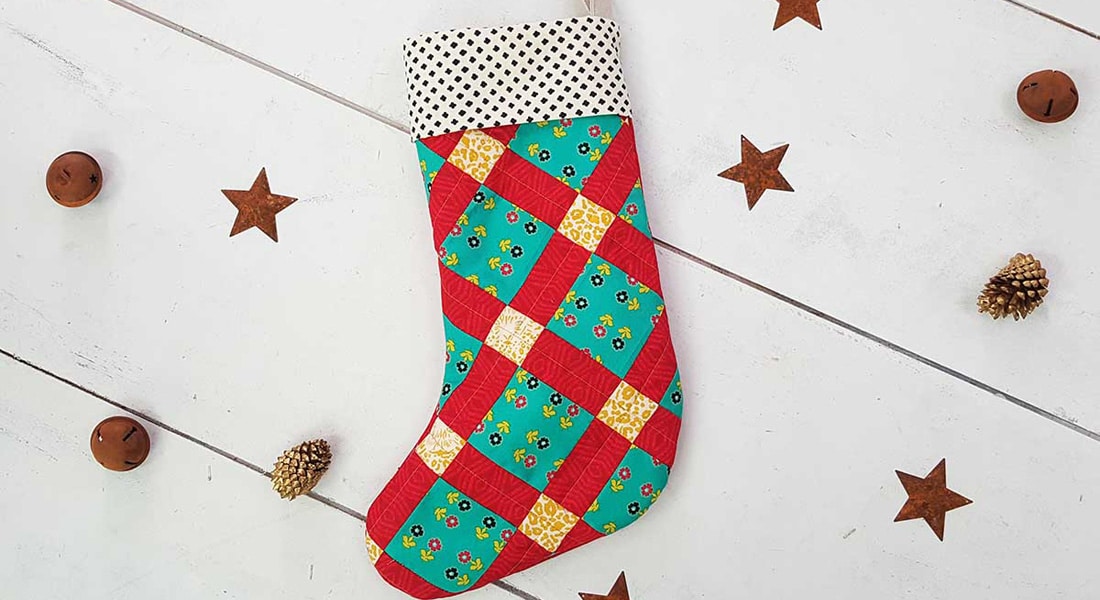
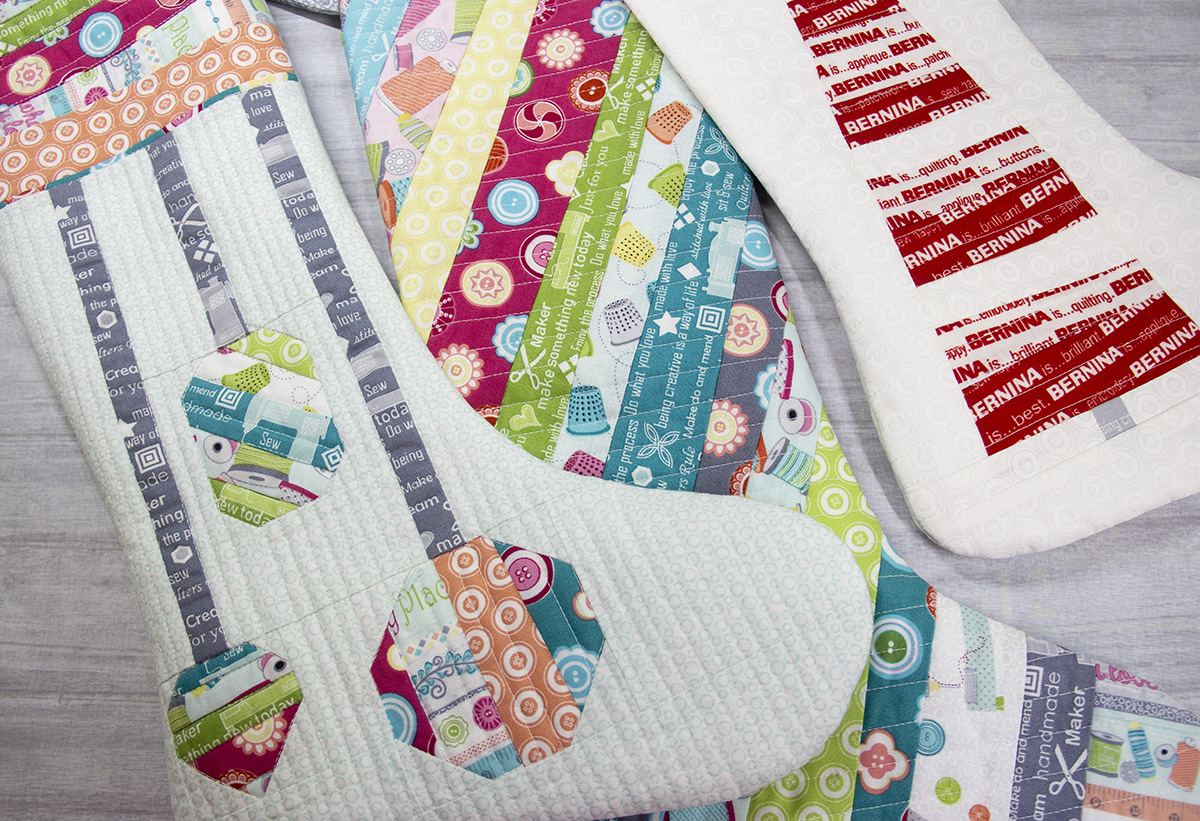
Stocking Flatware Holder
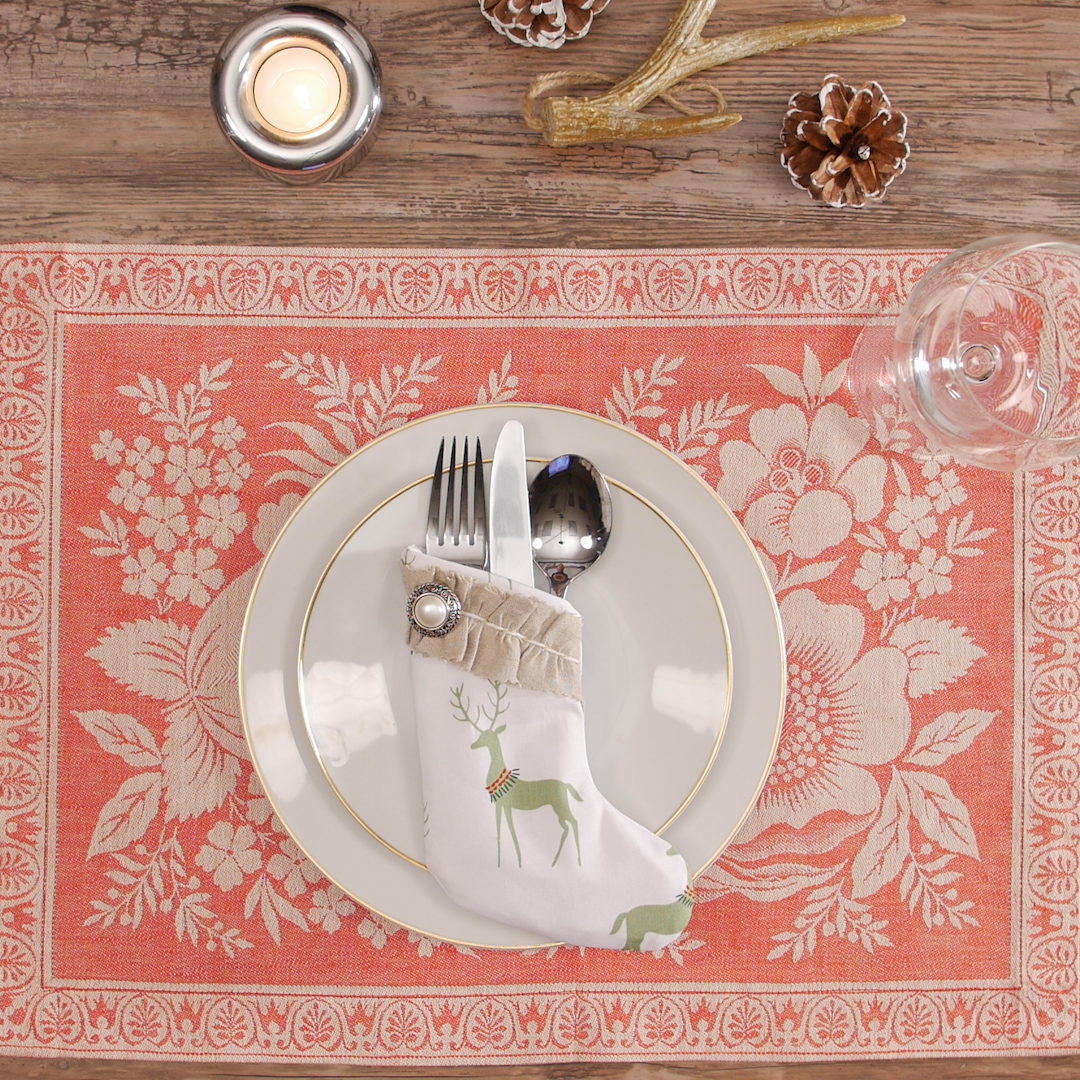
When I think of Christmas, one image that comes to mind is food. The big event is Christmas dinner when we sit down with family and friends to reminisce, catch up with one another, and eat! Preparations start with getting out our tried-and-true family recipes and end with setting the table. I like to create a setting that is welcoming and not too formal. My stocking flatware holders add a touch of fun and whimsy to the formal table setting. I couldn’t resist the reindeer fabric, adding some linen and a vintage button. With this project, it’s all about the fabric and embellishments. You can create something simple with a solid color fabric or something fancy with velvet. Think about your table setting for this year, what look and feel you want to create, and make it yours!

Materials to Create a Stocking Flatware Holder
- BERNINA 480
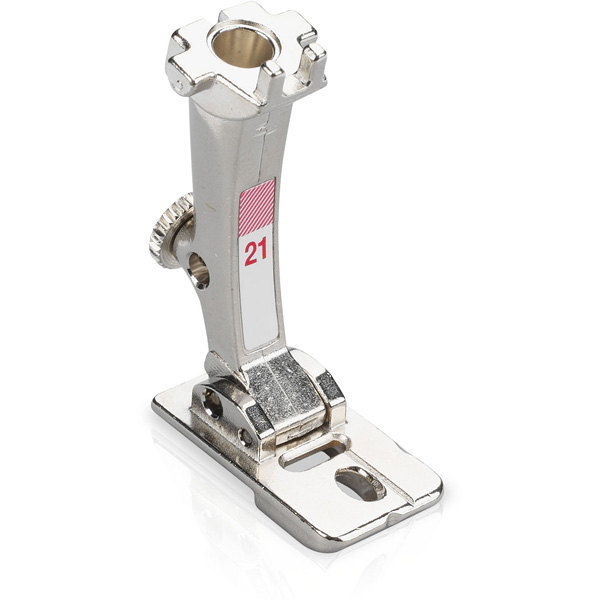
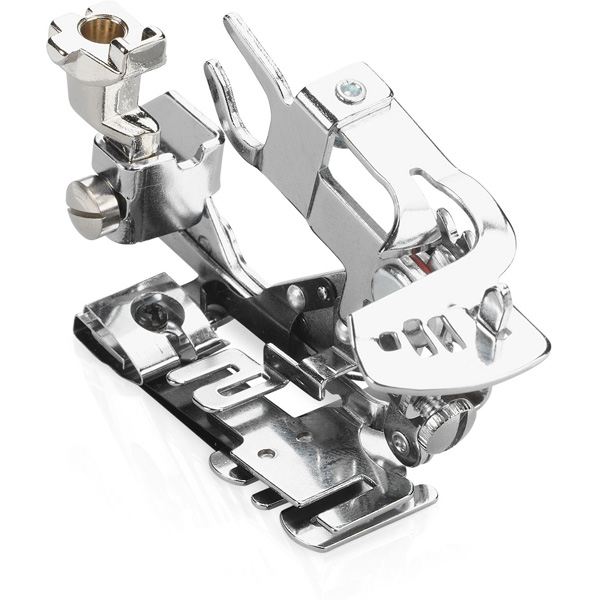
- Braiding Foot #21
- Patchwork Foot #37
- Ruffler Foot #86
- Download and print Stocking Template
- Fabric
- Holiday fabric for outside of stocking
- Lining fabric
- Linen fabric for trim
- Notions
- Aurifil 50 weight thread
- Invisible thread
- Rotary cutter & ruler
- Pinking shears
- Marking tool
- Point turner
- Tweezers
- Cording
- Button
Cutting and Tracing
Cut out the stocking template. I made a clear, plastic template with an applique sheet. It is not necessary for this project, but makes positioning the stocking much easier. I marked my template to ensure all my stockings faced same direction.
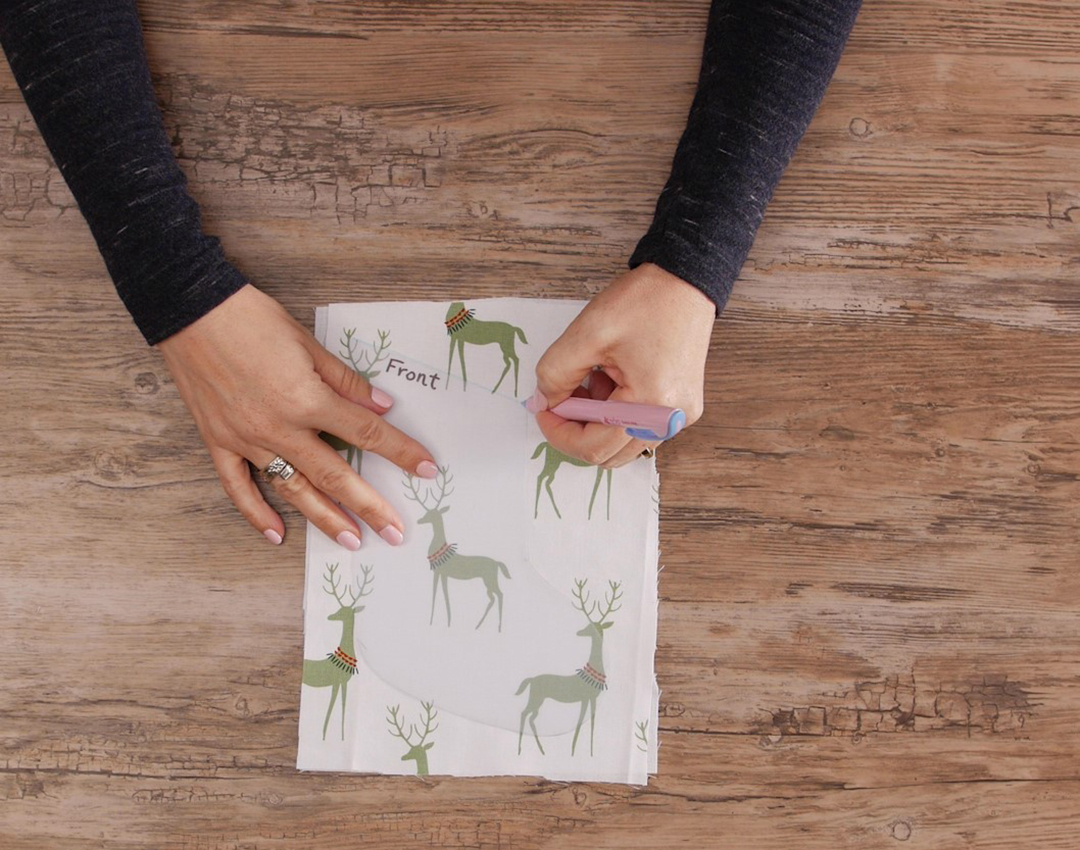
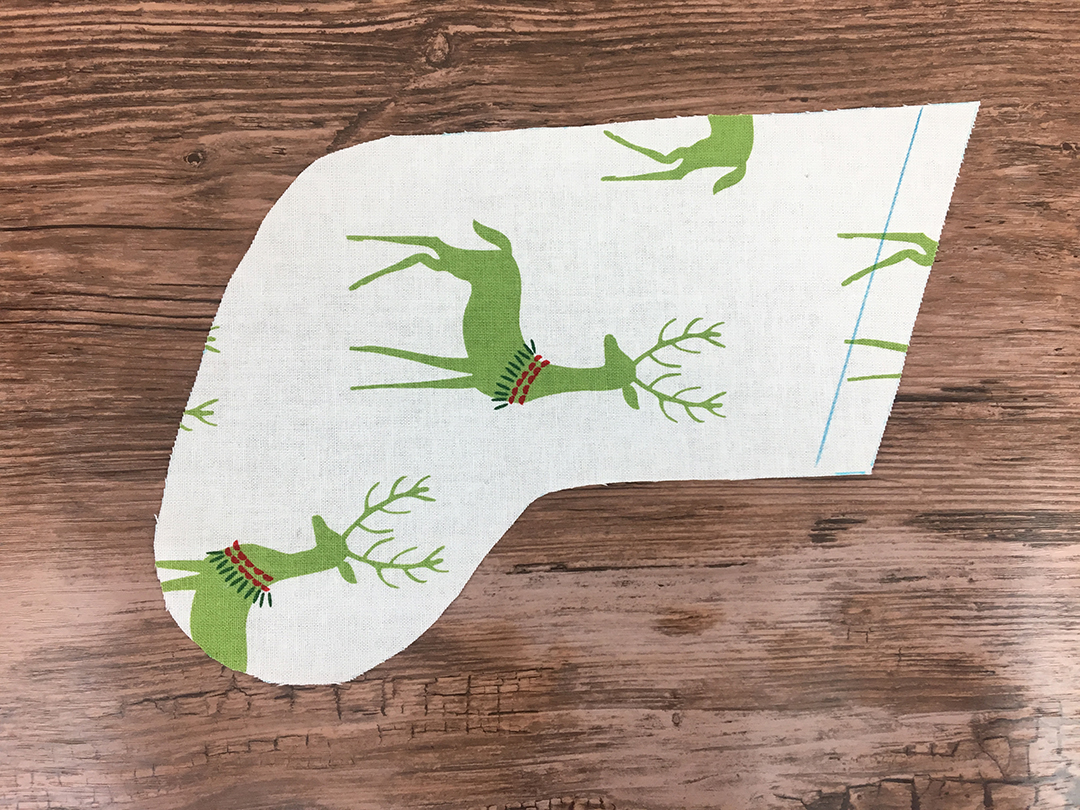
Trace and cut 2 main fabric pieces and 2 lining pieces for each stocking. (Note: Placing fabrics with wrong sides together before tracing will ensure that you have a front and a back.)
Cut linen fabric 2” x 11” and use pinking shears to pink the raw edges.
Decide which main piece will be the front of your stocking. Mark ½” line from the top edge of this piece with a temporary marker. This is the placement line for the top edge of your linen piece. If you would like the ruffle lower, mark the line further down the stocking. Don’t mark further up or your ruffle will end up in the seam allowance when we sew the stocking together.
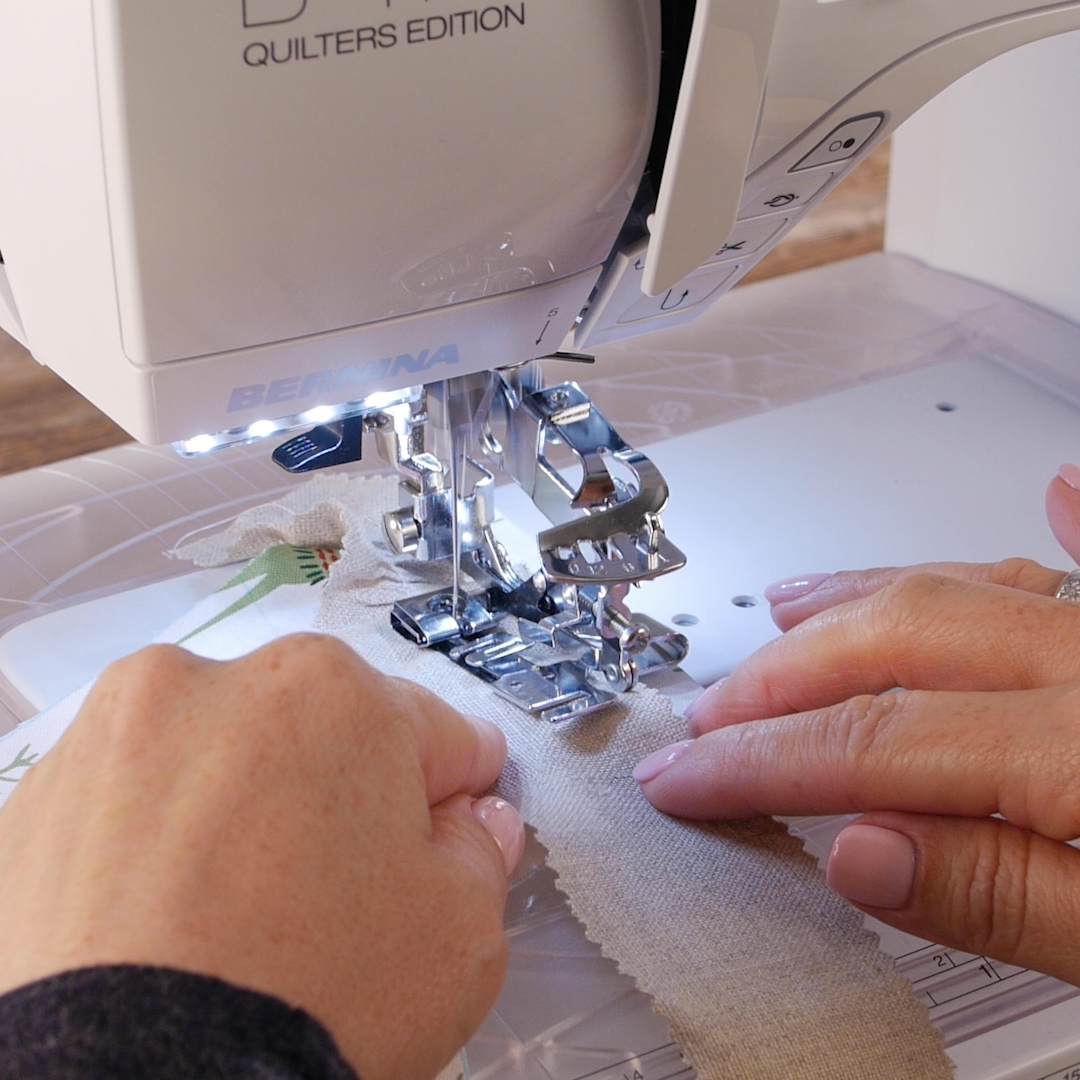
Make & Attach Ruffle (at the same time!)
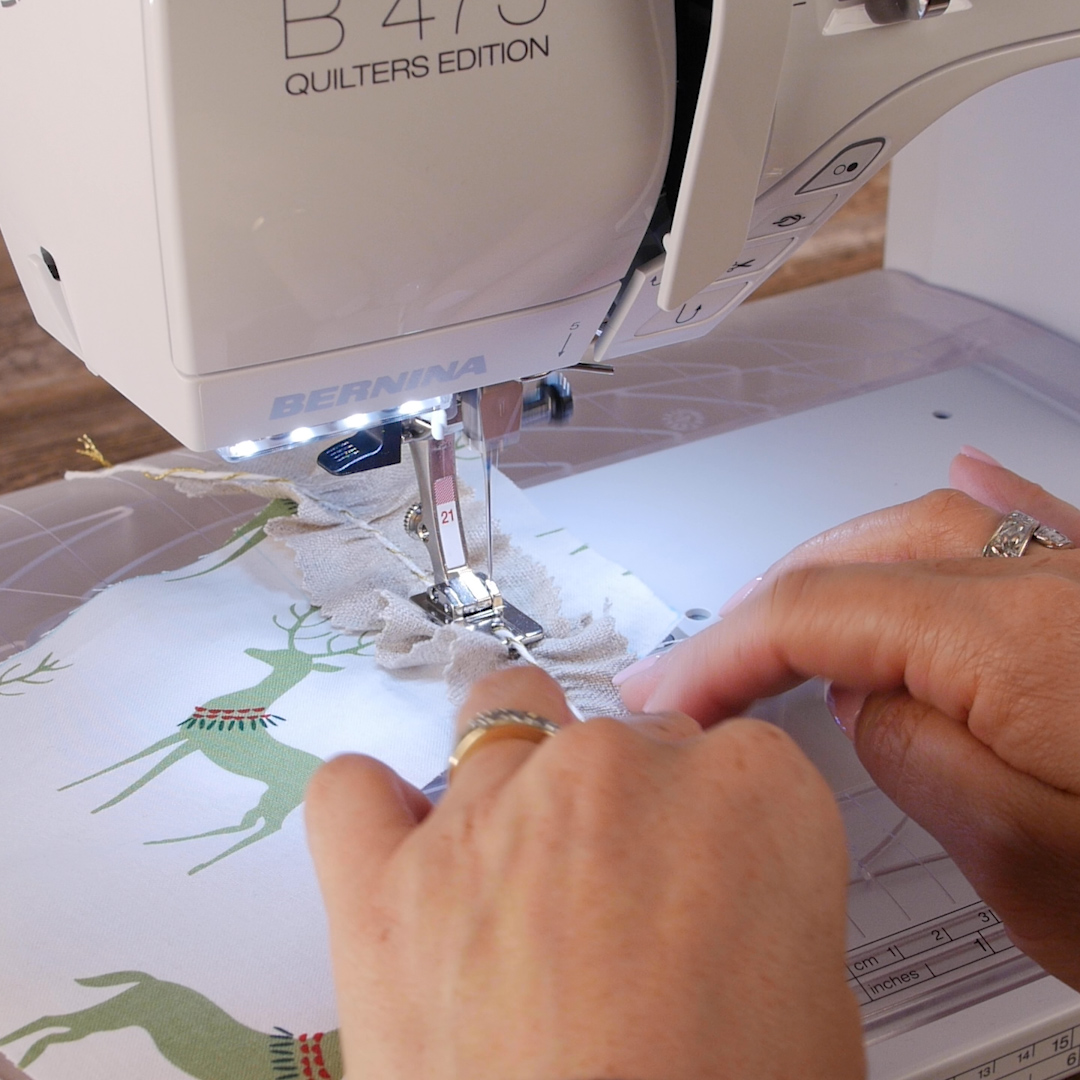
Attach Ruffler Foot #86 and set the stitch selection lever to 1. This sets the pleat density. The screw at front of foot sets the pleat depth. You would turn it clockwise to decrease the pleat depth and counter clockwise to increase the depth. Here is a great blog post about the ruffler foot. Read this first and then practice with scrap fabric to get the ruffle exactly how you like it.
When you are ready, place your linen piece under the needle to start, add stocking piece underneath foot, and ruffle! The linen piece will ruffle at the same time it is being sewn onto the stocking piece. It is easier to leave an inch of extra linen at start and end of sewing and trim later than trying to line up everything.
Attach Braiding Foot #21 to the machine. Thread the machine with invisible thread or matching thread. Select Zigzag Stitch #2.

Pull cording through the hole of the braiding foot with tweezers. Sew cording down center of ruffle. Audition different colors and different thicknesses. This extra step adds a nice finishing touch to the ruffle.
Sew Stocking Together
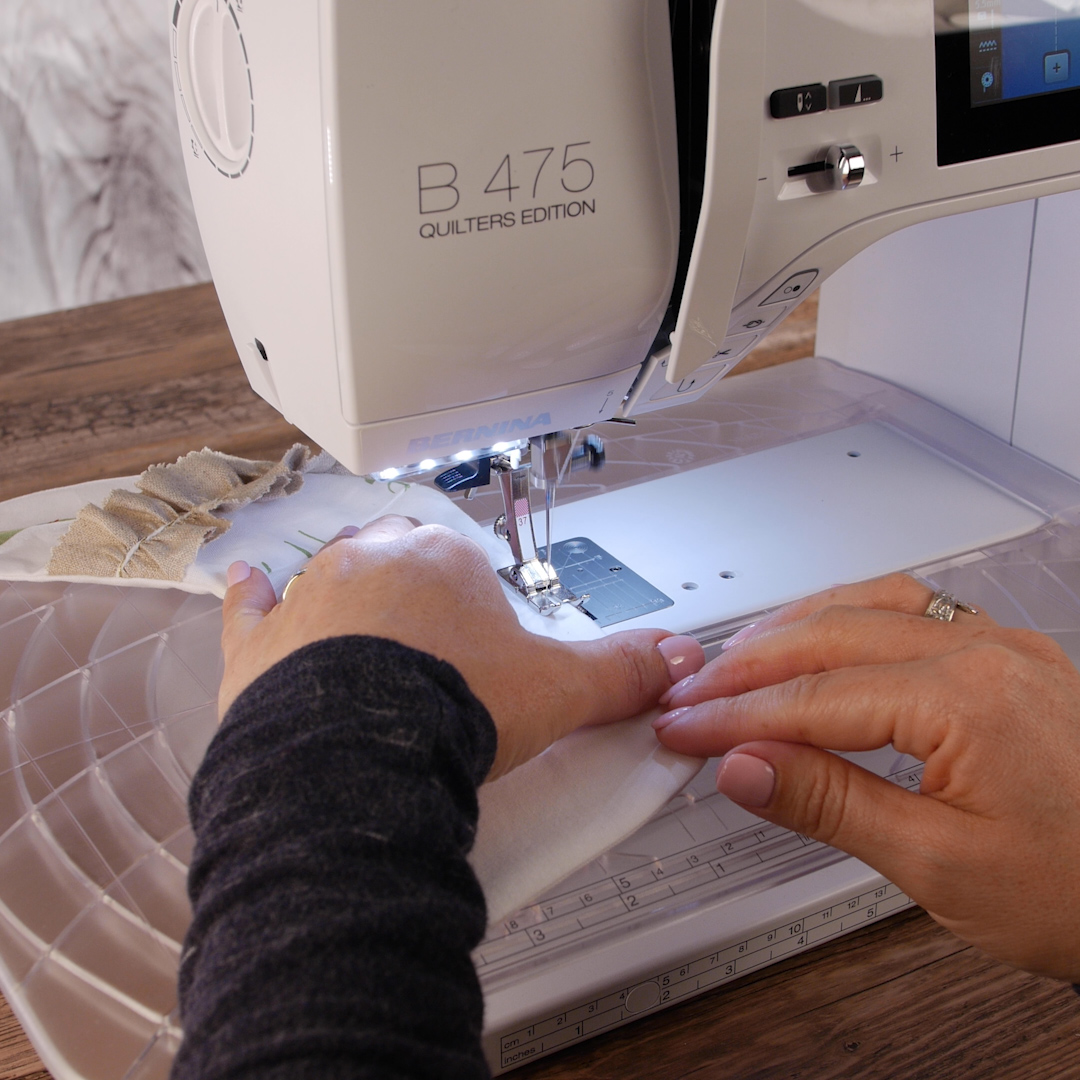
Attach Patchwork Foot #37. Select Straight Stitch #1. Place one main piece to one lining piece right sides together. Pin and sew ¼” seam allowance along the top raw edges only of both sets. Do same with remaining pieces.
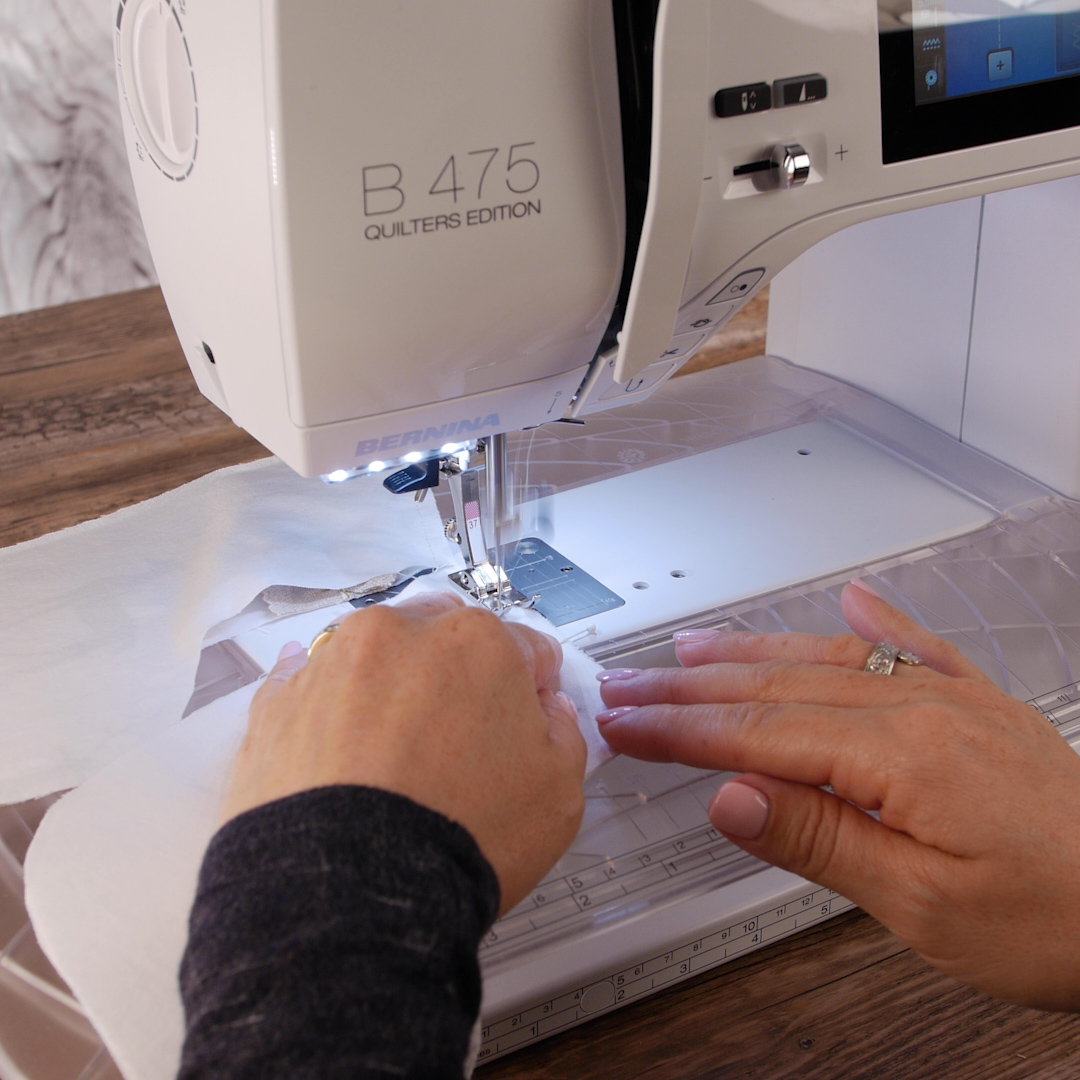
Now, open up the 2 sets and place right sides together (lining to lining and main fabric to main fabric. If you haven’t done so already, go ahead and trim any excess ruffle fabric extending beyond the stocking.
Pin along the raw edges, nesting the previously sewn seams. Place double pins to mark a 3” opening in the lining.

Sew ¼” seam allowance. Slow down your machine around the curves. Remember to leave 3” opening in the lining.

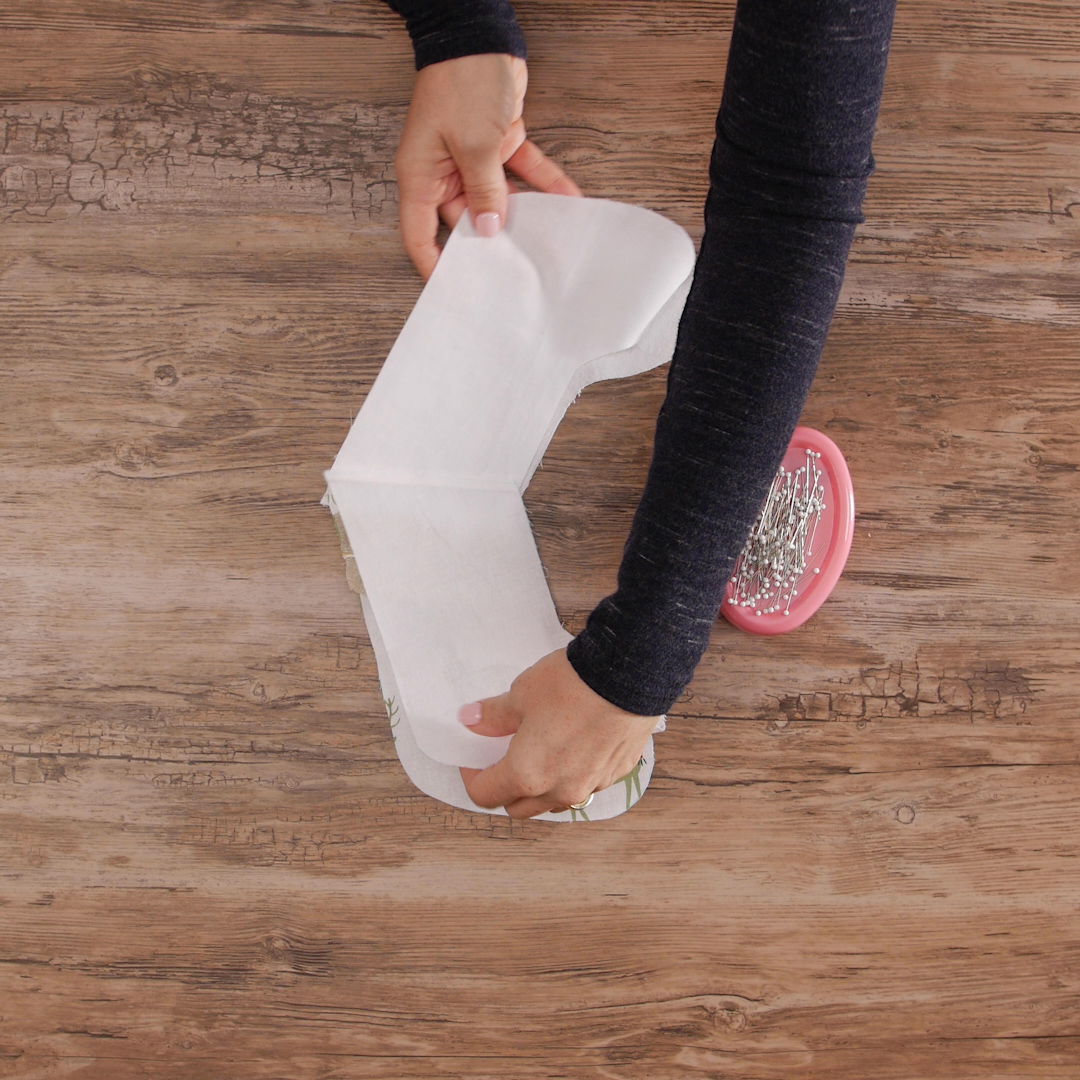
Snip curves and turn right side out using a point turner.
Sew opening in the lining closed.
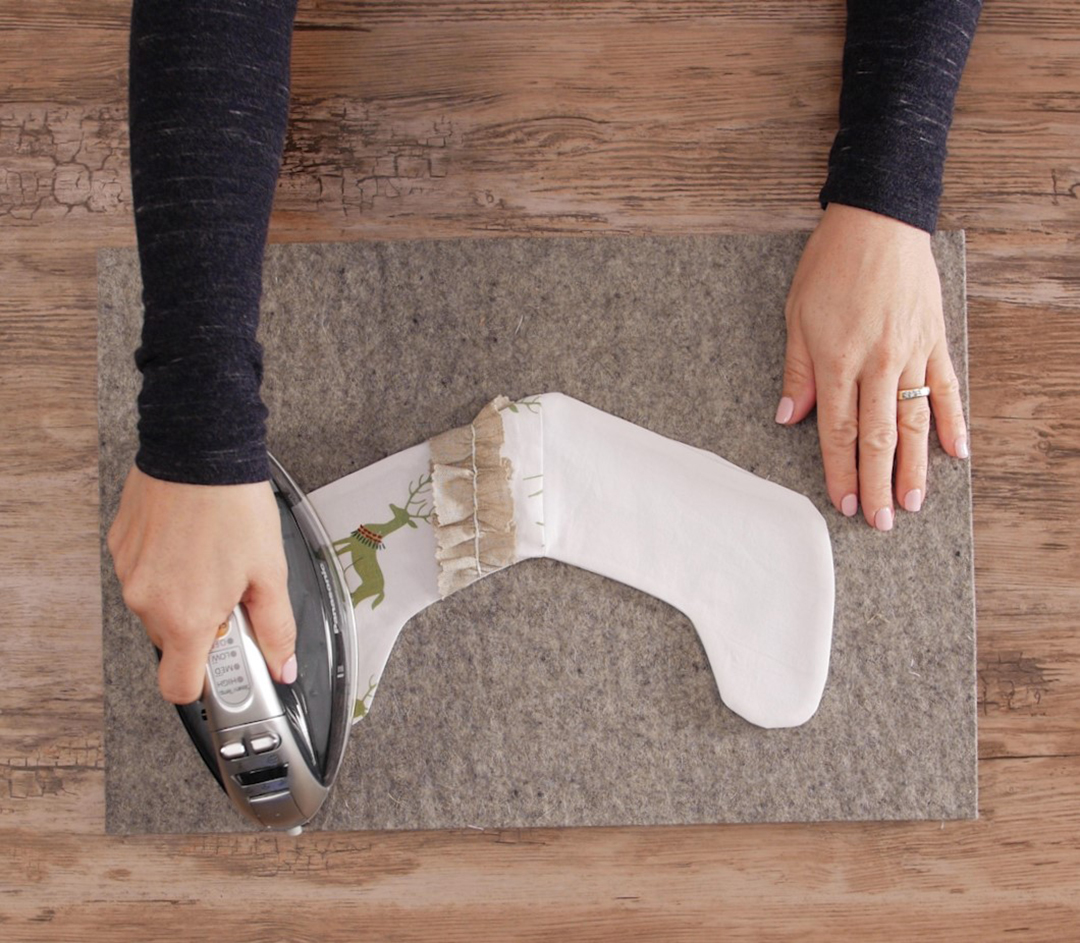
Press well.
Place the lining inside stocking. It’s beginning to look a lot like Christmas!
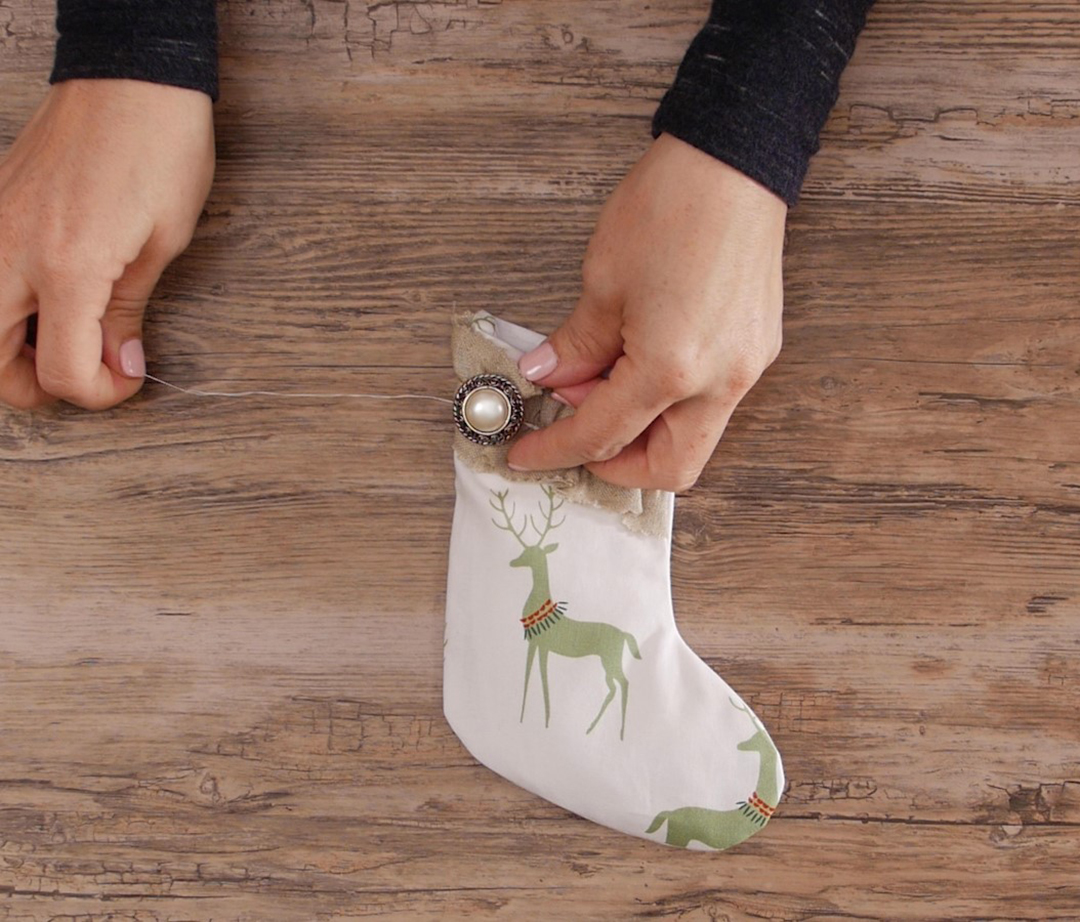
Embellishments
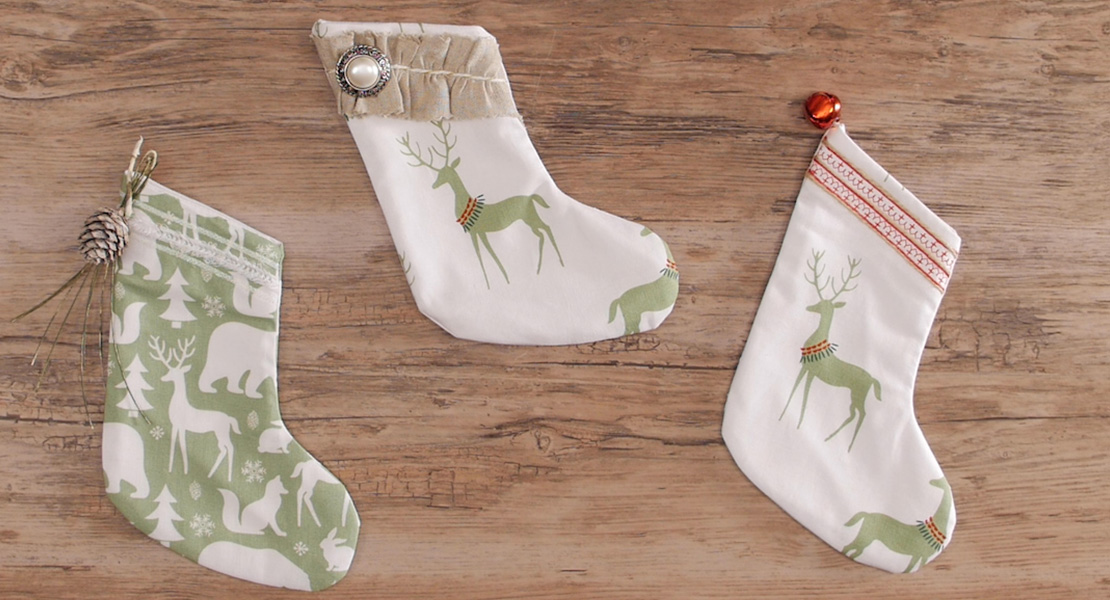
Get out your buttons, jingle bells, floral bits and pieces and embellish! I decided to keep mine simple and added a large, vintage button I found thrifting (my second favorite hobby).
Other ideas: make your own fabric covered buttons; use your machine’s decorative stitches; add a name tag using your machine’s alphabet; add charm with guest’s initial; tuck a special note inside. And if you have kids coming over to dinner, why not let them embellish their own stockings?
Be creative, have fun, and enjoy a peaceful Christmas dinner with family and friends.
Used Products


What you might also like


6 comments on “Stocking Flatware Holder”
-
-
Yes, those are fun too! I like the Danish Star also!
-
-
This is so cool
-
Thank you! I had a lot of fun with them! I hope you enjoy making your own this holiday season!
-
-
why is the video SOOOO fast! it would help if it was slower.
-
It is speedy! Hopefully the video gives you a quick taste of the project – it’s not really meant to be a tutorial. Instead we suggest you follow the steps in the post. Enjoy!
-
Leave a Reply
You must be logged in to post a comment.

I like to make the Scandinavian hearts.