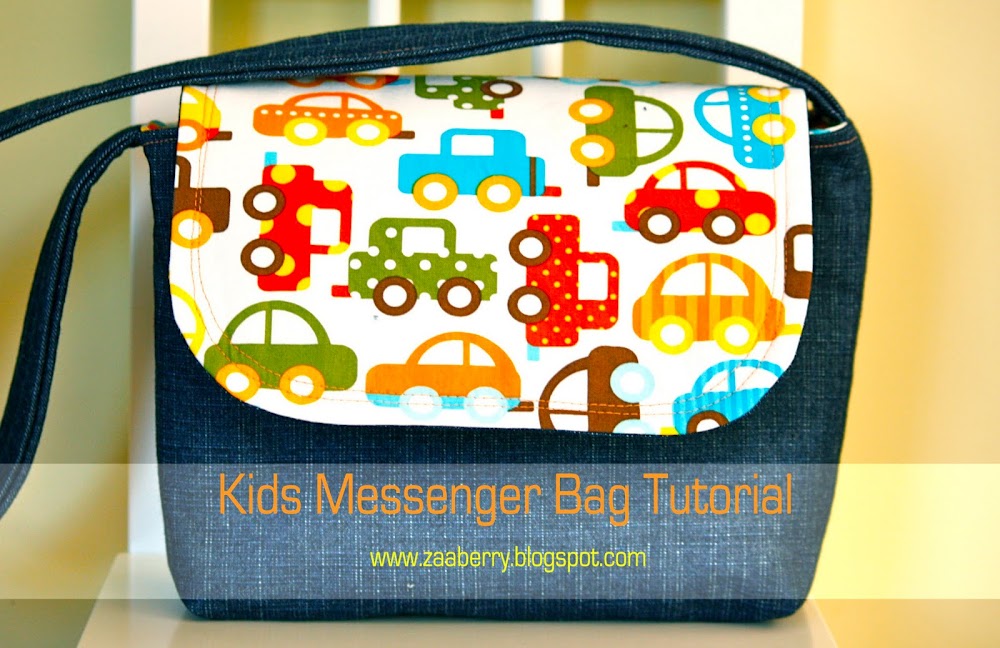
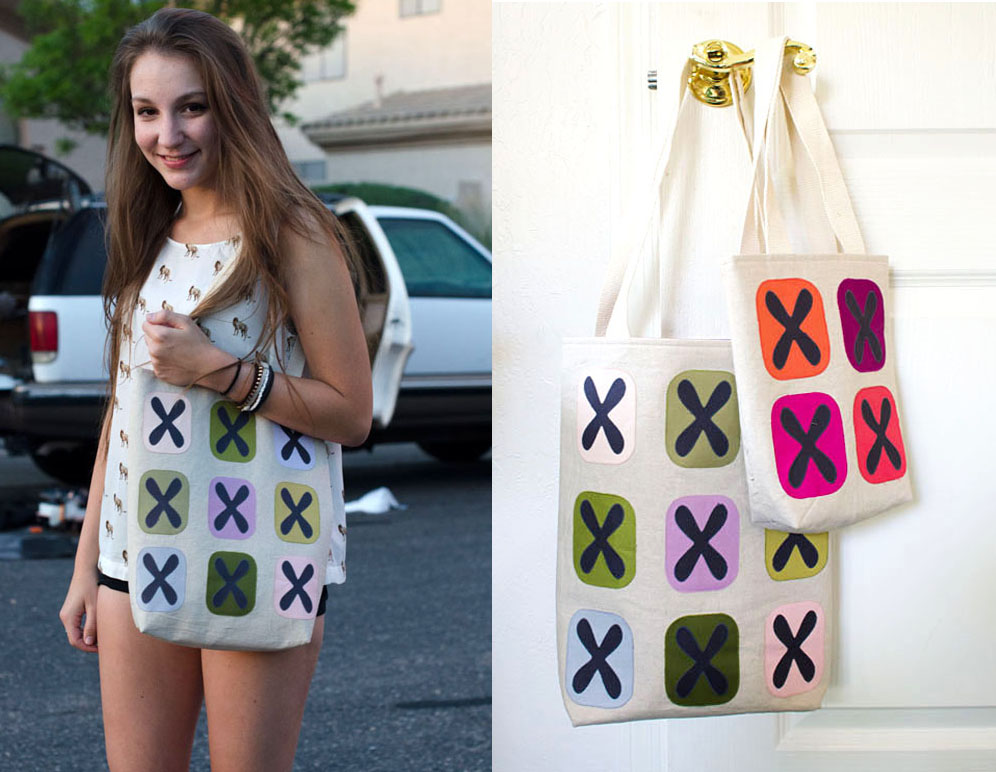
How to Make a Billboard Messenger Bag
Looking for a sturdy way to tote your books around town? This messenger bag fits the bill! It’s roomy enough to hold your belongings, even when you’re carrying a heavy load. The secret? Recycled billboard material!
Find recycled billboard material at billboardtarps.com.

Supplies
- Recycled billboard material (or 1-1/2 yards of sturdy fabric)
- 1-3/4 yards of fabric for lining
- 1-1/2 yards of 1-1/2″-wide webbing
- Two 1-1/2″ D-rings
- Coordinating thread
- Scissors and/or rotary cutter and mat
- Water-soluble marking pen or tailors chalk
- Ruler
Step 1) Cut the fabric.
Cut the following from the billboard material (or other sturdy fabric):
- Three 16″ x 19″ rectangles (bag front, back, and flap*)
- Two 4″ x 16″ rectangles (bag sides)
- One 4″ x 19″ rectangle (bag bottom)
- Two 6″ x 8″ rectangles (tabs)
Cut the following from the lining fabric:
- Four 16″ x 19″ rectangles (bag front, back, flap*, and pocket)
- Two 4″ x 16″ rectangles (bag sides)
- One 4″ x 19″ rectangle (bag bottom)

*If desired, create a curved flap edge by tracing around a lid or plate on the two corners of the long edge of the flap piece.

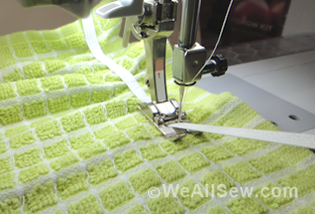
Tips for working with billboard material
- Use a large sewing machine needle to help keep your needle from breaking. Those for denim or leather work best.
- Increase the stitch length. If the stitches are too short they will shred the material.
- Do not iron directly on the billboard material, as it will melt. It’s best to either finger press or use a press cloth and the synthetic setting on your iron.
- If you find that the material doesn’t move easily through your sewing machine, try using a presser foot with a non-stick coating, such as BERNINA Non-Stick Zigzag Foot #52.
- Don’t use pins to hold the edges in place, as they will leave holes in the billboard material. Use binder clips or paper clips instead. If pinning is necessary, be sure to keep the pins within the seam allowances.
Step 2) Make the lining.
With wrong sides together, fold one 16″ x 19″ lining rectangle (the pocket piece) in half to create an 8″ x 19″ rectangle. Press. Edgestitch 1/8″ away from the finished, pressed edge.

Place the folded rectangle along the lower edge of one lining piece, right sides together. Baste along the raw edges.

Fold the lining in half lengthwise; find the center and make a crease. Stitch along this crease, creating two divided pocket sections. Set the lining piece with the pocket aside.

With the short ends together, stitch the side lining pieces to each end of the bottom lining strip.

Starting with the upper corner, sew side strip to one lining panel, pivoting at the corners. To pivot: Stitch until you reach the seam of thee side strip, move the needle down into the fabric, lift the presser foot, and turn the strip. After pivoting, lower the presser foot and continue sewing.

Clip the corners.

Repeat for the second 16″ x 19″ lining panel.

Step 3) Make the body of the bag.
Stitch the side and bottom pieces together and attach them to the side pieces in the same way as the lining was constructed in the steps above.
Since billboard material is quite a bit thicker than regular woven cotton fabric, you may find it necessary to clip the material at the seam edges when attaching the sides to the main panels. To do this, when it is time to pivot, keep the needle down, lift the presser foot, clip the panel at a 45° angle to the needle, then left the panel and side/bottom strip and continue sewing.

Step 4) Make the flap.
To create the bag flap, place the lining and exterior flap pieces right sides together, then sew around the three sides of the panels.
Trim the seam allowances to reduce bulk.

Turn the flap right side out and press. If desired, topstitch around the three finished edges of the flap panel.

With exterior fabrics right sides together, baste the flap to the back of the messenger bag.

Step 5) Make the tabs and strap.
Fold one tab rectangle in half lengthwise; finger press to create a crease. Open up the fold and bring the raw edges in to the center to meet the fold. Fold again on the initial crease, creating a long rectangle with two finished edges. Edgestitch along both long edges of the tab. Repeat for the second tab.

Slip a D-ring through one tab and fold the tab in half. Center the tab on an exterior side panel, matching the raw edges, and baste it in place. Repeat for the second tab.

Insert the bag exterior into the bag lining, right sides together, matching seams and raw edges.
Stitch around the bag, leaving a 6″-wide opening for turning. (If using sturdy fabric rather than billboard material, the opening doesn’t need to be this large.)

Pull the bag right side out through the opening. Press.

Edgestitch around the bag, making sure the flap and tabs are kept away from the stitching. The edgestitching will close the opening in the lining and bag.

Insert the webbing through one of the D-rings. Fold back 1″ and stitch in place. Repeat for the other end of the strap and the second D-ring, making sure the strap isn’t twisted.

Used Products


What you might also like


24 comments on “How to Make a Billboard Messenger Bag”
-
-
Wow! This is really a neat idea!
-
Very nice project! Do you have some sources for the billboard material?
Nice site redo, too!
-
what is recycled billboard material and where do you get it?
-
Wow, Stacy! I love this project. Where do you get recycled billboard material?
Thanks. Stella
-
Great ideas… but how do you get the recycled billboard material?!?
-
Fabulous idea! How do you find billboard material?????
-
okay – I’ll bite. whatever is used billboard material? Am I supposed to find a billboard and climb the “ladder” and cut a piece off of it? Kathy
-
Looks great. I love, love bags. Where do you get billboard materail? (I am think of bill board along the Highways???)
-
This is a great project! I’m checking in with Stacy Sews this morning to find out where to find the recycled billboard material, stay tuned!
-
I got mine from the Billboard Tarp Warehouse (billboardtarp.com). You can’t select what your tarp looks like, but you do get a ton of useable ‘material’ to chose from!
-
The billboard material looks great. I like using ripstop nylon or a waterproof twill-like fabric for more suppleness. Would the billboard material be rigid enough for using as bottom support in a bag place of plastic? If not, do you have any sources for a material to use to shape the bottom of a bag?
-
Hi Pamela, I’ve used Pellon Peltex or a really stiff craft interfacing to reinforce the bottom of bags before, and it has worked really well! I’ve never worked with the billboard material before so I’m not sure how sturdy it is – mabe someone else can let us know?
-
Pamela, I didn’t use a support in the bottom of the bag, but the material will hold weight (doesn’t sag) better than the ripstop. If you’re planning on toting around really heavy items, you can create a false bottom (I like to use plastic needlepoint canvas that’s encased in the same material as the lining).
-
I saw these bags/totes made of billboard material at a recent art fair. Price was $75. And UP!
-
I wonder, does the Billboard bag has a closer? if not, maybe 1-2 round magnets will safely close it .
Yamayka.
-
Love it!
I love the fact that I can use some of my collage ideas, and I ADORE the fact that it’s made out of recycled materials.
-
Pingback: WeAllSew « https://weallsew.com
-
Pingback: WeAllSew « https://weallsew.com
-
I need some assistance with some of the steps. It doesn’t really make sense to me. Help!
-
Hi there carrolldsjb1. Can you let me know which step is confusing to you so I can try to help?
-
-
Pingback: WeAllSew « https://weallsew.com
Leave a Reply
You must be logged in to post a comment.

That’s great!