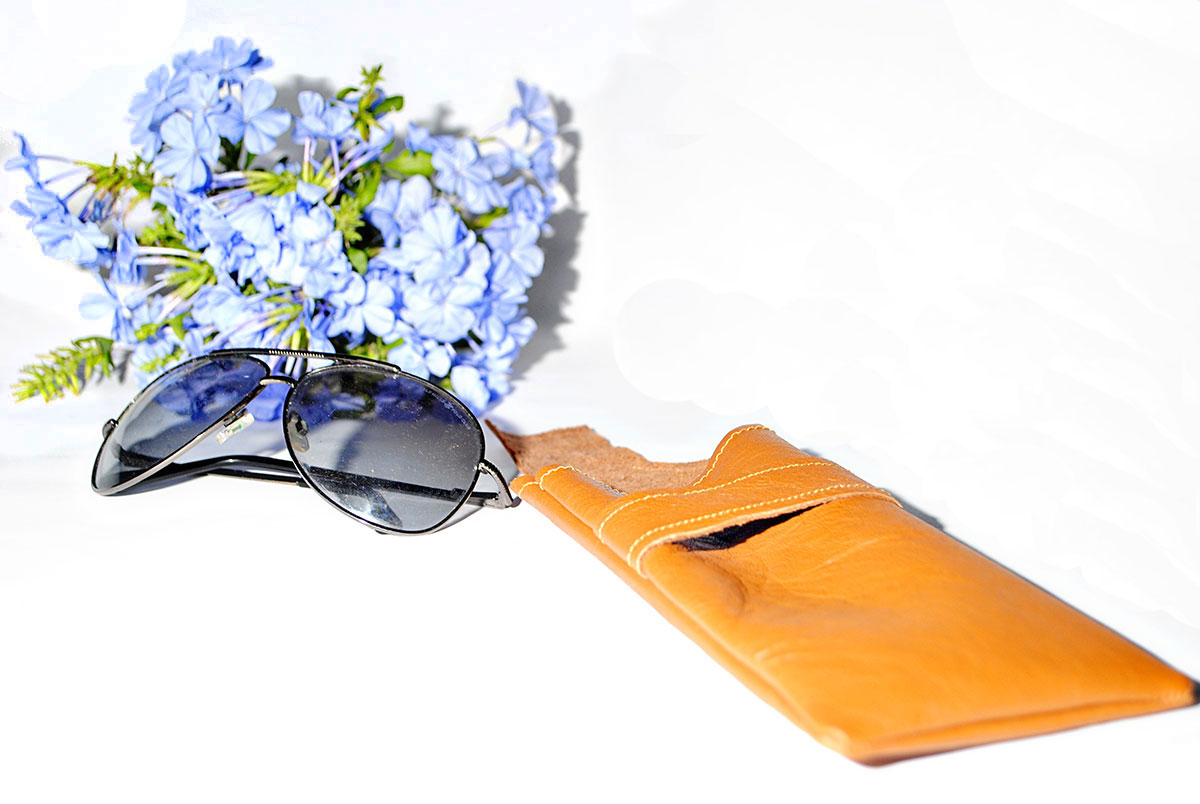
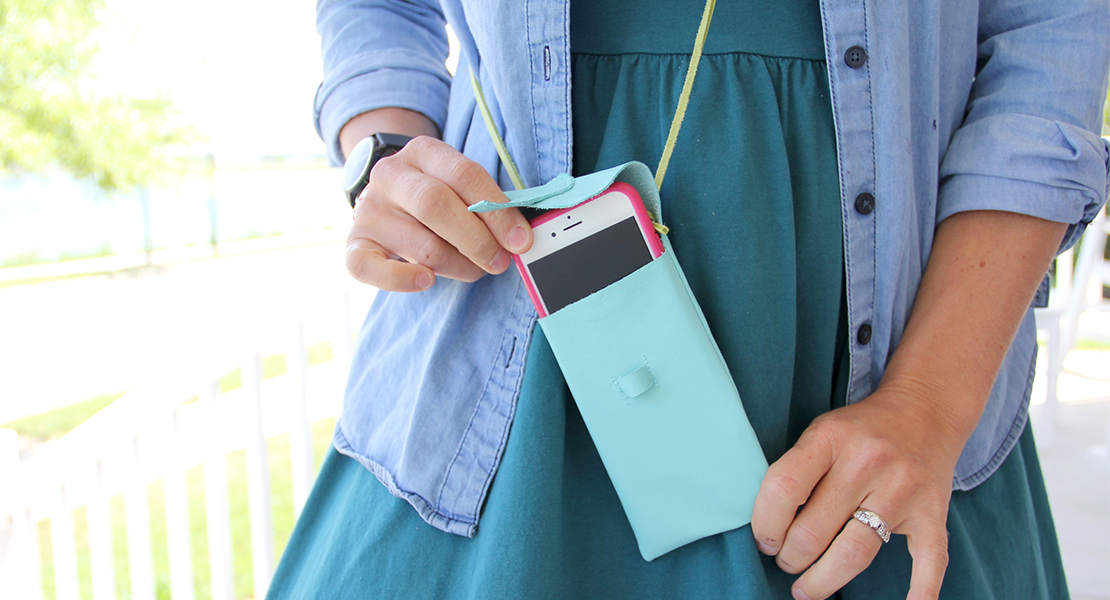
Leather Sunglass Case Tutorial

Summer is in full swing here, and that means my sunglasses are getting a lot of use! I am constantly misplacing them, and know that if I have a sunglass case, they wouldn’t go missing in my purse! I have a great leather sunglass case tutorial for you today using just a few scraps of leather. Leather can sound a little bit intimidating to sew, but it’s actually not too complicated.

Let me start by giving you a few leather sewing tips:
- Have a new, sharp leather sewing needle in your machine (these are marked leather on the front of the case)
- Use binder clips or clover clips instead of pins to hold your project together
- Remember that once a needle goes into leather, the hole is there forever
- You don’t need to finish seams or line a leather project, the edges will not fray
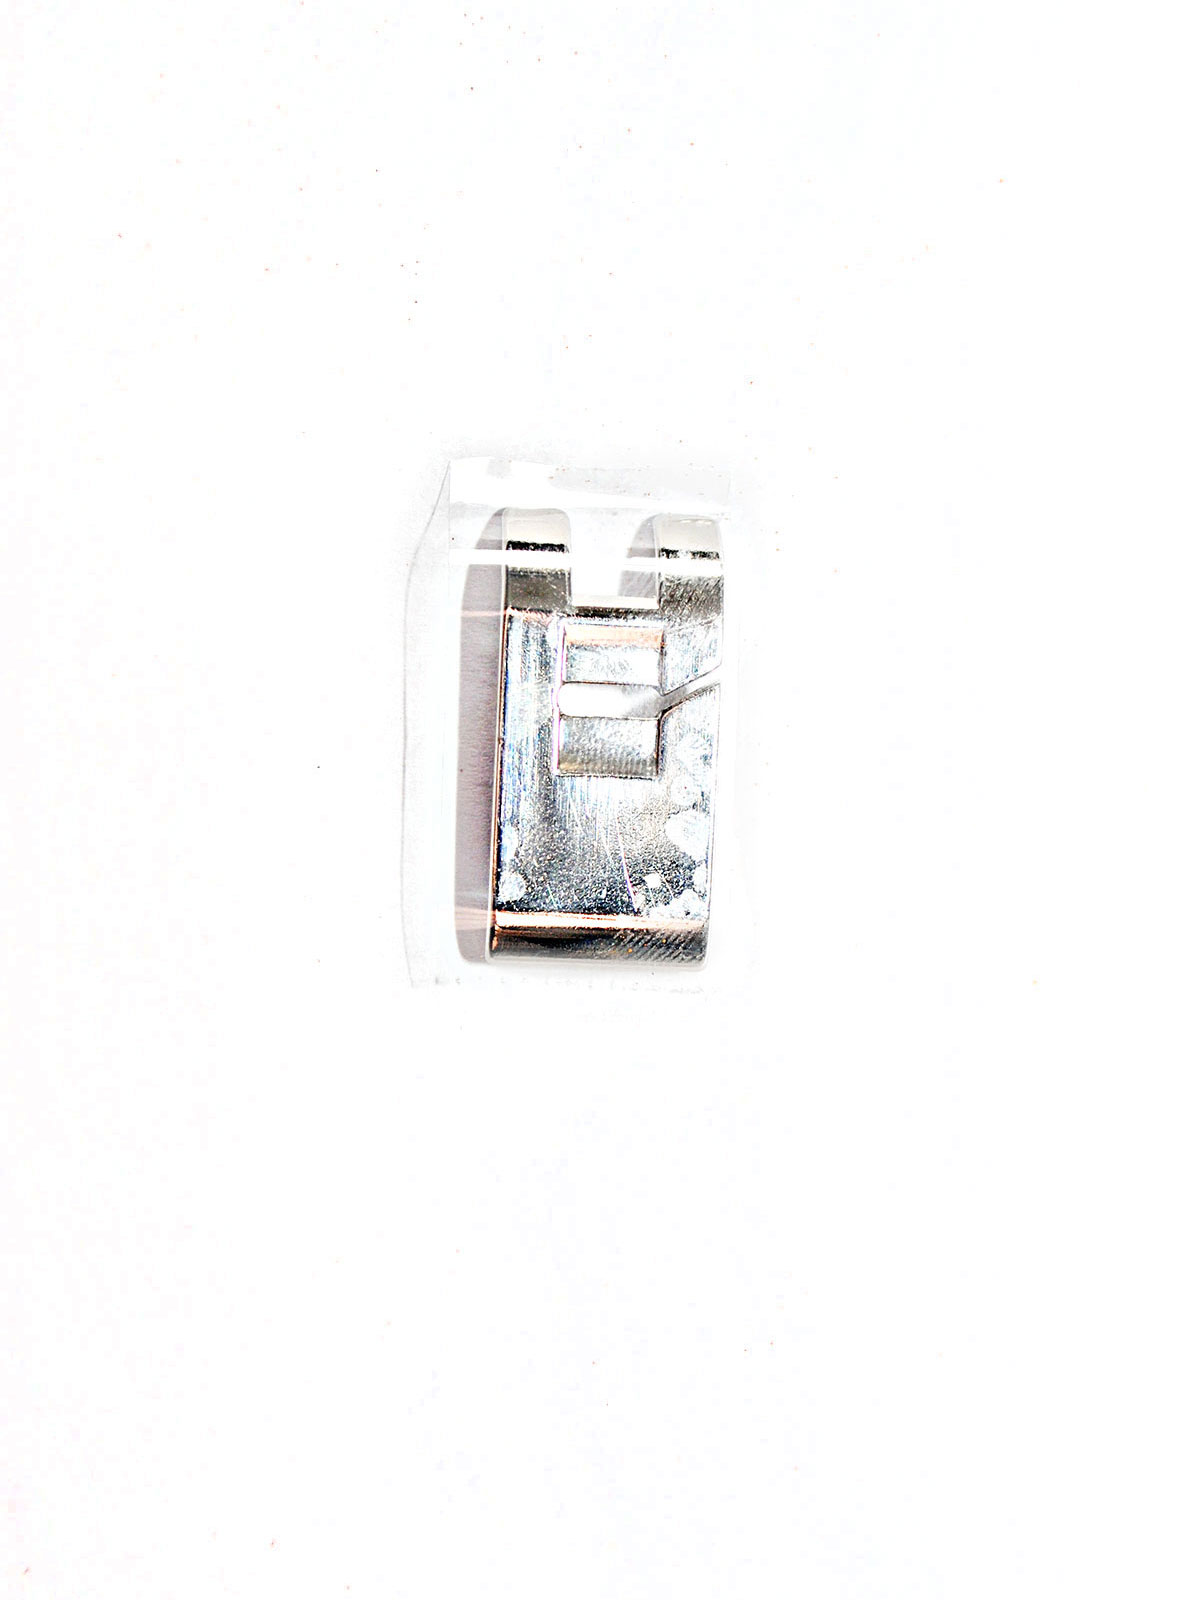
- Use a presser foot with a non stick sole, such as Straight stitch foot #53 with non-stick sole
- If you do not have a non-stick foot, use a piece of tape attached to your presser foot
Now that we have a few leather sewing tips under our belts, we are ready to sew the sunglass case.
Materials to Sew a Leather Sunglass Case:
- Sunglass Case Pattern
- Leather scraps, measuring a total of 15 inches by 8 inches
- Scissors
- Binder or clover clips
- Point turner
- A sharp, new sewing machine needle
- Sewing machine (I used my BERNINA 350 PE)
- Straight stitch foot #53 with non-stick sole or tape (see above comment on non stick presser feet)
Assemble the Pattern
Print out the leather sunglass case pattern above. It will print out on two pages. Line up the triangles in the middle, between page one and two, and tape together. Make sure when printing the pattern that you have selected print to actual size and auto portrait/landscape. Once the pattern is printed and taped, cut your leather for your project.
Sew the Leather Sunglass Case
Step One: Topstitch
Topstitch the top edge(s) of the front and back pattern pieces, as well as the top and bottom long edges of the front flap closure.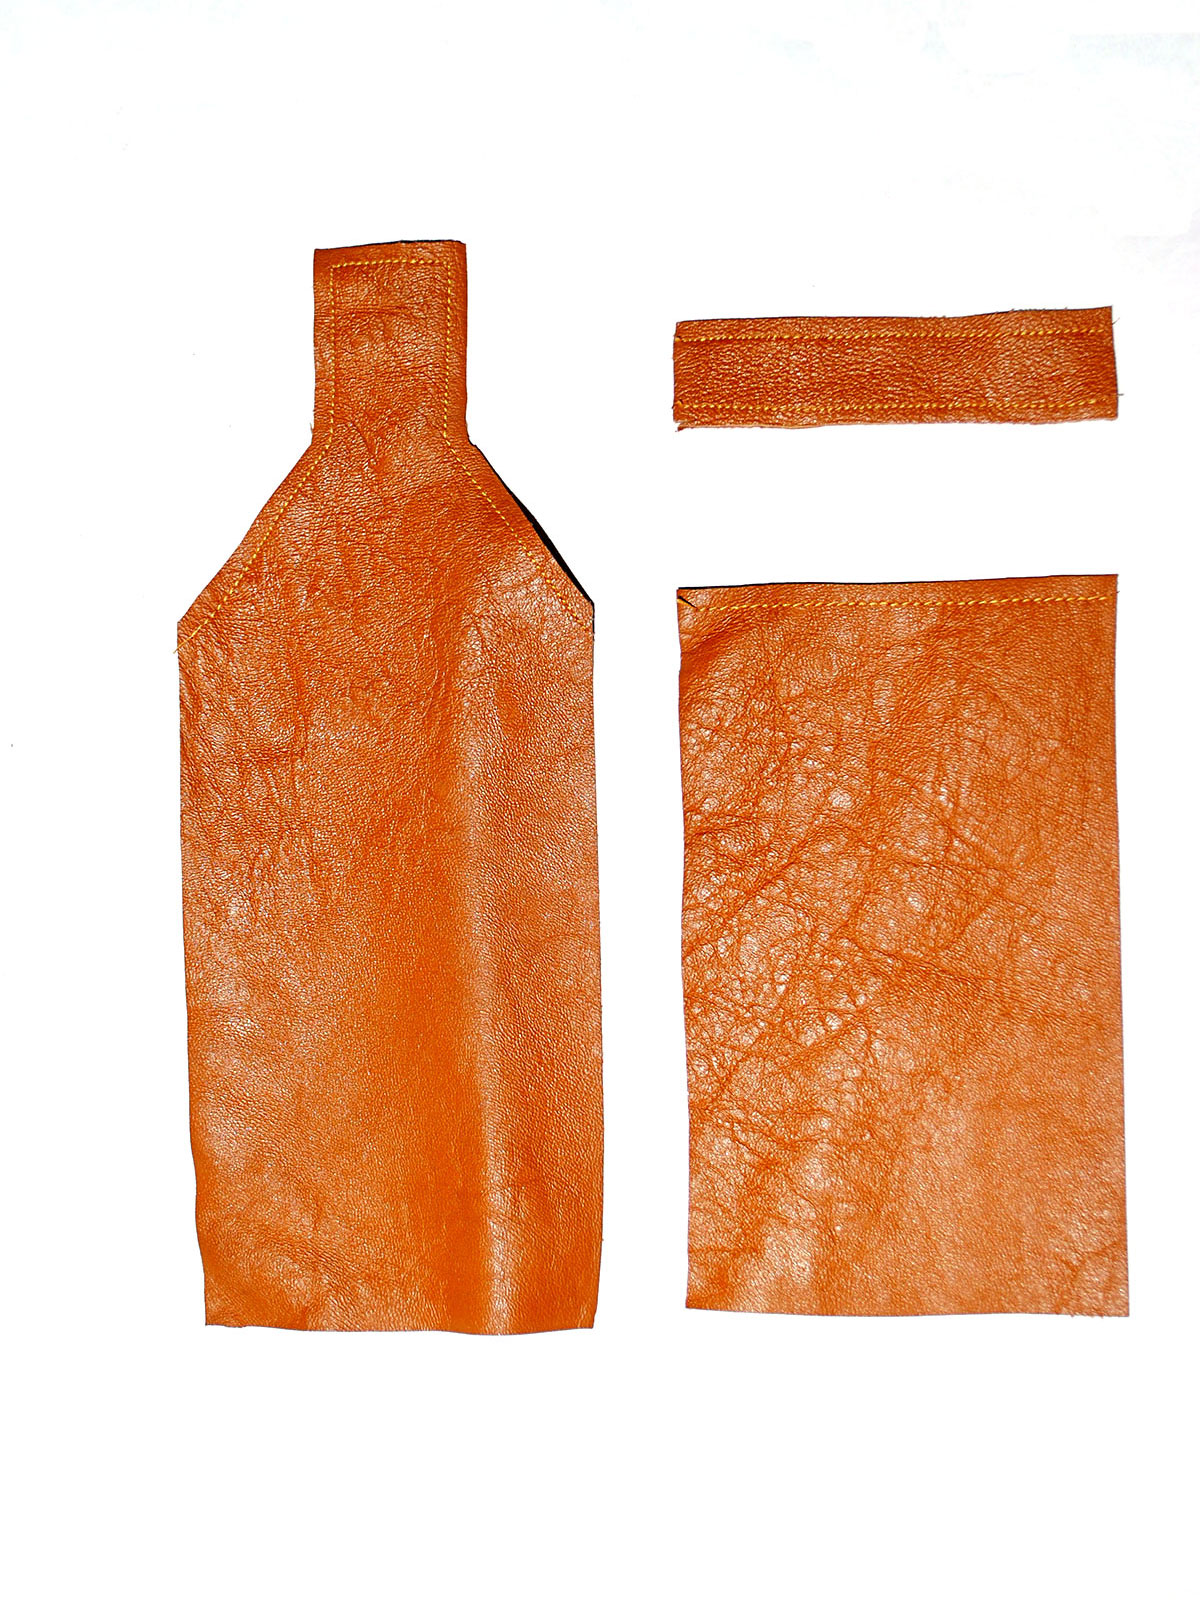
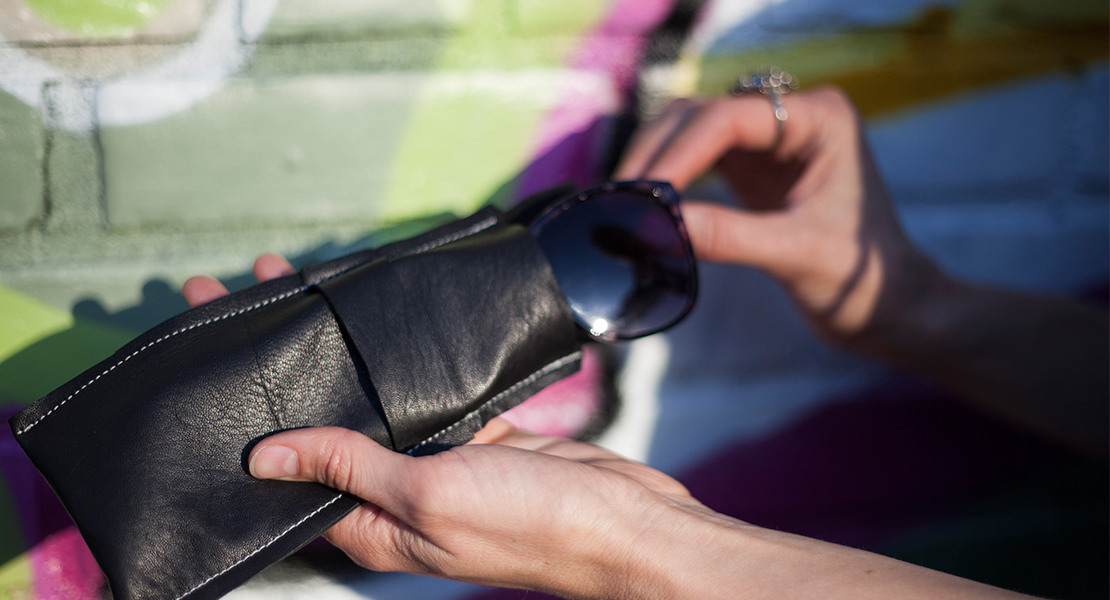
Step Two : Attach Front Flap
Measure down 2 inches from the top of the front of the sunglass case and stitch the front flap closure along the sides using a 1/4 inch seam. Remember to use binder or clover clips and not pins to hold the leather pieces in place.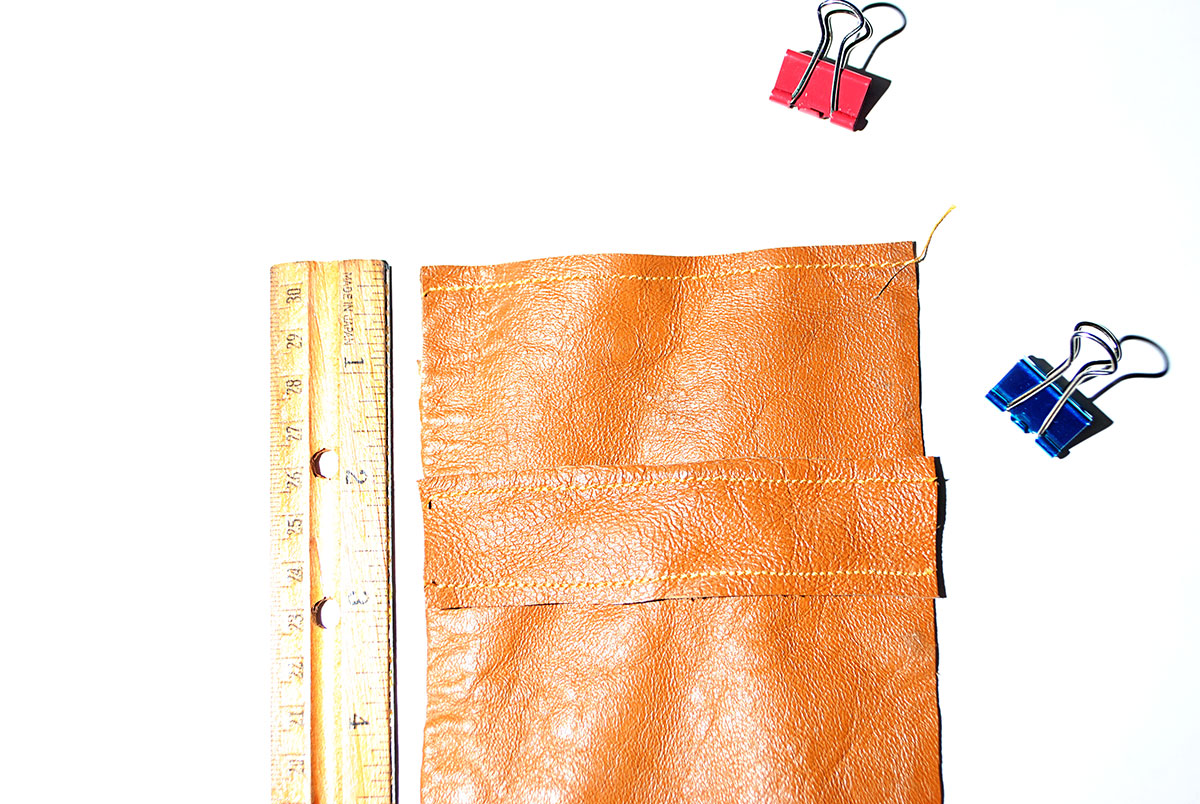
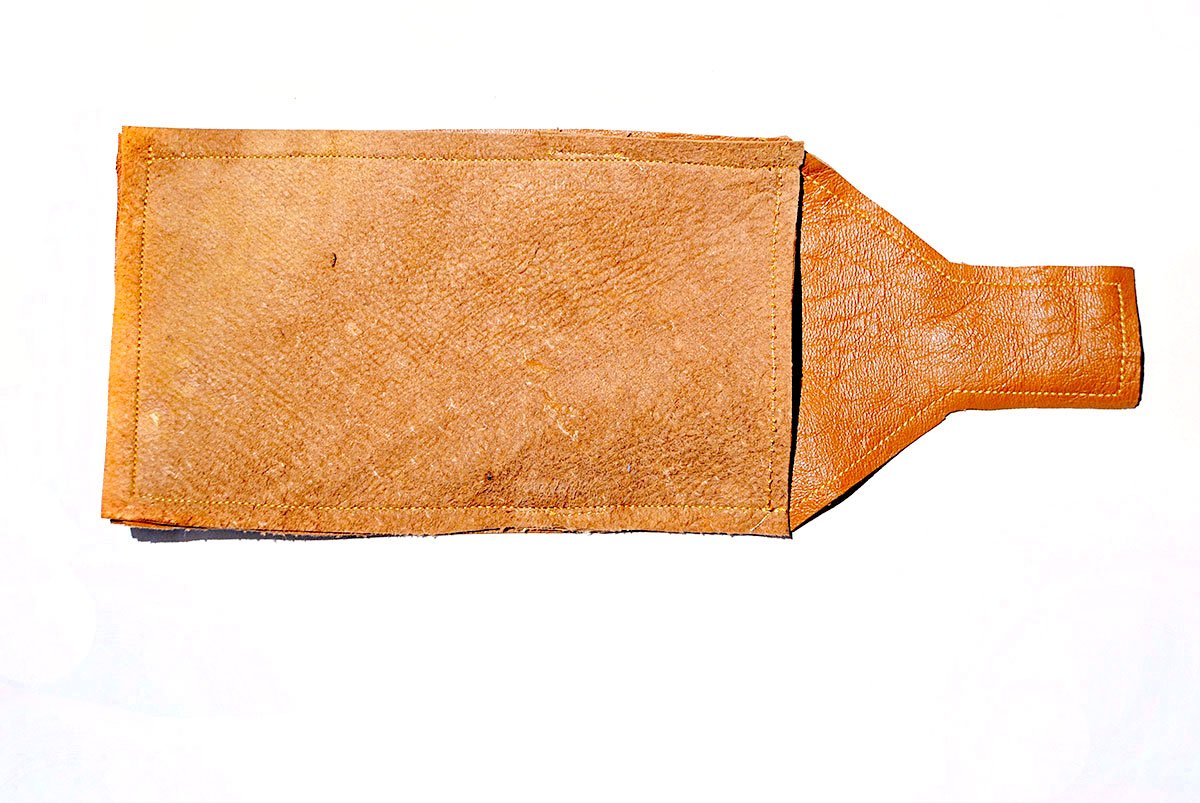
Step Three: Sew Front and Back Pieces Together
With right sides together, sew the front and back sunglass case pieces together on three sides using a 3/8 inch seam allowance, leaving the top of the front un-stitched (that is the edge that you added topstitching to earlier). 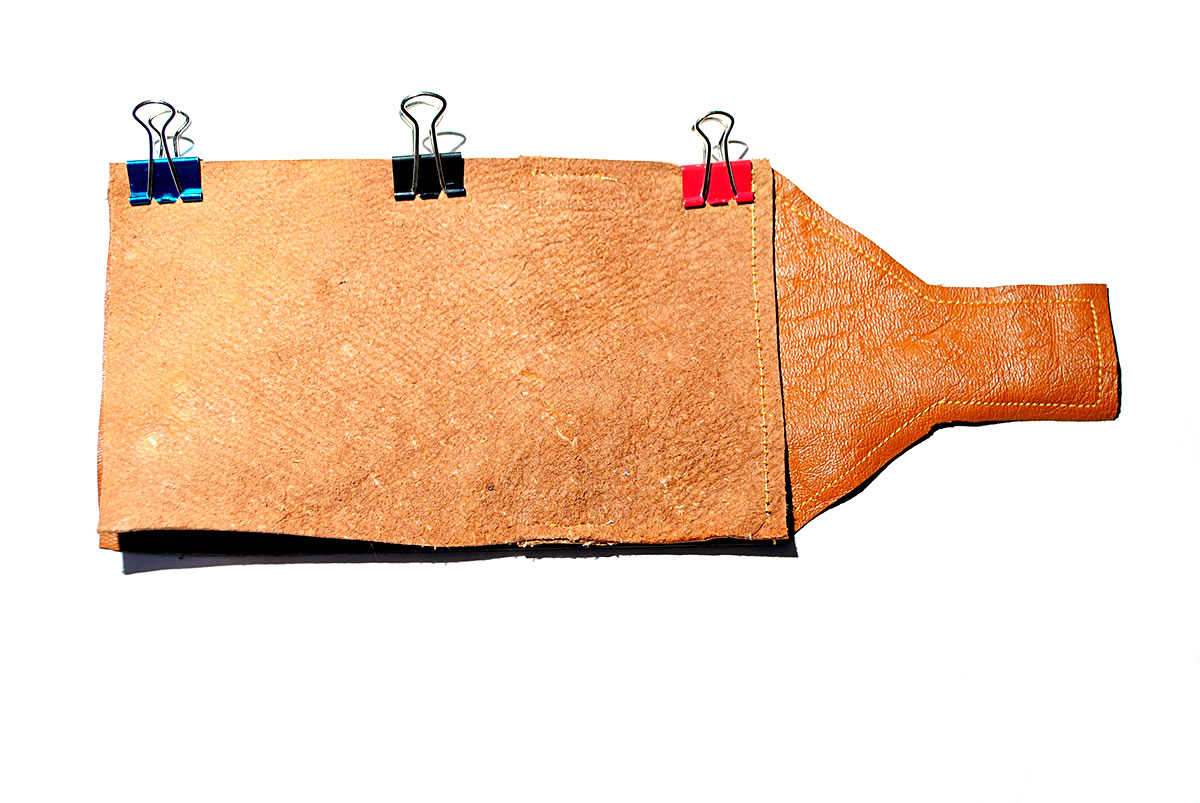
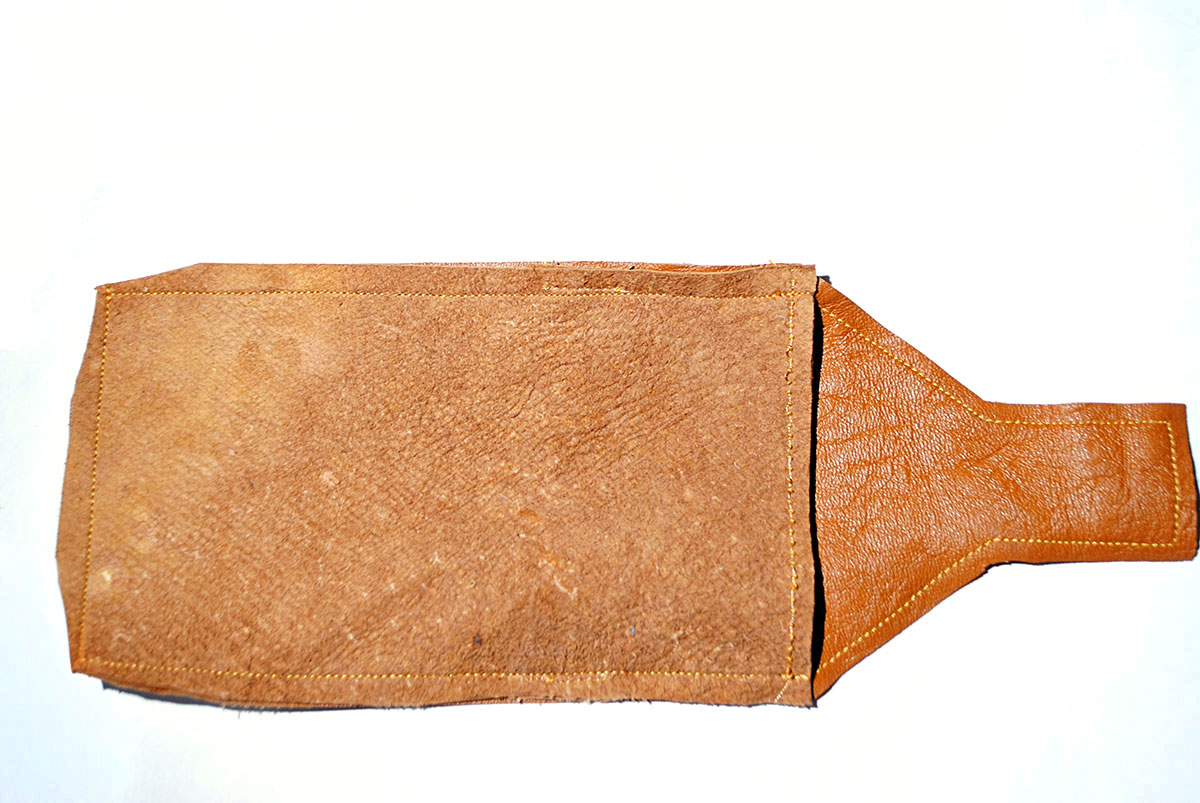
Step Four: Trim Bottom Corners
Trim the bottom two corners to make it easier to turn those corners to a point. Flip the project right side out, making sure the front flap piece is in the front. Use a point turner to help get your corners turned completely out. And that’s it! Your sunglasses are now ready to go into their new case!
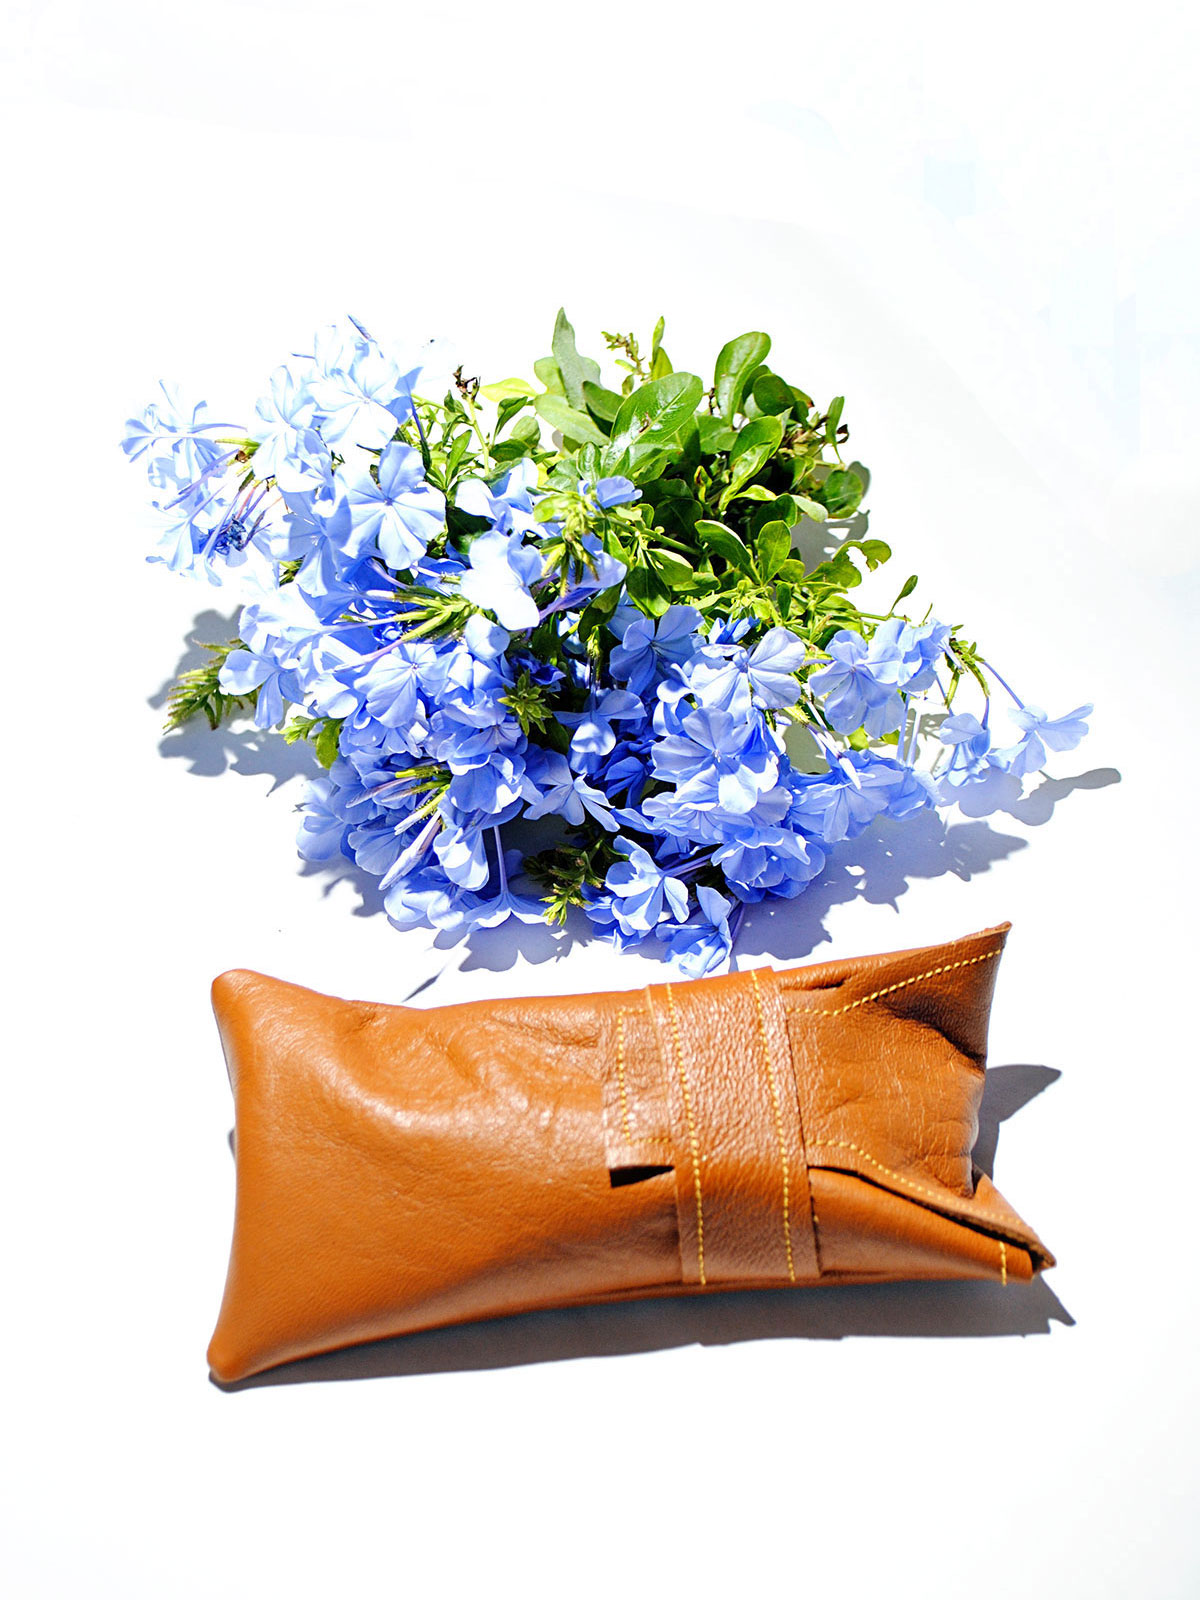
I can’t wait to see all of the leather projects you start sewing! I should note that my favorite source to find leather is from old leather jackets at the thrift store…you can’t beat the price and it feels good to reuse a little bit of something old!
Used Products


What you might also like


6 comments on “Leather Sunglass Case Tutorial”
-
-
Oh yay! Thanks Michelle!
-
-
Very nice. Thanks for sharing.
-
Thanks…I hope you make one!
-
-
Thank you! I’m so excited to make this great pattern for this eyeglass case! Can’t wait to make it!
-
Yay…I can’t wait to see your finished eyeglass case!
-
Leave a Reply
You must be logged in to post a comment.

How cool is this??? I love this a custom handmade leather eyeglass case would make a great gift! This is one to book-mark.