Roman Shade Tutorial

A Roman shade is a great way to dress up your windows and making your own is a great way to save money and have fun at the same time!

Materials to Make a Roman Shade
Note: exact amounts of fabrics and some materials determined by measurements, see below.
- Decorator fabric
- Drapery lining fabric
- Fusible web, 1/2″ wide (I use Stitch Witchery)
- Plastic rings, 1/2″
- Shade cord
- Cord cleat
- Cord pulls
- Thread
- Scissors
- Ruler
- Pins
- Fabric marker
- Iron
- Sewing machine (I use a BERNINA 350 PE)
- BERNINA Blindstitch Foot #5
- Serger (optional)
- Drill
- Screw driver
- Screws for your hardware
- Hand saw (optional)
- Staple gun or hot glue gun
- Corner braces, 1 1/2″
- 1 x 2 wood board (length will be determined by the width of your shade)
- Wood dowels
- Slat of wood, large wood dowel or metal rod (for weighing down shade)
- 3 Screw eyes
Measure and Cut
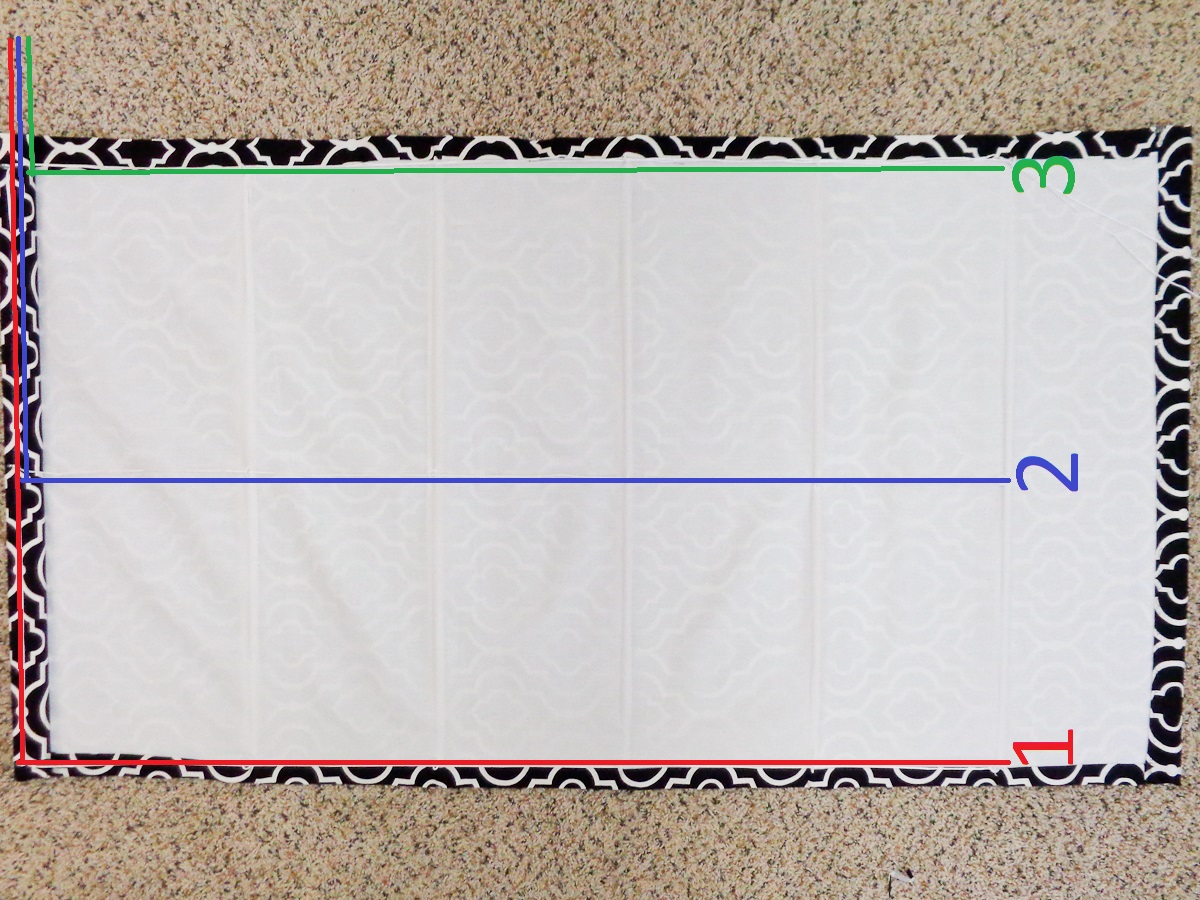
To make your Roman shade, measure your window for the width and length. You will cut your decorator fabric 3″ wider than the finished width and 5″ longer. My shade will be 31″ wide and 55.5″ long. So, my fabric will be 34″ wide and 60.5″ long. The drapery lining fabric will be 1″ less than the finish width and the same length.

How to calculate wood dowel spacing: The dowels should be evenly spaced 8″-12″ apart, and should be 1″ shorter than the finished width of the Roman shade. I used 3/8″ dowels spaced 9″ apart with a 1.5″ hem.
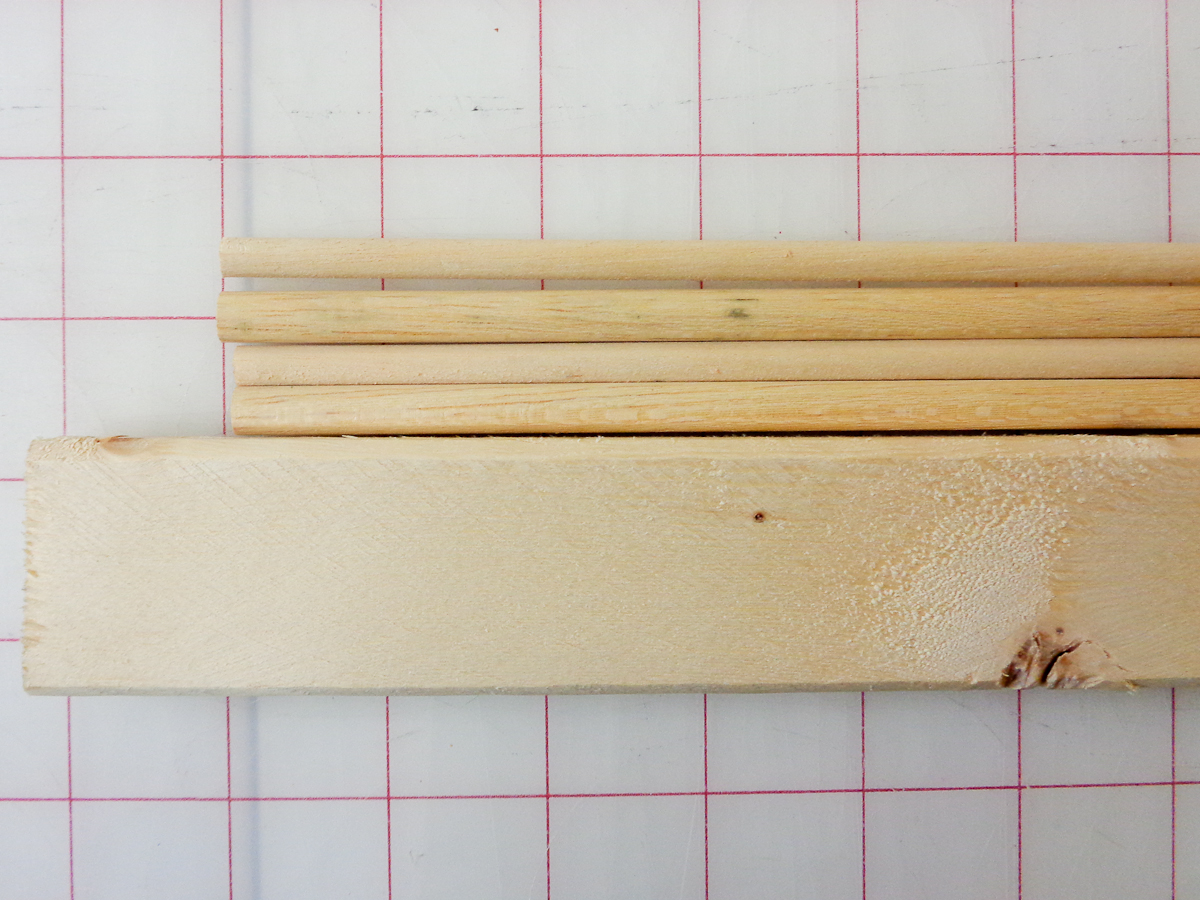
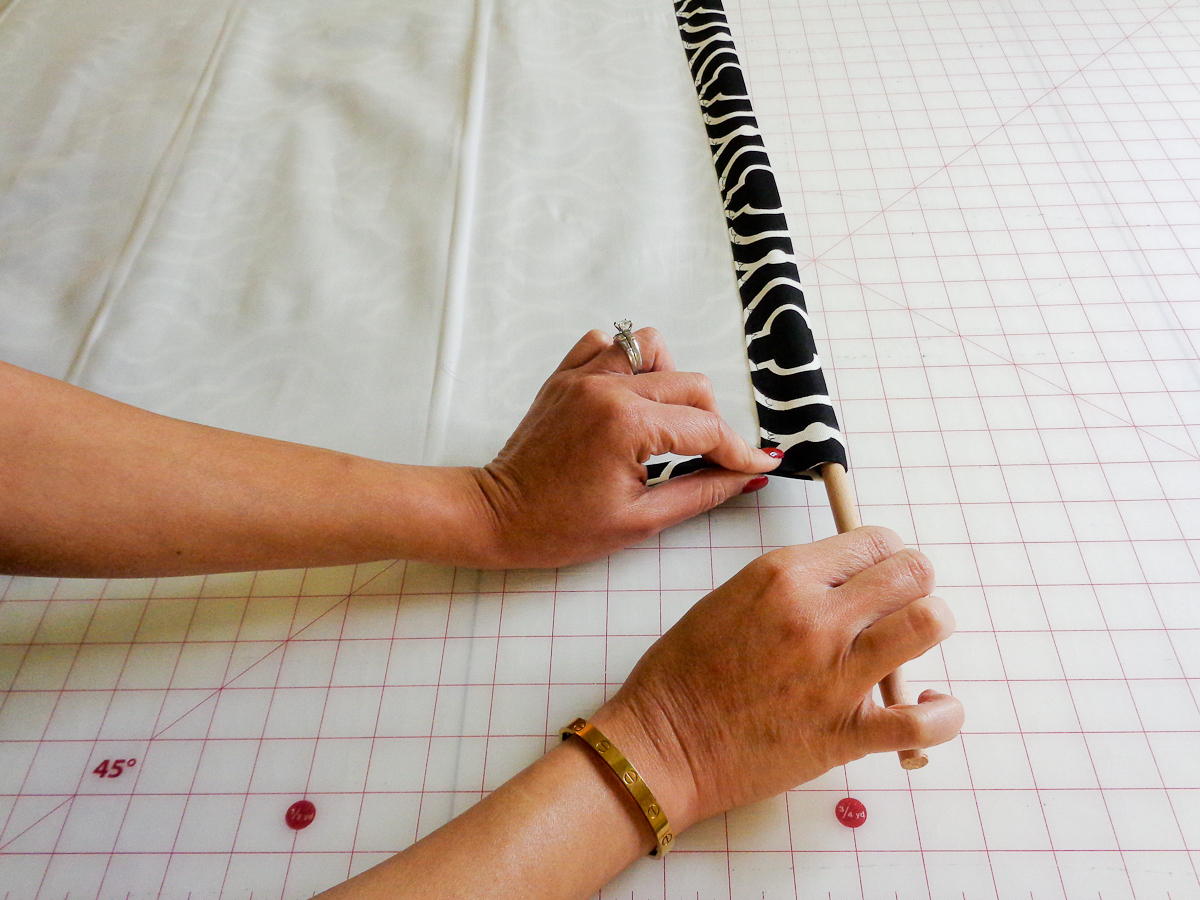
The 1 x 2 wood board should be the length of the finished width of the Roman shade. I purchased my wood from the lumber department of Home Depot and they will cut to measure. You can also purchase your dowels from there. Or if you purchase them from a craft store, you will need a small hand saw to cut them.
Sew the Fabric Together

With right sides together, pin drapery lining fabric to decorator fabric.
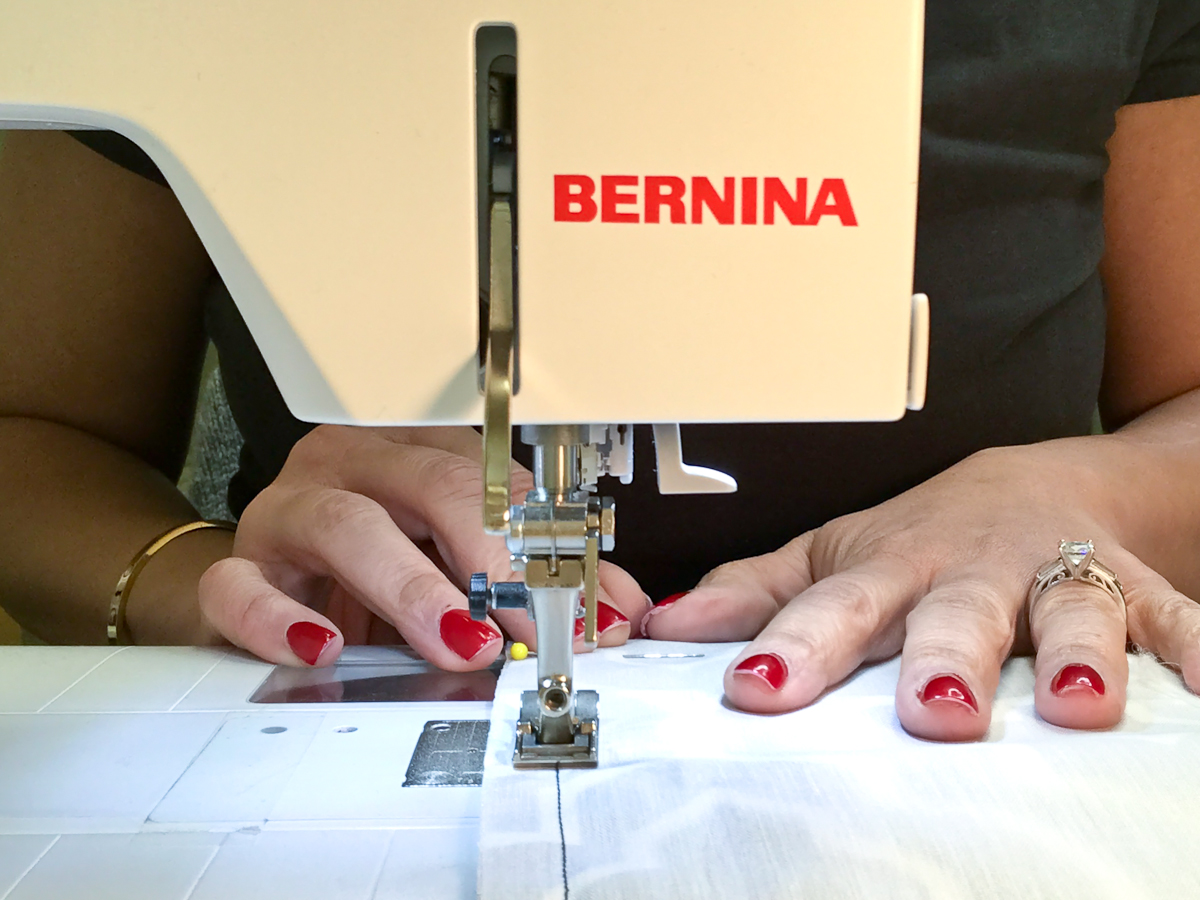
Sew both sides with 1/2″ seam allowance.
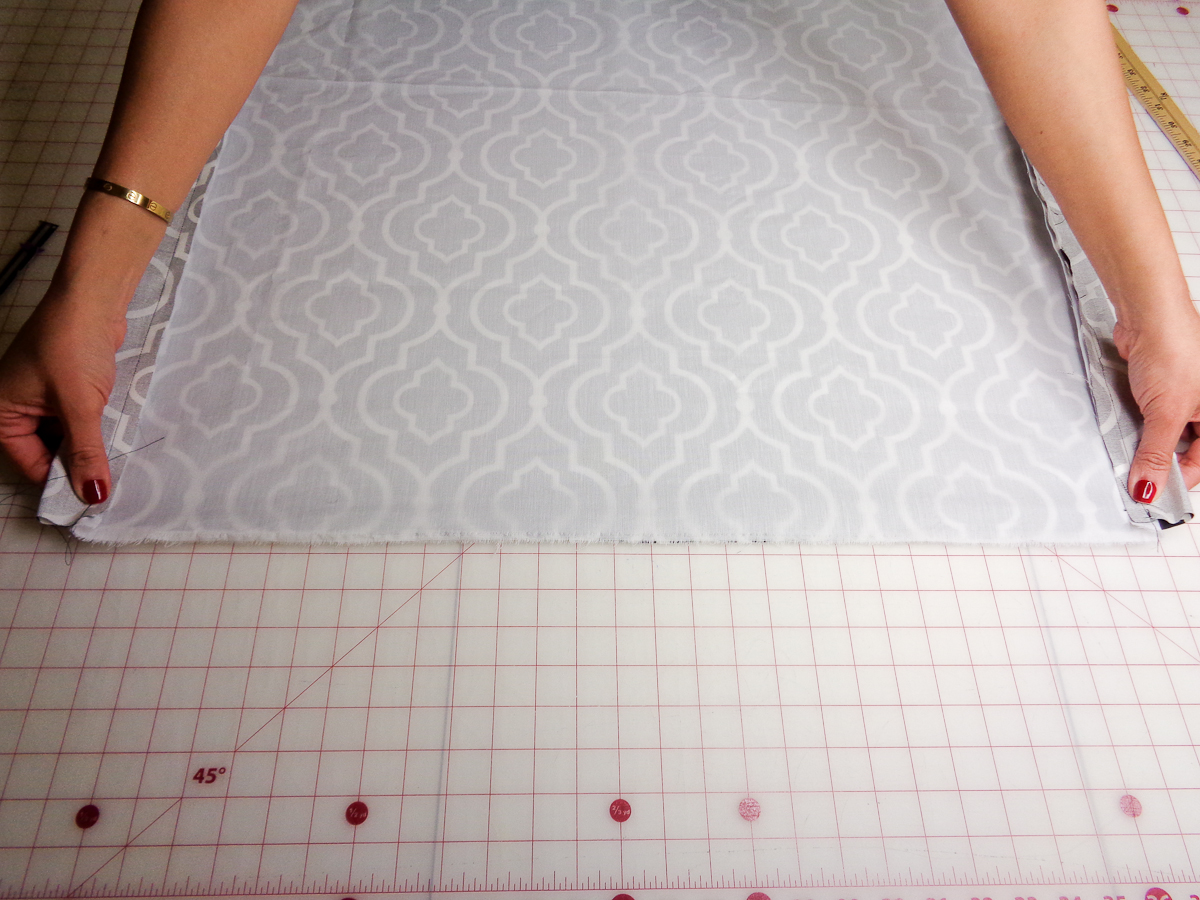
Center the lining on the back.
Make sure that there is an inch of decorator fabric on both sides.
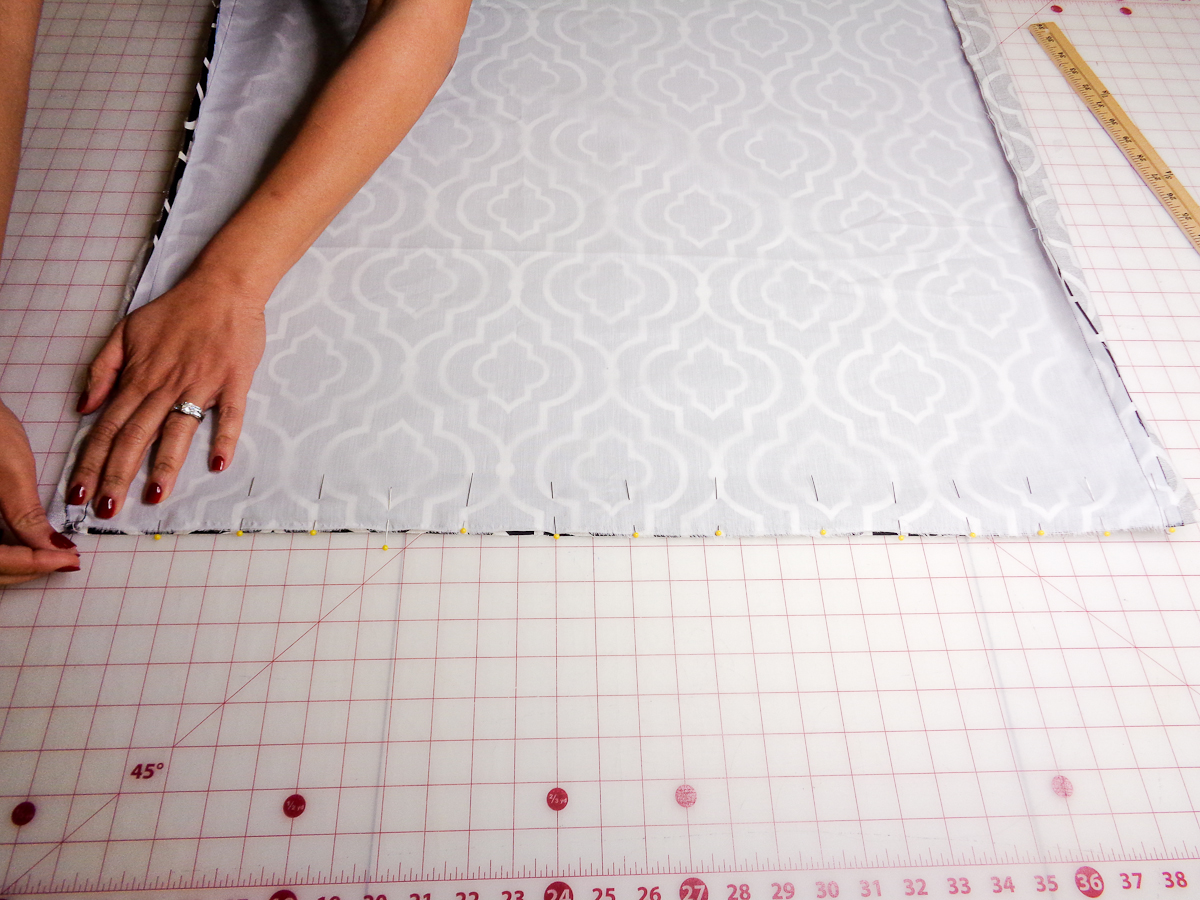
Pin the bottom.
And sew across the bottom with a 1/2″ seam allowance.
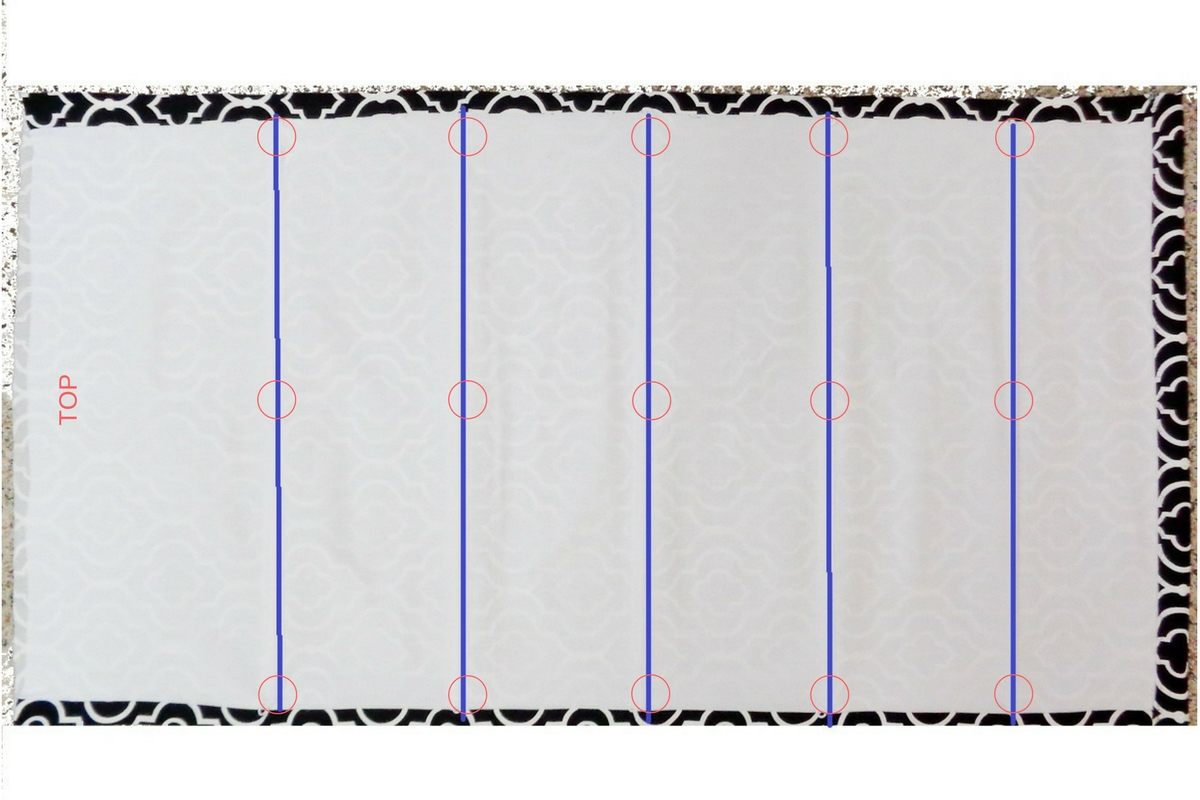
Mark the dowel placement

With your fabric marker and a ruler, mark the dowel placement on the wrong side of the decorator fabric.
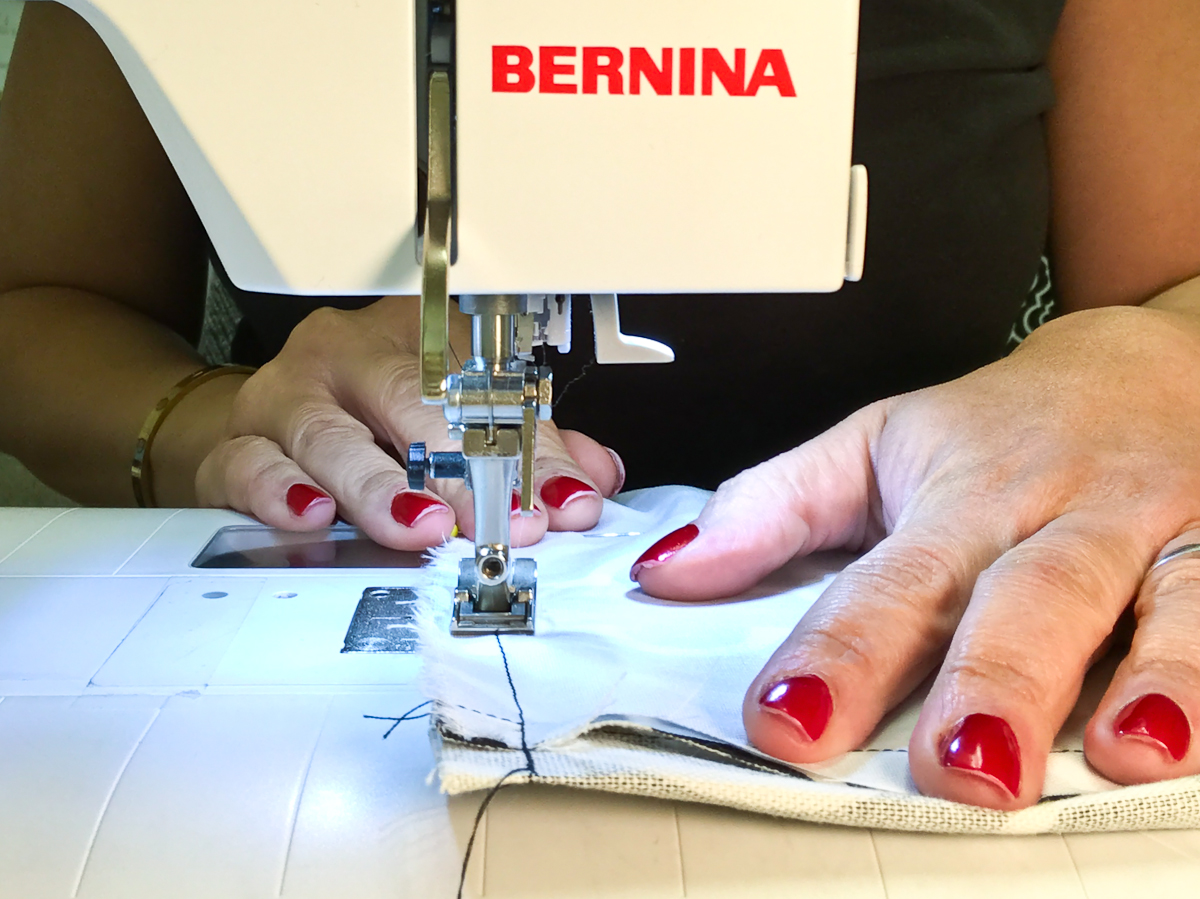
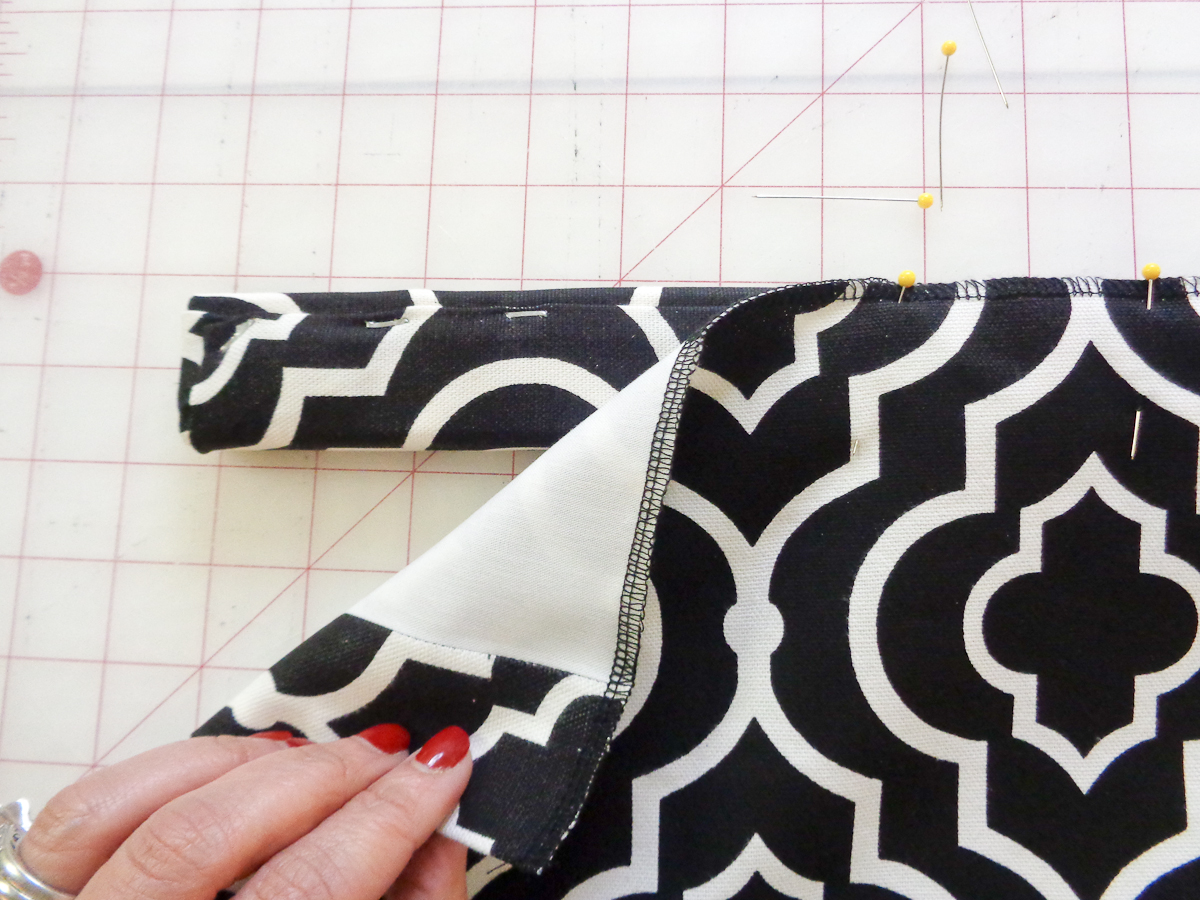
Make Dowel Pockets

To make the dowel pockets, cut 2″ strips of the lining fabric the width of the finish measurement of your Roman shade.

Fold in half and press.
Sew raw edges together with a 1/4″ seam allowance.

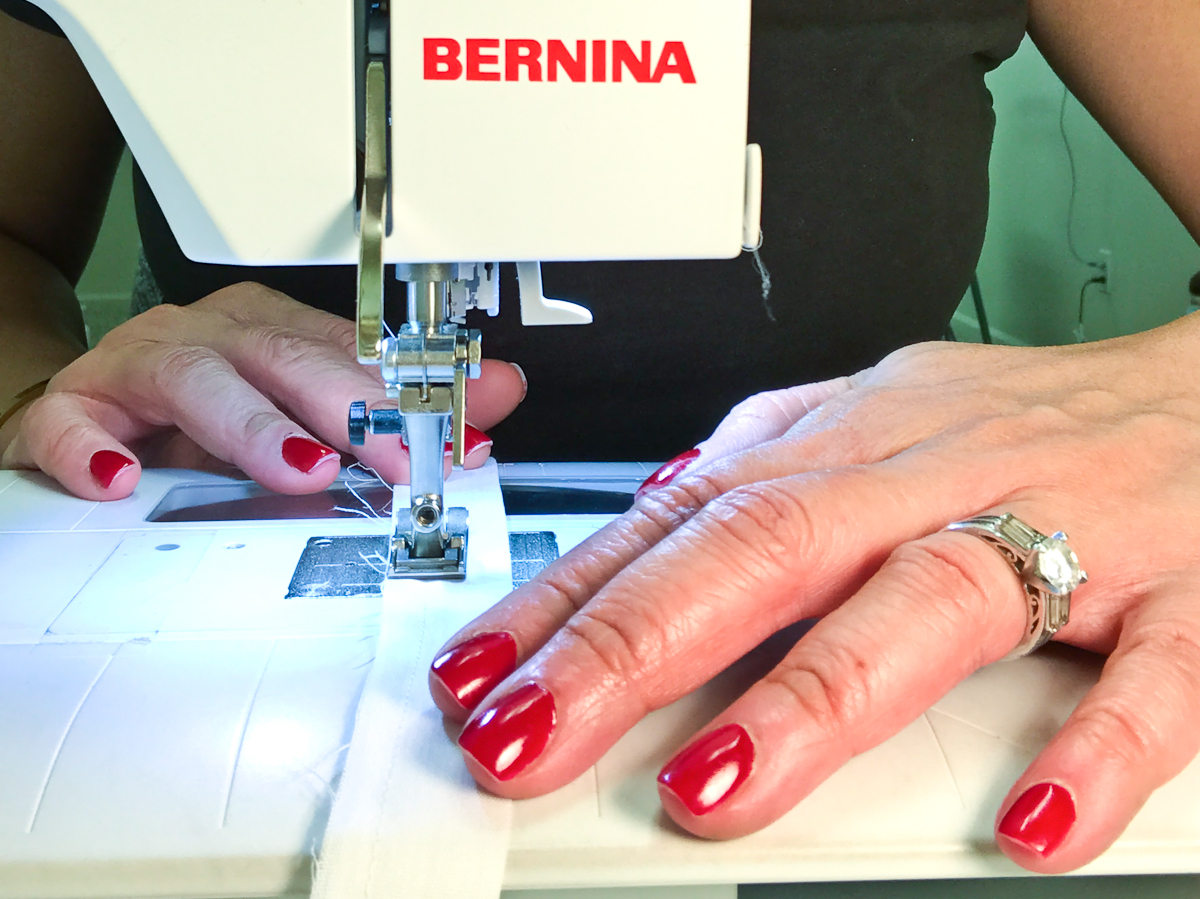
Take the fusible web (I use Stitch Witchery) and lay it on top of the dowel placement lines.
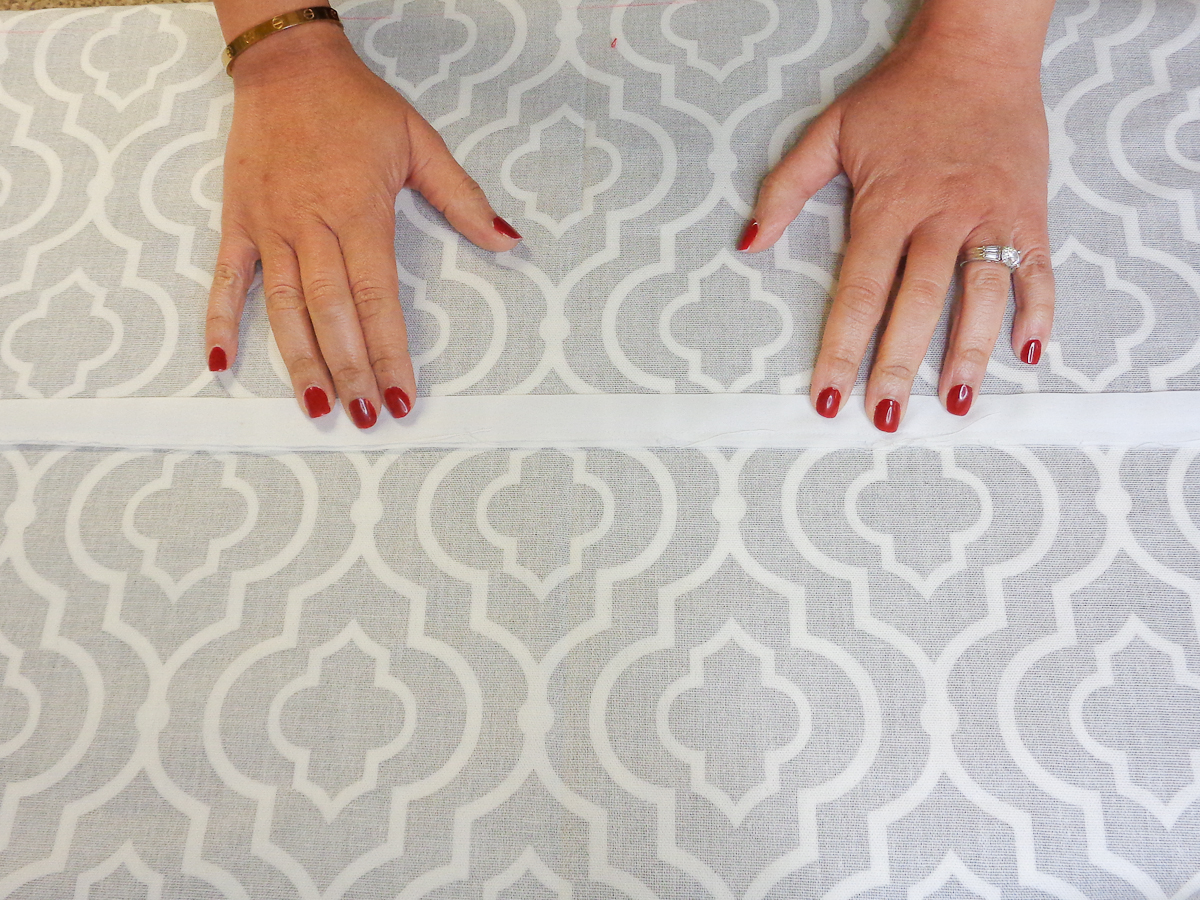
And fuse the dowel pockets onto the fabric. Repeat for the rest of them. Then insert the dowels.
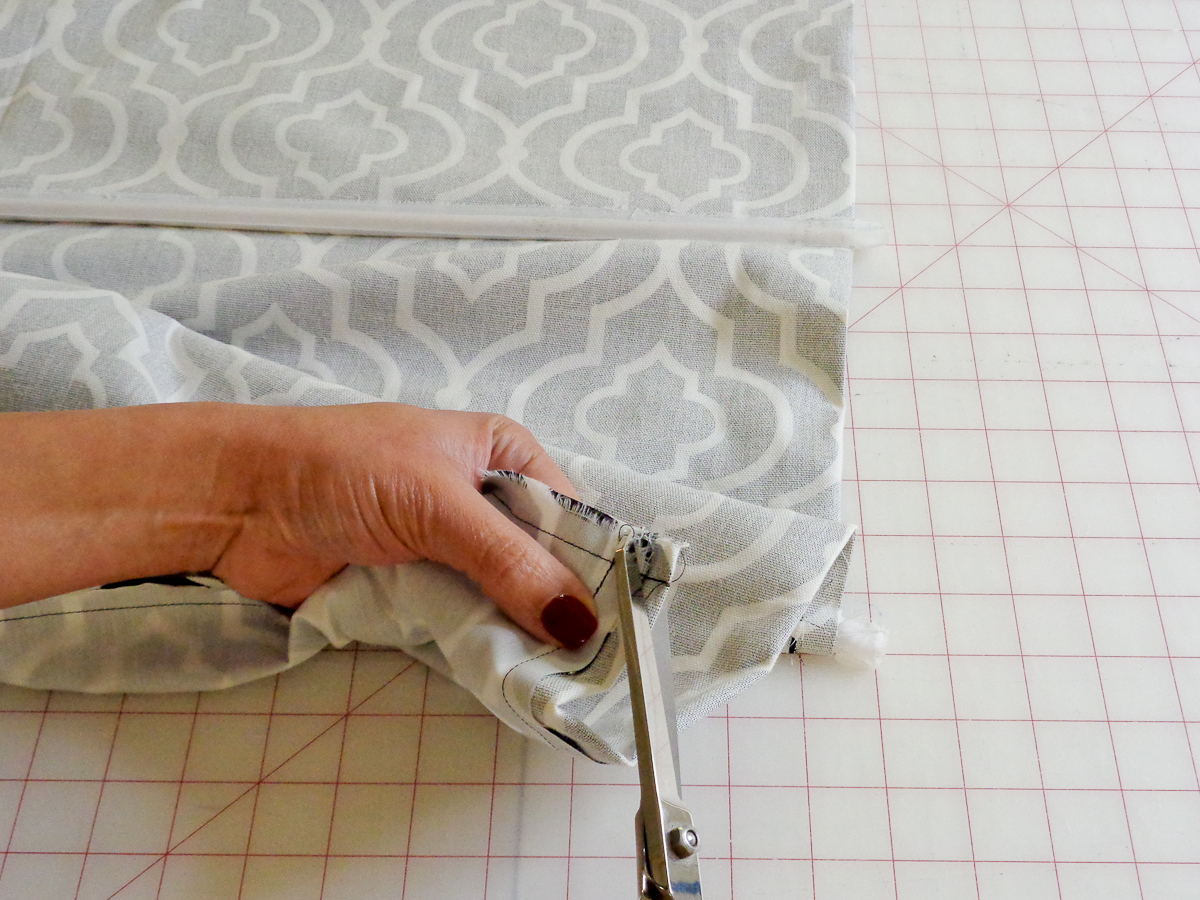
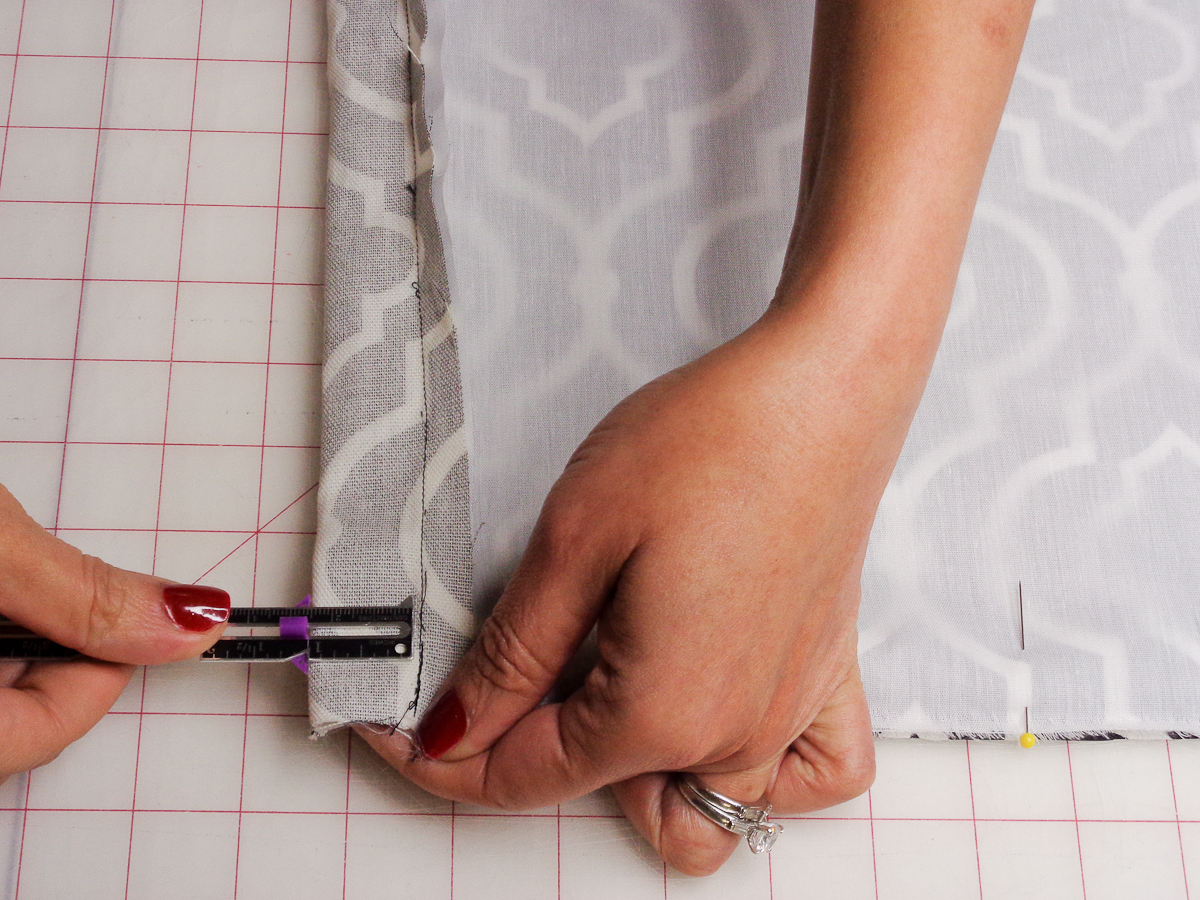
Clip the corners and carefully turn to the right sides out.
Poke out the corners and press.
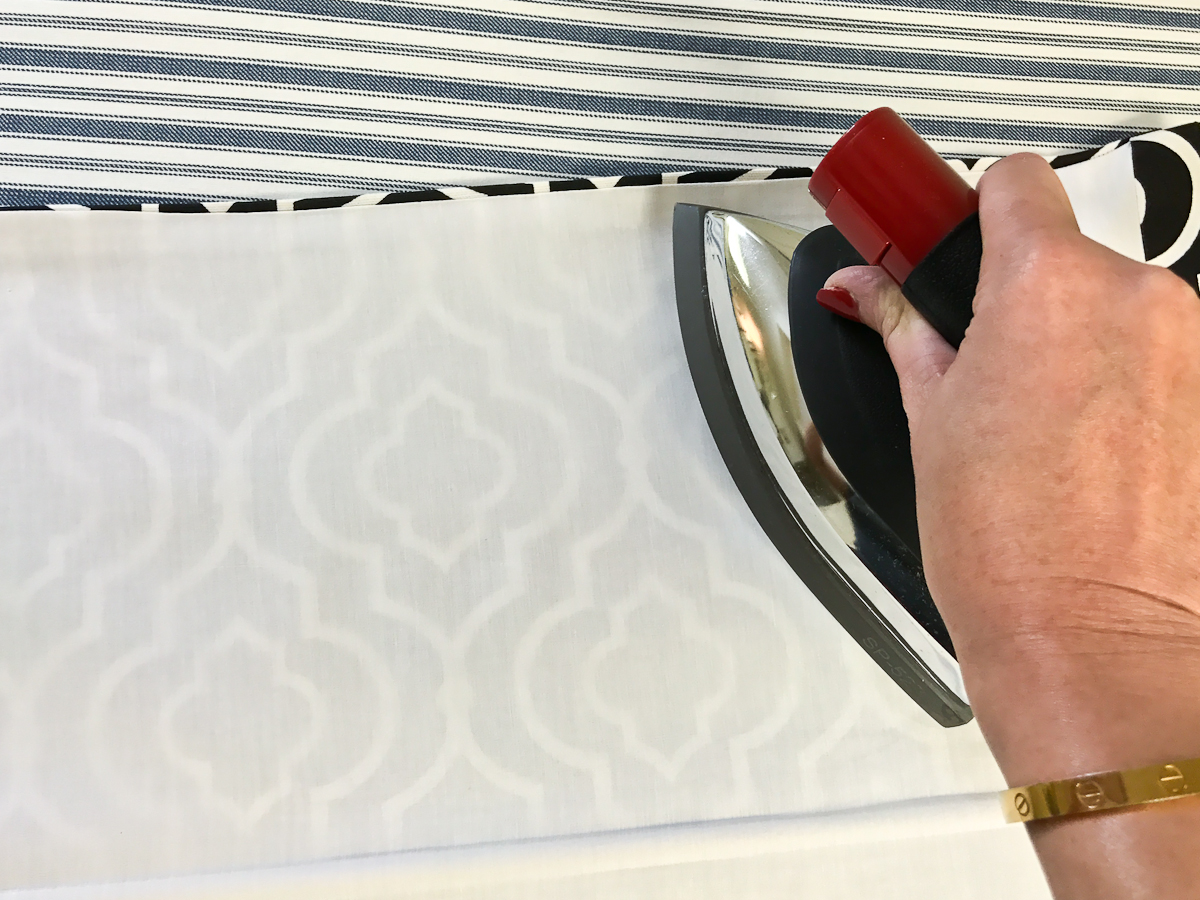
Hem the Bottom
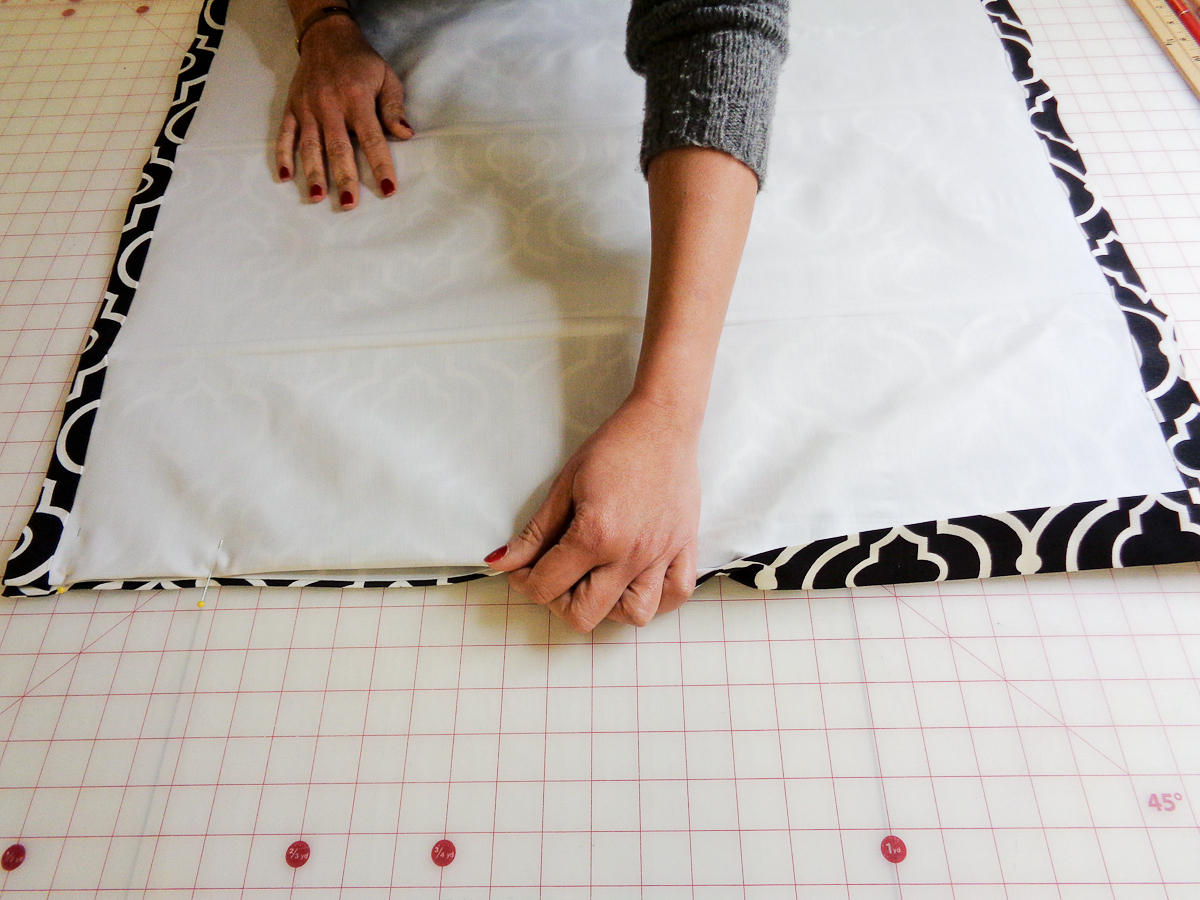
Fold up the bottom 1.5″. And to create blind hem, fold the hem under so that the 1/4″ of the edge of the fabric shows.
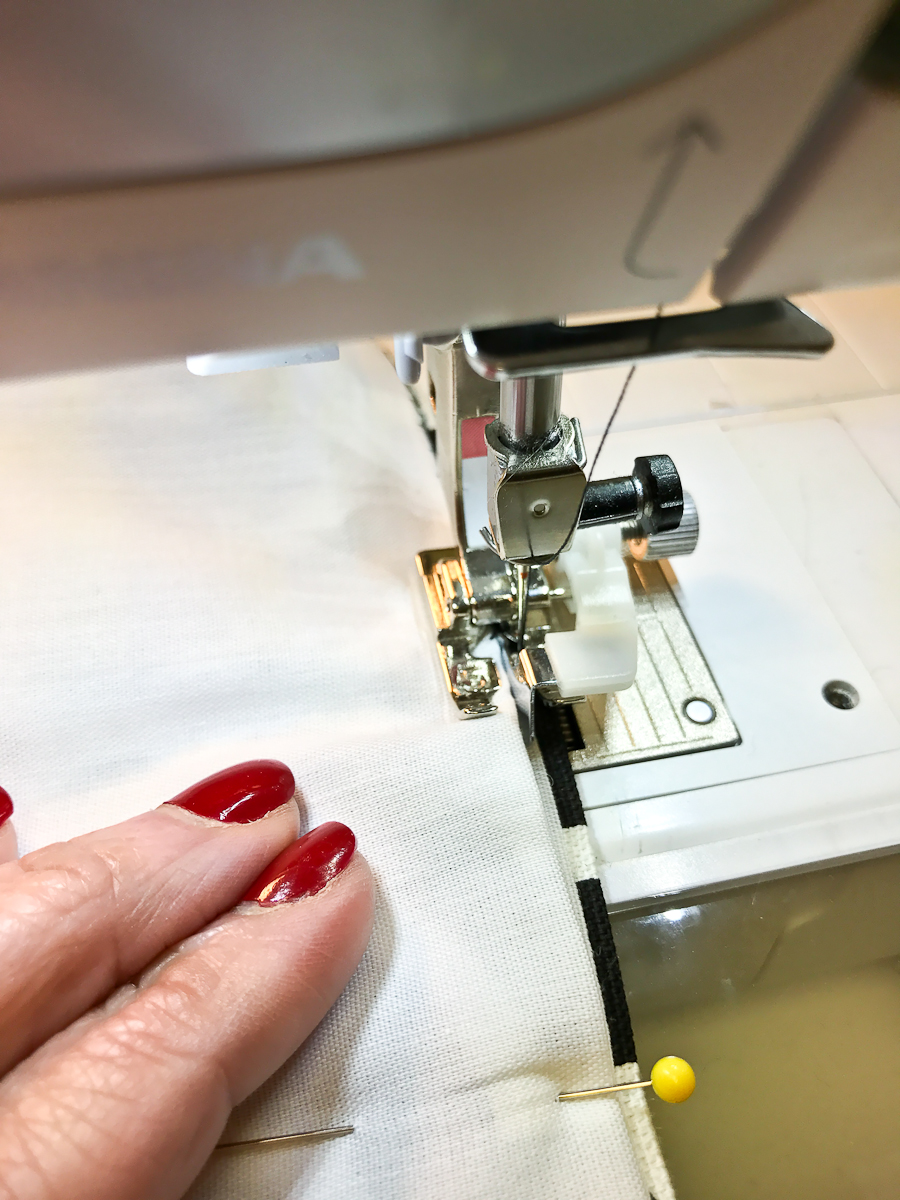
And sew the blind hem.
Insert your large wood dowel, slat of wood or metal rod in the hem to weigh down the Roman shade. And slip stitch the openings.
Sew on the Rings
Next, you will sew on the rings that will guide your cord.
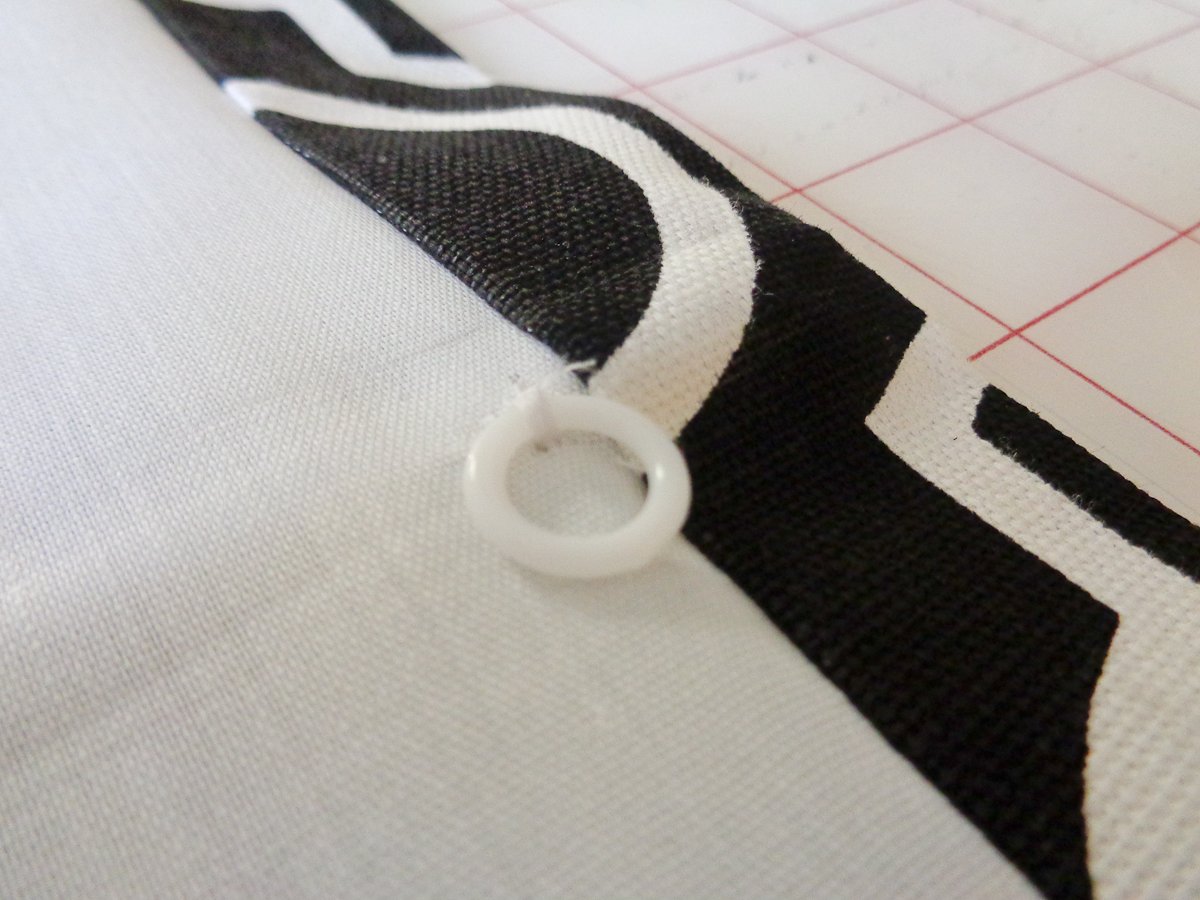
The rings are hand sewn at the ends of the dowels and in the middle.
How to Attach the Mounting Board

This part is optional, but I think covering the 1 x 2 mounting board gives your Roman shade a professional appearance. To cover the board, cut the fabric width equal to the distance around the board, plus 1″. The length of the fabric should be the length of the mounting board plus 3″. Staple (or use a hot glue gun) one long edge of fabric to the board. Leave around 6″ free on each end. Fold the other long edge under about 3/8″ leaving the around 6″ free on the end. Miter the corners and fold the excess fabric at the ends (sort of like wrapping the end of a gift box) and staple near fold.
Finish the top edge of the shade using an overlock or a zigzag stitch. Secure it to the mounting board by first pinning it into place and stapling (or using a hot glue gun) to the board.
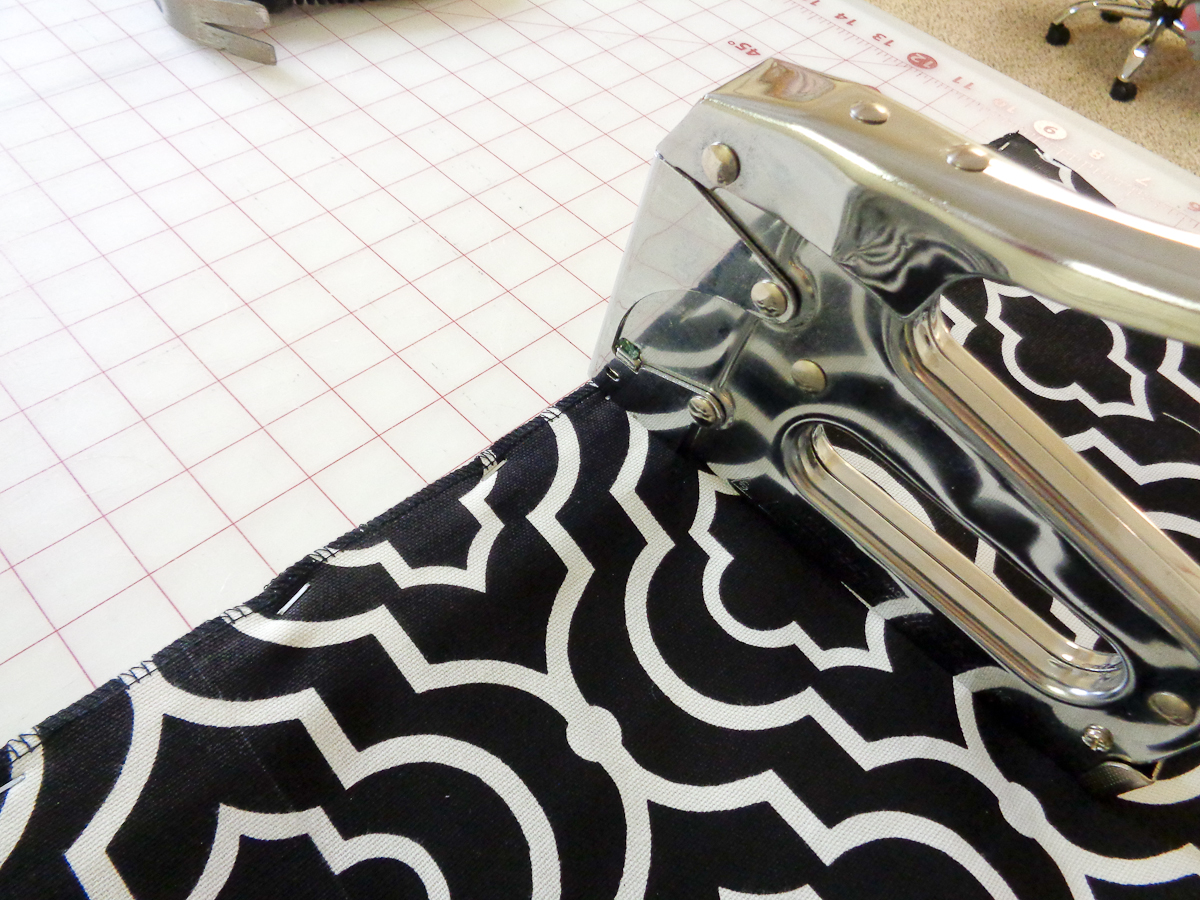
This side will be on top of the shade and will not show.
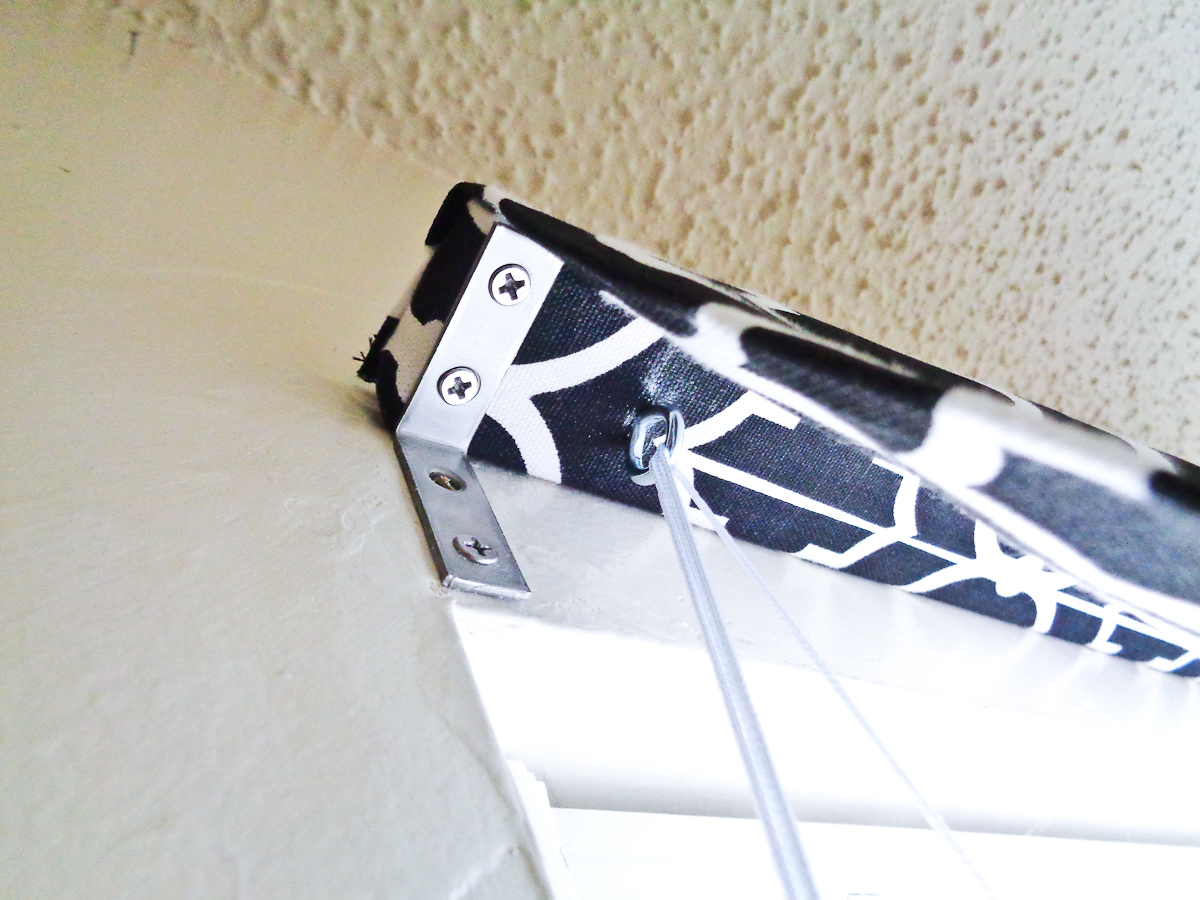
Install Screw Eyes
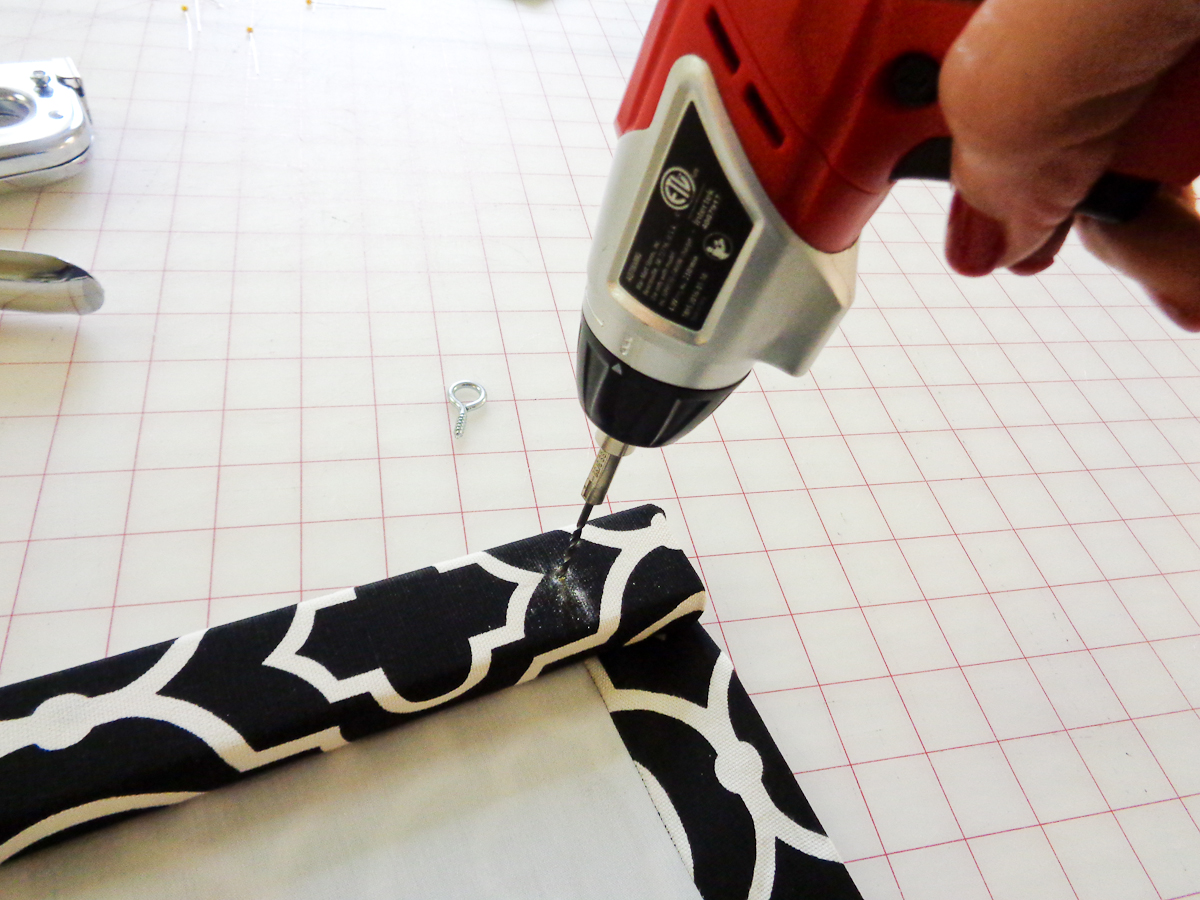
Install screw eyes to the mounting board above each row of rings. To install screw eyes on the underside of the mounting board, use your drill to make holes first. If you don’t have a drill, you can just use good old-fashioned elbow grease with your screw eyes by hand. This just makes it easier.
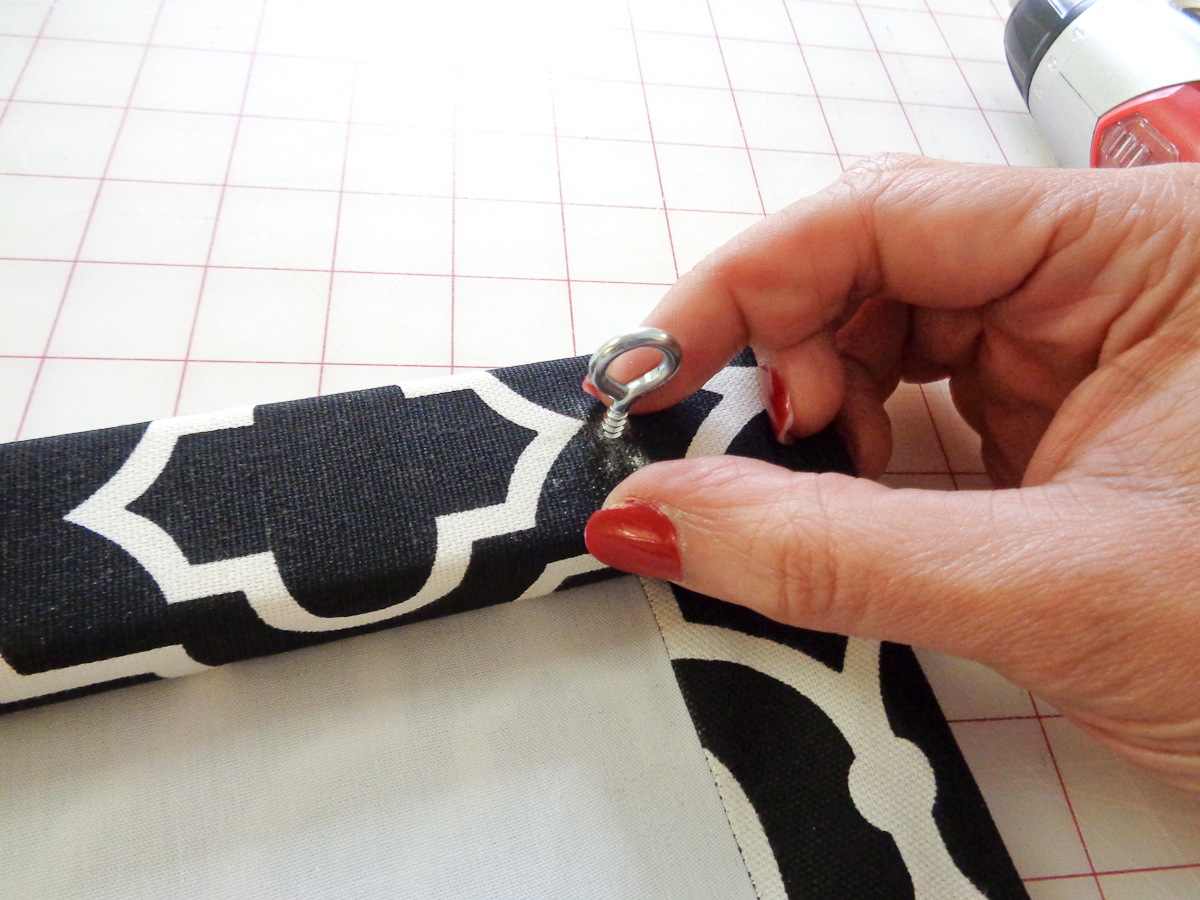
Insert your screws eyes.
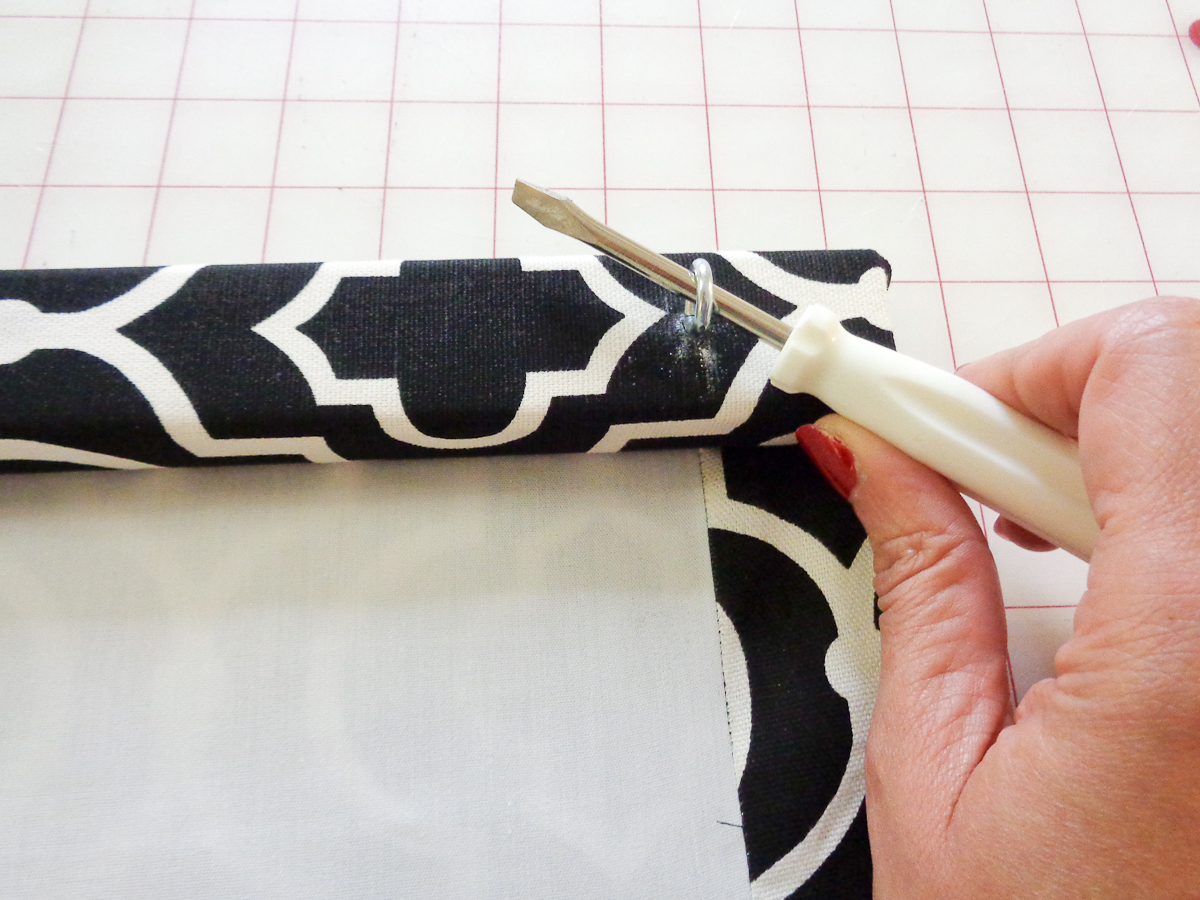
Use a screwdriver or awl to tighten your screw eyes.
Finishing your Roman shade
Place your Roman shade face down on a flat surface. You need to decide which side your draw cord will hang. Mine will hang on the left, so this is the direction my cords will go. Cut enough cord so that you’ll have a couple feet after the last screw eye. Starting at the bottom, begin on the first row—string the cord through the rings and through each eye screw as shown in the diagram above. Complete each row the same way. Tie each cord in a knot at the bottom rings to secure and use fabric glue to prevent them from fraying or coming untied.
Mount your Roman shade to the wall or window.
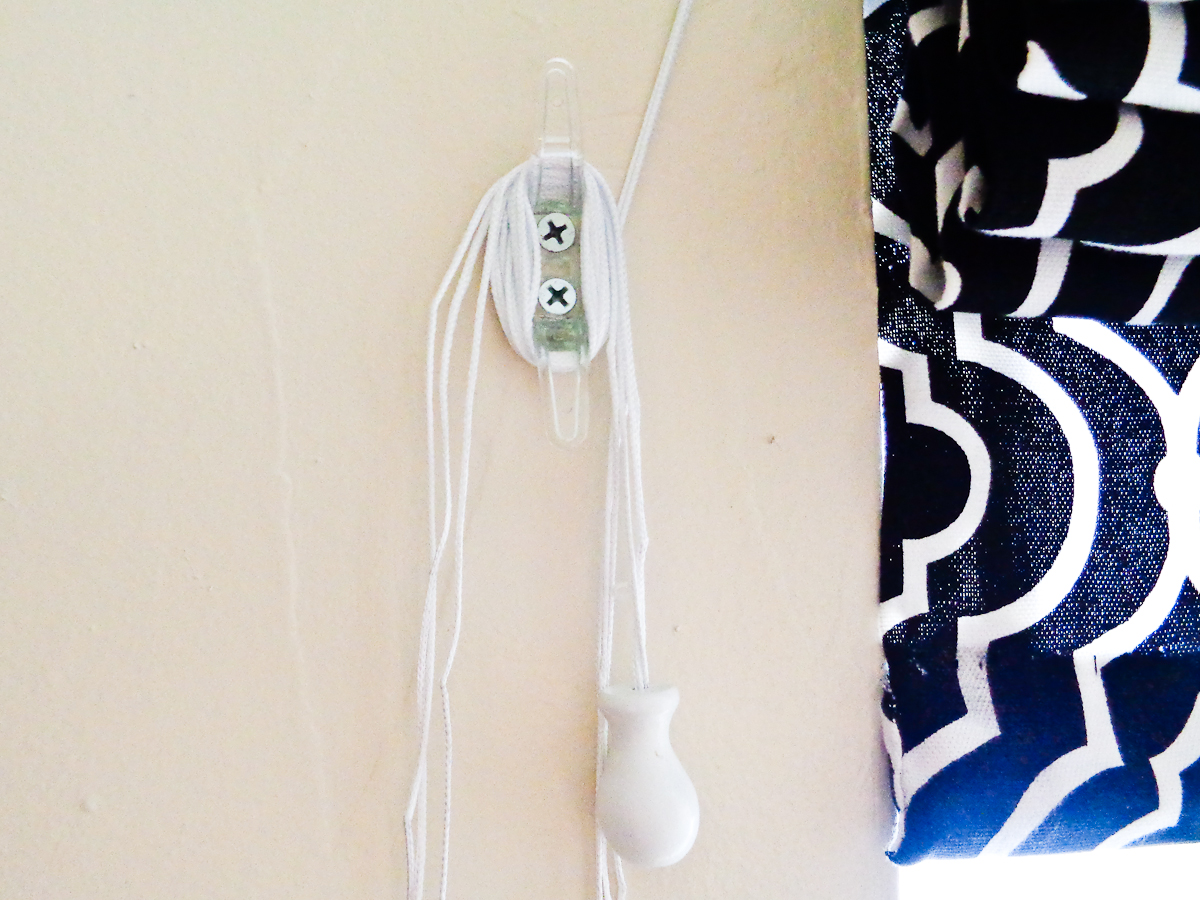
Adjust the length of your draw cord while the Roman shade is lowered so all the tension on each cord is equal. Add a cord pull and knot the end. Add your cord cleat to the wall or window frame and wrap the cord around it to secure the Roman shade while raised.
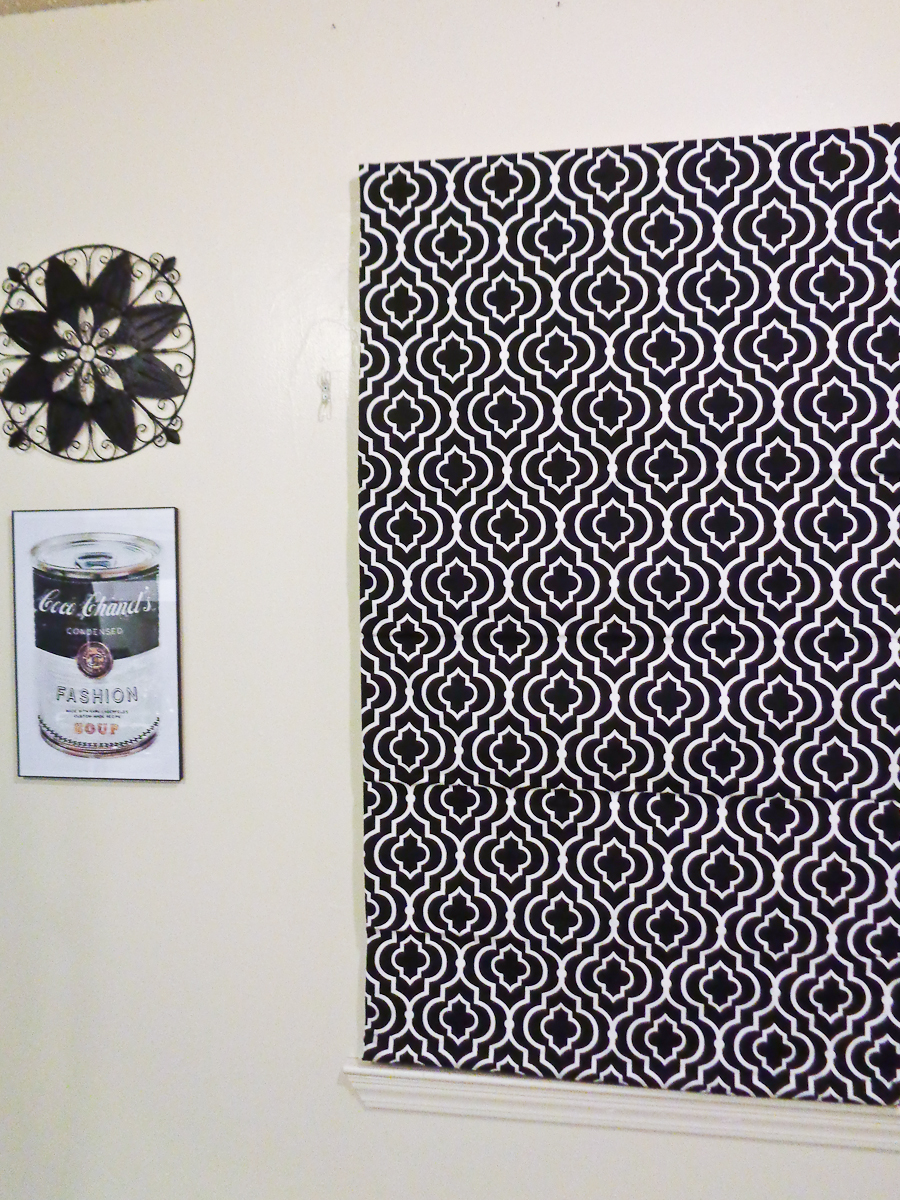
And you’re finished!


What you might also like


3 comments on “Roman Shade Tutorial”
-
-
There are two pull cords. You have to pull them simultaneously to adjust both sides.
-
I have been wanting to make a Roman shade for a long time.
I found your tutorial on Pinterest and it was absolutely wonderful.
Your tutorial and pictures were so detailed. Thanks to you I made my 1st Roman shade. It turned out really good.
Leave a Reply
You must be logged in to post a comment.
I made this roman shade. It turned out really good but I’m having a problem raising it up. I have done everything the pattern said. When I raise it up it is crocked like they aren’t pulling up evenly. Help please.