How to Make a Vinyl Applique Luggage Tag
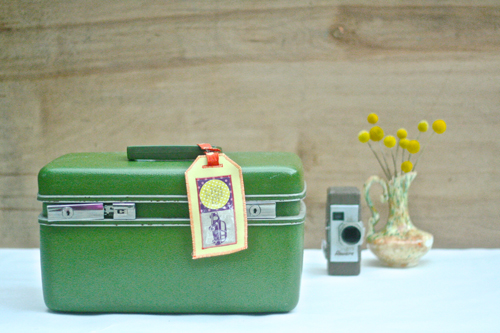
They say getting there is half the fun. I’m not a huge fan of flying. The moment I step off the plane I give myself a congratulatory pat on the back for making it through the flight without having a panic attack. Then, I head down to baggage claim to pick up my luggage. I spend way too much time searching for my bags. I’ve thought of buying new brightly colored luggage but not only is it quite an investment but the type and size of my luggage is so varied depending on where I’m headed. I wanted to create a tag that I could transfer to any bag, would be durable enough to get tossed around by the airlines, and was cute and colorful so I could recognize my bags in a sea of other ones.
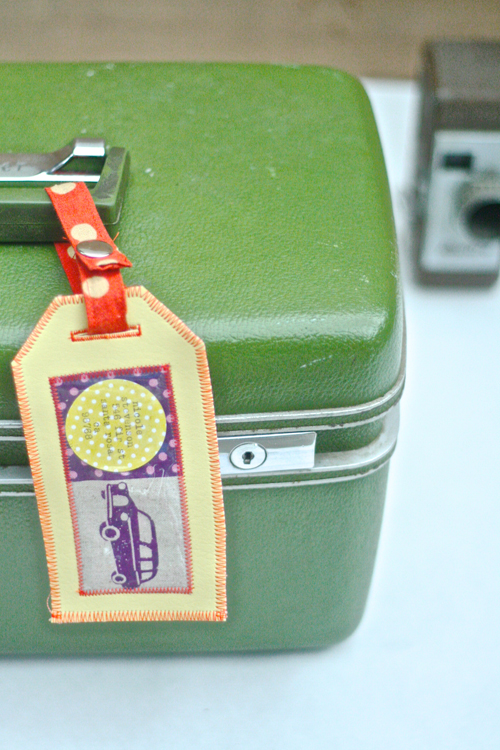
With Craftcation (the conference for makers and creative business owners that Delilah and I produce) just around the corner, another plane trip is creeping up. So, I decided to give my luggage a little love and sewed this vinyl applique luggage tag. This tag is super simple to make as well as unsnap and transfer to just about any bag.
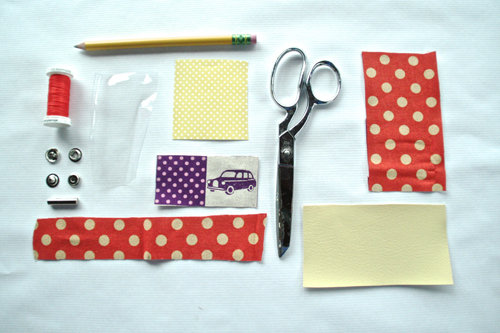
Supplies
- One 3″ x 5-1/2″ rectangle of colored vinyl
- One 3″ x 5-1/2″ rectangle of printed fabric
- One 1-3/4″ x 3-3/4″ rectangle of printed fabric
- One 1″ x 6″ strip of printed fabric for the strap (adjust depending on how long you want your strap to be)
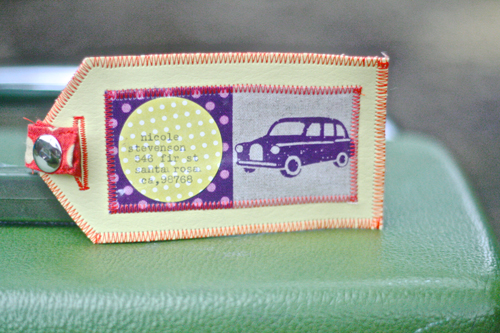
- One 1-1/2″-diameter circle with your address on it
- One slightly-larger than 1-3/4″ x 3-3/4″ rectangle of clear plastic
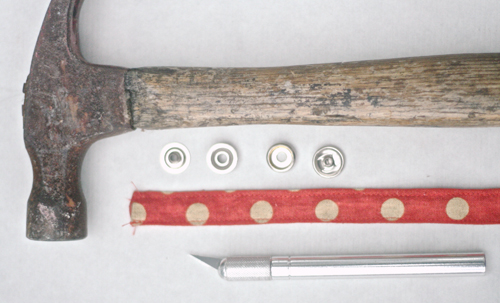
- Snaps + snap-setting tool
- Thread
- Spray glue
- Iron + ironing board
- Hammer
- Scissors
- Sewing machine (I used my BERNINA 380)
- Seam ripper
- X-acto knife
- Bobby pin
Step 1) Make the address tag.
I used a typewriter to type my address but you could also use a computer and print it out.

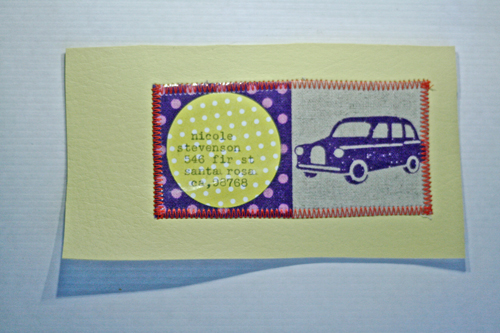
Use spray glue to adhere the address circle to the small rectangle of printed fabric.
Use spray glue to adhere the clear plastic on top of the address circle and the small printed fabric rectangle.
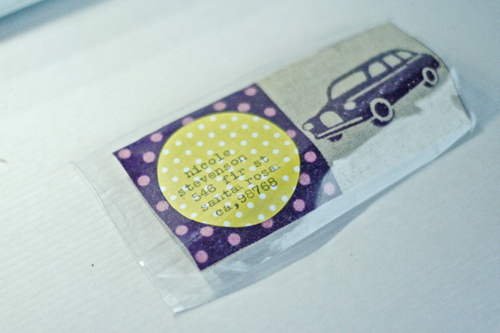
Trim around the edges so the plastic and fabric are the same size.
Use spray glue to adhere the plastic-covered fabric to the piece of vinyl. Place it about ¾″ from the bottom.
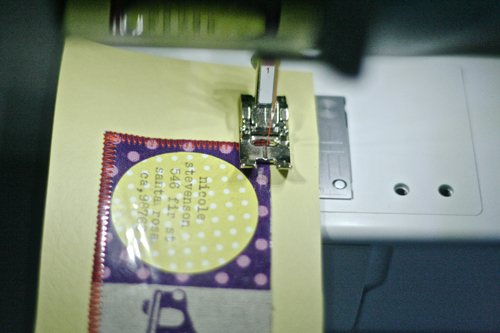
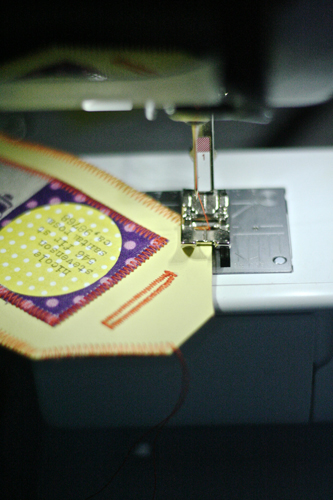
Using a zig-zag stitch (I set my BERNINA B 380 at 1 for width and 5 for length), applique the plastic-covered fabric to the vinyl.
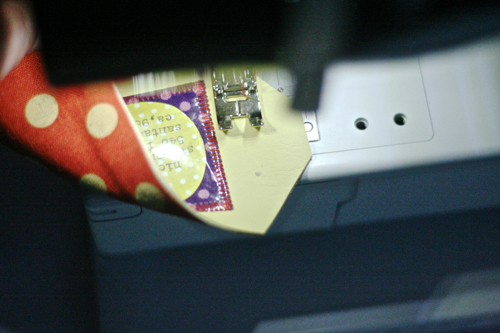
Clip the corners of the tag (I cut out a triangle that was 1″ on each side and used it as a template so both sides would be the same).
Stitch a 1″-long buttonhole. The BERNINA B 380 makes buttonholes ridiculously simple!
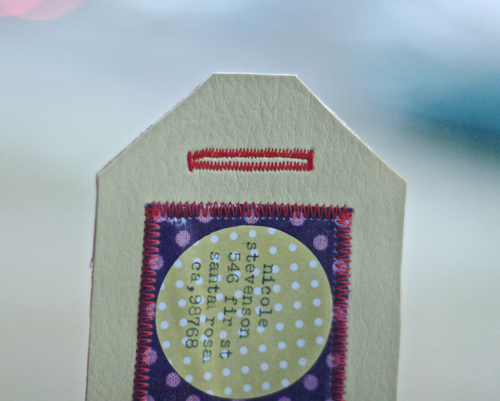
Using a zig-zag stitch (I set my BERNINA B 380 at 1 for width and 5 for length), stitch the fabric back and vinyl front together.
Step 2) Make the strap.
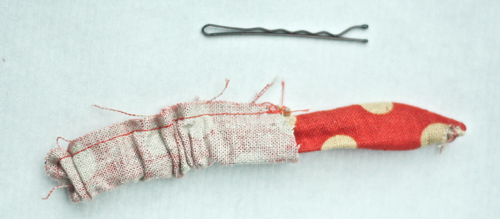
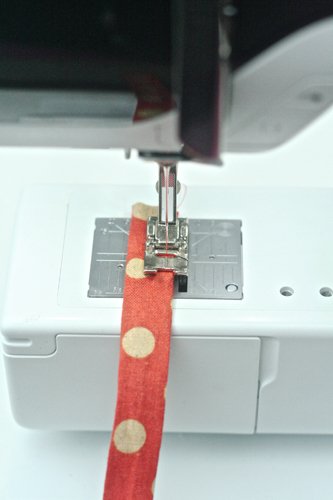
To create the strap, take the long skinny piece of printed fabric and fold it in half width-wise with the right side of the fabric facing in. Then sew a straight stitch down the length of it, 1/8″ from the raw edges.
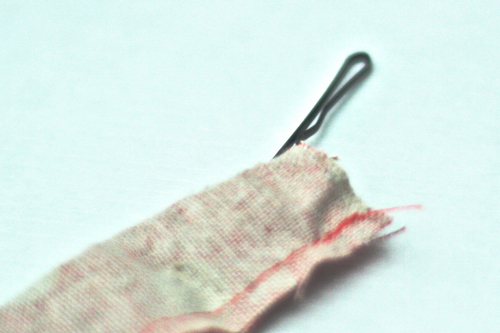
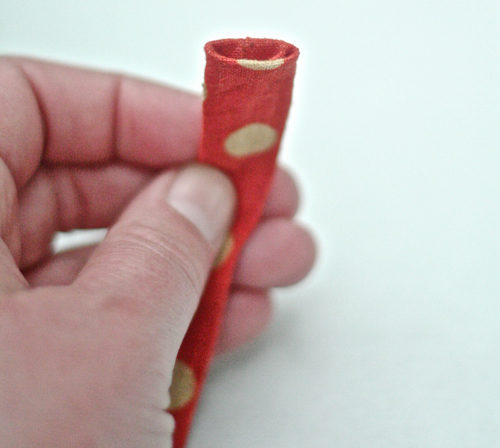
Using a bobby pin or a fancy tube-turning tool turn the strap right way out.
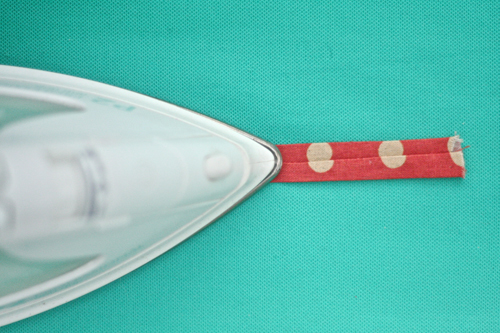
Iron the strap.
Fold the raw edges inside the openings on each side.
Topstitch on each side of the strap to keep it from rolling.
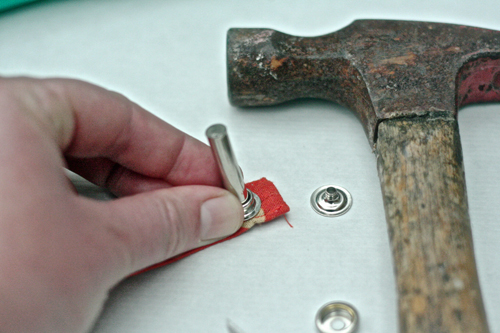
Attach the snaps on each side of the strap according to the directions on the snap box. (This varies depending on what snaps you get.)
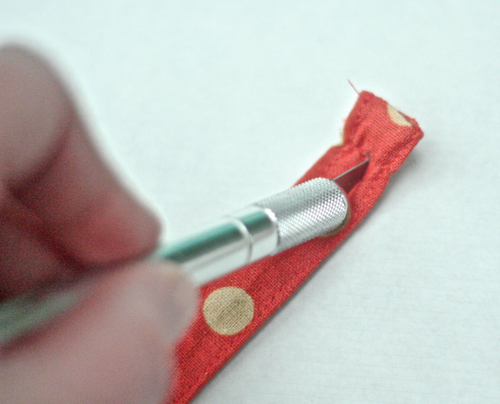

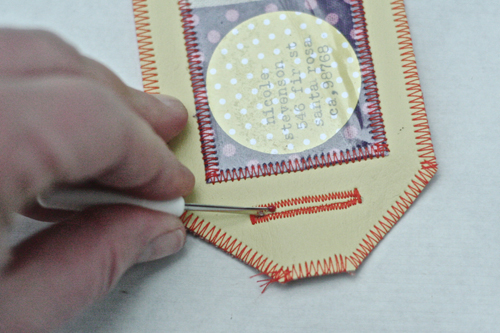
Use a seam ripper or exacto knife to cut an opening in the buttonhole you created on the tag.
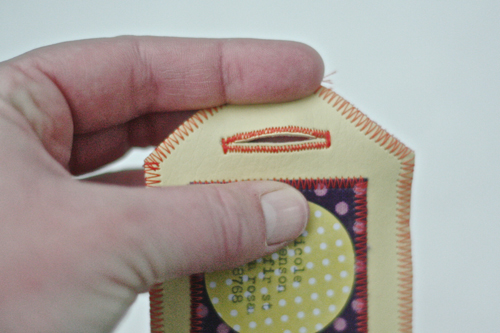
Insert the strap through the buttonhole.
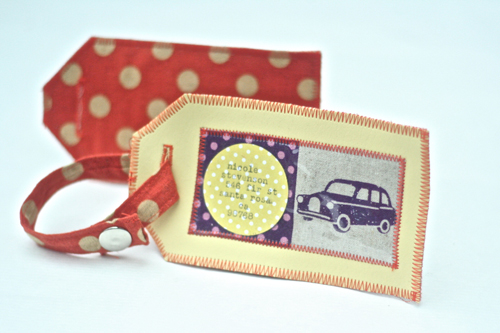
Attach the strap to your favorite piece of luggage and enjoy your trip!


3 comments on “How to Make a Vinyl Applique Luggage Tag”
Sure wish I could print the pictures of “How to Make A Vinyl Luggage Tag!!”
Is there a way to print the pictures along with the instructions??
jlvian–Mine printed out fine with all the photos directly from the browser page. Not sure why you are having a problem. As an alternative for you, I also copied the entire set of instructions to Word, and when I printed it from there, all photos were included with the instructions.