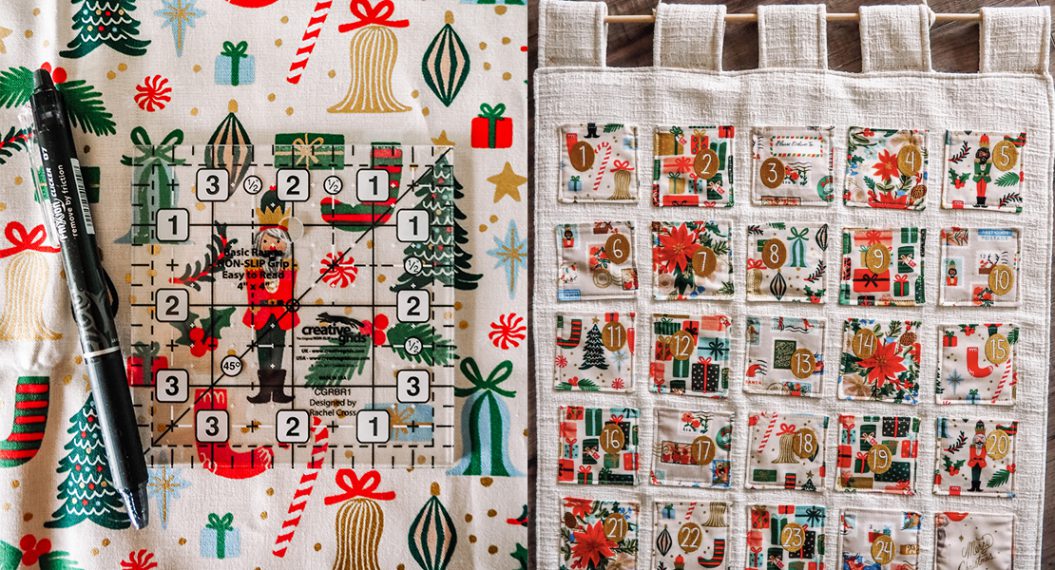
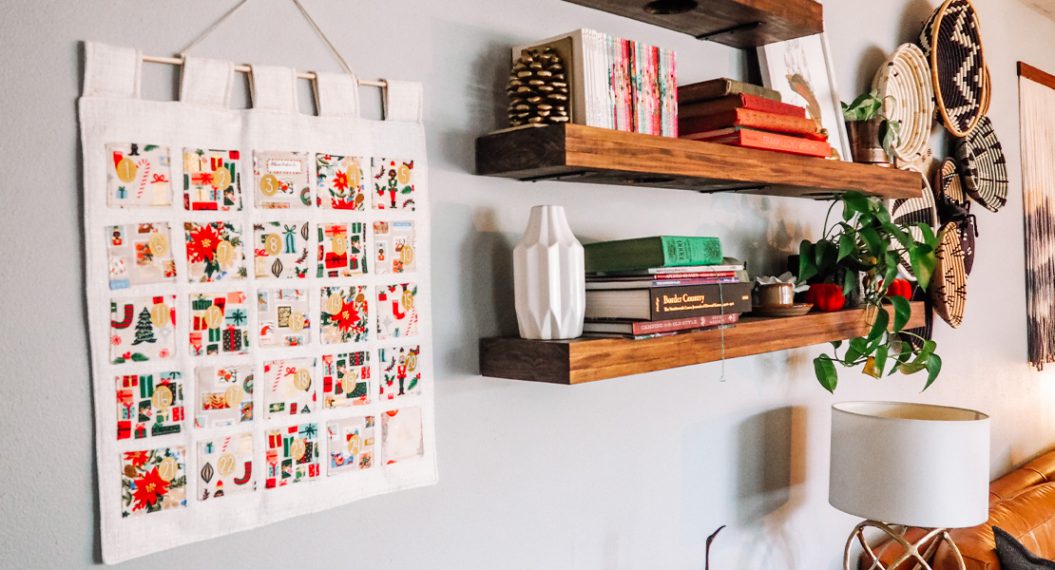
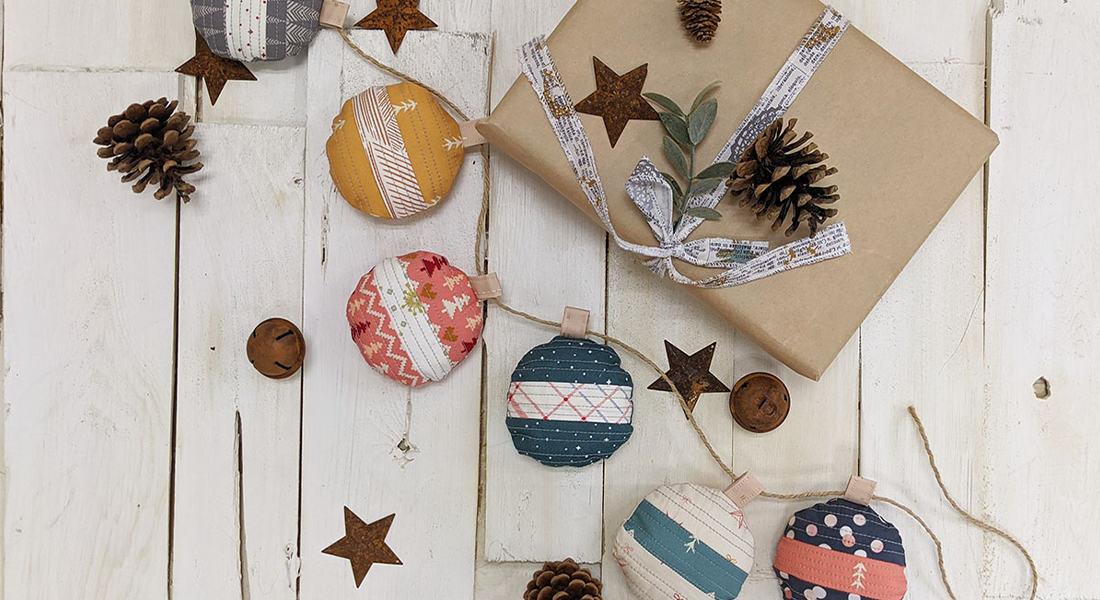
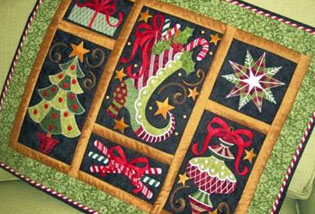
How to Make a Festive Christmas Wall Hanging
Hi Quilty Friends!
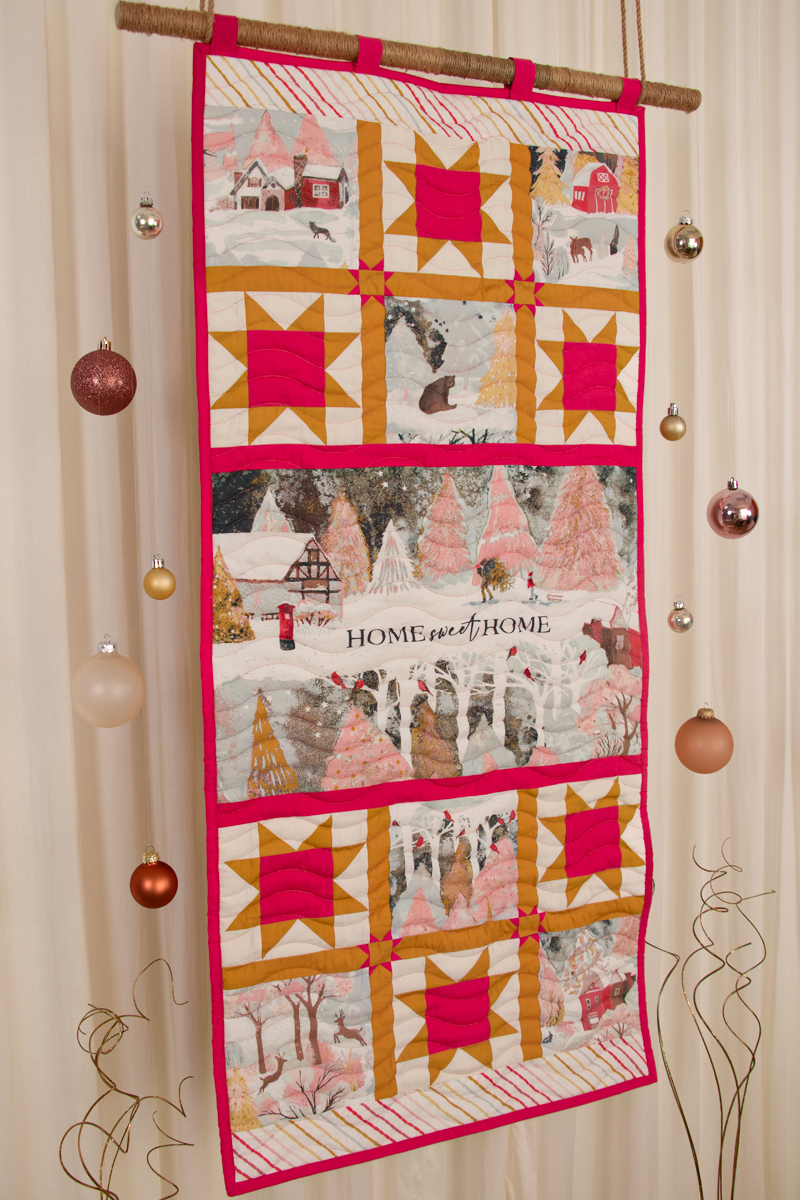
There’s nothing quite like getting ready for Christmas time and coming together to celebrate the season! We are getting our cozy decor ready with a festive sewing project you’re going to love. We’re piecing and quilting a dreamy Christmas Wall Hanging!
This blog is also available in Spanish here. For English, continue reading below.
Este blog también está disponible en español aquí. Para la versión en inglés, sigue leyendo a continuación.
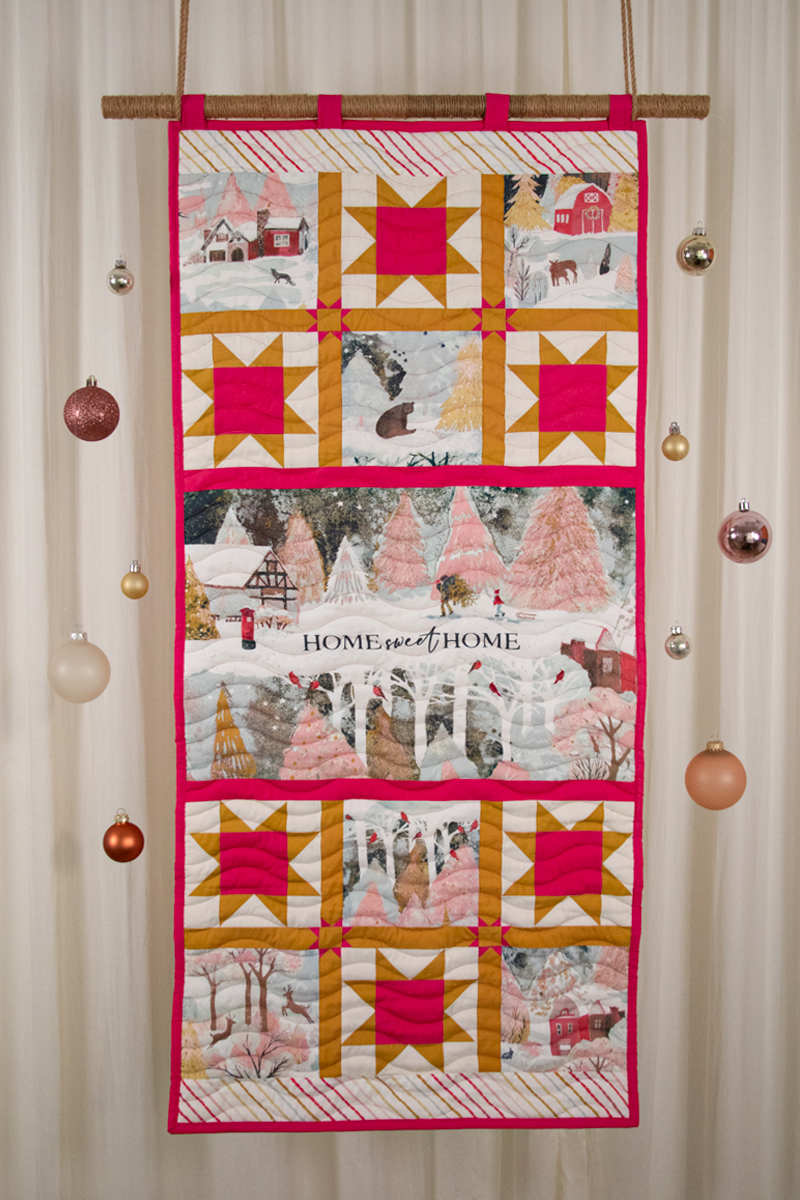
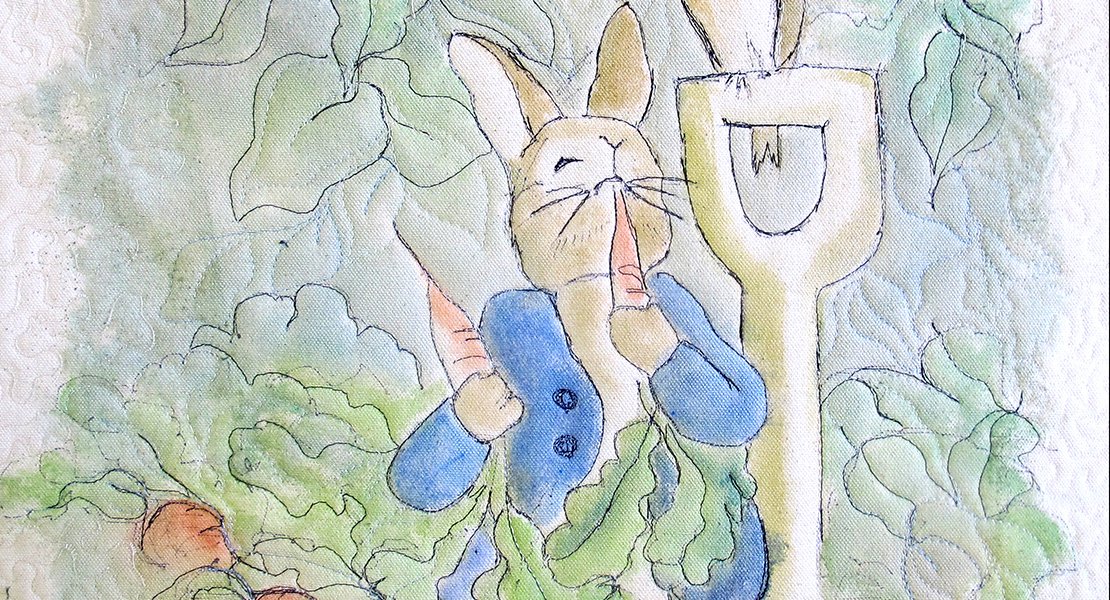
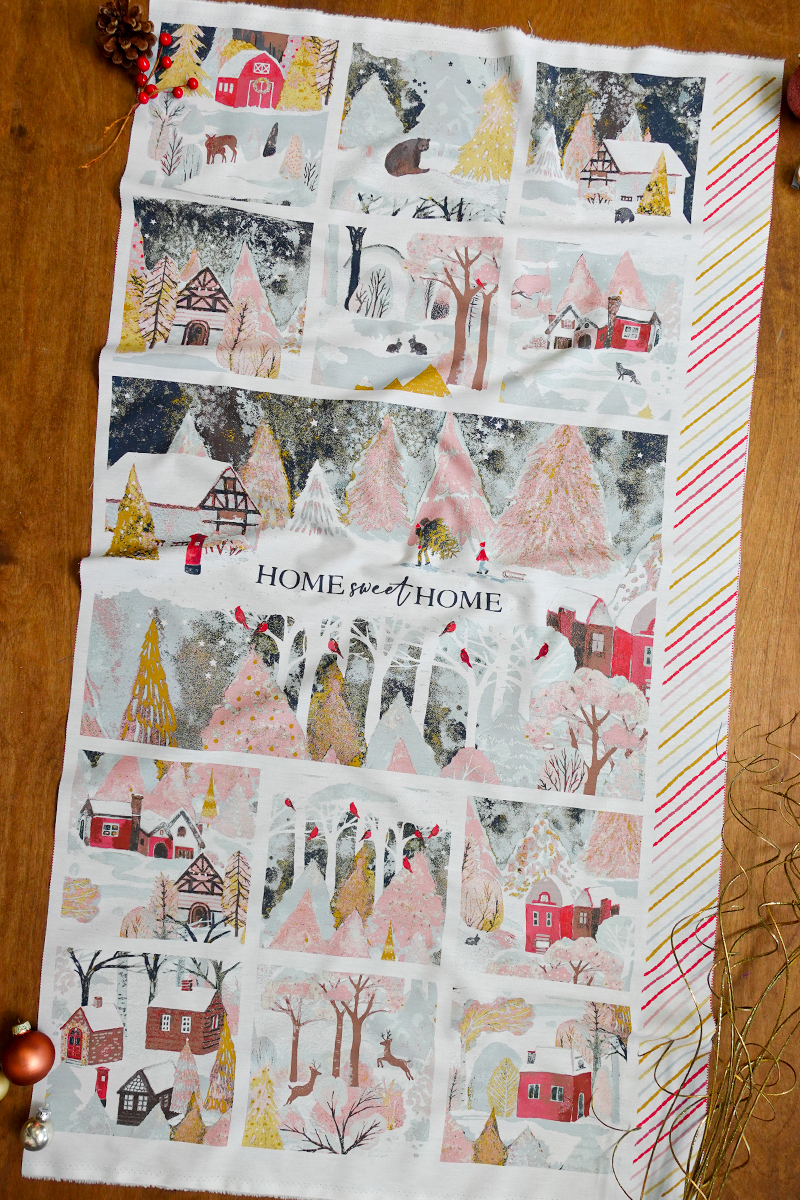
We’re using the AGF Welcome Home panel and adding sashing with charming star accents and bold quilt blocks to make this wall hanging really shine. Mix and match your favorite panel pieces, or follow along with our layout! Curious about quilting with rulers but not sure where to start? We’ll teach you beginner-friendly ruler work tips to create that beautiful, puffy texture in your quilting with the BERNINA Q 16.
Remember, sub-cutting your fabric pieces helps speed up assembly while giving you clean, accurate seams! All seams are ¼” seam allowance. All seams are ¼” seam allowance.
Materials to Make a Christmas Wall Hanging
- (1) Welcome Home Panel by AGF ADV25916
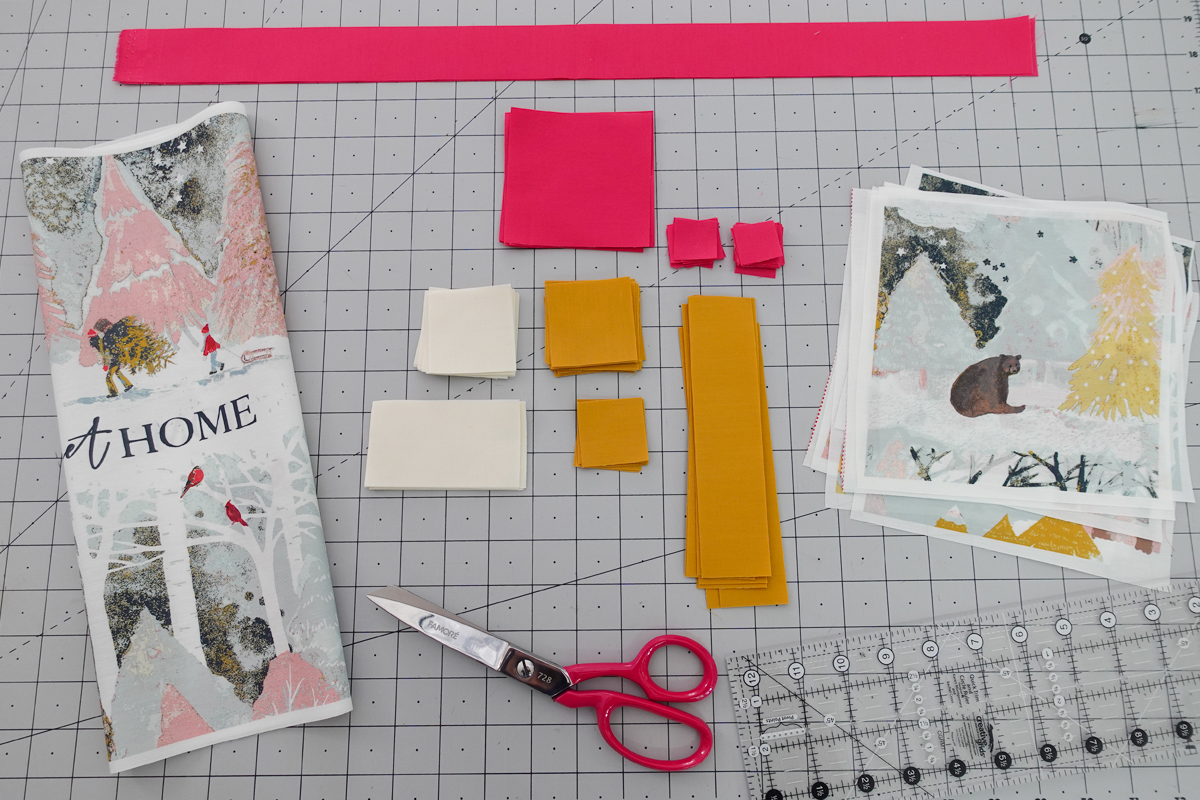
- Fabric A – AGF Pure Solids Honey PE-421
- Fabric B – AGF Pure Solids Cherry Lipgloss PE-405
- Fabric C – AGF Pure Solids White Linen PE-408
- Patchwork Foot #37
- Adjustable Ruler Foot #72
- Essentials Ruler Kit
- High-loft Batting
- Aurifil Thread #2445 40wt
- Rotary Cutter
- Quilting Rulers
- Heat Erasable Fabric Pen
- Iron
- Clips/Pins
Cutting Instructions
Fabric A
- Cut 3 (three) 2″ x WOF strips, then Sub-cut into 48 (forty eight) 2″ squares
- Cut 1 (one) 1½” x WOF strip, then Sub-cut into 4 (four) 1½” squares
- Cut 3 (three) 1½” x WOF strips, then Sub-cut into 14 (fourteen) 6.5″ rectangles
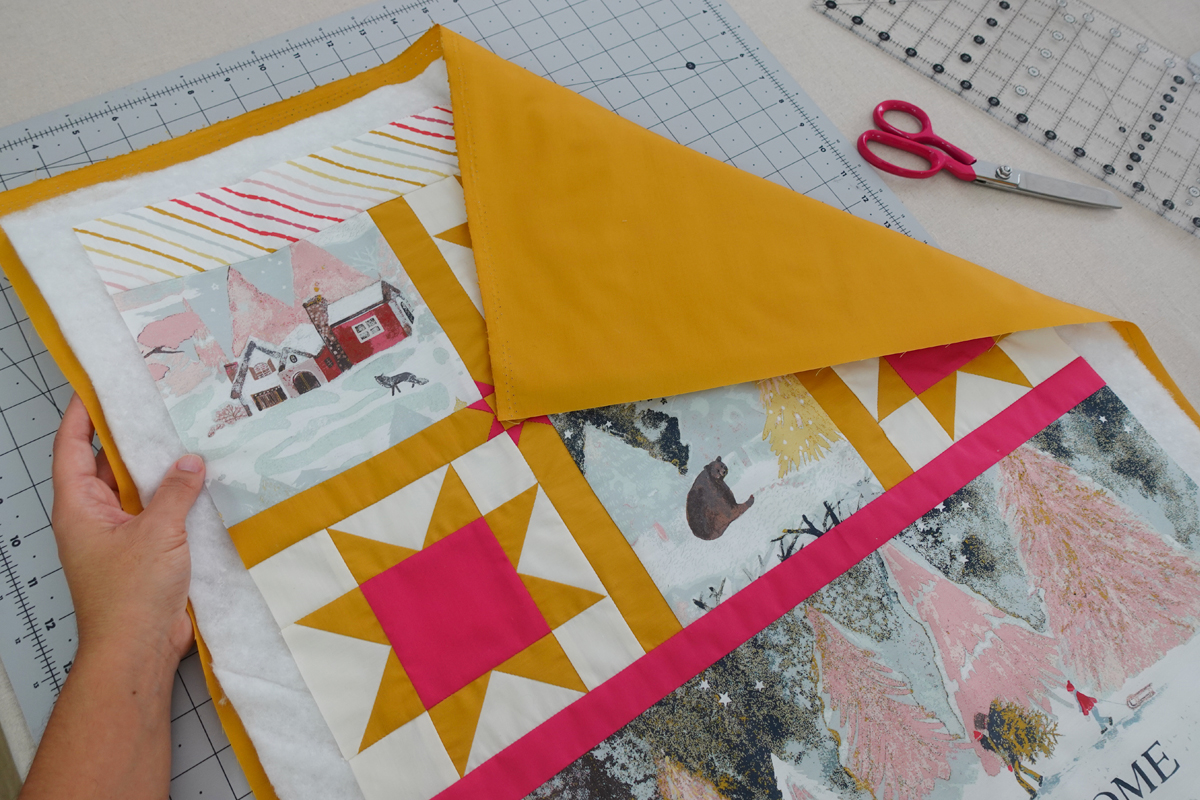
From the remaining fabric, cut 2 (two) rectangles 22.5” x 21”, sew them on the 21” edge with a ¼” allowance to make a 44.5” x 21” rectangle for the backing.
Fabric B
- Cut 1 (one) 3.5″ x WOF strips, then Sub-cut into 6 (six) 3.5″ squares
- Cut 1 (one ) 1½” x WOF strips, then Sub-cut into 2 (two) 20.5″ rectangles
- Cut 1 (one) 1″ x WOF strips, then Sub-cut into 32 (thirty two) 1″ squares
Fabric C
- Cut 3 (three) 2″ x WOF strips, then Sub-cut into 24 (twenty four) 2″ squares
- Cut 2 (two ) 2 ” x WOF strips, then Sub-cut into 24 (twenty four) 3.5″ rectangles
Step 1: Prepping for the Wall Hanging Top
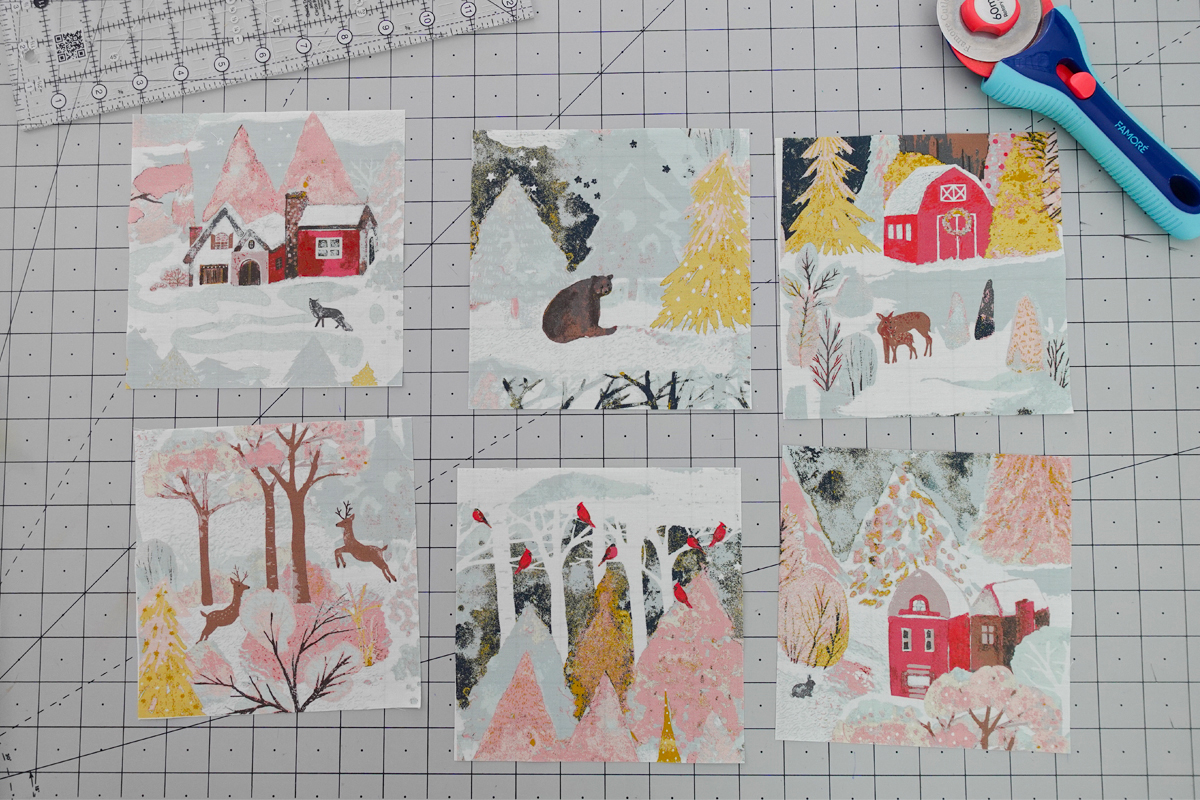
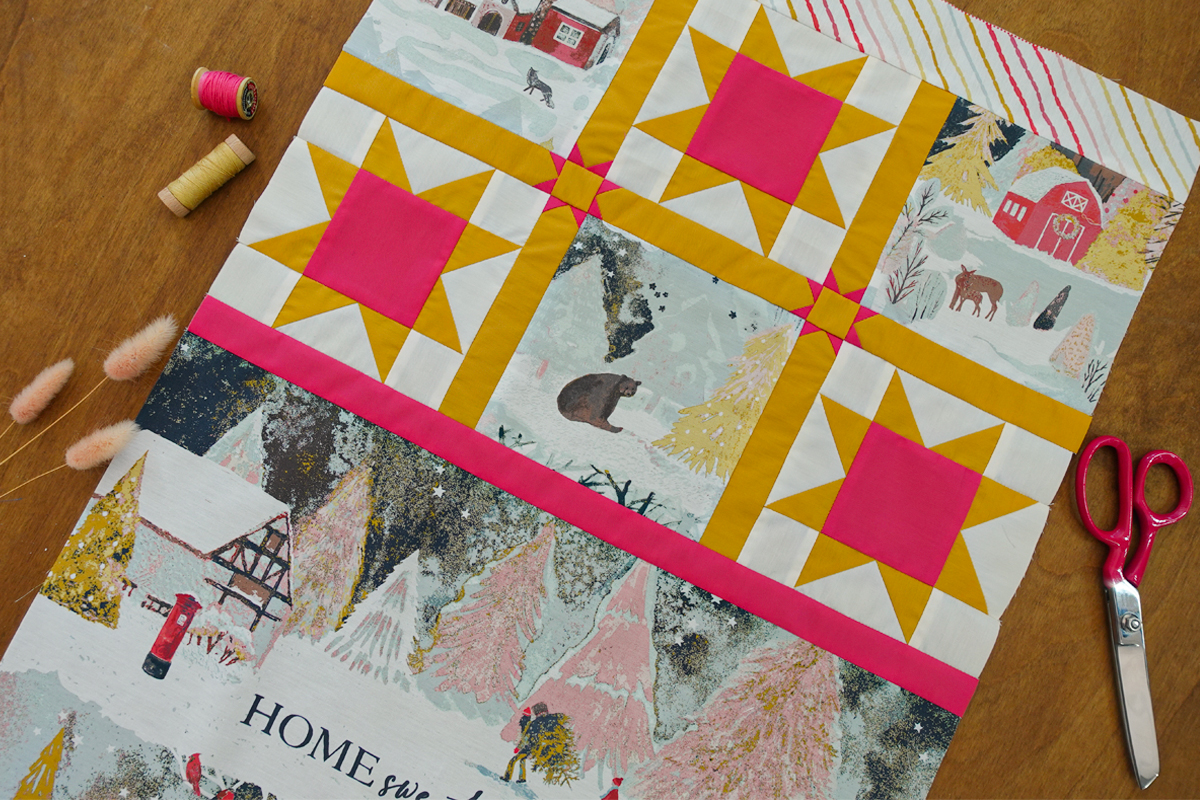
Choose your favorite 6 squares from the Welcome Home Panel and trim to 6.5” squares
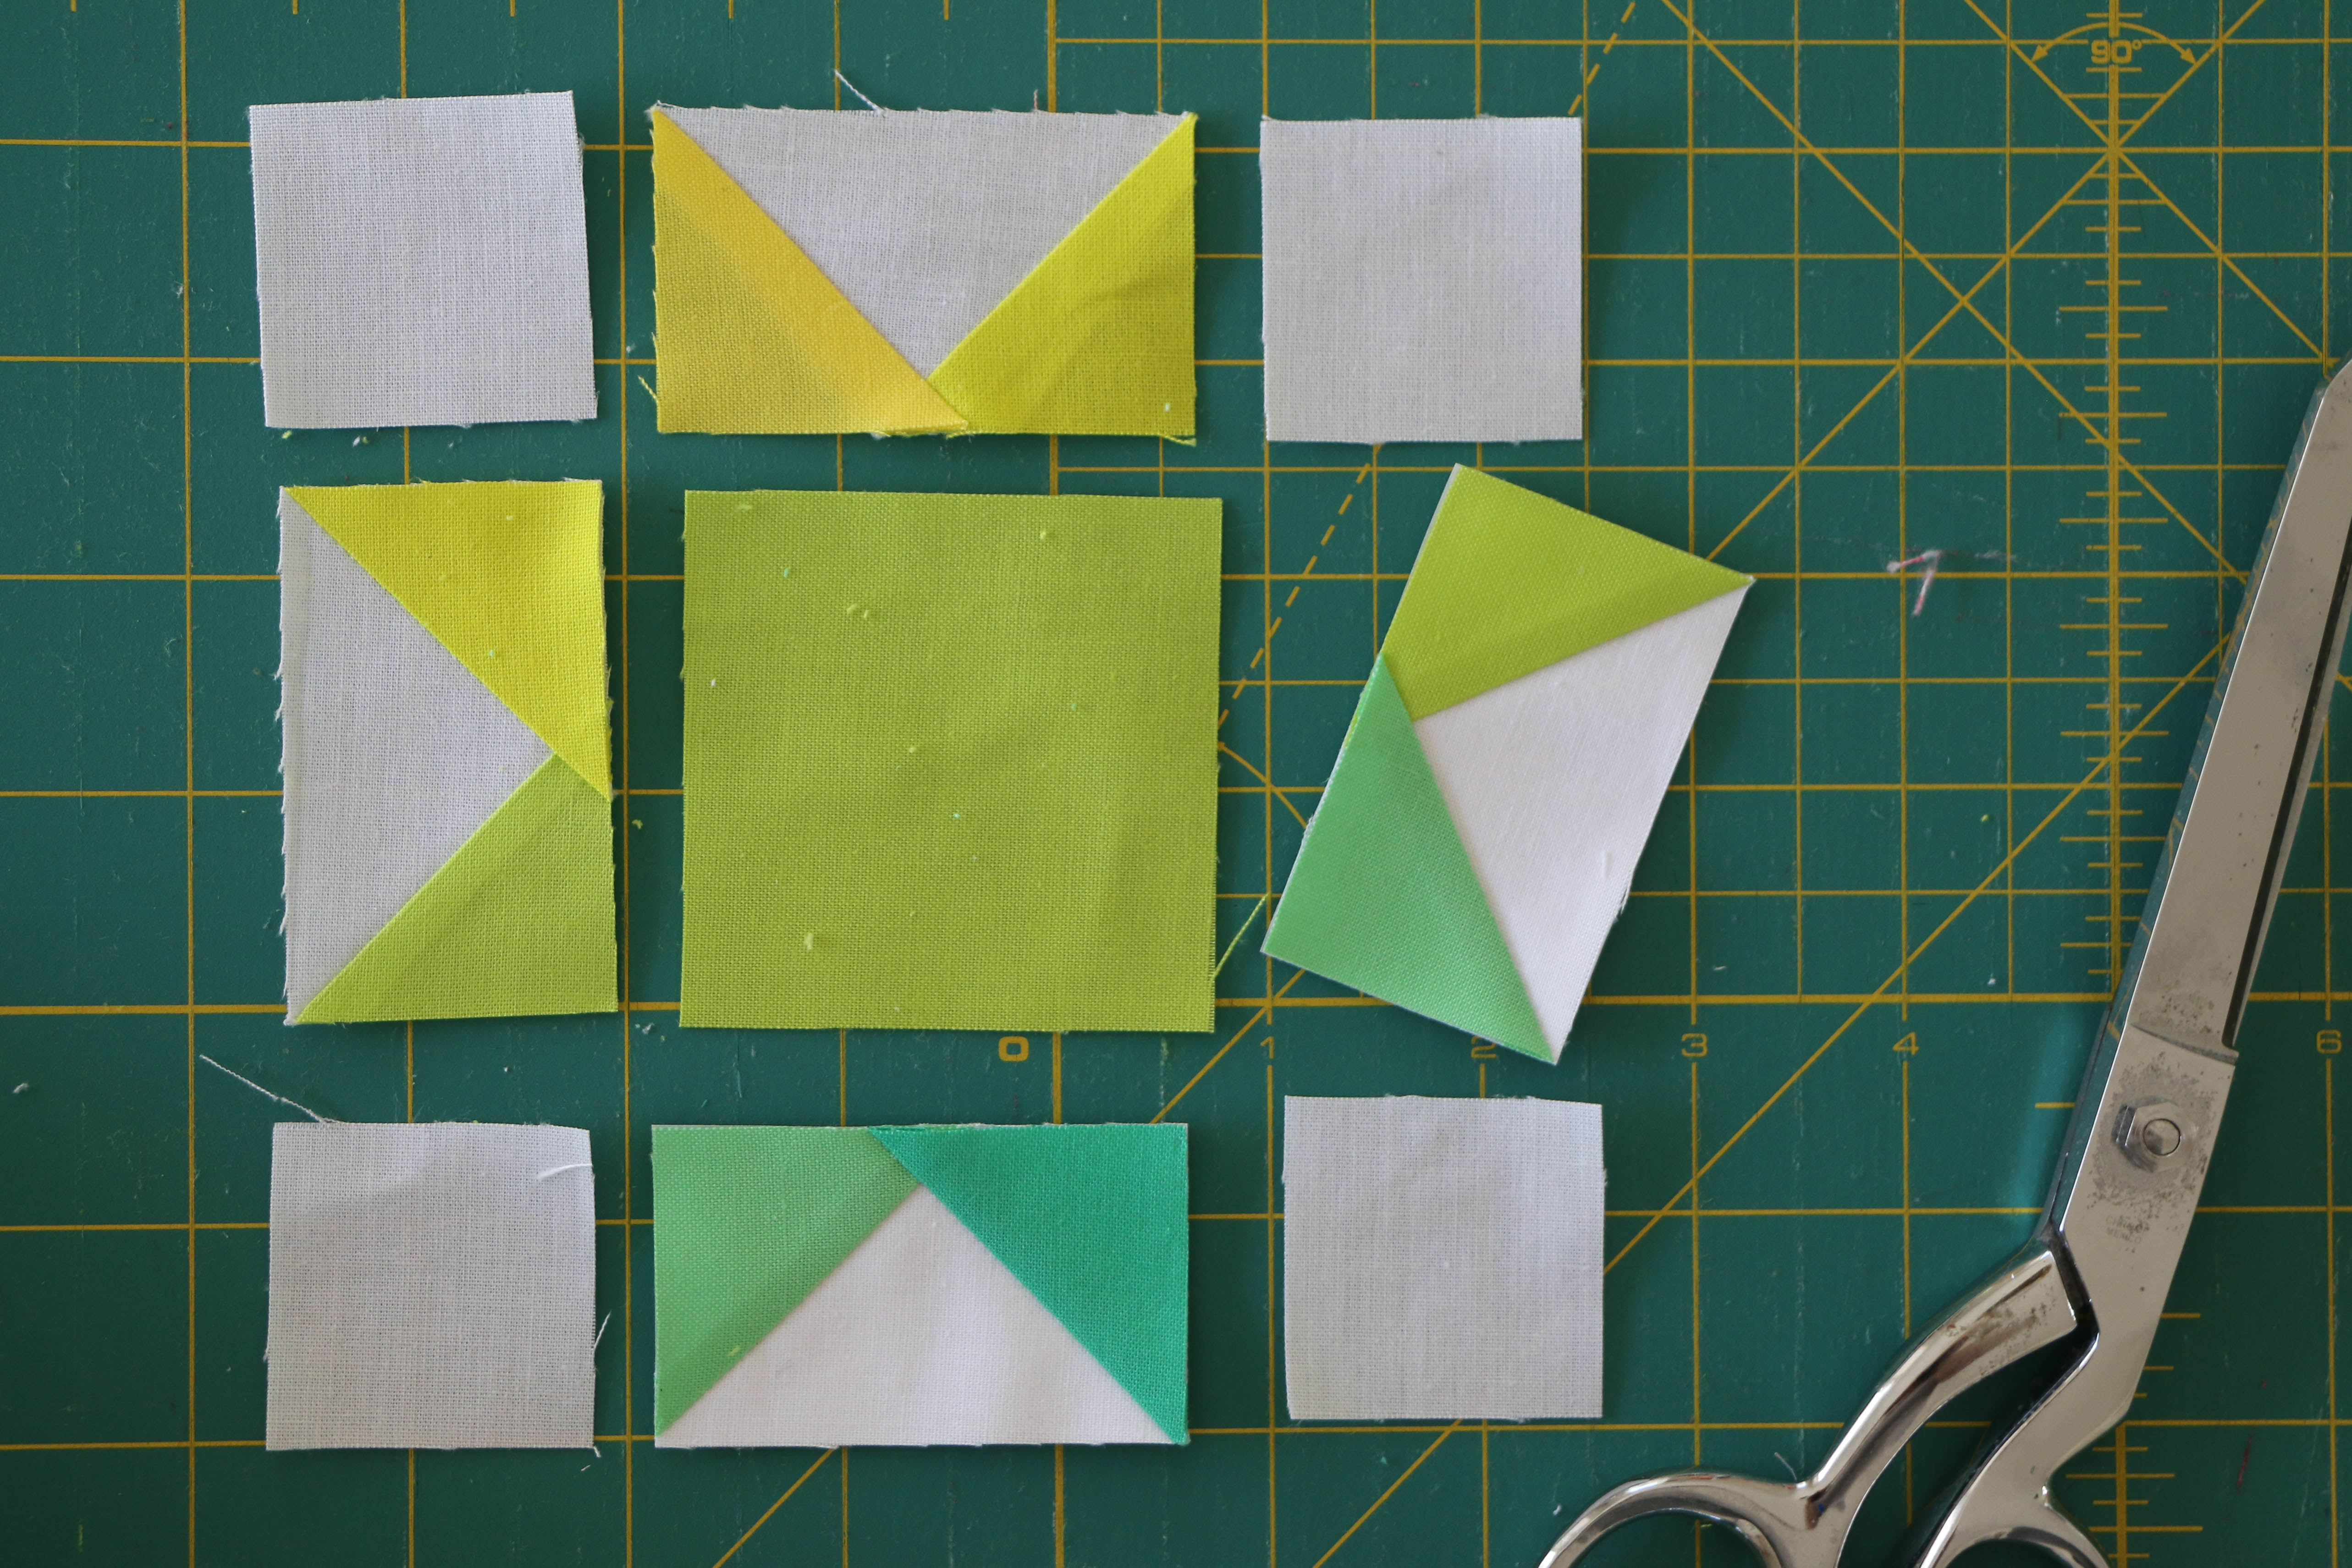
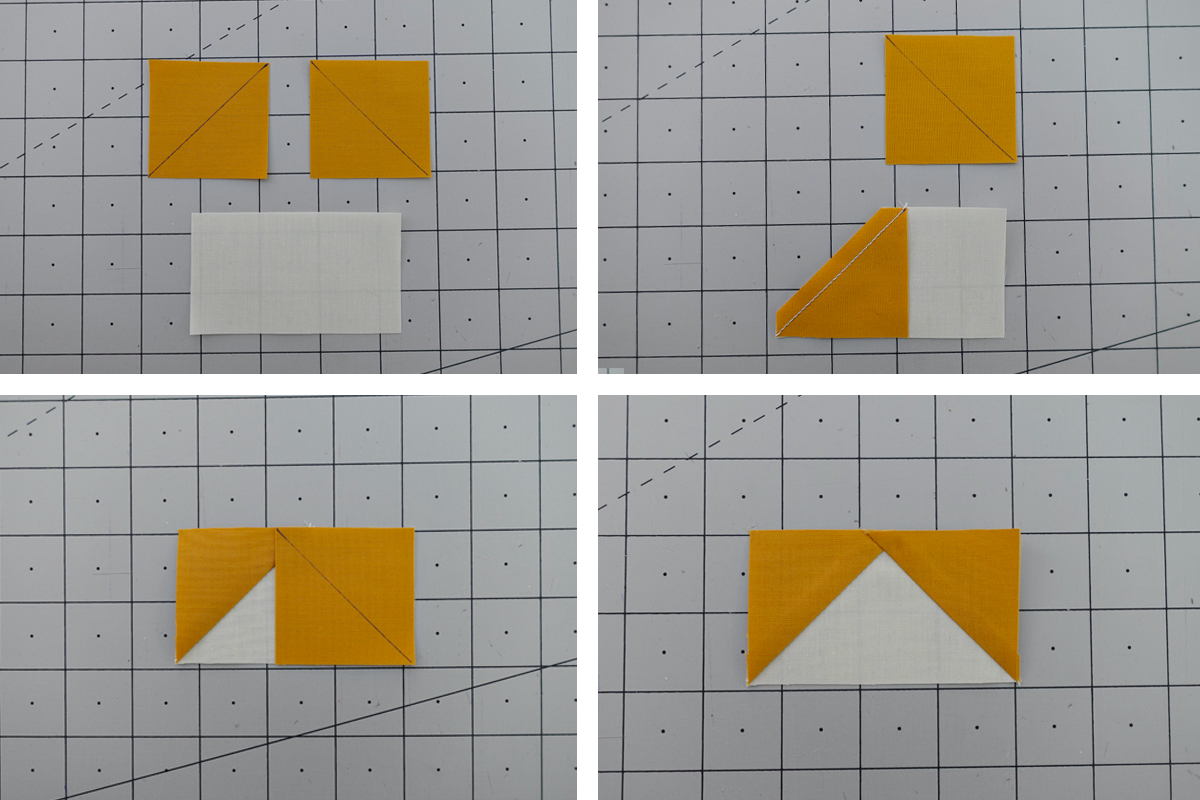
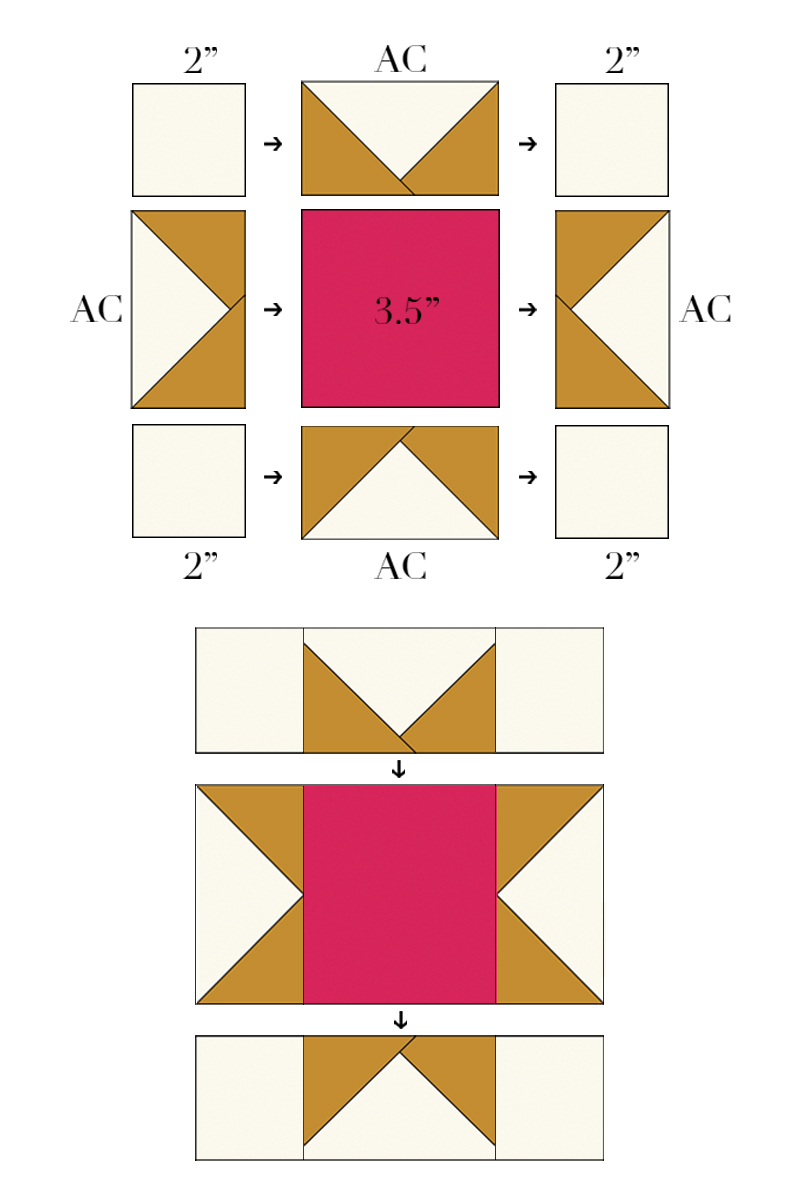
Take two 2” squares of fabric A and one 2” x 3.5” rectangle of fabric C. Use the flying geese technique to make 24 of these AC units
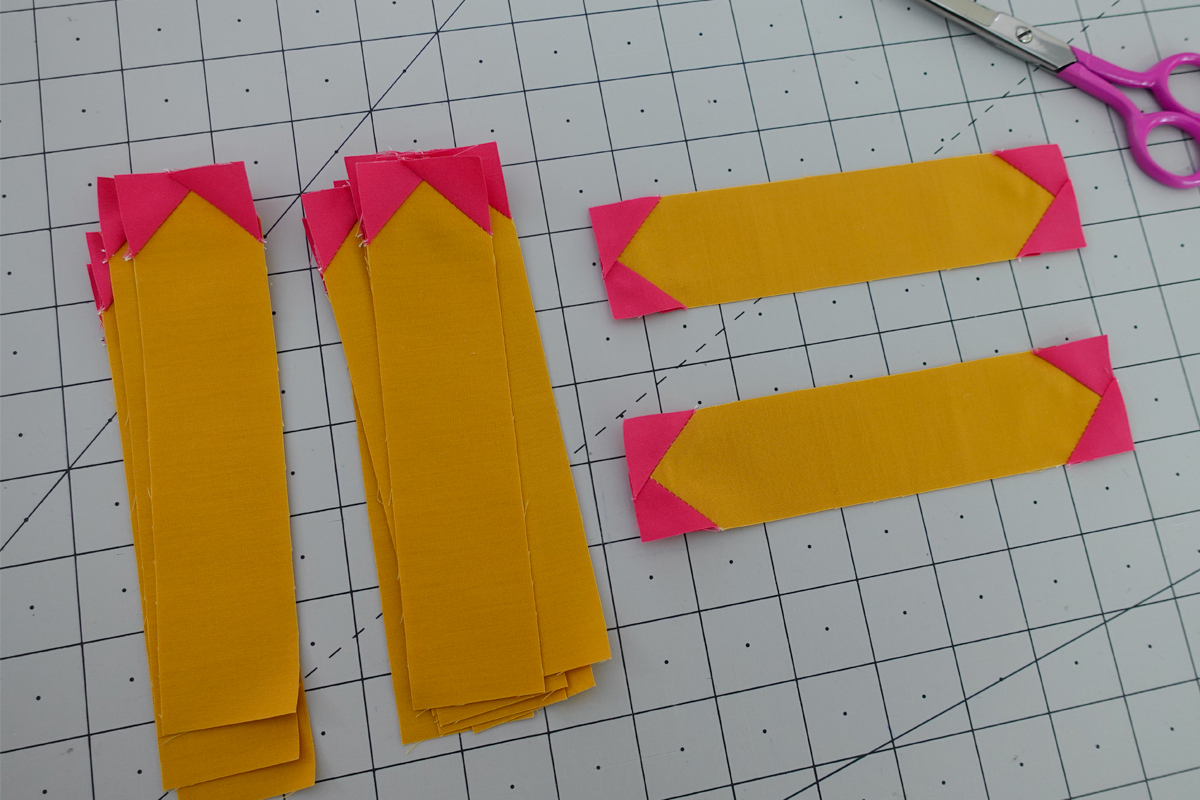
Take one 1.5” x 6.5” rectangle of fabric A and two 1” squares of fabric B. Use the corner square technique to make an AB unit. Repeat for a total of 12 AB units.
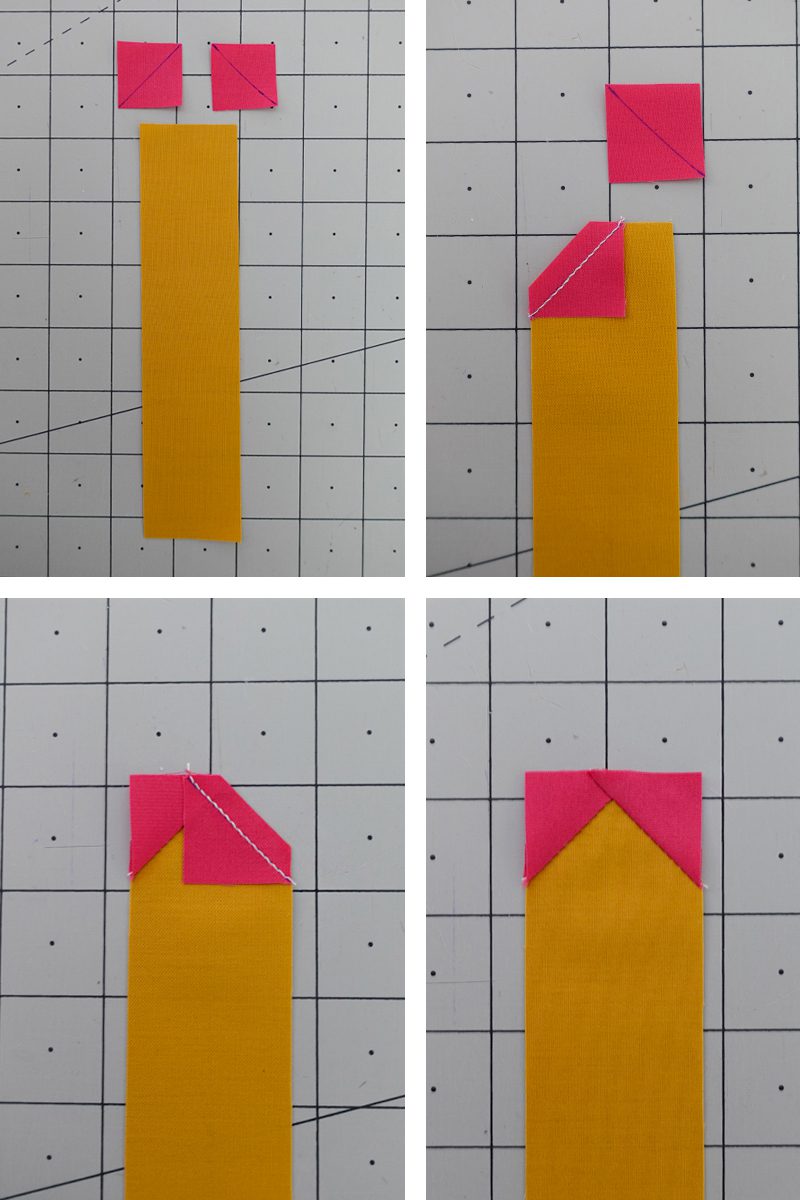
Take one 1.5” x 6.5” rectangle of fabric A and four 1” squares of fabric B to make a BAB unit. Repeat for a total of two BAB units
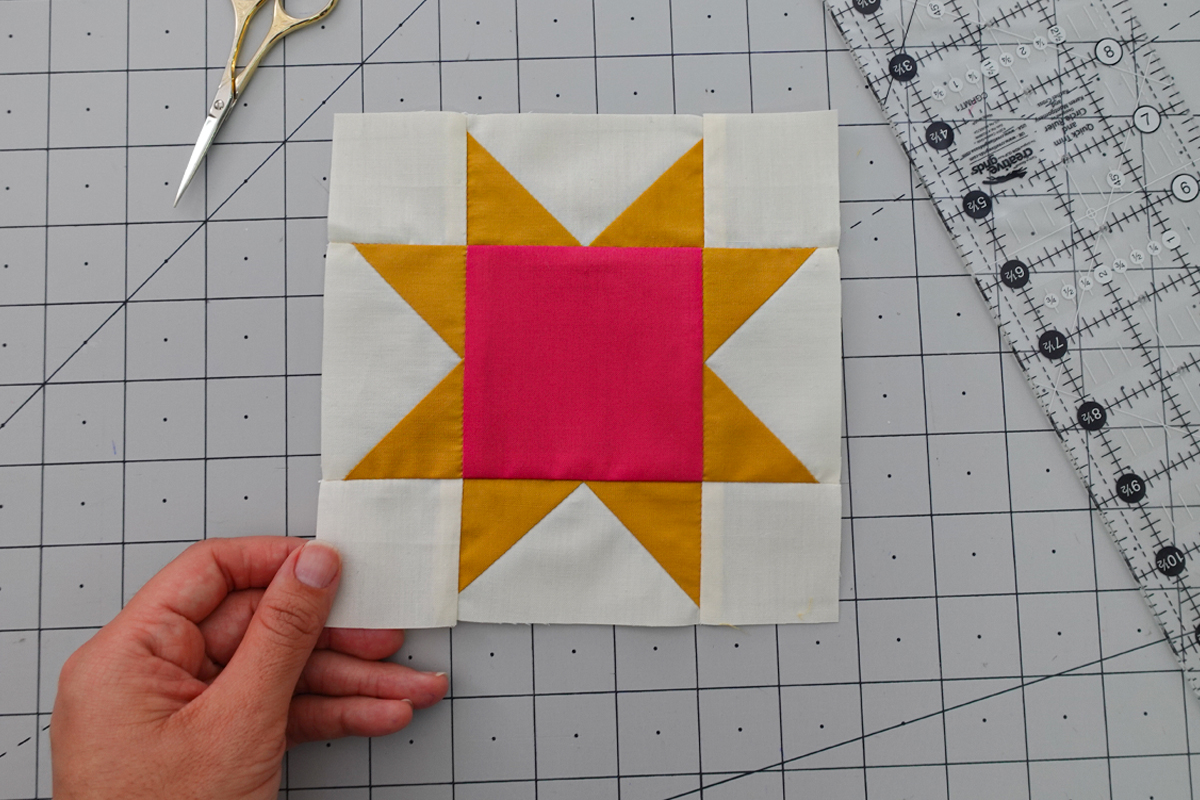
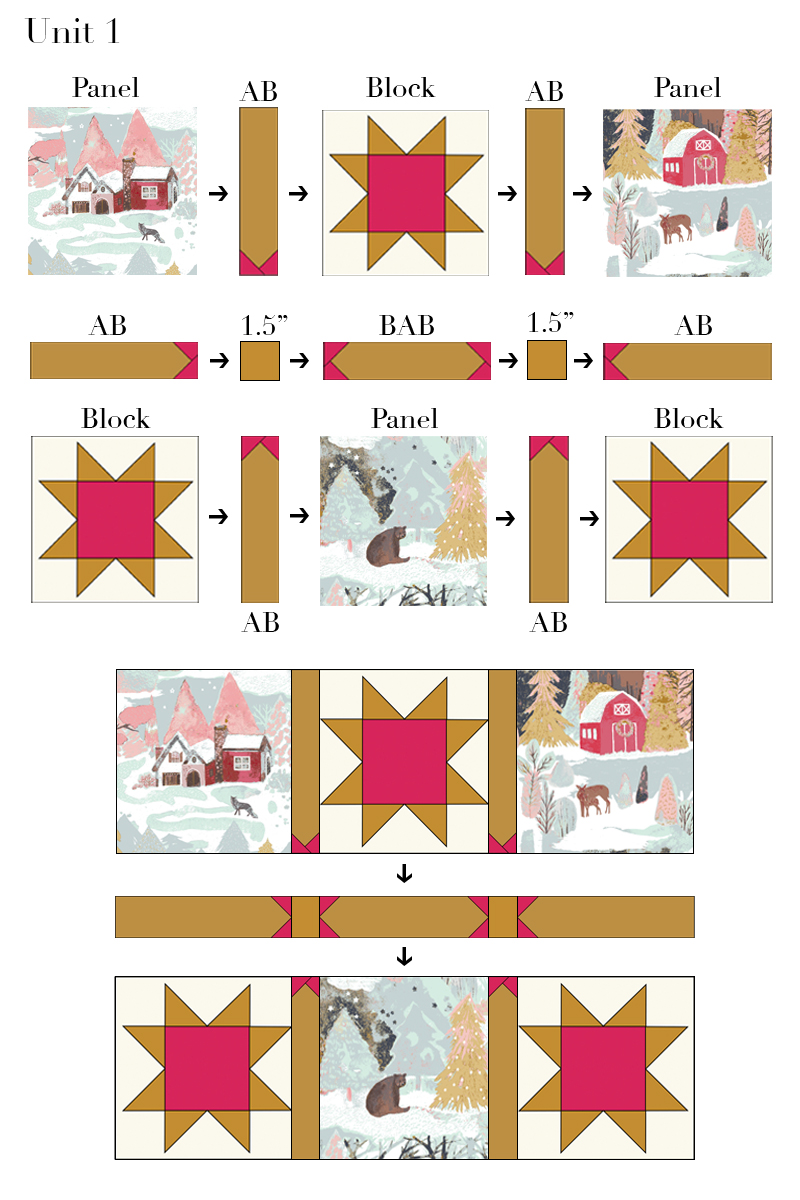
Follow the diagram to piece together the star block. Repeat steps for a total of 6 blocks
Step 2: Piecing Together the Wall Hanging Top
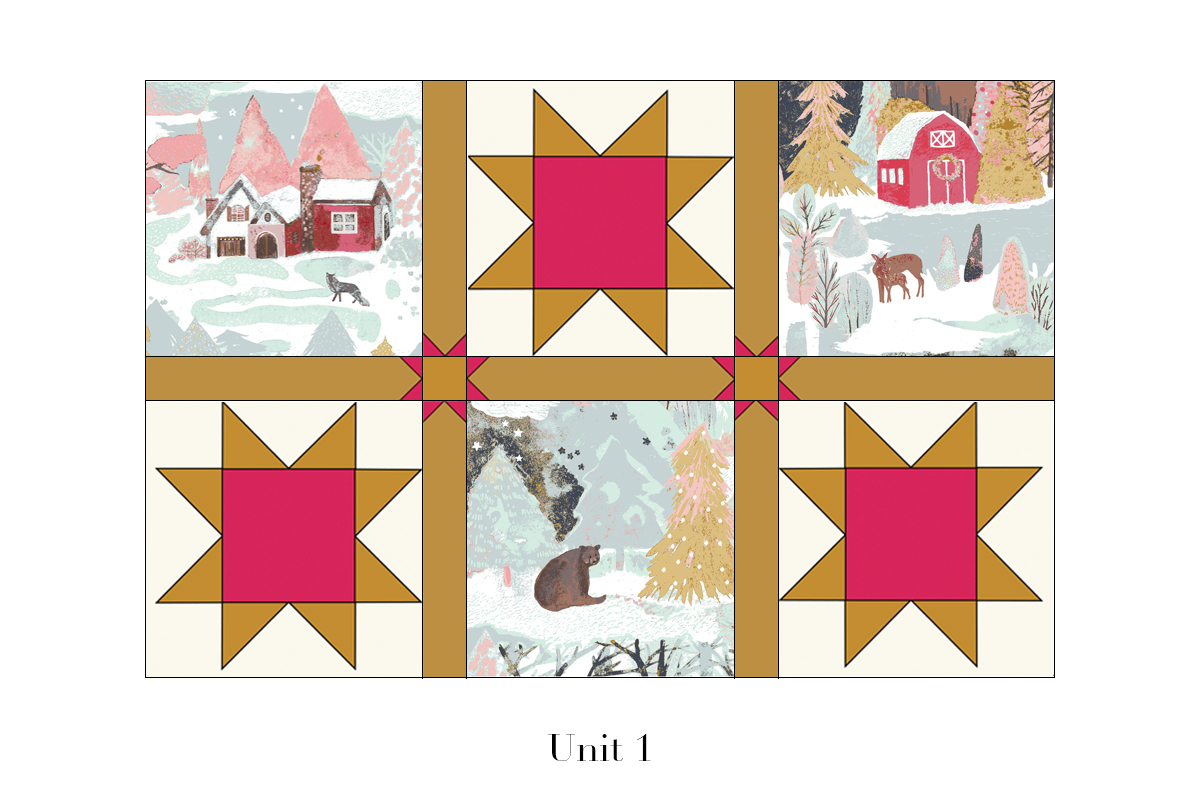
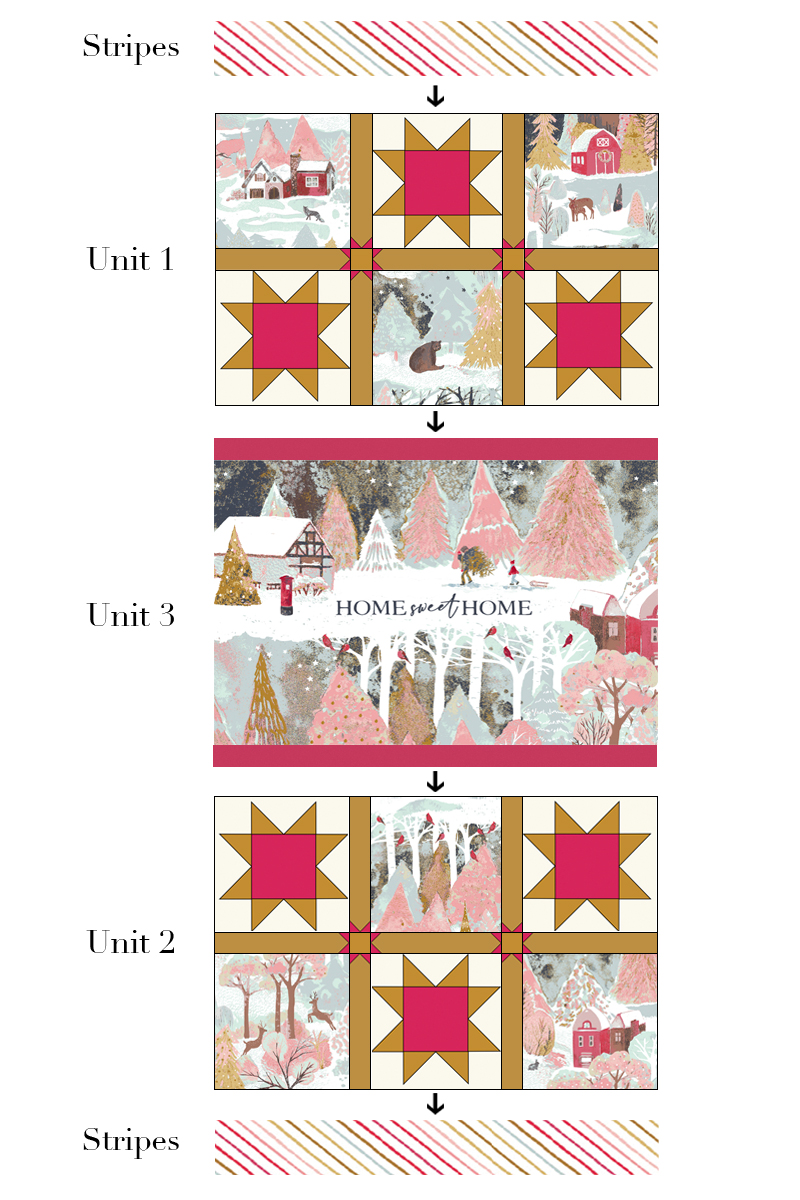
Follow the diagram to piece Unit 1 together. For the panel pieces, use our suggested order or play around and create the look you love!
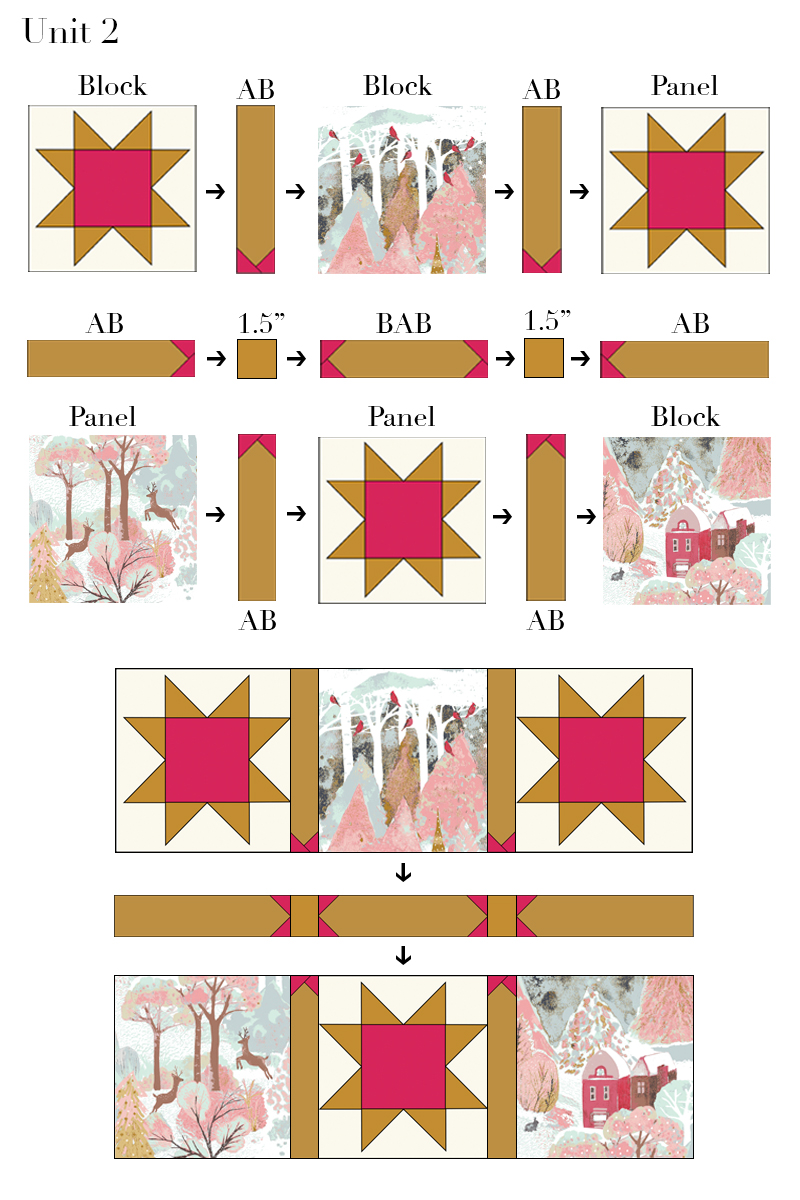
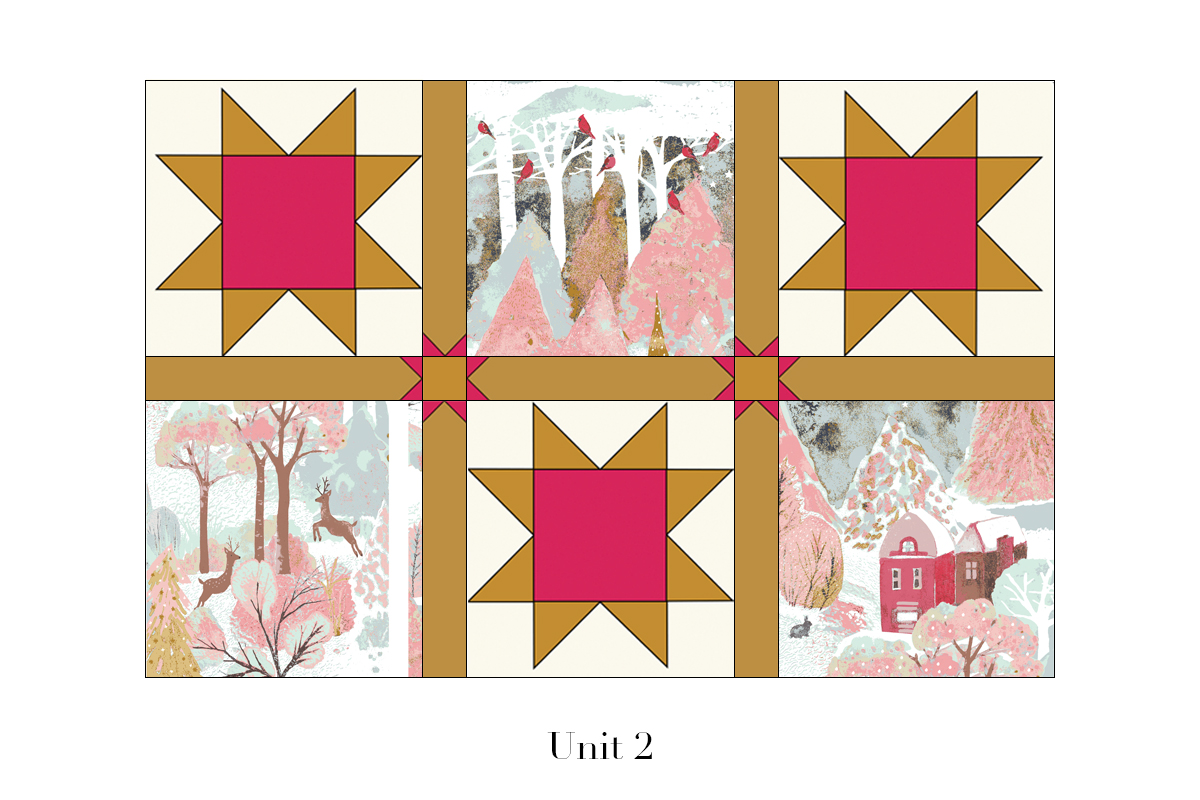
Follow the diagram to make Unit 2
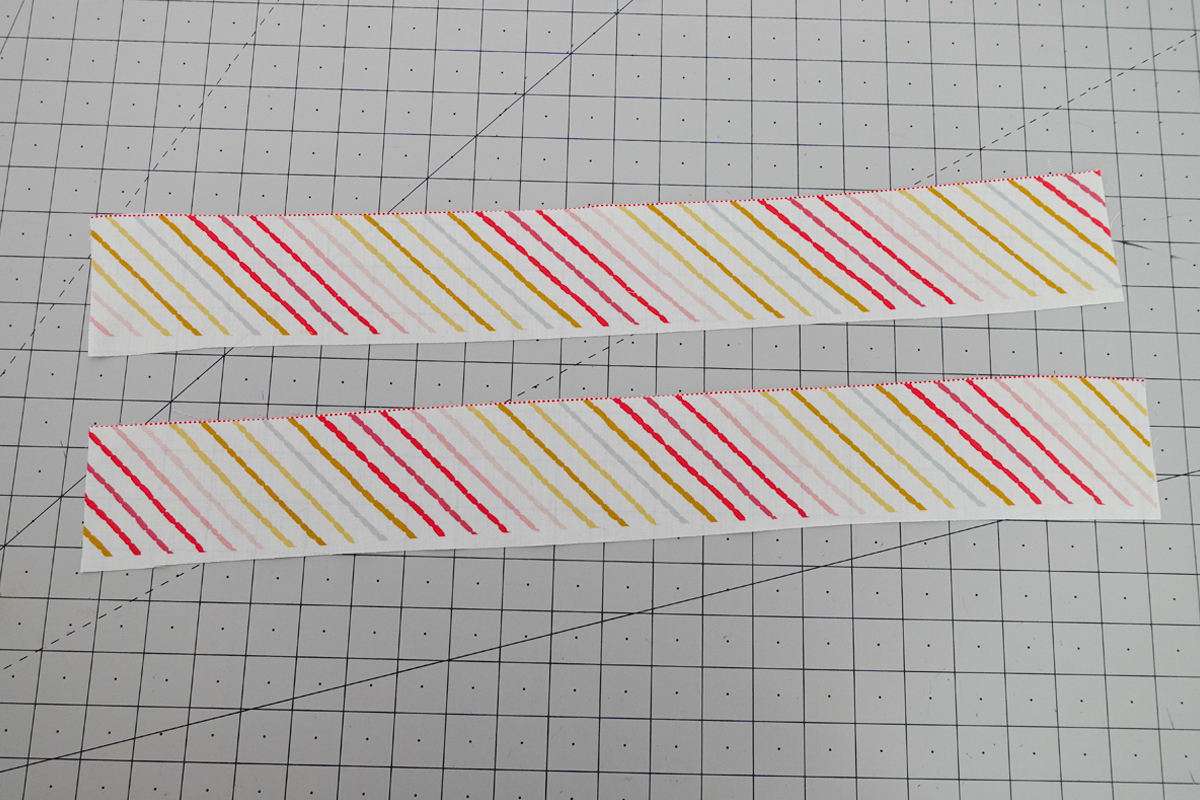
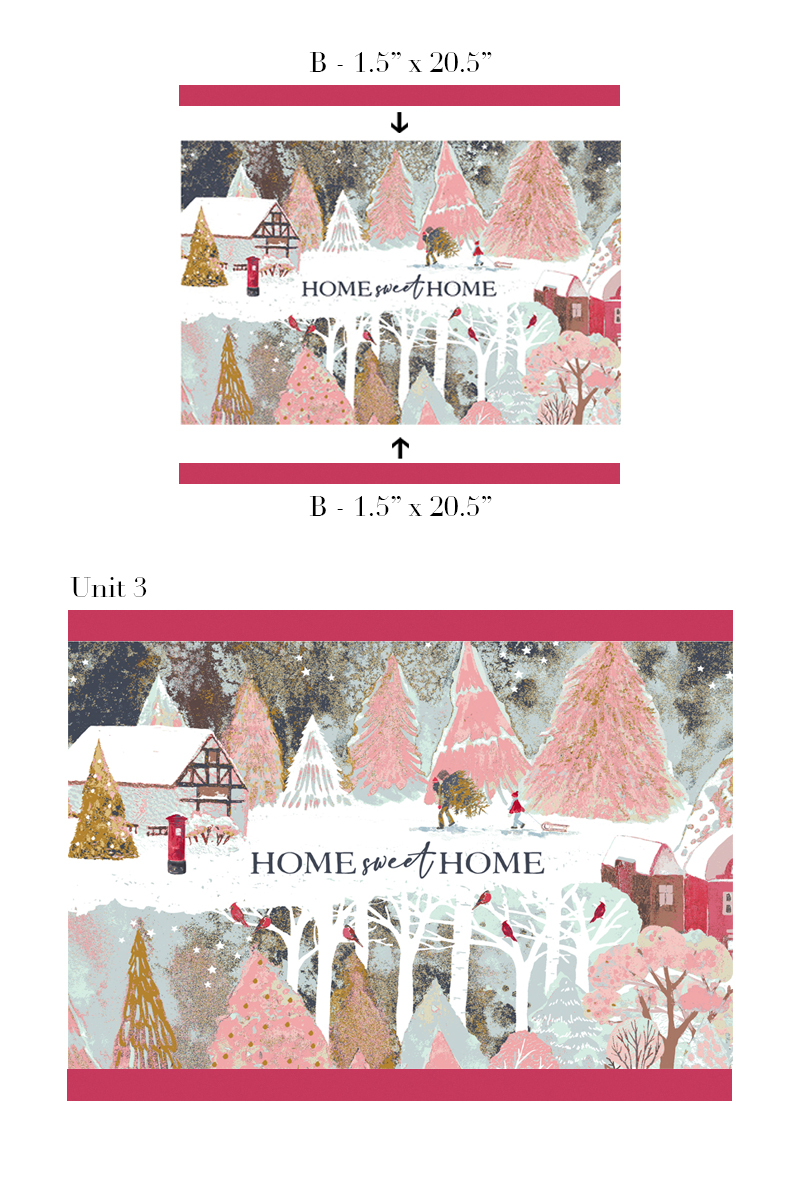
Trim the striped panel strip in two pieces to measure 20.5” each. Take the Home Sweet Home center piece and also trim to 20.5″ in width. Take two 1.5″ x 20.5″ strips of Fabric B and sew them to the top and bottom of the Home Sweet Home piece to create Unit 3.
Let’s sew the wall hanging together!
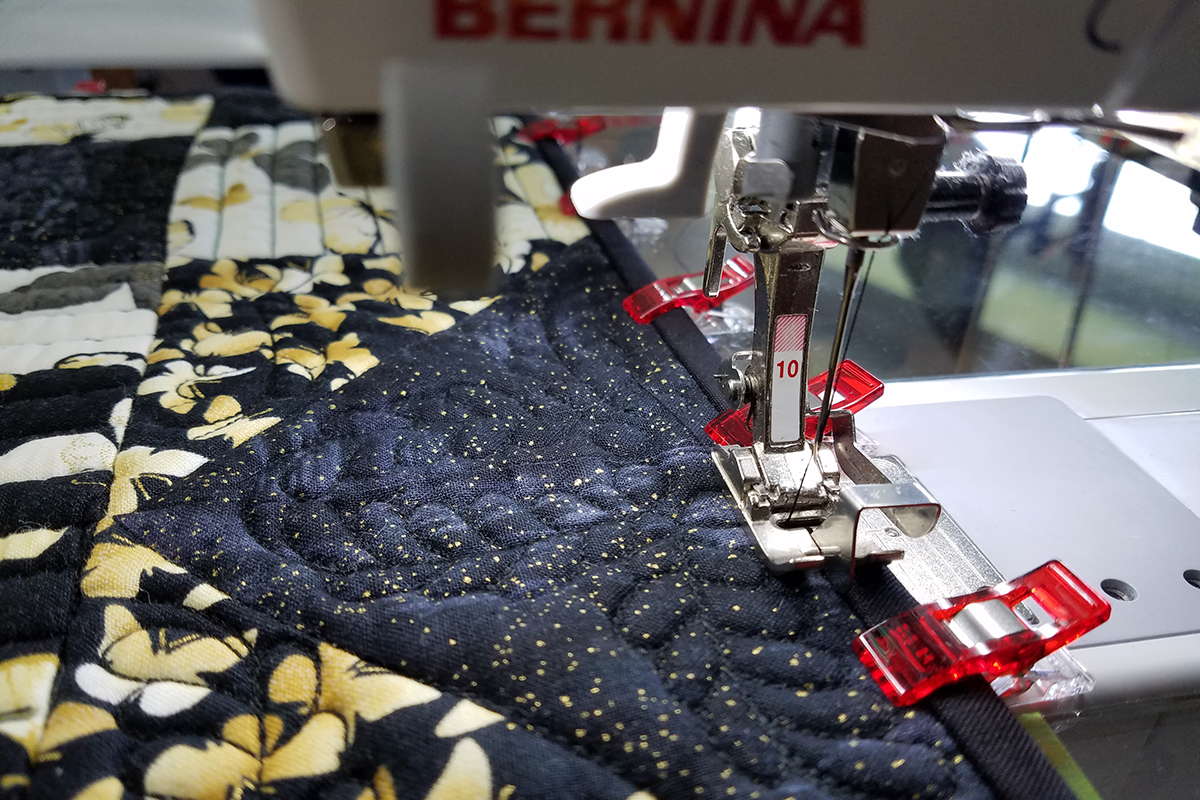
Layer the backing fabric, batting and top to make a quilt sandwich and let’s head over to the BERNINA Q 16 for quilting!
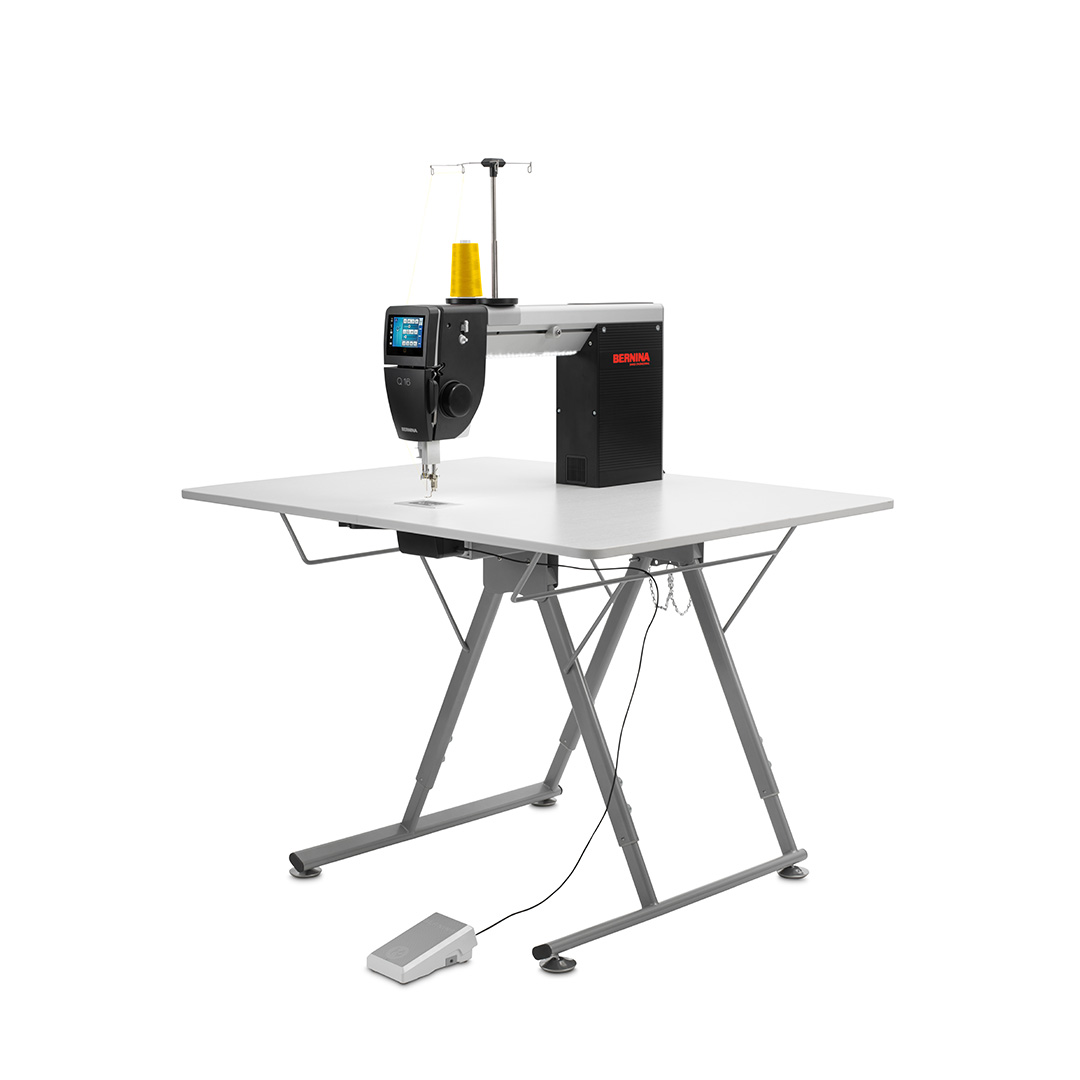
Step 3: Quilting on the Q 16
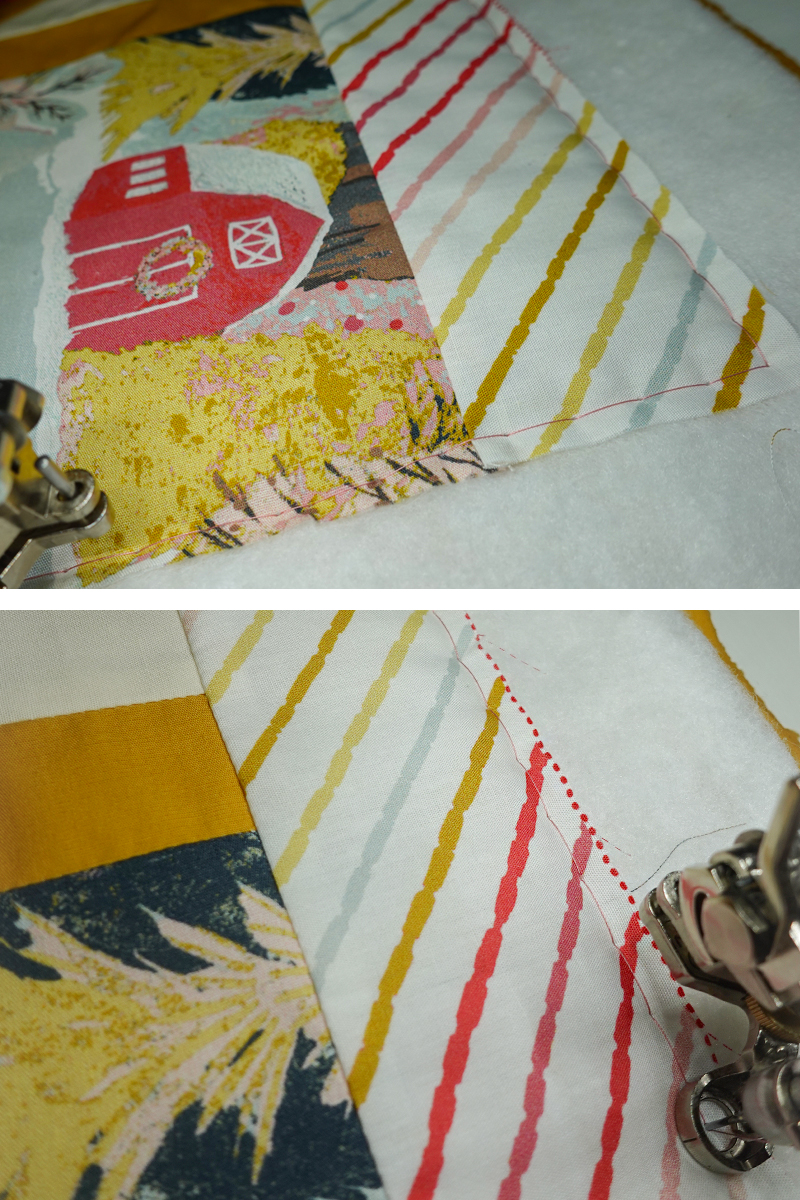
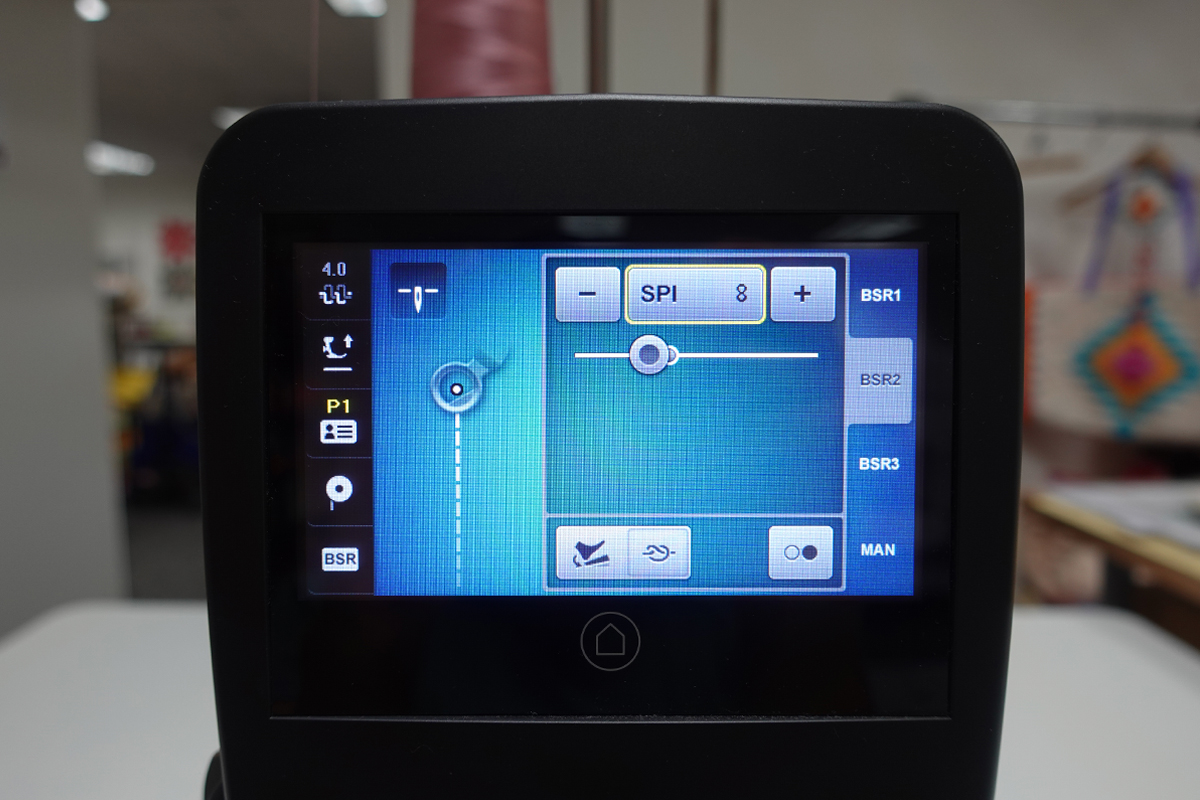
First, we are making a basting stitch all around the wall hanging, sewing ¼” away from the edges. Set the machine to BSR3 – SPI 2. This setting makes 2 basting stitches per inch and will hold our layers nicely in place.

To make quilting with rulerwork easier, we are making a continuous stitch in a ladder motion, so we don’t need any tie-off stitches. Check out this great video from BERNINA on Tie Off Stitches to brush up on them for future projects!
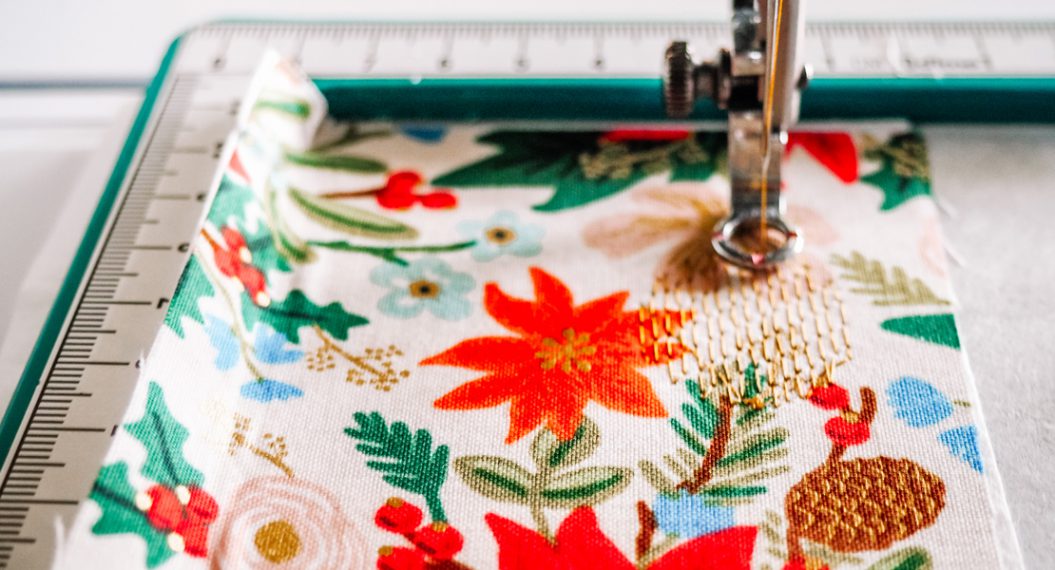
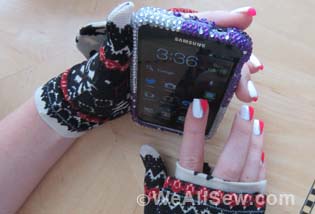
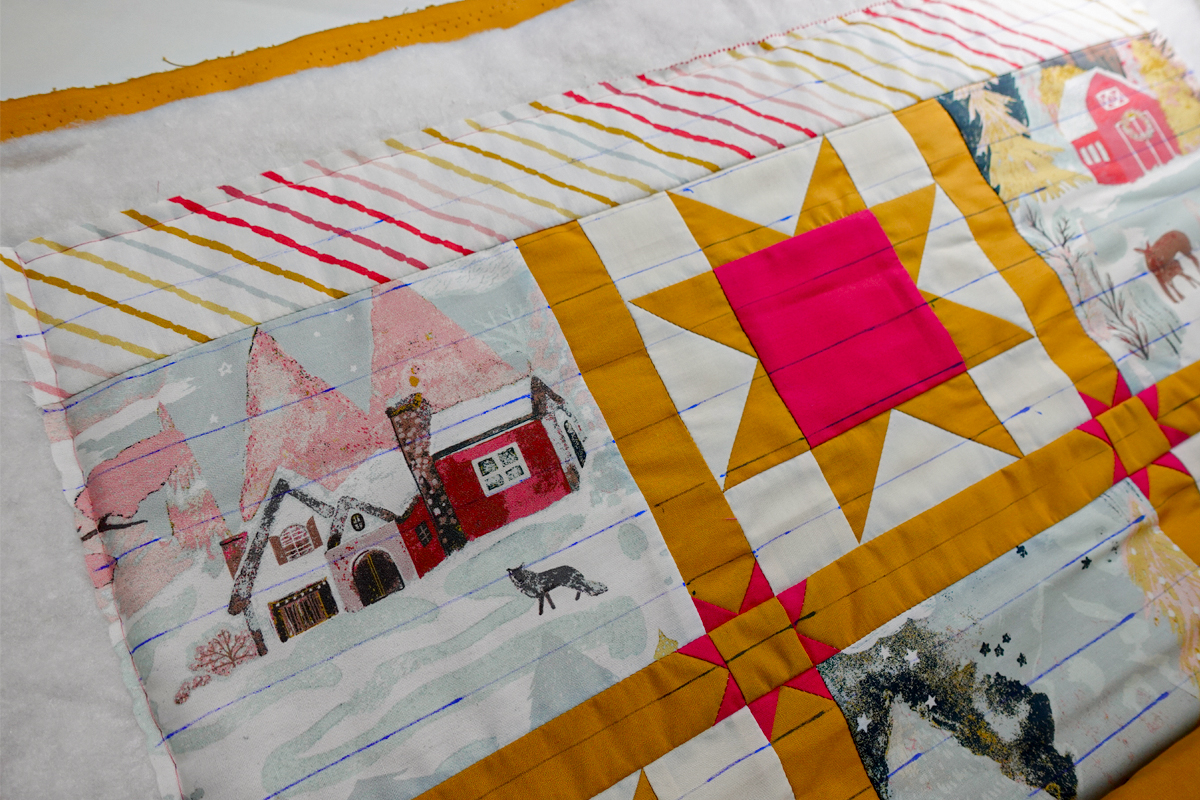
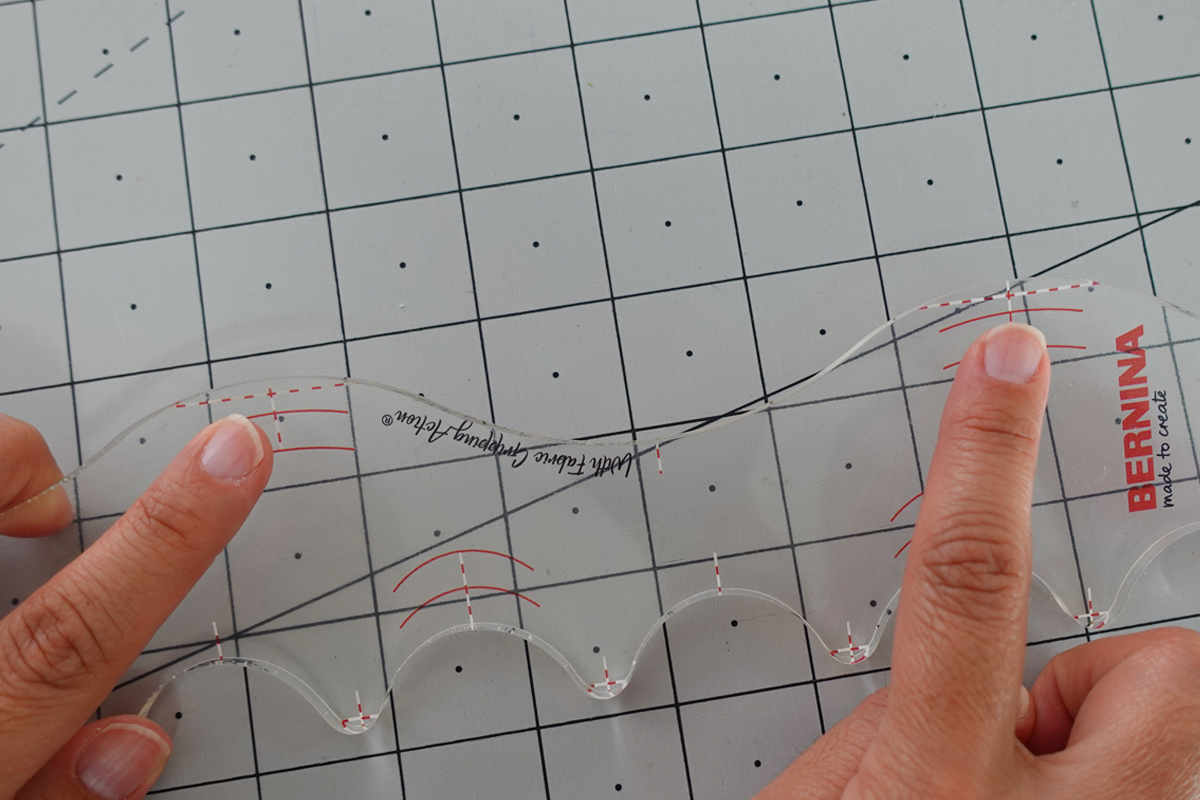
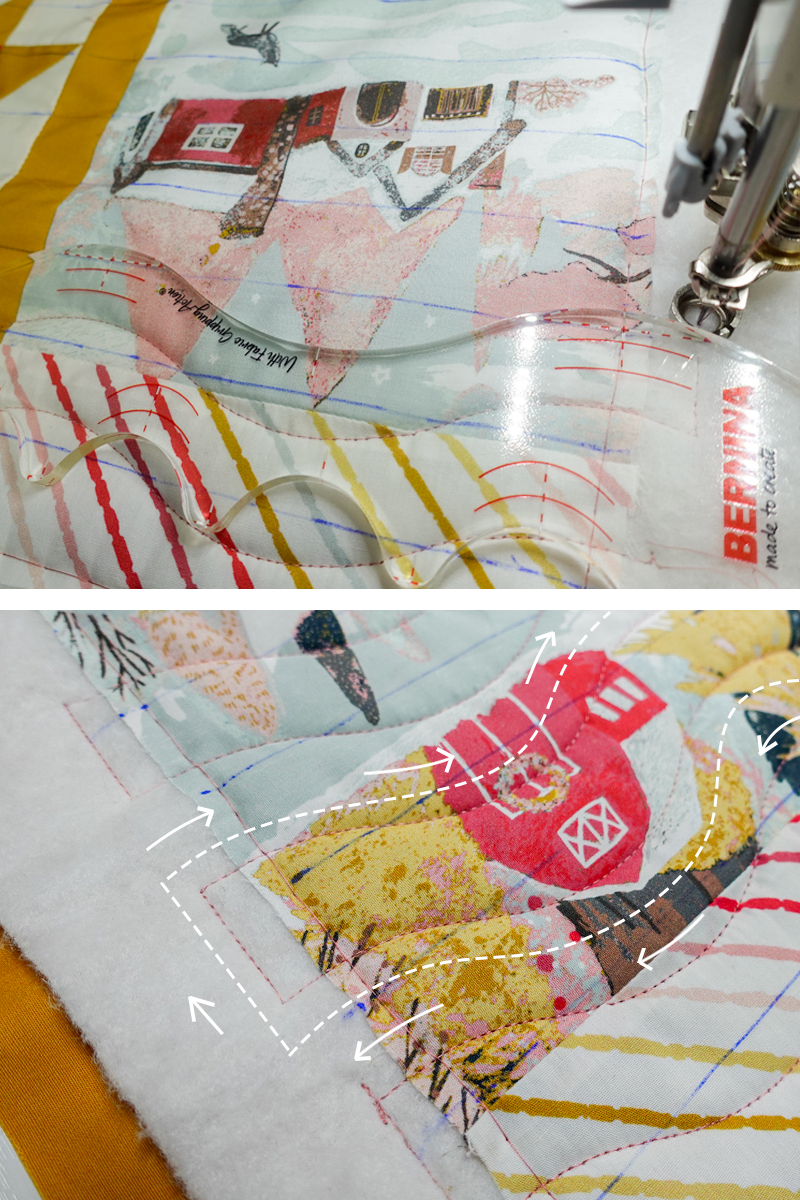
Ruler work rulers are thicker and have markings on them to help you create designs. To help us get started and accustomed to following these markings, draw horizontal lines with a heat-erasable pen along the width of the wall hanging in 1” intervals to use as reference points. We are using the #72 foot, which has a thicker sole, so it glides along the ruler. Also, a nice pair of quilting gloves goes a long way! It will help you quilt effortlessly.
Next, set the machine to BSR2 with SPI 8 for ruler work. In this setting, stitches only happen when you move the fabric; no extra stitches sew if you pause to reposition the piece while continuously pressing on the pedal.
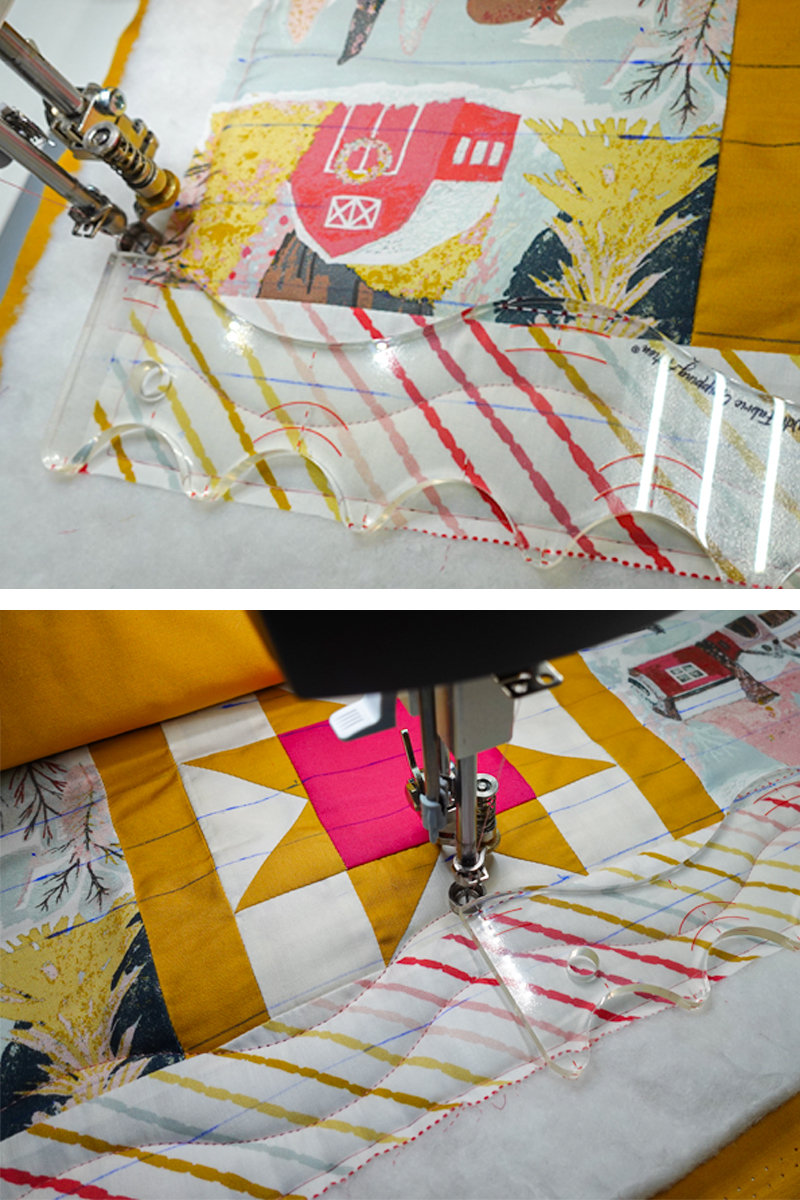
Start with the Wall hanging upside down so we can roll up from the bottom and away from us on the Q16 table. Place the + markings of the ruler’s right side on the first line we marked to start quilting. Holding firmly and steady, follow the contours of the ruler, gliding the sole of the foot against the ruler.
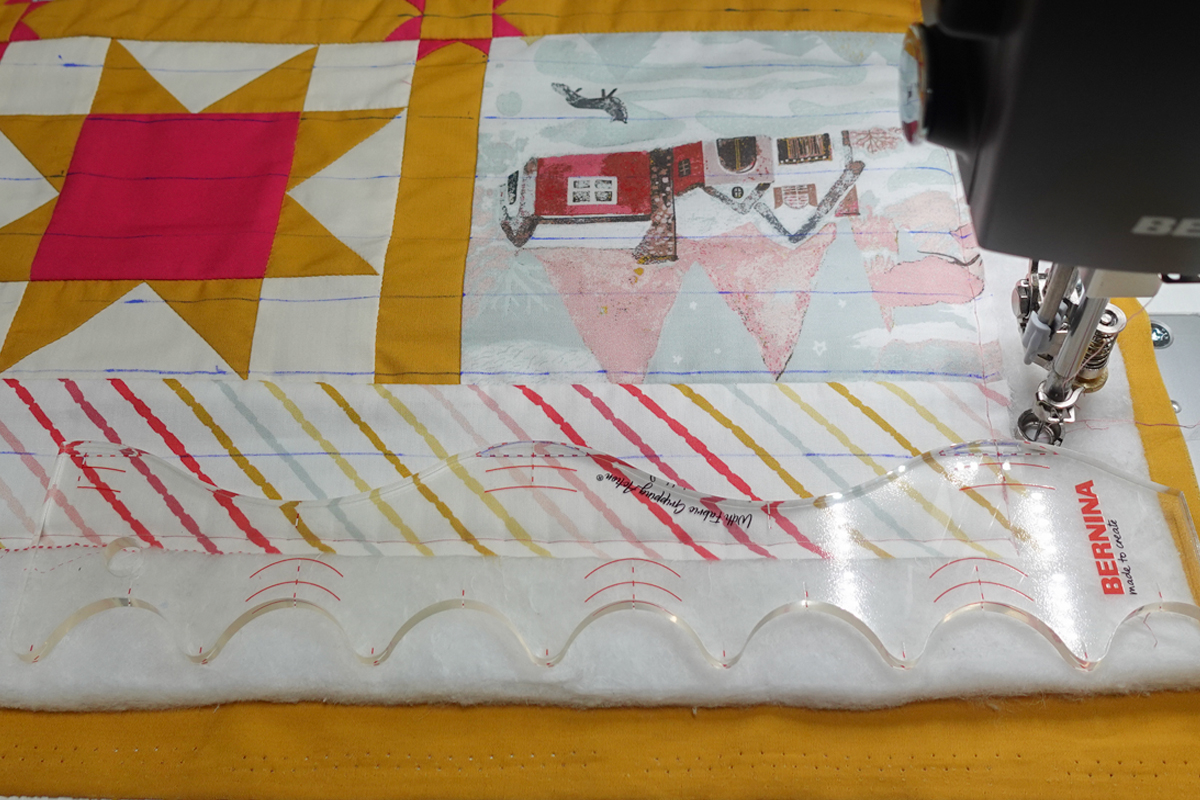
When you reach the last + on the ruler, stop moving the wall hanging and reposition the ruler at the beginning, matching the markings again on the horizontal line to continue the design, repeat until you reach the edge of the wall hanging top.
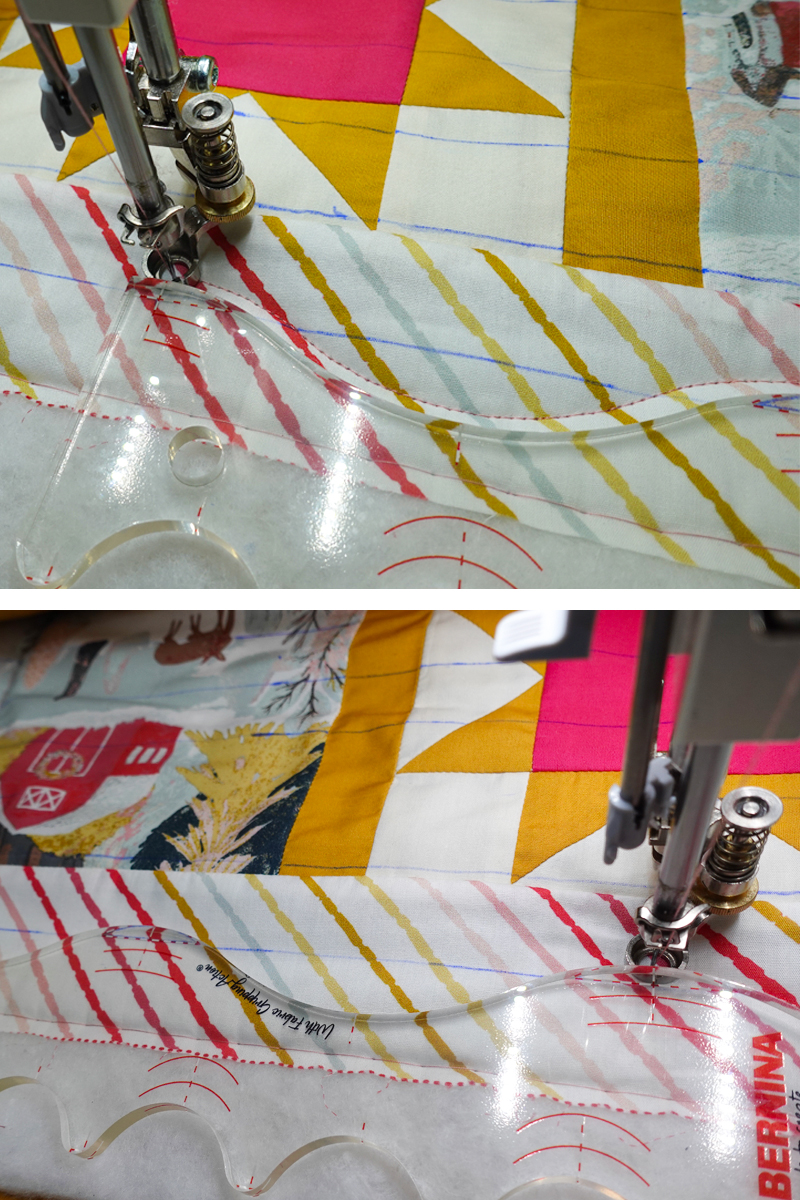
Sew past the edge of the wall hanging top and use the edge of the ruler to sew a straight line ¼” over the following horizontal line.

Place the ruler’s + markings matching at the next horizontal line. Make sure the shape of the curves match the previous one we just stitched and repeat until you reach the next edge, continuing the ladder motion.

Step 4: Finishing
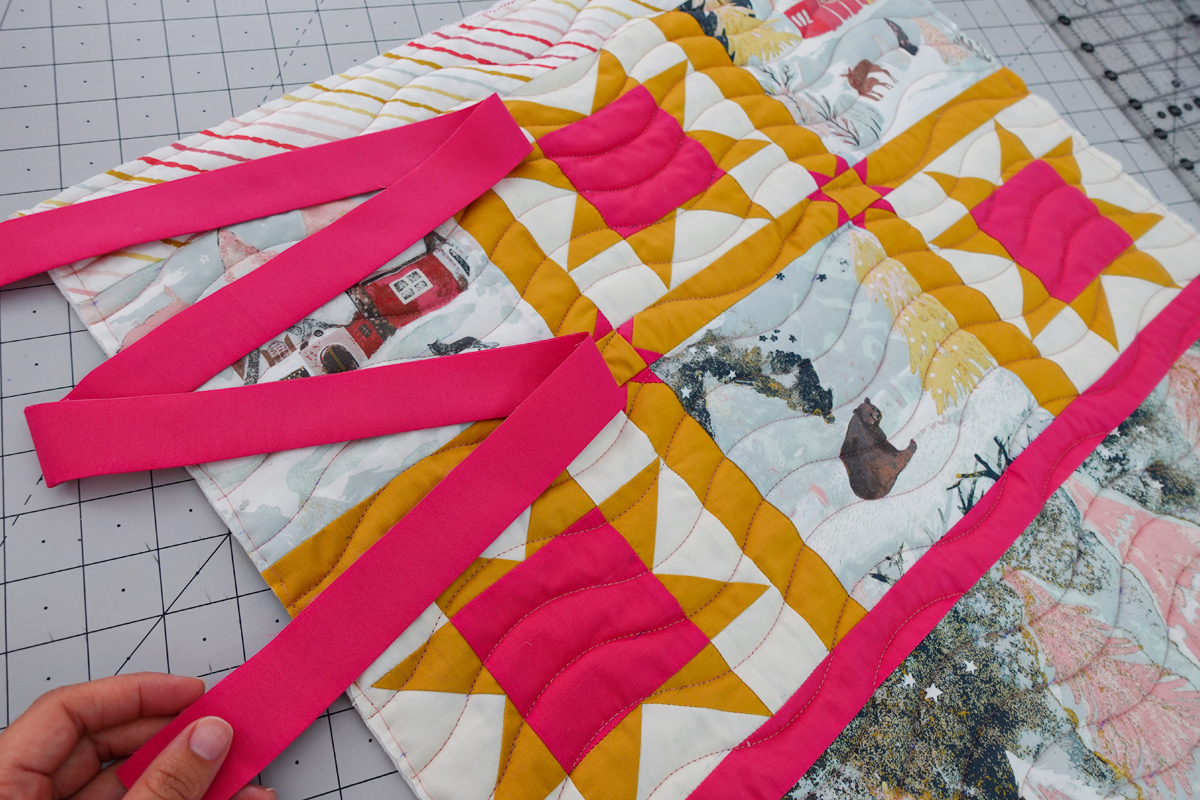
Cut four 2.5” x WOF strips of fabric B and sew together to make a continuous binding. Bind the wall hanging using your favorite binding technique.
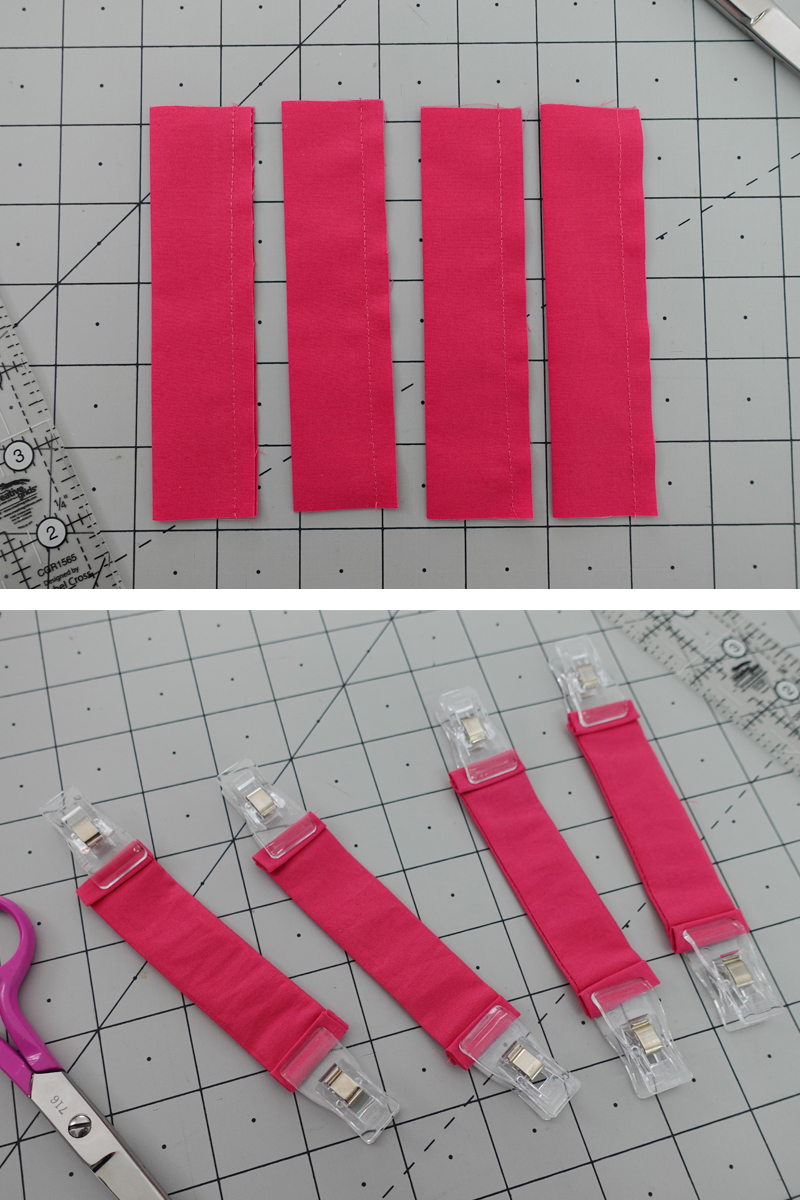
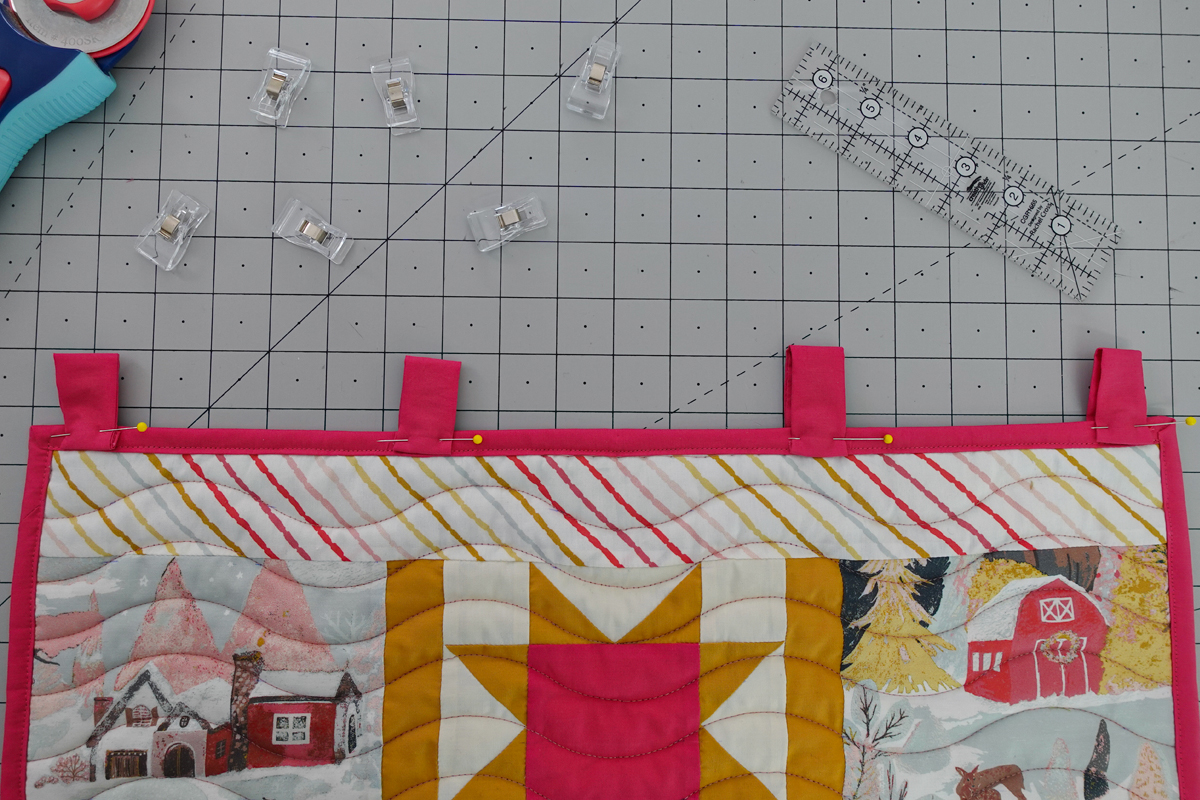
Using leftover fabric from the binding strip, cut four 5” inch pieces (they will measure 2.5” x 5”). Sew ¼” away from the edges and turn inside out. Fold in ¼” twice on each end and hold with clips.
Place them equally spaced at the top of the wall hanging with pins and sew backstitching at beginning and end to secure.
And we are finished! This bold wall hanging, accented with dainty details, comes together as a stunning centerpiece for our holiday décor. Plus, it’s the perfect project to dip your toes into the fun and creativity of ruler work quilting!
We wish you a wonderful holiday season!
AGF