Troubleshooting for Skipping Stitches
From the technical point of view we see occasional misconception when the machine does not sew correctly and statements such as “the machine will not pick up the stitch” ,” the timing is off” etc. might be true but can also be far from an actual machine problem. Remember quality machines are designed to stay in timing and balance, having a timing issue is rarely the case.
The Sewing Machine Needle
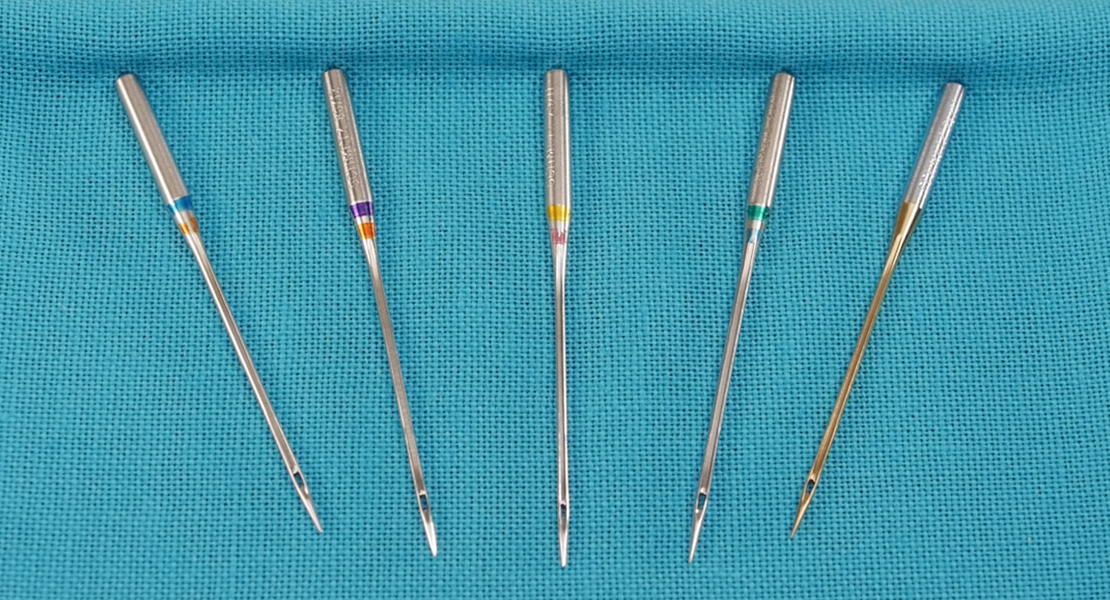
The needle is one of the most important parts of the proper sewing process, a selection of the wrong needle in respect to the thread, fabric and applications can cause major sewing issues.
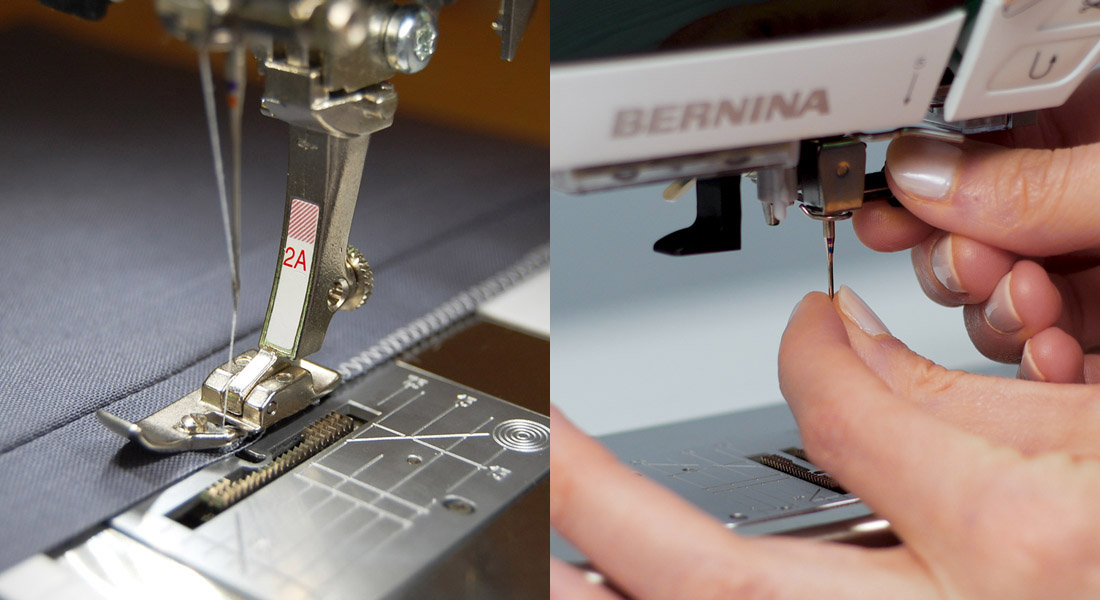
Let’s look at the different parts of the needle, household needles have a location flat on the shank that positions the needle in the correct proximity to the hook. The BERNINA needle clamp is designed in such a way that the needle cannot be inserted incorrectly. The needle shaft determines the size of the needle. The metric size of the needle (i.e. 120) is a direct correlation to the thickness of the shaft. To determine the thickness of the needle—take a 120 size needle for example—move the decimal point to the left by two. 120 = 1.2mm or 80 size needle = 0.8mm. In the front of the needle there is a long groove allowing the thread to flow freely. The scarf of the needle is in the back, facing the hook tip, allowing the hook tip to enter deeper into the loop that is formed in the back of the needle. Right below the scarf there is a short groove favoring the loop formation. The needle eye delivers the upper thread into the hook area. The needle point punctures the fabric.
Let’s visit some technical reasons why skipping stitches, thread fraying or breaking issues can occur outside from mechanical misalignments. In order to better understand what is happening under the hood (needle plate) we need to visit the basic loop formation that applies to all sewing machines.
From the technical point of view there are three basic mechanical timings that need to be correct in order to eliminate the issues listed earlier:
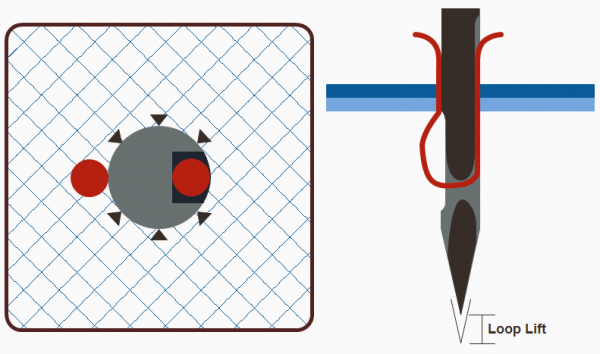
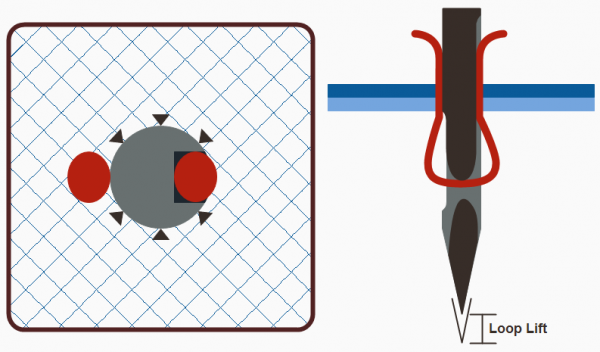
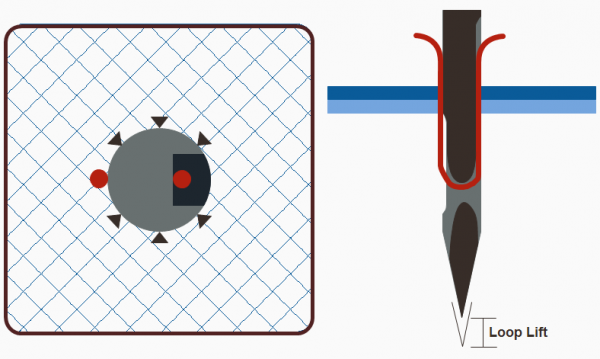
- Loop lift is the amount of upwards motion for the upper thread to form a loop behind the needle and for the hook tip to enter that loop to carry that loop all the way around the bobbin case.
- Needle height is the distance between the bottom parts of the hook tip in respect to the upper edge of the needle eye, this relation is important for the hook tip to catch the needle loop in any left/right needle positions.
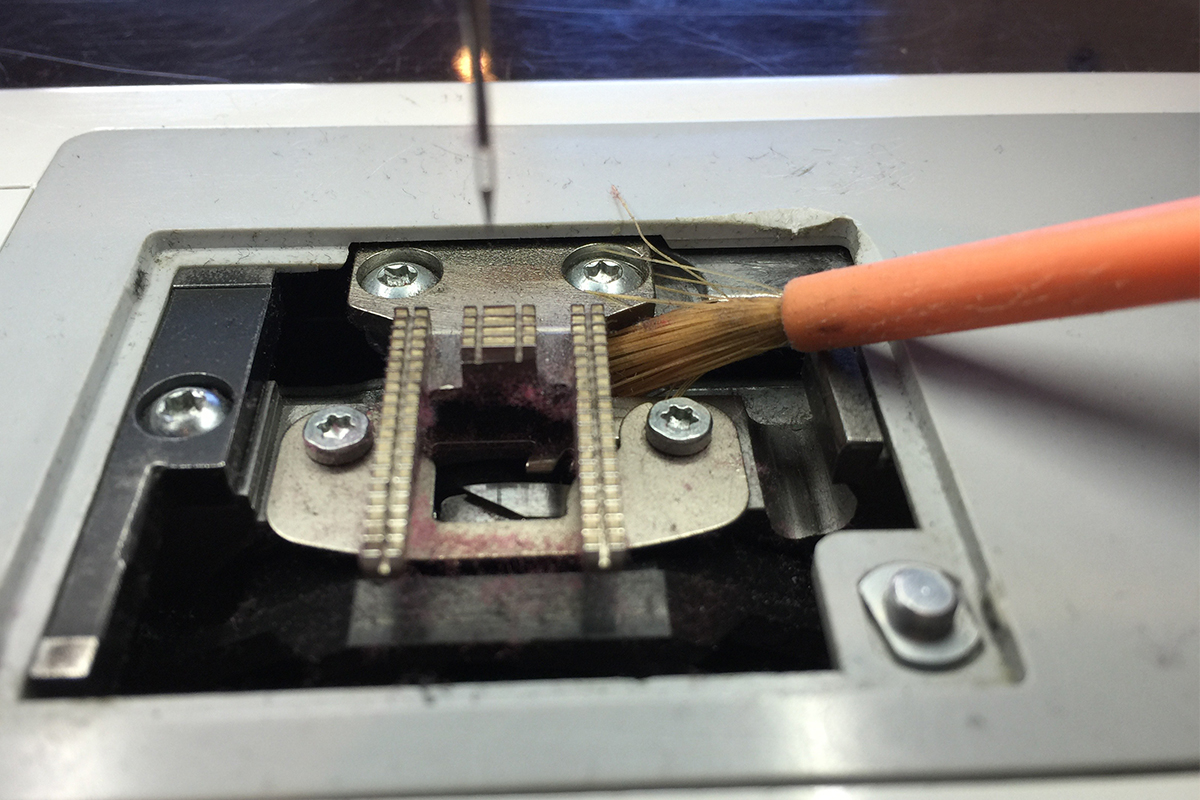
Hook/needle clearance the distance between the needle and the hook, in order for the hook tip to catch the loop and also to protect the hook/needle from contacting each other we hold a very tight distance.
In order to better understand how the upper with the lower threads connect we need to look at the basic loop formation
Loop Formation
The properly threaded needle penetrates the fabric, once the needle reaches the lowest point and the needle starts it’s upwards motion (loop lift) a loop is formed in the back of the needle. The loop is caused due to the design of the needle. In the backside of the needle, facing the hook tip, the needle thread is being jammed between the needle and the fabric. In the front font of the needle the thread can move freely within the long groove of the needle.
Loop Formation
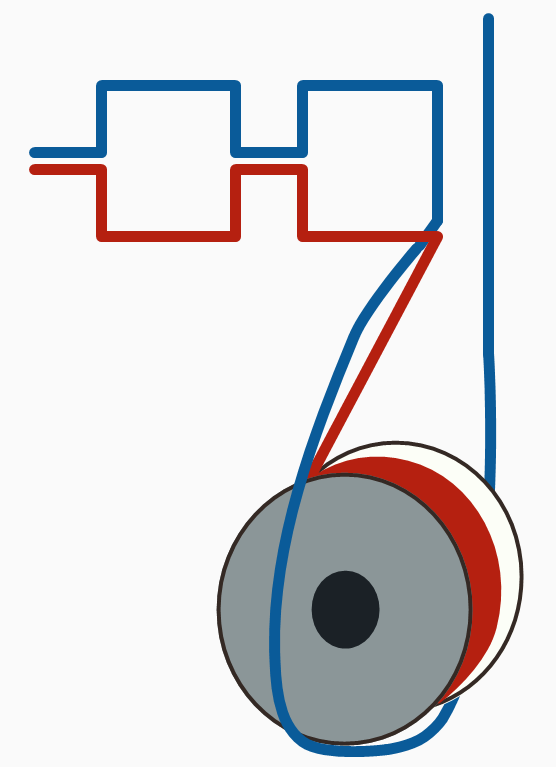
After the loop is formed in the back of the needle, how is the upper and lower thread being linked?
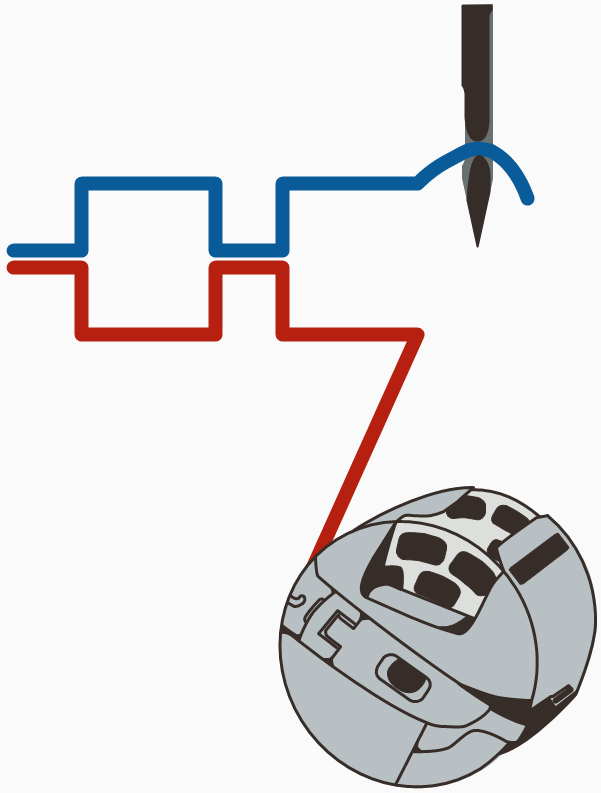
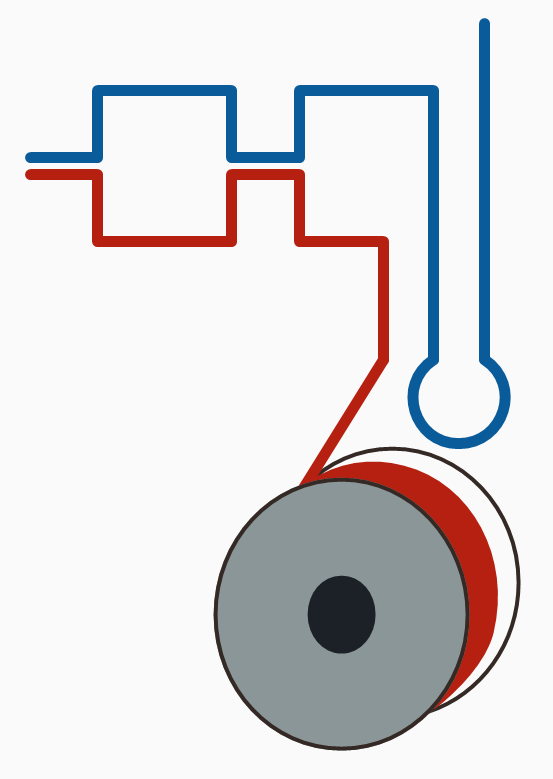
Initial state, in this case the upper thread is blue, the bobbin thread is red. The upper and lower threads are meeting roughly in the center of the fabric.
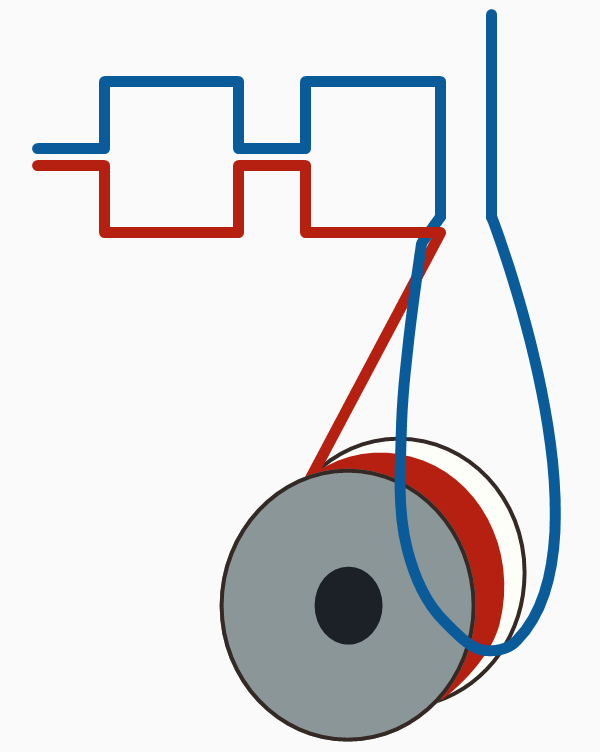
The upper thread is being lowered by the needle and after the reaching the lowest position the needle travels upwards (loop lift) thus a small loop is formed in the back of the needle.
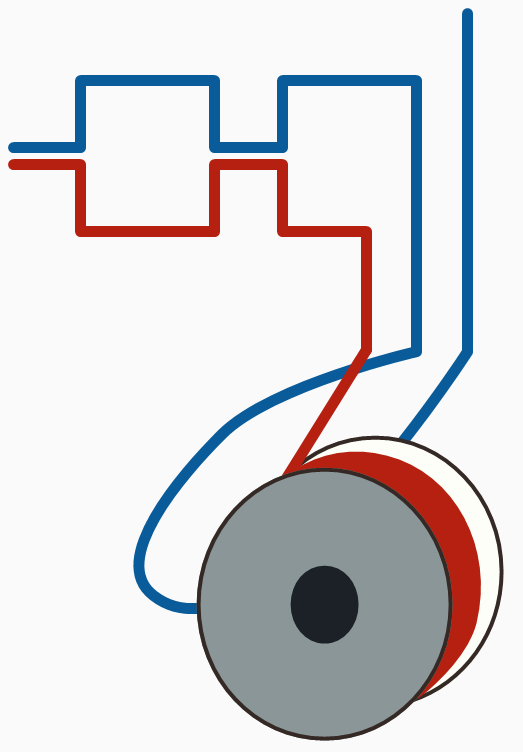
Once the loop is sufficient, the way the machines timed the hook tip (any hook system rotary, drop in, oscillation etc.) will enter the needle thread and guides the upper thread around the bobbin case
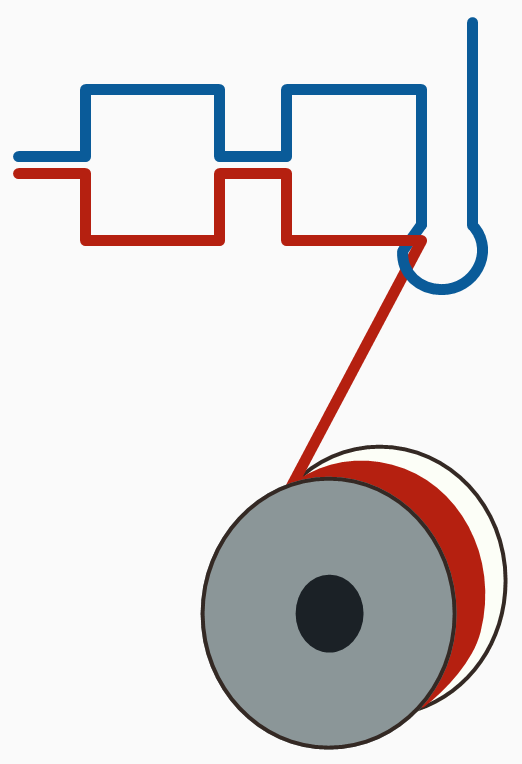
Once the hook guides the upper thread around the ½ of the bobbin case, the thread take up lever starts to pull up the upper thread.
The take up lever accelerates the upper thread as it is being whipped around the bobbin case
The upper thread is pulled against the bottom of the fabric. Then the feed dog takes over and tightens the newly formed stitch at the bottom and into the fabric. This process has to take place at every single stitch, regardless if the machine is running at 500 stitches or 5000 stitches per minutes.
Exceptions why the upper and lower threads are not connecting (skipping stitches/thread breakage)
What causes the loop not to form or to be picked up?
There are basically two reasons:
- There is no loop in the back of the needle for the hook tip to catch (most likely reason)
- The hook and the needle are not timed for the hook tip to catch the loop (least likely reason)
Example of a skipped stitch
Let’s look at the reason for not having good size loop in the back of the needle.
- The machine is not threaded correctly
- Simply re-thread the top and bottom of the machine according to the manual
Wrong needle size in respect to the thread size
- If the needle thread relations is off it directly affects the loop size in the back of the needle.
- Small needle large thread combination generates a loop in the front and the back of the needle with the tendency for the large loop in the front to flip to the back, thus the hook enters the front and the back part of the loop. This causes a major thread breakage.
Large needle small thread combination generates a very small loop, possibly not big enough for the hook tip to catch.
- Solution: Old rule of thumb to check for correct needle size verses thread size, thread the needle eye with the thread you want to use and let the needle hang on the thread, aligning the thread in a 45 degree angle the needle should slide on its own weight.
- Search for the thread/needle charts that are available on the internet
Bent needle
- Although there is a loop in the back of the needle, due to a bent needle the loop might be guided away from the hook tip. In addition a bent needle causes fabric feeding issues as well as misalignment in multi-directional patterns.
- Solution: Rule of thumb, always use a new needle when starting a new sewing project. Change the needle every 8 hours of sewing time during the course of the project.
Wrong needle size/ fabric relations
Solution: Refer to the needle packaging for the suggested fabric for the needle. Some BERNINA machines have a Creative Consultant built into the machine that is a guide for selecting the proper needle for the fabric.
Needles not inserted correctly
- A needle that is not pushed all the way up against the top stop causes skipping stitches, thread fraying, thread breakage in the far left or right needle penetration.
Solution: The needle must be pushed all the way up and properly secured by the needle clamp screw.
Fabric flagging
- Flagging of the fabric especially light weight and elastic type fabrics can cause a disturbance of the needle loop.
- A standard needle plate with a large stitch hole might not be able to support the light weight fabric.
- If a wrong foot, such as an applique foot is used, flagging cannot be prevented.
Solution
- Use the appropriate needle for the fabric (usually smaller, use a coated needle to reduce the friction between needle and the fabric)
- If possible select a needle plate with a smaller opening i.e. straight stitch plate if the sewing tasks permits
- Use a standard presser foot or even a straight stitch foot
- Stabilize the fabric with wash away stabilizer
- Adjust the presser foot pressure to hold down the fabric sufficiently
In summary, quality sewing machines are designed to stay in timing and balance, and only in rare instances do we see that machines are out of timing. If a machine skips stitches, frays and breaks thread, has a bad tension etc. remember 80% of the time the issues is not caused by the machine. Most sewing and embroidery issues can be resolved by simply consider the three points: TNT Threading, Needle and Tensions.
What you might also like
11 comments on “Troubleshooting for Skipping Stitches”
-
-
Quality of thread is also a consideration and type of thread compared to your fabric. Mage sure that the thread does not have knots, slubs, or other irregularities along it, and that it is not leftover from a previous generation. Thread can become more fragile with age.
-
-
I would love to share this article (or a link to this article on our website ) The Plano Tx chapter of the American Sewing Guild. http://www.planoasgsews.org
Thanks!
Markita (webmaster) -
I just recently had this issue and after many different needles, feet and pressure the problem was solved by microtex needle, pressure of 75 and using foot #13; I was inserting a zipper on a microfiber winter jacket so needed the zipper foot but had to modify the stitching lines in order to prevent all the skipped stitches and foot 13 was the only one that was successful.
-
Im working on a friends 440 qe and it suddenly stopped making good stitches on the top. The tension seems balanced when sewing a bias. The bottom looks good. The top will have three or four good stitches then it looks smooth with no stitch definition. I’ve cleaned, oiled and changed needles and thread, rethreaded it several times. What is going on?
-
I have done all the recommended changes: new needle, correct needle, good thread, correct tension. Still have skipped stitches. How do I check and correct timing?
-
In order to check the timing of you sewing machine, special timing tools are needed. If the machine needs to be timed some machine covers have to come off. We recommend to take your sewing machine to an authorized dealer to perform these tasks.
Regards,
Hans
-
-
I have a virtuosa153, that was serviced less than a year ago. I have done all of the above steps, repeatedly, and continue to experience skipping and splitting/breaking of thread. I am desperate to get it working but due to current quarantining, taking it for service is not an option. Any advice would be appreciated.
-
Please provide the following information: Type and size of needle, type and size of the upper and lower thread, presser foot used, fabric used and type of stitching.
Please check if you can sew on the far needle position left and right using a straight stitch.
Regards,
Hans -
#1 pressers foot, gutterman mara 100, plain quilting cottons for stitch testing(had been sewing masks with no problem, then-problems started), #12 sharp needle-changed/fresh several times.
I never thought of changing needle position, as I have just been straight stitching. Far right-zero stitching – no pick up at all. Far left- success! I’m getting a nice even stitch, did several lines wth no skipping or thread breakage. Not perfect solution, this allows me use use machine until I can get it to a tech. Thank you for the suggestion! -
It appears you have done everything we suggested in the article. Usually, if a machine is skipping stitches while moving the needle position from left to right or right to left there is an issue with the timing between the hook and the needle or the needle height is off. If you can stay and sew in the needle position that does not give you skipping stitches then I would suggest to keep on sewing until you schedule a service appointment with your BERNINA dealer.
Regards,
Hans
Leave a Reply
You must be logged in to post a comment.






After double checking the needle size, placement, etc. as described above, my top thread is STILL too tight and continues to break. I have slowing moved the top tension all the way to “1” and continue to have this problem. Please advise.