How to Sew a Kids Busy Book, Part 3: My Family
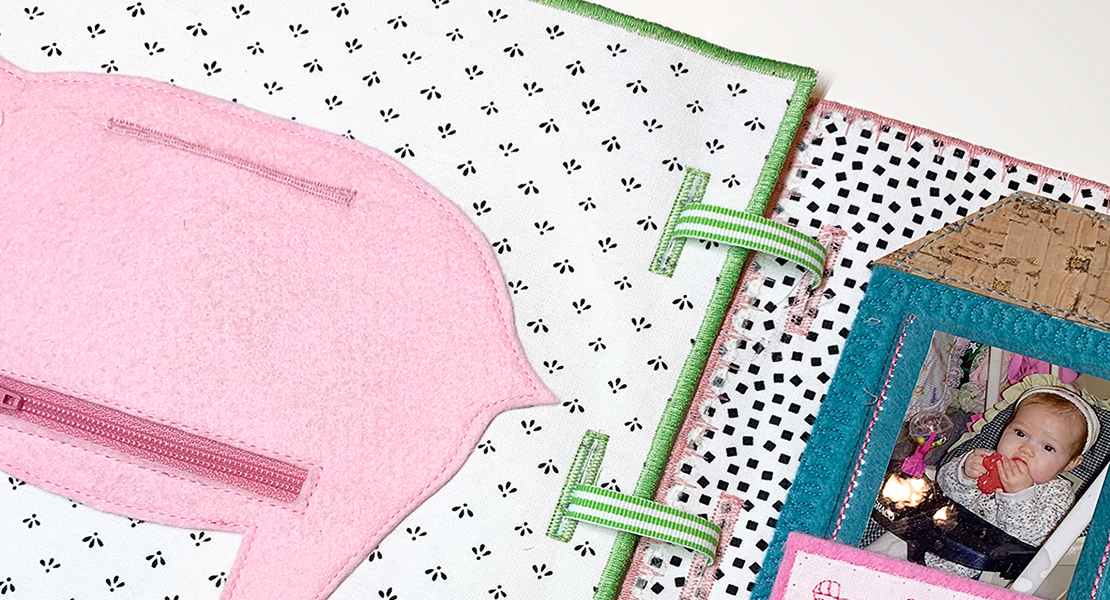
Welcome to Month 3 of our BERNINA Busy Book series. If you missed Month 1 & 2, don’t fret! I will include the necessary materials, fabric information, and background page instructions at the beginning of every post so you can jump right in. But if you want to go back to the beginning, you can find the links to the previous pages at the end of this post. We are starting this month with a page called My Family. We will create vinyl windows that allow photos to be changed throughout the year. You can switch out the photos to create a My Friends page or a My Vacation page. In this tutorial, you will learn how to sew on vinyl using the Non-Stick Presser Foot #52/52C/52D. This foot is a zig zag foot that glides easily over vinyl. You will learn how to use decorative stitches, and you will learn how to use Combi-mode on the machine.
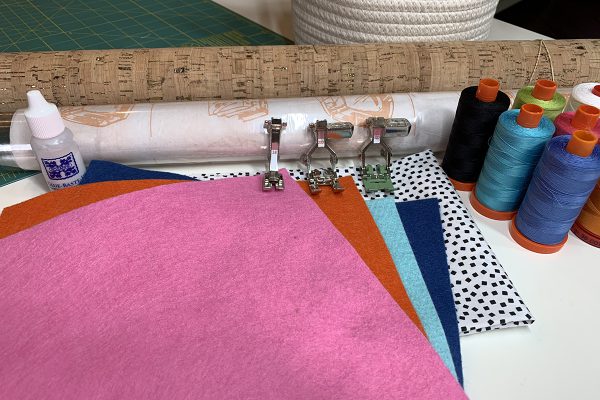
Materials for Every Page
- 10” x 10” background fabric (purchase 3 yards if making all page backgrounds the same)
- 10” x 10” OESD Ultra Clean and Tear Fusible Stabilizer
- 50 weight thread
- Rotary cutter & ruler
- Rotary cutting mat
- Scissors
- Iron and pressing mat
- Roxanne Glue-Baste-It or similar glue stick/pen
- Temporary fabric marker
- Pins
Additional Materials for My Family Page
- 8 1/2” x 8” blue felt for house
- 2” x 4” and 8 1/2” x 1 1/4” cork for door and roof
- 12” square piece of light to medium weight clear vinyl
- Clover Wonder Clips, preferably Jumbo size
- Various colors of 50 weight thread
- Optional: 1/4” Stitch Witchery
- Optional Name Tags: 4” x 10” white fabric, various colors of felt, and 3/4” hook and loop tape roll
BERNINA Machine and Feet
- BERNINA 590 E
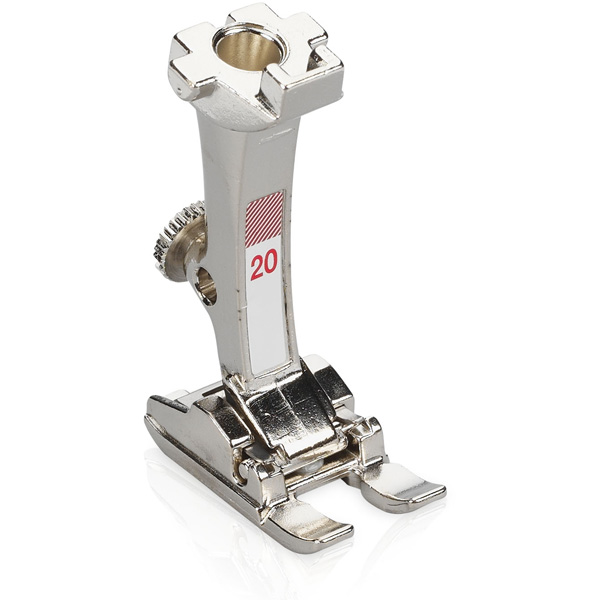
- Open Embroidery Foot #20/20C/20D
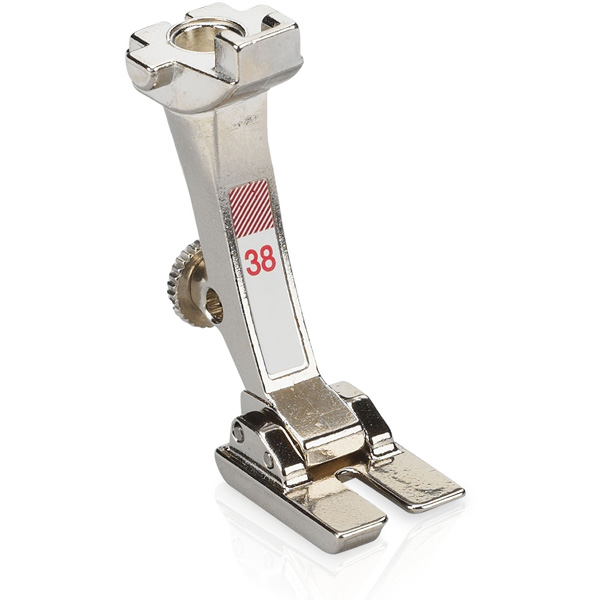
- Piping Foot #38
- Non-Stick Foot #52/52C/52D
Choosing Background Fabric for Each Page
There are a few options when choosing the background fabric for each busy book page. The simplest option is to find one fabric for all the pages. Purchase 3 yards so you have plenty if you decide to use it for binding or you make additional pages in the future. Another option is to purchase 10” square pre-cut fabrics (sometimes called layer cake). This precut set comes with 42 coordinating pieces of 10” x 10” fabrics, usually from the same fabric collection. Your third option is to buy coordinating fat quarters. Around 10 will be plenty, as you can cut at least 2 pages from each fat quarter. I purchased black and white fat quarters for my busy book. Lastly, you can choose fabric as you go. If deciding everything up front is not your style, select fabric for one page at a time.
Choosing Felt for Each Page
If you have been sewing and crafting awhile, you probably have felt laying around. Collect your felt and get ready to use them! If you need more felt or don’t have any, browse the felt selection on etsy.com. I found some nice felt color collections in a wool/rayon blend that is resistant to pilling and pulling, easy to cut, and affordable. Because the blend didn’t stretch as much as other felt, it was much easier to sew.
Background Page
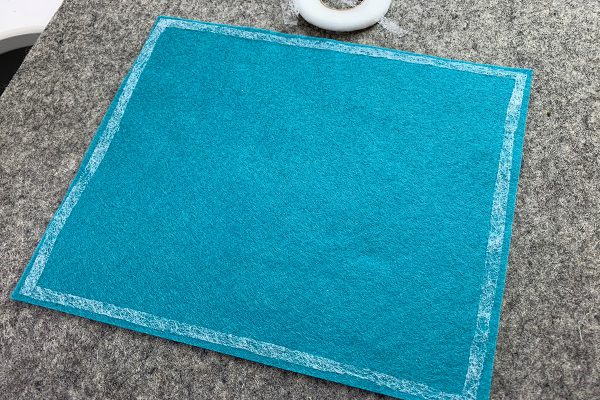
Press your 10” x 10” fusible stabilizer to your background fabric with a dry iron for a few seconds until the fabric adheres to the stabilizer. I am using OESD Clean and Tear Fusible Stabilizer. One side of each page will have buttonholes to insert ribbon or binder rings. Add a strip of temporary adhesive tape down the left or right side, depending which way the page will face. The tape will remind you to leave this area clear of embellishments.
House
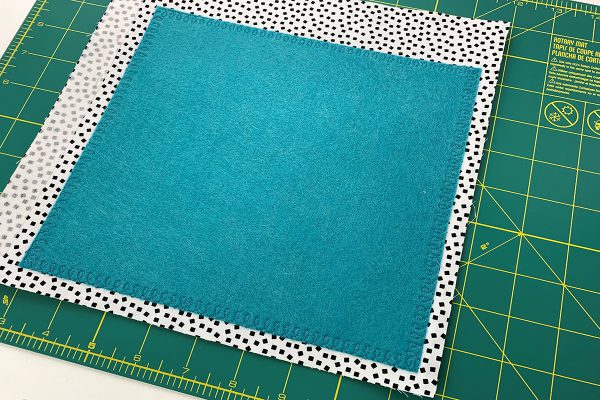
Place the 8 1/2” x 8” blue felt onto your background fabric. You can pin in place or use a product called Stitch Witchery. I am going to use Stitch Witchery to ensure the felt doesn’t slightly shift while sewing. Place strips of the fusible along the edges. Steam in place so that the fusible partially melts onto the felt. Do not touch the fusible with your iron or you will have a sticky mess.
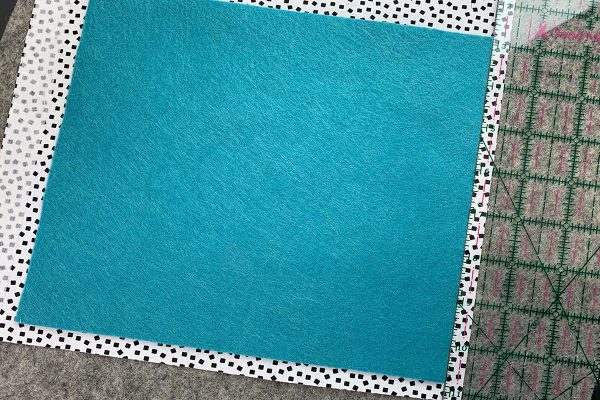
Turn over the felt and place onto your background page with the longer side horizontal. Align the felt about 3/8” from the bottom edge and right edge. Press both sides to fuse the felt onto the fabric. Make sure you adjust the iron temperature to the felt material. My felt is a wool/rayon blend and medium heat worked fine.
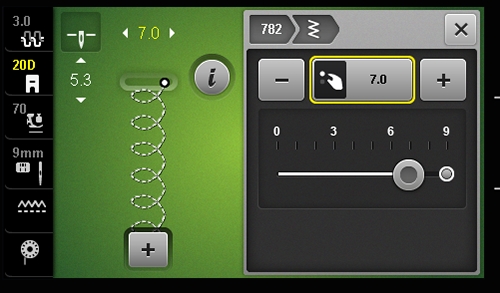
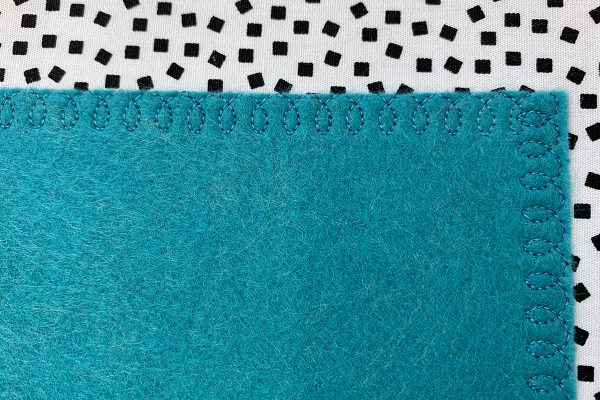
Attach Open Embroidery foot #20/20C/20D. Thread the machine with a color that matches your felt. Go into your Decorative Stitches tab on the machine. Select Folder 701 and scroll down to Stitch #782. Change the stitch width to 7 mm. Make sure Needle Stop Up/Down function is set to stop in the down position.
Securing Stitches on Machine
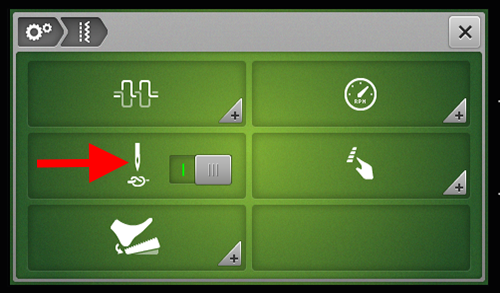
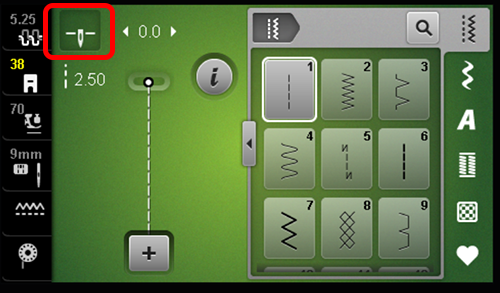
When using decorative stitches, I like to program my machine’s stitch Securing Functions. There are two places to secure with stitching; one secures stitches at the start of sewing and the other secures stitches at the end. Go into the Setup Program and select Sewing Settings. Check your Securing Stitches icon (needle). If you see a red circle the function is off. If you see a green line the function is on. Keep this on so when you start sewing, the machine will automatically sew securing stitches.
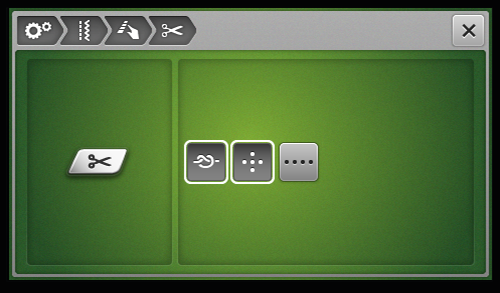
Now, on the same screen, touch the Program Buttons and Icons icon (the pointing hand). This will take you to another screen with 5 icons. Touch the Thread Cut icon (scissors). If nothing is outlined, the machine will cut threads when the Thread Cutter button is pressed. You can program securing stitches before the thread is cut by selecting the Automatic Securing icon (the knot icon). You have the option to secure stitching in place or in close succession. Now, when I press the Thread Cutter button on the machine at end of sewing, the machine will secure stitches and cut threads.
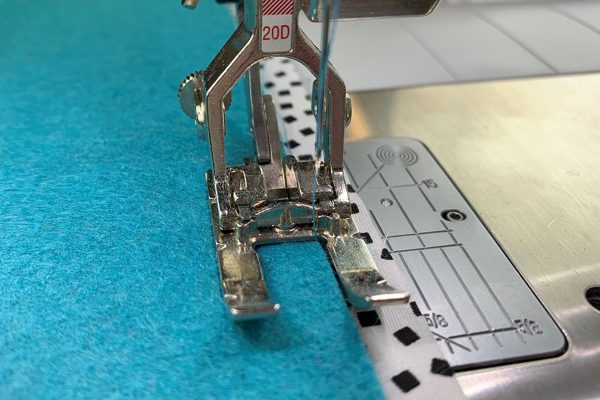
Now, let’s sew on the house! Place felt up against the inside right toe.
Sew. Stop about 1/4” from the corner and press Pattern End button on the machine. The machine will stop sewing at the end of the stitch pattern. With your Free Hand System, lift the foot, turn your fabric to sew the next edge and check your needle placement. Is the felt butted up against the inside, right toe? If not, lift the needle and adjust the felt. A small adjustment will not be noticeable, especially since we are using matching thread.
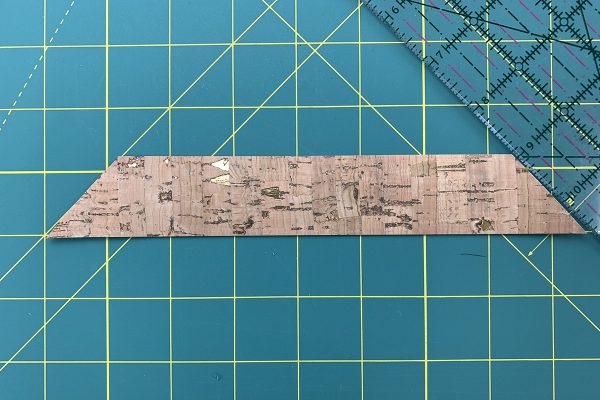
Find your 8 1/2” x 1 1/4” cork fabric. Trim the short ends at 45 degree angles.
Place the cork strip on top of the blue house to form the roof. Hold in place with Wonder Clips or use Stitch Witchery. I wanted to see how the fusible performed on cork fabric so I used Stitch Witchery. It worked great!
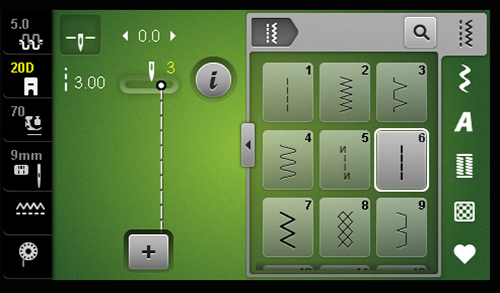
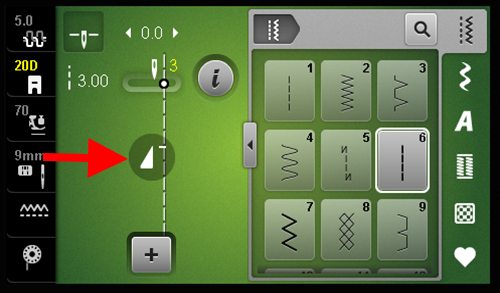
Select Triple Straight Stitch #6 in your Practical Stitches tab. Move needle position to 3.
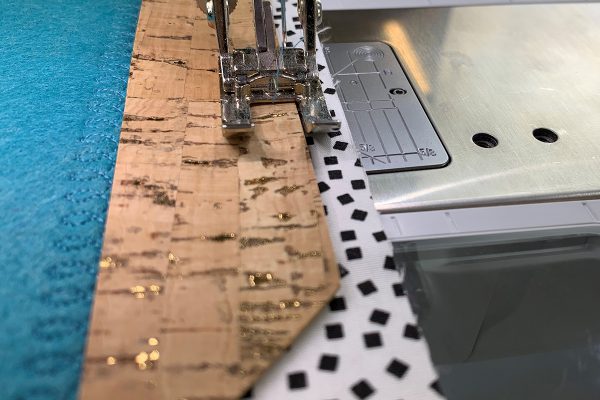
Line up cork against the inside right toe and sew in place with same color thread used for the house.
When you are close to the corner, stop and check needle placement. Decide if you want to make one more triple stitch. If not, turn your fabric and continue sewing. If you are not sure where you are in the triple stitch pattern, you can always check your machine screen. If the Pattern Begin icon is on the screen, you are in the middle of the stitch pattern. Press it if you want to start at beginning of stitch.
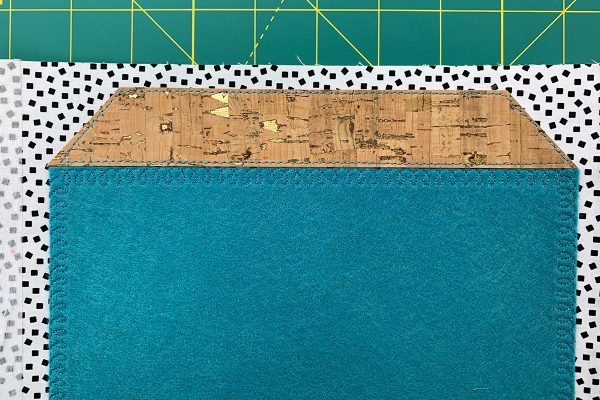
Continue sewing around all sides.
Door
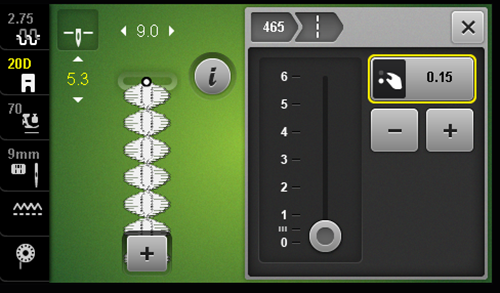
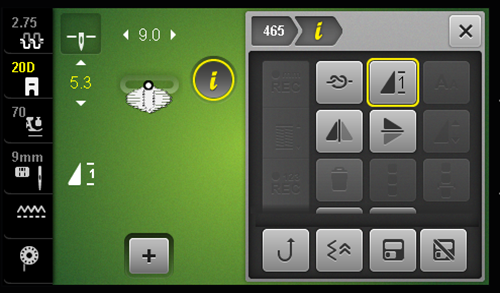
Find your 2” x 4” piece of cork fabric. Go into the Decorative Stitches tab. Select Folder 401. Select stitch #465 by scrolling or using the search function. Change stitch pattern length to 5.3 mm. Notice the stitch length is .15 mm. One number is for the stitch pattern length and the other is stitch length.
Go into the Information menu and select Pattern Repeat of 1.
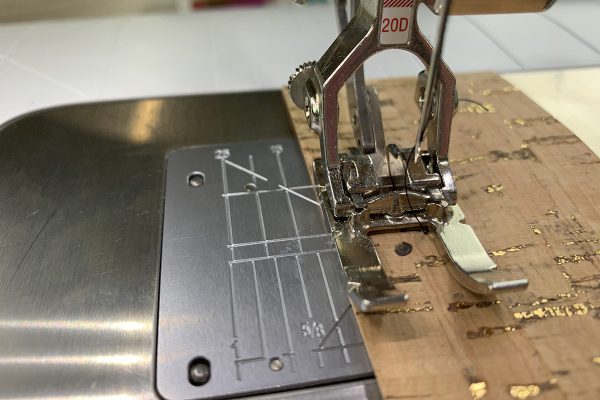
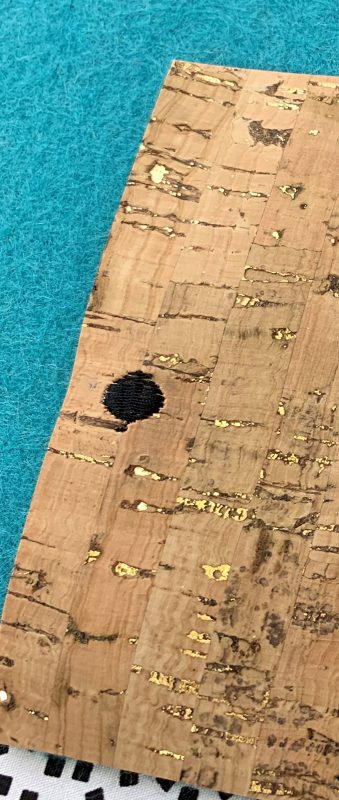
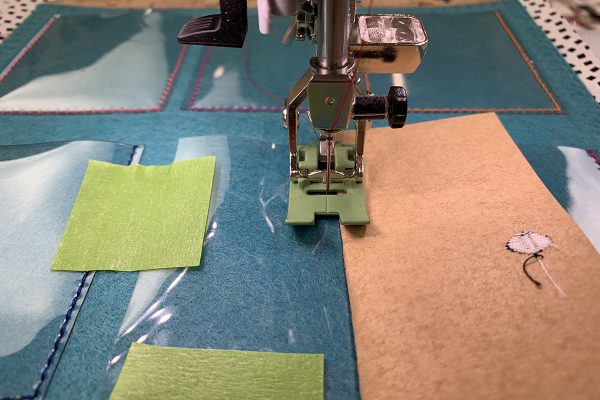
Mark an appropriate placement for the doorknob with a temporary marker. With the Open Embroidery Foot #20/20C/20D and black thread, place the marked spot under the foot and stitch out the doorknob.
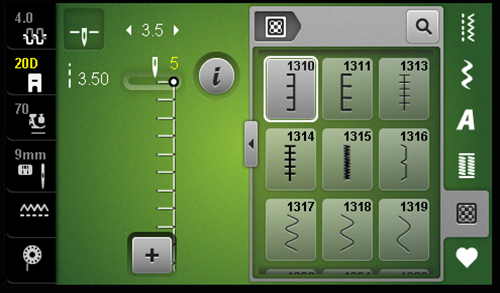
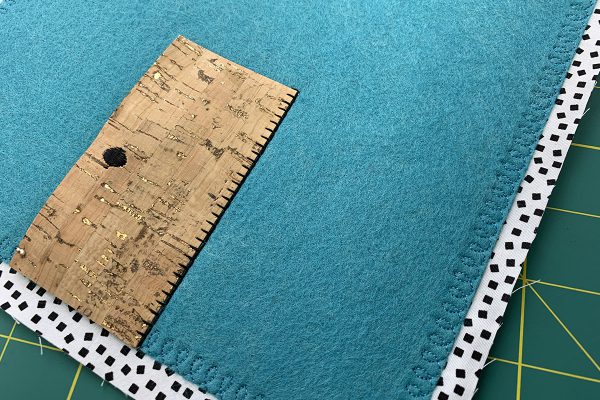
On the felt house, mark the center at the bottom edge. Center the door on this mark and secure with tape. Select the Quilting Stitches tab and select stitch #1310 which is a blanket stitch. Move needle position to 5.
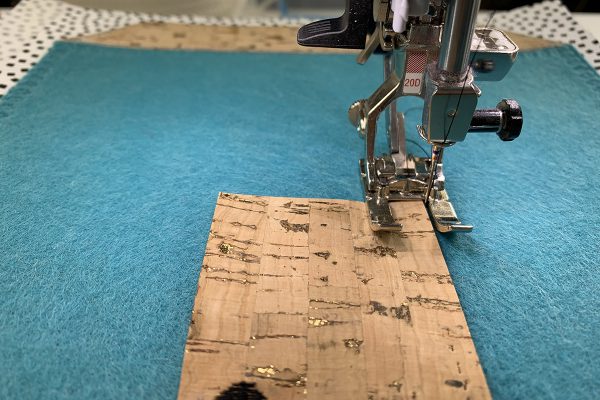
Place the cork fabric up against the inside right toe. Lower needle so that it falls just to the right of cork, but not in cork. The needle should land in the felt. If you look closely, there is a notch in the foot where the needle falls when in needle position 5. This allows the vertical part of the blanket stitch to land right next to the cork without penetrating the cork.
Sew down the right side of door until you are almost to the end. Hit Pattern End button to complete the last stitch pattern.
Windows
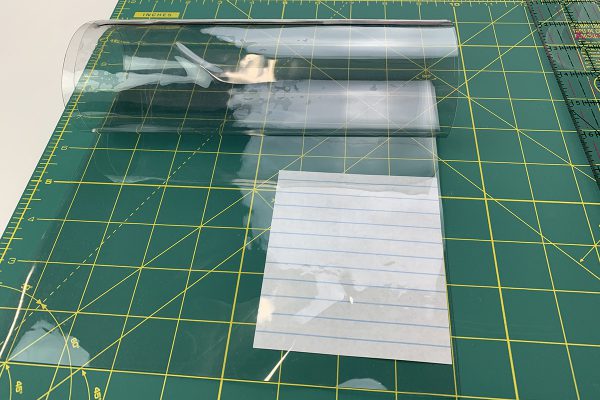
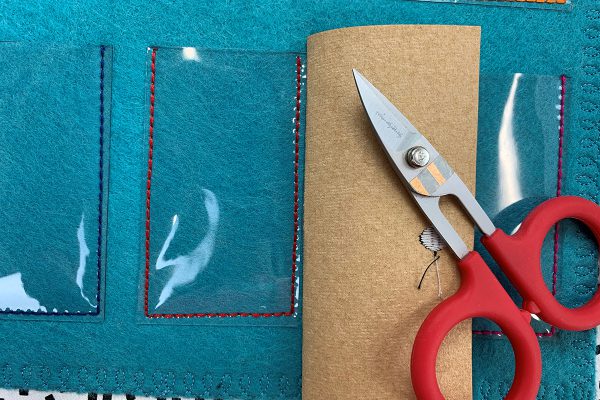
Most likely, the vinyl will come with a sheet liner. Keep this attached to make cutting the vinyl easier. If there is no sheet liner, add your own. I used plain paper. This makes cutting clear vinyl so much easier and less frustrating.
Cut vinyl to the following sizes:
(4) 2 1/2” x 3”
(1) 2” x 3”
(1) 1 3/4” x 3”
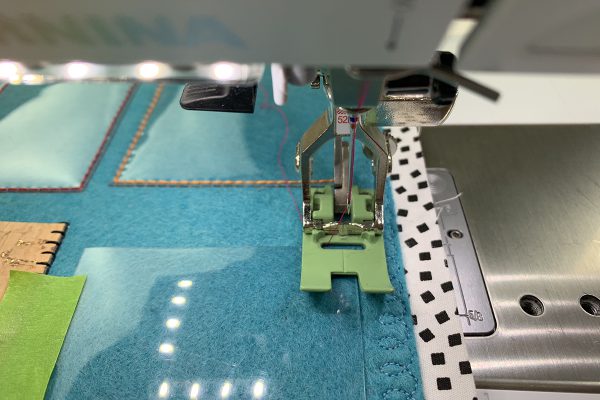
Let’s sew on vinyl! There are two important questions to ask when sewing vinyl: (1) What foot should I use? (2) Which needle is best? Non-stick Foot #52/52C/52D (zig zag foot) is designed for stitching on difficult materials. The special coating helps the foot to slide over “sticky” materials. Because vinyl does not “heal”, I recommend Microtex needle 70 or 80. Microtex needles have fine, sharp points so when the vinyl is punctured, the hole is minimal. If you use a thick Jeans needle, you might be able to see holes.
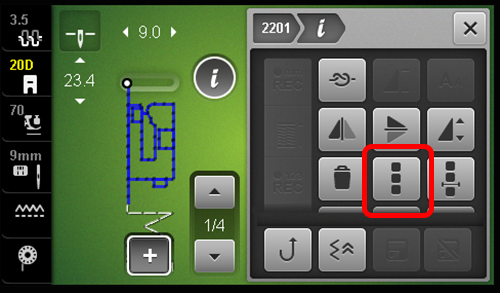
Attach Non-Stick Foot #52/52C/52D and Microtex needle 70 or 80. Go into the Quilting Stitches tab. Select Stitch #1302. This is a straight stitch with a stitch length of 3 mm. Go into the Information menu. You will see an icon with 3 rows of dashed lines. This changes a single stitch to a triple stitch and is an option for most stitches. Select the Triple Stitch icon. Those of you familiar with your machine, probably realize that stitch #6 in the Practical Stitches tab is a straight triple stitch that is 3 mm! I wanted to show you how to use the Triple Stitch icon so we made our own J! (The Triple Stitch Function is available on BERNINA 5 Series machines.)
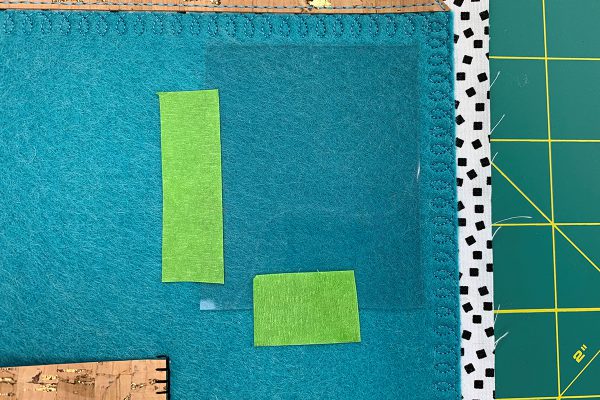
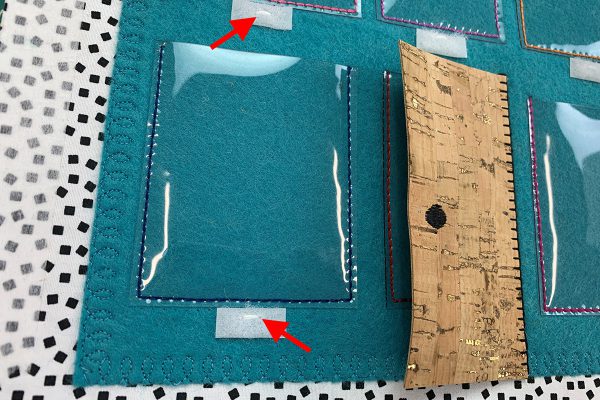
We are going to start with the top row of windows. Take one of the vinyl pieces 2 1/2” x 3”. Line it up on the top right corner of the felt house so that it is 3/8” from the top edge of the felt house and 3/8” from the side edge of the felt house. Add temporary tape to secure the vinyl. I am using painter’s tape. Remember, no pins! The vinyl will not heal from pin punctures.
Line up the vinyl against the inside, right toe. Place the vinyl so that the top is visible through the slot in the foot. I know it is hard to see since the vinyl is clear. It might help to place a piece of colored tape above the vinyl so you know where to start.
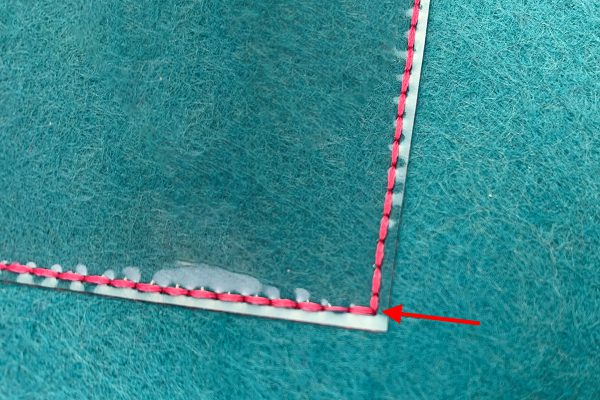
Start stitching down the right side, across the bottom, and up the left side. Do not stitch the top! When you near a corner, slow down and stop on the last stitch of the pattern (the complete stitch pattern goes forward, backward, and then forward again). Make sure your Needle Stop Up/Down icon is set in the down position, and use your Free Hand System to check the needle placement. When you turn the corner, if the vinyl is up against the inside right toe, you can continue sewing. If not, sew one more triple stitch. If you don’t need a complete stitch length of 3 mm, use the Lower Multi-function knob to shorten the stitch length. I found 1.8 mm got me to where I needed to be when I was just a bit short. Remember to go back to 3 mm before continuing the next line of stitching.
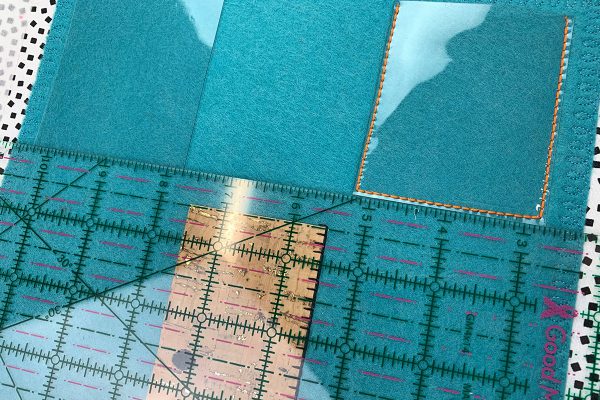
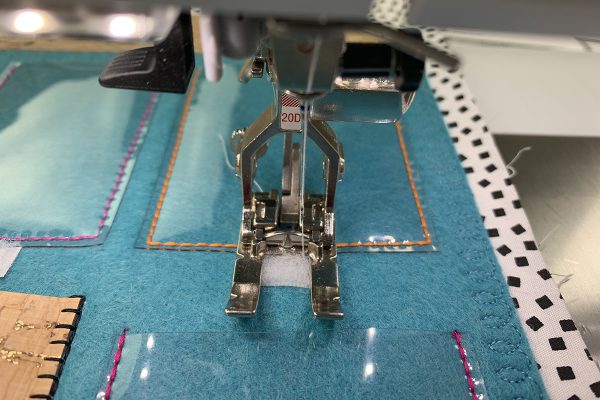
Add a different color thread to the top. Line up the same size vinyl window on the top left corner using a ruler. Use tape to secure in place making sure vinyl is 3/8” away from edges of felt house. Stitch on slowing down at the corners.
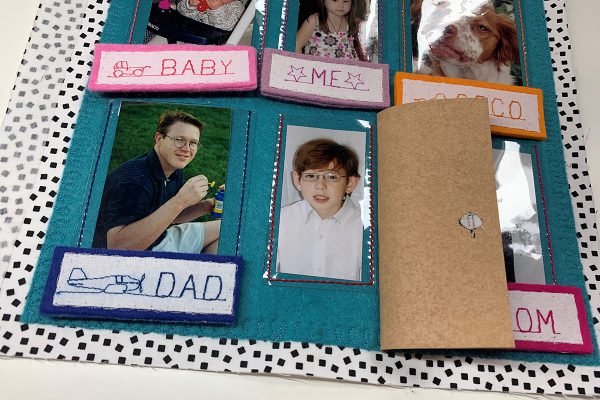
The 2” x 3” vinyl window goes in the middle of the top row. The other two 2 1/2” x 3” vinyl windows go on either side of the door. Line up these two windows 3/8” from the side edge of the felt house and 3/4” from the bottom edge of felt house. Use tape to secure. Sew on in the same manner using different color threads.
Stitch the1 3/4” x 3” vinyl inside the door. Cork fabric is very pliable so don’t worry about flattening it. I lined up the inside right toe with the edge of the cork.
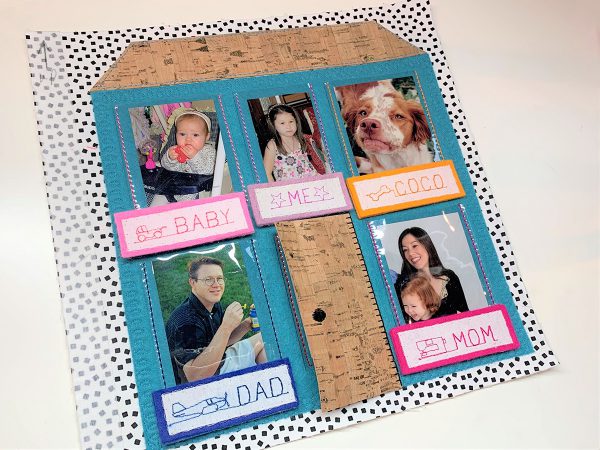
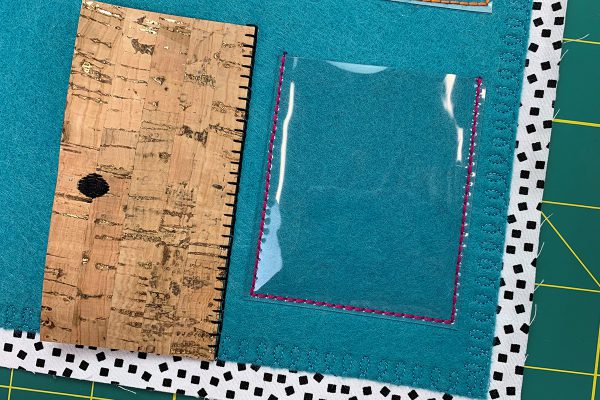
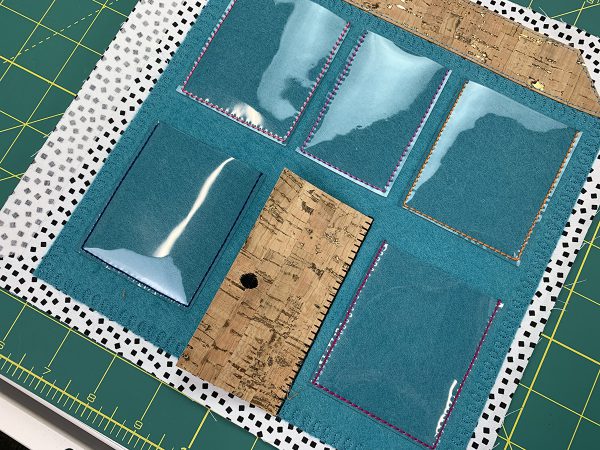
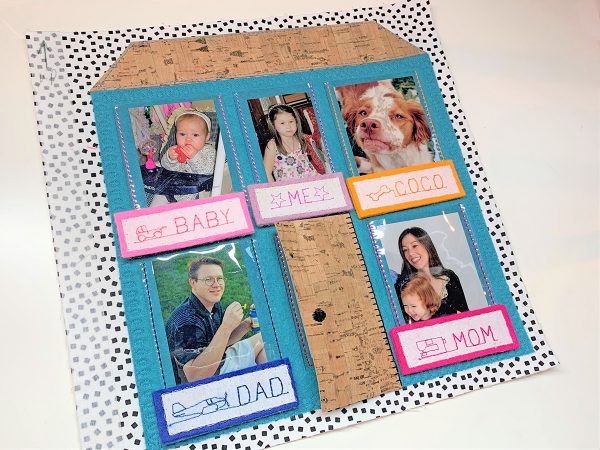
This is what you should have done so far. It’s fun and colorful!
You can call it a day (a very fun and productive one!) and put your family photos in the windows or you can take it one step further and add removable name tags! For the name tags, we will learn how to use Combi-mode.
Name Tags
Cut 5 pieces of 3/4” hook and loop tape about 3/8” wide. I am using the loop side of the tape. Place one centered under each window and glue to secure. I did not place one behind the door. Attach Open Embroidery Foot #20/20C/20D and white thread at top and bobbin. Go into Practical Stitches tab and select Stitch #25. This is a tackdown stitch. Place loop side of tape lengthwise and centered in the opening of the foot. Press the Start/Stop button on the machine. The machine will automatically stop at the end of the tackdown stitch. Do this for all 5 velcro pieces.
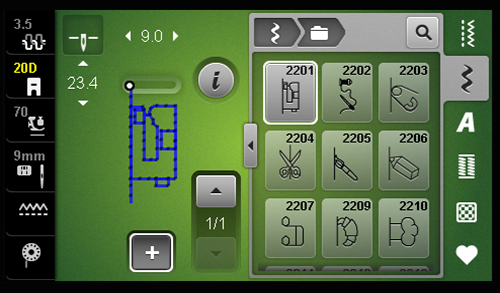
We are going to use Combi-mode to create the names. Touch the Combi-mode icon (plus sign) on the machine screen. Select Decorative Stitches tab. Look through Folders 901 and 2201 to find images to go along with the names. For my first name tag, I have chosen the sewing machine in Folder 2201.
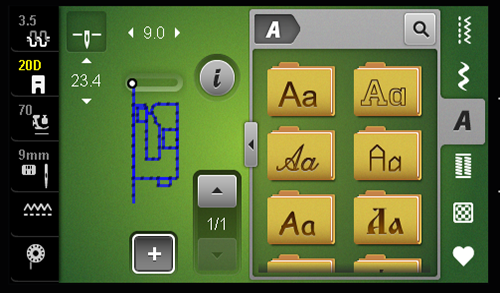
Next, select the Alphabets tab and select the Block Alphabet folder.
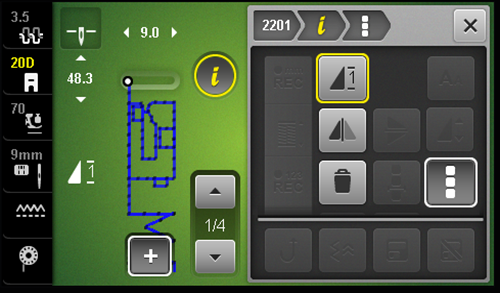
Scroll down or use the transition arrow to spell out MOM. Open the Information menu. Select the Editing the Complete Combination icon (3 squares).
You will see a screen with the Pattern Repeat icon. Select Pattern Repeat 1. Now, stitching will automatically stop after the last letter. Another way to end sewing is to press the Pattern End button on the machine when you get to the last letter. But, I found this way not as effective because I didn’t always remember to press the Pattern End button!
Notice the machine screen above shows 48.3 mm for the stitch pattern length of my MOM name tag. This measurement is for one pattern repeat. You can use this measurement to center any name tag or label.
When you exit the Information menu, the measurement goes back to displaying each individual stitch pattern length. The first measurement is for the sewing machine, the second is for the letter M, and so on.
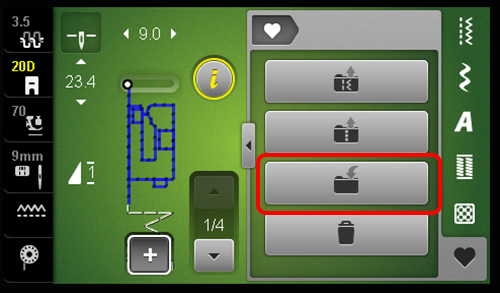
Go into your Personal Memory tab and save your stitch pattern. Do the same for 4 more name tags.
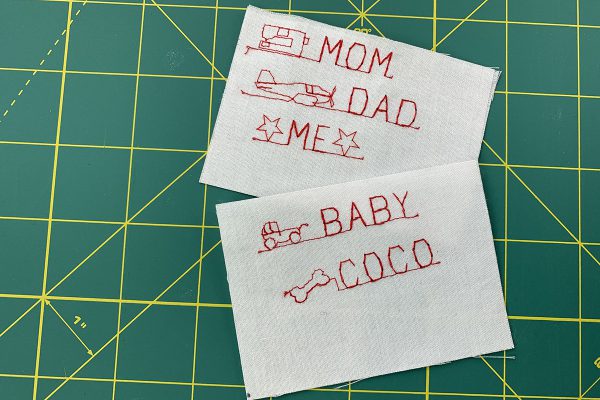
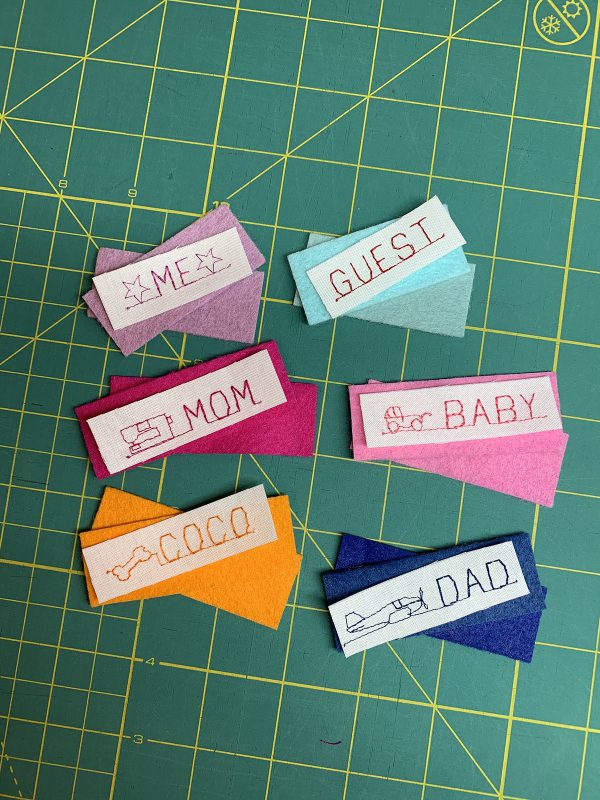
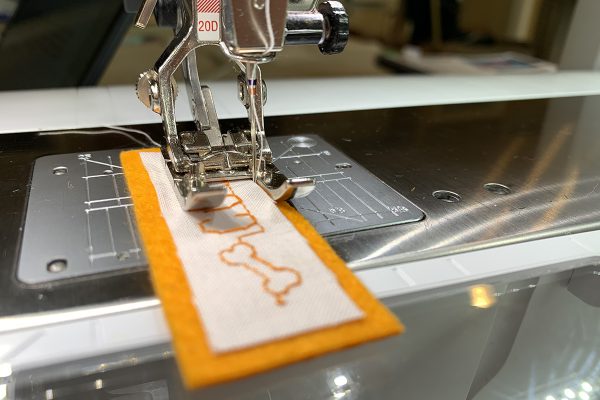
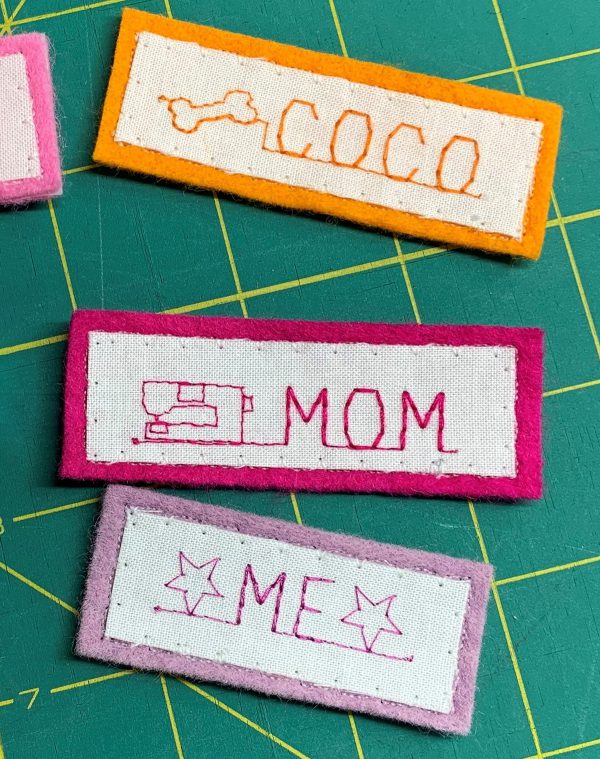
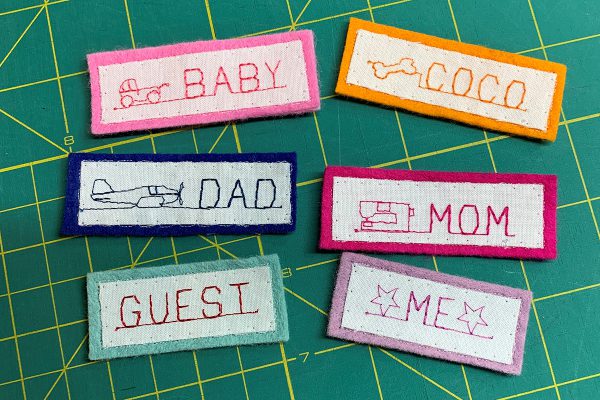
Find some scrap fabric and fuse stabilizer to it. With the Open Embroidery Foot #20/20C/20D attached, stitch out your saved name tags. You need to be in Combi-mode to find them since that is where you saved them. I am happy with how these look so I am going to keep what I have saved. Here are my practice pieces:
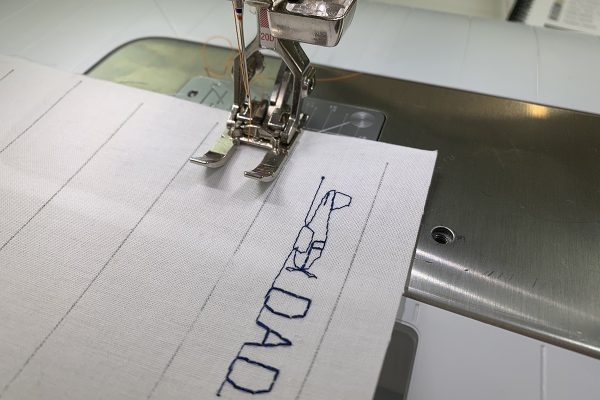
Fuse a 4” x 10” white fabric with Ultra Clean & Tear Fusible stabilizer. With a temporary marker, draw 5 lines across fabric 1” apart. Align the first marked line with the right side of the foot. Press the Start/Stop button to stitch out. Remember you saved the stitch pattern with a Pattern Repeat of 1, so the machine will automatically stop stitching after one complete pattern. Continue with the other 4 saved name tags. I changed thread color for each name tag to match the thread color of the window.
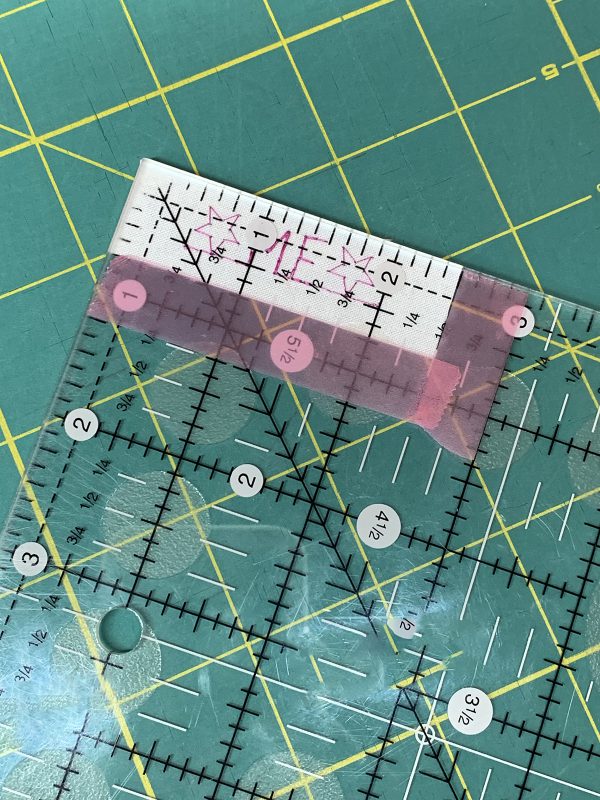
Cut out name tags on the marked lines. Then, cut them down to 2 1/2” x 3/4”. Make one tag 2” x 3/4” for the smaller middle window. When I am cutting out anything small that needs to be centered, I find it very helpful to apply highlighter tape to my acrylic ruler at the exact measurements.
Cut out felt in 5 different colors that are 2 3/4” x 1”. You will need 2 of each color. Make one set 2 1/4” x 1” for the smaller middle window. I matched my felt to the thread colors I used for the name tags.
Attach BERNINA Piping Foot #38. This foot is sometimes called the “uneven foot” because the right side of the foot is higher than the left side, which makes it great for uneven sewing surfaces. Piping, thick trims, and hook and loop tape are easy to sew with this foot. Select Needle Stop Up/Down icon so that needle stops in the down position. Now, when you stop to turn corners, the needle will be in the hook and loop tape.
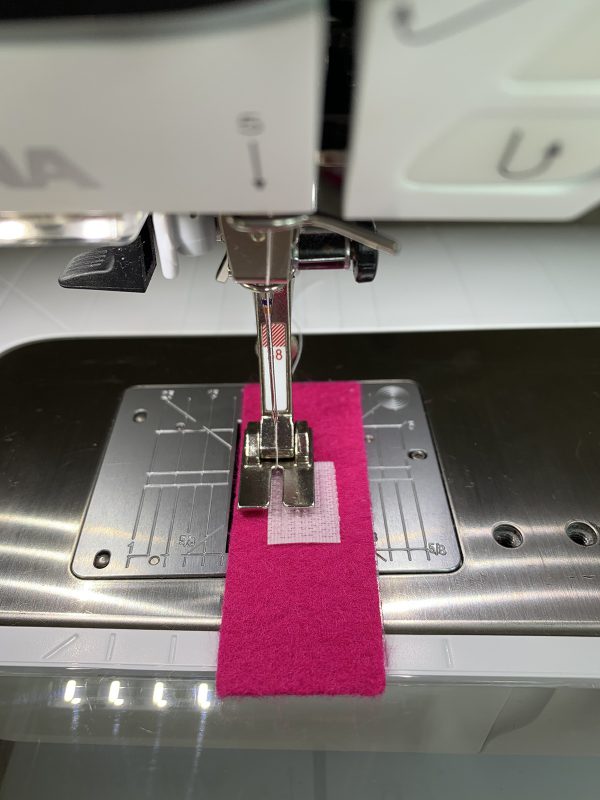
Cut 5 hook pieces from the hook and loop tape about 1/2” long from your 3/4” roll. Separate felt rectangles into two sets of the 5 different colors. Take one set to sew on the hook tape at the center. Place the right toe of the foot on top of hook tape and the left toe up against tape. It helps to add a dab of glue to keep the tape in place while sewing. Sew all 4 sides. Do the same with all 5 pieces.
Now, find your second set of felt and your name tags. We are going to do what is called in the quilting world, machine applique! Basically, it is hand applique by machine. Match the thread color of each name tag to the same color felt. With the name tag centered on the felt, secure it for stitching. You can pin it. You can use temporary glue (my current favorite is Roxanne’s Glue-Baste-It). Or you can use Stitch Witchery. I tried all three methods and preferred the glue. But, do what works best for you!
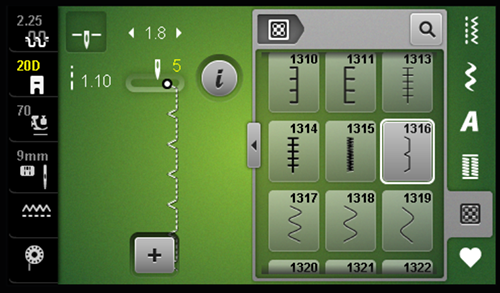
Attach Open Embroidery Foot #20/20C/20D. This foot gets a lot of use in my sewing room! Add white thread to your top and bobbin. On your machine screen, go into the Quilting Stitches tab and select Stitch #1316. Move needle to Needle Position 5.
Line up the name tag under the foot so that the inside right toe is butted up against the white fabric. If you lower the needle with the hand wheel, it should fall into the tiny groove on the right toe and land exactly next to the white fabric, but not in it. As you sew along the white fabric, the machine will take tiny “bites” into the white fabric every few stitches. This applique stitch helps to keep raw edges neat and is almost invisible. When you near a corner, use the Free Hand System to lift the foot and assess how many stitches you should take before turning the corner.
The last step is to fuse the matching felt pieces together. Fuse together one felt back to one felt front with a hot iron that is appropriate for your felt material. Do not use steam in case the felt bleeds through the white fabric.
Place your photos in the windows and add the name tags under the windows.
And who is visiting this week? Cousin Andrew!
Congrats on your BERNINA Busy Book page. I hope you enjoyed making My Family page and continue creating more pages. Also, I hope you learned something new that you can use in future sewing projects. My goal is that you learn at least one new thing for every page you create. Let me know what one thing you learned in the comments section! I love to hear from my social media sewists!
Keep calm and sew on!
Kids Busy Book Series
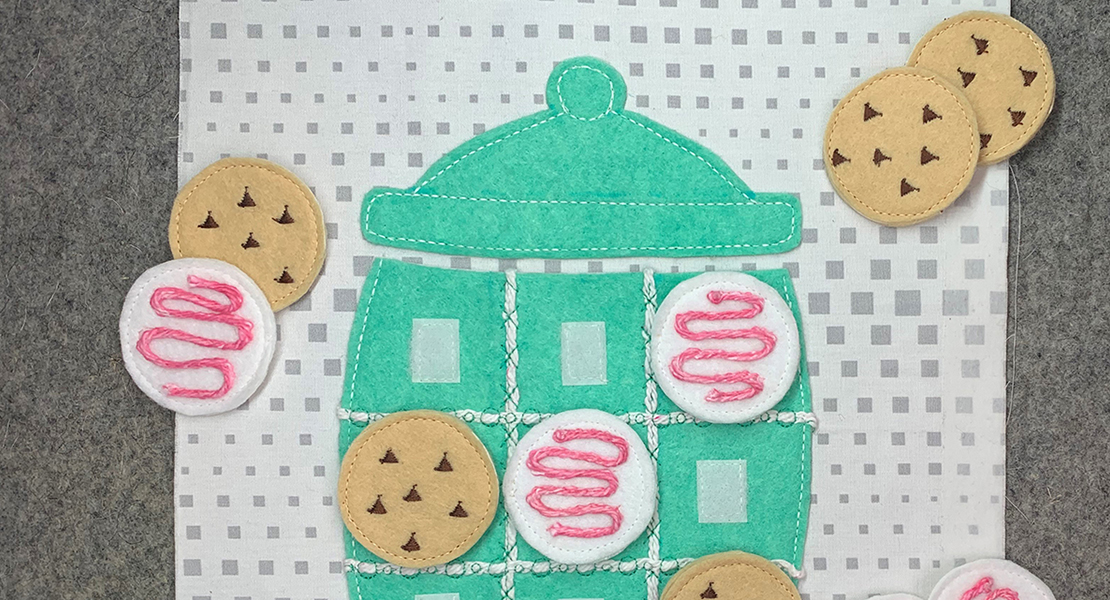
Part 4: Cookie Jar Tic Tac Toe
What you might also like
10 comments on “How to Sew a Kids Busy Book, Part 3: My Family”
-
-
Hello. I am so happy you are enjoying the busy book pages. This series is a work-in-progress so we don’t have consolidated list of supplies right now. I understand the issue with having to ship right now during shelter in place. Perhaps you can use the curbside pick up offered at some of the craft stores or improvise with other materials you can find in your craft supplies. Or maybe you can call upon your crafty friends or sewing friends to help out. I was about to send out an SOS on a foot of satin cord when I found some at the bottom of a bag of ribbon!
-
-
I am thoroughly enjoying making this busy book—love learning so many new things about my machine, the directions are thorough, and the page designs are wonderful. I want to ditto what someone else commented on page one. Could you possibly get them out faster? My little grandson will have almost outgrown the book’s usefulness by the time all the designs are released and instructions are given for page binding and finishing touches.
-
Hello. I am so glad you are enjoying the busy book pages! It’s so nice to hear from those who are doing the projects because sometimes you wonder if anyone else is out there! I will put together a post for the binding and title page in August after the June and July pages come out. The book will be put together in a way that will allow you to add and remove pages as your child/grandchild grows. I hope that helps!
-
I’m waiting patiently for these instructions but I understand we are all distracted these days. The good news is that once we have an idea on assembling – plus that title page – we can simply add each page as we make them to our little one’s book. They’ll be just as excited to get a new page as we are to make it.
-
Good news! The next post which is on how to finish the pages will be out later this week! Enjoy!
-
Tremendous !! ❤️
-
-
-
-
-
Hello. I am so happy you are enjoying the busy book pages. This series is a work-in-progress so we don’t have consolidated list of supplies right now. I understand the issue with having to ship right now during shelter in place. Perhaps you can use the curbside pick up offered at some of the craft stores or improvise with other materials you can find in your craft supplies. Or maybe you can call upon your crafty friends or sewing friends to help out. I was about to send out an SOS on a foot of satin cord when I found some at the bottom of a bag of ribbon!
-
I love this book I cant wait for the other pages and then make some for the grand kids. Thanks for making this
-
You are welcome! I hope you enjoy making the pages for your grandkids!
-
Leave a Reply
You must be logged in to post a comment.







Loving working on these pages! Wondering if there is any way to get a consolidated list of all of the “special” materials. It isn’t efficient to order one thing at a time because of the shipping costs. I am making two books–one that I hope to have done for a July 5 bday party for my 2 year old grandson. The other for a future, unknown child! Thank you so much for these wonderful instructions!