Appliqué Technique and Design Wall Tips
In the spring of 2014, I decided it was time to try using a design wall for quilting. Since I’m a long arm quilter, I had a bunch of batting already, so I just used tacks and hung some on the wall. There are fancier ways to make a design wall, but I’m an instant gratification kind of gal, so this worked for me!
Do you use a design wall? If you don’t, you need one. NEED. You can tack up batting like I did, or use a piece of flannel. If you want it to be sturdier and portable, you can wrap either of those materials around a piece of foam core or a sheet of insulation board and secure on the back with duct tape. Using a design wall has transformed the way I work on quilts. Another thing I use a lot is glue! More about that in a bit.
My design wall had only been up for a week or so, when I found that I couldn’t sleep one night. I got up and went into the sewing room and started messing around with scraps on the wall. I love how you can move fabric around and it just stays on the wall without pins! Since I’m a painter and I’ve always done self portraits, it was natural for me to arrange my scraps into a rough approximation of my face.
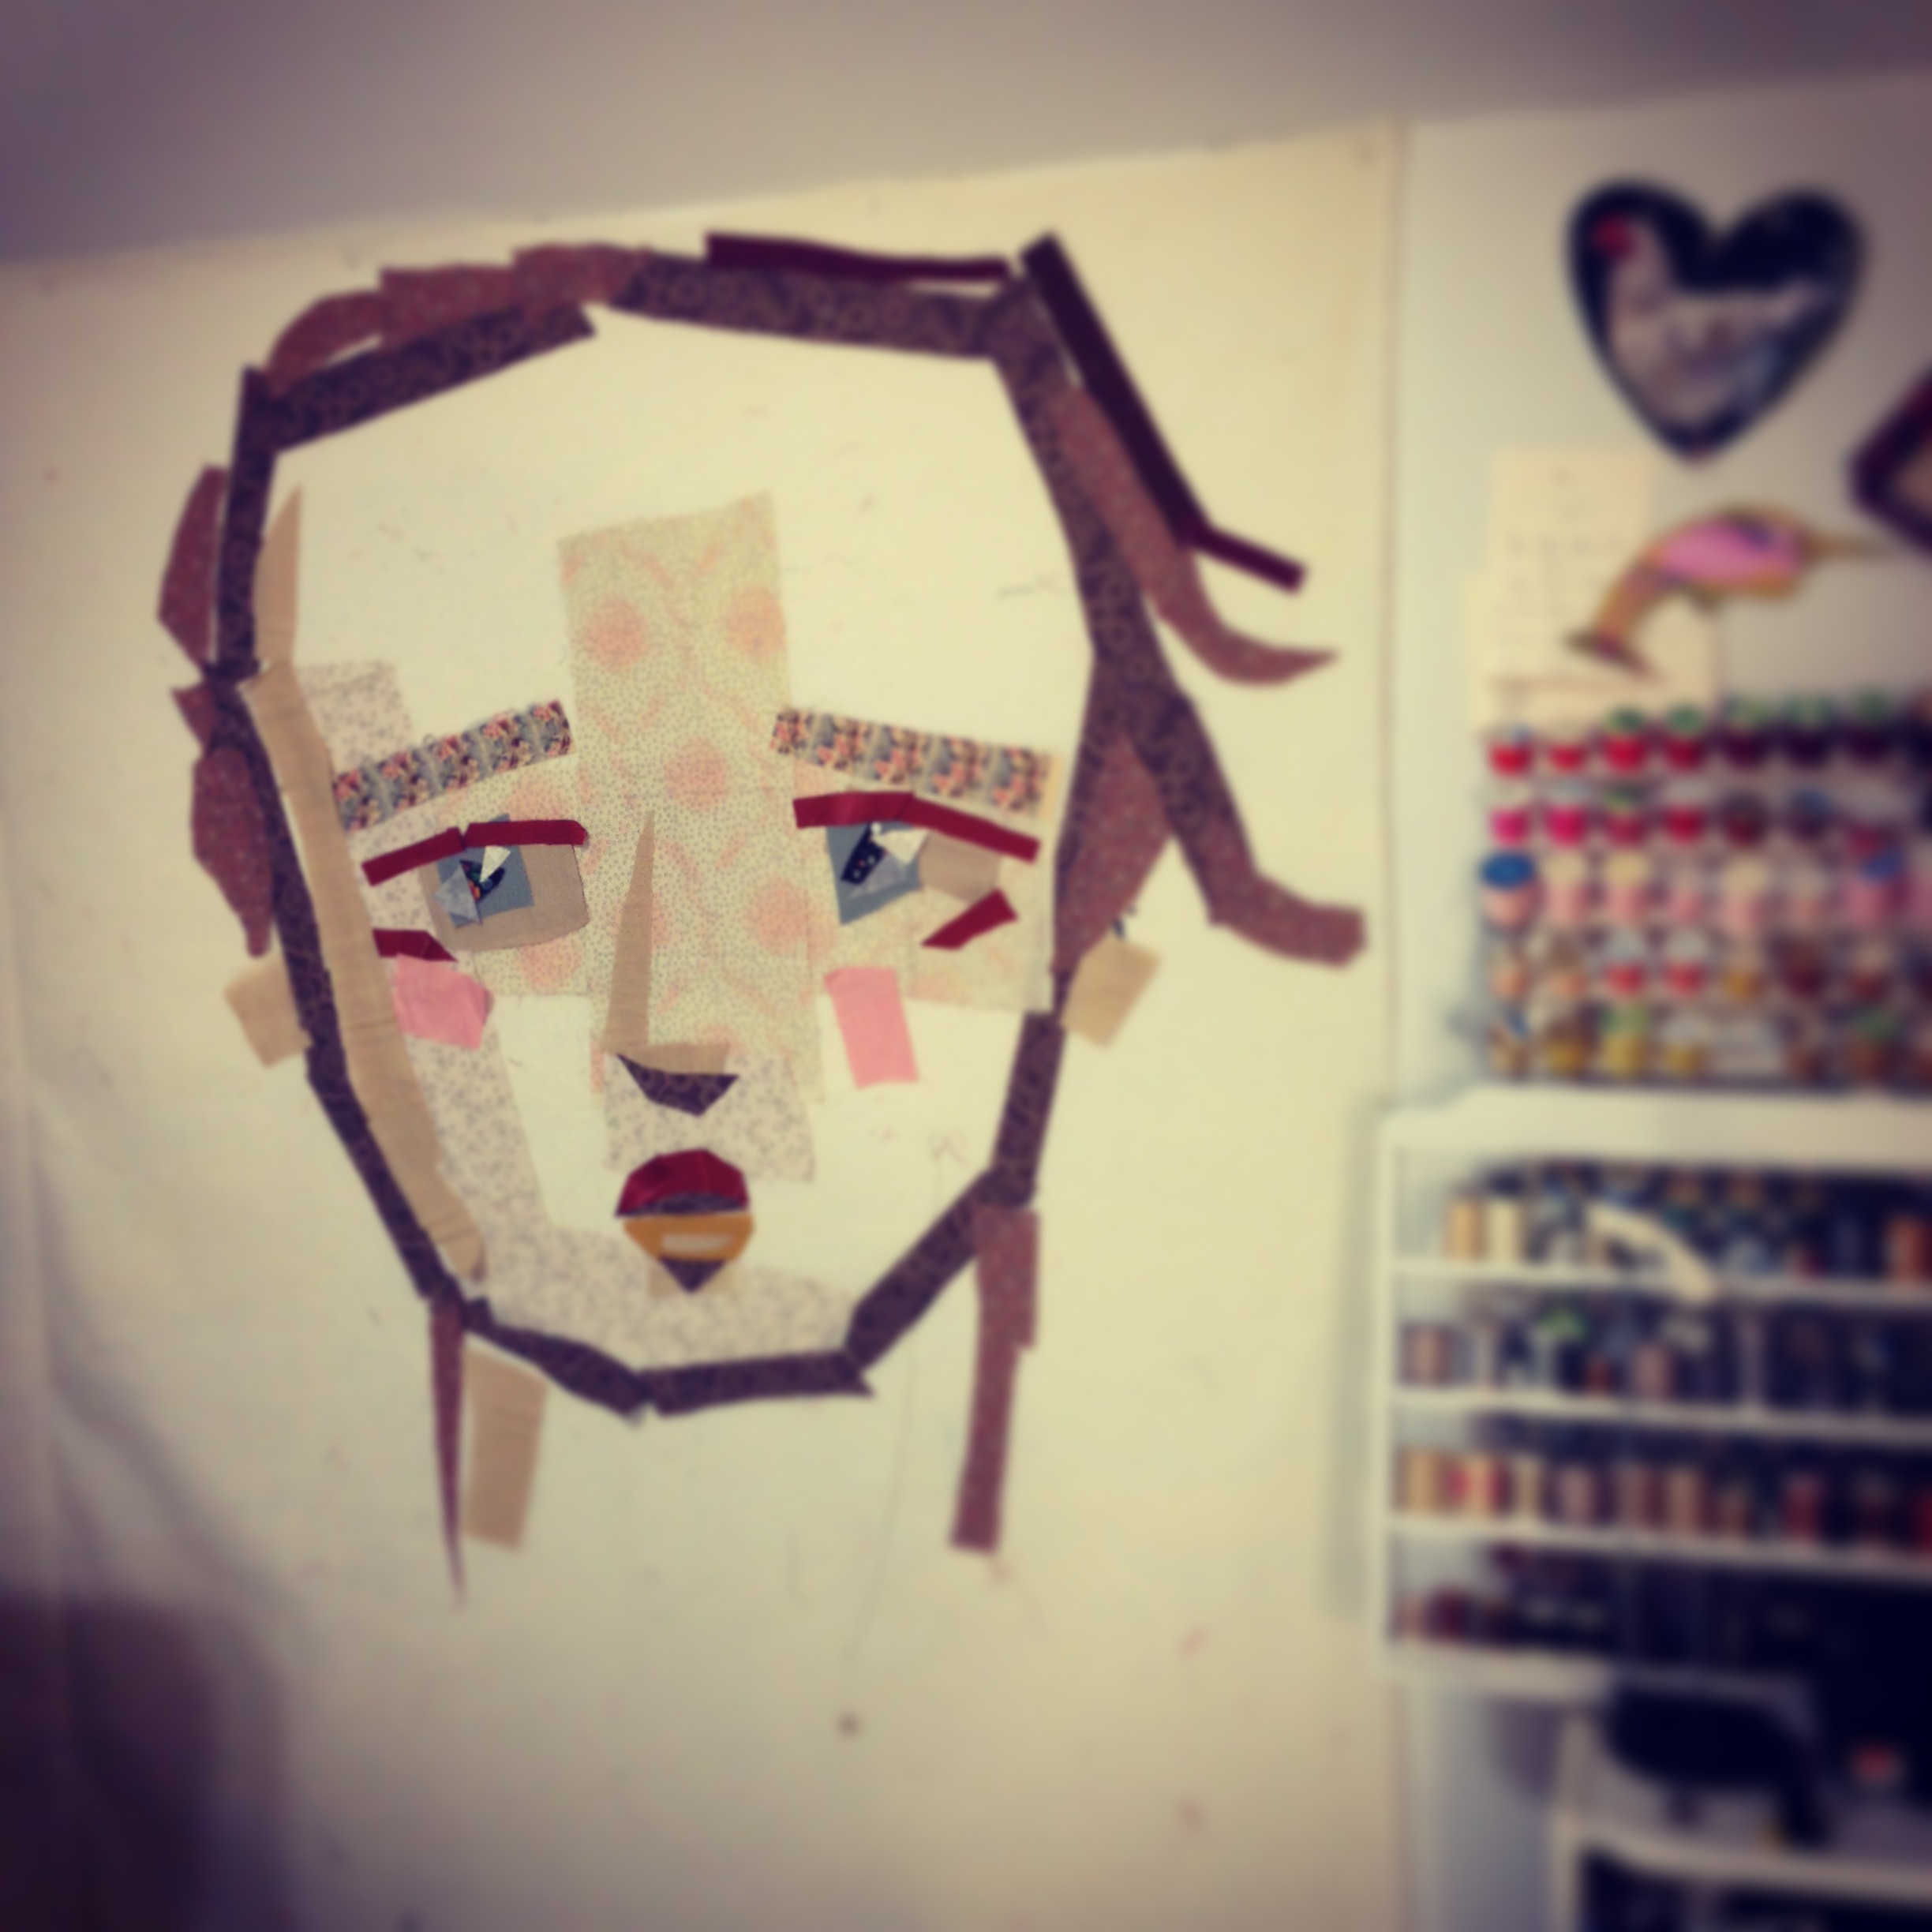
I wasn’t really planning to do anything with it, I was just entertaining myself on a sleepless night. I posted my experiment on Instagram and people were so encouraging that I decided to keep going with it.
The first thing I did was take all my scraps down and pin up a larger piece of fabric as a base for the appliqué, since what I had done the night before was just lay the scraps on the batting.
Once I had the base fabric up, I started by making the shape of the face and roughing in the features.
Since I was now working with fabric on fabric, instead of fabric on the batting of the design wall, the scraps didn’t stay in place as well. I grabbed a washable glue stick and used just a smear on the back of the scraps to hold them in place. I like to constantly rework and change things as I go, so this was the perfect solution. Just enough adhesion so they didn’t fall off, but not so much that I couldn’t reposition when I wanted.
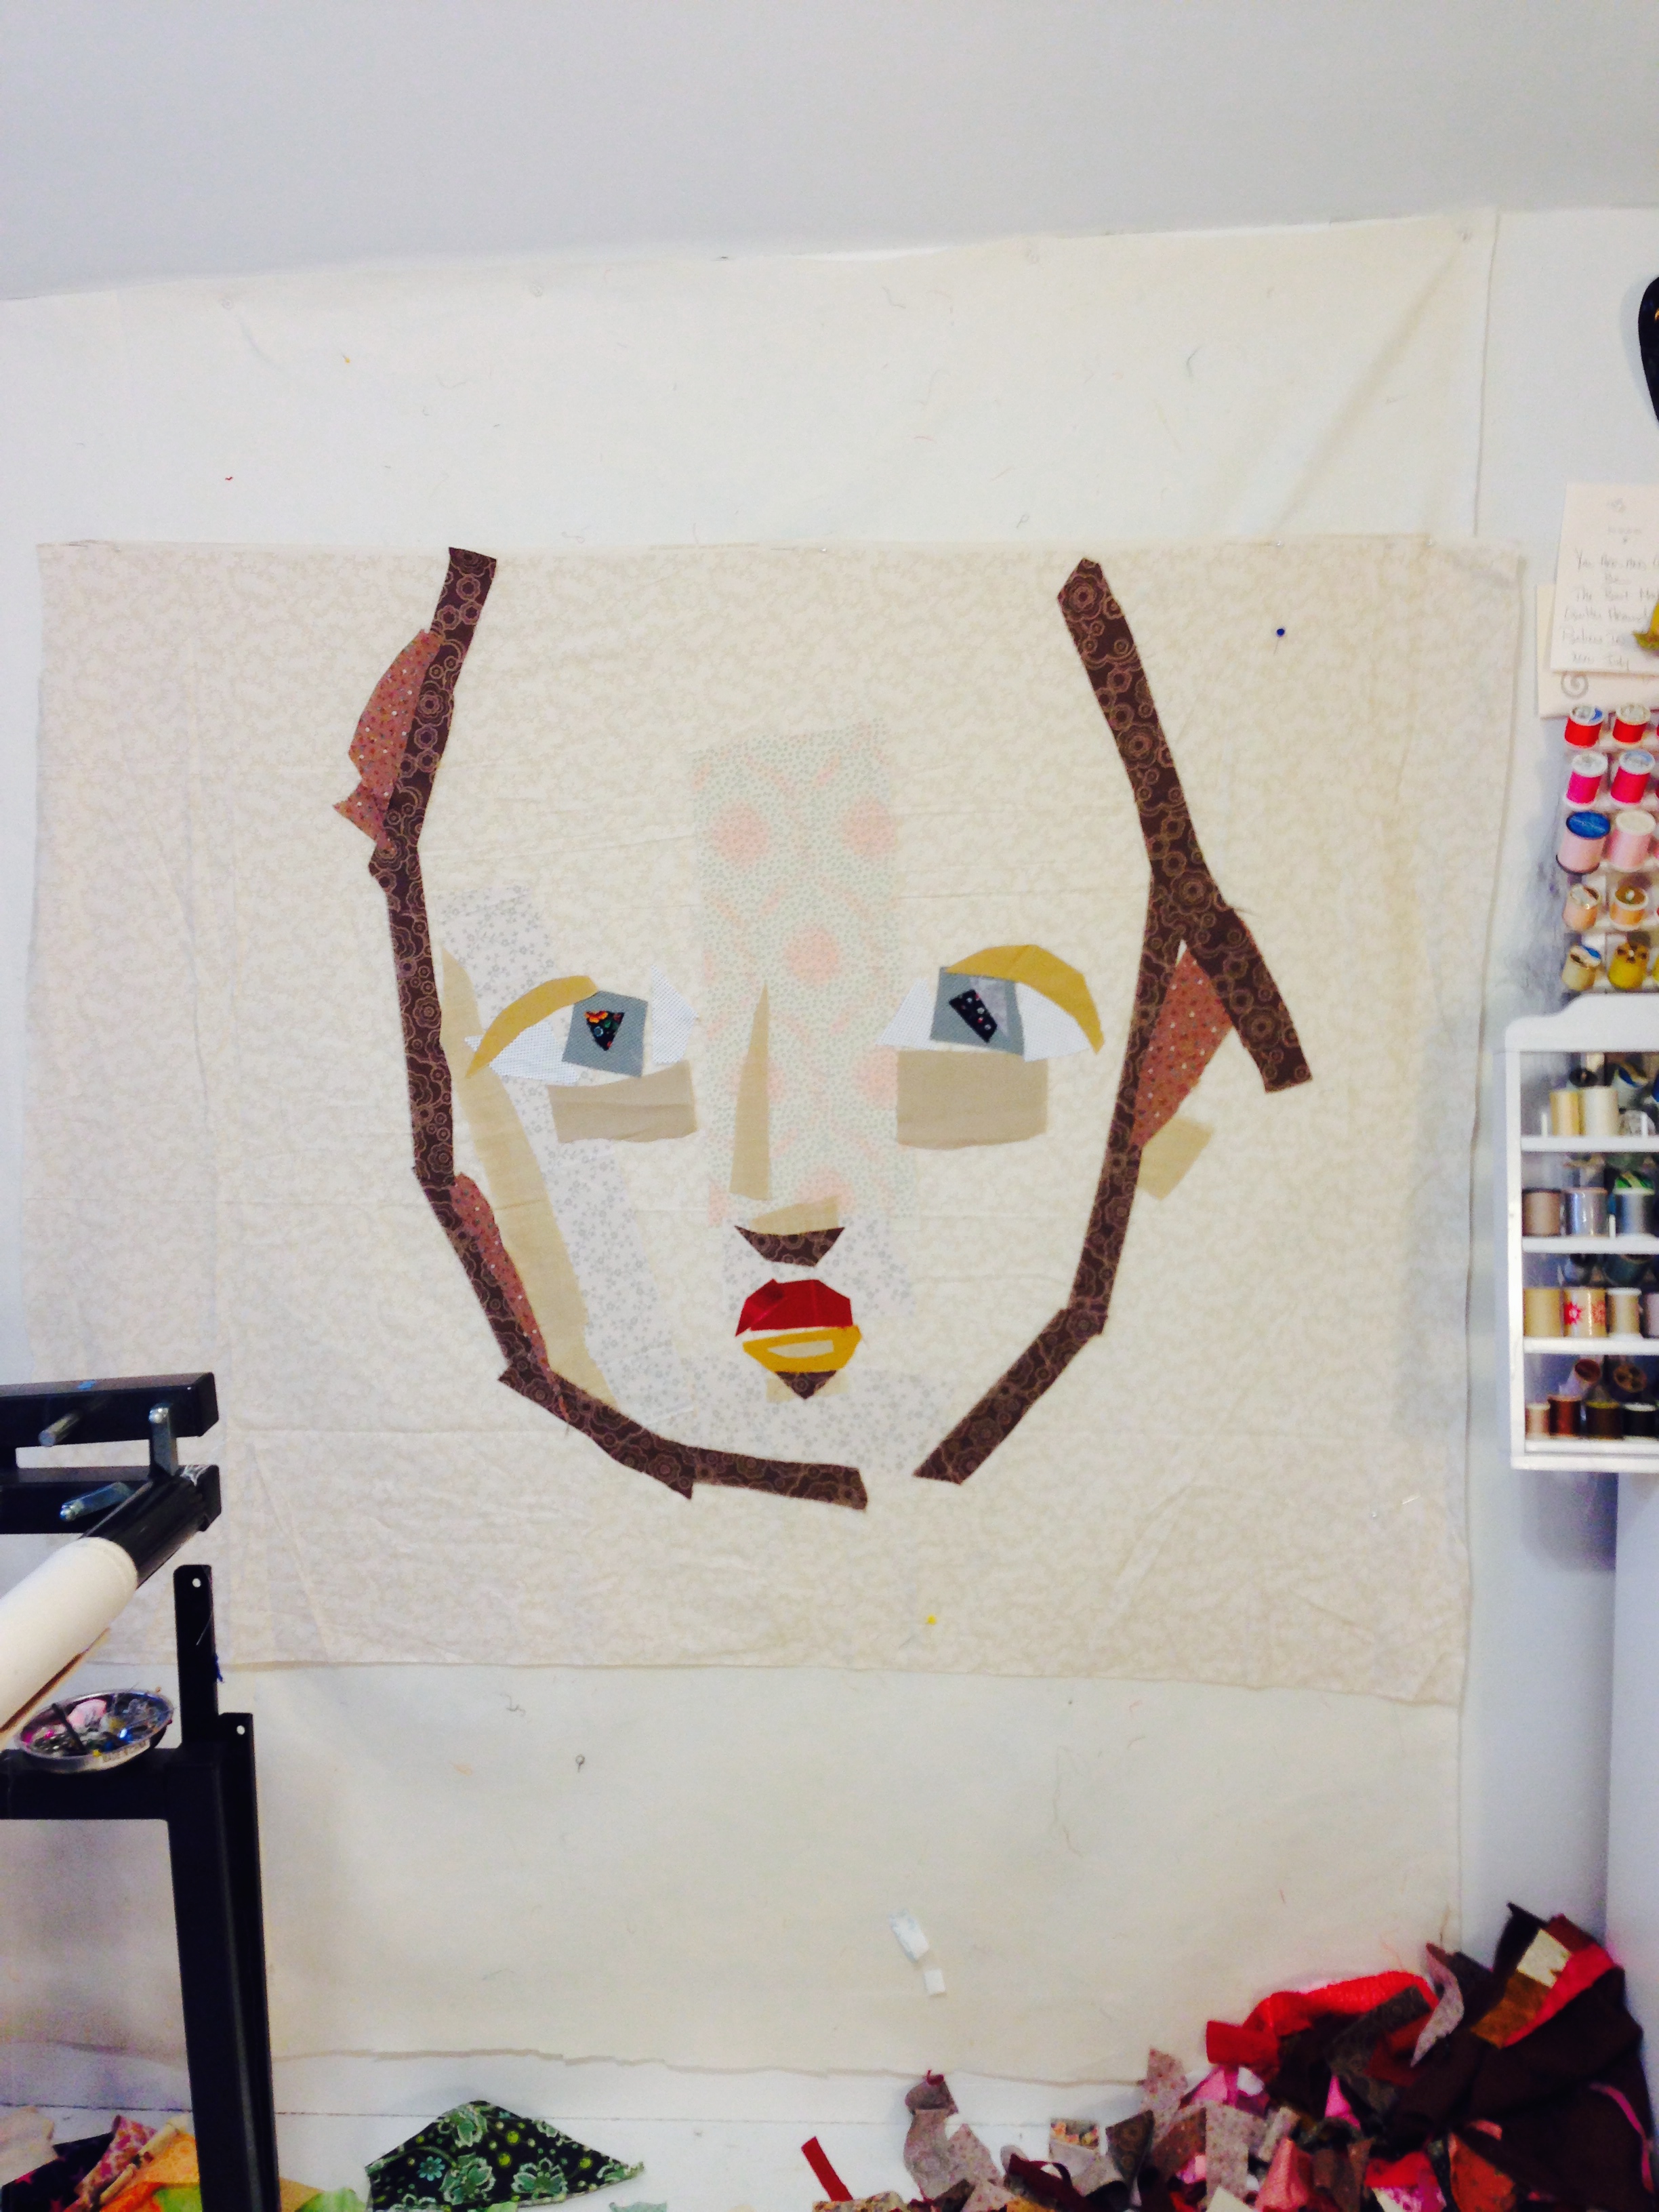
Here you can see that I started to refine the eyes by rounding off the iris and adding a dark lash line. I also started to define the neck:

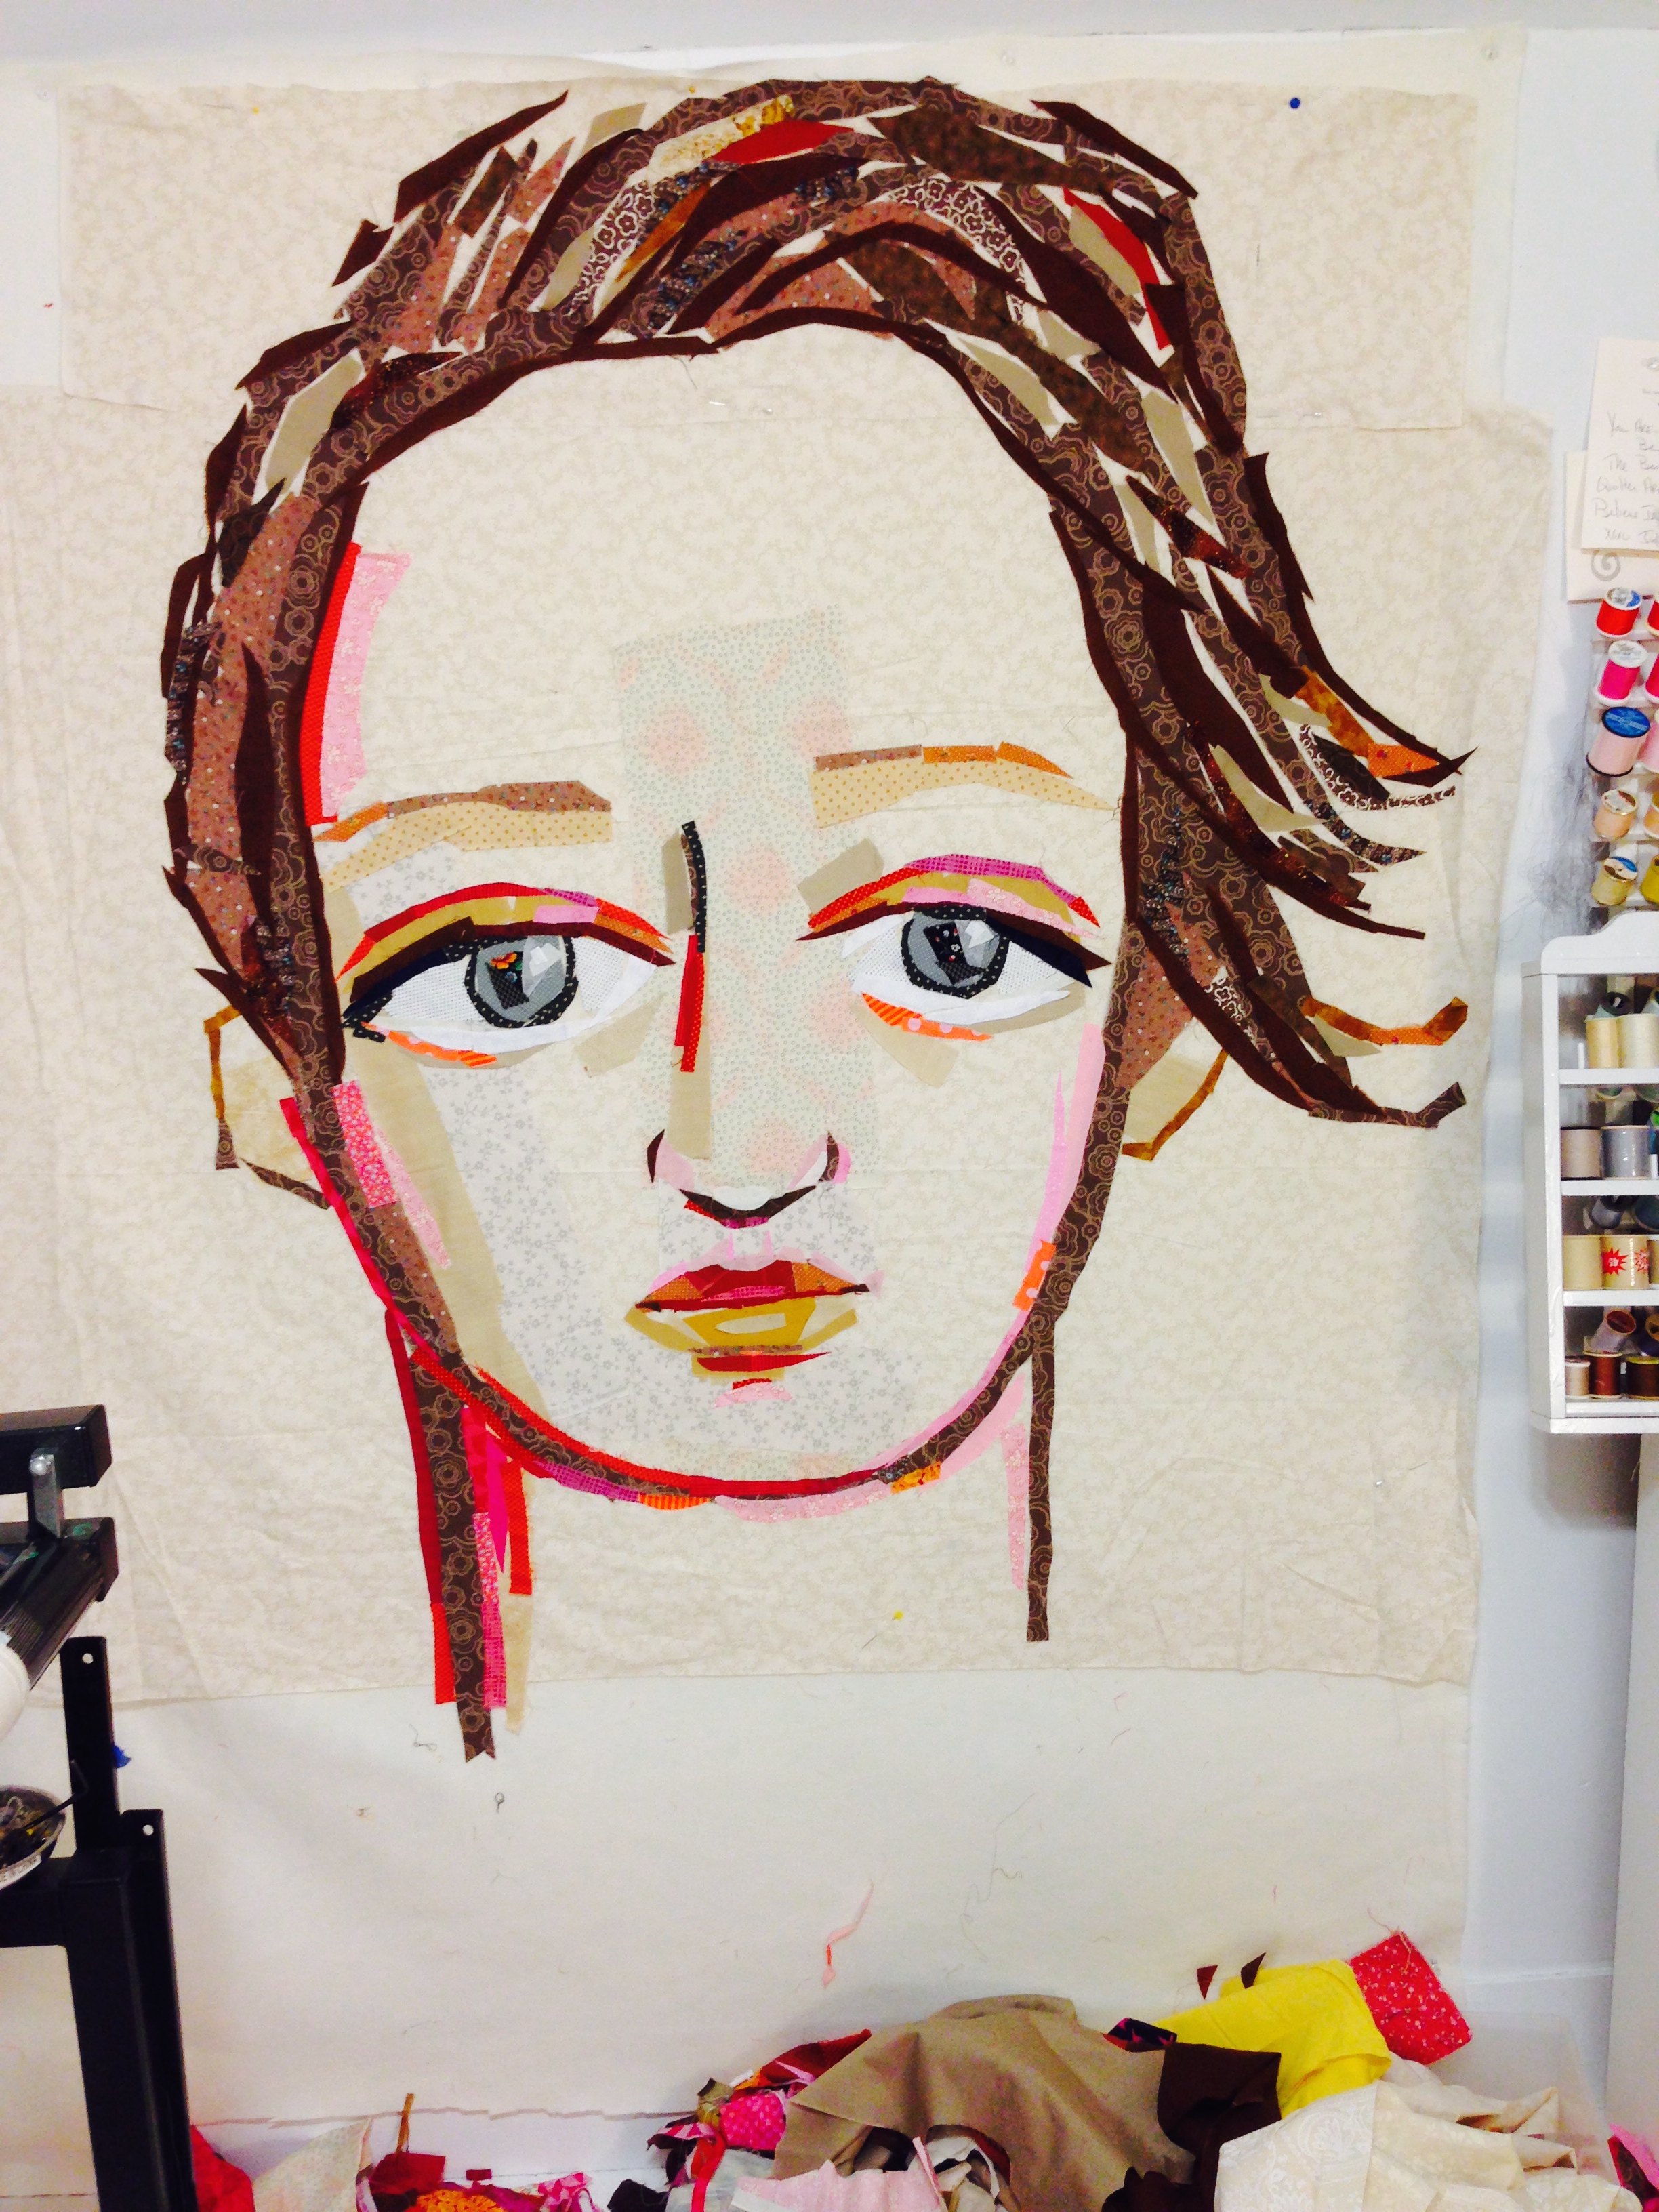
Next I built the hair silhouette and continued to add to the features. At this stage I added in some orange, one of my favorite colors:

I also defined the ears and nose with some strips of dark brown fabric, as well as widened the lips and added highlights. I wasn’t crazy about the nose. I knew I would rework it later.
Working on the design wall allowed me to step back and assess. After staring at it for a while, it looked a little bland and beige to me, so I decided to incorporate my other favorite color, pink, to warm it up and add interest:
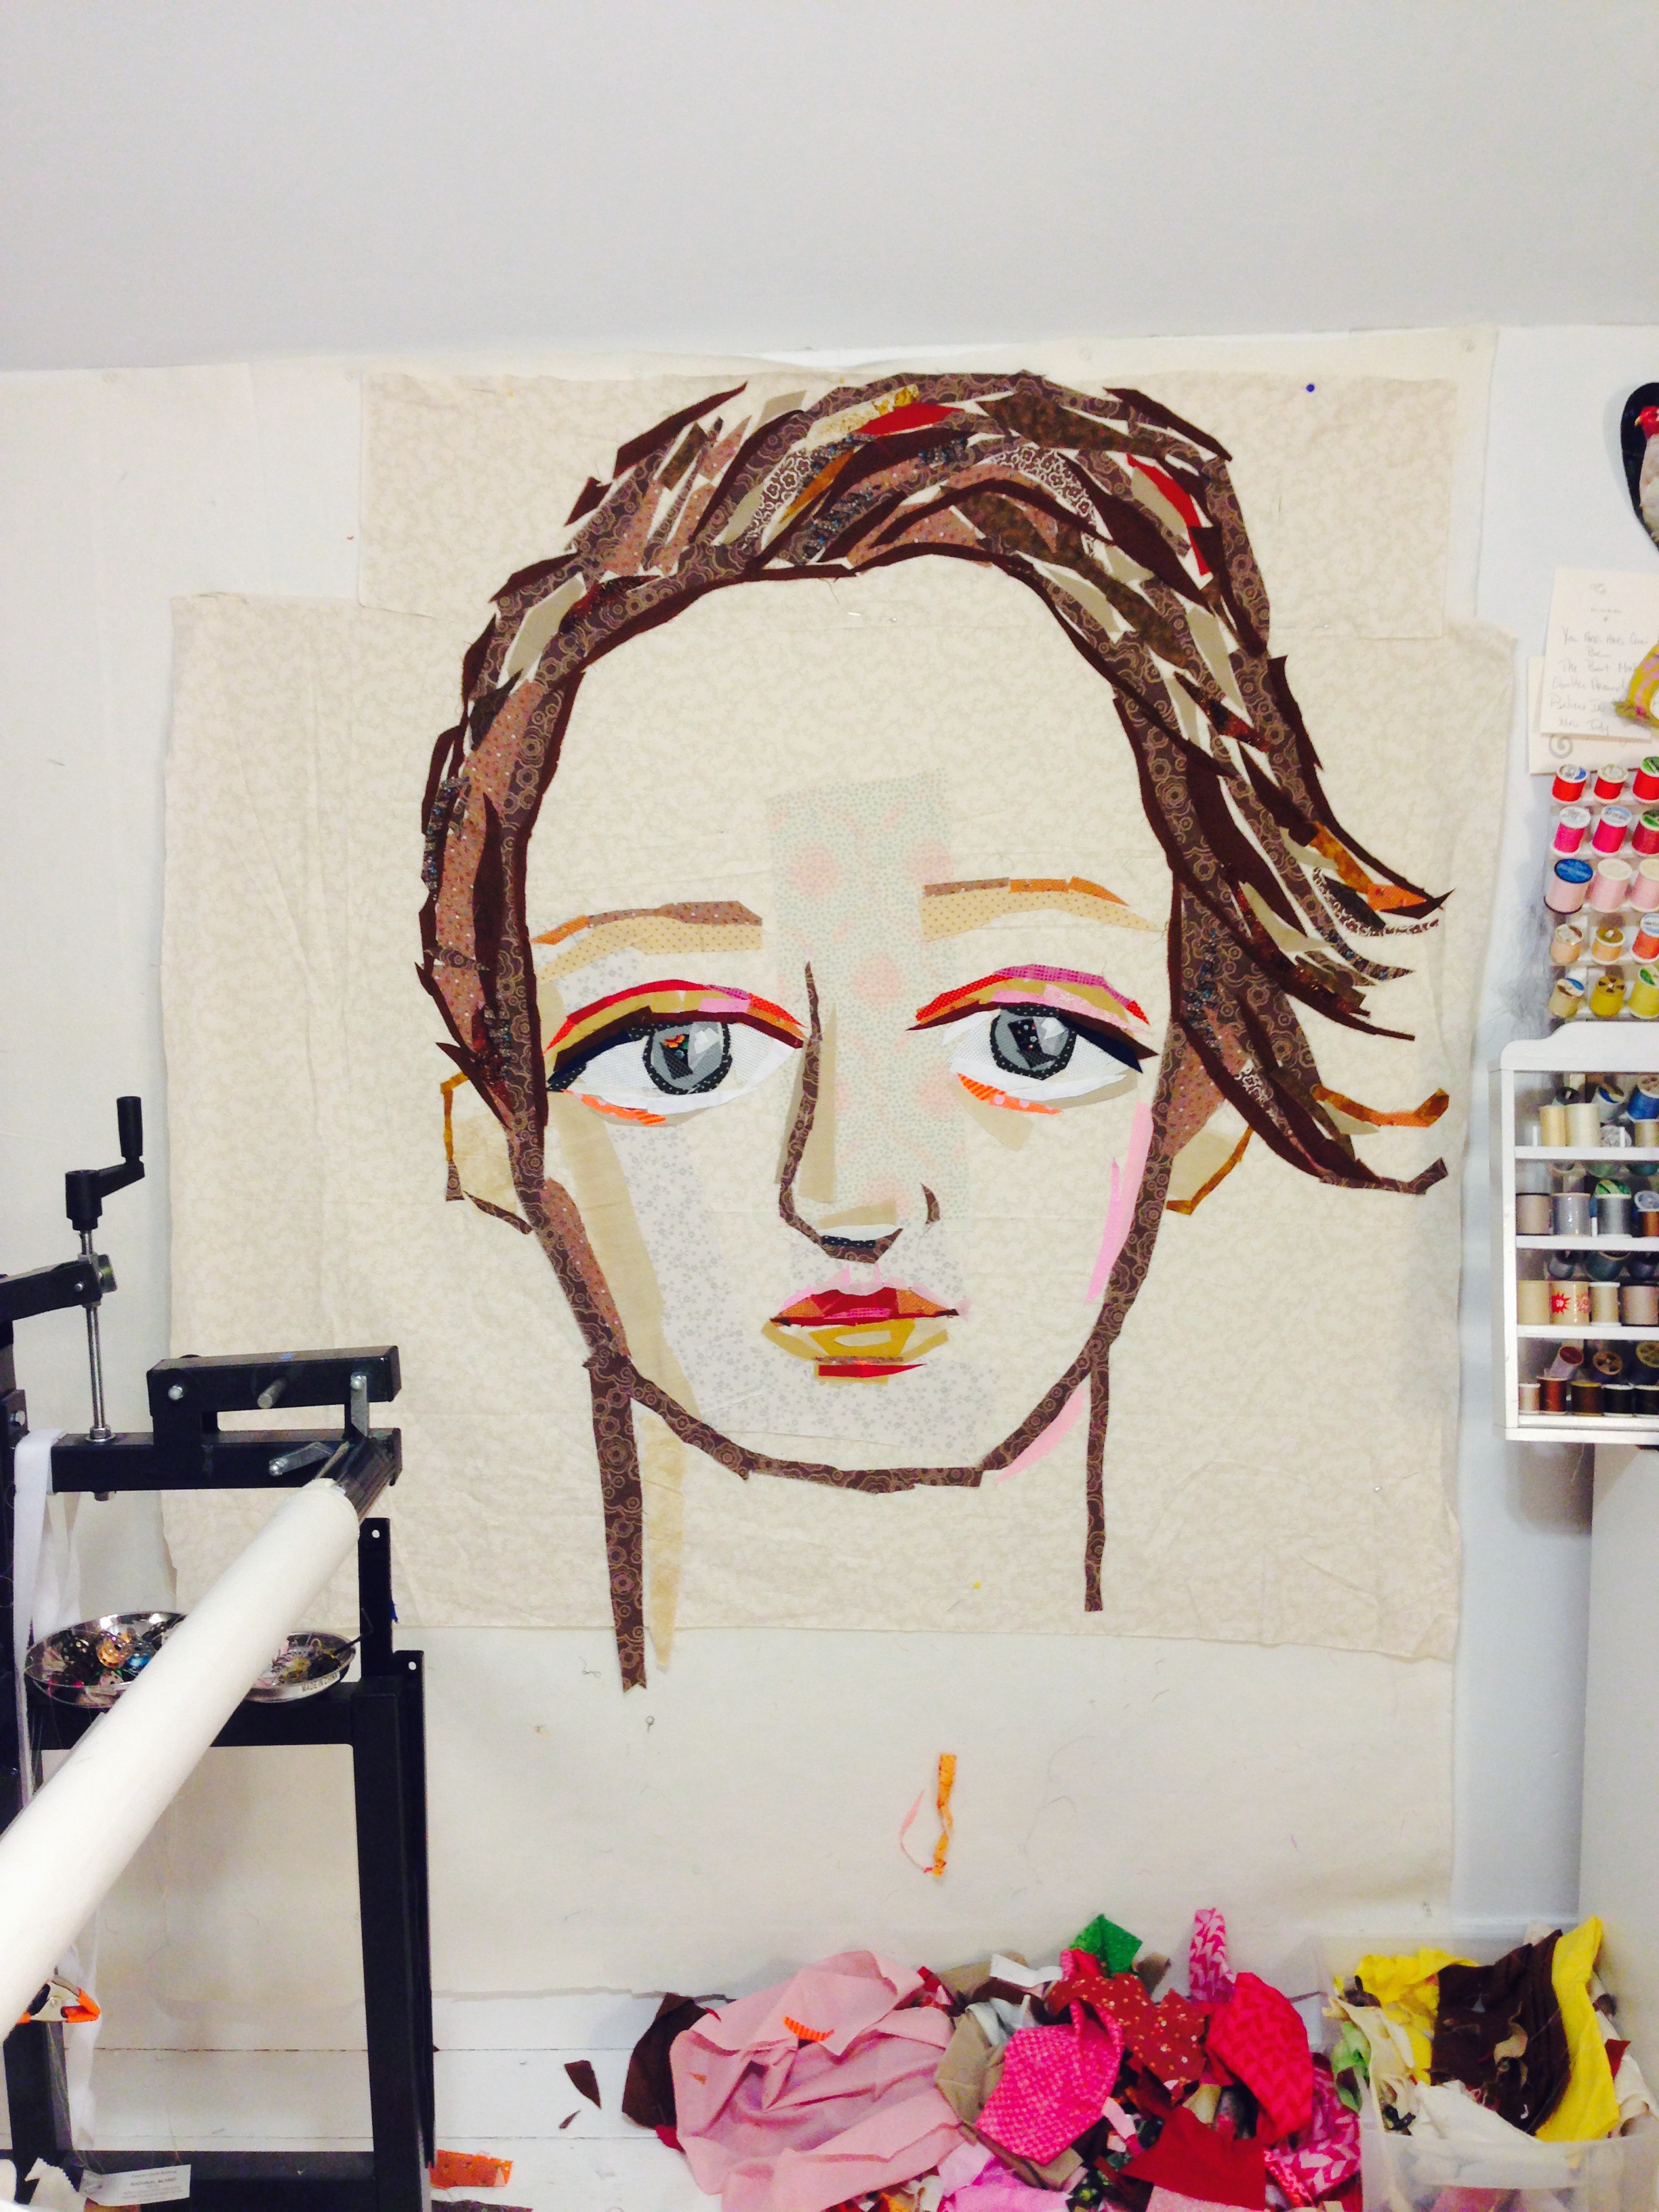
Ah, much better. I filled in the hair and add darkness in the crease of the eyelids. I was thinking of it like a painting adding highlights and shadows and little pops of color.
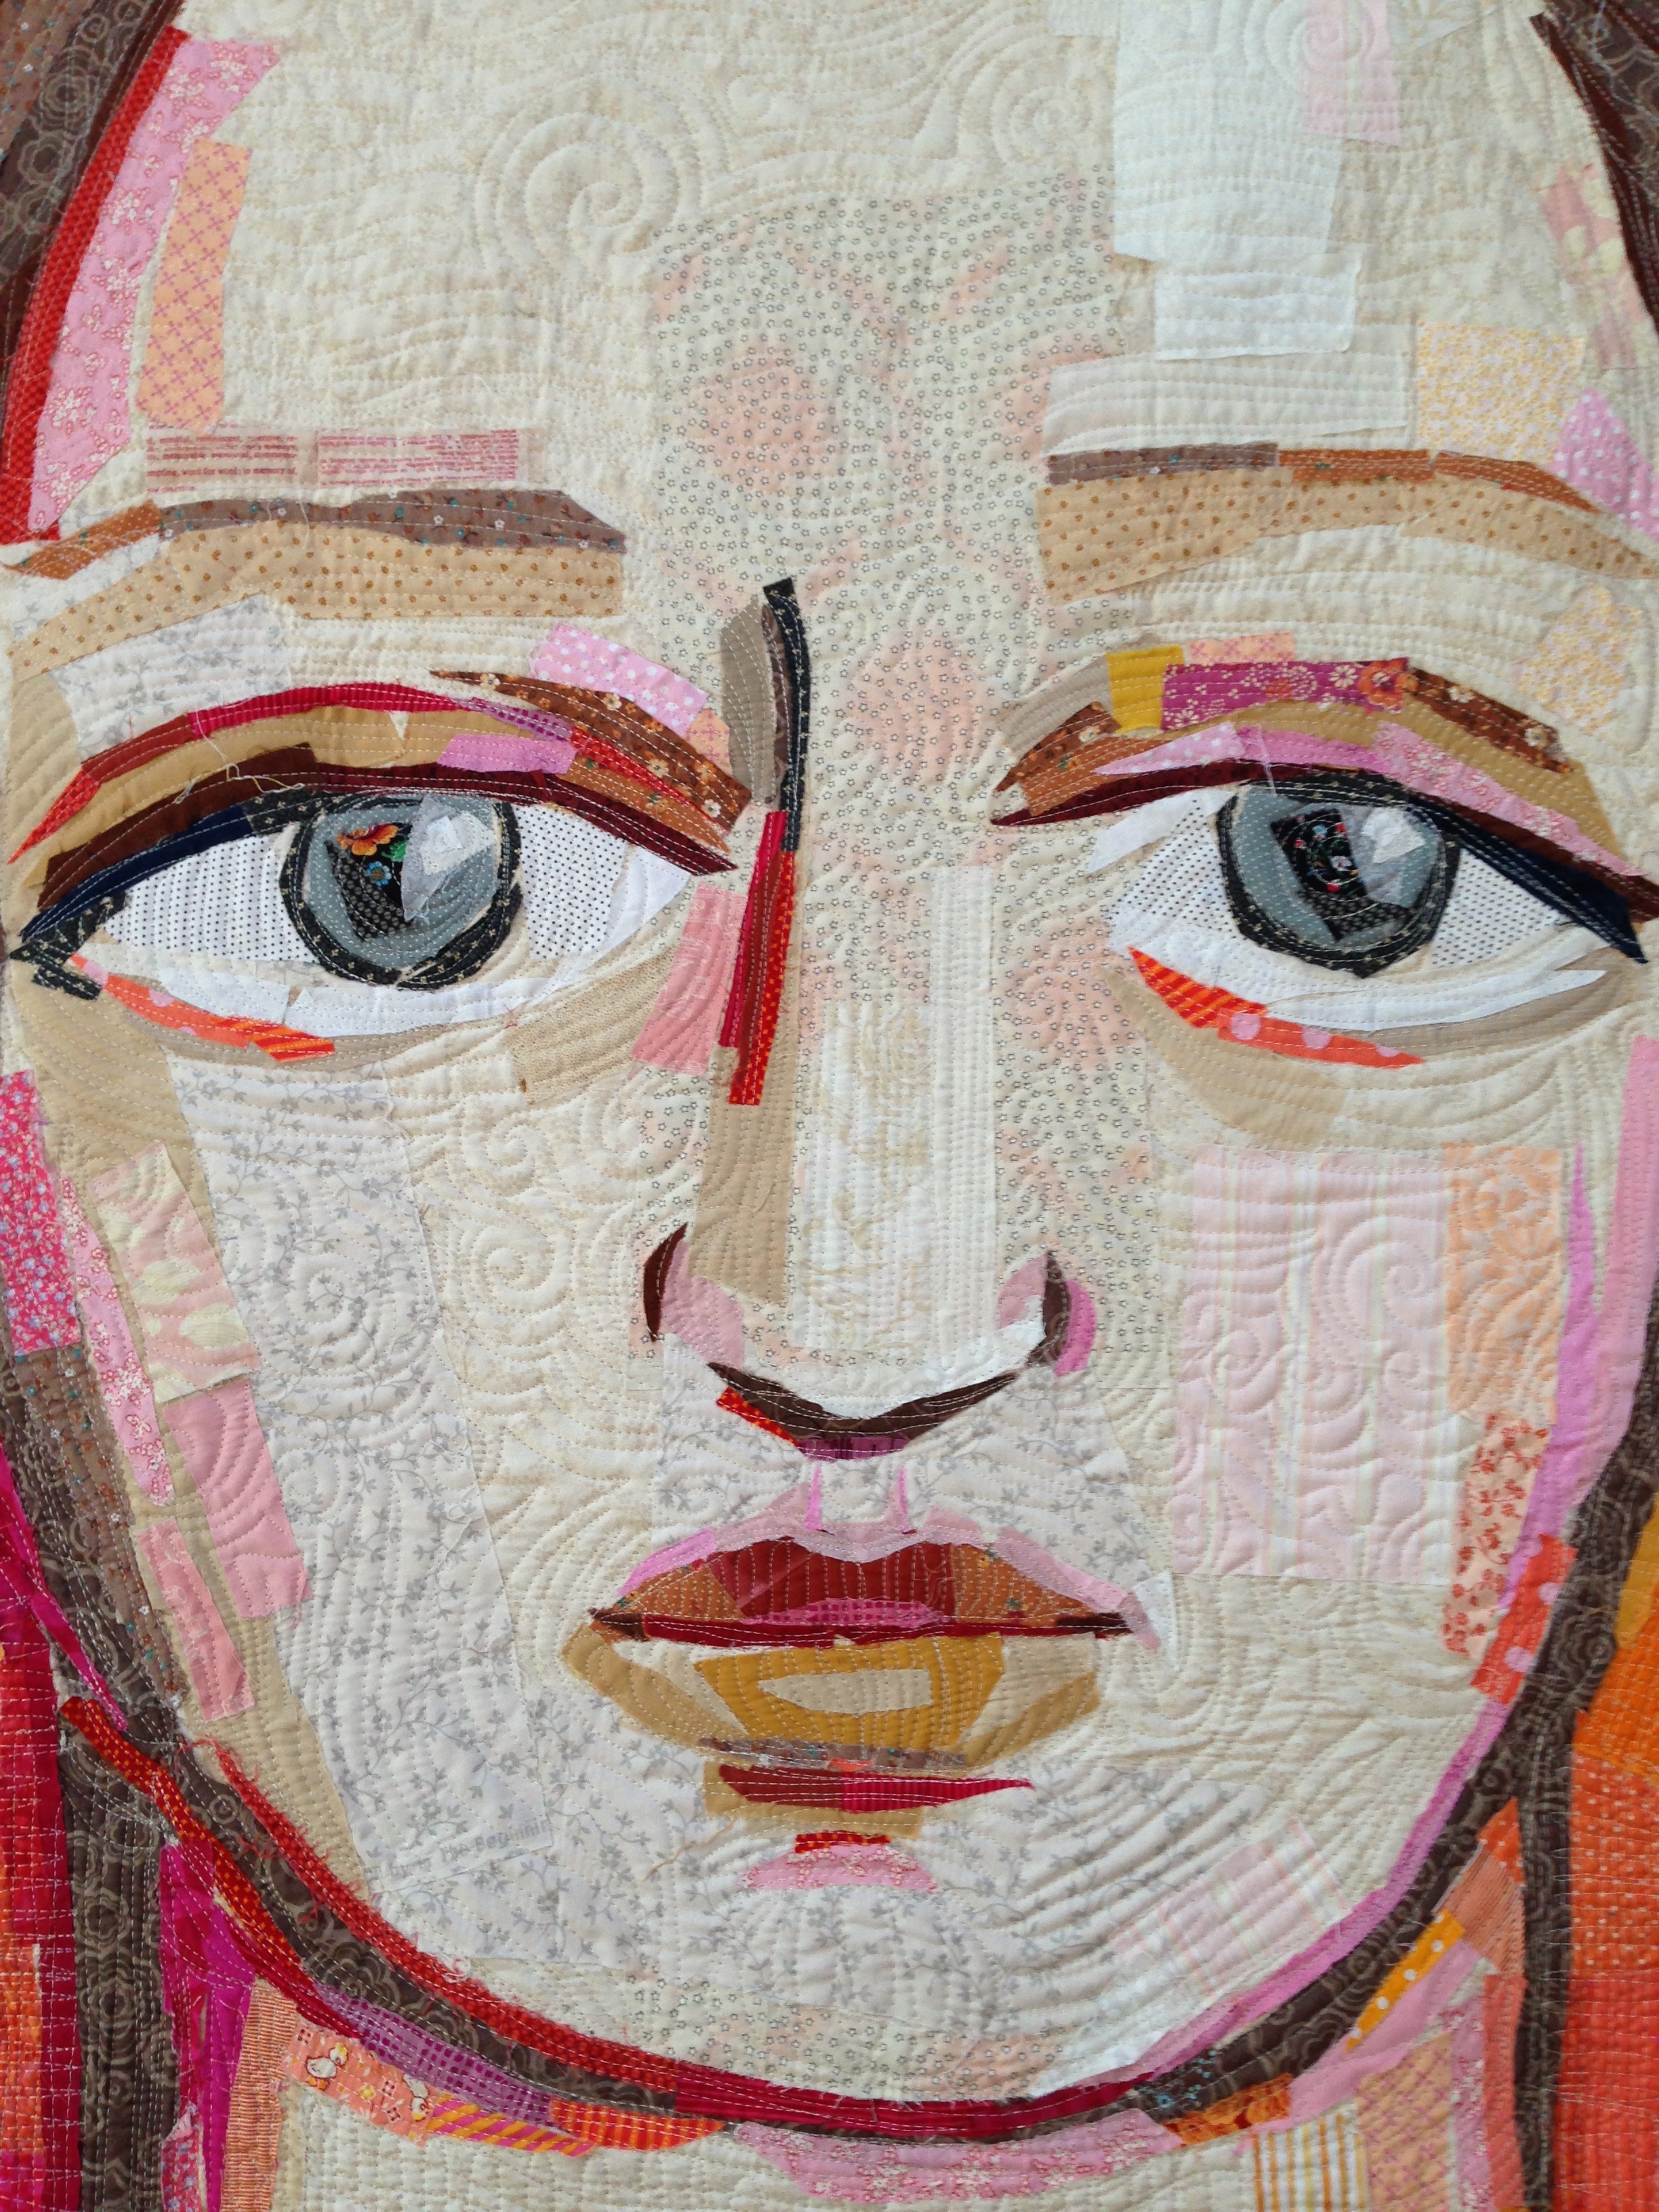
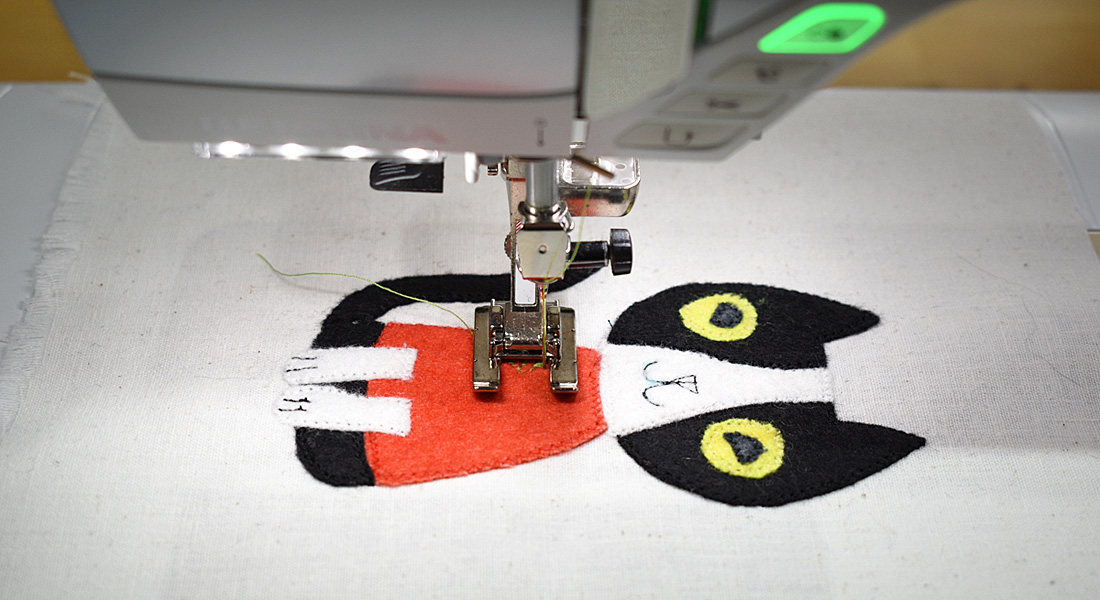
For these raw edge appliqué faces, I like to use small prints and tonals. Here is a close up so you can see:
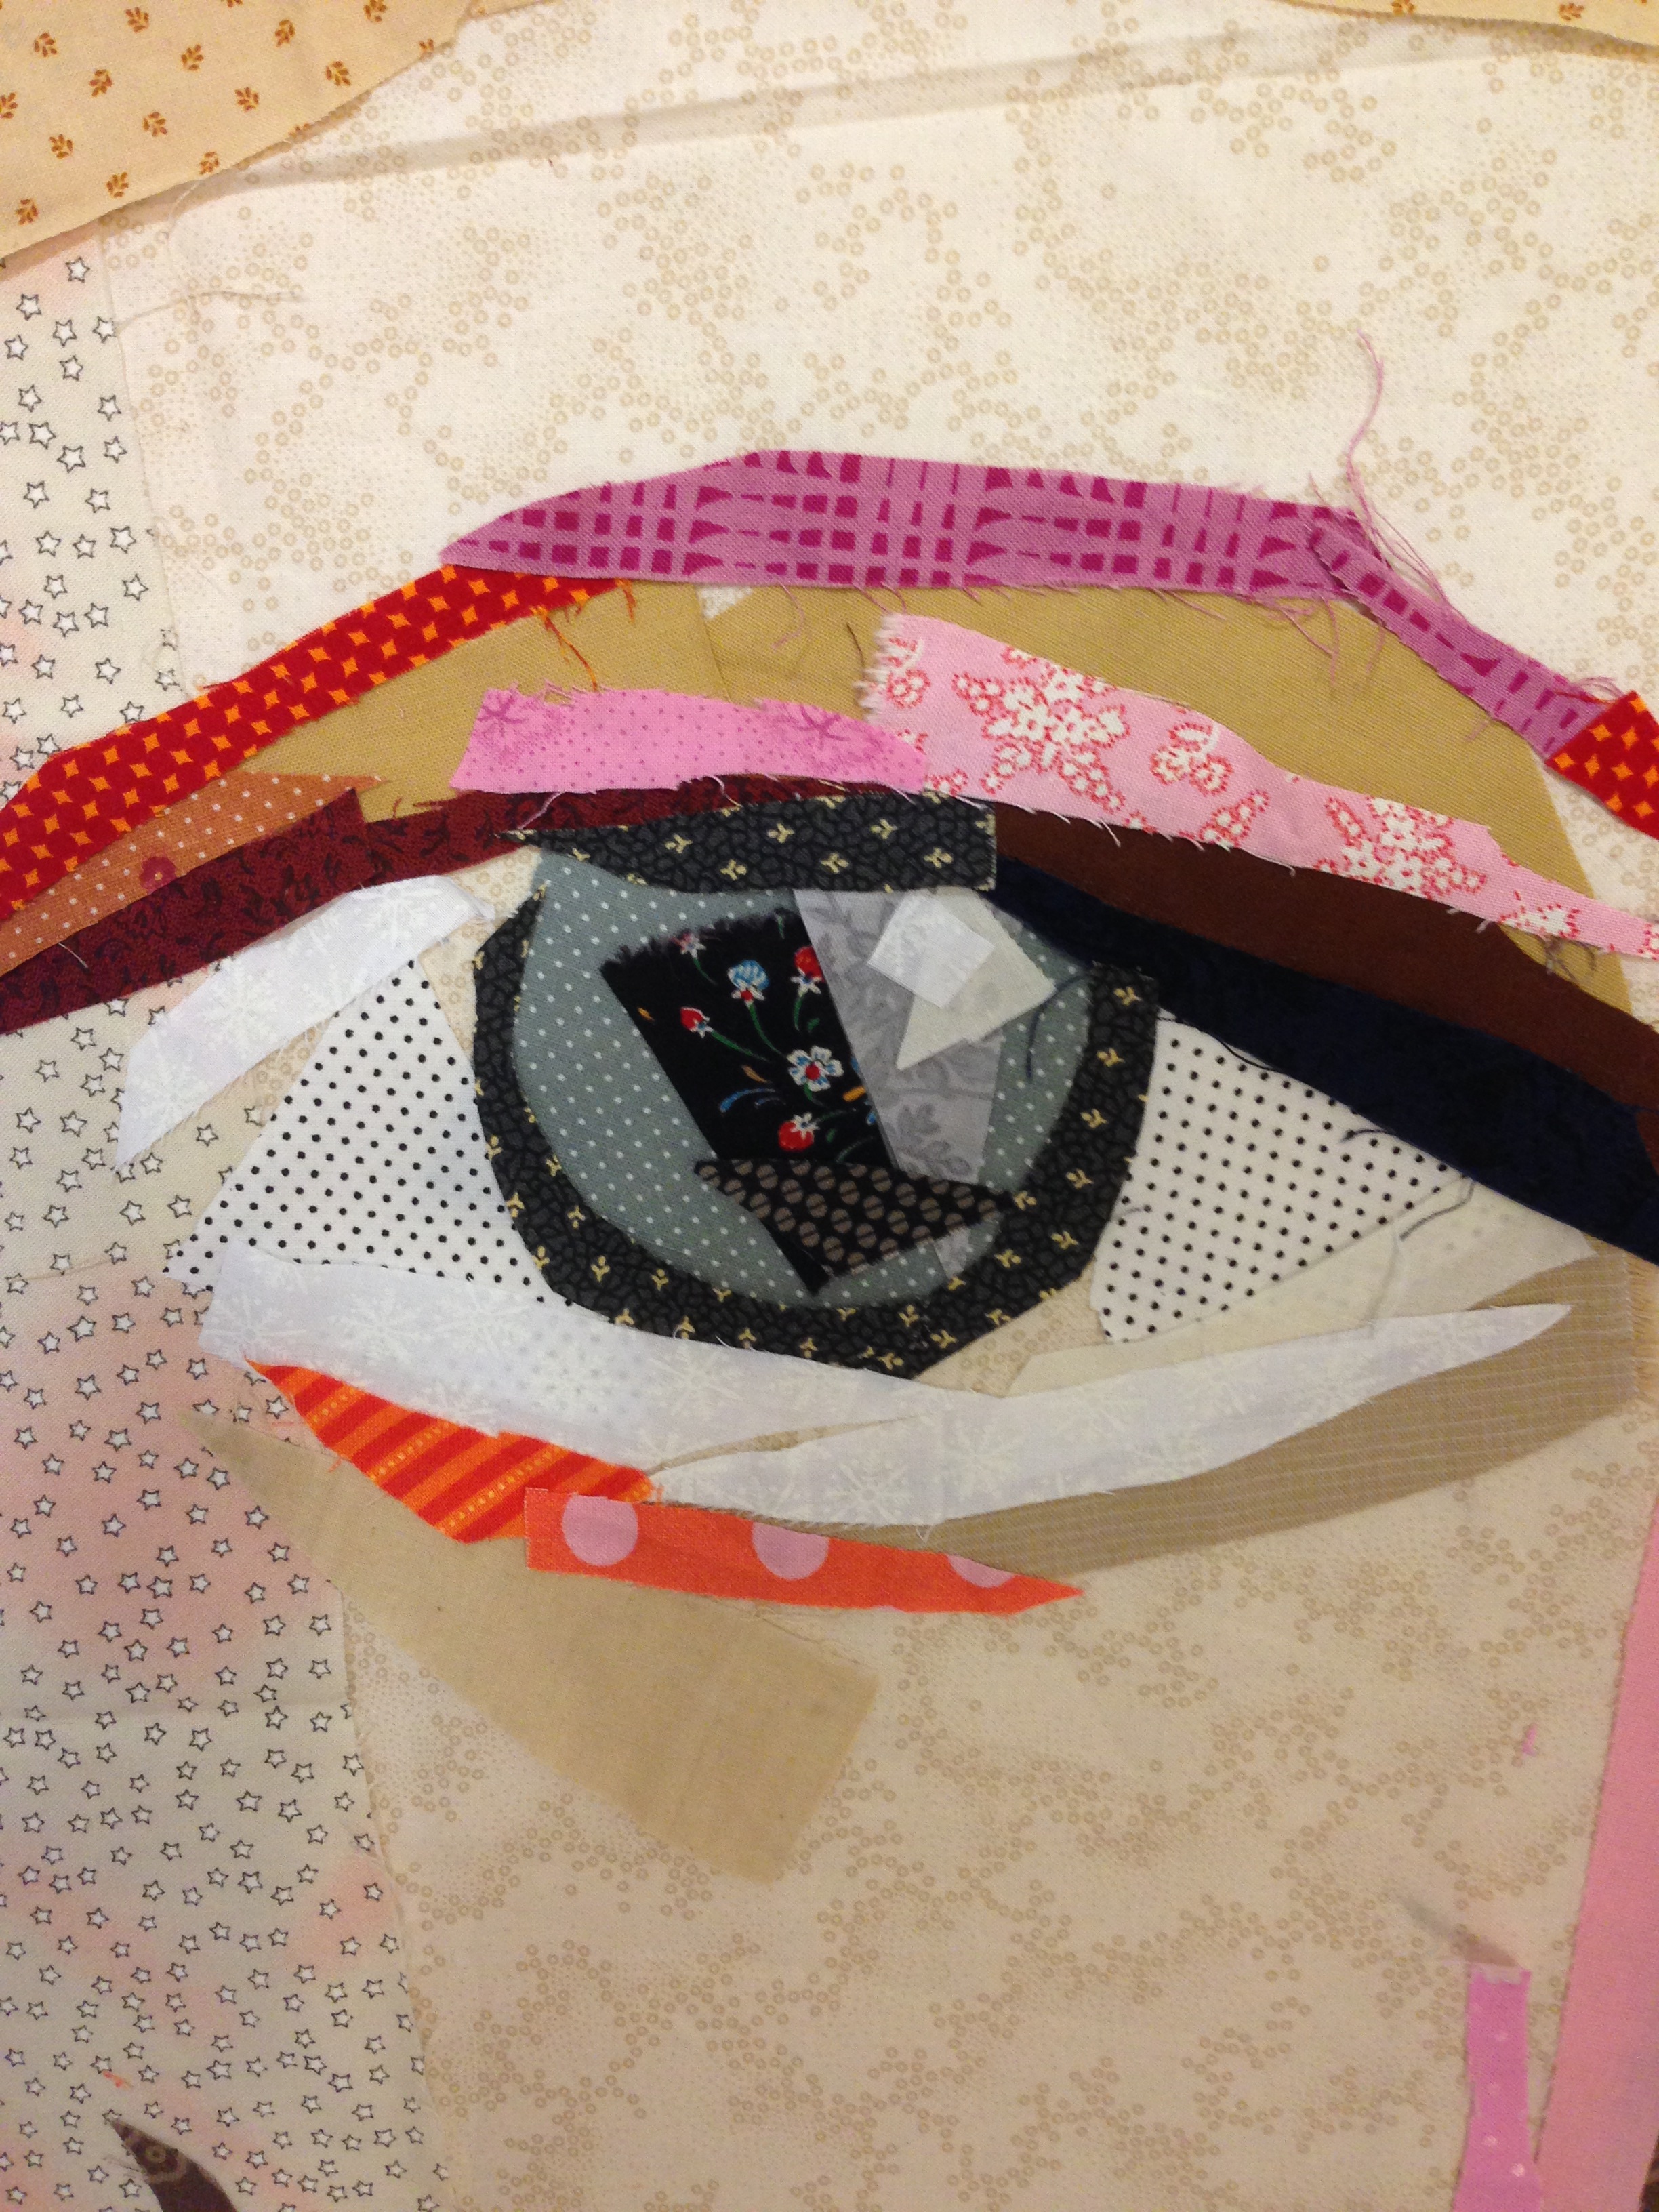
You can see I’m not too worried about perfection! I find the less precious I try to make it the more fun it is to create.
Here is where I’ve started to rework the nose, much better this time around:
I also added in some shadows in dark orange and red. I loved working on it, but was itching to try my hand at a pieced face, so I rolled up the fabric and the project aside for nearly a year!
I started working on it again because Casey York asked if she could put it in her upcoming book (The Applique Book: Traditional Techniques, Modern Style), so I had to finish it to ship out to the publisher to be photographed!
So now it was time to glue it down for real, so the edges of the fabric wouldn’t fold over when I went to stitch on it. I like to use a precision glue tip on a bottle of Elmer’s Washable School Glue for this.
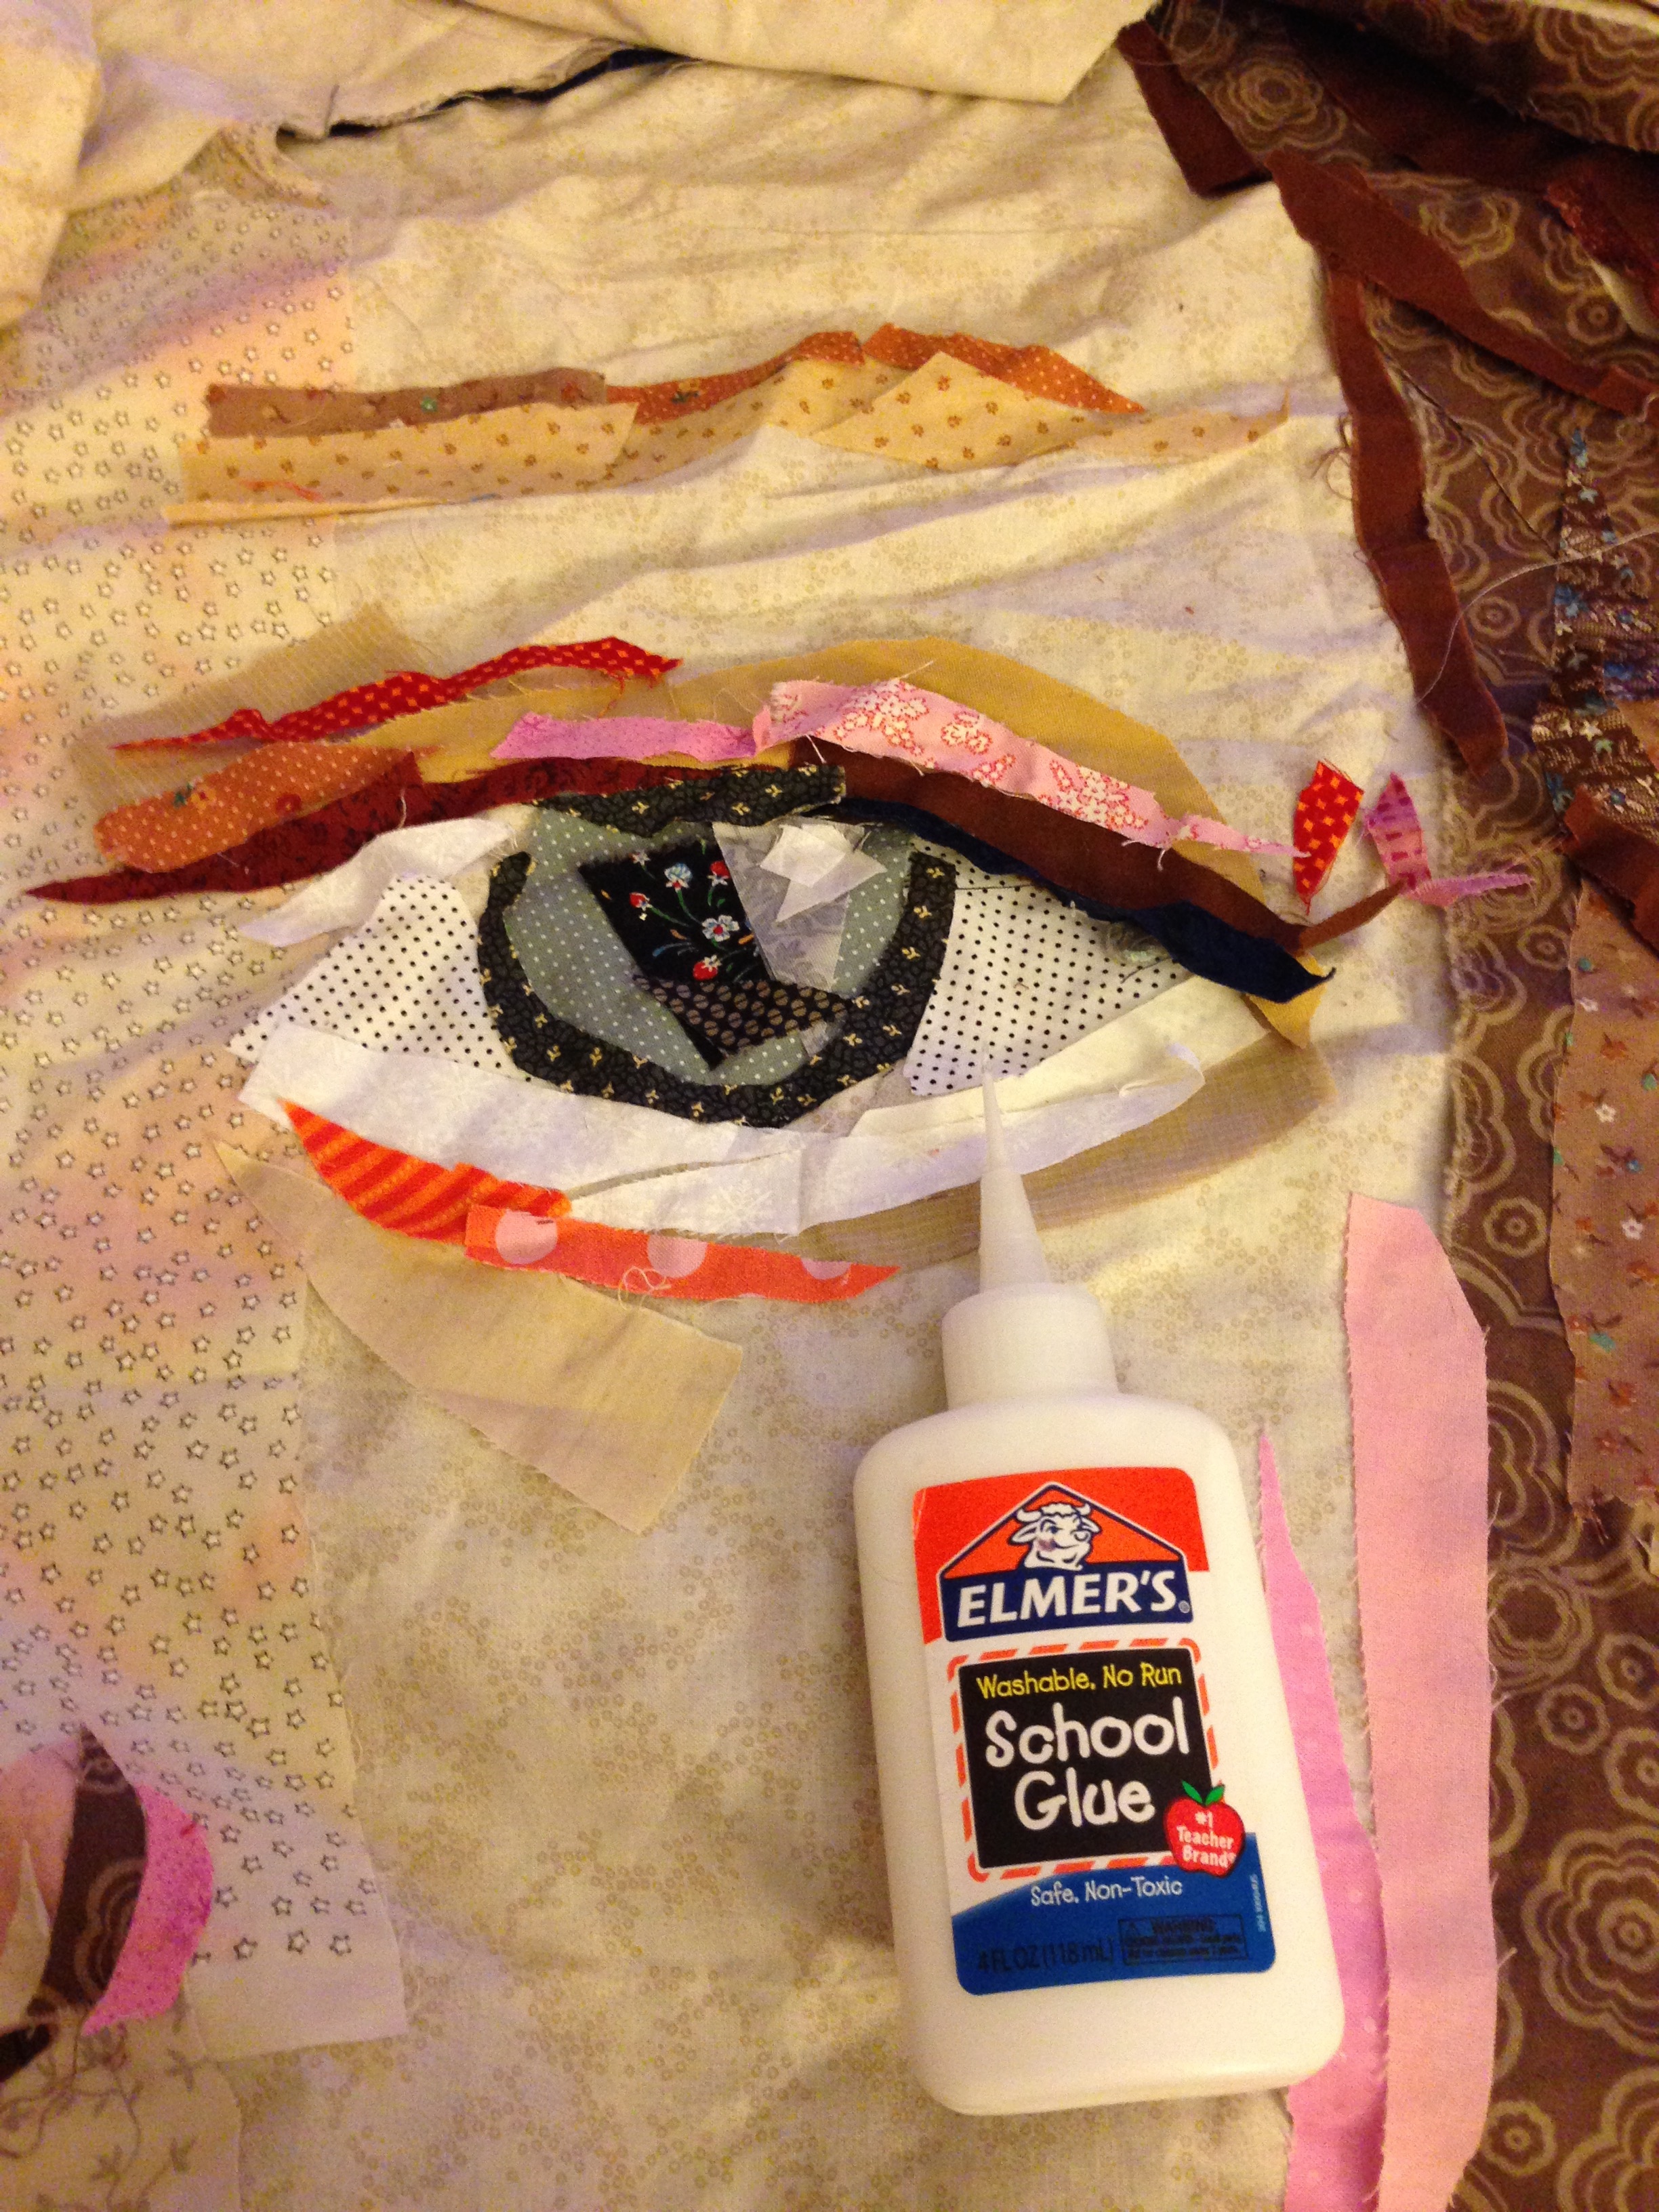
I squeezed a fine, sparse line of glue on the very edge of the back of each piece and pressed it into place. I watched few movies while I did that — it takes time!
Once I glued the features on, I took it back to the design wall and started working on the background. I decided to do a gradient of blue and then added a pink and orange outline around the head. You can see I also added some highlights to the forehead.
Part of my process is a lot of standing back and staring at it. Or, in this case, laying down on the floor and staring at it!
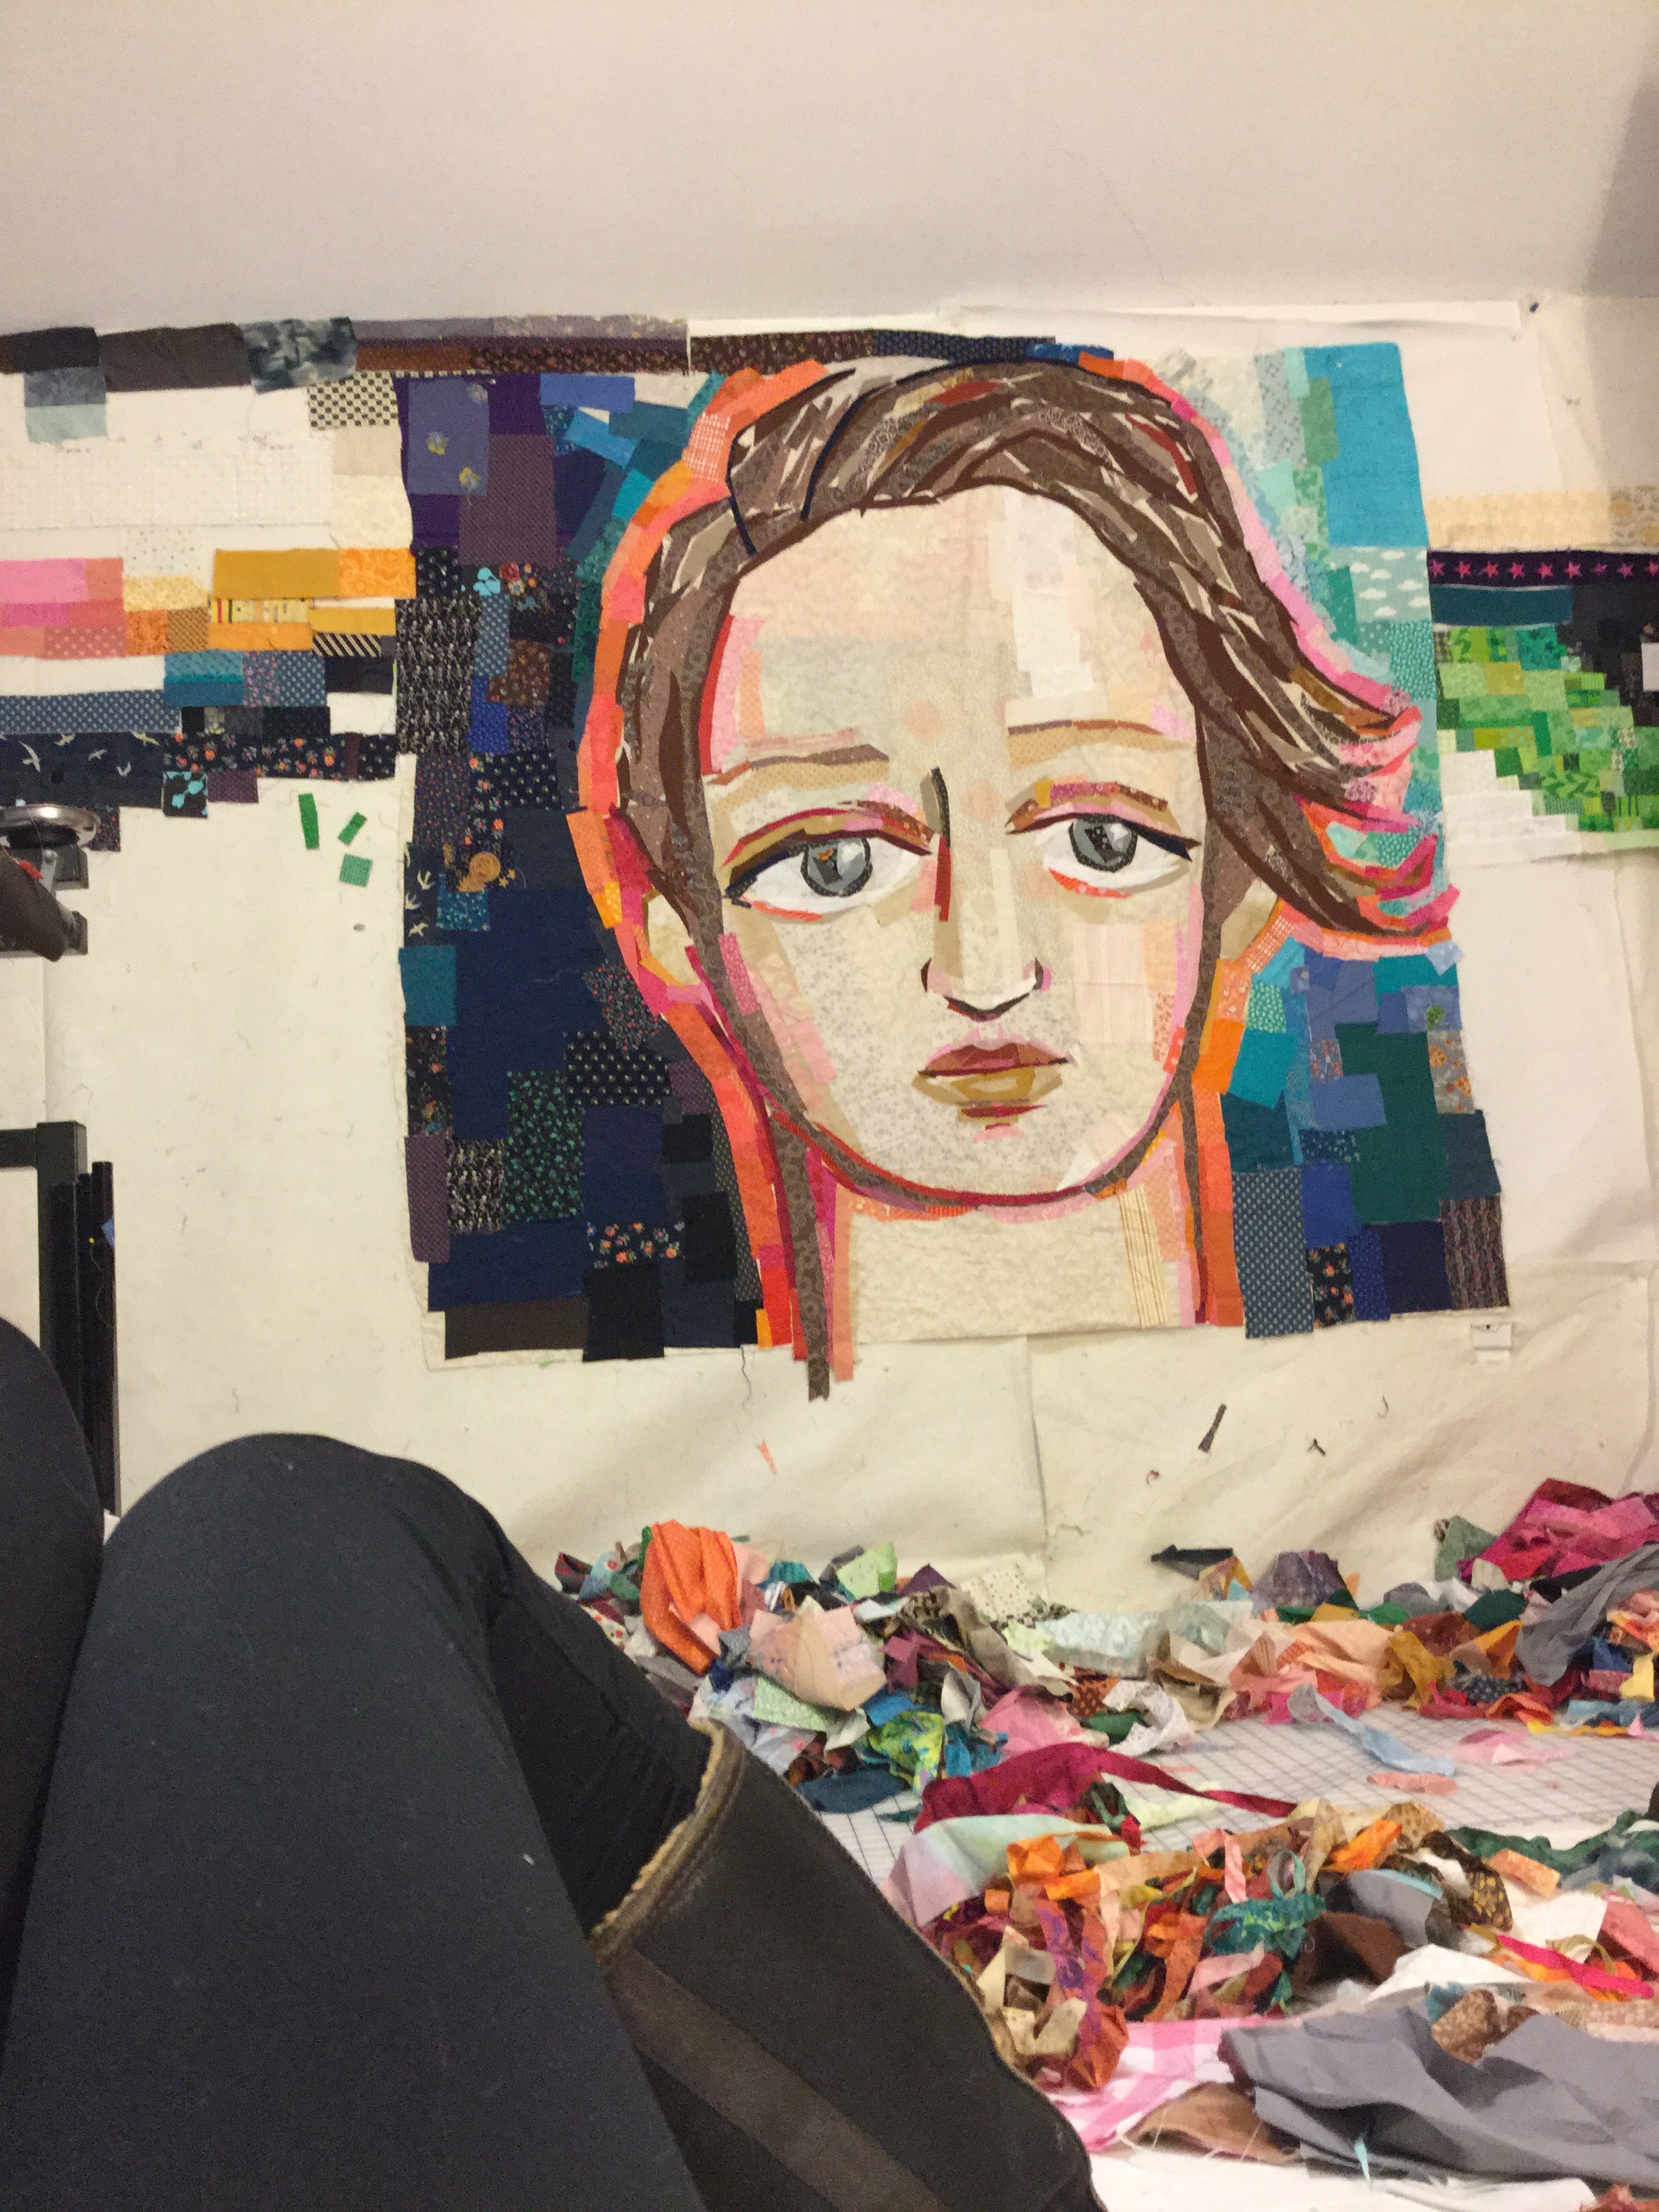
I wasn’t convinced about the background, but I was on a deadline, so I put it on the long arm and free motion quilted it.
But! I just couldn’t let the blue background stay as it was!
I layered white fabric on top of the blue gradient background — while it was on the long arm! I then stitched some flower shapes and cut away the centers to reveal the blue underneath for a little raw-edge reverse appliqué on the fly!

and I liked it SO MUCH BETTER!

I just got it back from the publisher and I may go back in and edit some more! I love the freedom of raw edge appliqué that allows me to do that.
I’m so excited to be teaching this technique (on a smaller scale!) at Quiltcon West 2016 in my class ‘Making Faces’. I love teaching people how to draw a face and then watch them unleash their creativity and use fabric in a new way! Both Quiltcon sessions have sold out, but I hope we’ll get a chance to meet if you go (p.s. I’m a hugger)! If you can’t make it, I’m always sharing my work and what’s inspiring me over on my blog.
xo,
melissa


What you might also like


3 comments on “Appliqué Technique and Design Wall Tips”
-
-
amazing – makes me feel like I could attempt this on a small scale. Thank you for all the pictures.
-
Oh, it is just GORGEOUS. How inspiring! And I’ve never tried elmer’s glue with my applique- what a fantastic tip. I’m grateful you posted. I really loved the face you started with too – the more abstract shapes for the features.
Leave a Reply
You must be logged in to post a comment.

What a fun way to use scraps to make something this creative! I love the way you took the dark blue background and changed your whole design with the white overlay. Pure genius!