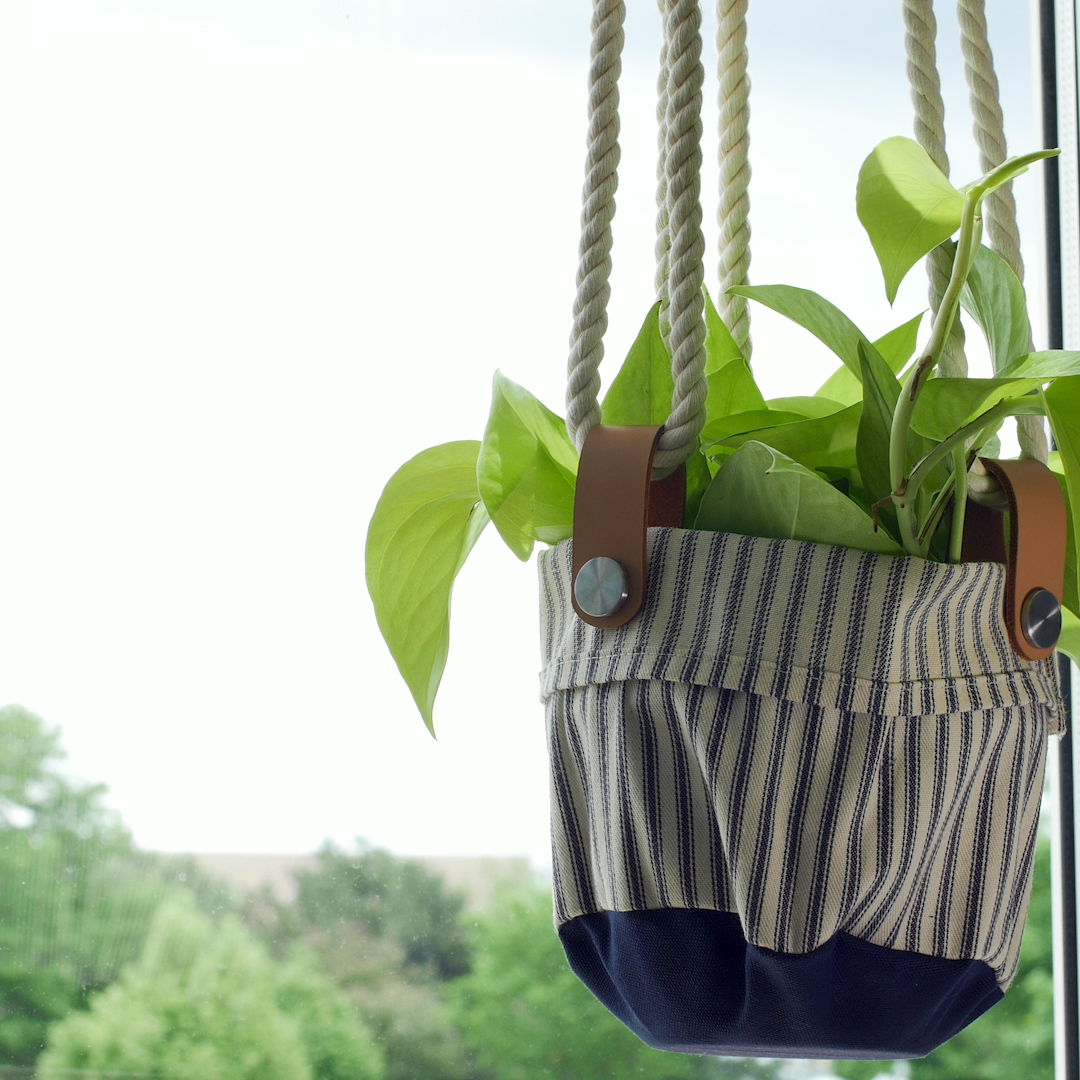
Canvas Plant Hanging Basket
Adding fresh plants to your home can make your space feel so much more fresh and bright. There are greens for all levels of light and exposure and so many ways to display them—large floor pots, small ceramics on tables or a mantle, even hanging from the ceiling! Creating a fabric hanging basket is a simple project and with the right tools, can add a little extra touch to your greenery at home.
Heavy duty canvas will hold up well to the weight of a hanging plant. Opting for a waxed canvas adds a little extra water-resistant protection in case you give your plants a little too generous of a drink. These materials may seem tricky to sew with but all you need are the right tools.
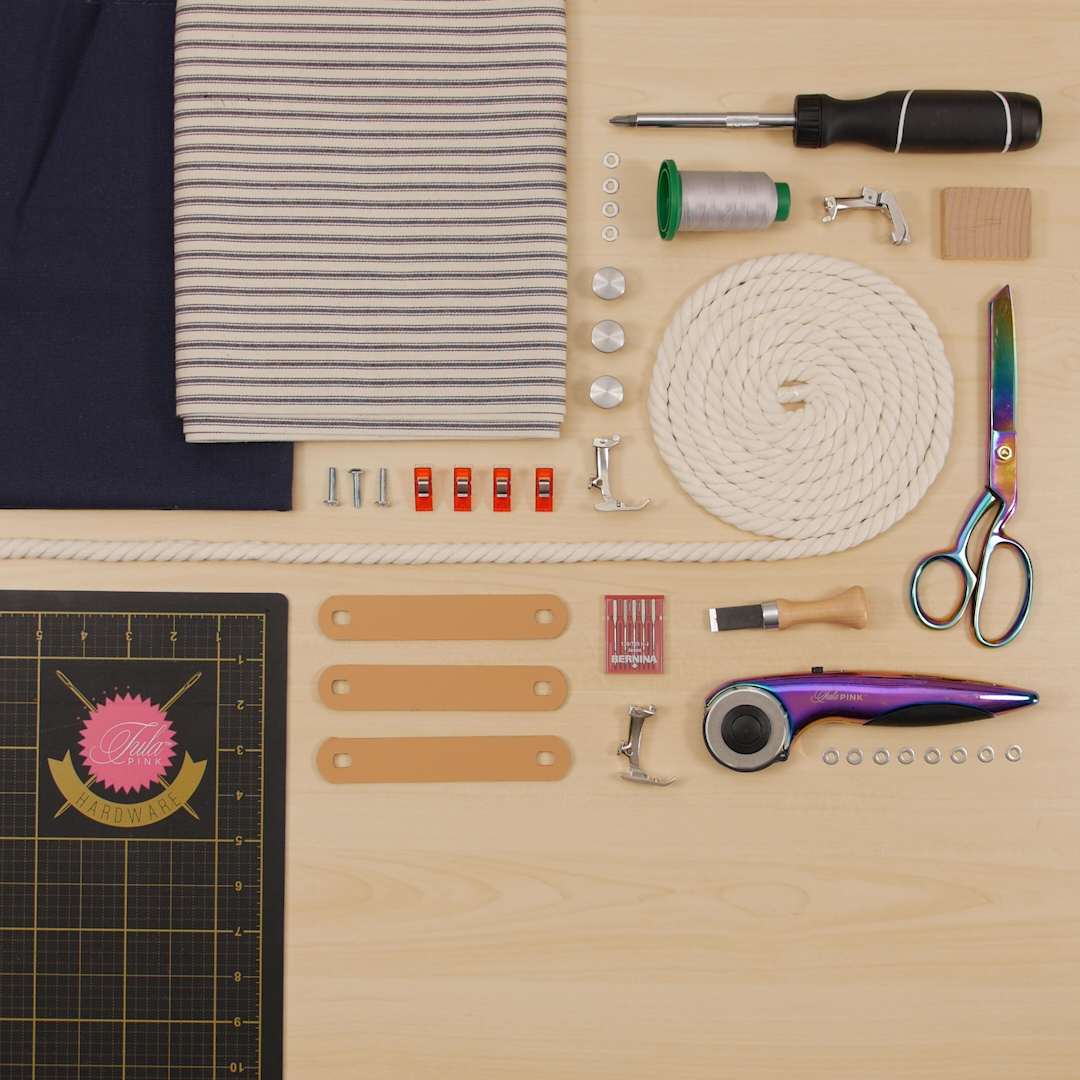
Supplies to Create a Canvas Plant Hanging Basket
- Heavy duty or waxed canvas
- Heavy duty polyester thread
- Pins
- Wonder Clips may be easier, depending on how heavy your canvas is.
- Chalk marking pen
- Iron
- Seam gauge
- Ruler
- Cutting mat
- Rotary cutter
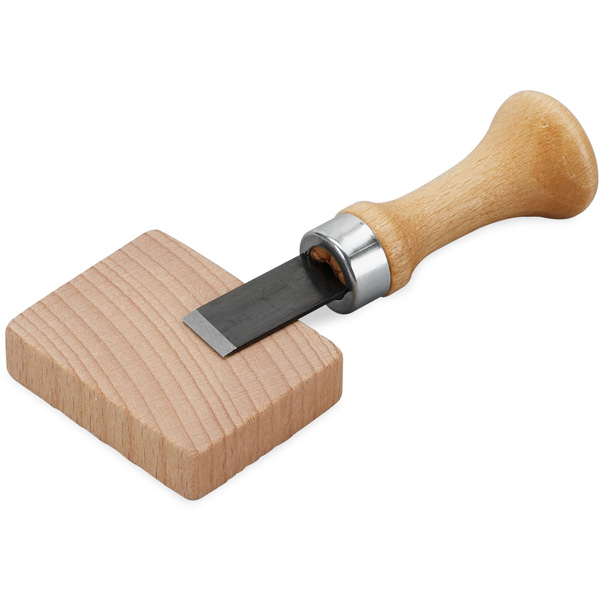
- Buttonhole cutter
- Hardware for hanging
- I used these leather drawer pulls from IKEA.
- You may also use grommets or other hardware.
- Heavy cotton cording or cotton rope
- Edgestitch Foot #10
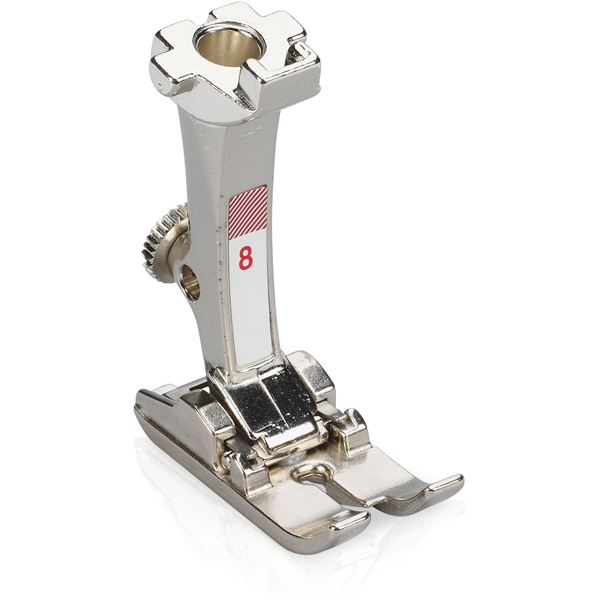
- Jeans Foot #8
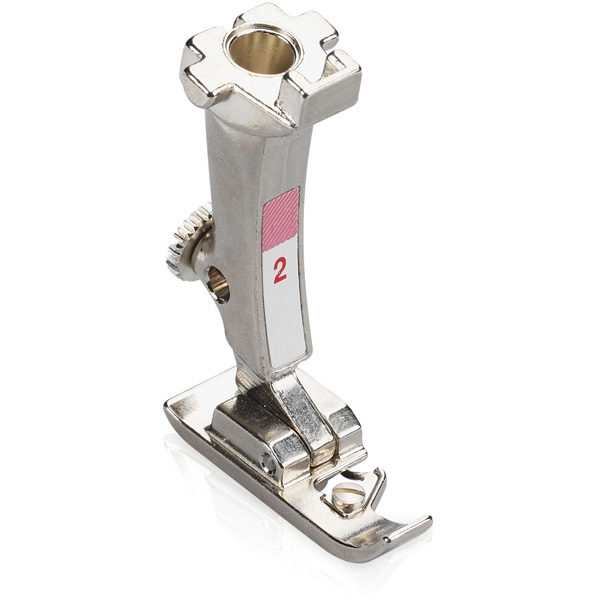
- Overlock Foot #2
- BERNINA 330 Sewing Machine
Step 1. Calculate your measurements
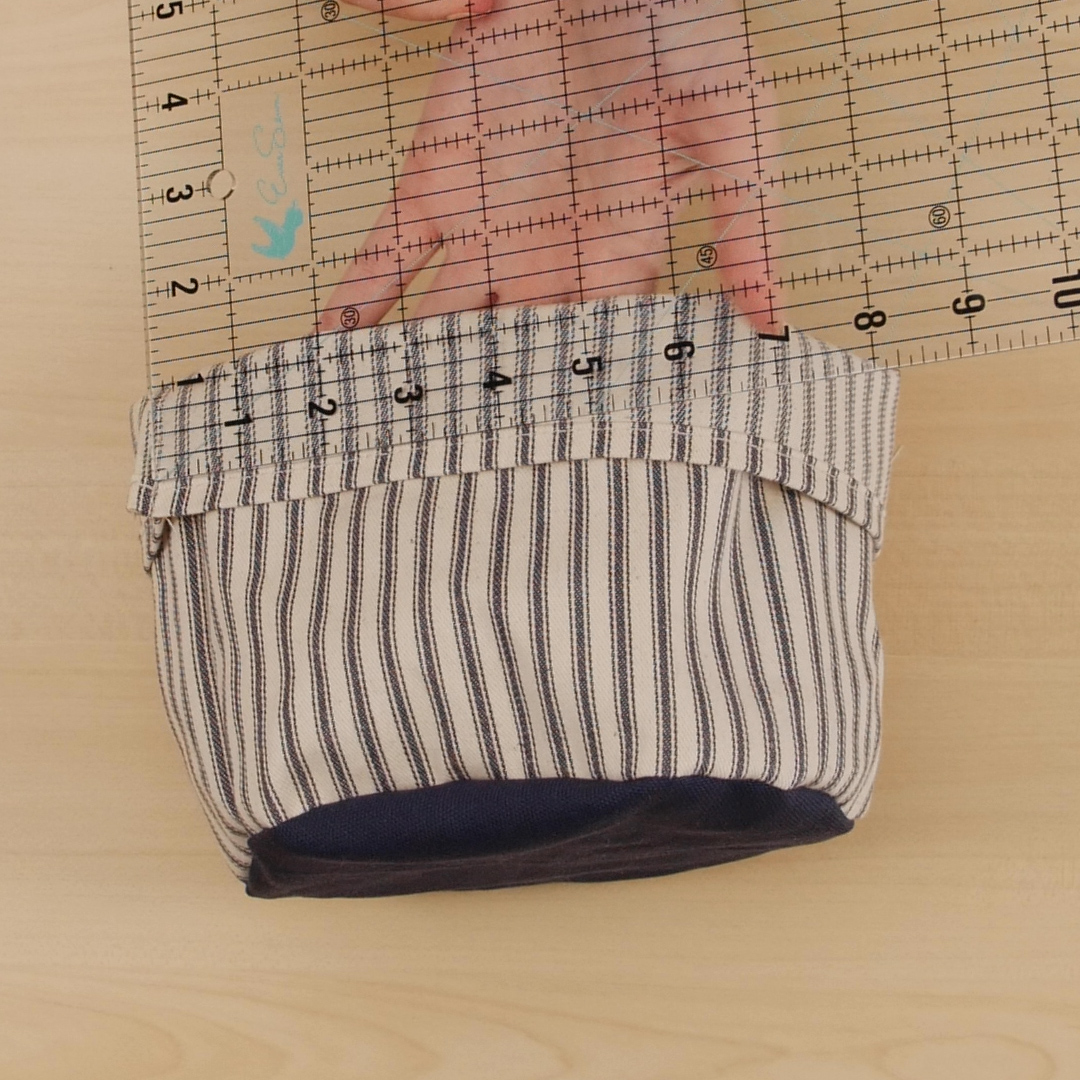
Our first step is to cut the fabric for our hanging basket. For a simple, small houseplant, the standard pot is 6” in diameter. We want to make sure our fabric basket is larger than this for the ease of sliding in and out. We will sew a basket finishing 7.5” in diameter.
For the bottom of the basket, we need to add seam allowance to our circle.
7.5” + 1/4” + 1/4” = 8”
For the sides of the fabric basket, we need to know the circumference. To calculate the circumference, multiply the diameter by pi (3.14).
C = 3.14 x D
C = 3.14 x 7.5
C = 23.56”
Next, we’ll add our seam allowance to this number. We want to allow for a ½” seam allowance.
23.56” + 1/2” + 1/2” = 24.56 or 24.5”
For the height of the sides, measure the height of your plant’s pot and add 2.5”. Mine measure about 6” tall.
6” + 2.5” = 8.5”
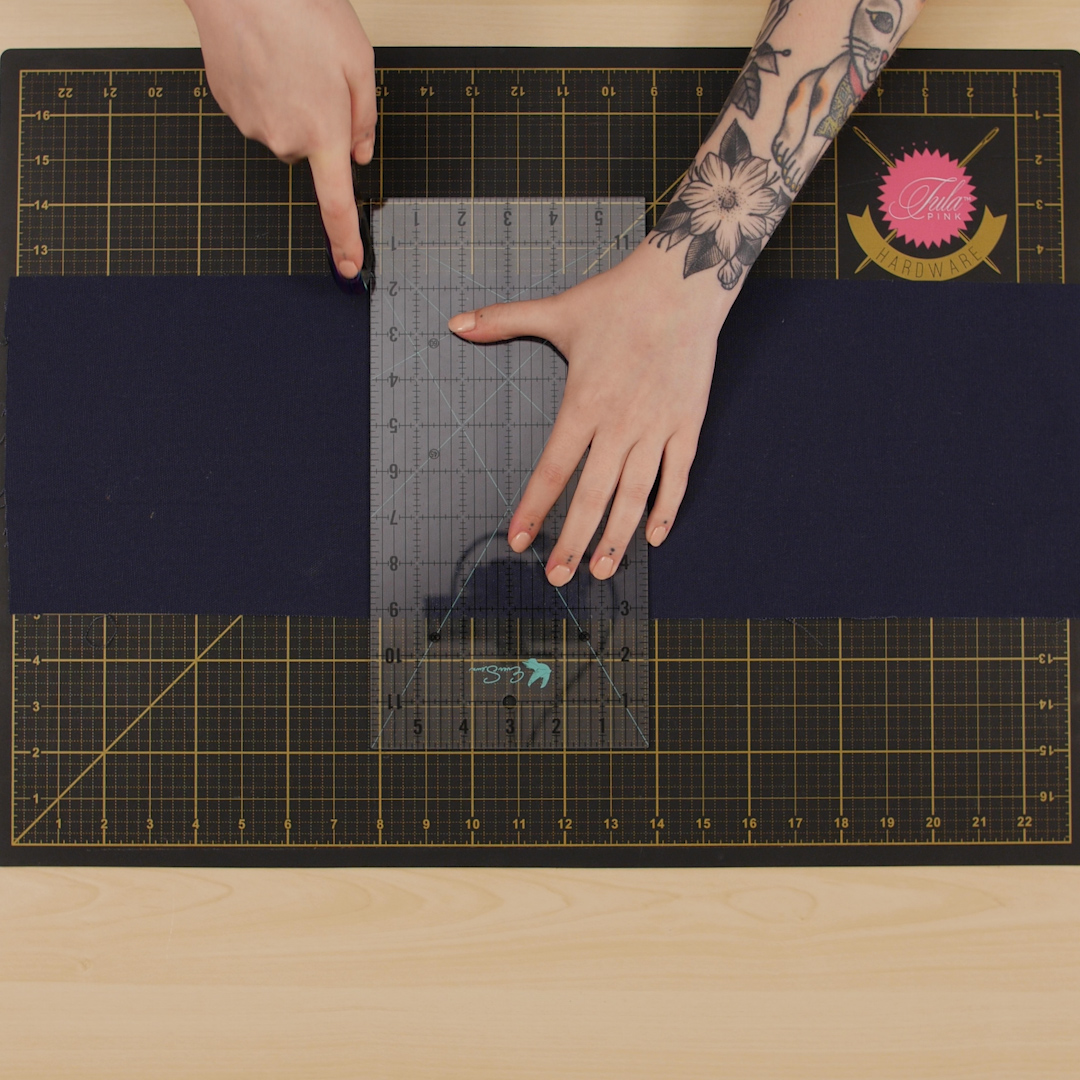
Step 2. Cut your fabric
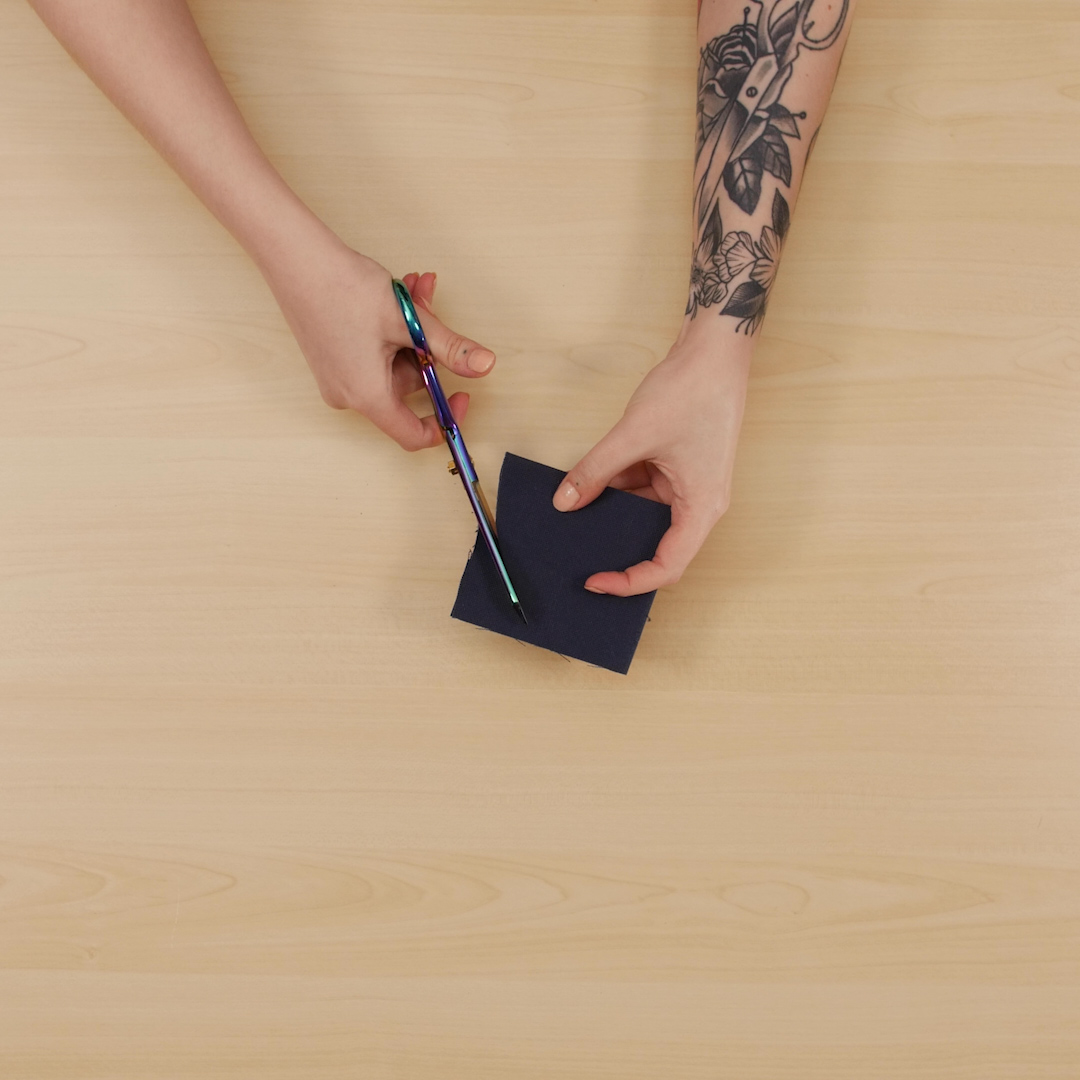
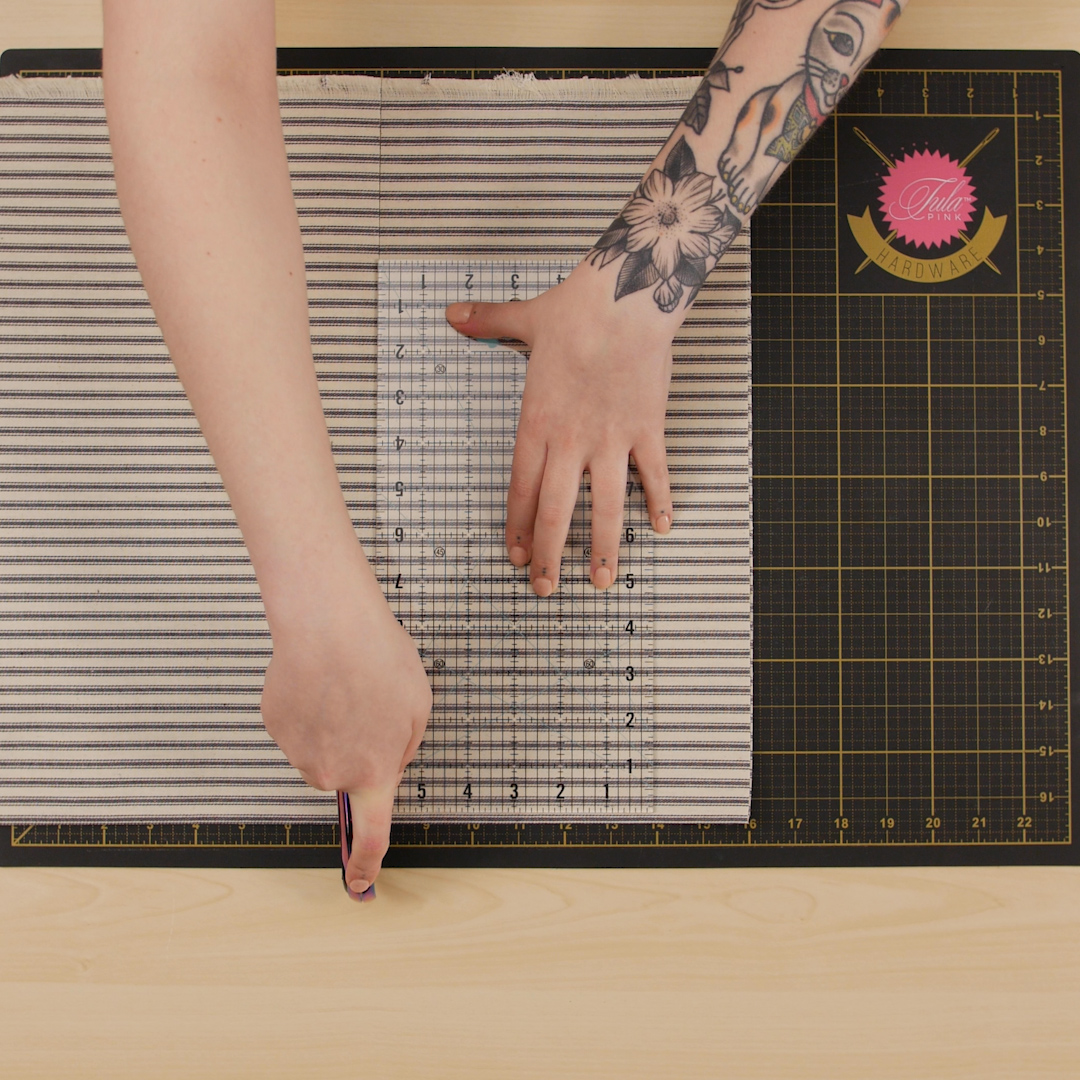
With all our measurements figured out, we can cut our fabric. To cut the circular bottom panel, start by cutting an 8” square. Fold this square in half, then in half again so you have a smaller, folded 4” square.
Use the ruler and chalk pen to measure 4” from the folded corner which will be the center, out to the opposite corner, and mark this point. Measure several similar points, measuring 4” from the center, to give yourself a guide for the curve of your circle.
With your guides in place, cut along this arch with sewing shears or a rotary cutter. You should have a clean, even circle.
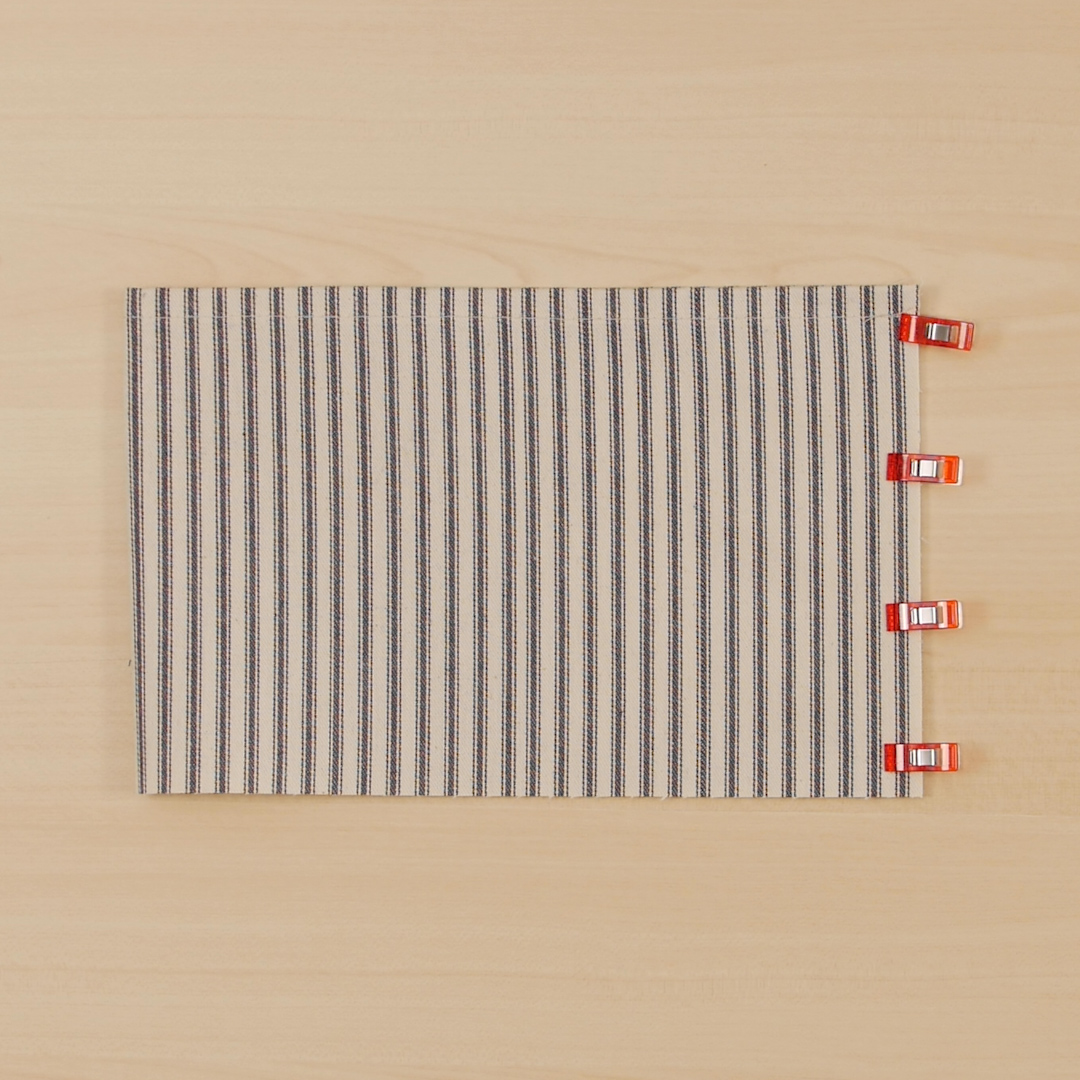
For the sides of the basket, cut a rectangle at 24.5” x 8.5”.
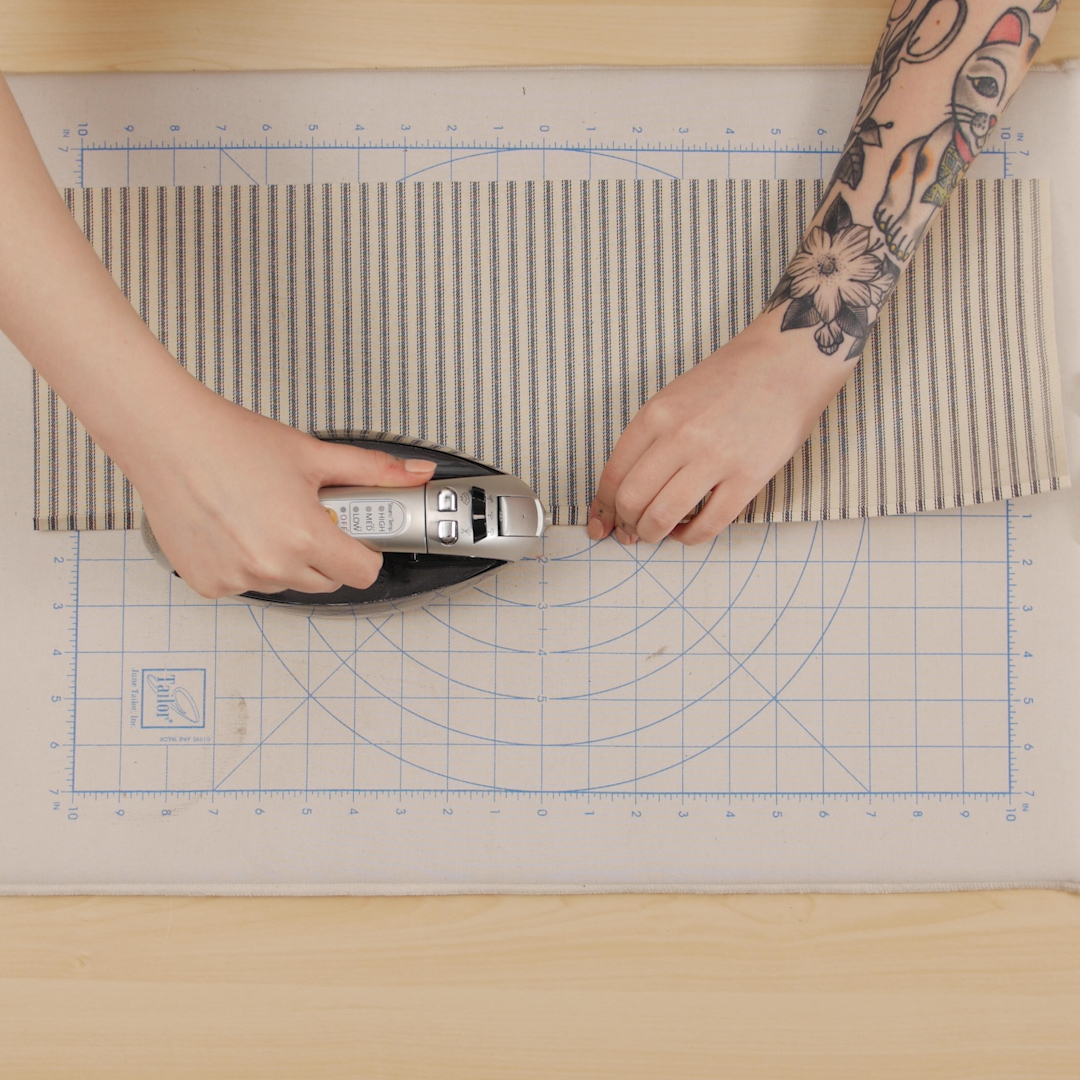
Step 3. Hem the top edge
Begin by creating a double fold hem along one long edge of your side panel piece. To do this, fold the edge over 1/4” to the wrong side of the fabric and press.
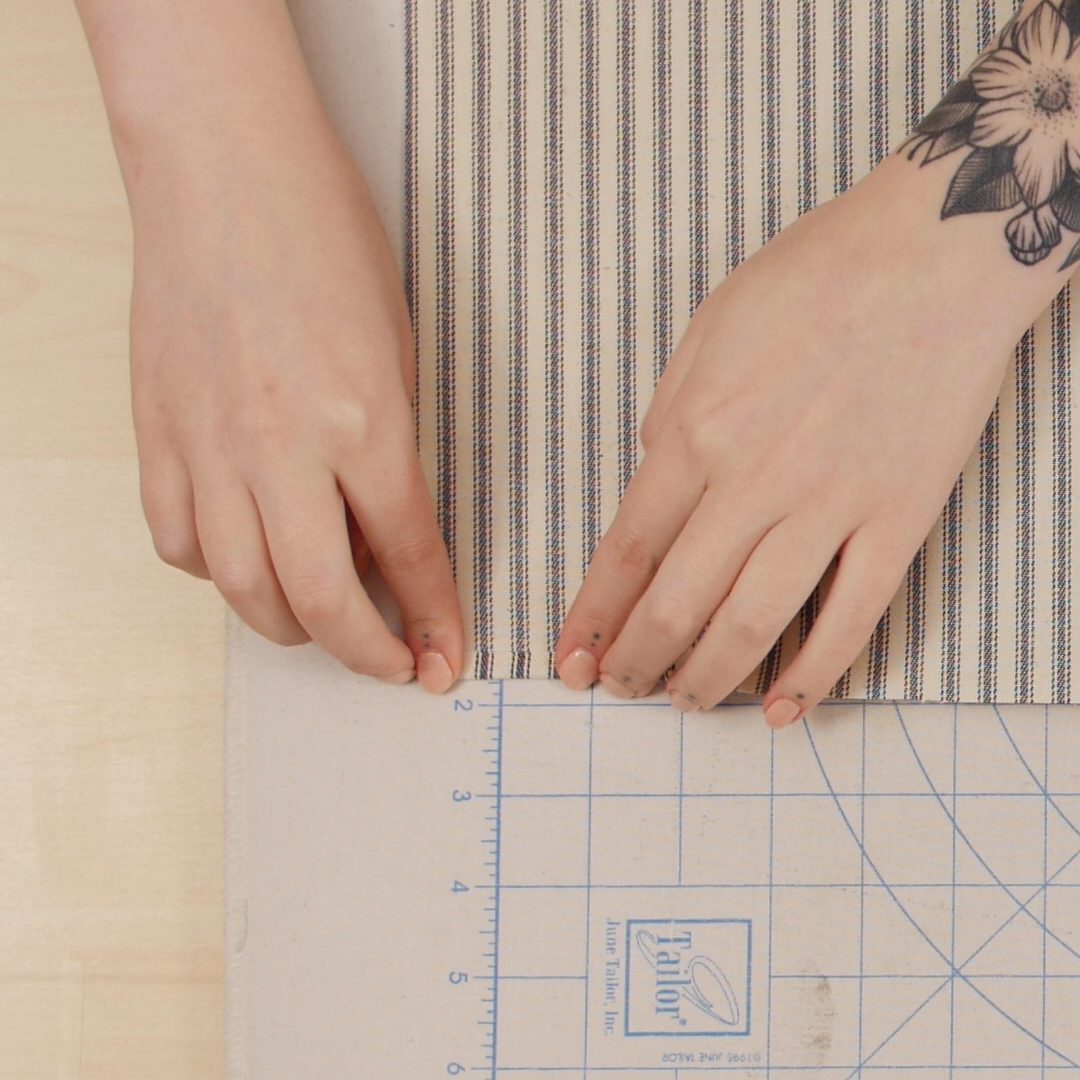
Then fold 1/4″ once more and press again. A good press and a little steam will set this fairly well, but you may to choose to pin this in place as well.
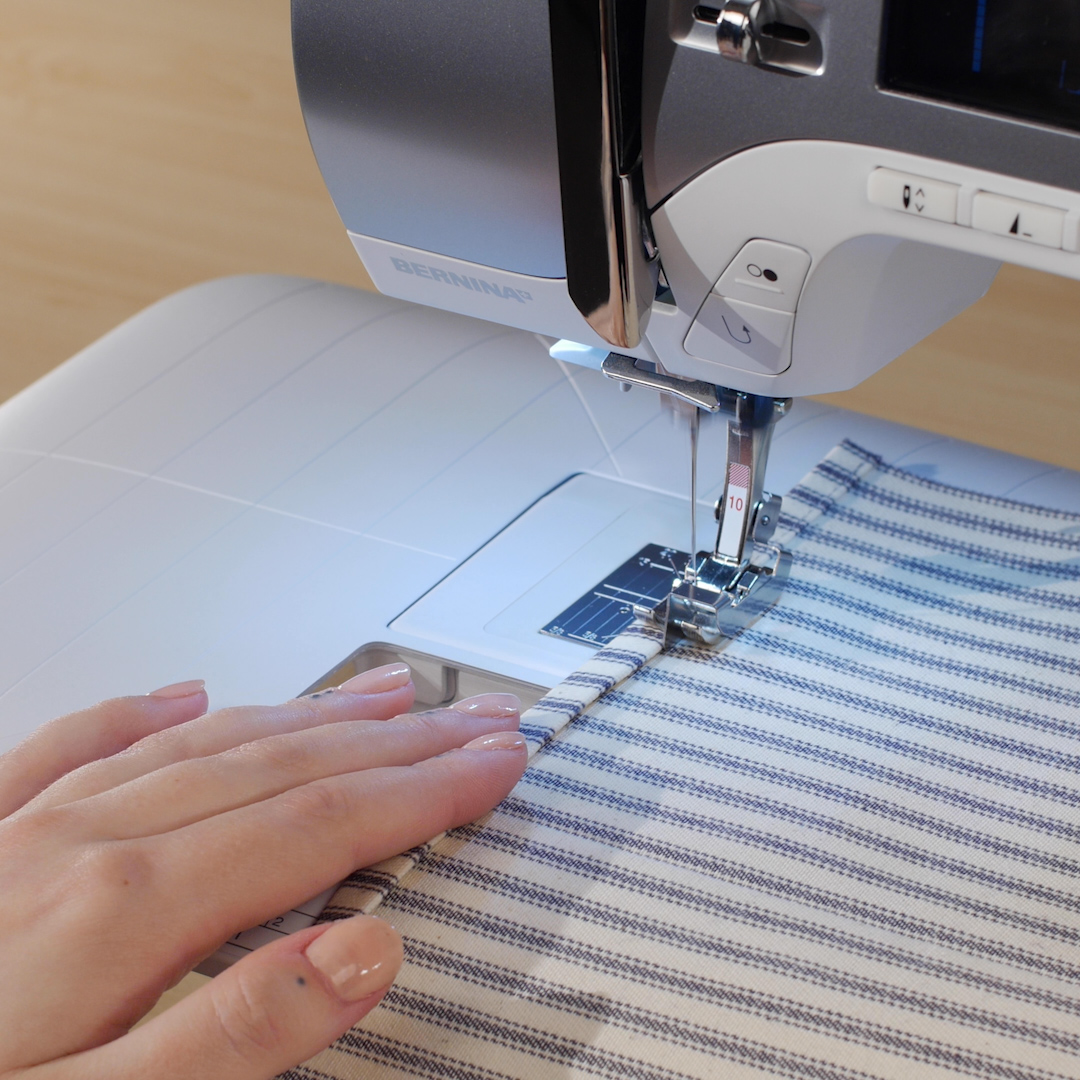
Attach Edgestitch Foot #10 to your machine. Move the needle position two or three positions to the left. With a straight stitch, place the side panel under the presser foot with the folded edge of the hem butted up to the center guide on the presser foot. Sew from one end to the next to secure the hem.
Step 4. Seam the side
Align the short sides of the side panel wrong sides together and pin or clip.
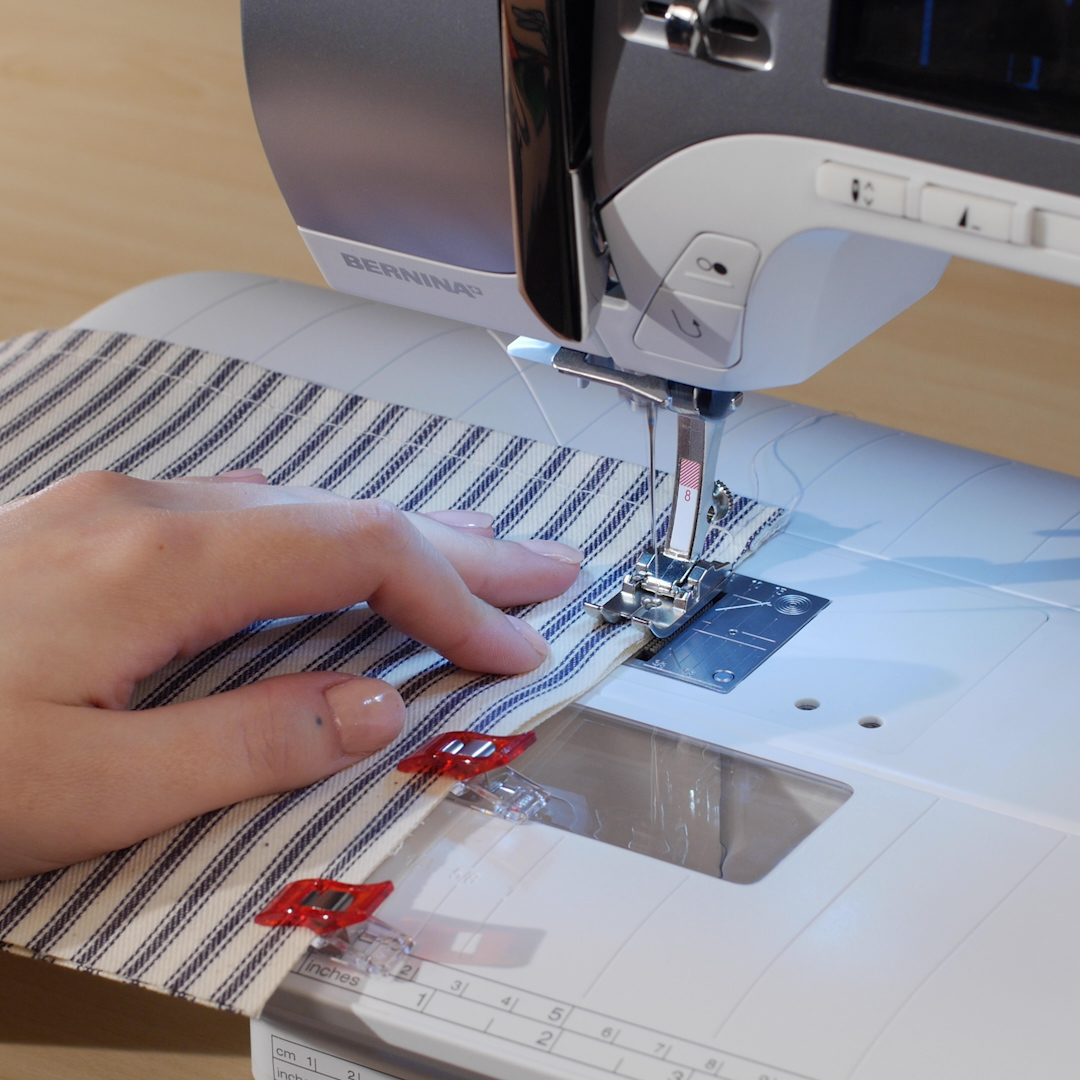
Attach Jeans Foot #8 to your machine. This foot is perfectly designed for sewing through denim, heavy canvas, or other thick materials.
Sew along the pinned edge with a scant 1/4″ seam allowance.
Grade the seam allowance down to 1/8” with your ruler and rotary cutter. Now, flip this tube inside out so now right sides are together. Press the seam you just sewed flat and smooth and pin along the same edge again.
Sew this seam again with a 1/4″ seam allowance, encasing the raw edges for a French seam.
Step 5. Set the bottom
Our next step will be to set the bottom circle panel into the side panel. Start by marking a few points around the perimeters to help in alignment—fold the side panel piece in half, marking the ends with the chalk pen. Then align those two points together as a center point, and mark the folds at either end. This will create four evenly spaced ‘quartered’ points along the perimeter of the side panel.
With the bottom circle panel folded in quarters, give the panel a light press to set creases at the folds.
Stand the side panel up with the raw edge up and the hemmed side down. This will make pinning much easier.
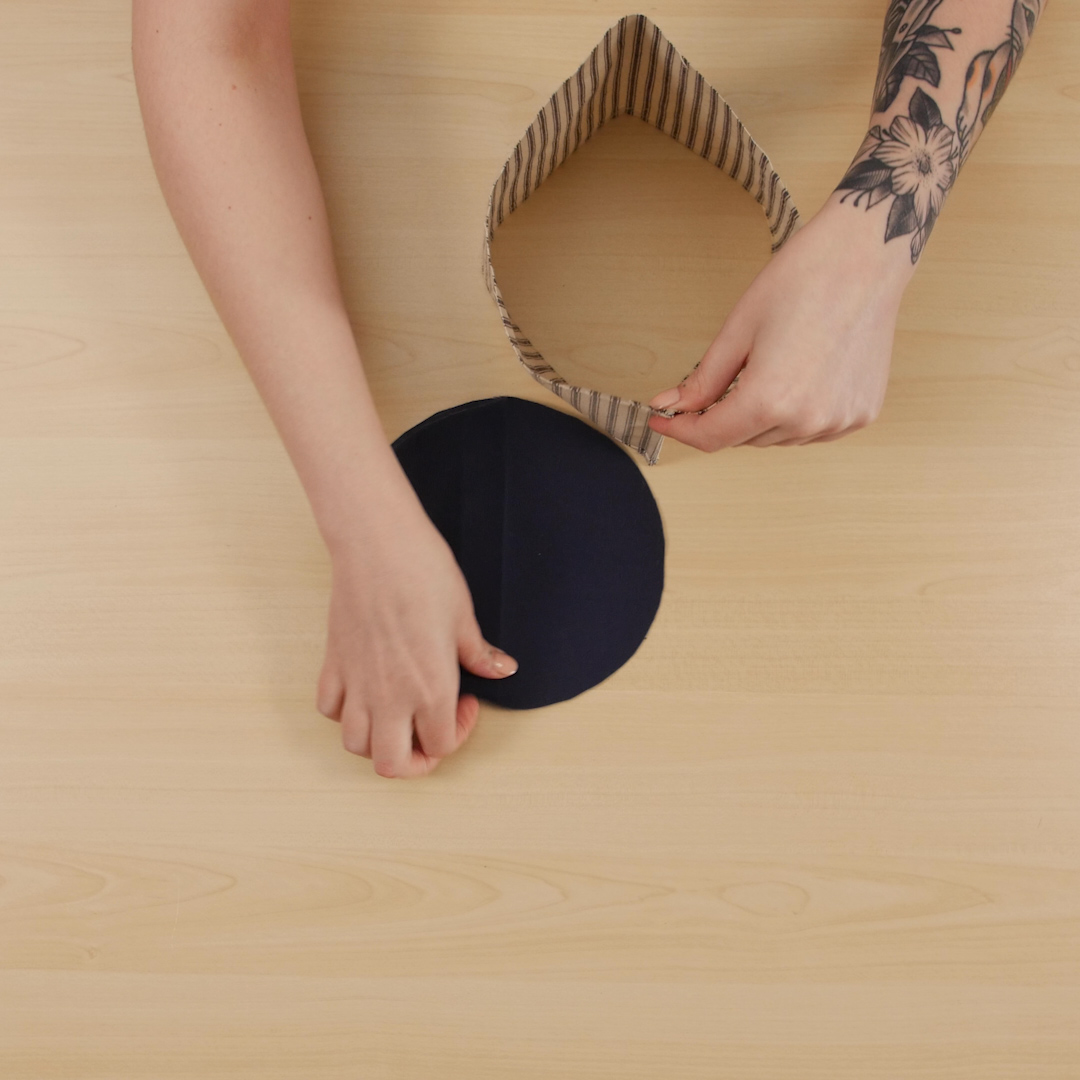
Align the creases in the bottom panel with the marked quarter points on the side panel and pin in place.
Pin as needed to ease between the quarter points.
Attach Overlock Foot #2 to your machine. Select a double overlock stitch (#8 on the B 330). A double overlock stitch will be very durable and also overcast the raw edge of the fabric to reduce fraying.
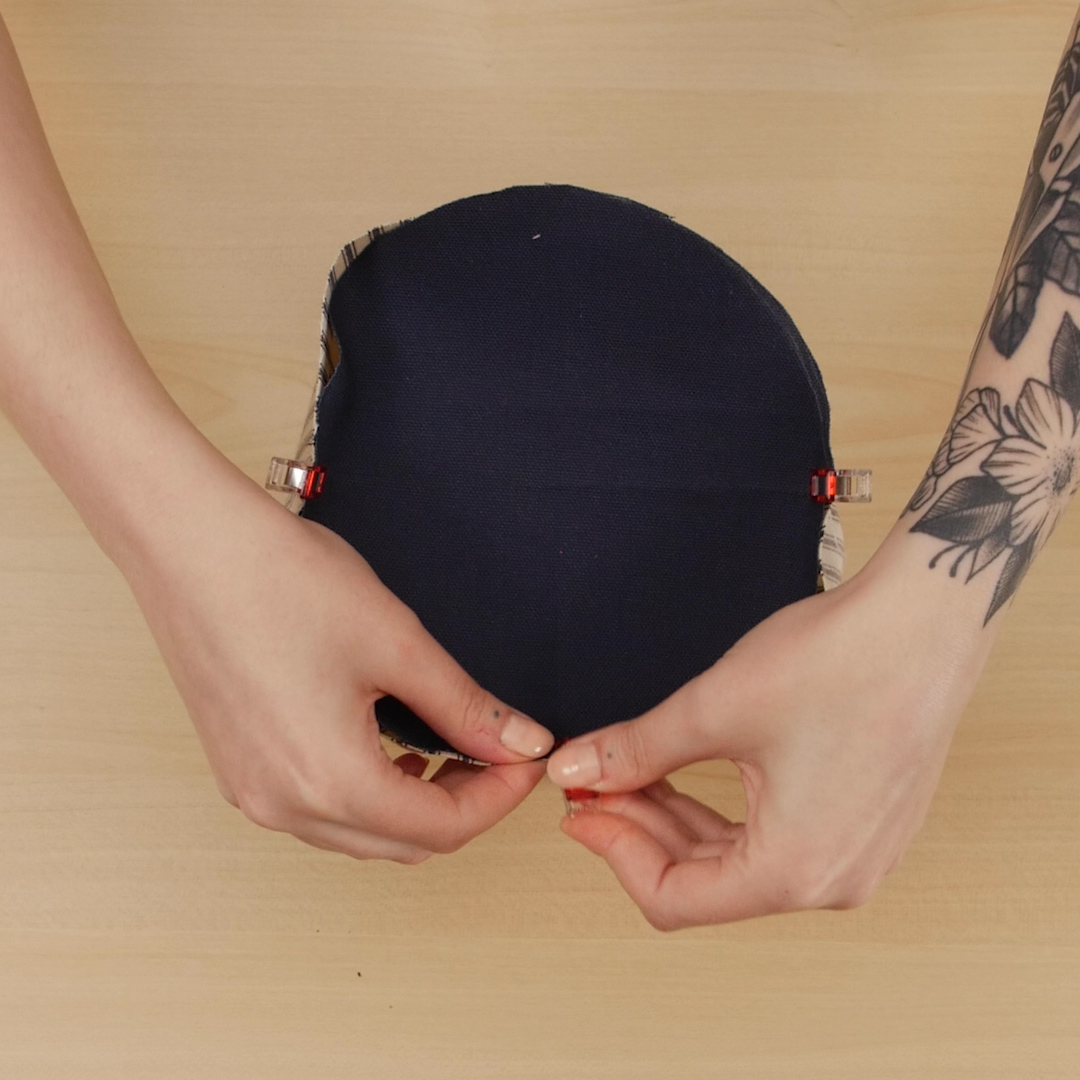
Place the fabric under the presser foot, aligning the raw edge with the small pin on the right side of the foot. Sew all the way around the perimeter.

When the bottom is completely set in, turn the fabric basket right side out.
Step 6. Set in hardware
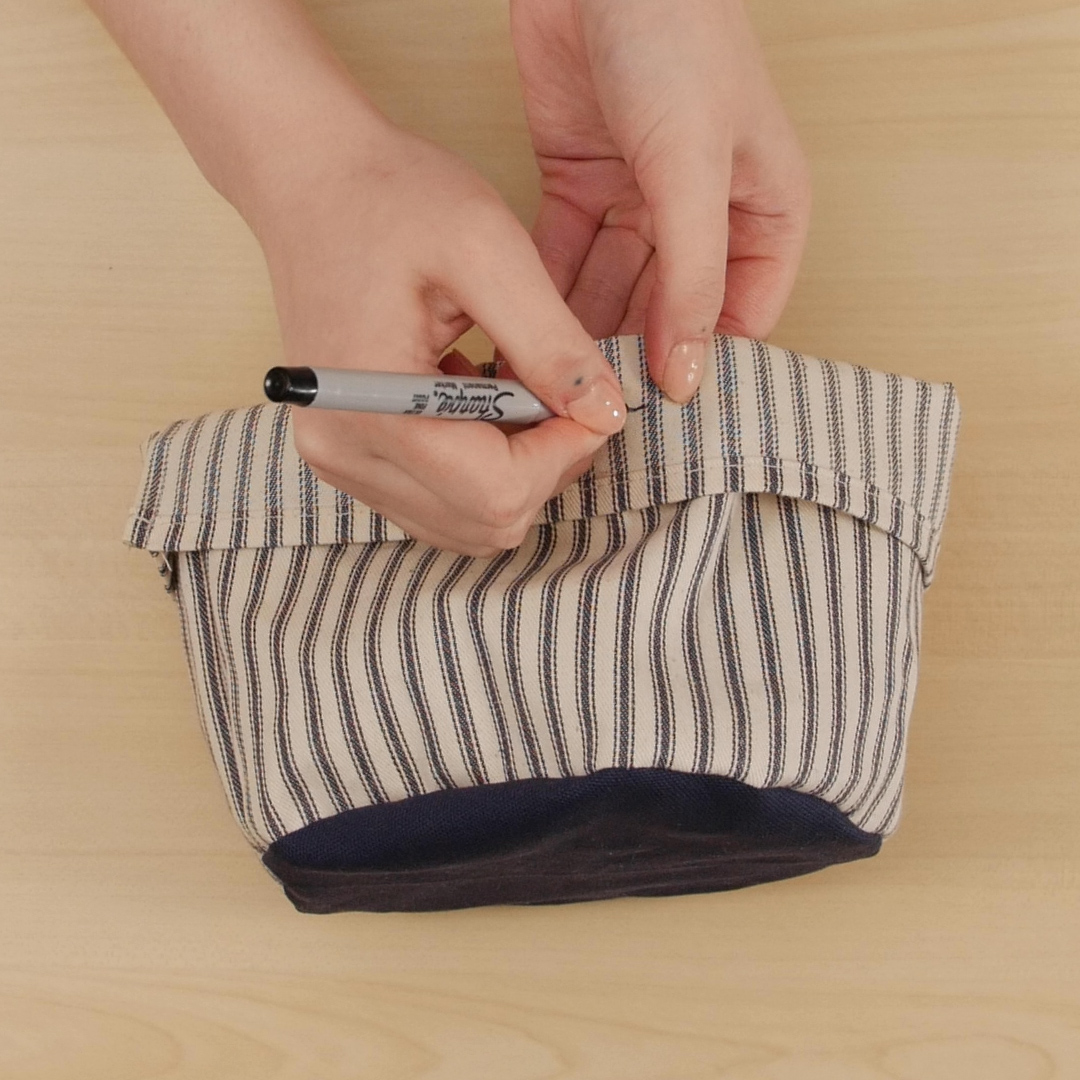
Next, we will add hardware to our fabric basket so that we have a way to hang it! Fold the upper hemmed edge down about 1.25” all the way around. Use a ruler or a seam guide to make sure this is even and consistent. Press the fold.
Mark three points all the way around, about halfway between the folded edge and the hem. Since our circumference is about 23.5”, these marks should be just shy of 8” apart.
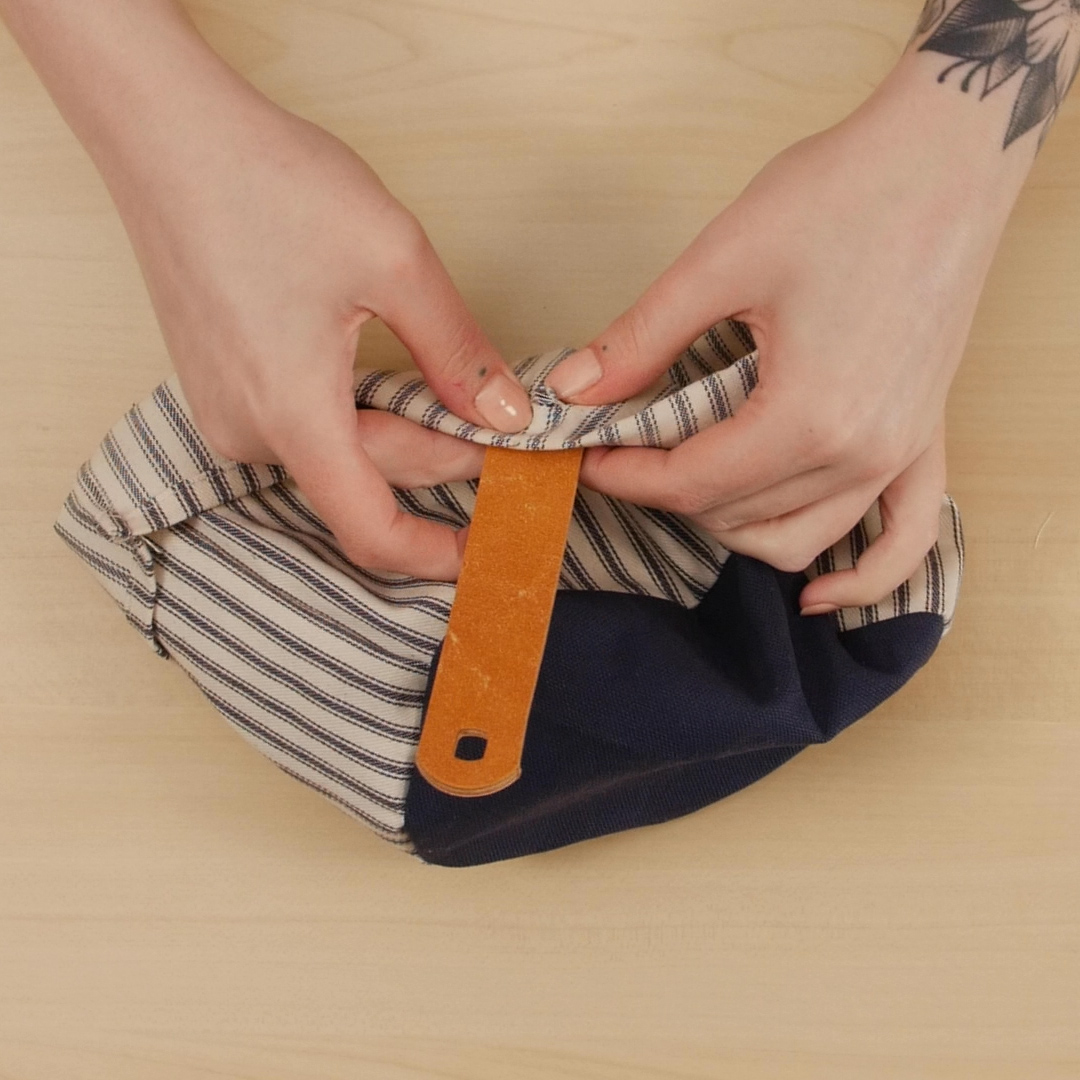
At each of these marks, we will set our hardware. I used some drawer pulls I found at IKEA for this, but you may choose to use grommets or another type of hardware. Follow the manufacturer’s instructions for these kinds of hardware.
Use small sewing scissors or a buttonhole cutter to cut a small slit (about 1/2”) in both layers of fabric.
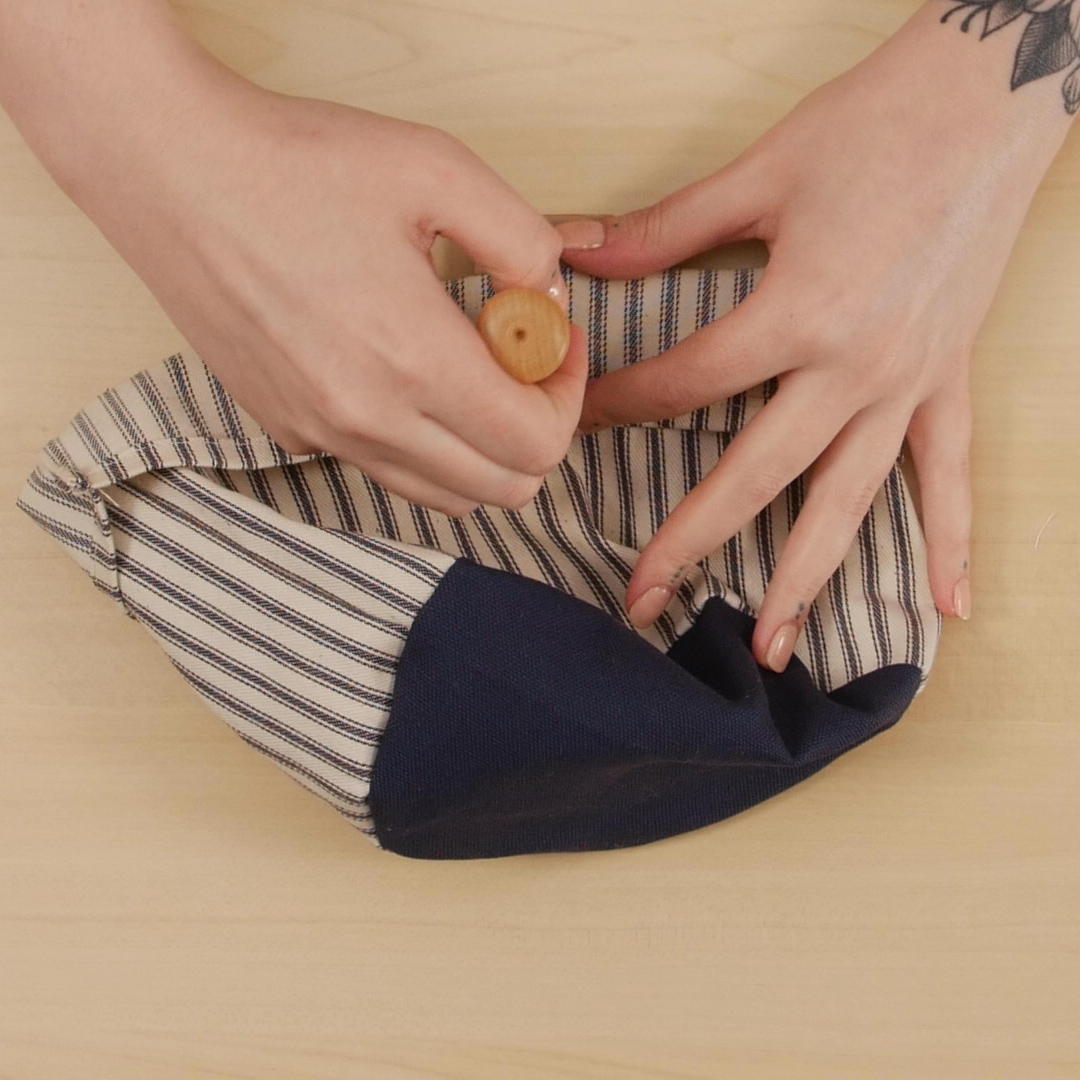
Insert the hardware and secure with a washer and screw on the inside of the fabric bag. For the IKEA hardware, you will need to purchase shorter screws from your local hardware store.
Step 7. Add cording to hang
Finally, we can get ready to hang our plant! Depending on the height you want to hang the plant, feed the appropriate length of cotton cording through your hardware. You can leave these as simple loops or incorporate some interesting macramé knots!

Secure all the sides together at the top with a knot and hang from your ceiling with a hook.