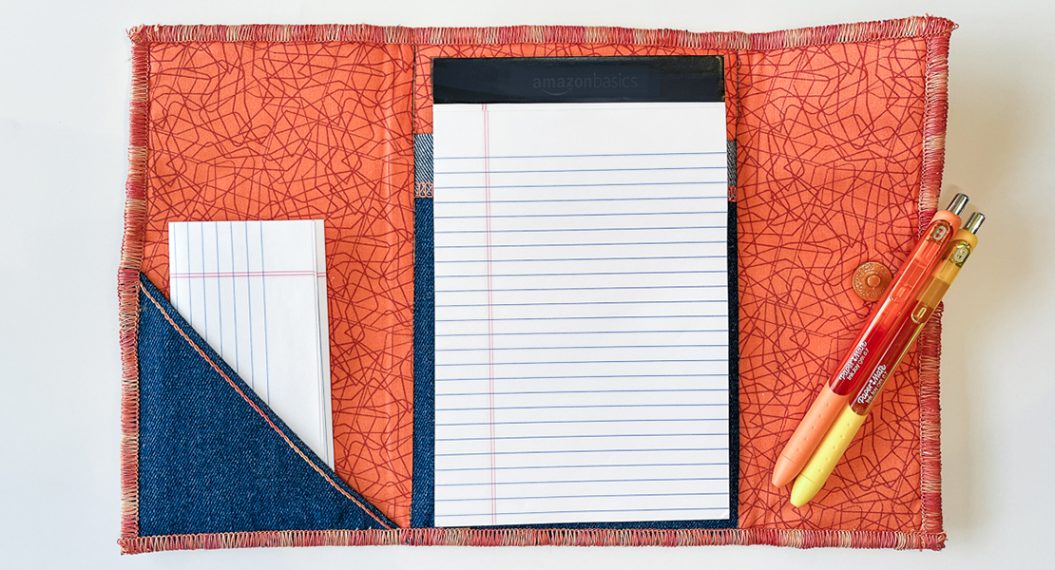
DIY Notepad Folio on the Overlocker, Part One
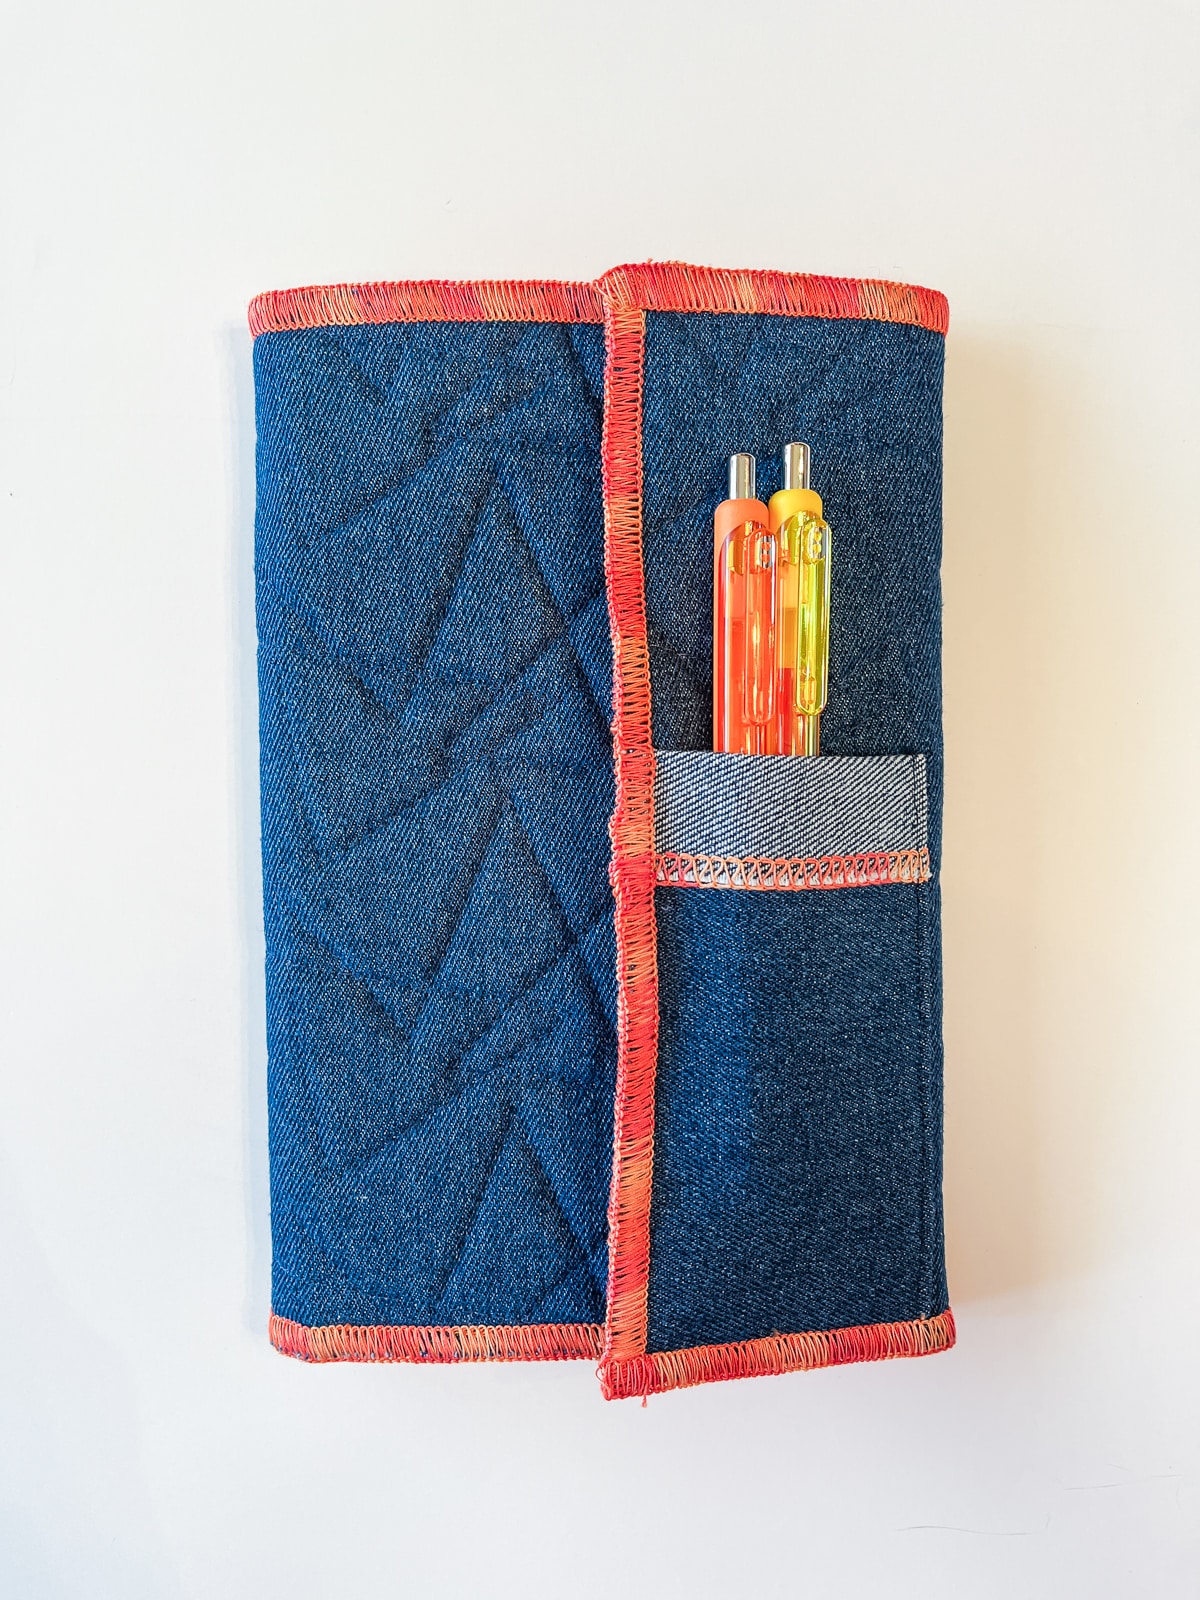
Do you find yourself hunting for paper and pen when writing notes? Maybe it’s time to get a little more organized with this notepad folio that has a handy pocket for a pen or two!
This project was inspired by a 2015 WeAllSew post by Sue Bleiweiss, a DIY Note Pad Folio. Click here to read the original post. I thought it would be a fun quilting and serger project, so let’s get started!
This will be a two-part post. In Part One, I’ll show you how to quilt in the hoop with the BERNINA B 990. In Part Two, we’ll play with some decorative thread on the overlocker and assemble the cover on the BERNINA L 890. The supplies for both parts are listed below.
Materials for Making the Notepad Folio
- B 990
- L 890
- Drop-shaped Embroidery Foot #26L
- Giant Embroidery Hoop
- Cover-/Chainstitch Foot #C13
- Clear Foot #C27
- Accessories Holder
- Coverstitch Hemmer 25 mm #C31
- OL/CS Height Compensating Tool
- Edge-to-Edge Quilting Design in BQM format (I used #LA12897-12 Modern Quilt Pantograph 12 by OESD)
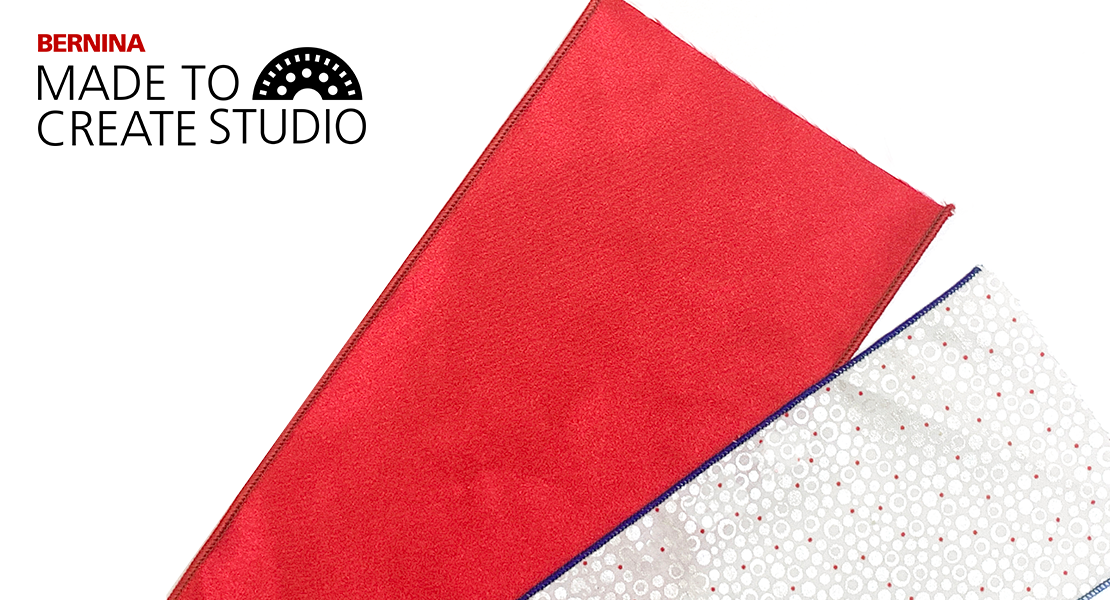
- Medium-weight Denim
- 15” x 20” rectangle for outside
- 4” x 6” rectangle for outside pen pocket
- 5” x 5” square for inside corner pocket
- 6” x 8” rectangle for inner notepad pocket
- Leftover fabric for testing hemmer placement
- Lining (I used Stitchy from Benartex)
- 5″ x 9″ rectangle for left lining
- 6” x 9″ rectangle for center lining
- 3 1/2” x 9″ rectangle for right lining
- Thread for quilting
- 12 weight thread (I used two spools of WonderFil Fruitti, a variegated thread)
- Serger thread (one spool to match the decorative thread and two spools to match denim for chainstitch work)
- 19” x 25” rectangle of Soft and Stable
- 505 Spray Adhesive
- Magnetic Snap
- Basic embroidery and serging supplies
Step 1: Make the Outside Cover
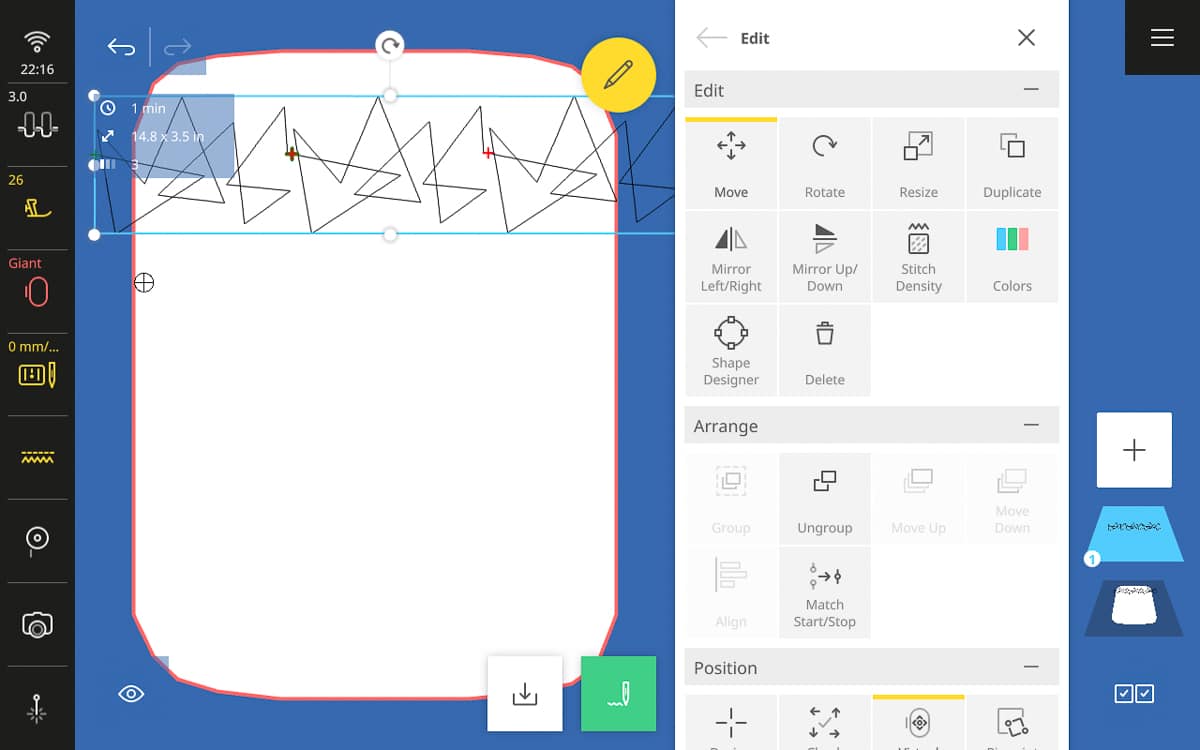
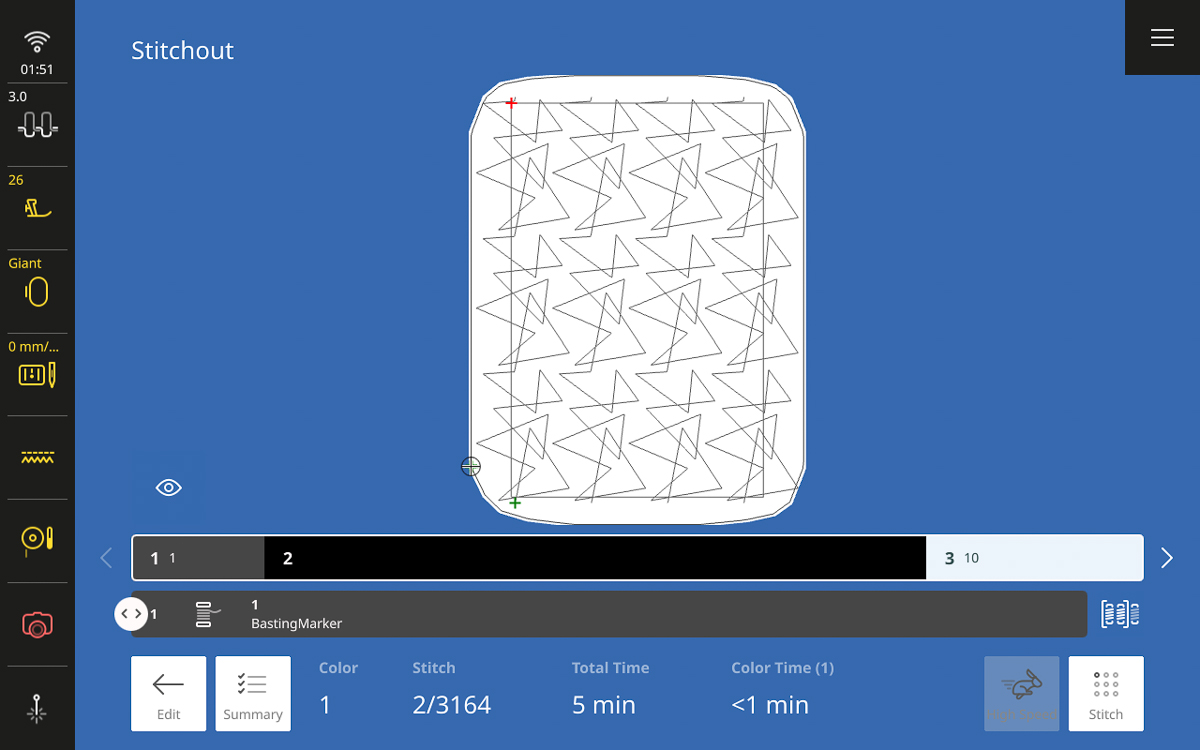
Thread the needle and bobbin with thread of choice. I’m going for a tone-on-tone effect, so I have Isacord thread that matches my denim in the needle and bobbin. Select the Giant Hoop. Open your quilting design. The beauty of using BQM designs on the B 990 is the ability to resize to any dimension and change the stitches per inch. Resize the design to 5” wide x 3 1/2″ tall.
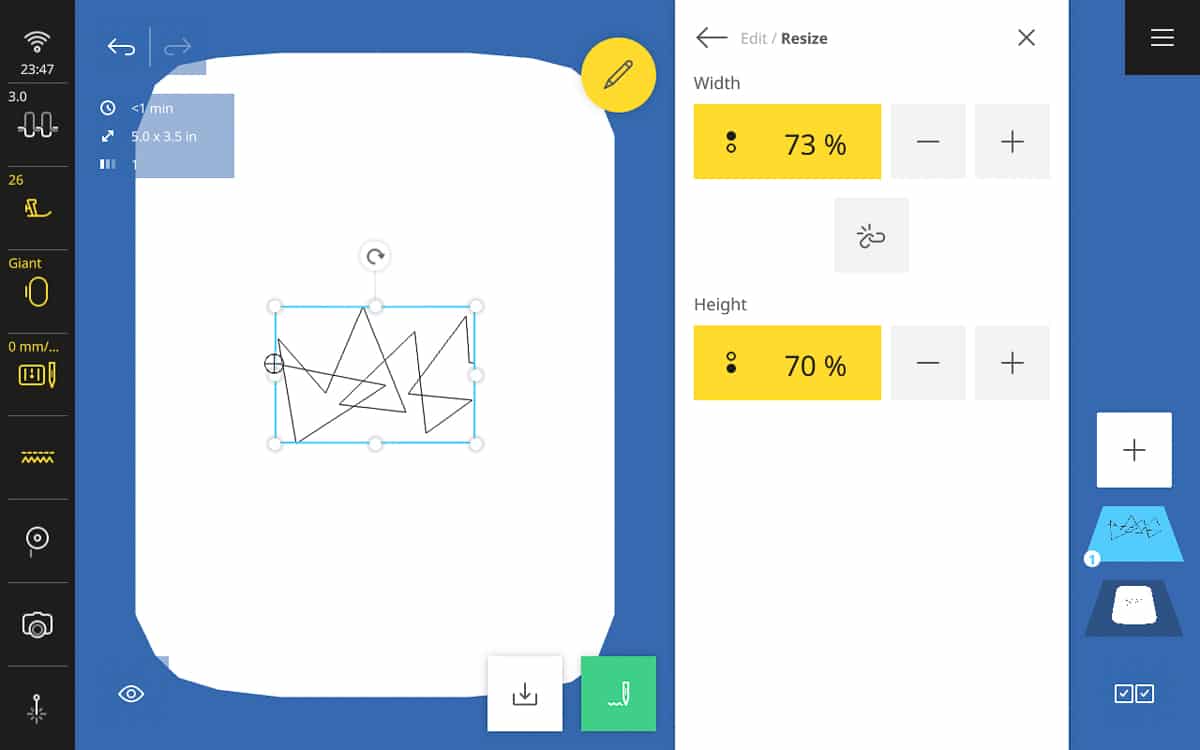
In Settings/Embroidery, change the SPI (Stitches Per Inch) to 8.

Next, select Duplicate to make three designs and apply Match Start/Stop. Then Group the design. Finally, move it to the top of the hoop. Yes, it’s too big! But don’t worry!
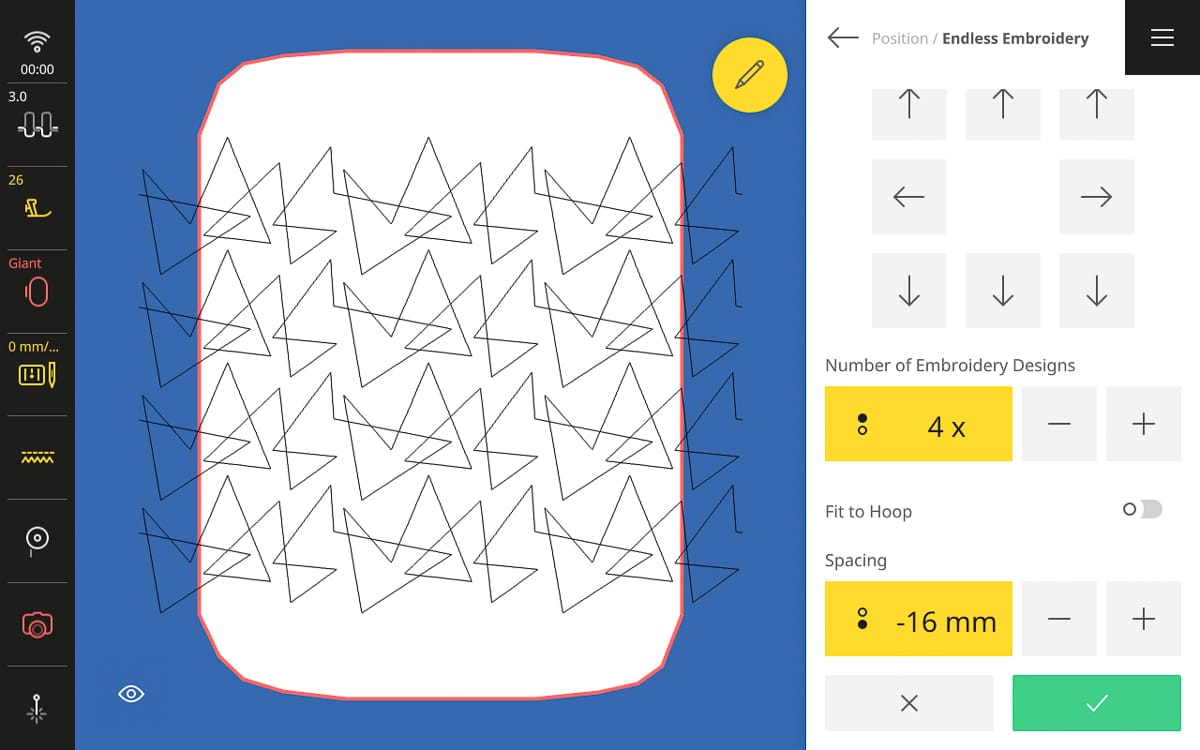
To quickly fill the space, use Endless Embroidery. Select four repeats, remove the Reference Markers and adjust the spacing as desired.
After confirming the Endless Embroidery Settings, rotate the design 270º.
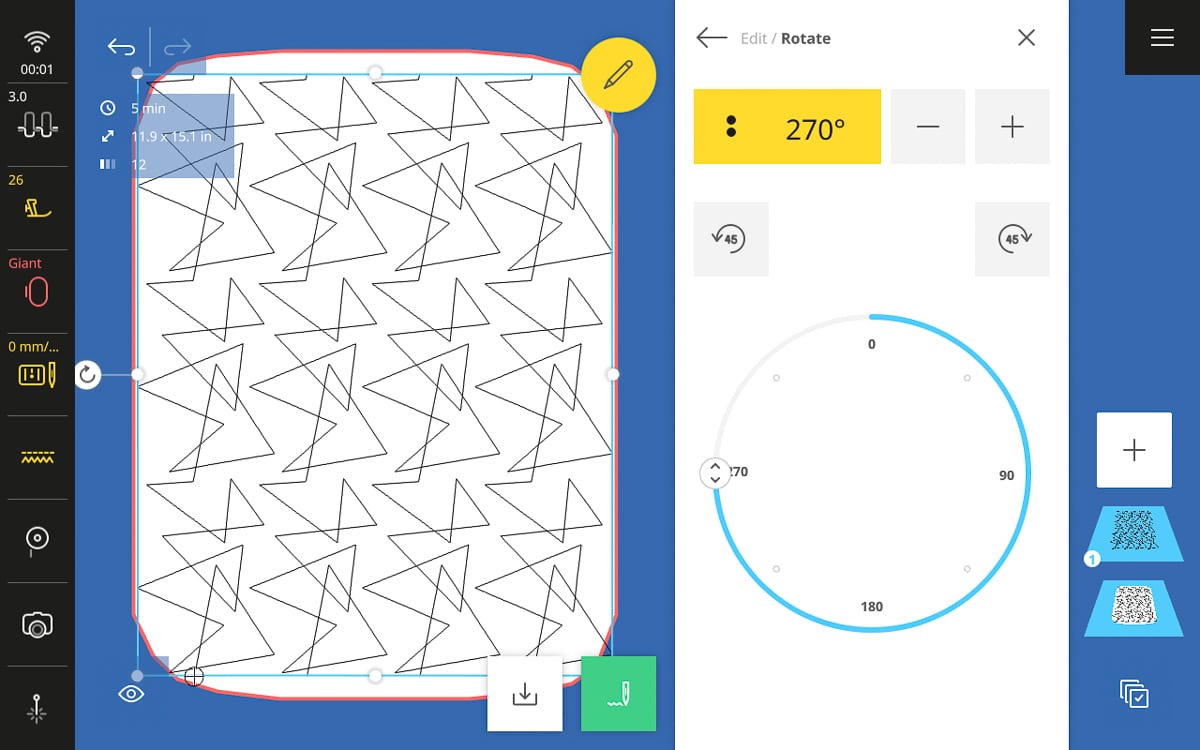
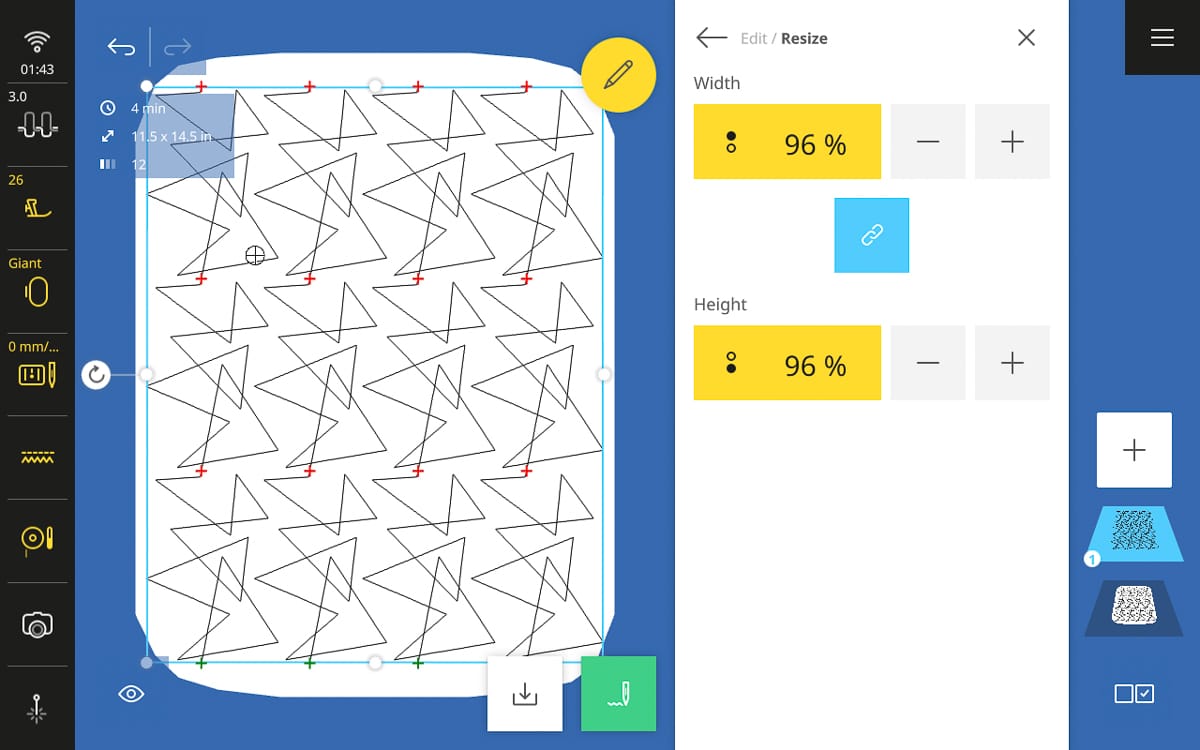
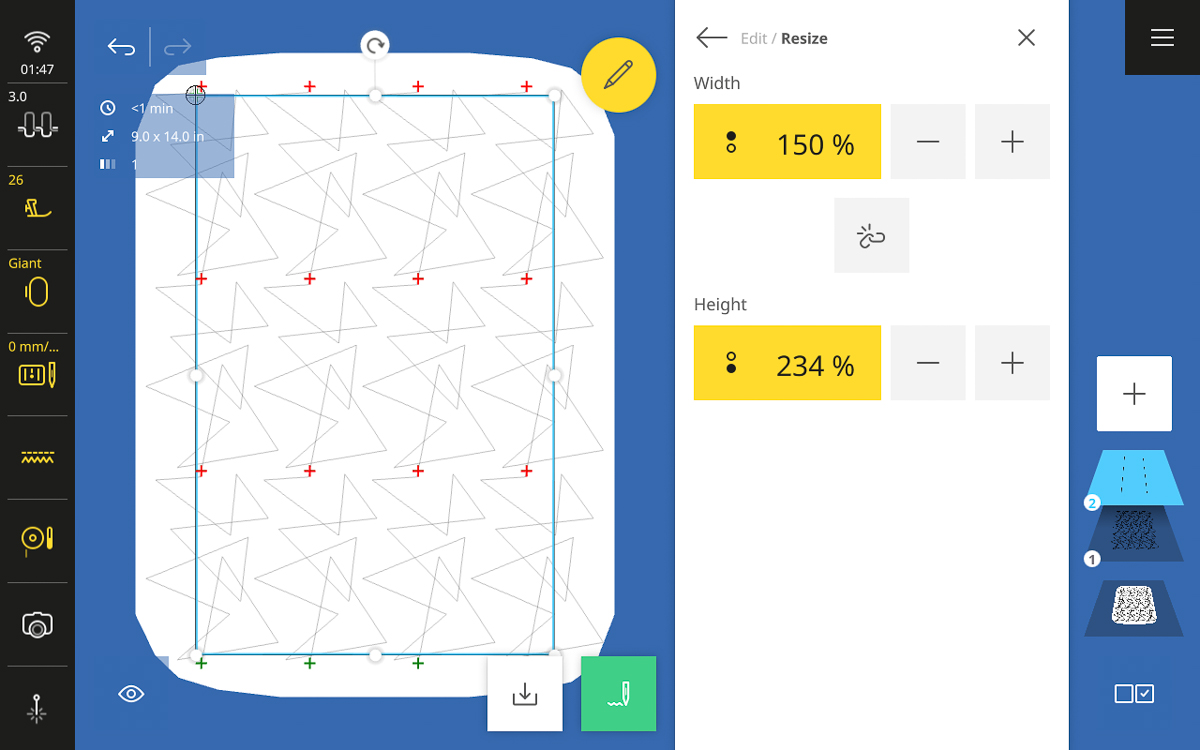
The design is still too big for the hoop, so proportionally decrease the size until it just fits.
This next feature is pretty cool. Open the Quilting Embroidery Folder and then open the Template Folder. Select QS101, the square.
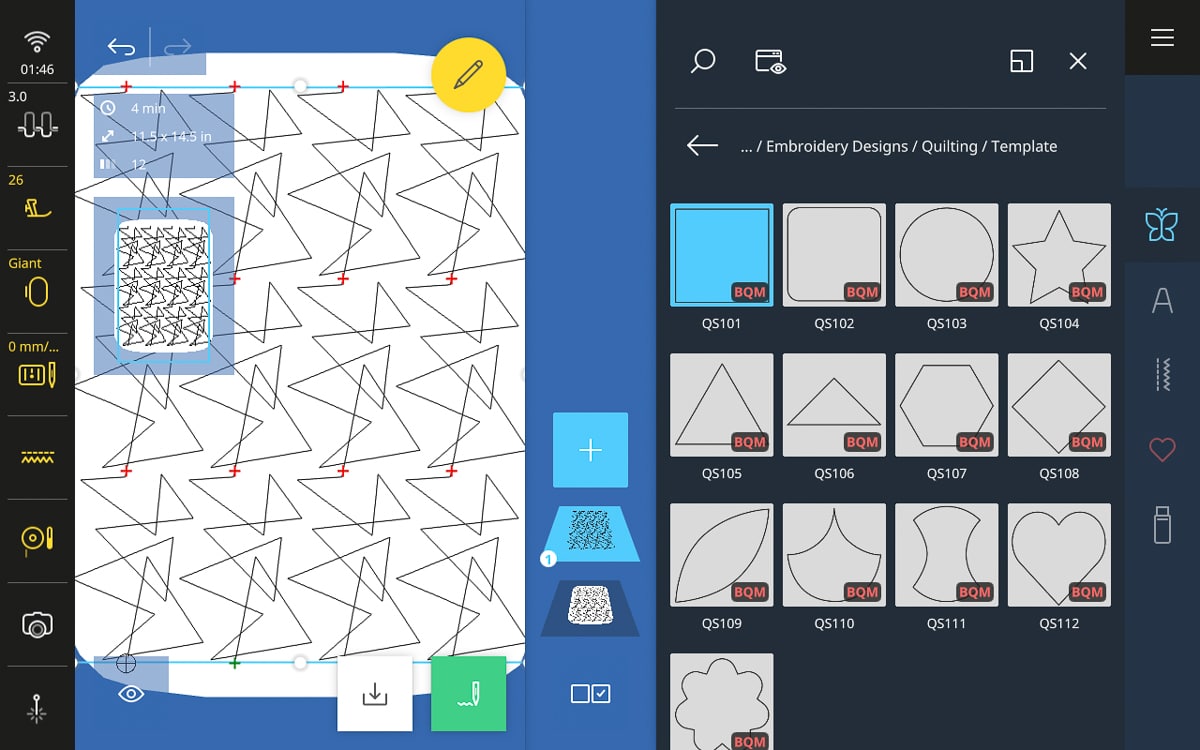
Resize the square to 9”x 14”, to the cut size of your notepad cover. Isn’t it great to see how the quilting design fills the space before it is stitched out? Stitching out the cutting line is an added bonus.
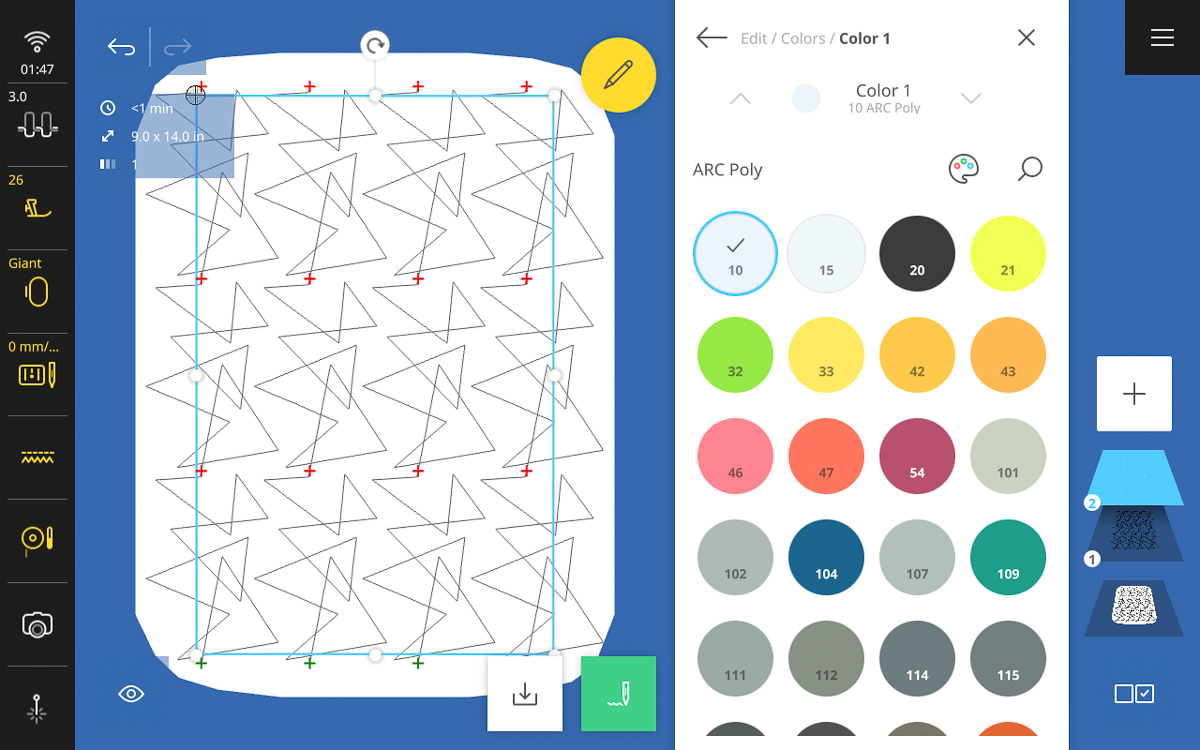
Change the rectangle color to white so it will show on the denim.
Step 2: Stitch Out on Denim
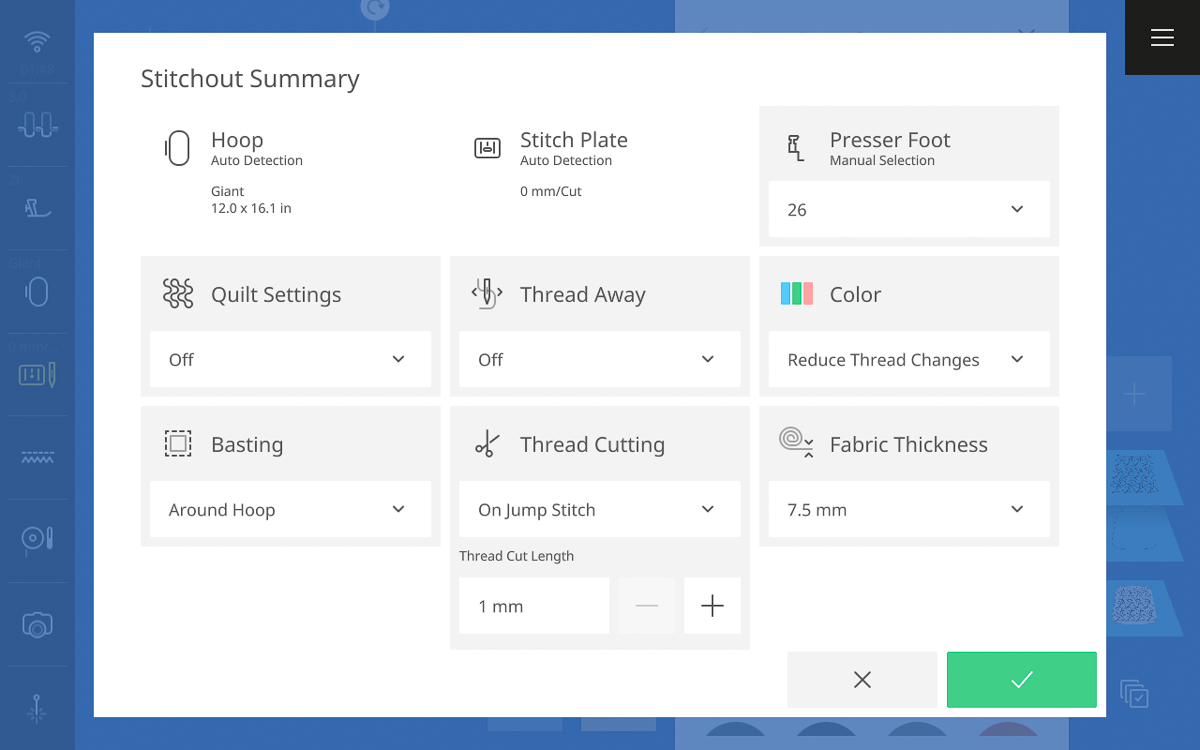
In the Stitchout Summary, turn the off Quilt Settings and Thread Away. Select Basting Around the Hoop, Reduce Thread Changes and adjust the Fabric Thickness to 7.5 mm.
Confirm the settings.
Hoop the Soft and Stable. Spray temporary adhesive on the wrong side of the denim and place on top of the Soft and Stable.
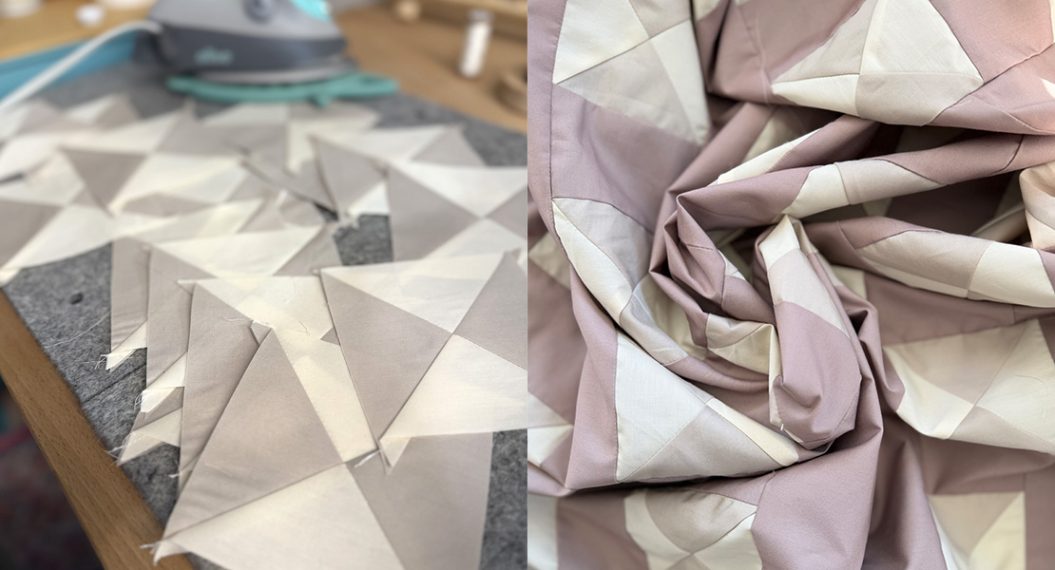
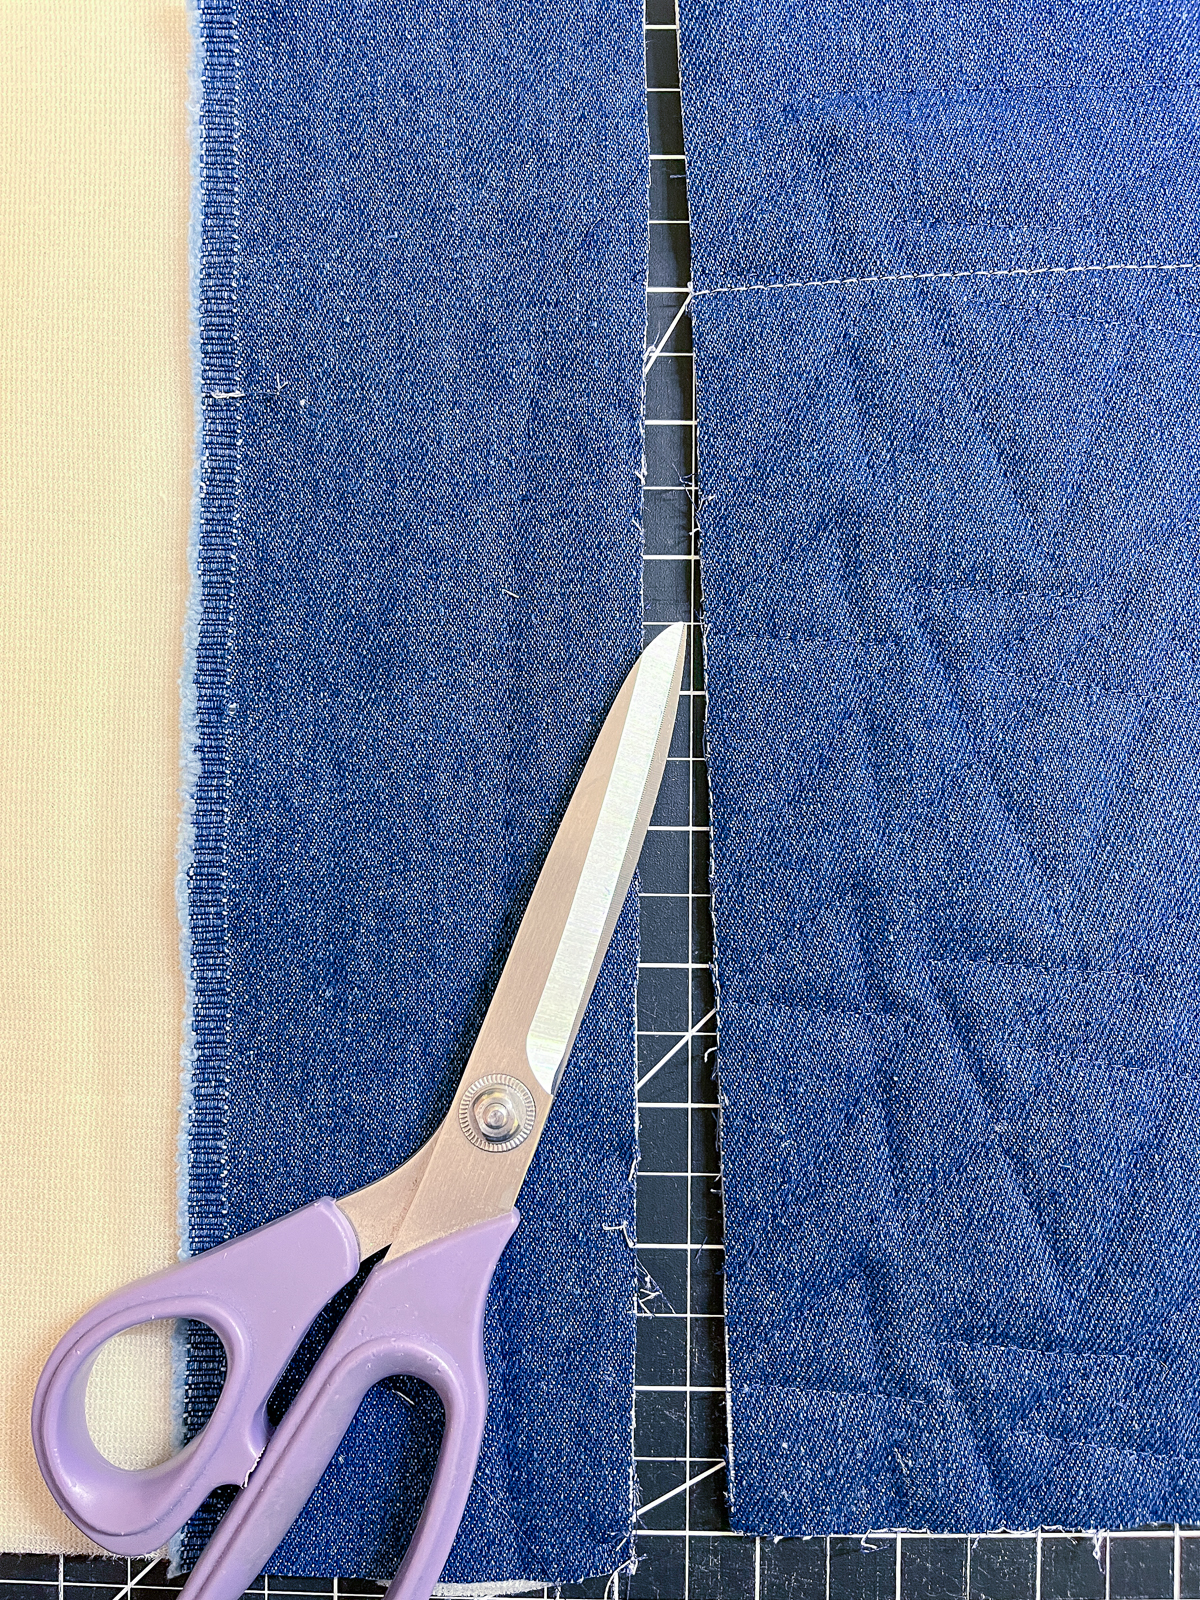
Set the machine for half speed and stitch the basting box. I like to use the foot control when stitching a basting box, especially if my fabric is floating above the hoop. Then stitch the quilting design and rectangle.
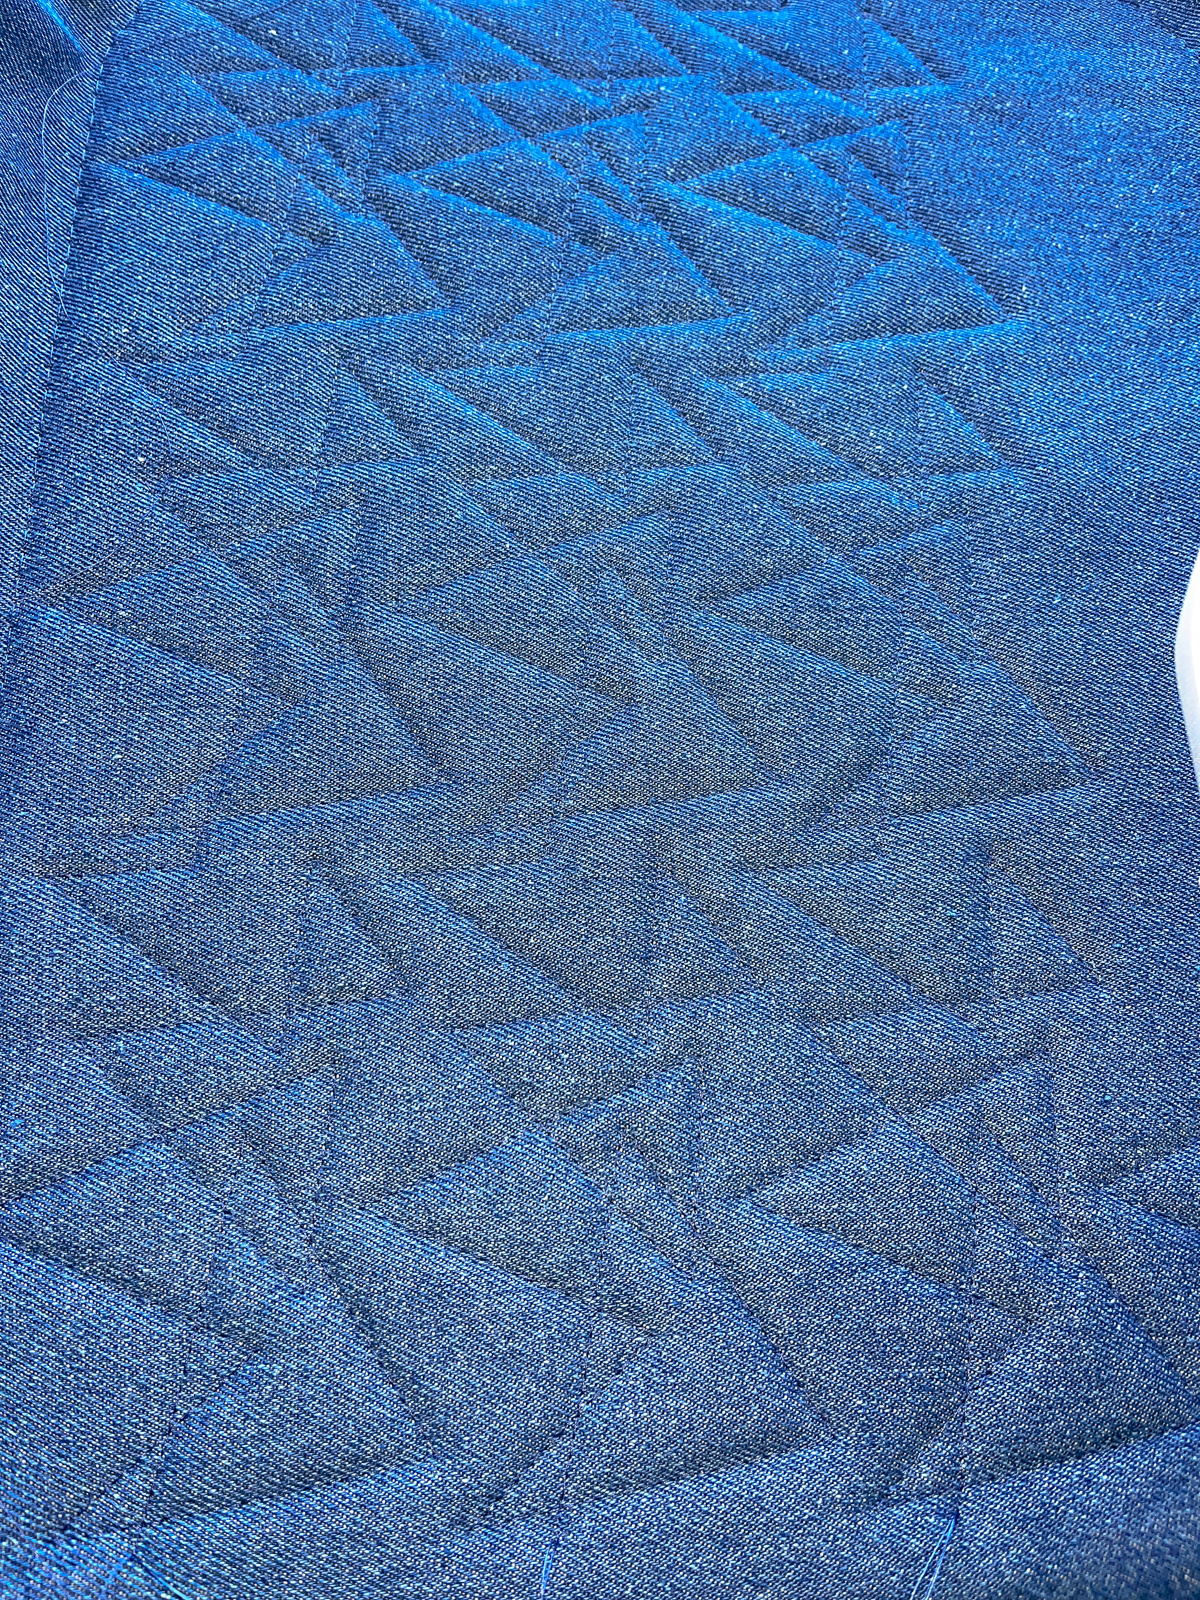
When done, remove from the hoop and cut out the rectangle on the stitching lines. Save the trimmings for test stitching later.
That’s all for Part One! Join me next time as we head to the overlocker to put the folio together.