DIY Fabric Bow Tutorial
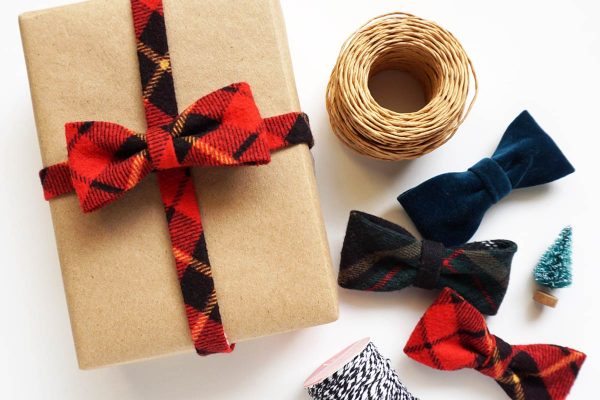
Hello We All Sew readers! My name is Beth and I blog under the name Sew DIY. The holiday season is such a fun time to sew things to decorate your home (or yourself!). But it’s also a busy time of year so I’m always on the lookout for projects that will be quick to make. Fabric bows are one of my favorites.
Attach the bows to a garment or other fabric item by hand stitching in place. This time of year, they can also be used as Christmas ornaments by threading a piece of wire or a twist tie through the center band and then attaching to a tree branch. Slide ribbon through the center band and use the bow to finish off a gift. The bows can be re-used year after year making them more environmentally friendly than disposable paper ones. Try out different fabrics like flannel, suiting, quilting cotton or velvet to create a look all your own.
These instructions are for making a small bow, about 3.5 x 1.75 inches. Note that the fabric is cut on the bias to make it extra easy to shape. If you’re using a plaid fabric, the bias cut will show off the plaid in a dynamic way.
Materials to make a fabric bow:
- Fabric scraps or fat quarters
- Matching thread
- Hand sewing needle
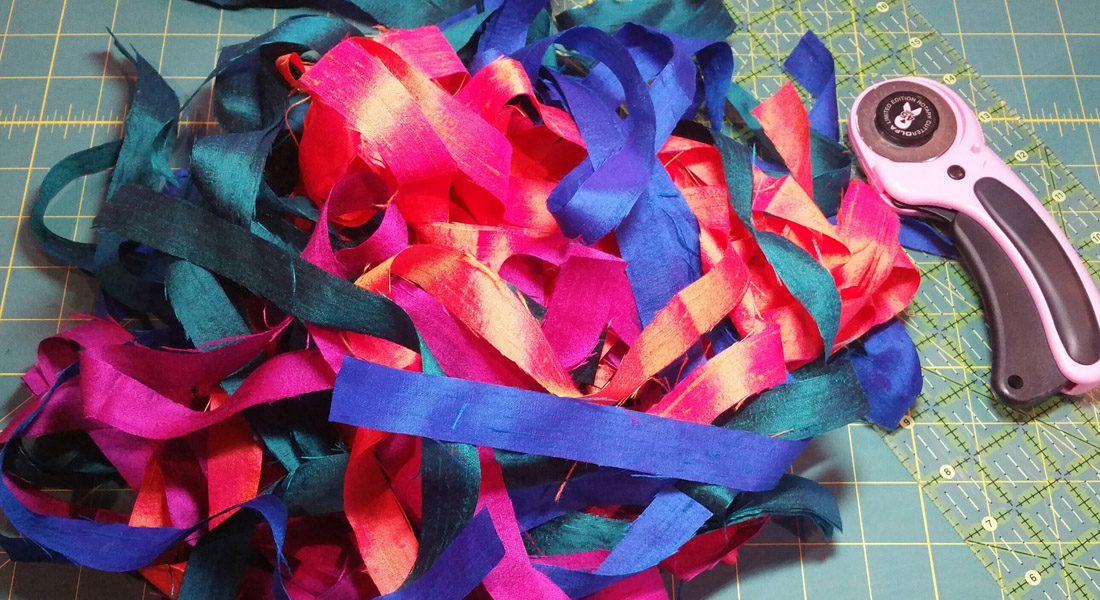
- Rotary cutter and self healing cutting mat (optional)
Step 1: Cut two pieces of fabric on the bias measuring 4 x 8 inches and 4 x 1.5 inches. The larger piece will be the main part of the bow and the smaller piece will be the center band that holds it all together.
Tip: If you’ll be making a lot of bows, cut a 4 inch strip of fabric on the bias. Then cut the strip into 8 inch and 1.5 inch pieces. A rotary cutter makes this especially easy.
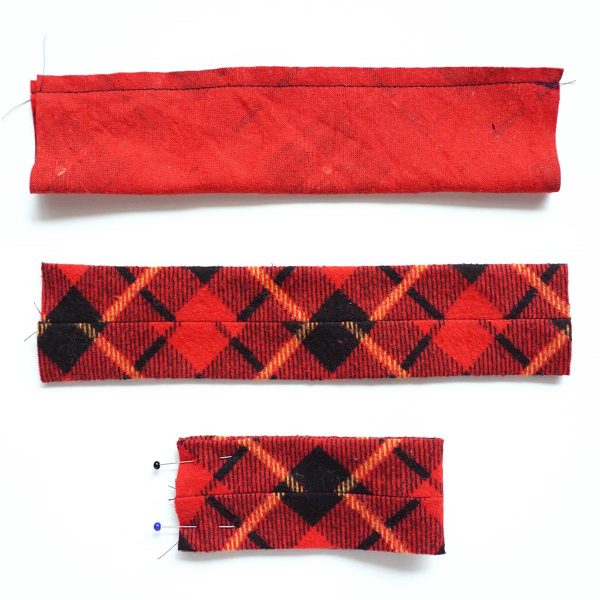
Step 2: First, we’ll make the main part of the bow. Fold the larger piece of fabric right sides together so that the long edges meet. Using a 1/4 inch seam allowance, stitch the long edges. Press the seam open and turn right side out. Center the seam in the middle and press. The side with the seam is now the wrong side. Fold short ends right sides together and stitch using a 1/4 inch seam allowance.
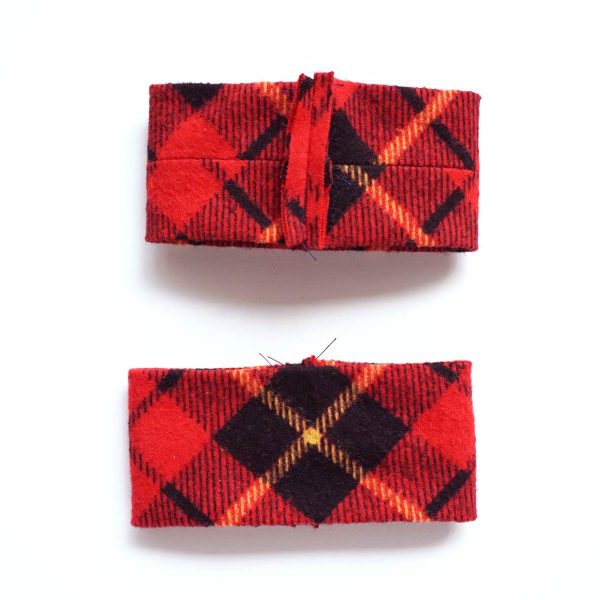
Press seam open. Turn the seam to the inside and center it in the fabric circle. The side with the seam is the back of the bow.
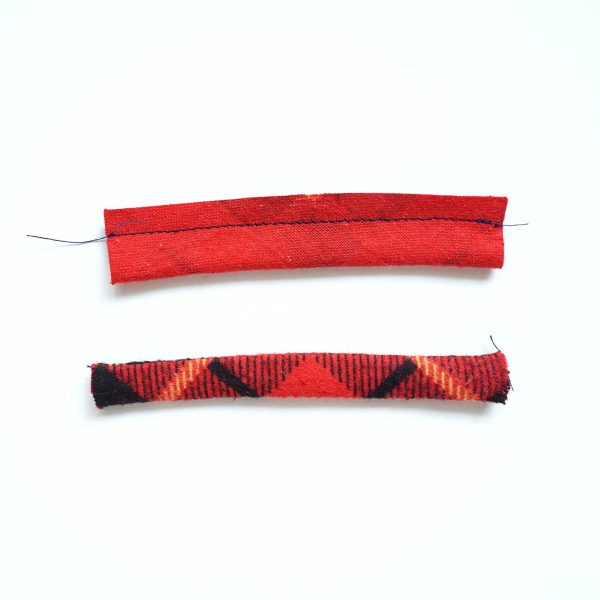
Step 3: Fold the center band right sides together and stitch the long edge using a 1/4 inch seam allowance. Trim the seam. Use a safety pin or tube turner to turn right side out. Press flat with the seam on one side.
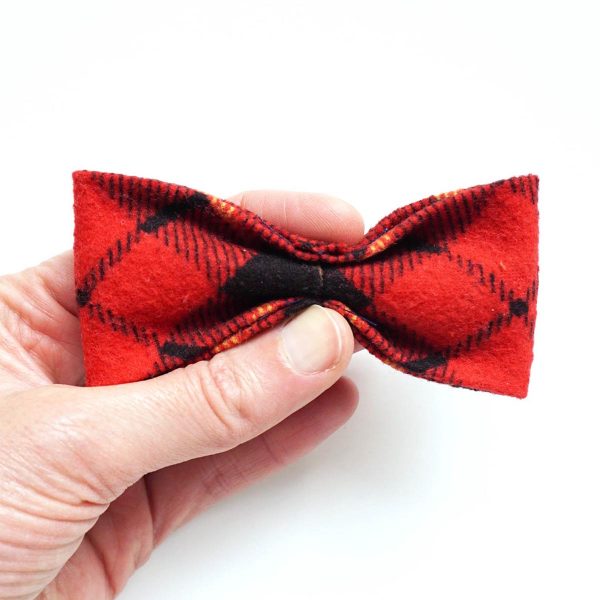
Step 4: Pinch and fold the bow in the center with the outside edges angled down. The shape of the folds is kind of like a double humped camel or an “M”.
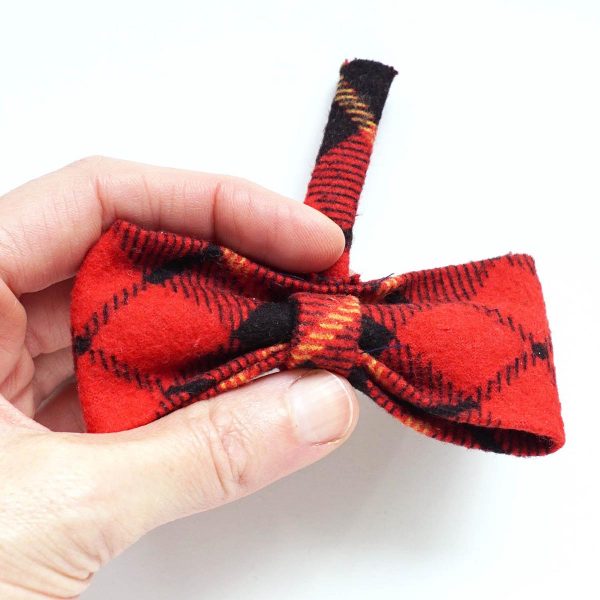
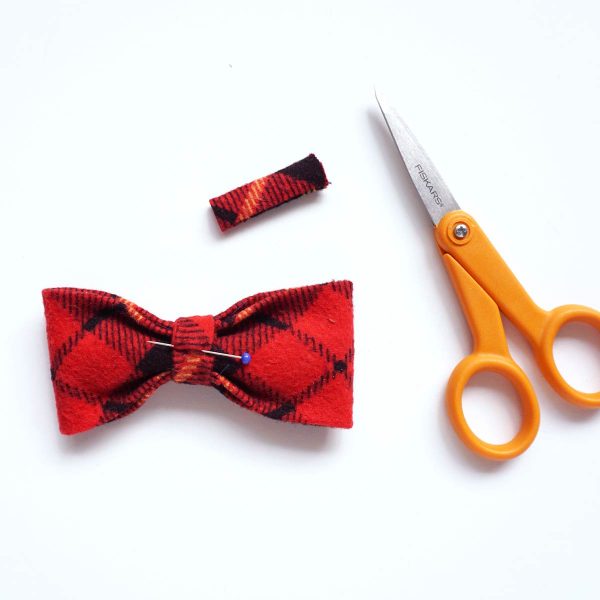
Step 5: While holding the bow in position, turn the bow over so the back side is facing up. Put one end of the center band inside the fold of the bow on the back side. Wrap the band tightly around the bow and trim away any excess. Fold in the raw edge of the band and hand stitch in place.
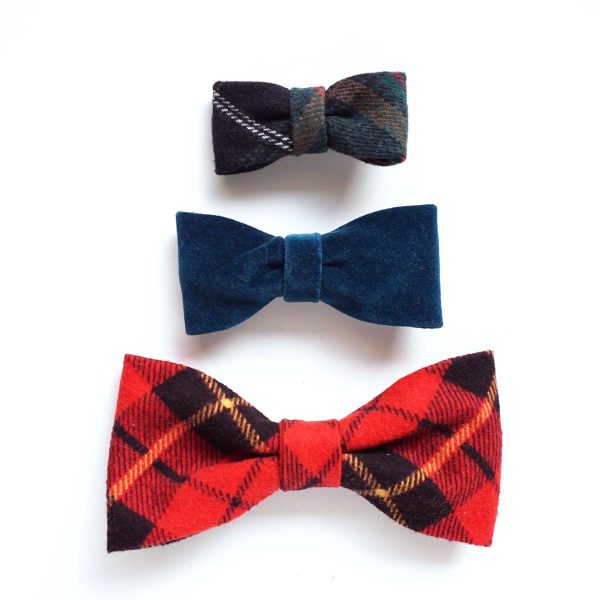
Since you might be thinking about different sizes, I tried out three sizes, shown above. The middle one is the size detailed in the instructions. For the smallest one cut one 3 x 6 and one 3 x 1.125. For the large size, cut one 6 x 12 and one piece 6 by 2.25. Be aware that the thicker your fabric is, the harder it will be to form the bow. I used flannel for the small bow and you can tell it’s a lot stiffer than the largest size. By the way, that big bow will be going on top of my Christmas tree this year!
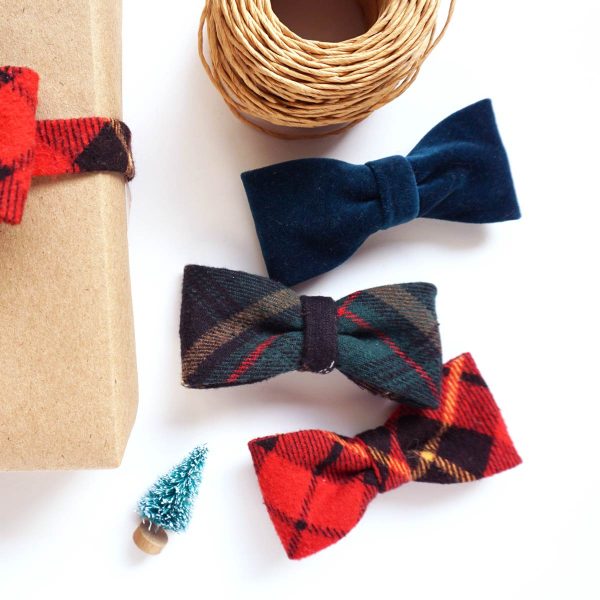
I’ve had a lot of fun making these bows and can’t wait to use them all over the house. I even slipped one on my cat’s collar and he looks so handsome! I hope you enjoy this fun little project too. Happy sewing!
Our December 13 Gift for You
Today’s gift is a BERNINA retro bag to one awesone WeAllSew fan.
All you have to do is post a comment below answering the following question:
For whom would you sew a bow?
A winner will be chosen at random on December 14, 2016 and announced the following week!
Good luck!
The contest is open for comments until December 13 at 12:00 midnight Central Time. Click here for contest rules.
What you might also like
92 comments on “DIY Fabric Bow Tutorial”
-
-
For one of our puppies are Golden Retriever puppies that we have
-
I’d love to make one for my dog, but I don’t have a dog right now, think it would look cute on my husband, like a bow tie. Are we going to have any Hanukkah projects?
-
-
There wasn’t a question to answer, but thank you for the great tutorial. This is a great way to make a bow.
-
Love this idea – it’s perfect for a special last minute touch for any project or gift! Thanks for the chance to play : )
-
My granddaughters would love these bows! Love the bag too!
-
-
My girls would love these as hair bows! Sweet bag!
-
What a great easy tutorial. I willsew bows for some very special gifts and also make hair barrettes for all the little girls in my life.
-
Since I don’t have a little boy I’d sew a holiday bow tie for my cat. It would be adorable!
-
I would see bows for my great grand daughter to put in her hair.
-
I would sew a bow for my quilter friends, because they would appreciate the work that went into It. I would also sew bows (maybe for next chrIstmas?) For my family as they know I like to overdo a bit and would reuse those bows themselves. Great tutorial. Thanks!
-
I would sew a plaid one for my cat! (Or for a friend’s cat).
-
I would sew the bow for a several bow loving grand daughters. It looks like the bow could be adapted for a bowtie as well.
-
I would sew bows for my granddaughters!
-
Great way to make bows for my Christmas tree and wreasth
-
No giggling, but I will sew matching bows for my 7 yr old grandson and his best friend, a 3 yr old border collie.
-
I think this cute little bow would look great on a gift for my son and grandson. Thanks for the great tutorial.
-
These bows are perfect to top fat-quarter fabric gifts for my quilting friends.
-
I would sew bows for my poodles.
-
I think these bows would be a fun addition to a wristlet.
-
I would make bows for my quilting friends. What a great idea.
-
My granddaughter would love a bow for her hair.
-
Looks really adorable. I’d sew bows for my quilting/sewing friends as well as for my granddaughters for their hair. They love bows in their hair. Love the bag as well. I like the red for Bernina colors. It is bright and cheerful. Thanks.
-
I make (and sell) sock monkeys. I often make them hats for different seasons or holidays. These little bow ties would be a perfect for a formal get together or New Years Eve!
-
I think this bow would be great on a man’s package. It’s also a good idea to keep in mind for Father’s Day.
-
I want to make these for my granddaughters!
Thank you. -
I re-use bows every year so this is a perfect way to make some that will actually last several seasons. I’ll make them for everyone on my gift-giving list! Thank you.
-
I would sew one for my second oldest daughter. She would love to have it on her present and then be able to reuse it for her hair.
-
I think these would be very cute for my little nieces in like a head band.
-
for any gift this would look wonderful
-
My son would love a bow like this…he would even wear it! Very cute, thanks for the unique tutorial!
-
I think it would be fun to put one on my girls’ ornament exchange.
-
I will make some of these for my granddaughters.
-
I will make “bow” ties for my two Siberian huskies for Christmas.
-
A future grandson!
-
My puppies!
-
I would sew two bows – one each for my two youngest grandsons. Great tips! Thank you for the helpful tutorial!
-
I am just learning how to do this kind of thing?
-
Looks perfect for any man or boy, but also for any crafter.
-
Will be making more Christmas projects in the future thanks to these great tutorials.
-
I think the bows would be great for anyone, and i like the comment from someone early that said they would be great hair bows after Christmas.
-
My granddaughters
-
I would sew a bow for my husband because he is my beau. ?
-
I would make one for my granddaughter and her dolls
-
My beautiful granddaughters.
-
I’d like to put a few on blue jean stockings which I’m hoping to finish. Well start too.
-
I know some guys who always wear bowties
-
I love this tutorial! Thank you! I’m going to sew my first bow for my daughter’s Christmas present!
-
Will make bows for Teddy Bears, a friend’s dogs, and maybe my cats (tho I doubt that they will tolerate them for long).
-
I would sew bows for all of the packages I’m wrapping. This would also be great for birthday, etc presents! This will be a new ‘bow go-to’ for me.
-
For my grandsons – all four of them.
-
I’d sew these for my dogs to wear on their collars.There are so many cool fabrics you could use.
-
On a gift for my sister.
-
I need to update my Christmas door wreath and these fabric bows would look really cute on it! I would make bows and decorate my wreath with them and big red ornaments and some gold pointsettas!
-
For a friend who I know would save the bow and reuse it.
-
I would sew bows to
put on gift cards. -
I’d sew a bow for my son-in-law who loves bow ties!
-
I would make 4 bows. We have 2 granddogs and 2 grandkitties.
-
I would sew a bow for my granddaughter
-
I sew bows on my Bernina for my sweet nephew! They are super cute on little onesies!
-
I’d make a bow for myself. I’d put it on a tube of fabric w elastic in it and make a festive bracelet for nyself.
-
The bows are adorable. I will sew one for my daughter.
-
These are so cute! I’d love to make one for my Siamese and shepherd for the holidays.
-
For present bows…
-
For my granddaughters to use in their hair
-
I would make 4 matching bows for my biewer pups and then take their picture for the holidays. Thx for the tutorial
-
For our dogs, a pug and a beagle, they would look very handsome in a bow.
-
I would sew a bow for my husband.
-
For my cousin, who I consider my kid.
-
I am thinking these would be adorable puppy dog bowties!!
-
For my granddaughters. They love bows.
-
I love this project, and I will sew a bow for myself and for my sweet doggy…Dieter.
-
For my Christmas packages. I made two bow ties out of silk velvet last night for my two grandson’s Christmas outfits.
-
For Whom Shall I Sew A Bow?
When delight and joy, I shall sew this bow for my sweet granddaughters for their dolls and gifts and dresses!
Pamie G.
-
Wow great idea. The first one I thought of was my dog Zip.
-
I love this bow. Since I don’t keep wrapping paper around, it is perfect. Will try it on my fellow friend and quilter this year.
-
I would sew a bow for my dog.
-
For my cats Jaspurr and Rufus. Don’t know how long they would stay on but worth a try.
-
I have ten grandchildren so I would make a different bow for each.
-
Pingback: Link Love: The End of 2016 - GnomeAngel
-
These bows would be great on all the packages under my tree. I never get around to buying ribbon, but I have lots of fabric!
-
I would love to sew a bow for my beautiful mother, who was so generous with her time. She taught me to sew & bought me my first Bernina.
-
I could make the bows with my eight year old granddaughter, and then she could wear them in her hair.
-
Will be making for my red lab, Buddy!
-
For my first grandchild, Emma who will be 3 months old on Christmas. Also, one for my golden and one for Emma’s golden. I think I might not be able to stop at three!
-
I plan to start a new family tradition and make a bow tie for myself, my husband, my two college aged step-daughters and my 91 year old mother who taught me to sew and quilt! This is a win-win for me 🙂
-
I want to make a dozen to keep in my Christmas wrapping supplies. I would reuse these each year!
-
My grandchildren. I am going to make a few to decorate our gifts. ?
-
Everyone on my list!
-
I am sewing velvet bows for my birthday club to put on their gifts!
-
All five of “my boys”, 4 sons.my husband and my dog Jordy.
-
I would make one for each of my grandchildren’s Christmas and birthday gifts
Leave a Reply
You must be logged in to post a comment.






Love this bag!!!