Whole Cloth Quilting Tips: Overall Quilting
Follow along with Roxane Lessa to see her creative process in making a whole cloth quilt! Visit the first part of the series, Whole Cloth Quilting Tips: Designing the Quilt here, and the second part of the series, Whole Cloth Quilting Tips: Making the Quilt Sandwich here. In this post, learn how Roxanne uses free-motion quilting to add dimension and design to her whole cloth quilt.
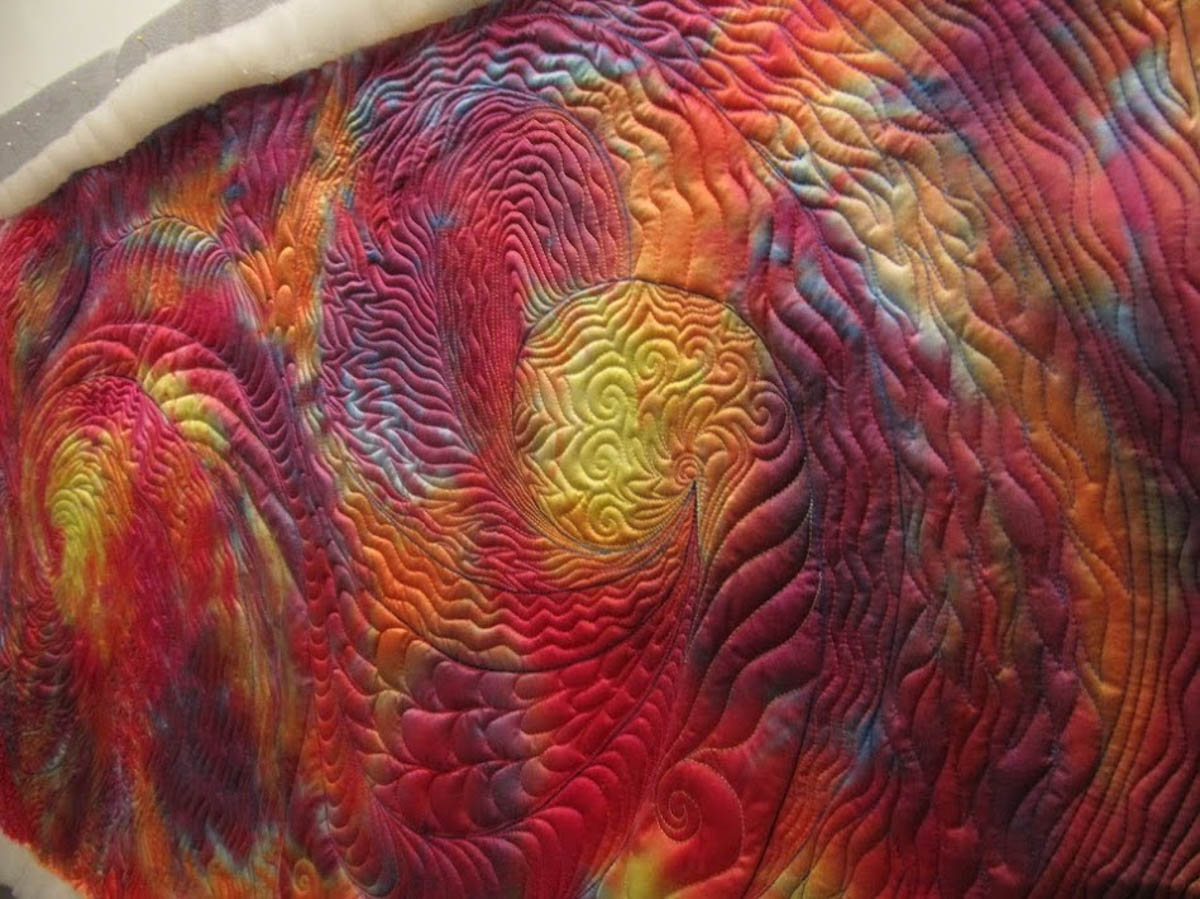
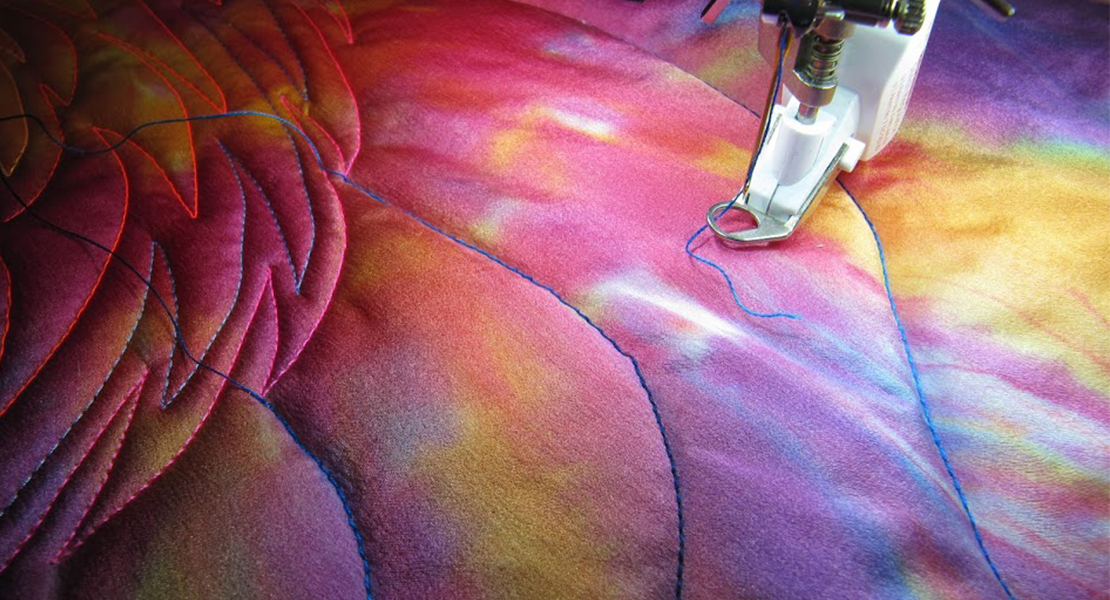
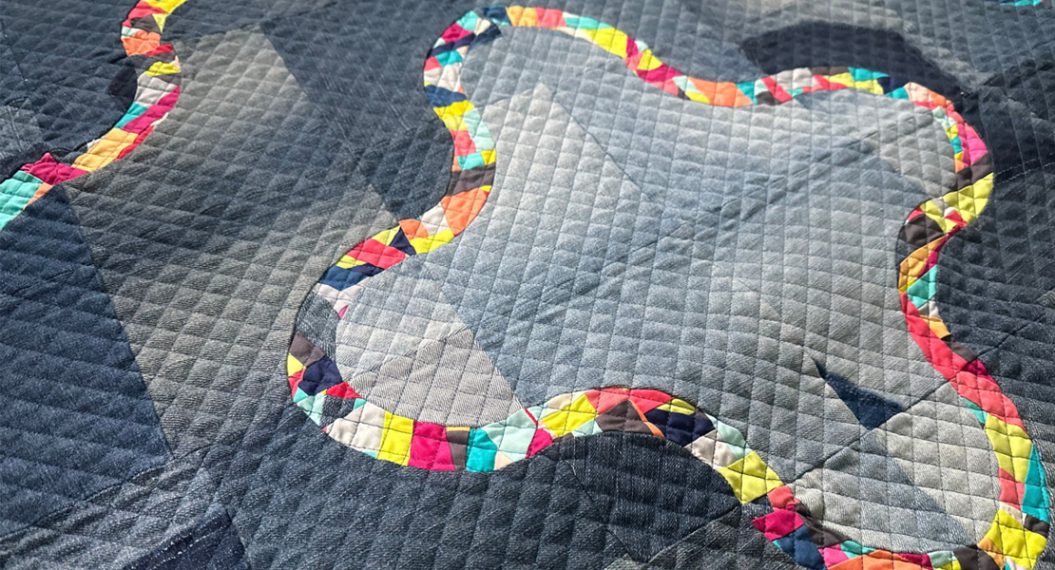
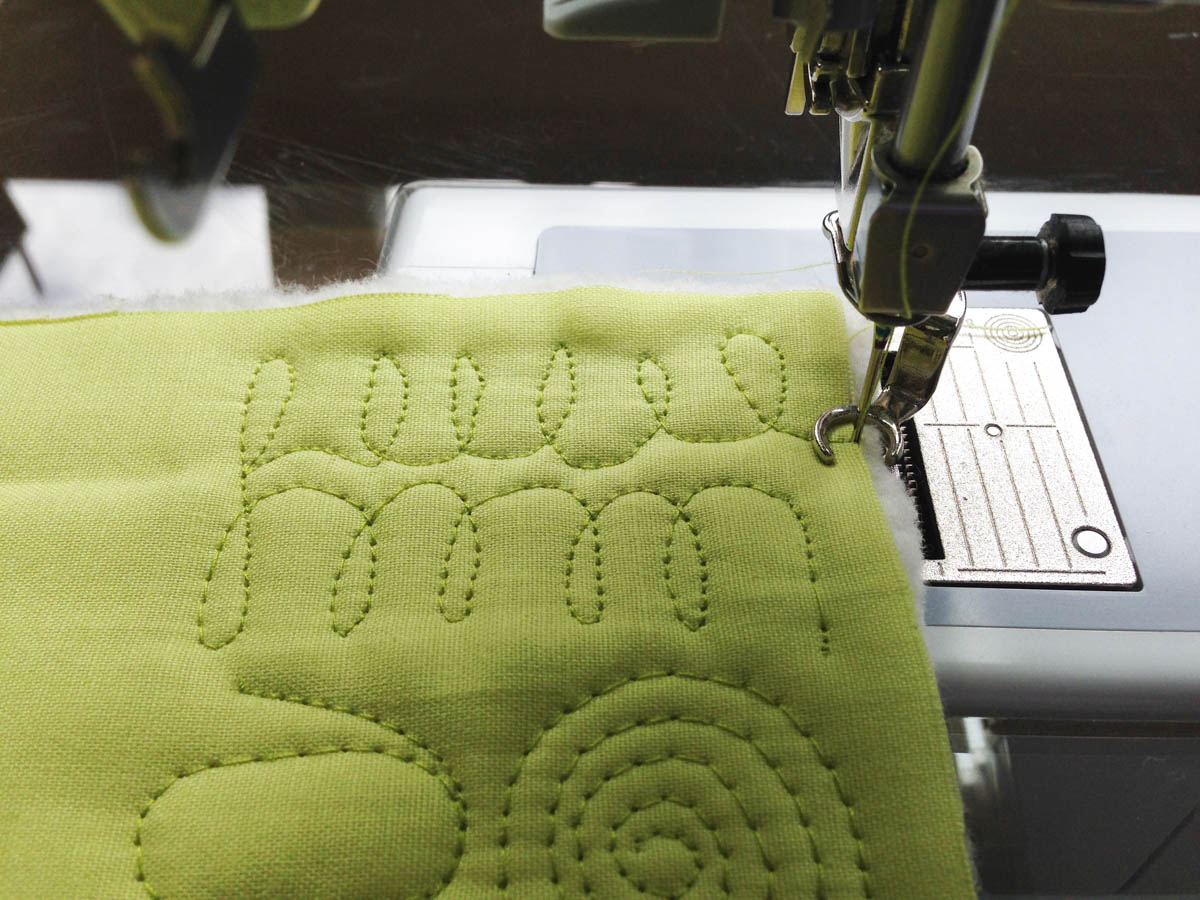
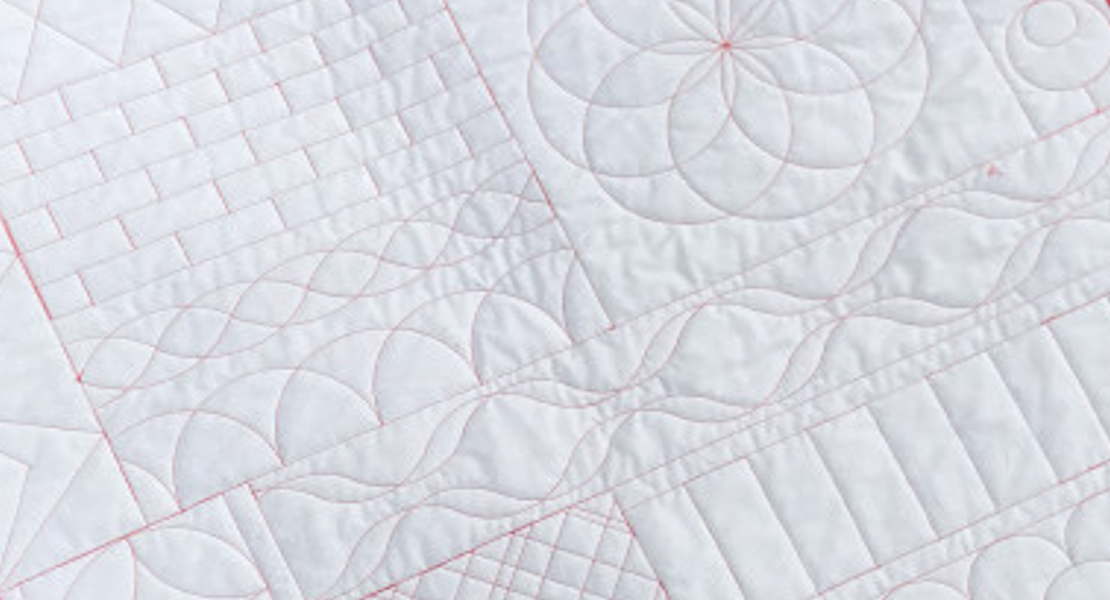
Now finally it was time to quilt! Starting in one of the yellow areas, I began quilting in a spiral echo pattern that I had tried out on my plastic earlier. I decided to start with yellow thread and gradually get darker with the colors as I moved away from this center.
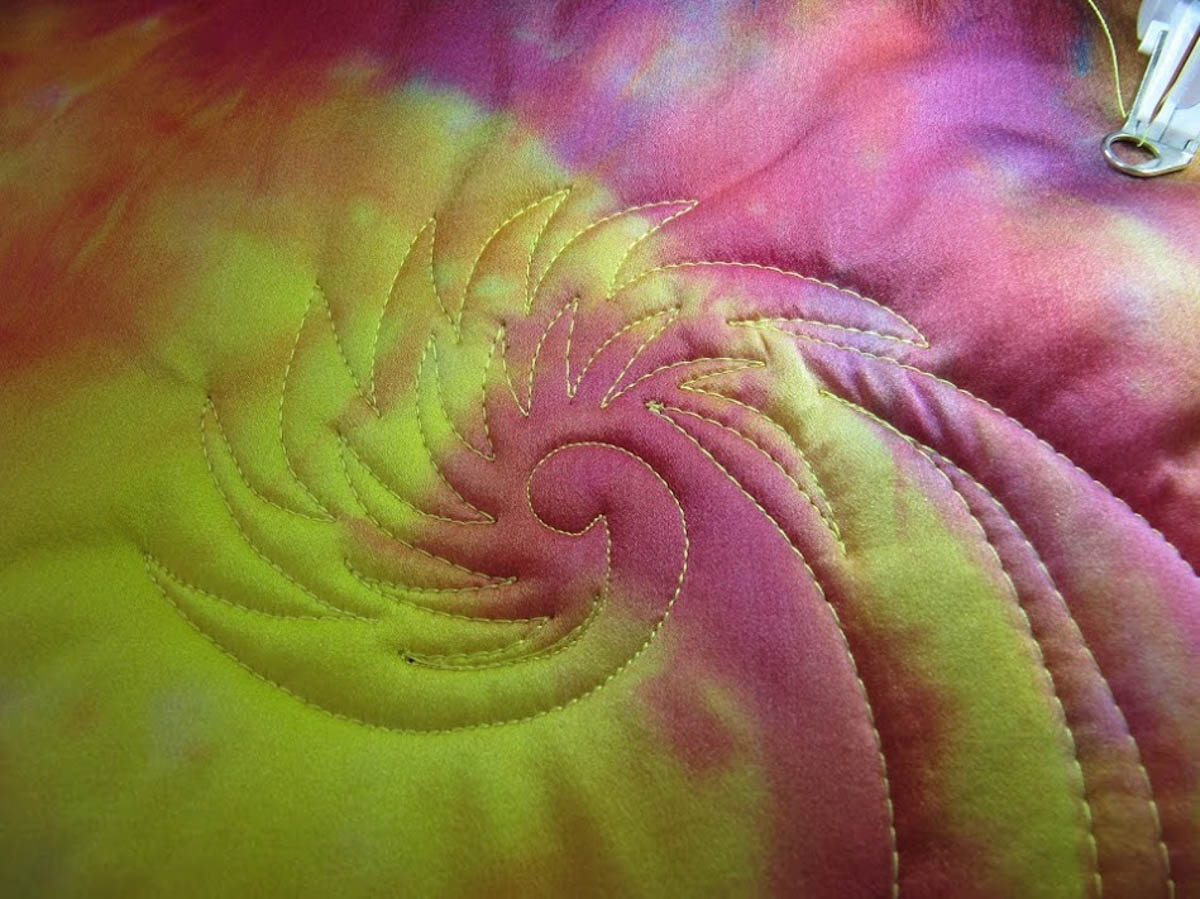
With each new spiral, I tried out the next color thread by laying it down first.

As I completed the first yellow area, I thought it was time to divide up the quilt with the blue thread. Trying to keep the curves smooth was the hardest part!
Quilt Large Areas First
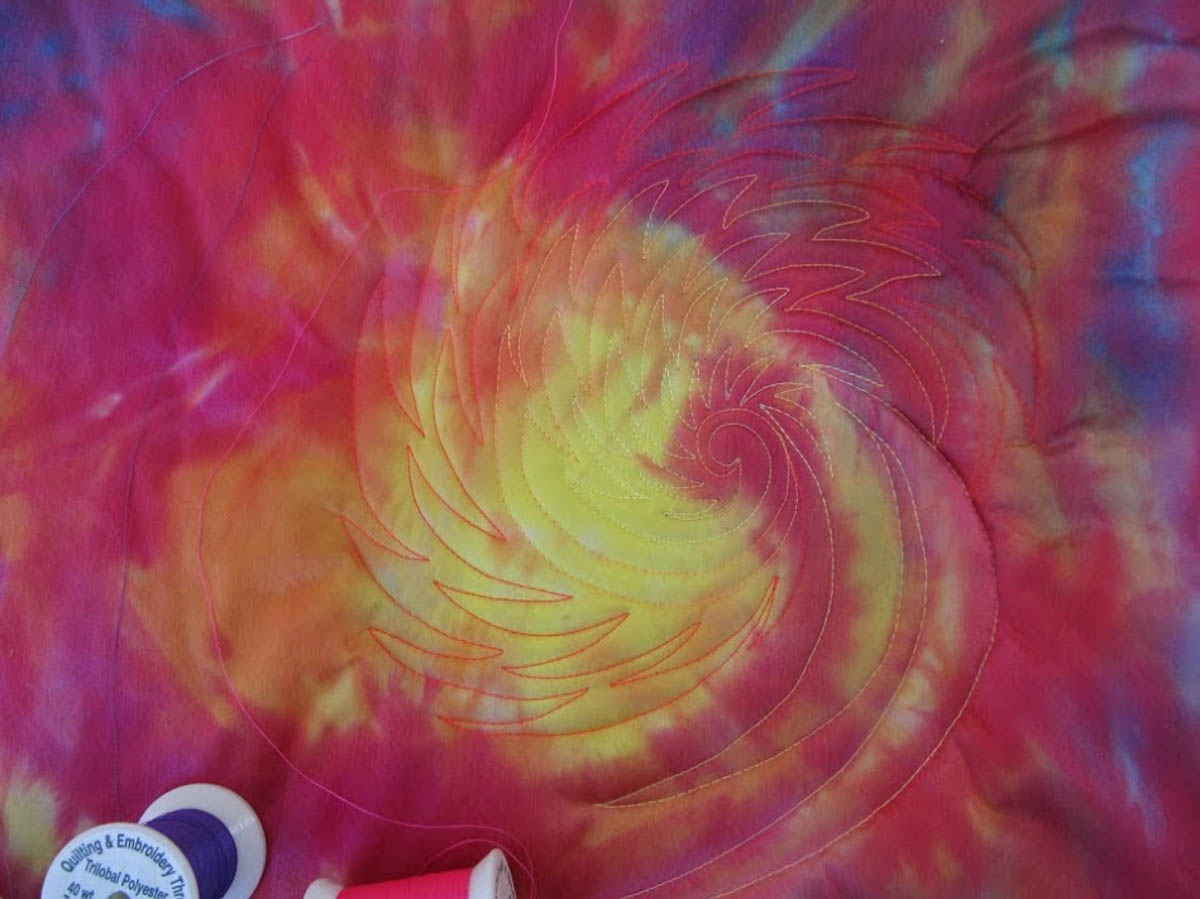
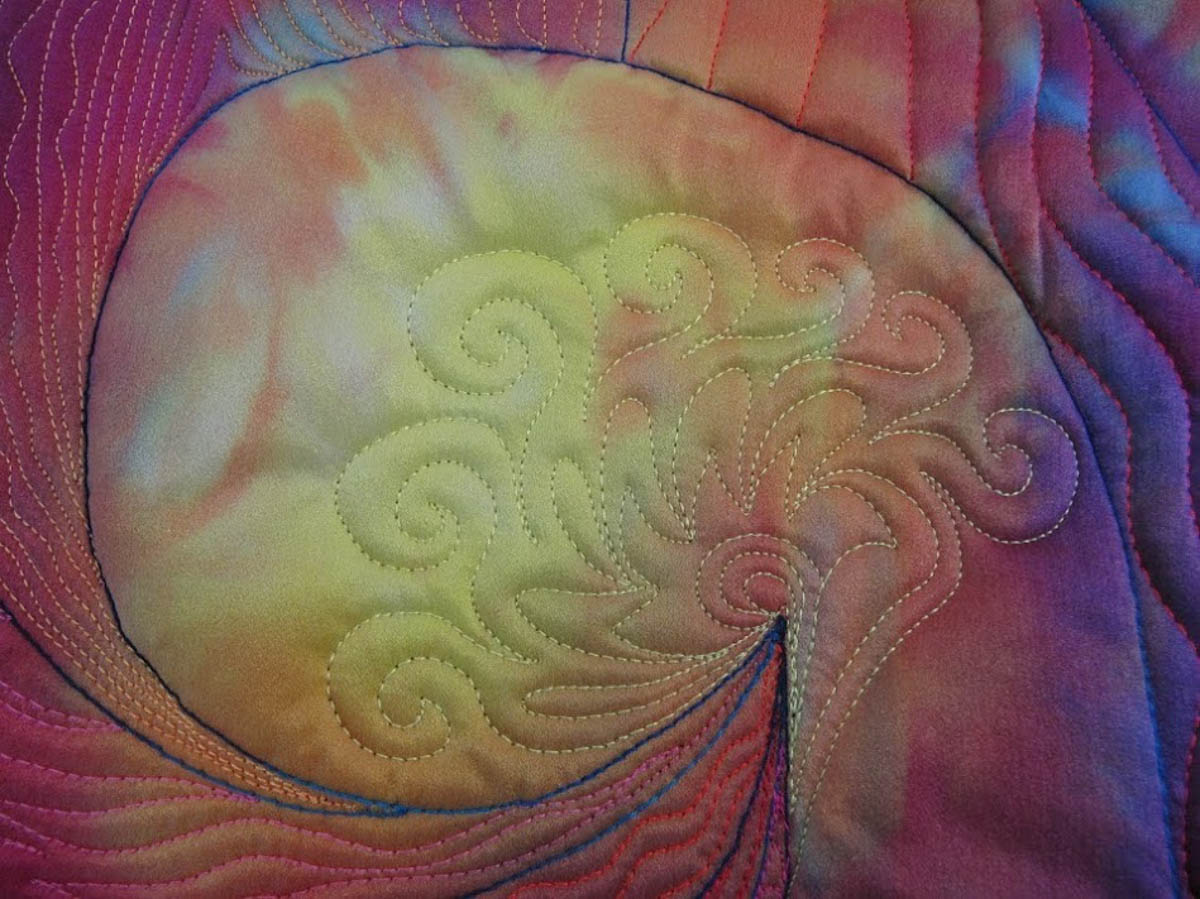
Once I had some larger spaces quilted out with the blue thread, it was time to decide what went in those large spaces. Out came the plastic and the markers again, so I could preview some ideas.

Once each area was quilted, I pinned the quilt up so I could evaluate the way the whole piece was shaping up. Each area I quilted seemed to lead me to quilt the next area until the left side of the piece was mostly done. But now, I had the whole right side to do.

Quilt Fill Stitches Last
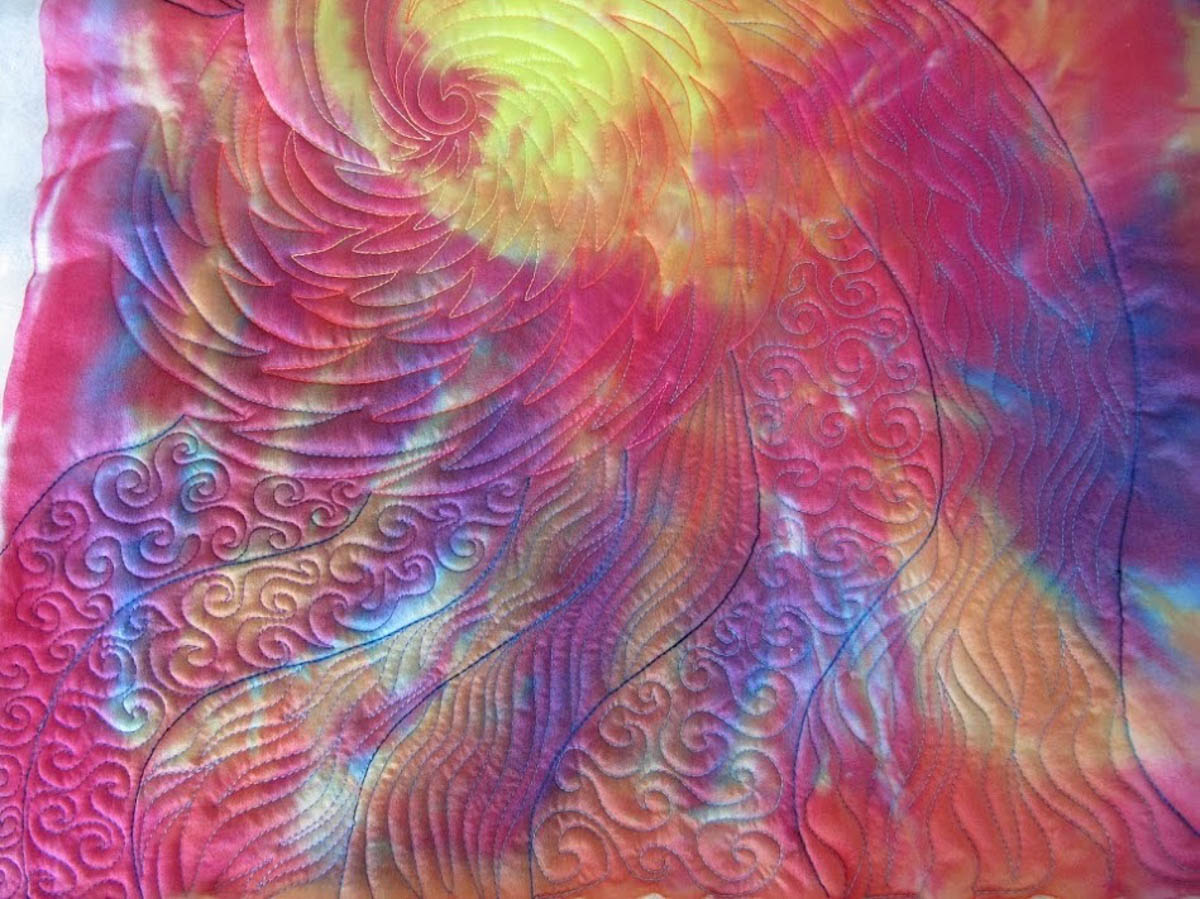
Putting the piece up on the wall allowed me to see the directional pull of the lines I had already made. The spiral design on the left seemed to want to flare out and come back around to a new spiral area on the right.

I purposely left some areas that were quilted more openly near the bottom, as the energy of the spiral opened up. It began to resemble a weather pattern seen from outer space. Now the quilting and the colors suggested a name for the piece: Tropical Storms.
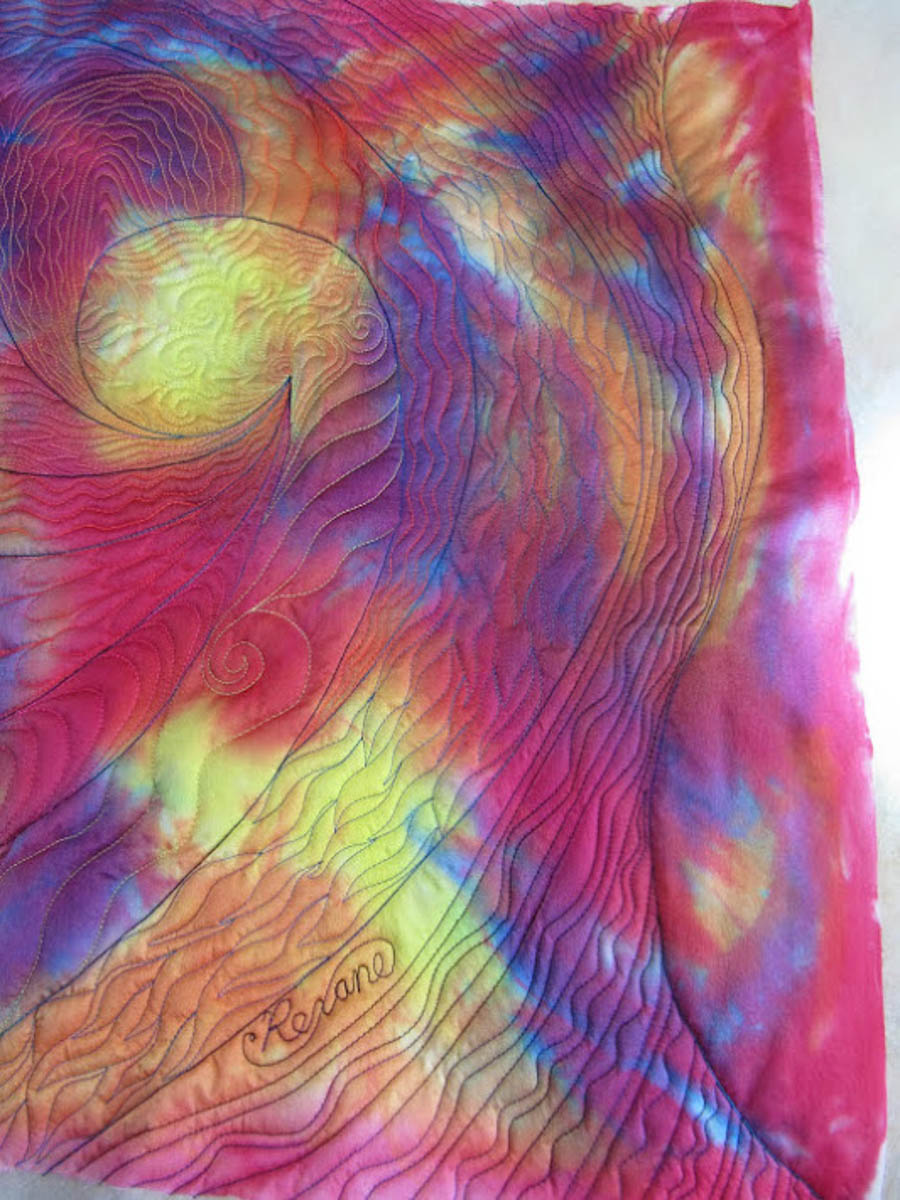
I continued to divide up the space with heavier blue quilting lines and filling in with finer threads and waves of color. My confidence at this point was much higher because I had repeated several quilting motifs and it was starting to look more cohesive. The wool batting was filling out the quilting nicely too.
My little helper egged me on.

When all the quilting was done, I ripped out some bobbles in the curves, and smoothed them out, and stitched my name in the right hand corner.
Since I had used the automatic thread cutter, I had a lot of little tied off threads to trim off the back too.
Eventually, all was done, and it was time to block the quilt. All that quilting had made it quite wavy. Using a small spray bottle, I misted the backing heavily until the front was damp. Then, I pinned it to my design wall with pins at 2″ intervals along the edges. Once it was dry, it was time to square it up, finish my edges with a binding, and add a hanging sleeve and label.
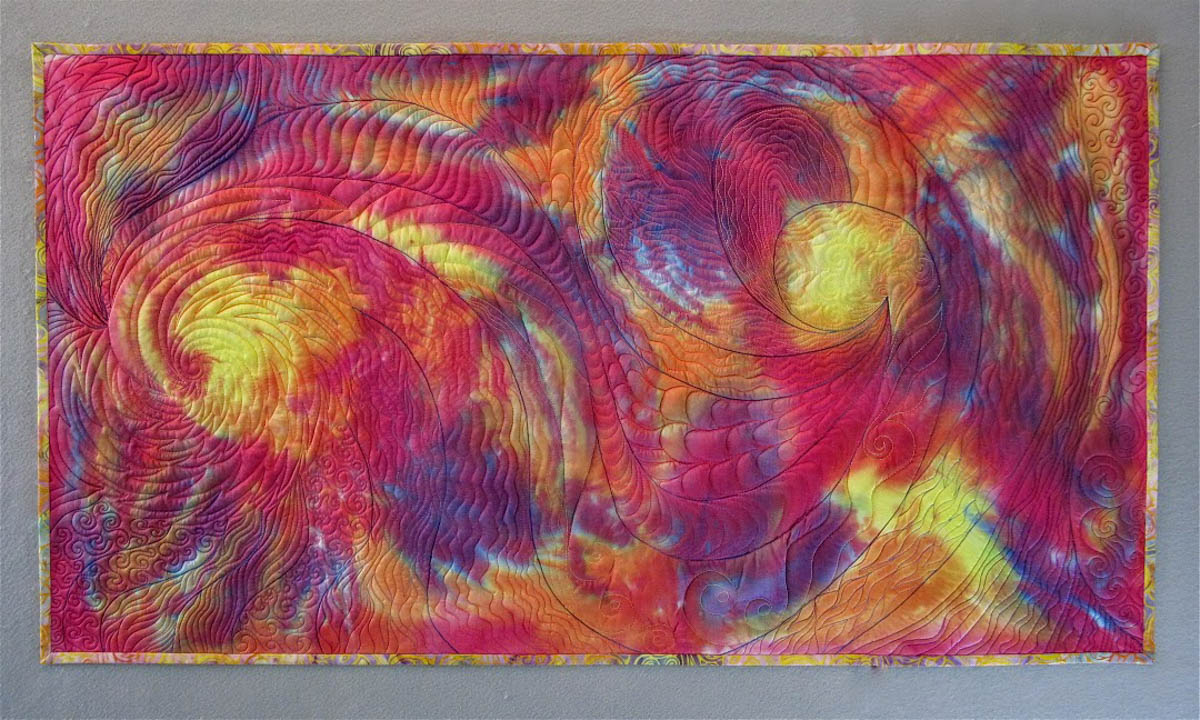
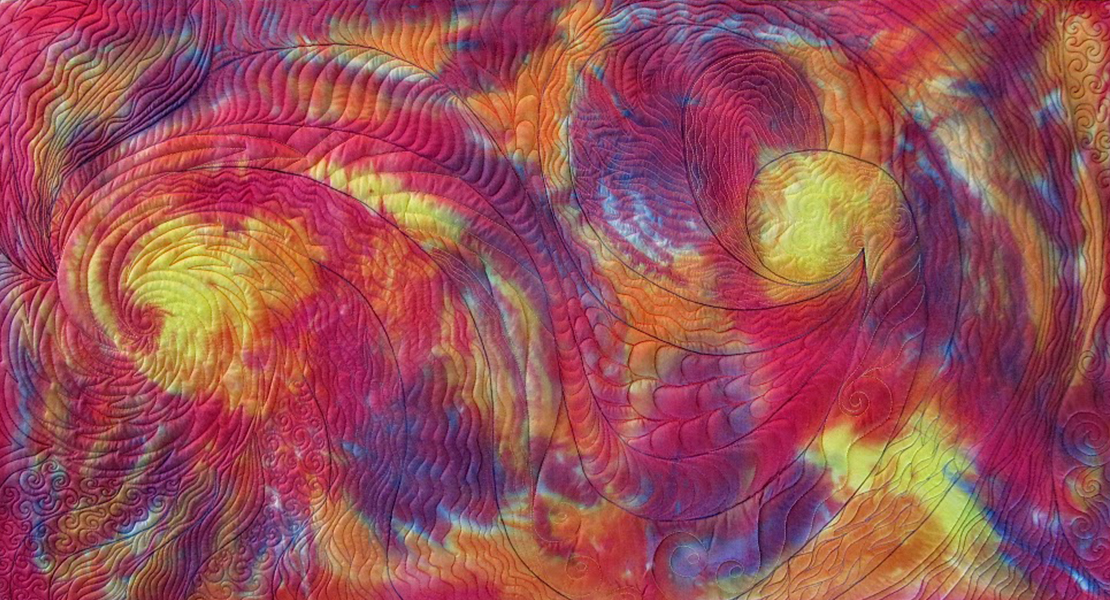
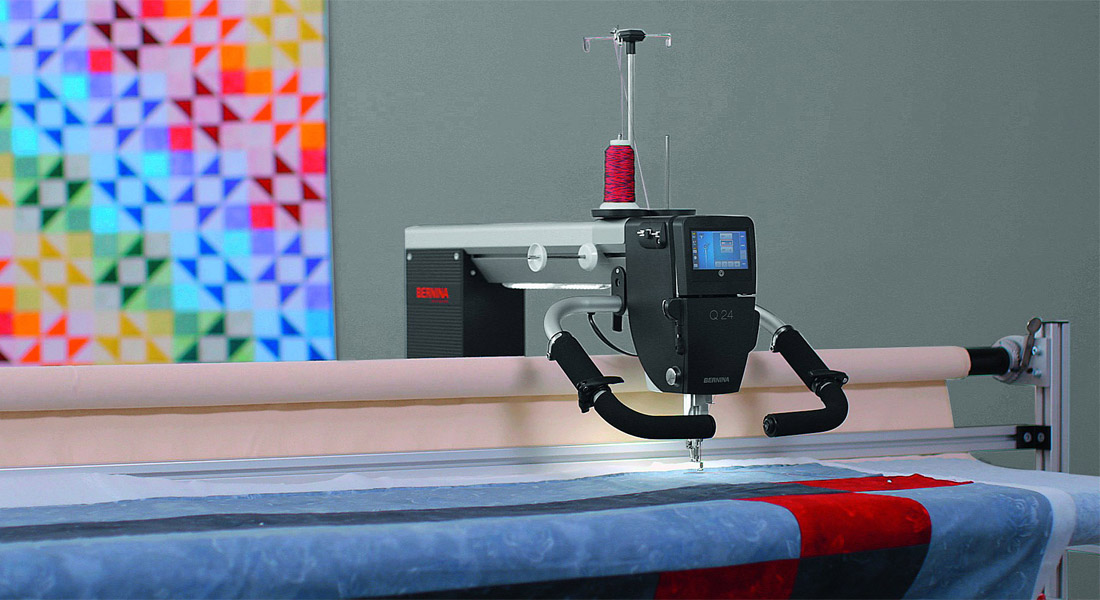
Now my piece, Tropical Storms was show ready. I’m hoping it will be accepted into a big quilt show in the near future. I hope this series of articles will inspire you to branch out with your free-motion quilting on a piece of lovely fabric you have been saving. The BERNINA 770 QE with the BERNINA Stitch Regulator (BSR), and 10″ throat space certainly made the experience very enjoyable and relatively easy.


What you might also like


7 comments on “Whole Cloth Quilting Tips: Overall Quilting”
-
-
Liz, I’m glad it looked fun, because it was! Thank you for your kind words. Let me know if I can help you get started with yours, my email is [email protected].
-
-
Wow, this is just lovely, and I love the little helper. 🙂
-
Thanks! That one is Huey. We now have 2 little helpers, Huey and Gracey, who is till a kitten.
-
-
I am trying to learn to do my own quilting since I have newer 830 and the stitch regulator. Do you have a pattern on the spiral on line that I missed. I would like to practice on with the plastic and a marker. I am really new at this. I can’t imagine doing something that beautiful.
-
Carol, I don’t have a pattern online, but that is a great idea. Please email me at [email protected] and we can talk about it further. In the meantime, just practice on your own in a doodle book with pencil and paper. It’s really just a matter of training your muscle memory to create different spirals. The stitch regulator will definitely help a newer quilter, like yourself. Also, I will try to develop something to put online. Thanks for your comment!
-
Beautiful. Thanks for very clear instructions.
Leave a Reply
You must be logged in to post a comment.

I’ve always thought about trying Whole Cloth quilting and you made it look so fun! Your quilt is gorgeous and I think it’s definitely show ready!