How to Attach Silicone to Fabric
If you are looking for new techniques to elevate your project, this tutorial will show you how to get creative attaching silicone onto fabric. Using a simple mold, you can create a whole new silhouette to build from. We hope this tutorial inspires your next project and opens the door to new and exciting materials for your sewing projects. Let’s get started embellishing your fabric with silicone!
Instructions to Create and Glue on Your Own Silicone Embellishments:
Products listed below can be found online or in some craft stores. Click the text to be taken to an online retailer option.
Materials to Attach Silicone to Fabric:
- Smooth-On Sil-Poxy silicone rubber adhesive
- Smooth-On Dragon Skin 10 Medium pourable silicone rubber
- Mann Ease Release 200
- Smooth-On Ignite silicone pigment
- Razor Blade
- Glitter
- Silicone crystal molds
- Mixing cups
- Stirring sticks
- Rubber gloves
- Straight Pins
- Shoulder pads/upholstery foam (Optional)
- Battery powered LED light (Optional)
- Tweezers (Optional)
- Studs, spikes, Swarovski crystals (Optional)
- E600 Bead and Jewelry glue (Optional)
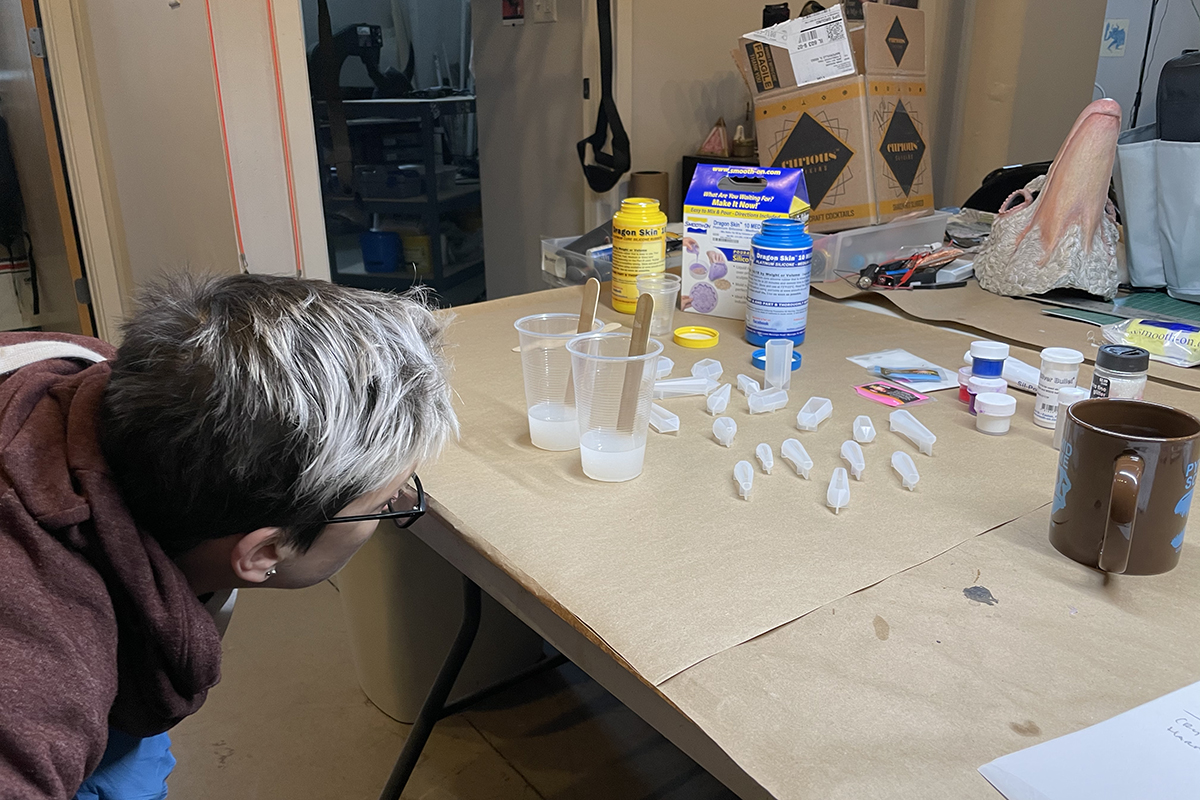
Step 1: Spray Ease Release 200 into Your Silicone Molds
First, you will want to add mold release to prevent sticking. Read the back of the can for full instructions and safety requirements. Shake well then apply a light mist, coating all surfaces including the outside of the mold in case any material overflows. Brush the surfaces with a soft brush, apply another light mist and let set for 5 minutes before pouring in any material.

Step 2: Pre-mix Dragon Skin Silicone Part A and Part B
It is likely that the materials have settled in their respective containers, so it is always a good idea to thoroughly mix each part before you begin measuring it out. Use separate paint sticks or tongue depressors to mix part A and B while making sure to scrape the sides and bottom. Rubber gloves are necessary for safety as well as cleanliness, as the materials are very sticky and hard to clean up.
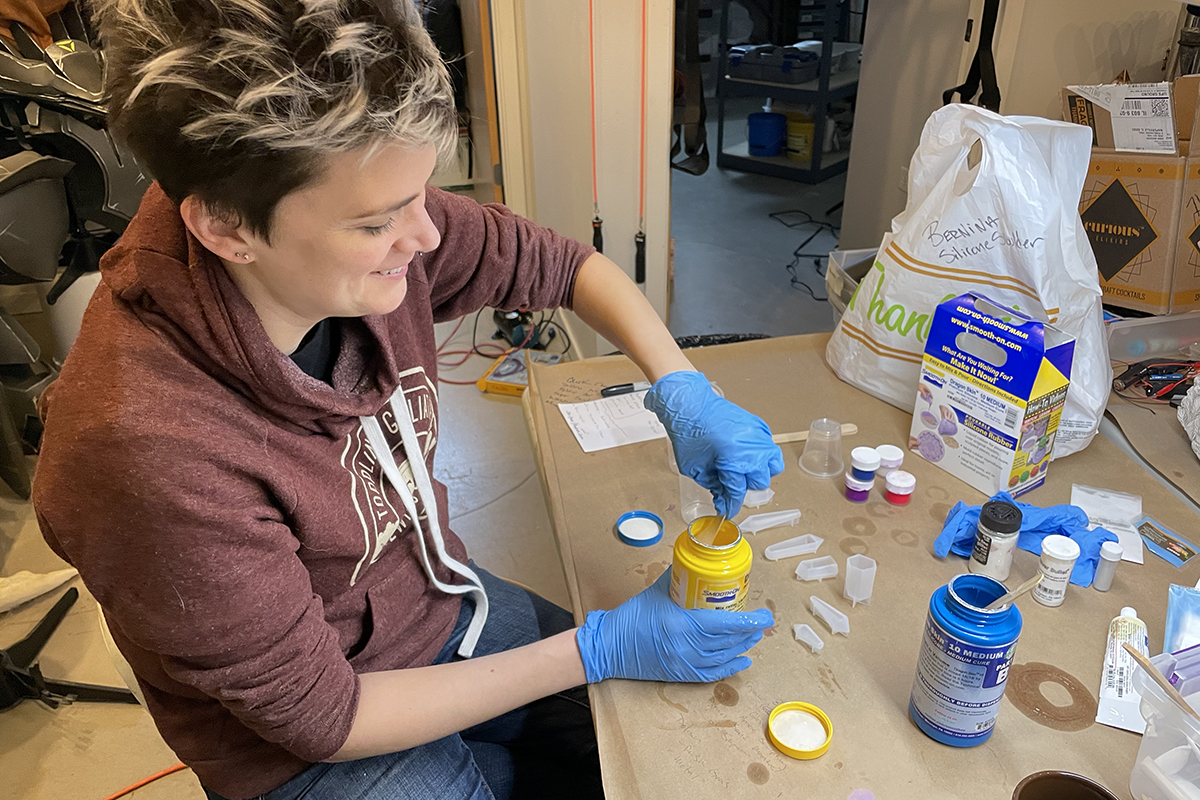
Step 3: Measure Equal Amounts of Dragon Skin Silicone Part A and Part B
Before you begin, please read all the safety bulletins and instructions provided with your Smooth-On Dragon Skin silicone. Start by pouring equal amounts (by weight or volume) of A and B into separate disposable cups.
Step 4: Add a Small Amount of Pigment to One Part of the Dragon Skin Silicone
To customize, you may add silicone pigment to tint your crystals. (A small amount goes a long way!) We used Ignite pigments from Smooth-On as they are bright and UV reactive for a fluorescent glow.
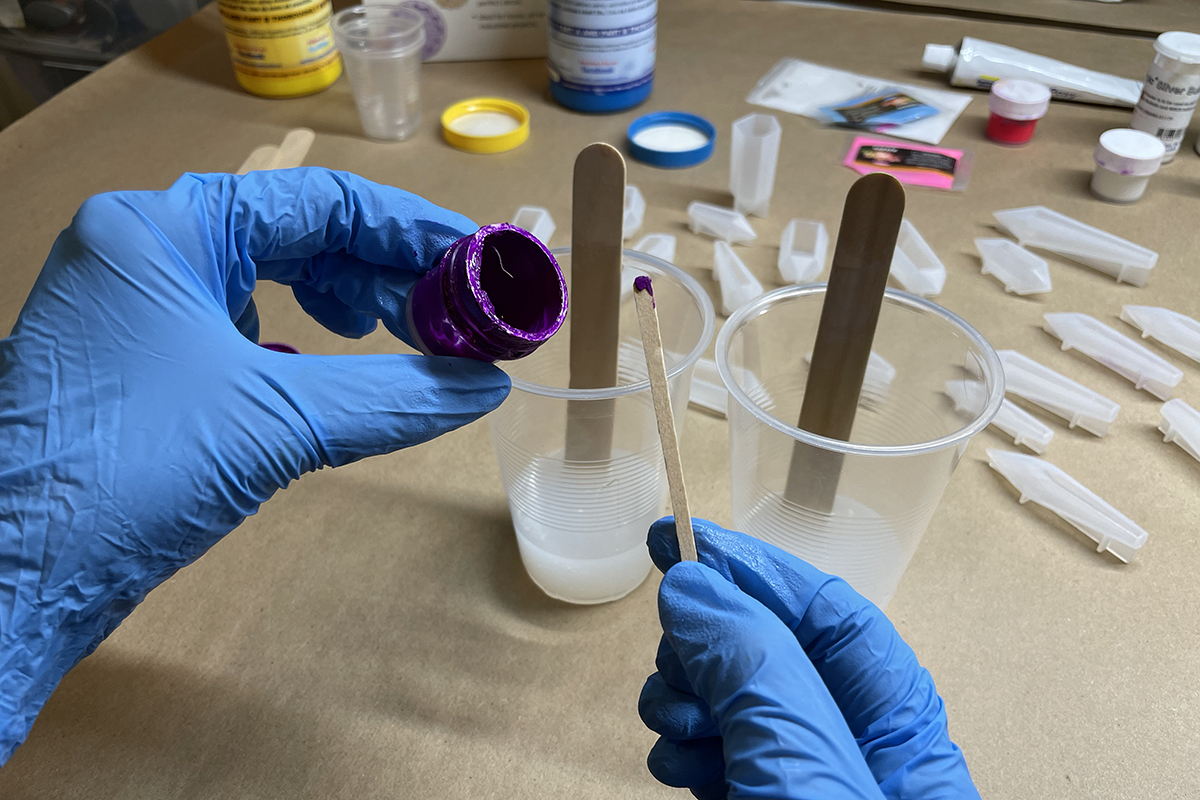
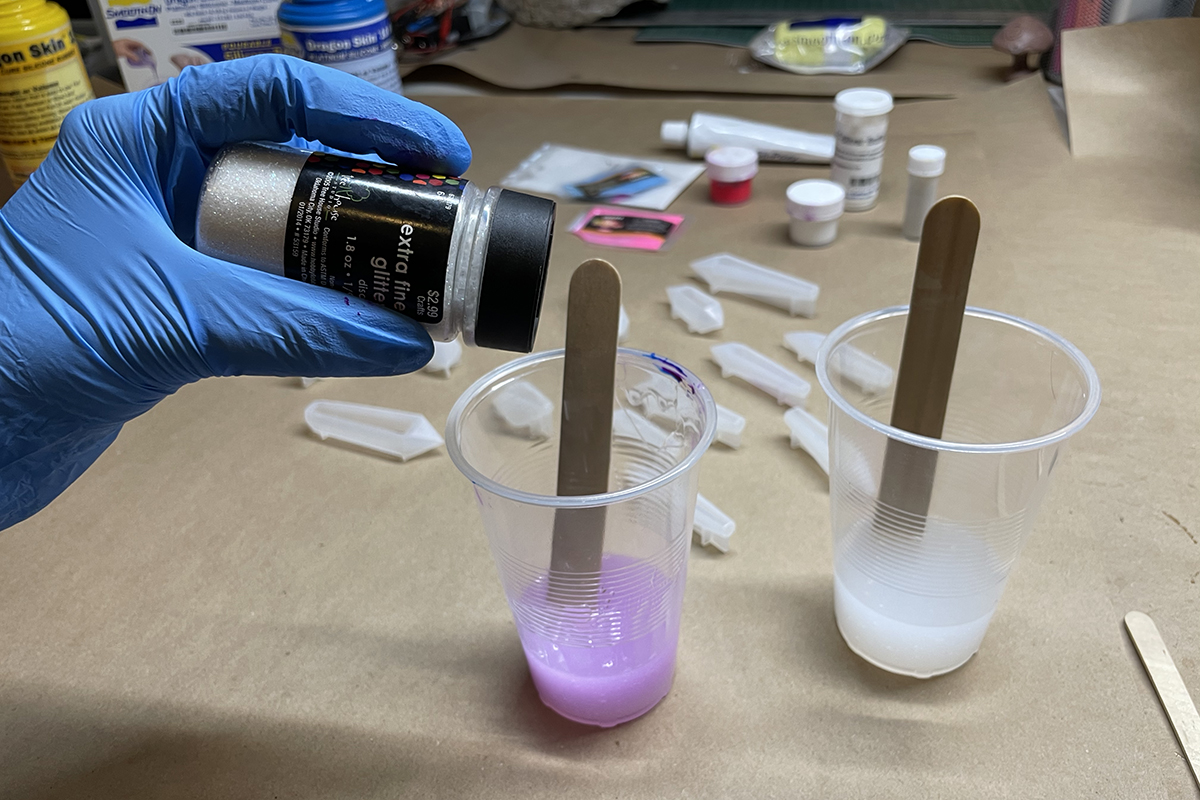
Step 5: Add Glitter or Other Effects to the Dragon Skin Silicone
Another fun customization is glitter or glow effects. Dash in a desired amount of glitter or even some glow-in-the-dark powder to one part of the silicone. By adding the pigment and powders to the divided silicone, you allow yourself more time to achieve the desired result without the threat of the silicone curing.
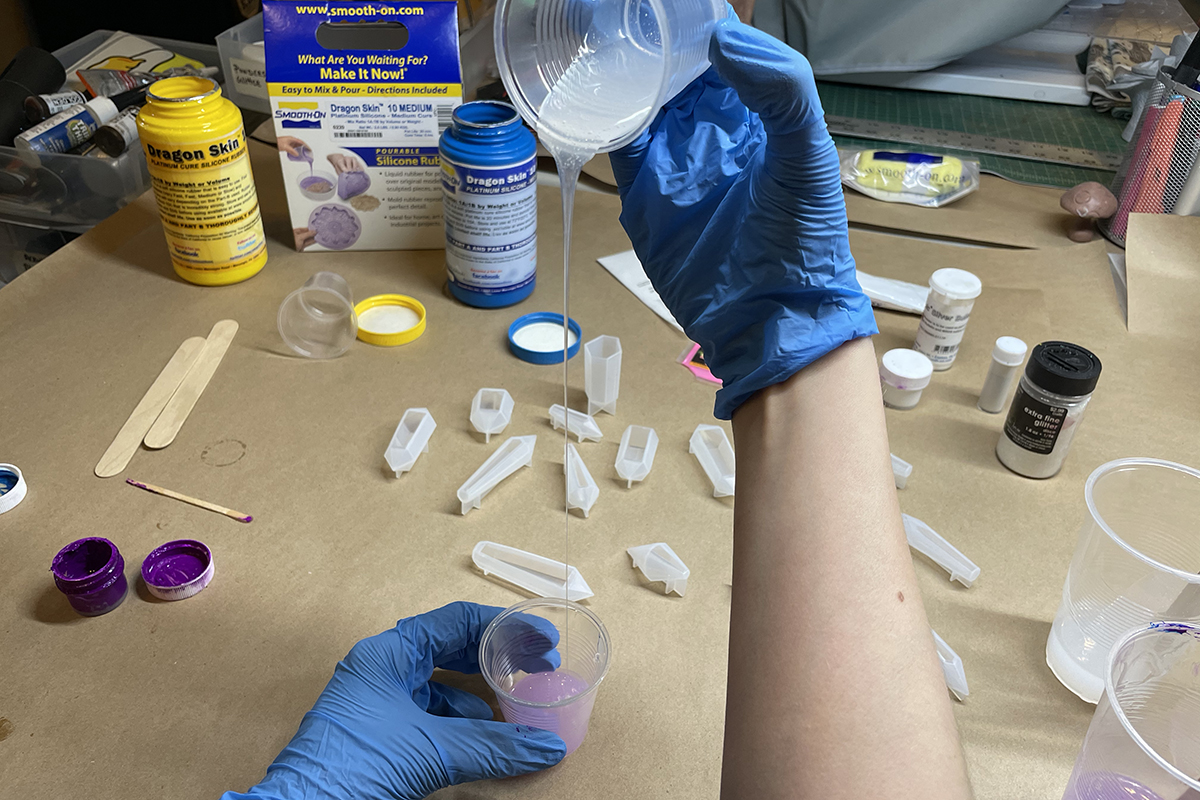
Step 6: Mix the Dragon Skin Silicone Part A and B Together
After you have added all your glitter and pigments, it is time to combine the Dragon Skin Parts A and B together. Pour one part of the silicone into the other part’s cup. Make sure to incorporate everything completely and mix thoroughly for about 3 minutes.
The pot life, working time, how long the material will take to cure and the density of the silicone varies depending on what Dragon Skin version you purchase. For this tutorial we used Dragon Skin 10 Medium.
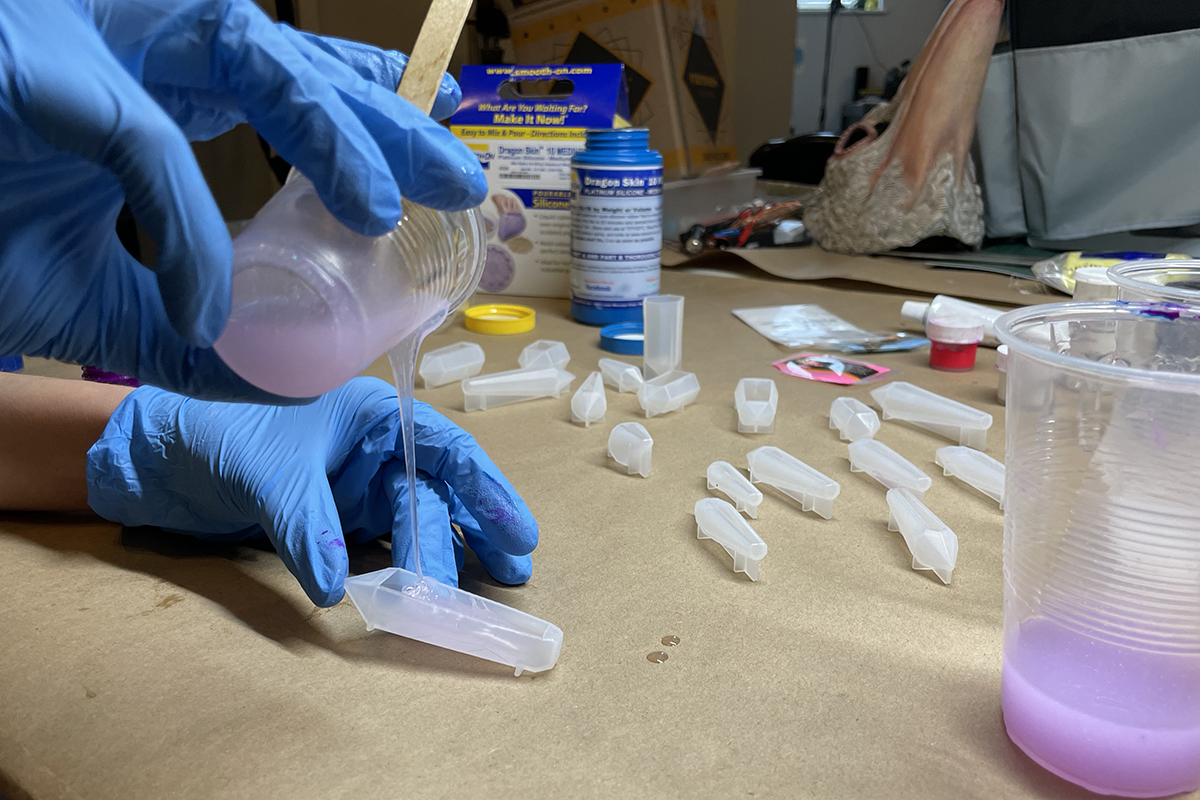
Step 7: Pour the Mixed Dragon Skin Silicone into the Mold
Slowly pour your fully mixed silicone into the molds. To help release air bubbles, pour the silicone in as thin of a stream as you can and from as high a point as you can. (this can get messy) Once filled, gently tap the molds on the table, therefore helping release trapped air bubbles. Allow the silicone to fully cure per the product instructions.
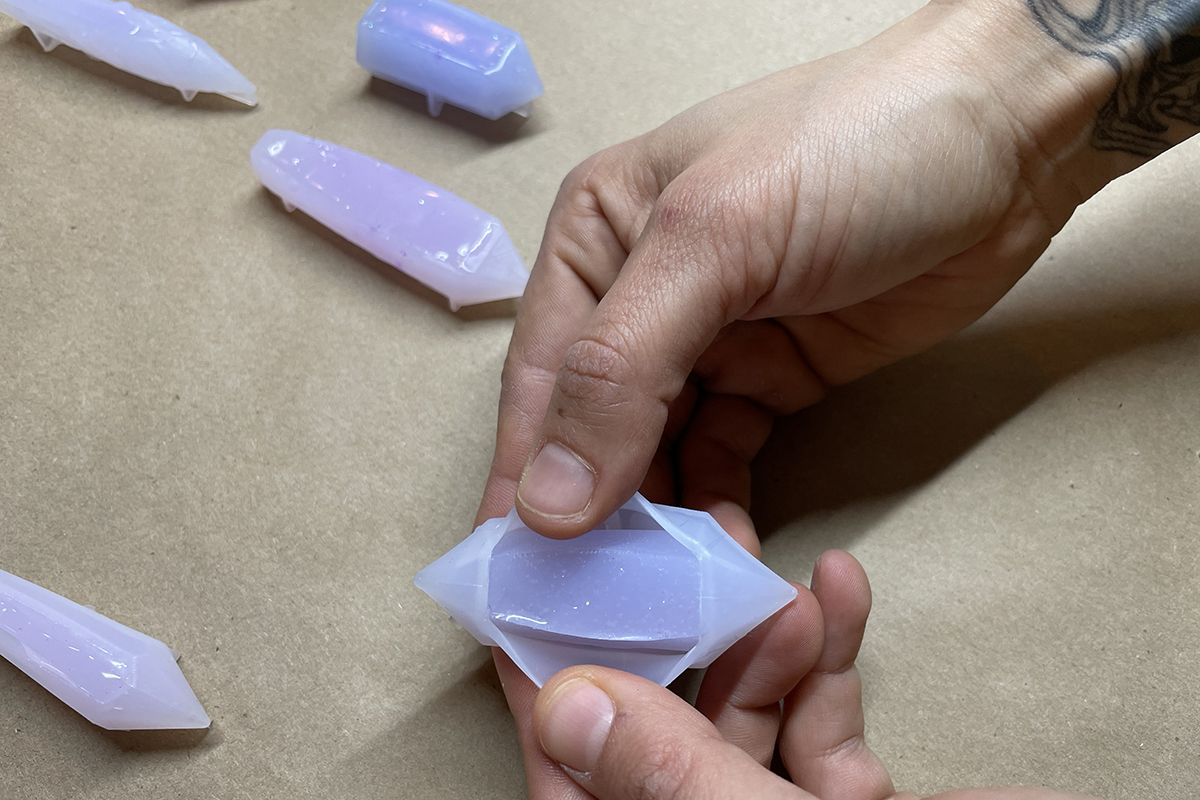
Now that the silicone is fully cured you can demold your pieces. Carefully pull at the sides to release the silicone from the mold and remove the newly casted crystals!
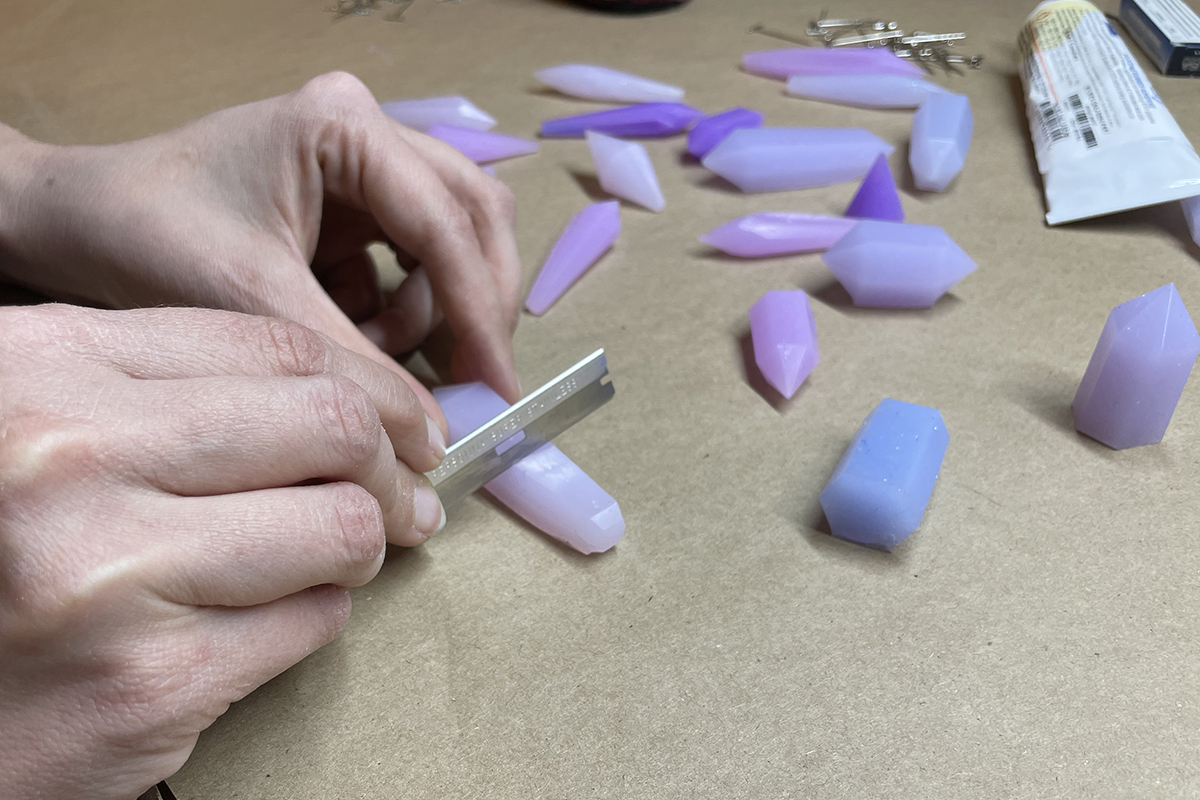
Step 8: Cut a Flat Edge Into Your Silicone Crystal
The crystals are two-sided and must be trimmed using a sharp blade. To add interest, some were cut directly in half, some longer and shorter, and some at angles to create the look of a natural landscape of crystal growth.
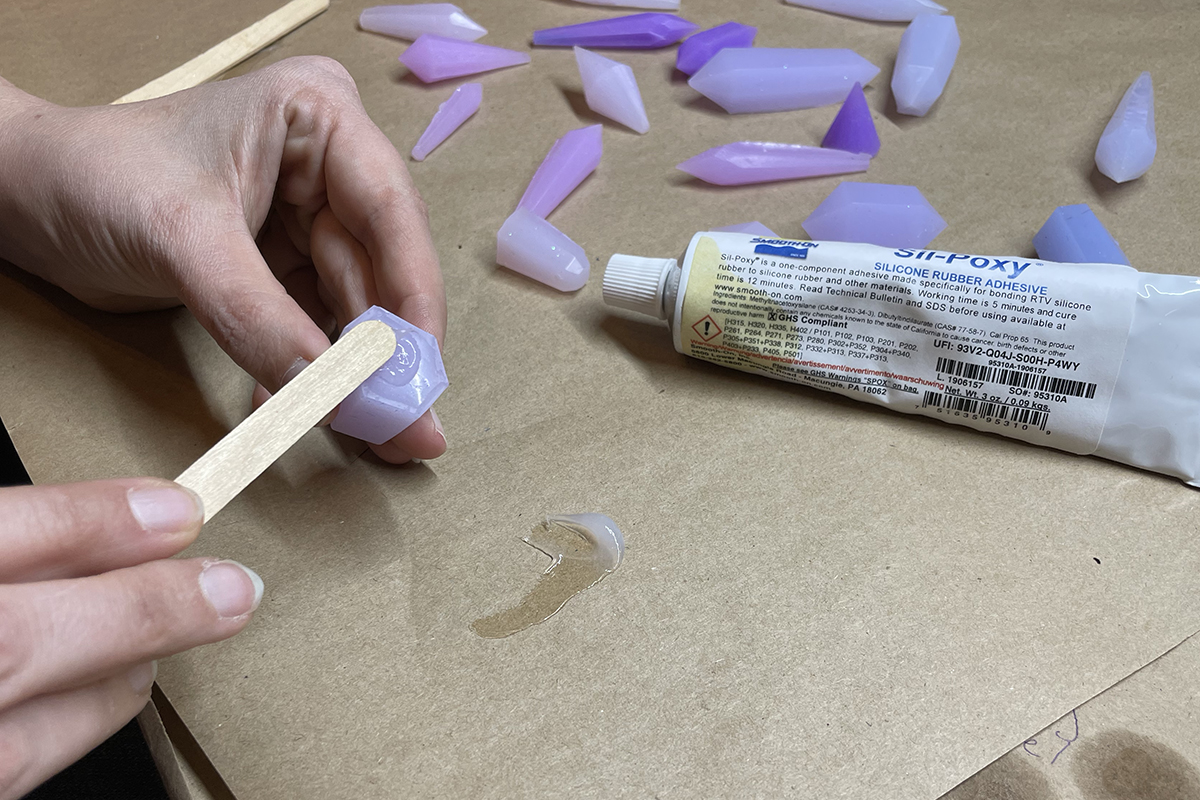
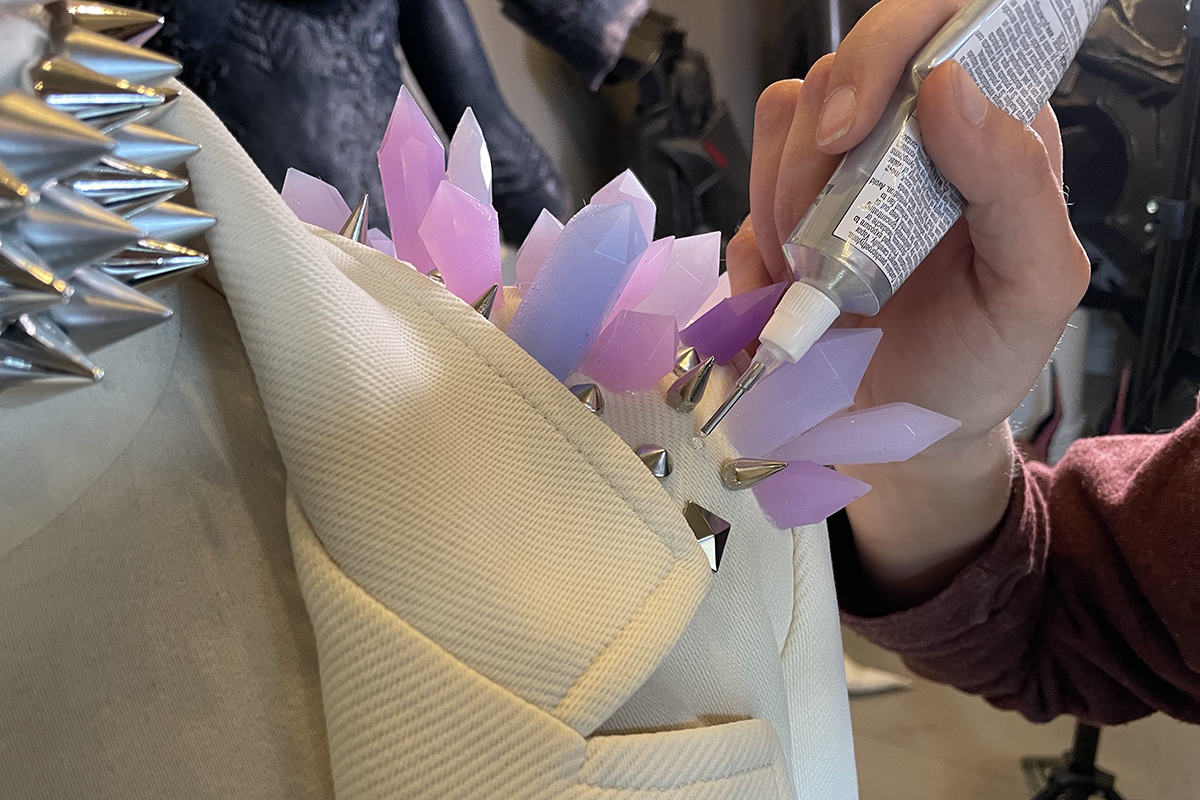
Step 9: Apply Sil-Poxy Silicone Rubber Adhesive to Attach Silicone to Fabric
A tongue depressor works well to apply a small amount of Sil-Poxy silicone rubber adhesive to the bottom of one of the crystals. You will want an even coat that covers up to the edge for best adhesion. After that, choose a location where you would like the crystal and press it firmly down into the fabric. If some adhesive seeps out it is ok, it will dry clear. Continue this process one piece at a time so your adhesive does not cure prematurely.
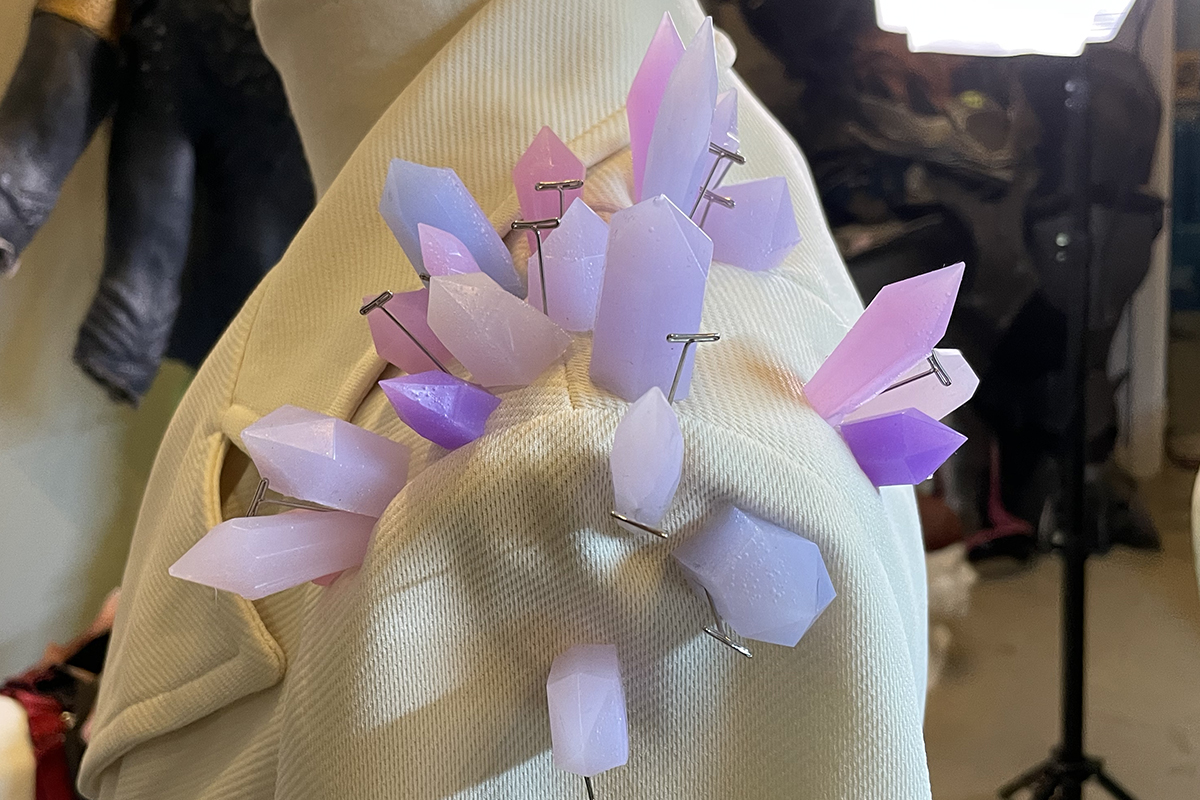
T-pins can be added to secure crystals that may need a little support until they fully cure.
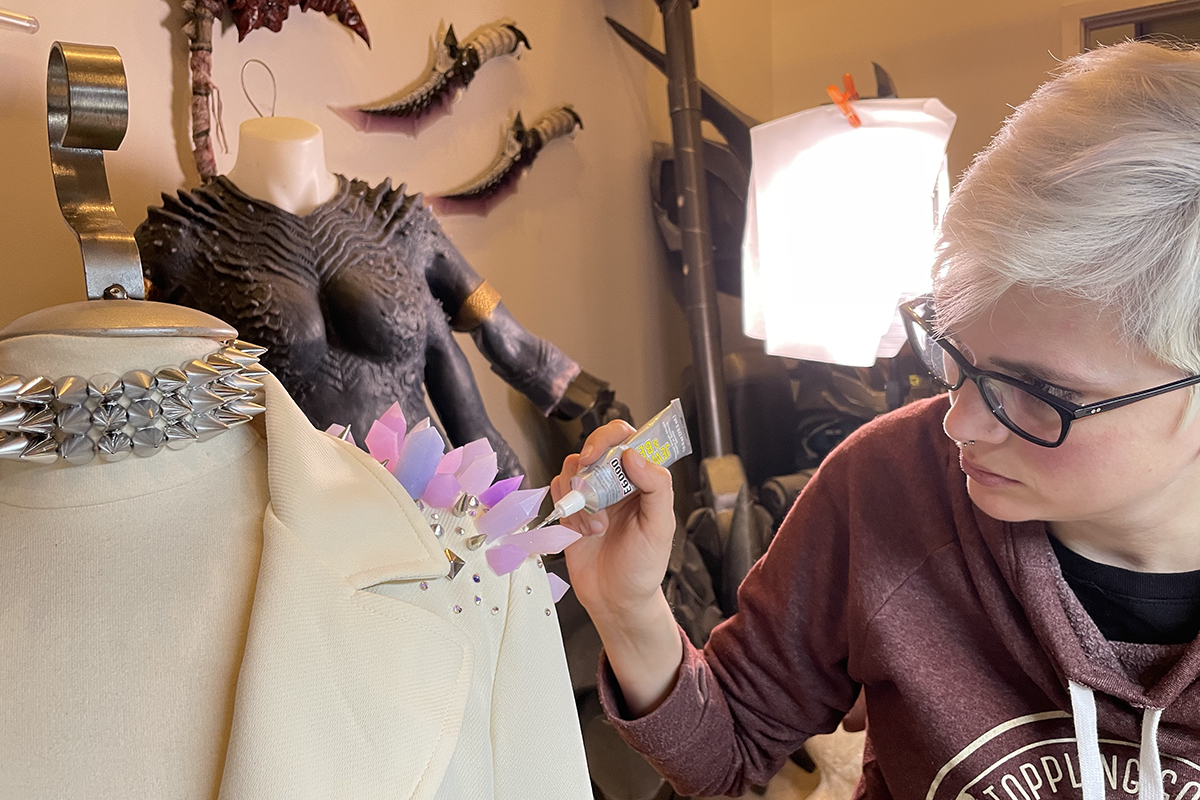
Step 10: Further Customize Your Project with Embellishments
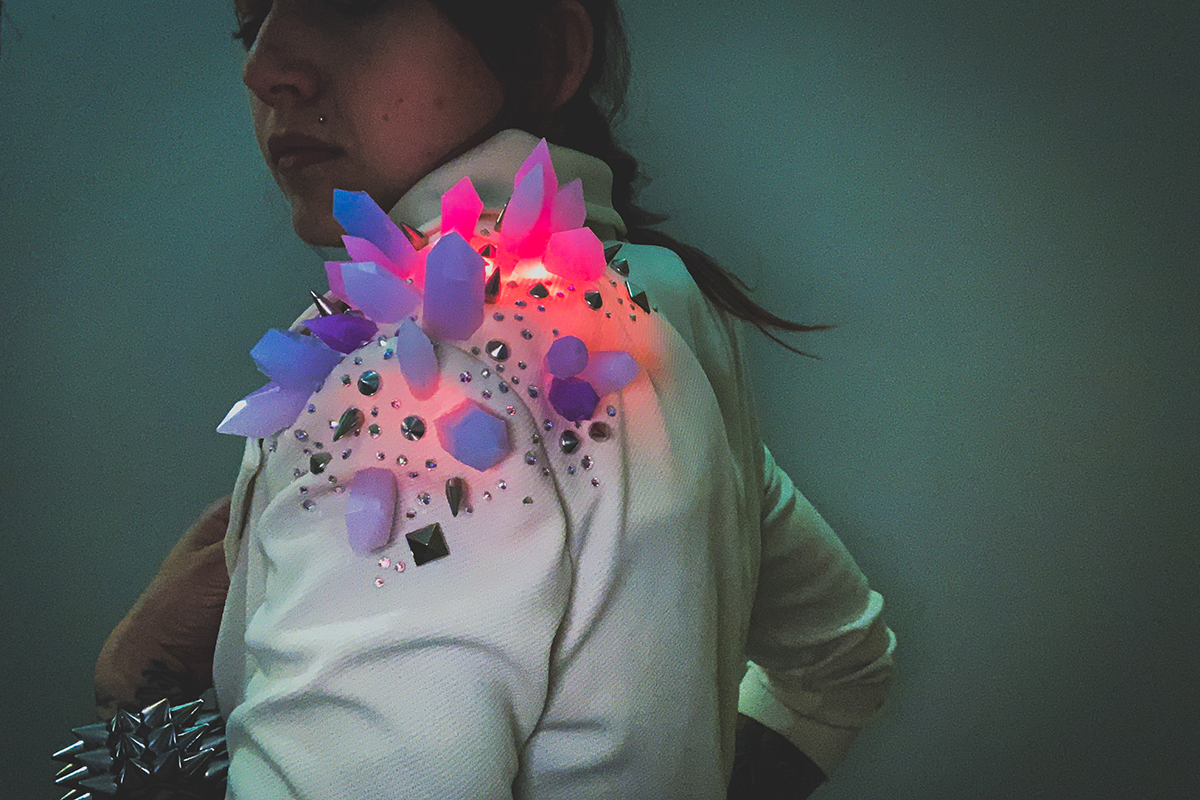
Get creative with any other embellishments you might like to add. For example, we attached metal studs and spikes among the crystals.

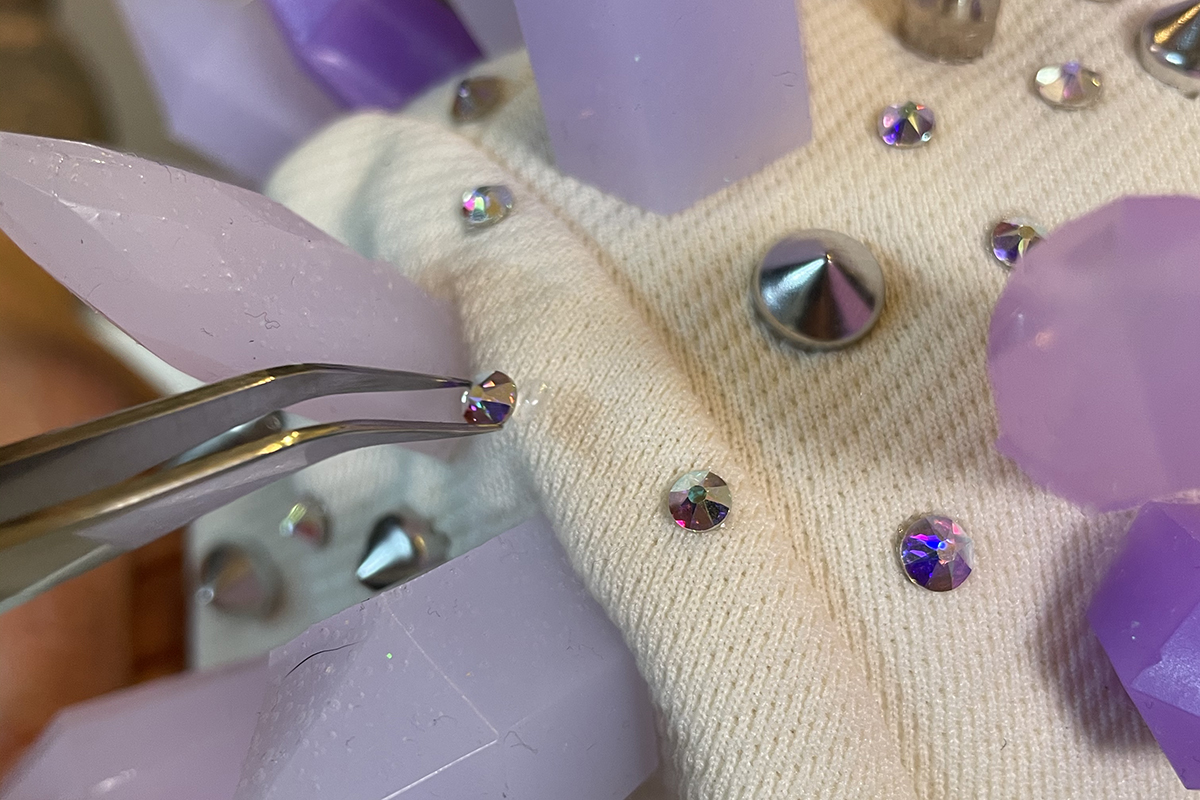
Step 11: Add the Finishing Touch with Some Crystals
Every project could use a little extra sparkle. Add a dab of E600 Bead and Jewelry glue directly to your fabric and gently place a crystal over it.
Use Famore Curved Tweezers help to gently and accurately attach each small Swarovski crystal over each glue dollop.
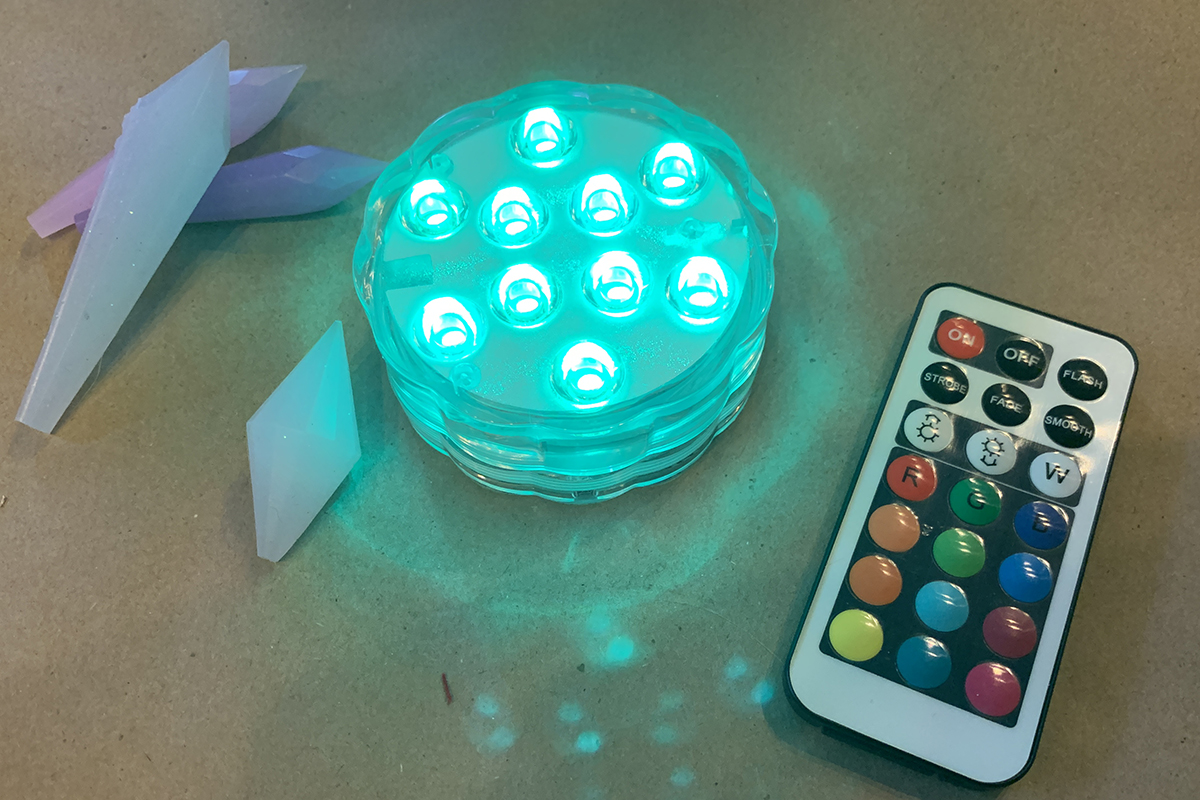
Step 12: Illuminating Your Silicone Attached Fabric
There are many ways you could light up these silicone crystals. For this tutorial, we purchased a battery-powered RGB color-changing LED light disk. A hole was cut into a piece of upholstery foam to house the light. After that, we attached the foam inside the shoulder like a shoulder pad. Padding was added to both shoulders so they would appear symmetrical.

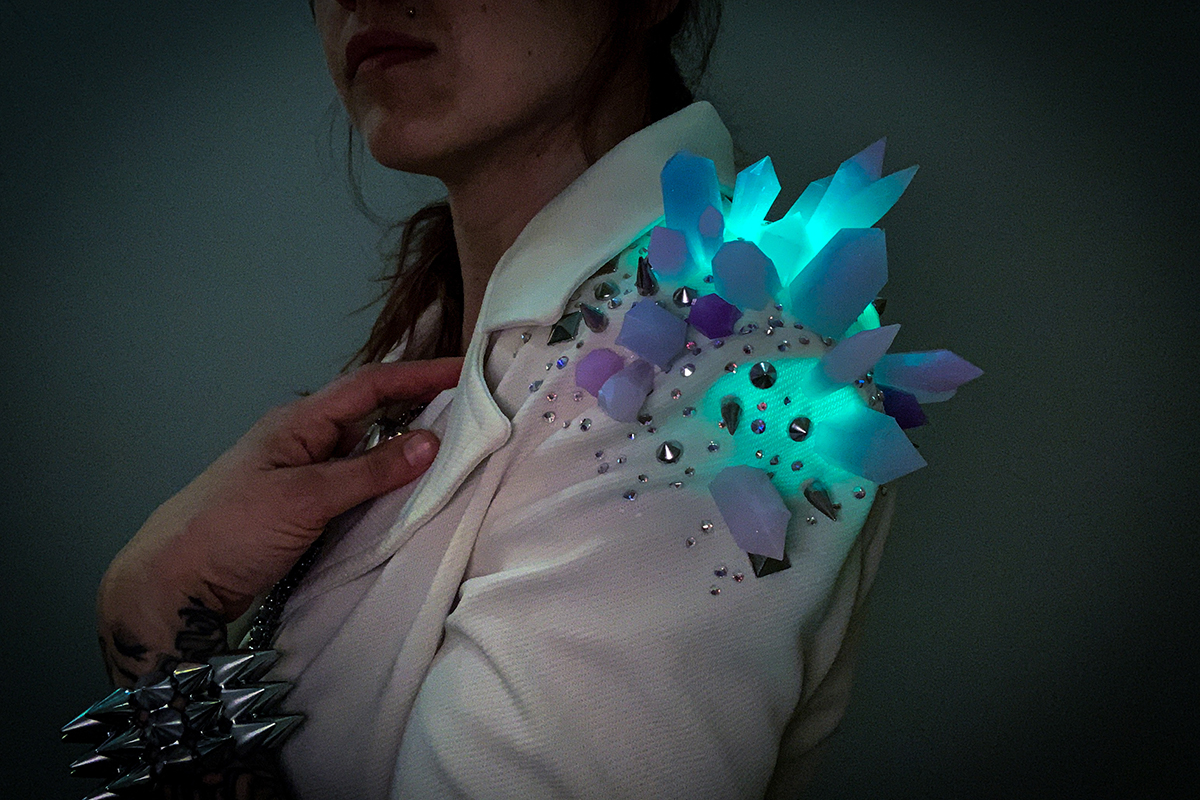

Overall, silicone is a fun and unique material to add to your projects. It is easy to use, can be cast in a variety of molds and can be tinted to any color you can imagine! Another benefit to silicone is that it is super stretchy and is perfect for attaching to spandex-type fabrics. The possibilities are endless so get creative and have fun!
If you have any questions or end up using this tutorial please reach out or tag us on social media!
Facebook: https://www.facebook.com/EggSistersFX
Instagram: https://www.instagram.com/egg_sisters/
Email: [email protected]
Website: https://eggsisters.com/


What you might also like


2 comments on “How to Attach Silicone to Fabric”
-
-
Love this! What a fun project that combines a multitude of cool features. Well done!
Leave a Reply
You must be logged in to post a comment.

This is really really rad.