How to Create a Dog Harness, Part 1: Digitizing the Dog Bone
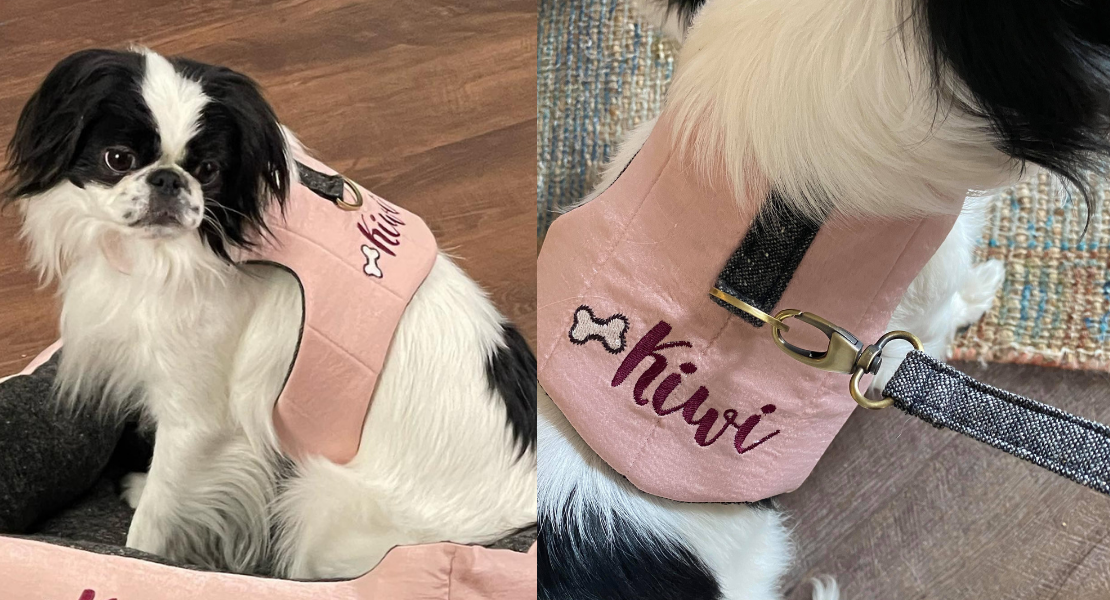
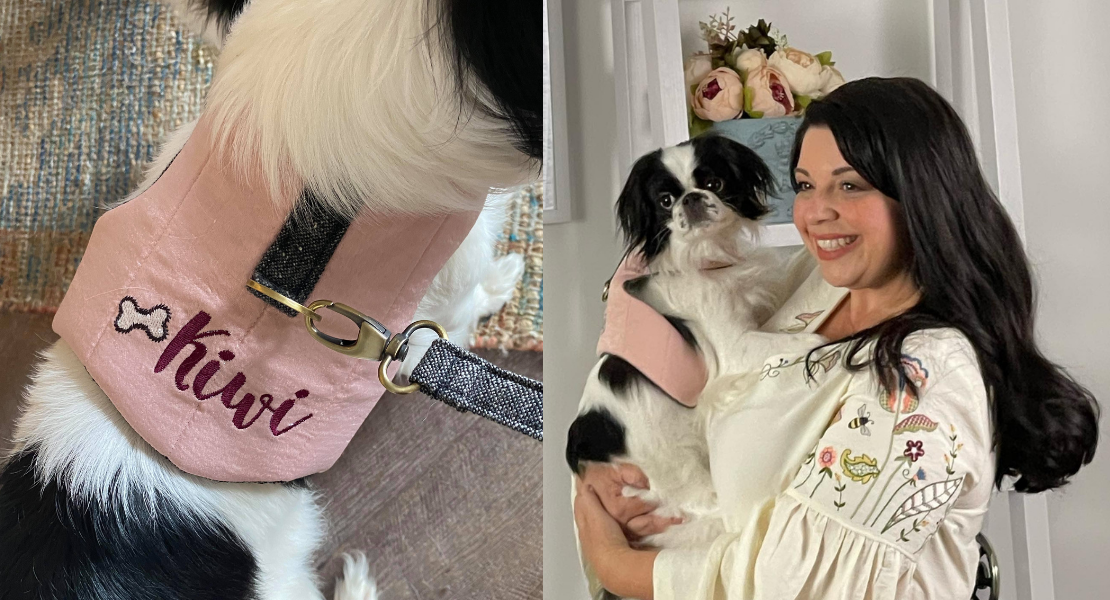
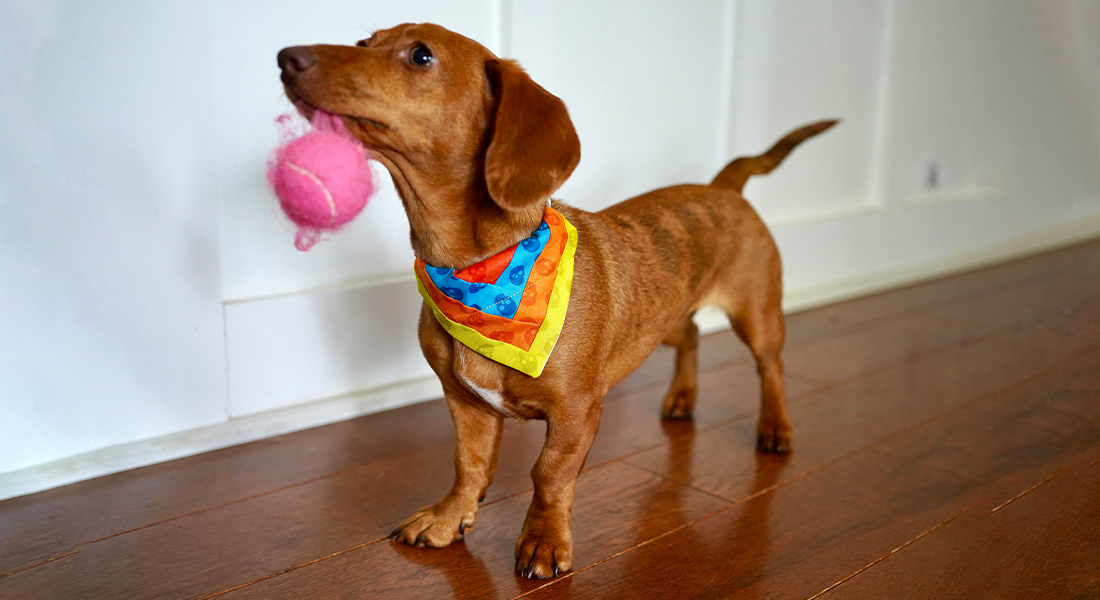
Hello my Sewing Bees, my name is Sue O’Very owner of Sookie Sews. You can find me on Instagram at @SookieSews and my website SookieSews.com where I have hundreds of sewing patterns, In-the-Hoop projects, and video tutorials. I am so thrilled to be the BERNINA Embroidery Software V9 Expert and to be sharing this step-by-step guide to digitizing the dog bone I used in the V9 campaign video on my dog Kiwi, the Japanese Chin.
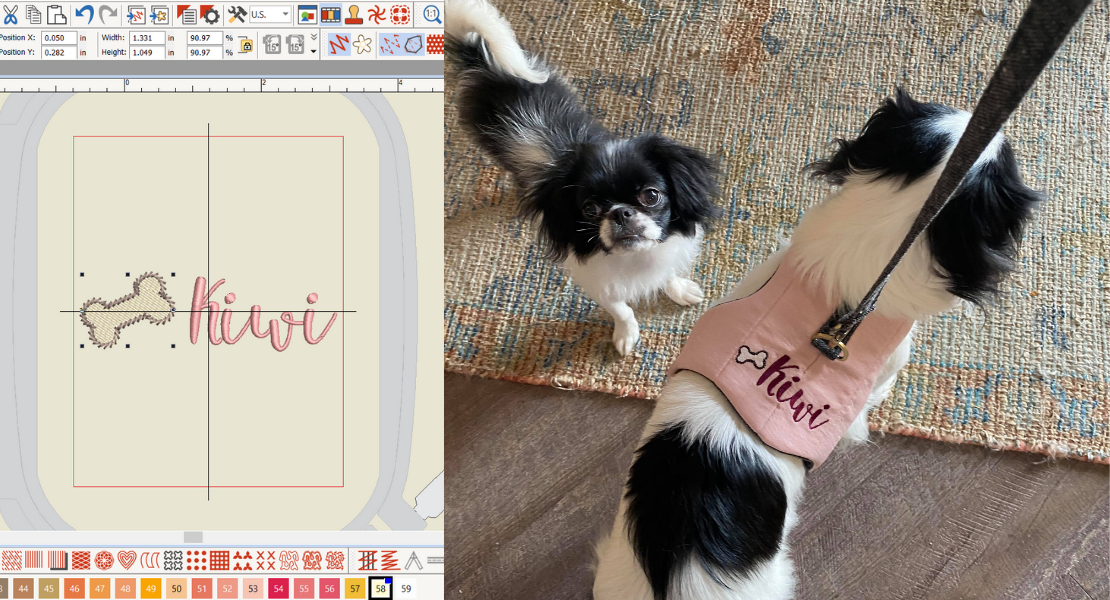
This is a three-part blog series featuring Kiwi’s dog harness. This first part is all about digitizing the Dog Bone and adding a name. The second is about how to embroider and sew the dog harness and the last is how to make the leash.
I hope you enjoy it!

Steps to Digitize the Dog Bone for Embroidery
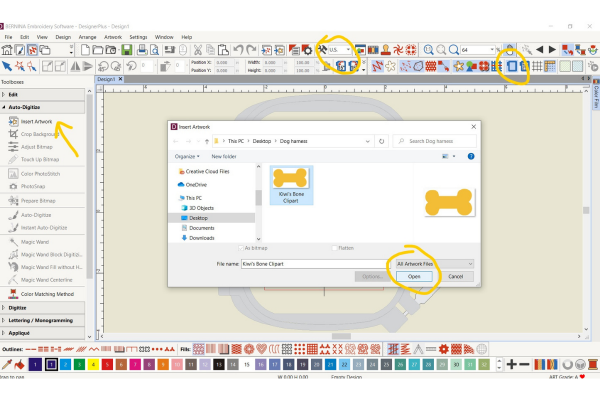
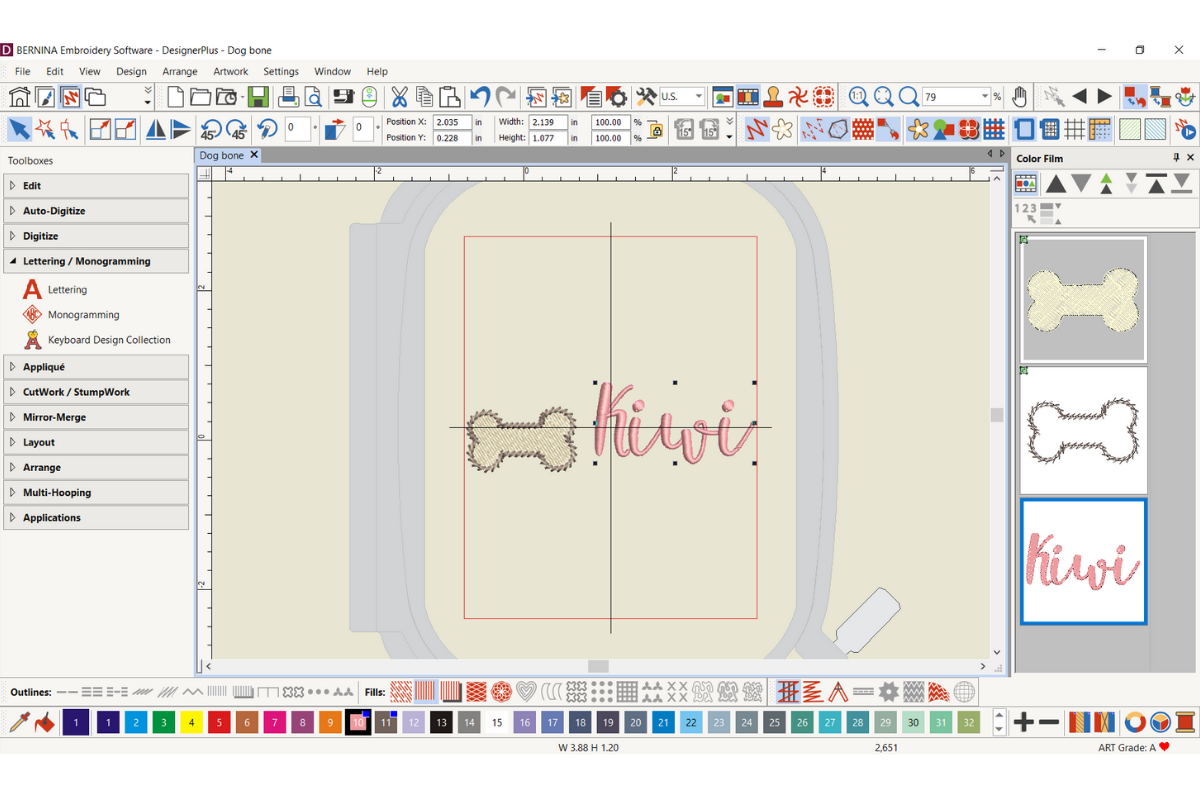
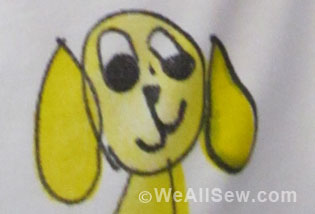
- Open BERNINA Embroidery Software V9 > New Design: Make sure the unit of measure is U.S. and change hoop to Medium by right-clicking on the hoop icon and selecting the Medium hoop. Select the Auto-Digitize Toolbox > Insert Artwork > Select the Kiwi’s Bone Clipart > resize to approximately 1.25″ wide.
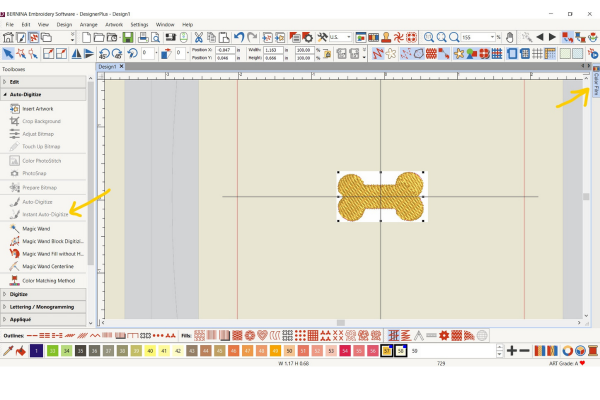
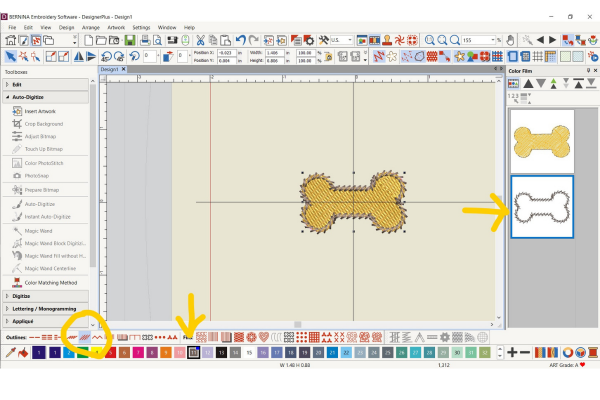
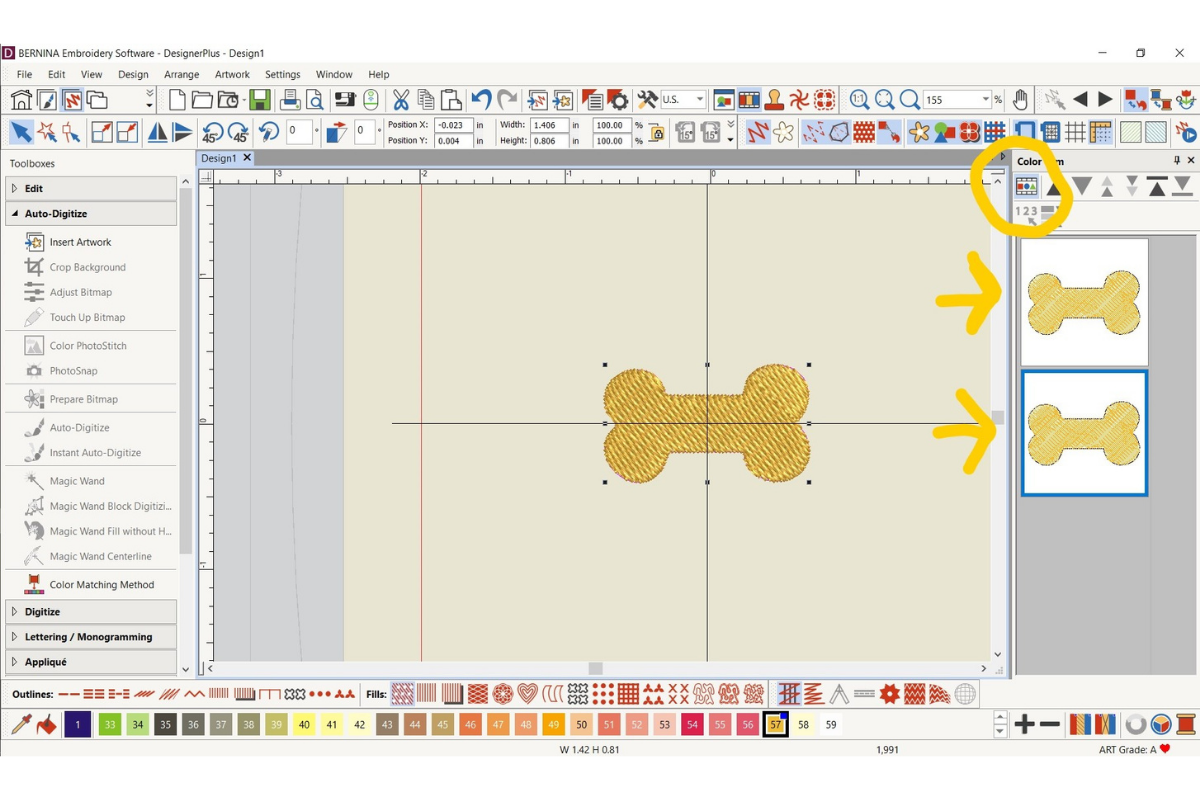
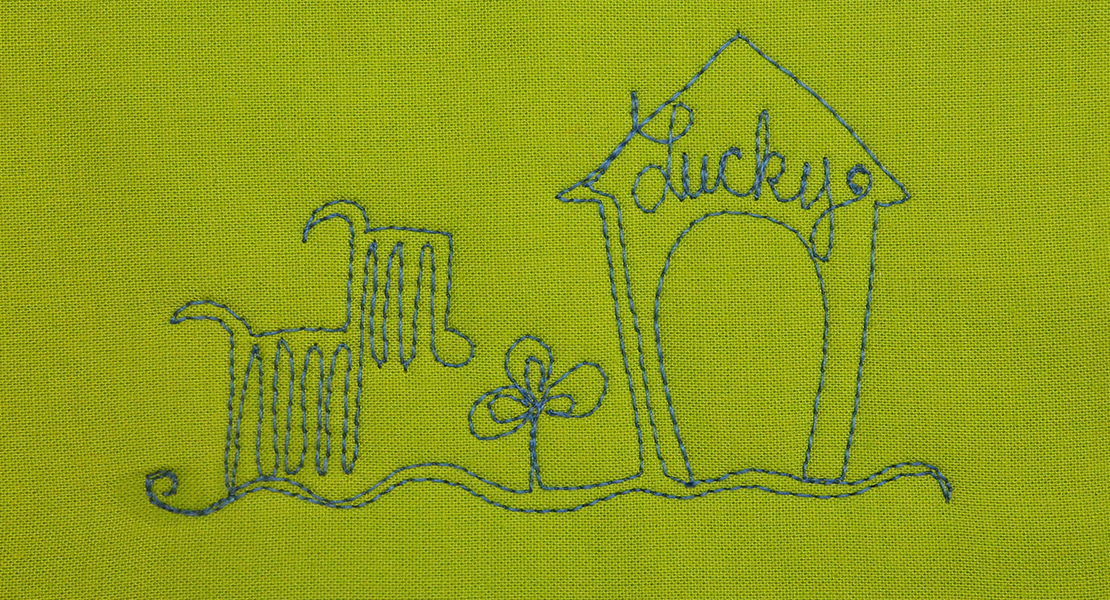
- Inside the Auto-Digitize Toolbox select Instant Auto Digitize, this will turn the bone into an instant design with fill stitches. Open the Color Film tab on the right side of the screen and click the “Pin” to keep it open.
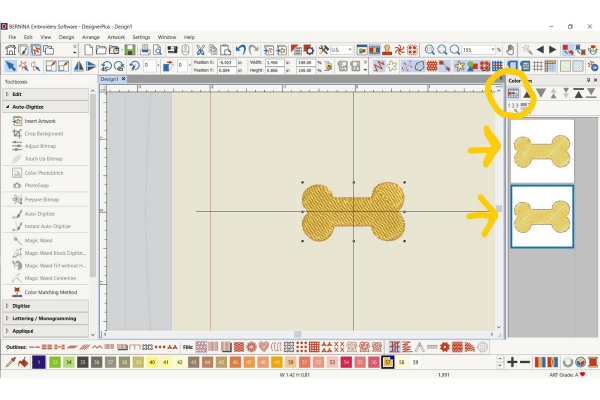
- In the Color Film, you will notice there are three boxes. The first box is the .JPG Bone clipart. Select it and delete it, we no longer need it. The second is the filled bone (see the Fill Toolbox at the bottom of the page showing the Fill), and the third is an additional area of color the software picked up that we don’t need, go ahead and delete it.

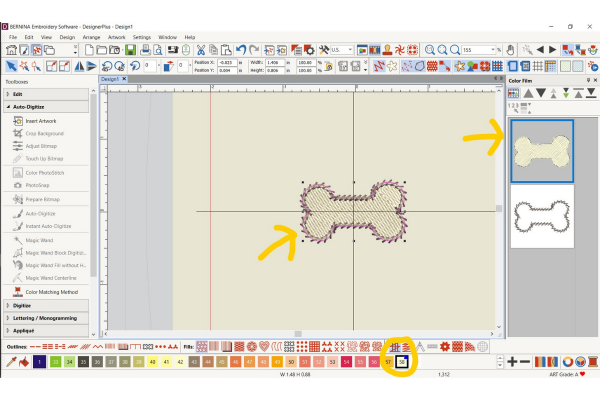
- All that remains in the Color Film now is the gold bone fill stitch. Select the Bone > Right-click > Copy > Right-click > Paste.Now there are two filled bones. If you do not see the two separate gold bones, select the icon Show Objects in the Color Film which will show you everything in your color film even if there are multiples of the same item, i.e. two gold bones.
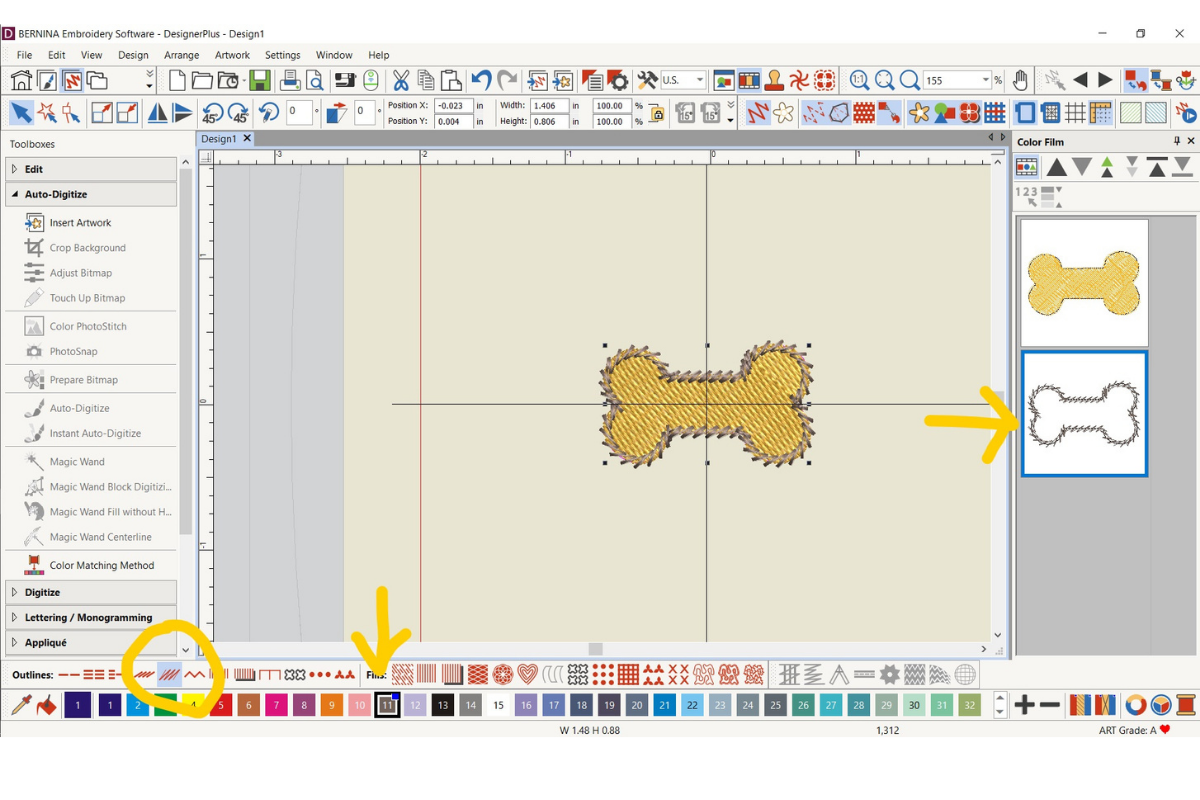
- Select the second filled bone > Change the color to a darker gray/brown (see the bottom of the screen where the color chips are) > change the Fill to a Stemstitch Outline (see the Outline menu at the bottom lower left).
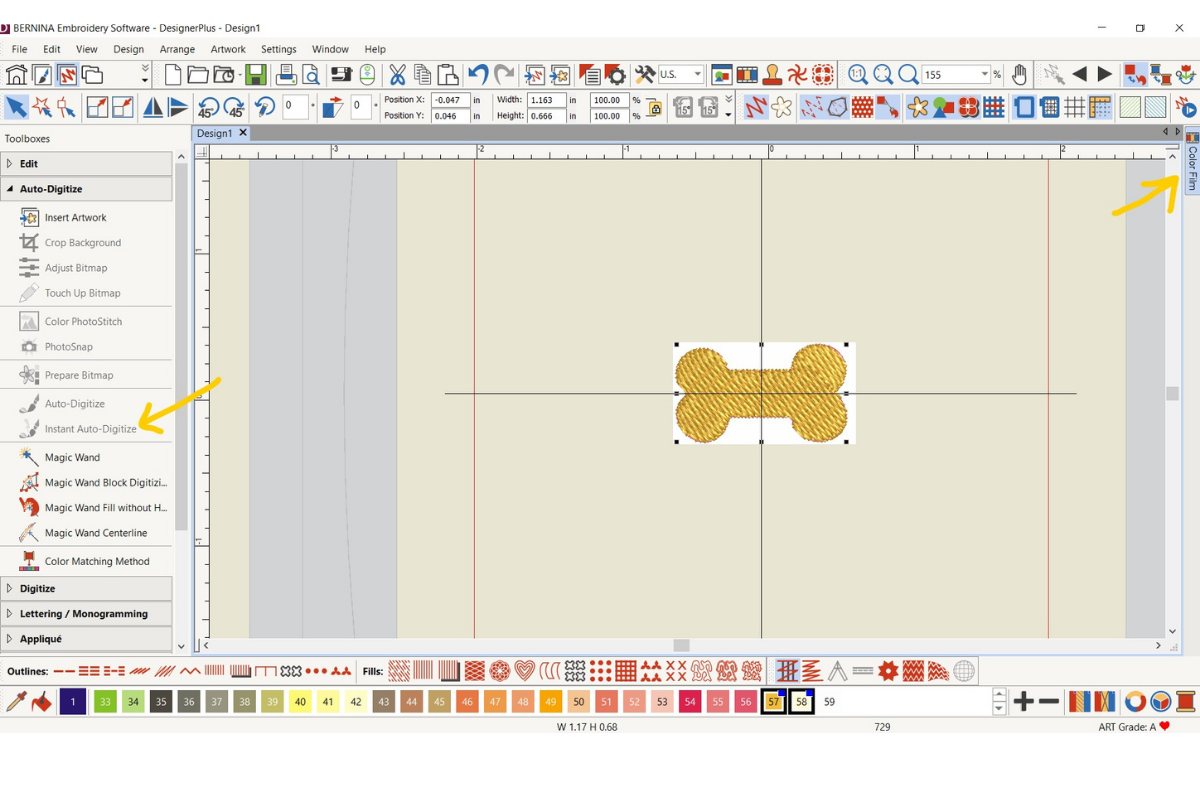
- Select the first filled bone and change the color to a lighter cream color.
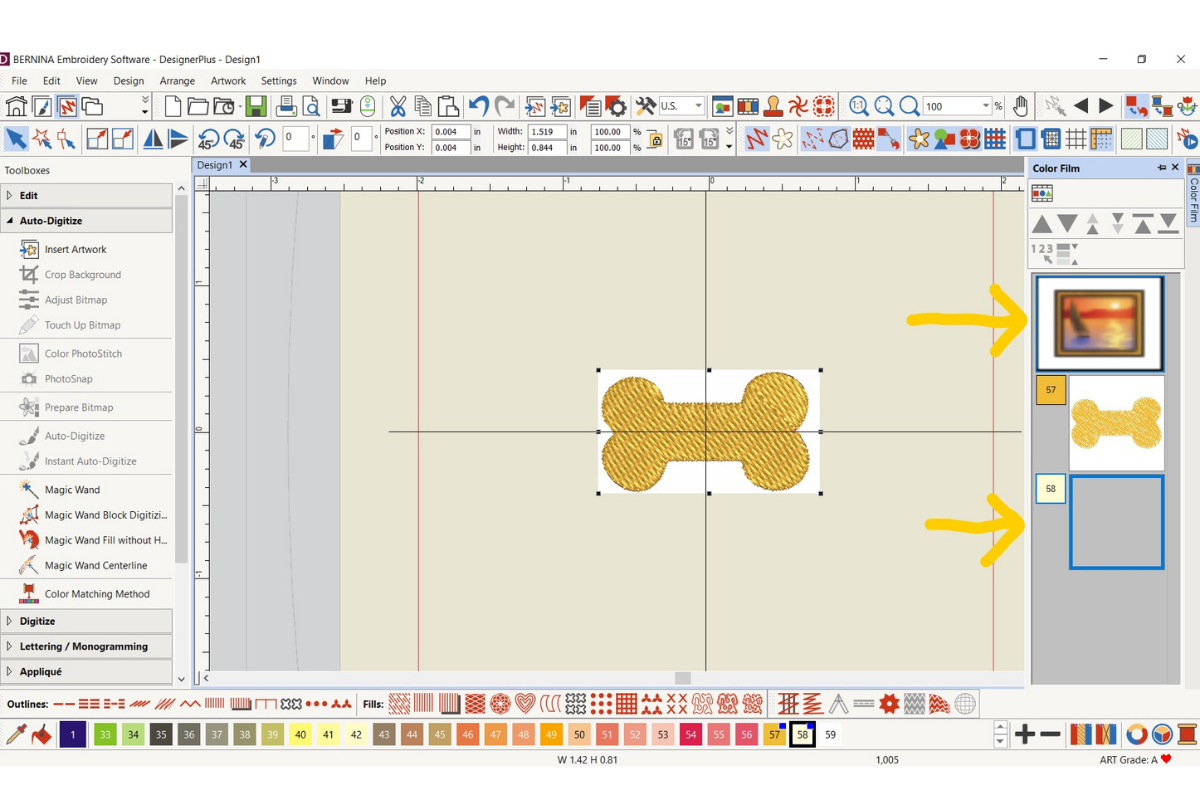
- If you want only the bone, File > Save as > .ART90. File > Export Machine File > BERNINA .EXP (or whichever format you need). If you’d like to add a name continue below.


Steps to Add Your Dog’s Name to the Design
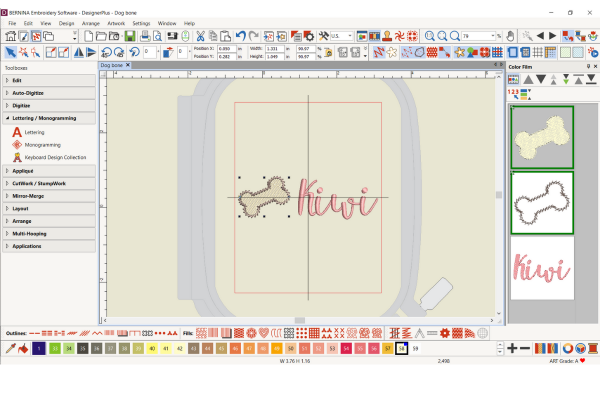
- In order to add the name to the bone, select both the fill and outline and Arrange > Group. Now you can resize and rotate the fill and outline at the same time.
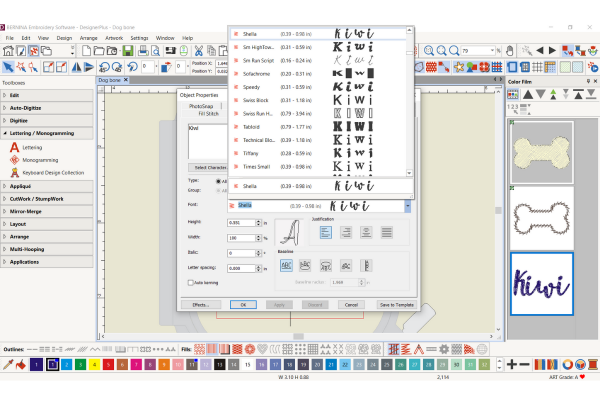
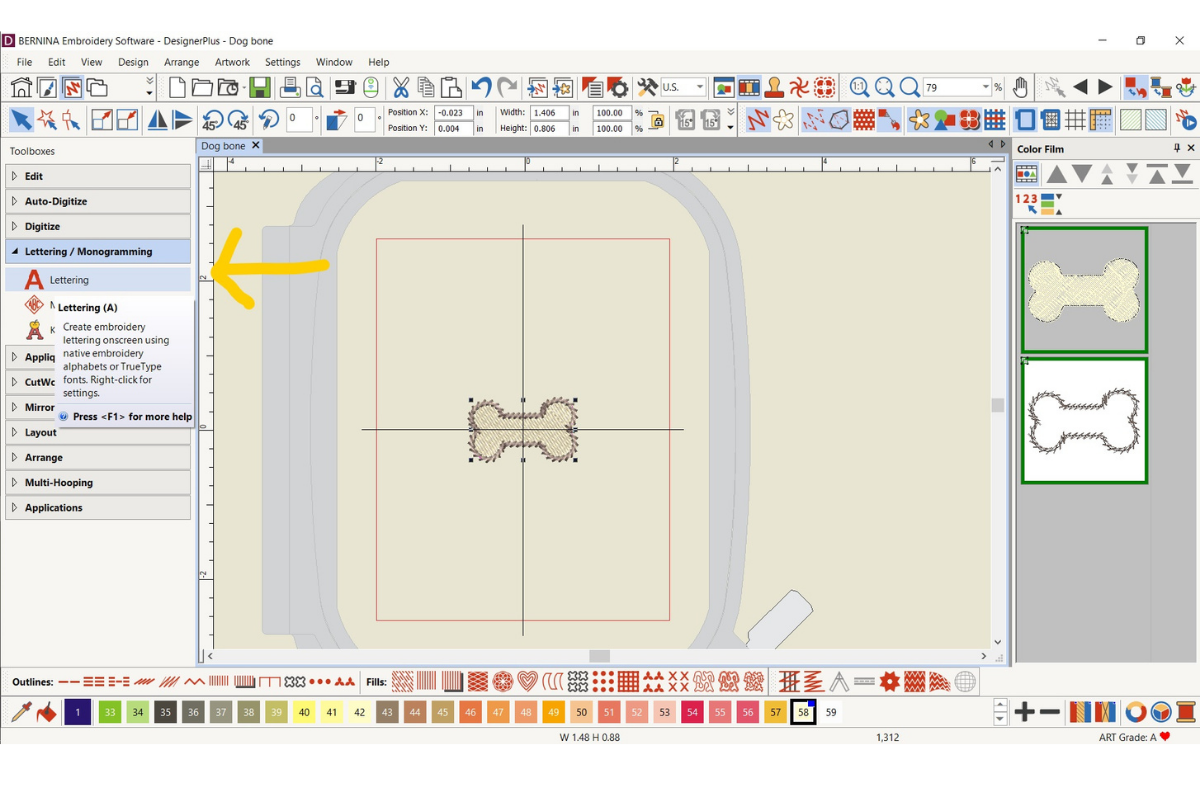
- To add a name open the Lettering / Monogramming Toolbox > Lettering > click on the screen and type the name and press Enter.


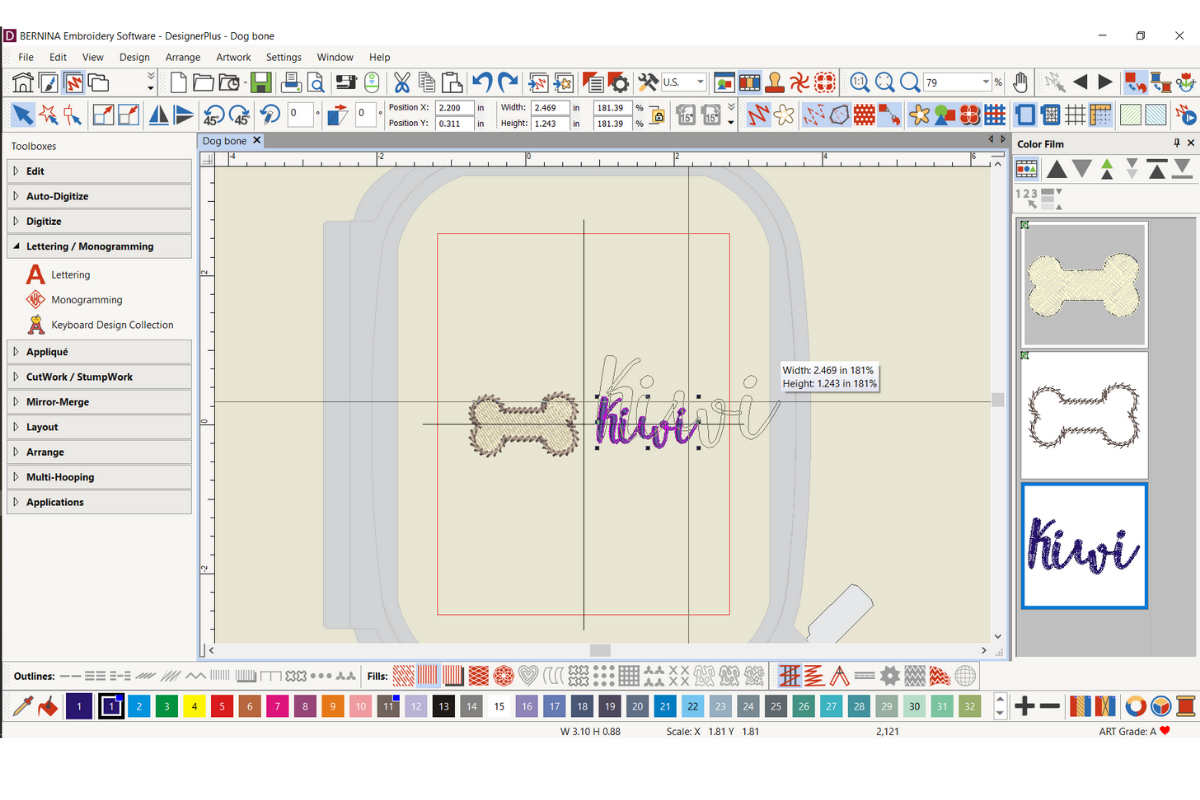
- To change the font, double-click on the name, which will open the Object Properties window. Find the font you like, my new favorite is Shella font, choose it, and select OK.
- Change the size of the font by selecting it so there are black boxes around the outside, click and drag one of the outer corner boxes to enlarge the size and release when you found the desired size.
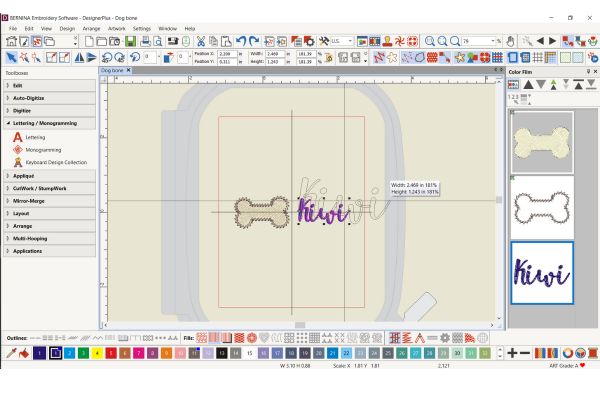
- Change the color of the font by selecting it and choosing a different color on the bottom.

- Rotate the bone by clicking it twice: Once click put the black boxes around the outside which allows you to resize and two clicks put clear boxes. Click one of the outside clear boxes and rotate the bone.
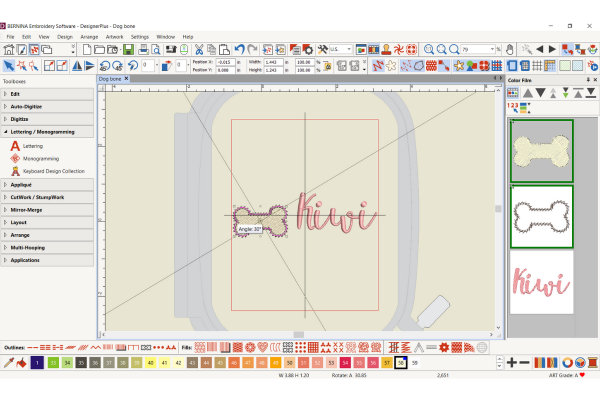
- Adjust the bone and name to the right size and direction of rotation until you are pleased with the results.
- File > Save as > .ART90. File > Export Machine File > BERNINA .EXP (or whichever format you need).


In the next blog post, I will show you how to embroider this on a FREE Dog Harness pattern. Stay tuned!
If you do digitize your own dog bone please snap a shot and be sure to tag me @SookieSews and @BERNINAUSA !!
How to Create a Dog Harness
- Part 1: Digitizing the Dog Bone
- Part 2: Embroidery and Sewing
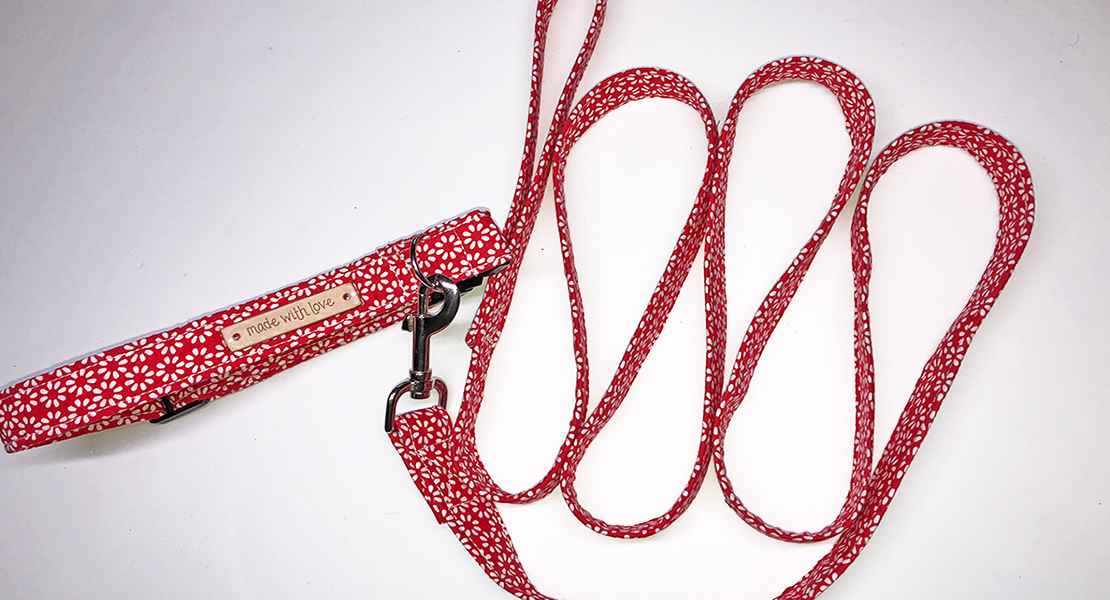
- Part 3: Sewing a Dog Leash
Used Products
What you might also like


8 comments on “How to Create a Dog Harness, Part 1: Digitizing the Dog Bone”
-
-
Love this idea and possibly looking forward to the next post….I opened the sewing pattern file, it looks like this project is for one specific size….can you please let us know what the finished size of the harness will be? Thank you!
-
Hello! Please stay tuned for the second post where Sue will show how to embroider and sew the dog harness. Thank you for reading WeAllSew!
-
Where did you find the sewing pattern file?
-
Hello! You can find the pattern in Part 2: https://weallsew.com/how-to-create-a-dog-harness-part-2-embroidery-and-sewing/
-
-
-
Never mind. I found the first two parts of the dog harness. Thanks.
-
I have Ver. 8 that I bought at local dealer and paid a lot because I had Ver 6
-
Now the is Version 9 so how much more do I have to pay to get Ver. 9 from Ver 8.
Leave a Reply
You must be logged in to post a comment.
Love this. I have two small dogs.