Improvised Patchwork Curtain, Part Two
Welcome back! This is Part Two of creating an Improvised Patchwork Curtain on your serger, you can check out Part One here. Today I’ll show you how to finish your patchwork curtain.

Materials to Make an Improvised Patchwork Curtain
- Large patchwork panel made from scraps (created in Part One)
- Solid color fabric or additional scraps for finishing the top edge of the panel – I used about ¼ yard of solid white linen fabric.
- Fusible Interfacing – about ½ yard of 20” wide interfacing.
- Pins or clips (optional)
- Rotary cutter and mat, and/or scissors
- Sewing machine – I’m using my B 735.

Finishing the Side Edges
We will finish the side edges, or vertical edges, of the curtain first. Press your patchwork panel well. If the edges are uneven, trim them with your ruler and rotary cutter or scissors to create a straight edge with no long threads.
The vertical edges will be finished with a narrow rolled hem. You can use any hemmer foot that is appropriate for the weight of your fabric. My fabric is apparel weight linen, with a few random weights in the mix. I am using Zigzag Hemmer Foot #66, ideal for medium weight fabrics. When using this foot, I like to move my needle position to the left, as it places the stitch line closer to the rolled edge of the fabric.
If you need a bit of help or encouragement before using this foot, I’ve got you covered! Here is my comprehensive tutorial on how to use Hemmer Feet, including how to get started and troubleshooting.

Hemming the Curtain
The bottom edge of the panel will get a straightforward hem. Again, if the edge of your patchwork is uneven, trim it with your ruler and rotary cutter or scissors.
Press the edge of your fabric up ⅜”, and then press up again ½”. If you prefer a deeper hem, go for it! It’s your project, so make the hem deeper if you prefer the look or want to use up some extra fabric in the length of your curtain.

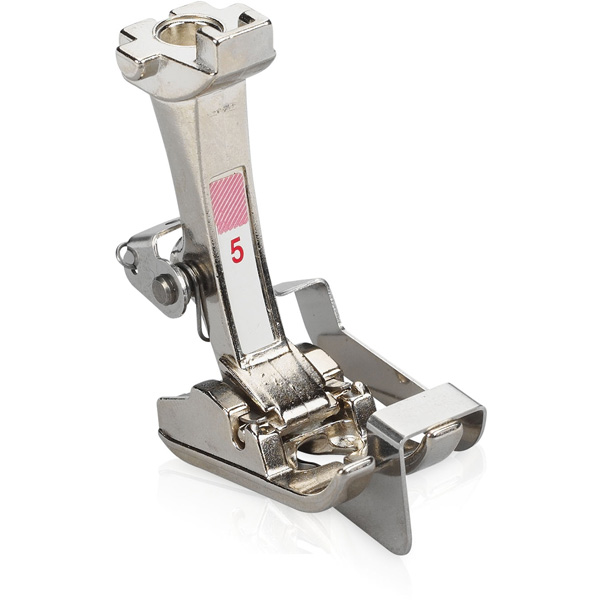
I used Blindstitch Foot #5 to edgestitch my hem – you can also use Edgestitch Foot #10 in the same manner. Move your needle position to the right and use the guide on the foot to hug the folded edge of your fabric. This creates a perfectly straight stitching line every time. Now three of the four edges of your panel are finished!
Top Edge of the Curtain
How you finish the top edge of your panel will depend on your end use. Mine will be a shower curtain, but you may deviate here if you’re doing something different, such as a window curtain or room divider.
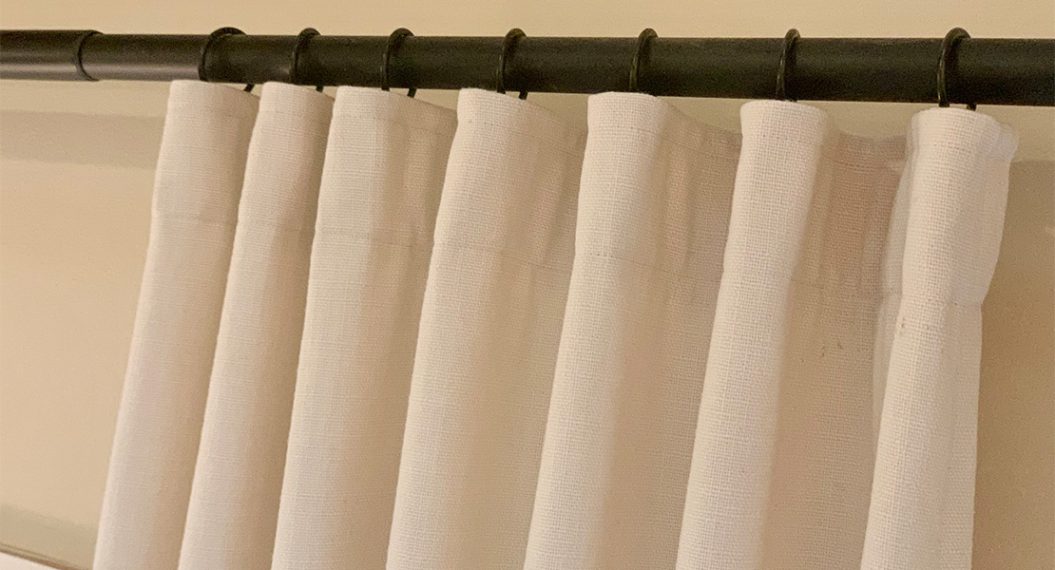
I created an interfaced, double-thickness strip with clean finished edges. I added 12 buttonholes, which allow me to hang the curtain from the hooks on my shower curtain rail.

Cut 2.5” tall strips of fabric, 1” wider than the finished width of my curtain. Interfaced this fabric with fusible interfacing before piecing them together on the serger. This creates a long strip of interfaced fabric. Press it in half, lengthwise, with wrong sides together (the interfacing will be inside the pressed strip).

Next, on the short edges of your fabric strip, fold your fabric to have right sides together (this will go against how the fabric is pressed). Serge this edge with a ½” seam allowance, and then turn it right side out again, and press. Repeat on the other end. Check that your finished strip is the same width as your curtain.

Pin this strip along the top edge of your curtain. Using pins here will ensure the edges match up perfectly. Serge this long seam, attaching this placket to your curtain. Take care to remove all pins before they reach the cutting blade. Press the seam.

I like to secure the thread tails by threading a large needle, and then sewing them into the serged seam. This creates a clean finish.
Buttonholes
First of all, take a moment to admire your panel! Isn’t it satisfying to make something so big?
I am adding 12 evenly spaced buttonholes, using automatic Buttonhole Foot with Slide #3A.

Mark your fabric with buttonhole placement. My buttonholes start ⅜” from the top edge of my curtain, and are spaced 6.5” apart. Depending on the finished width of your curtain, you may need to adjust that spacing. Alternatively, you could use grommets instead of buttonholes.
On my B 735, I turn down the stitching speed when sewing buttonholes. I position the buttonhole foot over my markings, and push the Start button on the machine. This way, the machine sews the hole with minimal interference from me! When it completes each buttonhole, I use the automatic cutter to cut the threads, and move on to the next buttonhole.

Finishing the Buttonholes
Add Fray Check to the center of each buttonhole. When completely dry, use your buttonhole chisel to carefully cut each hole open. Guess what? You’ve finished the project!

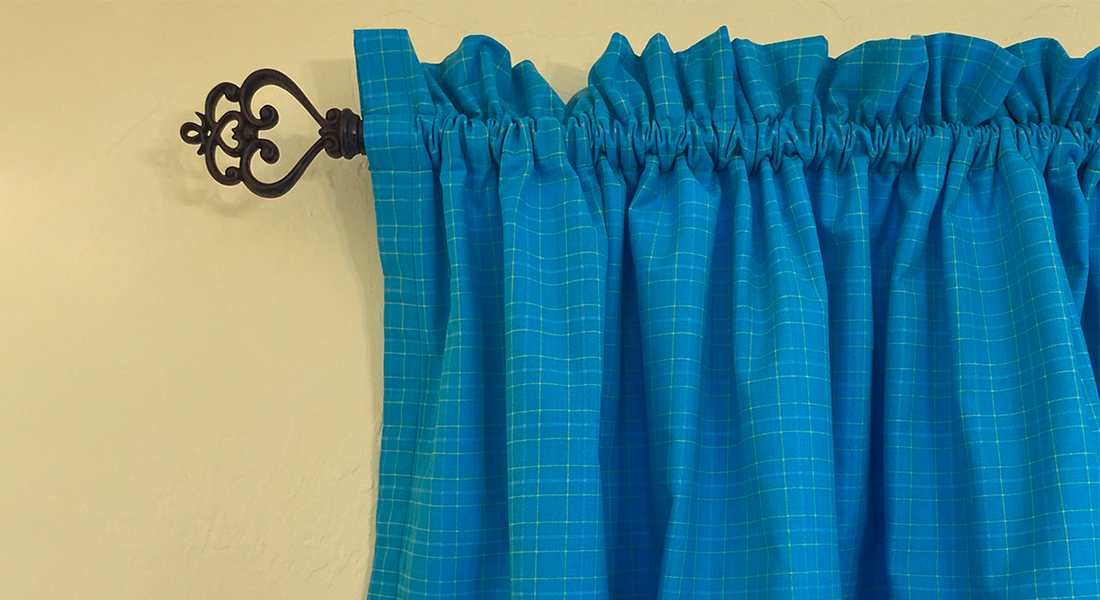
Hanging the Curtain
I couldn’t wait to hang this curtain! I live in an older home, and our guest bathroom needed a little sprucing up. The curtain adds color and whimsy – perfect for a small space!

Let me know if you make a curtain like this, or if this inspired you to try something new on your serger! To keep up with everything I’m working on, you can find me on Instagram or my blog. Happy sewing! XO, Martha