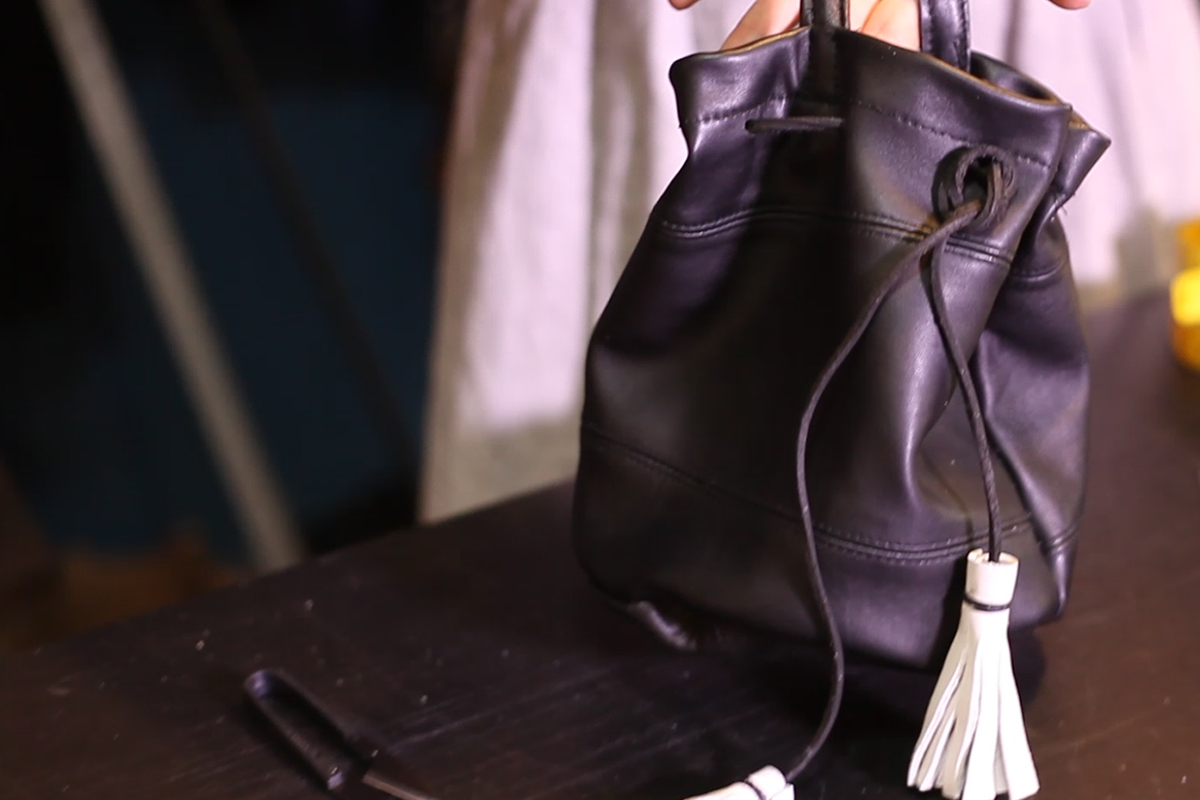
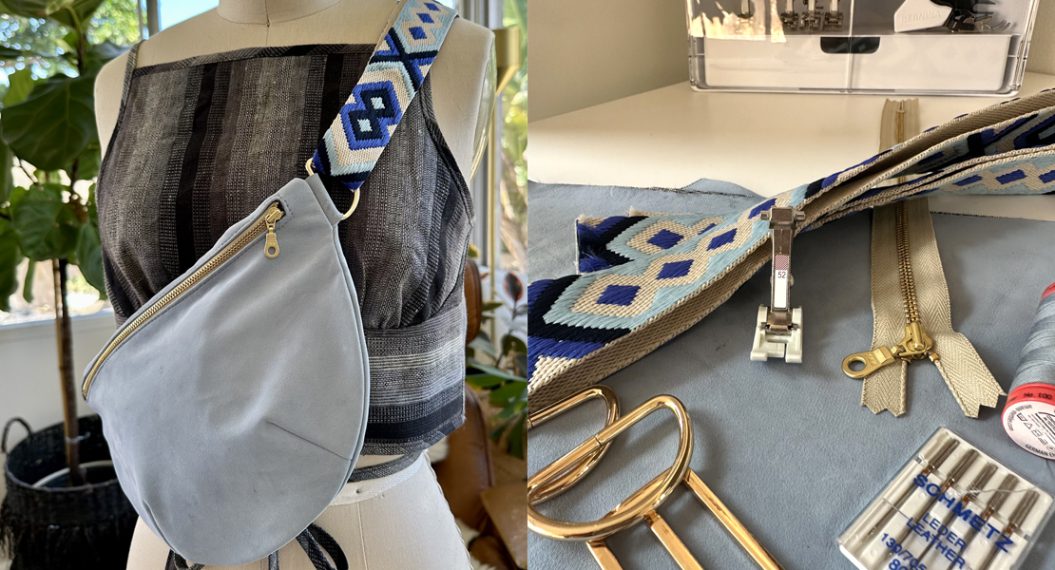
Leather Belt Bag
The fanny pack is making a comeback—who doesn’t love being able to carry your necessities hands-free?! Let’s step up from the belt bags of yesteryear and ditch the novelty prints and dated colors. Try out this version made with simple leather (or faux-leather for my fellow vegans out there).
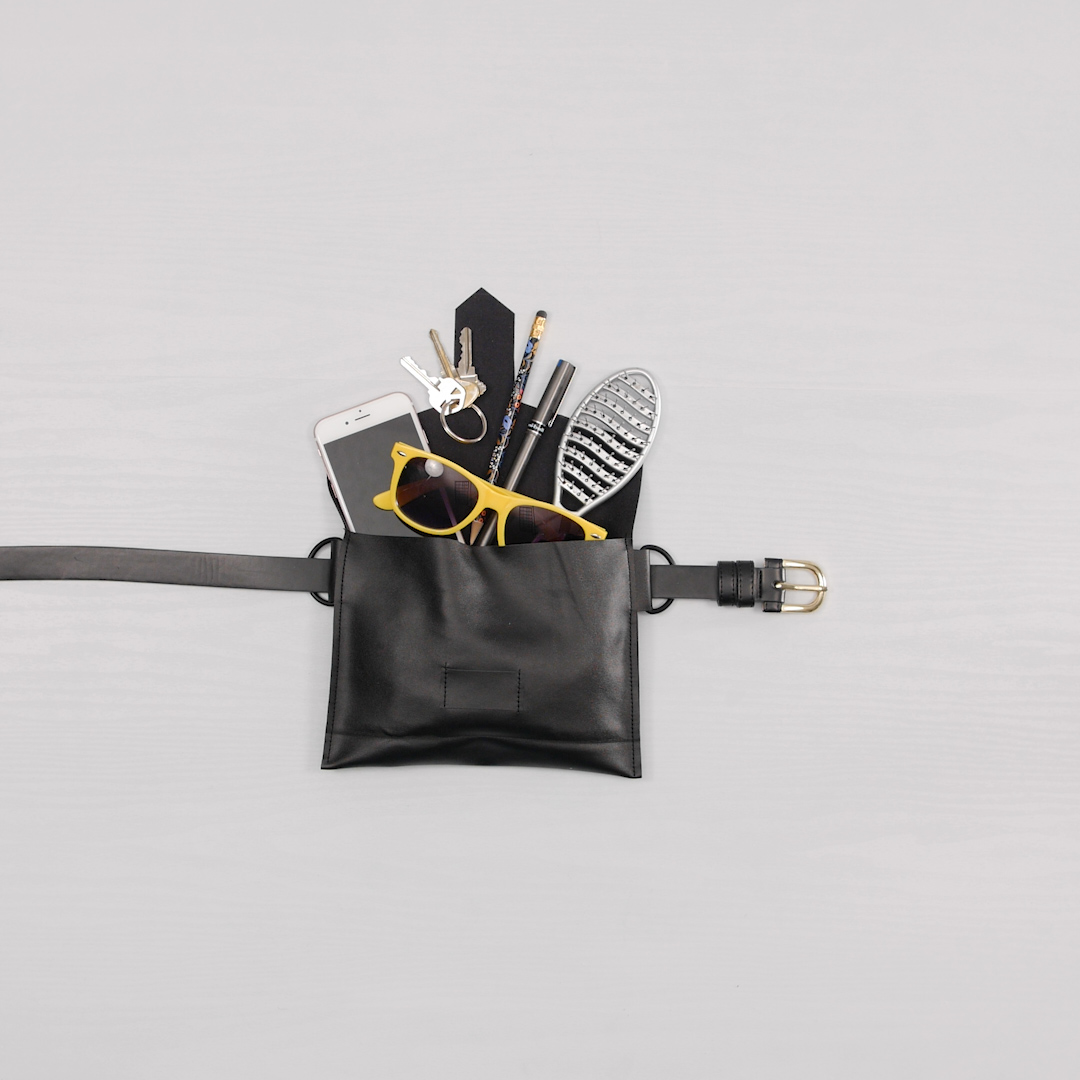
My favorite part about this version of a fanny pack is that there’s no need to worry about straps and sizing. All you need to do is thread it onto a ready to wear belt! One size fits all means one size fits YOU!
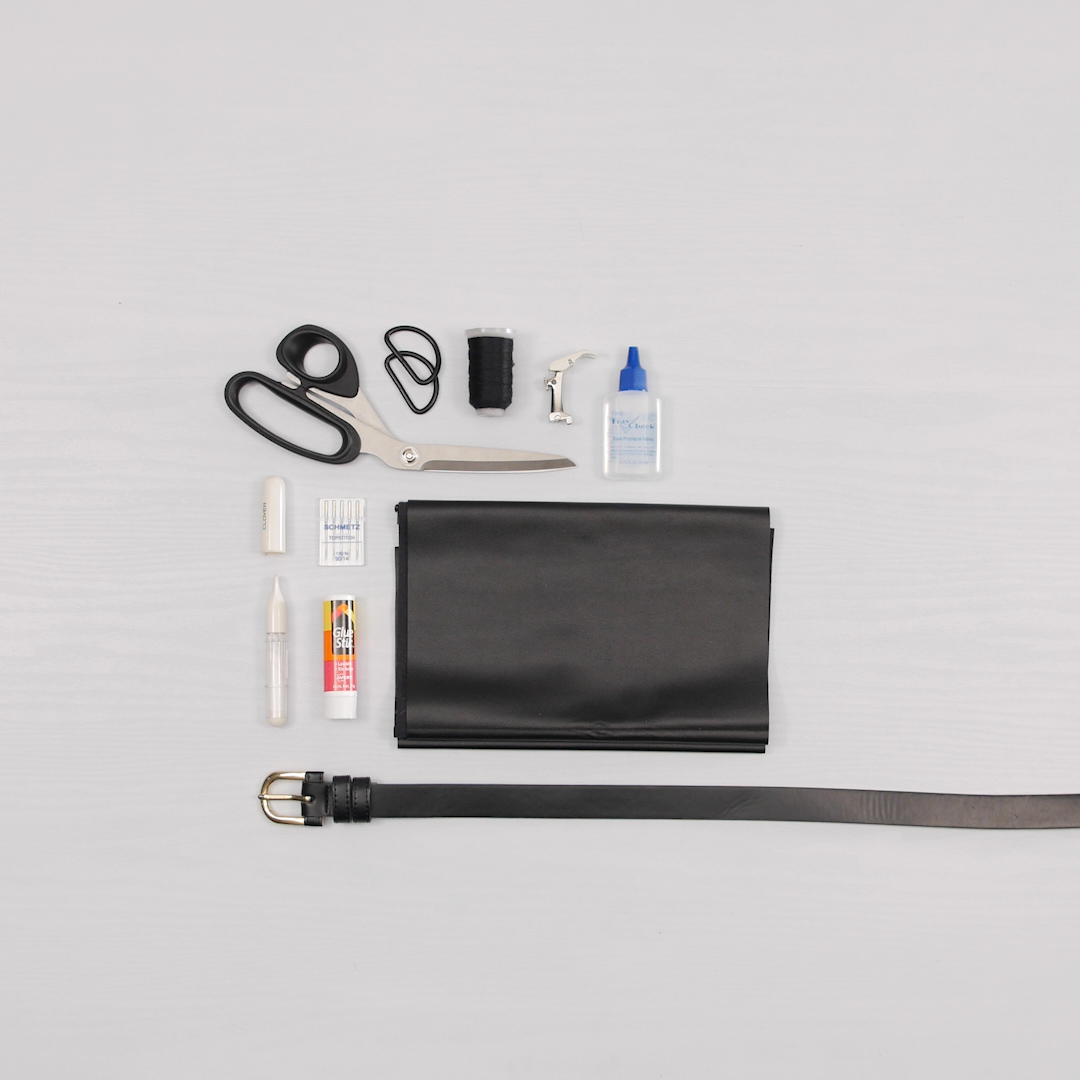
Supplies to Create a Leather Belt Bag
- 1/4 yard of leather (or faux leather)
- Leather Belt Bag Pattern
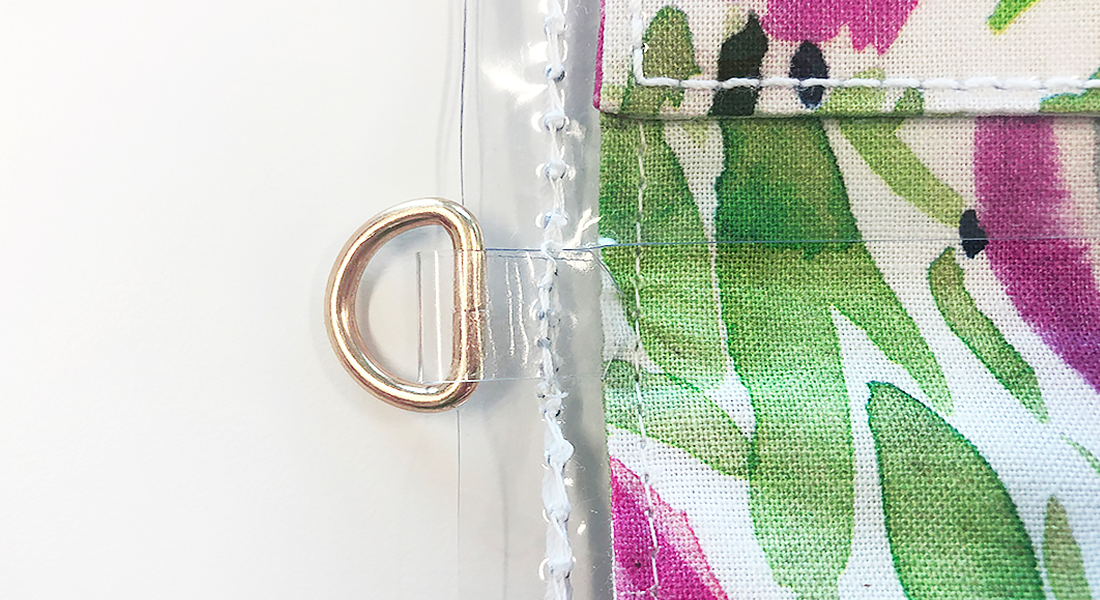
- Two 1.5” metal D-rings
- 30 weight topstitch thread
- Rotary cutter + cutting mat
- Scissors
- Glue stick
- Chalk marker
- Fray Check
- Wonder Clips by Clover
- A belt
- 1” to 1.5” wide
- Topstitch needles
- Non-Stick Zigzag Foot #52
- BERNINA 435
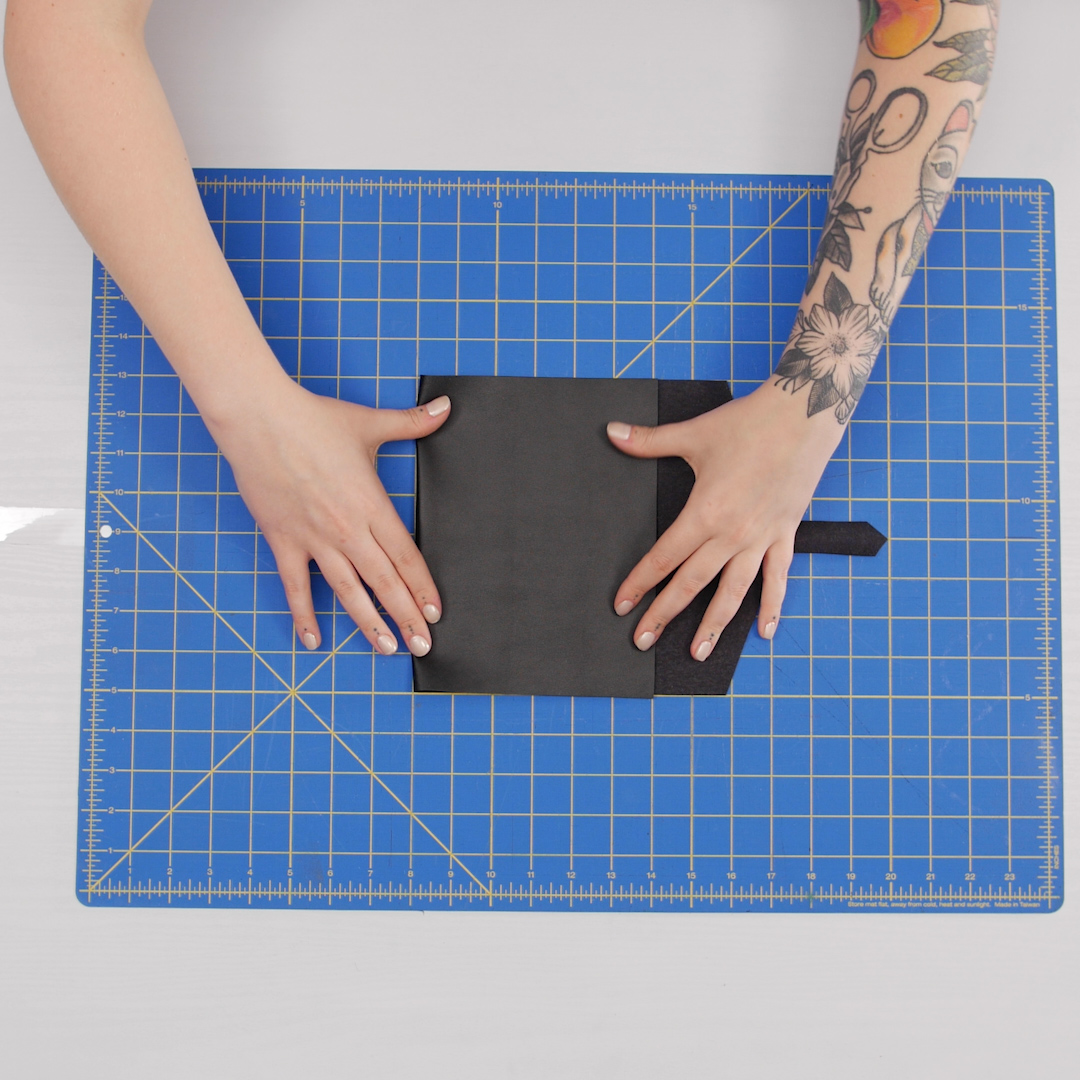
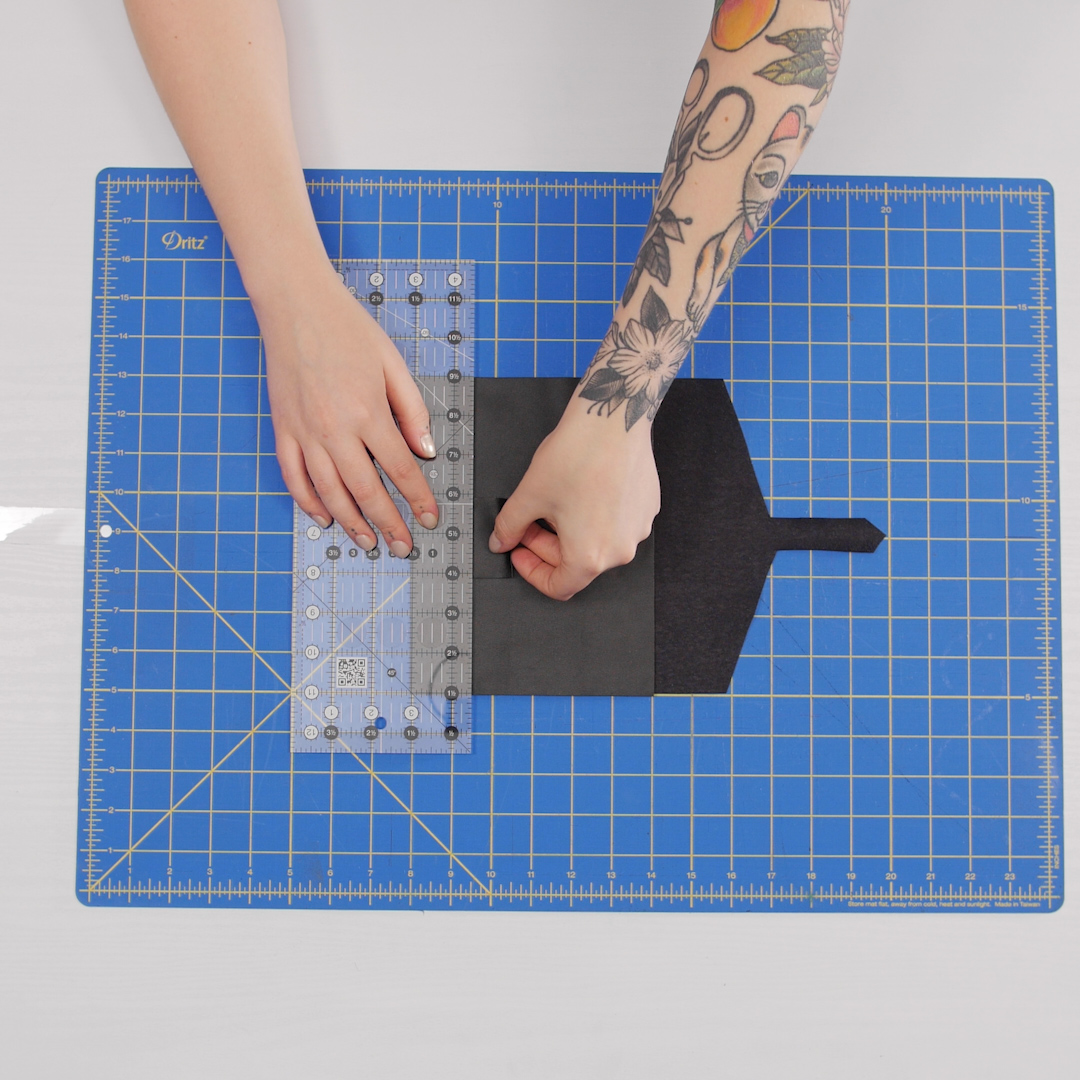
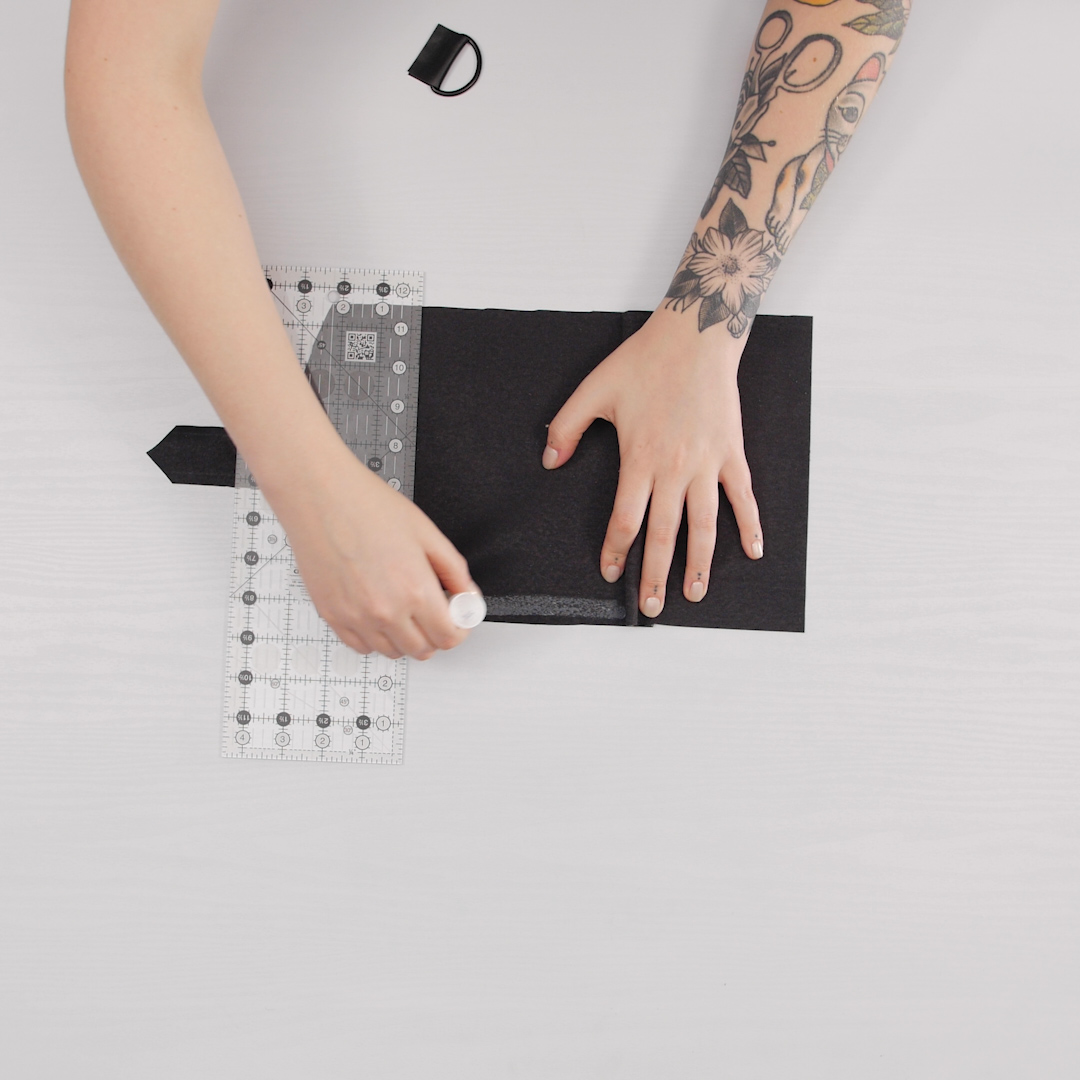
Step 1. Cut fabric
Lay template on leather (or faux leather) fabric. Trace with a chalk marker and cut to size.

Additionally cut two 1.5” x 3” rectangles and one 1” x 2” rectangle.
Step 2. Add closure tab
Fold the short, straight edge 6” over, toward the closure tab, with wrong sides together.
Measure 1.5” from the folded edge. Center the 1” x 2” rectangle and glue baste the ends in place. Using a standard water-soluble craft glue stick will hold our pieces together without making holes that pins would create.
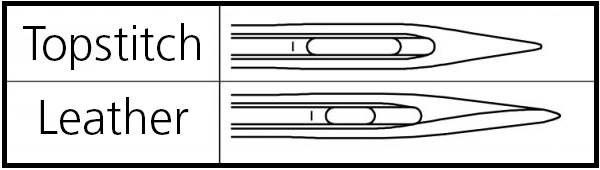
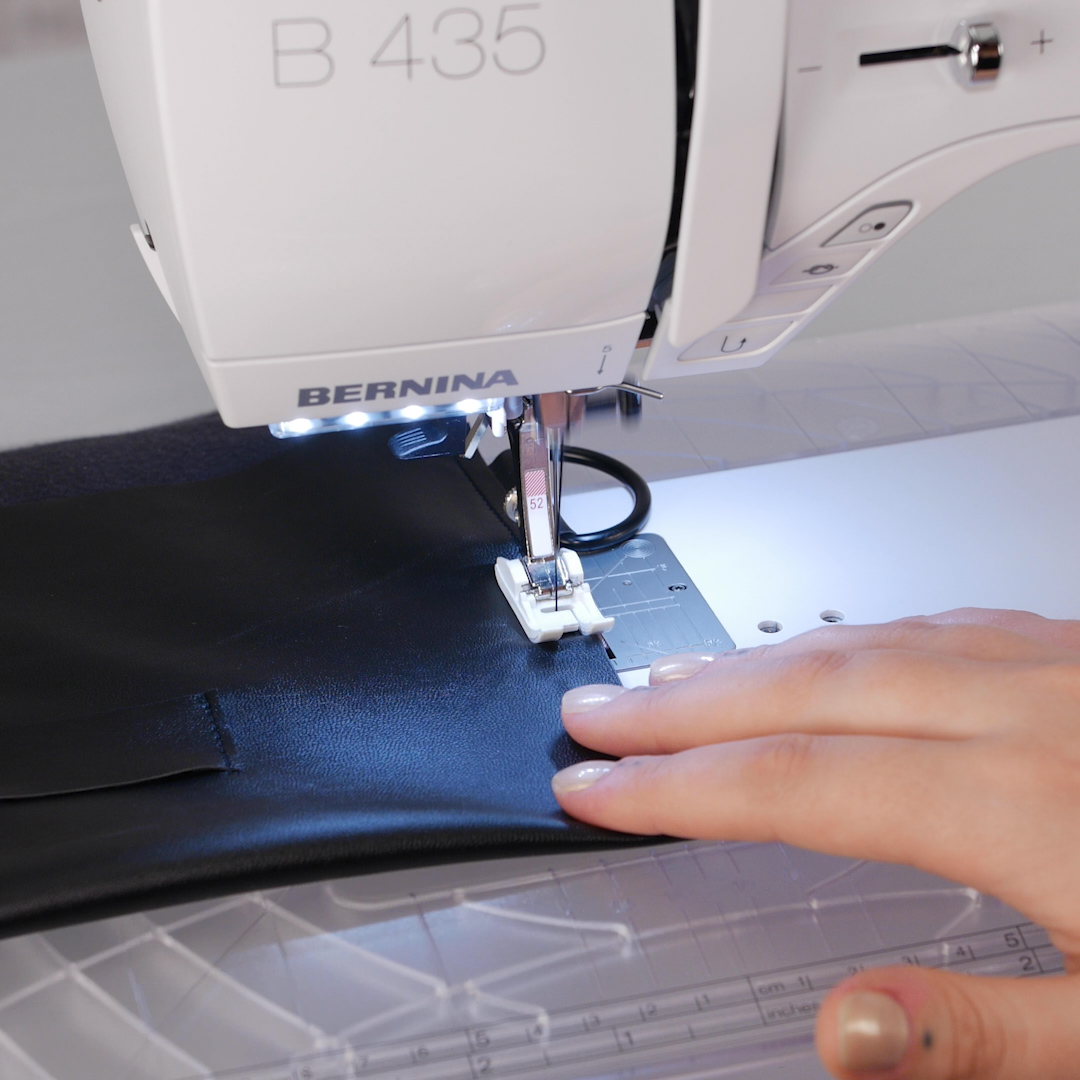
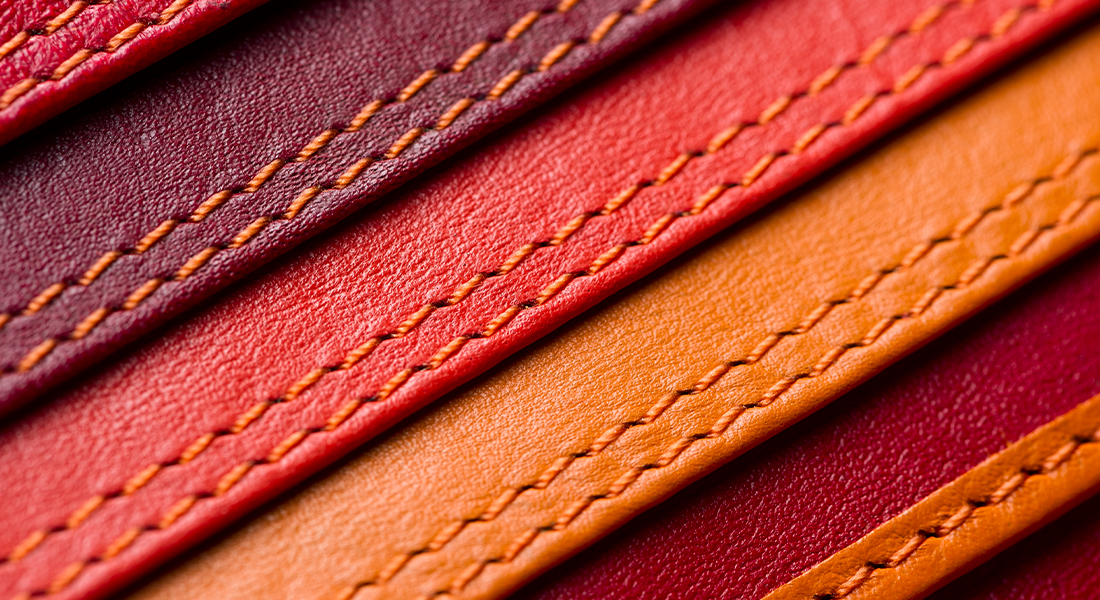
For this bag, we’ll be using topstitching thread and a topstitch needle. Topstitching thread is a heavier weight (20 to 30wt) thread that is used when the desired effect is a more pronounced, almost decorative seam. This is generally what you will find on leather accessories—a thick, smooth thread.
Because of the thickness of this thread, it’s important to use the right needle. A topstitch needle is one that is designed with a larger eye in order to accommodate heavy weight or decorative threads and an extra sharp point to sew precisely along bulky seams.
Be sure to test your seam on a scrap piece of leather (or faux leather) before constructing this project. On my pleather, a size 100 topstitch needle gave me the best results. If you’re working with genuine leather, you may have better results with a leather needle. The key difference between the two is that the “wedge” design of the point of a leather needle is almost blade-like, helping the needle penetrate and slice through layers of tough leather. The eye on leather needles also varies and often isn’t as forgiving as the eye of a topstitch needle.
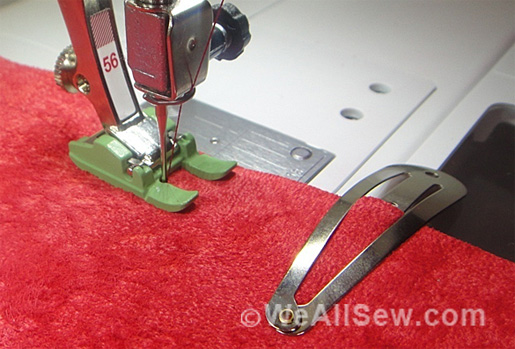
Attach Non-Stick Zigzag Foot #52 to the machine.
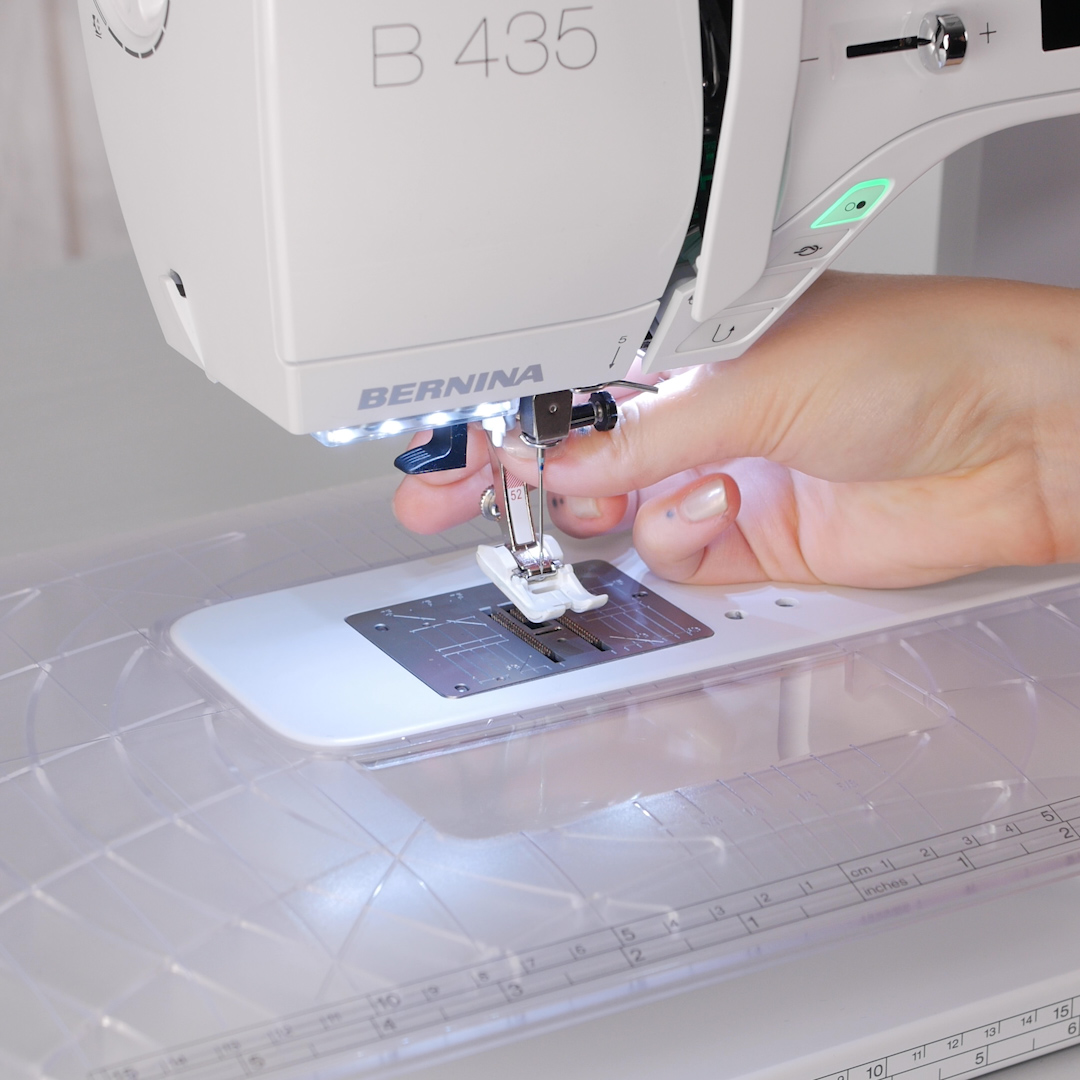
Increase the stitch length to 3.5 mm.

Align the raw edge of the closure tab to the inside of the presser foot. Stitch down both sides to secure.
Pull long thread tails before cutting. Pull all thread tails to the back (wrong) side of the fabric then hand tie, trim, and secure with Fray Check.
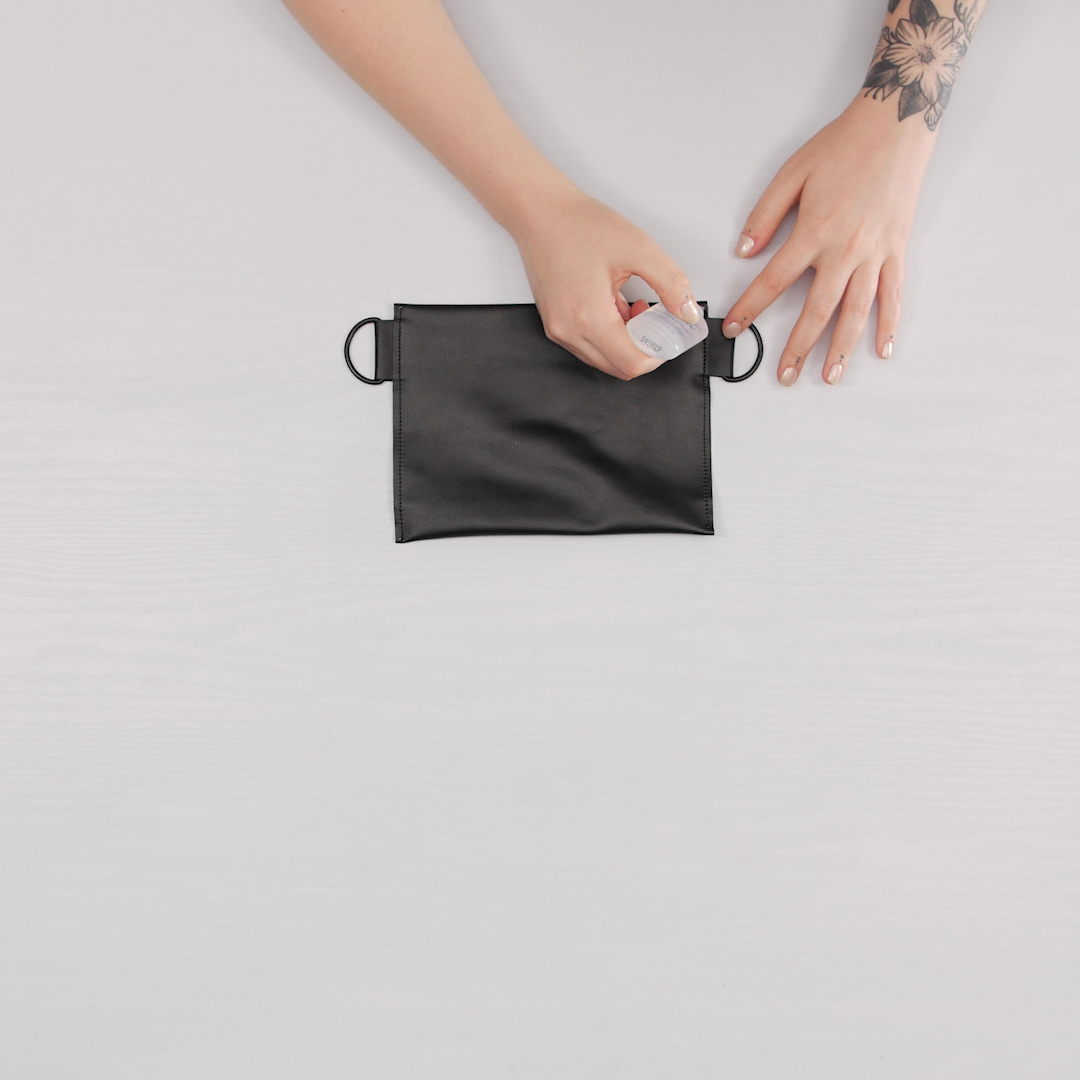
Step 3. Measure + glue baste
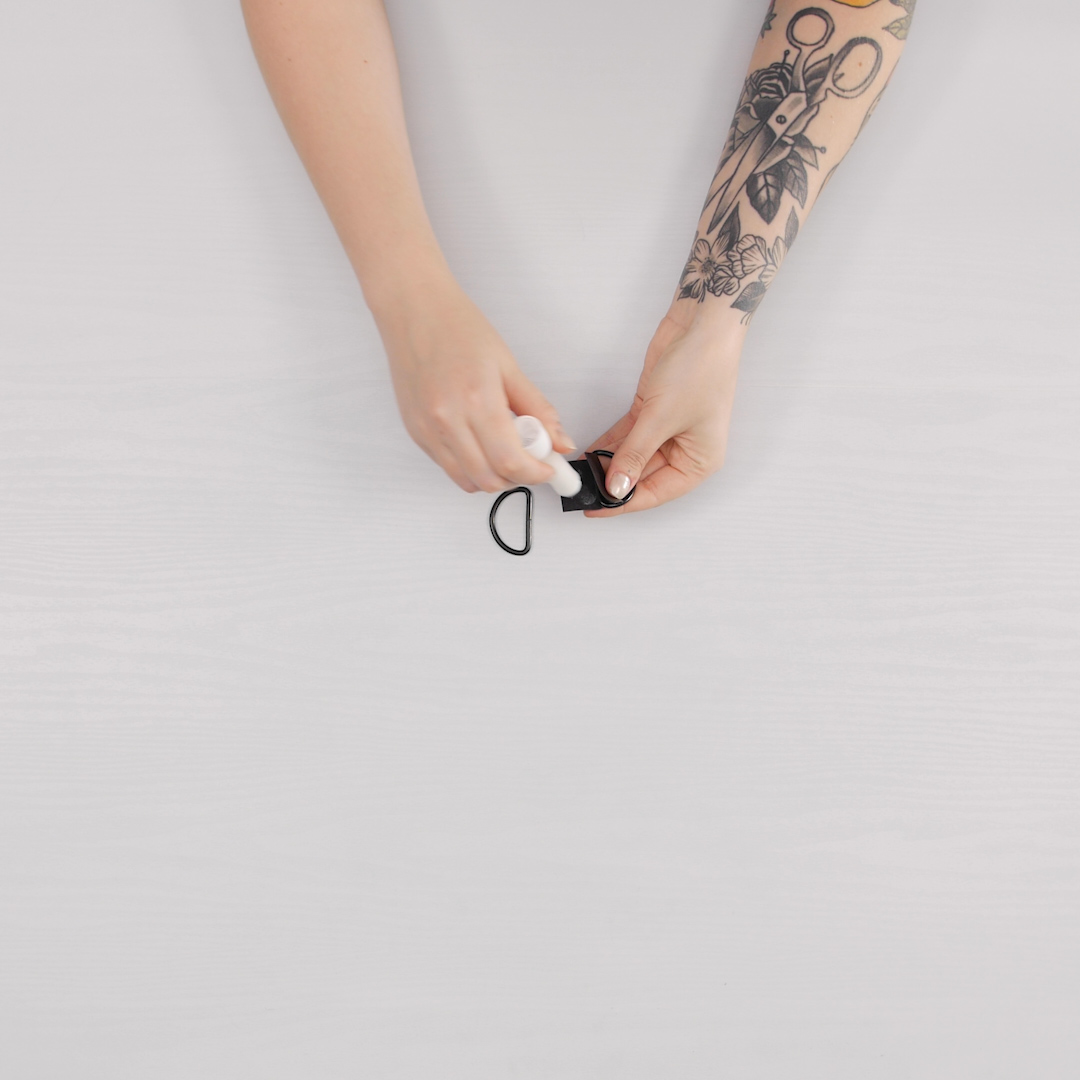
Insert the 1.5” x 3” rectangles through the metal D-rings. Baste the ends together with glue.
Again folding the short, straight edge 6” toward the closure tab, use glue to baste the sides together. Wonder Clip these edges together to make sure the glue sets.
Measure 2” down either side toward the folded edge and sandwich the D-ring tabs in the side seams, basting with glue again.
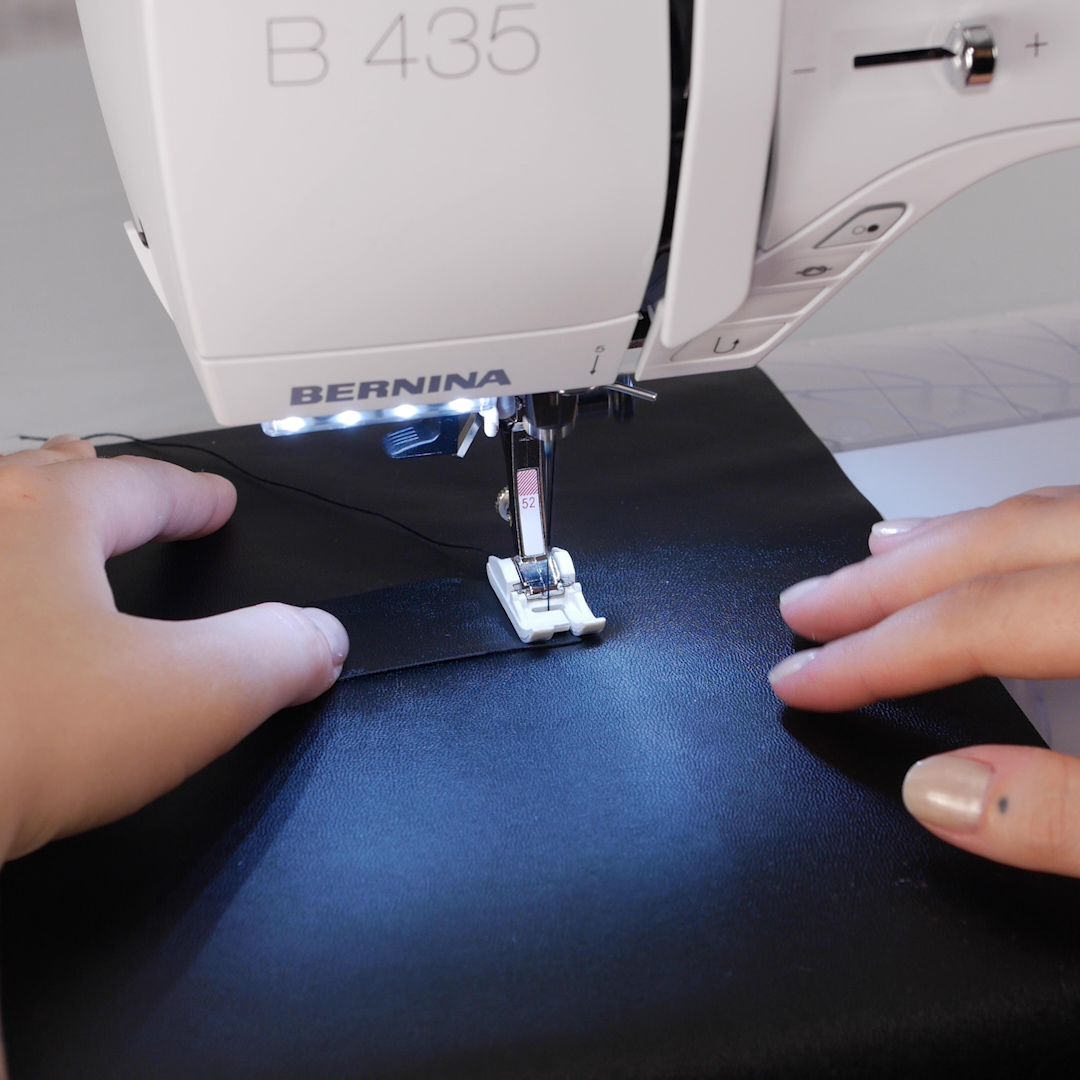
Step 4. Seam sides
Align the raw edge of the side with the inside of the toe of the presser foot and stitch down the sides, leaving long thread tails at the start and stop.
Hand tie the thread tails and trim close to the fabric. Secure each knot with a seam sealant such as Fray Check.
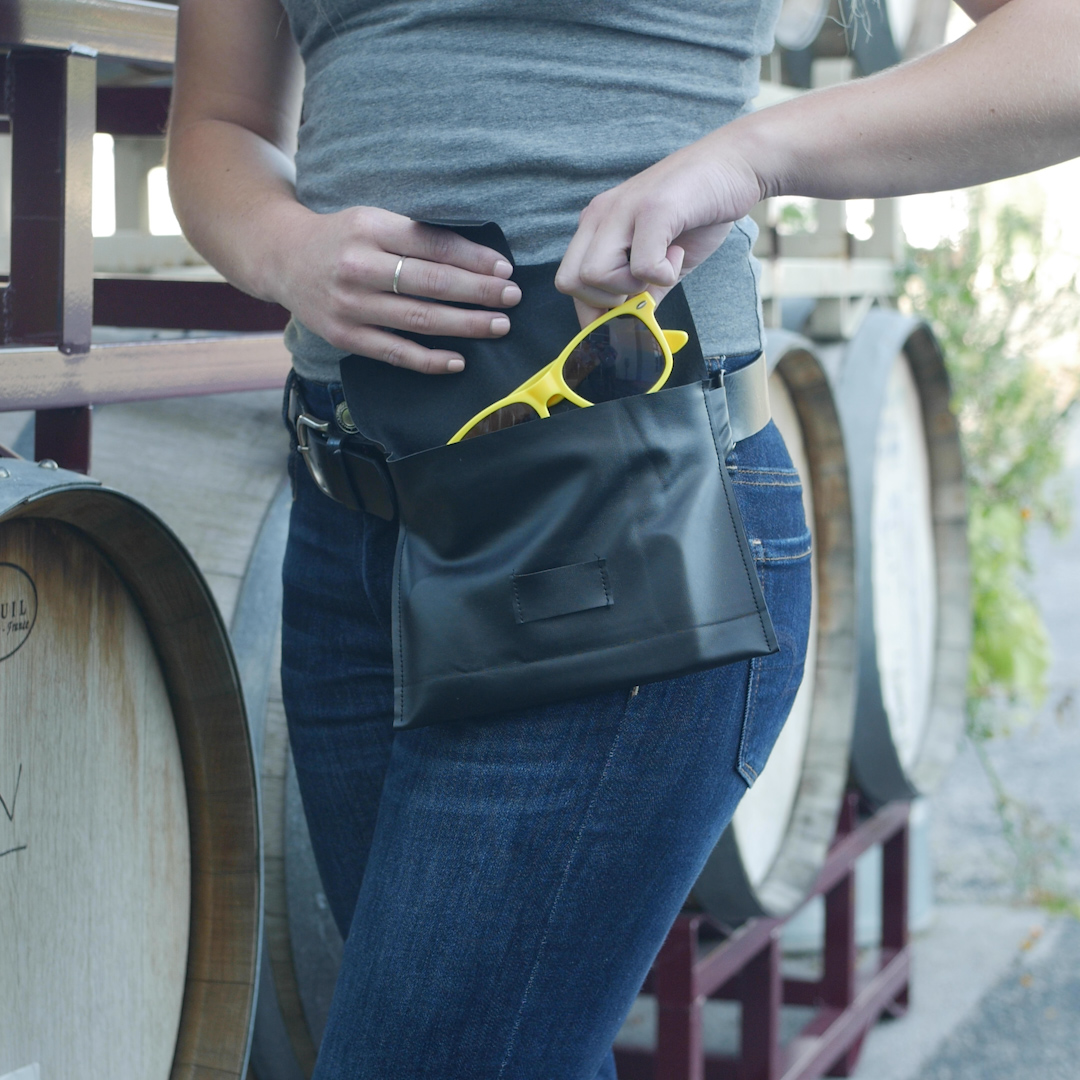
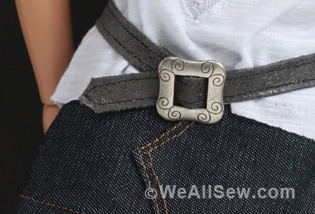
Step 5. Add belt and wear it out!
Feed the end of a narrow belt through the D-rings, passing the belt behind the bag, and secure around your waist. Tuck in your phone, lip balm, and any other necessities and you’re ready to go!
Used Products


What you might also like


6 comments on “Leather Belt Bag”
-
-
I’ve been wanting an idea for a pouch to carry my phone when my slacks have no pocket.This looks easy and perfect for the job!
-
I find pillows and tote bags the most enjoyable, especially in shades of blue and green.
-
Loving the simplicity, thank you for sharing
-
I made this project last year. I used leather from my mother’s leather coat. I deconstructed it and some of the leather for this project. I am not happy with my results. I haven’t used leather before and the author didn’t specify what size D rings to buy. I purchased rings that were too small for the belt. So be sure to check sizes before you purchase.
-
I am unable to download the leather belt bag pattern. Anyone else having this problem? I would like the template or the dimensions to cut out for the pattern..
Leave a Reply
You must be logged in to post a comment.

I love Embroidery on my quilts that I made from my husband T-shirt for my 4 Children he passed away 16 month ago. I don’t care much for the unit I have and the movers broke my Embroidery unit when I moved back in May. I don’t have a BERNINA yet but I’m saying my money so I can buy one.