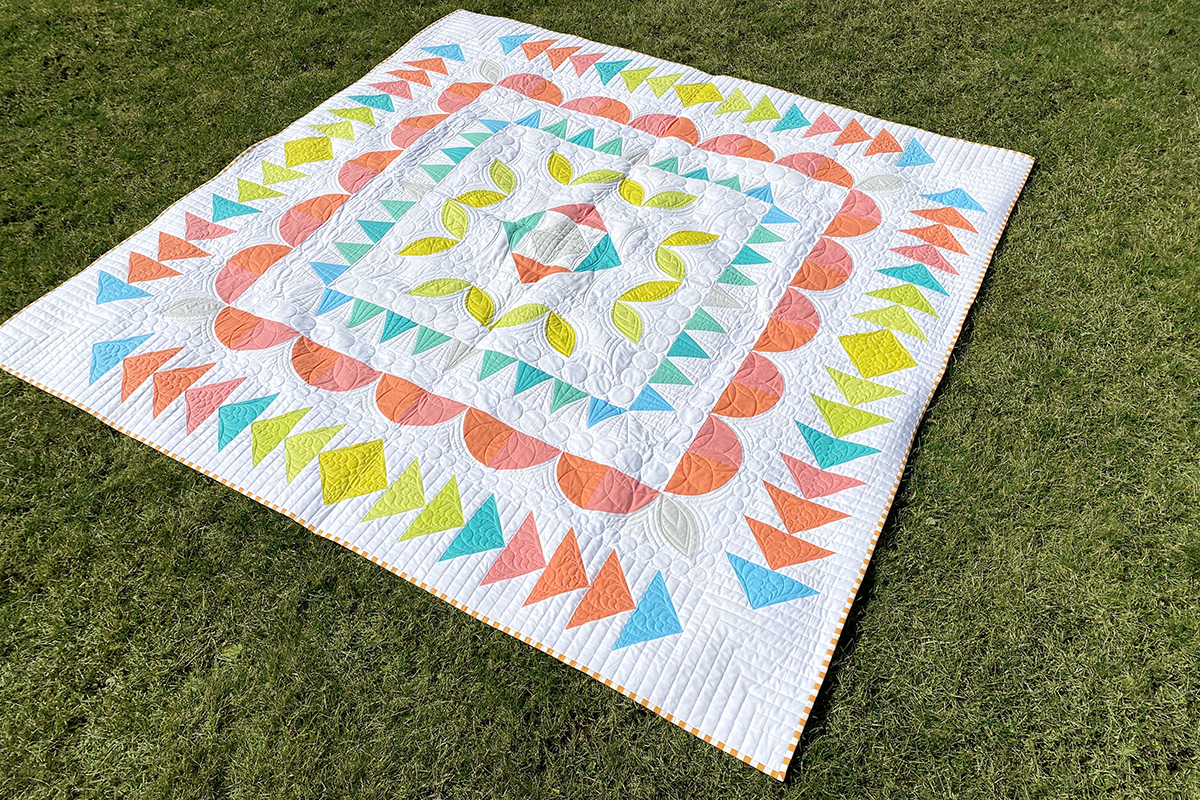
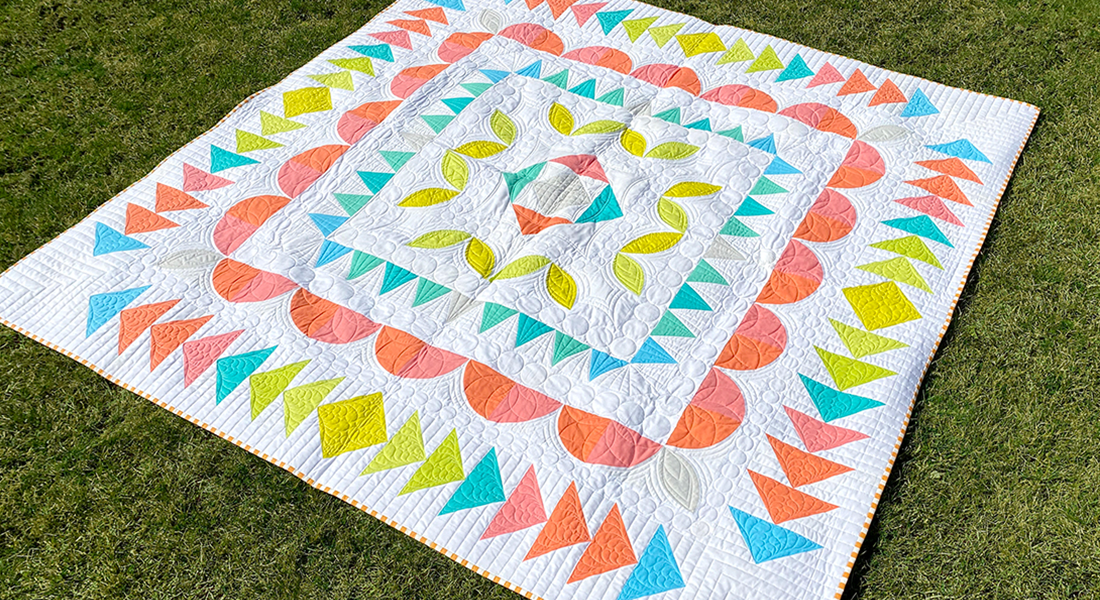
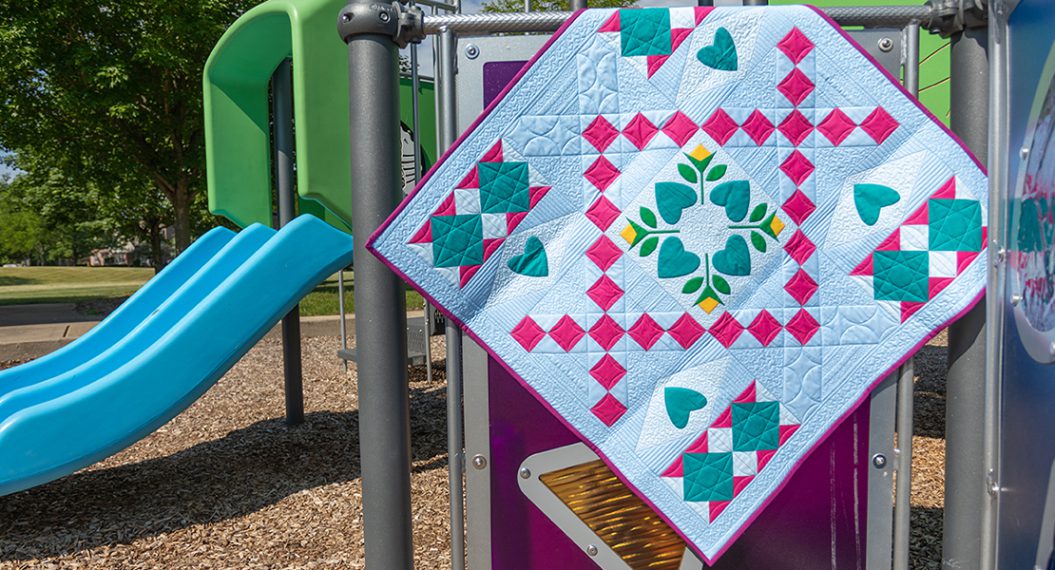
Passiflora Quilt Along, Part 7: Quilting
I was so excited when Hayley reached out to me and asked if I would quilt her quilt. Don’t you just love the Passiflora design?! It is so fresh and clean.
I hope you have been following along with Hayley’s blog series, and you too are at the point of quilting your quilt. If you need to check out the first six blog posts, click the links below:
- Month 1—Introduction + Fabric
- Month 2 – The Center Block
- Month 3 – The First Round
- Month 4 – The Second Round
- Month 5 – The Third Round
- Month 6—The Fourth Round
After the quilt top is completed, most patterns leave you with those 3 little words that cause many quilters’ trepidation. “Quilt as desired”. You have followed specific directions to get to a finished quilt top only to be set free with “Quilt as desired”!
How you quilt your quilt will depend on your skills, your equipment, and your vision for your quilt. The Passiflora Quilt is a Medallion Quilt and as you constructed it you began in the center and worked out. That is the way I approached the quilting for this quilt. Looking at the entire quilt can be a bit overwhelming so I always find it a bit easier to break it down into smaller areas.
I mentioned equipment, so let’s look at what you will need.
Your machine:
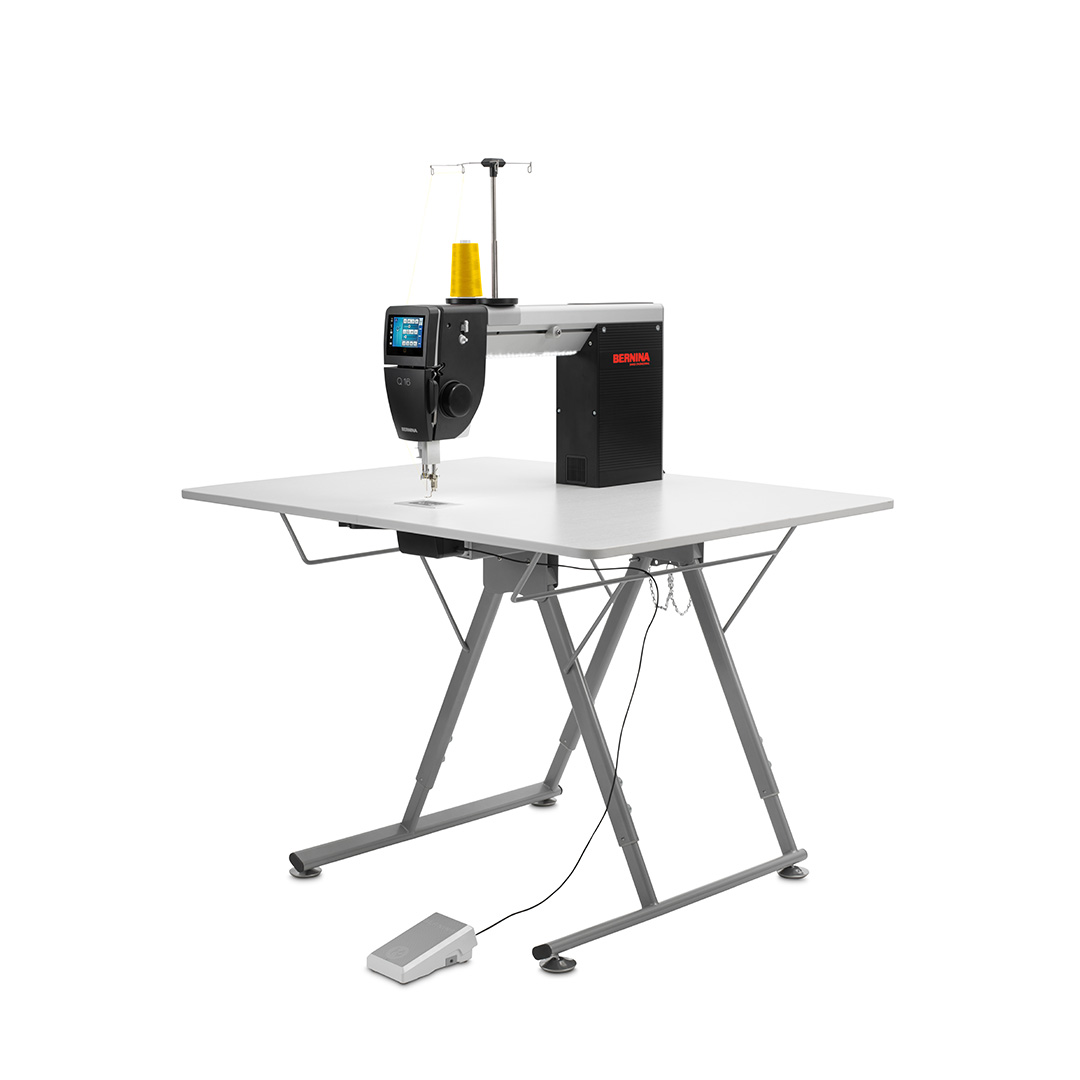
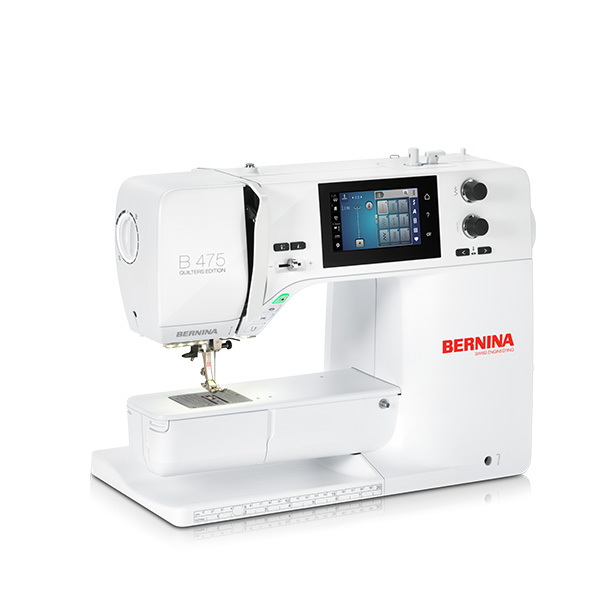
Today, more than ever before, machines come in many different sizes. From small portable machines like the BERNINA 470 QE with 7” of throat space (great for piecing but not so great for quilting large projects) to larger machines like the BERNINA 570 QE and BERNINA 770 QE and all the way to the BERNINA 880 with 12” of throat space. Or we can jump to the table model longarms, which are dedicated to the quilting process, like the BERNINA Q16 and Q20. And then of course the BERNINA Frame with either the Q20 or Q24. This option also allows for automation.
How you quilt your quilt may depend on how easy or how hard it is to manipulate the size of the quilt within the machine you are working on. Or it may depend on if you have a frame with automation.
Your skill level will of course make a difference, but I think when you have a machine where moving your quilt is easier, your skill level improves more quickly. You may be able to gain more skills at a larger machine, specifically when doing rulerwork.
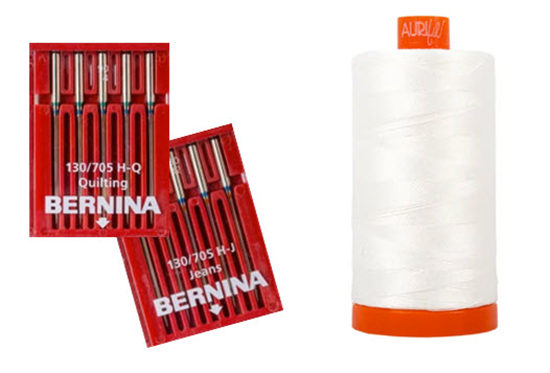
Make sure your machine has been cleaned and oiled before you begin. Insert a new needle. I recommend a #90 Quilting Needle or Jeans Needle. Thread the needle and bobbin with your thread of choice. I did not want a heavy look, so I used 50 wt Aurifil thread.
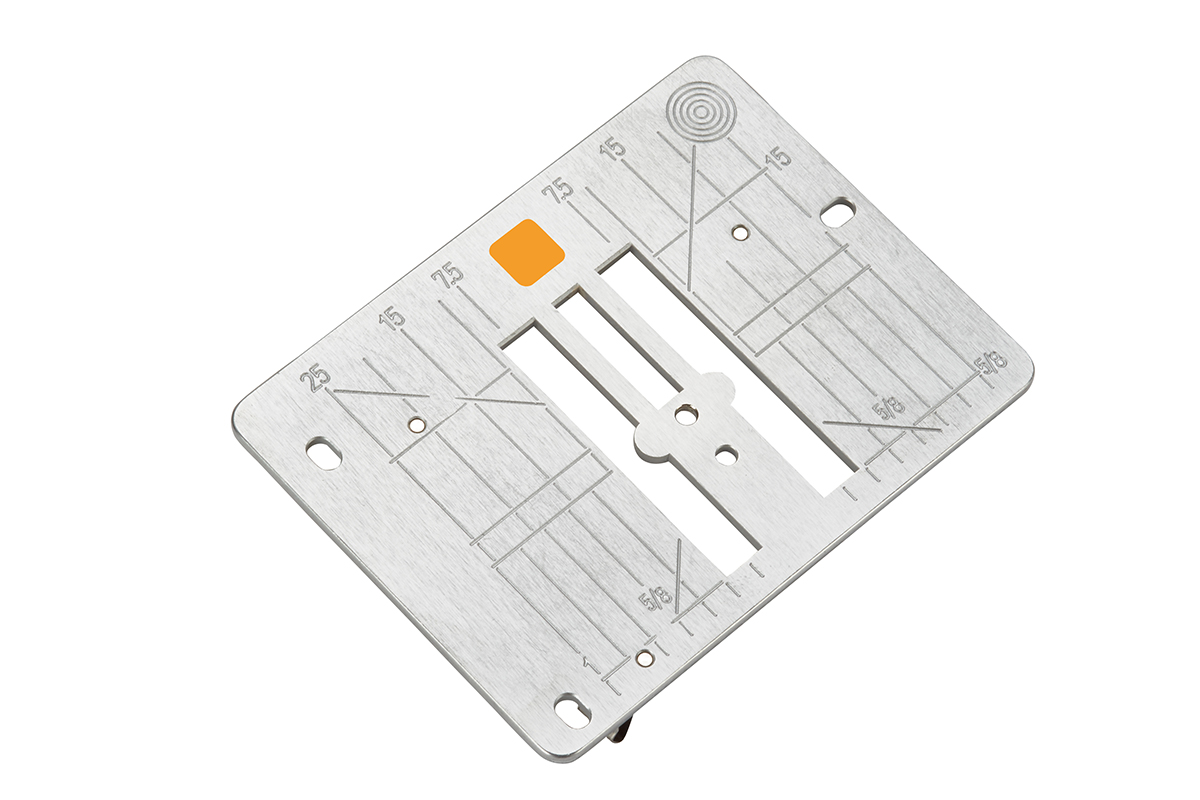
Attach a Straight Stitch Throat Plate and select the attached plate in the Security Program, if applicable to your particular machine.
If you will be doing any straight-line quilting at a domestic machine, you may want to use the Three-Sole Walking Foot with Seam Guide #50.
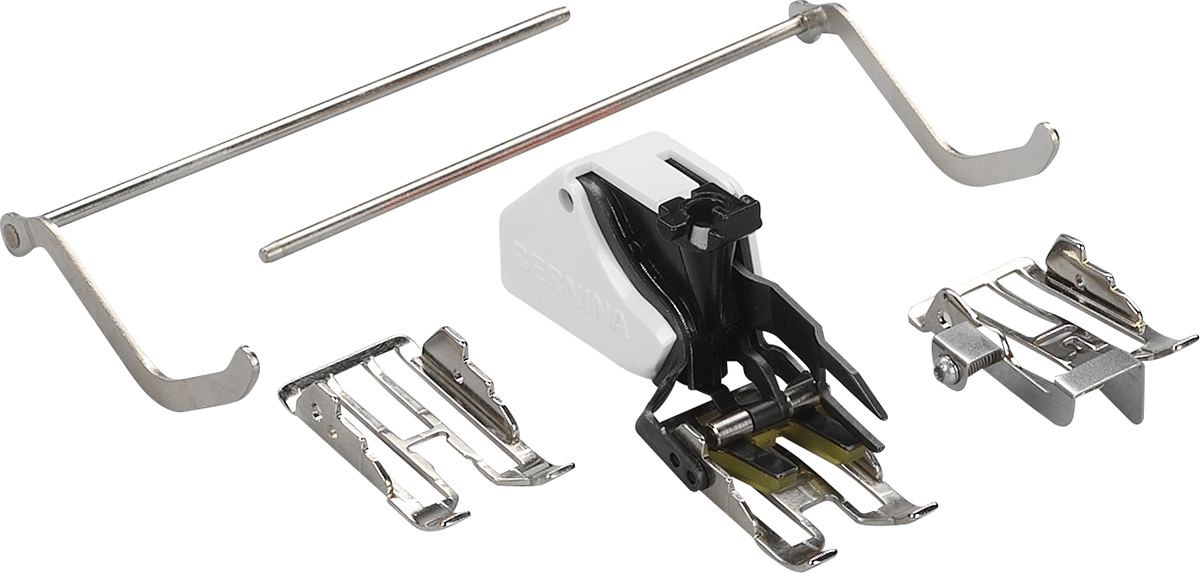
There are several Free Motion Quilting Feet available but my favorite is the Adjustable Stippling Foot #73. It can be adjusted for the loft of batting and has plenty of visibility.

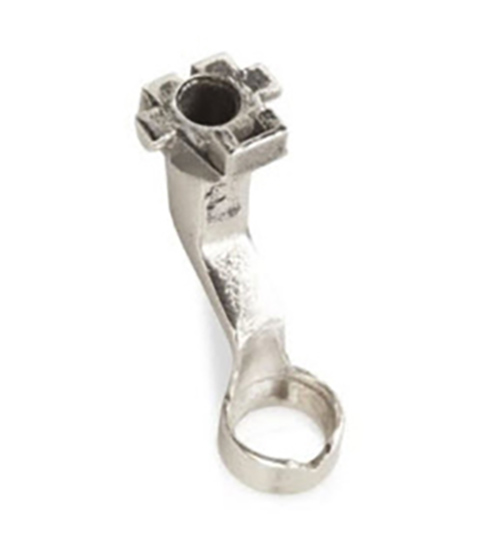
And if you are going to do rulerwork, you will need the Adjustable Ruler Foot #72 for your domestic machine.
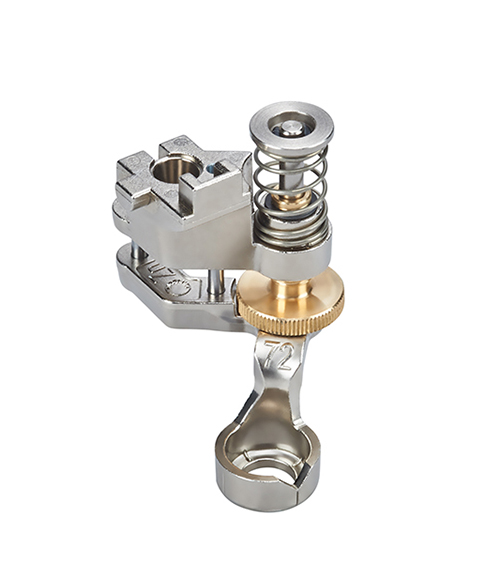
The BERNINA Longarm can use both the Adjustable Ruler Foot #72 Foot and the Ruler Foot #96.
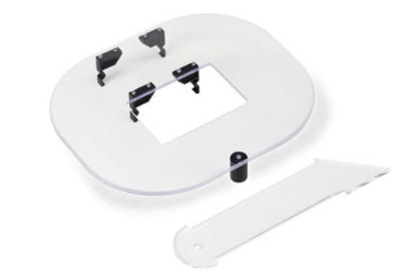
If working on a frame, you will also need the Ruler Kit which includes the Ruler Foot #96 foot as well as the Ruler Table and a ruler.
Before you begin, you will need to baste the quilt layers together. I prefer to pin baste using very small brass safety pins, or you could spray baste if you prefer.
If using a frame longarm, begin by loading the frame, attaching quilt backing and quilt top to the corresponding leaders. Because the quilting was done from center out and the quilt will need to be moved back and forth, I would recommend the following:
- Stitch basting rows, using 1” basting stitches, across the quilt every 4 or 5 inches, advancing the quilt as necessary.
- When at the bottom of the quilt, remove the backing and top from the leaders.
- Attach the backing to the Lower Leader marked “top”
- This way the layers of the quilt will be wound up on the Lower Rail, ensuring that the quilt will remain level between the Dead Bar and the Backing Rail. Remove basting stitches as you quilt the quilt.
At this point, you are free to “Quilt as Desired”! But first, I am going to take you through my planning and quilting process. I won’t be giving actual instruction on how to do rulerwork or how to use BERNINA Q-matic Longarm Quilting Automation System or Art and Stitch (included with Q-matic). Those are skills you will need to gain by taking classes at your local BERNINA dealer.
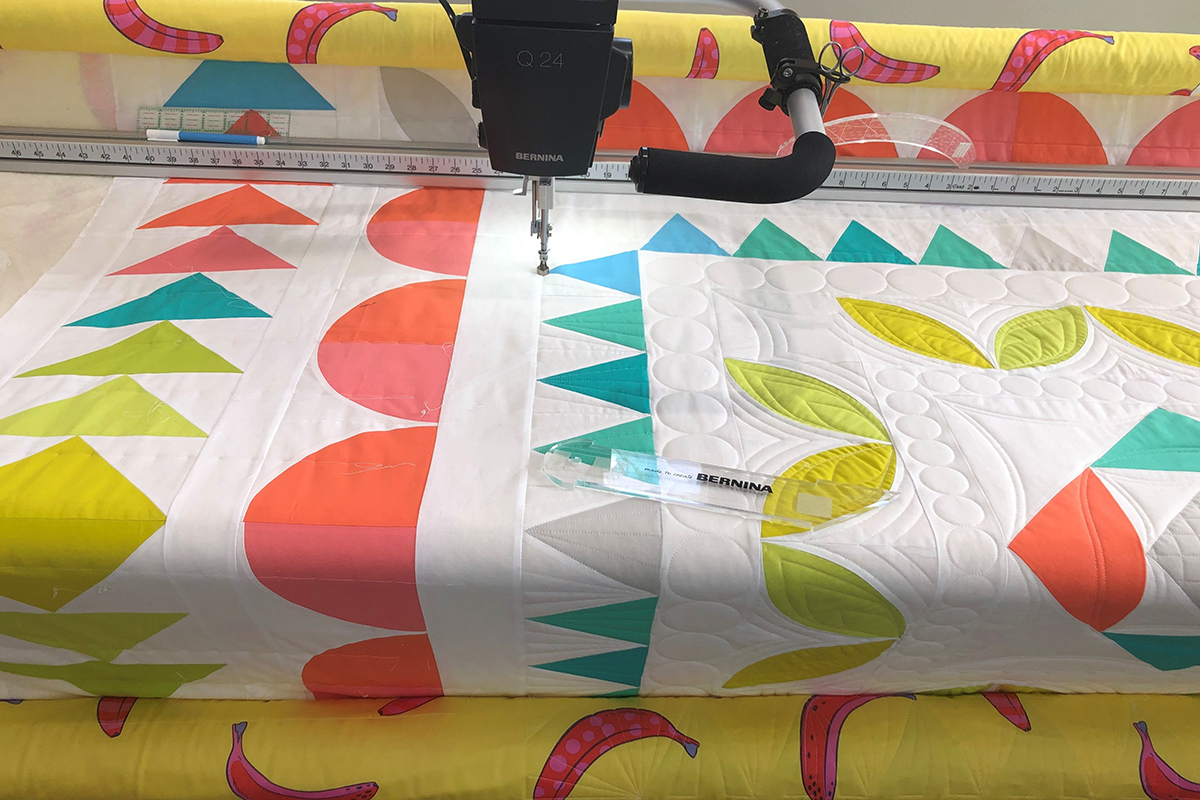
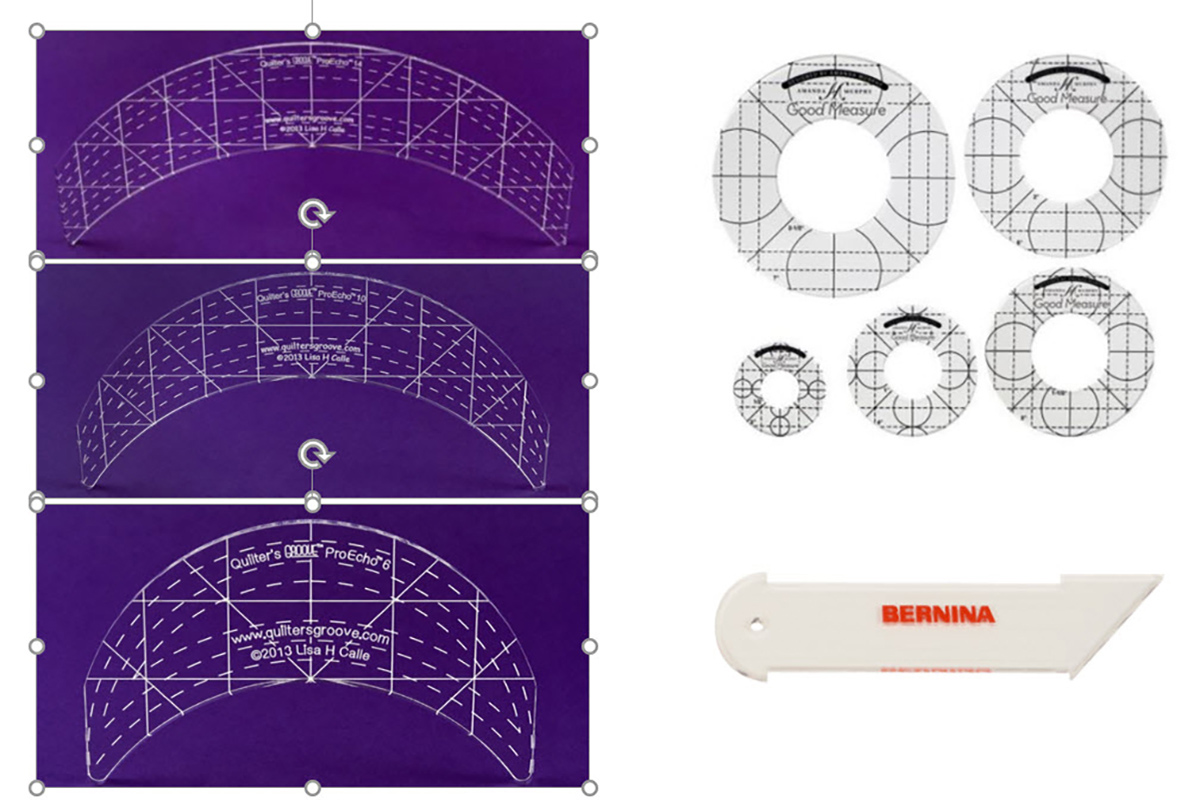
The Passiflora Quilt was quilted on the BERNINA Frame with the Q 24. The quilting was done with both rulers and automation. However, most of what was done with automation could be also be done with rulers, making it possible to follow the quilting ideas on a table model machine. The following rulers were used in the quilting:
- Quilter’s Groove ProEcho 10
- Quilter’s Groove ProEcho 14
- Quilter’s Groove ProEcho 6
- Amanda Murphy Good Measure Every Circle Set
- BERNINA Mini straight line tool 6-½”
However, if you do not have all of these rulers, see what you do have and how you can use what you have. As I said, it may change the design, but that’s okay—it makes it your design.
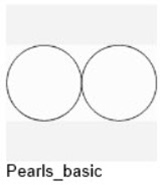
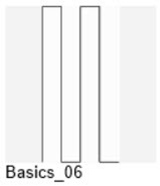
The following automated designs were used in the quilting. Pearls_basic and Basics_06 are built into Q-matic.
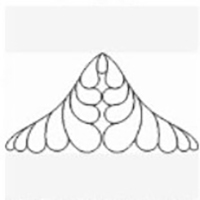
The feather triangle was purchased from Urban Elementz. It is from Jessica’s Whirligig-Wholecloth Set. But any digitized triangle design would do. There are even triangles in Q-matic or in Art and Stitch that could be used.
So, let’s take a look at developing a quilting plan. I don’t need to plan the entire quilt at one time; I just need something to get me started. Looking at the entire quilt can seem overwhelming. The inspiration for designing the center of this quilt is from the book Divide and Design by Lisa H Calle.
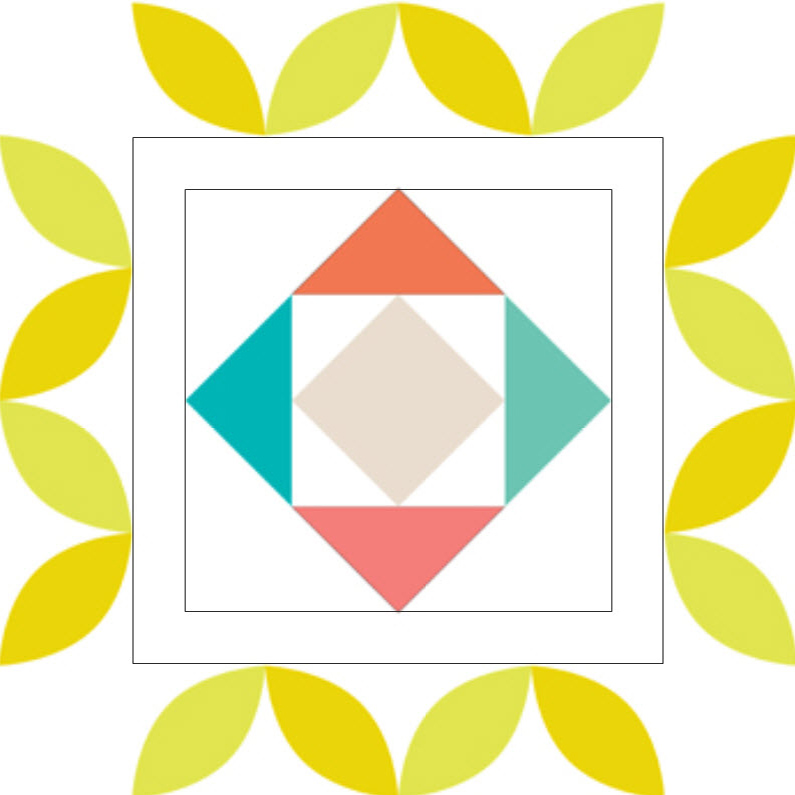
Enlarge the picture of the quilt from the first Passiflora Blog Post. Print out the center of the quilt. You may want to add lines on the drawing so you can see where the first border is seamed to the center block.
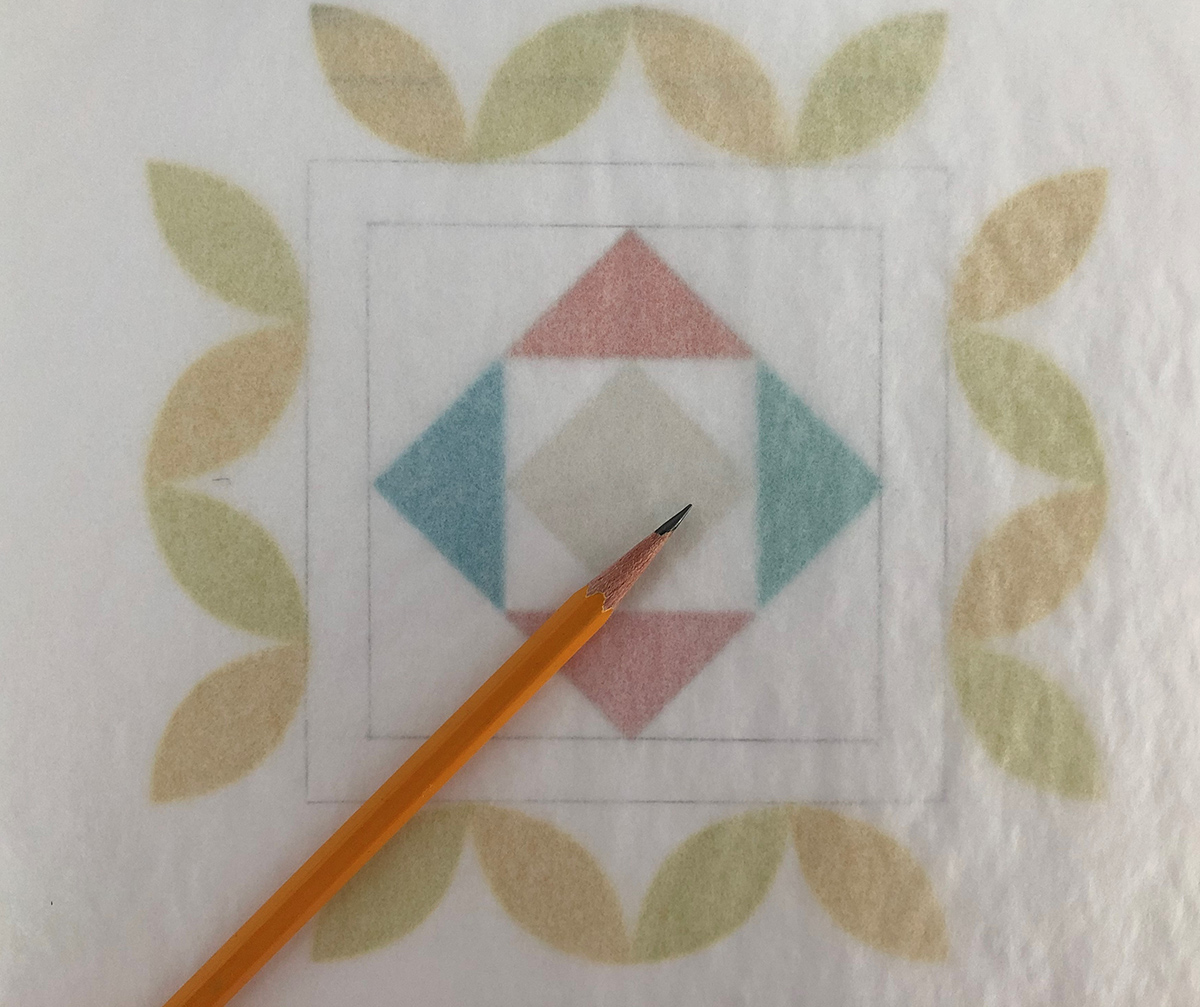
Place a piece of tracing paper over the picture. The tracing paper allows you to draw several designs without destroying the original picture. It is also easier to erase on tracing paper.
Use whatever arcs or shapes you have to draw a plan. As you see in the arcs, echoing the arc creates a more dynamic design. Draw as much of the quilting as you like. You can see that I drew feathers in the center square, even though I did not end up quilting them on the actual quilt, and that is okay.
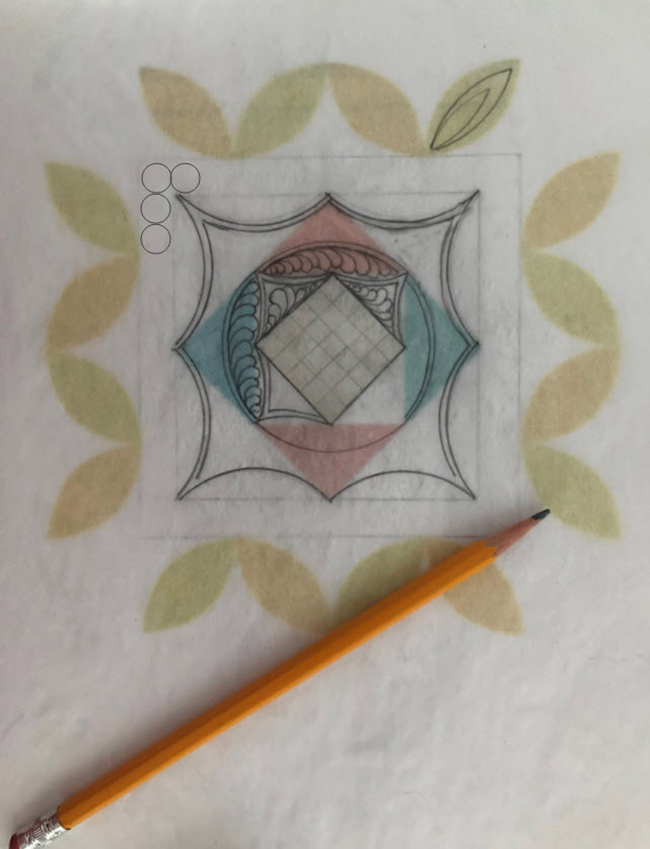
Once I decided on a center design, I knew that I wanted circles in the first border, and I knew that I was going to quilt each petal in the next border. Since the center was to be done with rulers, I needed to find rulers that would give me the arcs I wanted. Look through what you have. An arc is just a portion of a circle, so go through all your rulers to see what will work. The rulers you have available may change what you drew, but that is okay too. No one will see your original plan and we all know plans can change!
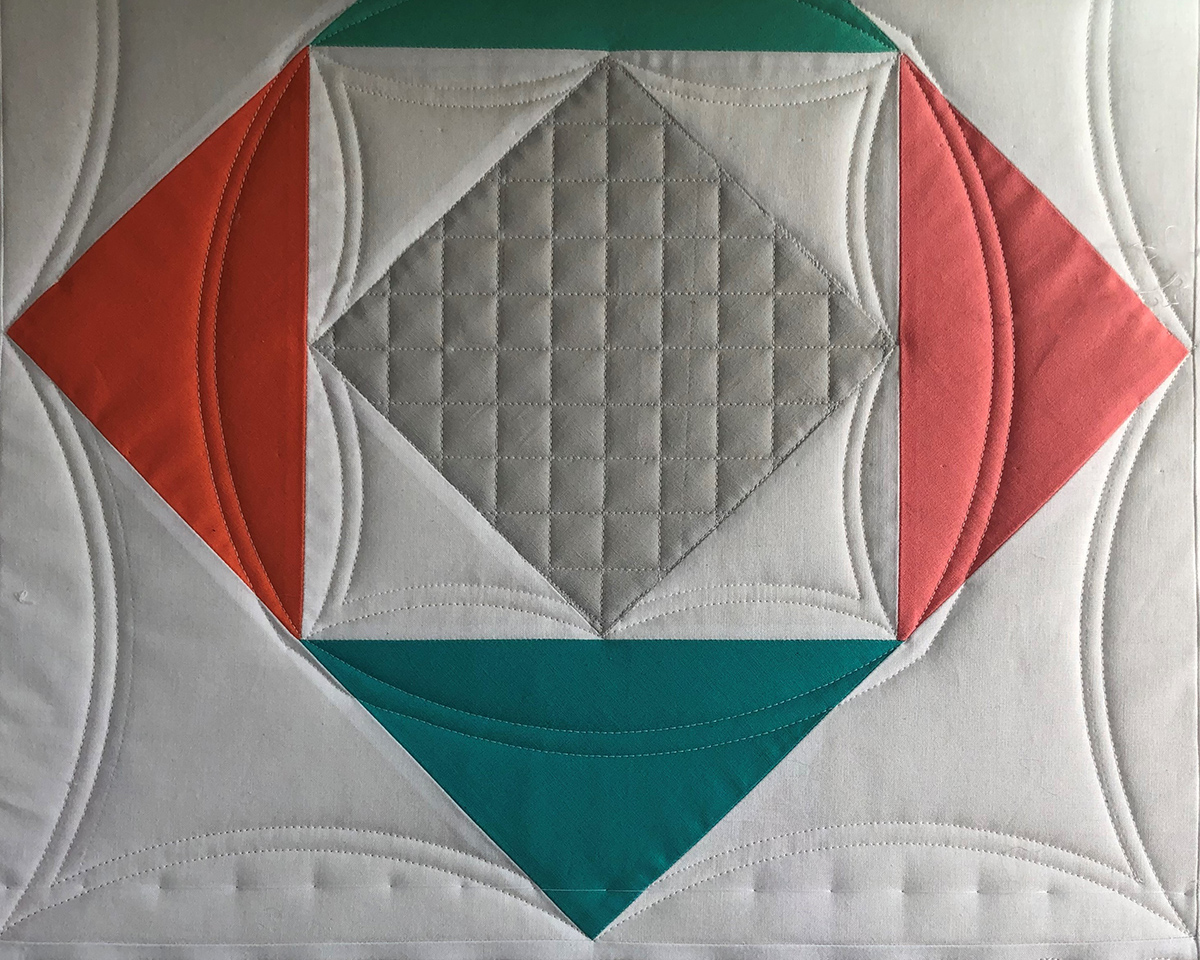
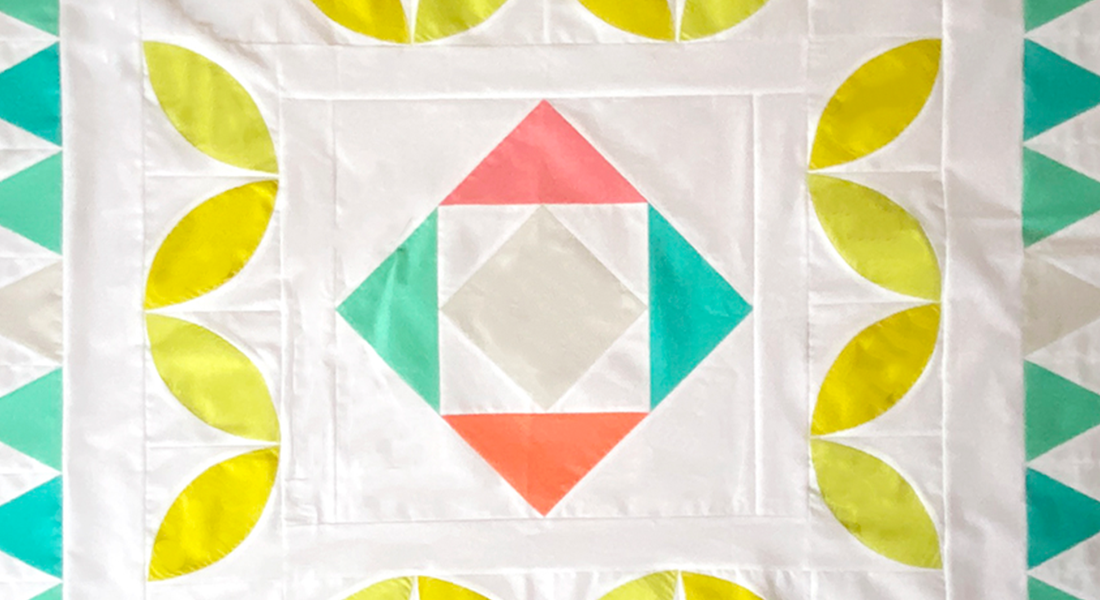
I began by gridding the center square with a 3/4” spaced grid using the straight edge ruler. I finished by quilting in the ditch around the square.
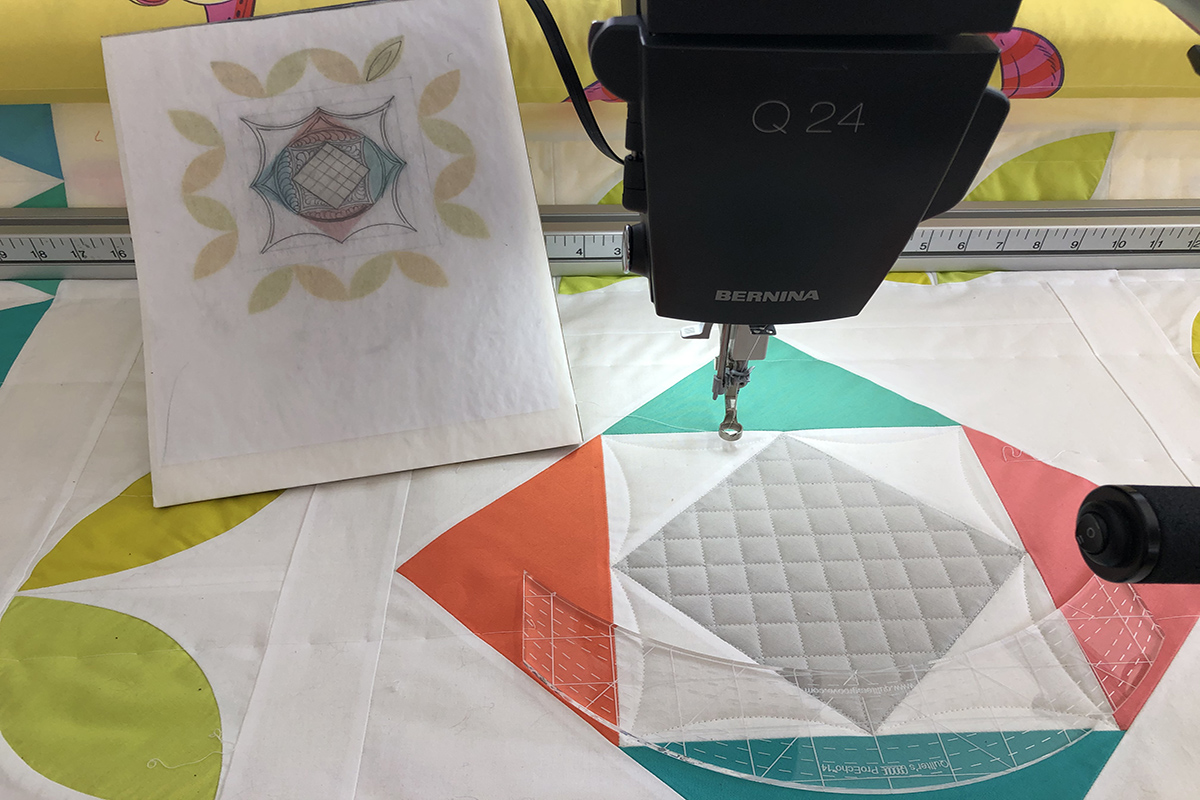
I then added the arcs, echoing each arc with a 1/4″ spacing. I used the ProEcho 14 and ProEcho 10 for the arcs.
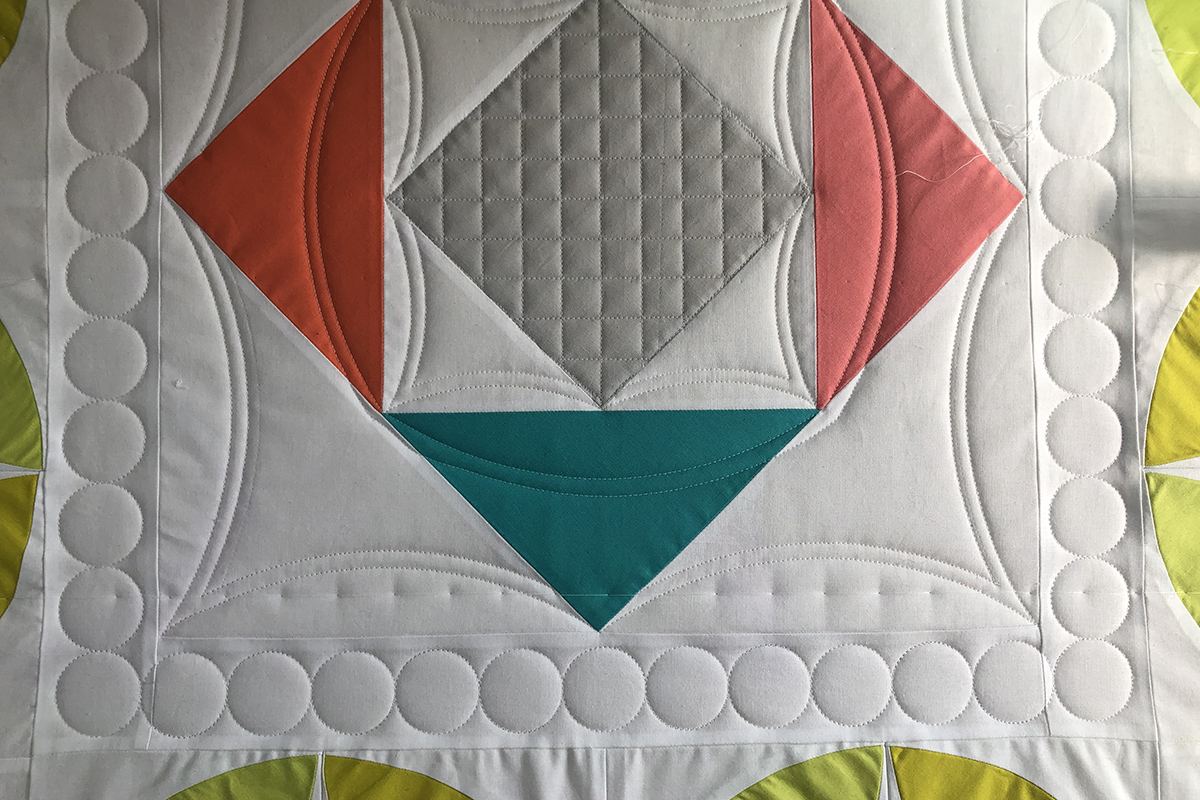
That took me to the first border. I decided I would use the Pearls_basic design to quilt circles in the border. I used E2E to join enough circles for each border. If you are using a Q 20, you may need to stitch the vertical borders in two stitch outs. Use the Trim feature if you need to cut off a circle to make it fit. I used Markers in the software as my placement method. By connecting the Markers, I could see exactly where I needed to place a row of circles. By clearing the Markers, I was left with a box on the screen that told me exactly what I needed to fill with circles. I could “tweek” the placement by rotating the design in the event the quilt border was not absolutely straight, and I could “tweek” the size of the row of circles by a fraction of an inch to make them fit, and it would never be visible to the naked eye. (Don’t forget to Dequeue everything and only Queue the circles.)
Although I did this with Automation, it could also be done with rulers. Amanda Murphy’s Good Measure Every Circle Ruler Set is perfect for this. This is her 1 ½” circle.

If you are quilting the circles with rulers, I would suggest that you start quilting each side in the center working out to each corner. That way if you need to use a different size circle or even a different design element in the corners you can make that adjustment.
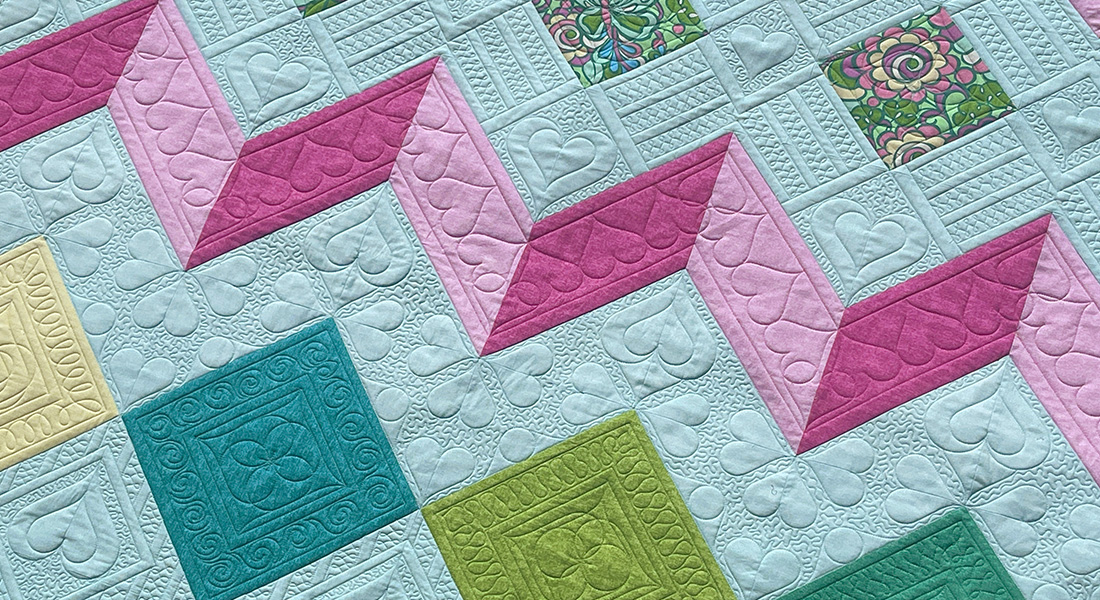
Now that I quilted circles in the first plain border, I decided all the plain borders would be quilted with circles, and I would just adjust the size of the circles. It felt good to have a plan for those plain borders. And it would be nice repetition.
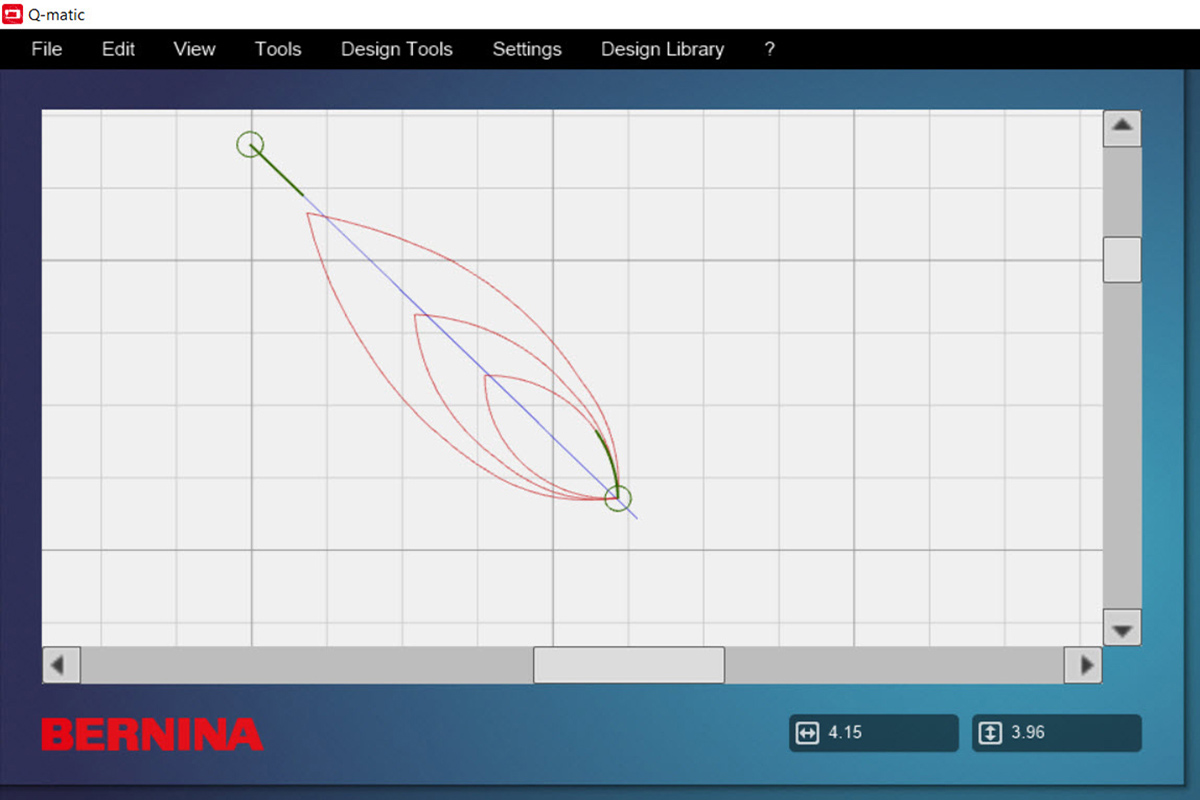
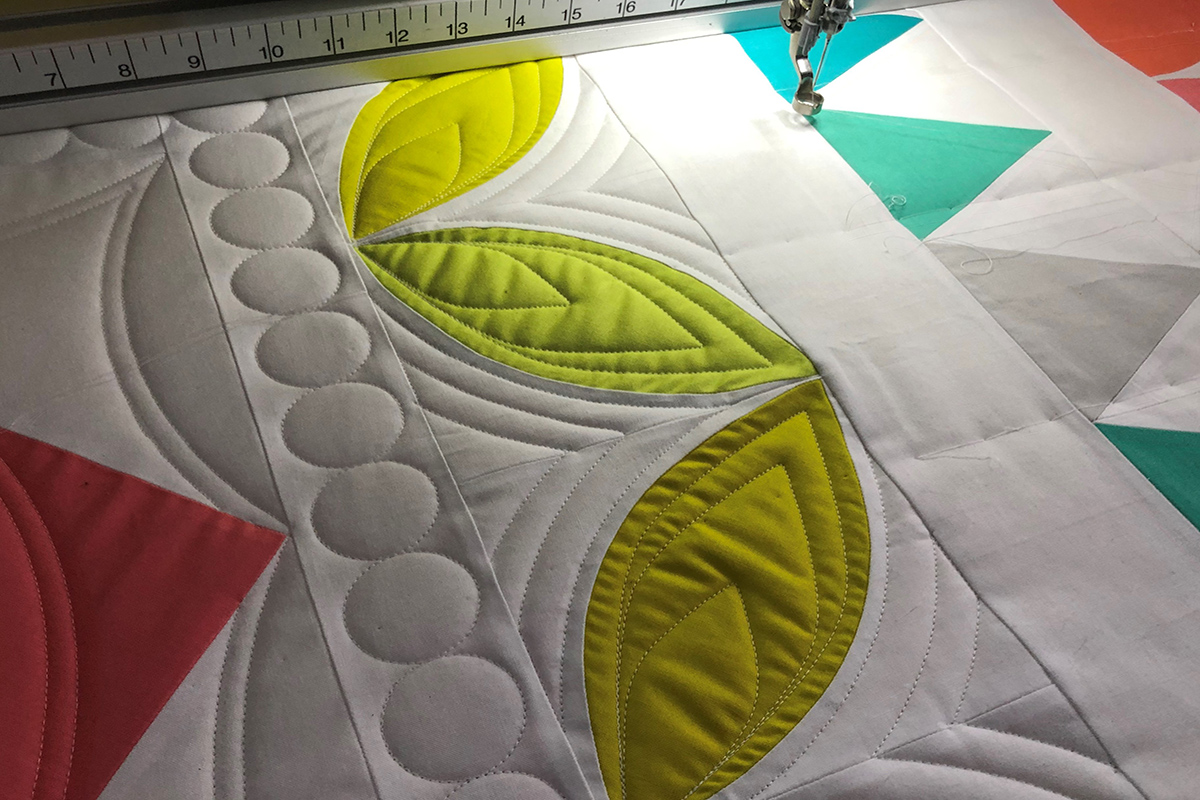
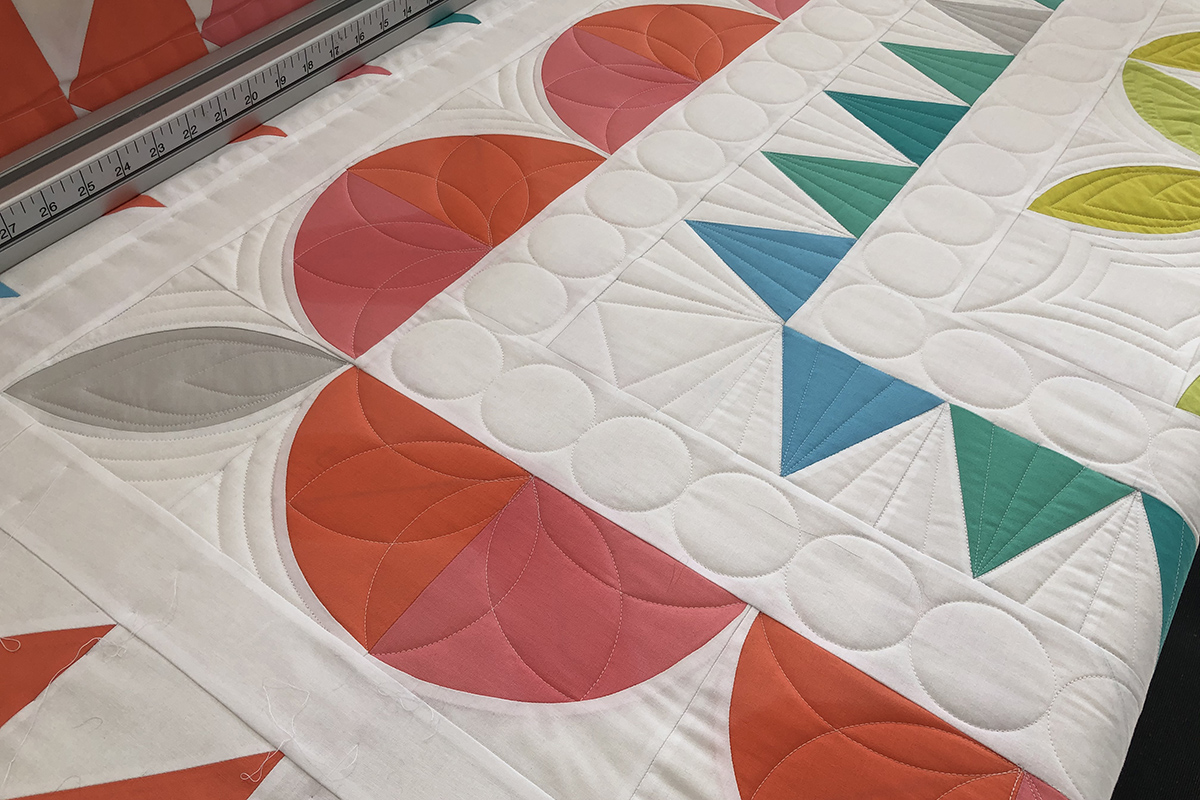
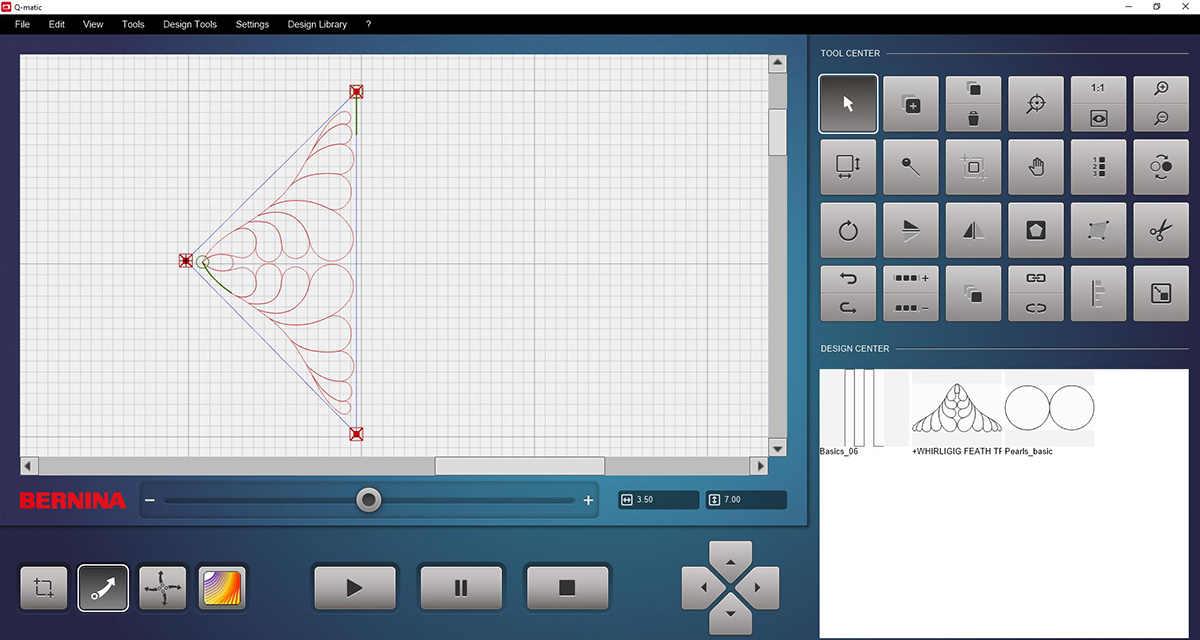
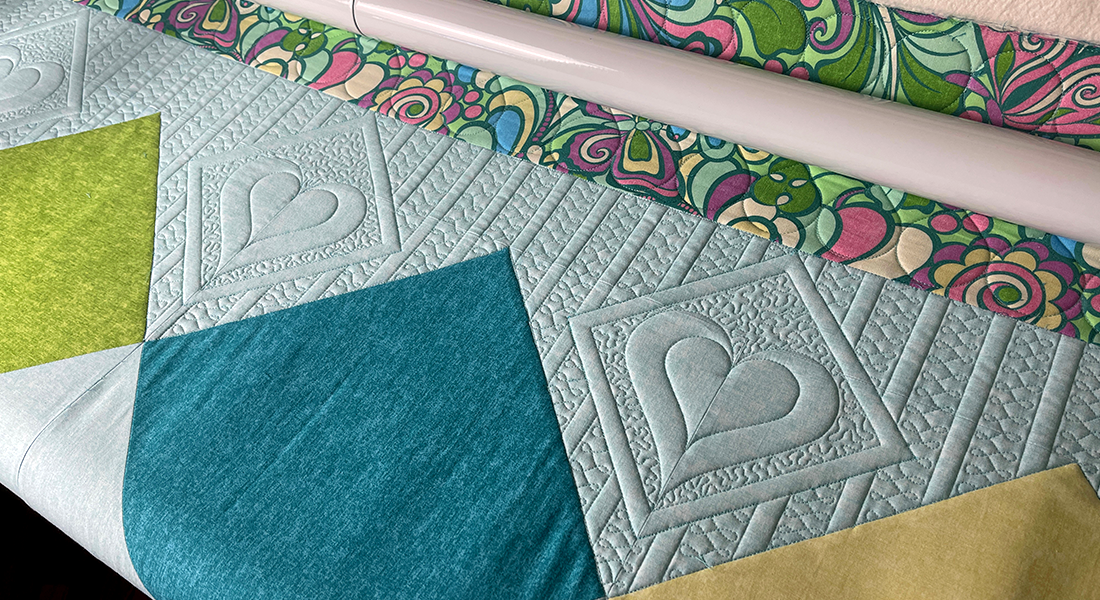
Moving on to the orange peel border, I had already planned to stitch 3 sizes of orange peels, all joined at one end, in each block. I could have done this design with 3 different size arcs from 3 different size circle rulers. But because I have Automation, I created my own design for this in Art and Stitch.
Stitches were added and the design was saved as a BQM. The design was imported into Q-matic.
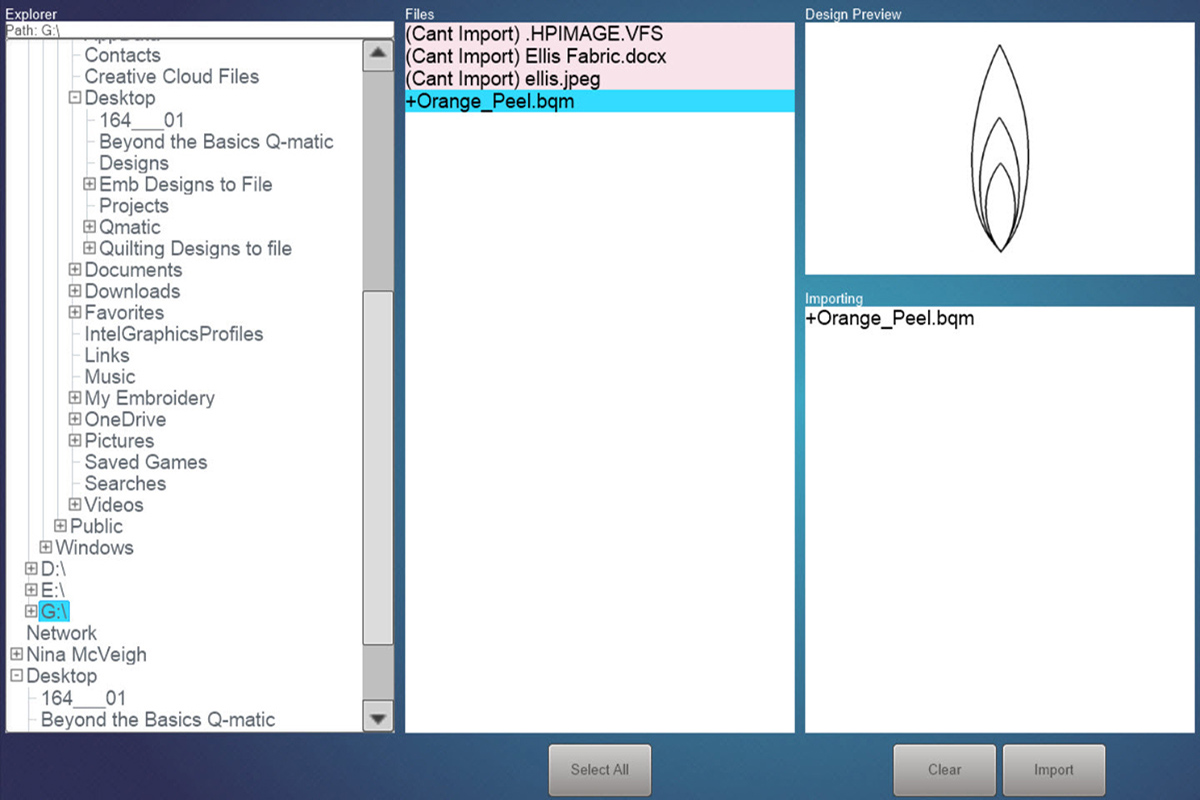
To accurately place the design, I used Markers, placing a Marker at each end of the orange peel shape. I connected the Markers, giving me a centering line. (I then cleared the Markers to get them out of the way). Each orange peel was just slightly at a different angle, so now I could use the .01 degree Rotate Tool to place the design.
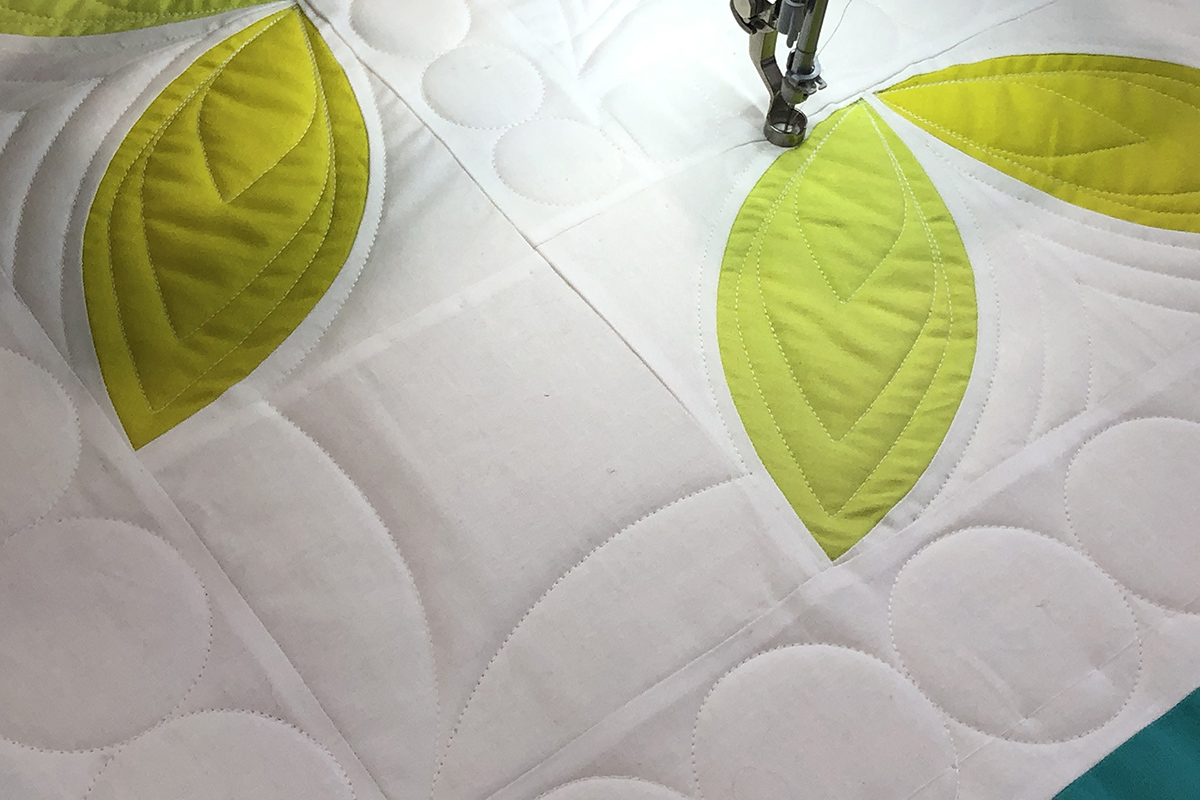
I did the entire border, moving the quilt back and forth on the frame as necessary. Now that the orange peel part of the border was done, I needed to do something in the areas between the orange peels. Since the ProEcho 10 ruler was the exact curve of the orange peel, I decided to echo the orange peel 1/4″.
I began at the seam line and echoed the two orange peel shapes creating a curved triangle.
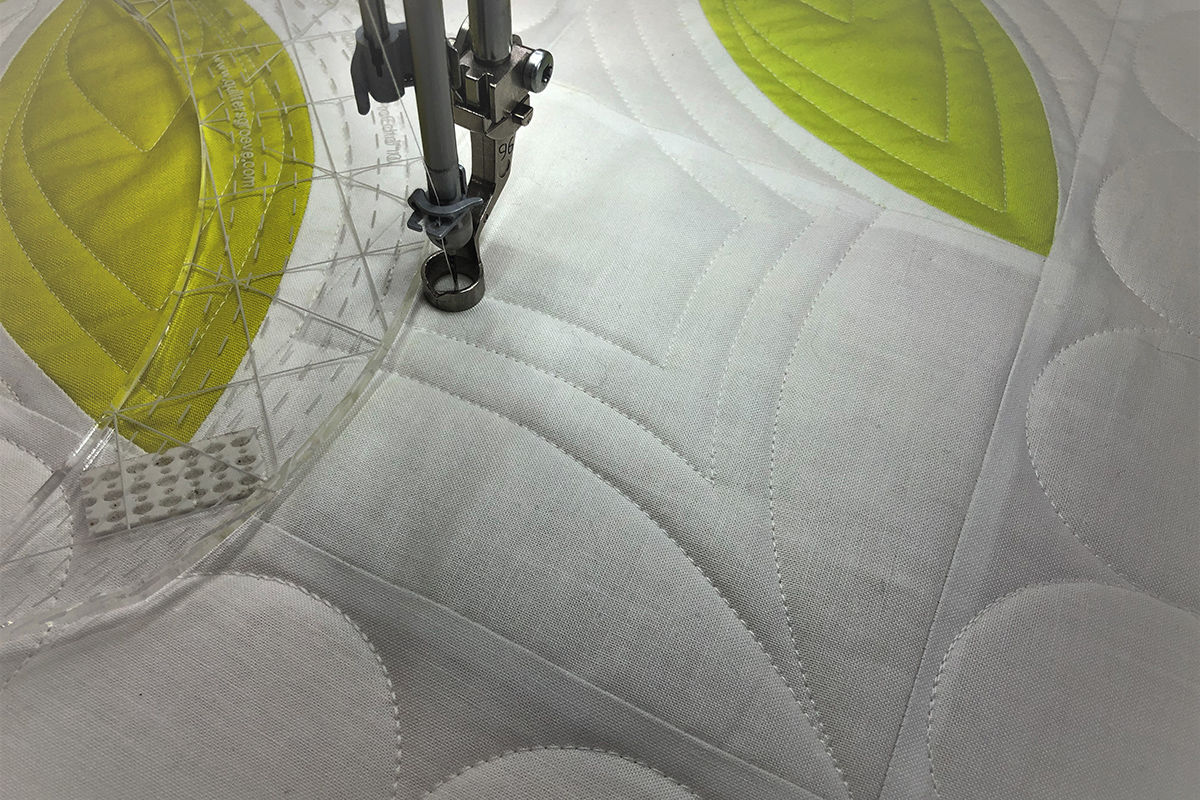
Knowing that I was going to echo this stitching, I used a straight edge ruler to stitch in the ditch. Stitch over so that the edge of the foot is ¼” from the stitching.
From here, I echoed the original line twice by placing the ¼” line on the ruler on the previously stitched line creating ½’ spacing.
I really liked how the curved lines added movement to the quilting.
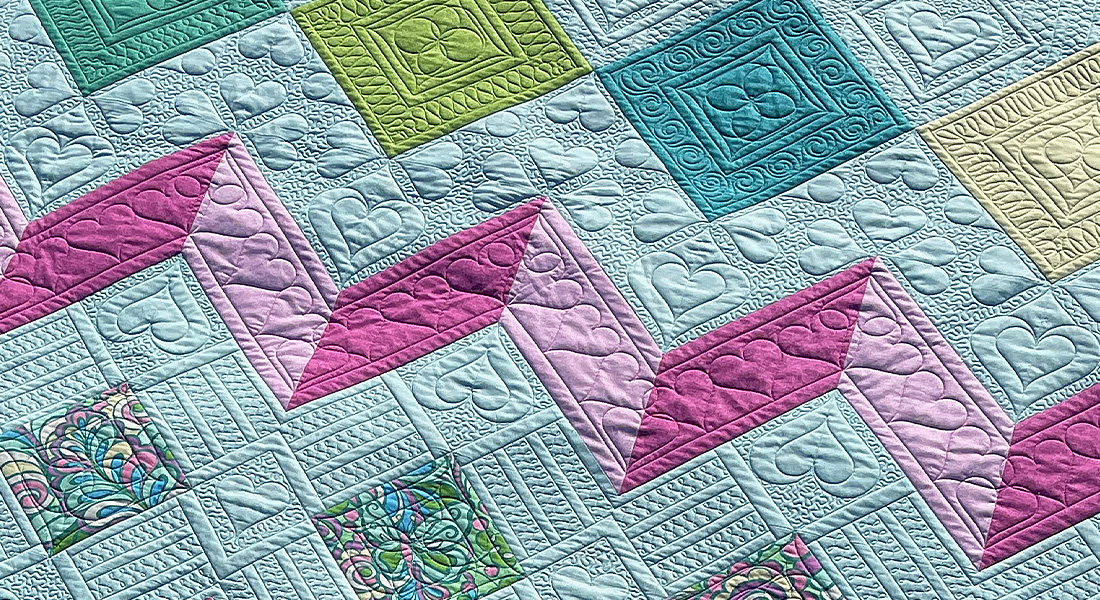
Because I was still trying to decide what to do in the corners of the orange peel border and I knew every plain border was going to be circles, I went ahead and stitched the next border. You will now need to split the vertical rows of circles. This is a wider border so the circles are 2.5”. As I was doing this border, inspiration hit!
In the corners of the orange peel borders, I brought the designs together by using the same echoed curve shape. But when I got to the white corner block, I brought a curved line out to the corner; then continued with a curved line out of the corner and echoed the remaining orange peel.
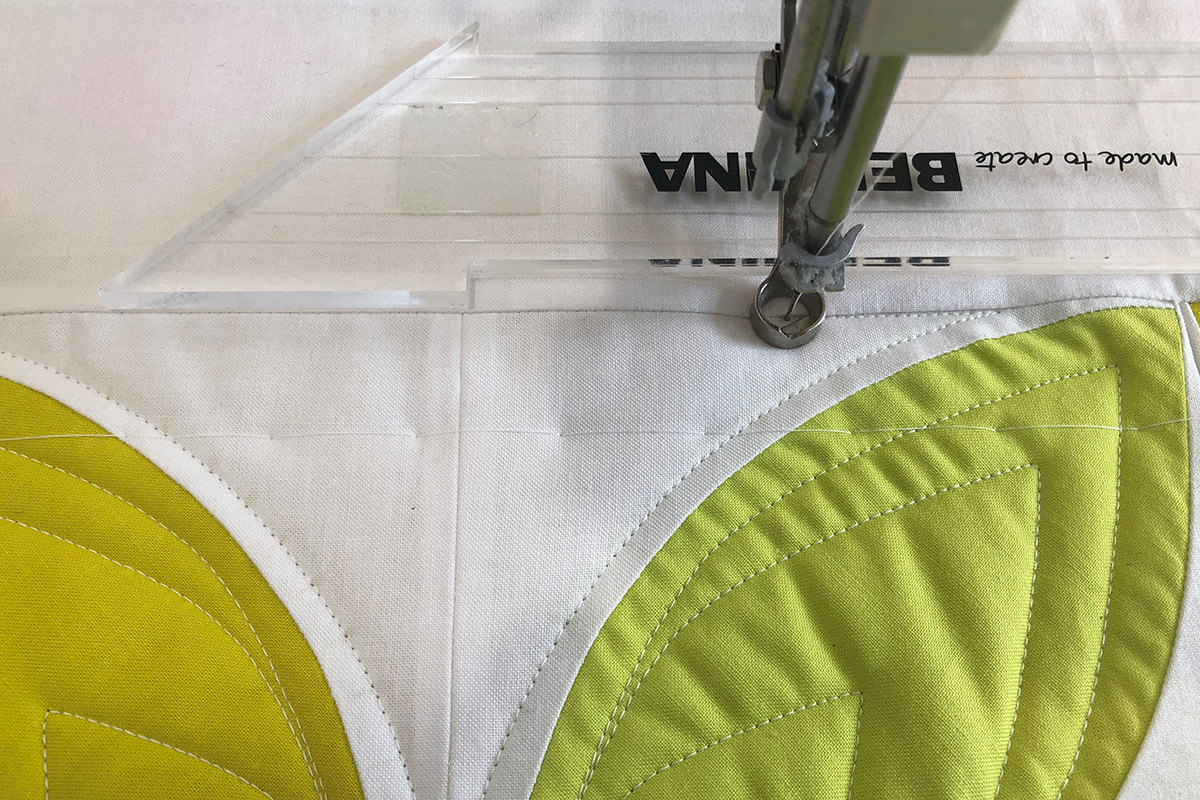
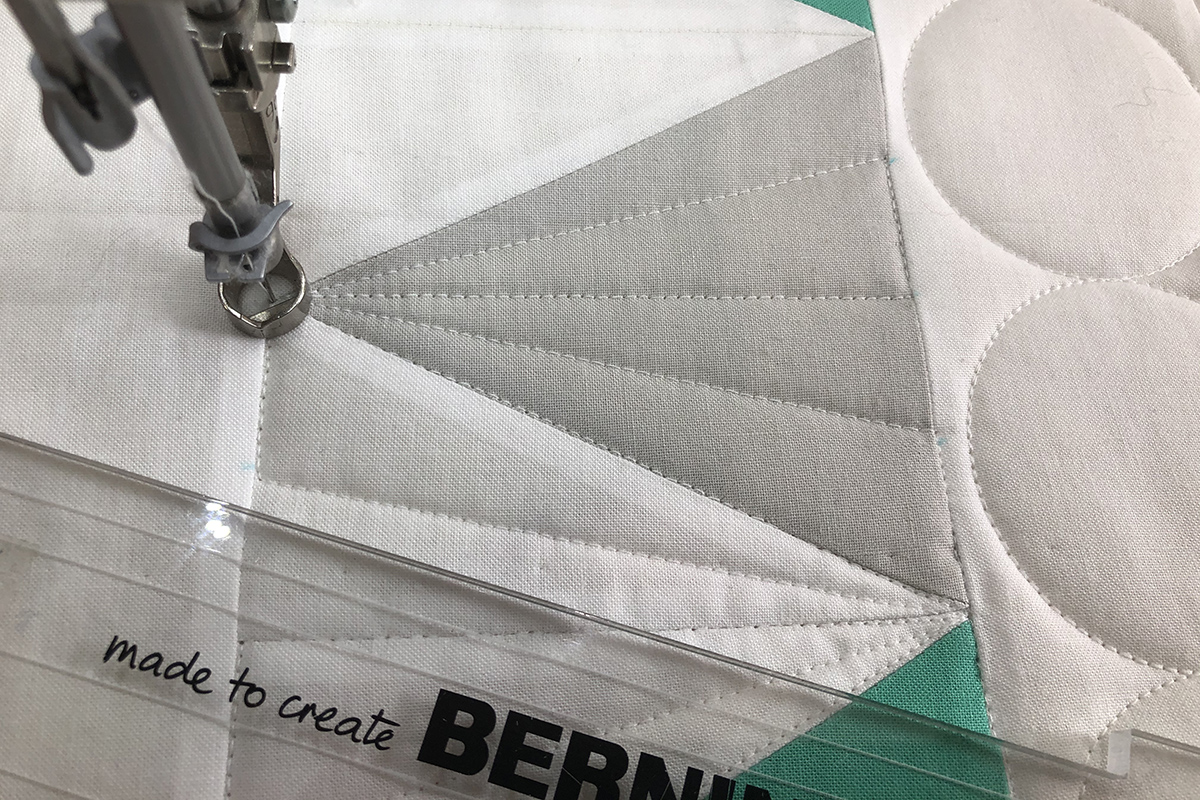
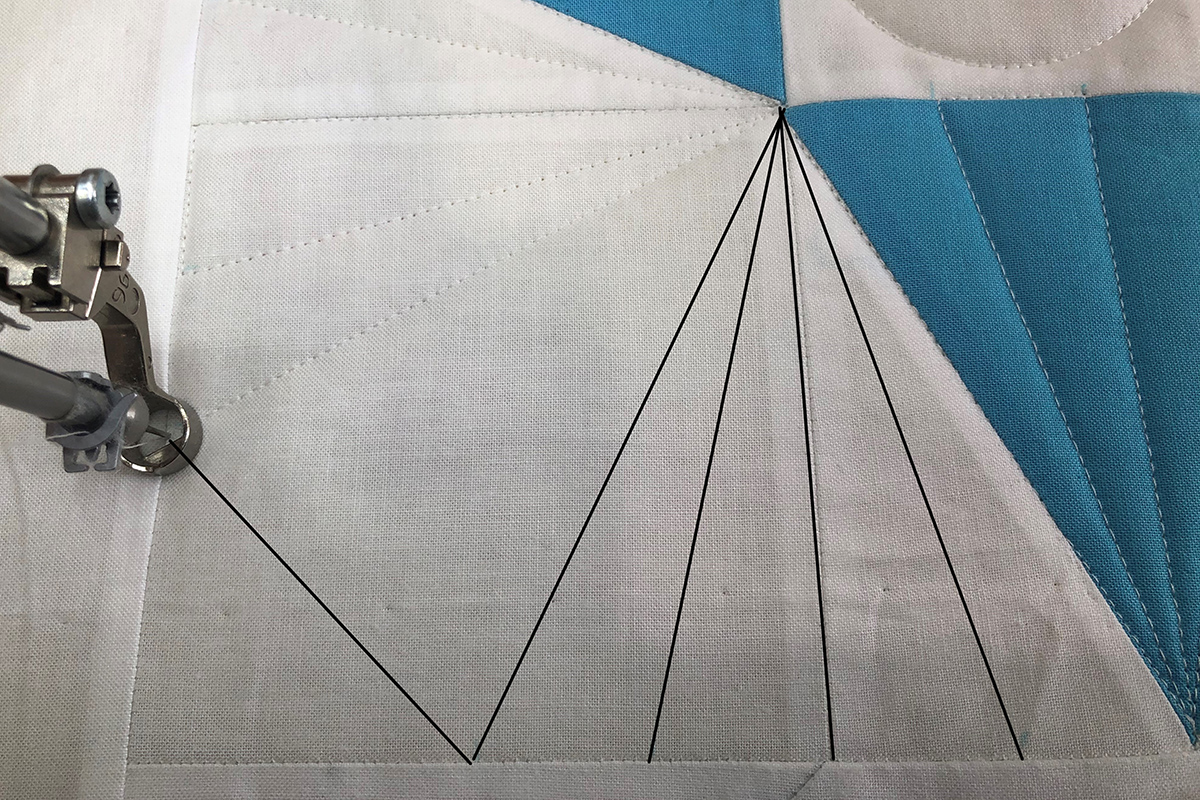
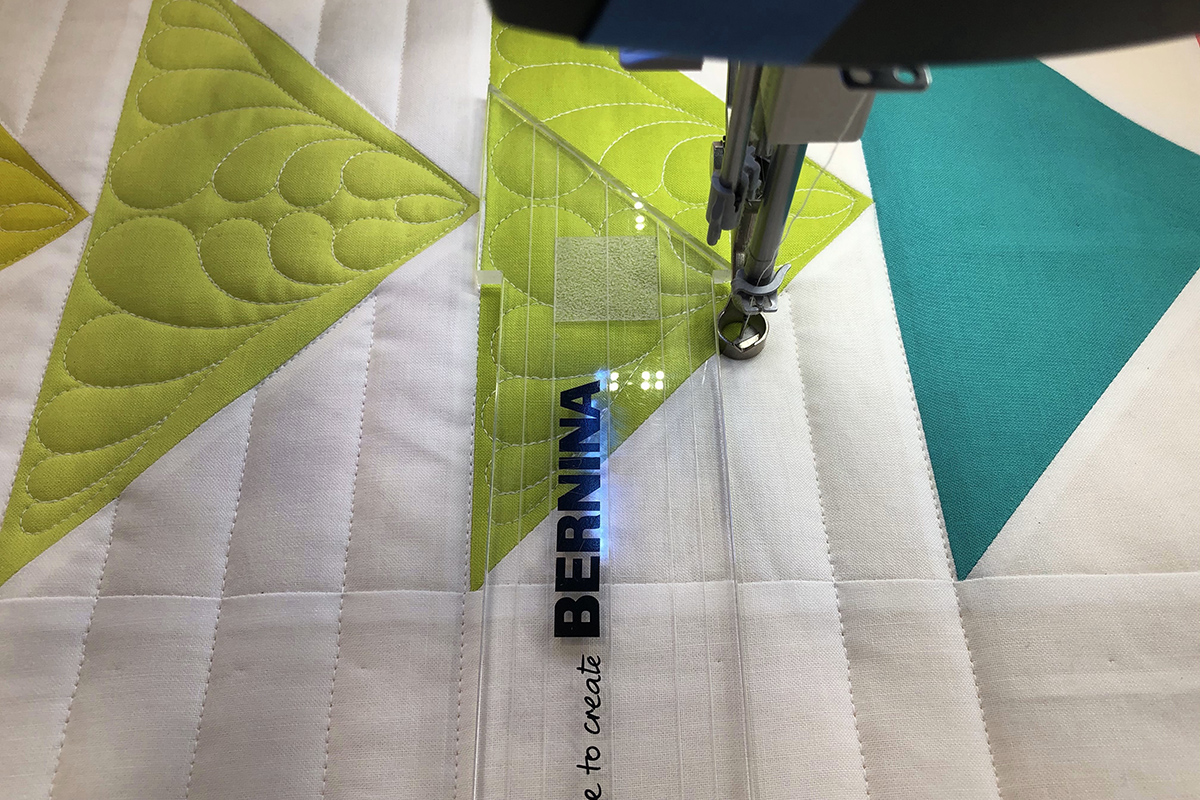
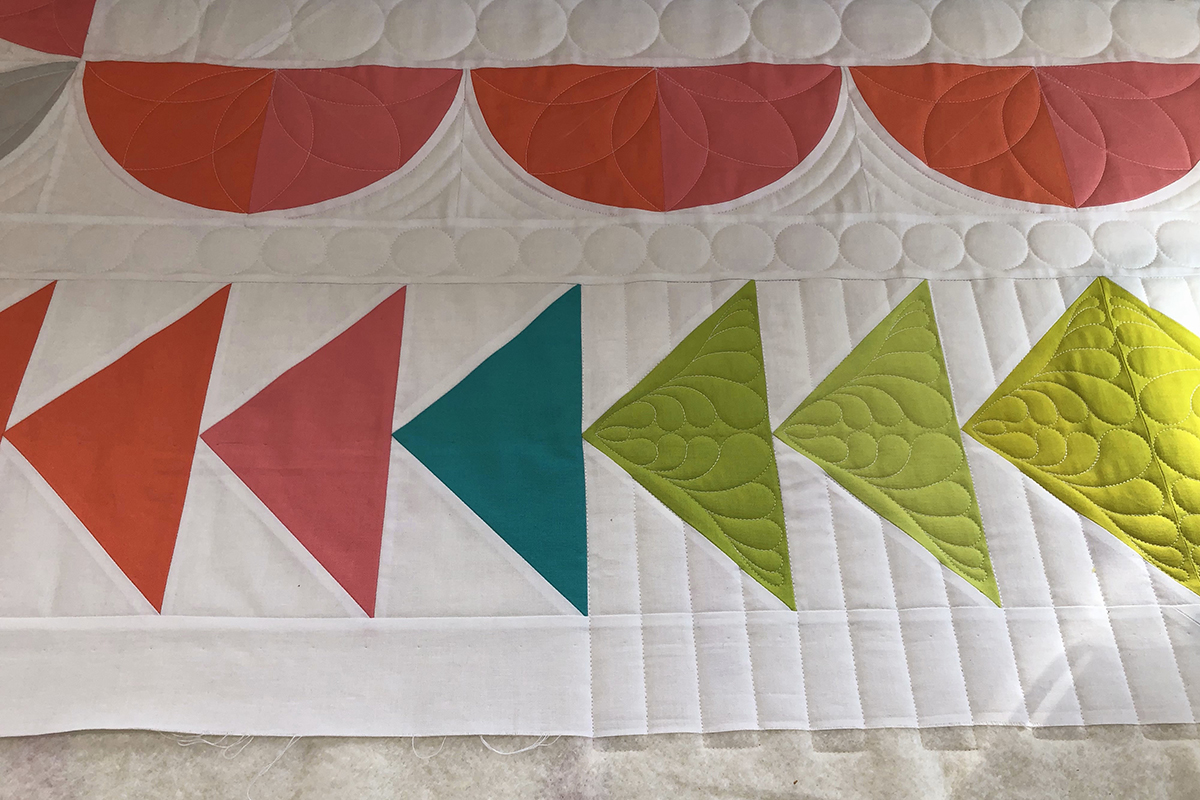
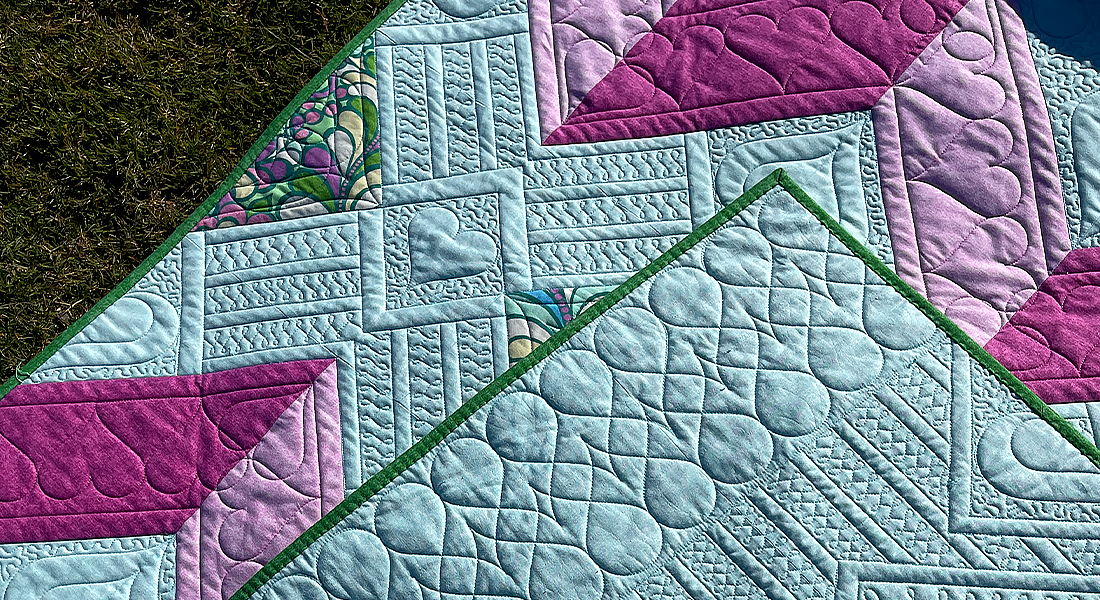
Then I moved on to the triangle border. This was an easy, all rulerwork border with all straight lines radiating out from the tip of each triangle. I marked 1” increments along the bottom edge of each triangle for even spacing.
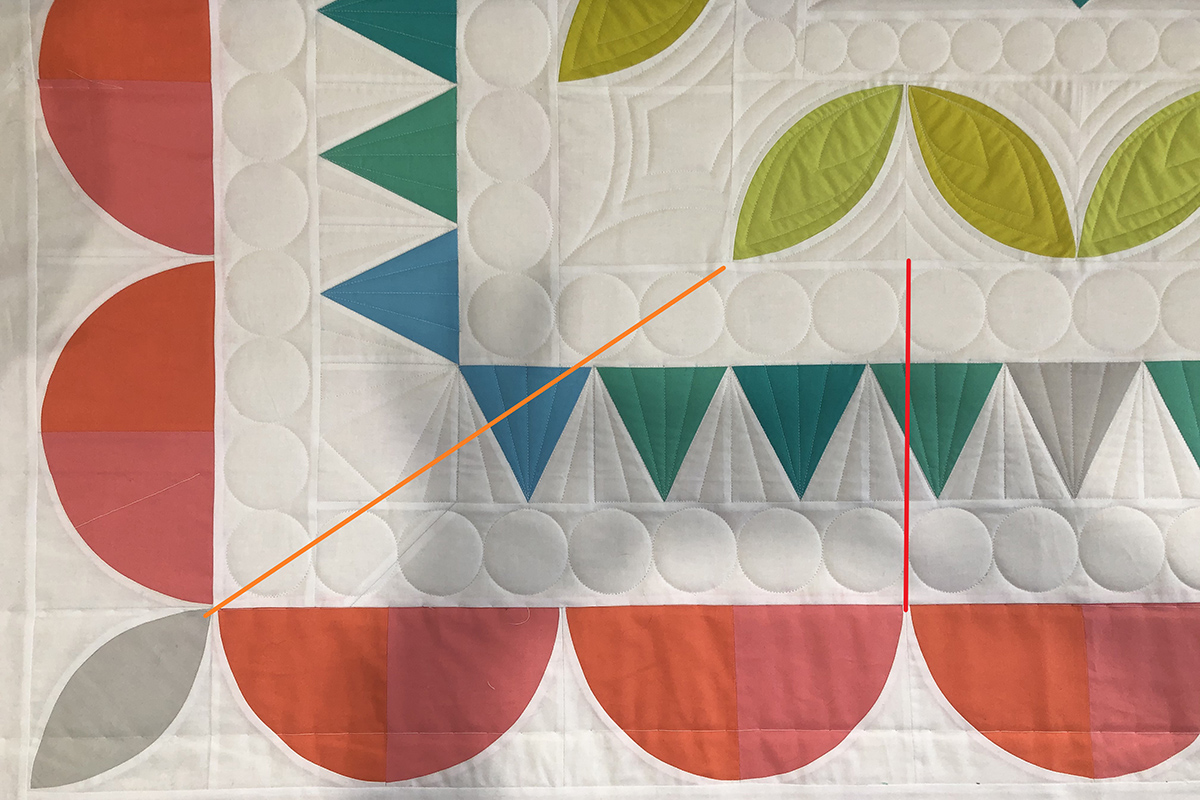
In the corners, I continued with the white triangles and joined then with a diagonal line in the outside corner as I have indicated in the photo.
Now for another row of circles. These are the same 2 1/2” size as the previous circle border. (Tip: If stitching the circles using automation, consider doing the long horizontal rows in sections in the event the horizontal border is not totally straight on the frame.)
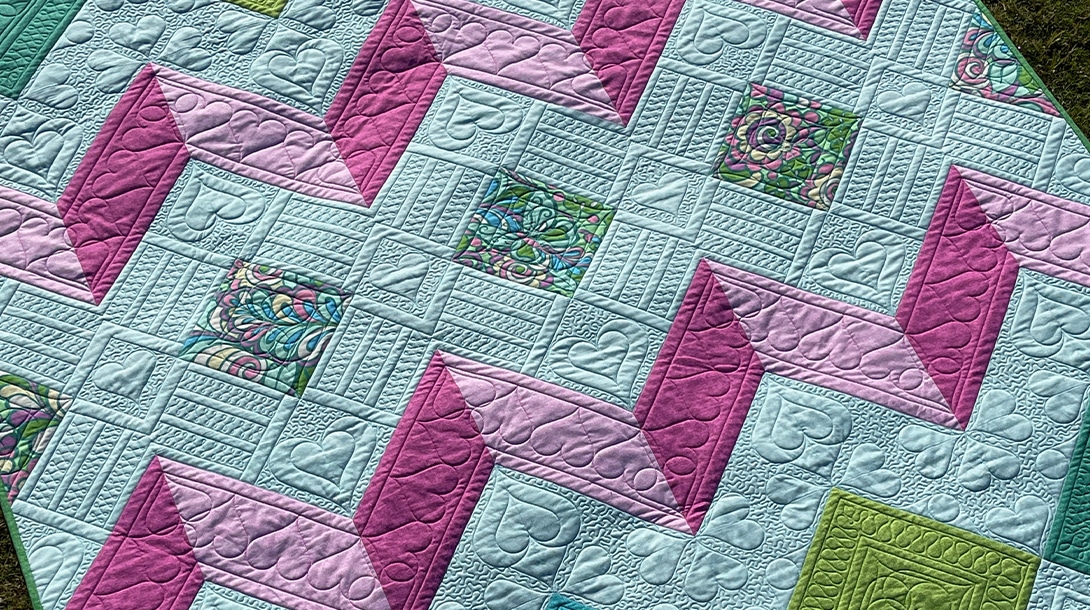
Moving on to the next pieced border, I needed to look at what I had already stitched and what I could repeat (besides the circles) to tie the borders together.
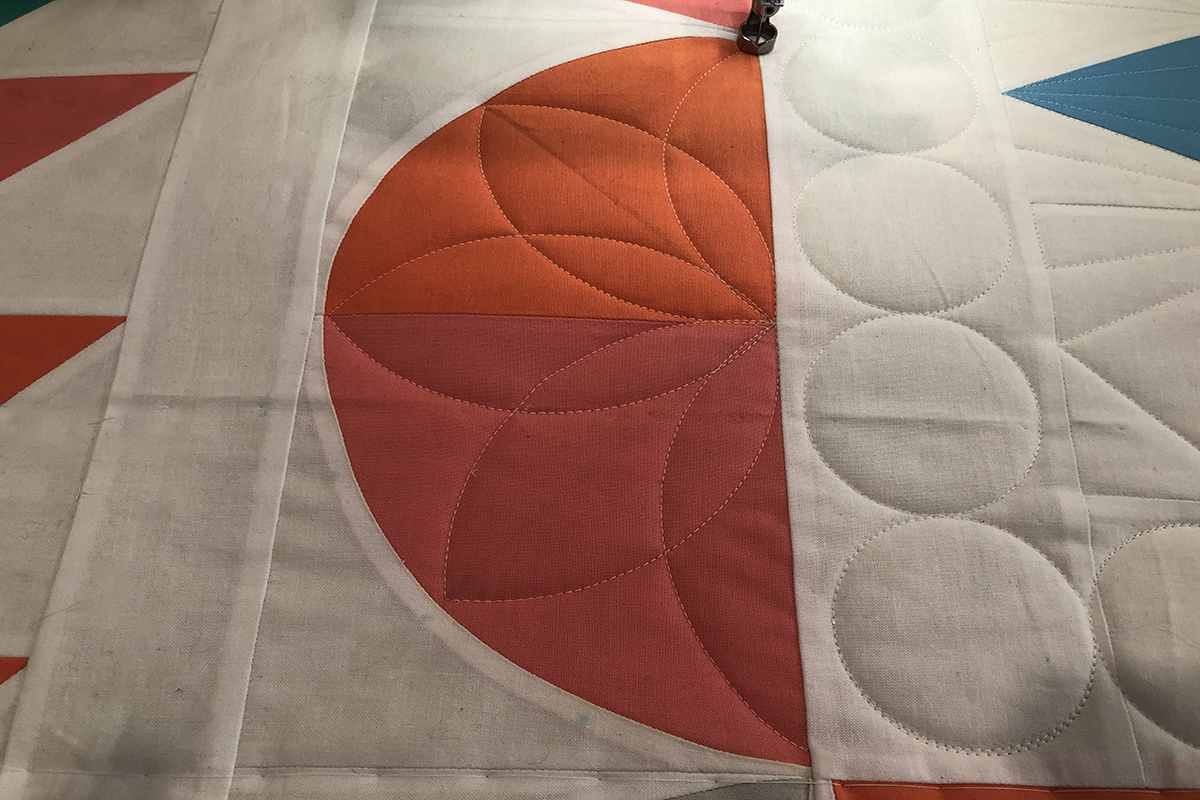
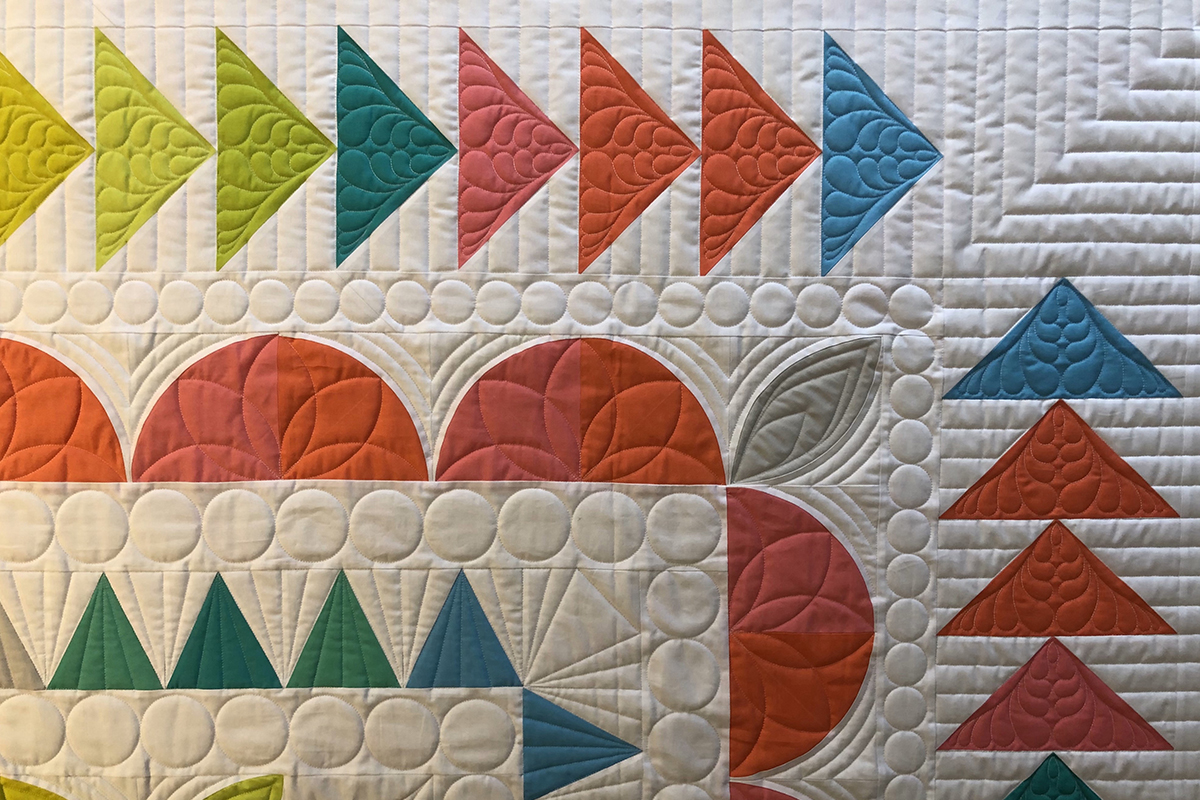
The corners of the next border are an orange peel block, so they can be quilted the same way as the orange peel border. And the space left between the Drunkard’s Path Blocks is the same space left between the Orange Peel Blocks.
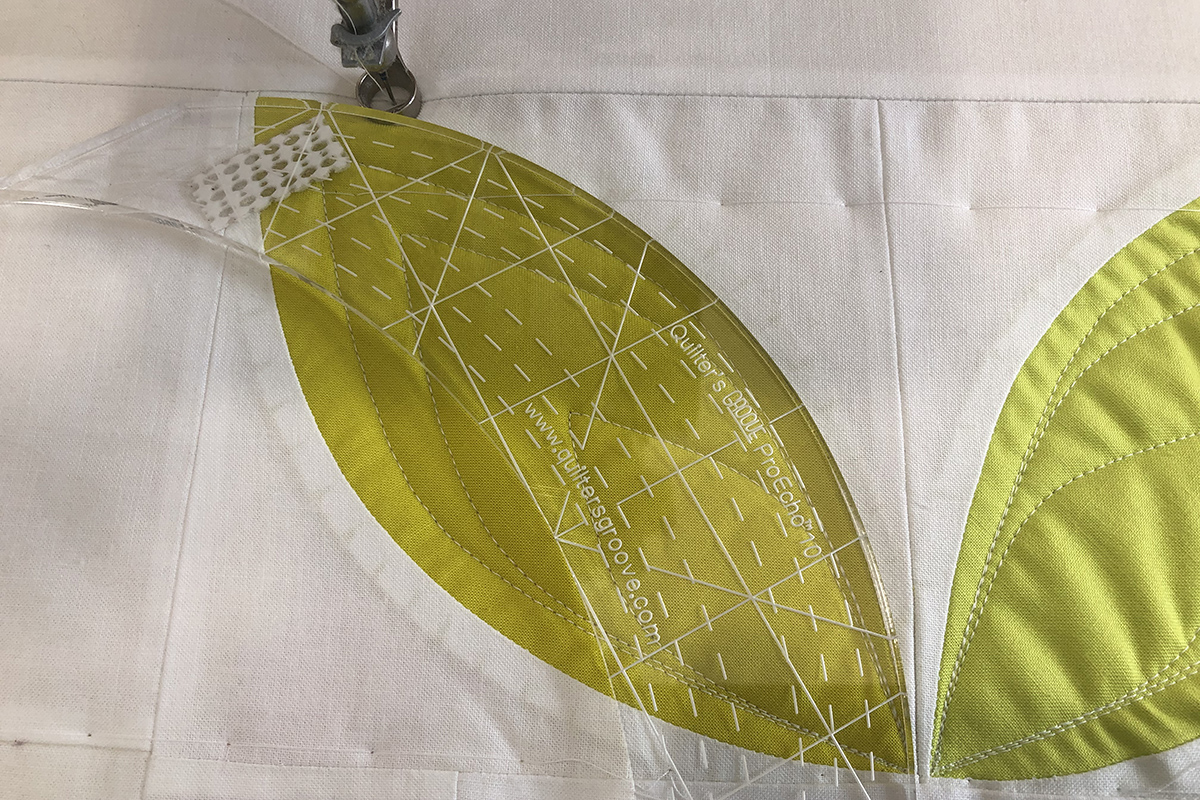
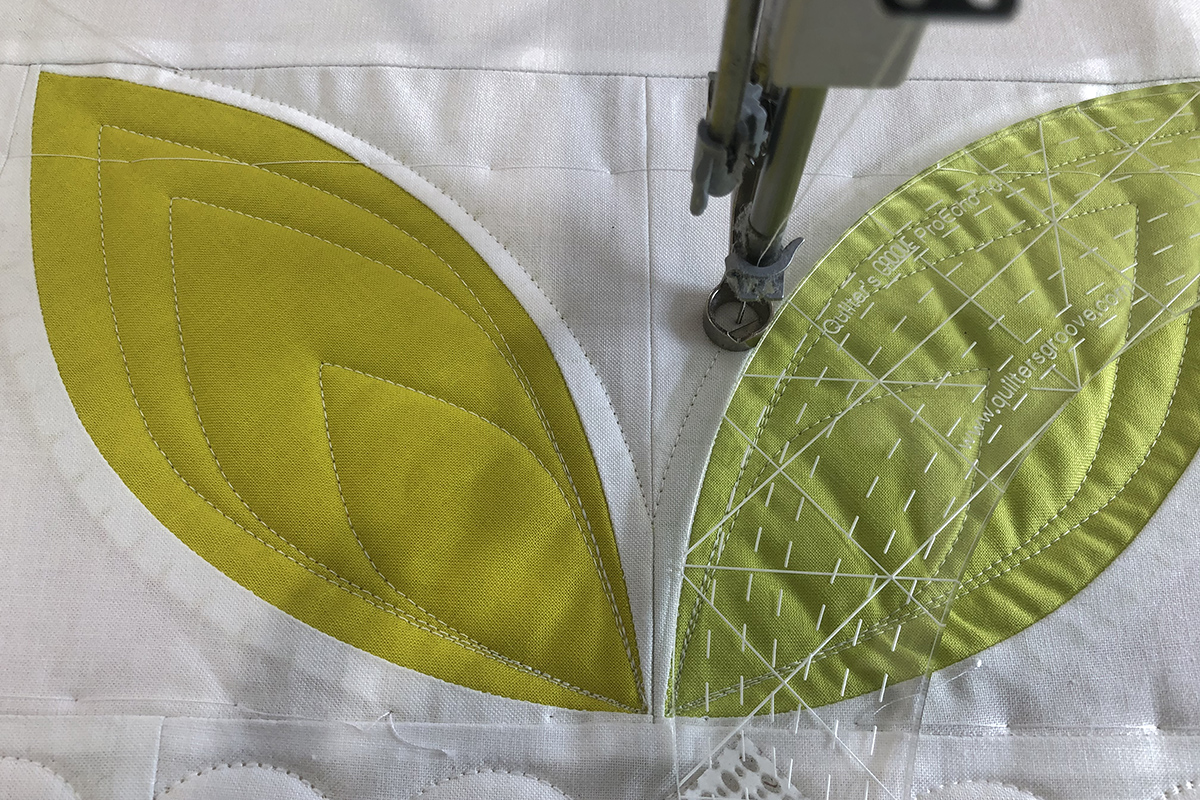
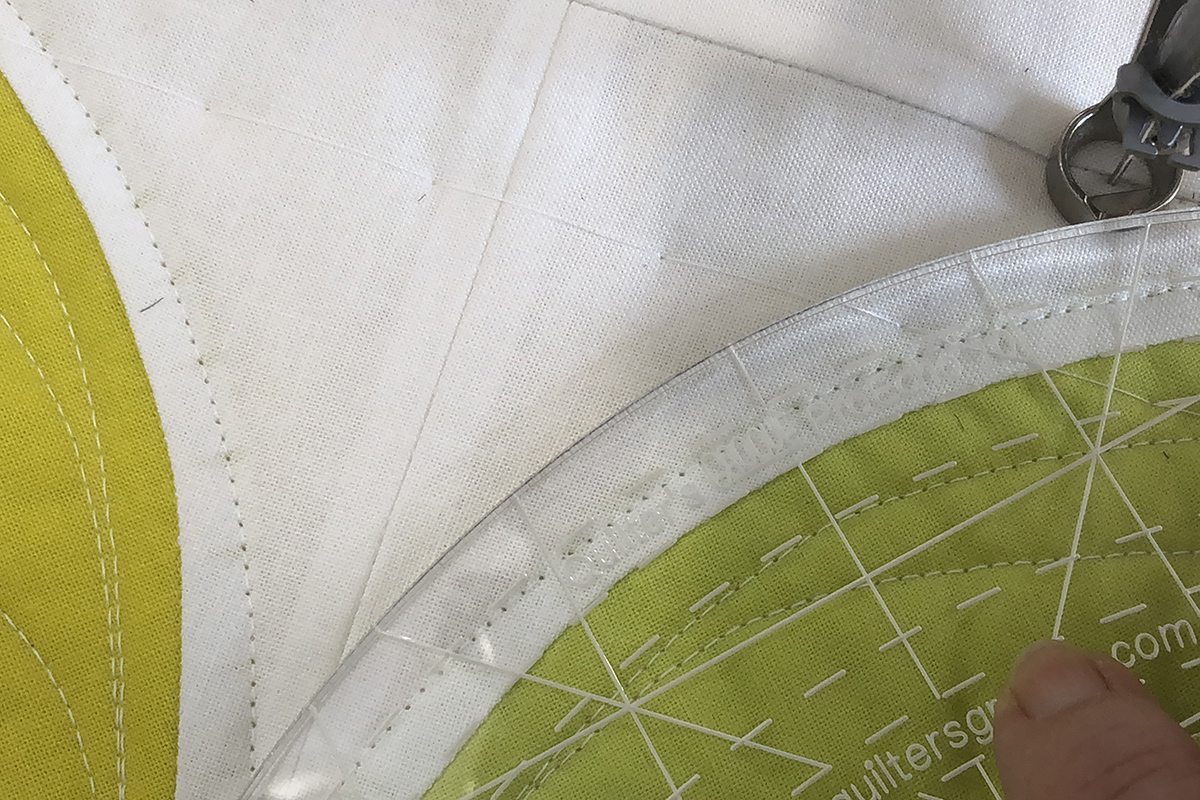
With those elements repeating themselves, I wanted to continue with the petal shape in the blocks that formed a half-circle, so I decided to do ruler work and stitch petals around the half circle. The arc of a 6” circle ruler worked perfectly for this.
I then did the automated design in the orange peel corner and filled in the rulerwork between the Drunkard’s Path blocks to complete the border.
This really tied the two borders together, unifying the designs.
At this point, I knew the next border was to be circles again! Circles on this border were 1 1/2″. Remember, if doing the circles with rulerwork, you want to start in the center of the border and work out to the corner. And it is okay if it does not come out perfectly in the corner. If it does not, you just need to get creative in a corner design!
As I looked at the last border of pieced triangles, I was also looking at the plain outside border. If I followed the rule I established in the beginning, I would stitch circles in that outside border. But I knew I did not want circles around the outside of the quilt. Hayley was going to bind the quilt after I did the quilting, and I thought it would be difficult for to do so without cutting off any of the circles. I also like more quilting out to the edge of the quilt. So, I decided to treat the 2 borders as 1. The first thing I had to do was decide what I wanted to do in the triangles. Because I was still contemplating doing some feathers in the center of the quilt, I decided to do a feather triangle. (and even though I didn’t do the feathers in the center after all, it still worked.) The feather triangle was purchased from Urban Elementz as part of a set of designs (Jessica’s Whirligig Wholecloth Set). However, if you are using automation, I think any triangle design would work, even the built-in Q-matic designs. I used Markers and joined them to create a triangle shape on screen so that I could exactly place the design in each triangle.
I finished the final border by doing straight line quilting spaced 1” apart. This can easily be done with a straight ruler.
However, I chose to stitch the lines with automation. I used built-in design, Basic_06, and sized it so the stitching lines were 1” apart and the length would accommodate the spaces on each side of the triangle. 4” X 6.5”
Use the Trim feature to cut off the joining line.
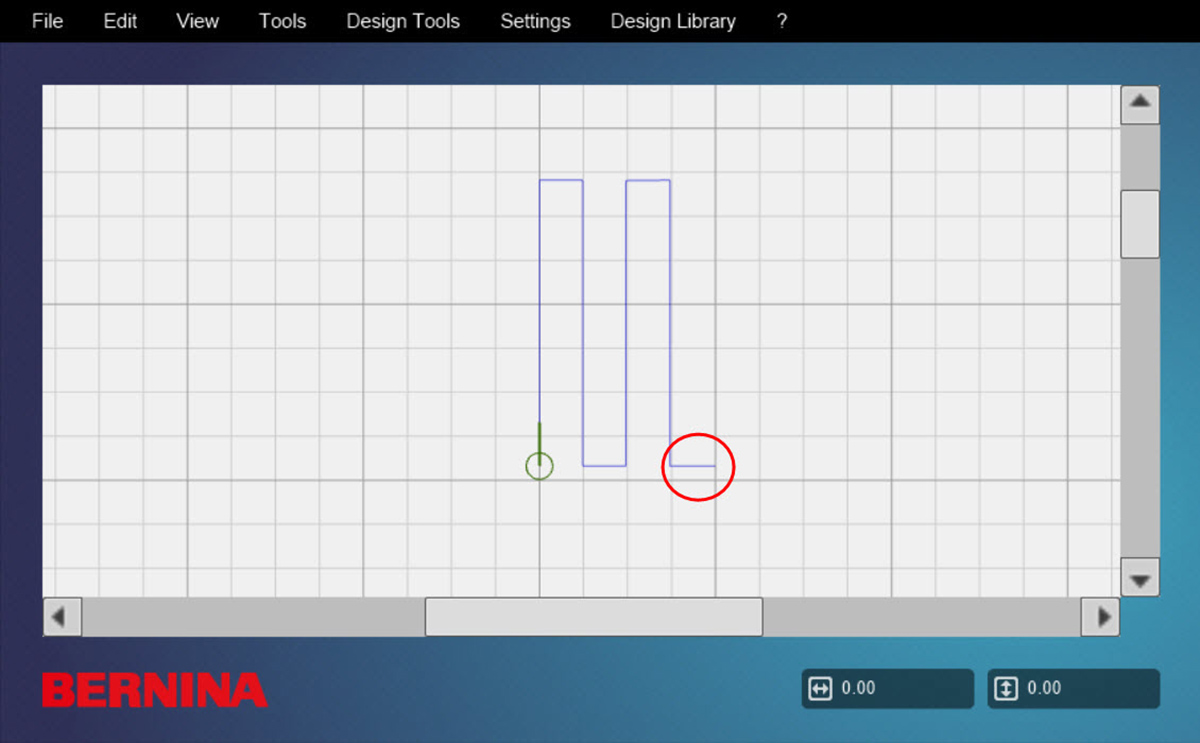
As I placed the design, I used the Sewhead to set a trim line to trim off the excess, horizontally, vertically, and at an angle.
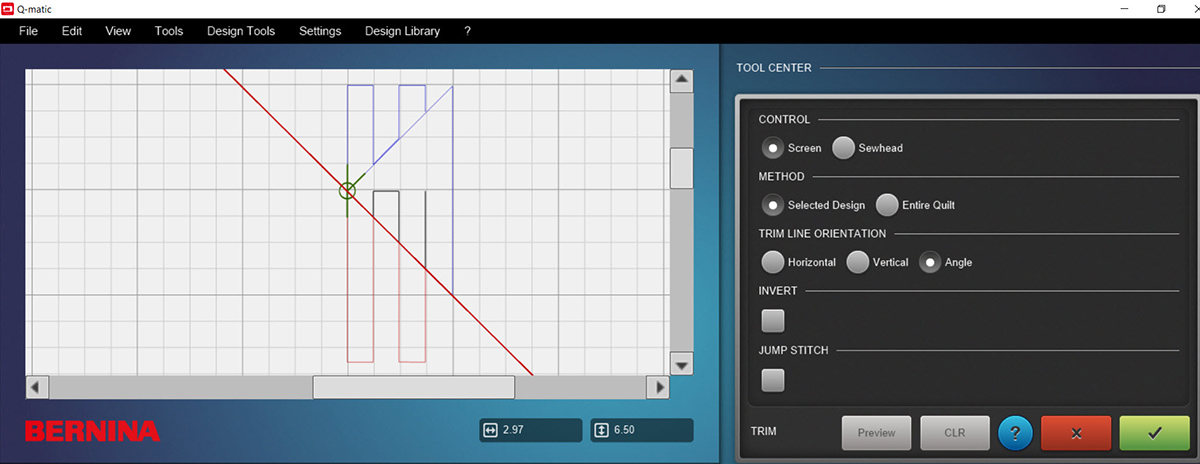
This makes it possible to place the stitching exactly where you want it.

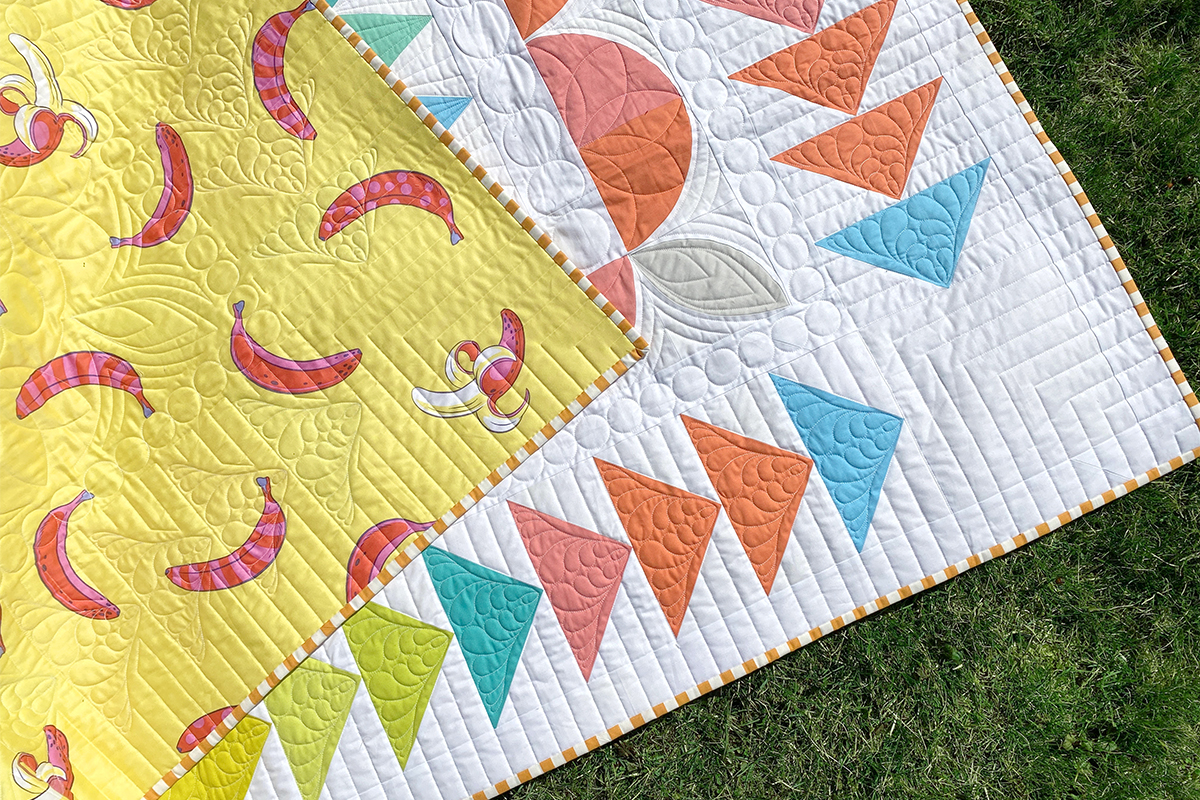
I really liked how the straight lines framed the quilt.
Therefore, I treated the corners like a mitered frame.
And just like that, the quilting was done! As you finish up your Passiflora Quilt and get ready to quilt it, I hope there are a few things you can take from this blog post. I think the most important thing is to just get started. Don’t let indecision cripple you. Start with a small partial plan or a complete big plan—just start. Take the elements you like from my quilting and add your own designs. The rulers you own may force you to create different designs. The machine you own and how well you can manipulate the quilt may change the designs. But that is okay, your quilt will be uniquely yours.
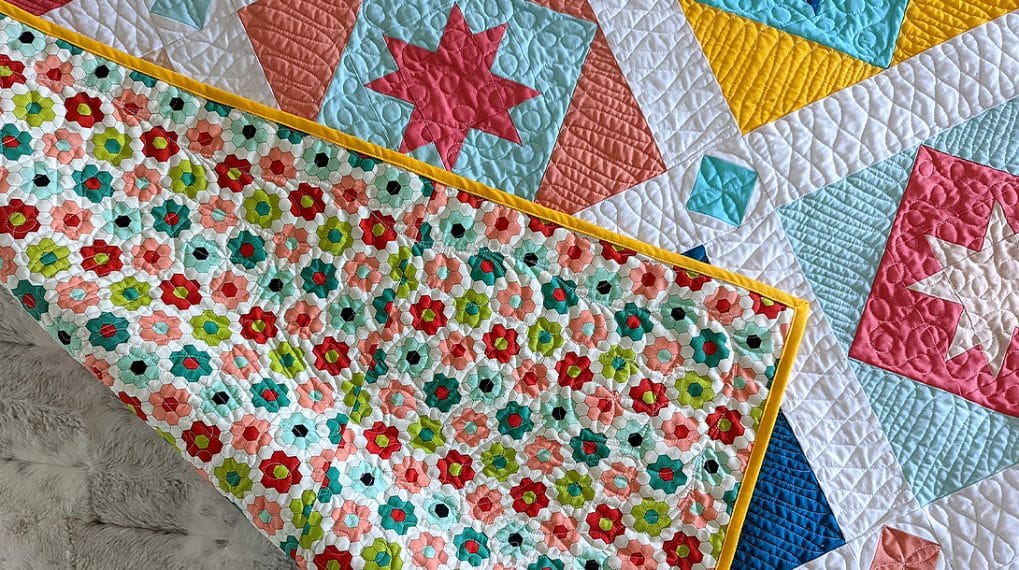
Then I boxed up the quilt and shipped it to Hayley for binding! The quilt turned out beautifully!
Passiflora Quilt Along
Used Products


What you might also like


One comment on “Passiflora Quilt Along, Part 7: Quilting”
Leave a Reply
You must be logged in to post a comment.

This is beautiful.