Quilting Green
Long before anyone ever had the idea of going “Green” to save our natural resources, women on the American frontier were repurposing fabrics. They created new bed coverings out of fabric they had on hand. Often times they used materials from well-loved clothes in creating the intricate patterns of their hand-stitched quilts. Over time their creativity became recognized as an art form in its own right, and quilts leaped from the bed to the wall.
The quilting tradition has become so popular that today there are stores dedicated to providing bolts upon bolts of new fabric for quilters who will buy anywhere from a “fat-quarter” to several yards of a special fabric to be used for new quilts.
Recently, I was challenged to make a “Green” artwork for an exhibit in an art gallery where the pieces were created from “recycled” materials. The sculptors used scrap metal and other found objects to create pieces. One artist painted on cereal boxes instead of new canvas.
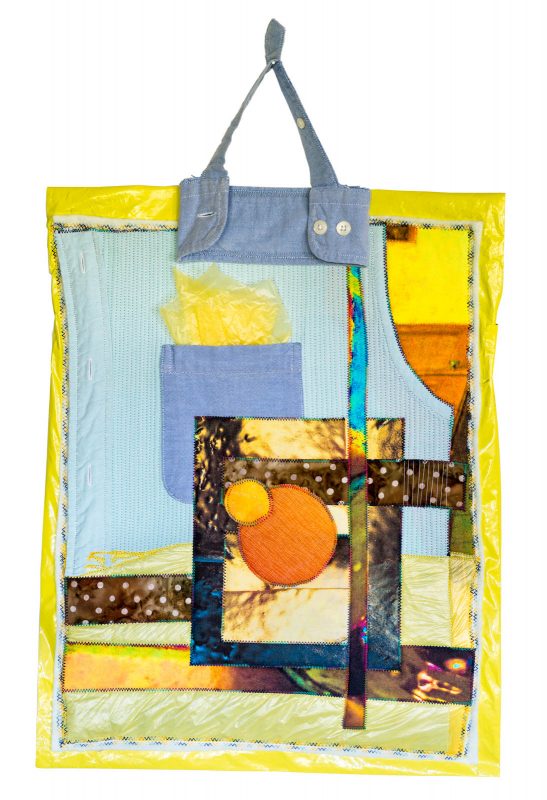
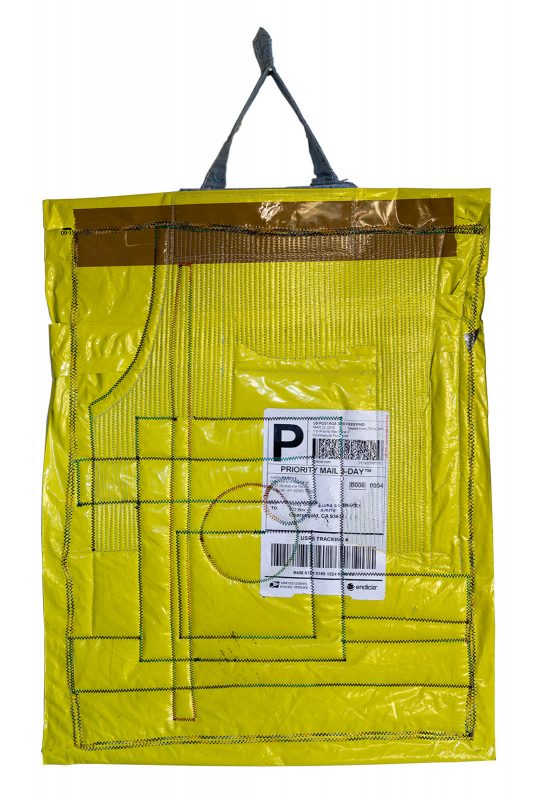
My art quilt “Off the Cuff” was stitched together with pieces from an old dress shirt and scraps of fabrics from my wife’s stash. The batting was Quilters Dream Green, earth-friendly, soft polyester batting made 100-percent from recycled plastic bottles. The backing was the plastic bag that the batting was shipped in, complete with the cancelled postage label. My BERNINA 770 QE easily stitched through all of these recycled materials.
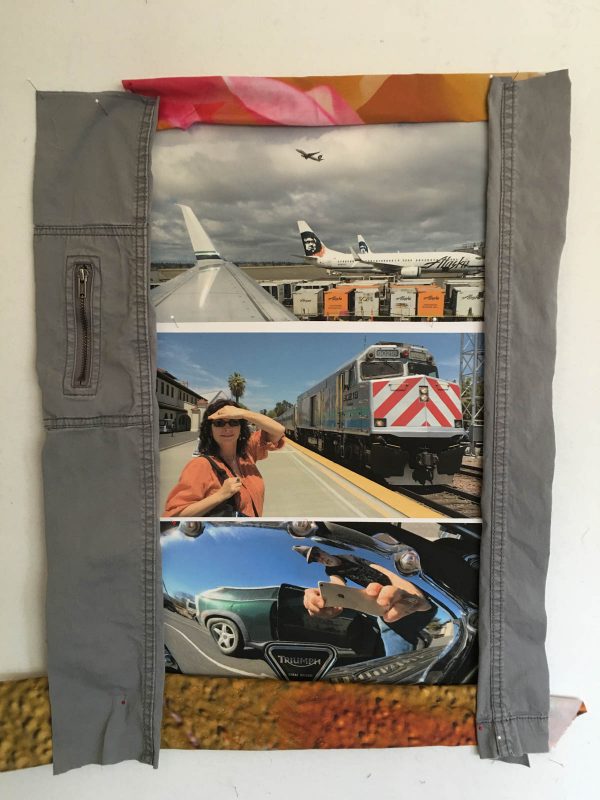
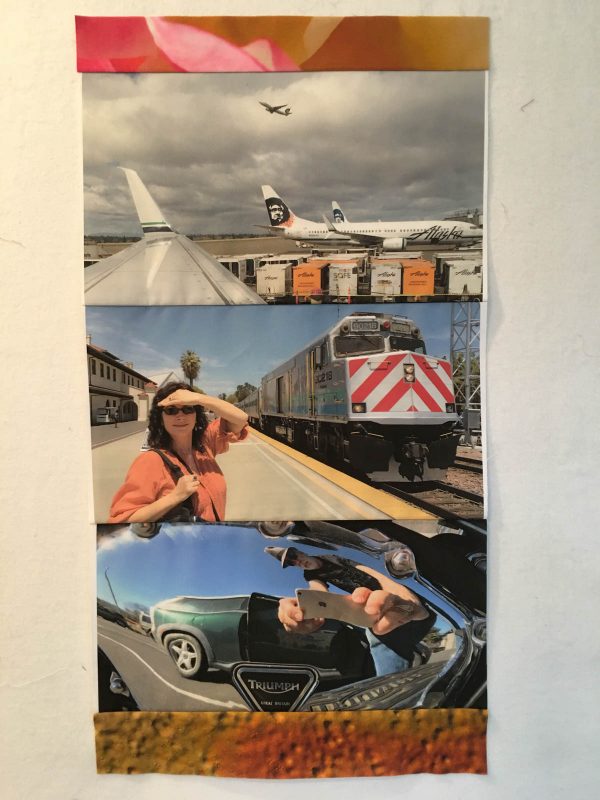
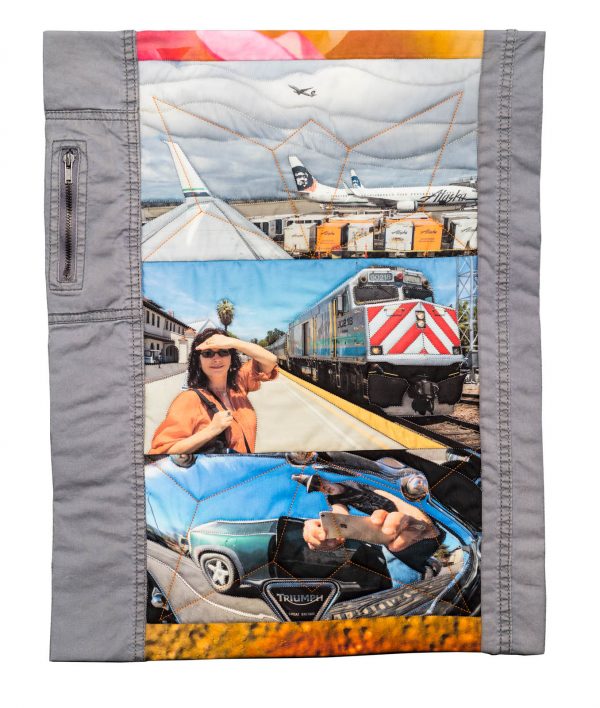
The next challenge I decided to participate at the art gallery was “Planes, Trains and Automobiles.” There was no “reduce, reuse, recycle” requirement. But I decided to continue my “green quilting” and take you along on the creation of “Leggin’ It.” It took First Place in the art exhibit, “Planes, Trains and Automobiles” at the Chris Sorensen Studio Gallery in Fresno, California.
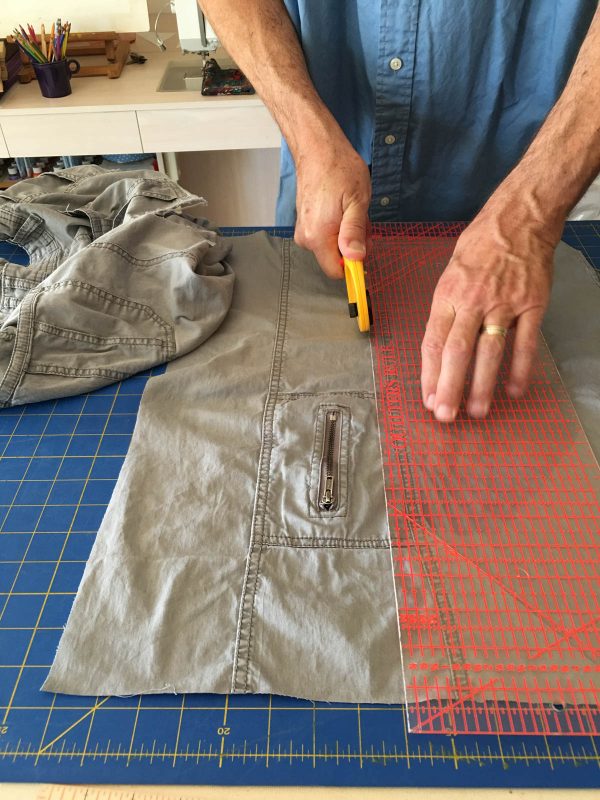
It was inspired by an old torn pair of travel pants that my wife had thrown out. I fished them out of the trash and cut off one of the legs.
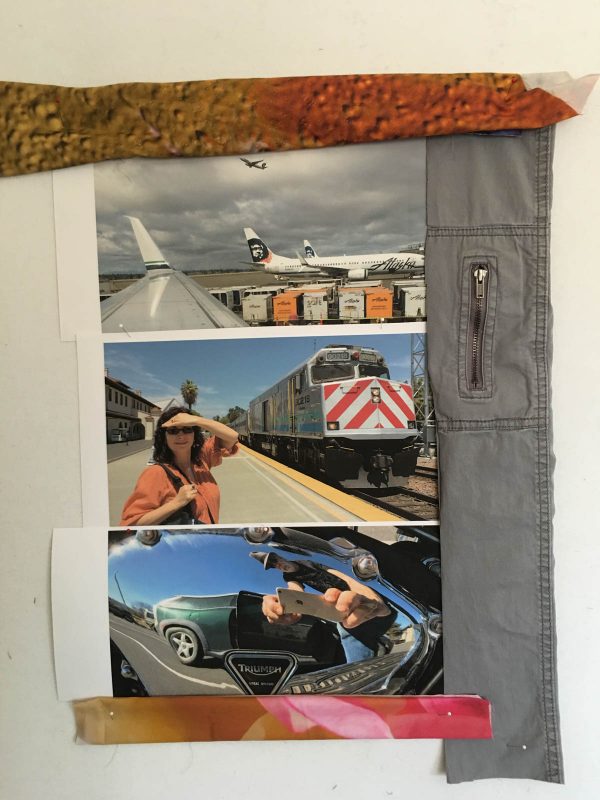
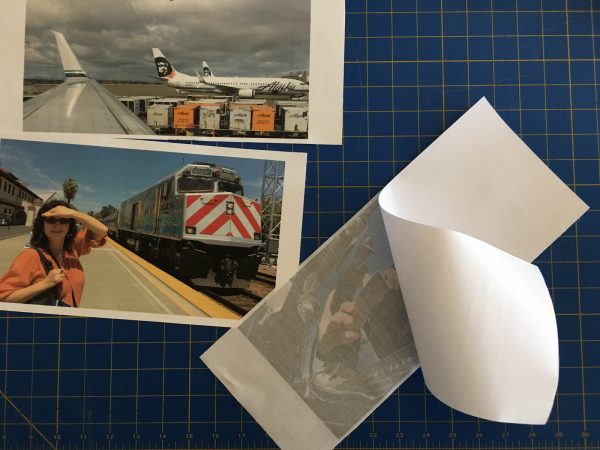
Next I had a remnant of Threads – inkjet printable cotton poplin off the end of a roll. It yielded three strips of fabric 12 inches by 7 inches wide. On those three strips I printed three images from my iPhone 6S. One each of planes, a train and the reflection of an automobile in the chrome gas tank of a motorcycle.
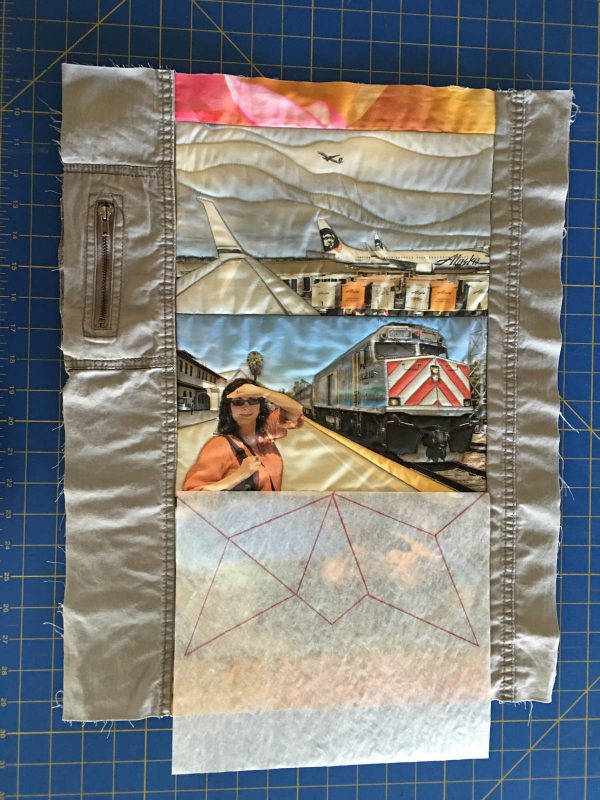
The three digital images would be pieced together to form a triptych for the center of my art quilt. I placed them on the design wall and “auditioned” the strips of gray leg material from the pants. I decided that I would place the piece with the zipper in it on the left and the other piece on the right.
For the top and bottom borders, digging through scraps of digital fabric from other projects I found two pieces that would let the eye bounce off the oranges in the triptych.
Once I had determined what I wanted the top to look like, I removed the paper backing from the fabric images.
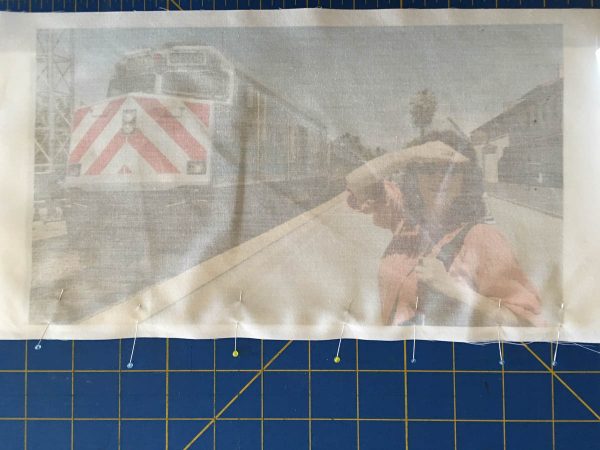
The first two pieces were pinned face-to-face. I was careful to align image parts of the fabric together so I could see the white borders of the fabric.
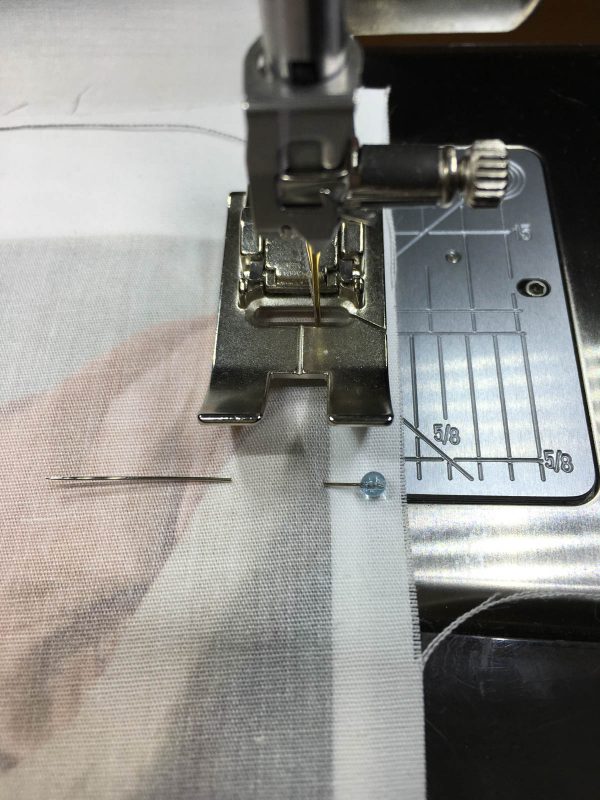
I wanted to stitch as close to the images as possible so that when they were opened up I would not lose much of the picture. I also did not want any white border showing between the images.
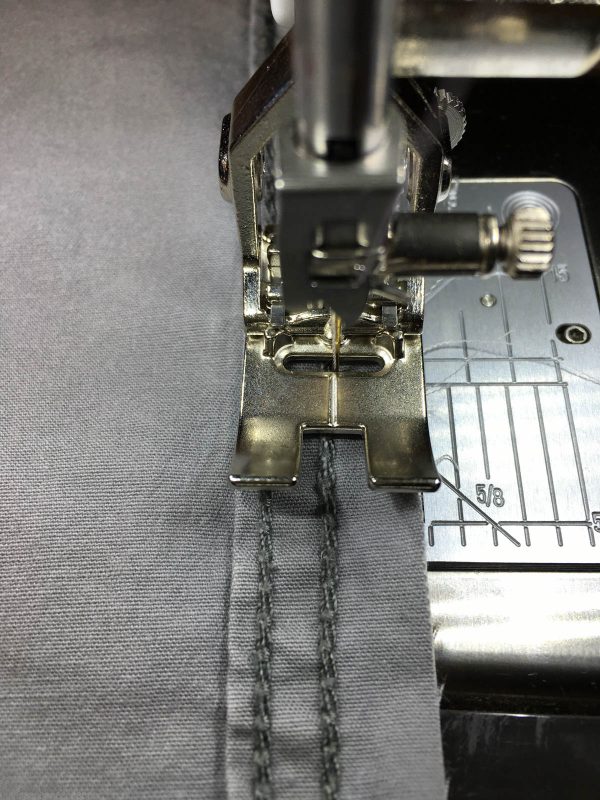
Using the 1C presser foot on my B 770 QE I used the inside of the right leg of the foot as a guide.
Because the BERNINA Reverse pattern foot #1C is a zig-zag foot I could offset my needle position to stitch as close to the image edge as possible without going into the white border. I offset the needle to the right two positions.
I repeated this procedure with the middle and top images of triptych fabric. Next I repeated this to put the top and bottom borders on my triptych.
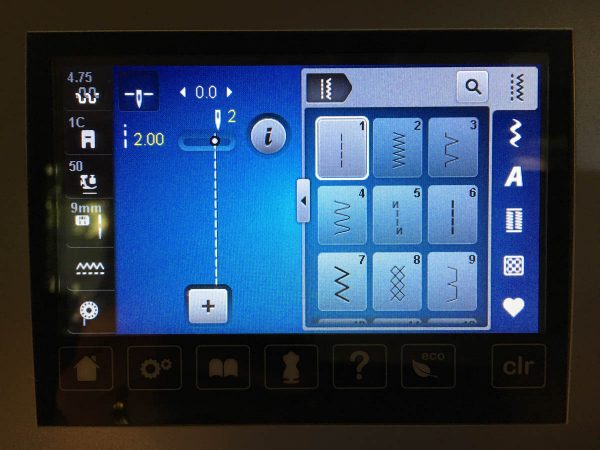
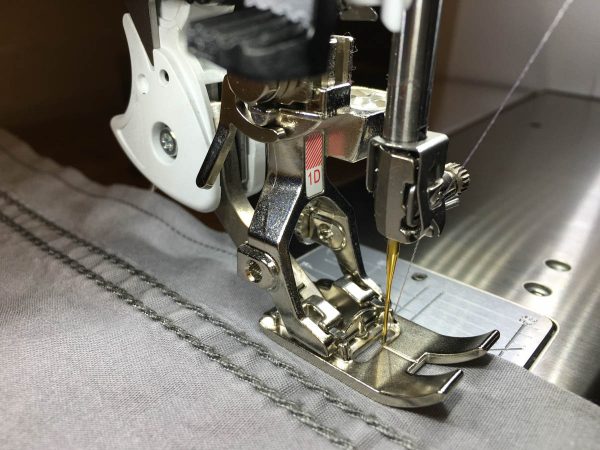
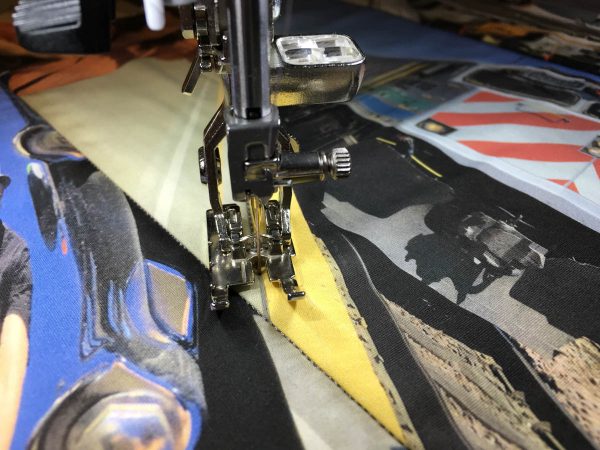
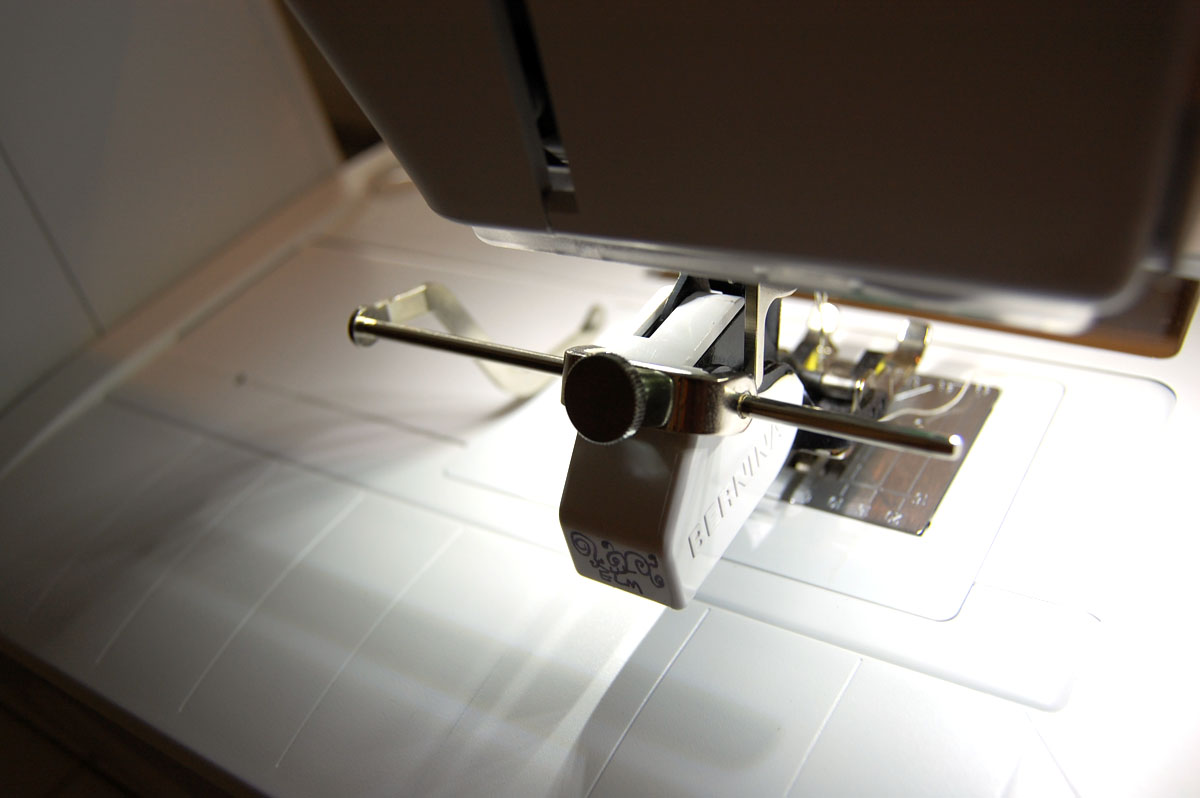
Next, I needed to add the left and right borders of the pants material. This was a cotton-Spandex blend, and it was more slippery than the cotton poplin fabric that I was going to sew it to. Because of this I switched to a BERNINA Reversed pattern foot #1D and engaged the Dual Feed on the B 770 QE.
Because I had trimmed the edges of the center to a quarter-inch I did not need to offset my needle when I stitched on the side borders.
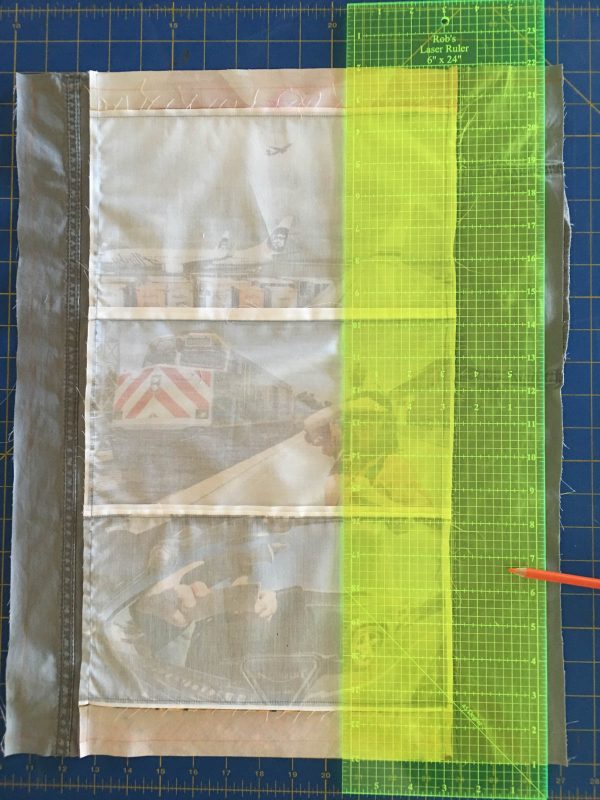
With the top pieced together, I squared it up. Because I planned to turn the edges of the top to finish the quilt instead of using a binding, I turned the top over. I carefully drew a rectangle on the back that would show the amount of material that I would be turning under. It is important to note here that I used a colored pencil to draw the rectangle. Graphite pencil lead will smear on fabric and ink pens can bleed through the material.
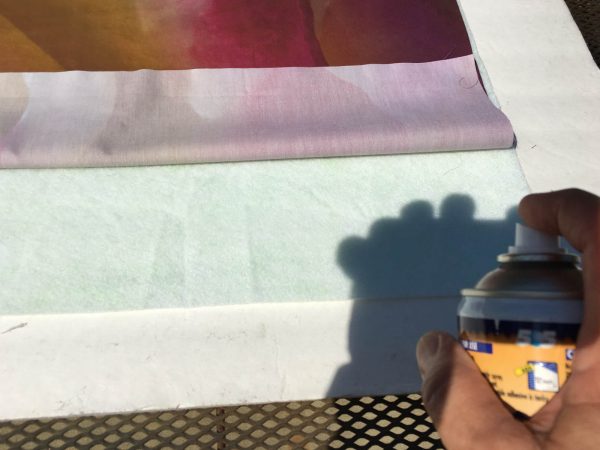
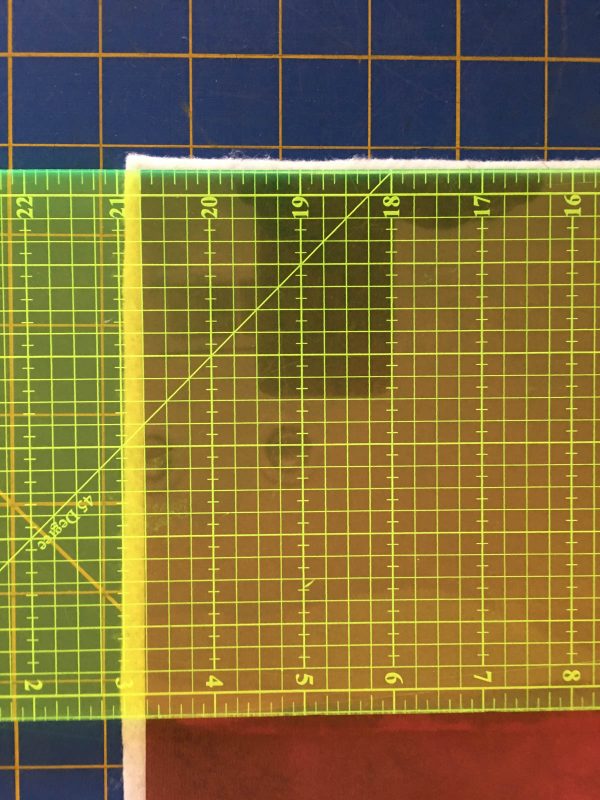
Next I measured the size of the rectangle and cut a piece of scrap digital fabric to the size of the rectangle. I then cut my green batting one inch larger. This gave me a half-inch border around the backing. I placed the backing on the bat and rolled it back. Working outside with plenty of fresh air, I sprayed the green bat with 505 spray temporary adhesive. I carefully aligned the backing with the bat, turned it around rolled back the other end of the backing and sprayed the rest of the bat.
Once I had the backing basted to the green bat, I trimmed the edges of the bat away.
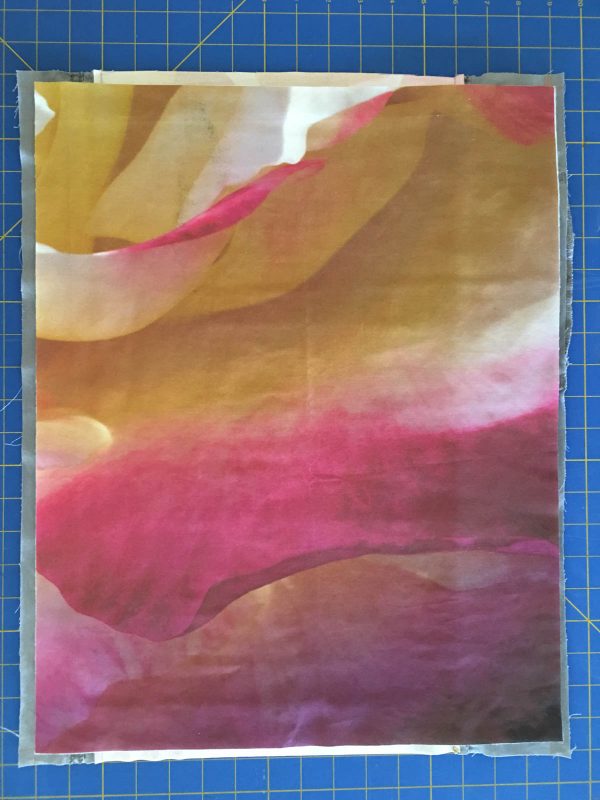
Next, I flipped over the sandwich of the green bat and backing. I sprayed the green bat side with 505 and then carefully placed the bat and backing inside the rectangle I had drawn on the back of my top.
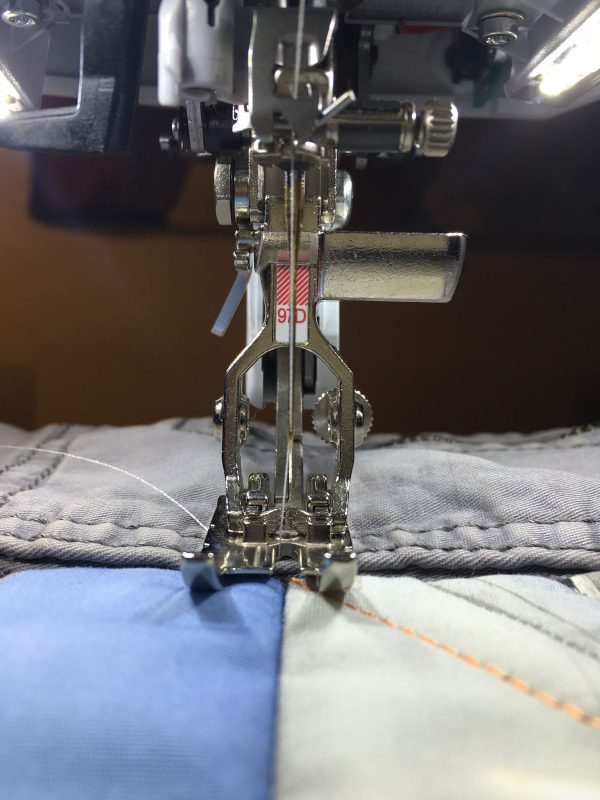
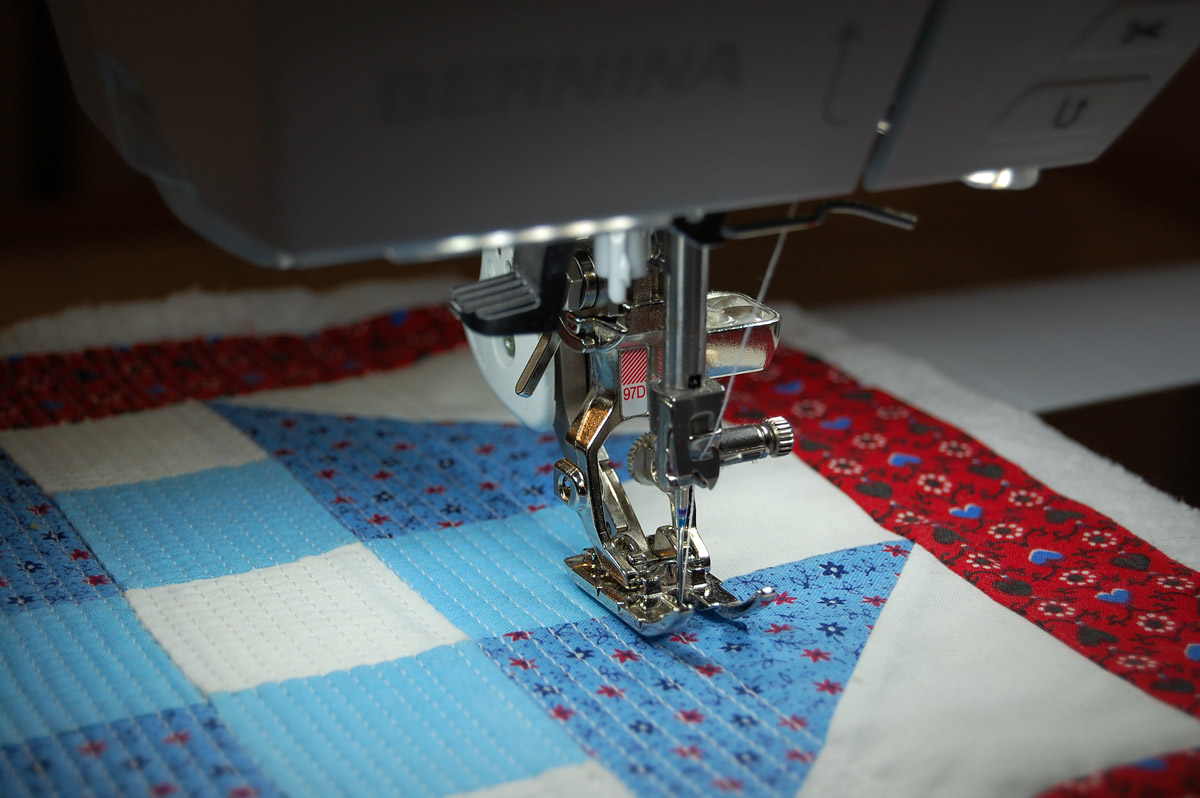
Using the BERNINA Patchwork foot 97 D on my B 770 QE, I stitched in the ditch between the bottom of the center image of the train and the top of the bottom image of the automobile. Since this was a small wall quilt (the finished size would be 15 inches by 24 inches.) I did not feel that I needed to pin baste the sandwich. Stitching in the ditch allowed me to run a stabilizing line of thread through my quilt sandwich.
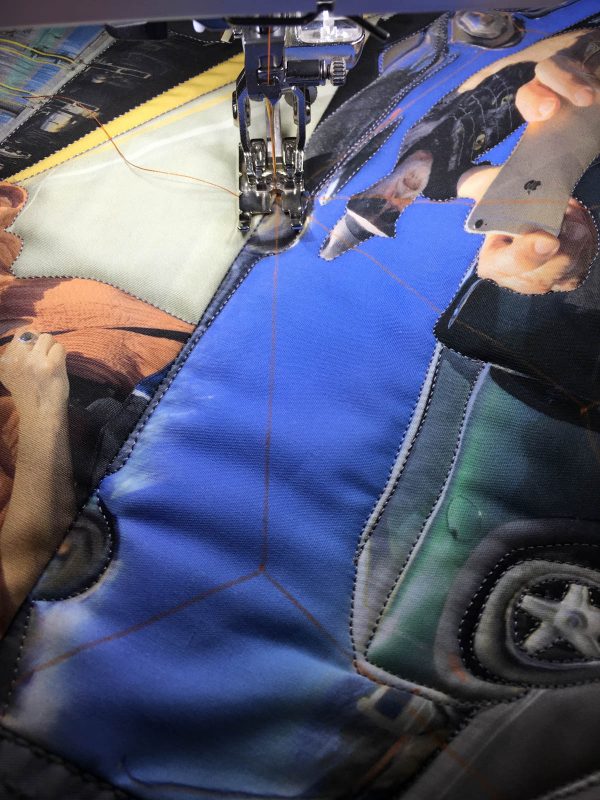
Then I began to stitch the lines in my images working from the center outwards. It is important here to mention that you should engage the dual feed feature on your BERNINA to keep the top layer of the sandwich from slipping as you stitch. The polyester bat does not adhere to the cotton top and bottom as much as a cotton bat would. If you forget to engage the dual feed, the top can slip and cause problems with puckering of the fabric. I know, because I forgot to engage it for a line of stitching and had to rip it out and resew it with the dual feed engaged.
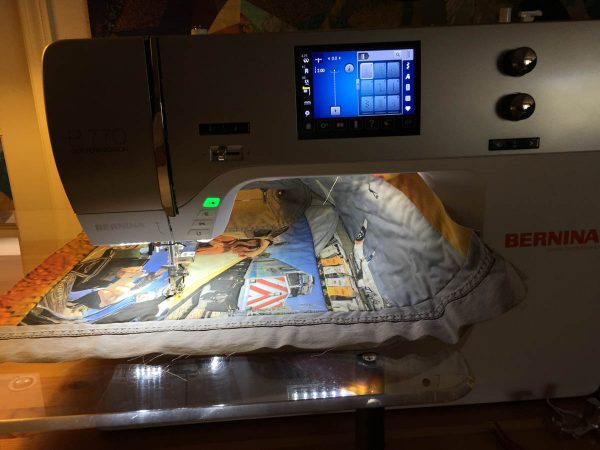
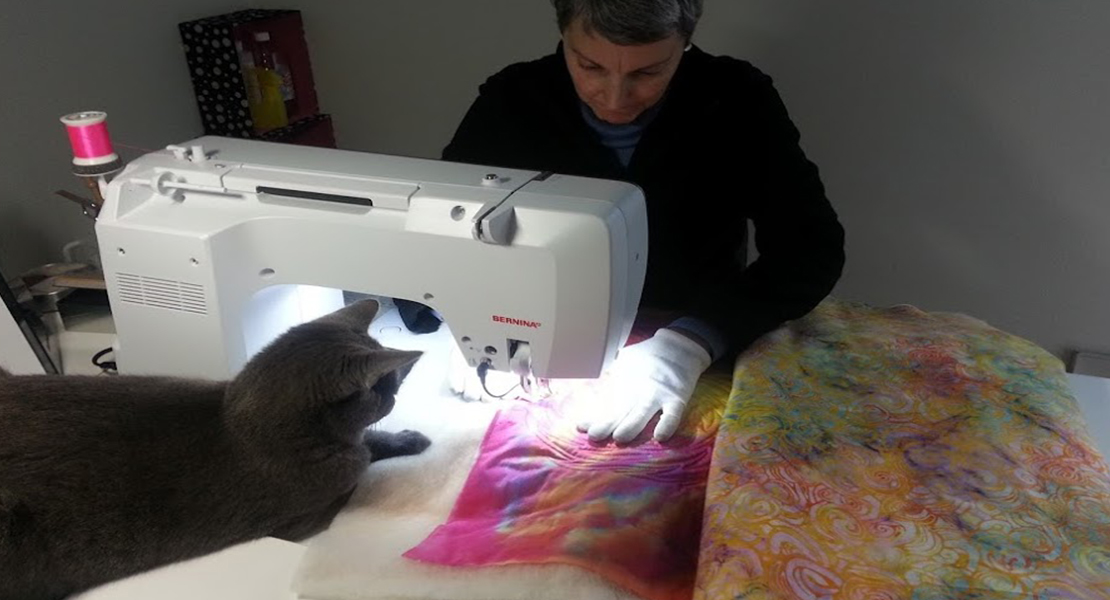
The large throat of the BERNINA 770 QE makes it very easy to move the quilt around as you quilt it.
While my art quilts are not traditional in any sense of the word, I often like to incorporate an element in them that reflects their heritage. Many times I will take a traditional pieced quilt block design and stitch a bit of that pattern into the final piece. In this case I chose a block named “Travel Star” as the basis for my stitching pattern over the top and bottom images of my triptych.
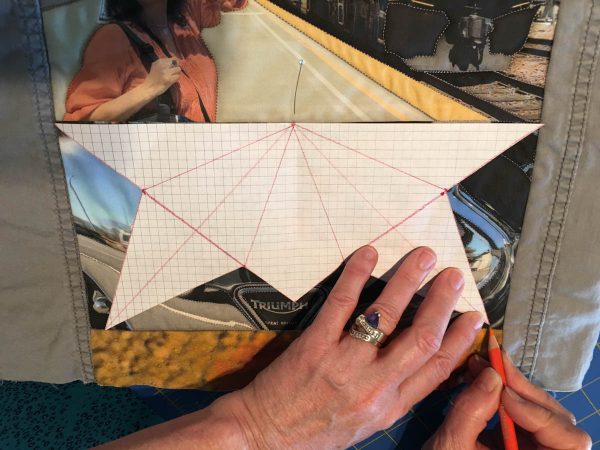
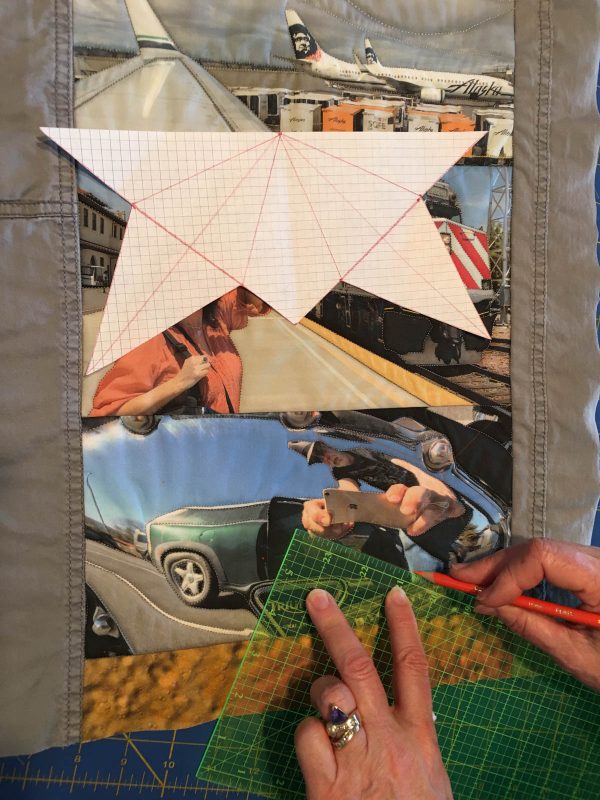
I split the pattern in half and using graph paper, I distorted the block design to fit over the images. To check the pattern I used tracing paper to go over the design. Then I laid the tracing paper over the image to see if I had it the right size. I did not get it right the first time, so I made adjustments to my stitching pattern until it was the correct size.
Once I was happy with the traced stitching pattern I went back to the pattern on the graph paper and cut it out for a template. I used the template to locate the points on my quilt top. Again, I am using a colored pencil that is the same color as my thread to mark the points.
Once the points of the template have been marked I carefully connect the points using my colored pencil and a straight edge.
This leaves a light colored line over my image that will be my stitching guide. Again, remember to engage your dual feed arm when you stitch the lines. Once the lines have been stitched you are ready to finish the quilt.
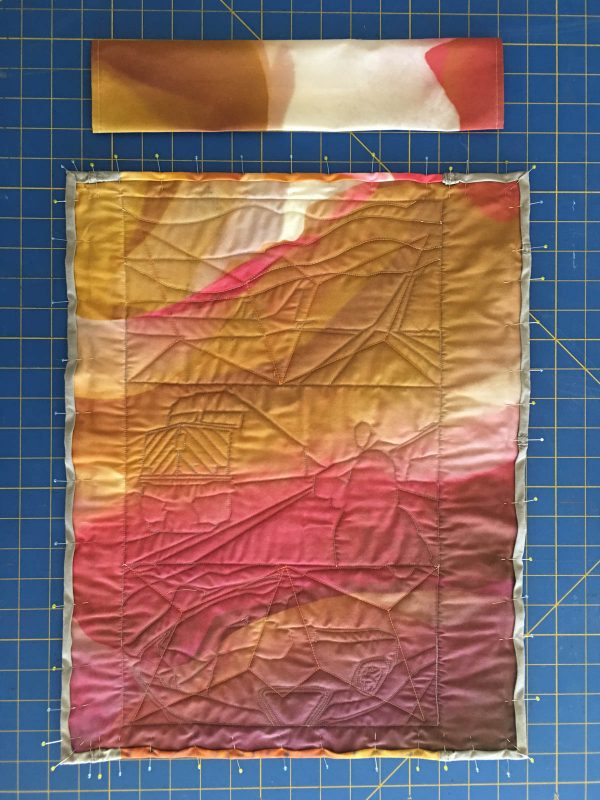
Turn the edges of the top around to the back and pin them. Your final steps will be to hand stitch the turned edge and attach your sleeve for hanging the quilt.
What you might also like
2 comments on “Quilting Green”
-
-
These are both great designs and ideas. Thanks for sharing them.
Leave a Reply
You must be logged in to post a comment.



That was an insane amount of creativity and ambition. Your project details allow us to appreciate it all the more. Congratulations!