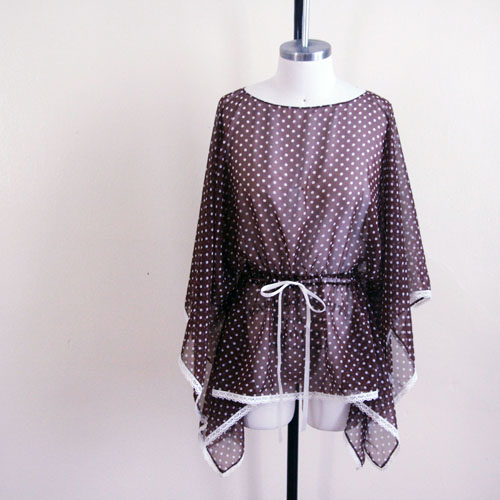
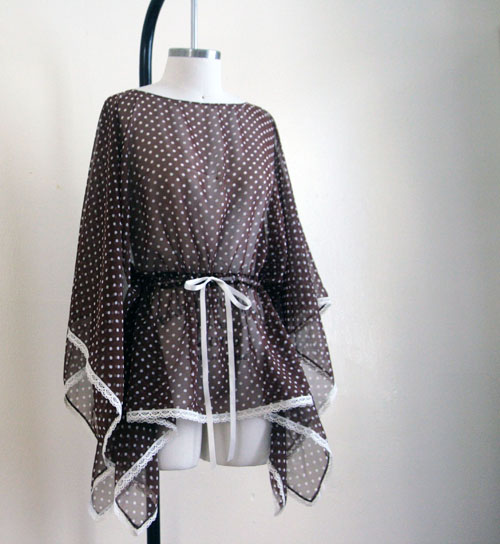
How to Make a Sheer Summer Top
Light and flowing like a summer breeze, this sheer top adds a touch of cool elegance when the weather gets hot. Casual enough for beachwear, yet stylish enough for an evening on the town, it’s an easy pick for a beautiful summer day.
Supplies
- 2-5/8 yards of sheer fabric
- 8 yards of lace trim, 1/2″ to 3/4″ wide
- 2-1/2 yards of 1/4″-wide double-sided satin ribbon
- OESD LightWeight Tear-Away stabilizer
- Construction thread
- Temporary fabric marker
- Scissors
- Ruler
- Edgestitch foot (BERNINA Edgestitch Foot #10/10C/10D)
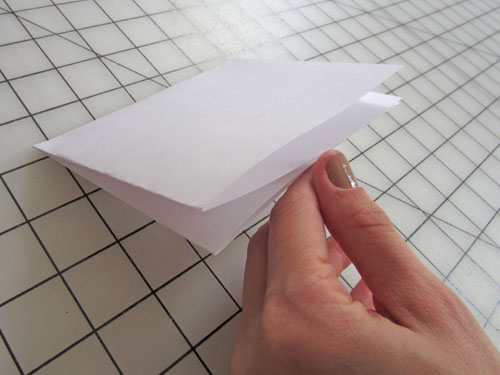
Step 1) Create the neck opening pattern.
Measure your natural neckline from your center front to your shoulder and determine how wide you want the neck opening to be.

Make your neck opening pattern:
- Fold a piece of paper in half twice as shown.
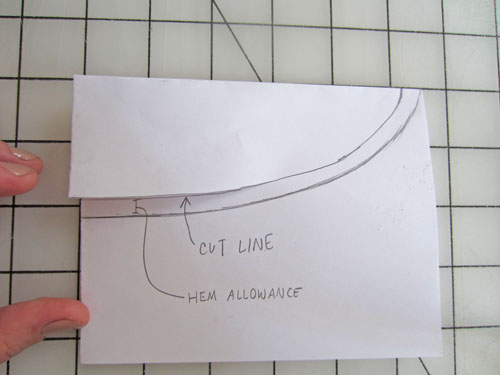
- Make the pattern as wide as determined above.
- Make the pattern 1-1/2″ deep at the center front, tapering to a soft corner at the opposite side.
- Add a 1/4″-wide seam allowance inside the drawn line.
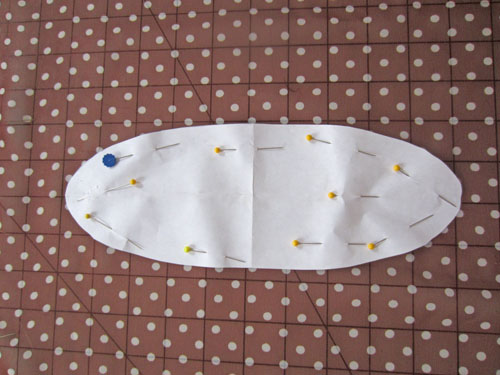
Cut out your neck opening pattern piece.

Step 2) Cut the fabric and finish the neckline.
Cut a rectangle of sheer fabric 92″ long and 50″ wide.
Center the neck opening pattern piece on the fabric, parallel to the short (50″-long) ends.
Cut out the neck opening using the pattern as a guide.
Sew along the neckline using a 1/4″-wide seam allowance.
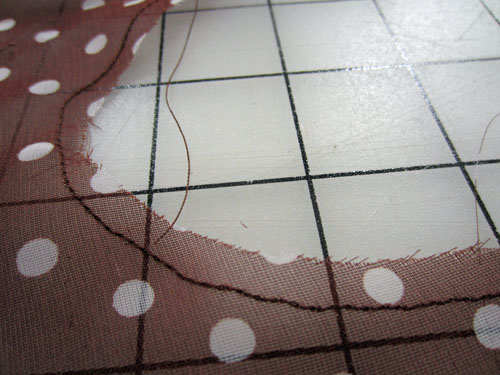
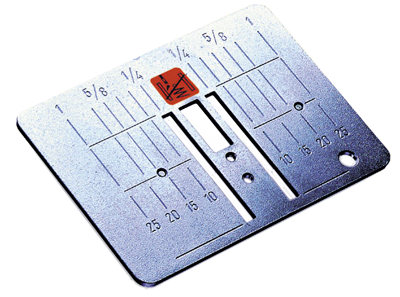
Tip: Does sewing on sheer fabric make you nervous? Try installing a single-needle-hole throat plate (a.k.a. straight stitch plate) on your machine. The tiny needle opening helps prevent the fabric from being pushed under the stitch plate as you sew.
Turn the raw edge under along the stitching line; press.
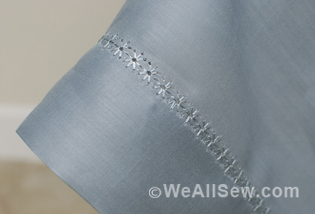
Edgestitch close to the fold to secure the edge in place.
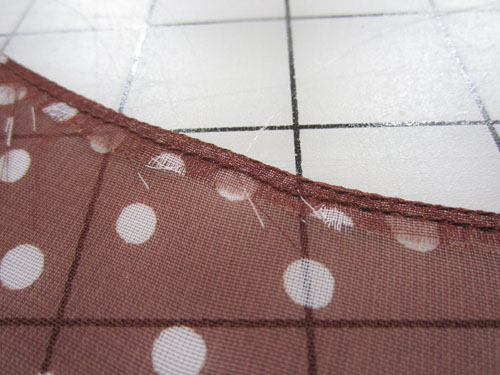
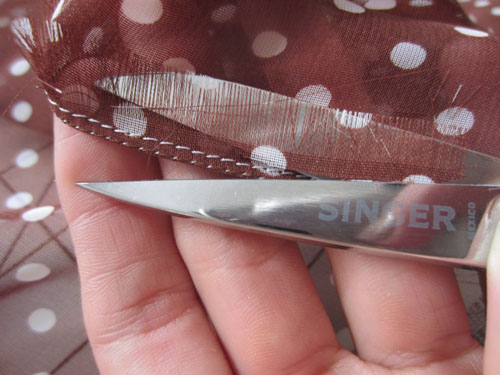
Trim away the raw edge close to the stitching.
Turn the edge under along the stitching; press.
Edgestitch close to the inner fold to secure the edge of the hem in place.
Step 3) Add the buttonholes and casing.
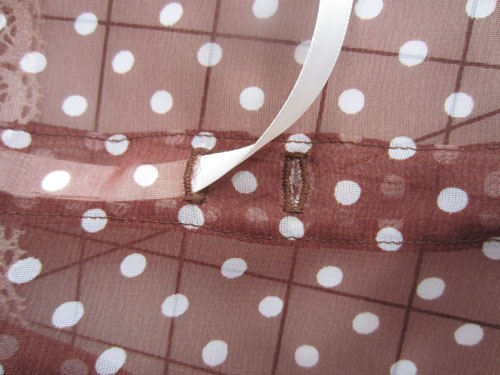
Draw two 1/2″-wide vertical buttonholes 10″ from one 50″-wide edge of the rectangle. (This will be the top’s front.) Space them about 1″ apart.
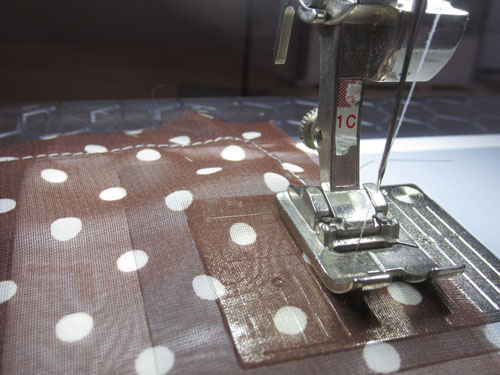
Cut a piece of tear-away stabilizer and place it behind the marked buttonholes on the fabric’s wrong side.
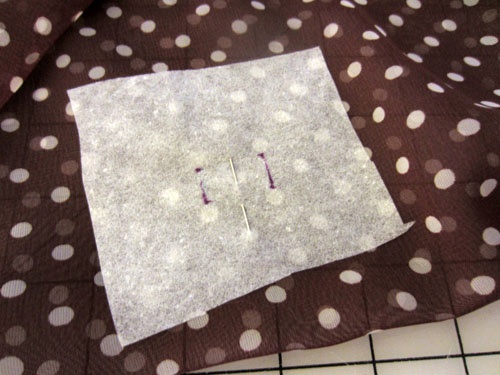
Stitch buttonholes along the marked lines. (For instructions, see your sewing machine manual.)
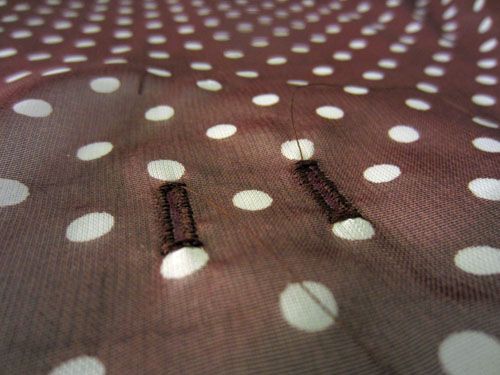
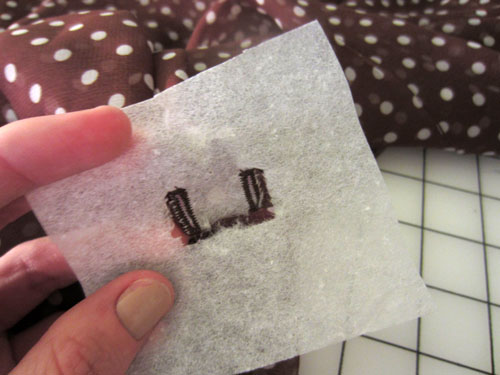
Gently tear away the stabilizer from the wrong side of the buttonholes. Be careful not to rip the fabric.
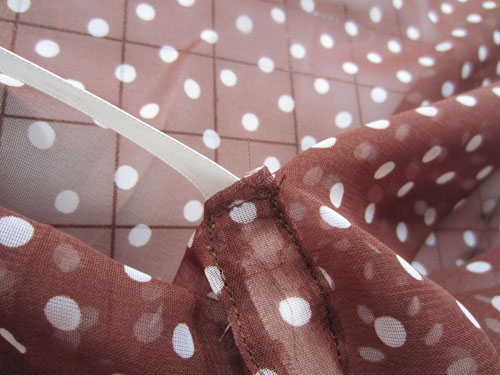
Cut two 23″-long and 2″-wide strips of fabric.
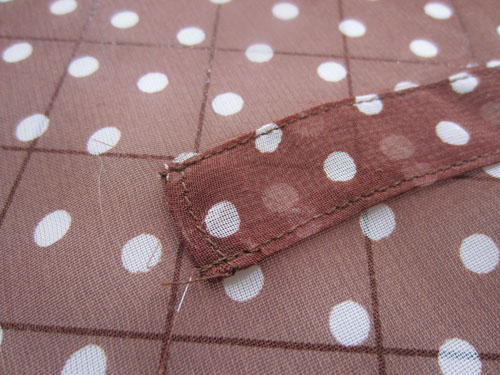
Turn each short end under 1/4″ two times; stitch to secure.
Turn both long edges of one strip under 1/2″.
Center this strip over the buttonholes with the long edges parallel to the top’s 50″-long edge. Pin in place.
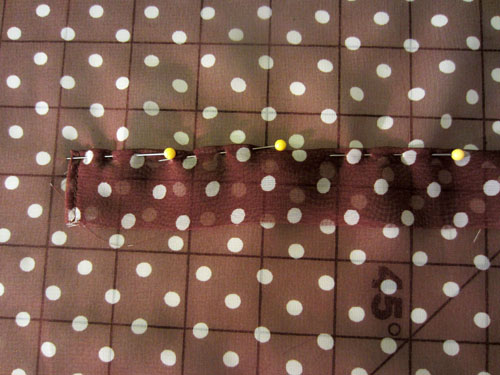
Edgestitch the strip in place along both long edges.
Repeat for the remaining strip, stitching it to the back of the top, 10″ from the opposite 50″-long edge.
Step 4) Hem the edges.
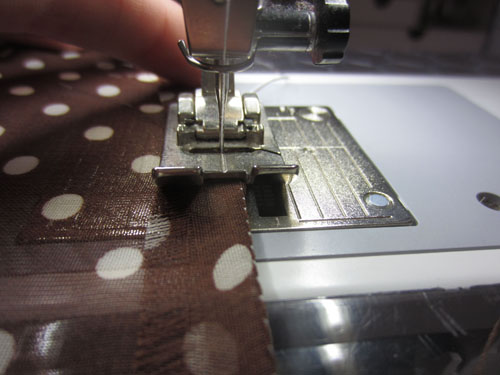
Stitch around the raw edges of the rectangle using a 1/2″-wide seam allowance.
Turn the edges toward the right side; press.
Stitch close to the folded edge.
Trim the raw edge close to the stitching.
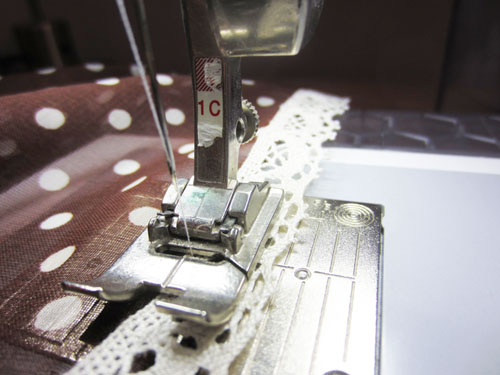
Pin the lace around the edges of the top, on the top’s right side. Make sure the lace hides the fabric’s raw edge.
Edgestitch the lace in place.
Step 5) Insert the ribbon and adjust the fit.
Thread the ribbon through one buttonhole and into the casing on the top’s left side.
Thread the ribbon into the casing on the back of the top.
Thread the ribbon back into the casing on the front of the top, then out through the second buttonhole.
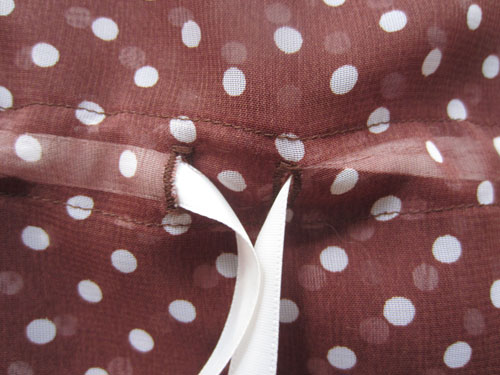
Put on your new top, adjust the ribbon to fit, tie the ends in a box, and then trim away the excess ribbon.


One comment on “How to Make a Sheer Summer Top”