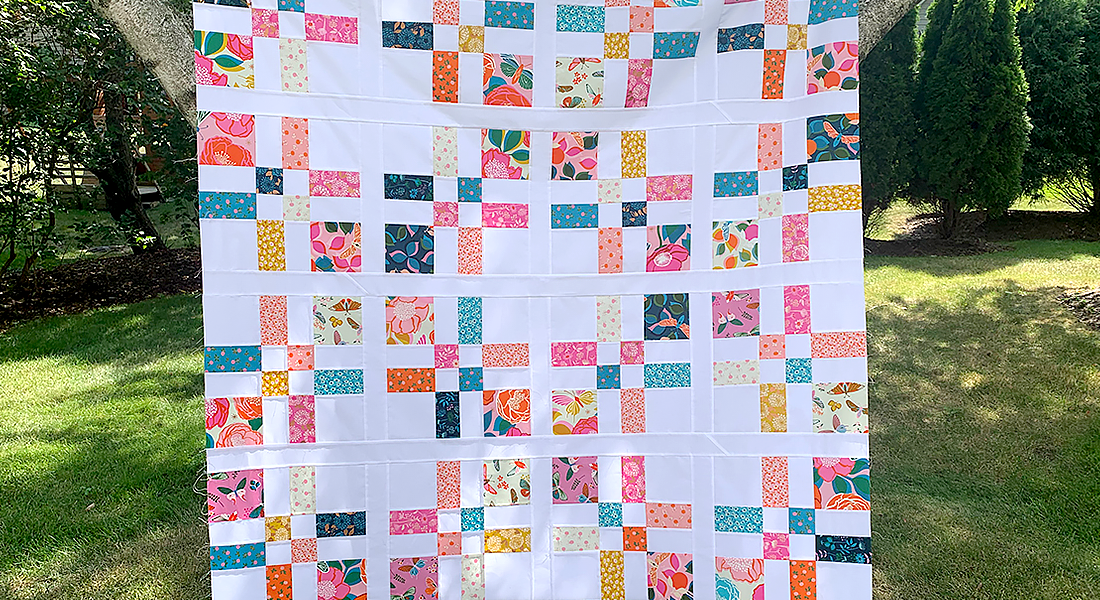
Stay Gold Quilt Along, Part 5: Straight Line Quilting
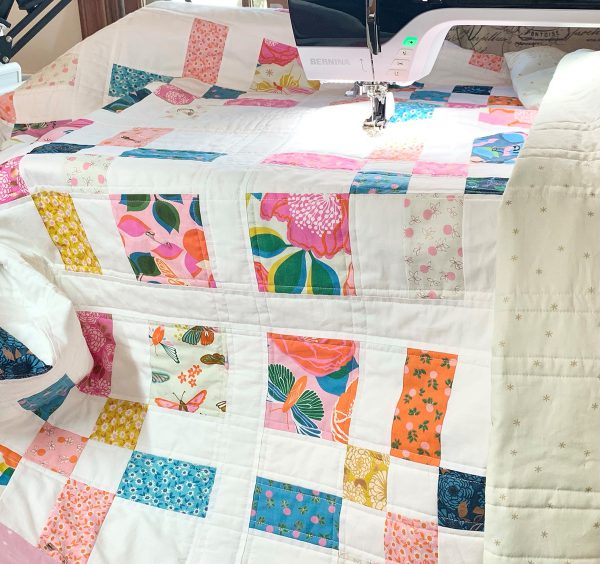
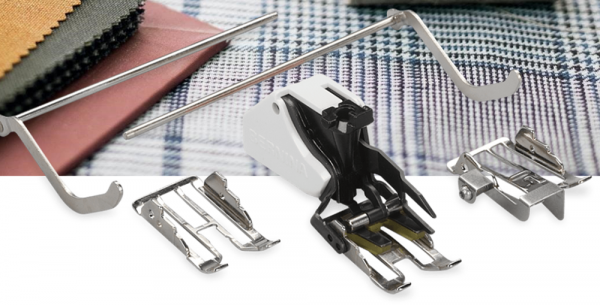
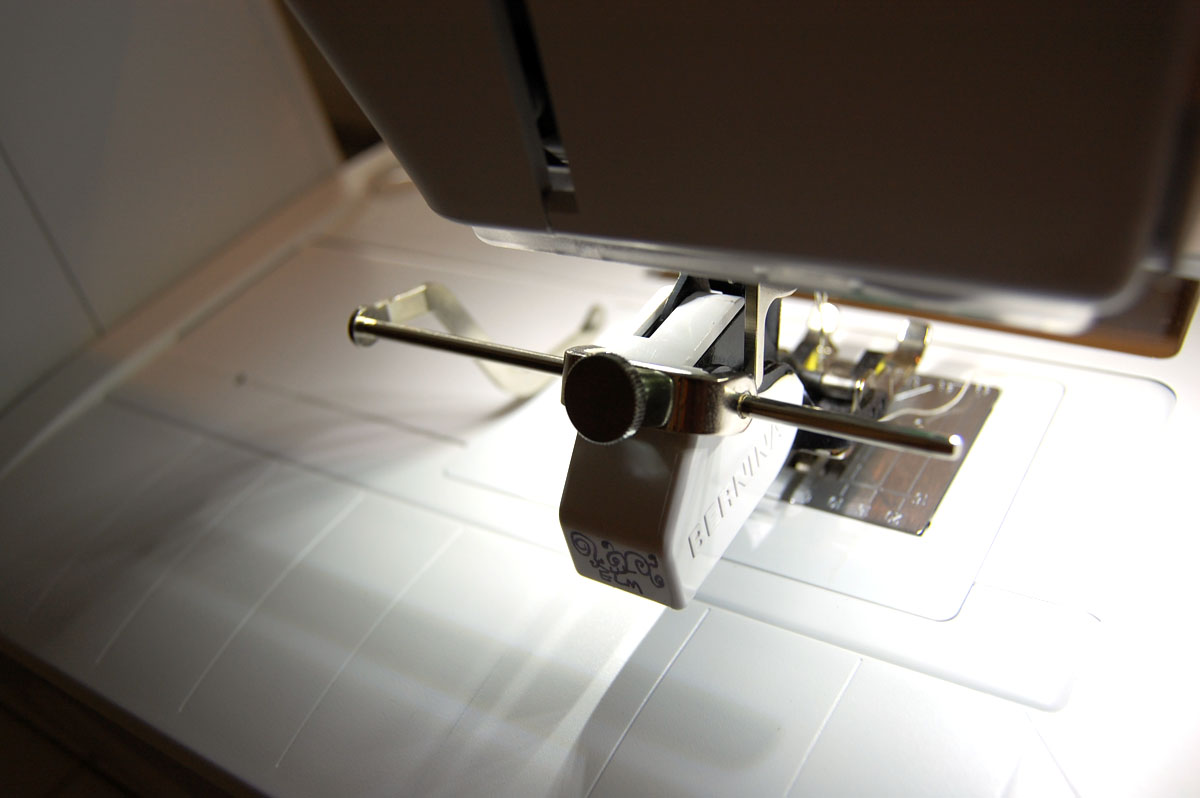
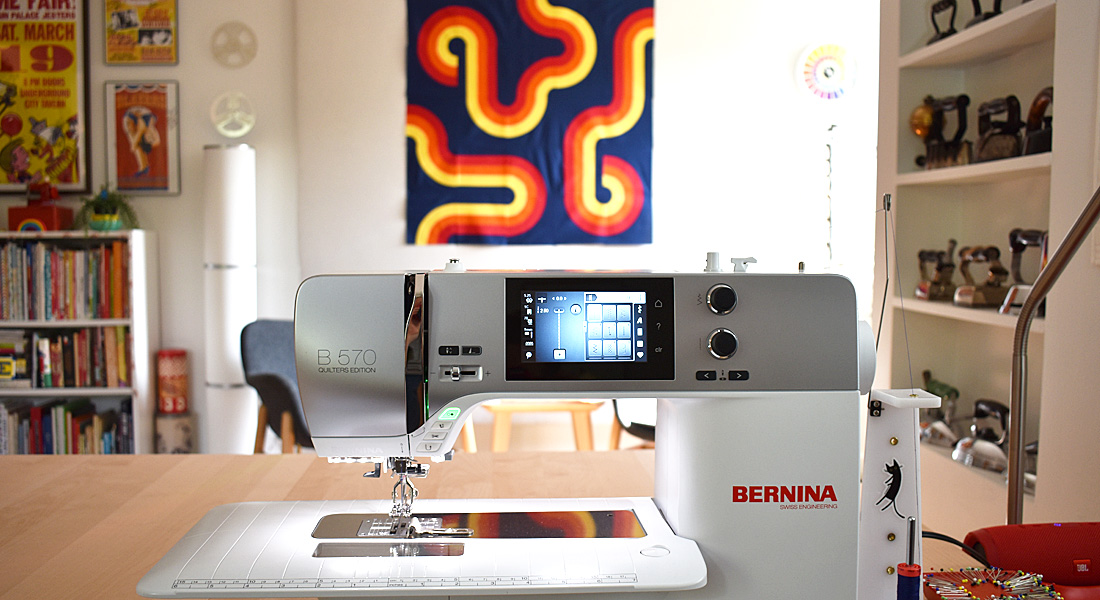
Can you believe it’s already Week 5 of our quilt along? We’ve covered so much these past few weeks and you have a beautiful quilt top to prove it. Congrats to you and welcome to the quilting community! We are a fun and inspiring group of sewists who love to learn new techniques, create with our hands and machines and teach others. Now it’s time to get out the BERNINA Three-Sole Walking Foot with Seam Guide #50 and get ready to explore directional quilting.
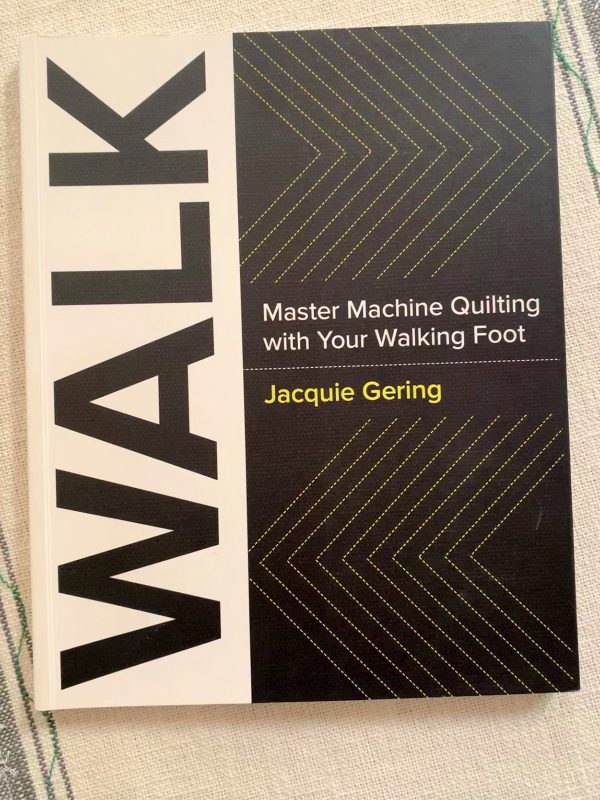
Unlike free motion quilting, directional quilting goes in one direction and creates lines and curves. There are a couple of books I reference to get ideas and inspiration for quilting designs. The first book is “Walk” by Jacquie Gering. Her quilting designs include lines and curves as well as decorative stitches. She uses a dot-to-dot method that makes quilting easy no matter how intricate the design. Her Radiating Diamonds and Curved Ribbon designs are a couple of my favorites.
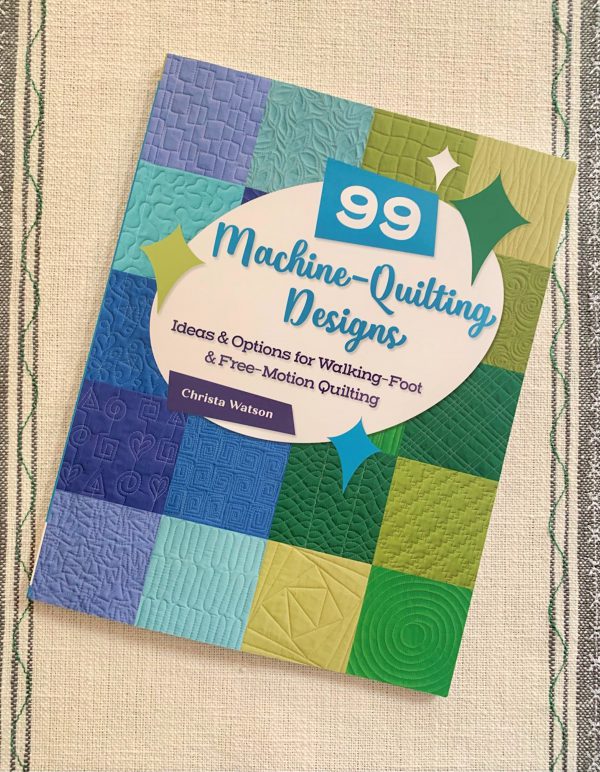
The second book is “99 Machine-Quilting Designs” by Christa Watson. Christa is one of our BERNINA Ambassadors and never disappoints. Her book has directional and free-motion designs. There are enough ideas in this book to keep you quilting for years—per the title, 99!
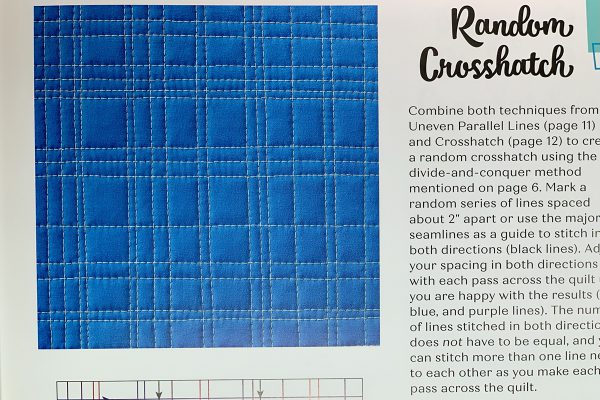
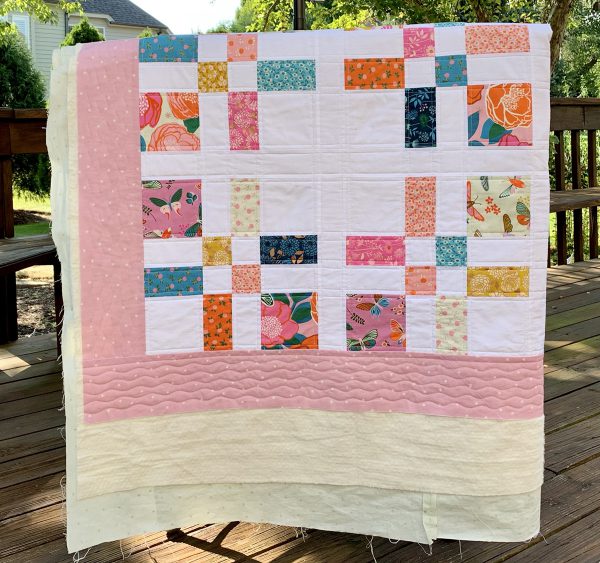
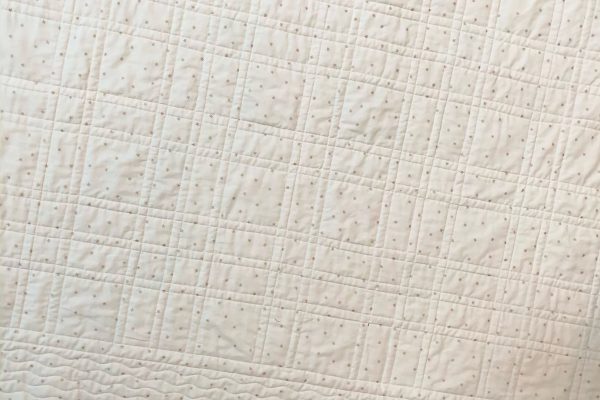
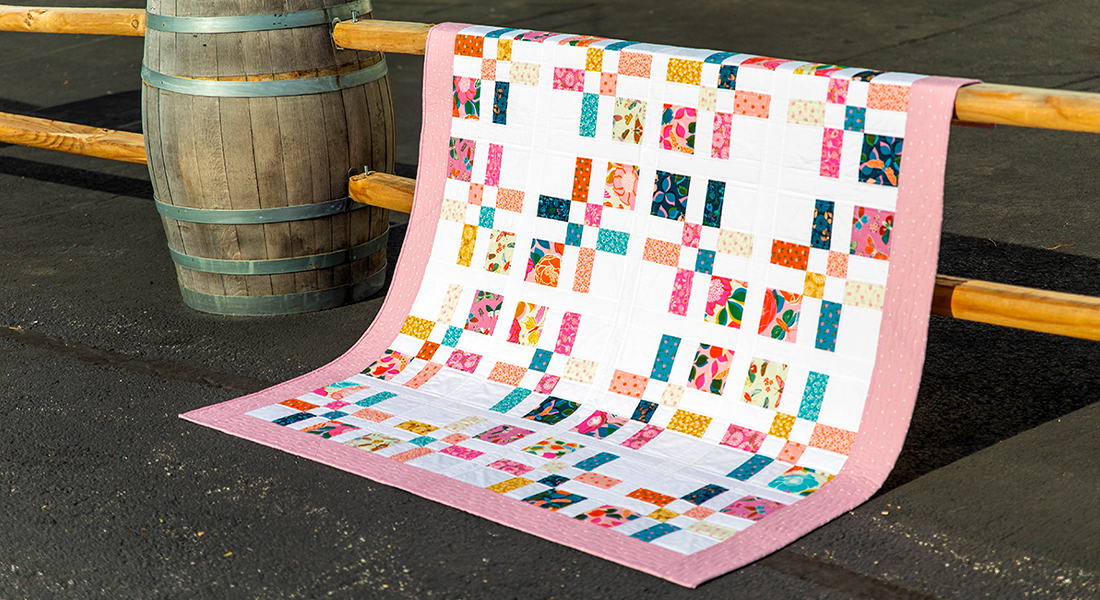
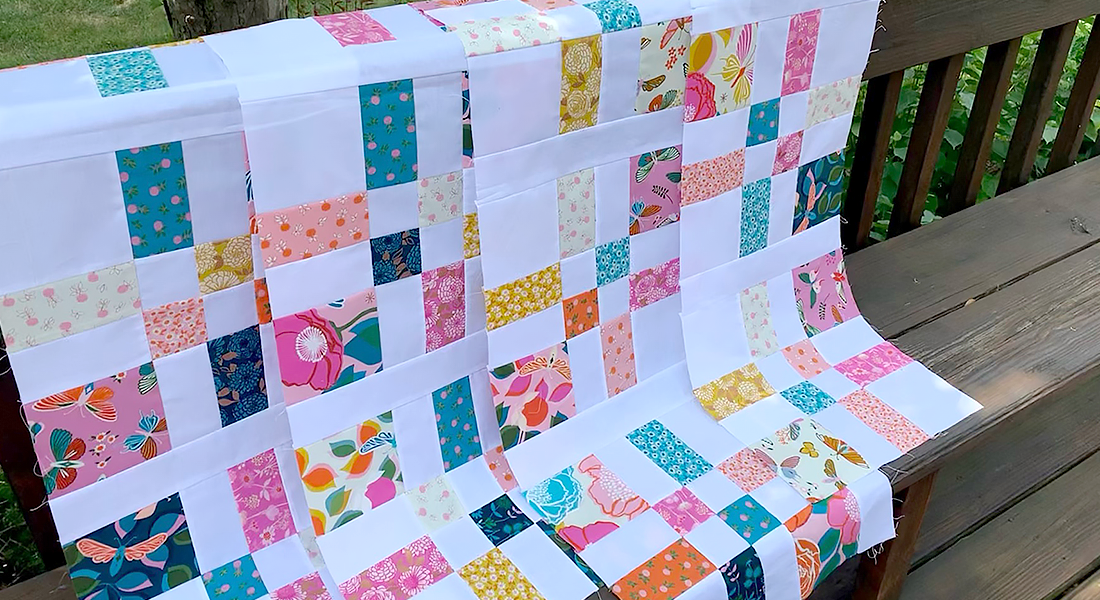
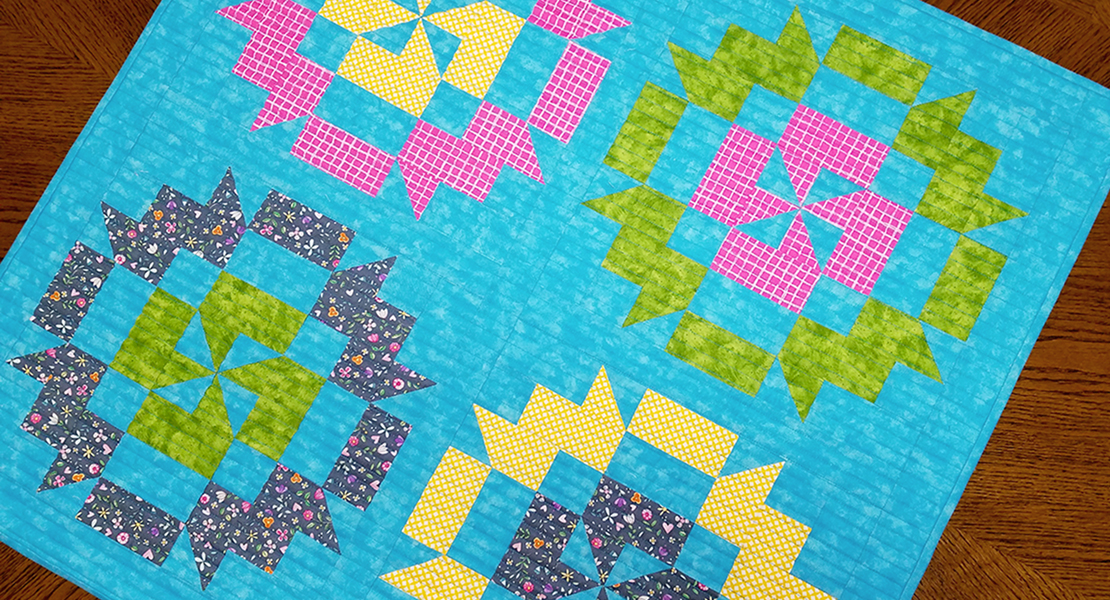
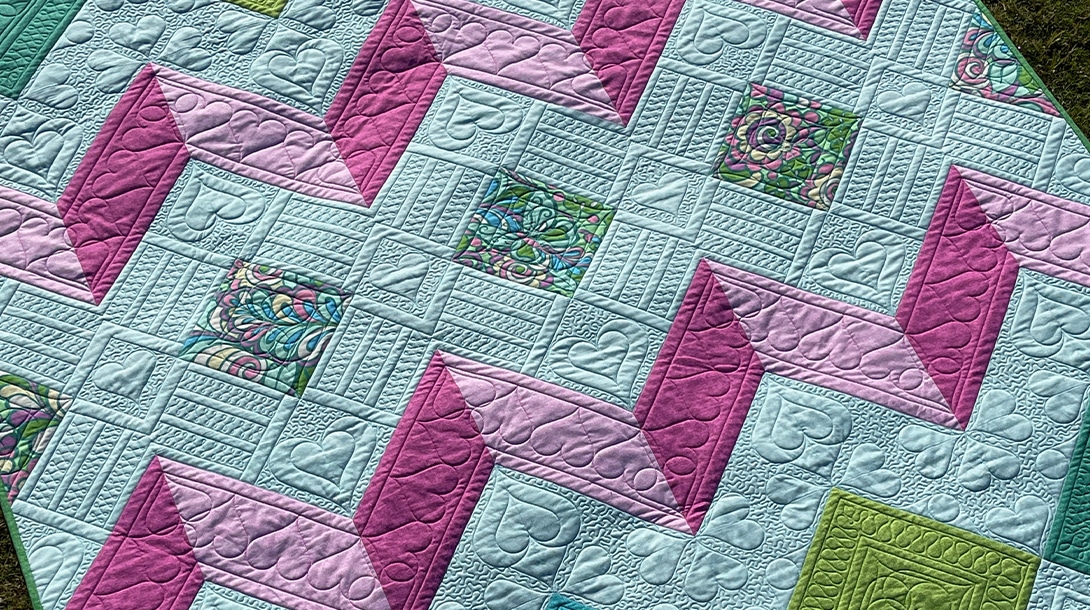
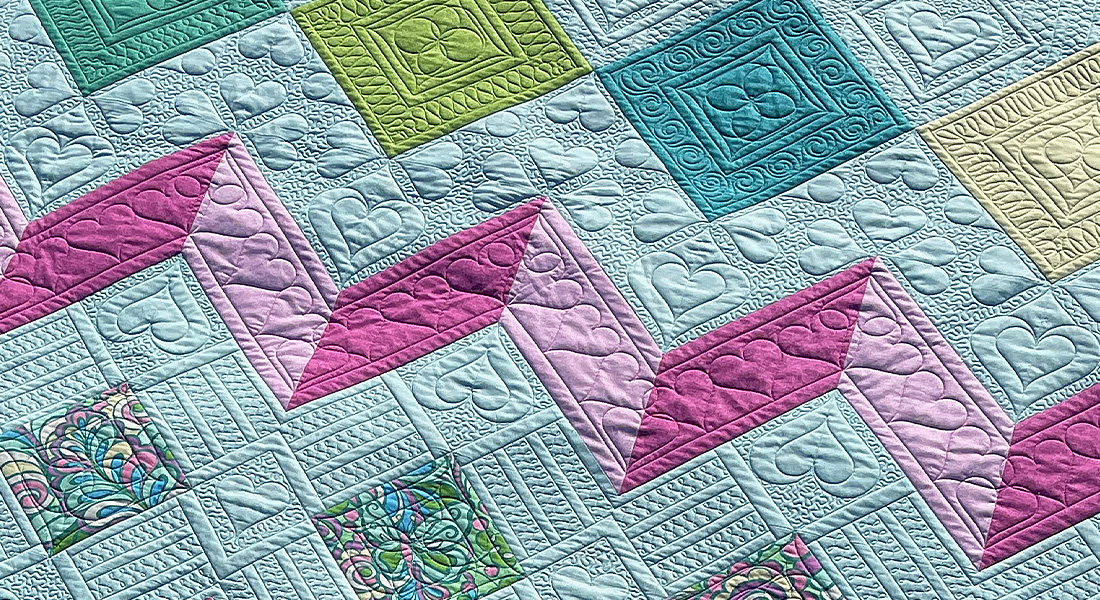
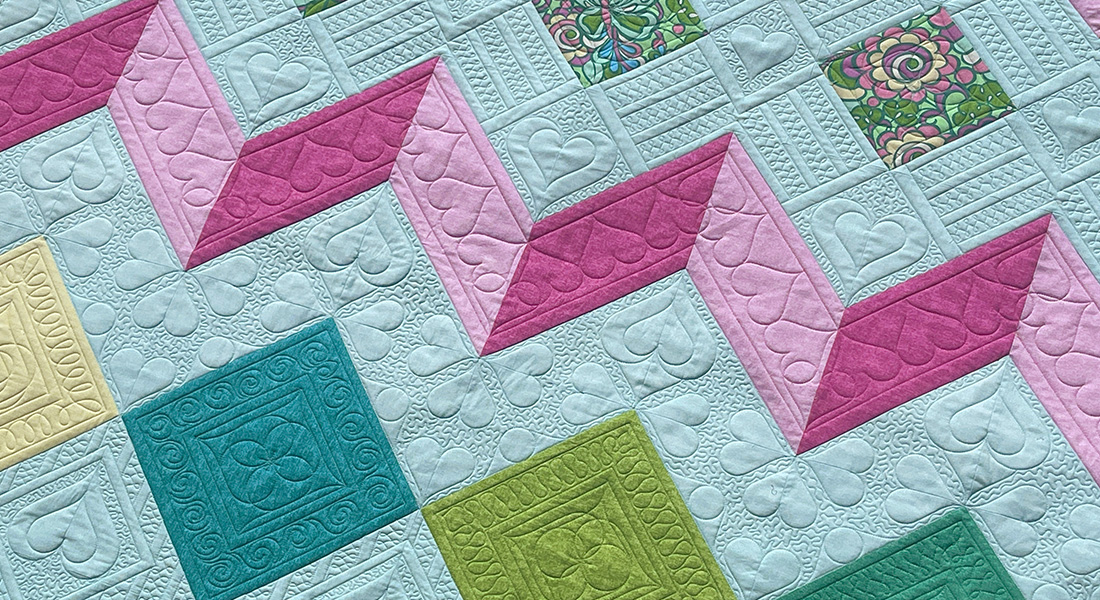
When selecting a quilting design, you want something that is going to enhance or showcase your piecing, not take away from it. Some quilters will wait to pin/baste the layers and instead put the quilt top on a display board for a few days. This helps to make a confident decision on a quilt design. But, you don’t need to do this since I’ve decided for you—crosshatch! There are many kinds of crosshatch designs, including diagonal, uneven and curvy, which you can read about in both quilting books. We are going to do an uneven crosshatch aka random crosshatch. Below is an example of a random crosshatch from Christa Watson’s book (publisher Martingale/That Patchwork Place). So fun!
Quilting the Stay Gold Quilt
Quilting Three Layers
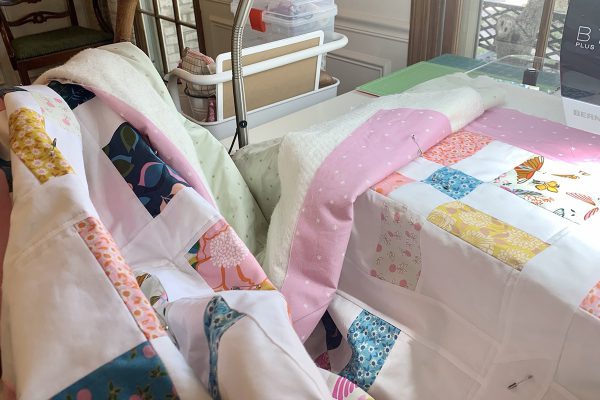
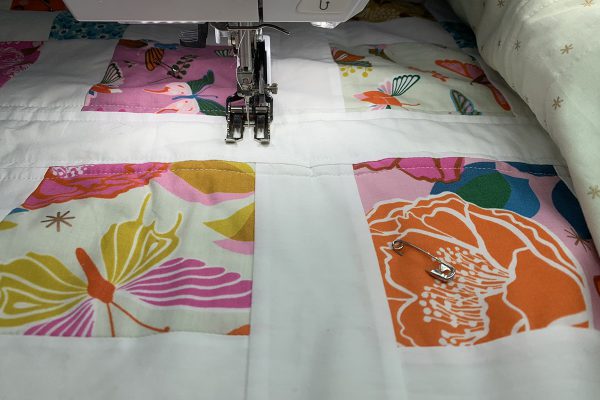
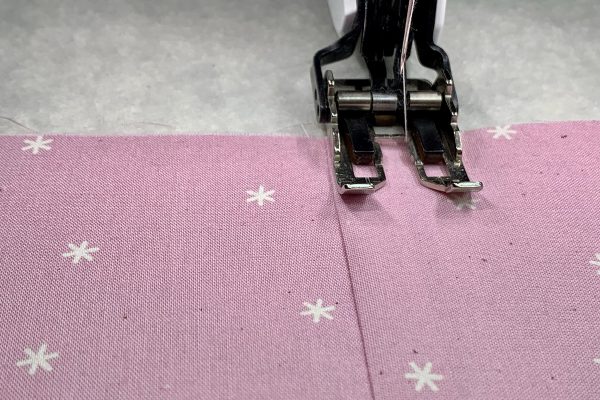
So your quilt is pinned and/or spray-basted—it’s time to quilt the three layers. The key phrase is three layers! We need all three layers to stay together while stitching or we’ll end up with distorted layers, puckers and folds. Yuck! But don’t fret because the BERNINA Three-Sole Walking Foot with Seam Guide #50 is perfect for sewing multiple layers and is easy to use. It comes with three soles—standard, open and center guide—two seam guides, the collar (not pictured) to attach the seam guides and a small screwdriver. Notice there are 1/4″ marks on the left and right toes of the foot. We will use these marks to guide our quilting.
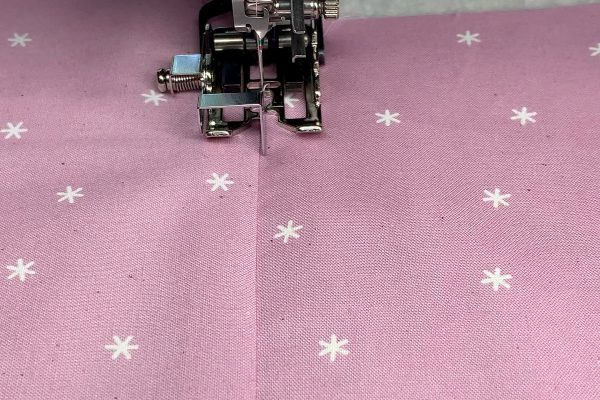
Now, stitch-in-the-ditch is always an option with Walking Foot #50 using the Center Guide Sole. With this sole, it is easy to stitch exactly in the ditch or the well of the seam. In fact, I didn’t like this method of quilting until I discovered this sole. With seams pressed to one side, there is a ridge on that side with the double layer of seam allowance. This ridge is easy to follow butted up against the guide of the sole.
Note: Do not stitch-in-the-ditch with seams pressed open. This will weaken the seams. If you know ahead of time you want to quilt this way, press your seams to one side.
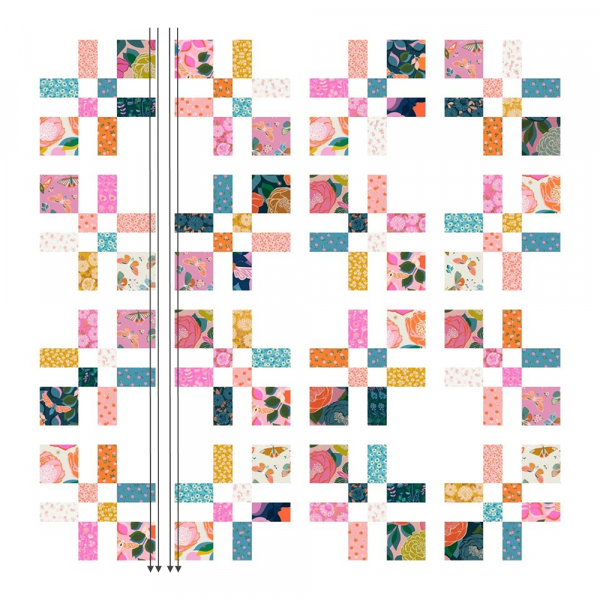
Quilting the Sashing
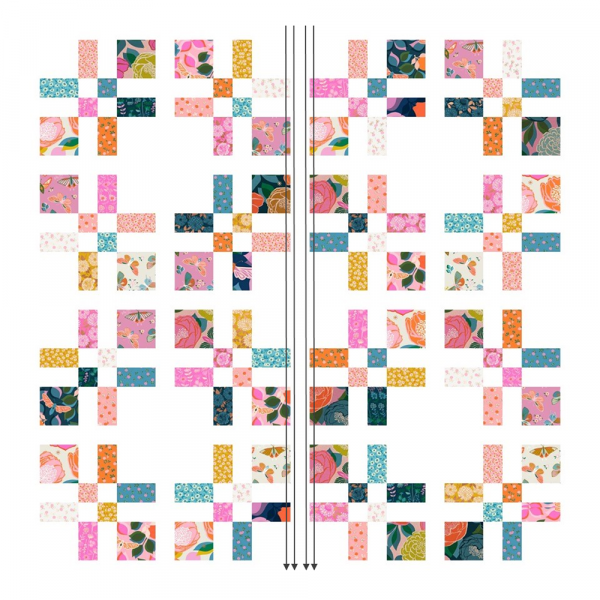
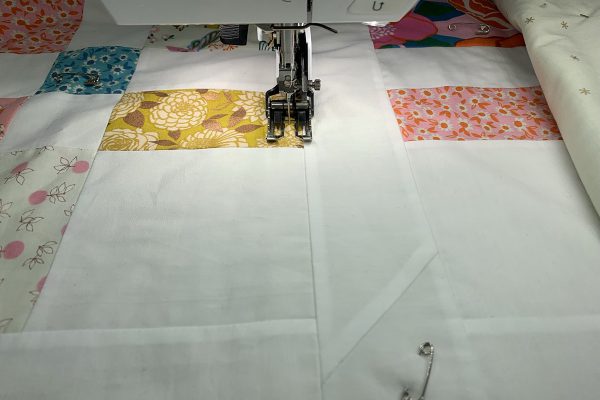
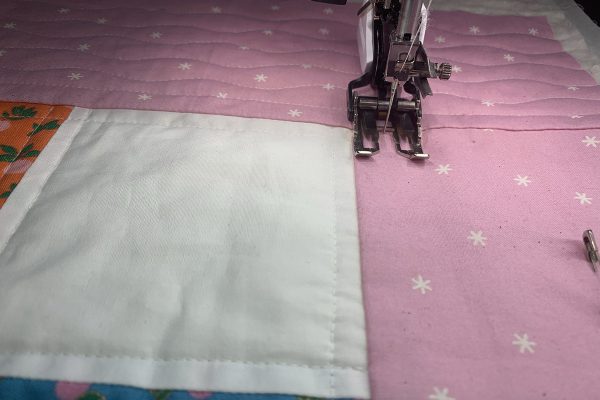
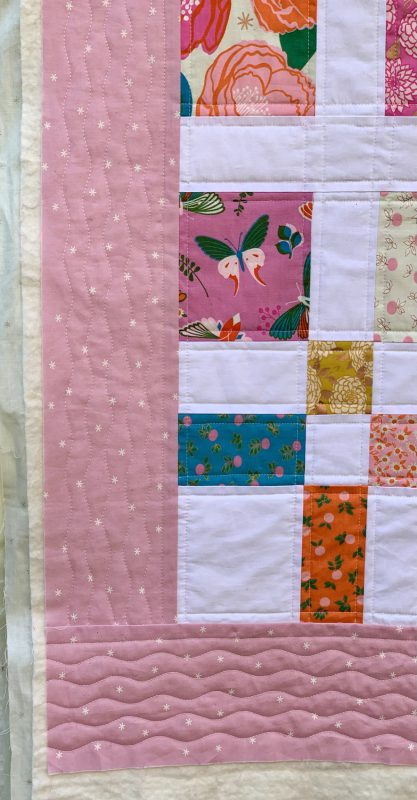
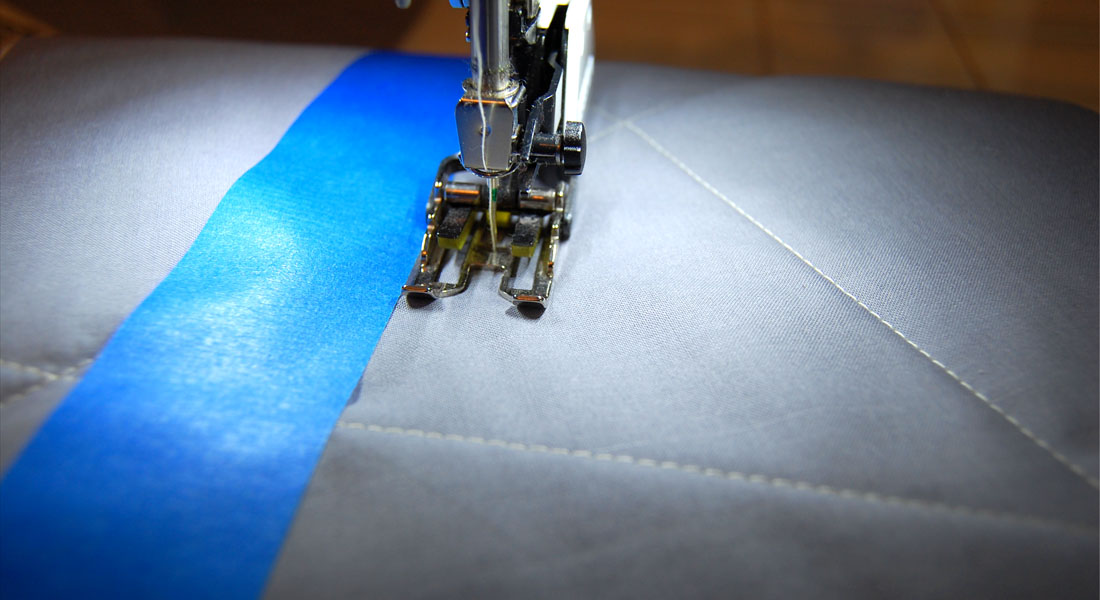
For our crosshatch design, we are stitching 1/4″ from the seam lines. Start at the center of the quilt with the center sashing. To give you an idea, see the diagram below. Stitch 1/4” inside the sashing and 1/4” outside the sashing on both sides.
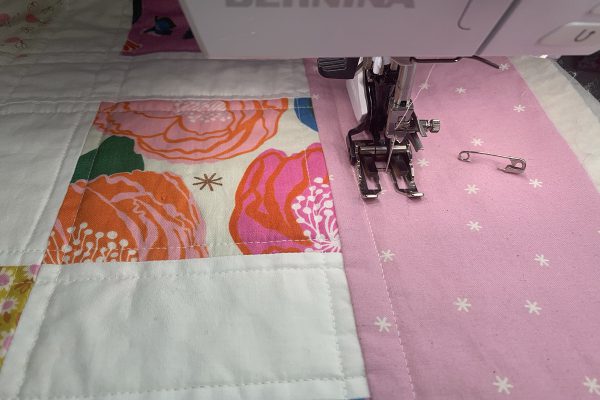
To start, grab something to put your pins in while quilting. Tip: Don’t close the pins for storage. You’ll need them open for pinning the next quilt—save your fingers! Attach Walking Foot #50 to your machine with the Open Sole attached to the foot. Insert Quilting Needle 75 and place Mettler 60 wt thread in white in top and bobbin. Layout the quilt on the floor so the 54 1/2″ sashing is vertical. Roll up the side of the quilt that is going into the throat of the machine. Situate the quilt at the top in the center.
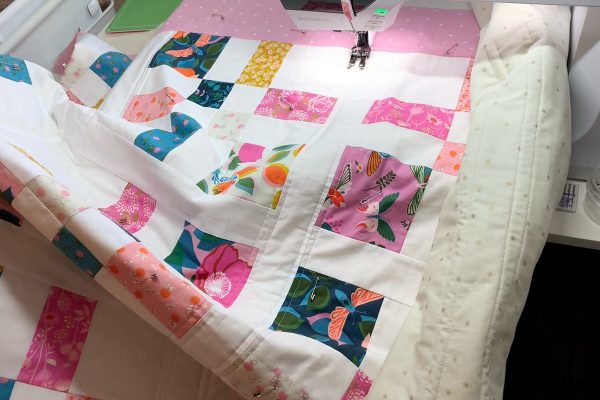
I place a chair to my left side to hold the rest of the quilt. You do not want any drag on the quilt from the weight of the quilt.
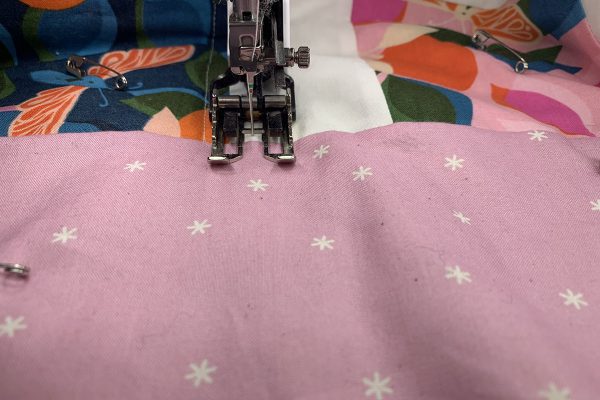
Lower the foot. On the left and right toes of the sole, there are marks that indicate your 1/4”. Use these marks to keep the quilt aligned while sewing. Lower the needle to check placement. You want the first stitch to land at top of the sashing, just under the border fabric. On the left side of the seam, this is your foot placement.
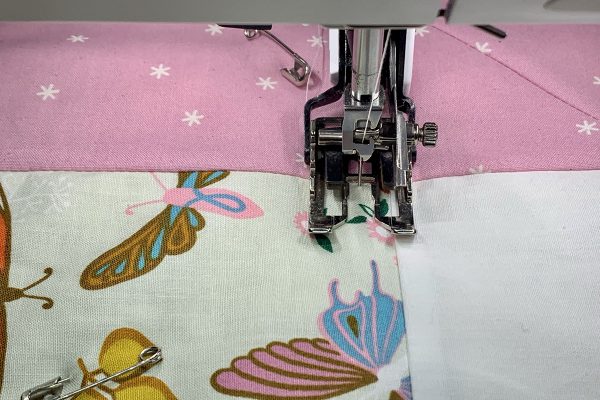
On the right side of the seam, this is your foot placement.
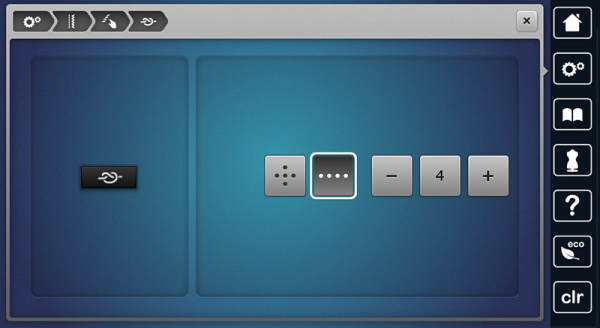
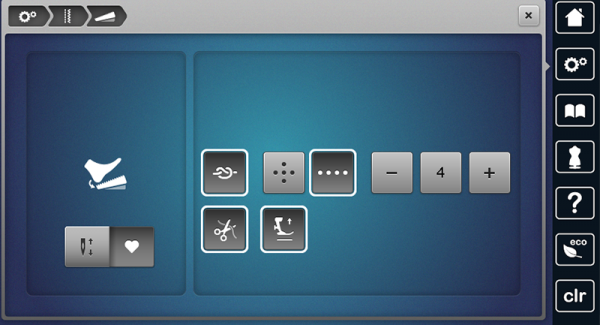
To secure the stitch, there are a few options. You can use the Secure Button, backstitch or thread the top thread to the back and knot. Decide what works best for you. The securing method I use depends on my project. For this quilt, I sew one backstitch then sew securing stitches. Basically, it’s one stitch forward, one stitch back, and 4 tiny stitches forward. I set the Secure Button in the Setup Program to sew 4 tiny stitches in a row.
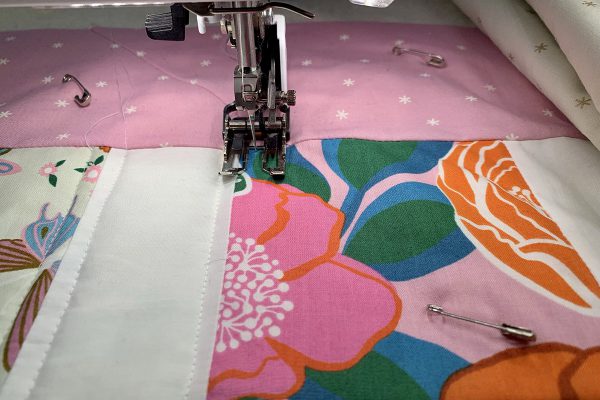
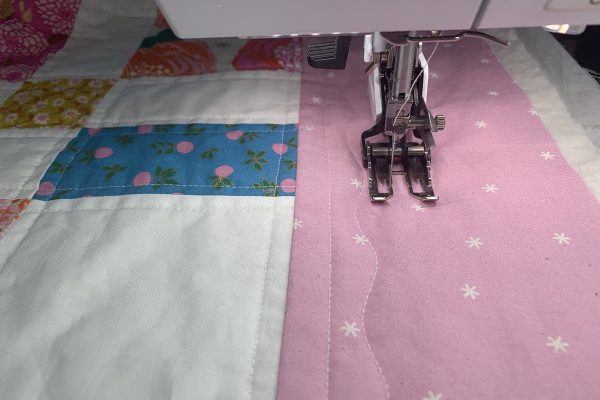
Then sew down the sashing keeping the 1/4” mark on the sole aligned with the seam.
Stop when you reach the end of the sashing – don’t sew in the border fabric.
Sew one backstitch.
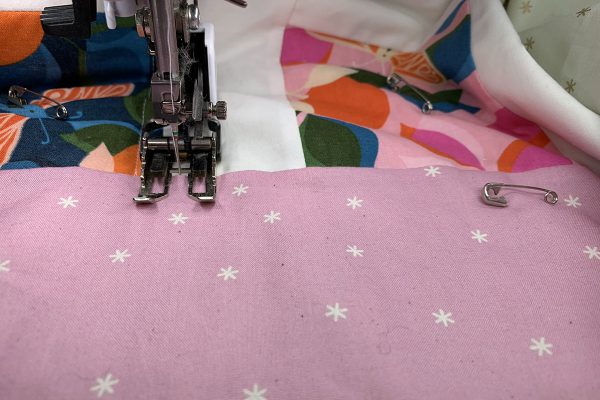
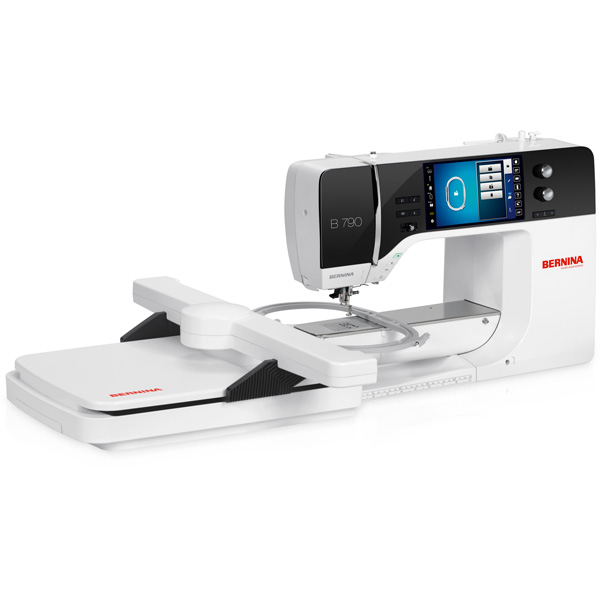
Then, press the Secure Button to sew 4 securing stitches and cut threads. With my BERNINA 790 PLUS, I can program the back kick on the foot control to sew four securing stitches, cut threads and raise pressure foot with the press of a heel!
Once you have quilted all four lines at the center sashing, move the quilt to the sashing on the right and sew the same quilting lines.

Then, move the quilt to the sashing on the left and do the same.
Now, rotate the quilt 90 degrees. Notice the sashing is not continuous but is made up of 12” units. There are 2” of sashing without seams between the 12” units.
Use a temporary marker to continue the line until you get comfortable sewing a straight stitch without the extra guidance.

Again, starting in the center, sew quilting lines along the white sashing 1/4” on both sides, inside and out.
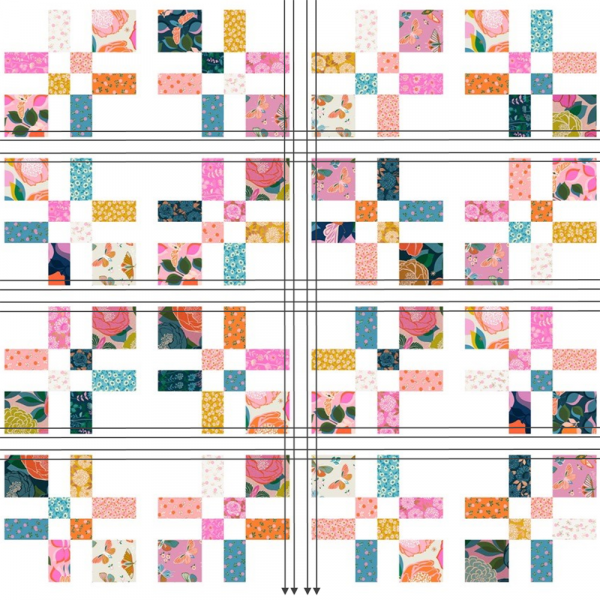
Do the same with the sashing on the right and the left. Now that you’re getting into a rhythm, listen to a podcast or a book on tape! We have many quilting lines to sew so you’ll get lot of practice and finish your podcast episodes or your book at the same time.
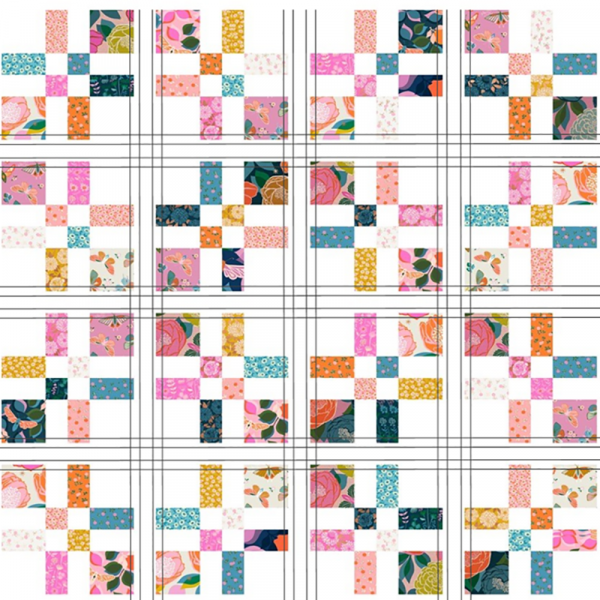
Quilting the Blocks
It’s time to quilt between the sashing. An intermediate quilter might look at this and decide to quilt a design in each block. As a beginner, we’ll continue with quilting straight lines. The middle rows (Row 2 and 3) have 3 seams each so they will have six quilting lines. The outer rows (Row 1 and 4) also have three seams each and will have six quilting lines plus an extra one along the border seam.
Once you finish quilting in one direction, remember to rotate the quilt 90 degrees and quilt those seams. All seams will be perpendicular to one another. You will have straight line quilting with Walking Foot #50 mastered by the time you are finished with this quilt!

Don’t worry if a line is slightly off because of the piecing. While sewing, slowly get back on track. Once the whole quilt is complete, no one will notice. Remember you are looking at it close-up right now, so every tiny thing is going to stand out. It’s going to be beautiful!
Quilting the Border
First, replace the Straight Stitch Plate with the 9 mm Stitch Plate. Now, two of the borders are 54 1/2″ and two are 62 1/2″. Start with one of the 62 1/2” borders. Place the left edge of the walking foot along the seam at the start. The edge of the foot to the needle is about 1/2”. Stitch along the seam to the end of the border. You do not need to secure the start and end of stitching.
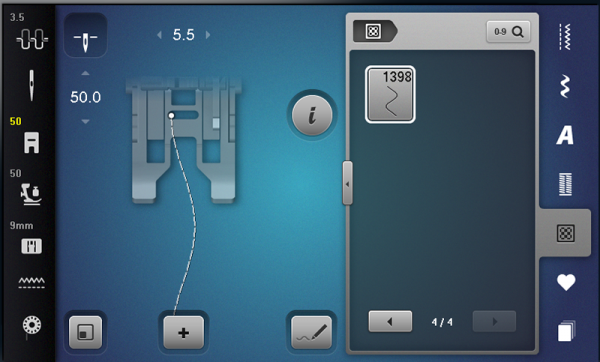
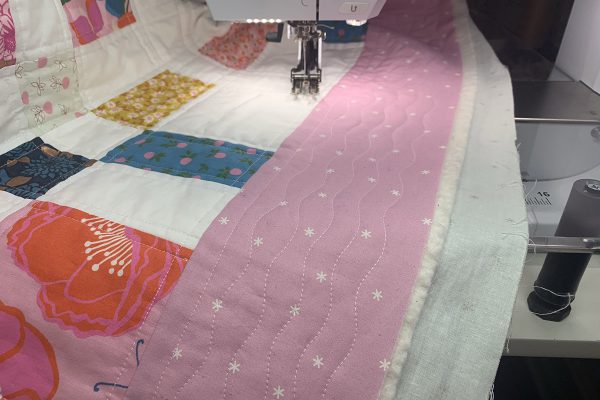
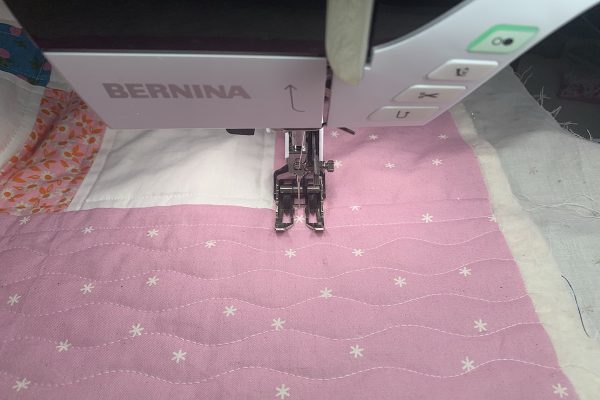
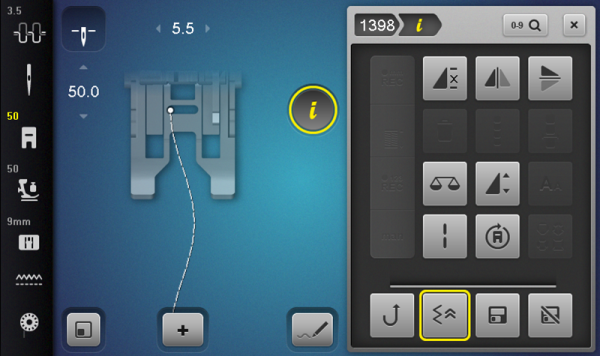
Now go back to the start of the border. Option: You can continue straight lines using the edge of the walking foot as a guide or you can stitch wavy lines. The wavy line can be stitched free form with the walking foot or with built-in stitches. My B 790 PLUS has three built-in wavy lines in the Quilting Stitches Menu—#1396, #1397 and #1398. Let’s check out #1398. Notice the Stitch Width is 5.5 mm. This is because I have Walking Foot #50 selected. Stitch #1398 has a 9 mm stitch width by default but because I have a foot selected with a 5.5 mm capacity, the machine will not allow a stitch width greater than 5.5. This is a security function in the machine and a great way to limit broken needles and four-letter words! Notice I have the 9 mm Stitch Plate selected also. If I forgot to change the stitch plate (never!) and still had the Straight Stitch plate on, the machine screen would show a straight-stitch because that’s all it would let me do. Another security function! So great that my machine is looking out for me!
At the start, line up the left edge of the walking foot with the straight quilting line. Sew to the end of the border.
Go back to the start of the border and quilt another wavy line, except this time as you’re sewing keep the left edge of the foot aligned with the “hills” of the stitched wavy line. These are wavy lines so it doesn’t have to be spot on.
Repeat this four more times. Notice my wavy lines are not concentric. There is a way to stitch the wavy lines line so they start at the same point but I did not want a uniform look. I wanted the wavy lines to be random. If you want a really organic look, you could do your own wavy lines with a straight stitch and move the fabric slightly to the left and right as you sew. Looking good!
Do the same for the opposite border. For the last two borders, you can follow the same method which will result in overlapping stitches in the corners. Sometimes I do this on my quilts and love the way it looks. But for this quilt, I prefer my quilting lines not to overlap in the corners. This is totally preference and one way is not right or wrong. Because I am quilting in the 54” border only, I need to start and stop at the seams and secure stitches like we did for the straight line quilting in the sashing.
If you are quilting wavy lines next rather than straight lines, there is one difference here. Rather than doing a backstitch to secure, use Back Stepping. Back Stepping follows the pattern of a decorative stitch. Backstitching goes in a straight line with the needle in the center position. This is noticeable with many decorative stitches. Try it on scrap fabric and see what happens.
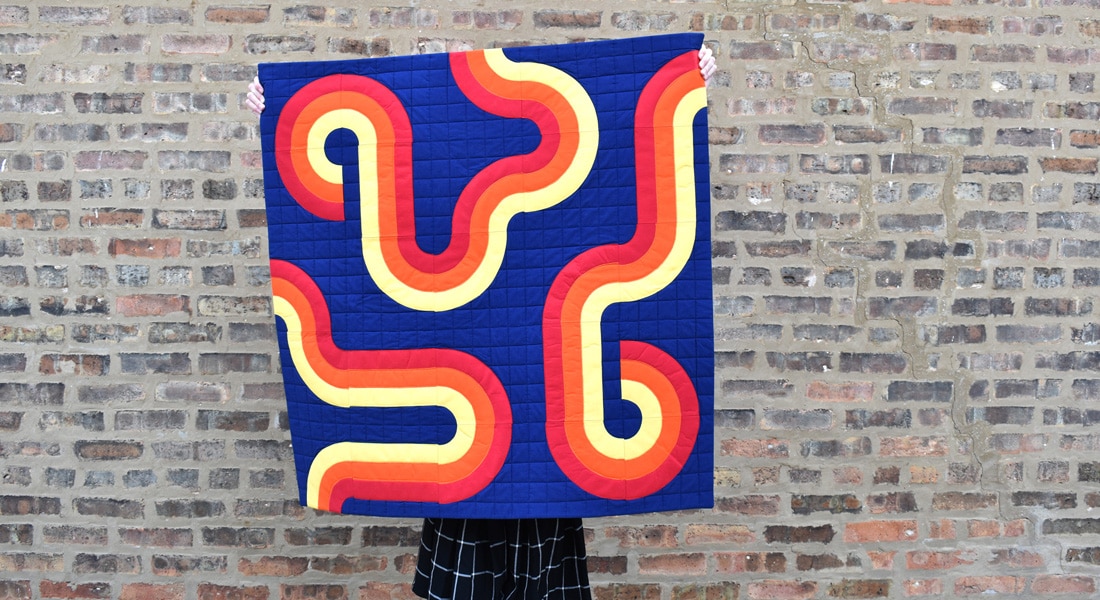
So beautiful! Next week we will stitch on the binding and make a fun block with the selvedges. Also, I’ll show a bonus option for your quilt top that is so pretty. But for now, take a break and admire your work. Think about how far you’ve come in the quiltmaking process. Think about how much you have learned. Every quilt you will continue to learn and try new techniques. So have a slice of cake and be proud of yourself that you are bold enough to stay gold!
Stay Gold Quilt Along


What you might also like


4 comments on “Stay Gold Quilt Along, Part 5: Straight Line Quilting”
-
-
Hello! We have changed the email for your account. Thank you and happy stitching!
-
-
Excellent tutorial for beginners. I especially liked the clear explanations for the design and construction choices made by the quilter/writer. Great way to ease into using all of the various options for quilters on the Berninas. Some beginner quilt designs are a little too simple. This one had just enough interest and complexity. Thanks!
-
Thank you! I appreciate the feedback. I’m glad you found the quilt along great for beginners as that was my goal! Happy sewing and quilting!
-
Leave a Reply
You must be logged in to post a comment.

Please change email to [email protected] [email protected] is no longer as of Dec 2