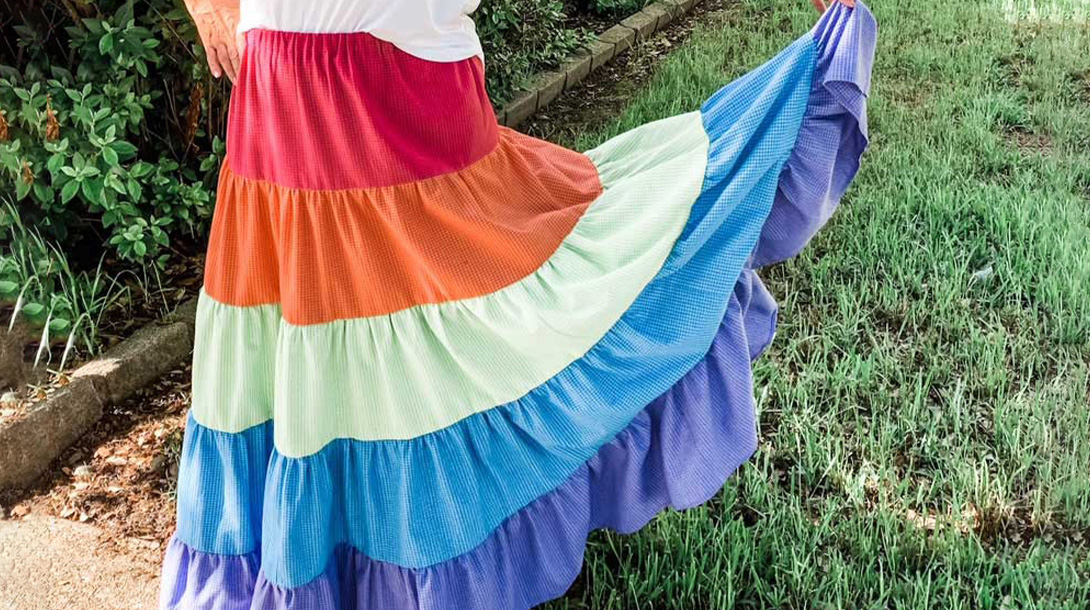
How to Sew a Tulle Skirt
No matter what the season, it is always time for a fun new toddler skirt. I’m always looking for an opportunity to sew little girl clothing items. One textile that I have not worked with much is tulle, so I knew that I had to incorporate a few layers of it into this fun skirt.
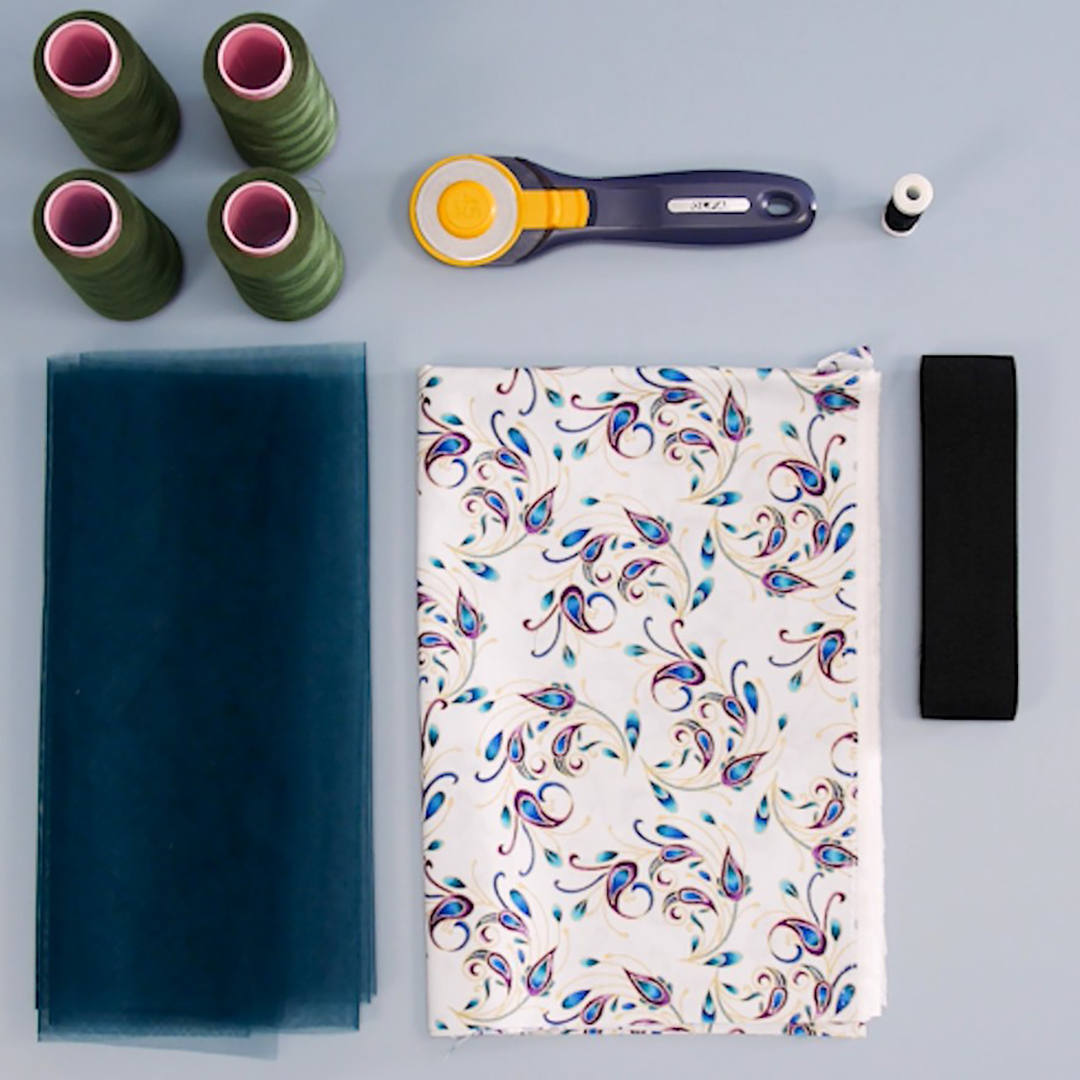
Supplies Needed
Machines
Fabric
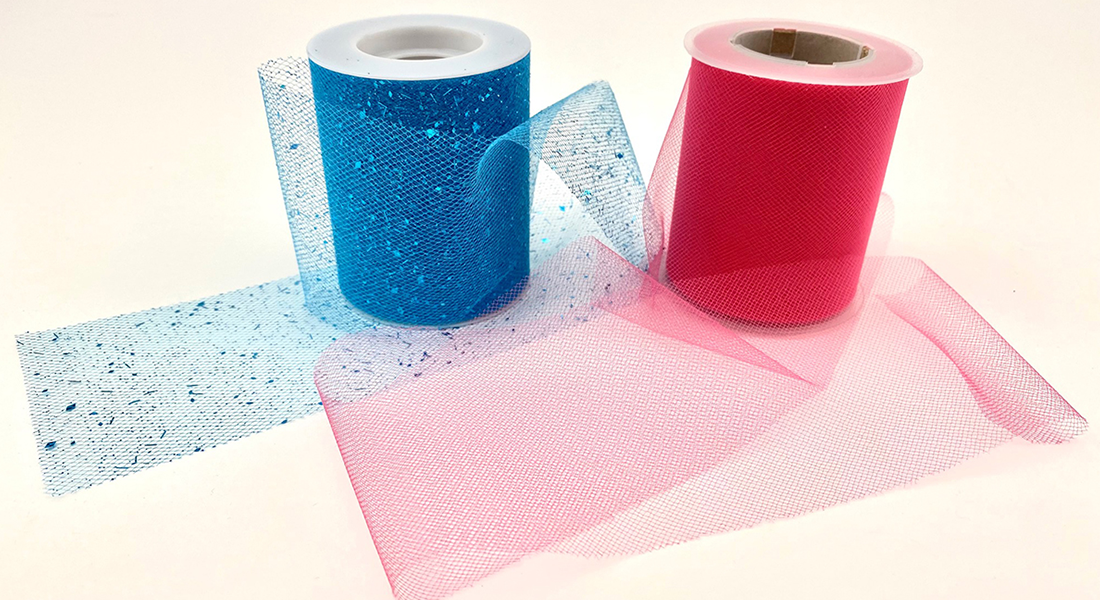
- Tulle (four pieces)
- Cotton Lining (two pieces)
- 5-inch Elastic Waistband
- Custom Pattern Piece
Notions
- 6 x 24” ruler
- Rotary Cutter
- Straight Pins
- Seracor Thread 4 Spools
- Cotton Thread that matches elastic waistband
- Yarn Needle
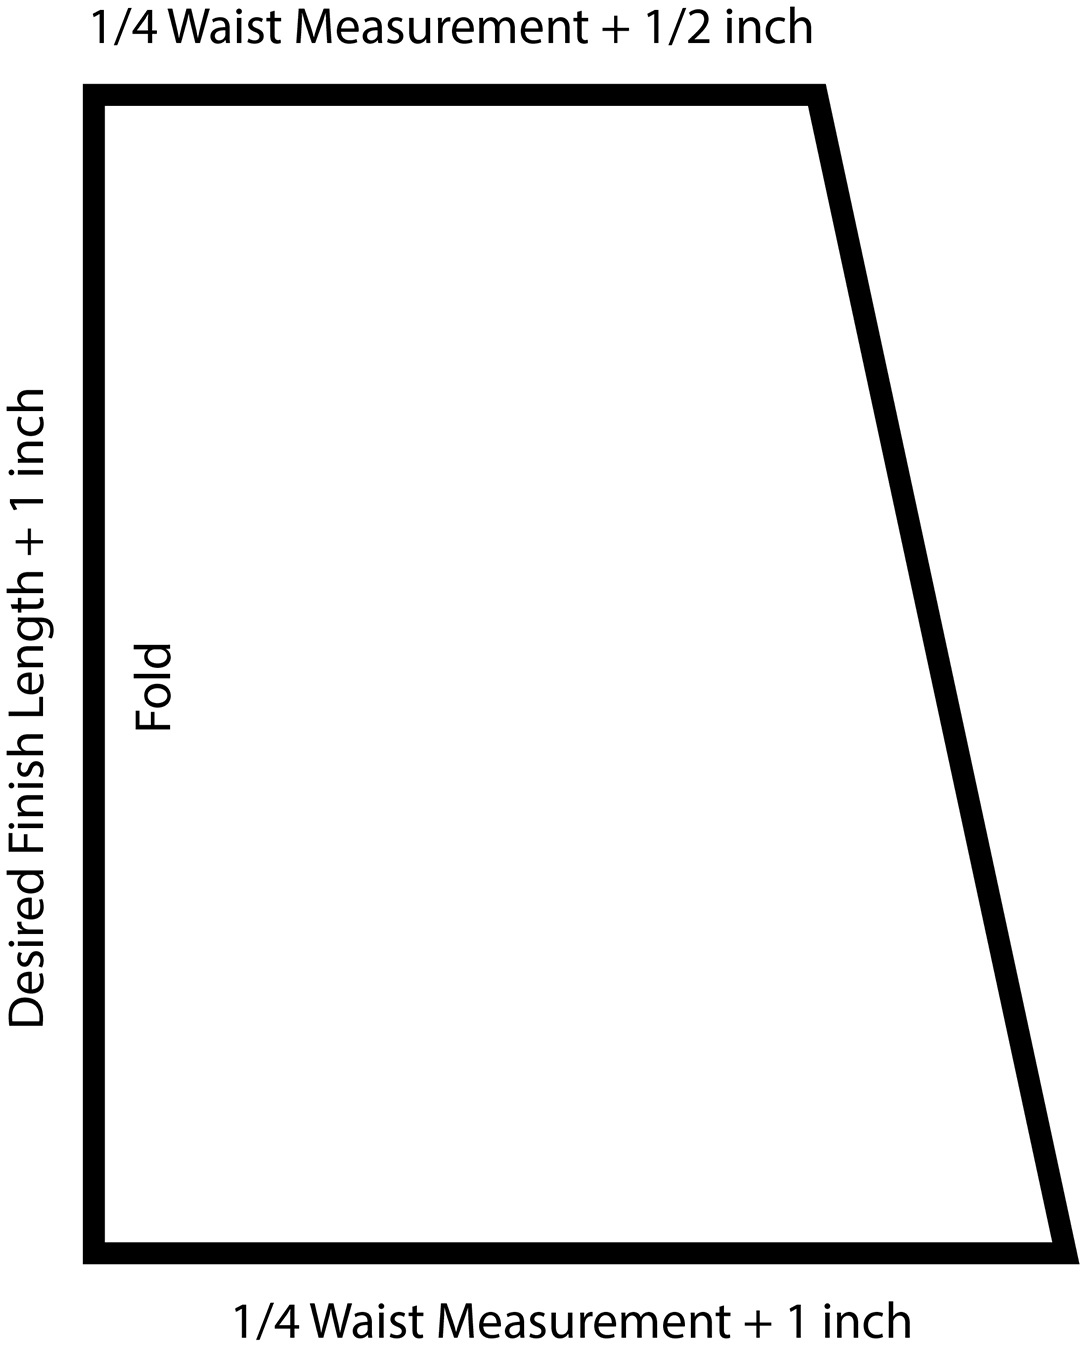
Step 1: Measuring and Creating the Pattern Piece
The plan is to gift this skirt to my friend for her daughter. I had her send me her daughter’s waist measurement to get started on making the pattern piece. The waist measured 19.5 inches and she wanted the skirt to be about 10 inches long when finished. I used an 11 x 17” piece of paper and drew out a pattern template to use to cut the cotton fabric on the folded edge. You will need both a front and a back
Step 2: Preparing Fabrics
For my pattern I will need to cut:
Cut (4) Tulle Pieces 11” x 18”
Cut (2) Cotton Pieces Using the Pattern Piece placed on the fold of the cotton
Cut (1) Waist elastic 19” long
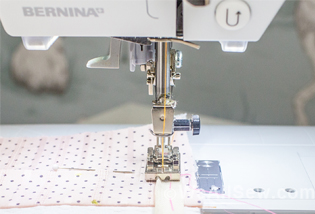
Step 3: Gather Tulle with an Overlocker
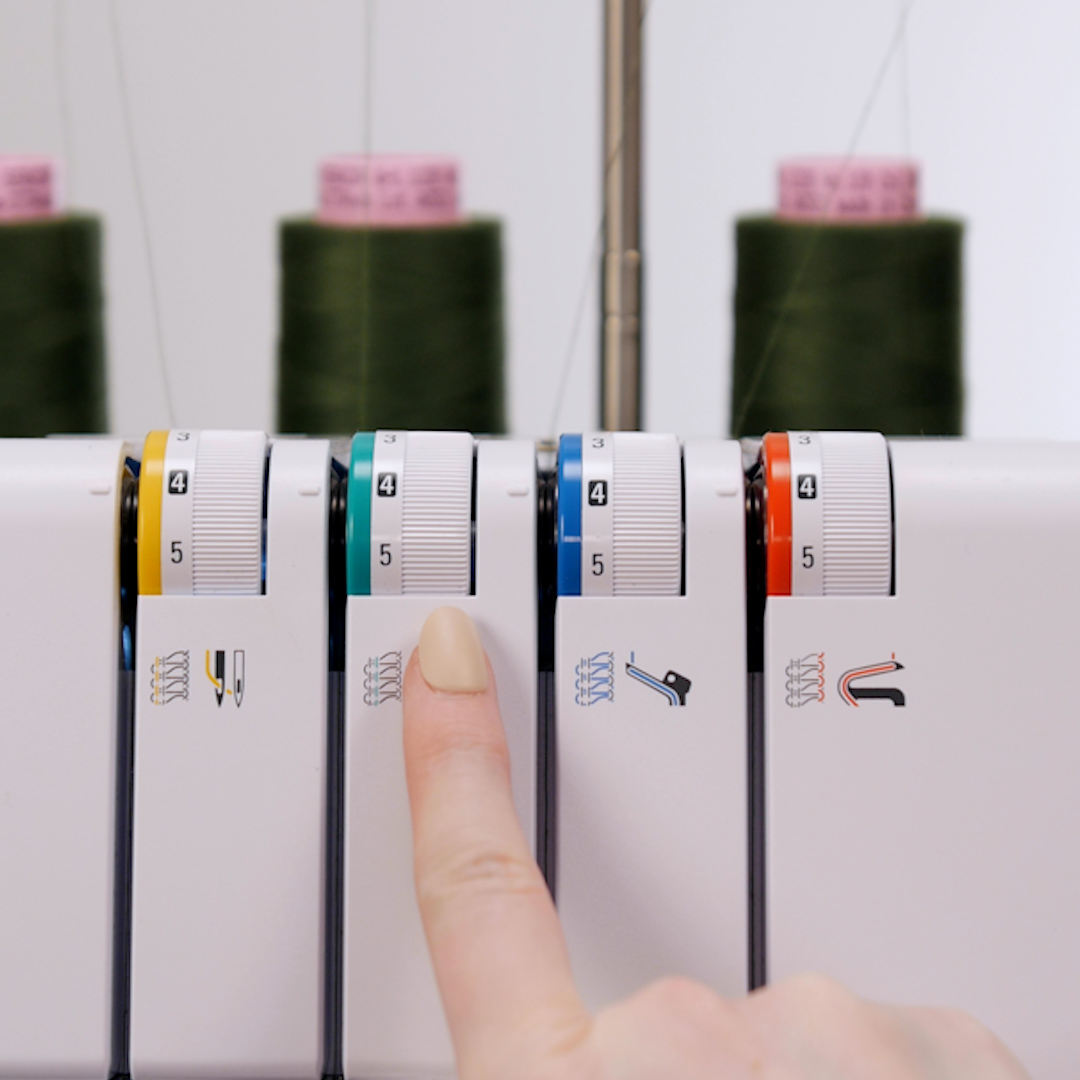
An overlocker is the perfect machine for gathering fabric because it has differential feed. This allows you to set the two feed dogs to move at different rates and use this to gather your fabric edge. The added bonus is that this is done while finishing the edge.
Thread the machine for the standard 4-Thread Overlock with Seracor Thread.

I adjusted the Stitch Length to 4.0 and the Differential Feed to 2.0. To get the right amount of tulle needed, all I had to do was test sew a few swatches to see if it was gathering to my liking.

I started out with 20 inches of tulle and gathered two pieces and then measured the final gathered length. It was a bit too long for my waist measurement, so I determined that 18 inches would be just right.
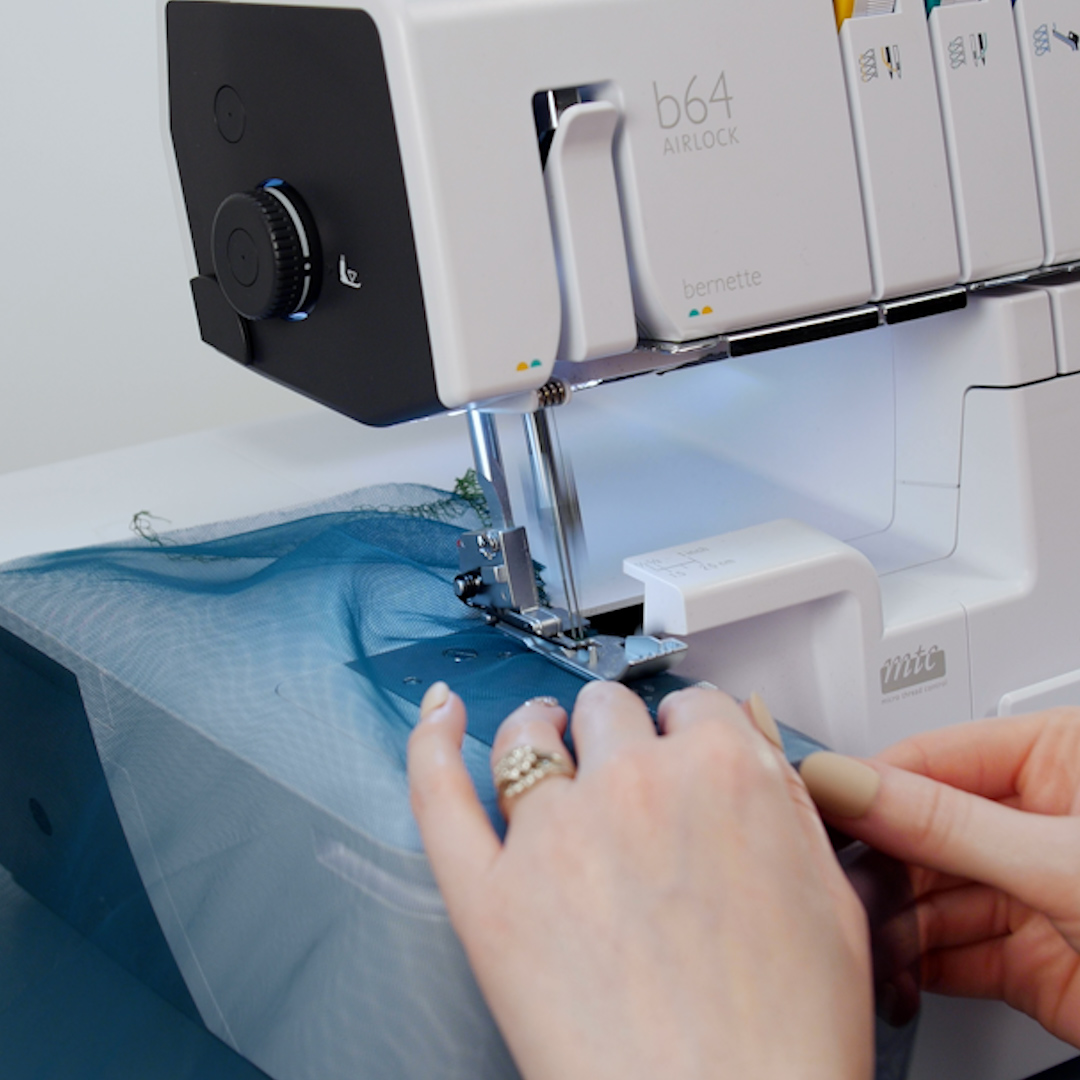
When you are happy with the length for your tulle, seam the two pieces of tulle with the a 4-thread overlock, but with the stitch length back to 2.5 and the differential feed back to 1. Sew the other two (or as many layers as you’d like to add) pieces of tulle and set aside for now.
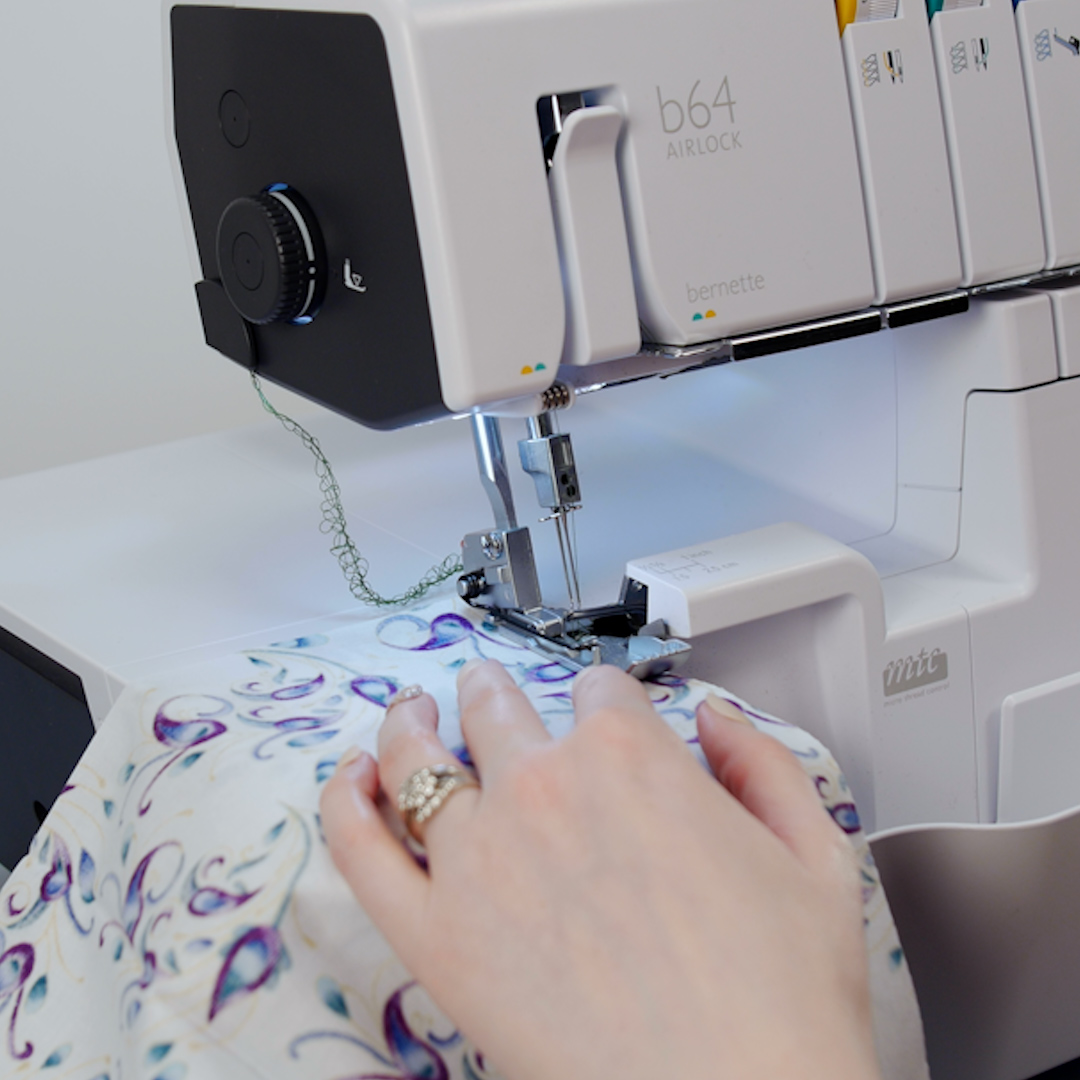
Step 4: Sew a Skirt Lining
This skirt is much more useful if it has a lining built in under the tulle. After gathering the tulle pieces, I then created a cotton lining using the pattern I had drafted. Make sure your overlocker settings are back to the standard 4-thread Overlock Stitch.

With right sides together, sew both side seams by lining up the edge of the fabric just inside the knife blade, making sure to just skim the fabric edge. I left a chain of stitches on both ends and used a large yarn needle and threaded back the tails into the seam allowance.
Now you are ready to hem the bottom of the lining. I did this on my b79- but you could easily to a rolled hem on your overlocker if you’d like. For the hem, fold the bottom edge up 1/4” twice (double fold) and then sew a straight stitch along the edge of the hem.
While at your sewing machine, create your elastic waistband. I sewed my elastic together, overlapping the end by 1 inch and stitched a box for extra security. This creates a little negative ease in the waistband, so the skirt will stretch to fit.
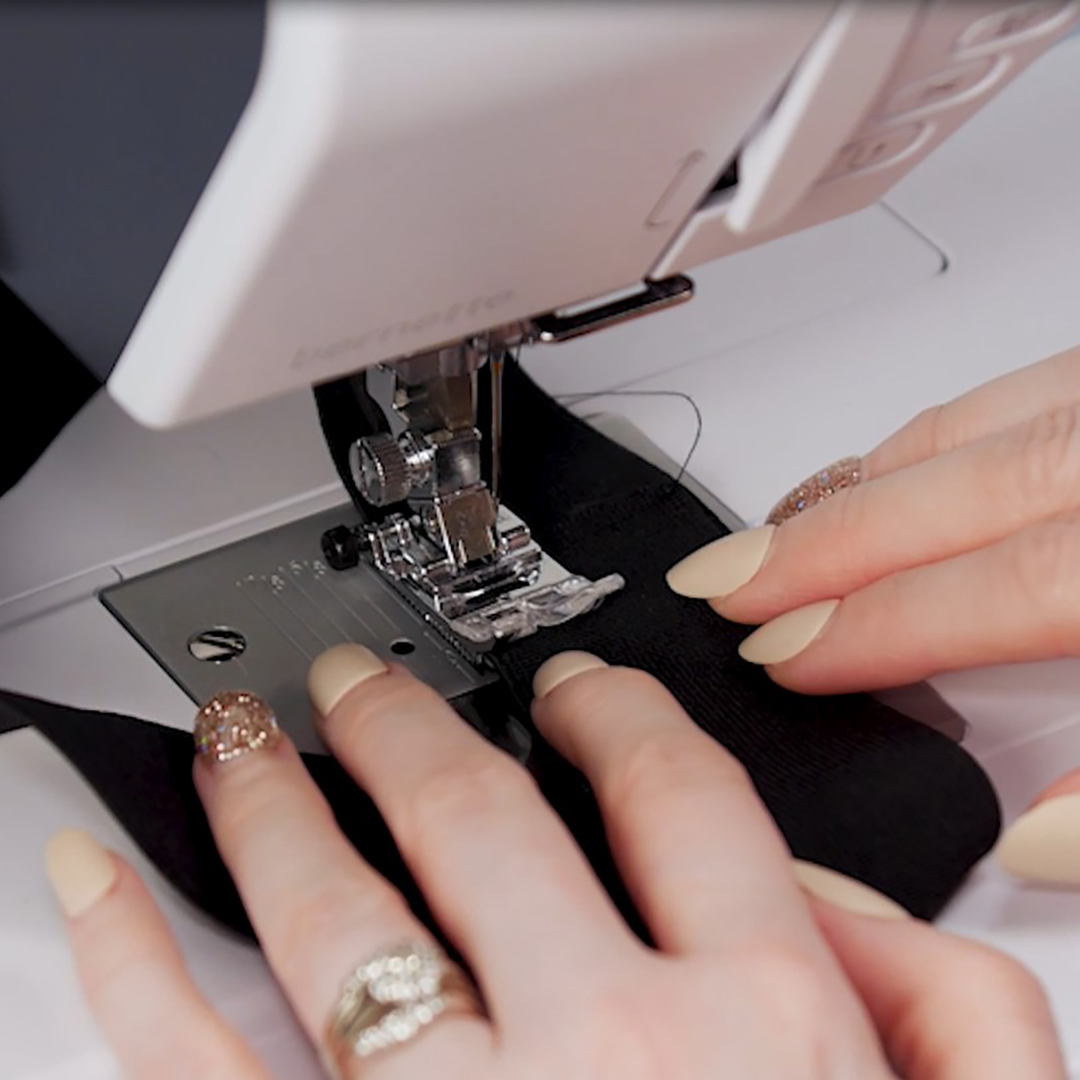
Step 5: Join the Tulle and Lining to the Waistband
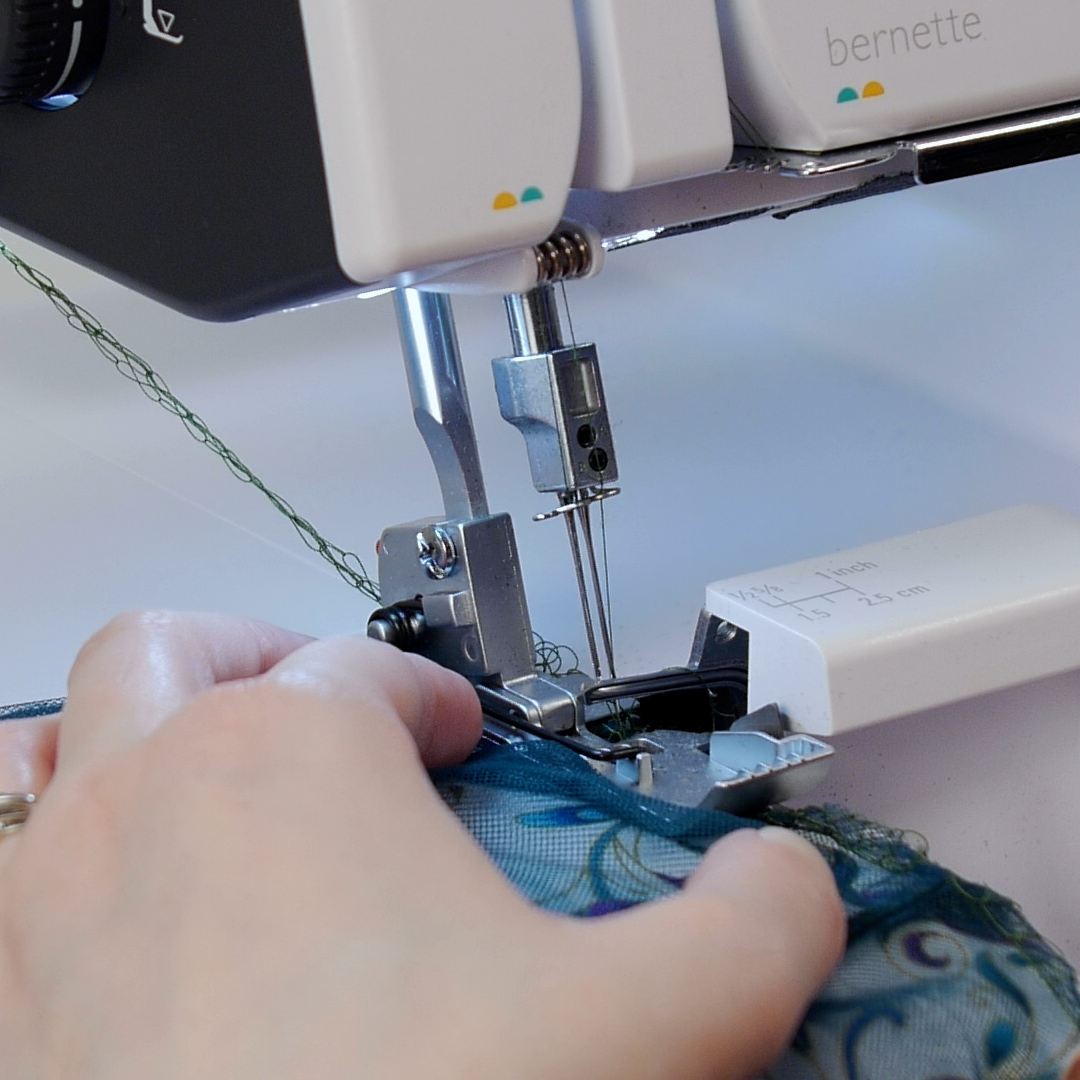
Back at my b44, I serged the gathered tulle to the right side of the un-hemmed cotton lining, joining them together. Make sure that as you do this you are not undoing the gathering that you had done previously to the tulle by not cutting the fabric edges while you sew.
Now add the skirt to your waistband. For your elastic waistband, you will need to locate and pin on the quarters. This will also help lining up your skirt to the waistband so you can stretch the elastic as you sew. Line up each side seam with a pin and re-pin all the layers together, do the same for the front and the back. The elastic band should overlap the skirt by 1/2 inch. After I pinned I flipped the skirt inside out to sew.
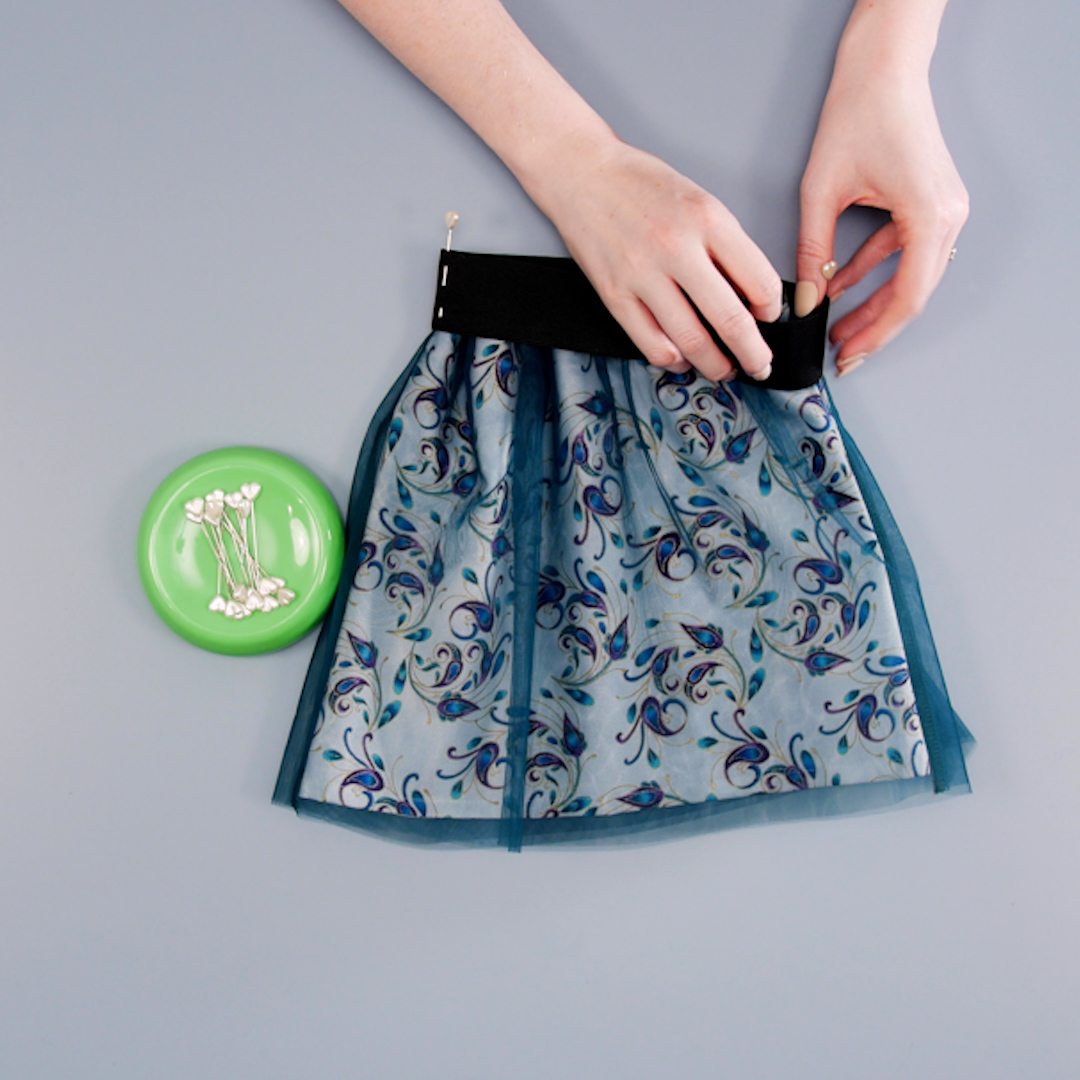
On the b79, I removed the Freearm Cover from the machine to make sewing the waistband to the skirt easier. I decided to use Stitch 2, zig zag. I changed the stitch width to 6.4 mm and the stitch length to 2.0 mm and most importantly, needle stop down.

To help keep the skirt and waist band straight, I used my overlock stitches as a guide, sewing directly on top of them. I decided to start sewing on the back where the box is, and backstitch a few stitches to secure the ends. I located the first pin at my side seam and held there and stretched the elastic to the skirt and started sewing. I used my left hand to support the back of the skirt when I pulled, so I would not strain the needle and foot. Once I approached the first pin I stopped and removed it, and advanced the next section of the skirt to the front of the machine and once again stretched the elastic over the skirt.
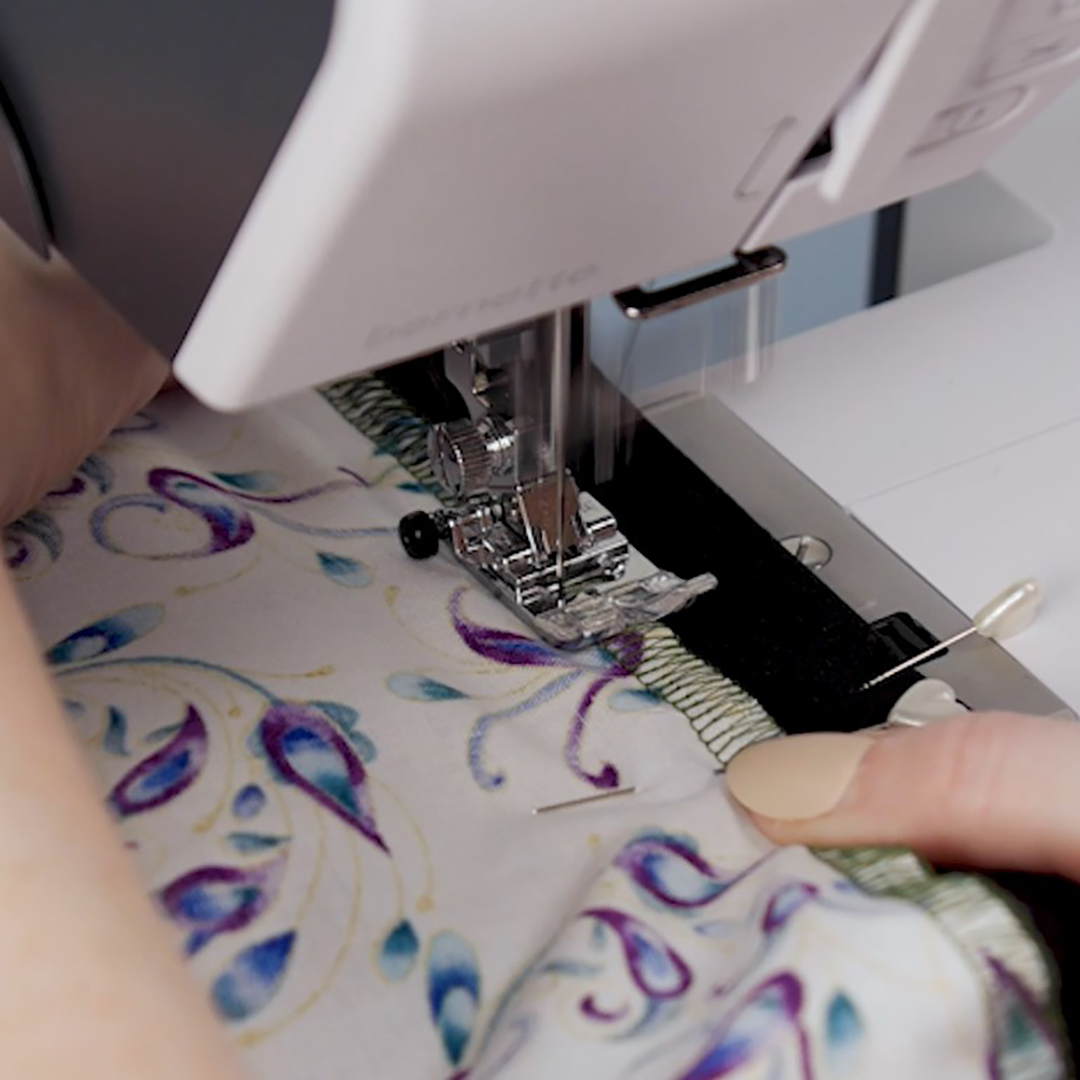
When I was back at where I started, I secured my ends again and trimmed my threads.
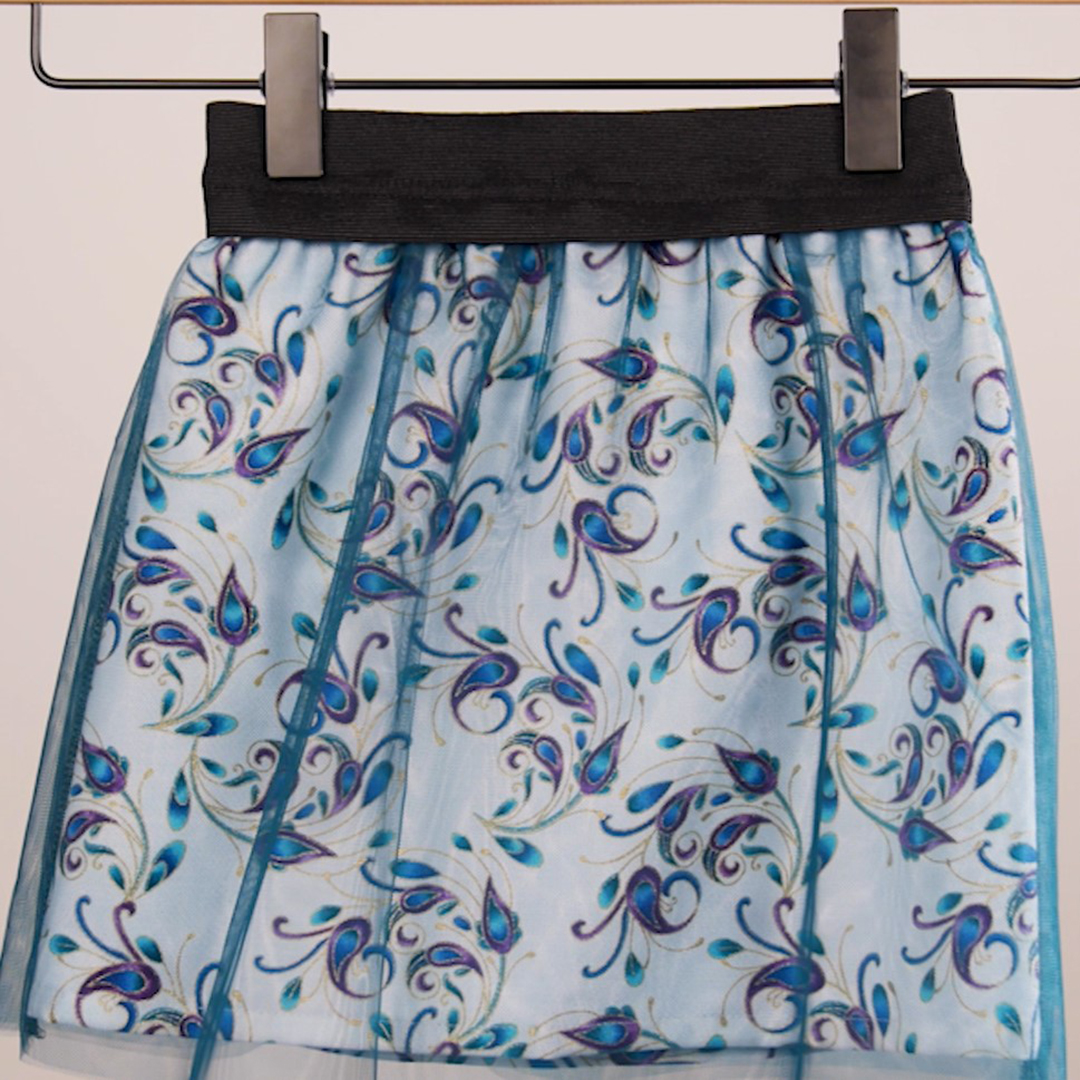
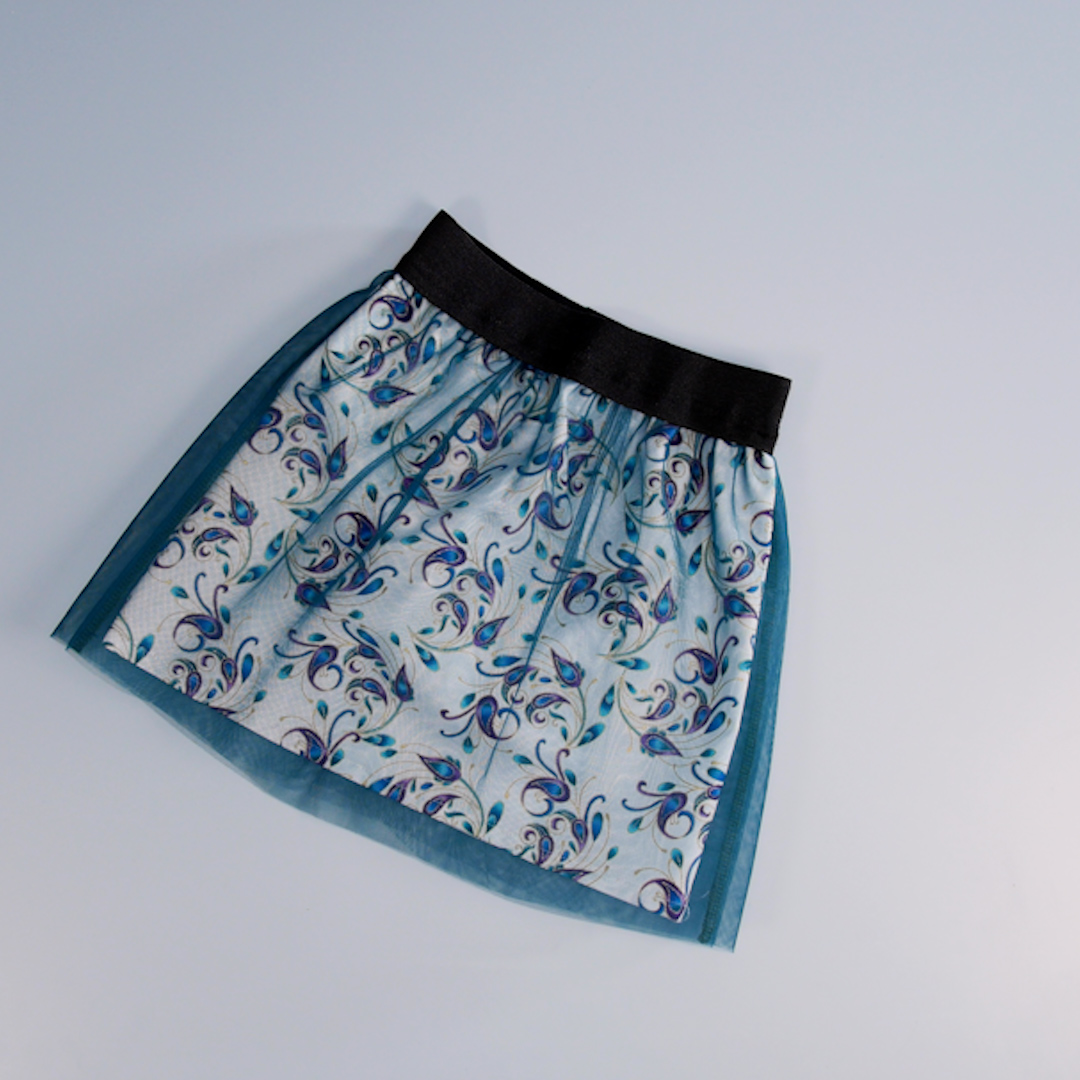
The tulle and cotton skirt turned out wonderful and my friend’s daughter loves running around the house wearing it. The tulle adds so much fun to the cotton prints. Since the pattern is simple, I’m excited to make her another skirt once she grows out of this one!
Used Products


What you might also like


2 comments on “How to Sew a Tulle Skirt”
-
-
What a great idea! I’m a little confused by the cutting instructions though. While the elastic band would be the actual waist size (or a skosh bigger), I would think the lining and tulle need to be the same width and about 1-1/2 times the size of the waist band so they gather up into the waist elastic. That’s not clear from the directions as I’m reading them.
Leave a Reply
You must be logged in to post a comment.

How to Sew a Tulle Skirt is a brilliant idea but there would be no way to get it on unless hips are the same size or smaller than waist.