Upgrading Your Straight Line Quilting, Part Three: Accenting with Hand Stitching
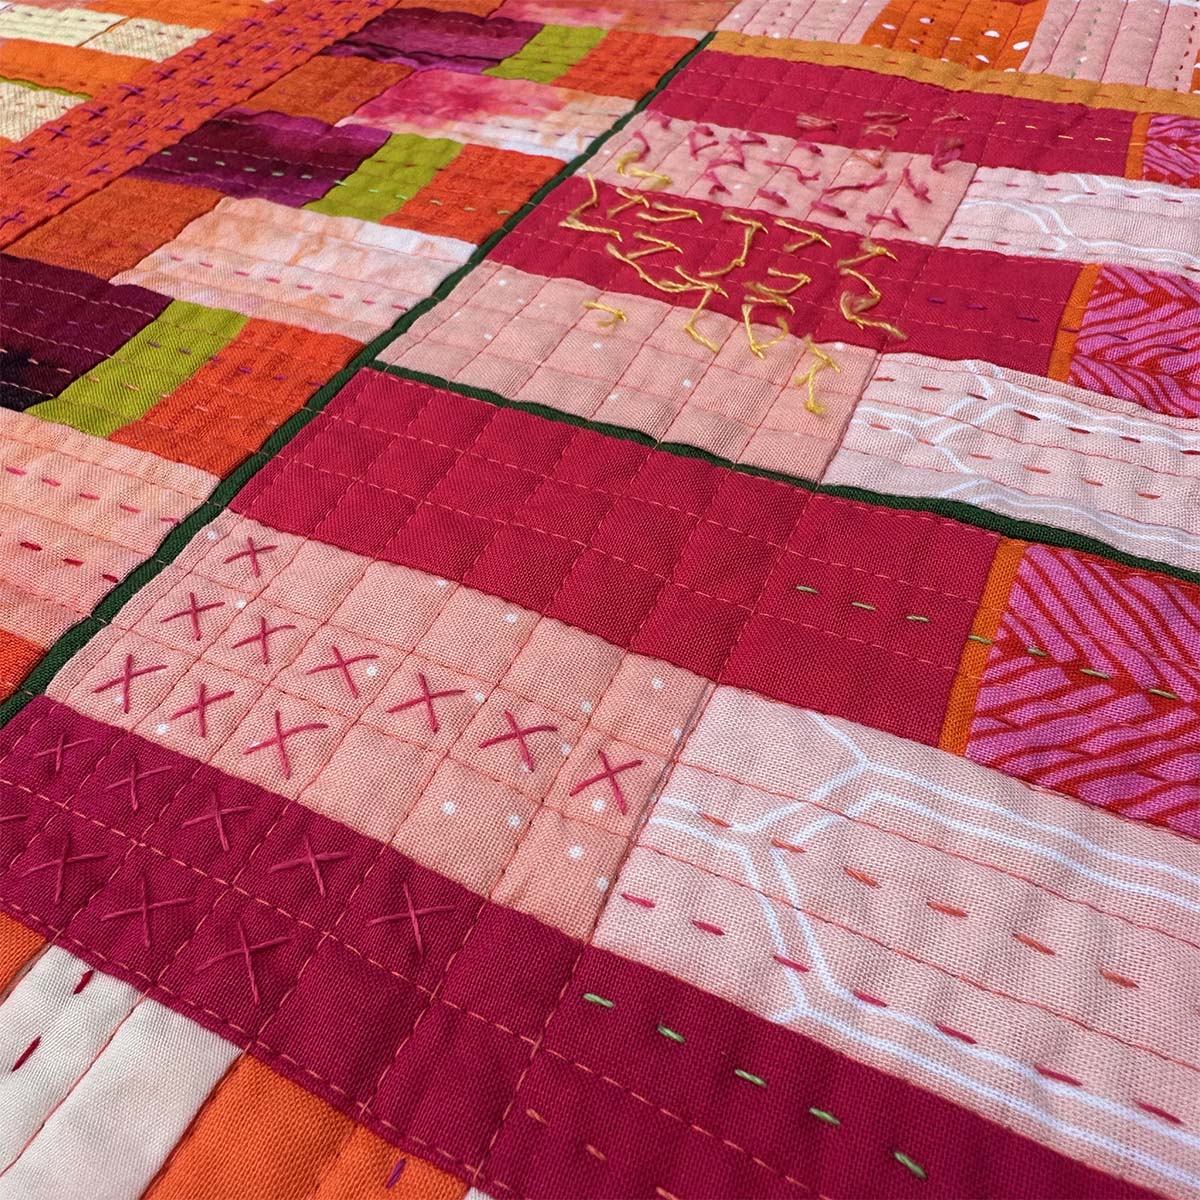
Let’s look at how machine and hand stitching can combine to create a dynamic effect in your quilts. Machine quilting is the go-to method for most contemporary quilters—I know it’s my favorite method! In this series of posts on straight-line quilting, we have discussed options for taking this basic quilting motif up a level to add interest to our overall quilt designs. Today, we are going further by adding hand-stitched accents to our machine quilting.
Why Would You Combine Hand and Machine Quilting?
Hand stitching is an excellent complement to machine quilting, and combining these two forms of stitching brings the best of both worlds: the speed of machine quilting and the texture of hand quilting.
Texture
Hand-quilted quilts have a specific texture due to the quilting stitches traveling up and down through the quilt with a single thread. Machine quilting uses a top and bobbin thread to create a solid stitching line, resulting in a lovely but different texture. When you combine hand and machine quilting in a single piece, you can achieve an overall texture reminiscent of a hand-quilted quilt but with a mostly machine quilting speed.
Hand-Quilting is Easier When Combined with Machine Quilting
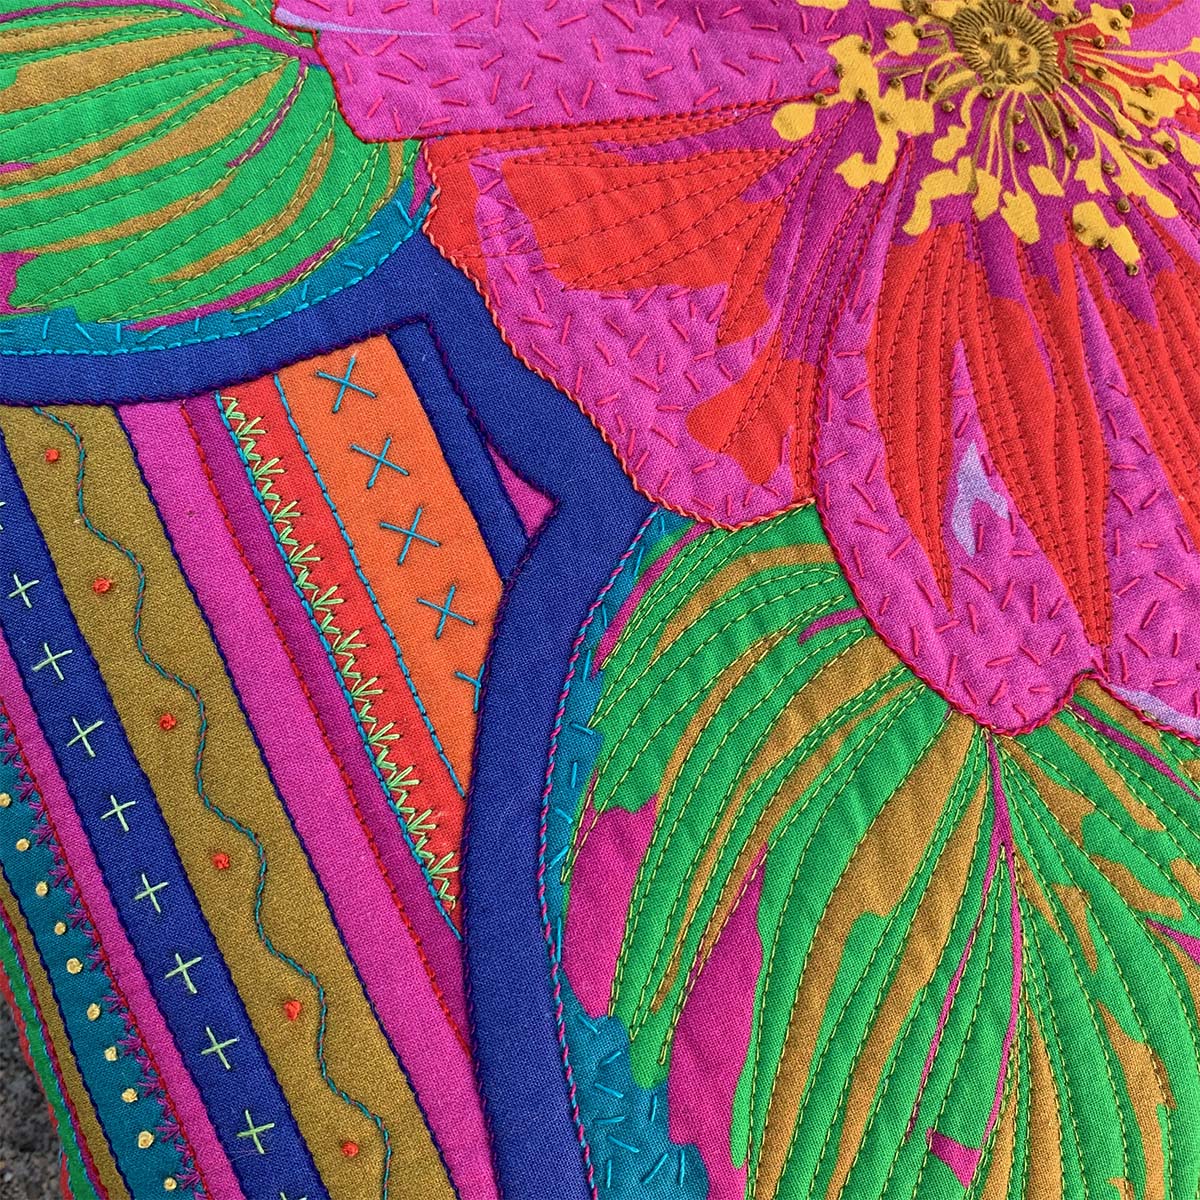
Have you ever tried to hand quilt around safety pins or through spray basting? Your quilting thread easily gets caught on the safety pins, and the needle can get gummy from some basting sprays. When hand-quilting an entire piece, the best option is thread basting, which is time-consuming to put in and take out. However, when you machine quilt most of the quilt first, the layers are firmly held together, making it easy to add hand quilting without any unwanted shifting.
Increases visual interest with additional decorative stitches
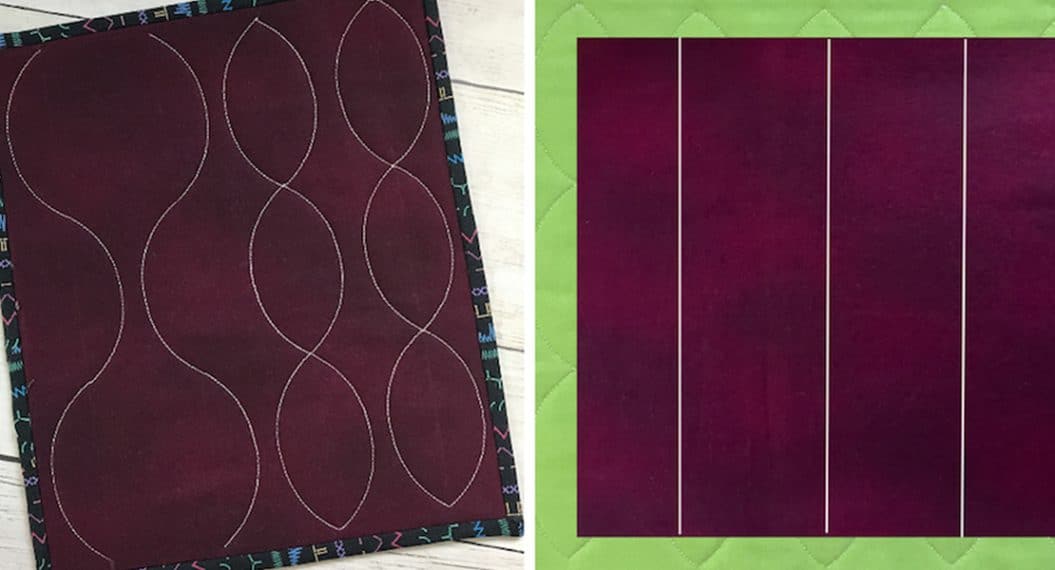
Decorative hand stitches can incorporate breaks into the line, which adds visual interest. When combining hand stitches directly into machine straight or decorative stitches, you can combine multiple colors into a single line of stitching.
Materials for Decorative Hand Stitching
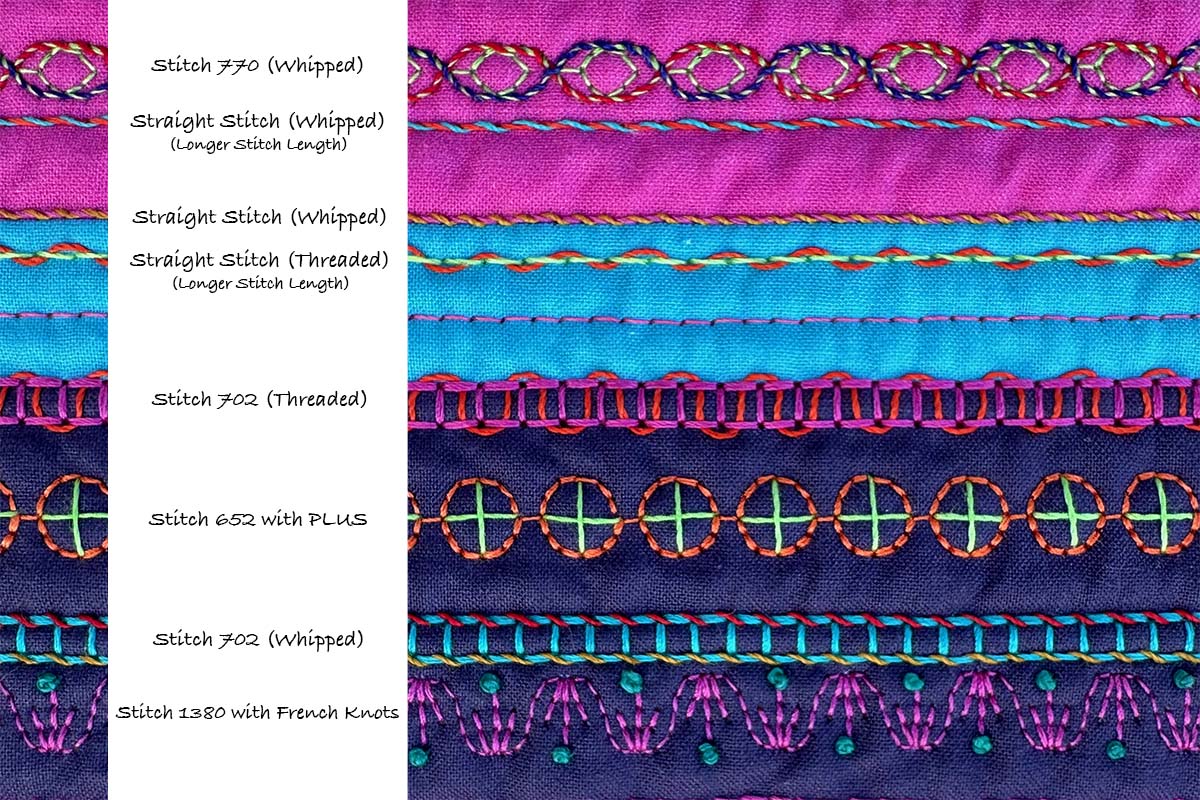
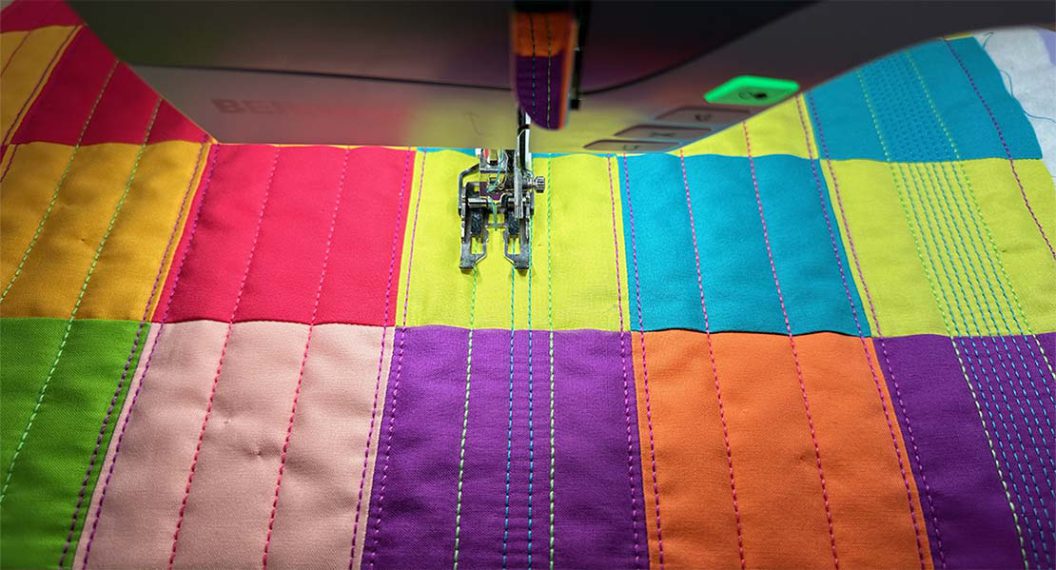
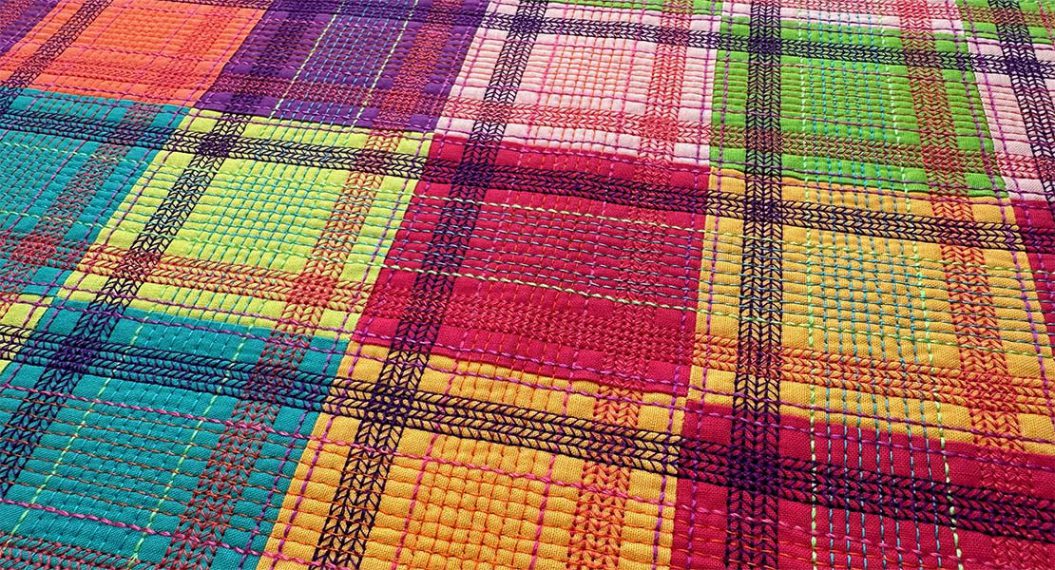
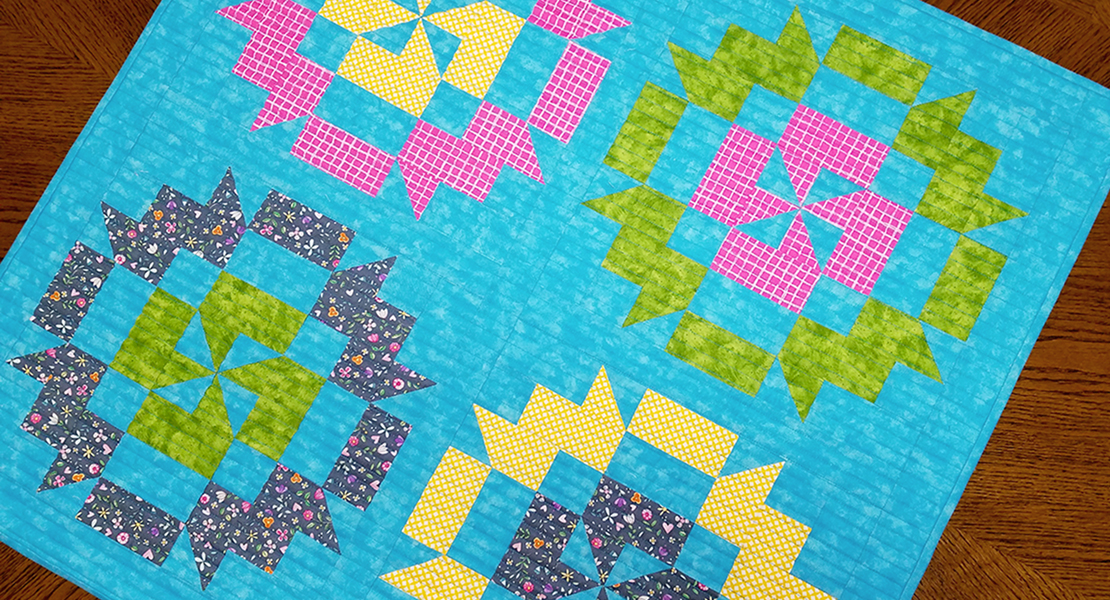
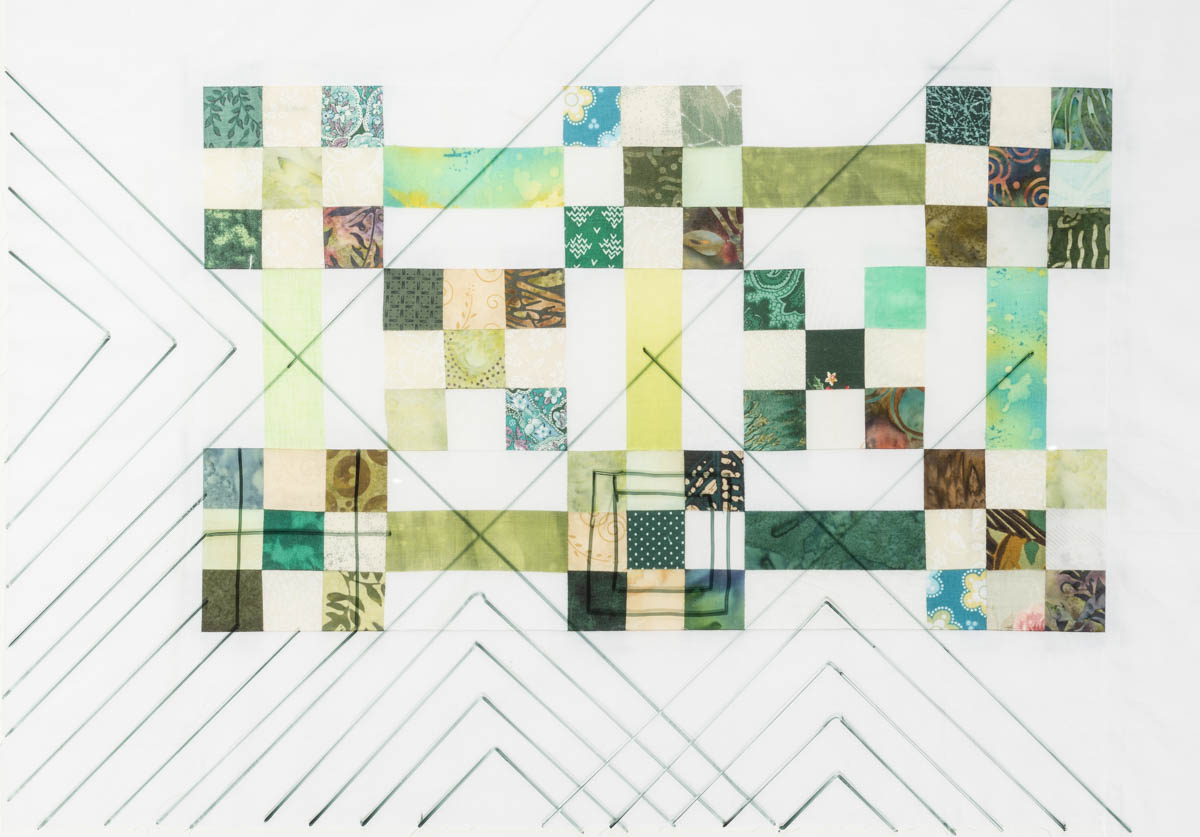
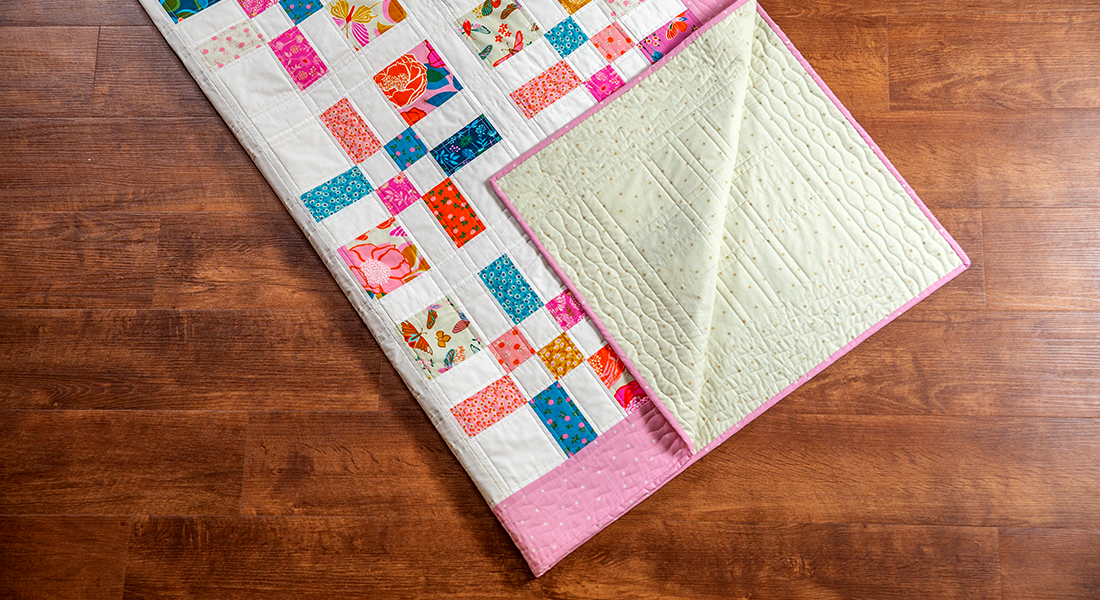
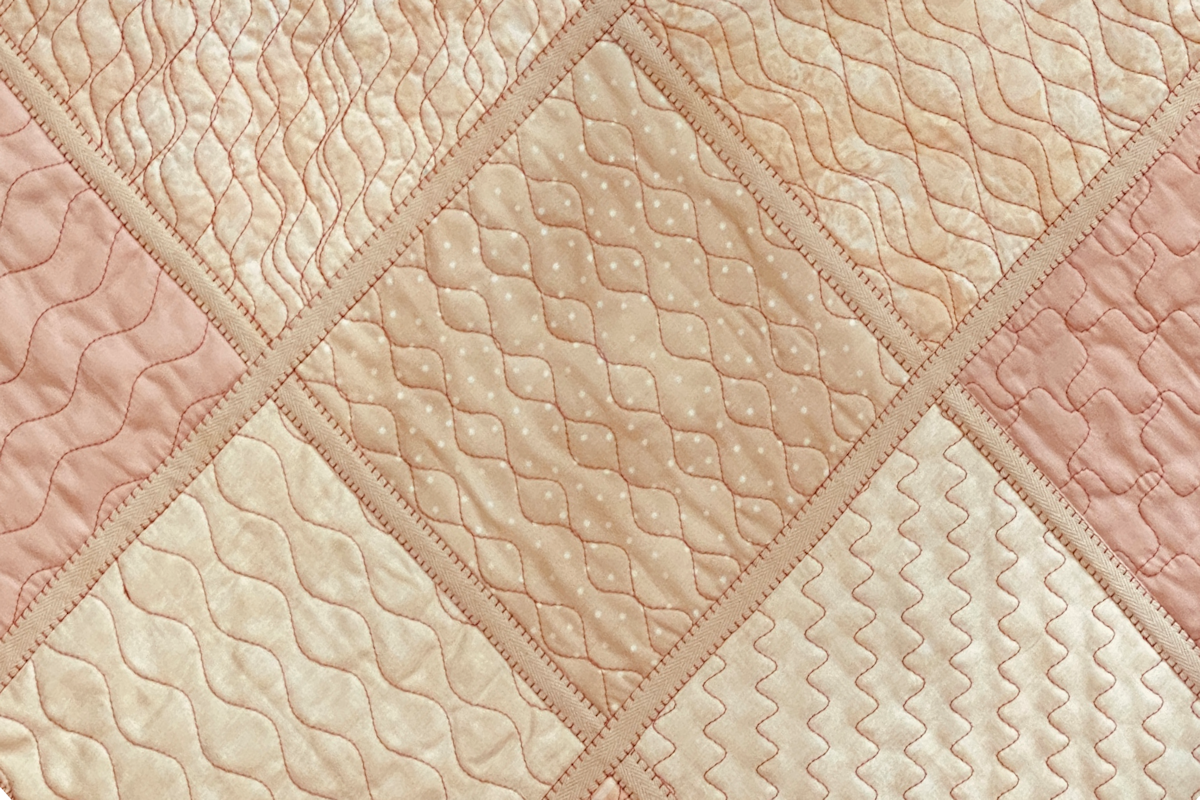
Hand stitching can enhance almost any type of quilted project, so you don’t need specific materials to get started. I suggest working with a practice quilt sandwich to learn the stitches. This quilt sandwich can be plain, or you can use this mini-quilt panel I developed to explore decorative stitching using a variety of thread colors. You can even use a simply pieced mini-quilt and take it to the next level with your stitching!
What you’ll need to give hand stitching a try:
- A small quilt sandwich
- 12-weight cotton thread for stitching (It’s even more fun with various colors!)
- A hand-sewing needle with an eye large enough to accommodate the heavier thread weight. I use a package of Bohin Sharps in assorted sizes for most decorative hand quilting.
- Removable marking pen or pencil that will show on your quilt sandwich
- Basic sewing kit
Adding Decorative Hand Stitching to your Straight Line Quilting
Most decorative hand stitches originate in embroidery designs; we adapt them to function as quilting stitches. Remember that not every embroidery stitch is suitable for every type of project.
Do a sample of any stitch you want to incorporate into your quilting and check how the stitching looks from the front and back. Most stitches look great on the front, but the back may have long traveling stitches that can get caught in fingers or toes if used in a functional cuddling quilt. That doesn’t mean you can’t use these stitches, but they may be better suited to a cushion cover or wall quilt than a quilt that gets handled a lot.
Wrapped Stitches
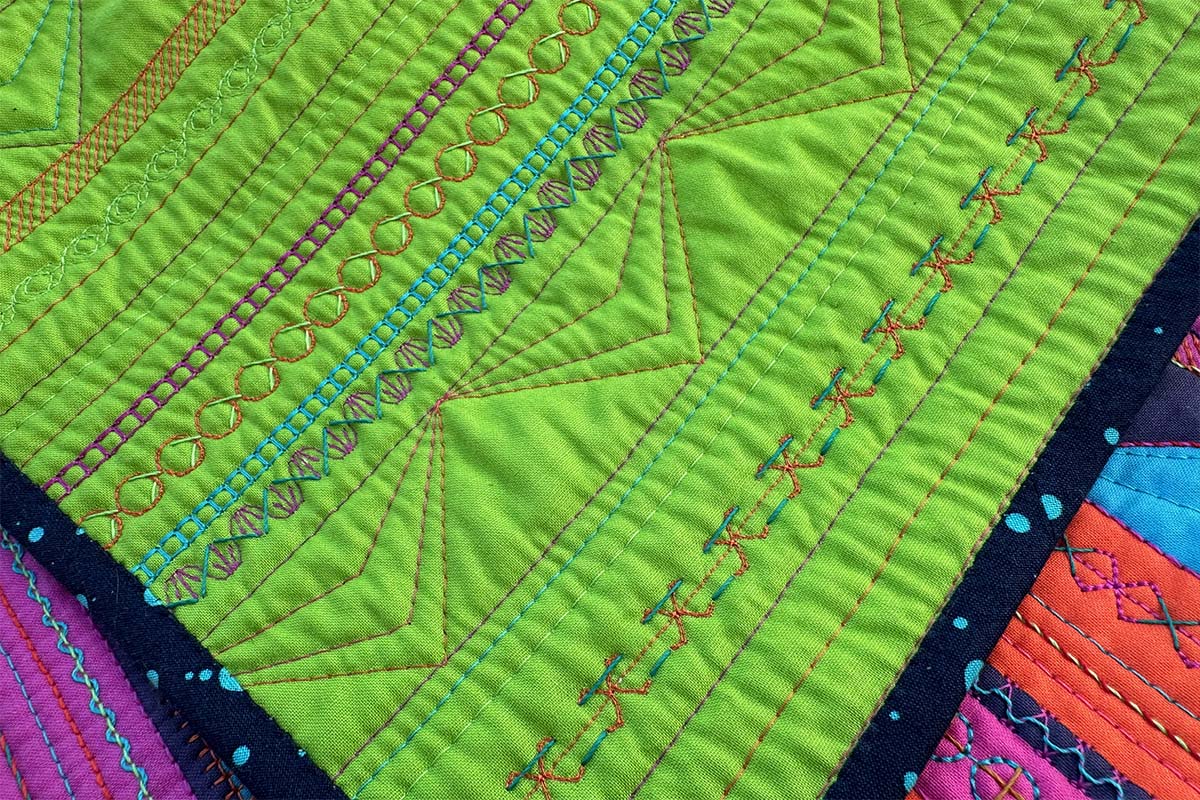
Wrapped stitches involve creating a base stitch and then wrapping that stitch with a different piece of thread. They are the perfect accompaniment for straight and decorative machine stitches because the machine does the hard work of creating a base, and you get the fun of wrapping the stitch.
In embroidery, wrapped stitches are usually created using a needle with a blunt point. When using wrapped stitches in quilting, I like to have a sharp needle to start and bury thread tails. Rather than changing needles to wrap the stitches, I do the stitch wrapping with the eye of the needle traveling under the stitch first. Since this requires pushing the needle at the sharp end, I always wear a thimble when doing wrapped stitches. (And really, any hand stitching!)
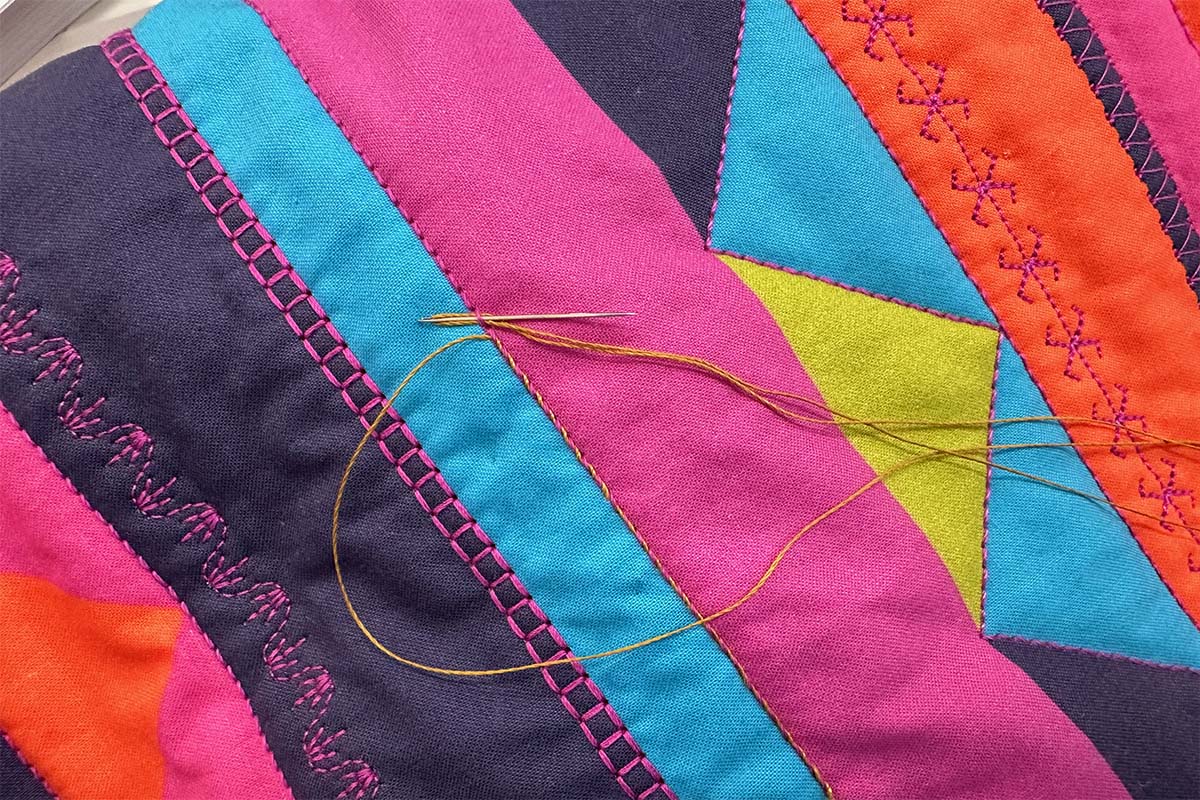
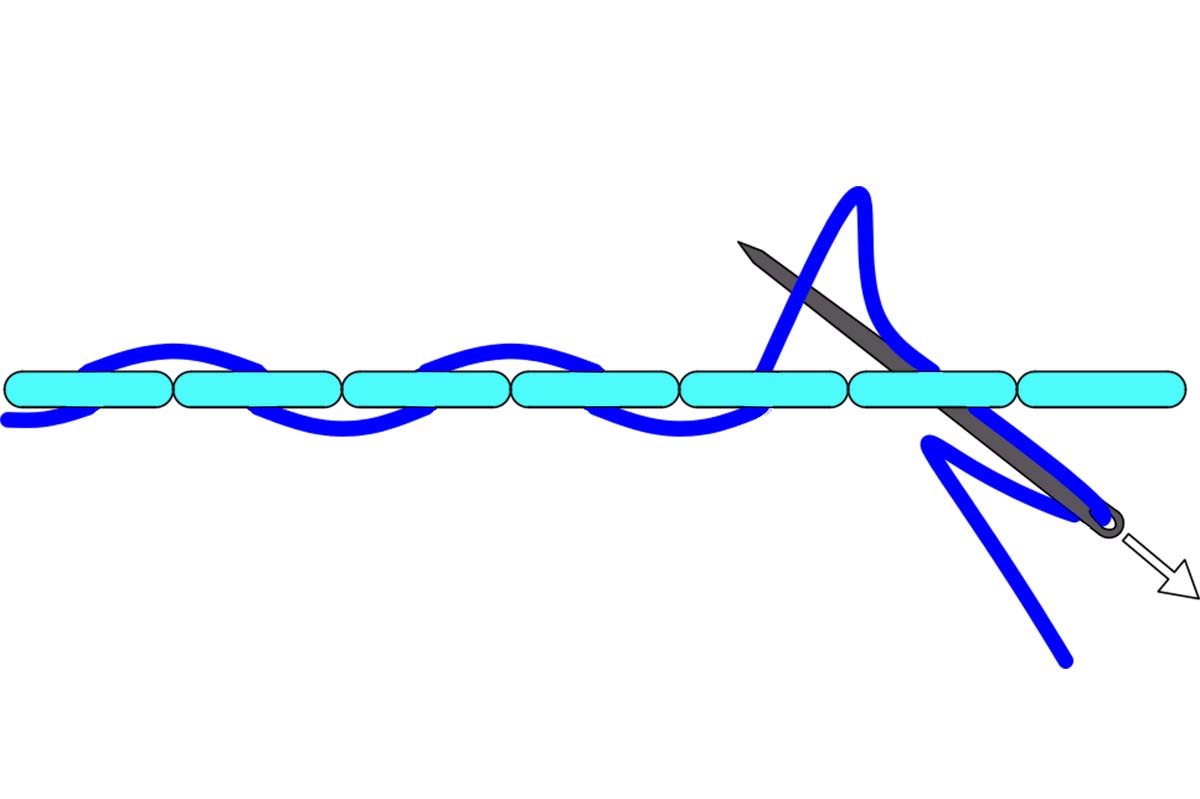
Whipped Straight Stitch
Machine stitch a straight line. Adjust the length of the stitch to create a different look.
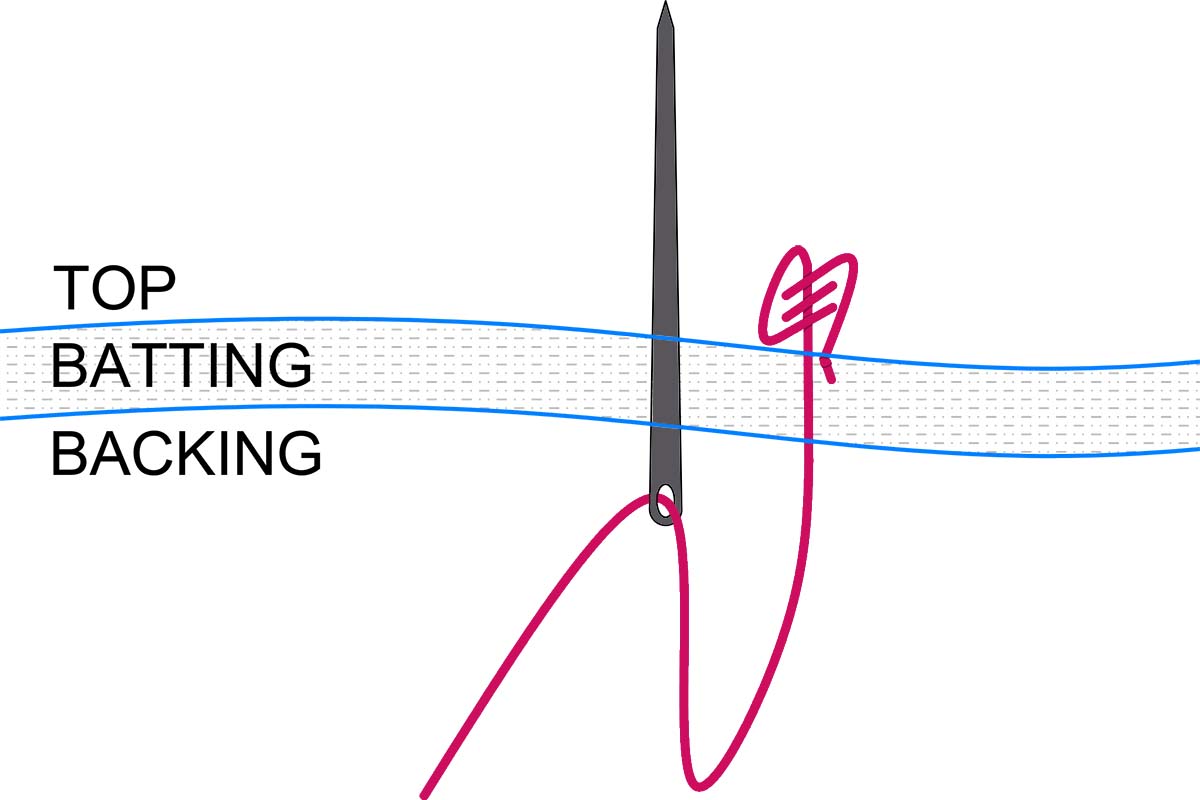
Bury the knot of your wrapping thread at the beginning of your machine stitching line. Leading with the eye end of the needle, travel under the first stitch from bottom to top. Repeat this process in each stitch, always traveling from bottom to top to create the whipped straight stitch.
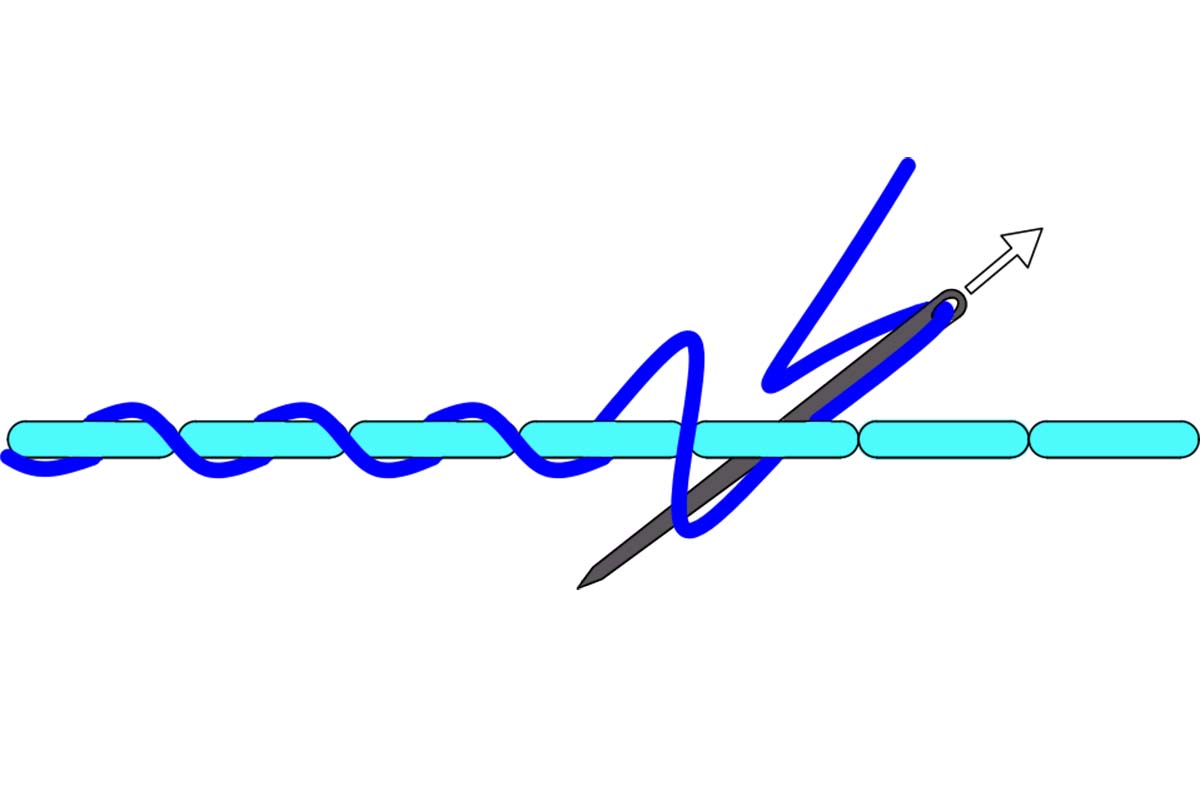
Threaded Straight Stitch
Machine stitch a straight line. Adjust the length of the stitch to create a different look.
Bury the knot of your wrapping thread at the beginning of your machine stitching line. Leading with the eye end of the needle, travel under the first stitch from bottom to top, then travel through the second stitch from top to bottom. Continue along the stitching line, alternating the needle’s direction to create the threaded straight stitch.
Wrapping decorative stitches
Any decorative stitch with a straight line within it is a candidate for wrapped stitches.
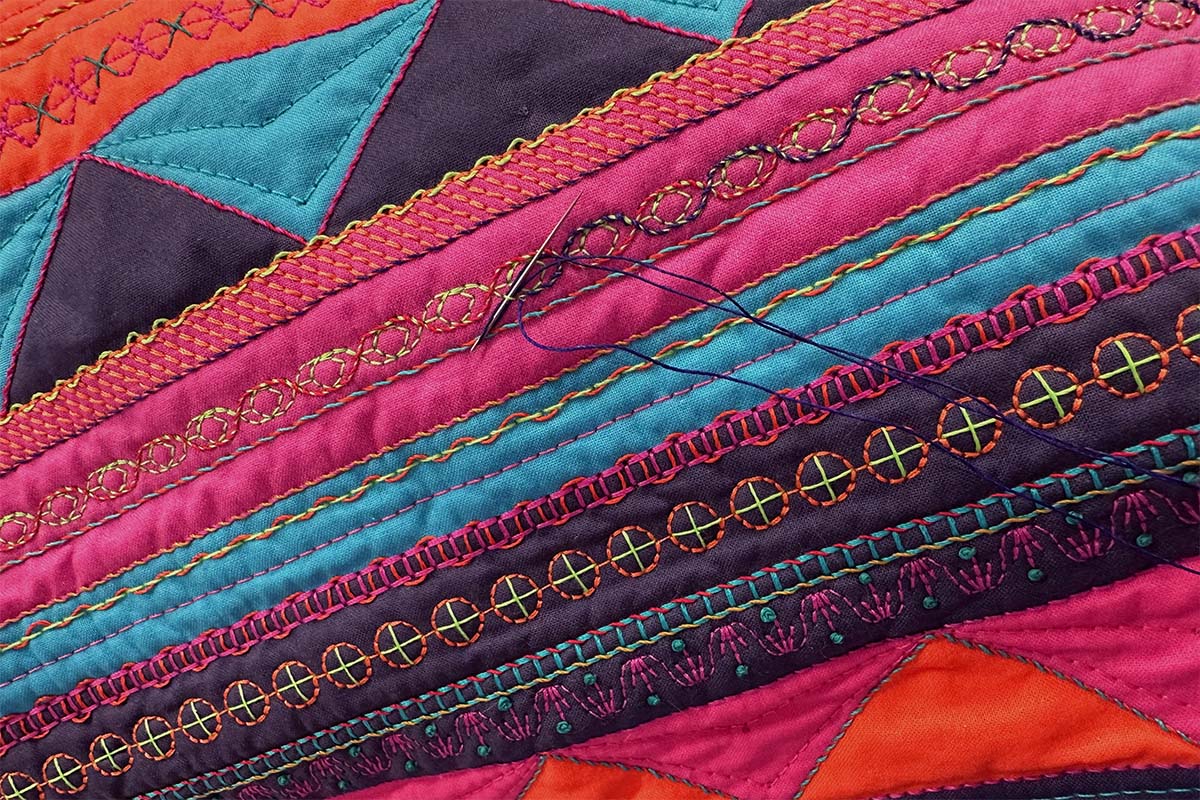
The design of stitch 770 creates the appearance of two outer lines flowing over each other. I used a whipping technique along each line with a different thread color in this example.
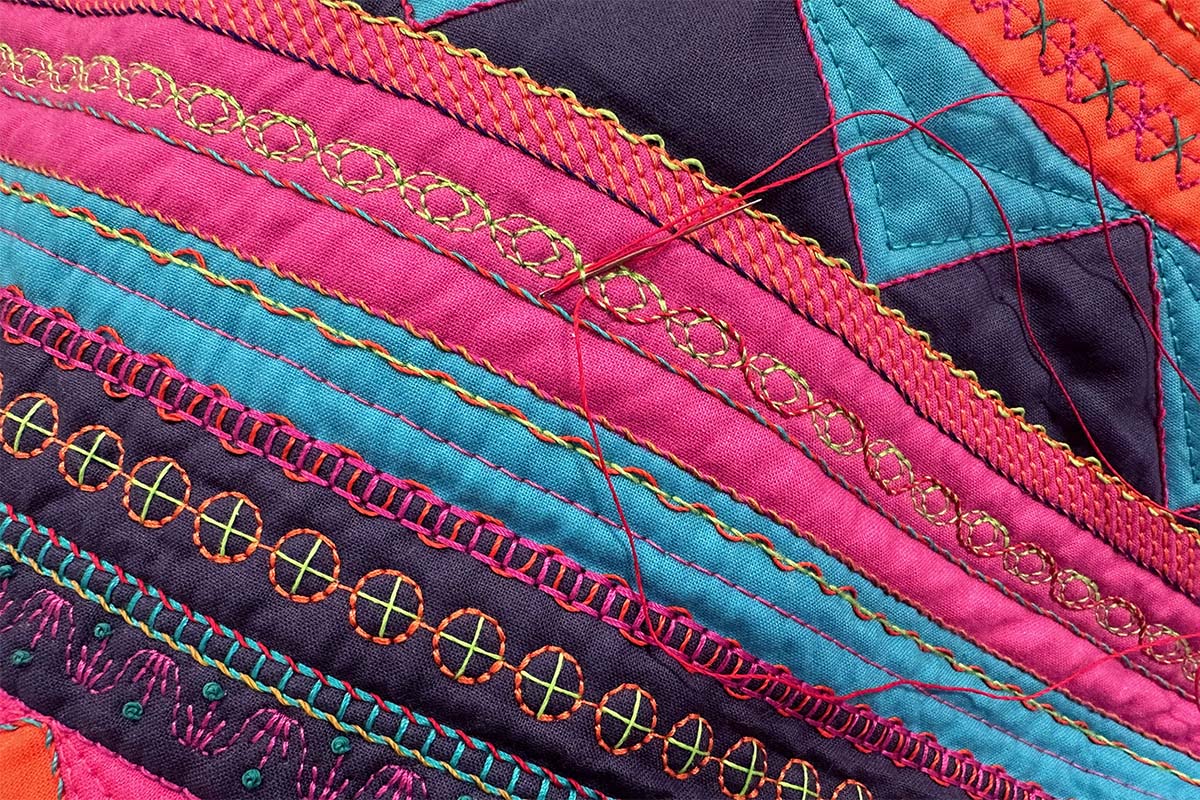
Stitch 702 creates parallel lines of stitching that work well for either whipping or threading. When using the whipped straight stitch technique, I used separate threads to wrap each side of the stitch.
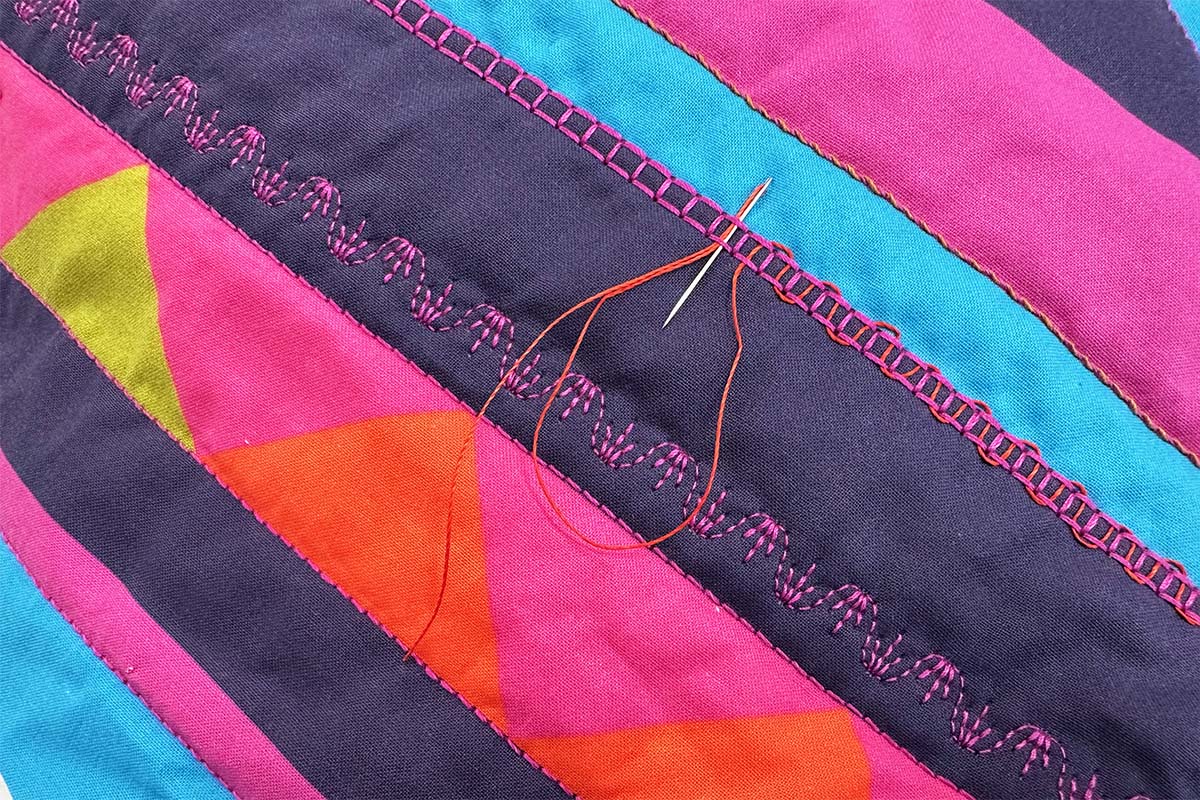
For the threaded stitch technique, I traveled through the parallel stitches to create a wider version of the threading method.
Plus Stitch
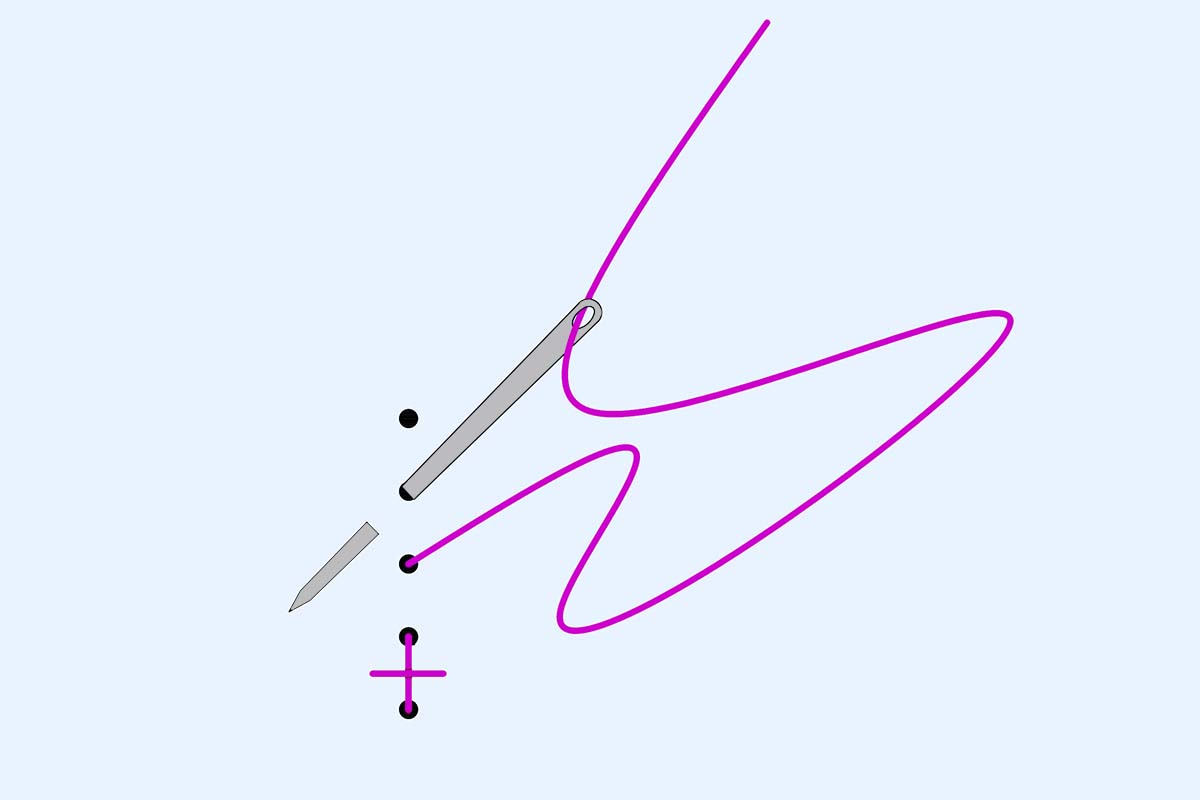
Mark your stitching line with dots 1/4″ apart using a removable fabric pen. You can adjust this spacing to achieve larger or smaller stitches, but this is a good size to start. I prefer doing this stitch with the line running perpendicular to my body. I start stitching close to me and work away.
Knot and bury your thread, bringing the thread up in the first mark.
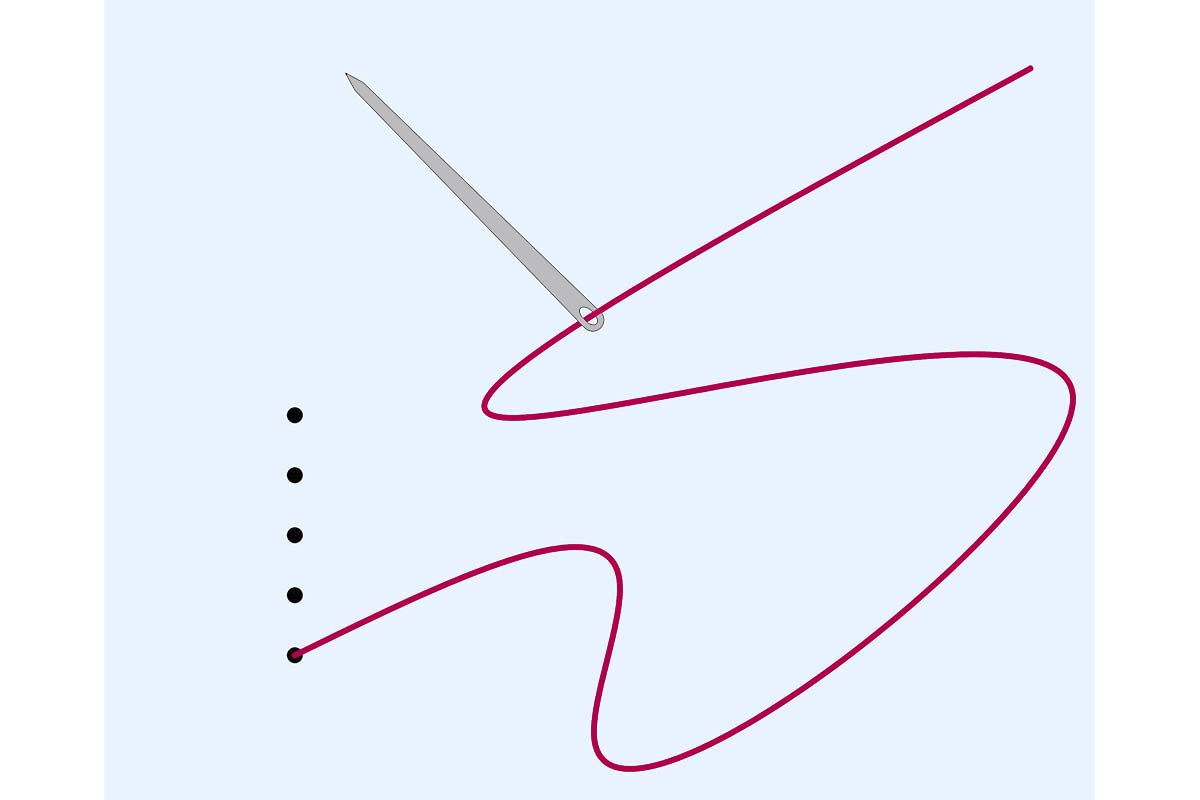
Insert the needle in the next marked dot and bring it up at a 45-degree angle between the first and second marks. This point will be approximately 1/8″ away from the first part of the stitch.
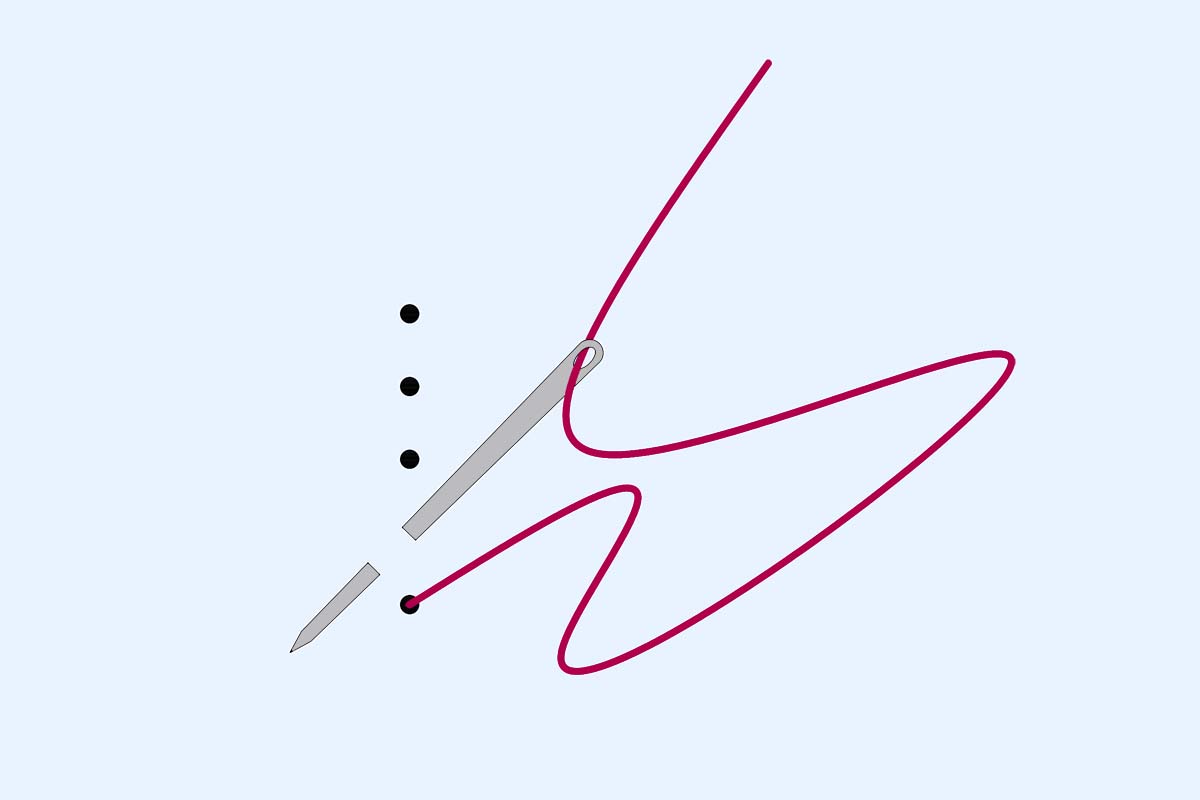
Insert the needle perpendicularly across the first stitch, which is approximately 1/4″ long. Bring the needle up in the third dot.
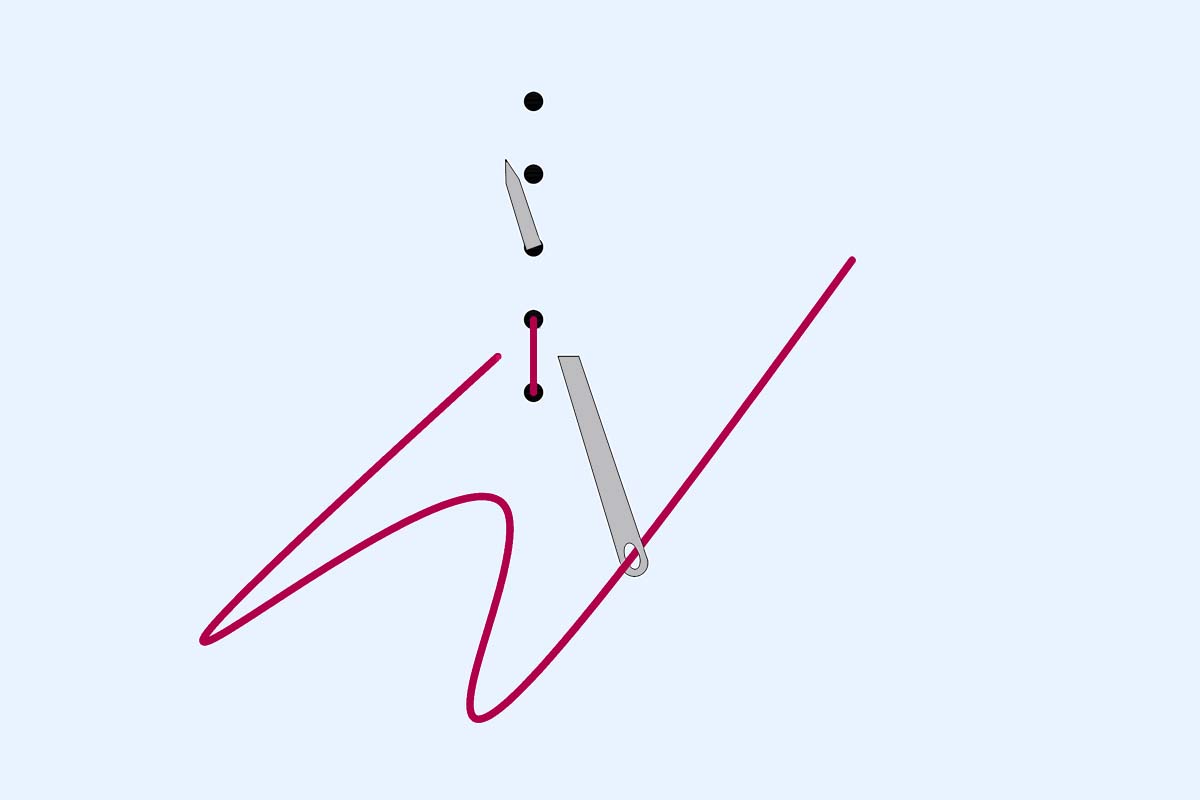
Continue stitching by repeating these steps.
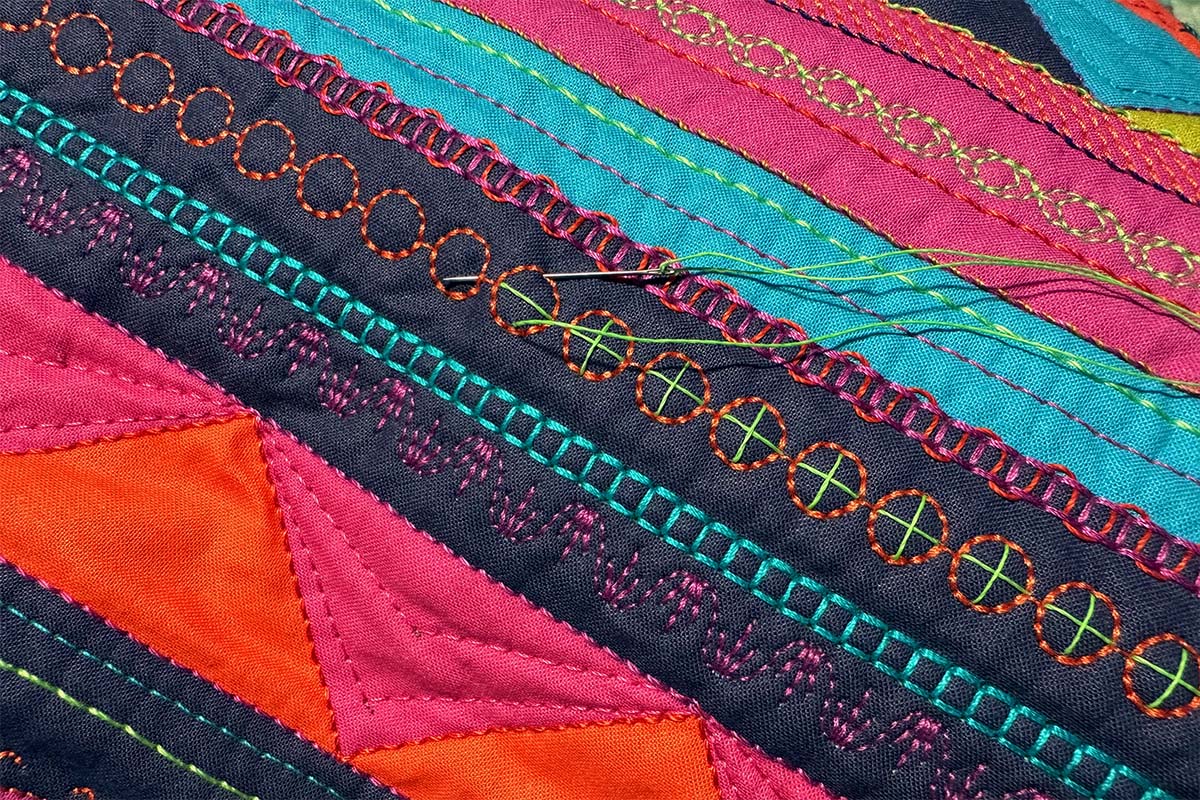
Stitch 652 features a line of open circles that work well for adding decorative plus stitches.
I added extra color to stitch 332 by layering plus stitches over the machine-stitched design.
X-Stitch
Mark two parallel lines with dots 1/4″ apart. Once you have practiced this stitch, you can adjust this spacing to vary the look of the X-stitch. I prefer doing this stitch with the line running perpendicular to my body. I start stitching close to me and work away.
Knot and bury your thread, bringing the thread up in the first mark of the right-hand row.
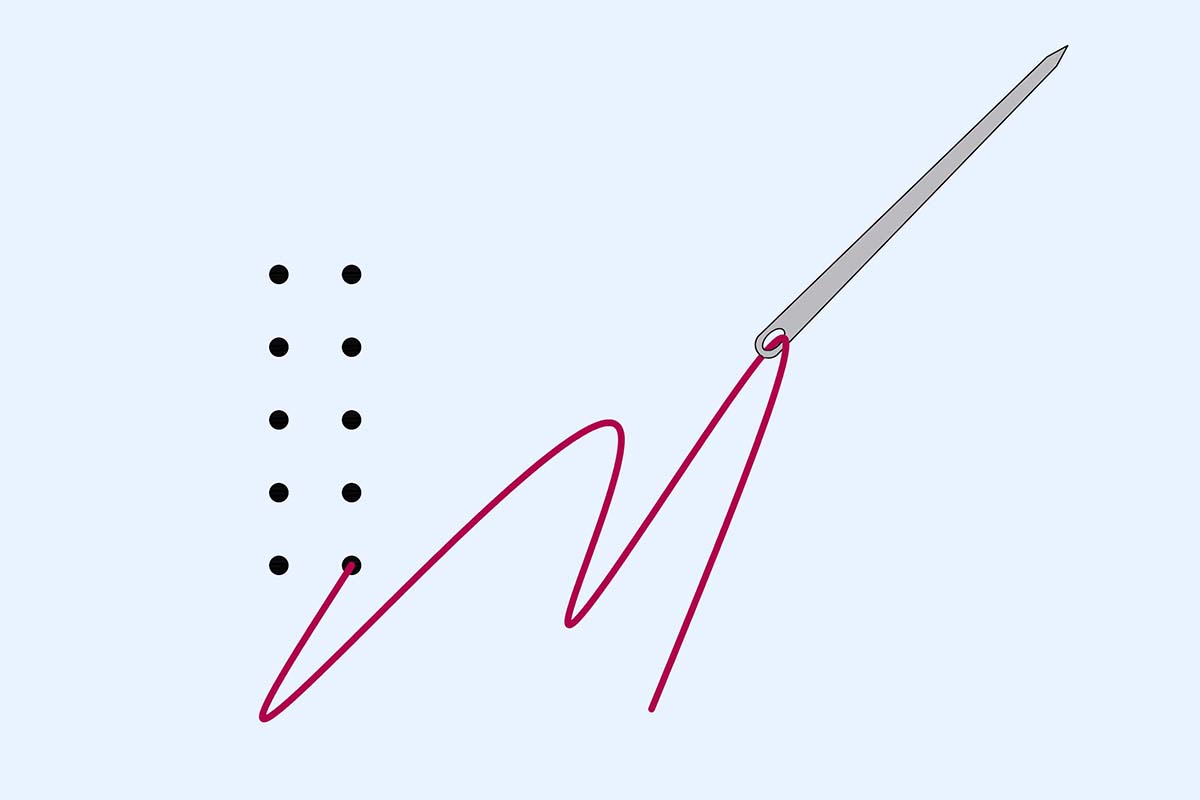
Insert the needle into the dot diagonal from the first dot and bring it up in the dot directly across from the first dot.
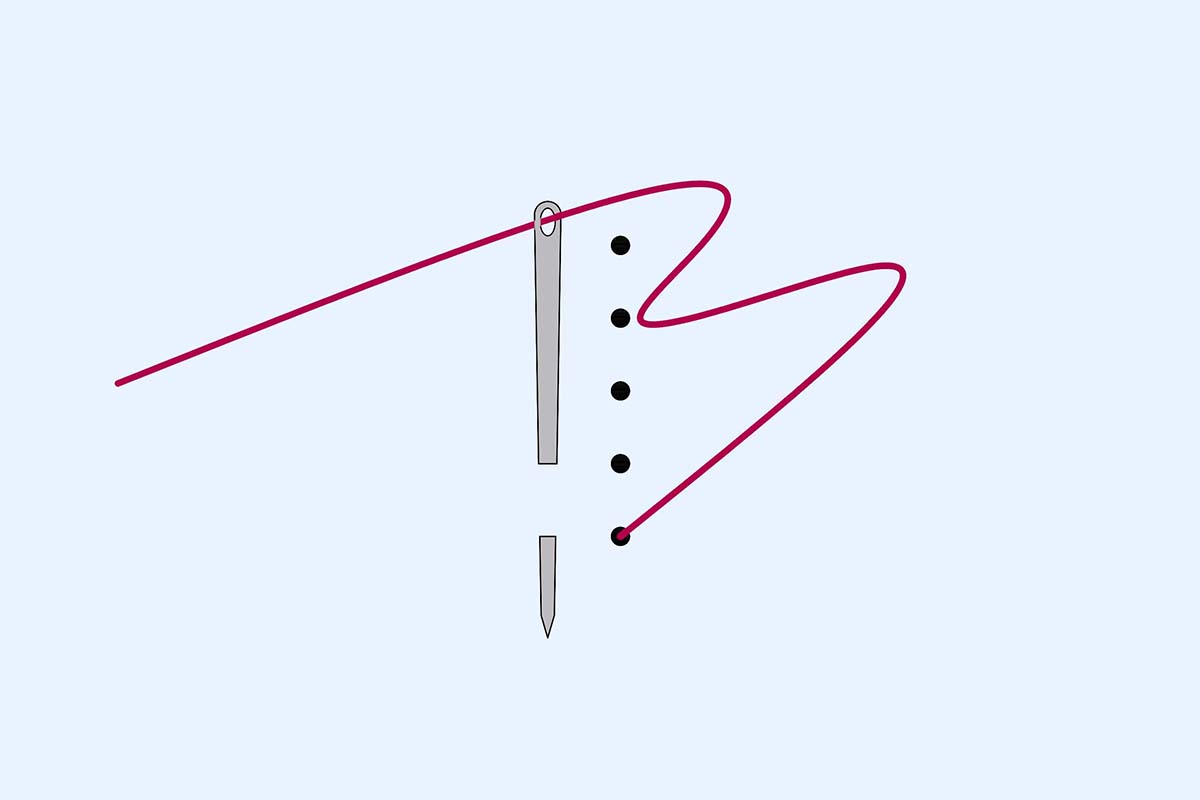
Insert the needle in the dot directly ahead of the first dot and bring it up at the next mark in the line.
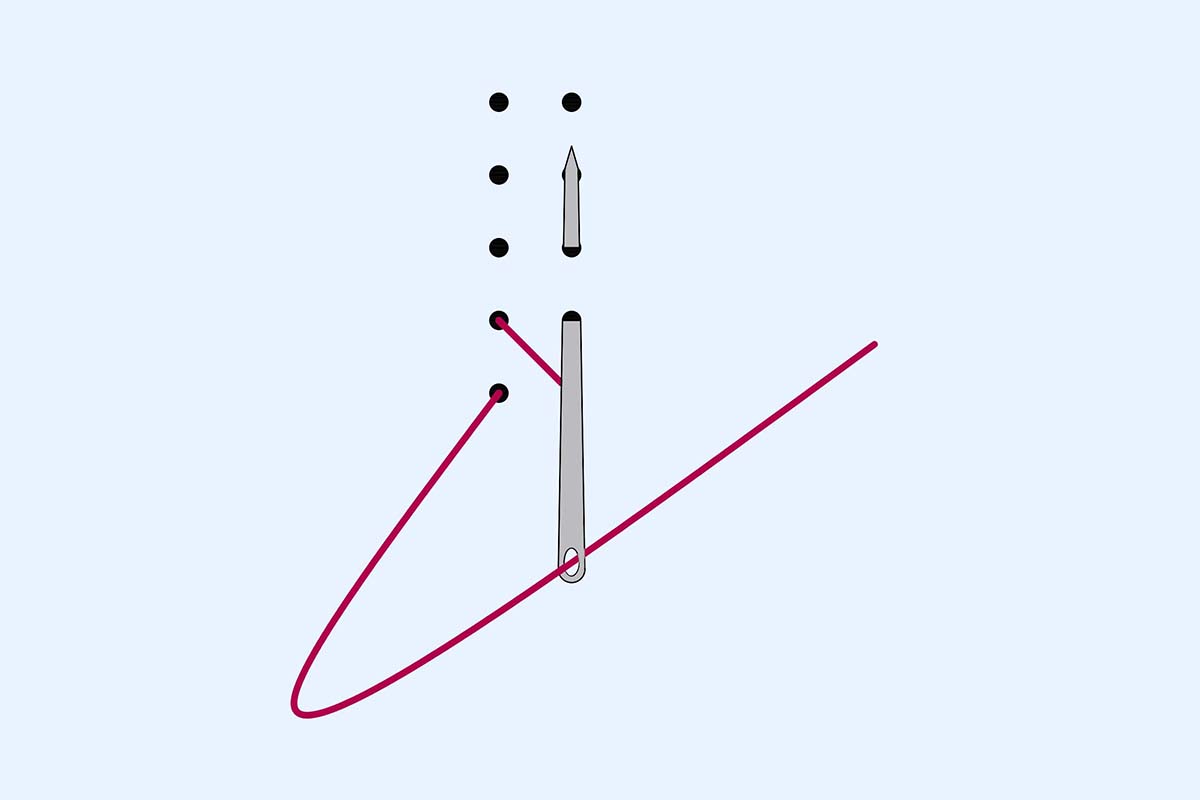
Continue stitching by repeating these steps.
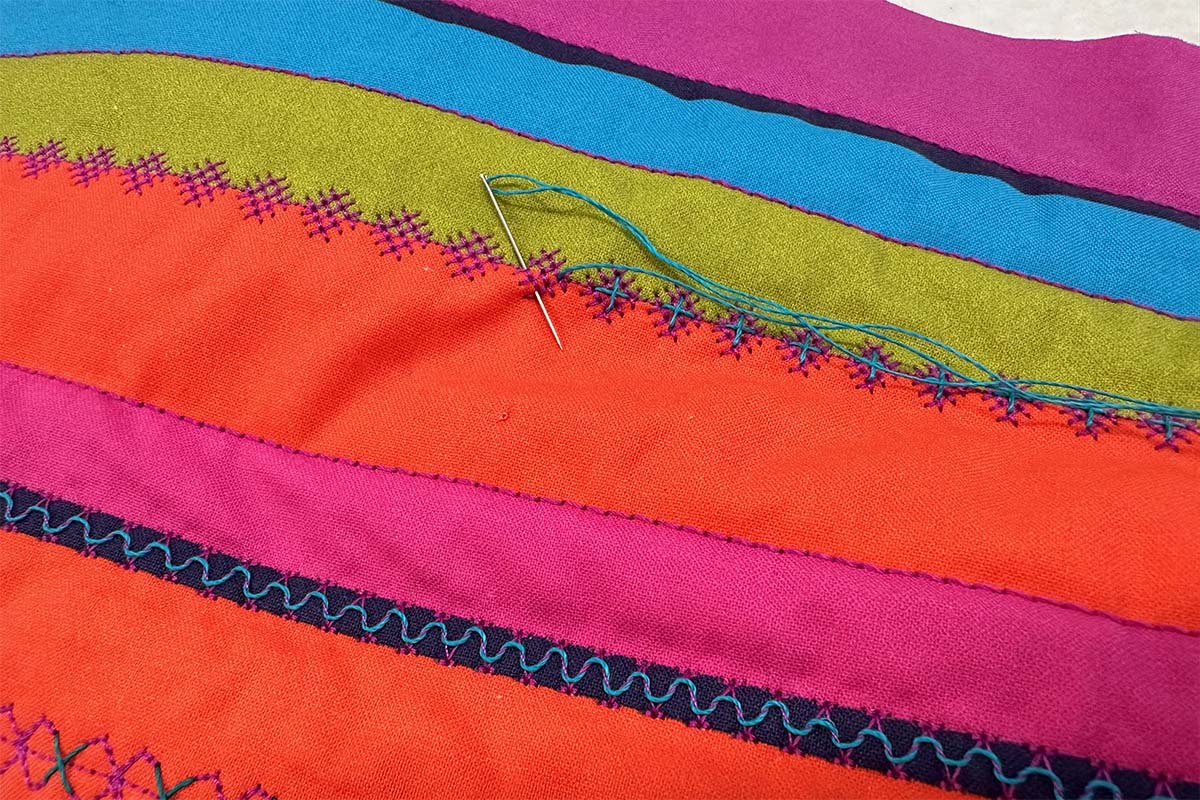
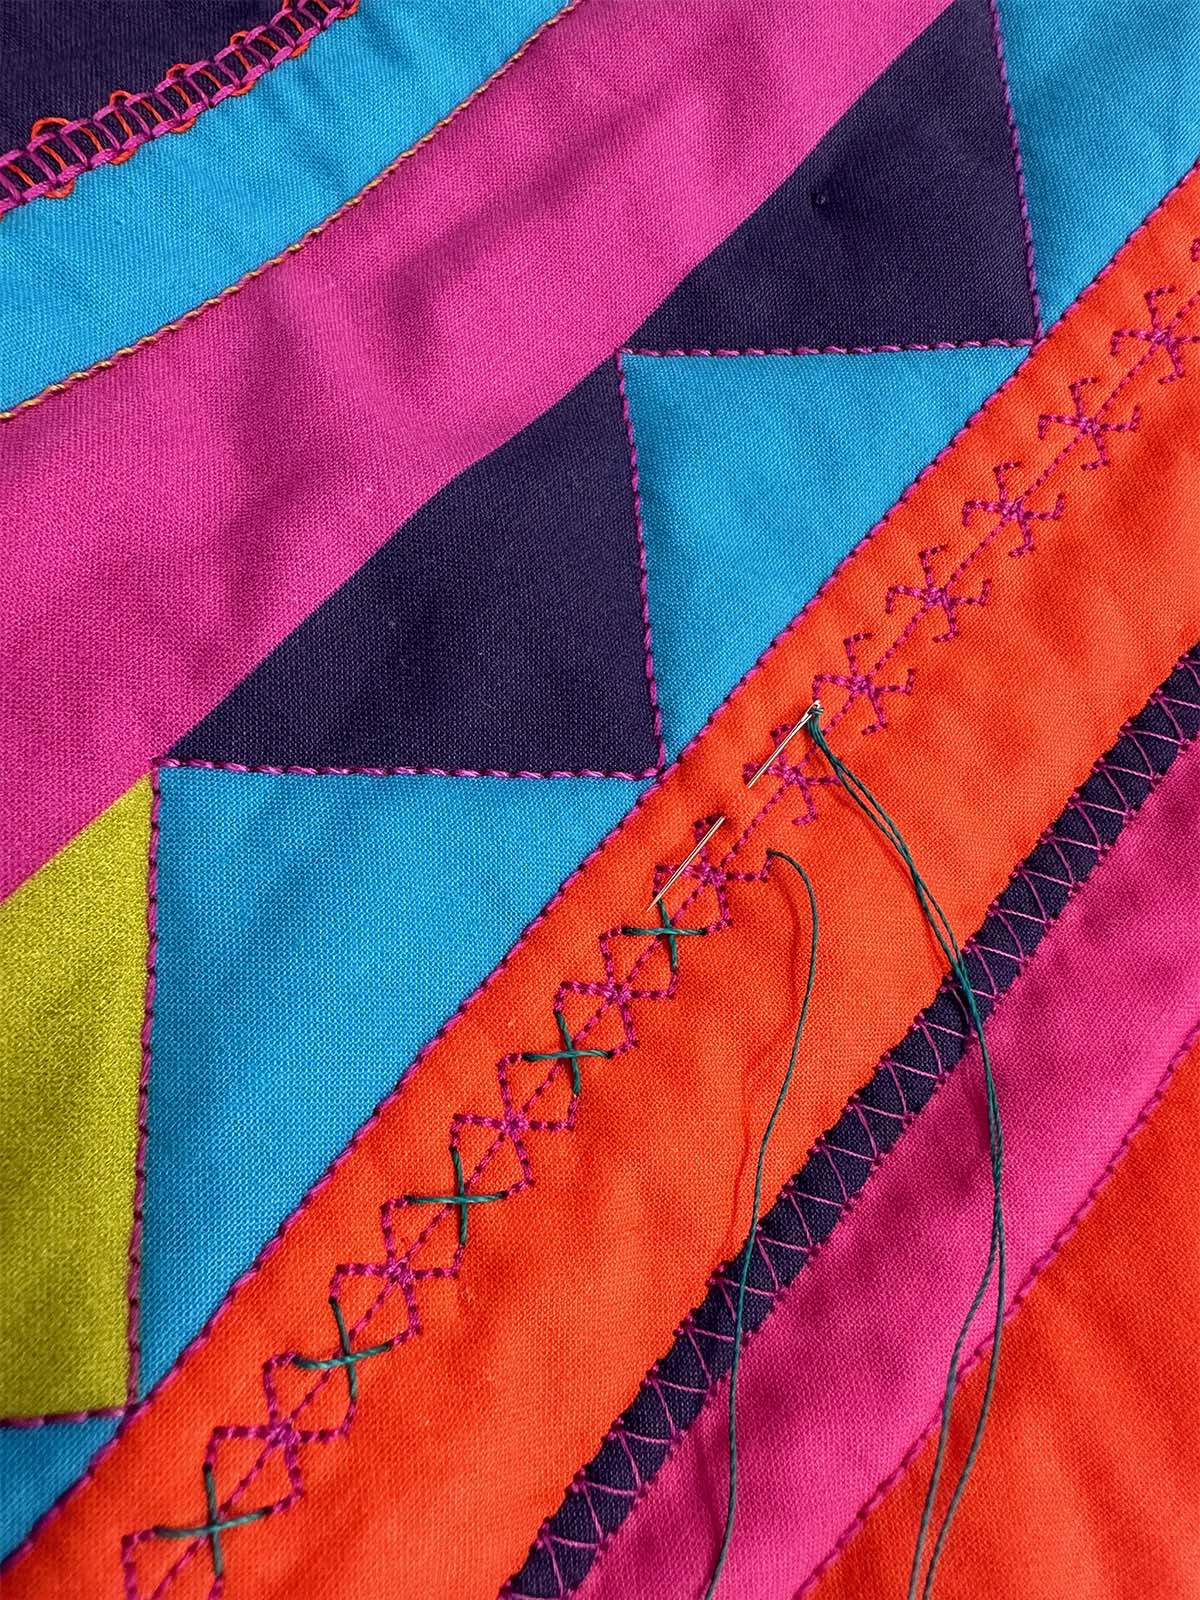
The X-stitch combines well with symmetrical stitches with distinct points within the pattern. In the photo below, I am adding X-stitches to stitch 1370. The addition of hand stitching to this machine stitch brings in extra color and increases the visual weight of the design.
French Knot
Mark your stitching line with dots 1/4″ apart.
Knot and bury your thread, bringing the thread up in the first mark. Using the part of the thread near the fabric, wrap the thread over and under the needle.
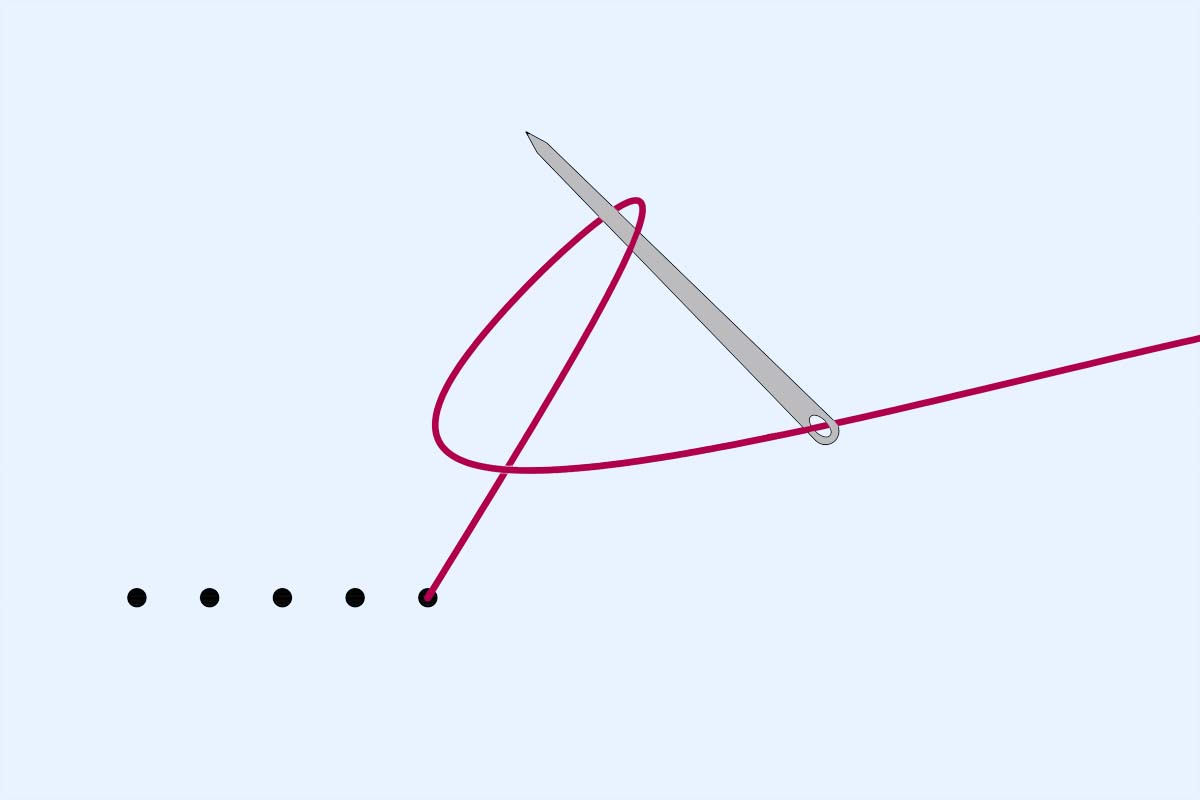
Wrap the thread around the needle twice more for a total of three wraps. The more times you wrap the thread, the larger the knot will be.
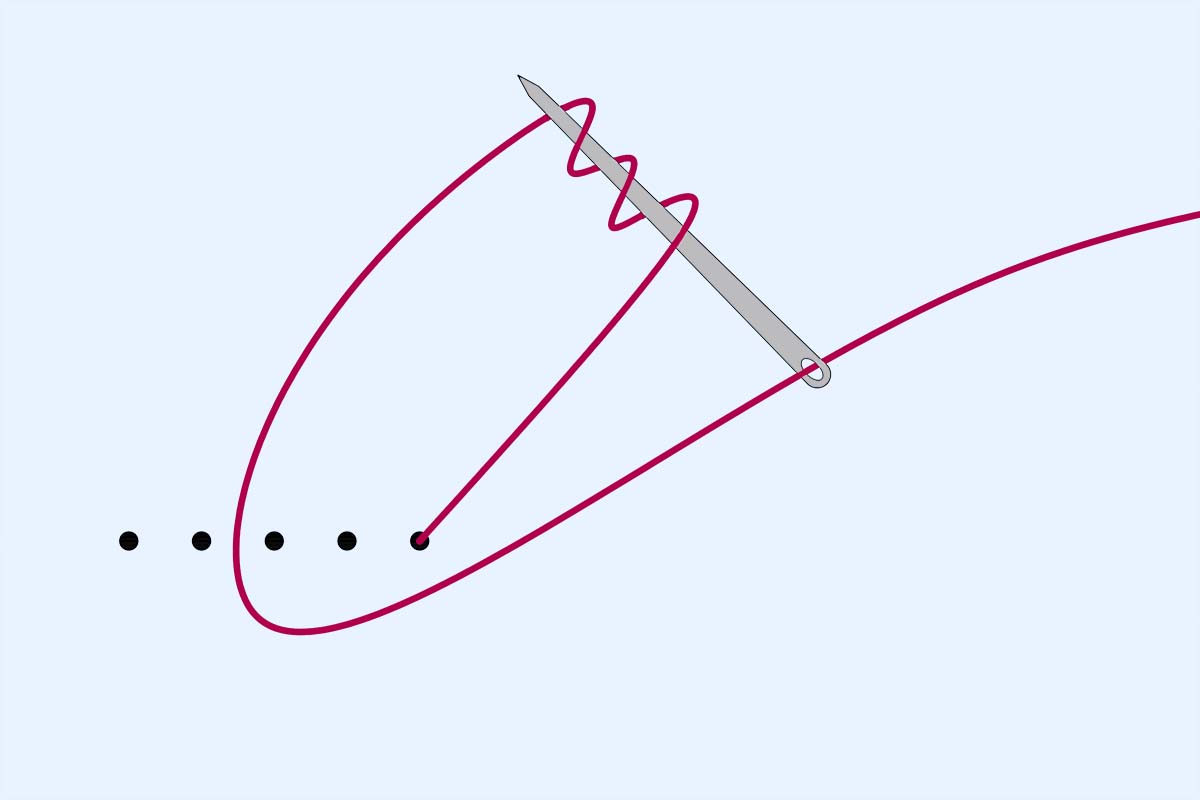
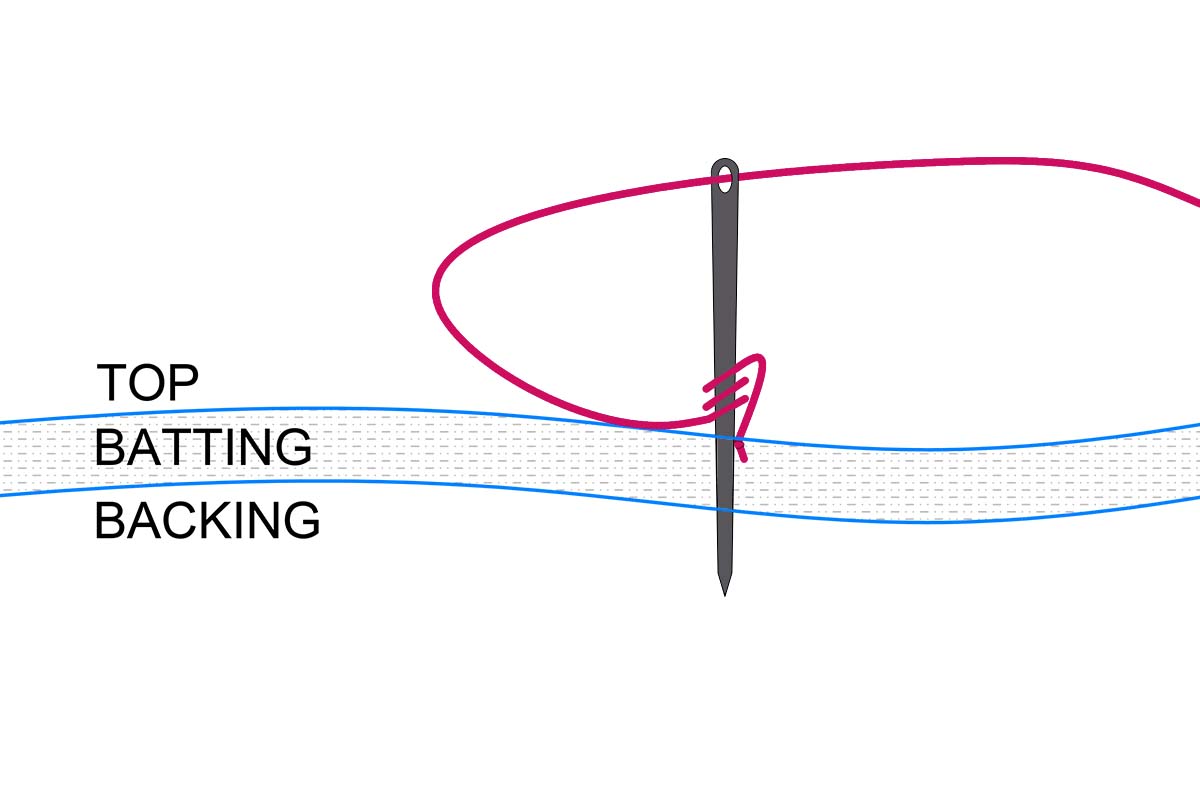
Slide the thread along the needle so the wrapped portion of the thread is as close to the fabric as possible. Insert the point of the needle straight through the same dot you started the stitch.
Slowly pull the thread through to the back of the quilt to form the knot.
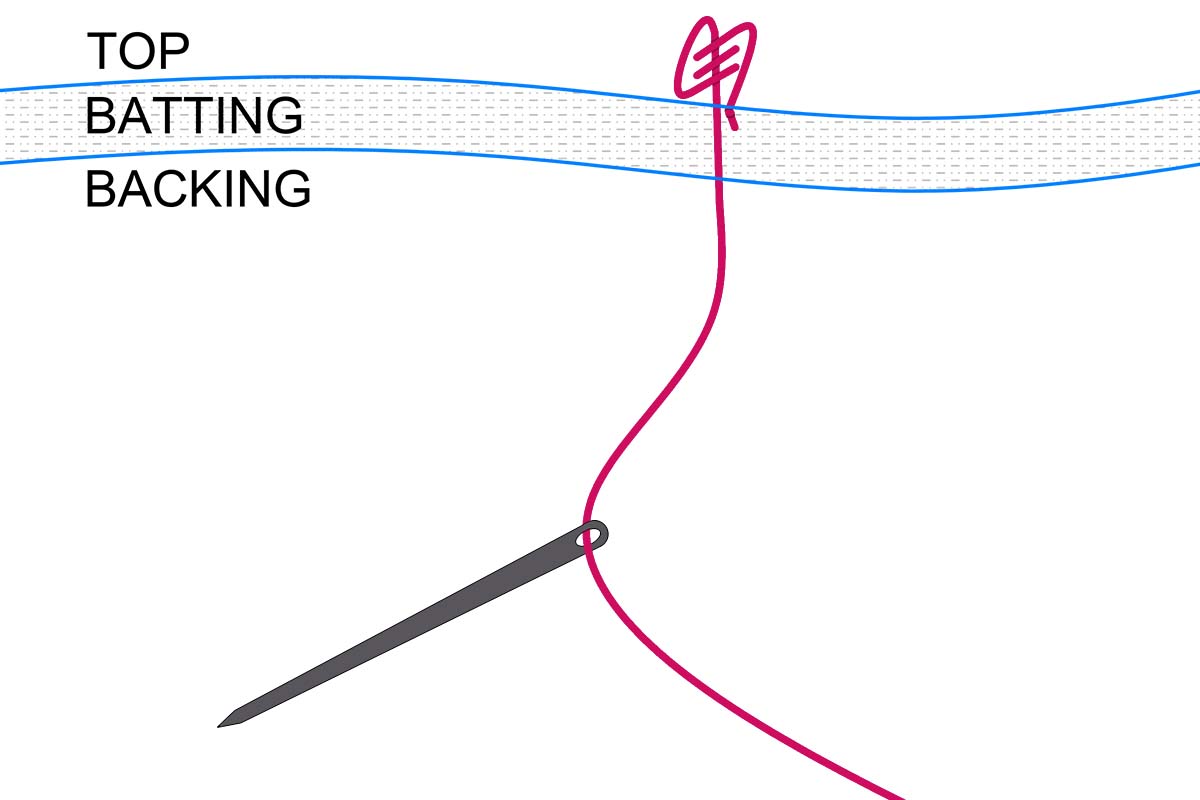
Bring the needle up through the next marked dot and repeat these steps to complete your row of stitching.
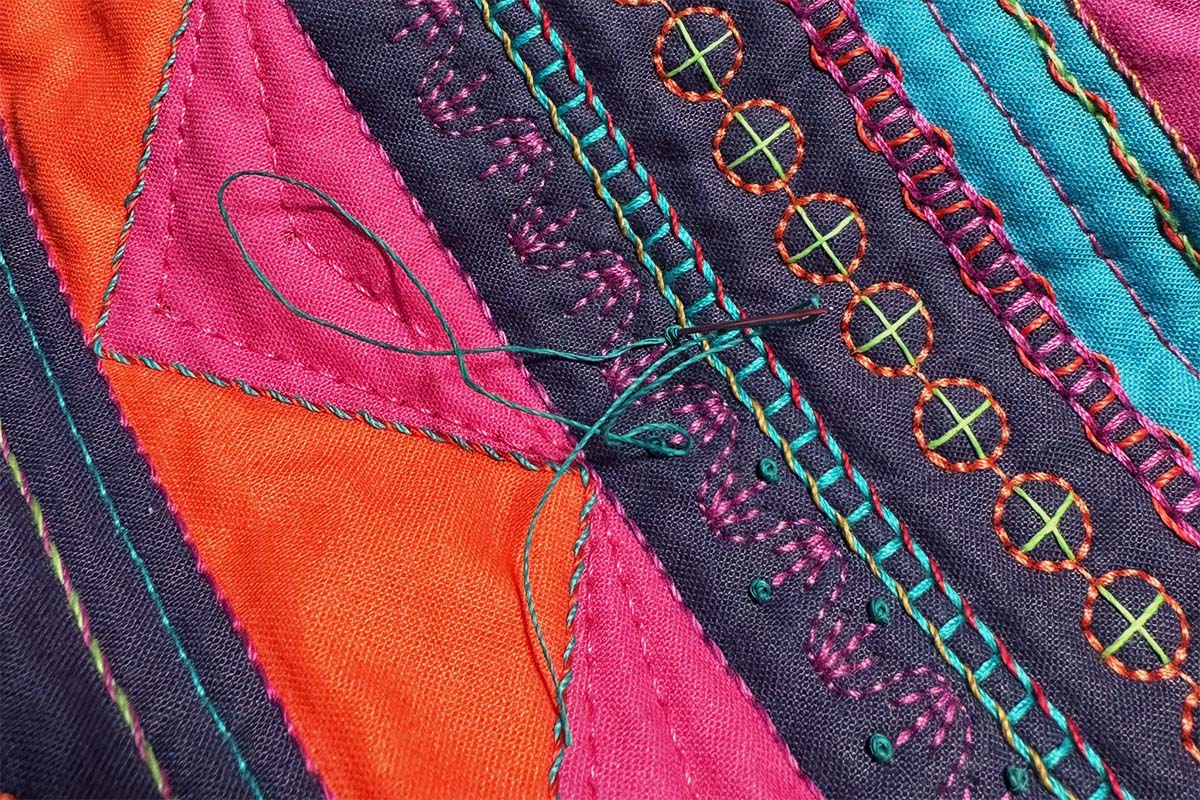
French Knots are a great accent to many machine stitches. I particularly enjoy adding them to decorative stitches with points such as stitch 1380.
Additional Resources for Hand Stitching Inspiration
Are you excited to combine more decorative hand stitching with your machine quilting? There are many excellent resources out there to help you get started. Here are three of my favorite books on embroidery stitches:
- Creative Stitching Second Edition by Sue Spargo
- Creative Stitches for Contemporary Embroidery by Sharon Boggon
- Embroidery: A Step-By-Step Guide to More Than 200 Stitches by Lucinda Ganderton
For online embroidery resources, check out this stitch dictionary and the Royal School of Needlework Stitch Bank.
Your Project is Next!
Thank you for joining me for this series on upgrading your straight-line quilting. I hope you have lots of ideas for how you will incorporate straight-line quilting in a new way into an upcoming project!
What you might also like
2 comments on “Upgrading Your Straight Line Quilting, Part Three: Accenting with Hand Stitching”
-
-
Upgrading Your Straight Line Quilting by Cassandra Beaver, January 2, 2025. In the paragraph below Materials for Decorative Hand Stitching, she talks about a “multi-quilt panel” that she developed to explore decorative stitching using a variety of thread colors that we can use. I clicked on the icon, and there was no “multi-quilt panel”. Where will I find her “multi-quilt panel”?
Leave a Reply
You must be logged in to post a comment.





The link to the mini quilt panel from Spoonflower isn’t currently working.