Upholstered Cushion Cover
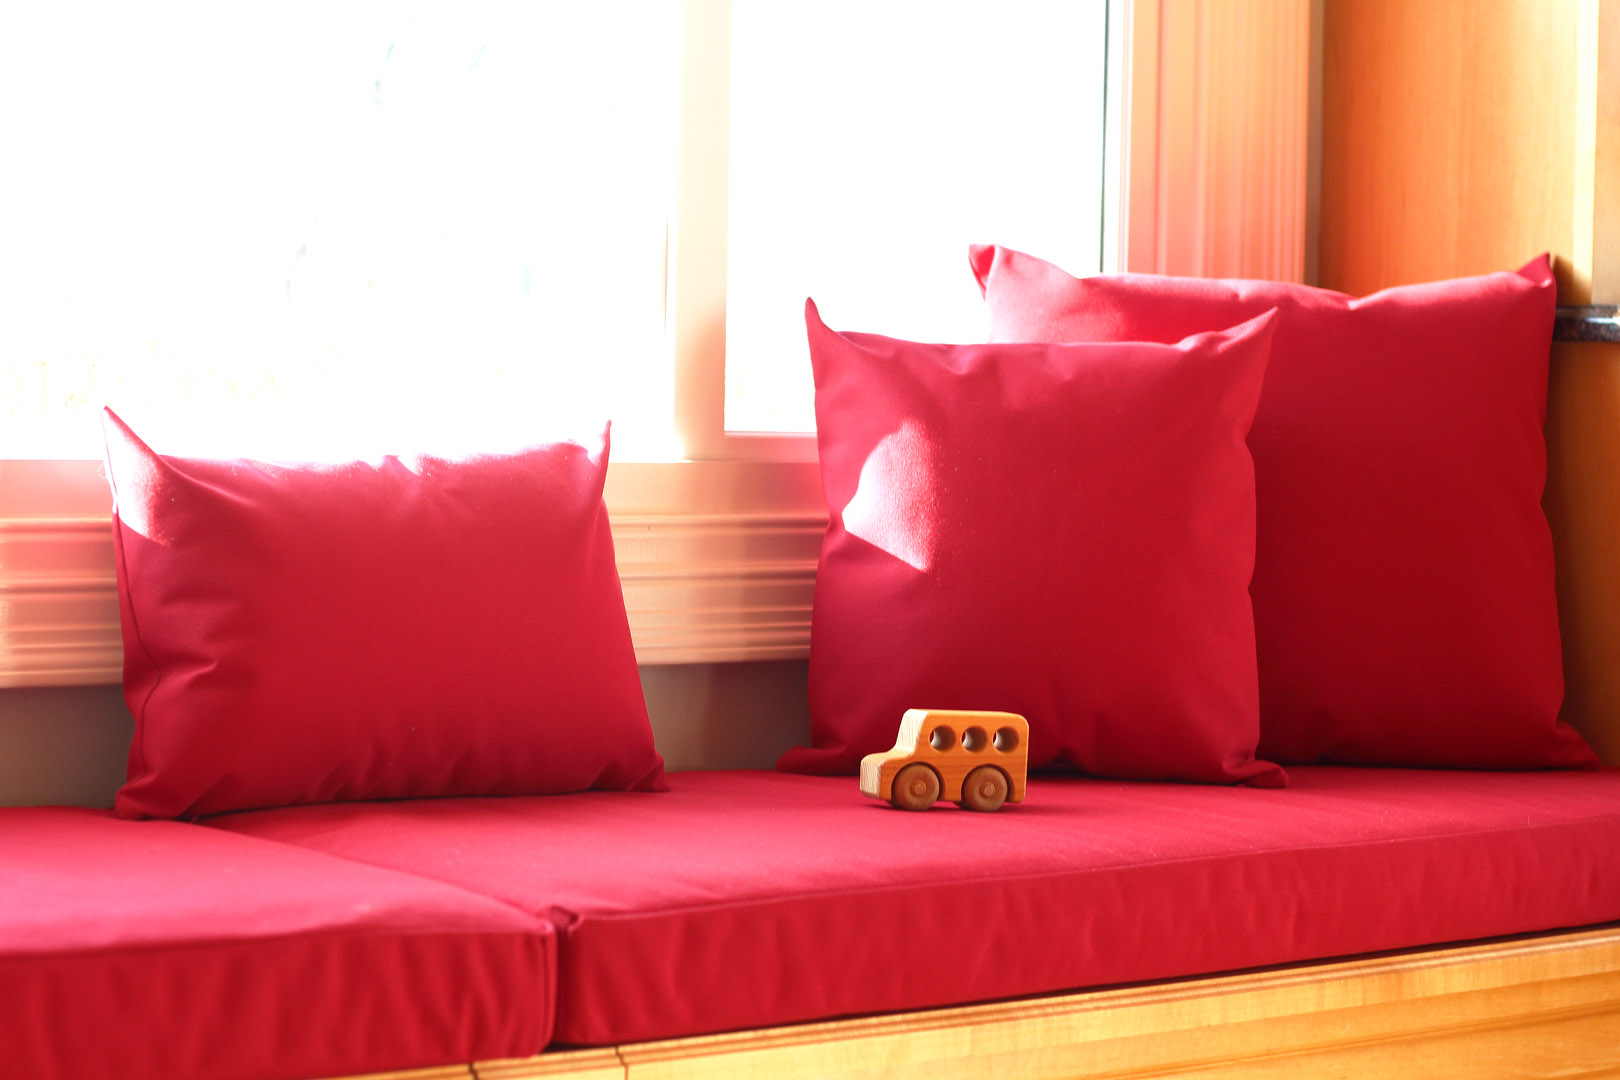
Sometimes all it takes to give old furniture new life is a simple cover. I made the simplest of upholstered cushion covers for these seats featuring a zipper panel on the back of the cushions with a flap to hide the zipper pull. I’ll show you how easy it was to make these simple covers!
Materials to Make an Upholstered Cushion Cover
- Home dec or heavyweight fabric (see below for measuring and yardage)
- Long ruler, fabric marking pencil, and scissors
- Coordinating thread (I used both a heavyweight upholstery thread and a strong polyester all-purpose thread)
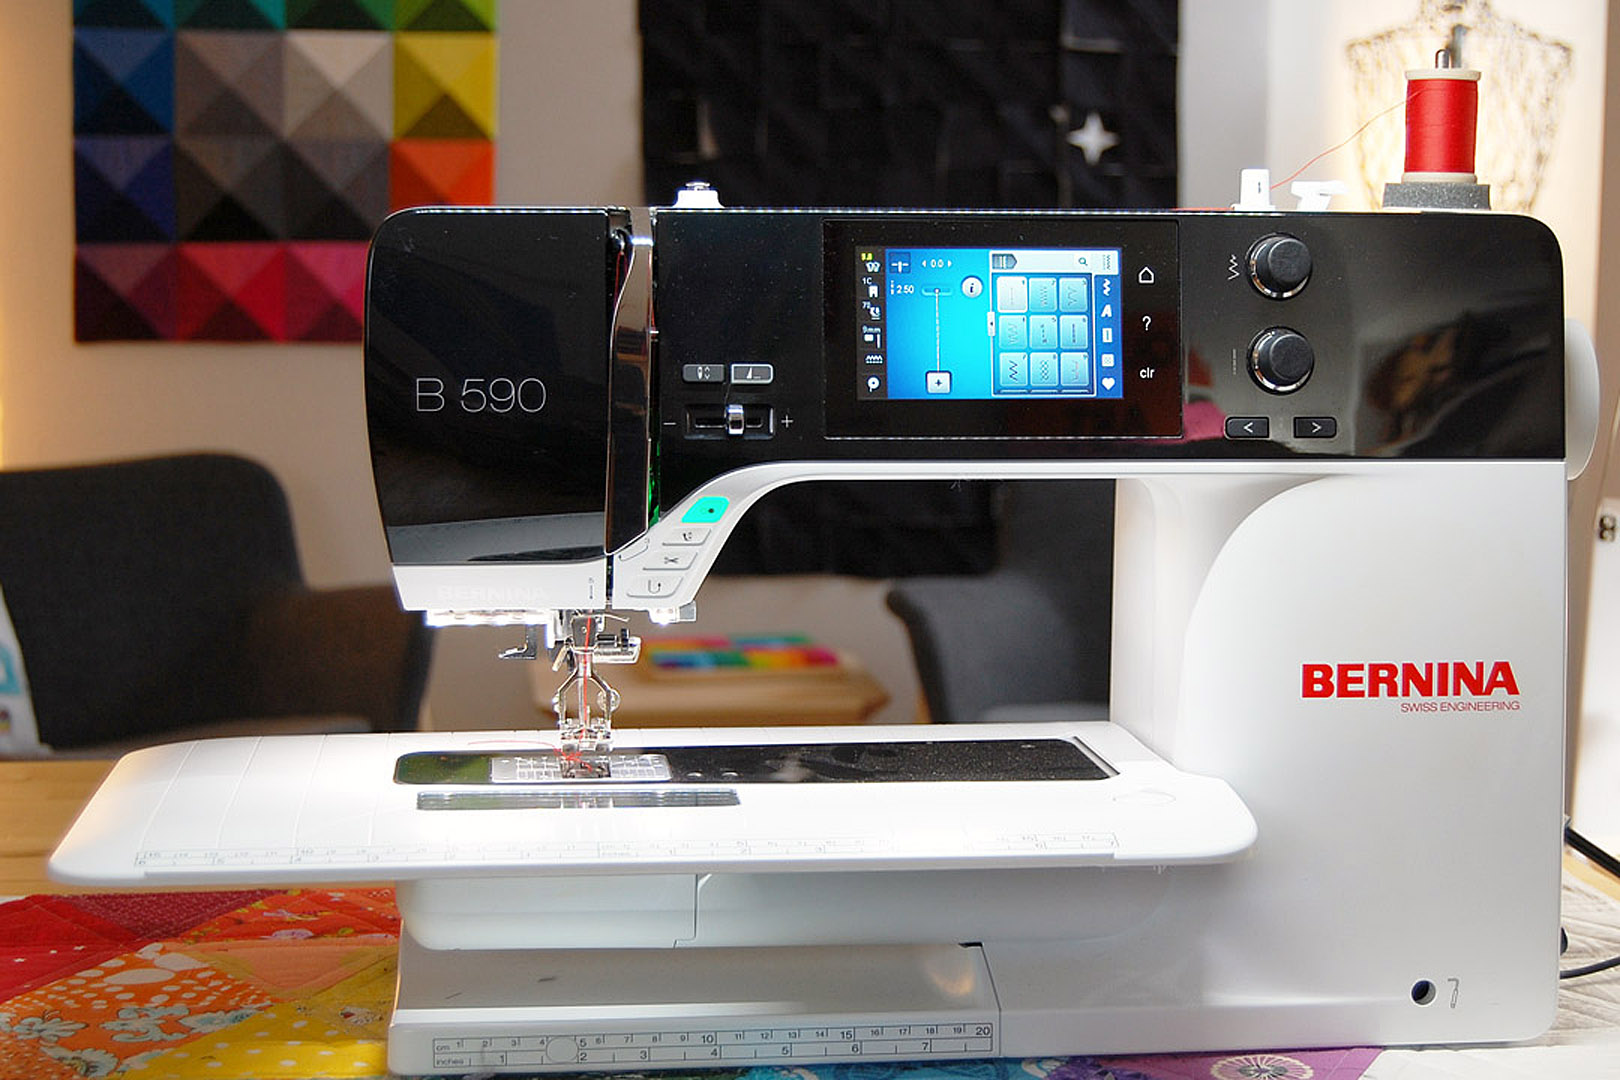
- Sewing machine (I sew with a BERNINA 590)
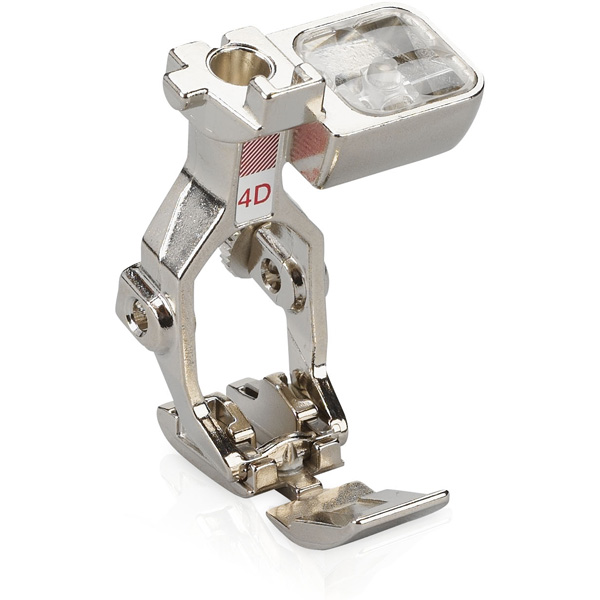
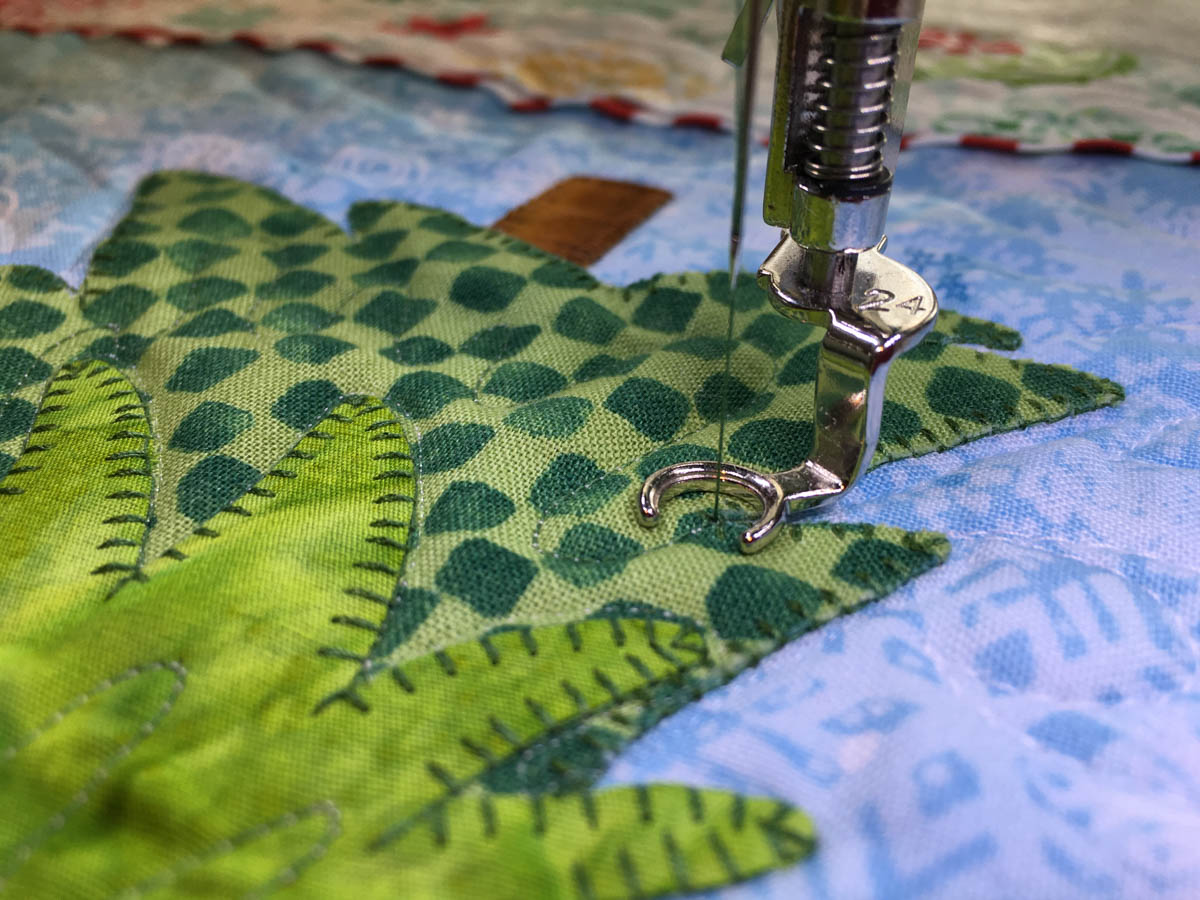
- Reverse pattern foot #1D, Zipper foot #4D
- Straight pins
- Iron and pressing surface or seam roller
Step 1: Measure to make a pattern.
The easiest way to cover a cushion is to carefully inspect how the old cover was constructed and make the new cover in the same way. Since I work best with visuals, I made a few sketches to help me with measuring and cutting along the way.
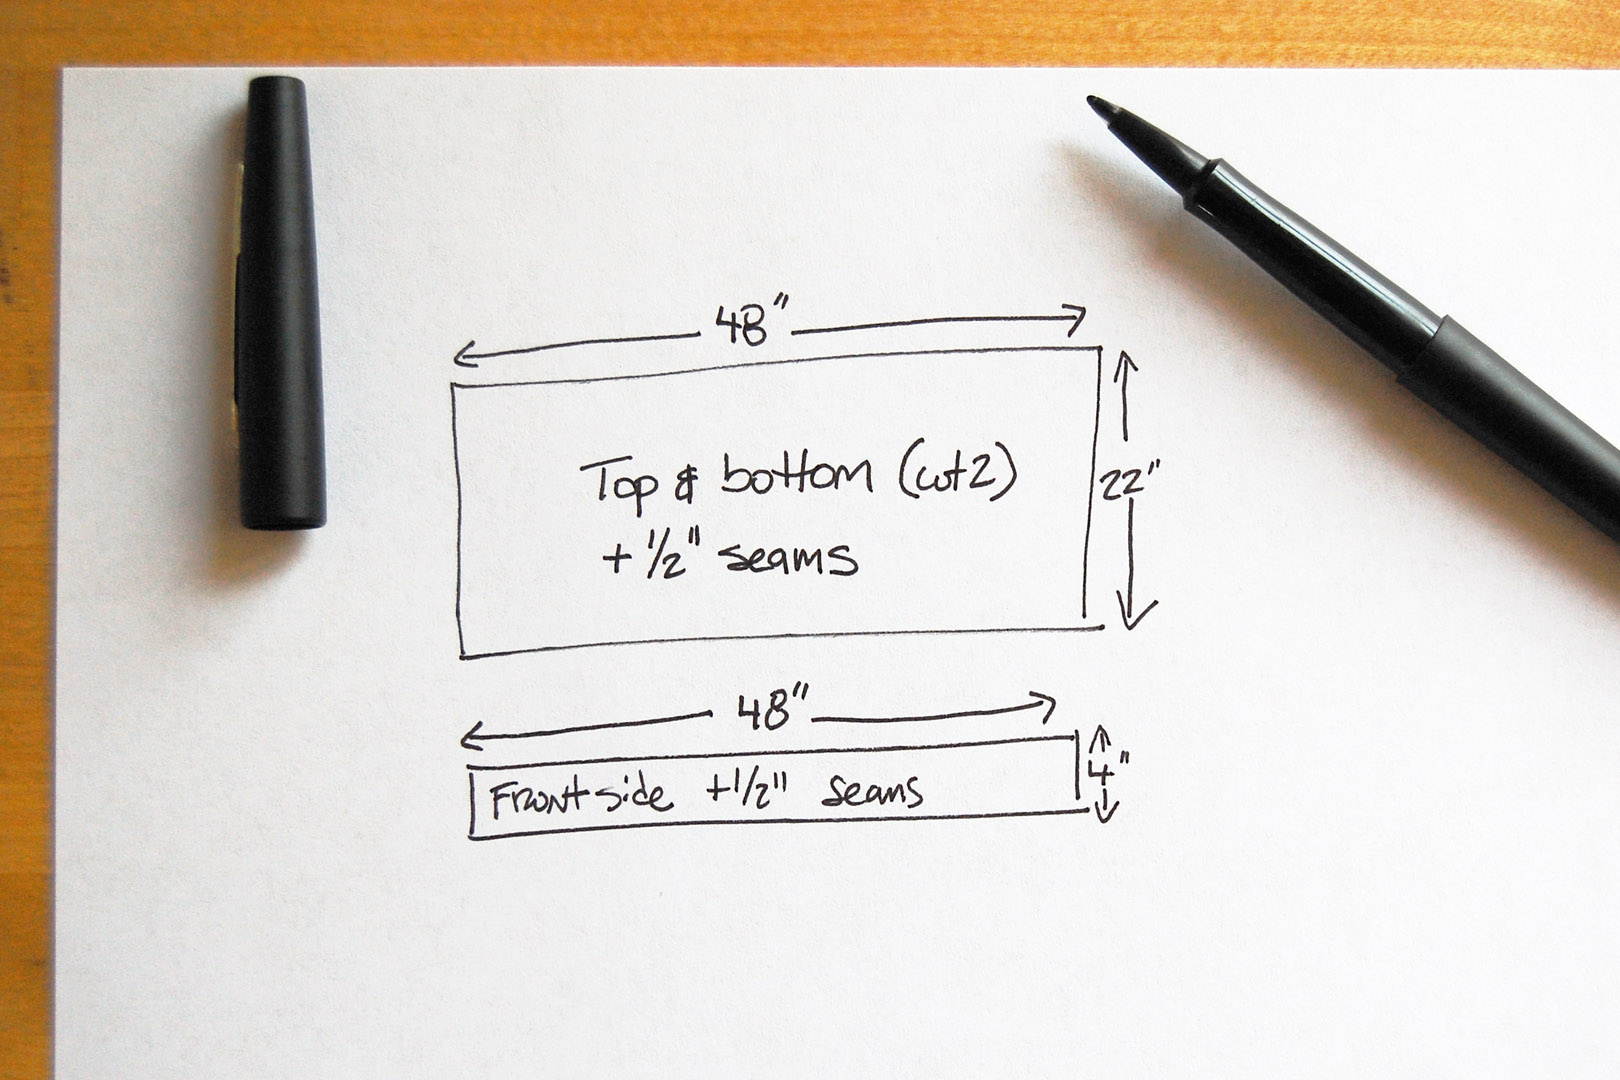
I carefully measured the cushions, and made a sketch to help me record all of the measurements for each side.
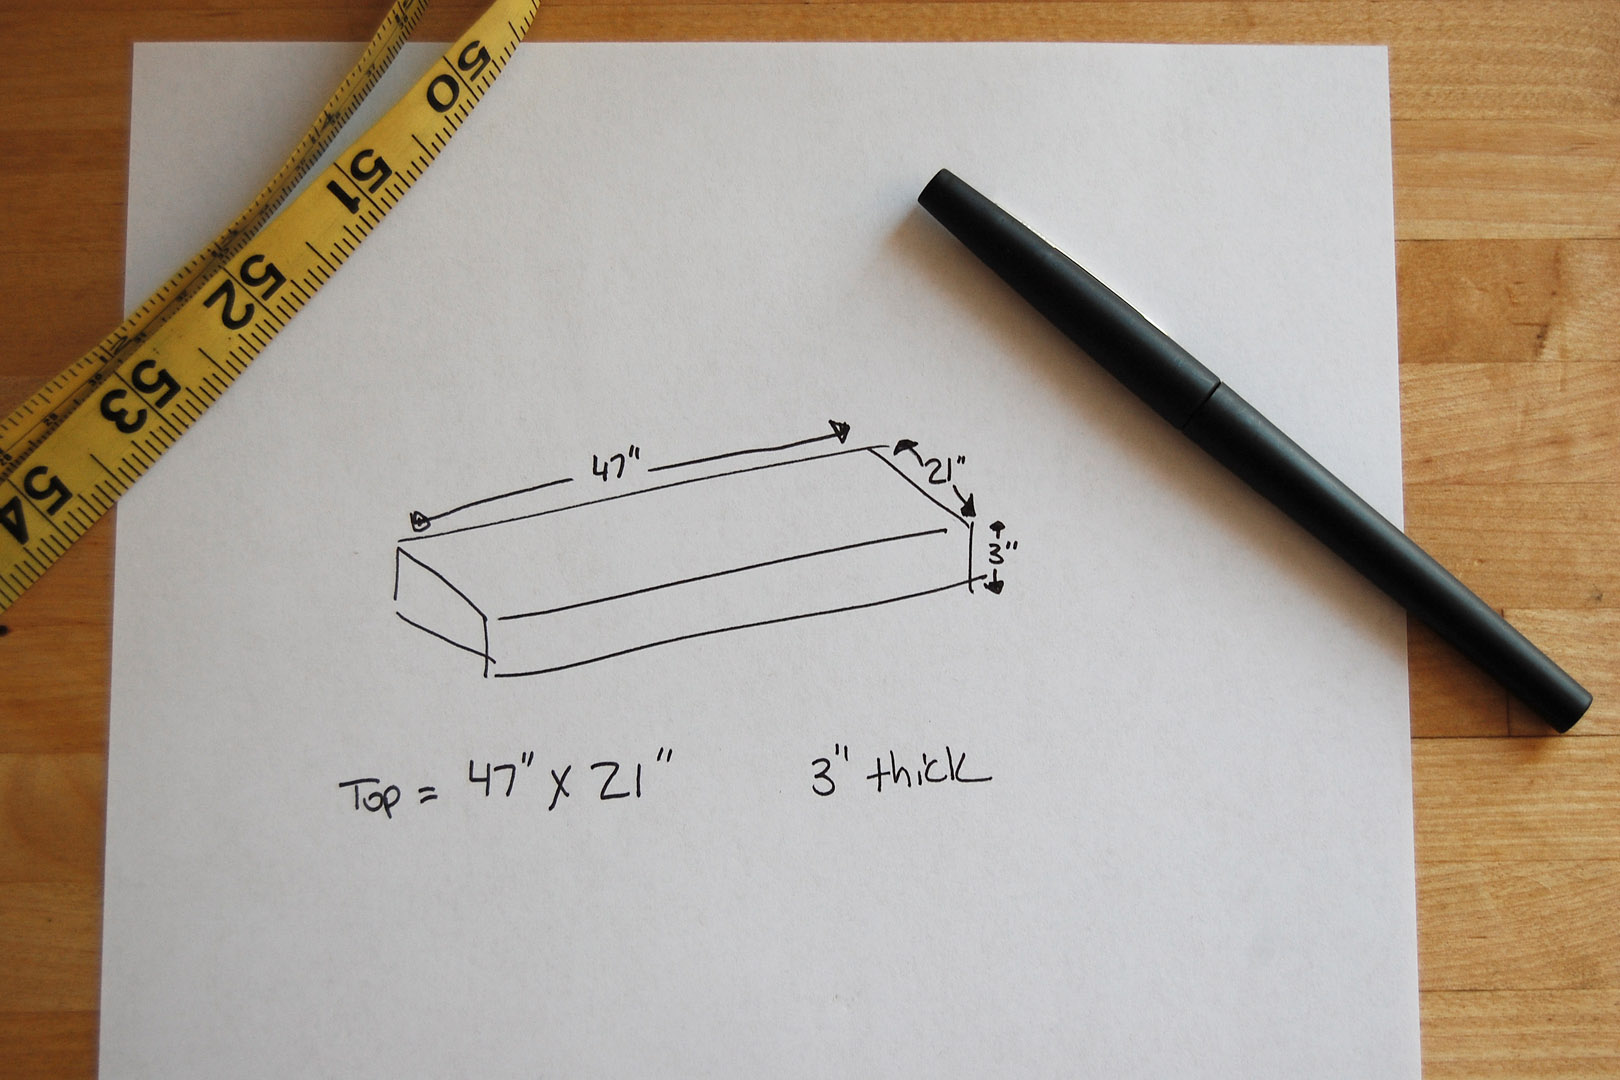
Then I sketched out each pattern piece needed for one cushion. The top, bottom, and front are simple, I just used the same measurements from the cushion and add in 1/2″ seam allowance for each side.
The sides and zipper panel in the back take a little more thought! (Reading ahead in the tutorial to see exactly how these pieces fit together might help you understand how these pieces work.) In this cushion, the side panels attach with a seam at the front corner, and wrap around the back corner to attach to the zipper panel. The bottom of the zipper (the end where the zipper pull will sit when the zipper is fully open) is sewn with a simple seam to the side panel. But the top of the zipper (the end where the zipper pull will sit when the zipper is all the way closed) has extra fabric that creates a folded pocket to hide the zipper pull, see below.
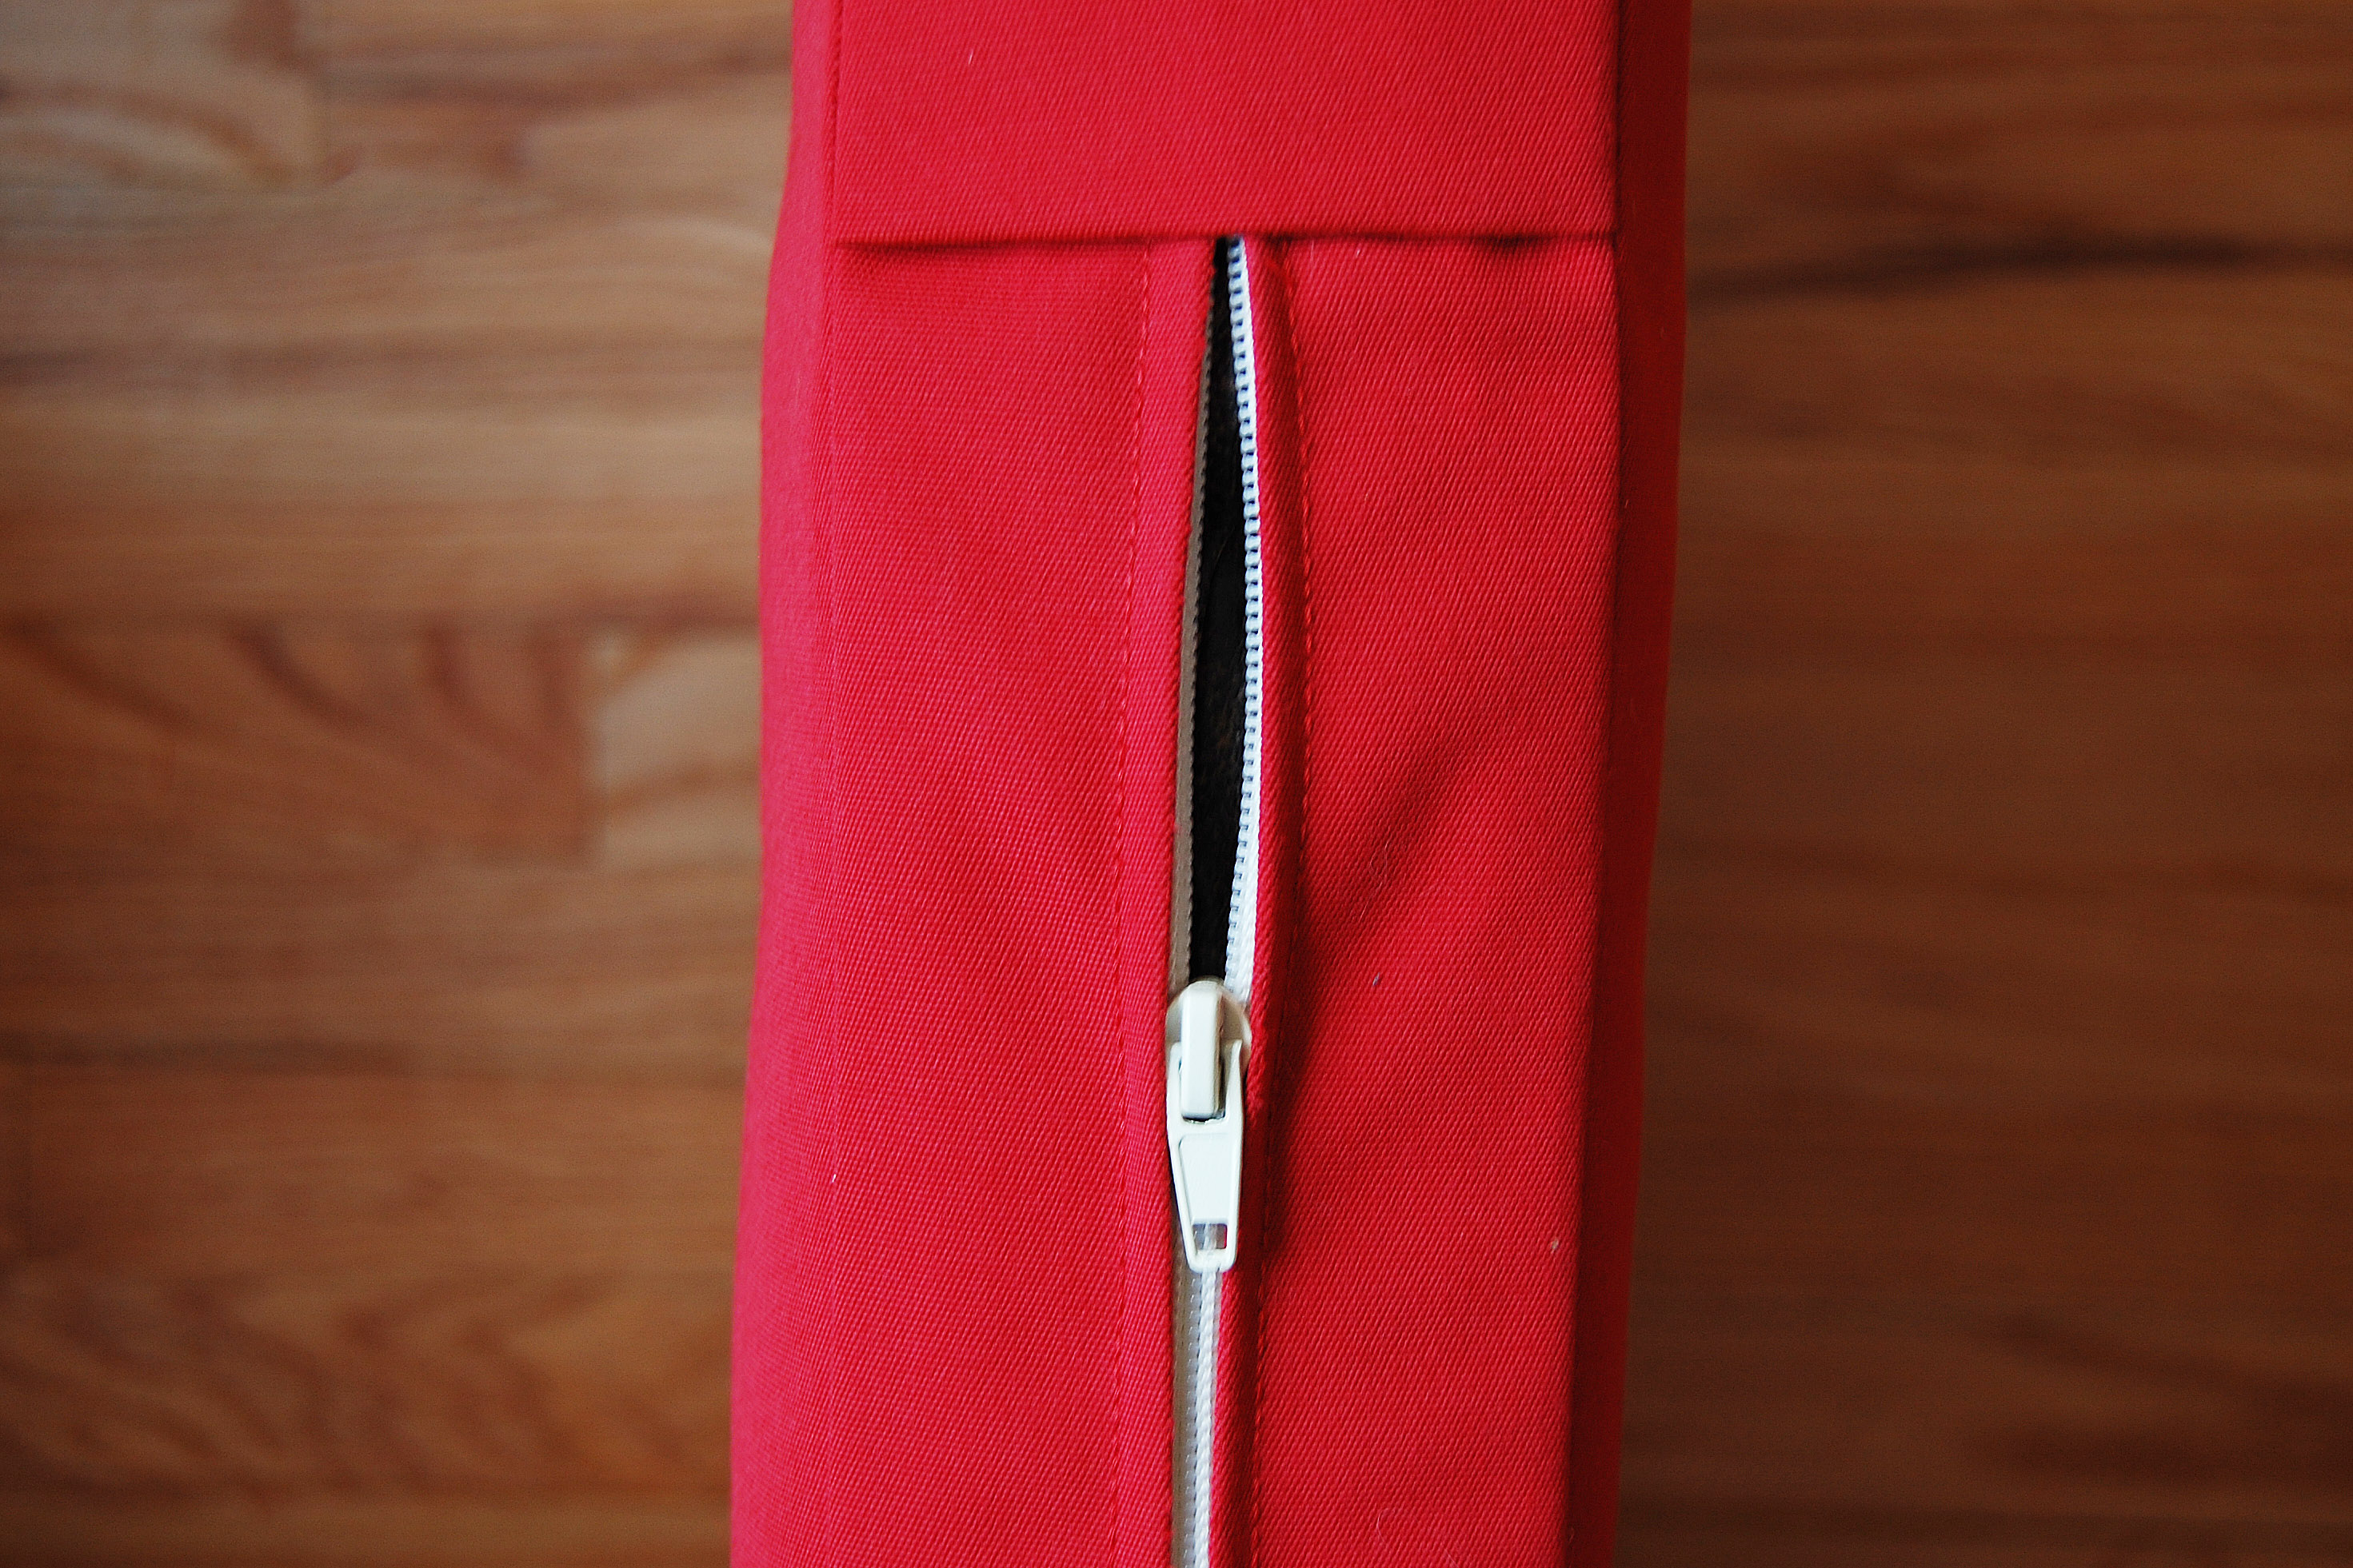
Zipper open at top, and below, zipper closed all the way with the pull hidden by the pocket.

This means that the zipper panel is a few inches shorter than the back panel, and one side panel will be longer than the other to allow for the folded over pocket end. Here’s how I figured these measurements.
The zipper panel has two long strips of fabric with the zipper sewn between them, and is approximately 5-6″ shorter than the full length of the cushion. Checking my measurements above, the cushion is 47″ long, so I subtracted 5 1/2″ from that measurement to arrive at a length for the zipper of 41 1/2″ long.
Checking my measurements again, the height of the cushion is 3″ tall, which means to allow the zipper to be dead center in the back side, the strips on the top and bottom of the zipper (including the 1/2″ seam allowance) should measure 2 1/2″. Because 3″ divided by two equals 1 1/2″, and then adding back in the 1/2″ seam allowance on each side brings the total to 2 1/2″.
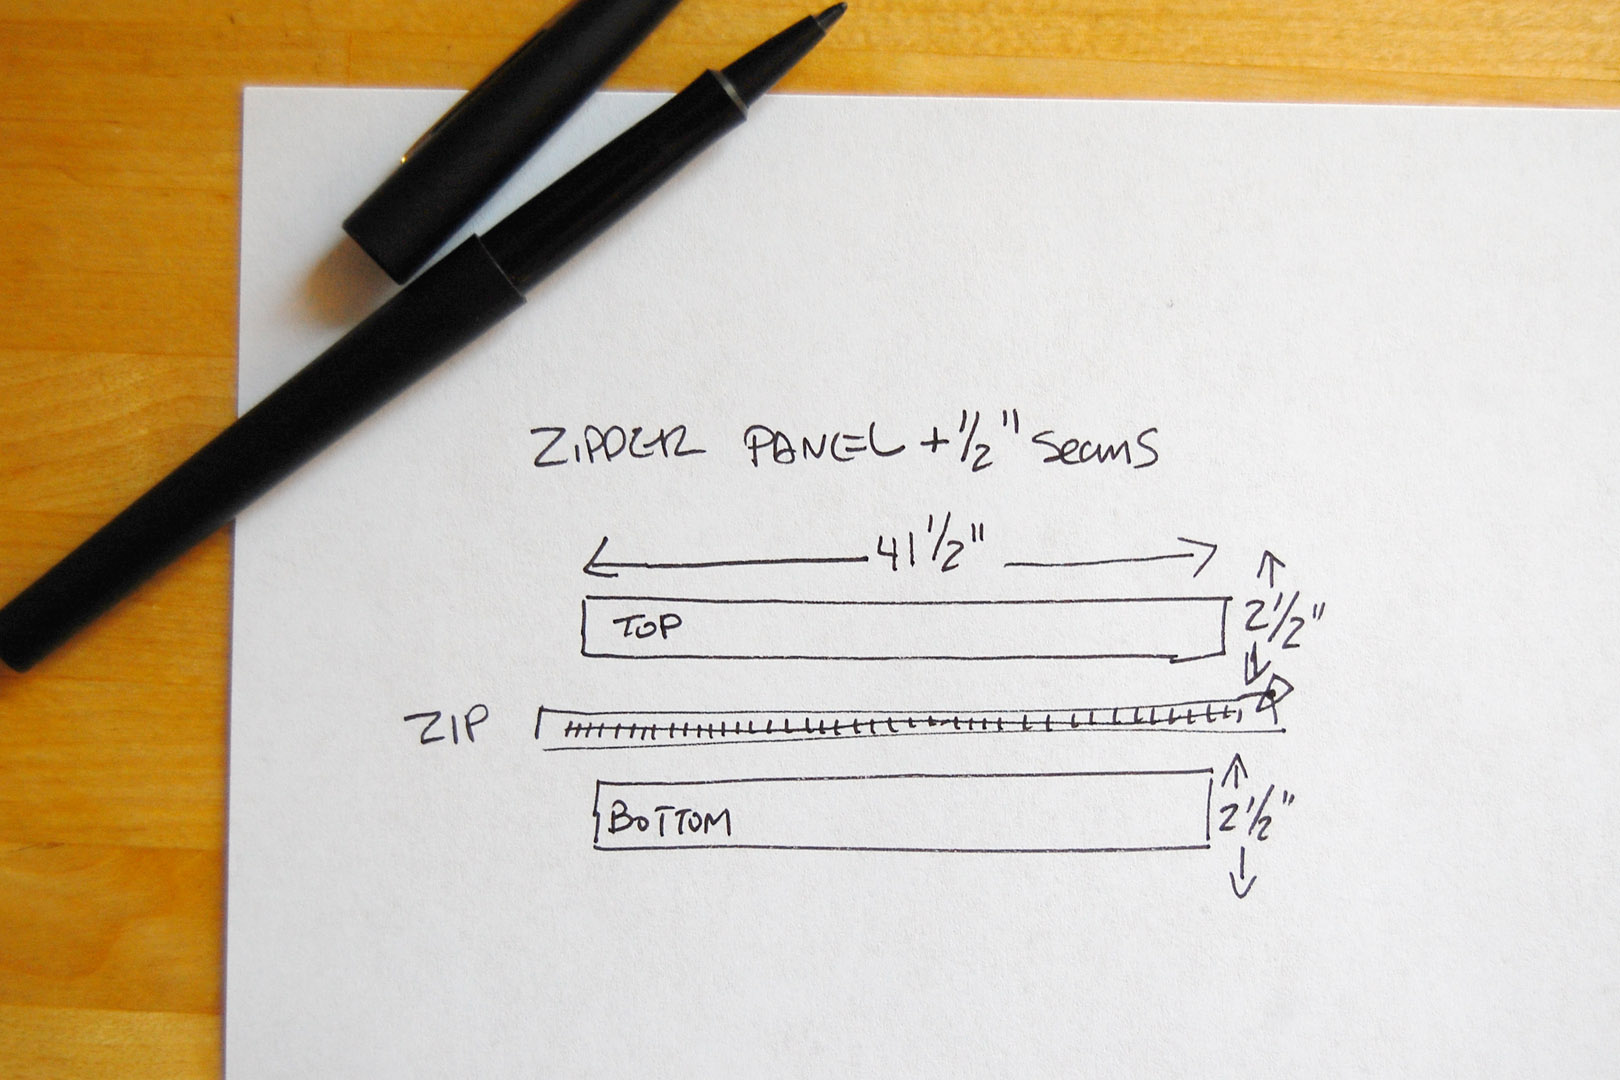
So, my pattern calls for two strips to sew the zipper at 41 1/2″ long by 2 1/2″. And I need an upholstery zipper a few inches longer than the strips.
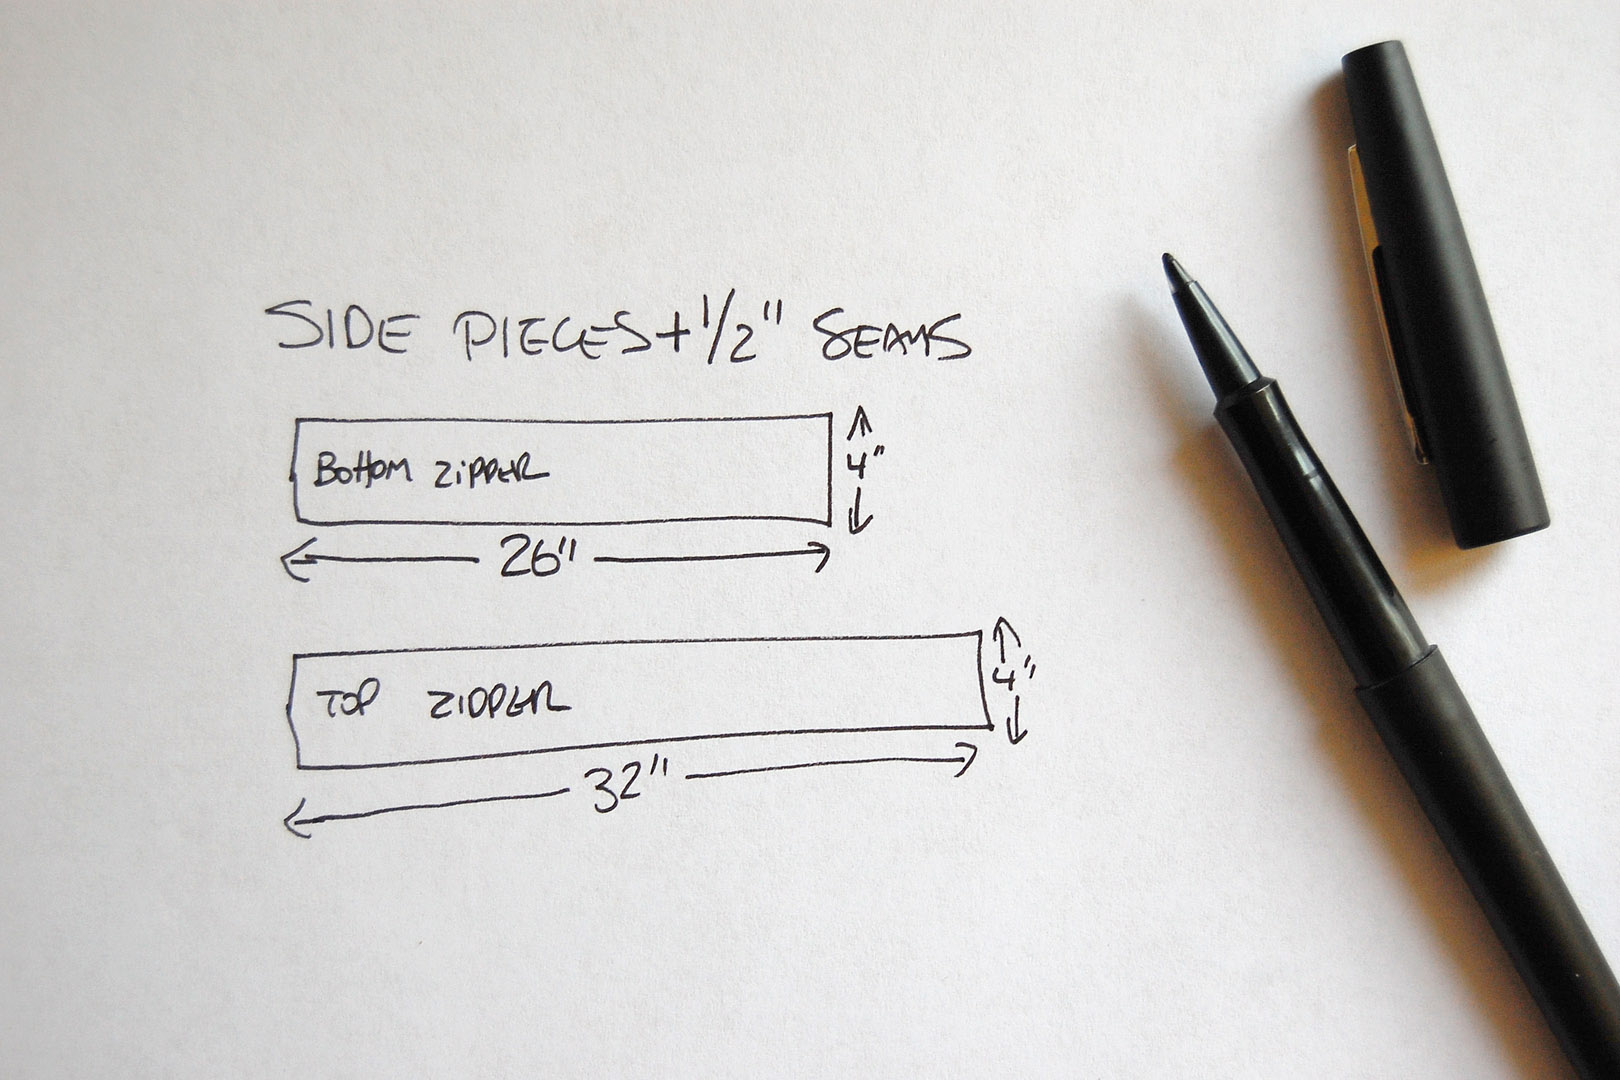
The side pieces are the last piece of the cushion puzzle. Each one will attach to the front panel piece mentioned above (cut at 48″ x 4″) and to the back zipper panel; but the longer piece allows for a fold to create a pocket to cover the zipper end when zipped closed.
For the shorter panel, I added 3″ to the side cushion measurement of 21″, then added 1/2″ seam allowance on all sides. The shorter side piece will be cut 26″ x 4″.
For the longer panel, I added 10″ to the side cushion measurement of 21″, then added 1/2″ seam allowance on all sides. The longer side piece will be cut 32″ x 4″.
Figure your fabric requirements from your final pattern piece measurements based on the width of the fabric. Buy an upholstery zipper about 4″ longer than what you will need to allow some wiggle room when sewing the zipper in to the cushion.
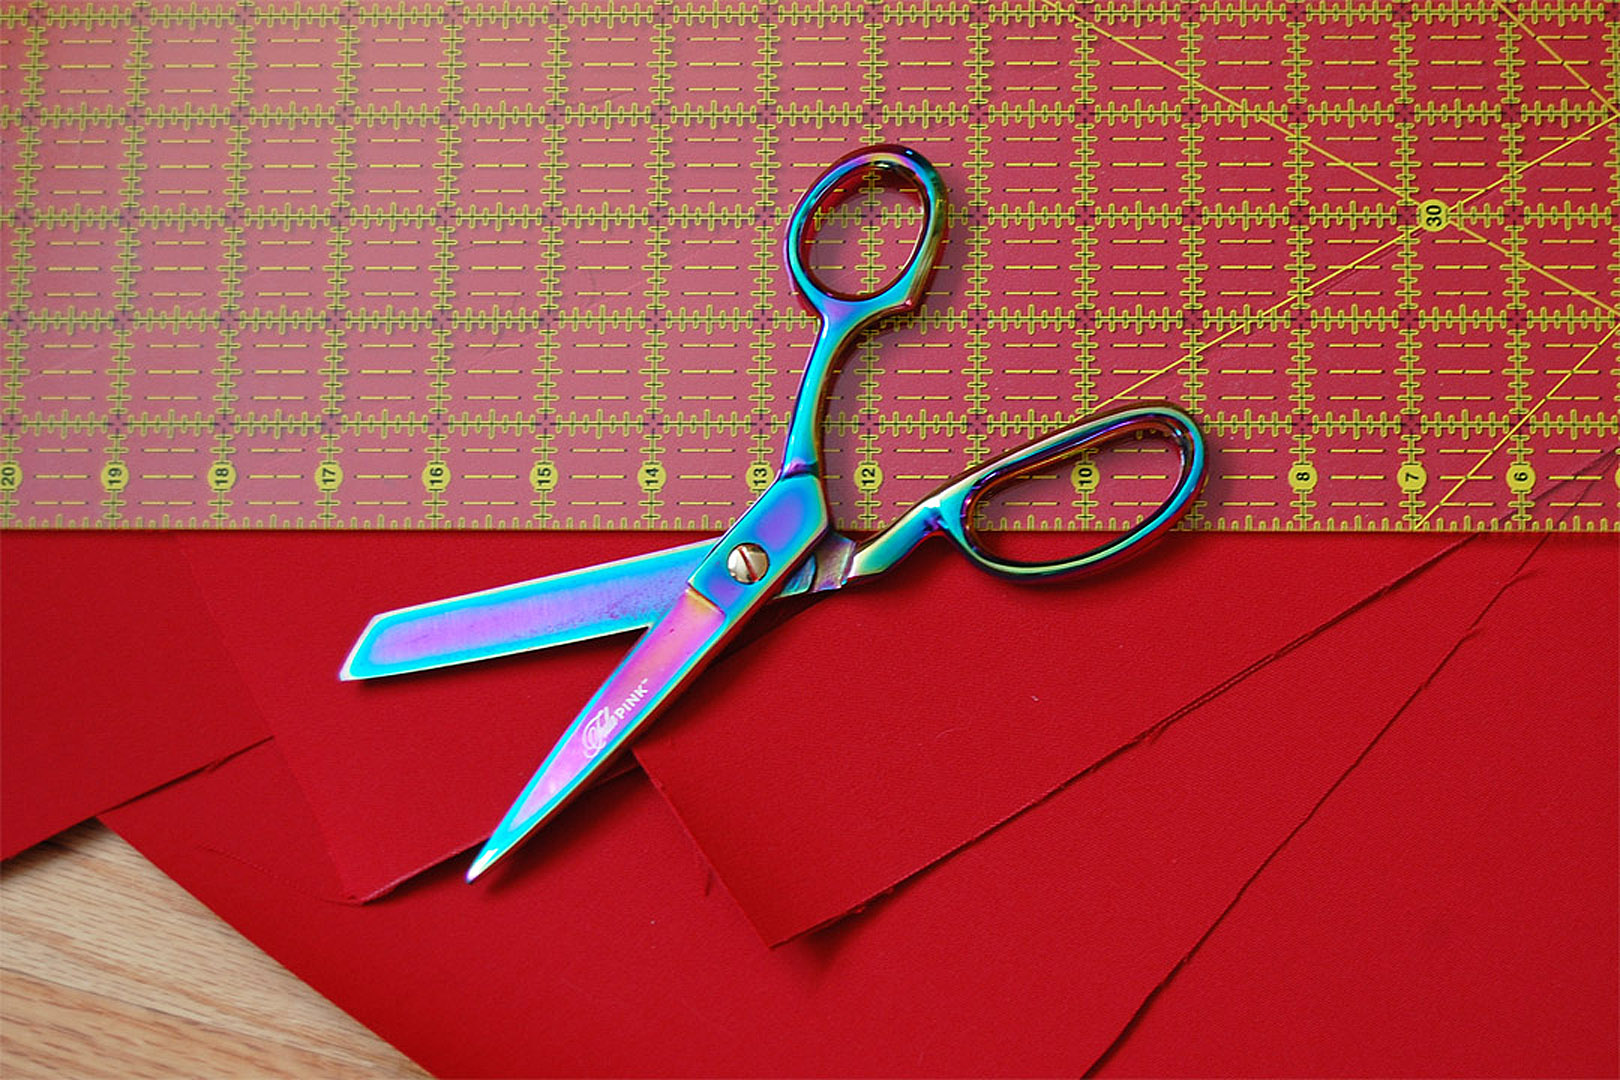
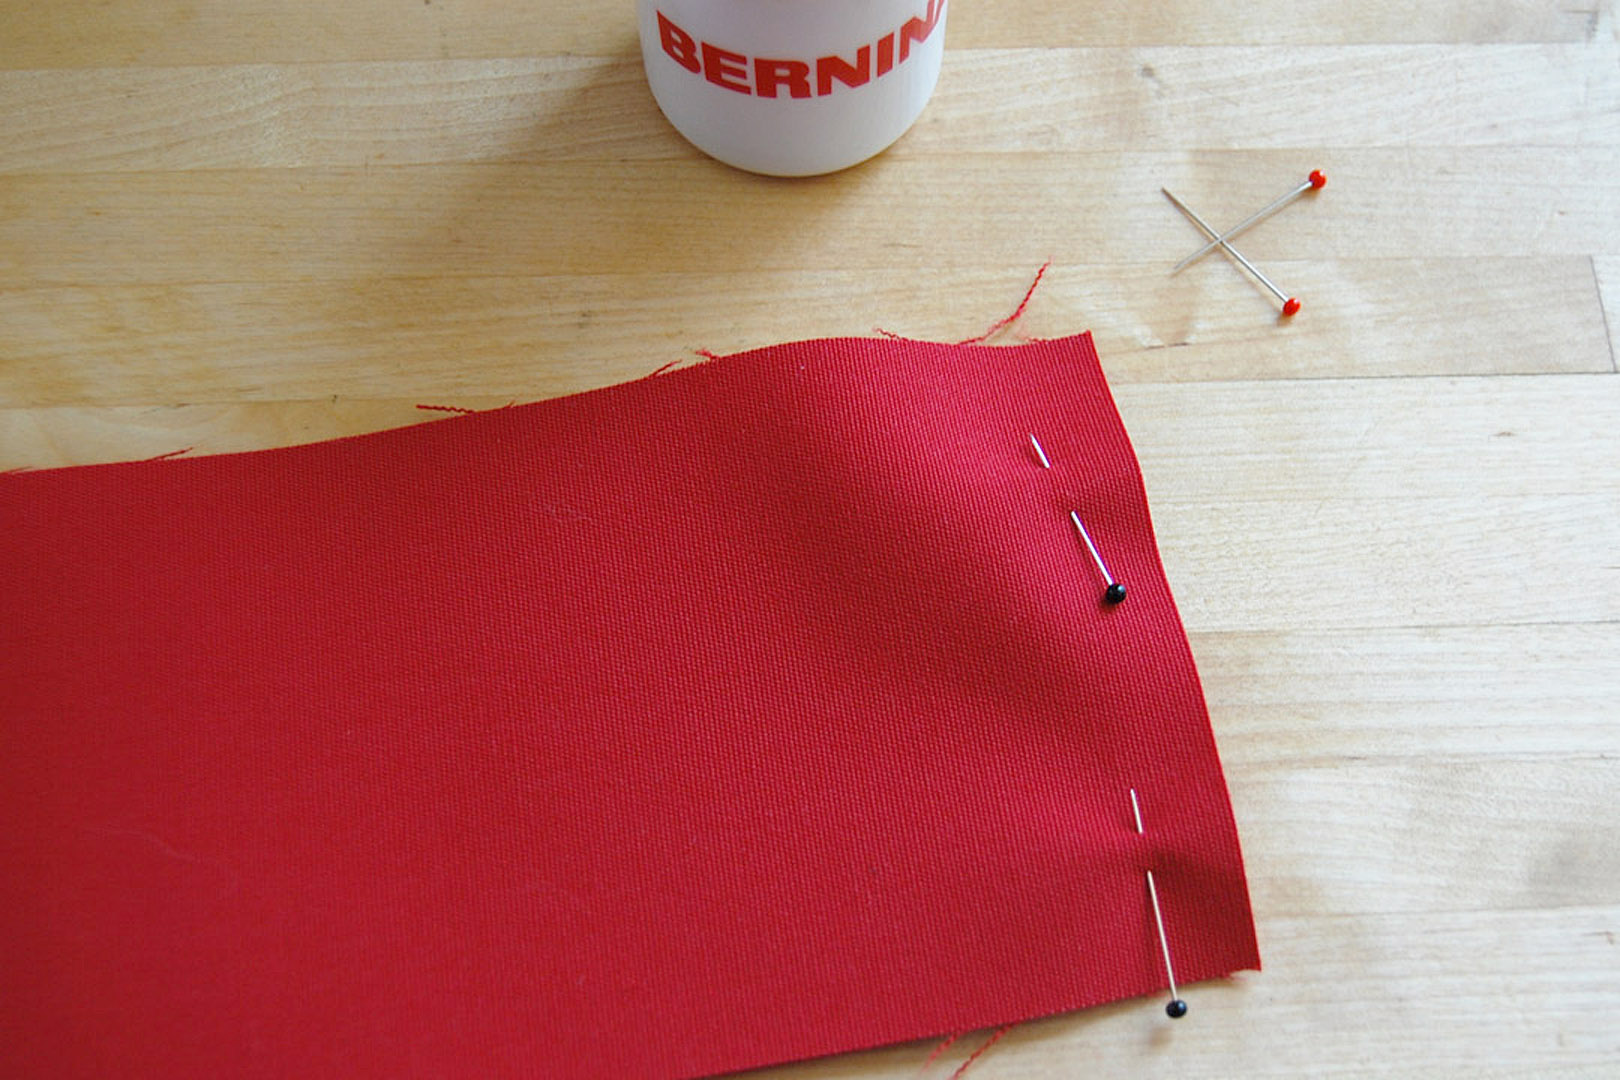
Cut all the pattern pieces you will need. I used a ruler, fabric marking pencil, and scissors to cut all the pieces since they were so large. It helps to mark the back side of each piece with information about which piece of the pattern puzzle it is.
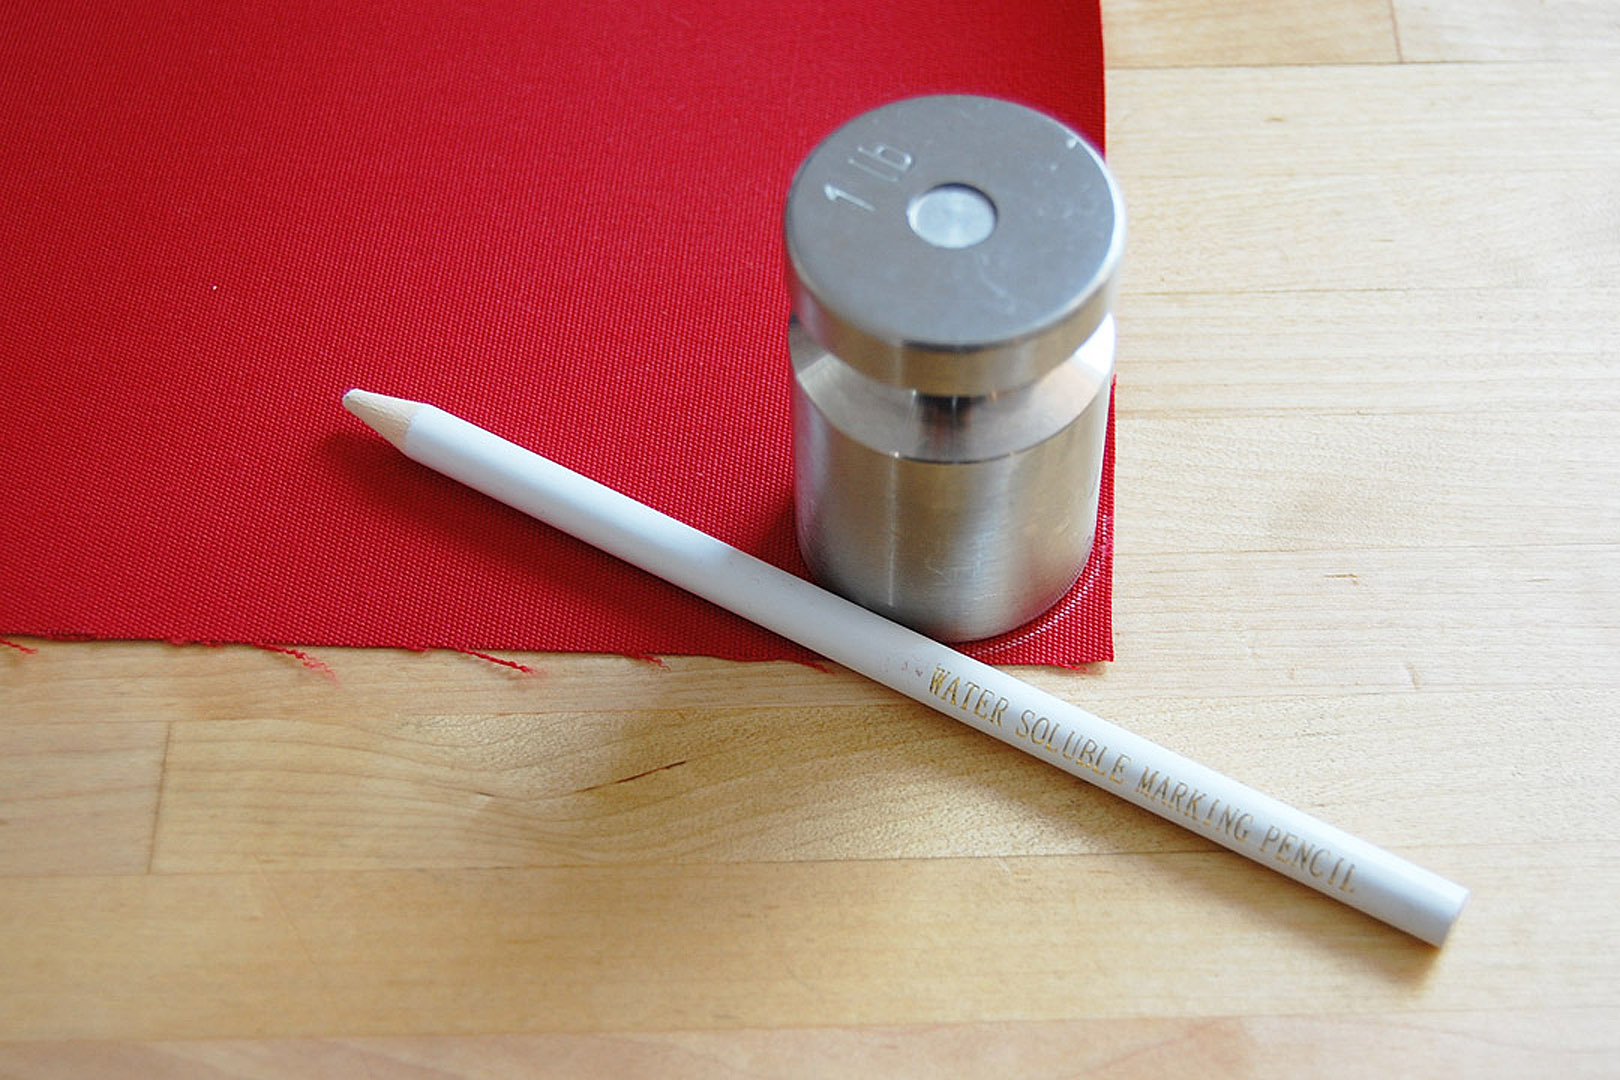
Look carefully at the corners of the cushion you are creating the cover for. My cushions have very slightly rounded corners, and I want to create the cover to match. If I sewed the corners without the curve, they could look saggy and droopy! I used a pattern weight with a slight curve to mark each corner on the main top and bottom pattern pieces.
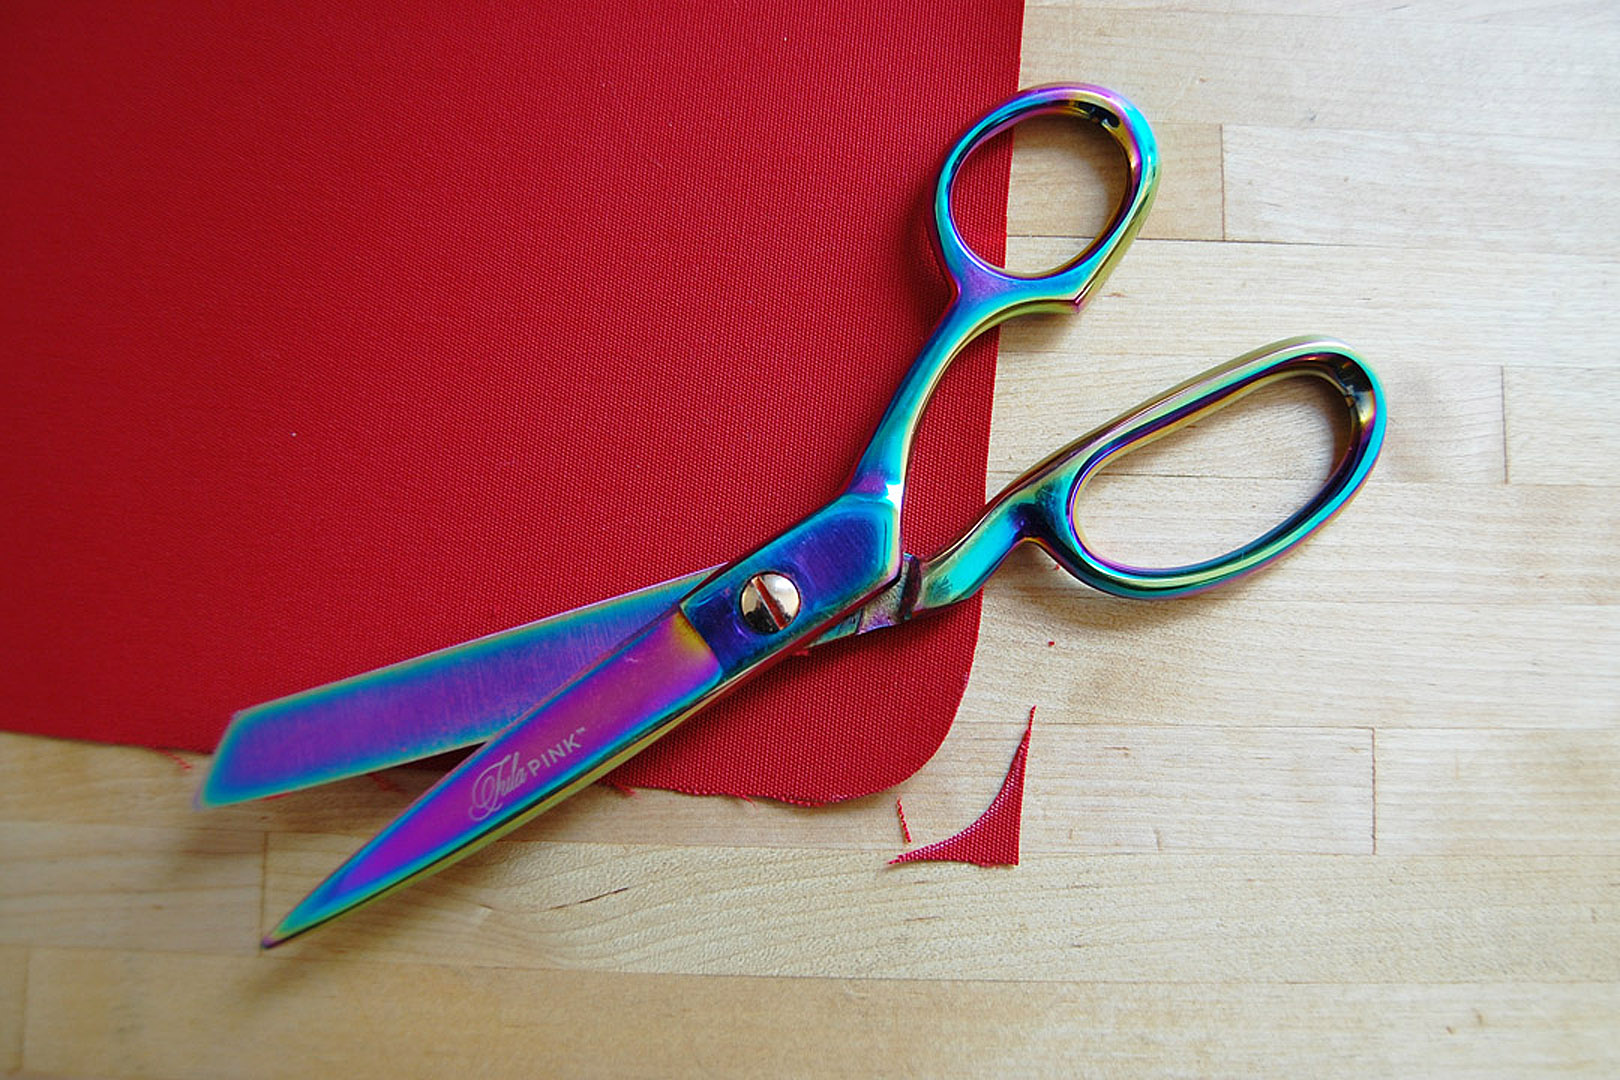
And carefully cut each curve with sharp scissors.
Step 2: Sew the zipper panel.
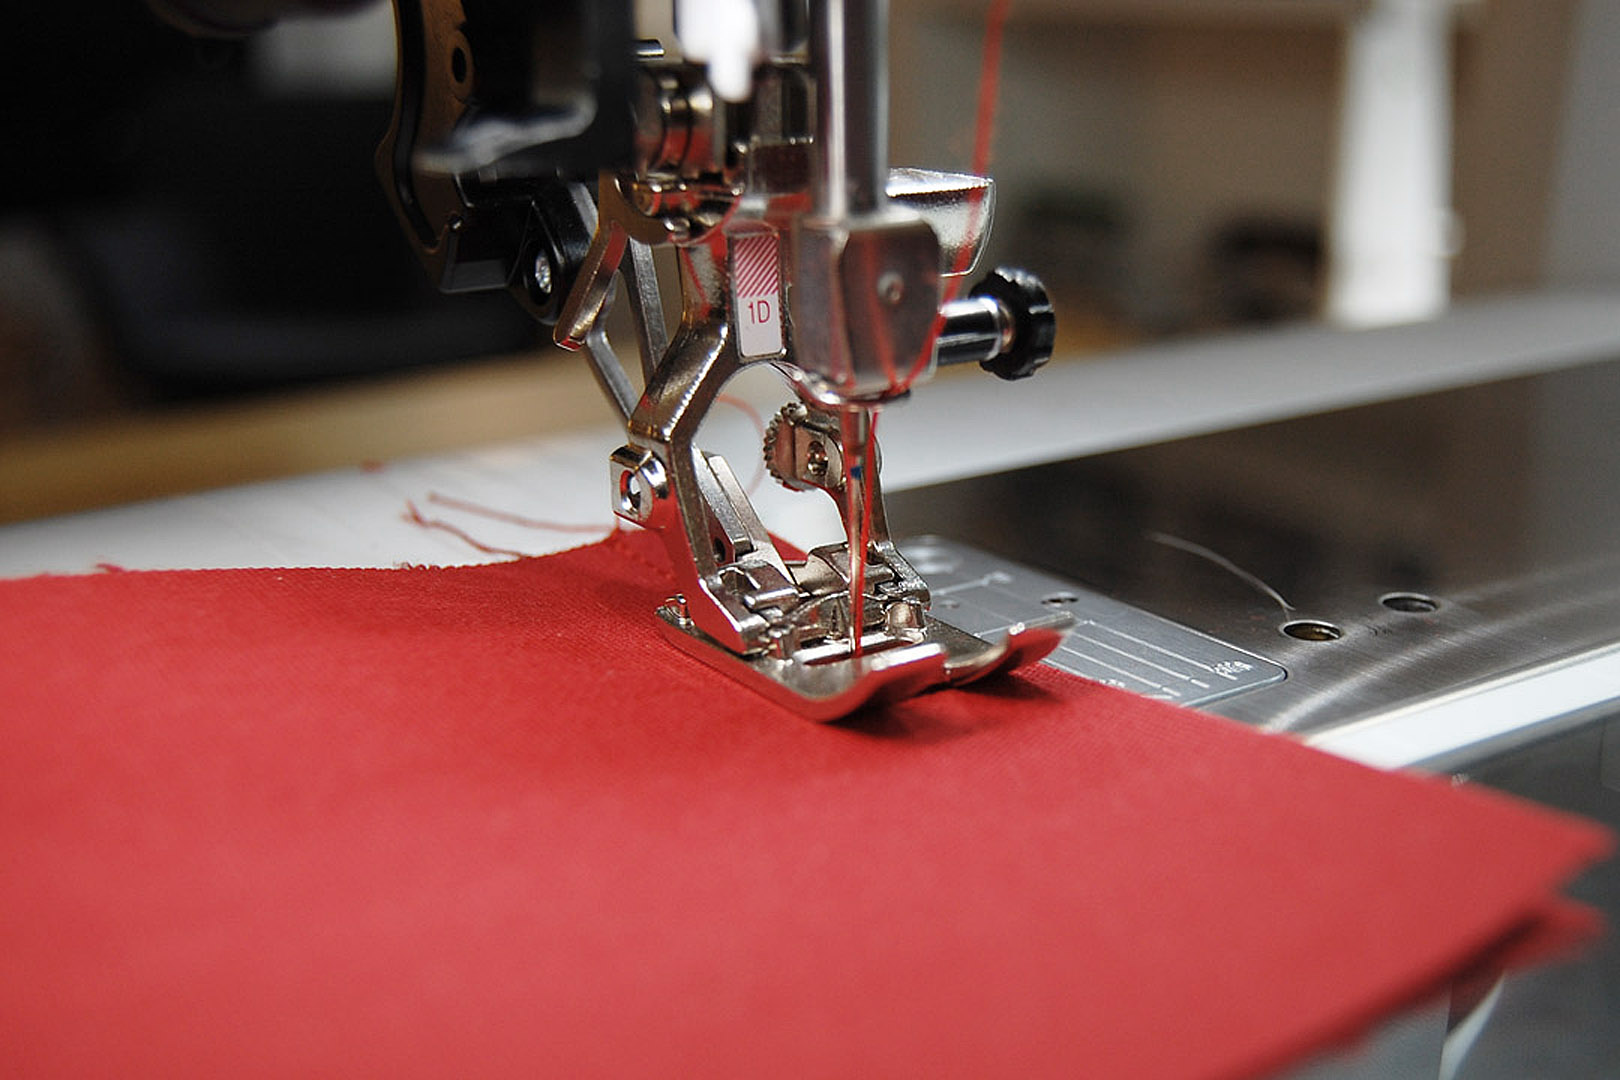
Set up your sewing machine to sew the cushion cover. I used the Reverse pattern foot #1D with Dual Feed engaged for the basting step. I used upholstery thread to sew the major seams of the cushion for strength.

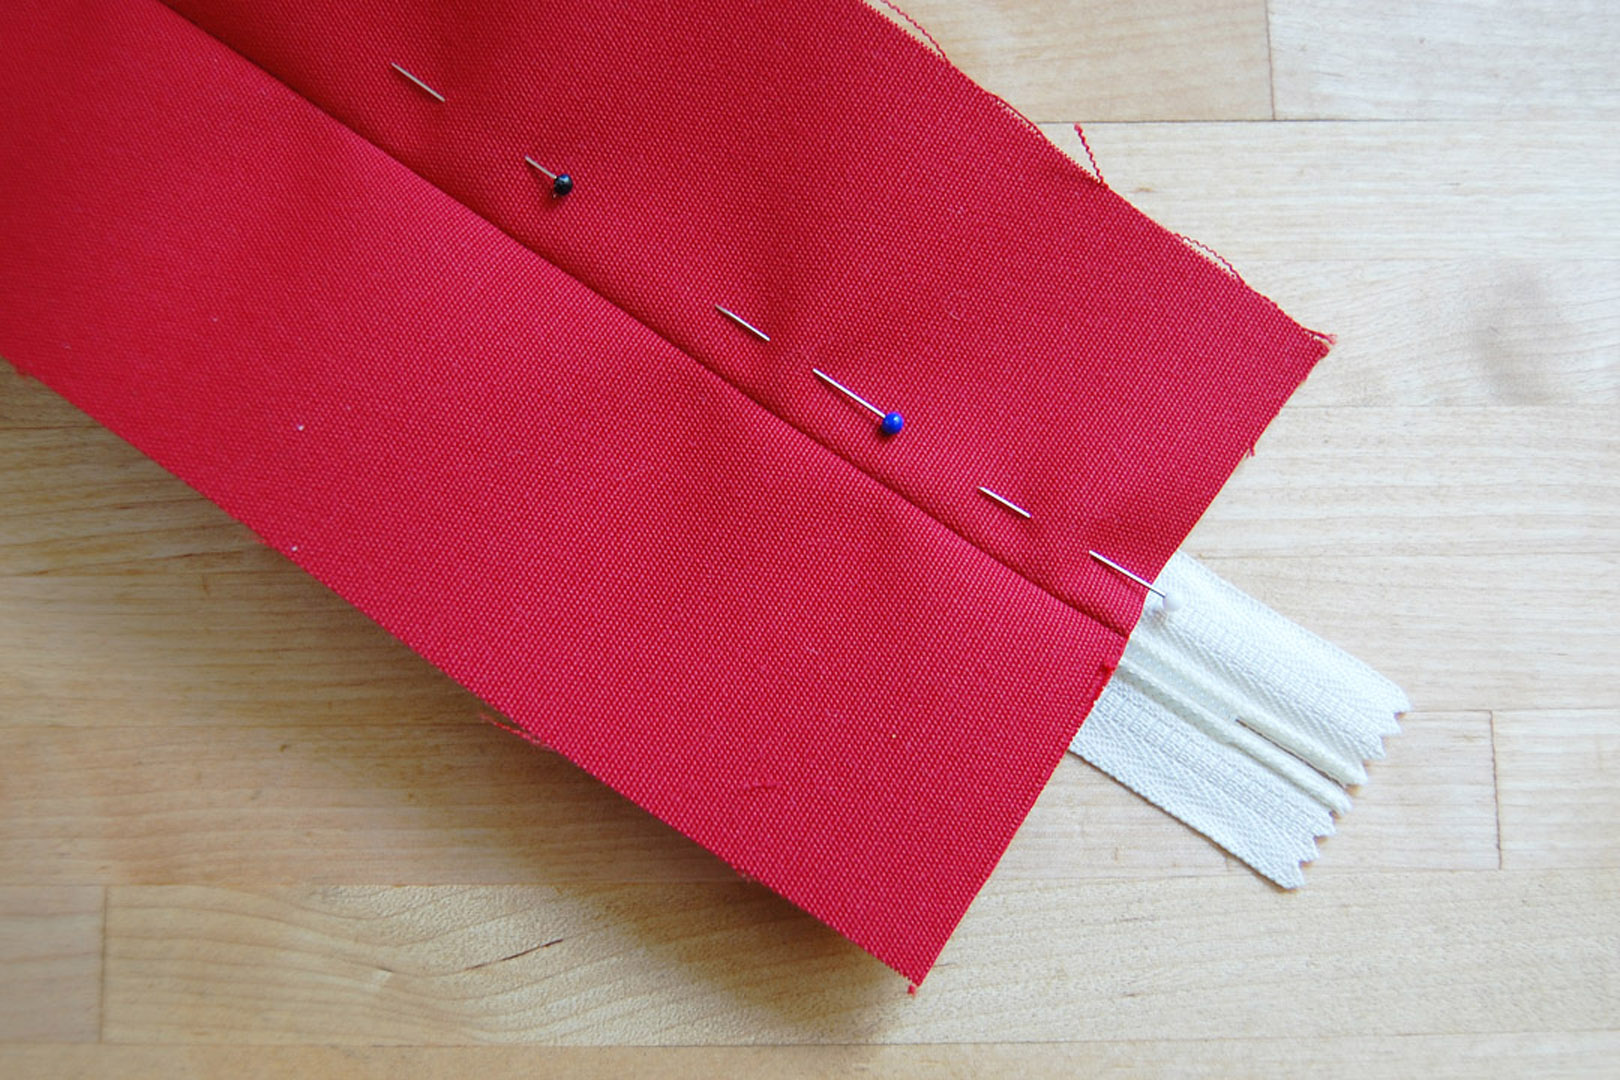
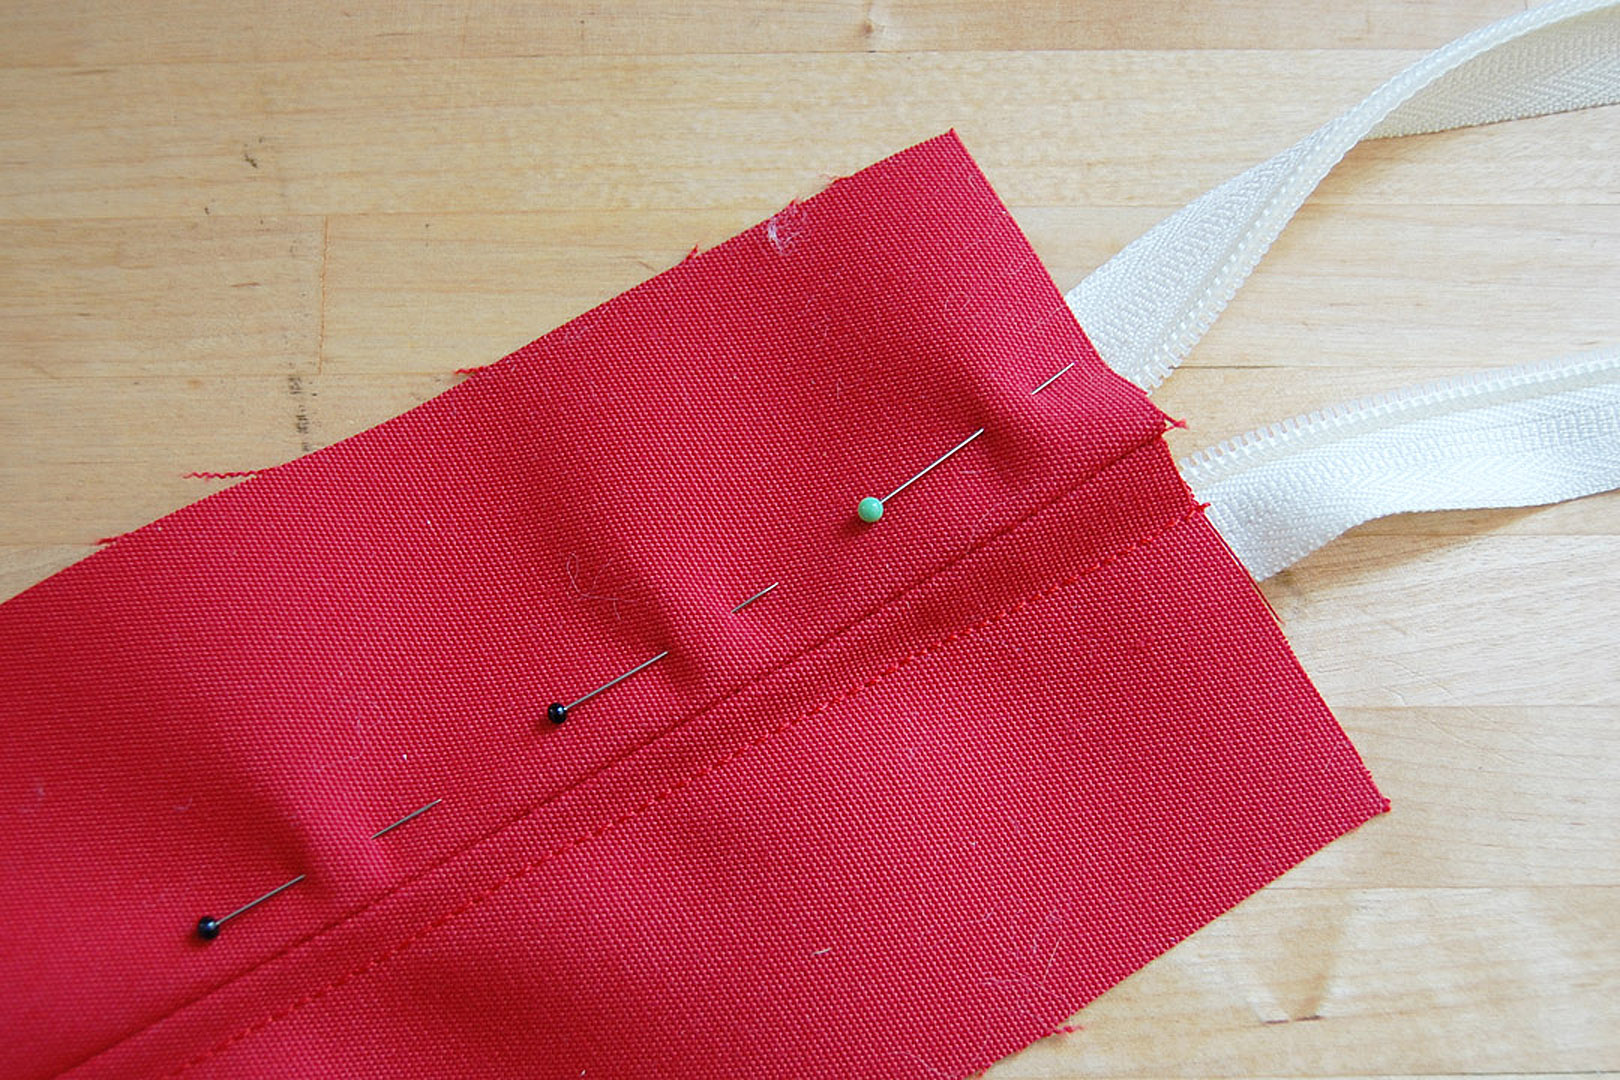
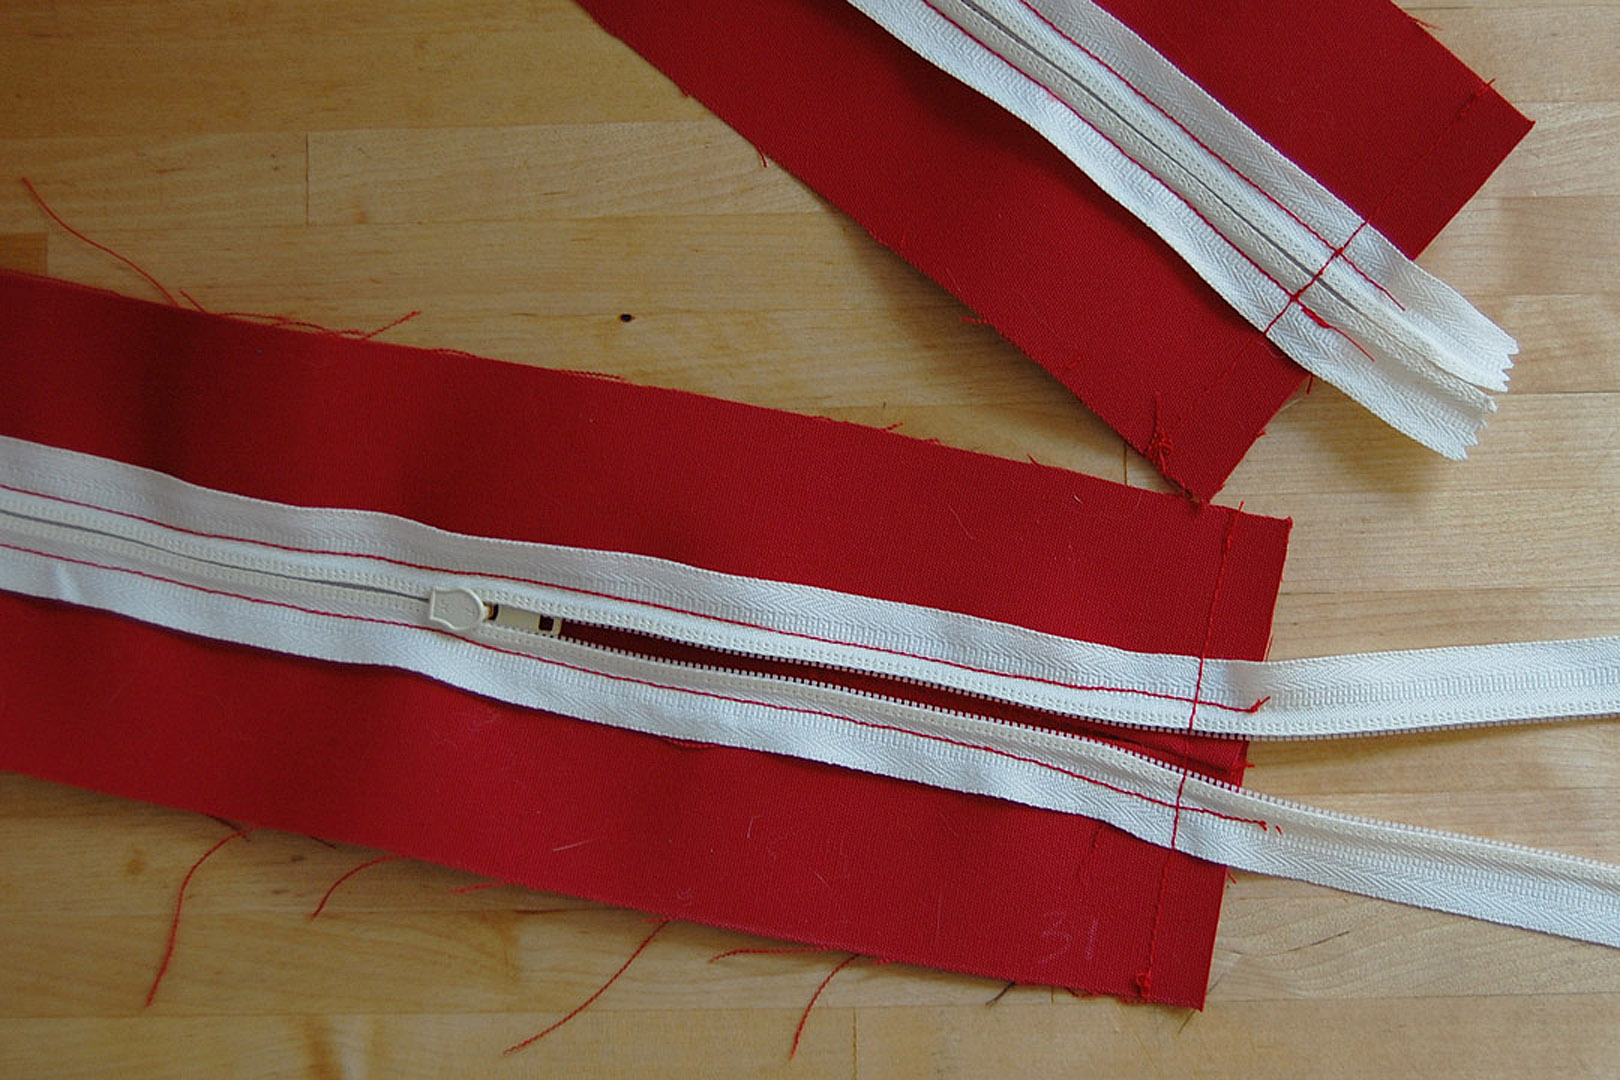
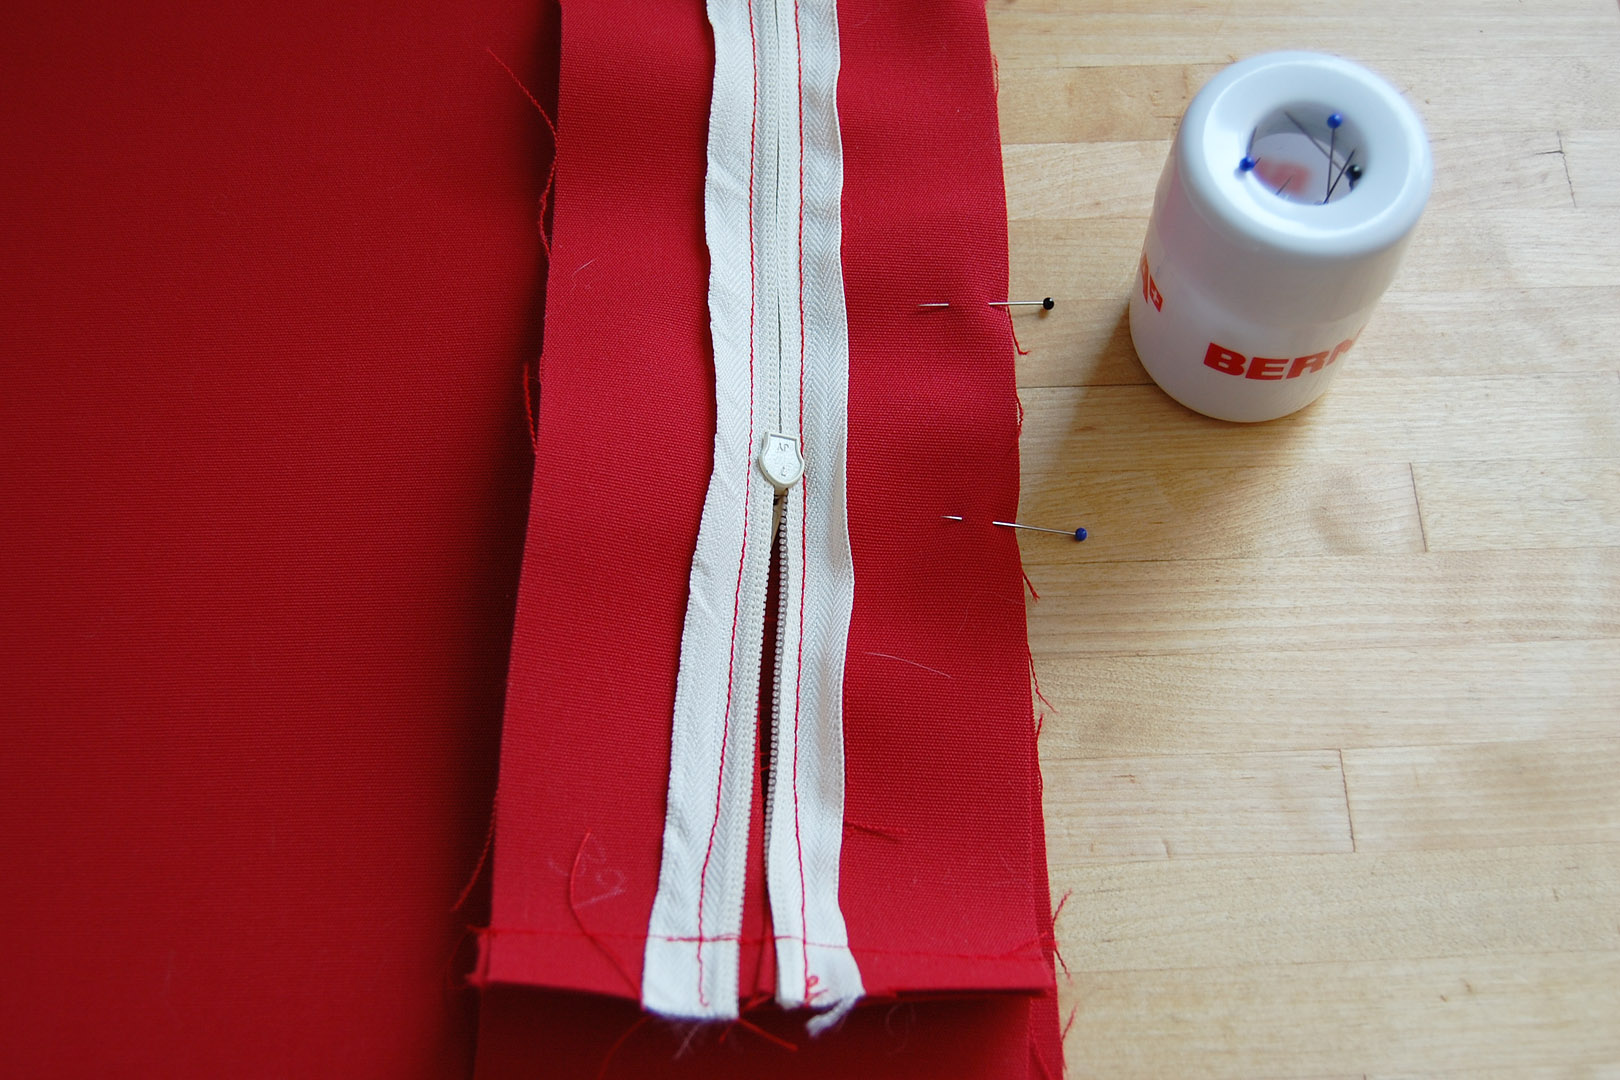
Using both of the long cut zipper panels cut 41 1/2″ x 2 1/2″, I placed them right sides together and pinned down the longest edge. Make a mark 1/2″ at each end of the zipper panel where you will backstitch to create strong ends for the zipper.

Start sewing at 1/2″ seam allowance with a normal straight stitch length at 2.5mm, stop at the first 1/2″ mark, and backstitch several times for strength. Then, increase your stitch length for basting to about 4mm, and continue sewing all the way down the long edge. Stop at the second 1/2″ mark, decrease your stitch length to 2.5mm, and create another strong backstitch.
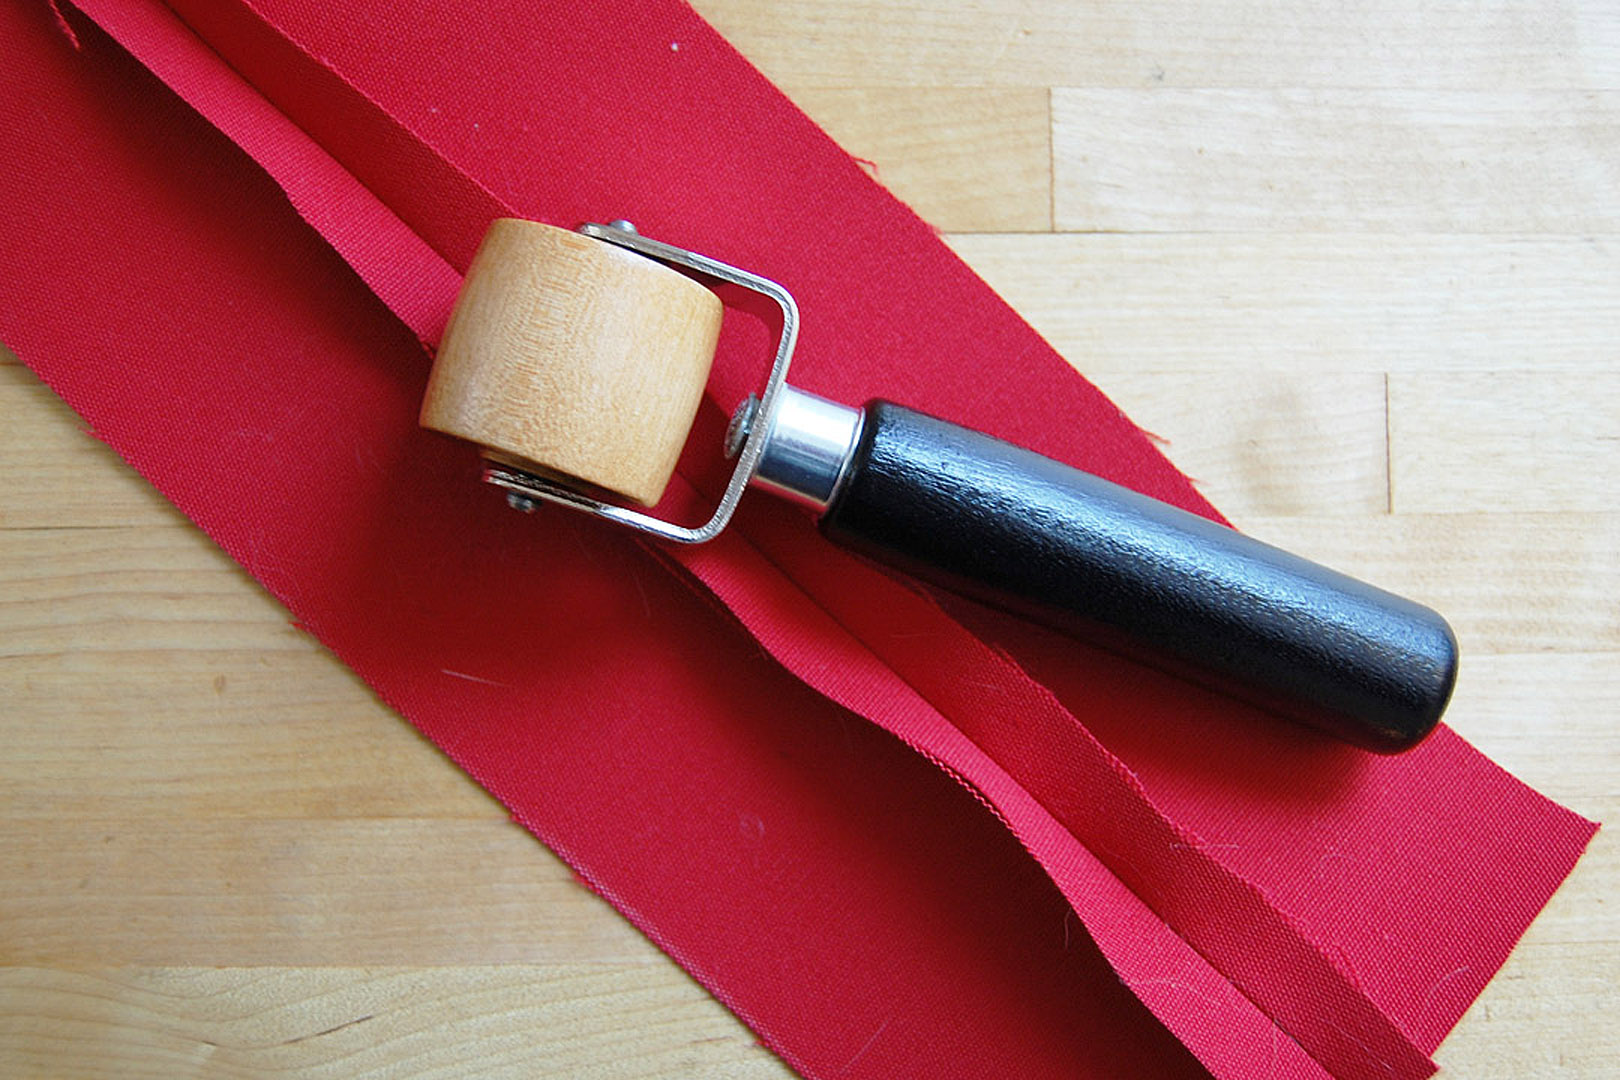
If your material can be pressed with a hot iron, open and press the seam. If your material cannot be pressed with a hot iron, use a seam roller to press the seam open.
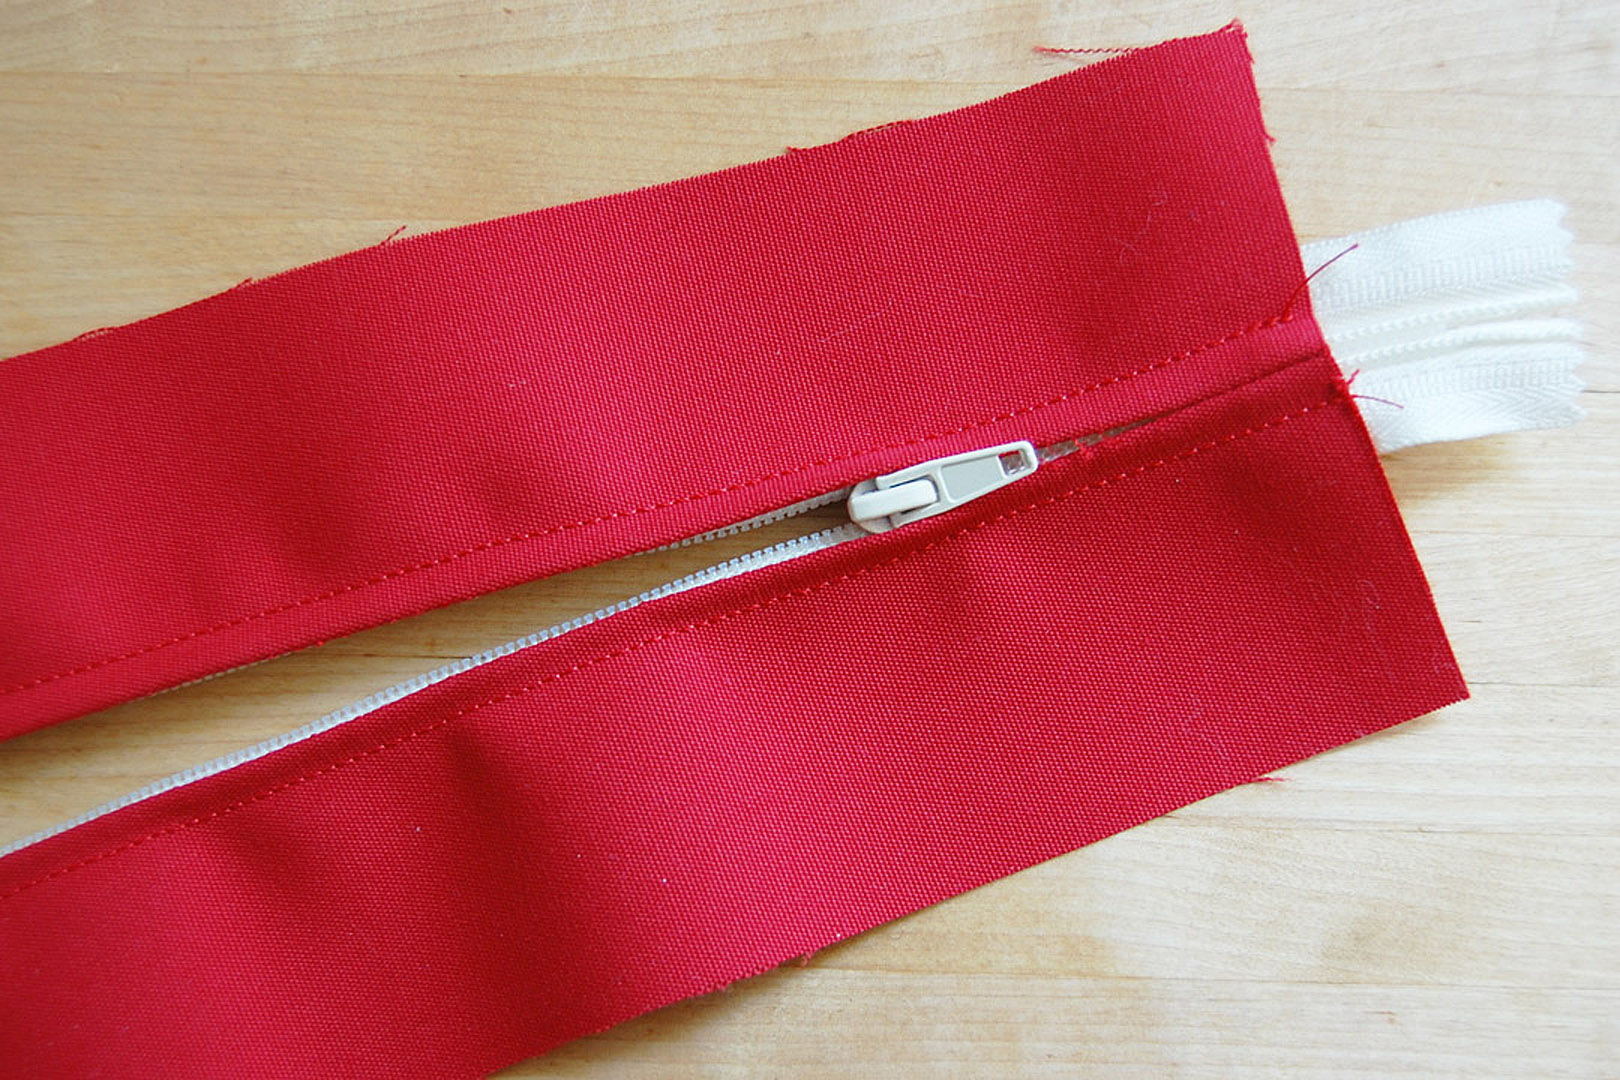
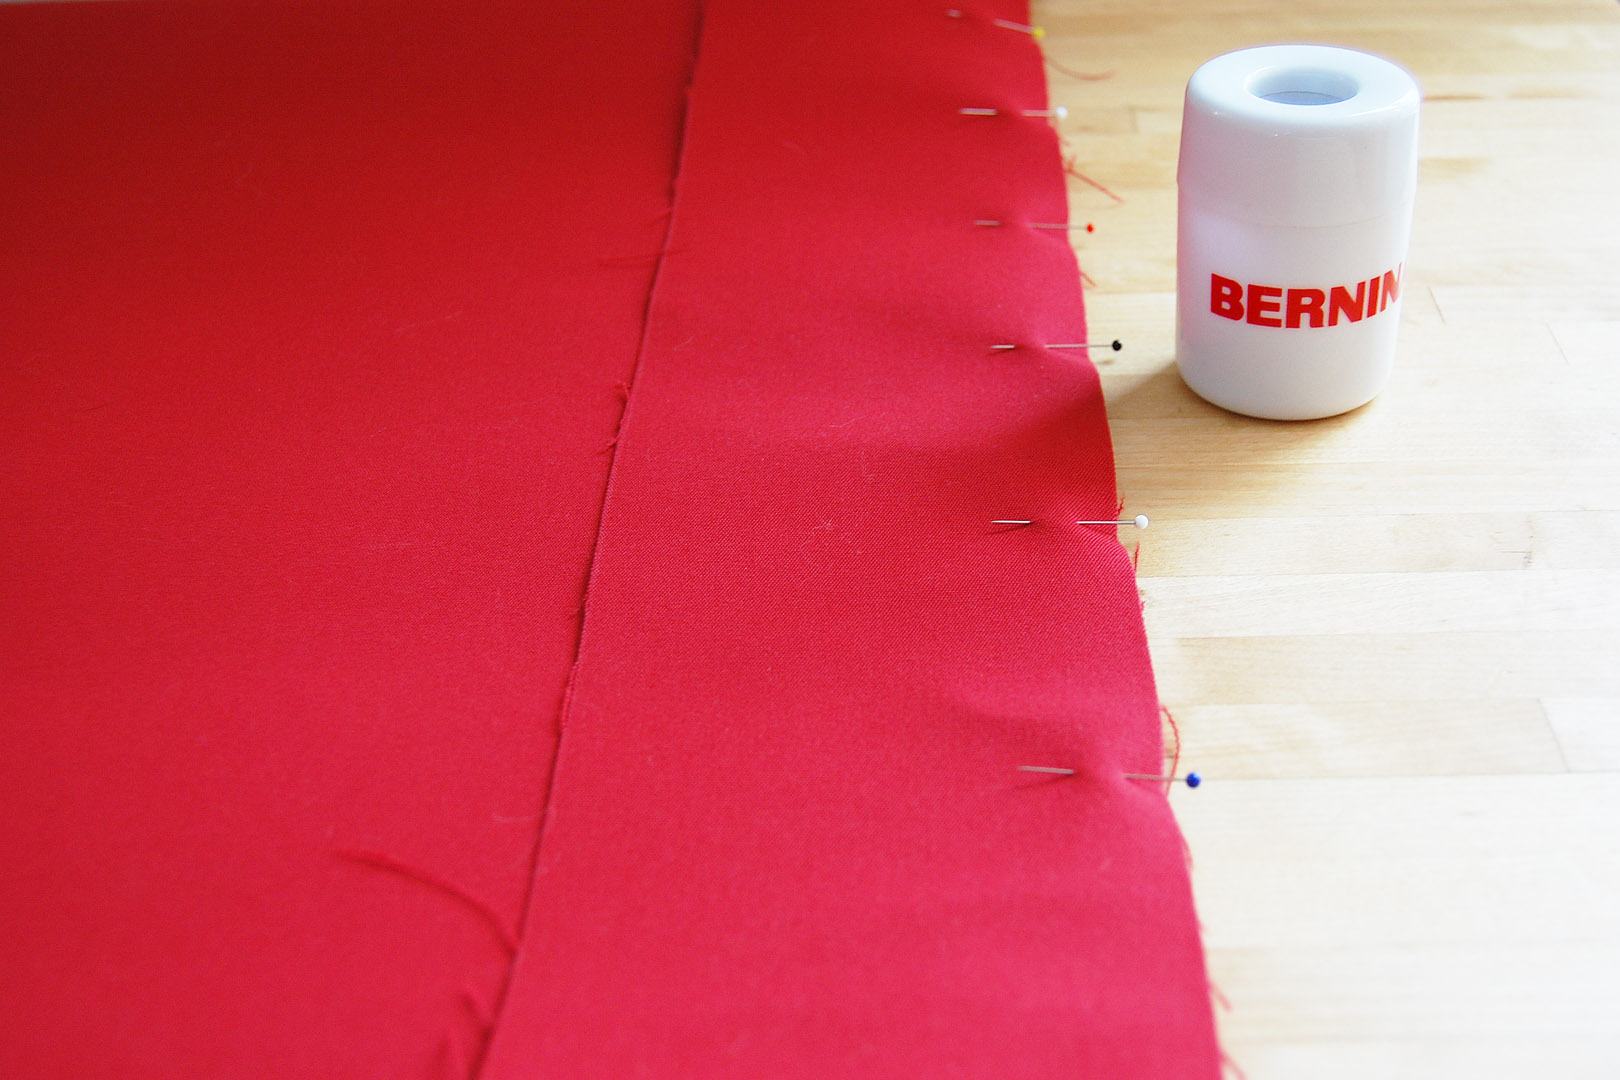
Center one end of the zipper tape at one end of the zipper panel. Start to pin the zipper tape in place along just one side of the basted seam.
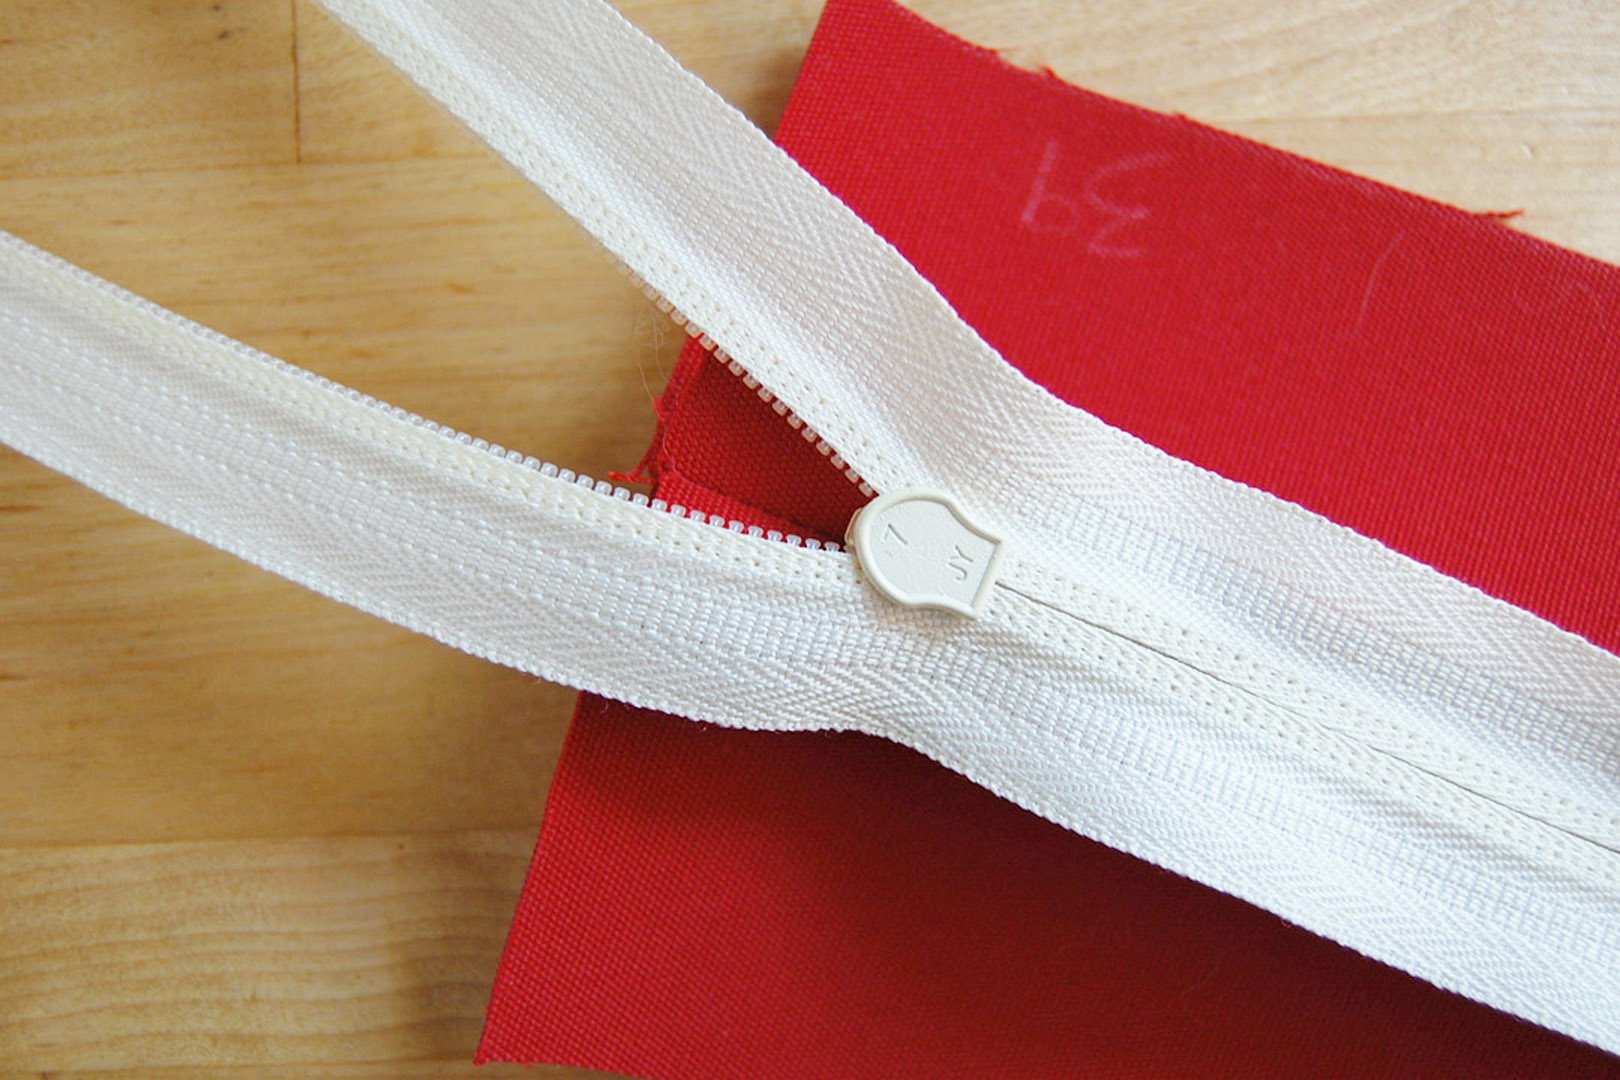
Be sure to leave the zipper open about 1/2″ at the other end before pinning to stitch.

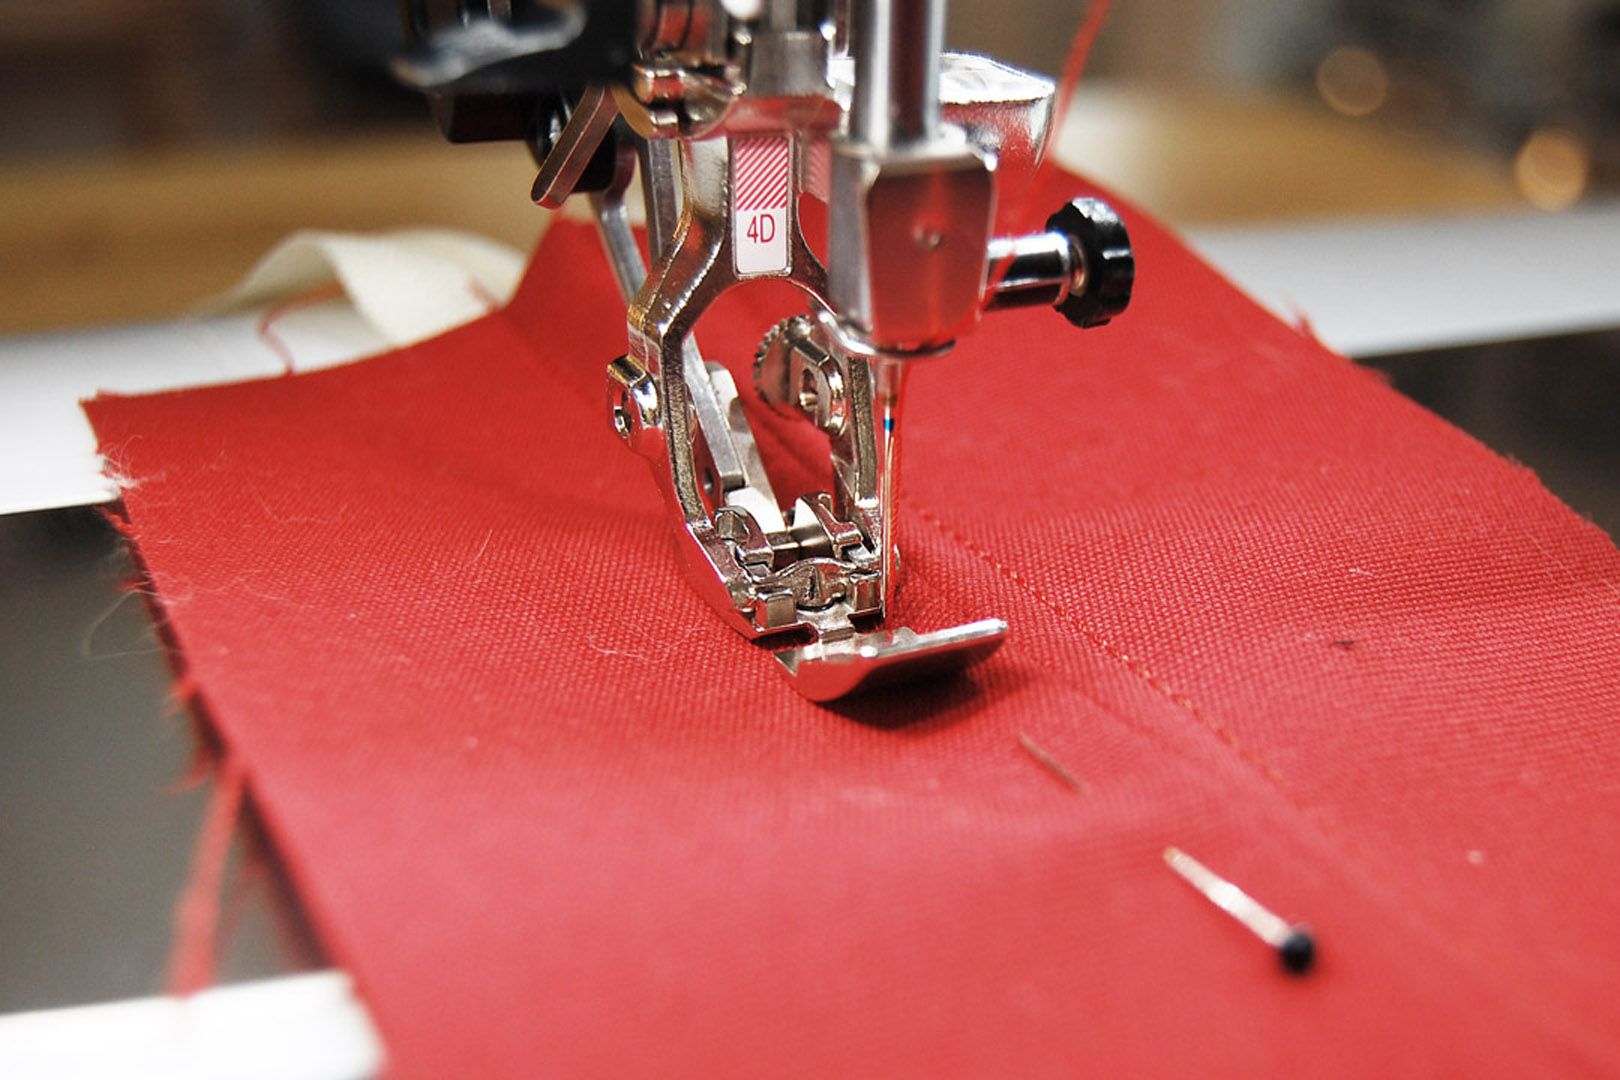
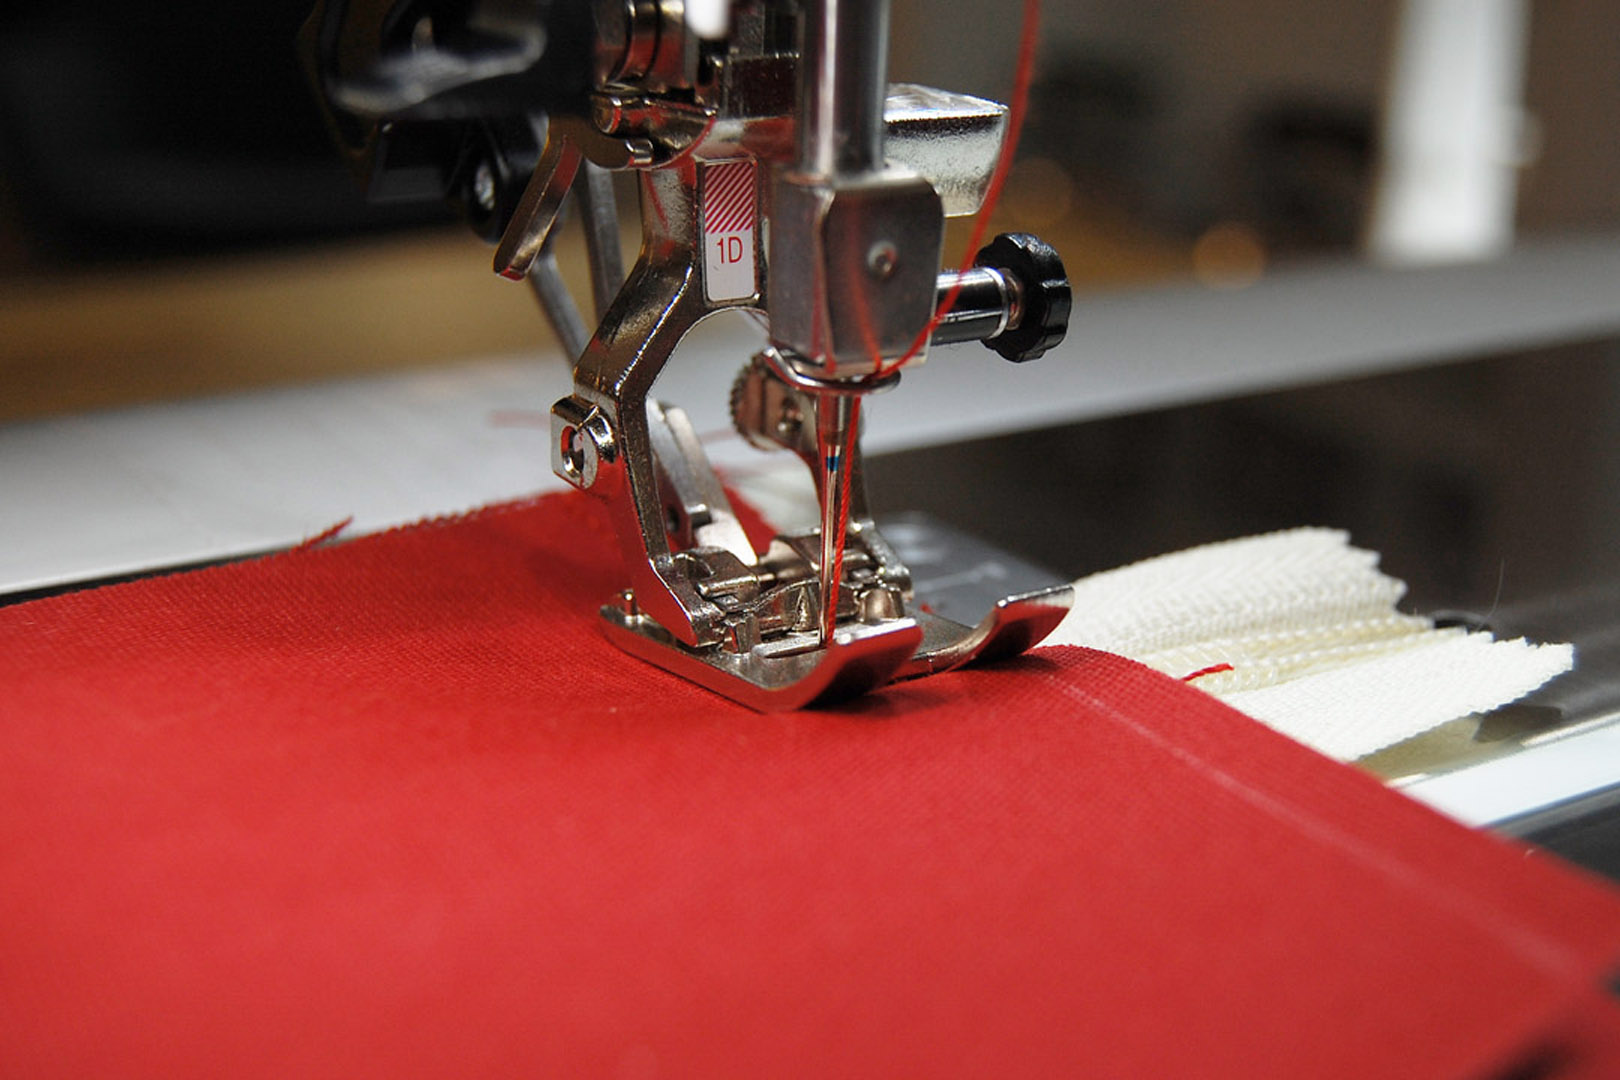
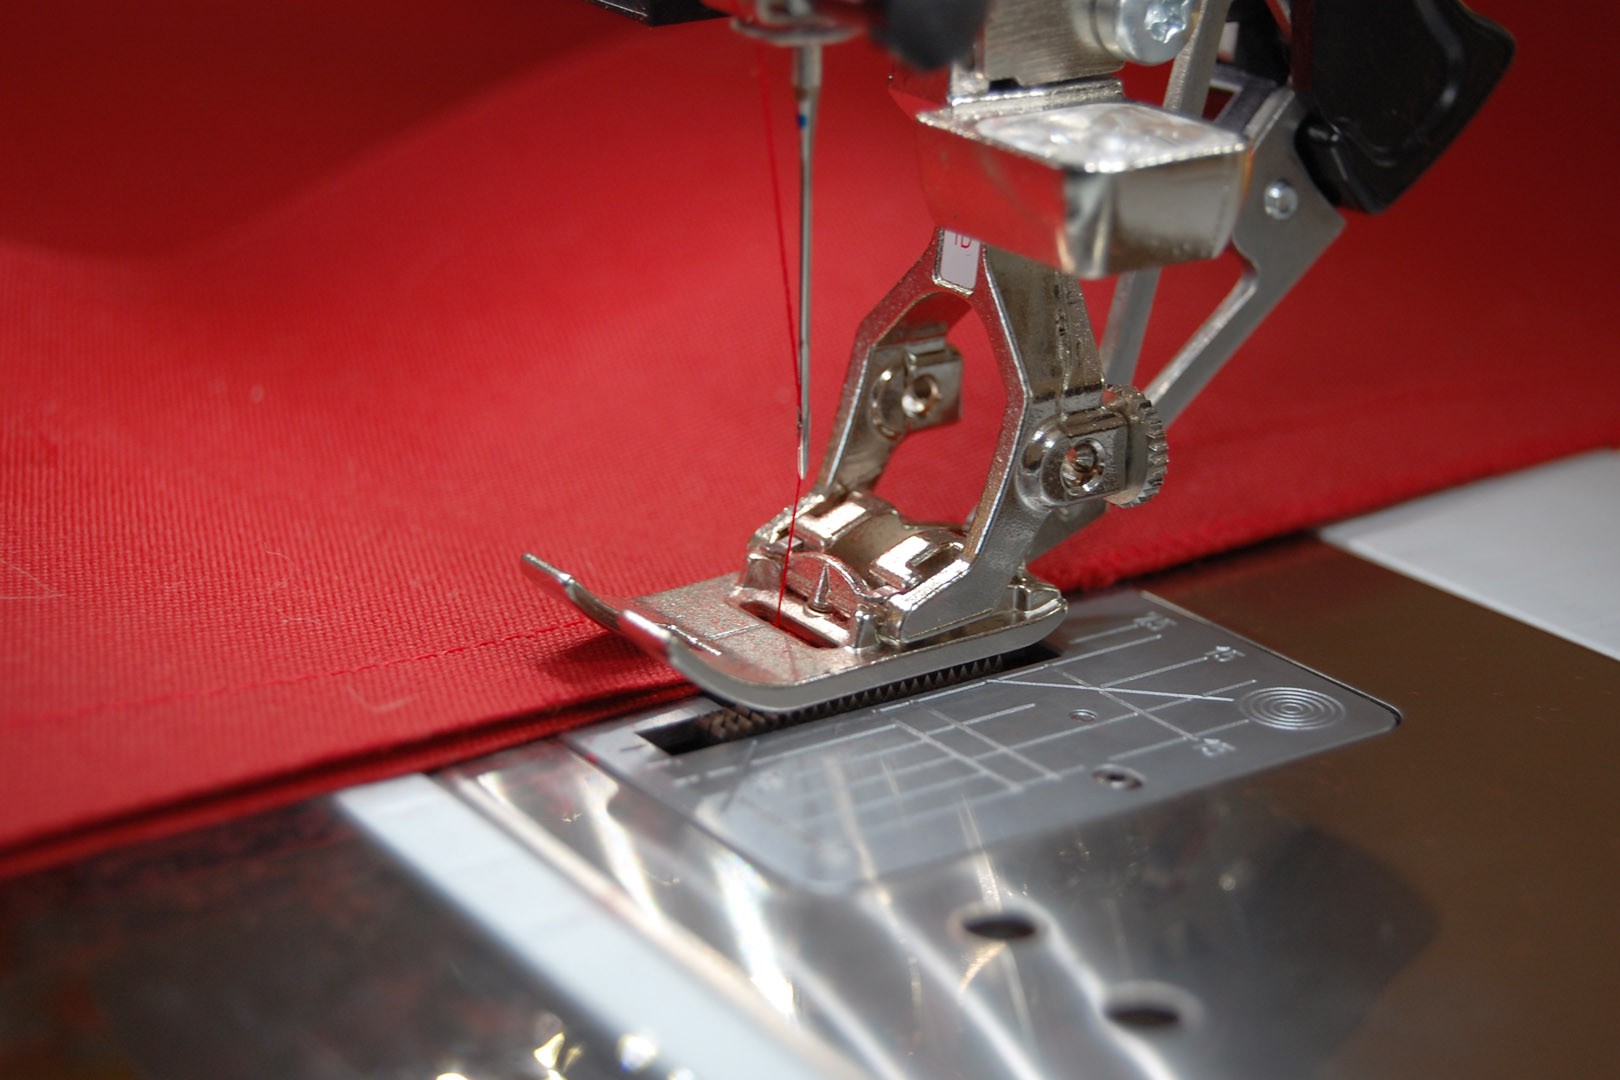
Insert a zipper foot to topstitch the zipper tape in place. I am using Zipper foot #4D with Dual Feed.
Move the needle position over to the far left, place the foot near the zipper coil (you can feel the edge of the zipper coil through the fabric), and stitch all the way down the edge with a 2.5mm stitch length. You will need to move over just a bit to stitch around the open end of the zipper.
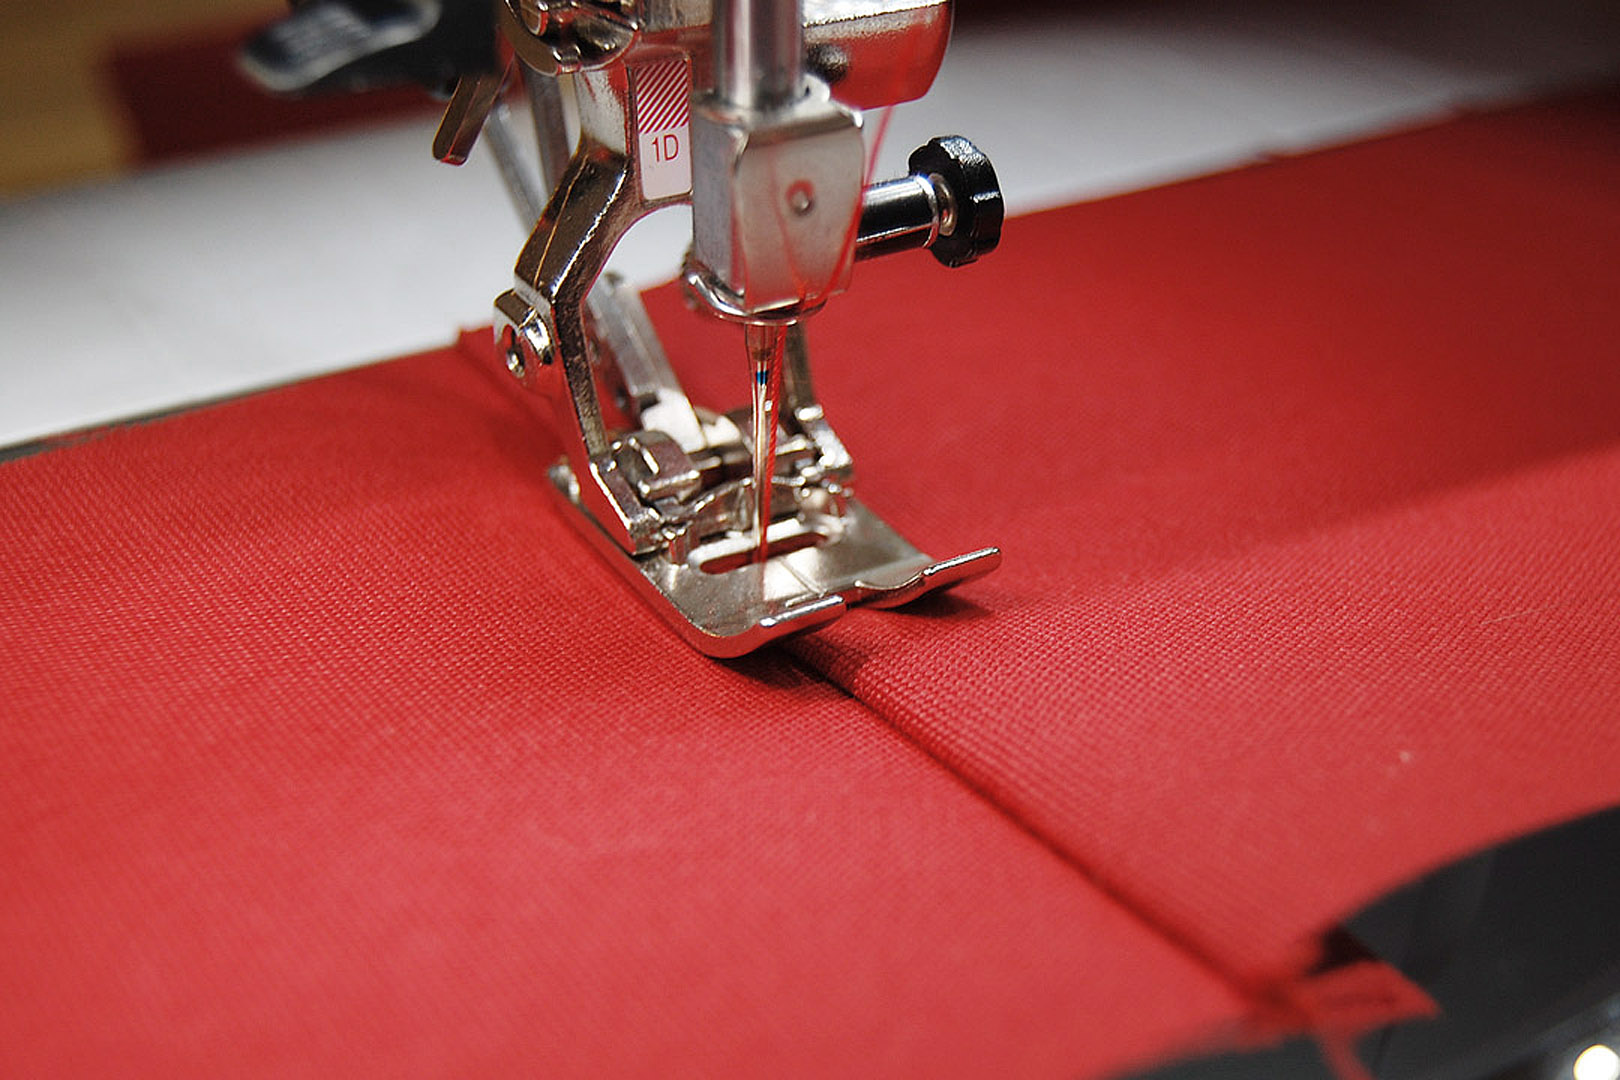
Then pin the other side of the zipper tape near the seam.
Sew in the same direction as the first line of stitching, moving the needle position to the far right. This will help prevent possible puckering from sewing the zipper in place from two different directions.
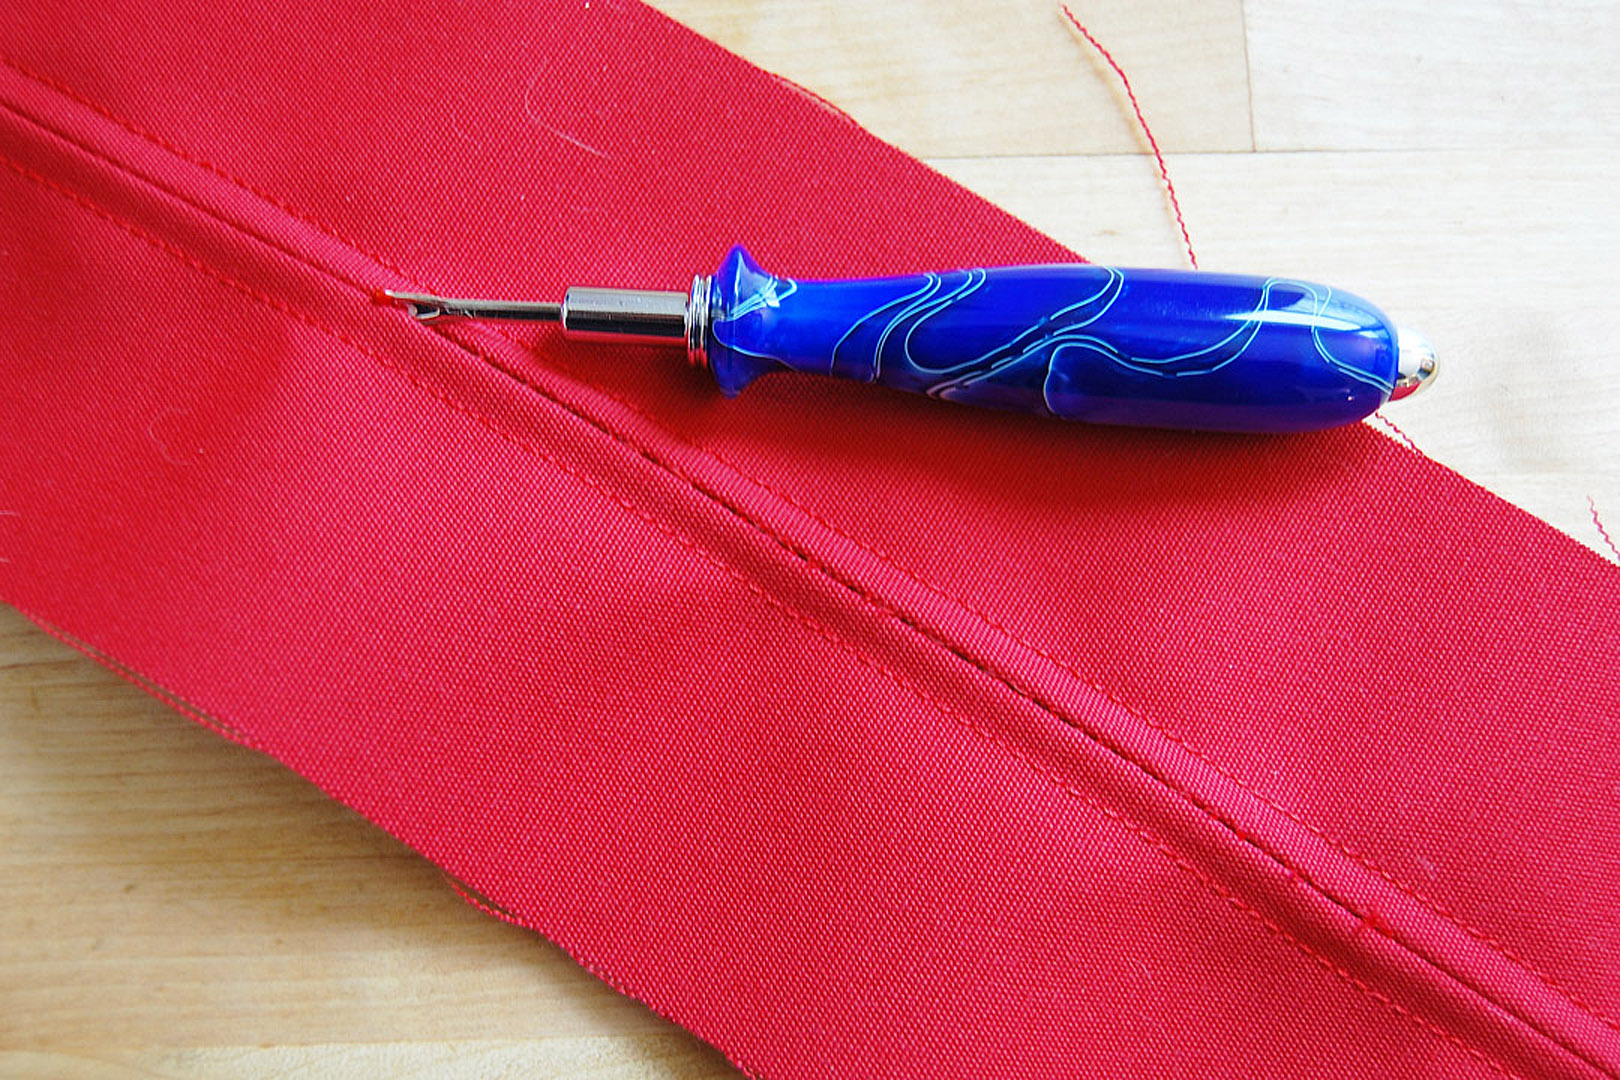
After top stitching the zipper in place, carefully rip out the basting stitches, being extra careful not to remove the backstitches at each end of the zipper.
Now test the zipper by opening and closing it along the full length of the zipper panel a few times. If you accidentally stitched too close to the zipper coil, the zip will stick and not open or close smoothly. If you find this has happened to you, remove the stitches and re-stitch the zipper in place. Set your completed zipper panel to the side and move on to the next step.
Step 3: Sew the side panels.
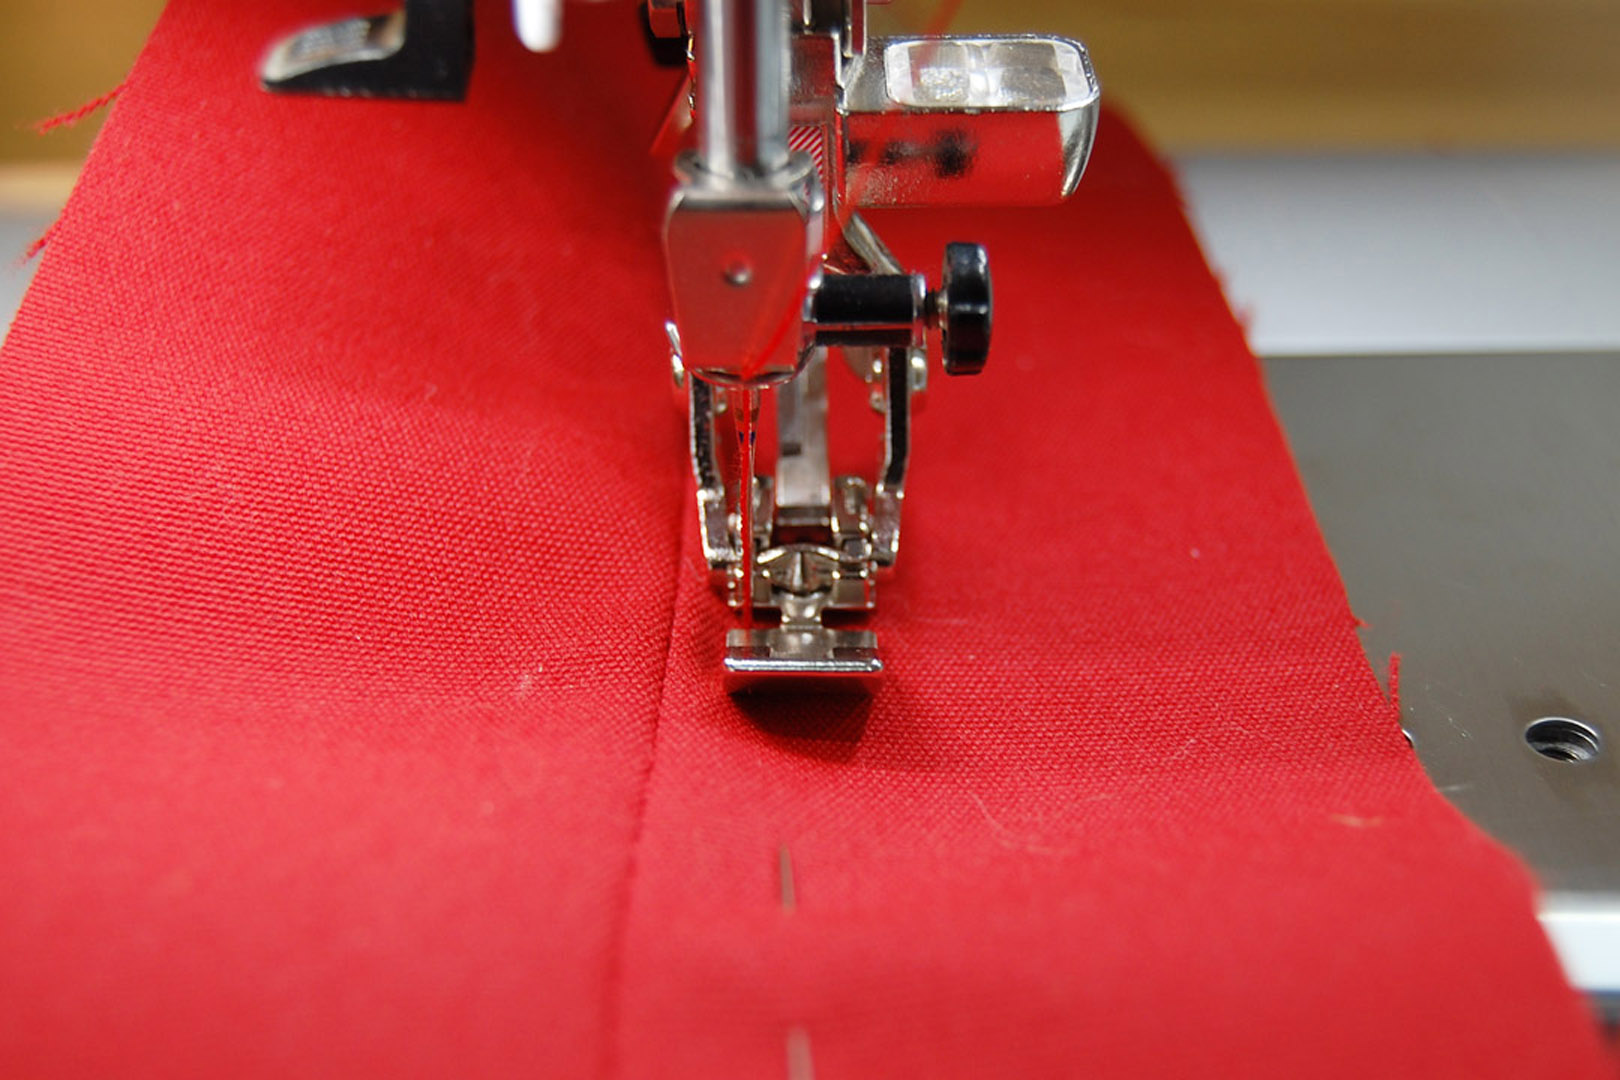
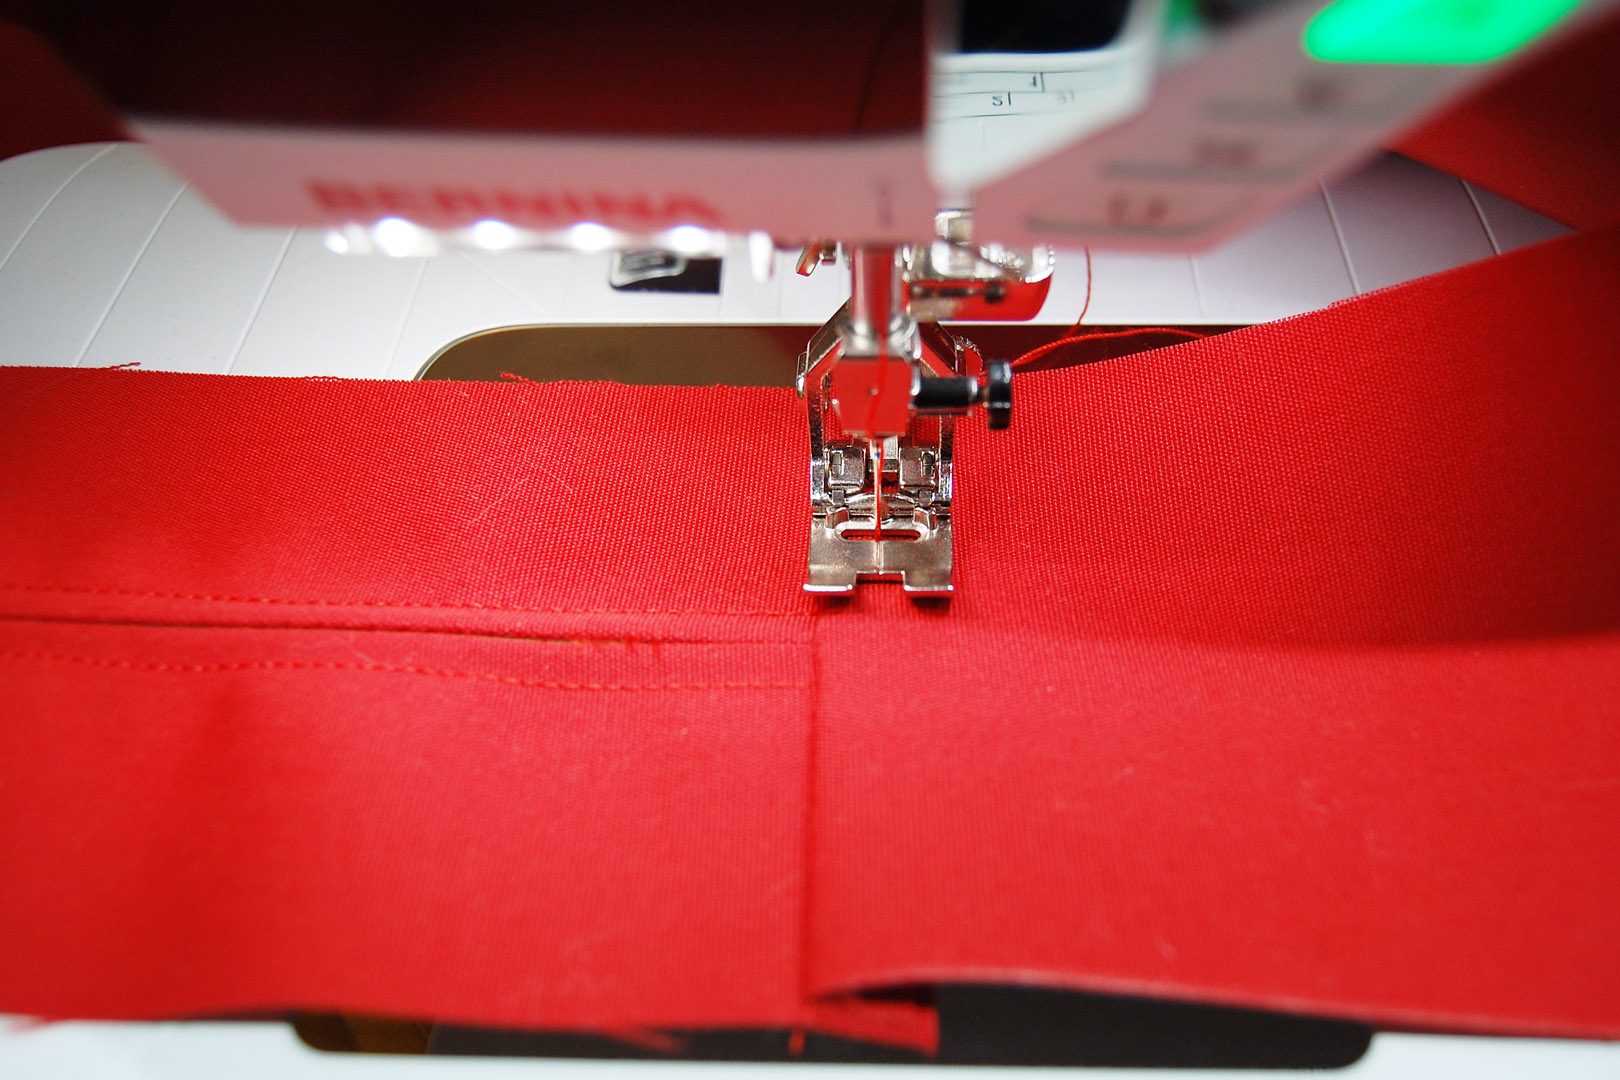
Switch back to the Reverse pattern foot #1D, or if you do not have a Dual Feed foot, you may want to use the Walking foot #50 to help sew the thick fabric and layers. You will need the longest side piece and both side cushion pieces for this step. Pin one side piece (remember one is longer than the other) to each end of the long, front edge of the cushion cover. It doesn’t matter which side, the longer or shorter, is sewn on which end at this step. Sew at 1/2″ seam allowance.
After stitching each side, press open with the seam allowance to the SIDES, facing away from the long, center piece.
Topstitch along the open seam about 1/8″ – 1/4″ from the seam edge.
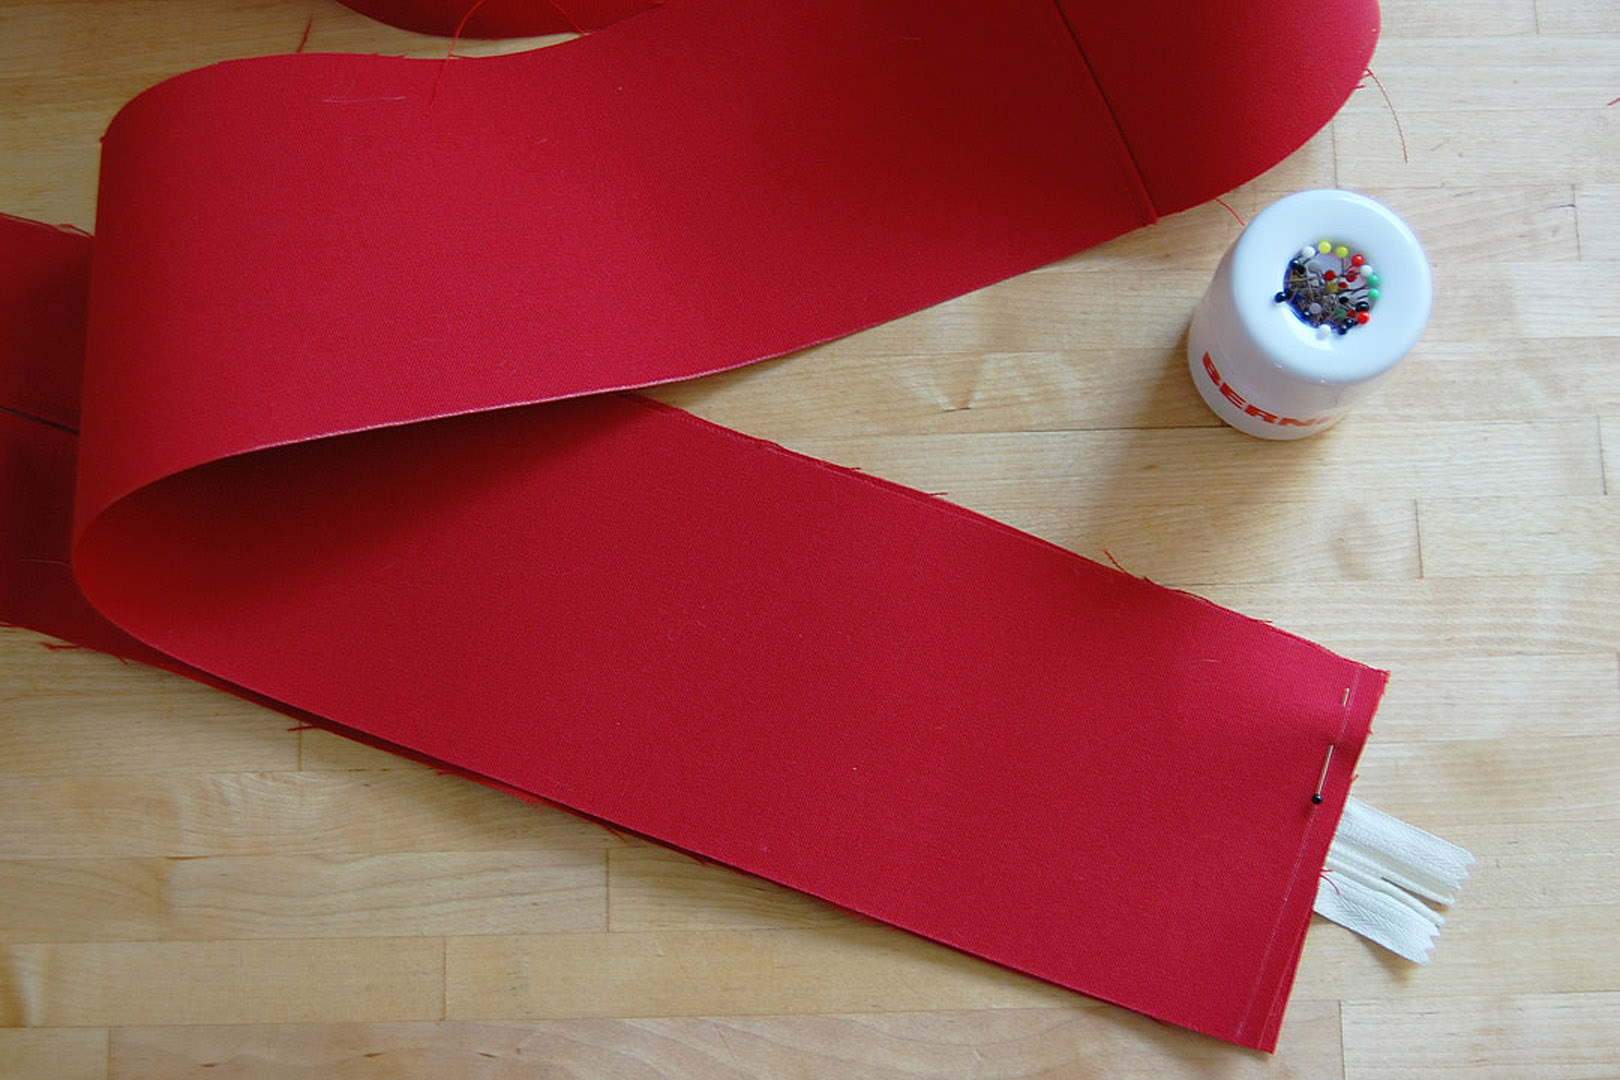
Now you have one long strip sewn in three pieces. Identify the shorter of the two side pieces, and pin this end wrong sides together to the bottom of the zipper panel (the side where the zipper pull sits when the sipper is fully opened).
Stitch across with a 1/2″ seam.
Note about sewing over the zipper!
If your zipper is polyester or plastic, slow down and sew very carefully over the zipper teeth.
If your zipper is metal, do not attempt to sew over the zipper teeth; sew up to the zipper teeth, backstitch, then move to the other side of the zipper teeth, backstitch again, and continue sewing.
Next, sew the other end of the side strip to the top end of the zipper, making sure to leave the zipper open a few inches when stitching. Here’s a quick tip! Make sure your long side strip is not getting twisted during this step, it’s pretty easy to get a twist while making this last seam.
Trim the extra zipper tape even with seam allowance.
On the bottom end of the zipper (the end where the zipper pull sits when the zipper is fully open) press seam allowance to the side, away from the zipper. Topstitch across the seam.
Step 4: Assemble the cushion cover.

Grab the straight pins for this step and one side of the cushion pattern. Find the center of one long edge of the main cushion pattern piece by folding in half and mark with a pin. Find the center of the long middle section of the side cushion by folding in half and marking with a pin. Arrange the side cushion cover piece with the zipper panel as shown in the photo above; with the front section right side down, the top of the zipper panel (where the zipper pull sits when zipper is closed) should be facing up, and the bottom of the zipper panel facing down.
With right sides facing together, match pins to start securing the middle of the main cushion pattern piece with the side cushion piece. Start pinning down around the cushion.
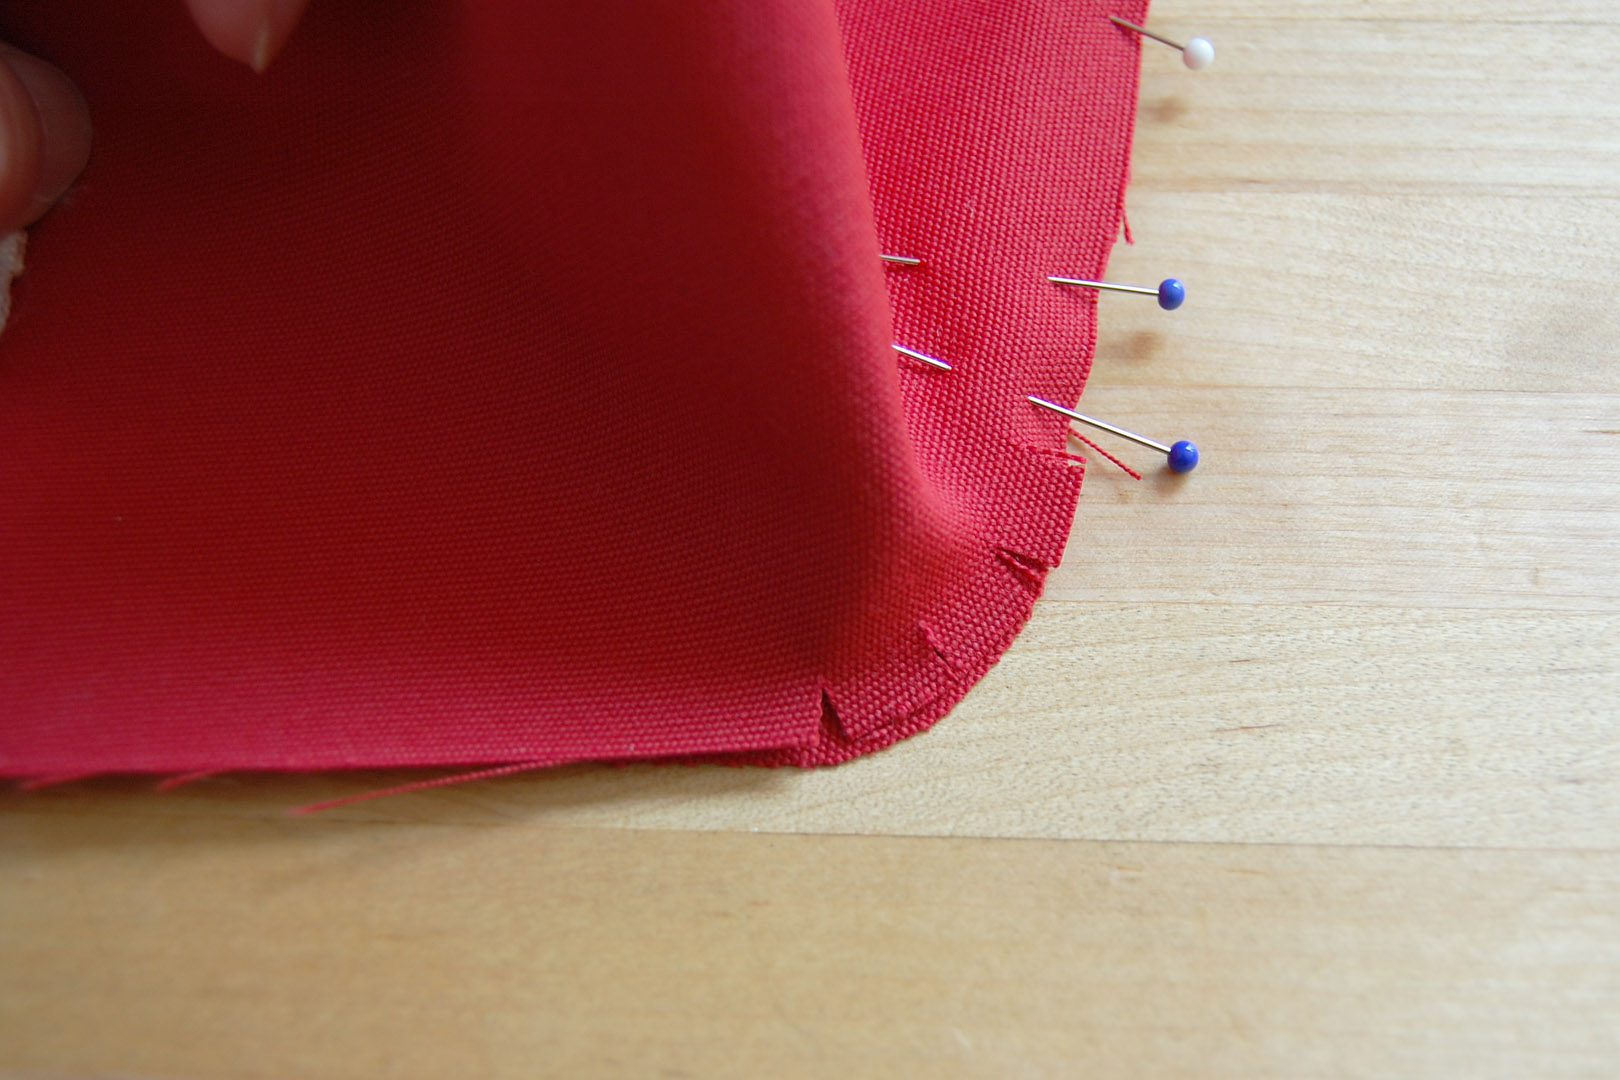
If you have curved corners, make a few small snips 1/4″ into the side panel where it attaches to the corner; this will help the fabric ease into the turn. Keep pinning around the side, and up around the zipper.
Stop pinning about 6″ from the top end of the zipper.
Next, start pinning from the front of the cushion cover up and around the other side towards the top of the zipper panel.
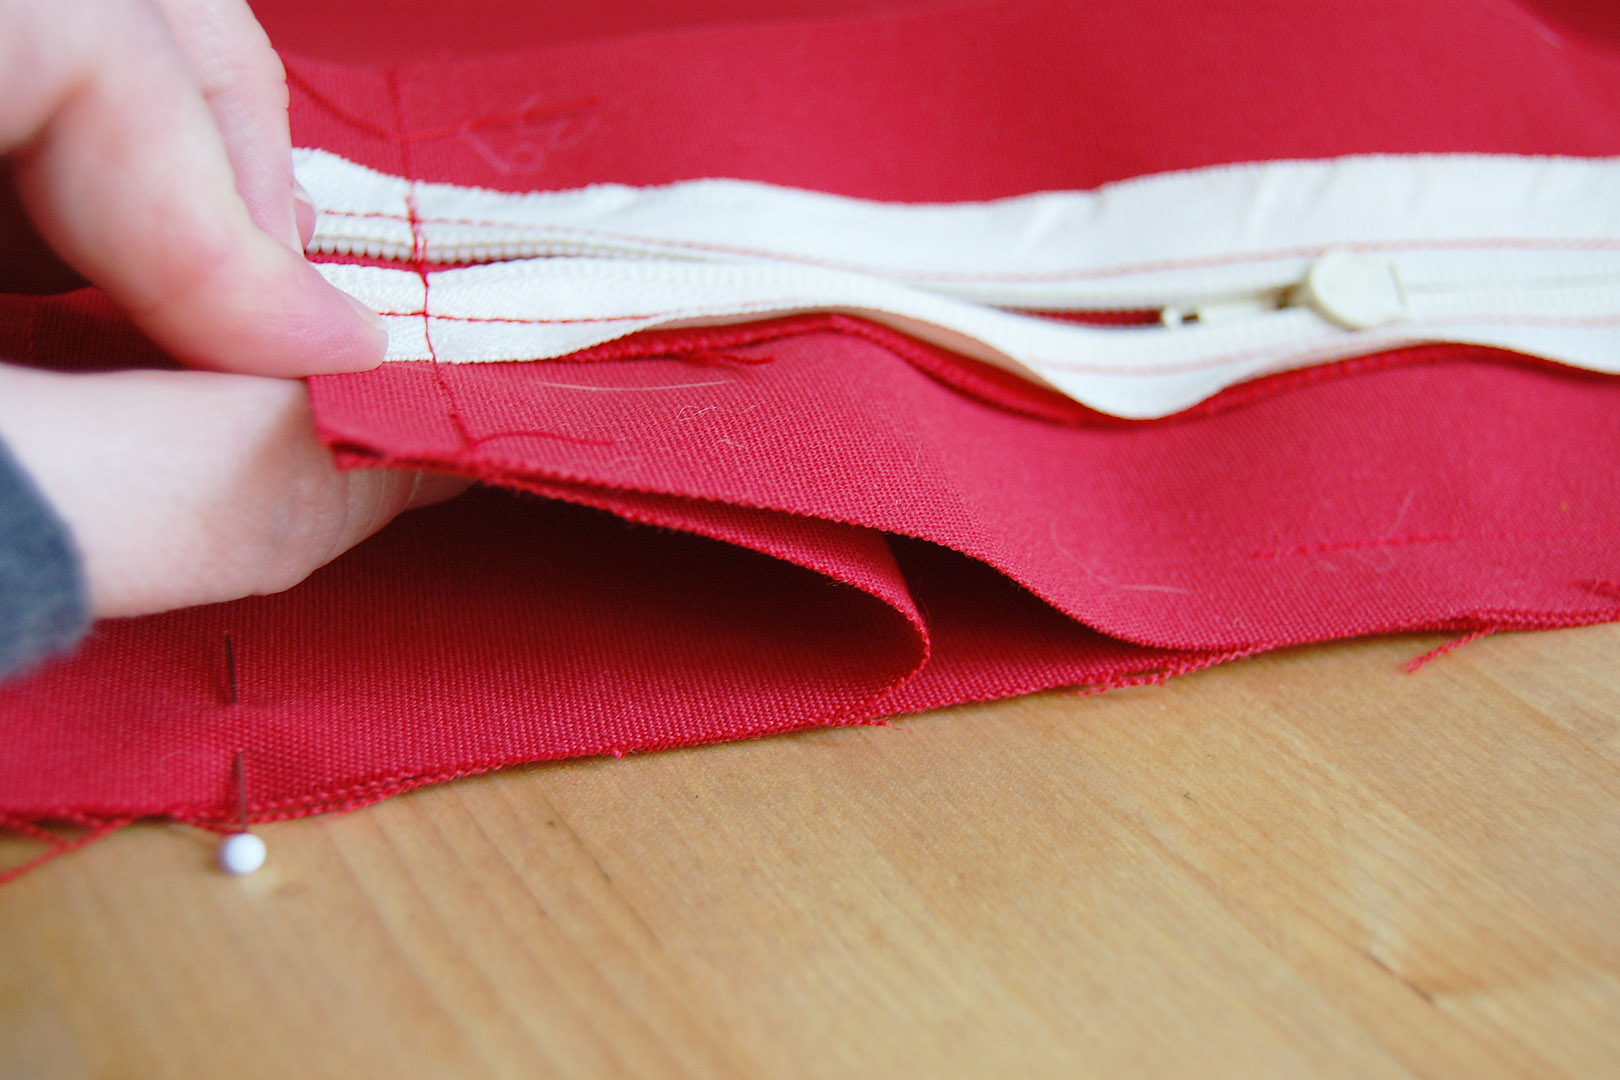
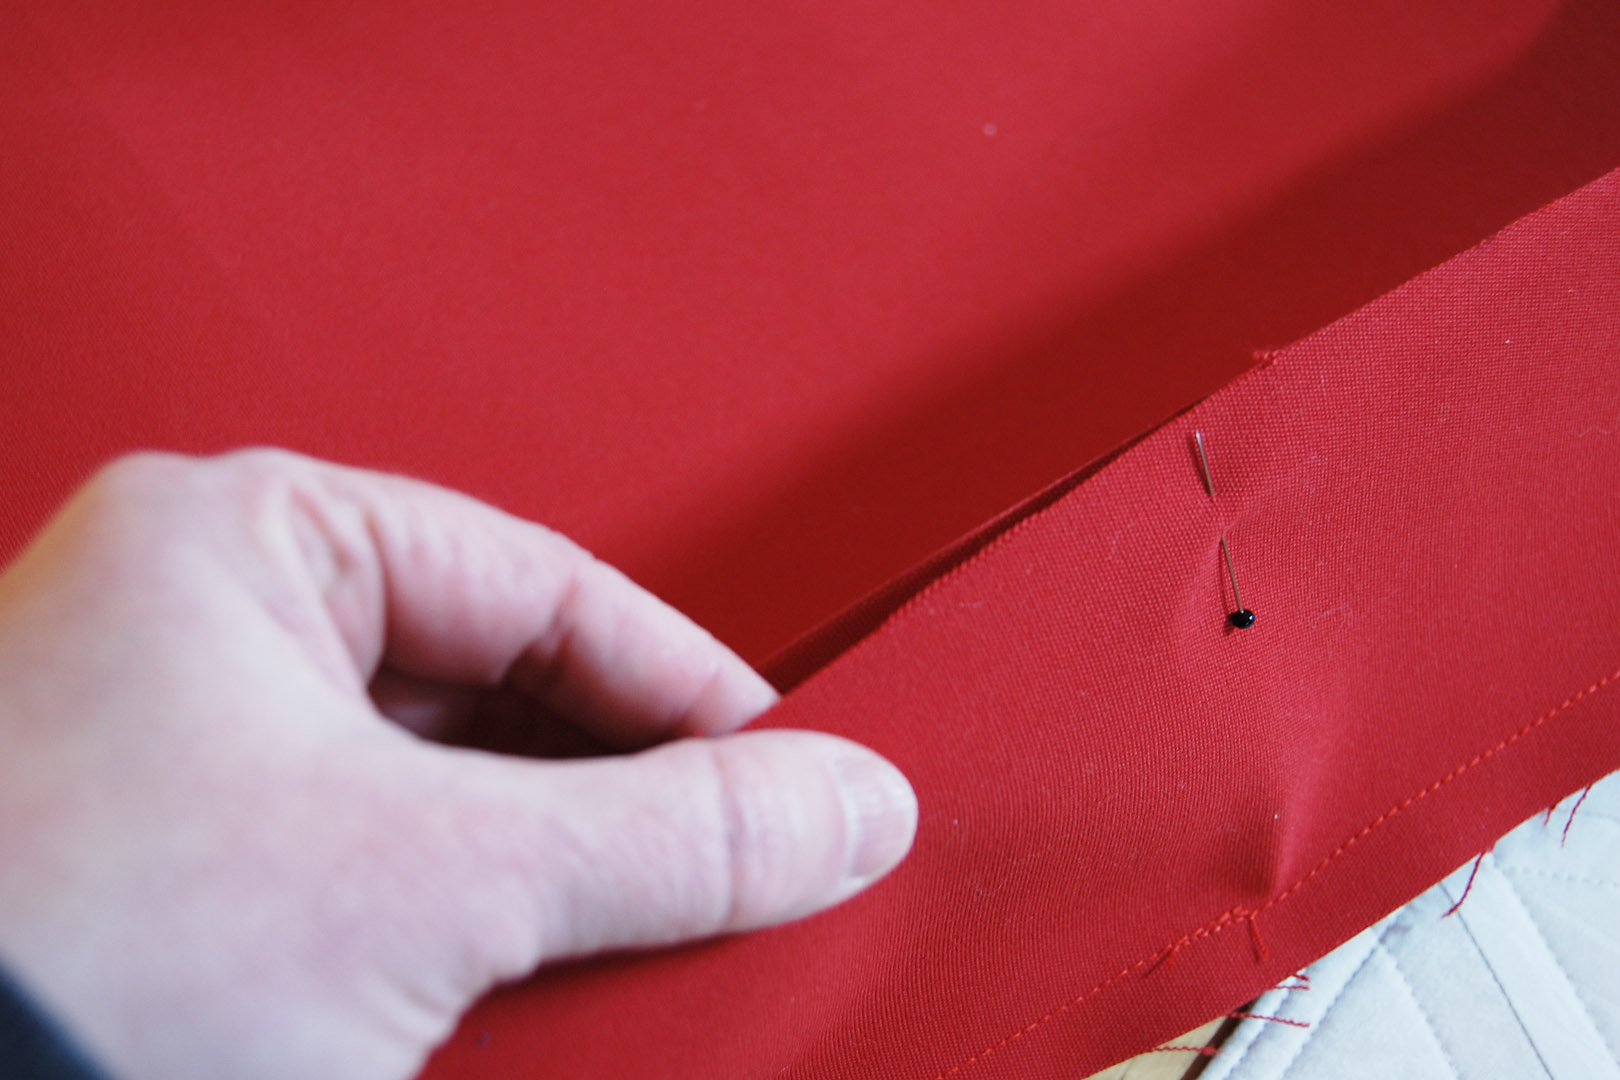
When you reach the top end of the zipper panel, you will have extra fabric. This fabric will create the pocket over the zipper pull. Carefully fold the extra fabric under the zipper from the seam as shown in the photo above.

Press down on the fold and pin in place. Sew all around this side seam using a 1/2″ seam allowance. When reaching the fold at the zipper panel, backstitch a few times to create a strong seam at the fold.

It helps to slow down when sewing over these thick layers.

After stitching the side panel to the first main cover section, it’s a good idea to finish the raw edges of the seam with a zigzag stitch. This helps to strengthen the edge by keeping it from unraveling.
I used the default zigzag stitch and the Reverse pattern foot #1D, making sure the stitch sewed off the outside of the raw edge to give it a clean finish.
Next, you will attach the final main cushion pattern piece to the other side panel. Begin by finding the middle of the front side panel and matching it to the middle of one long edge on the main cushion. Make sure you are pinning right sides together.
Note! Make sure you leave the zipper open at least half way to turn the cushion right-side-out after stitching.
Sew the final seam with a 1/2″ seam allowance all the way around. Finish the raw edges just the same as the other side with a zigzag stitch.

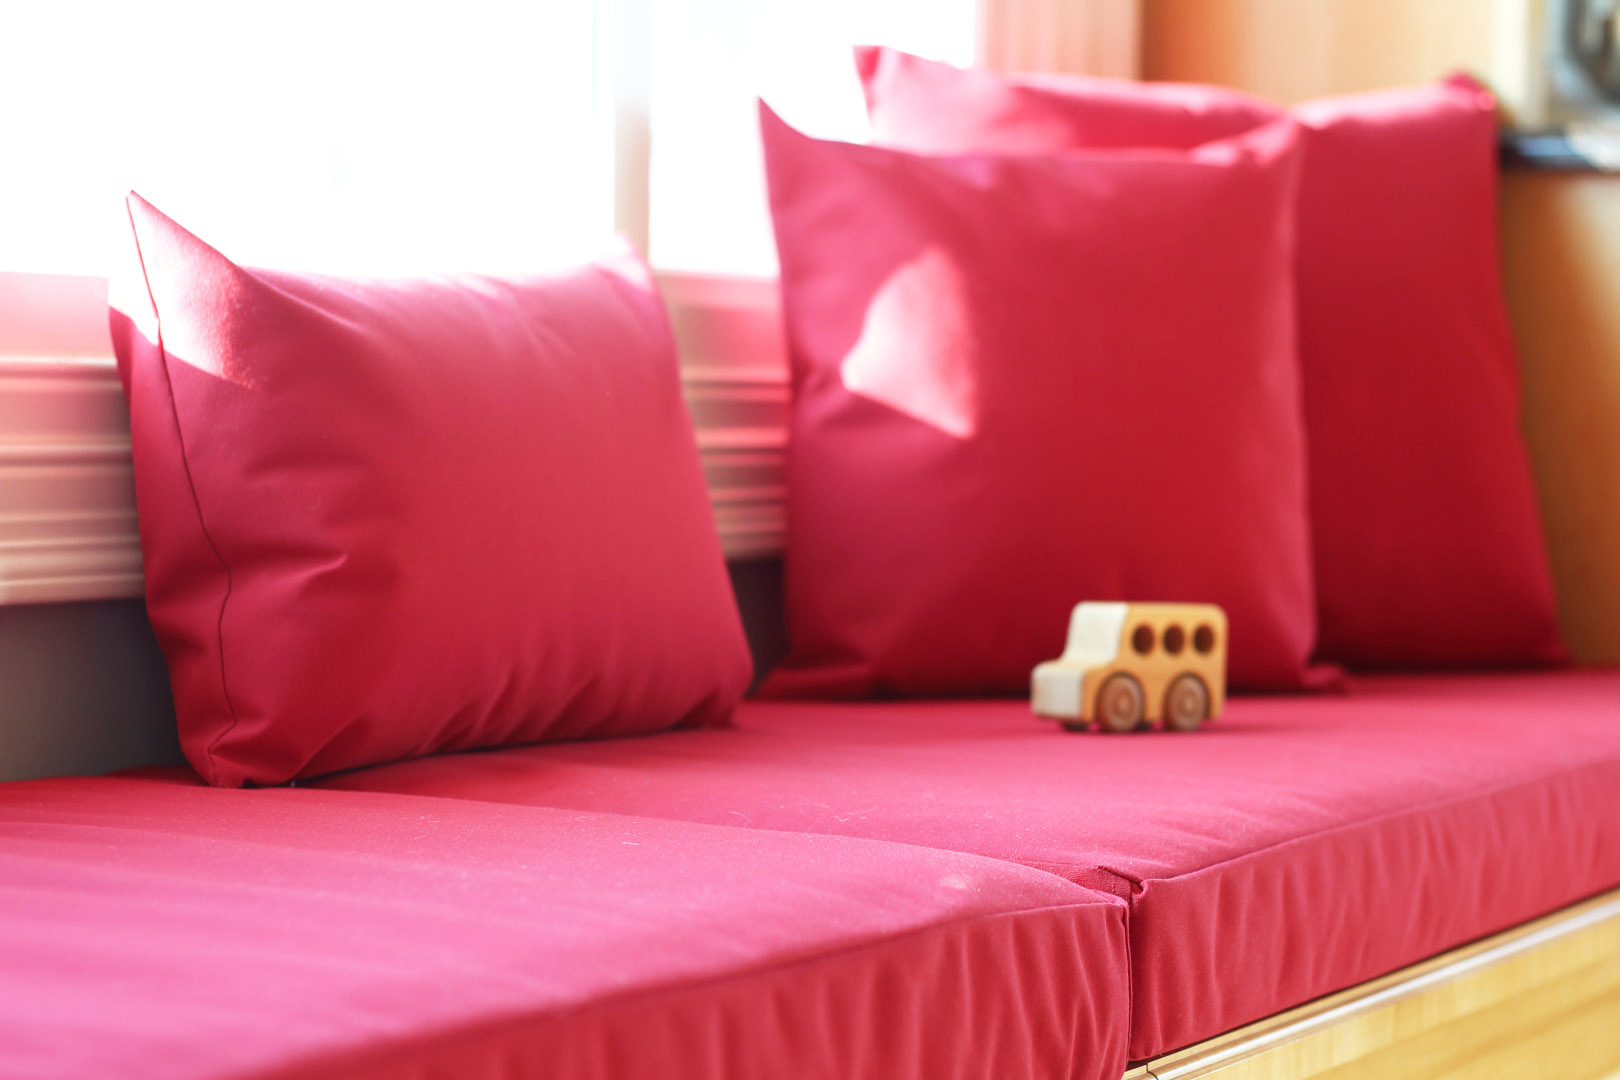
After completing the sewing, carefully turn the cushion cover inside out. Use the blunt end of a chopstick or the eraser end of a pencil to help push out the corners. Pop the old cushions in the covers, and enjoy your “new” seat!
If you want to update some pillows to coordinate or match your new cushions, check out my simple pillow cover tutorial here!