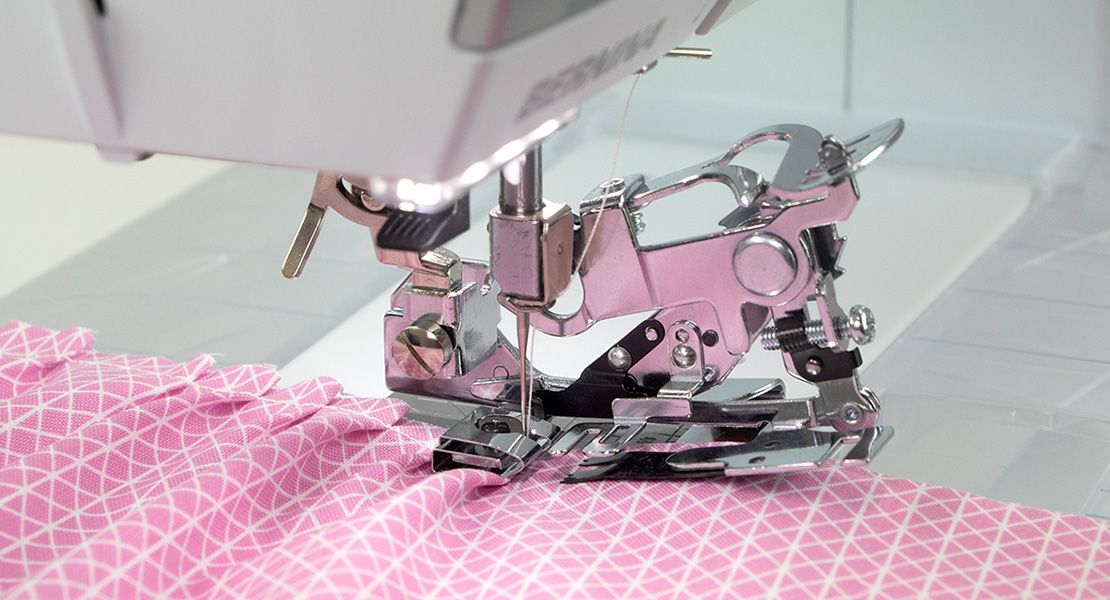
Coverstitch Techniques
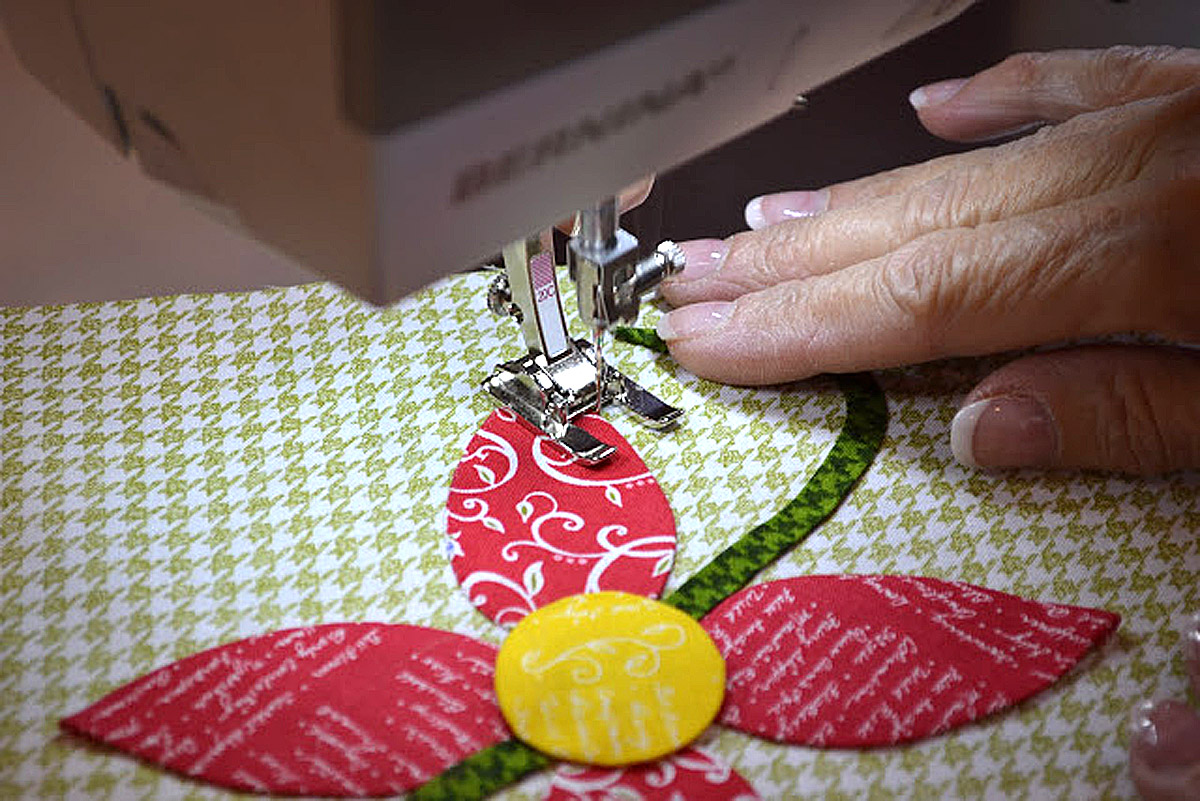
Are you curious about a coverstitch machine and what it does? This machine is key to achieving that perfect polished hem finish to your sewing projects. Whether you need to shorten your t-shirts or use a chainstitch as a basting stitch to fit a garment, this is the machine for the job. The bernette Funlock series of machines includes two options for coverstitching: b42 (Cover- and Chainstitch machine), or bernette 48 (Combo machine). You will love how using a coverstich can create stretchy finishes for activewear and finish any project with a professional looking hem.
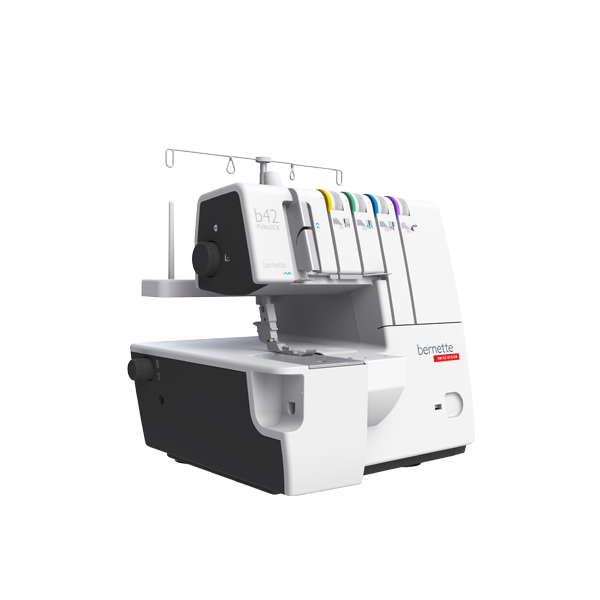
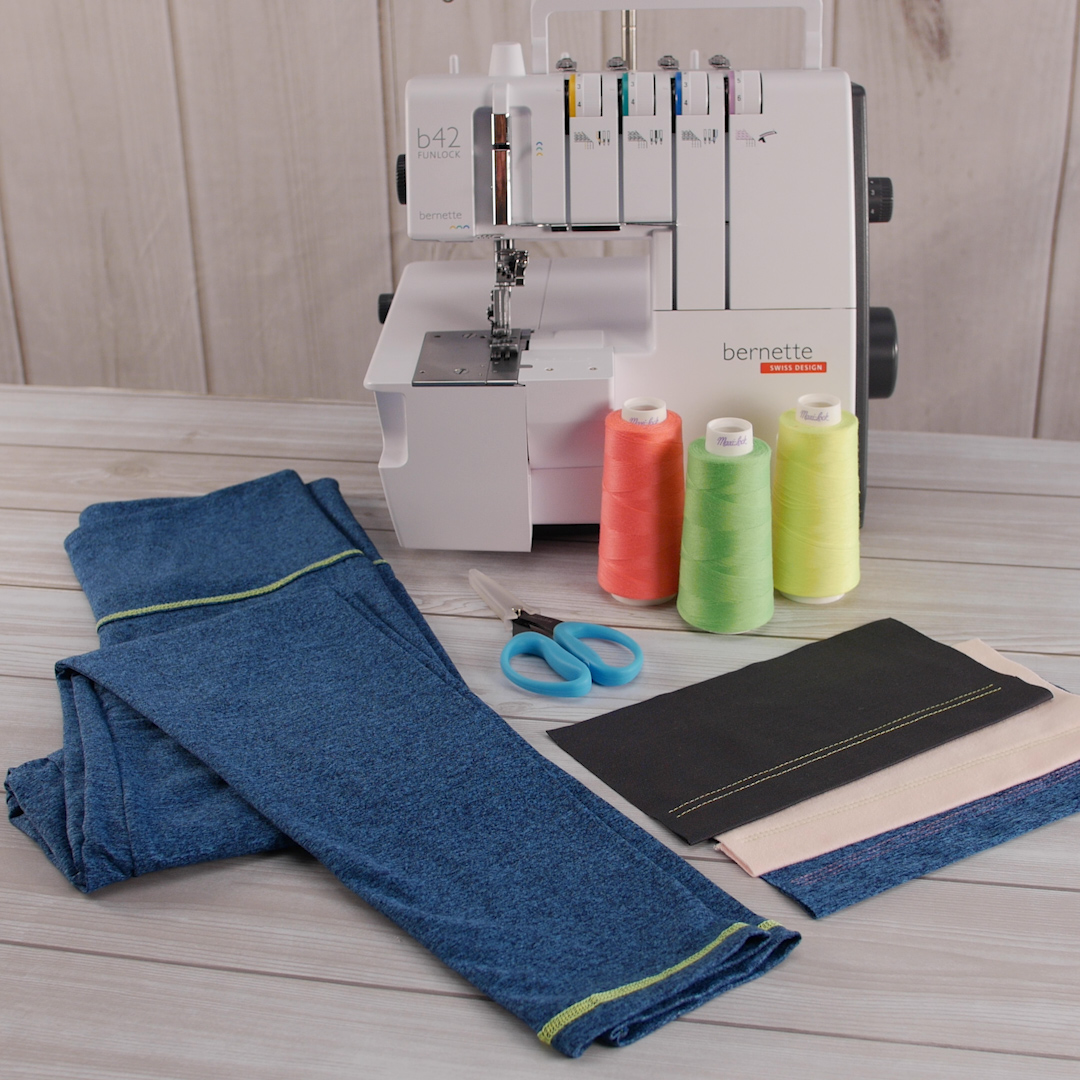
Machine Featured: bernette 42
Coverstitch Variations
The b42 model is a chain- and coverstitch machine that does only 4 stitches; three variations of coverstitch and a chainstitch. A chainstitch uses a single needle and is the stitch commonly associated with the top of feed bags. You can also use this stitch for basting or decorative sewing. Add a fun thread to the looper and use this on the top of your project for a fun way to embellish any project. A coverstitch is the stitch you are familiar with seeing along the bottom of your t-shirts. Many people assume that this stitch can be done using a standard overlock machine. However, there is no cutting of the fabric that happens when doing a coverstitch. This means that unless your overlocker is a combo machine and can be converted from overlock stitching (where the fabric edge is cut), it will not do this type of hem. As someone who sews a lot of knitwear, I prefer having a designated coverstitch machine and the b42 is a great place to start if you are learning. This machine has a great price point and is very simple to use and has great stitch quality.
This technique feature covers the three variations of coverstitch options—all of which are easily achieved by simply choosing which needles to use.
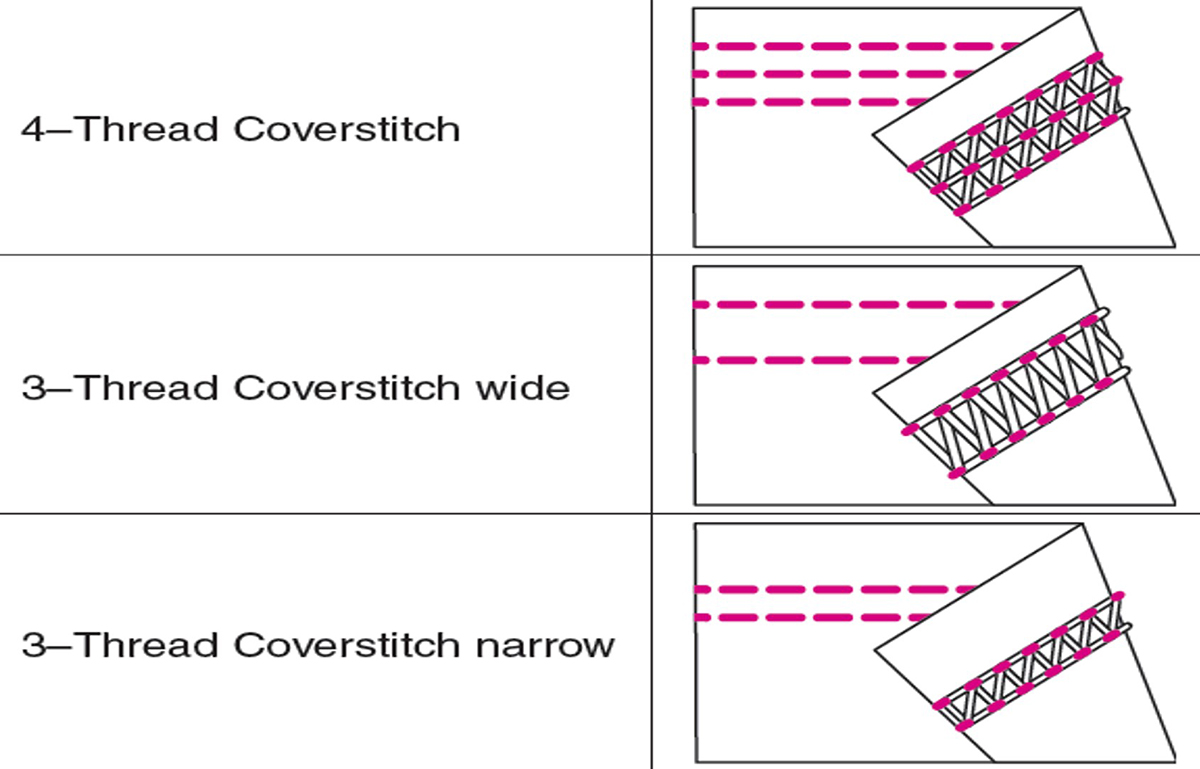
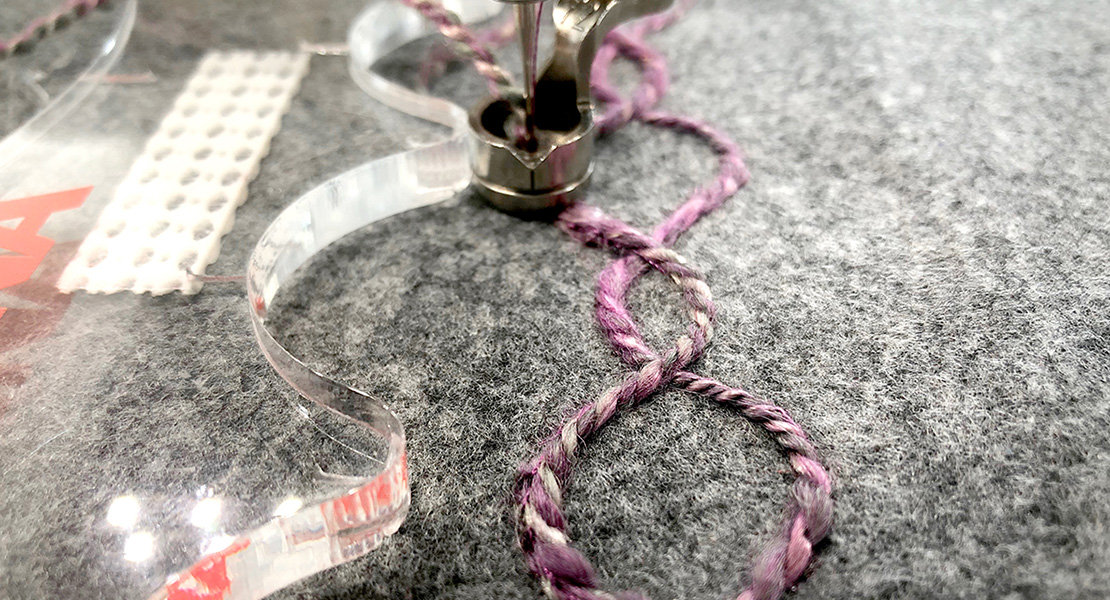
4-Thread Coverstitch
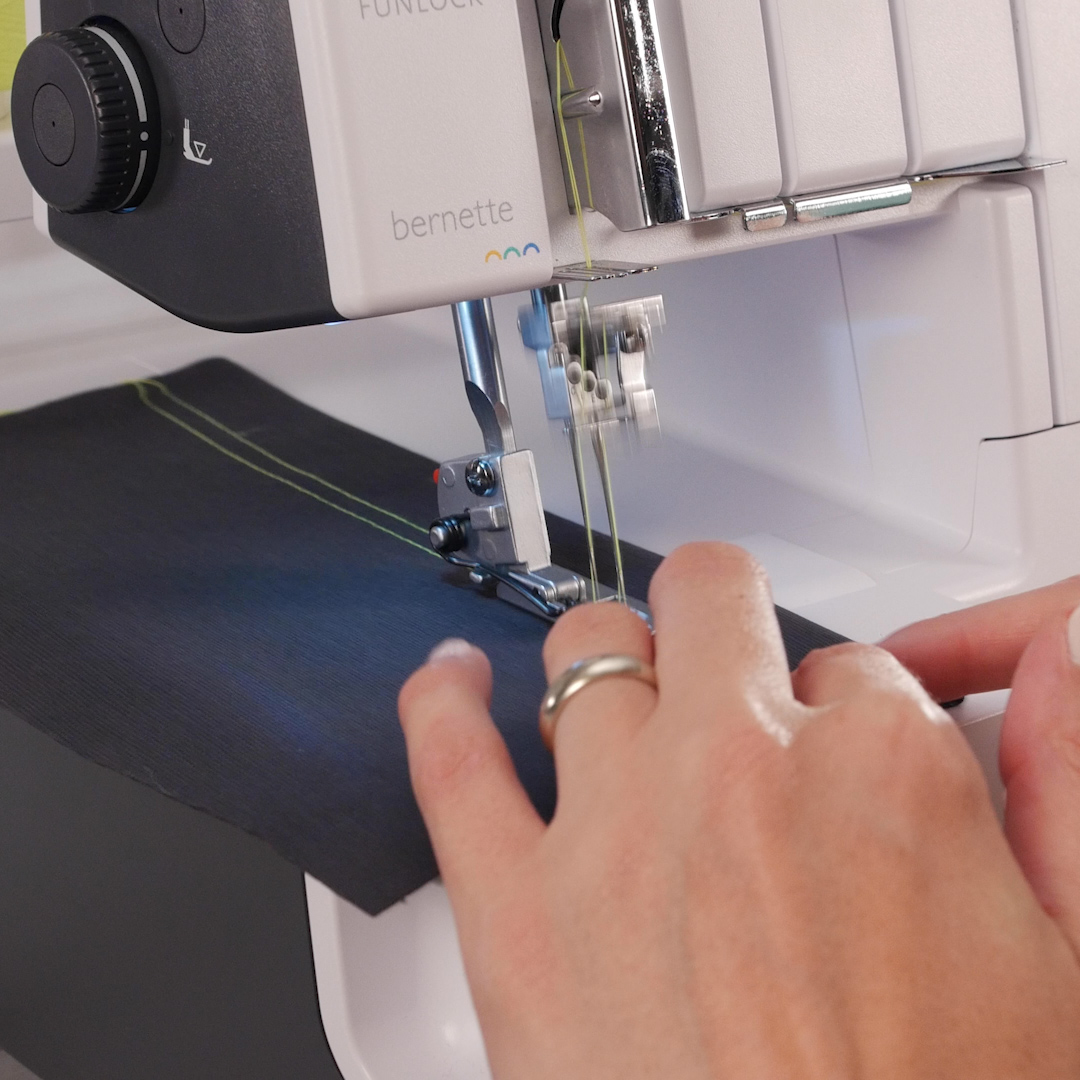
A 4-thread coverstitch uses all three needles along with the looper to form the stitch. Traditionally the front side of the stitch is the needle side, however, you may choose to have the looper side show on the front to resemble the double sided coverstitch you see on lots of activewear today.
and
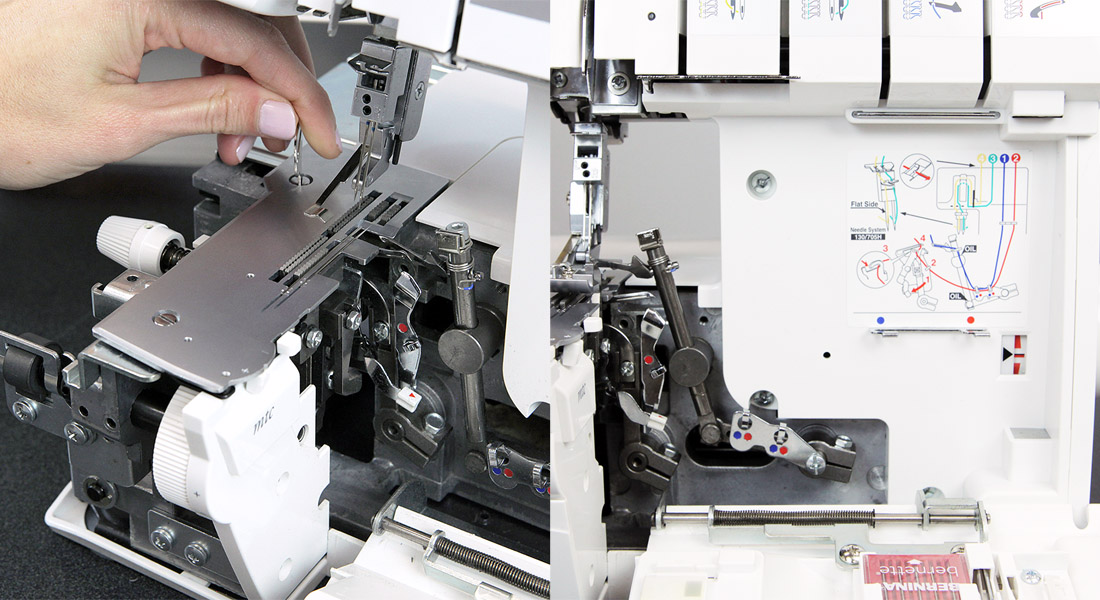
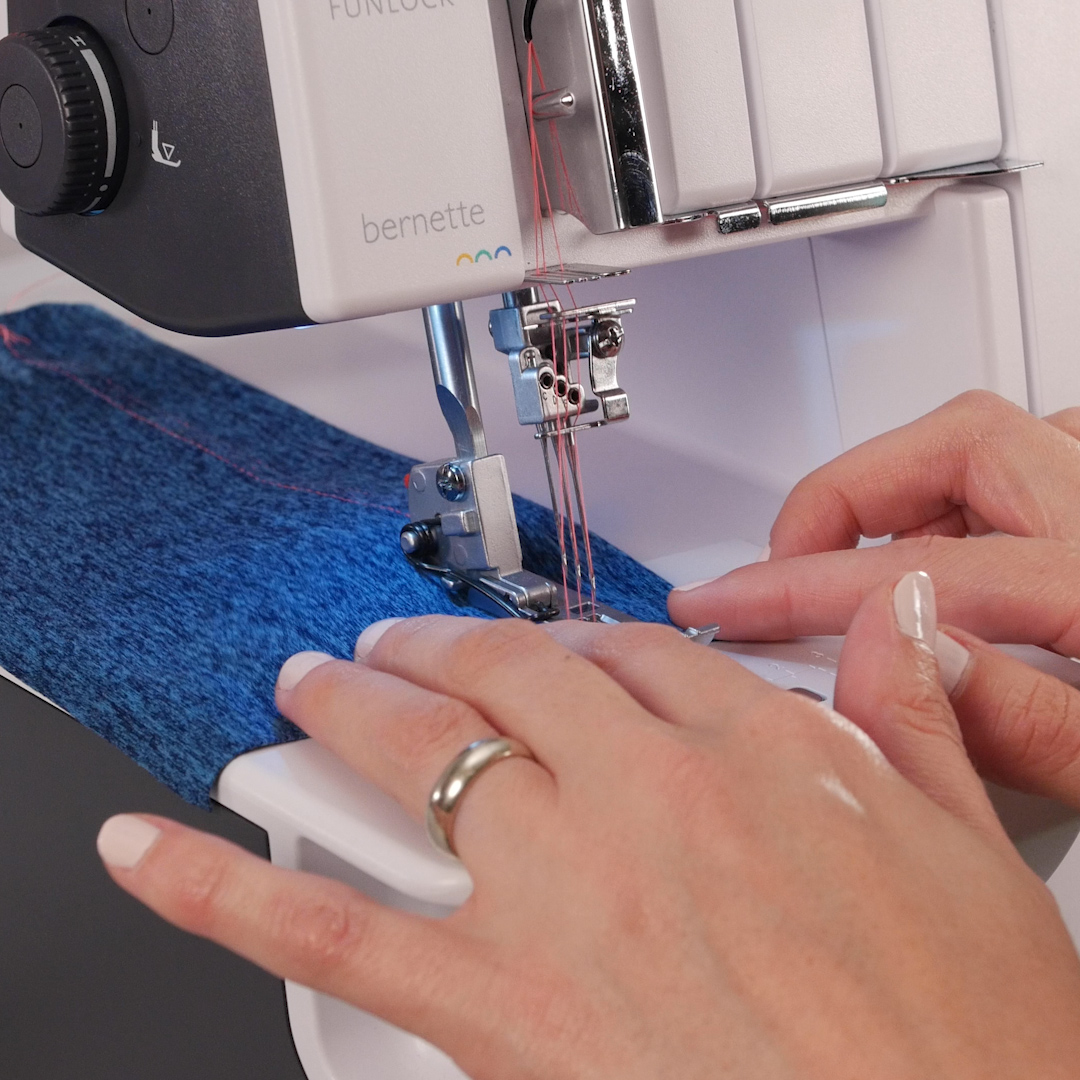
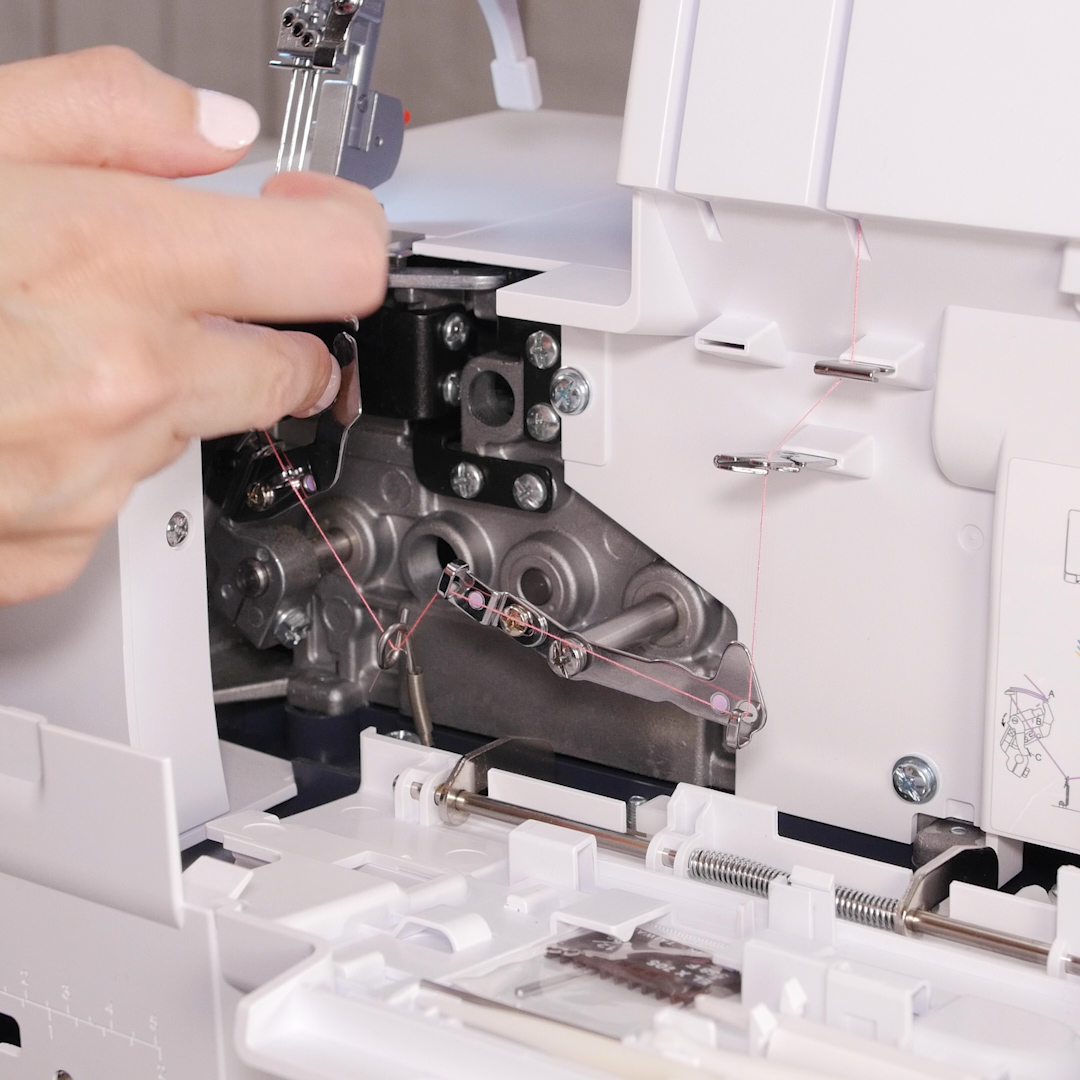
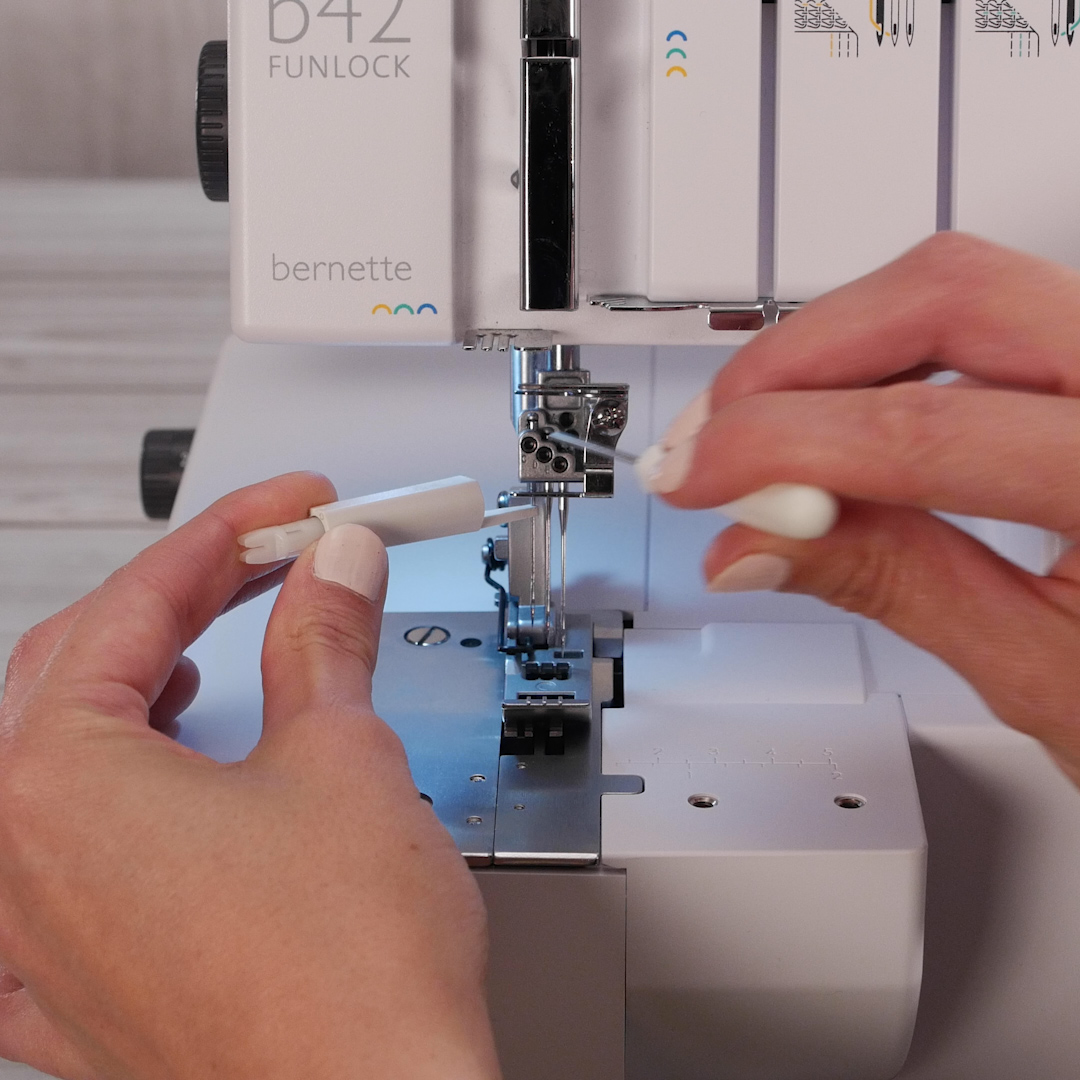
The bernette Funlock 42 has a looper that is threaded entirely from the front of the machine! Because this machine has only the mechanical parts associated with chain- and coverstitching, it is clear and easy to see the threading path—perfect for beginners.
The machine also comes with tool storage onboard in the looper door. Here you will find the needle threader tool, which makes threading and changing needles easy to do. There are also tweezers that help you to manage the threading through all the guides. Additionally, there are extra ELx705 needles (perfect for coverstitching), a screw driver and a lint brush.
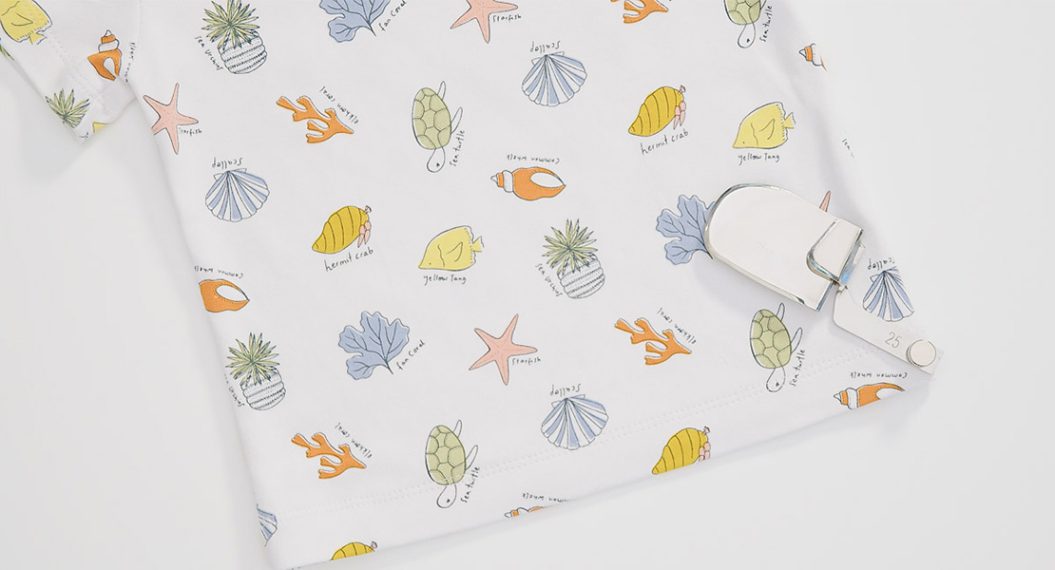
3-Thread Coverstitch Narrow
If you prefer a narrow version of the coverstitch, simply remove either the left or right needle but keep the center needle in position. The spacing between the two rows of needle stitches is 1/8” approximately. It is less likely to tunnel the fabric and has a more delicate look. I like to use it on woven fabrics or lightweight knits.
And
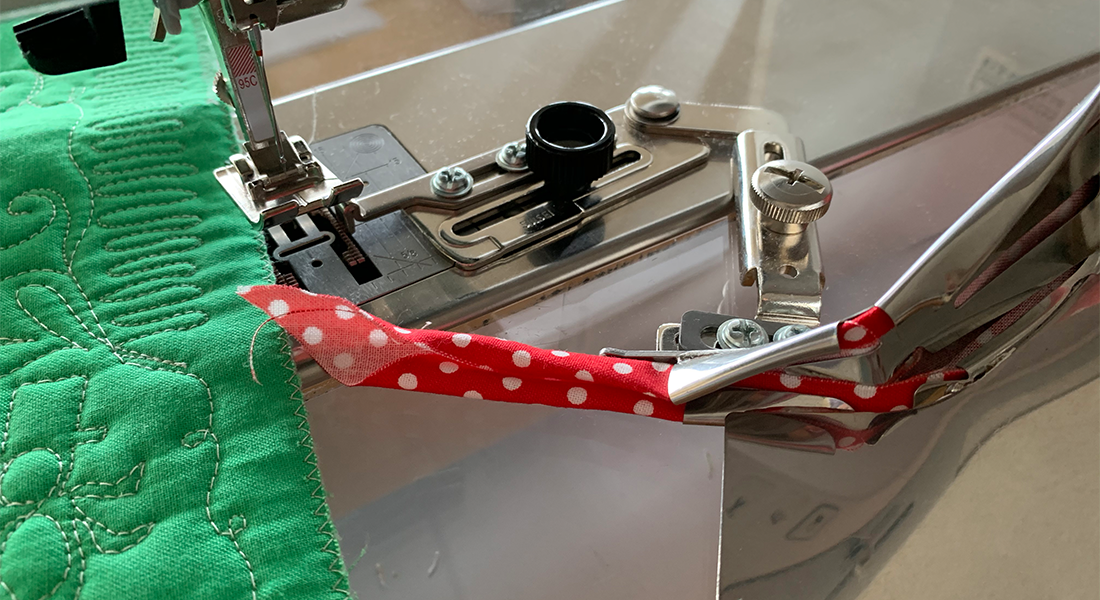
3-Thread Coverstitch Wide
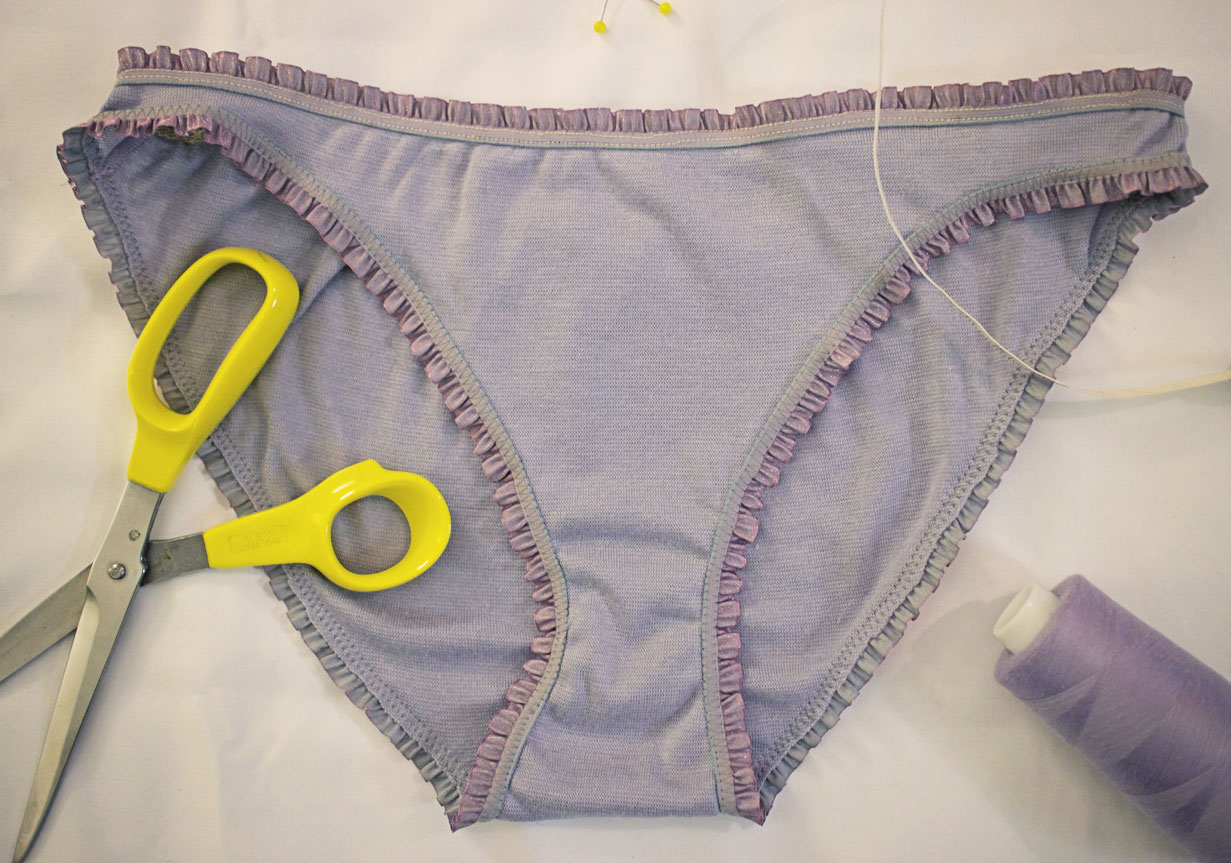
The 3-thread wide coverstitch uses the left and right needles. This is the stitch that most commonly resembles what you will find on t-shirts. It is approximately ¼” wide. I have known people who have purchased a coverstitch machine for this stitch alone so that they could shorten their t-shirts.
And

Ending a Coverstitch
Knowing how to properly lock the stitch when ending a chainstitch or coverstitch is an important skill to learn. This will save you a lot of frustration when starting your next stitch.
Always begin and end the sewing with fabric underneath the needles (often times you will be sewing in the round—so you may overlap the beginning stitches with the ending stitches). Always turn the handwheel to place your needles in a high postion when finished sewing.

Then raise the presser foot. Use tweezer to help grab the needle threads; moving from behind the needles/foot, pull the thread out from under the foot (it will still be forming a loop with the looper thread).
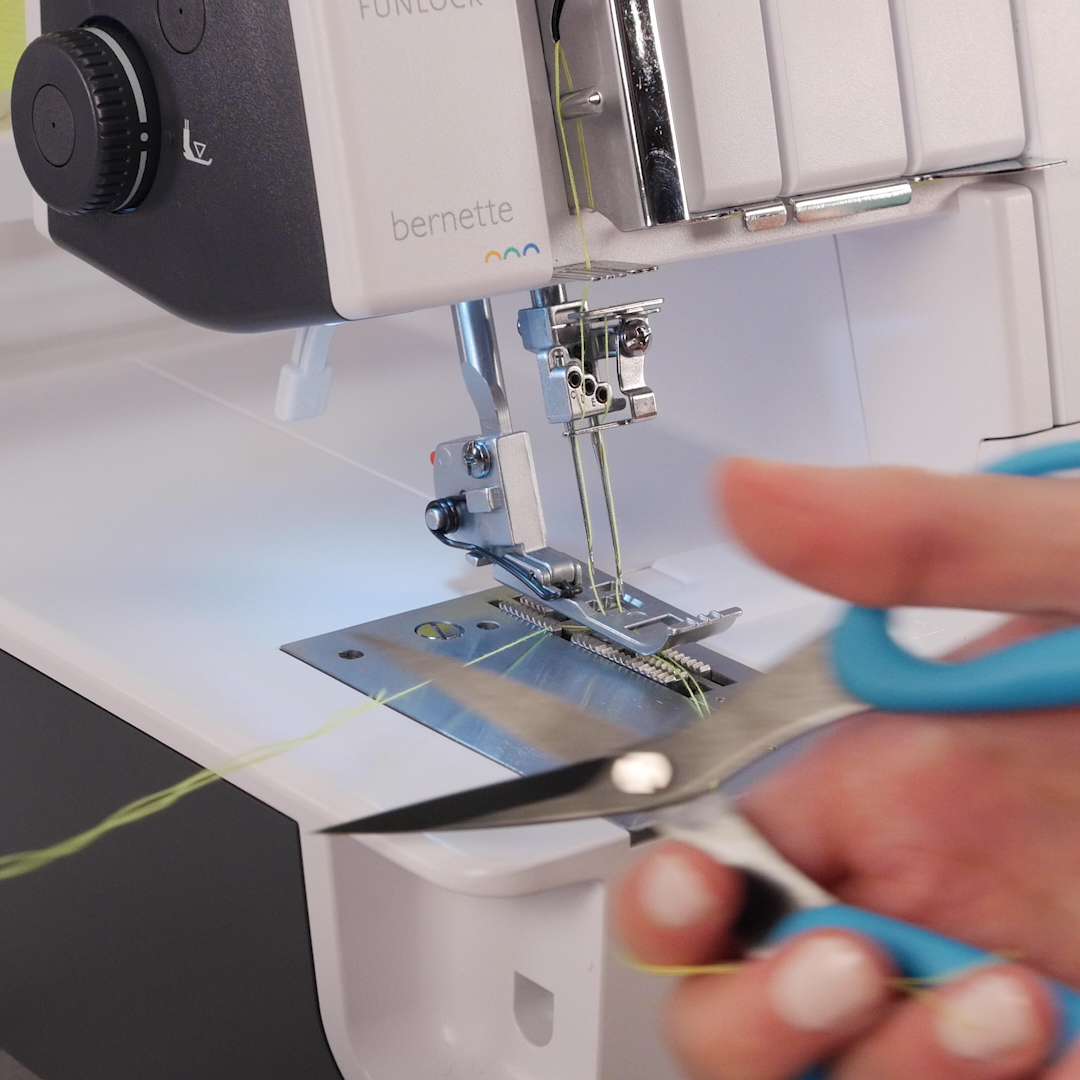
Pull the threads to the front of the machine and snip the ends (loop) so that you have at least 3” for a thread tail. Then move the fabric out from under the foot toward the back left of the machine. You will see the looper thread release and the needle thread tails will be pulled to the underside of the fabric (and it’s here that they are locked, hooray!). Now you need to trim the remaining looper thread, again leaving at least a 3” tail.
And if you get in this habit you will always have the correct number of threads to start your next stitch and nothing that can get tangled or break.
You can pull your beginning stitches to the back side of the fabric after you are finished sewing the seam to neaten the look and lock them in place, but the stitch doesn’t unravel from the beginning, just the end.
Tip: If you need to remove the stitches, find the looper thread on the stitch where you ended the seam and begin to pull. This will release quickly—which is great when you need it, but sad when you don’t. Learn to lock your stitch first, you can always release the needle threads if needed.
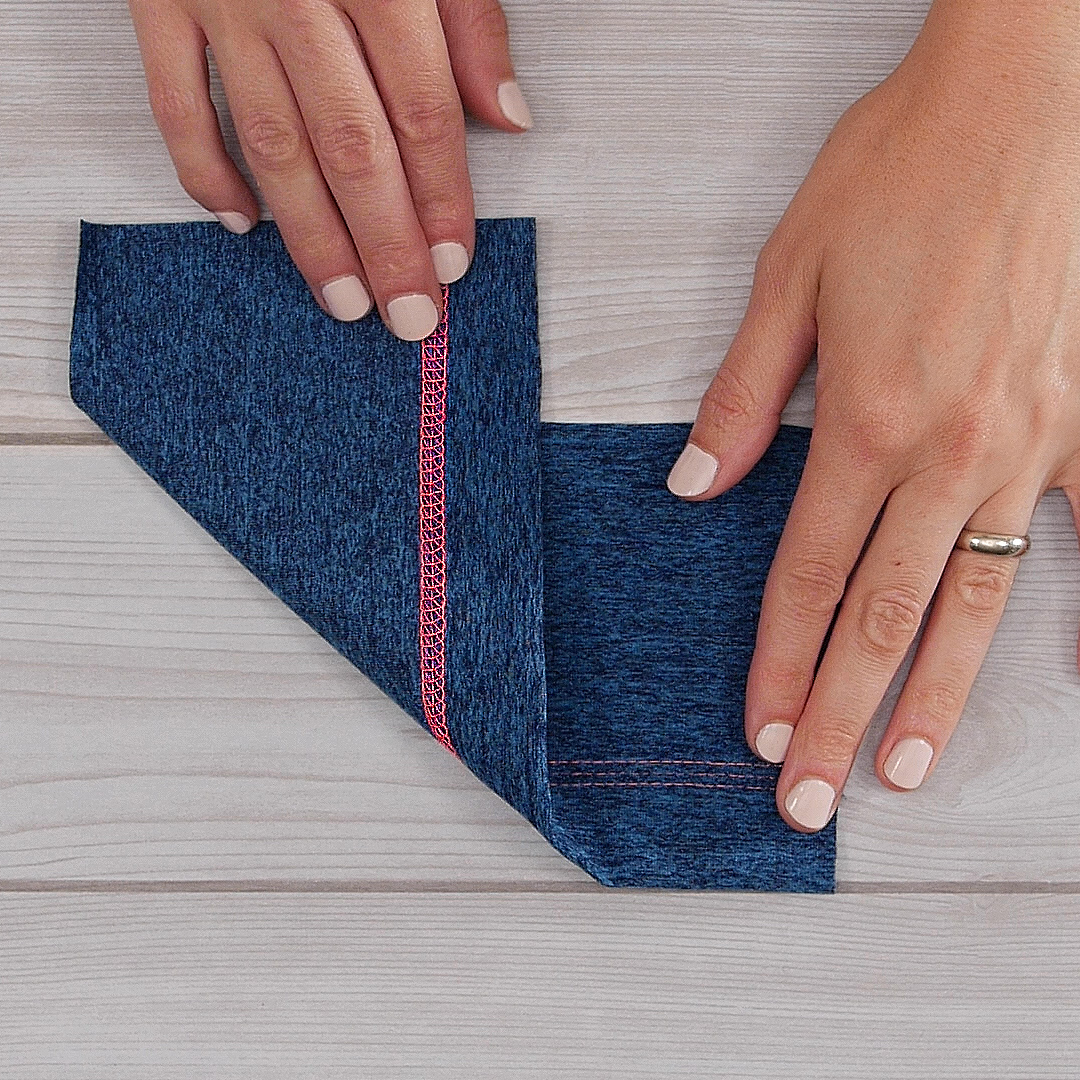
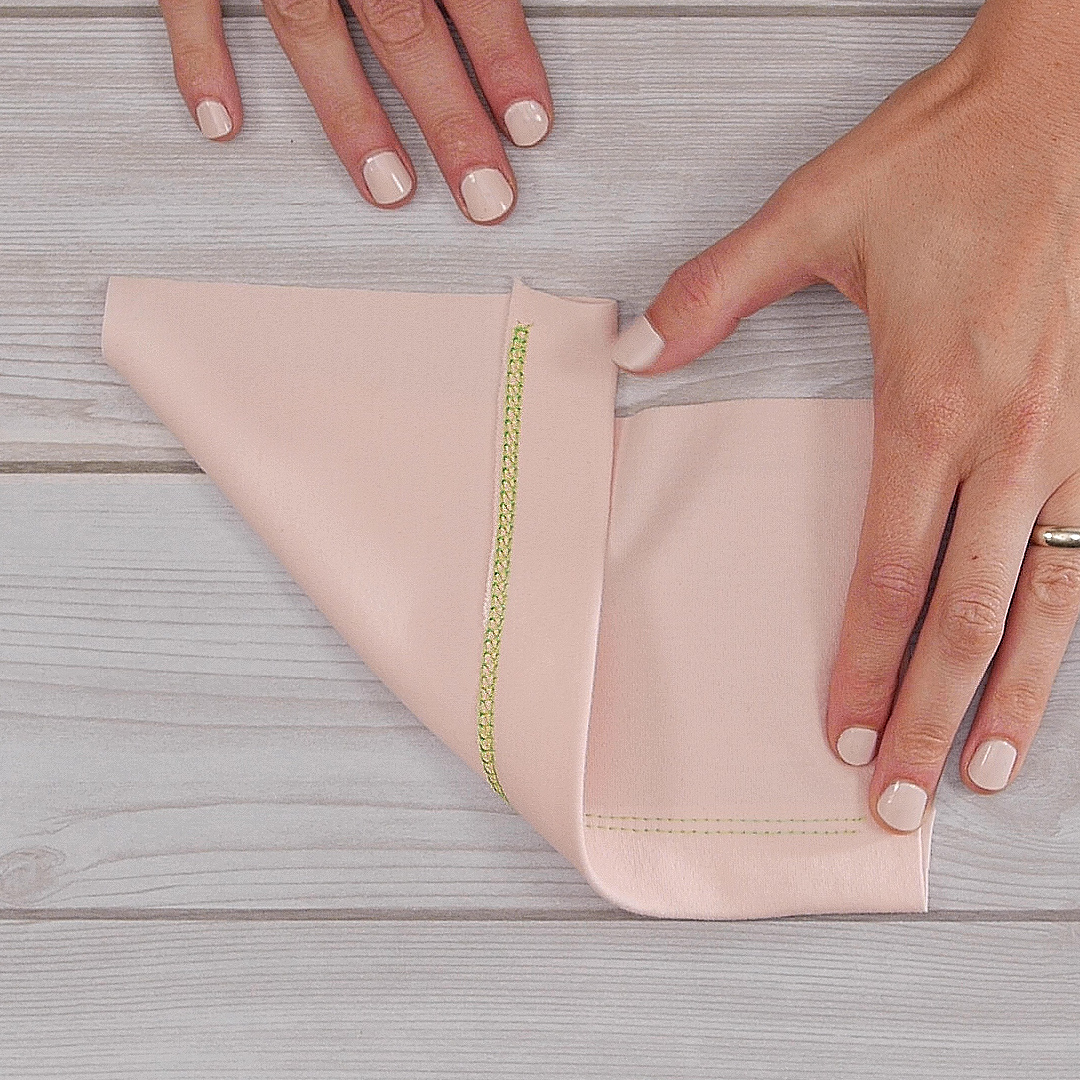
All of these stitches have a lot of inherent stretch—which is why a coverstitch is a preferred hem finish to a zigzag or twin needle on your sewing machine. If you need even more stretch and you want to have a stitch that is soft to touch, try using a textured thread in your looper like; Woolly Nylon, or Maxi-Lock Stretch (polyester). The leggings that I featured are Helen’s Closet: Avery leggings. It is a great pattern that is fun to embellish with the coverstitch. I chose to expose the looper side of the 4-thread coverstitch in neon thread—its bold!