Fast Face Mask Sewing Techniques
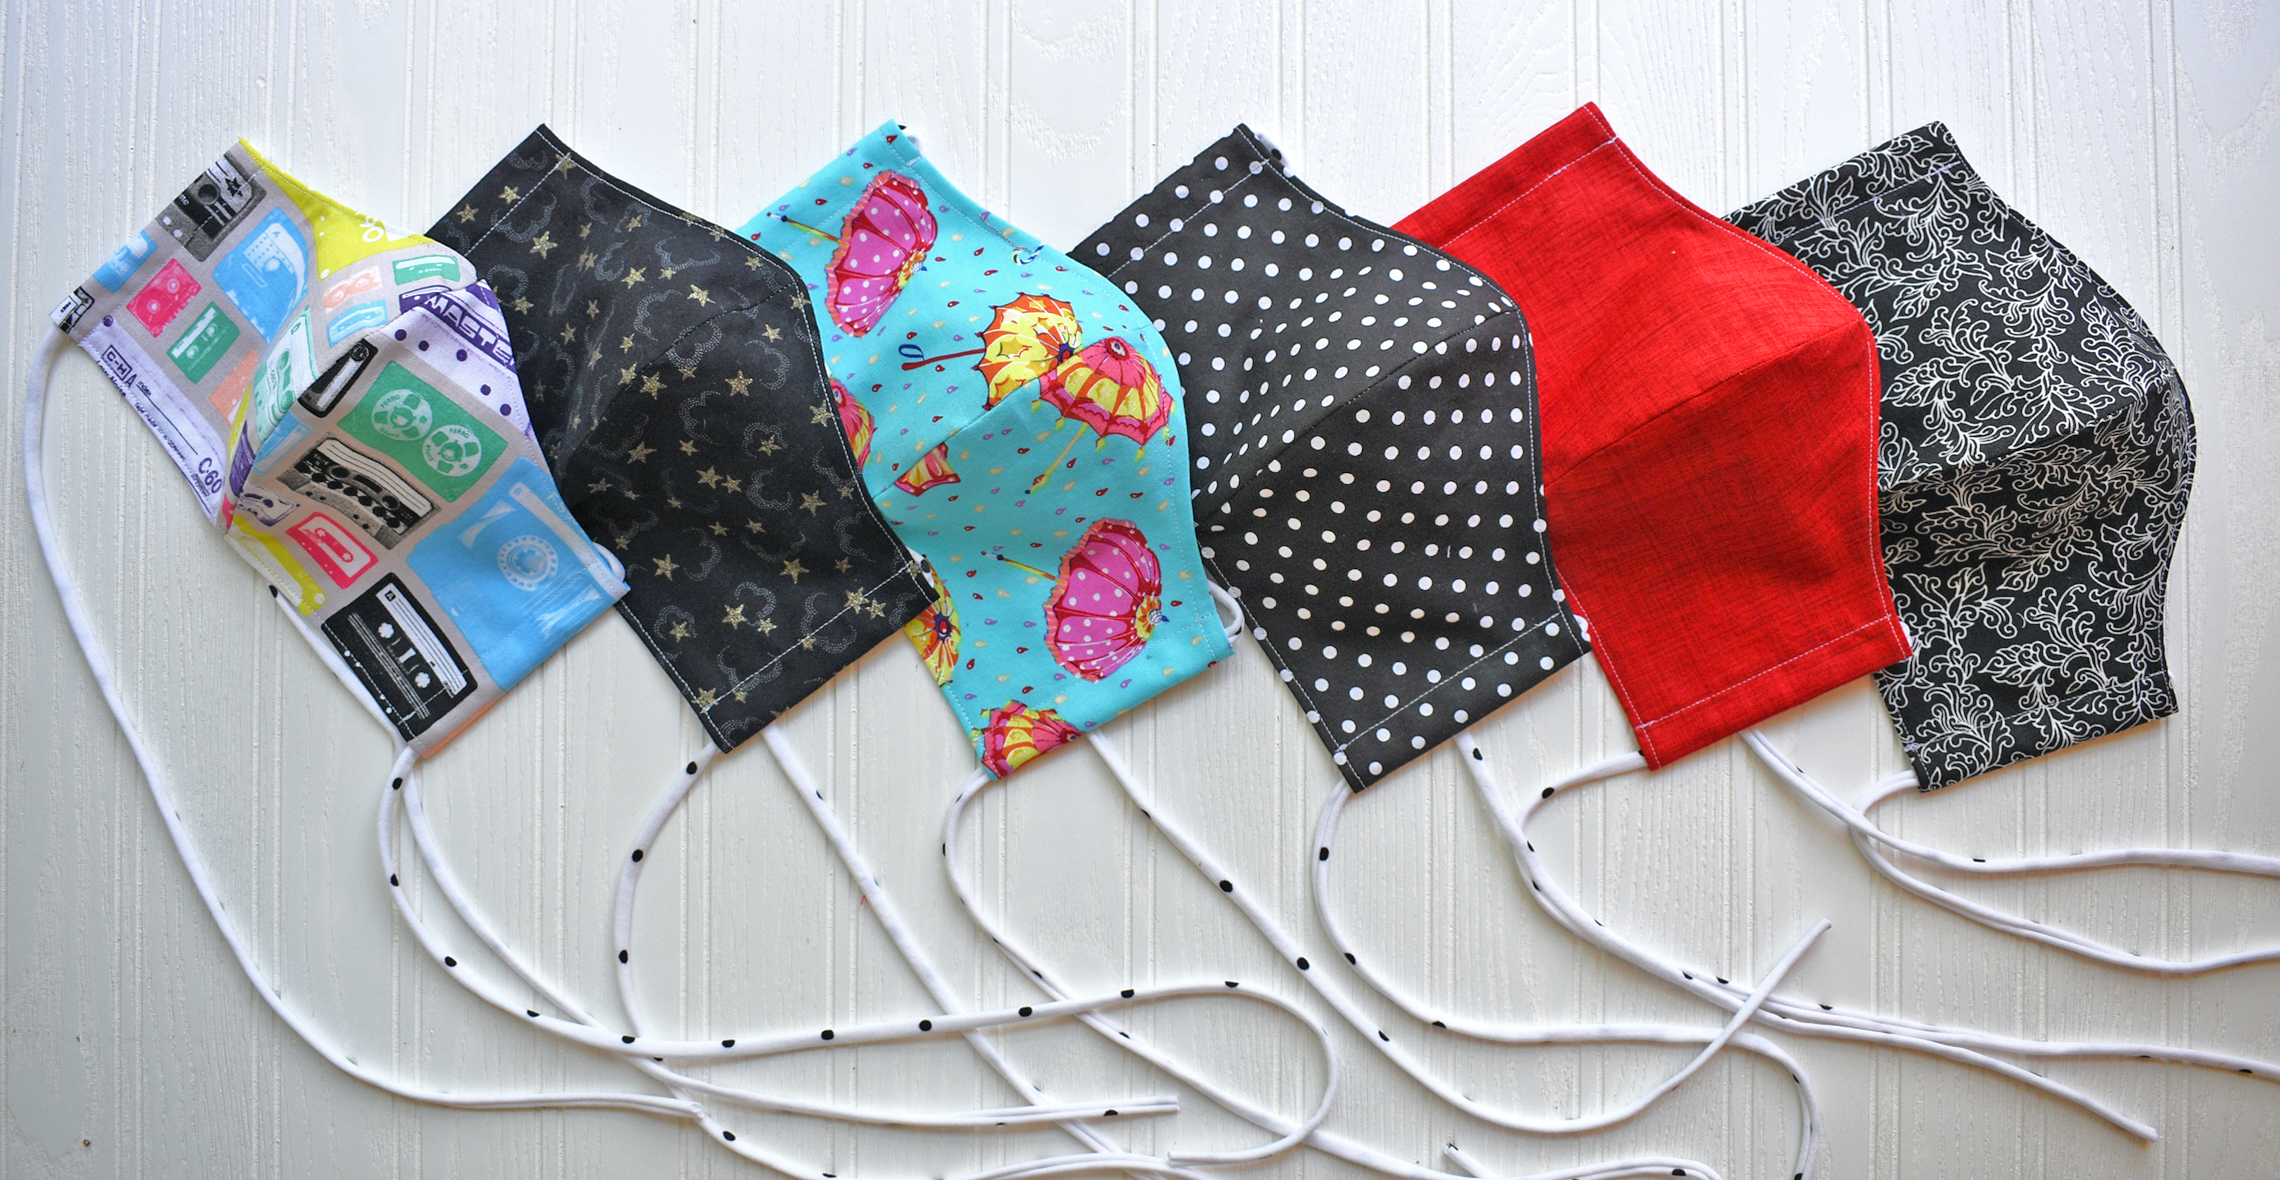
With the CDC’s recent recommendation regarding face coverings in public, many of you have already been sewing lots of face masks! I’ve been sewing for my whole extended family, neighbors, and making some to donate.
I just got one of the new AccuQuilt GO! DIY Face Mask Medium die, but no matter what pattern you are using, try some of these tips for fast face mask sewing. You can download a free, printable face mask pattern from 405maskmakers.com if you don’t use the die cutter.
Face Mask Die Cutting Techniques
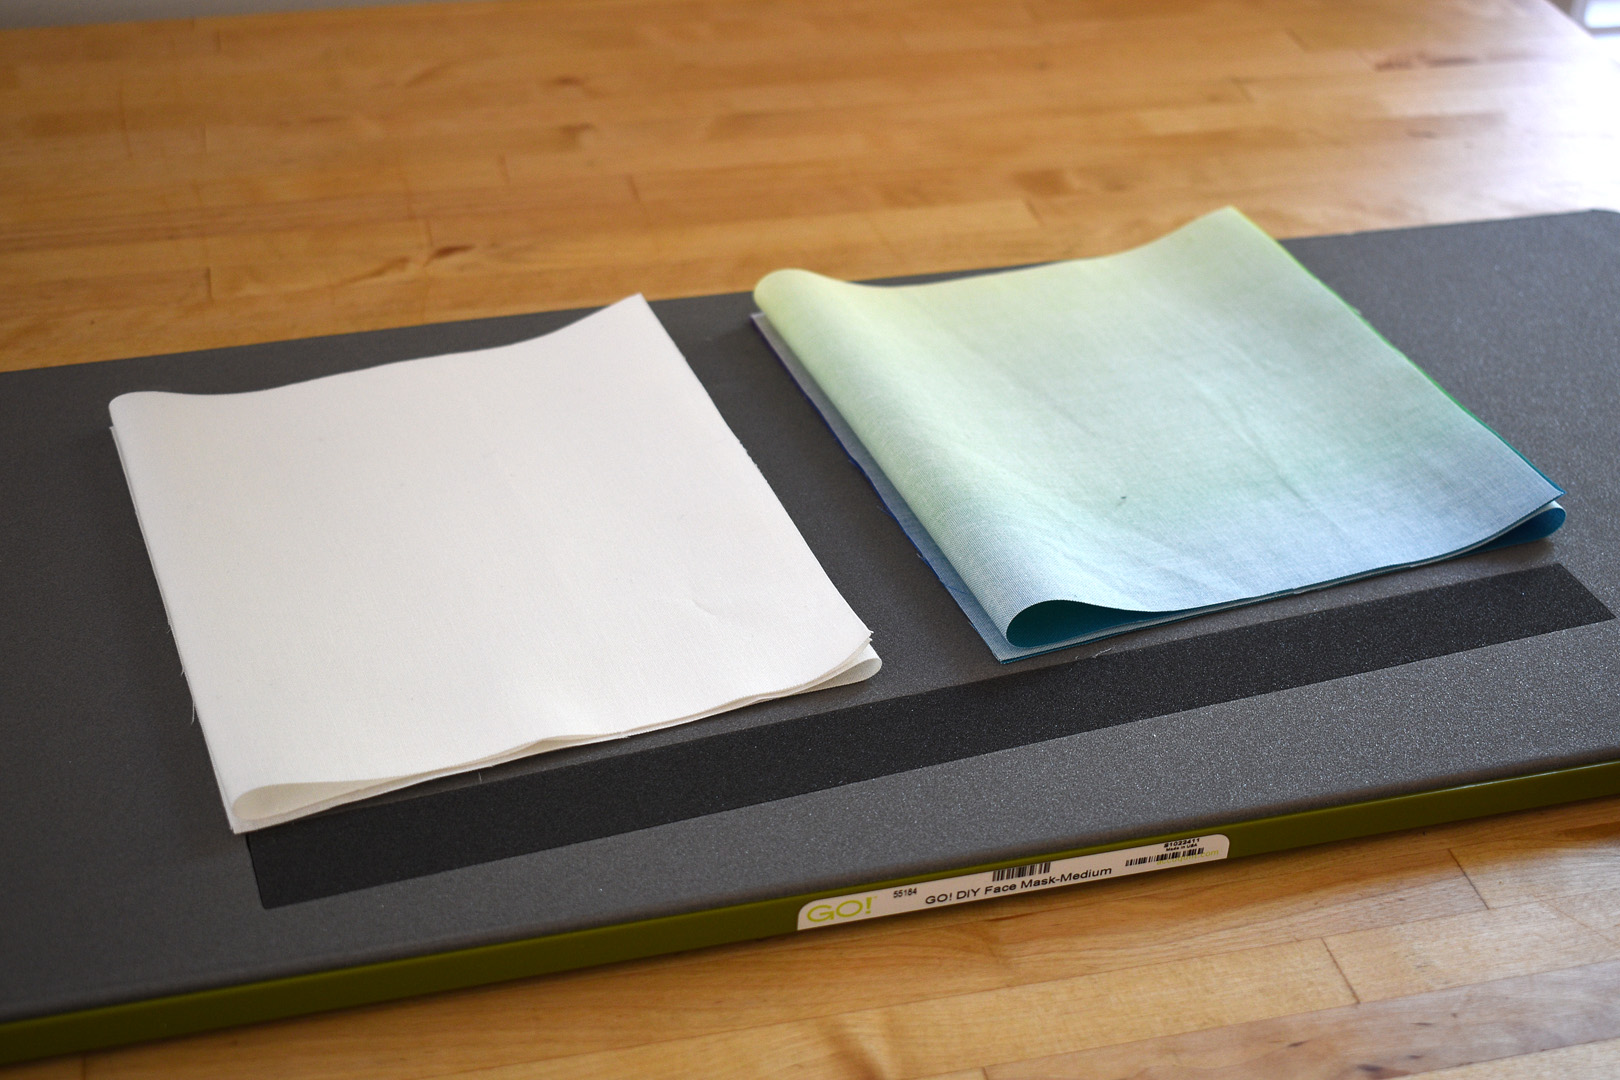
The AccuQuilt DIY Face Mask Die Medium cuts an outside pattern piece, an insdie (or lining) pattern piece, and can also cut ties. You do not need to cut the ties if you use elastic, hair ties, or cotton knit ties. AccuQuilt suggests cutting the fabric in squares to cover the face mask die patterns, but I found it’s faster to cut rectangles and fold them in half.

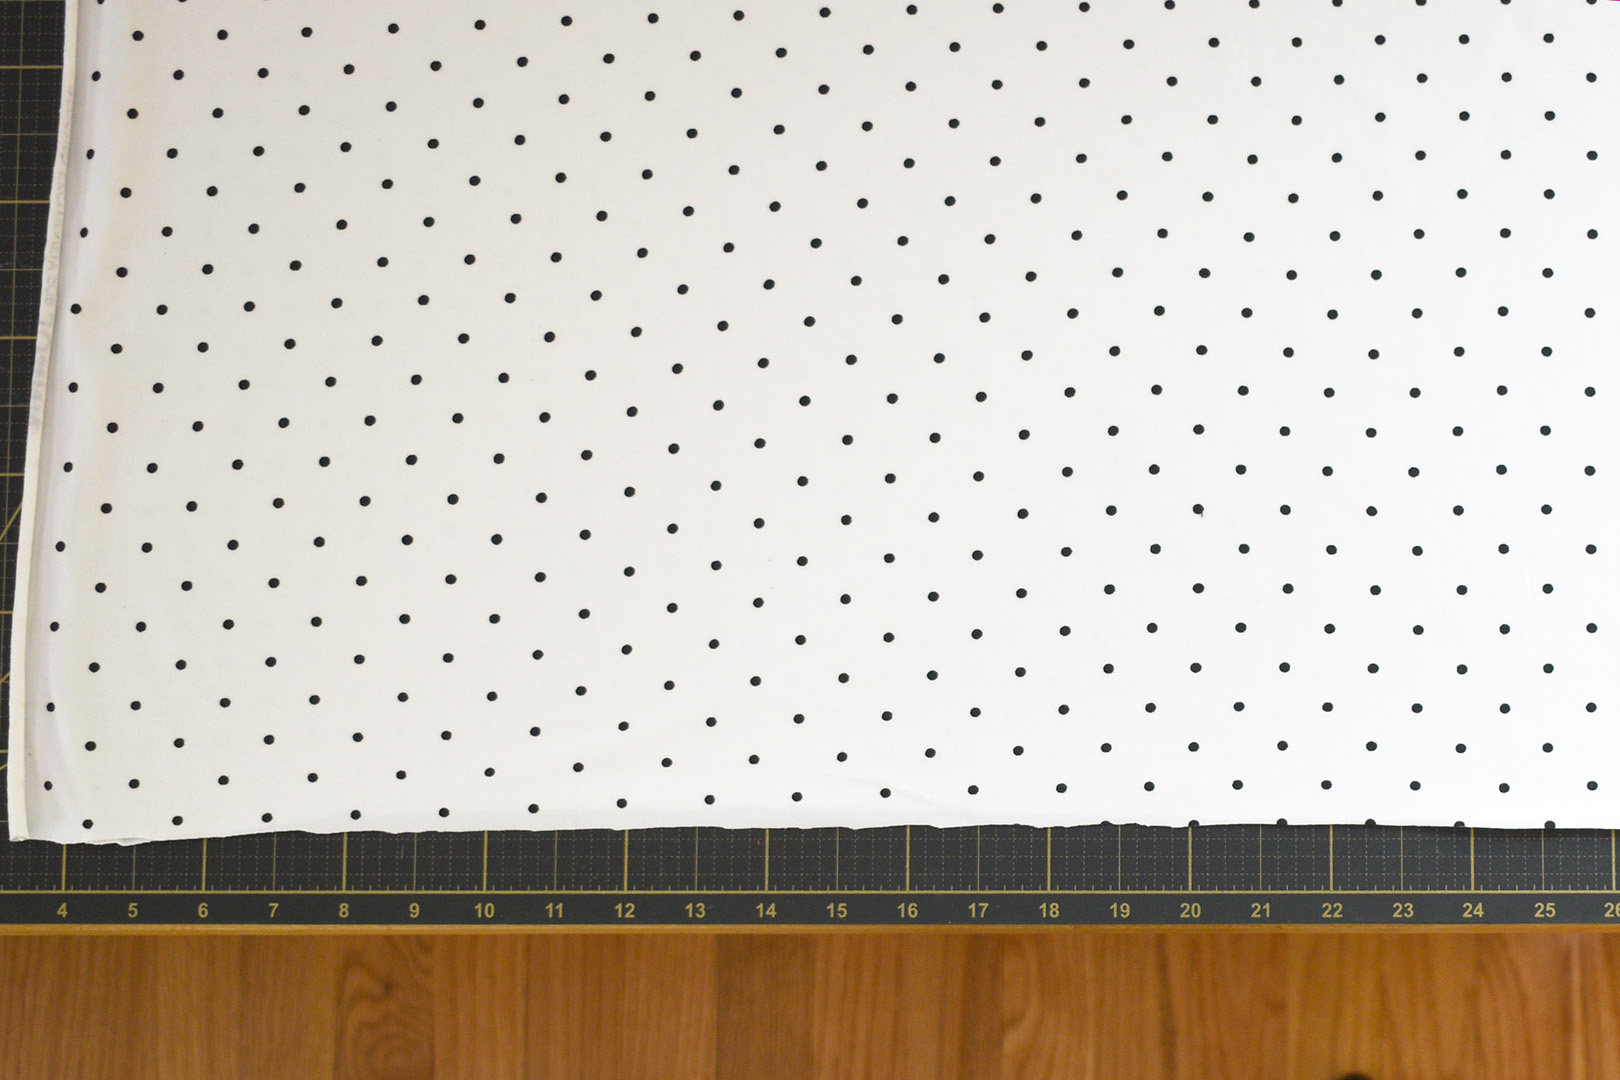
For the Medium size die, you can cut rectangles of fabric 13.5″ x 7″ for the outer mask pattern, and 12.5″ x 7″ for the inner mask pattern. If you’re using a different sized die, measure to see what size rectangles will work best for you.
With 44″ – 45″ wide fabric, you can cut wide strips the width of the fabric (WOF), then cut into smaller rectangles for this method. Make 13.5″ wide WOF cuts for the outer mask pattern, and 12.5″ WOF cuts for the inner mask pattern. Then, cut each of those into 7″ wide rectangles. There is very little waste with this cutting method, save the selvage edges and a bit of the middle fold of fabric.
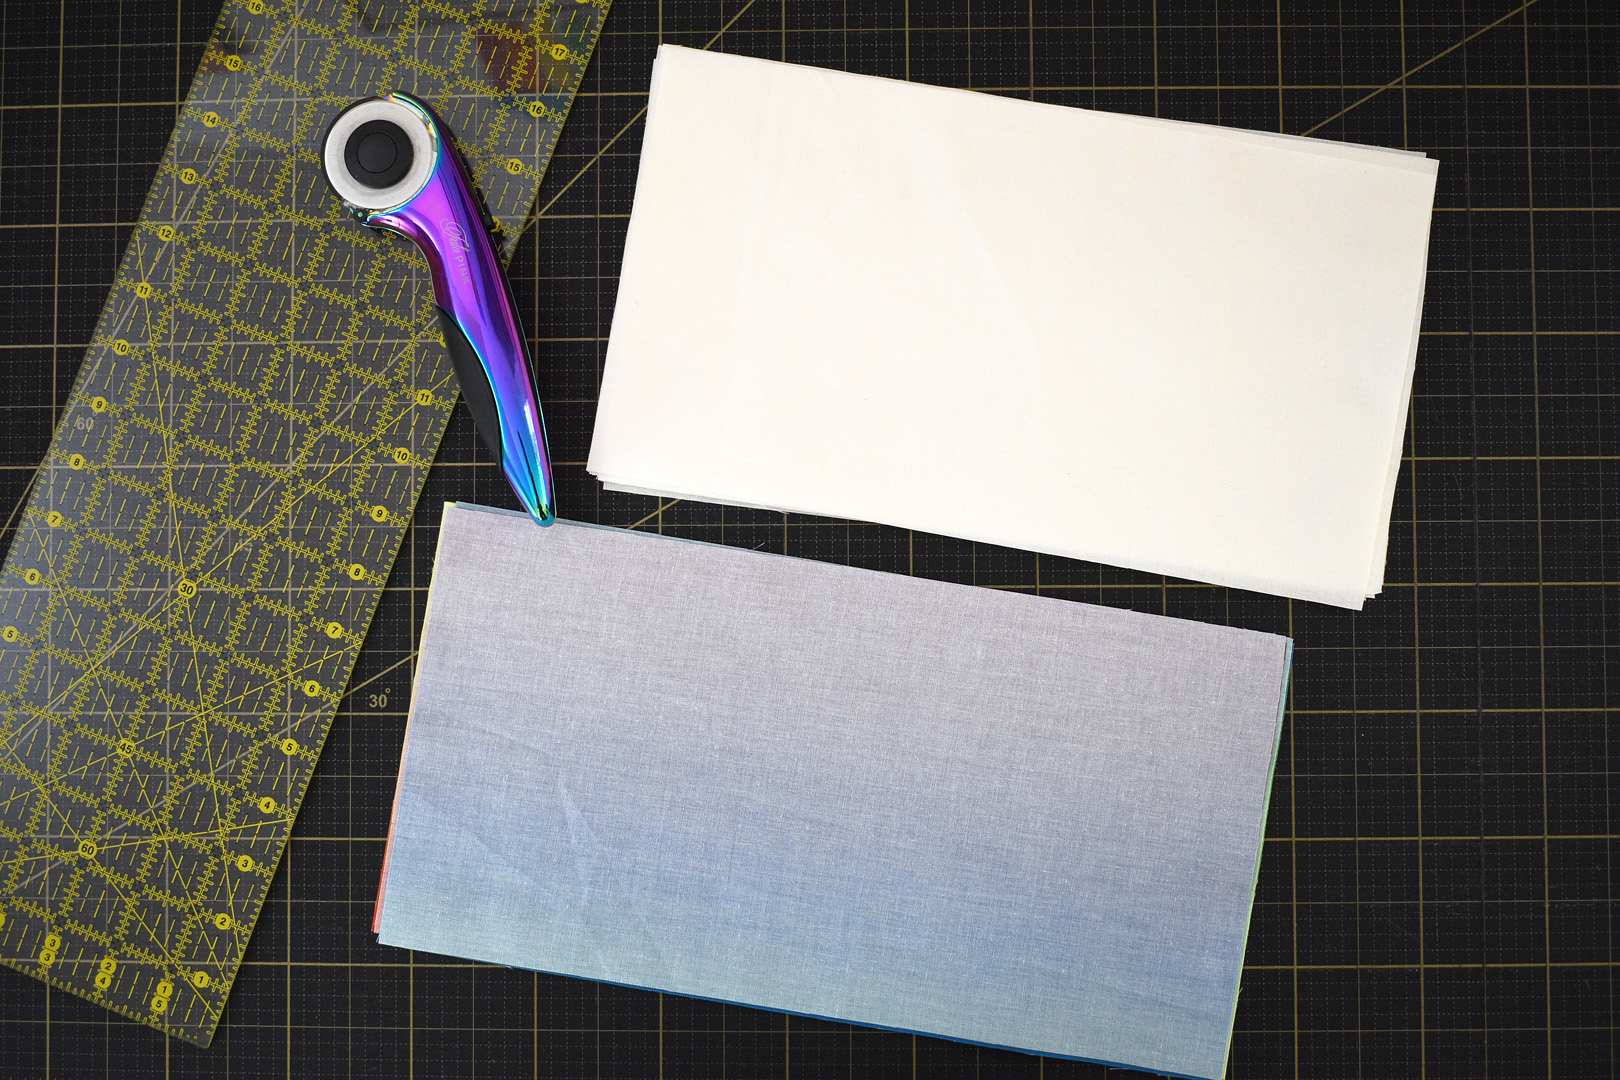
If you’re using fat quarters or scraps from your stash, cut into rectangles using measurements above. Make an equal amount of rectangles for the outer and inner pieces.
Grab the cut rectangles and get ready to load the die cutter. The AccuQuilt die can easily cut through 6 layers of fabric.
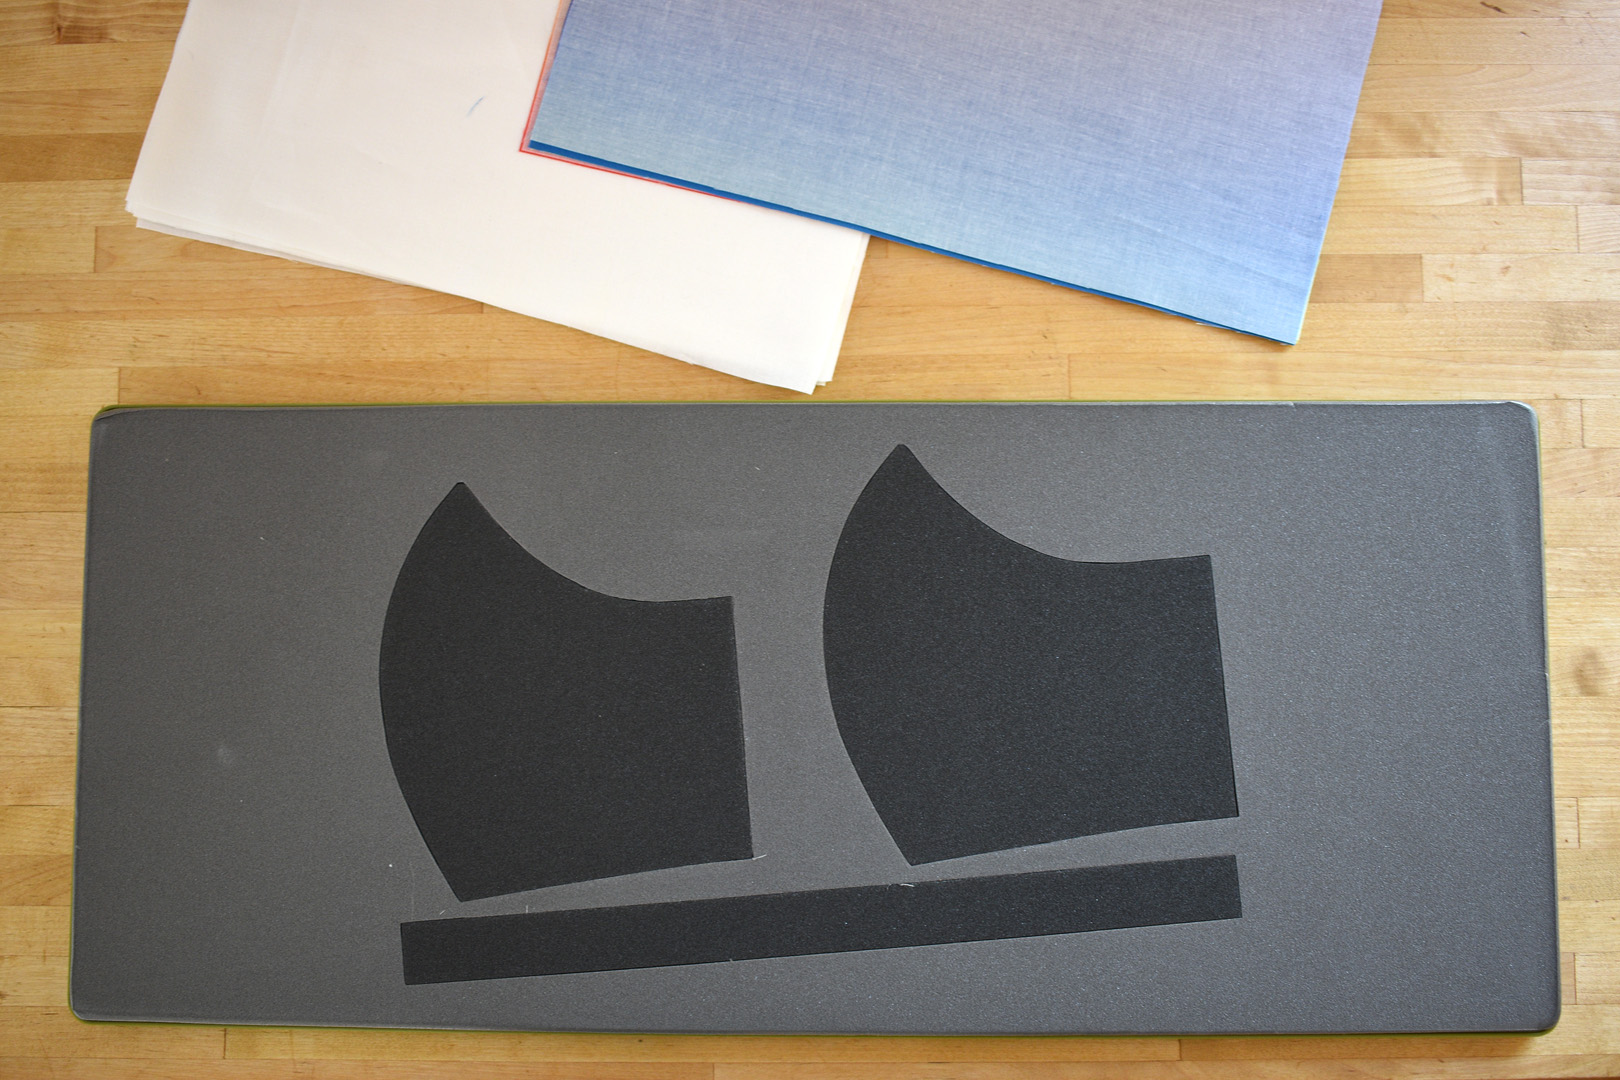
First, fold each rectangle in half the long way, right sides together, and center over each die. Make sure the inner pieces of fabric are over the smaller of the two die cut patterns.
Next, grab one more of each piece folded right sides together, and layer with the fold in the other direction.

And finally, grab one more of each folded piece to layer with folds in the opposite direction of the last piece. You will have a total of three folded pieces layered over each mask die pattern, folded in opposite directions.
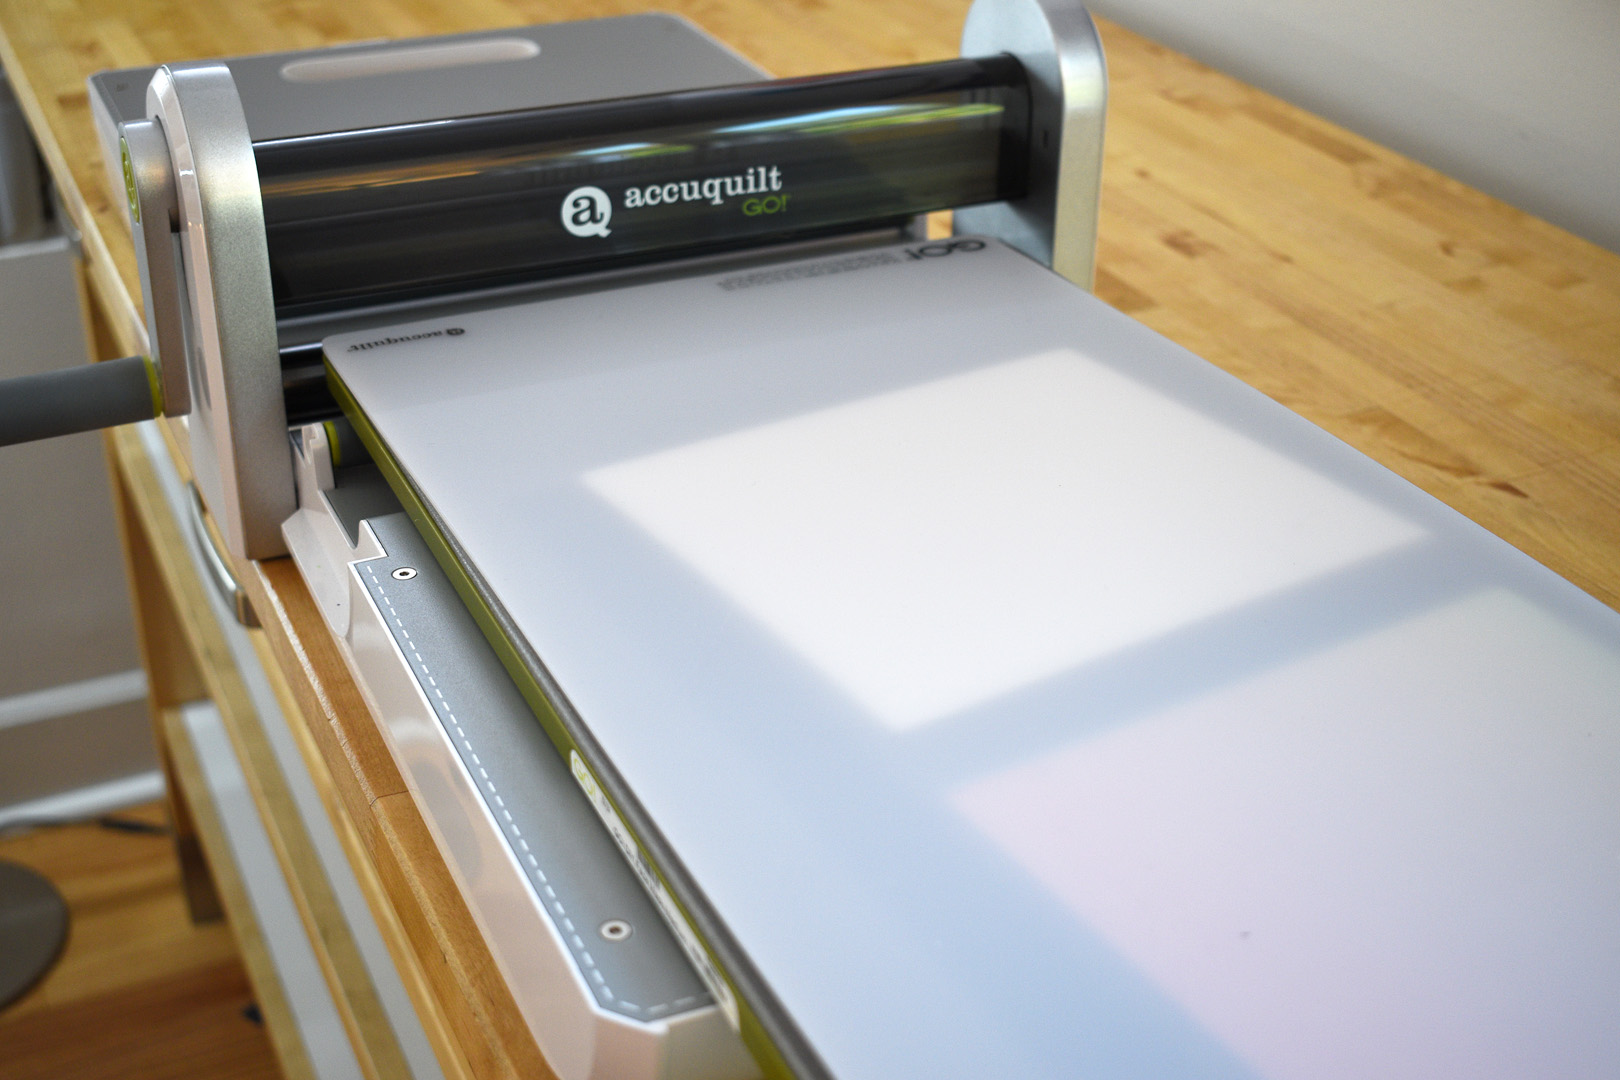
Layer the cutting mat on top of the die board. Use any cutting mat that fully covers the die cutters, even if the cutting mat is a bit smaller than the full length of the die board.
TIP: Don’t always place the cutting mat oriented in the same direction when cutting. Get the most from your cutting mat by flipping it over to use the other side, or flipping the direction over, or moving the mat slightly back or forward.
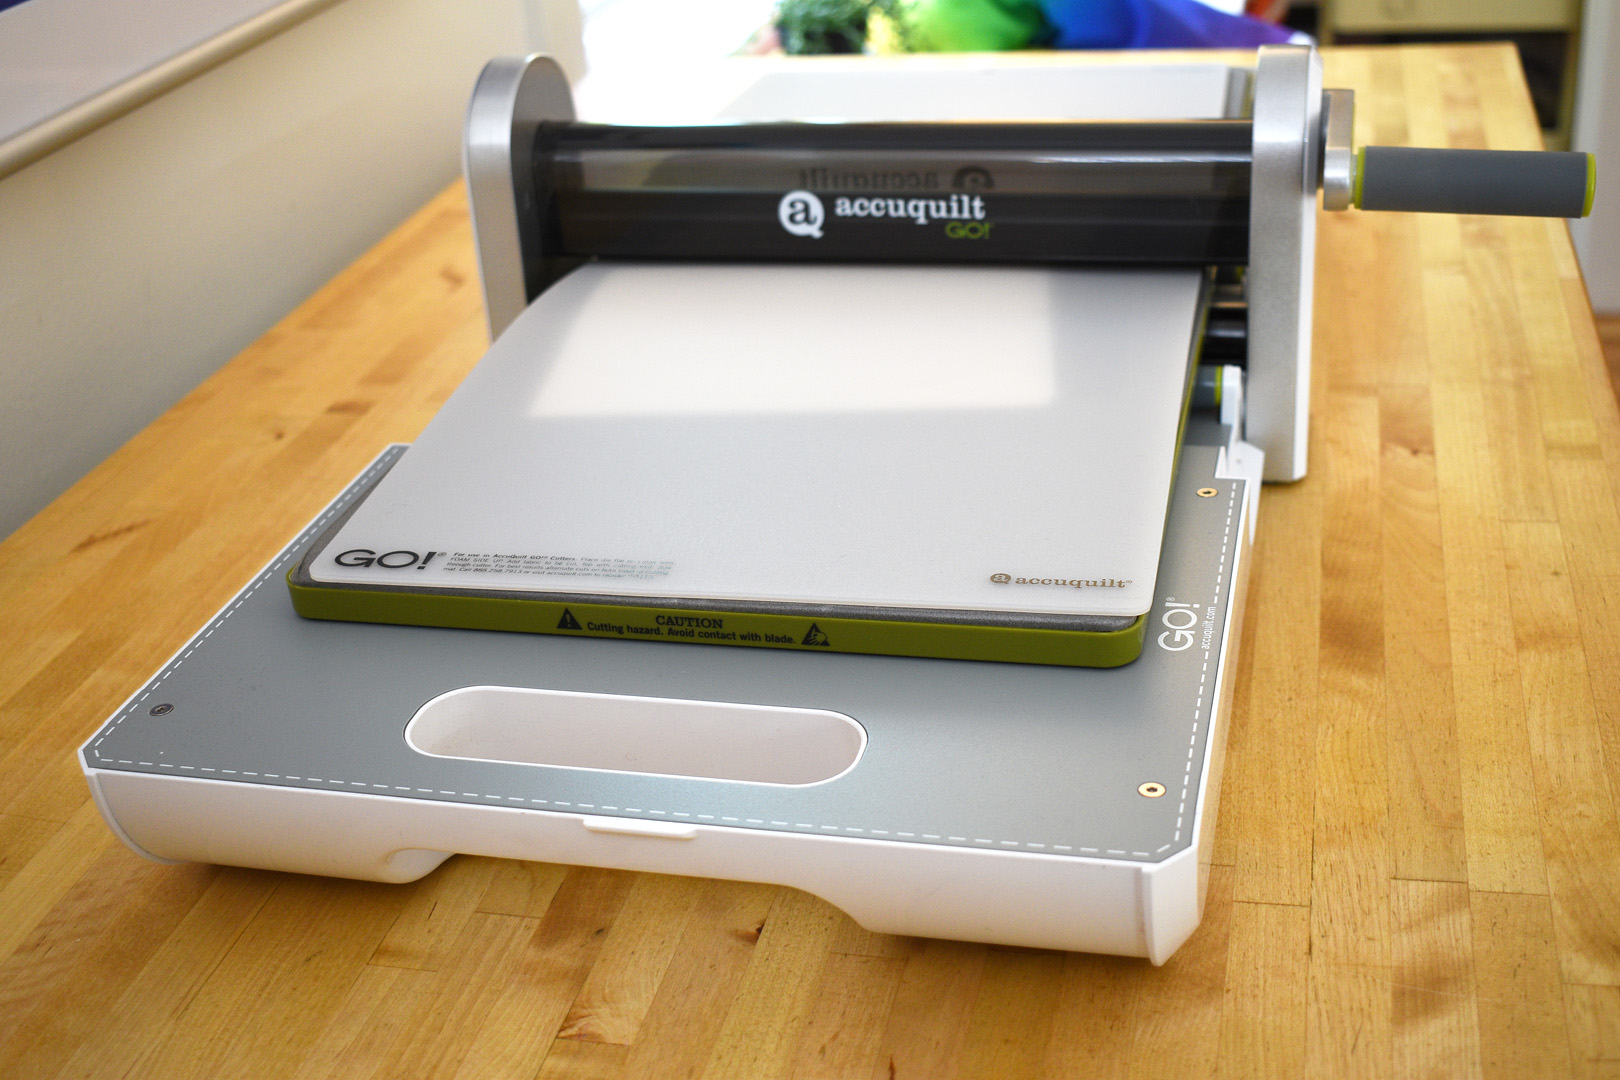
Send the die through your cutter and…
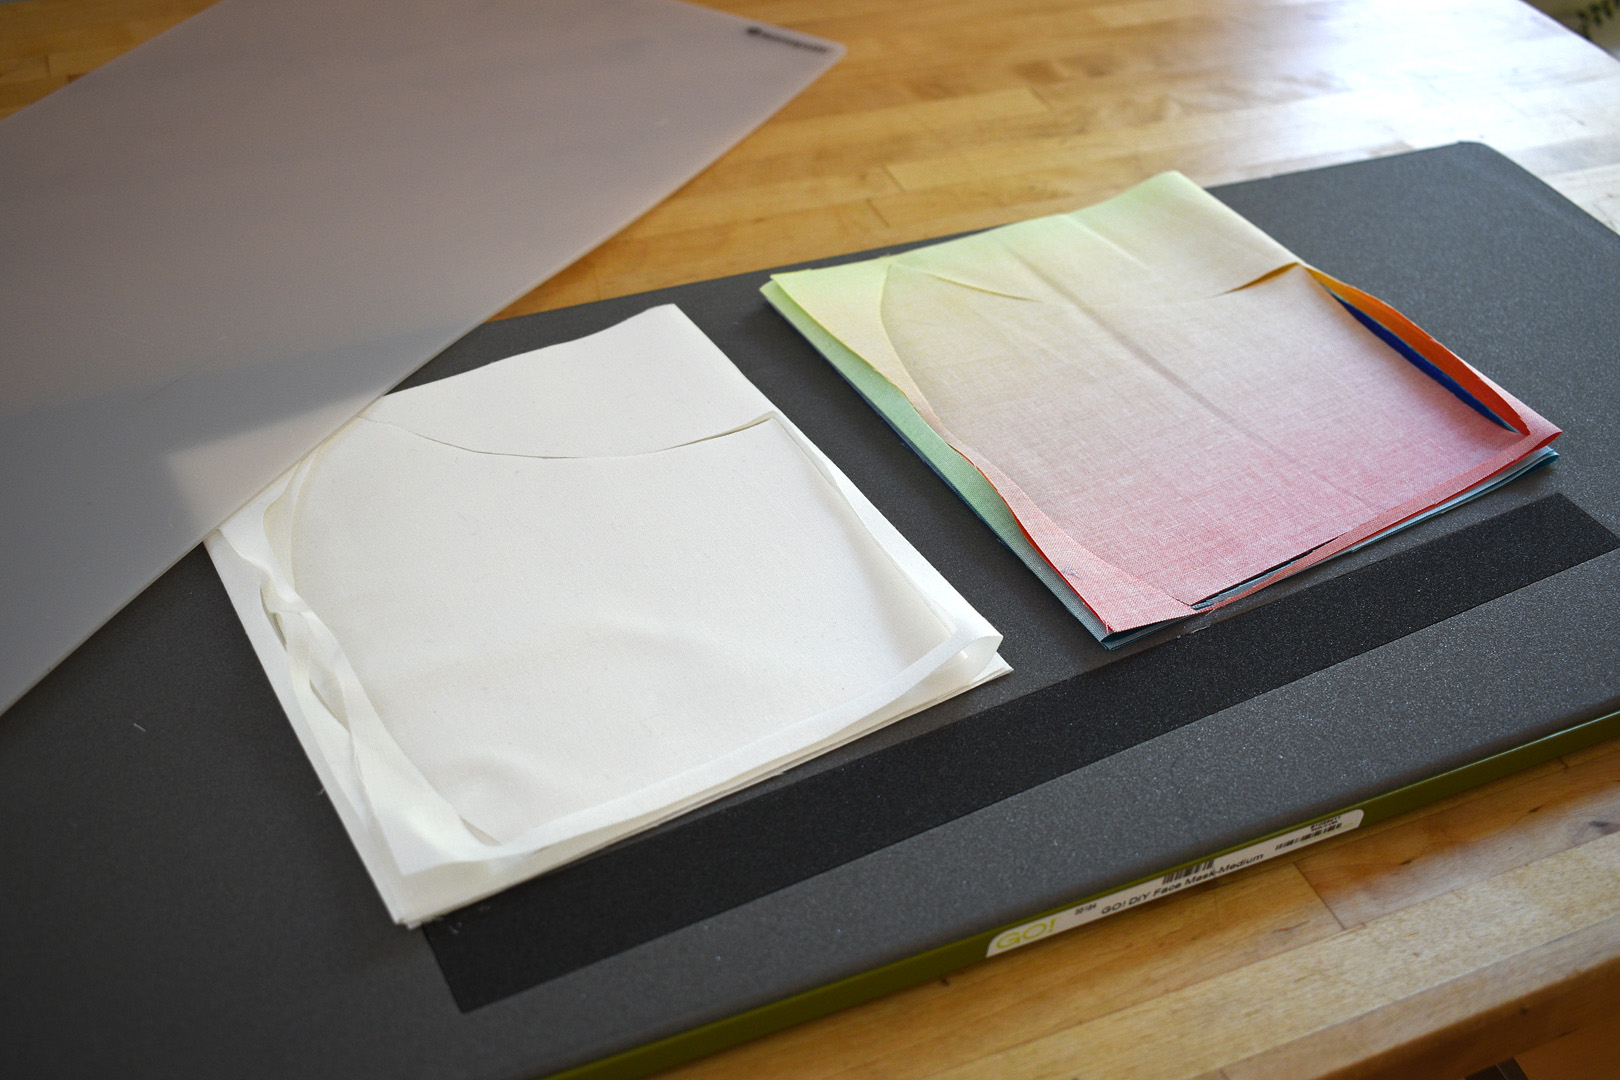
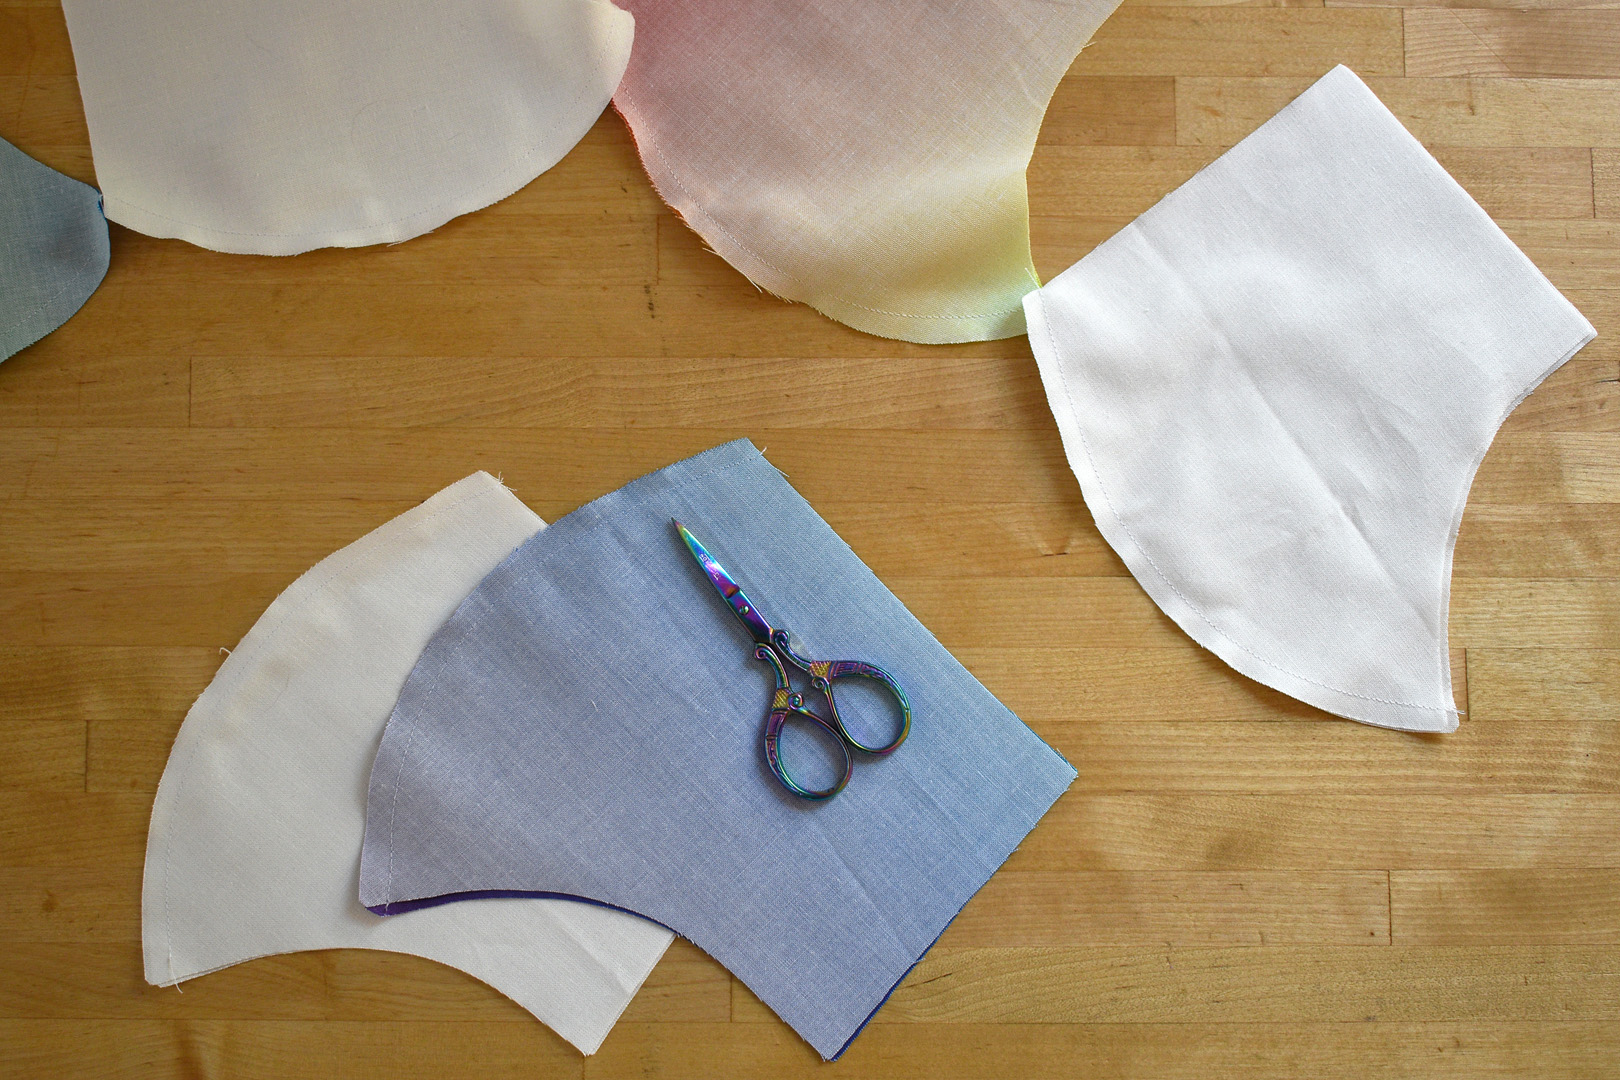
you have cut enough pattern pieces to create 6 masks.
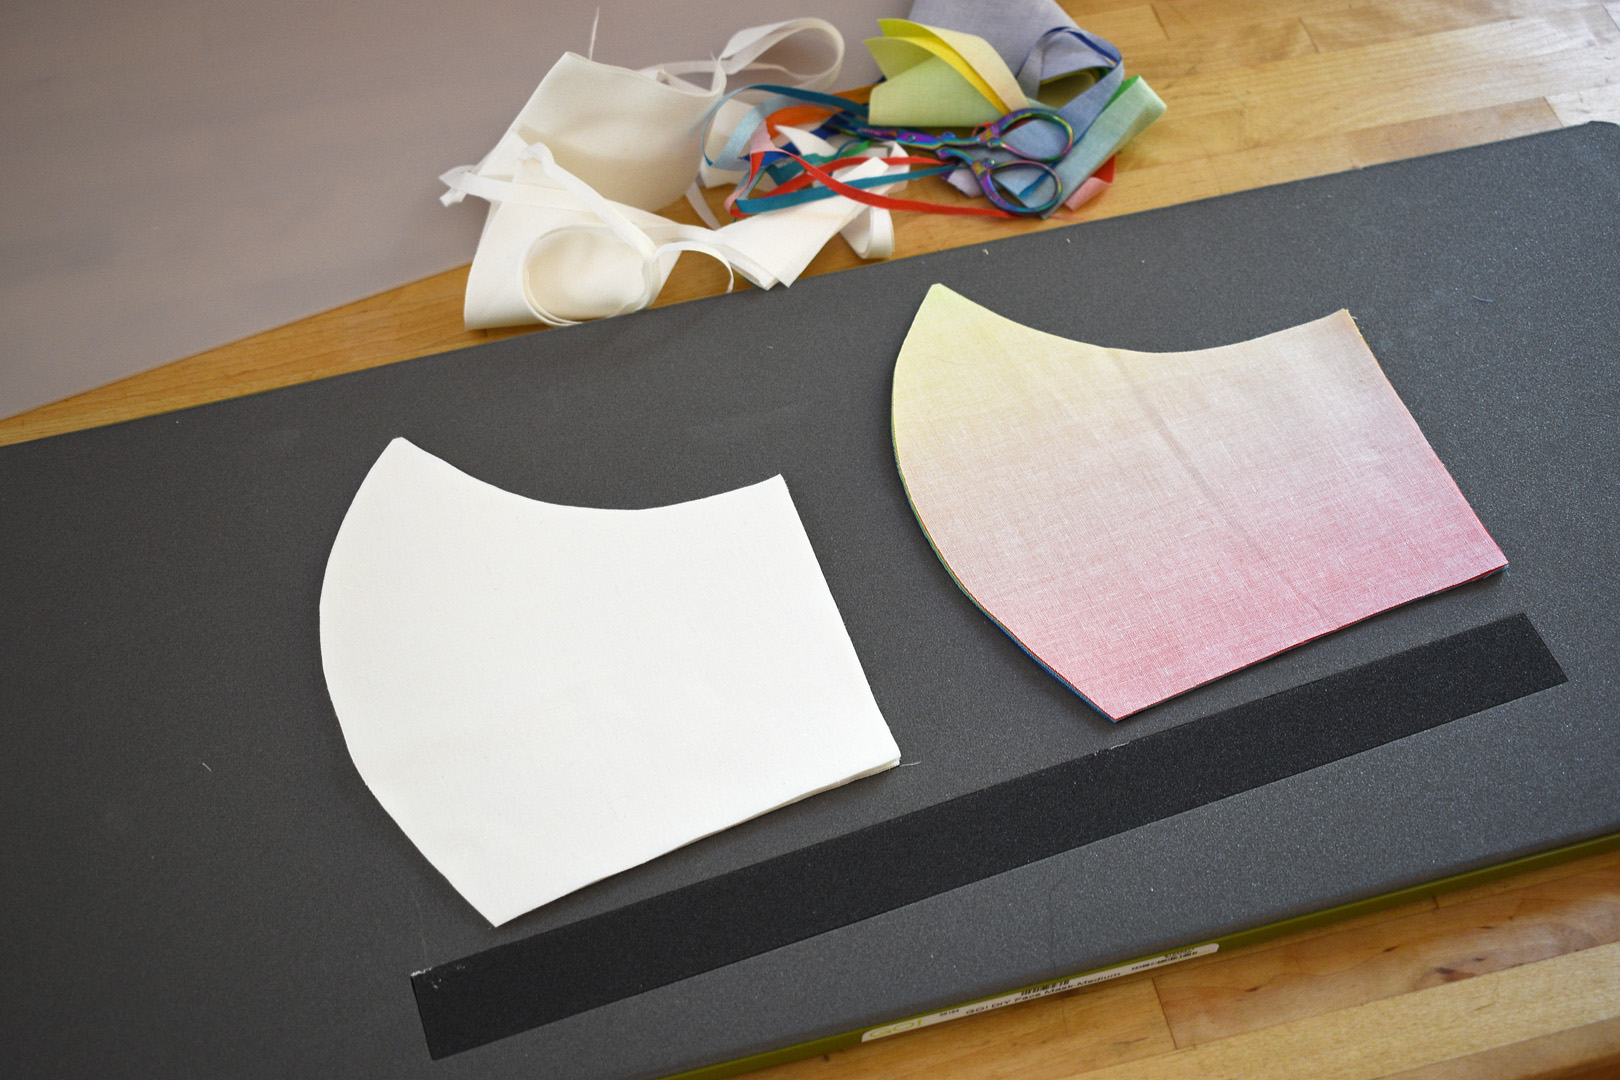
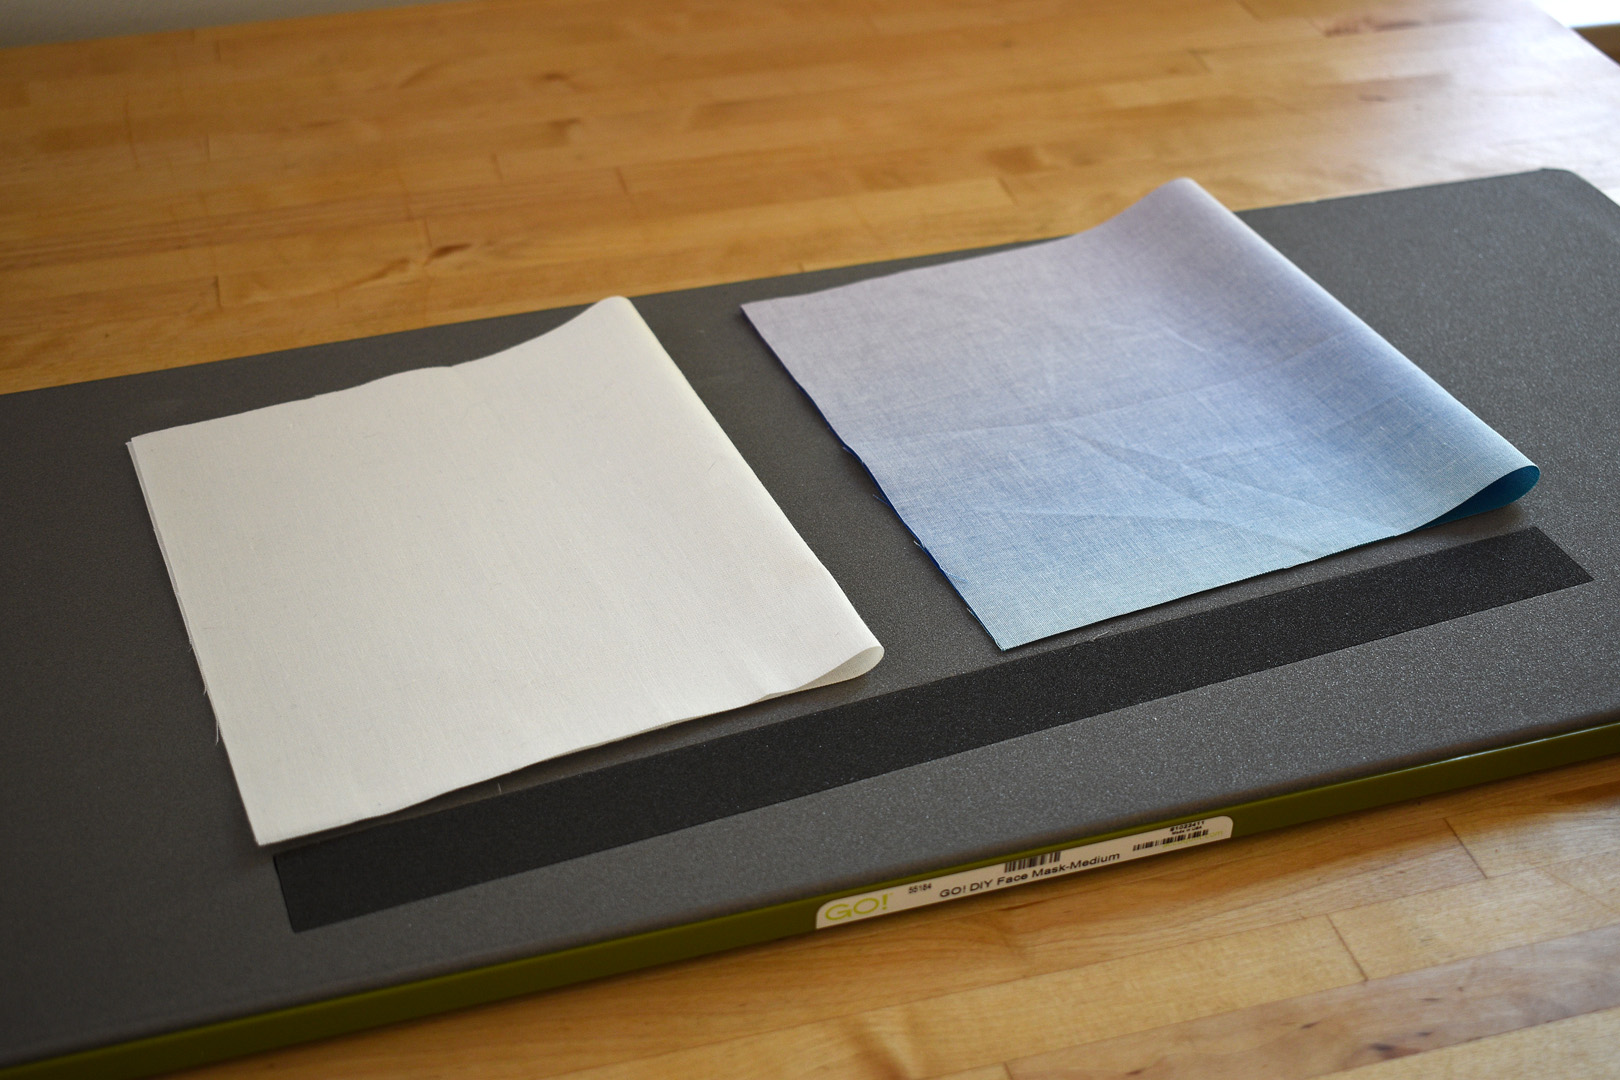
Since the fabric is right sides together, this stack is ready to sew!
Face Mask Sewing Techniques
To make sewing face masks more efficient, I use the batch sewing method. This method is perfect for sewing multiple items or projects that are exactly the same using an assembly line method. So, for each step in the mask making process, each step is done for all of the masks at the same time. If you haven’t yet stitched up a fabric face mask, I suggest sewing just one first to see how the process goes, and then follow through with the batch sewing method for more masks.
Here’s how I set up my sewing machine to batch sew these masks.
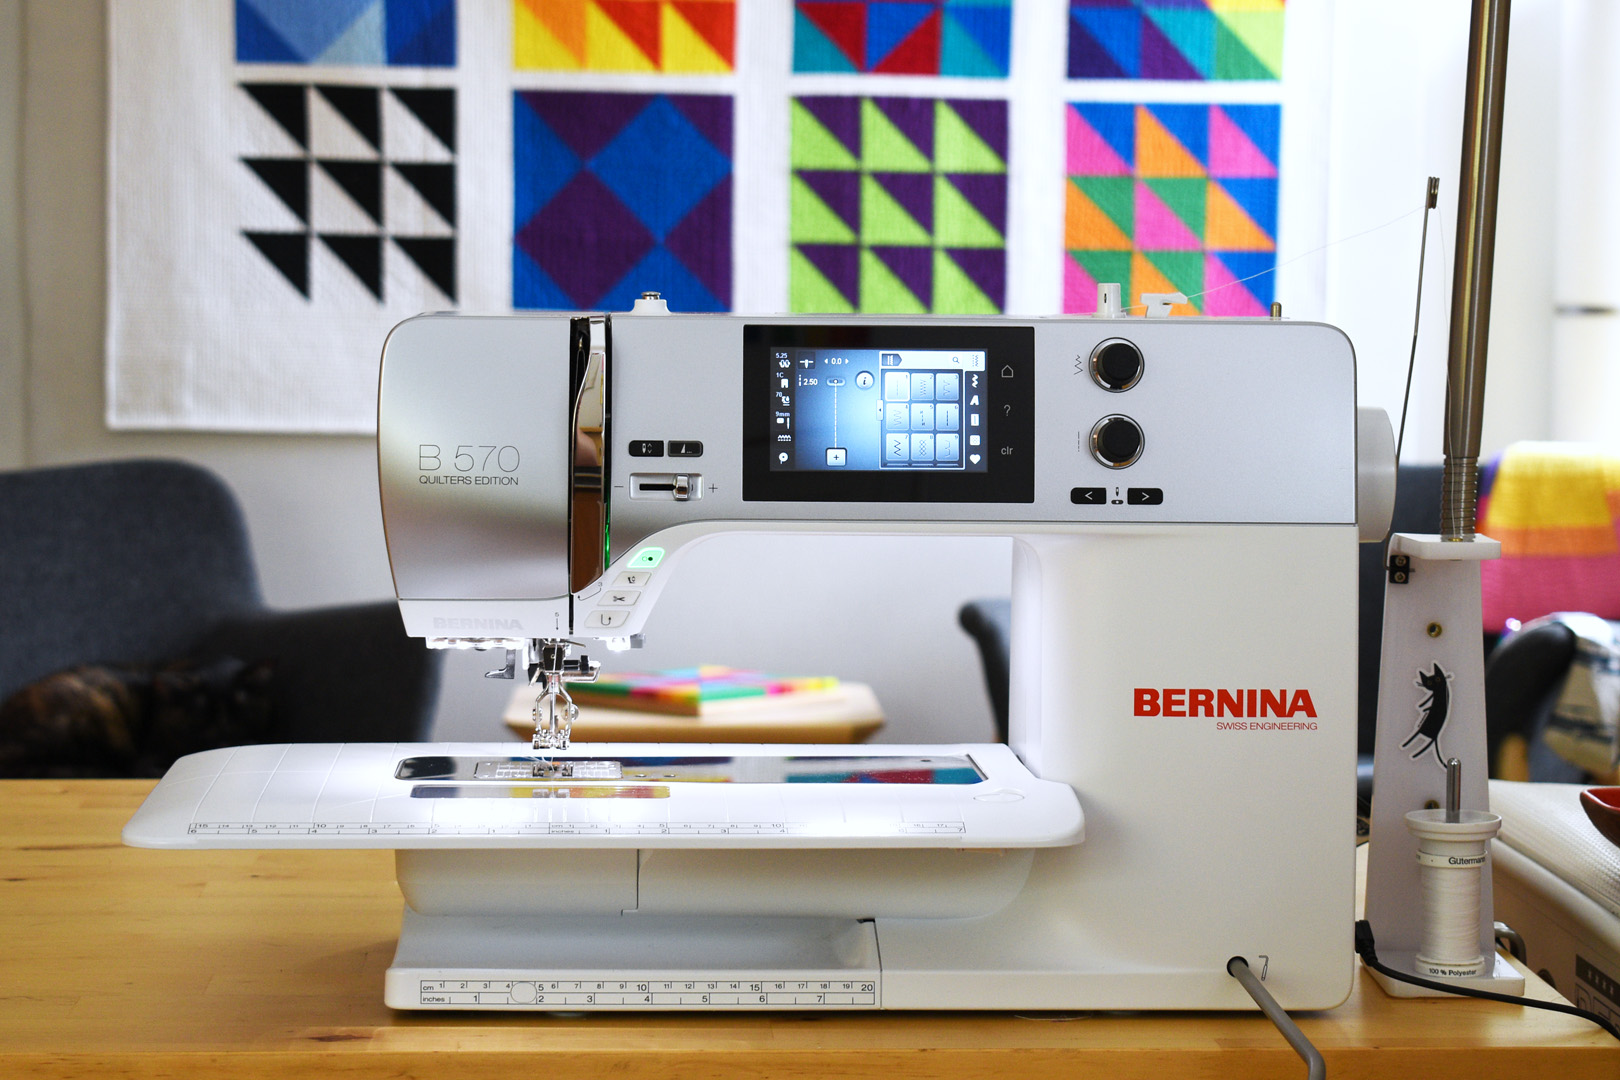
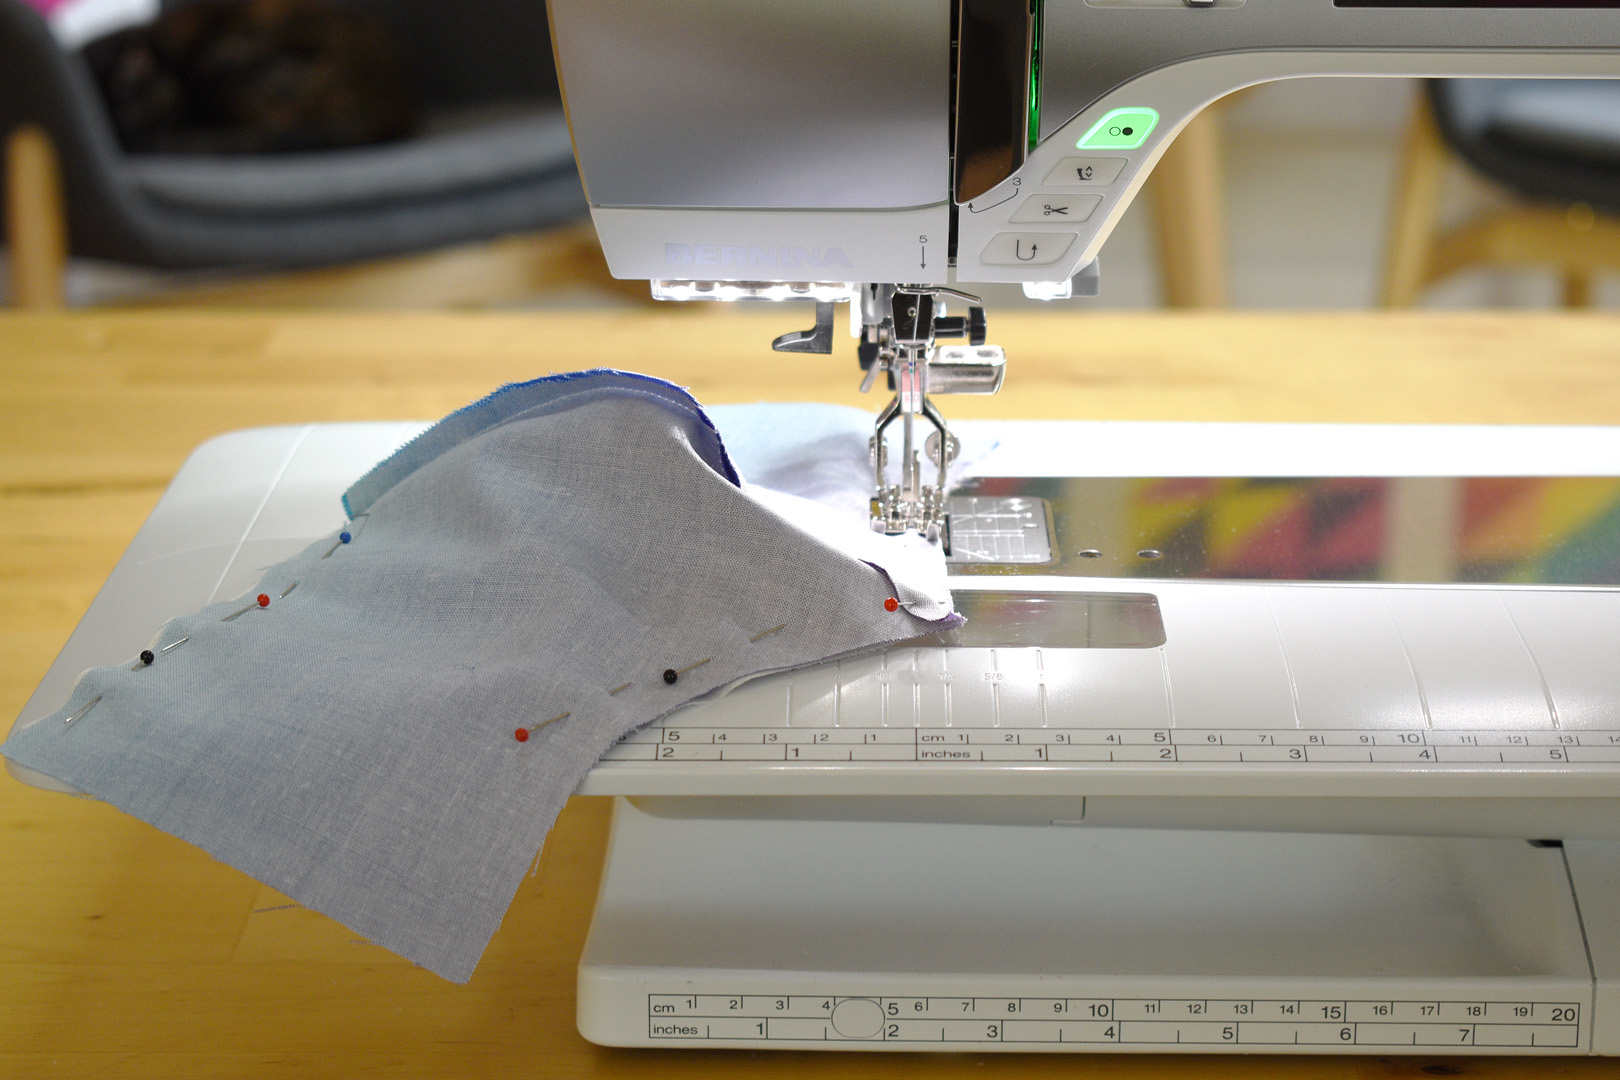
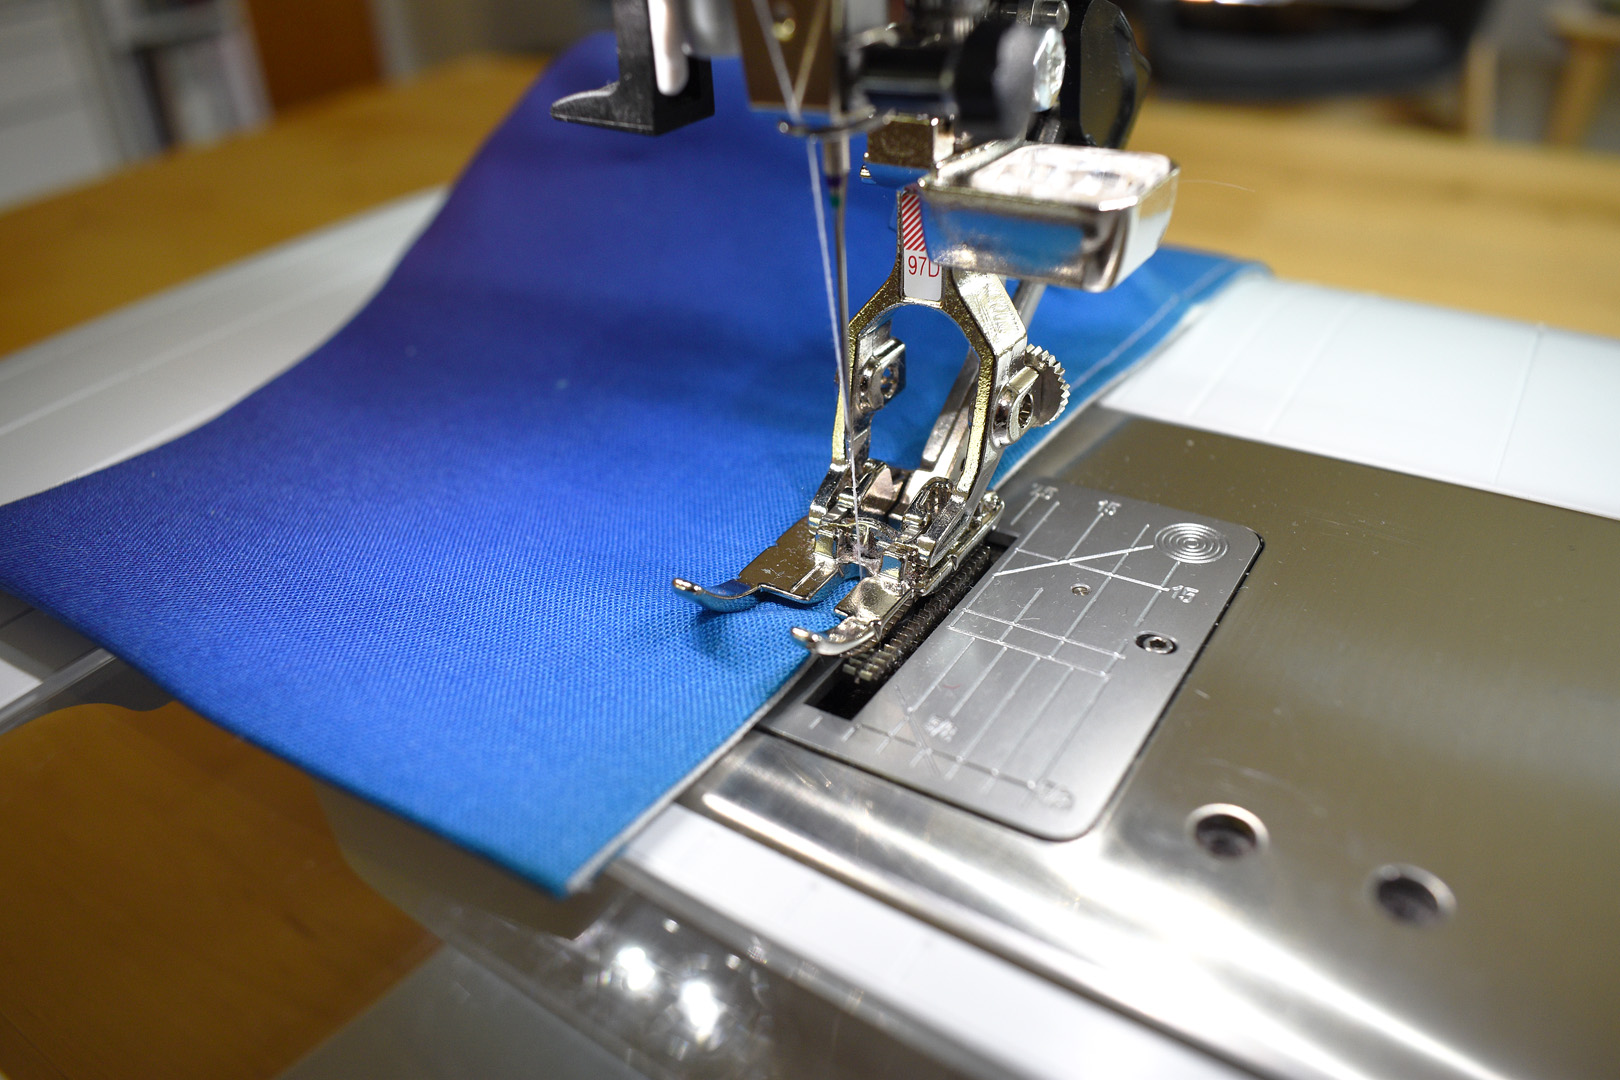
I use the Free Hand System with my B 570 QE to help me make quick adjustments when sewing so I can keep both hands on my project. I set my machine to use the needle-down feature, which means the needle will stop in the down position when I take my foot off the control pedal. This means if I need to stop sewing to make a quick adjustment, the needle will stop down in my project and hold the fabric in place for me.
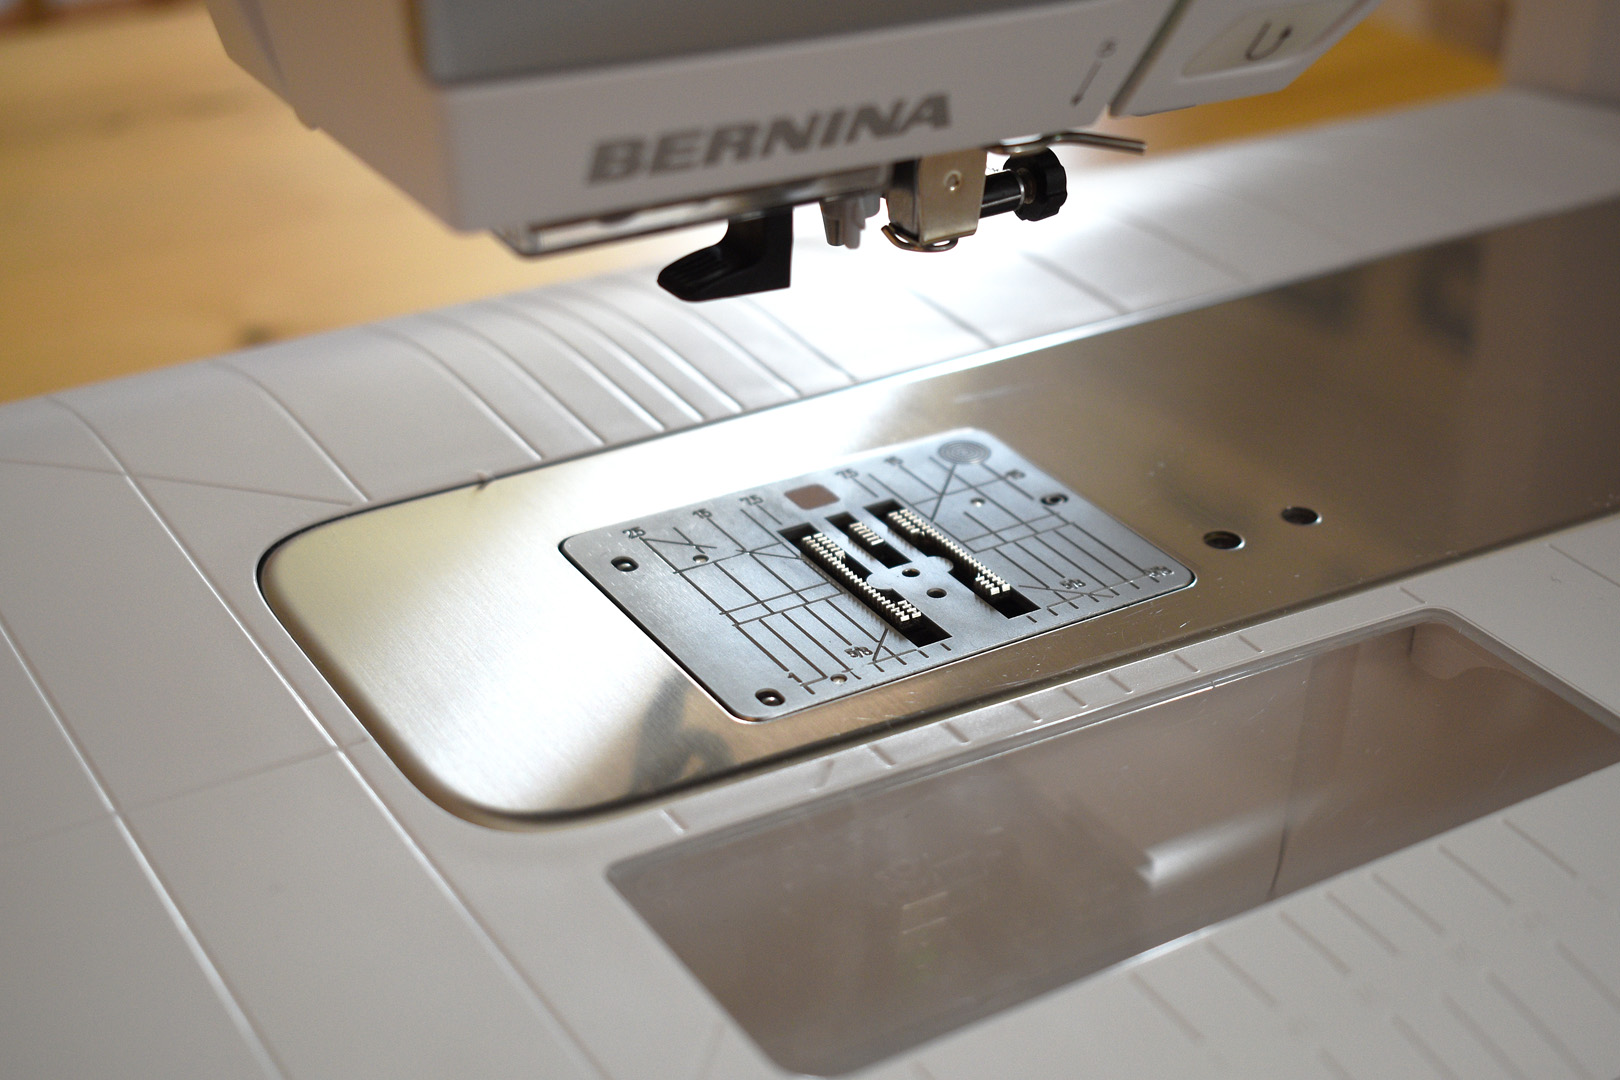
I use a straight stitch needle plate to assist in making perfect straight stitches.
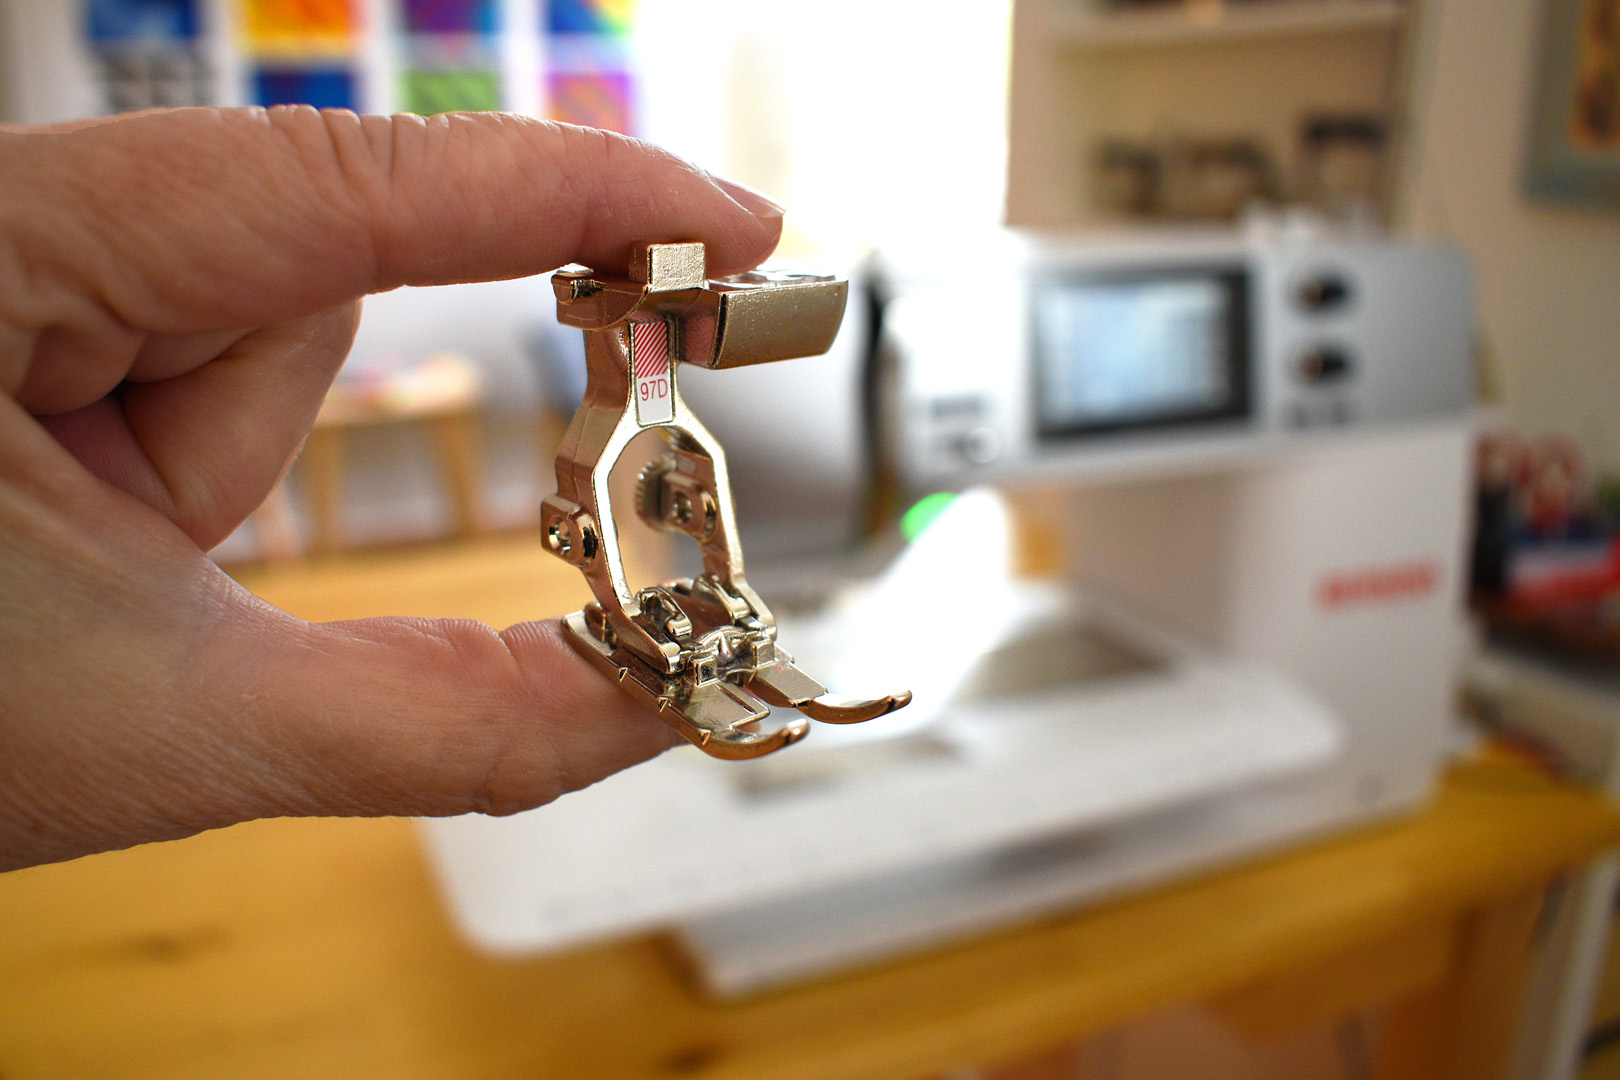
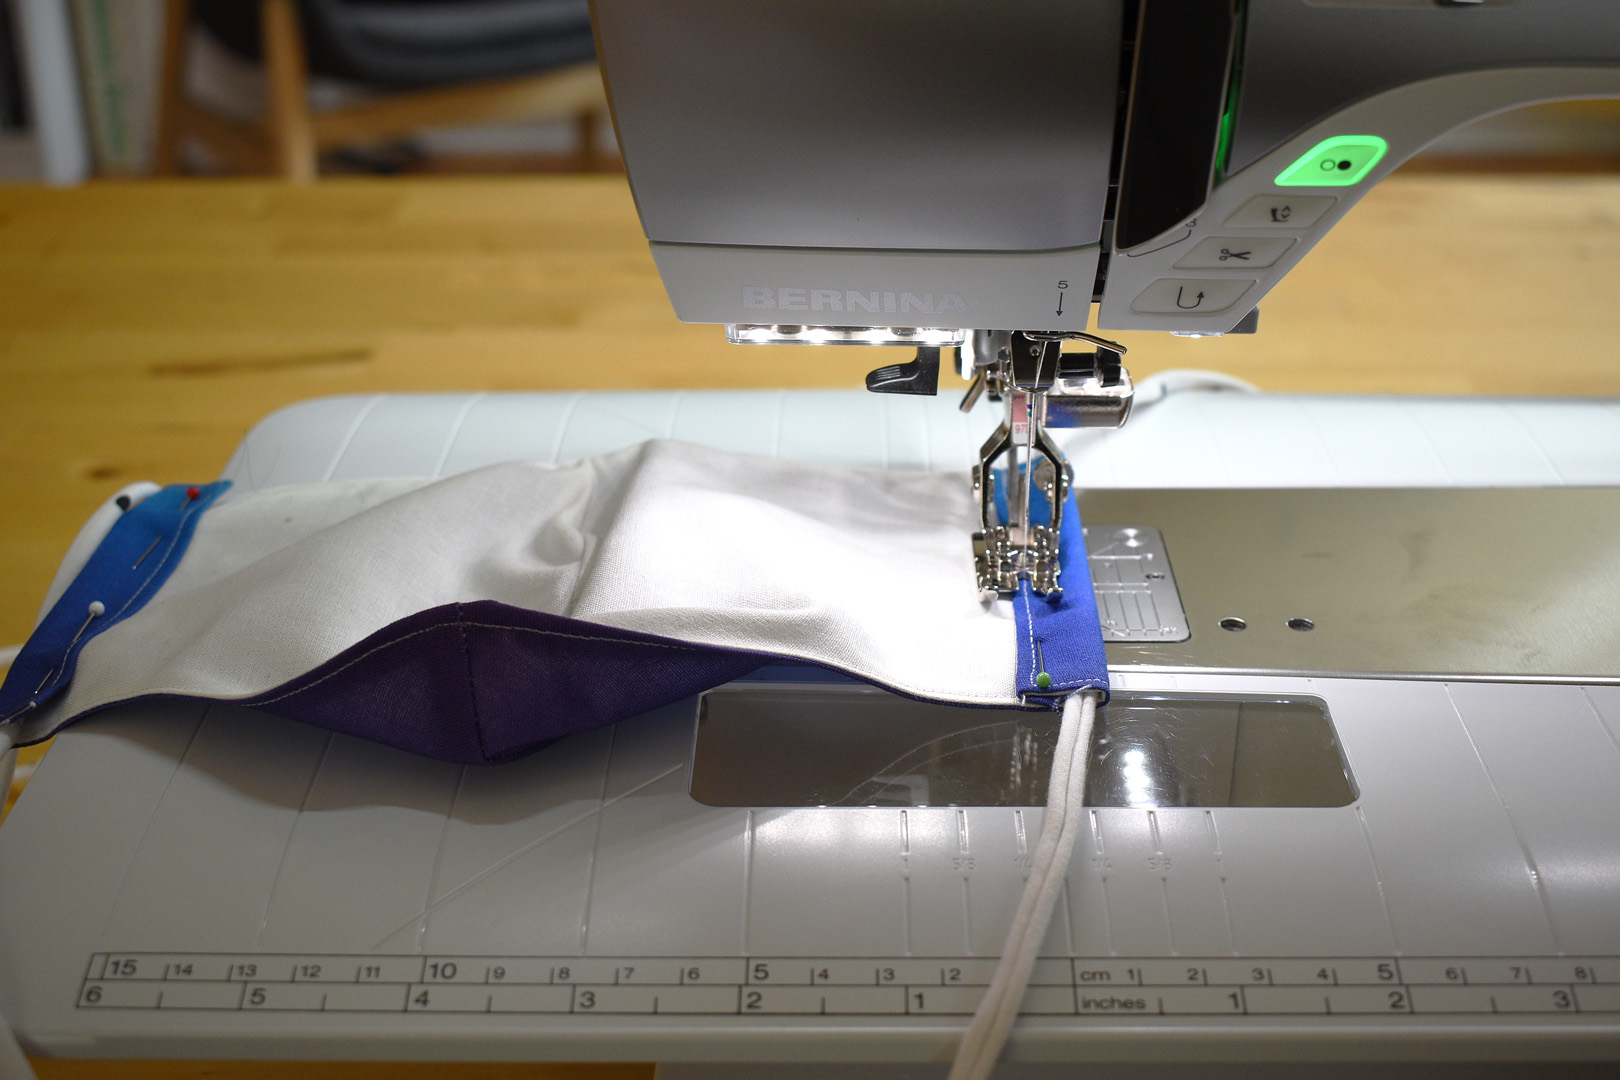
I use Patchwork foot #97D with Dual Feed engaged for sewing all steps in making the masks.
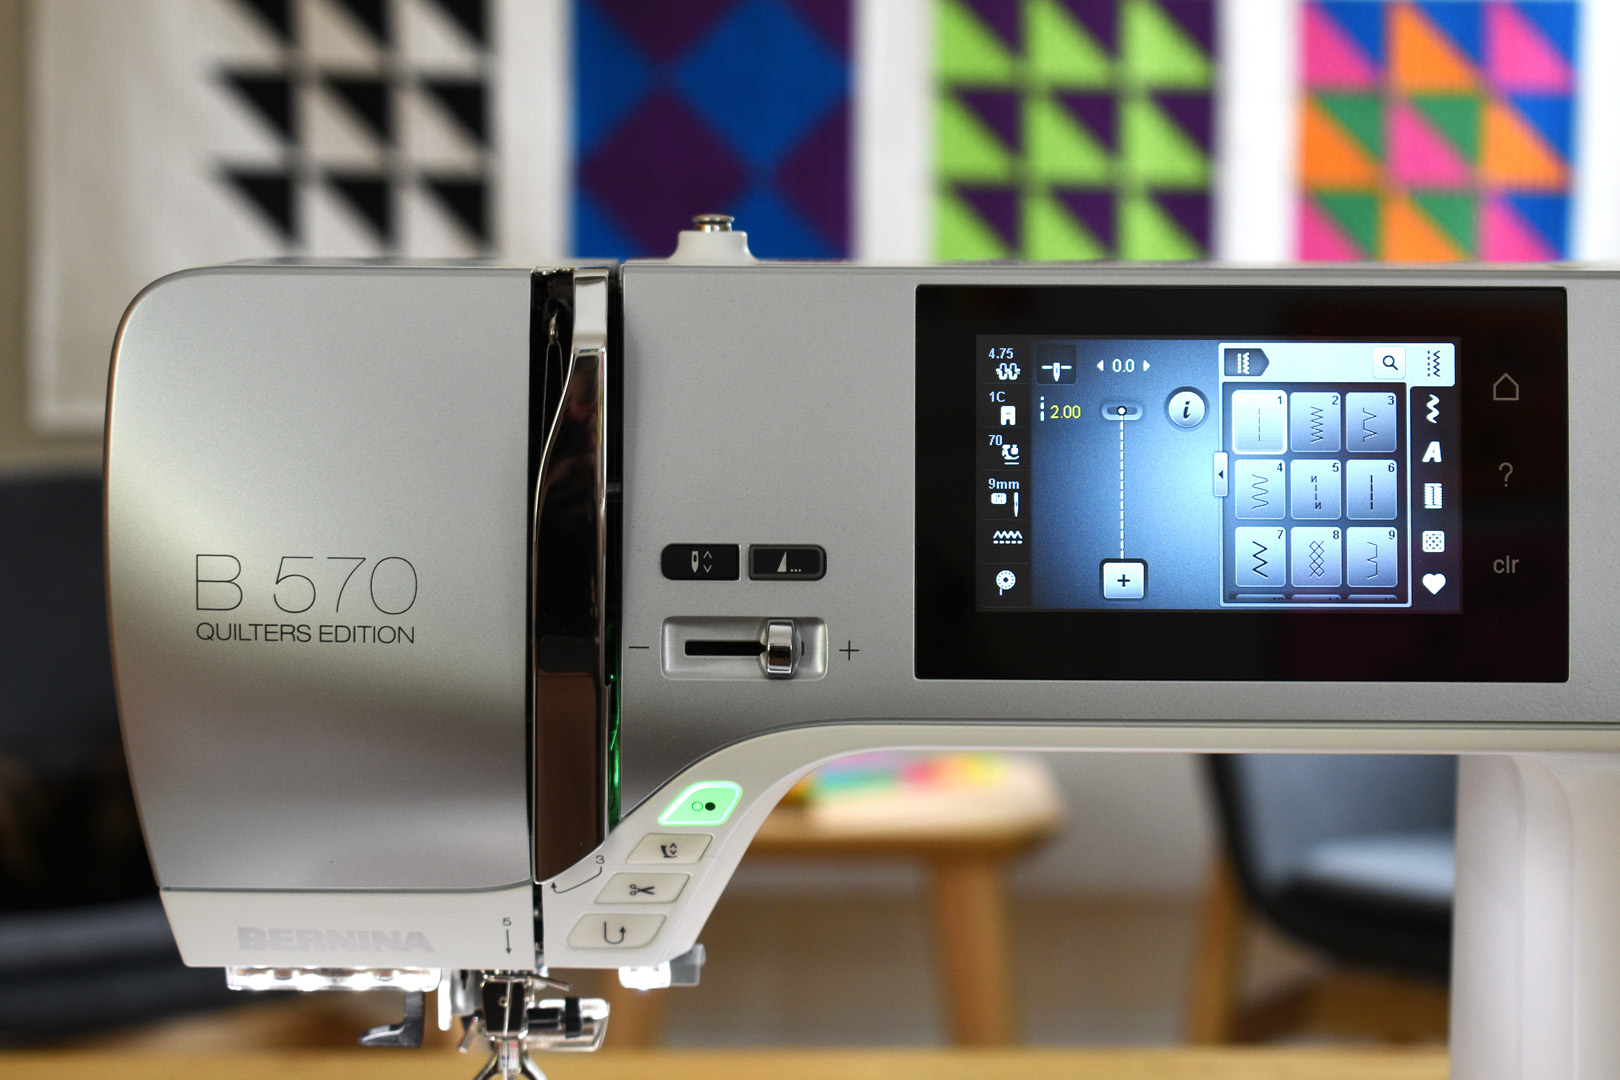
I step the stitch length down to a smaller 2.0mm stitch to make the seams stronger.
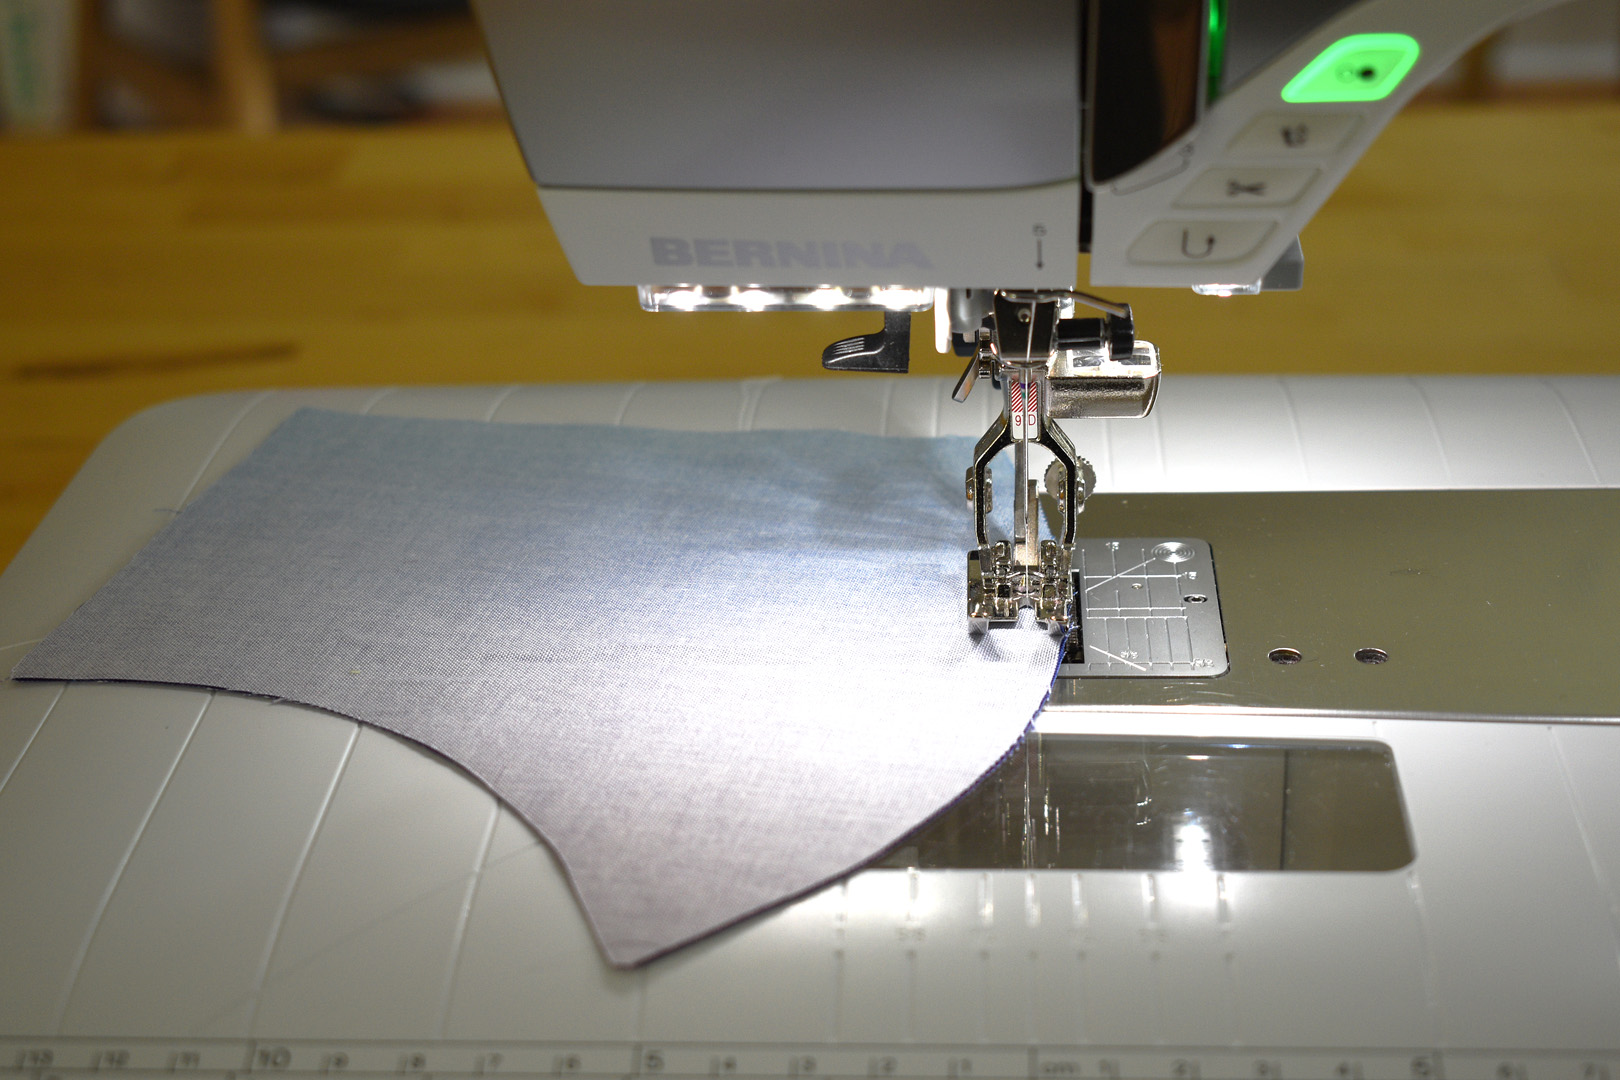
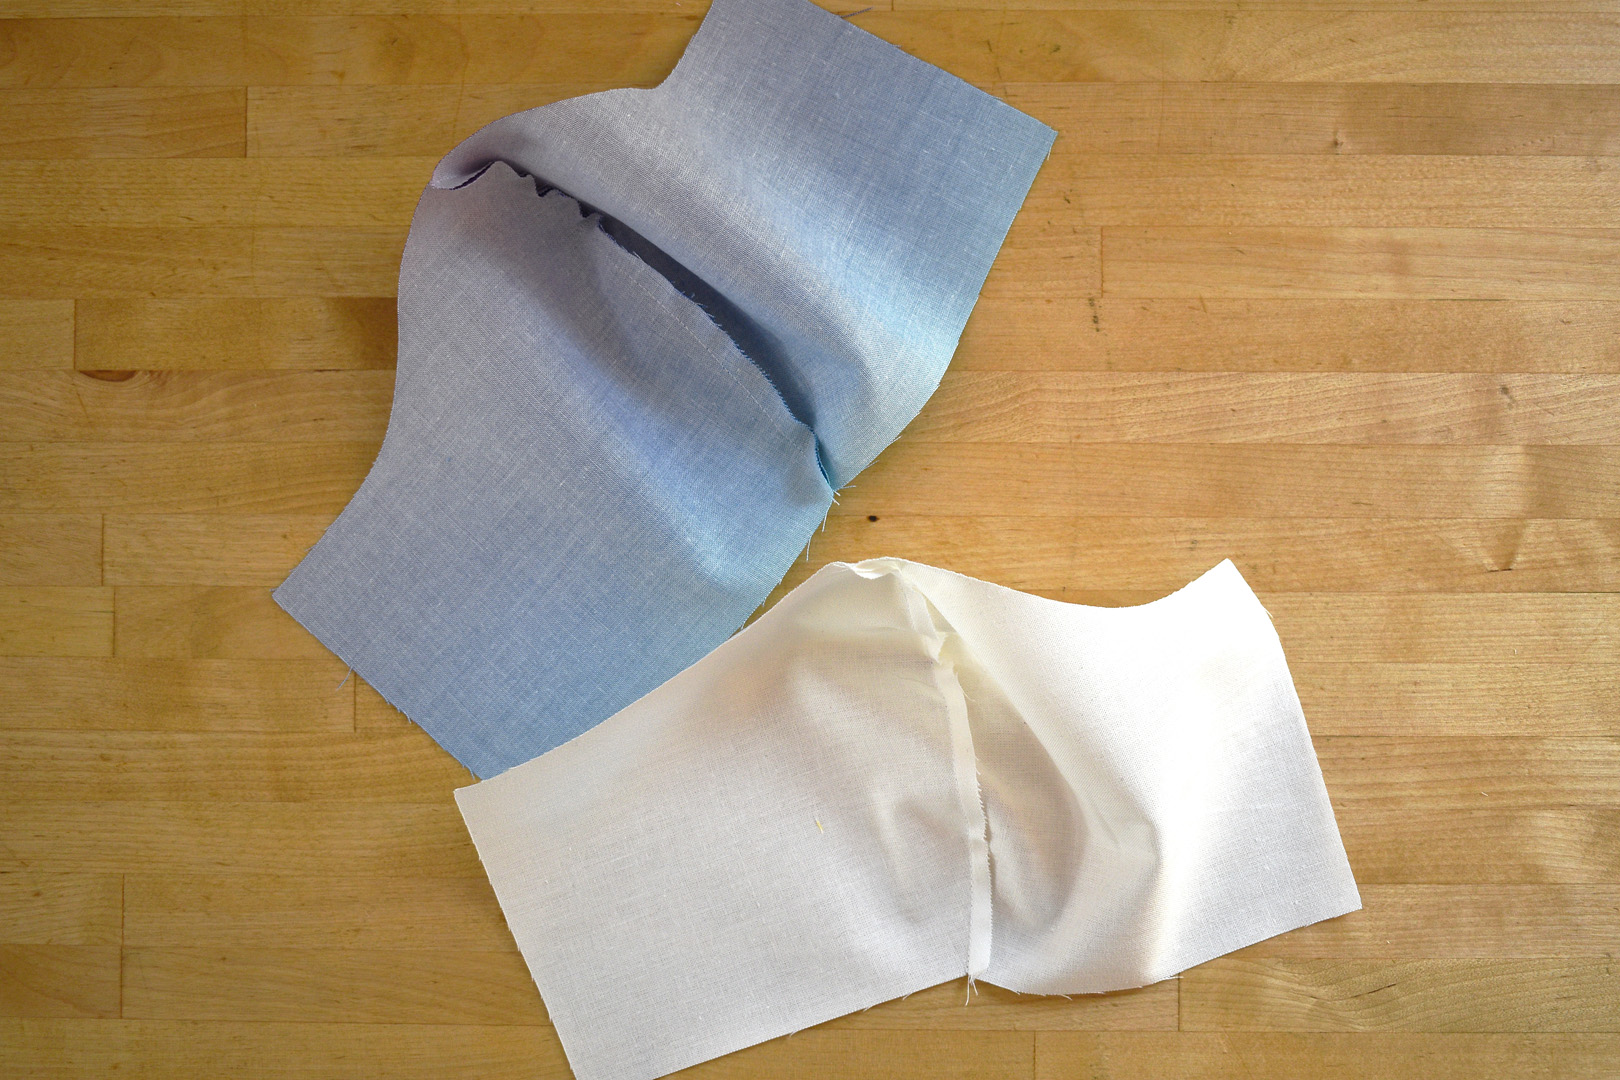
The first step in sewing this type of fabric mask is to sew the center seams in both the outer and inner fabrics using a 1/4″ seam. I use the edge of the Patchwork foot as a guide.
Use your hands to gently guide the curves under the foot, making sure the edge of the curve is even with the quarter inch foot.
TIP: Use the string piecing method to quickly sew each step at the machine. Don’t stop sewing after reaching the end of the first piece, place the next piece under the needle to keep on sewing. The threads will connect each of the pieces into one long “string” in this method. The video below shows you what string piecing the masks looks like at this step.
Use thread snips to cut the string of pattern pieces apart before moving on to next steps.
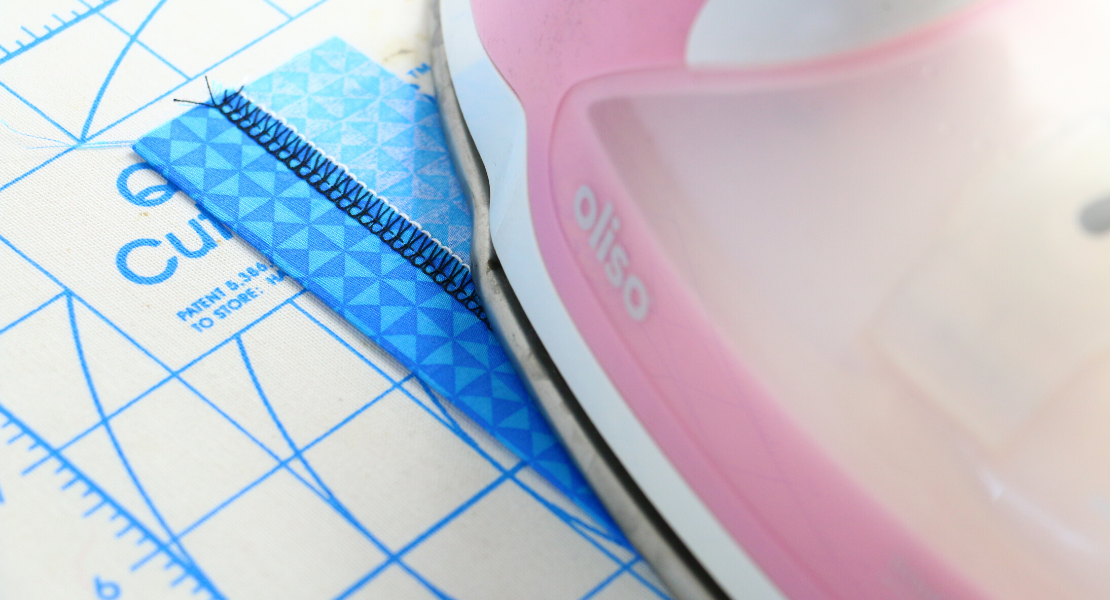
You can move right ahead to pinning the inner and outer pattern pieces together, but I give the mask a quick pressing to set the seam first.
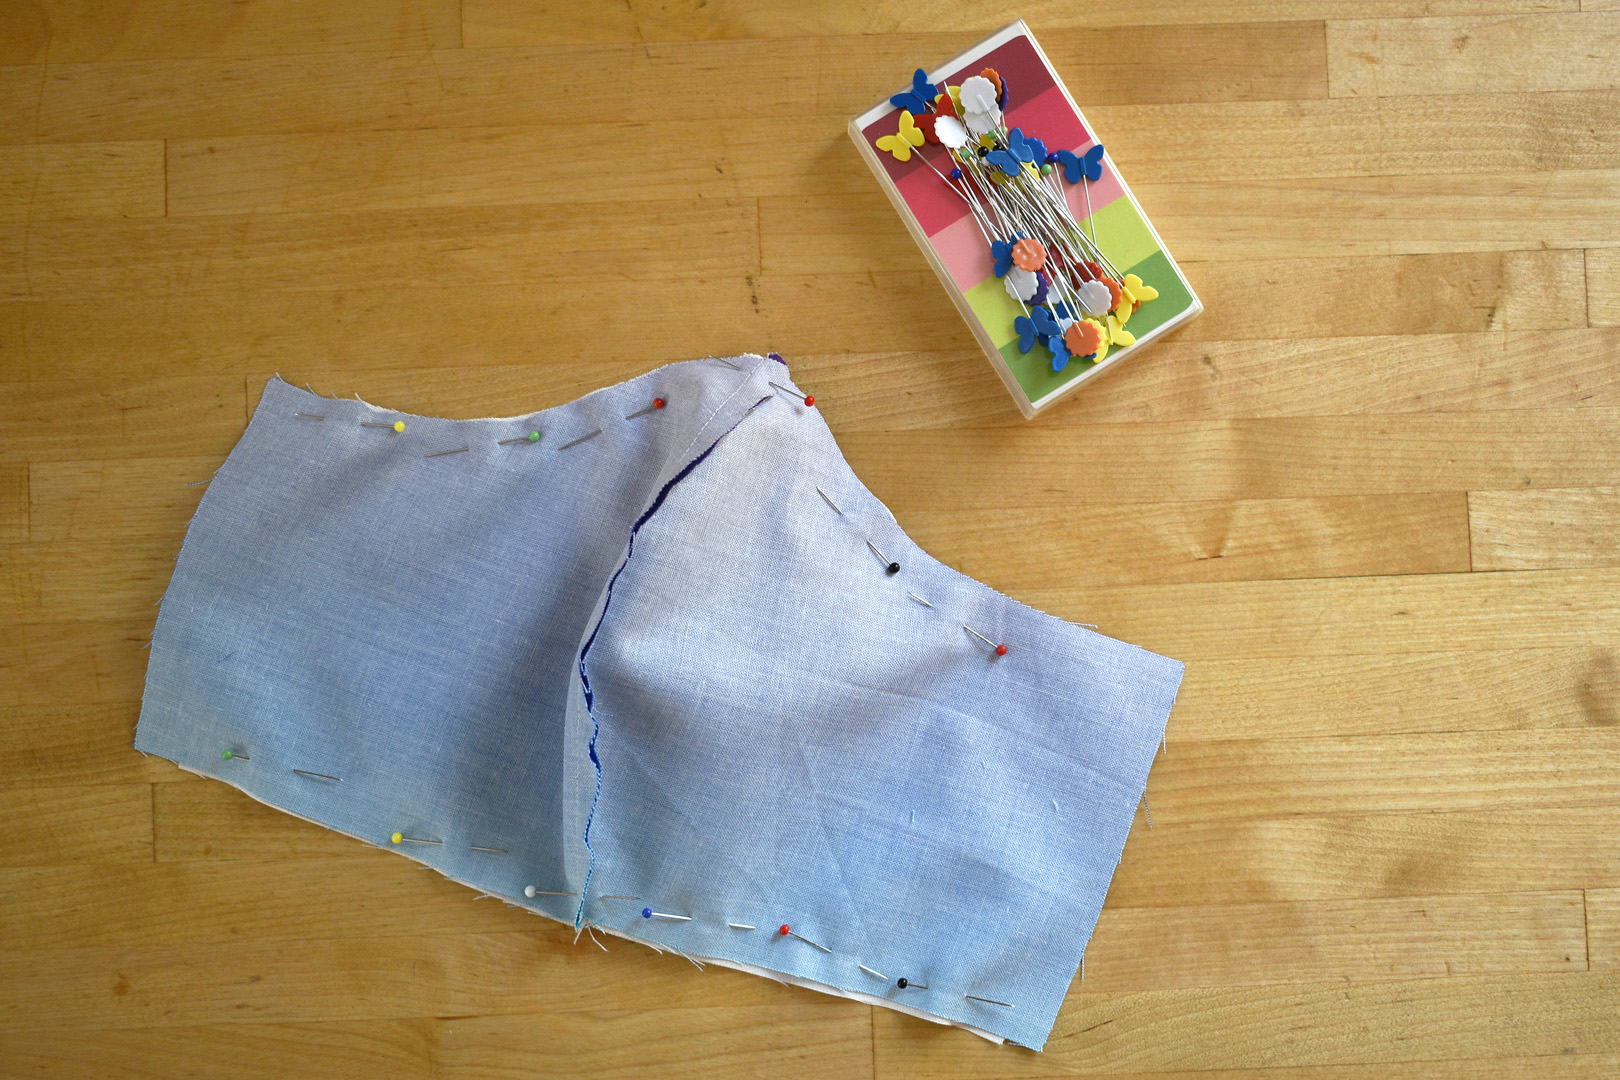
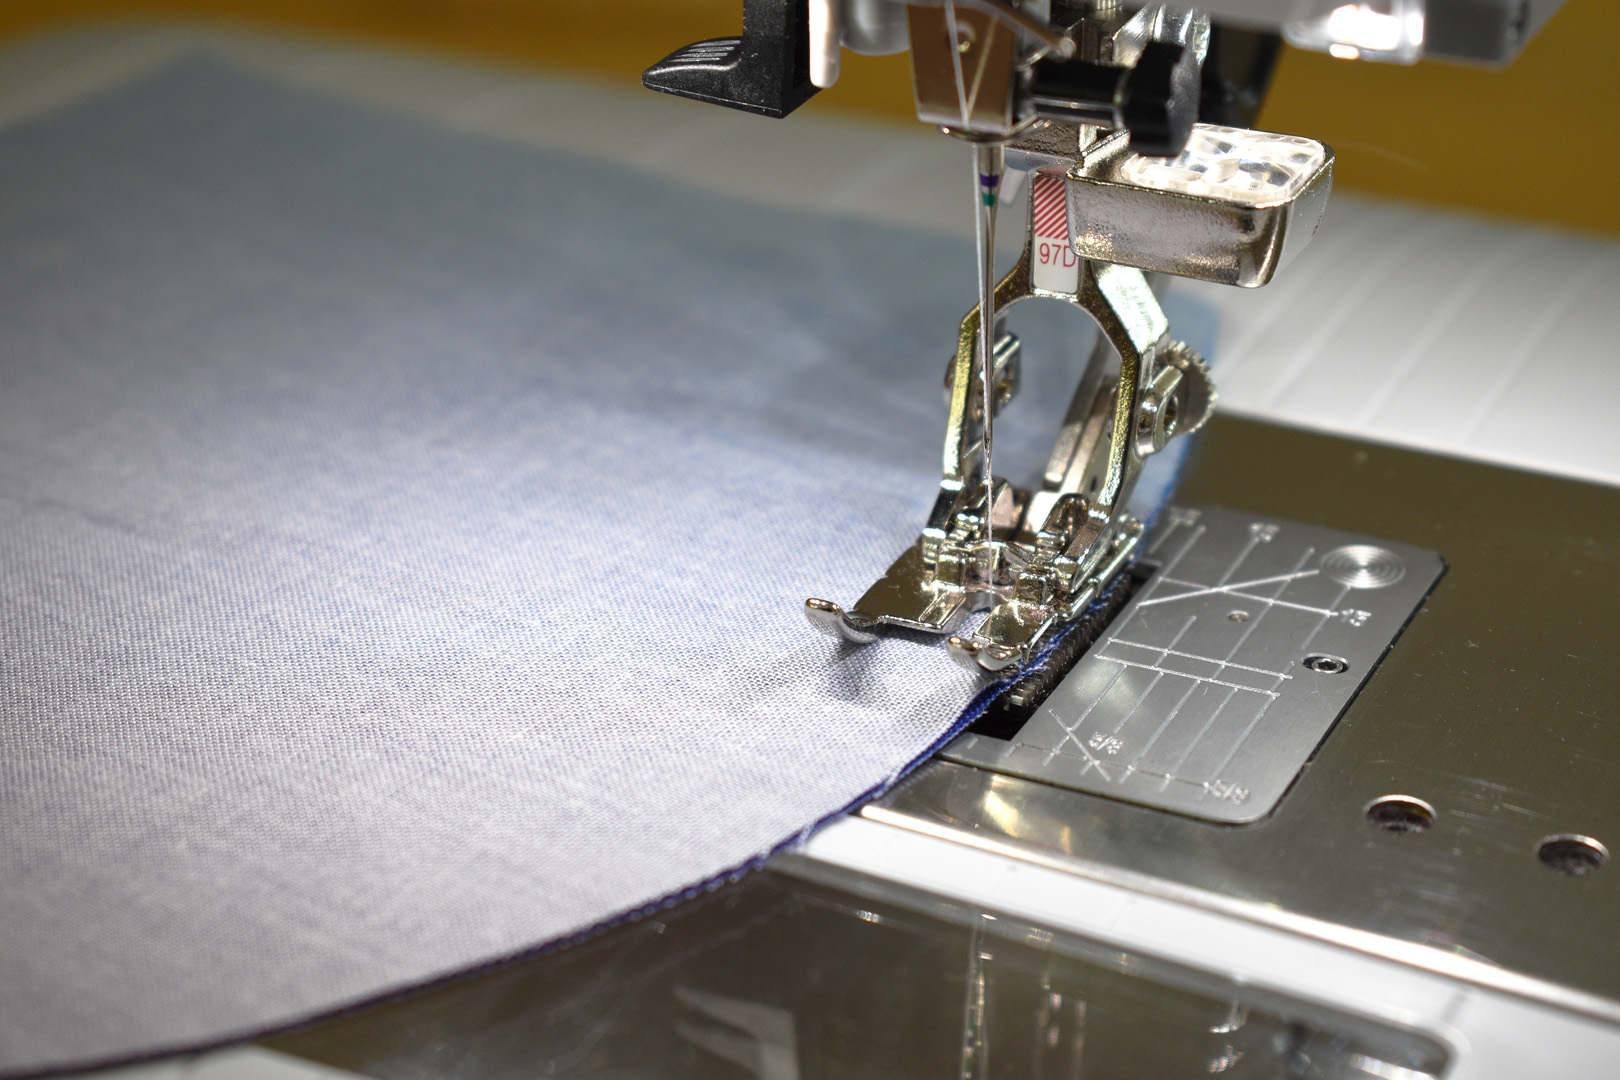
Pin one outer and inner piece right sides together, matching center seams. Do not pin the sides of the mask, these are left open.
Sew along the top and bottom mask edges with a 1/4″ seam.
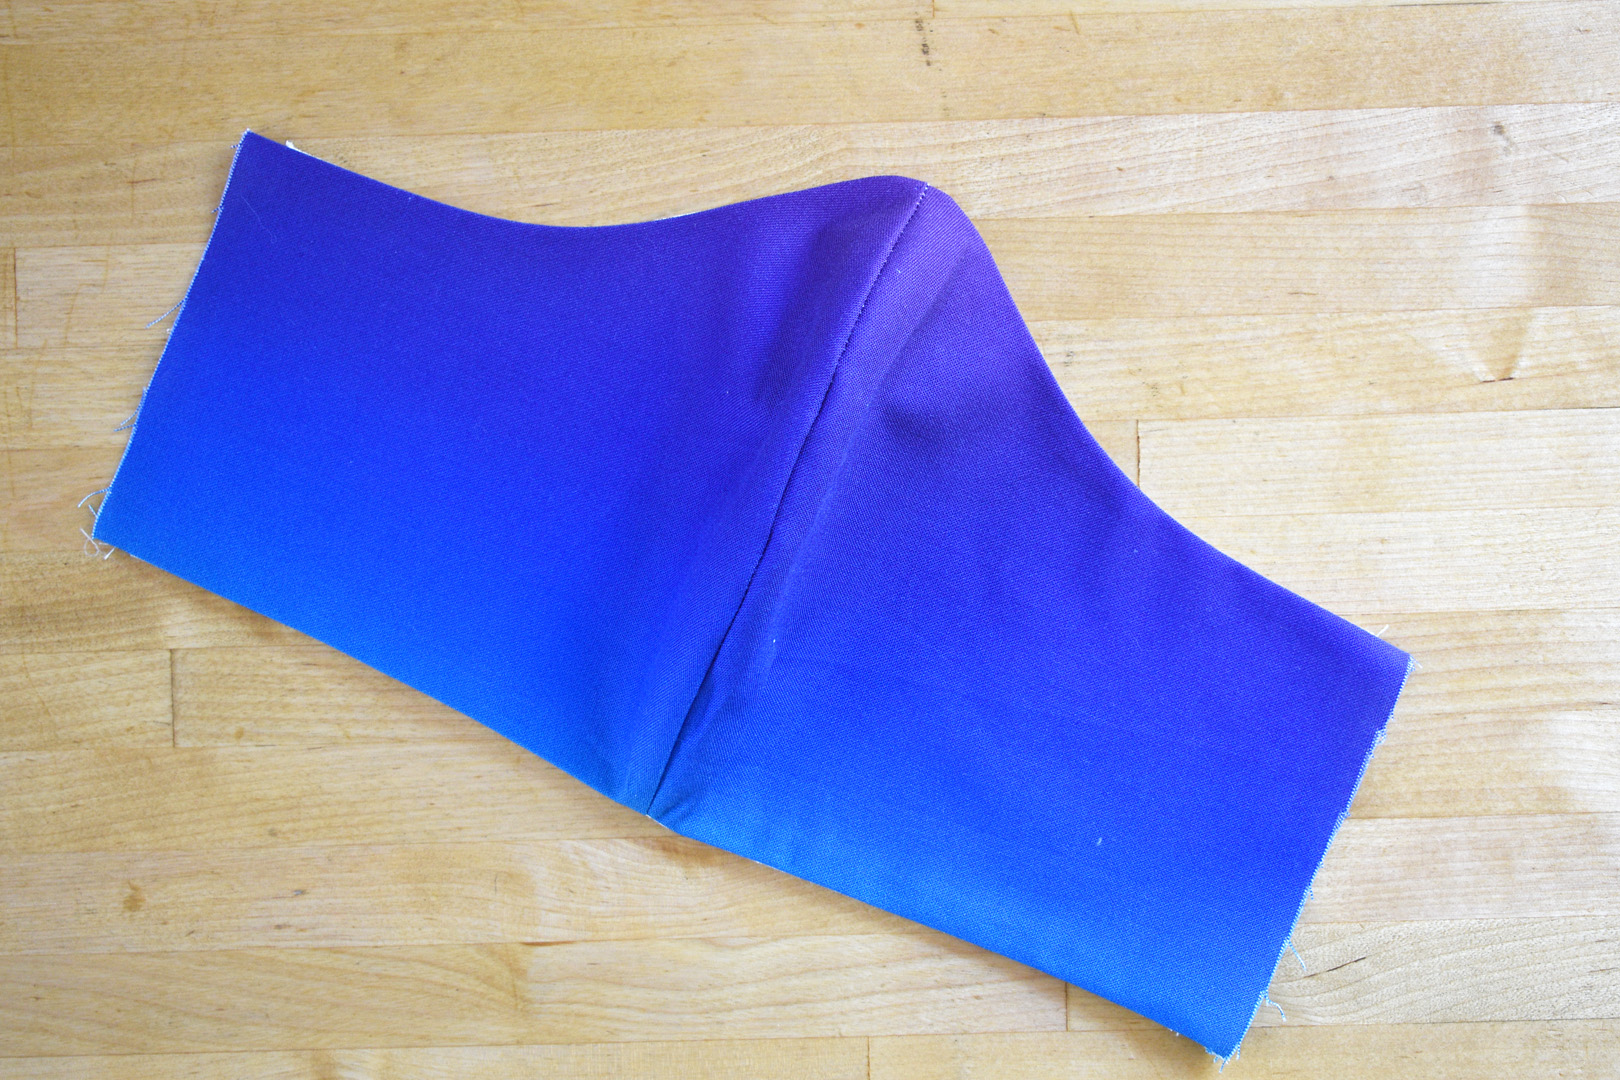
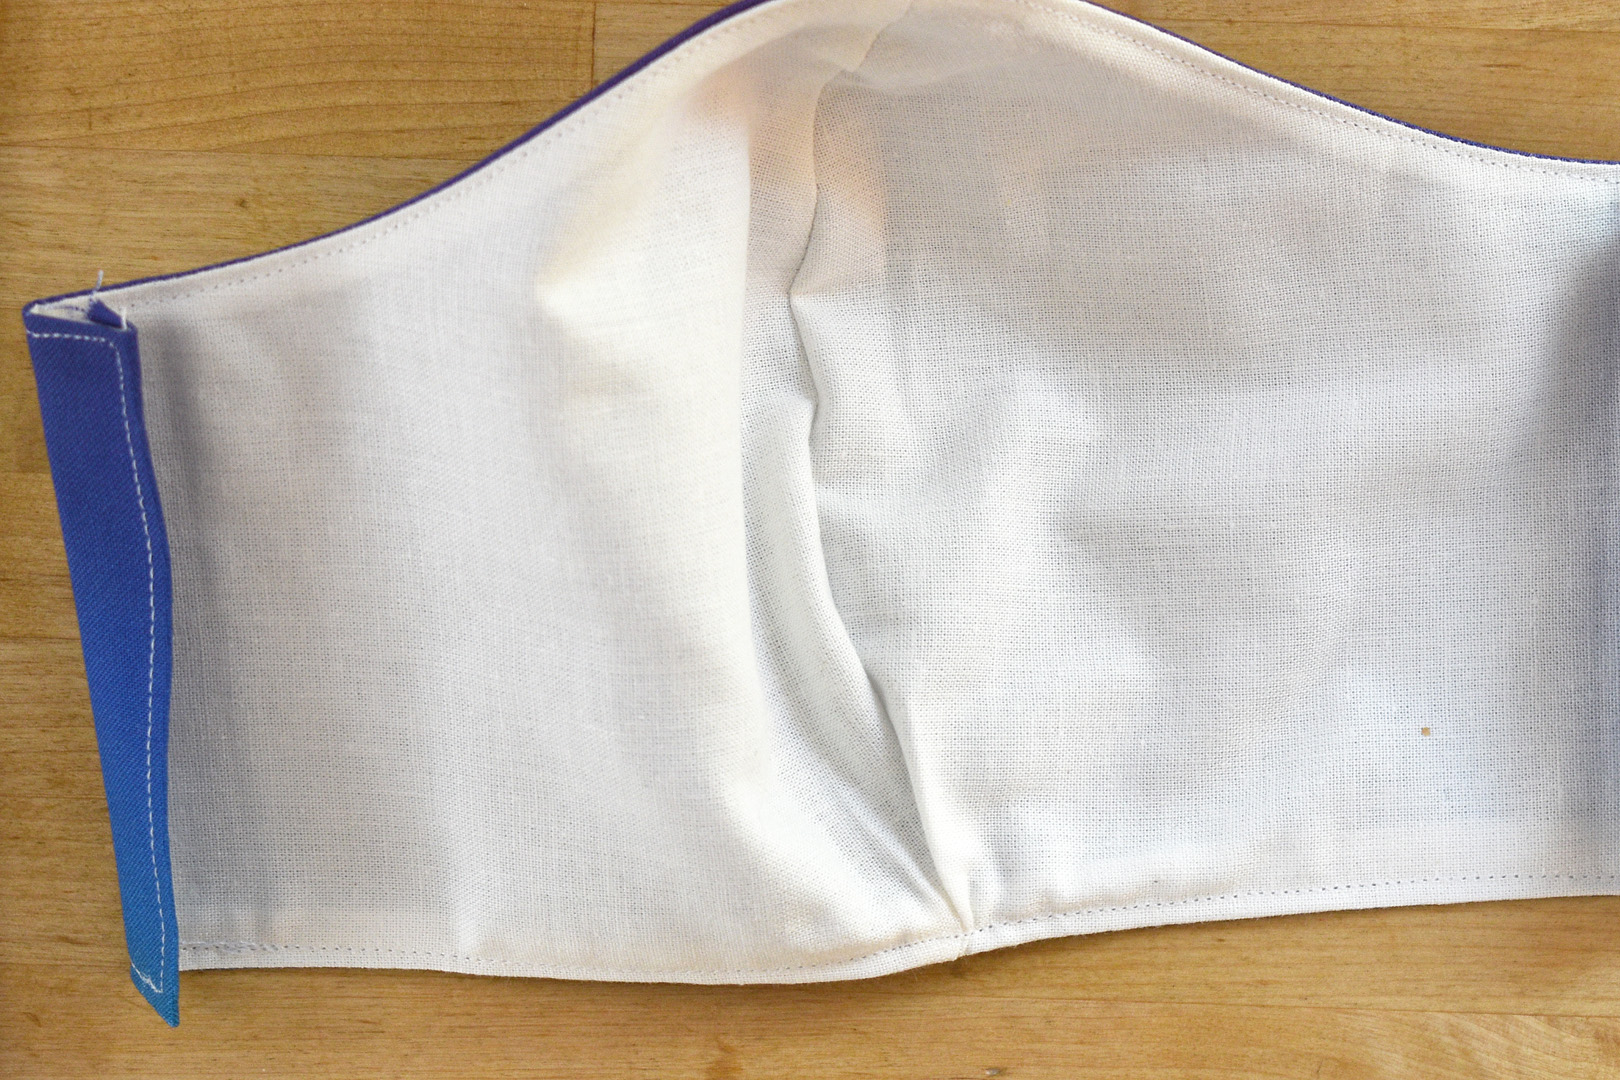
Use the opening in the sides of the mask to flip the mask right side out. Press the top and bottom seams flat.
TIP: This is now the point where you can insert a strip of metal in the top edge of the mask for a closer fit around the nose. You can check out tips for this process in this Mask Sewing Tips post here. If you are going to use a zigzag stitch at any point in making your mask, don’t use a straight stitch needle plate – you will break a needle!
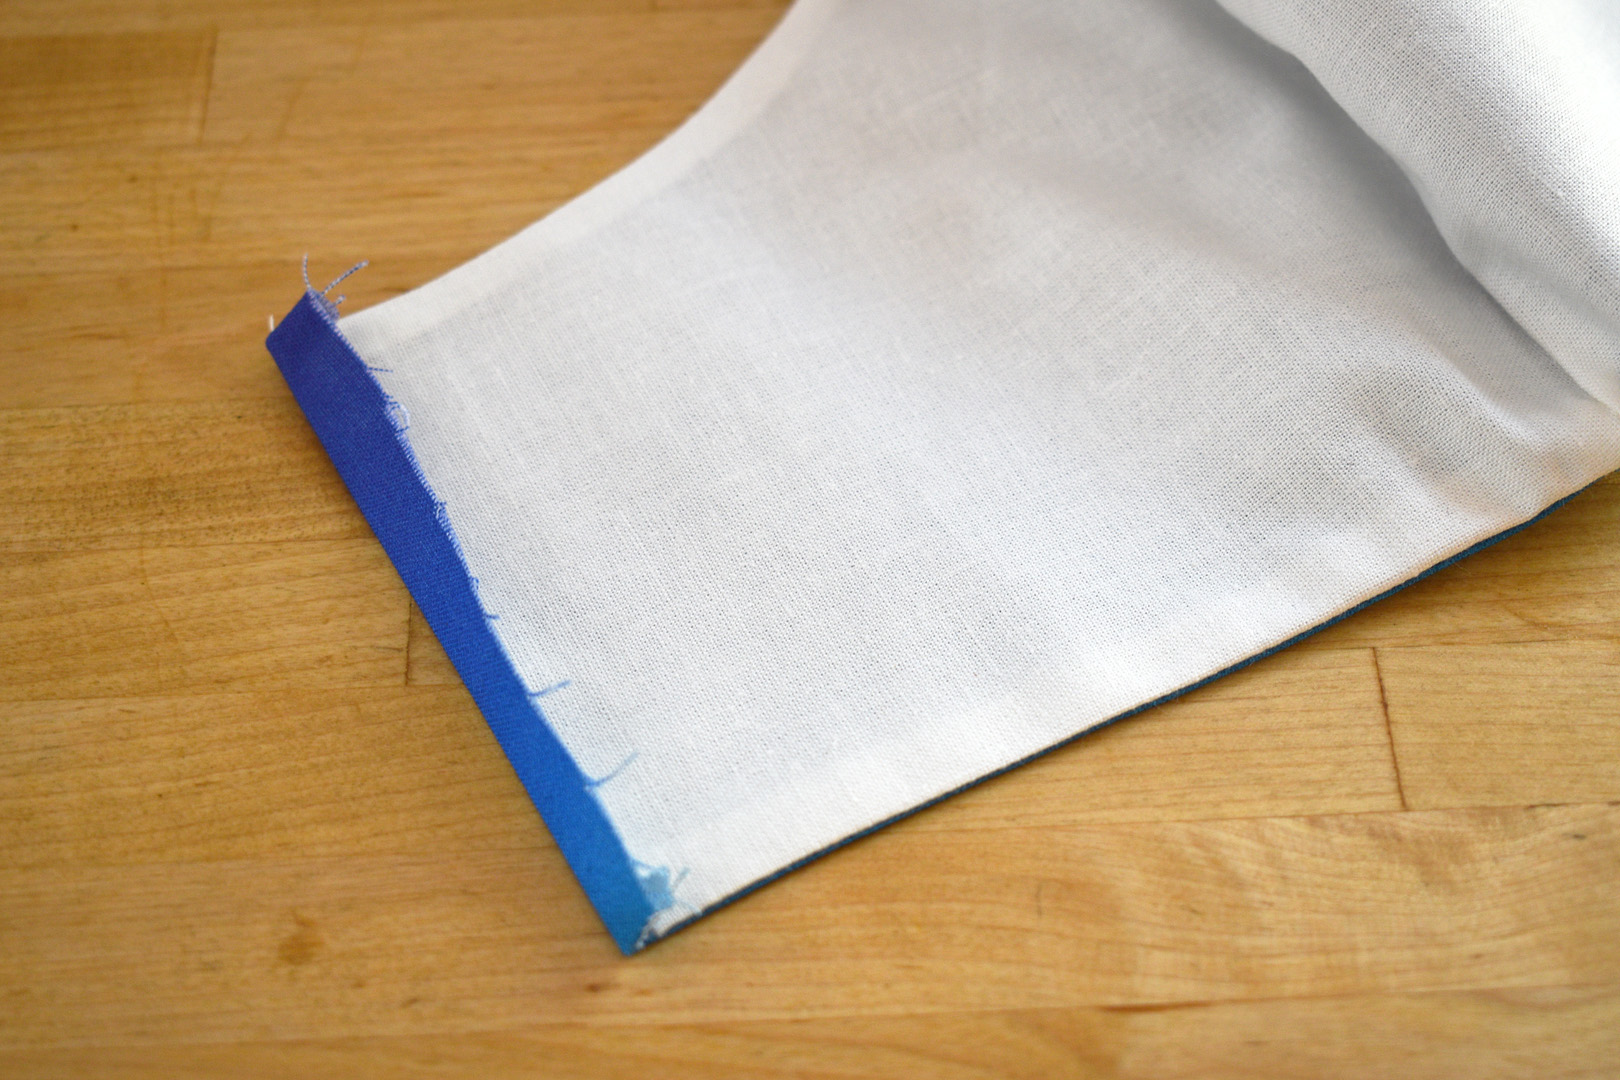
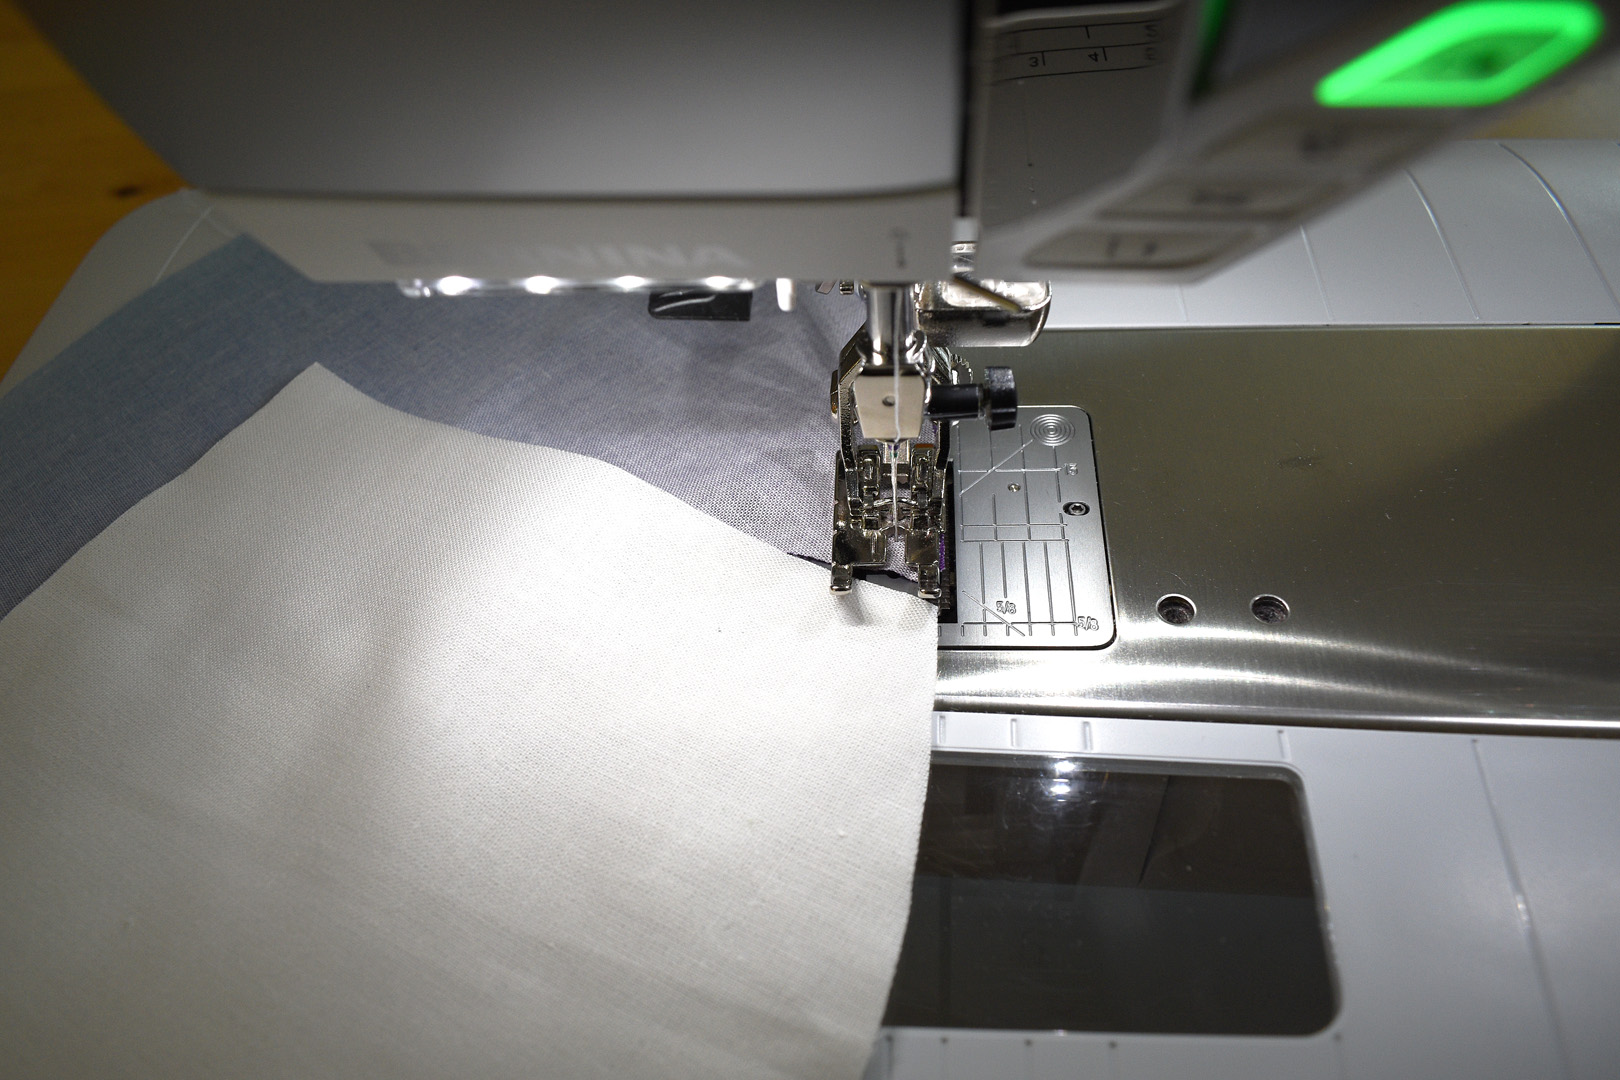
The inner fabric is about 1/4″ shorter than the outer fabric. Flip the mask to the back side, and press the outer fabric 1/4″ over the edge of the inner fabric.
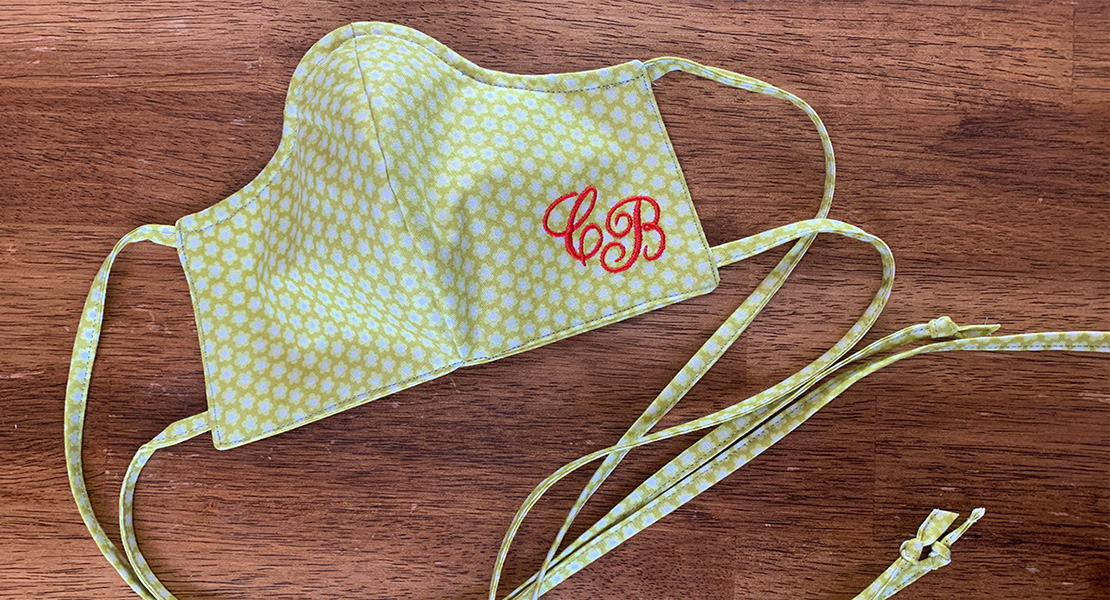
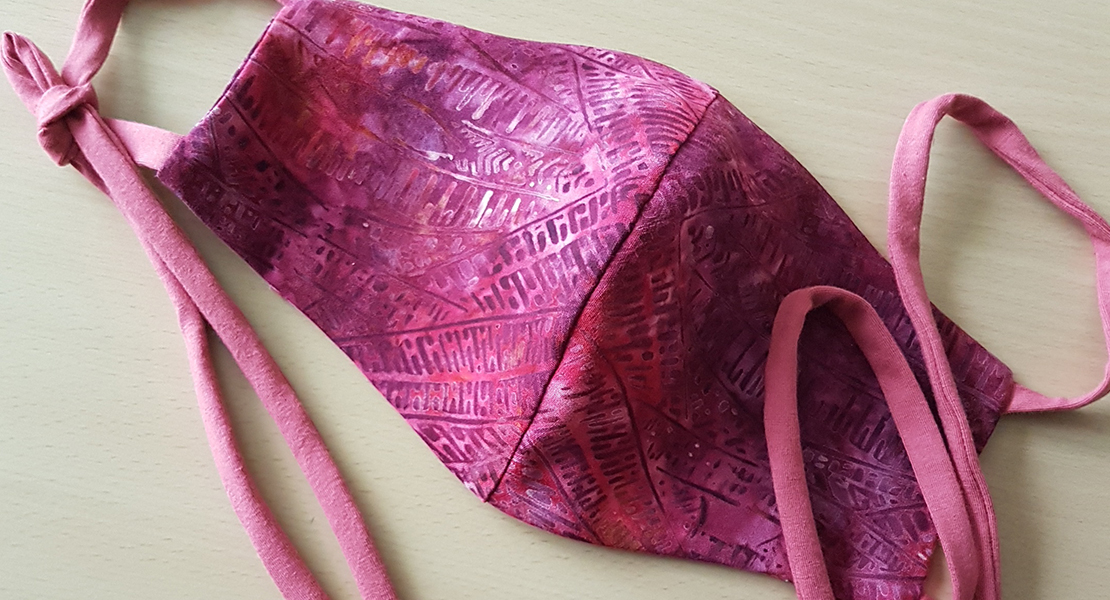
Top stitch all along the outer edges of the mask. I continue to use the Patchwork foot #97D for this step, but you can use the Edgestitch foot #10 for this step if you choose.
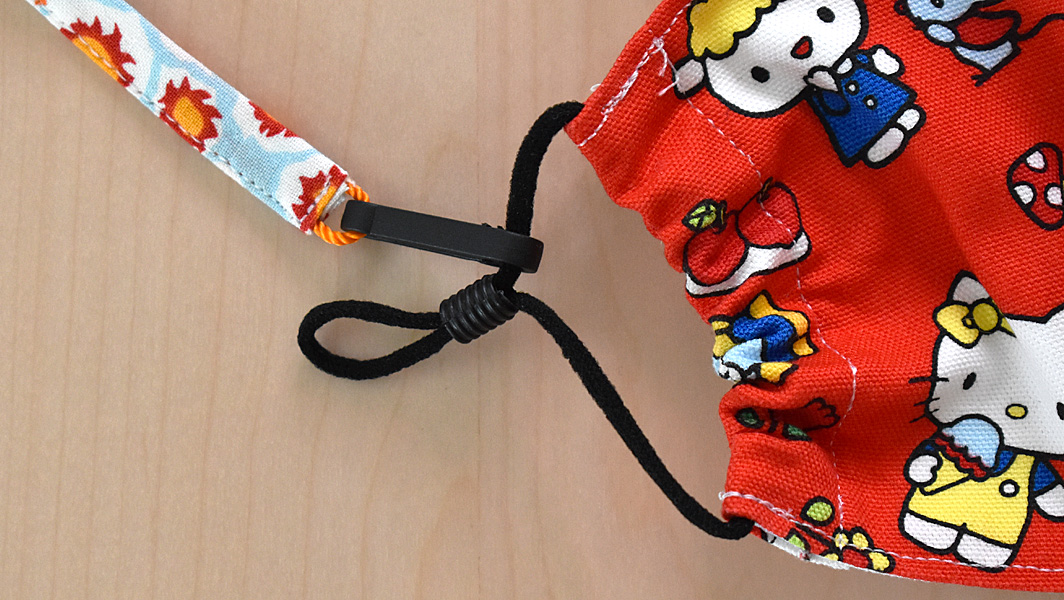
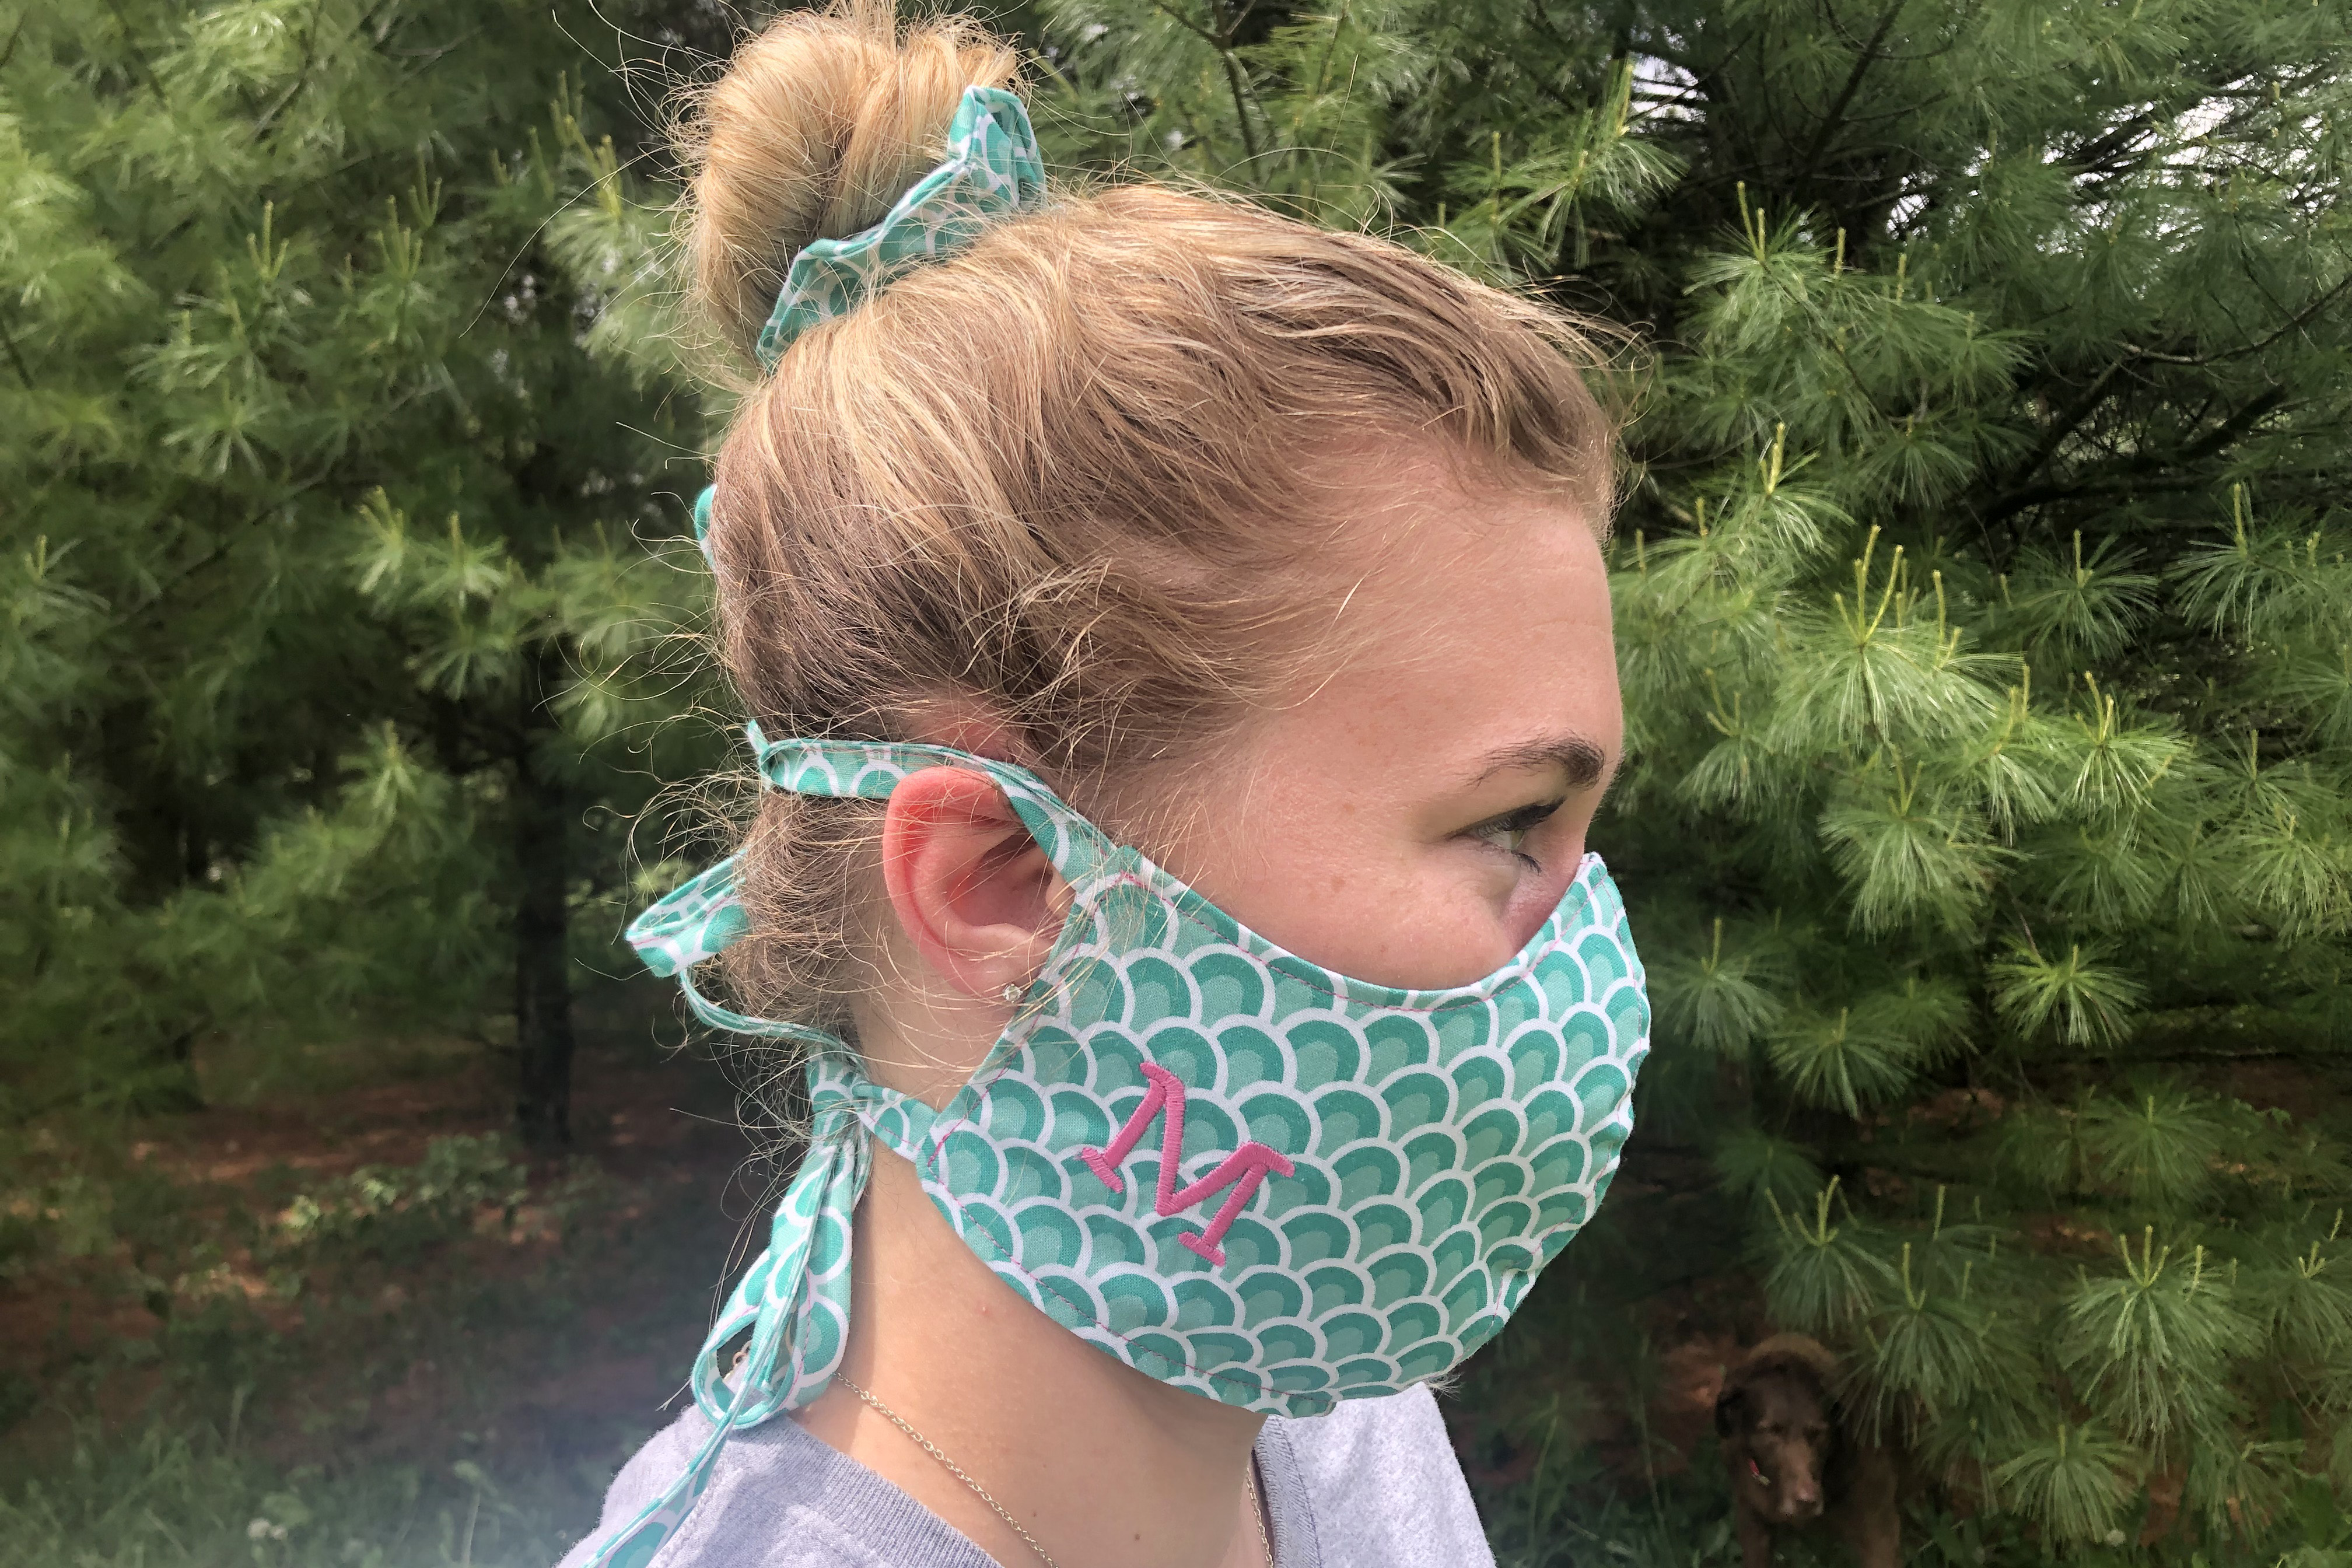
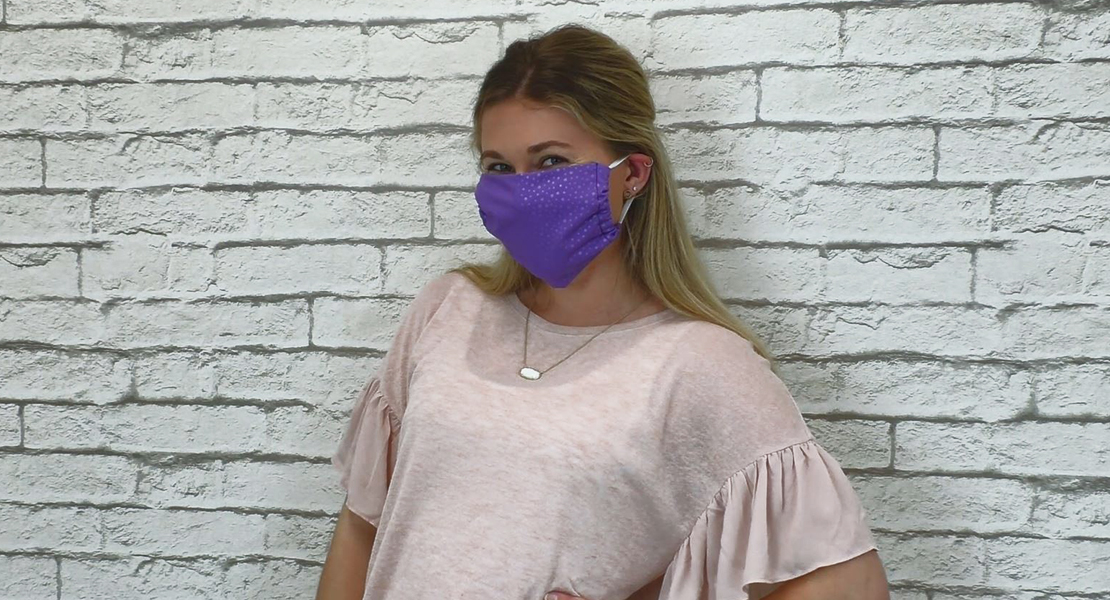
After topstitching around the mask, turn the sides of the mask to the back to create a casing for the elastic or ties. You can insert an elastic hair tie, a piece of elastic sewn into a loop, or a long tie made from 100% cotton knit. I have issues with elastic on my ears, so I opt for long knit ties. I’ll show you how to make these in the next steps, and how to wear a mask made with a long tie at the end of the post.
TIP: This is the step in the process where you can create a better fit for your mask. Hold the mask up to your face to see how close the edges come to your ears. If the mask is too wide, make a larger fold of fabric on the sides. I fold over about 1/2″ on each side for my own masks, and I fold over about 1″ on each side for my daughter’s face masks (she’s a 6th grader).
Making Knit Fabric Ties
Press the cotton knit fabric well to make sure there are no wrinkles before cutting the ties. Fold the knit fabric in half on the cutting board, lining the fold up perpendicular to the raw edge.
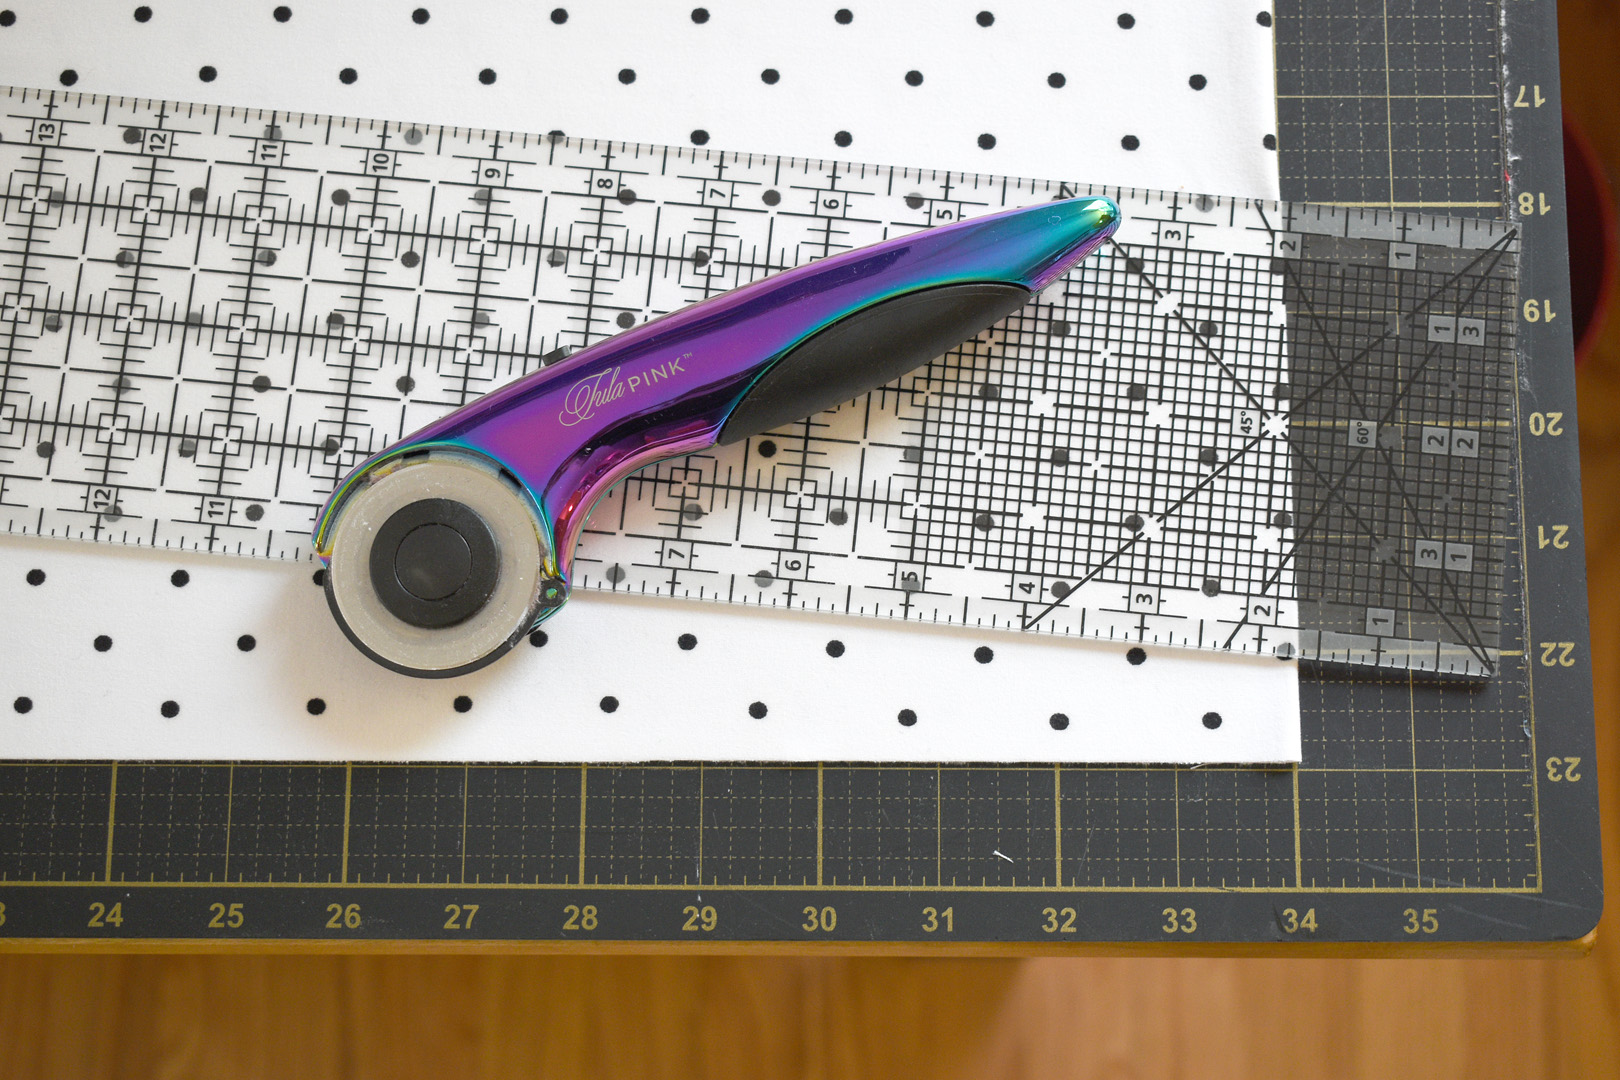
Use a long ruler and rotary cutter to trim the edge even.
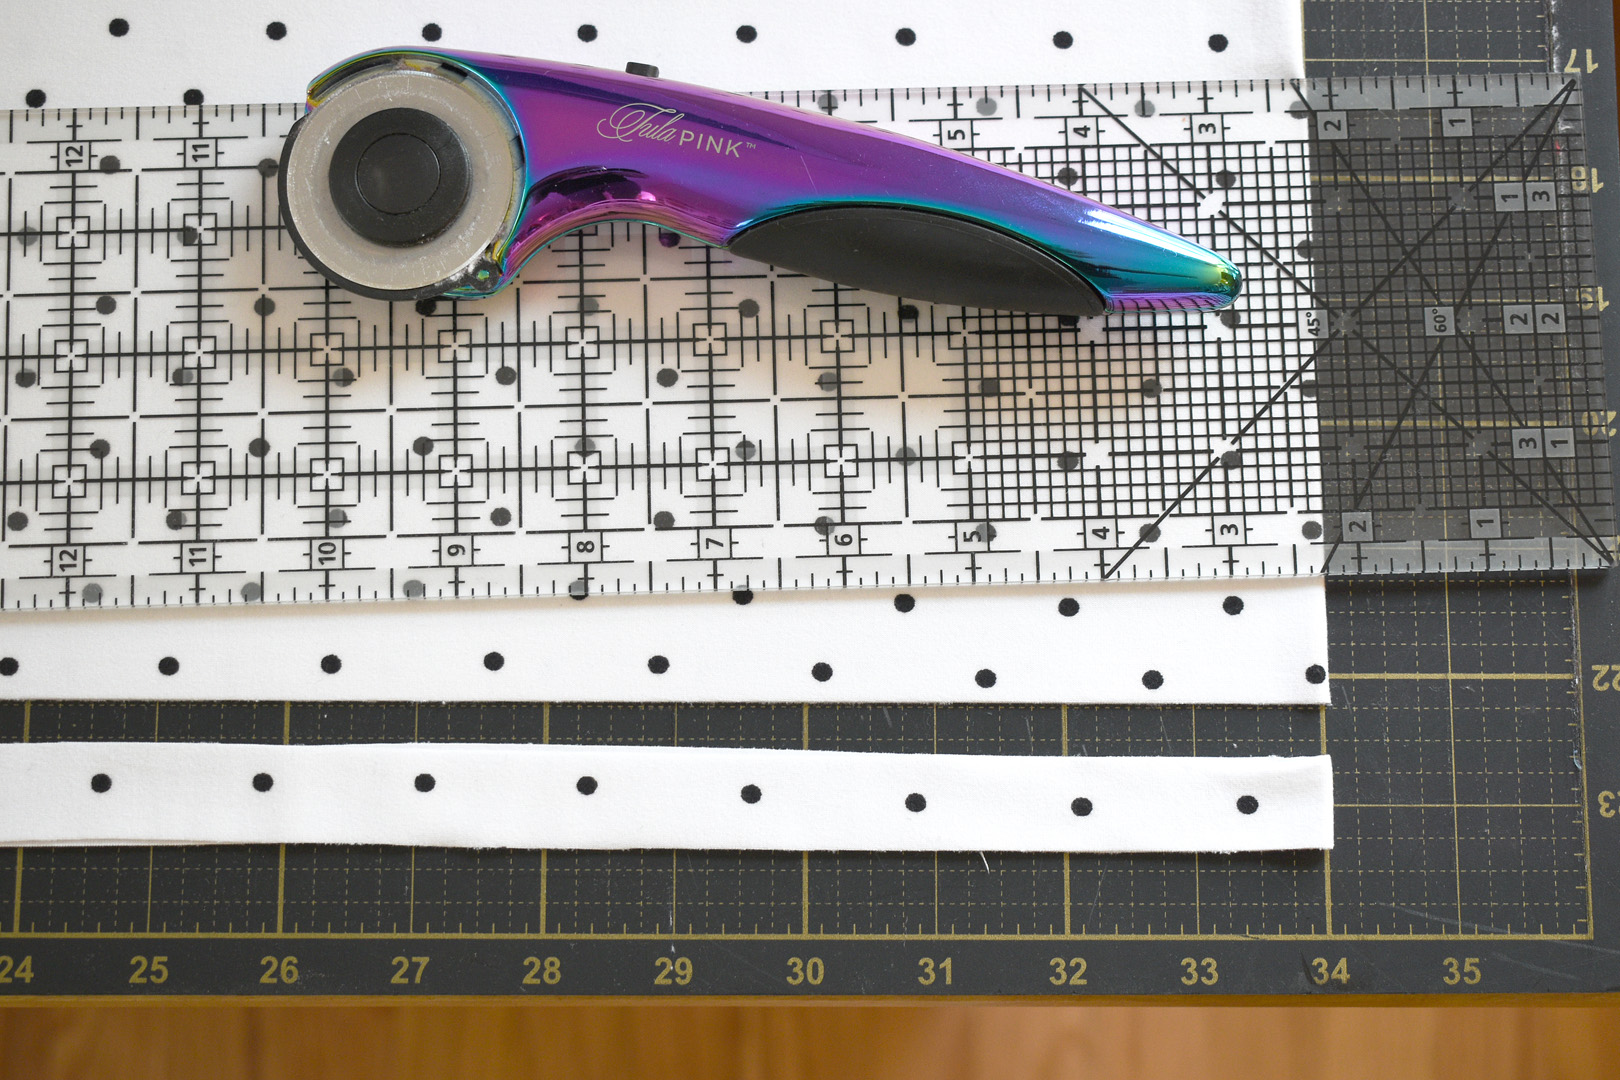
Make 3/4″ cuts the width of the fabric. Keep cutting until you have as many ties as you need.
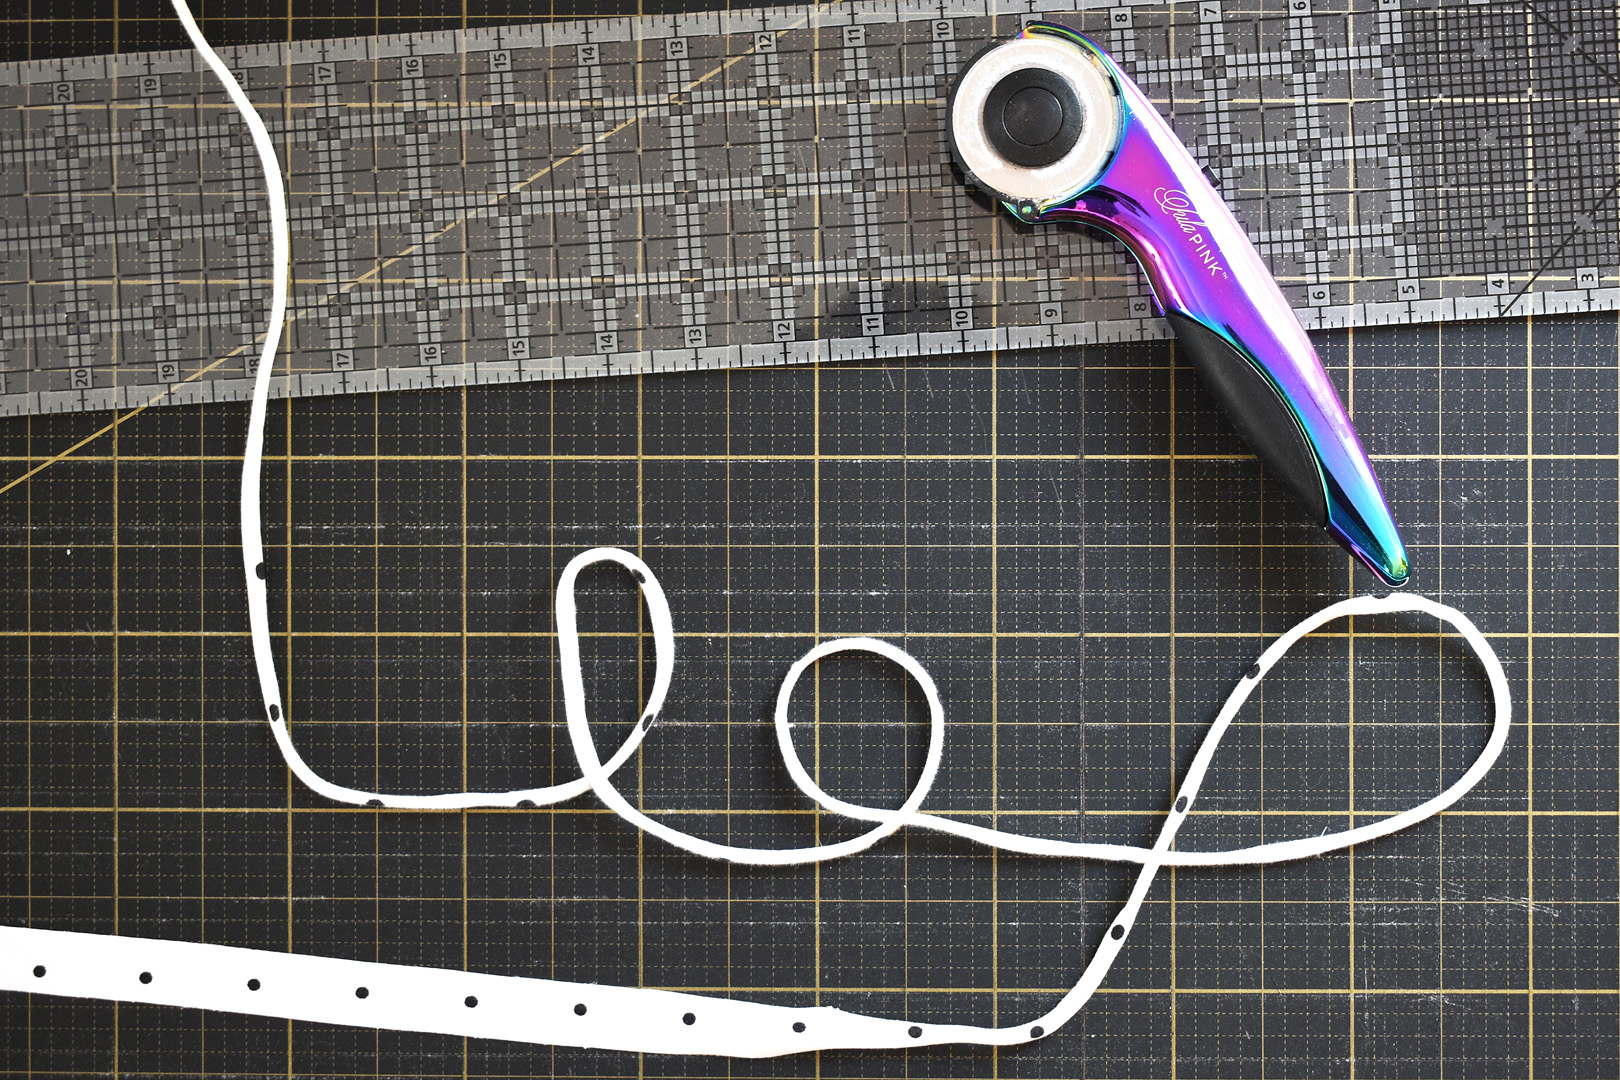
Pulling a cut tie tightly will cause the knit fabric to curl up into a piece of stretchy knit string. The tie will be longer than needed, and I usually leave the tie long until the person I’m making the mask for decides on a good length. Cut the extra off and tie a knot near the end.
Now to finish those masks!

Insert the elastic, hair ties, or knit tie into the folded over edges of the mask. If using the knit tie, make a loop in the center and place the edges in each side of the mask as shown.
Top stitch the sides of the mask, backstitching at the beginning and end of each side to create a strong stitch. Trim the threads and you have finished a fast fabric face mask! Try the mask on and secure the knit ties before cutting off the extra. I usually leave the ties long when giving them away with a note to the recipient to trim the ties to the desired length when wearing the mask.

Here’s a little demo below of how to wear a face mask with knit ties. These are GREAT for people (like me) who have a difficult time with elastic ties over the ears. The knit ties are definitely more comfortable for wearing a mask for long periods of time.
Used Products


What you might also like


3 comments on “Fast Face Mask Sewing Techniques”
-
-
Thank you for this video….question…..you state you are using Foot 1D yet it looks like you are using 97D. I am new to Bernina and slowly acquiring feet and would appreciate your thoughts on Foot 1D! I do have 97D which is great for 1/4″ and 1/8″ seams. I do have the accuquilt mask die and use it often though I have tried many other patterns as well. Love the idea of using knit ties!
-
Hello murf5048, you are correct! I am indeed using Patchwork foot #97D to sew masks. The foot was incorrectly listed in the text, and it’s been updated. I love this foot in particular for sewing masks because of the extra feed power of the Dual Feed, which helps when sewing over seams and that last step of sewing the casings. Happy stitching! – Erika
-
Leave a Reply
You must be logged in to post a comment.

Yes, batch sewing is great, once I make a prototype. Sometimes I forget and end of with a batch of useless things. I remember looking at the accuquilt die several months ago and thinking it was a bit expensive for such a limited design. There are just sOOOO many mask patterns out there for different circumstances! Thanks for the video.