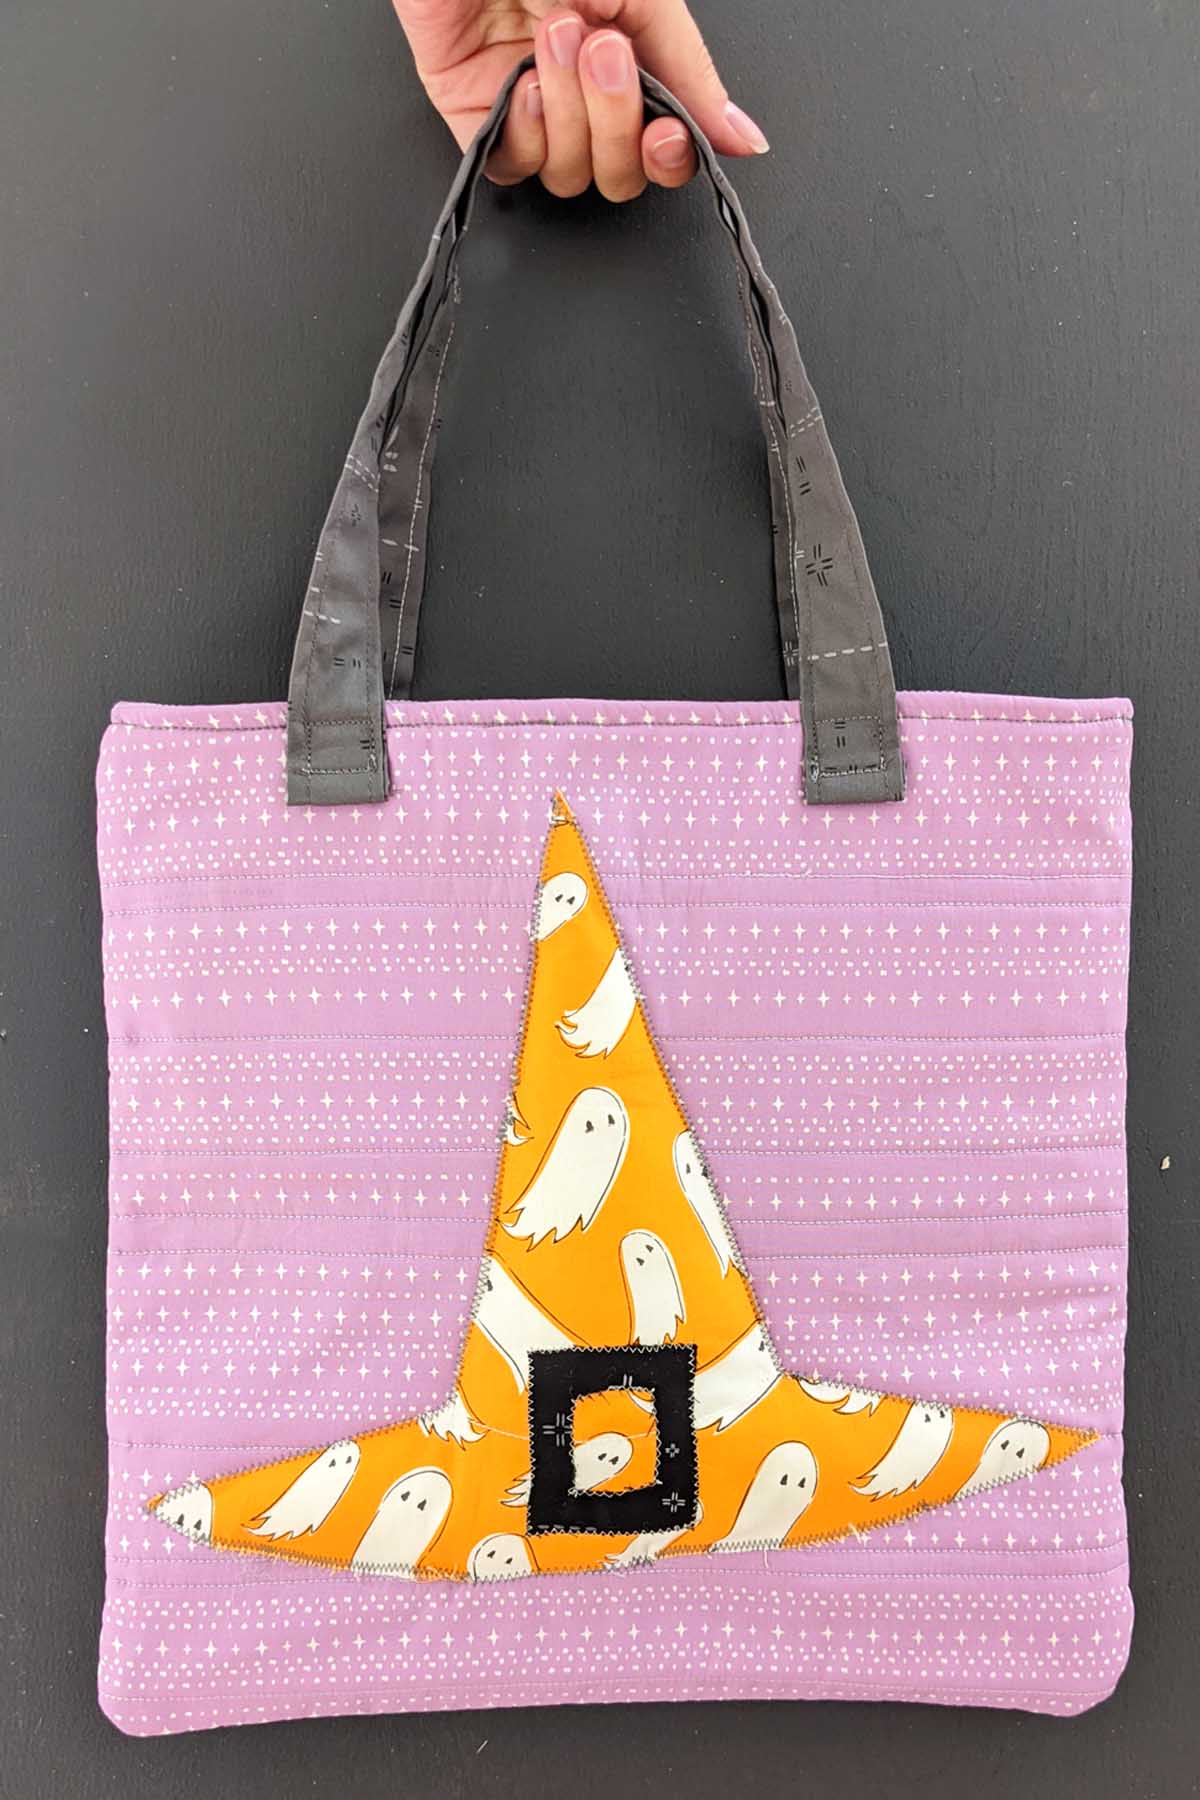
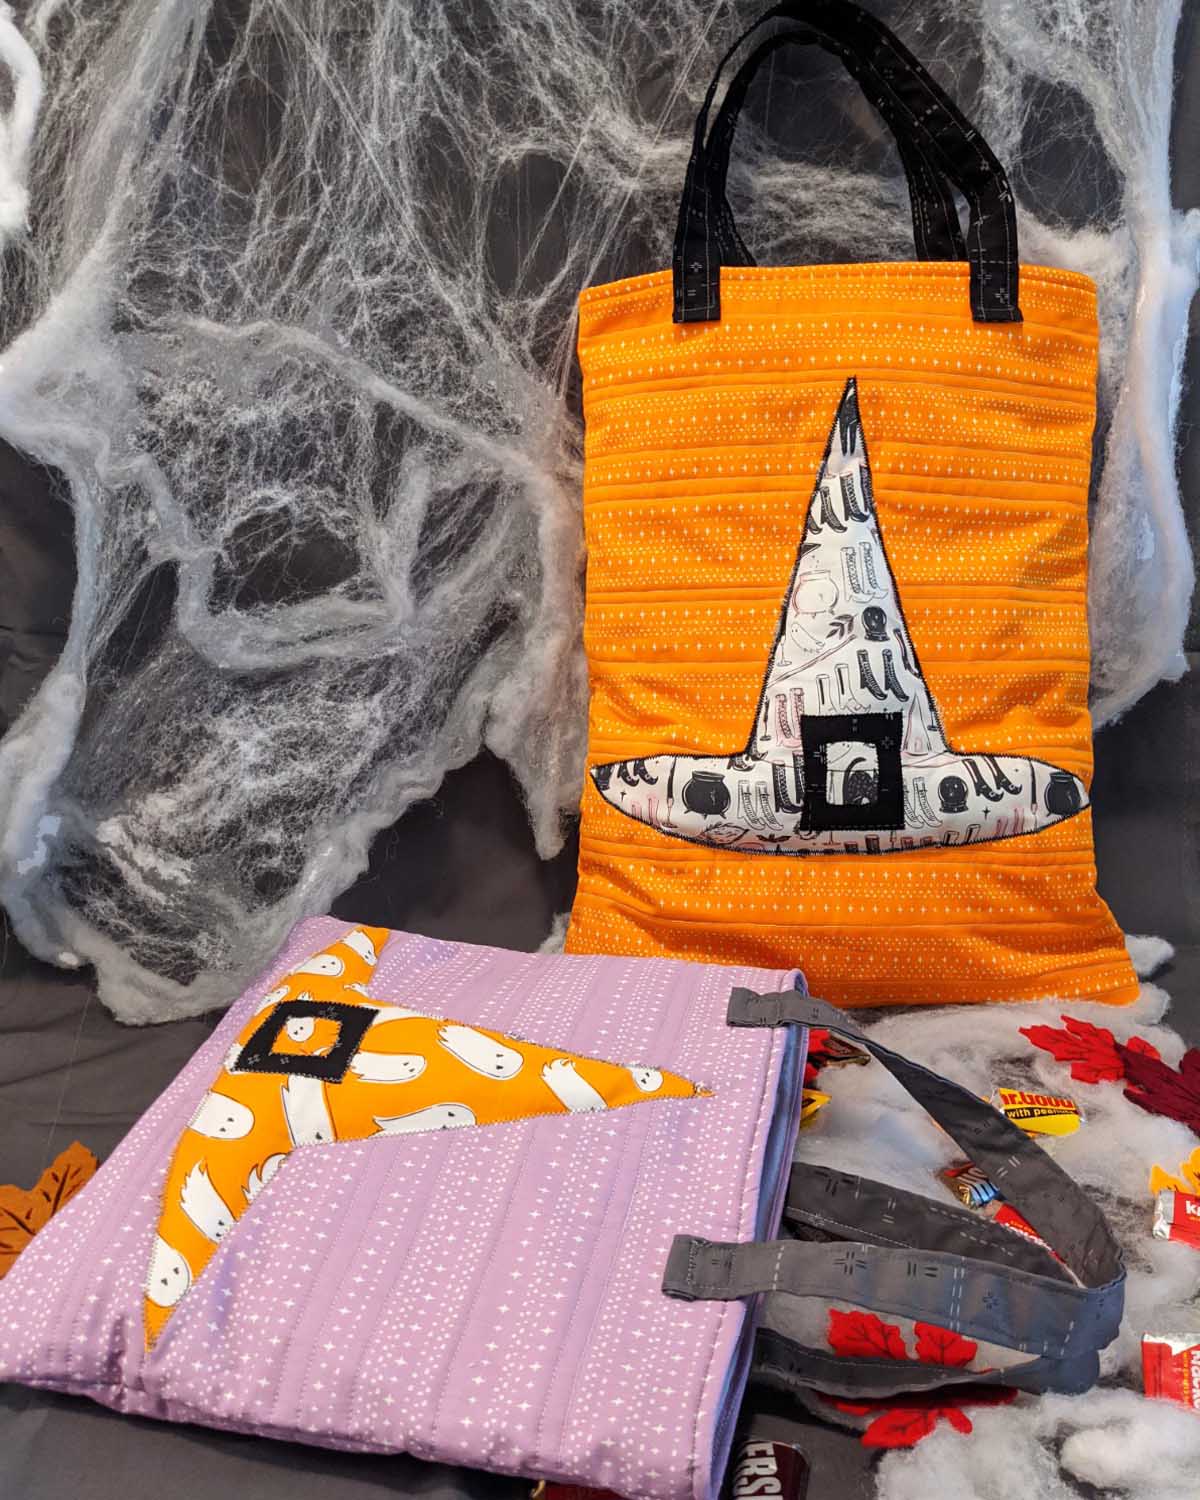
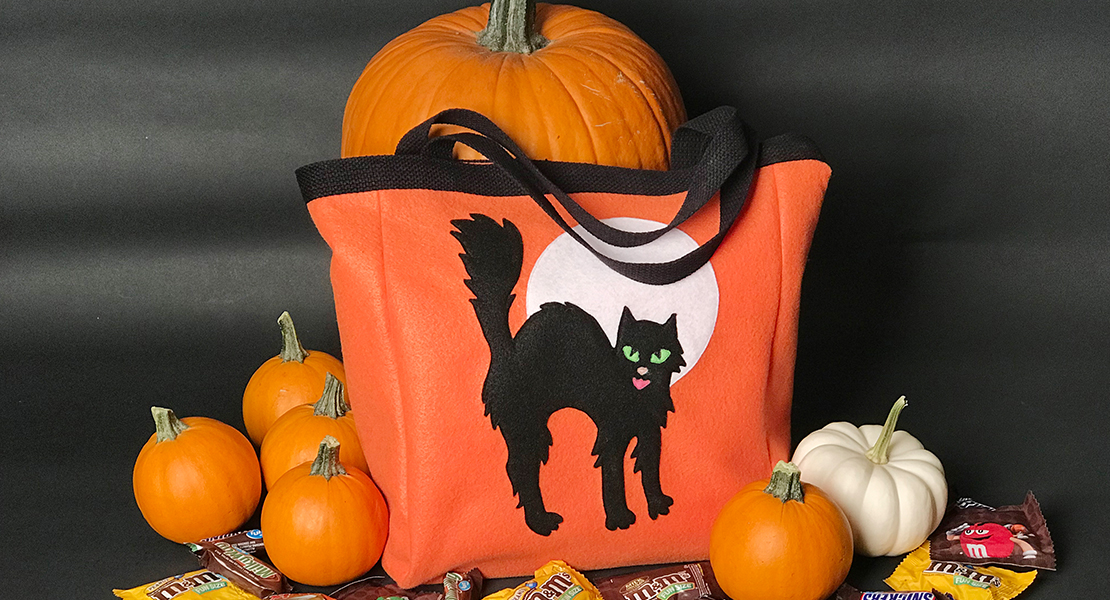
Halloween Totes with Downloadable Witch Hat Pattern

If you love Halloween as much as I do, then this project will be ideal for you. Halloween is just around the corner and we can get parents and children together for this trick-or-treat bag.
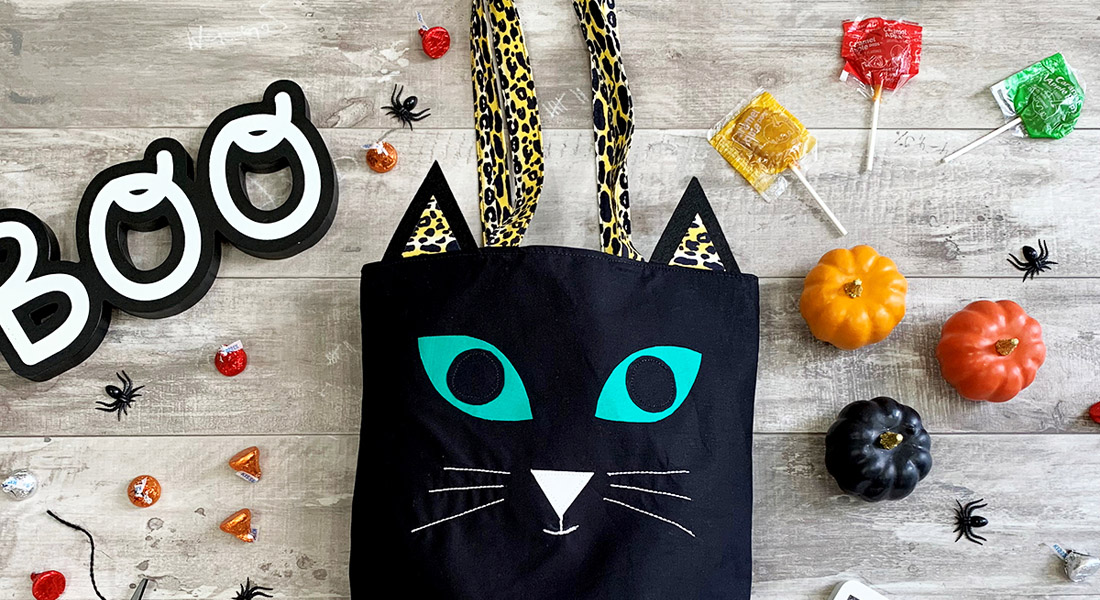
These mix and match totes will be filled with candies and memories for years and years to come.
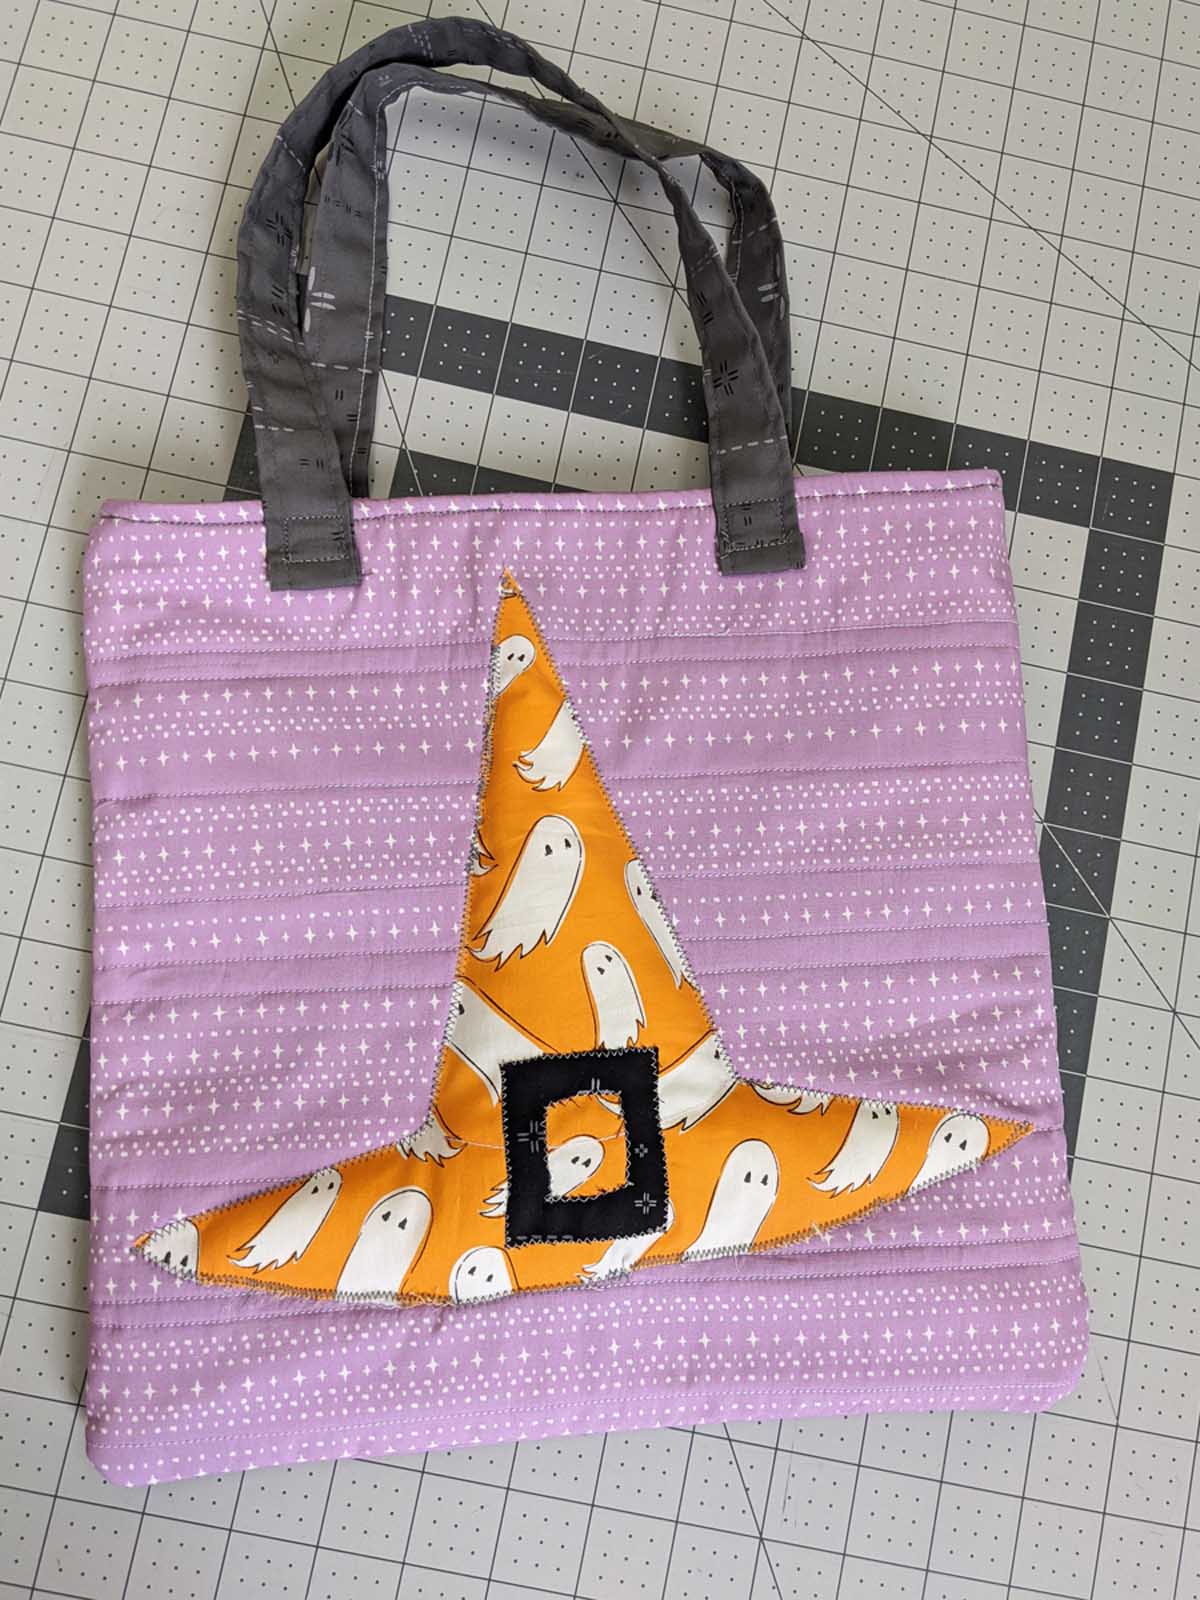
I decided to create these totes, using our Spooky and Sweet fabric from AGF studio collection, combined with AGF Decostitch fabric from our fabric blender collection to add that neutral touch to our bags. I added a three-dimensional witch hat applique to give a unique effect.
Hope you enjoy making this project as much as I did.

Materials to make both Trick-or-Treat totes
Fabric A: SNS-13001 5/8yd
Fabric B: SNS-13010 3/8yd
Fabric C: DSE-709 Fat Eighth
Fabric D: DSE-704 Fat Eighth
Fabric E: SNS-13011 Fat Quarter
Fabric F: SNS-13007 Fat Eighth
Lining Fabric:
Big tote: Fabric G: PE-457 5/8yd (suggested)
Small tote: Fabric H: PE-425 3/8yd (suggested)

Additional material needed:
One (1) 24” x 24” square of Batting for big tote.
One (1) 18” x 18” square of Batting for small tote.
Quilting and sewing thread.
Pillow stuffing.
Template for Download
Download the Witch hat template here.
Cutting Directions:
Two (2) 14 1/2’’ x 18 1/2’’ rectangles from fabric A.
Two (2) 12 1/2’’ x 12’’ rectangles from fabric B.
Two (2) 22’’ x 4’’ strips from fabric C (handles).
Two (2) 22’’ x 4’’ strips from fabric D (handles).
One (1) template 1 from fabric E.
One (1) template 2 from fabric F.
One (1) template 3 from fabric C.
One (1) template 4 from fabric C.
Two (2) 14 1/2’’ x 18 1/2’’ rectangles from fabric G (lining).
Two (2) 12 1/2’’ x 12’’ rectangles from fabric H (lining).
On this tutorial, I will be showing how to sew the smaller tote. Both have the same construction.
Step 1:
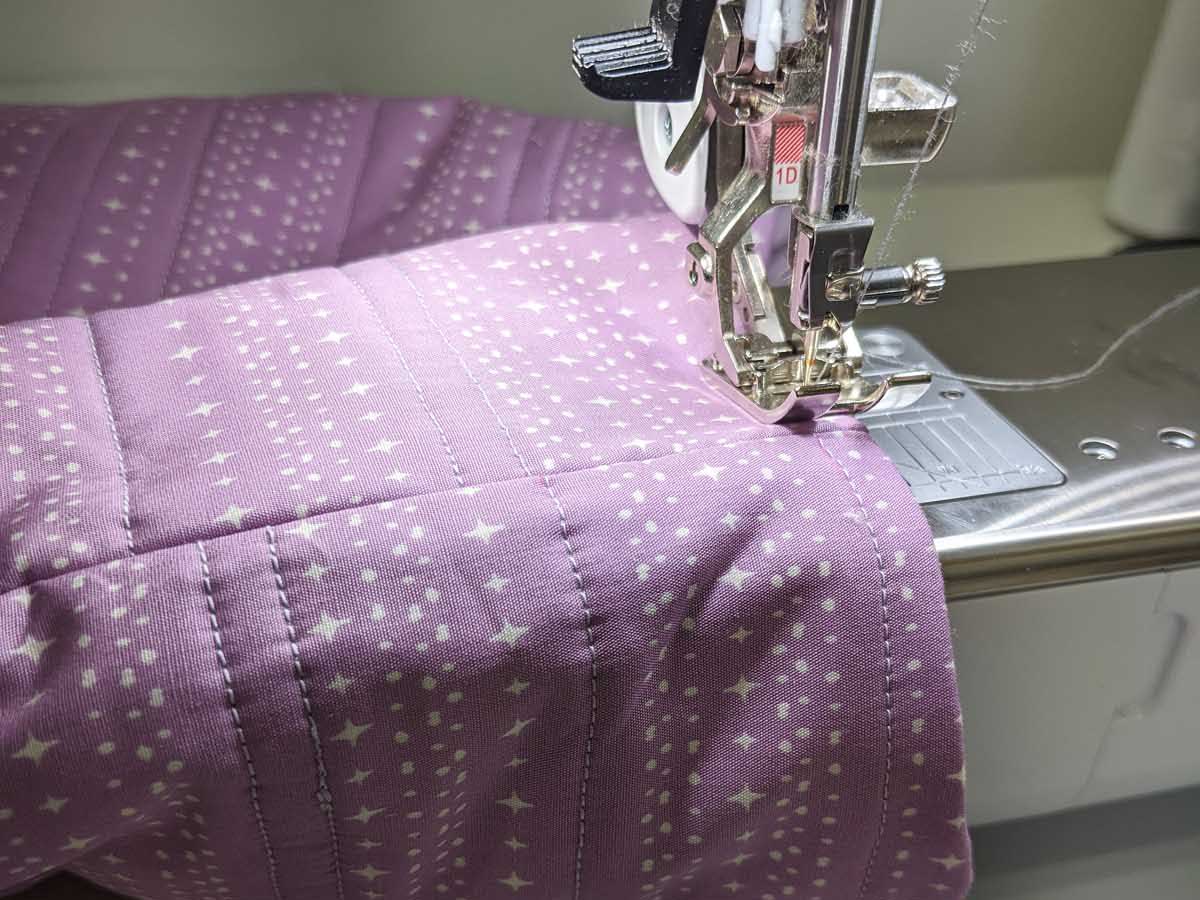
Take one 14 1/2’’ x 18 1/2’’ rectangle from fabric A and place one 24” x 24” batting piece on the wrong side of fabric A.
Pin your piece so you can start quilting and avoid the fabric from shifting.
For my personal choice of quilting motive, I decided to mark straight lines and sing the Reverse pattern foot #1D I was able to make perfect stitch lines.
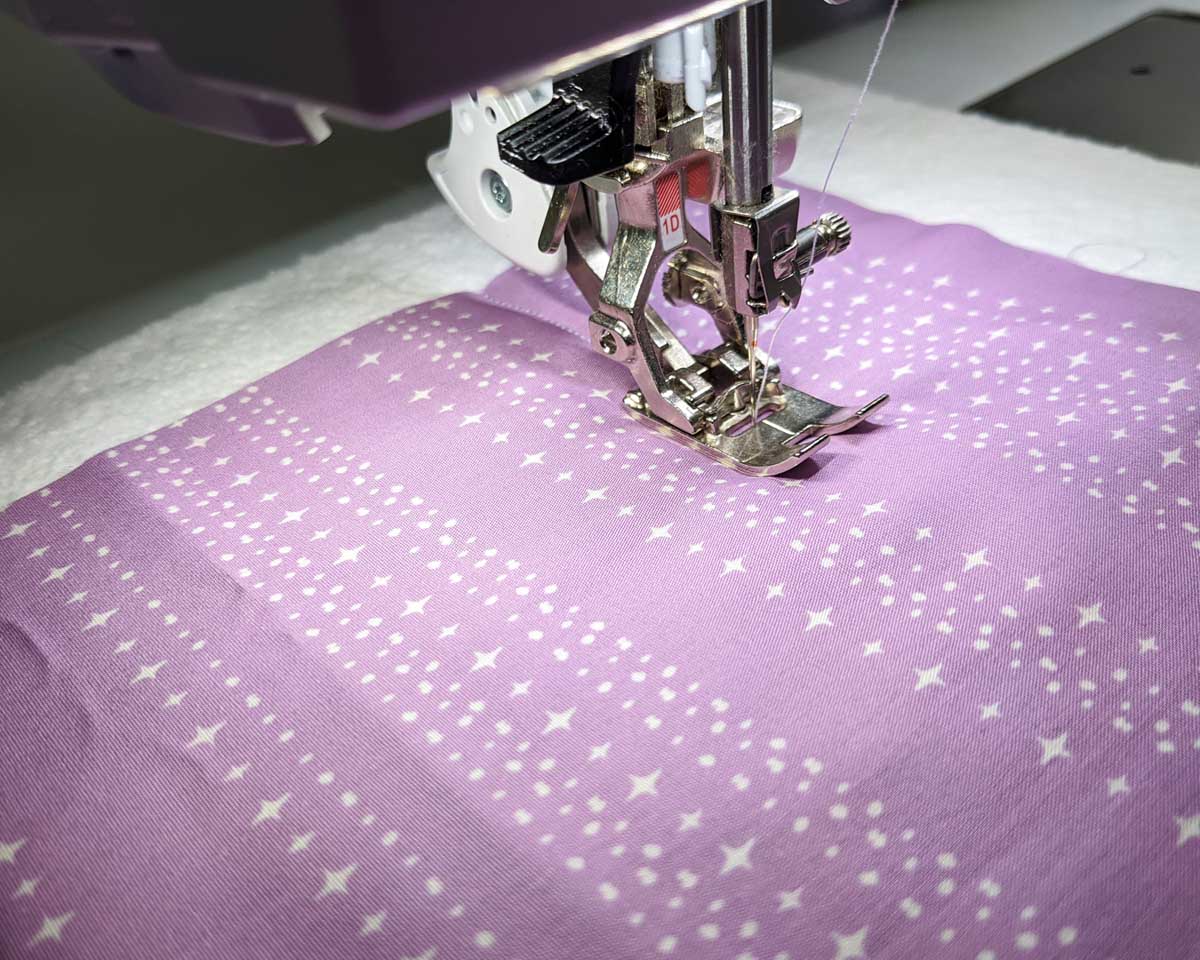
Repeat the same for the other 14 1/2’’ x 18 1/2’’ rectangle from fabric A.
Now that you have your front and back of the tote quilted, trim excess fabric and press.

Step 2:
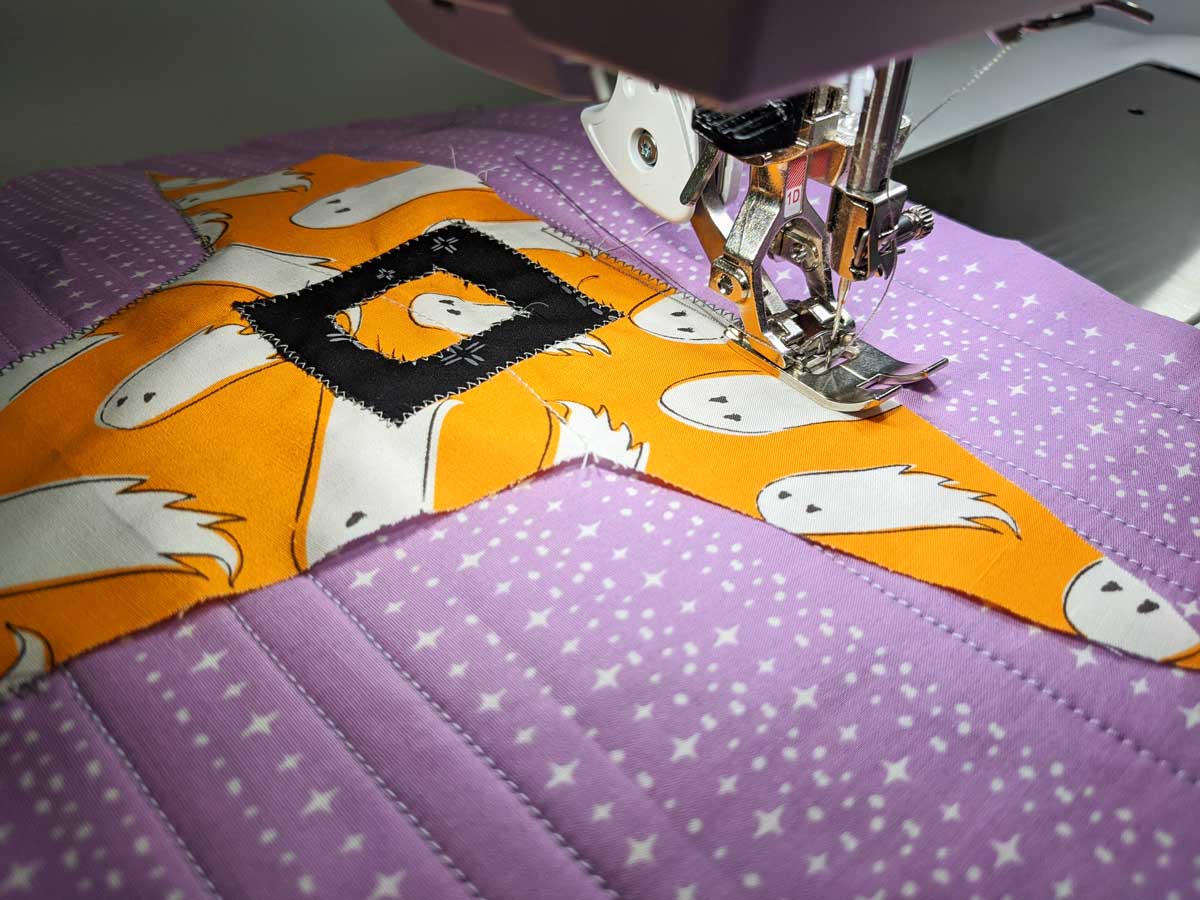
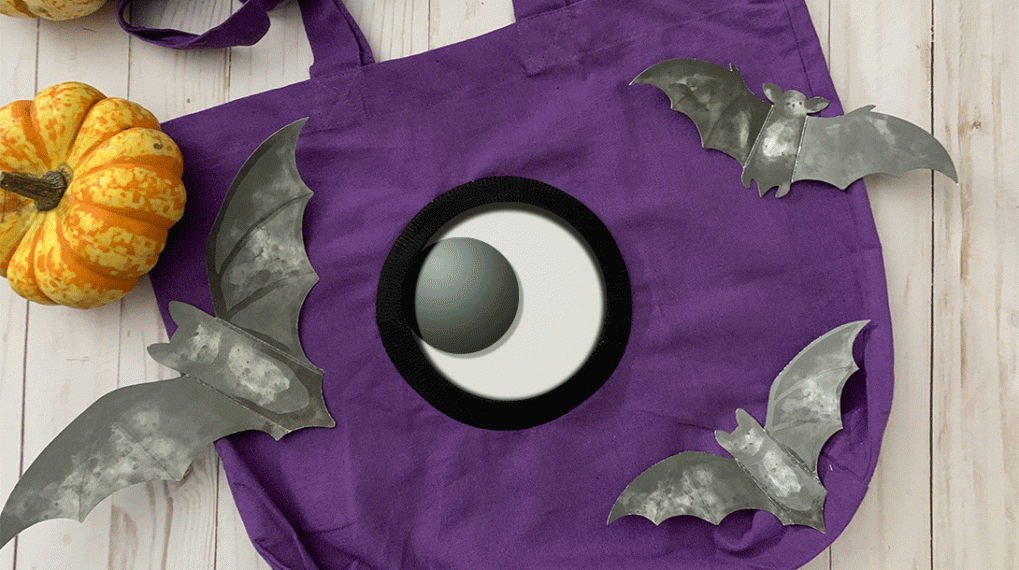
Cut out your Witch’s template 2 using fabric F and template 4 using fabric C.
For the witch’s hat, I wanted to sew a little curved single stitch to create the crease effect on the hat, so I decided to mark a line with a water soluble pen and too a small piece of lightweight fusible on the wrong side of the fabric. Trim excess of fusible.
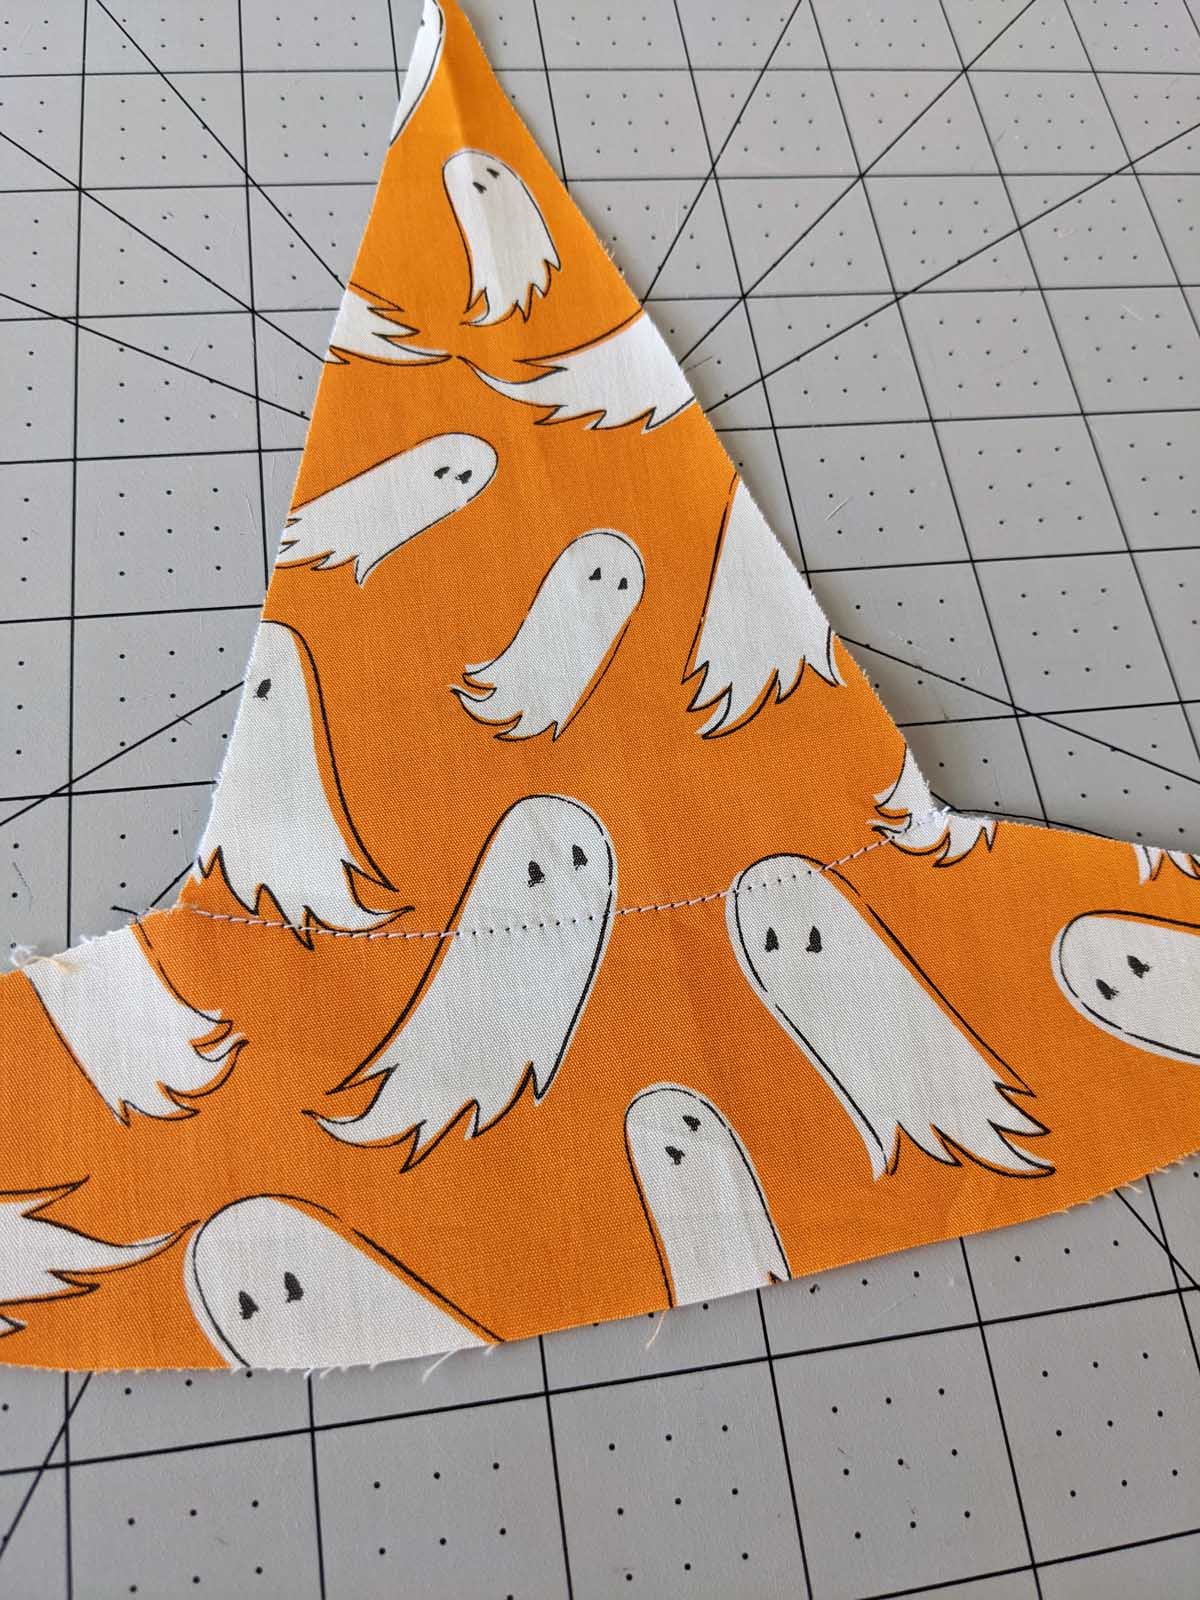
Take template 4 and place it on top of template 2. After you place it centered, pin your piece and switch your machine setting to #2 zig zag stitch and stitch your edges. I reduced the stitching to an 2.3 with a, 1.30 length. You can set up your zig zag to your desired setting.
Step 3:
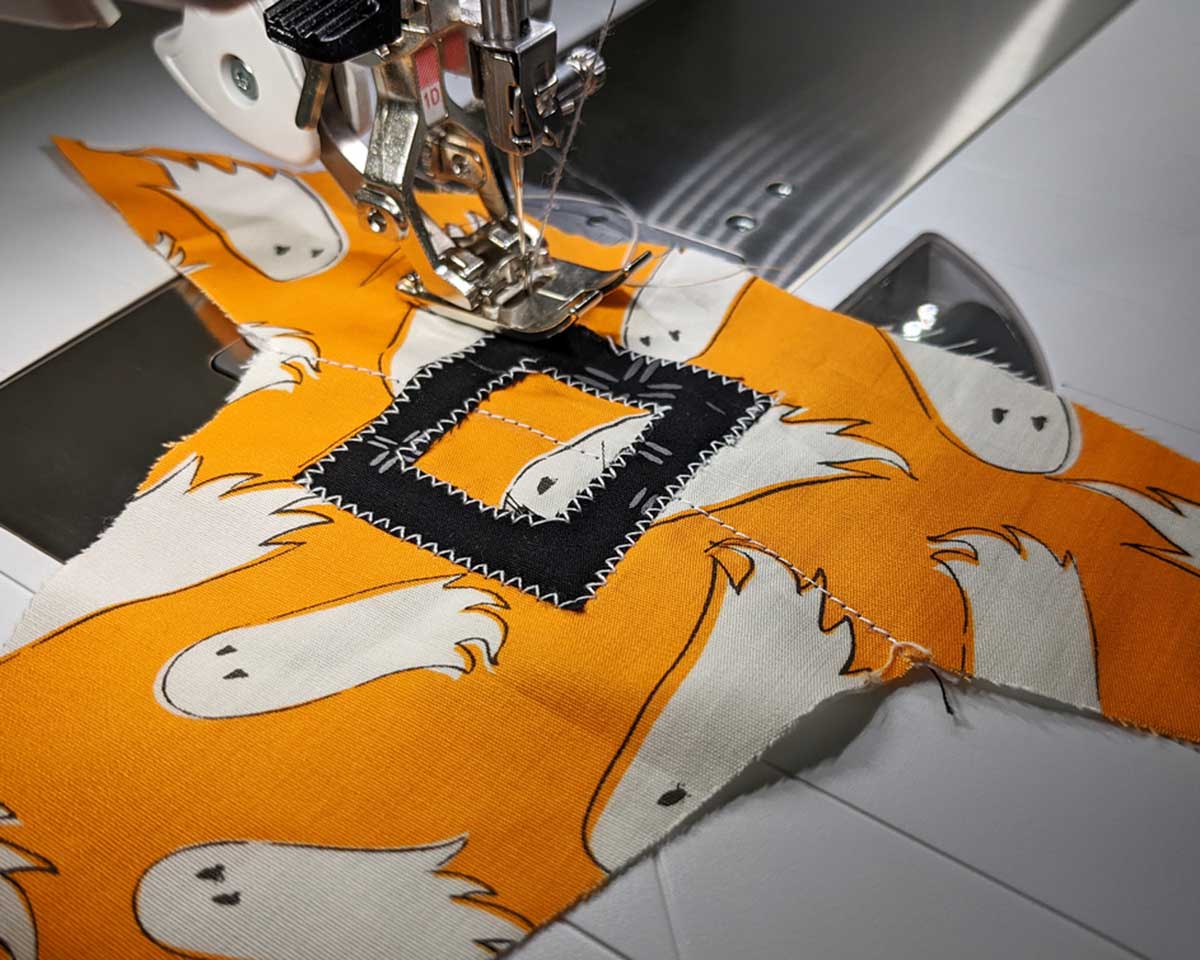
Place your witch’s hat piece on top of one of fabric A rectangles. Place about 1 1/2” from the top, 2 1/4” from the bottom and about 1” from the sides. Once you find your center, pin your piece.
Zig zag stitch all around, leaving about 3-4 inches of opening.
Insert pillow stuffing. Insert just about the right amount, since we don’t want for the hat to look so bulky.
Close your opening.

Step 4:
Place the front and back of your tote right sides facing together and pin all around.
Stitch all three sides at 1/4” seam allowance, leaving the top part unsewn.

Step 5:
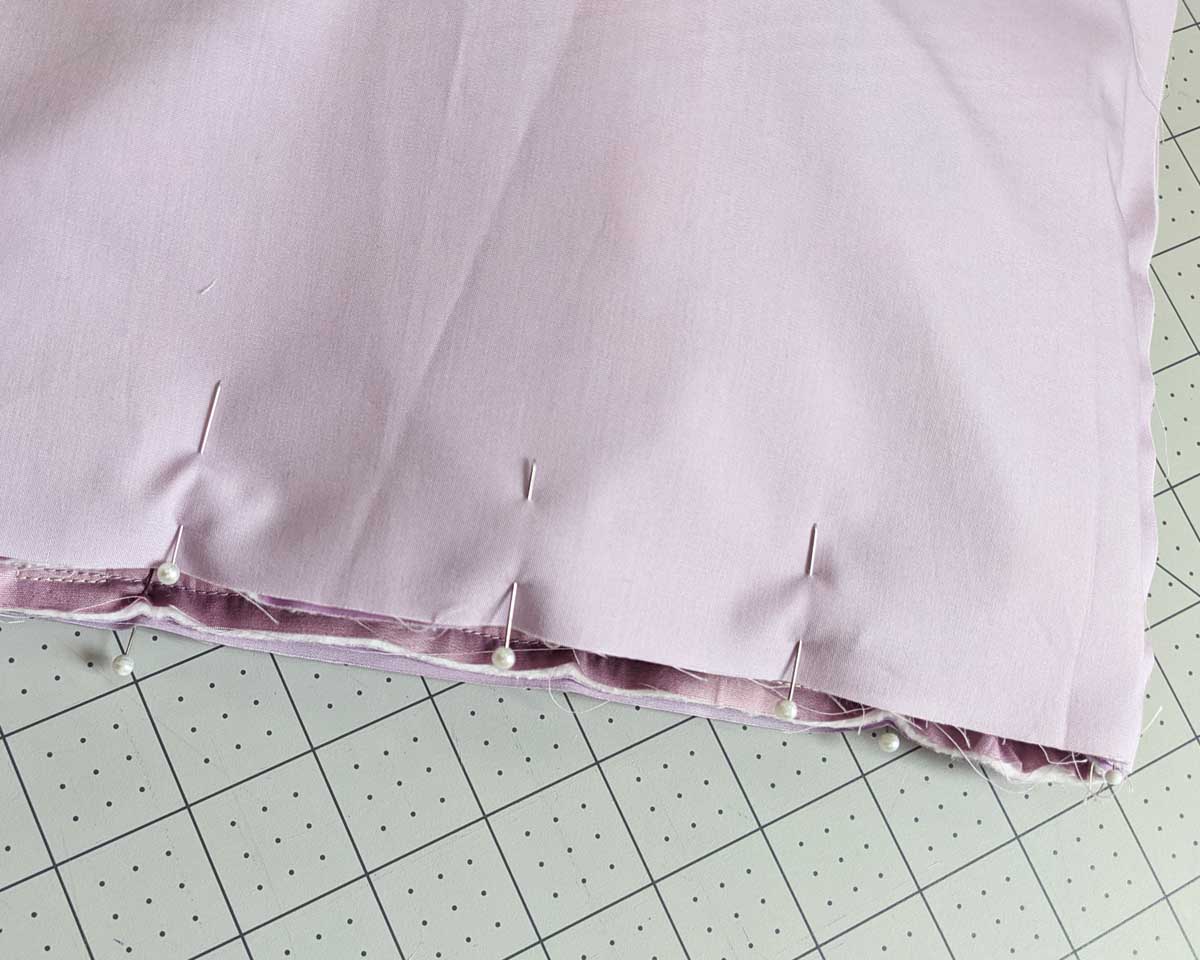
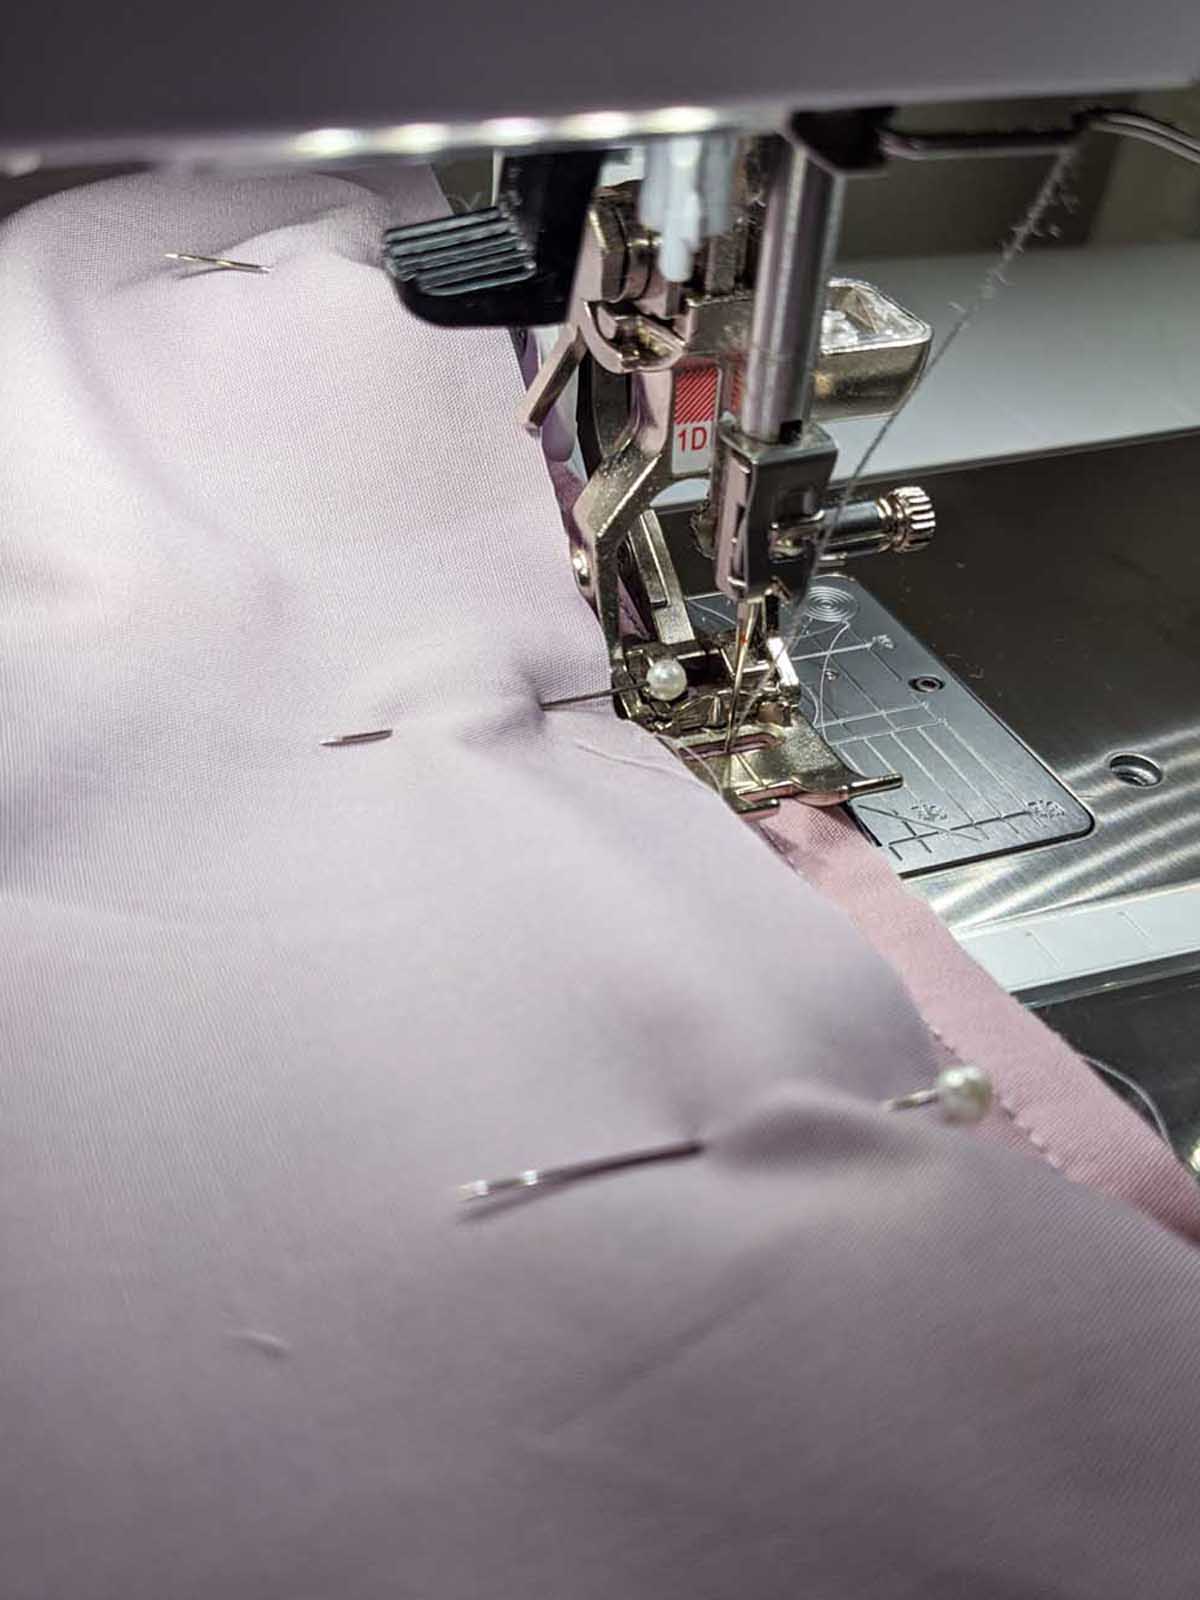
Take (2) 14 1/2’’ x 18 1/2’’ rectangles from fabric G, which will be your lining pieces and place them right sides facing pining all around.

Stitch all three sides at 1/4” seam allowance, leaving the top unsewn. Leaving about 3-4 inches of opening on one side in order to turn your tote bag inside out.

Step 6:
Insert the main tote to the lining piece, right sides facing each other, making sure to match your seams.
Pin all around.
Stitch the top of your tote at a 1/4” seam allowance.
Pull your tote bag through the opening of the lining and hand stitch or machine stitch the opening.
Insert the lining in the tote and press carefully the top edge.
Step 7:
Edge stitch at about 1/8” the top of the bag to secure the lining with the main tote piece. You can remove the free-arm table of your machine to sew more comfortably and be able to rotate your bag as you sew.
Step 8:
To create your handles, take one 22” x 4” strip from fabric D and fold the strip in half length wise to create a crease in the center.
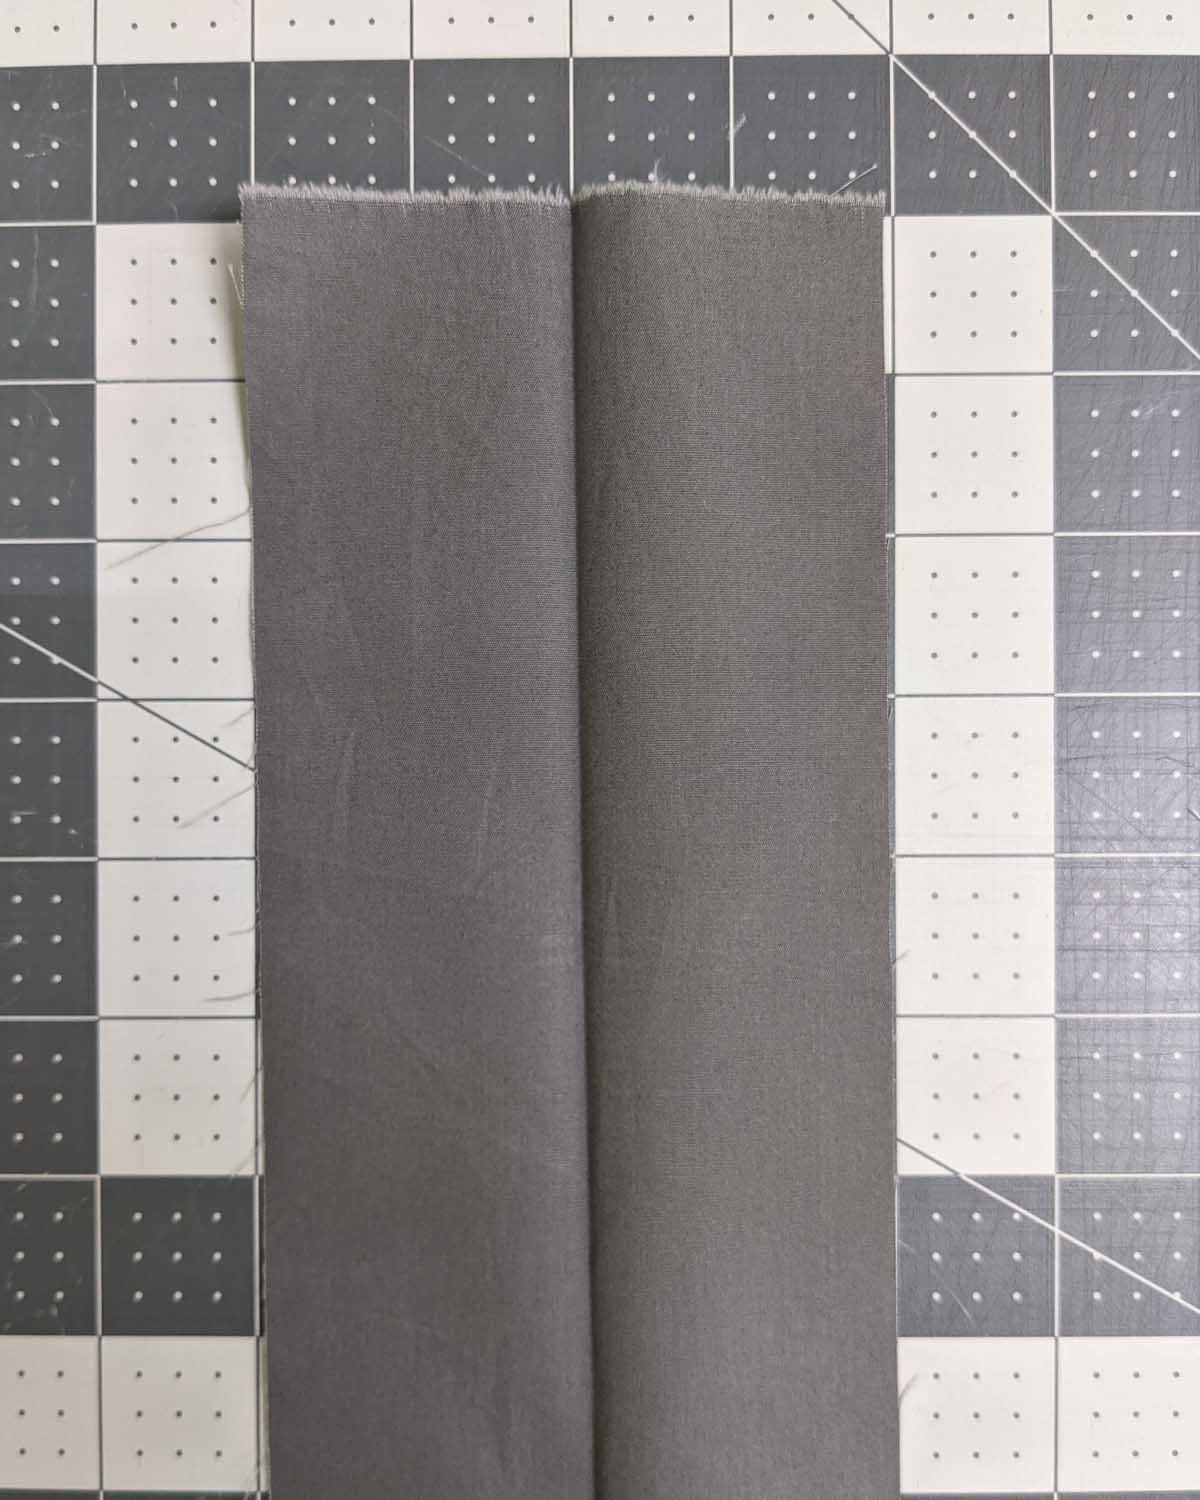
Open the strip and fold the edges towards the center crease. Fold the folded edges.
Stitch right on the edge and then sew at the other side of the handle piece. Using the Reverse pattern foot #1D I was able to make perfect stitch line.

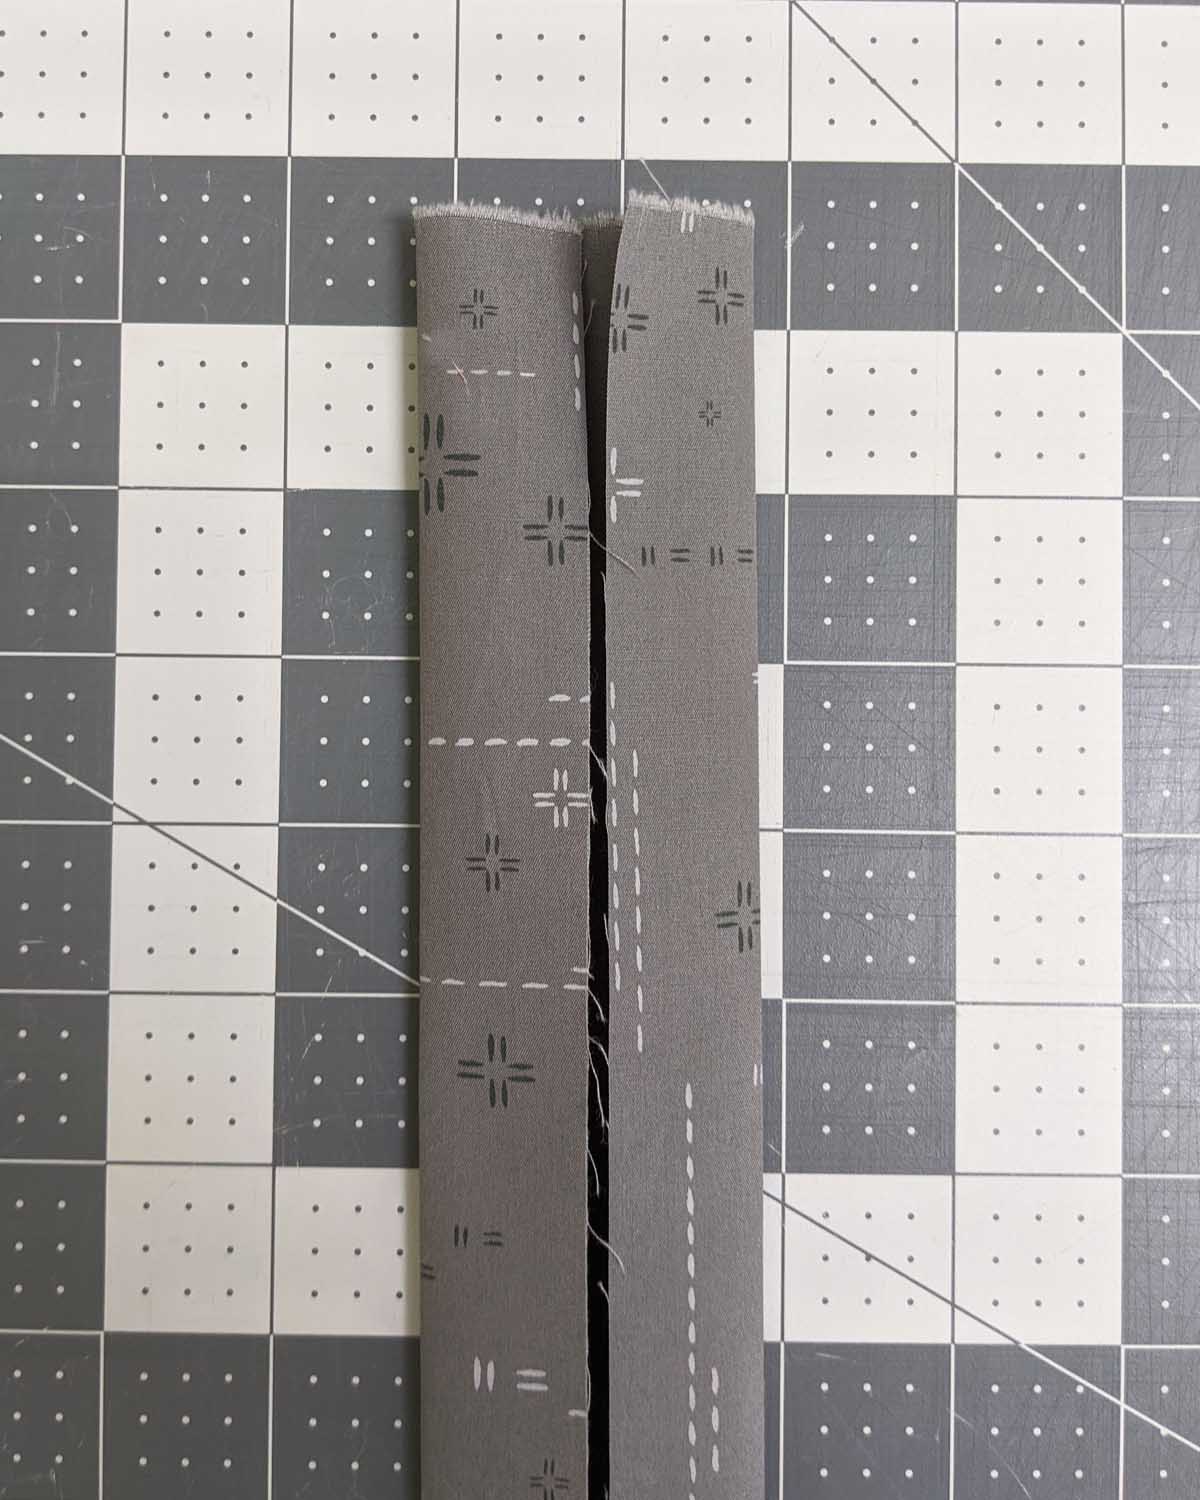
Repeat the same for the other 22” x 4” strip from fabric D.
Then, fold your raw edges twice and edge stitch.
Step 9:
Take your front piece and measure from the top down 1” and from the side about 2 1/2” and pin one of the handles.
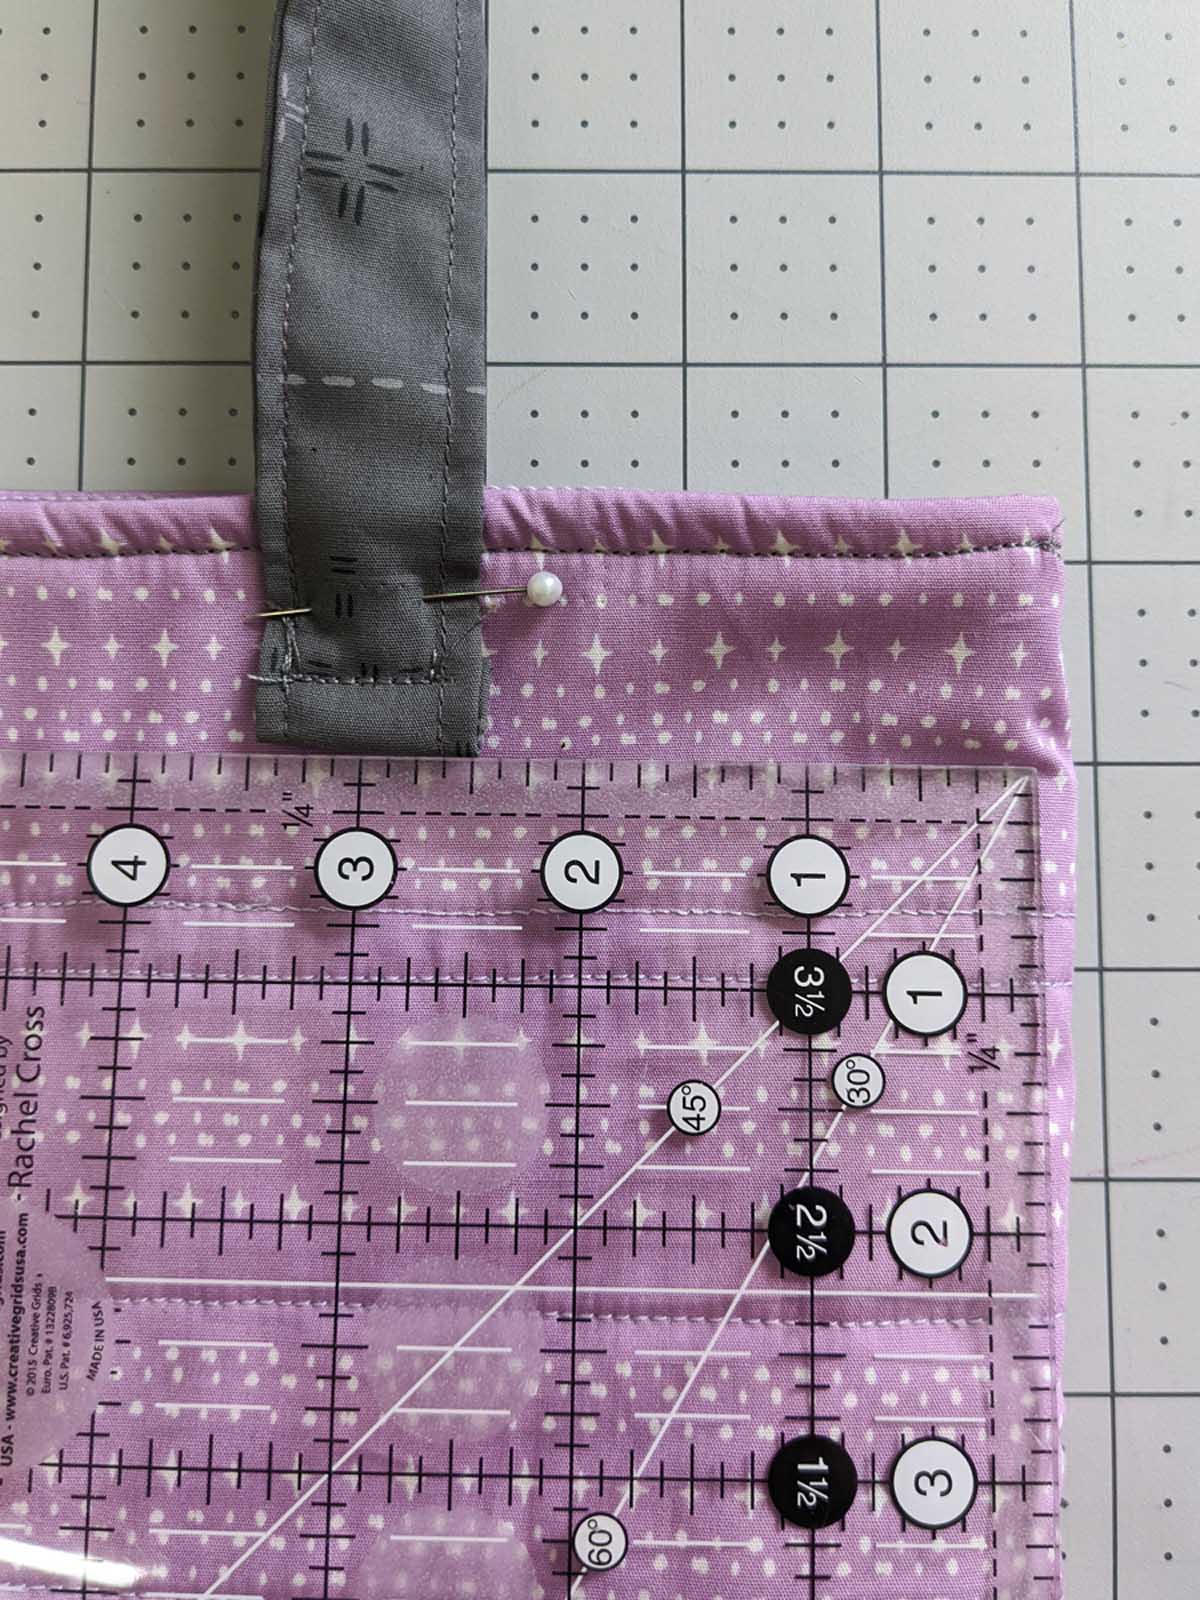
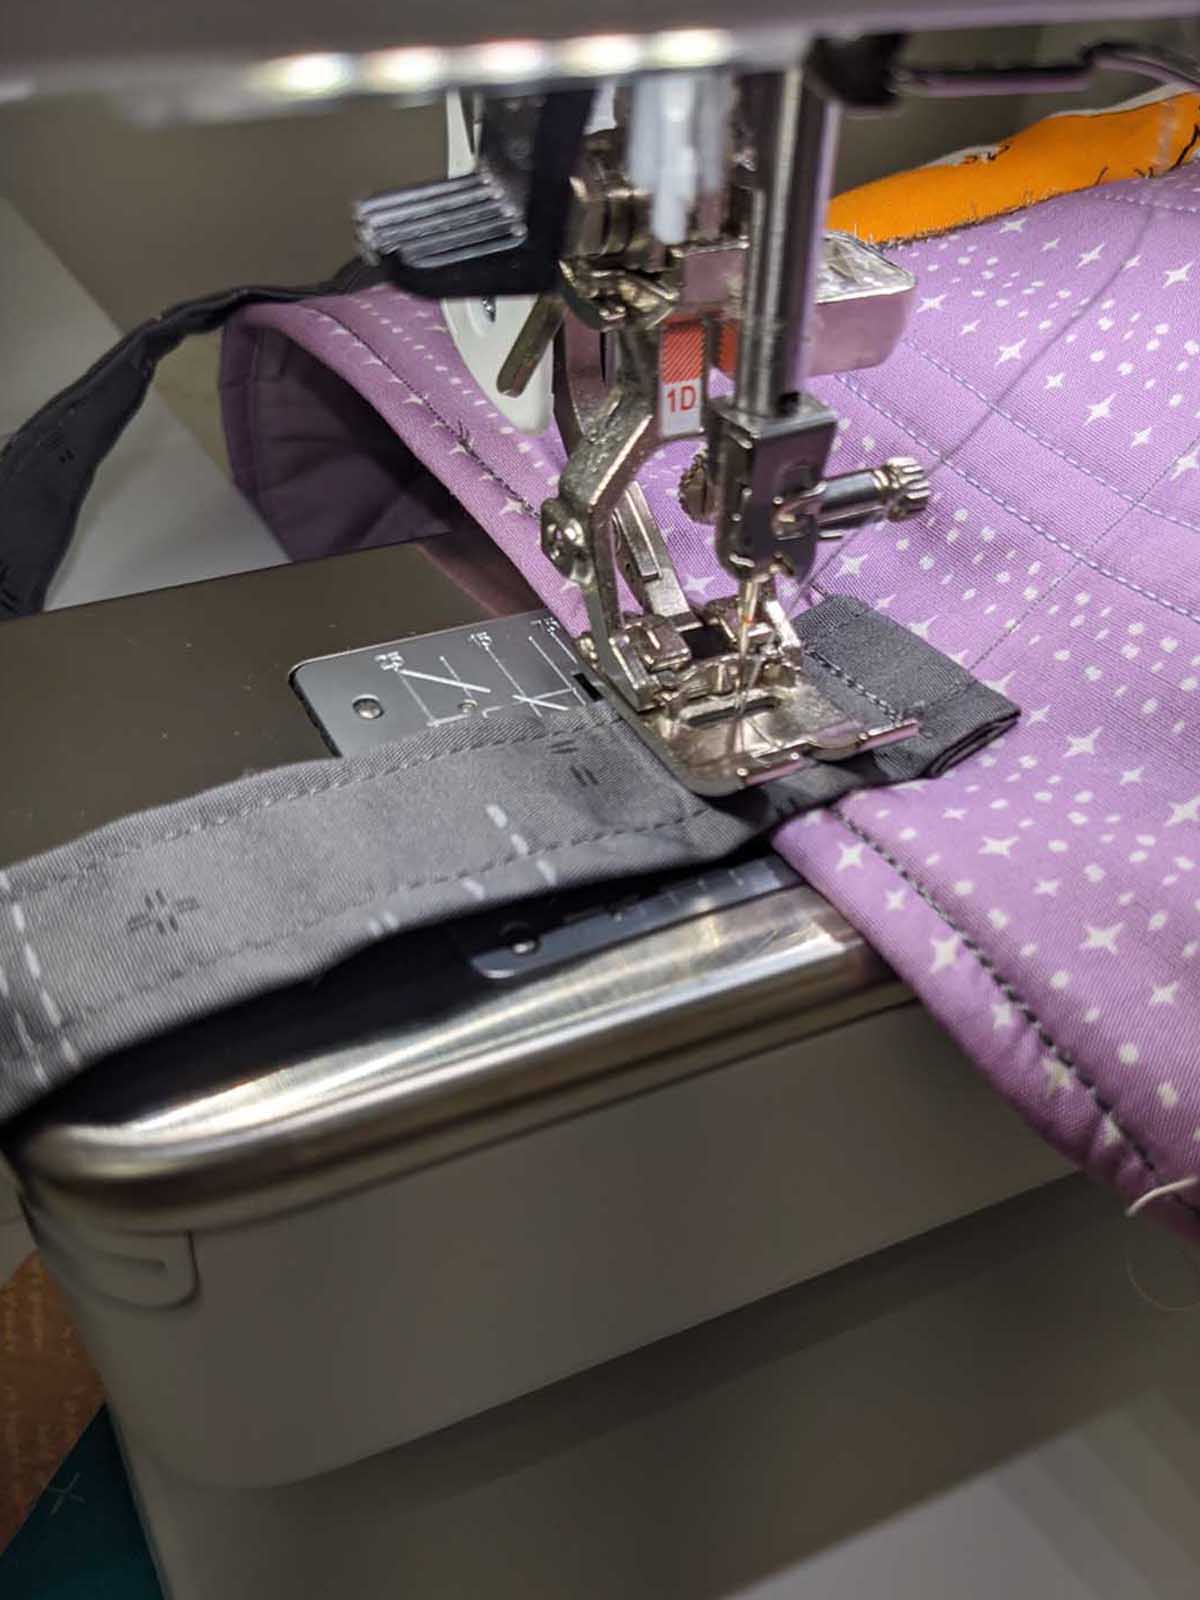
Sew a 7/8”square to secure the handles with the tote.
Repeat the same for the back side of the tote and your done!
Repeat the same instructions for the bigger tote and enjoy your Trick or Treat totes!
Happy Halloween!
Used Products


What you might also like


3 comments on “Halloween Totes with Downloadable Witch Hat Pattern”
-
-
Today is Halloween. Happy Halloween!!!
It was fun to see today in the market kids wearing their costumes. I made sure I told each one I liked their costume.
-
-
Your Halloween bags are so cute! Thank you for the tutorial and for the witch hat template
Leave a Reply
You must be logged in to post a comment.

this post just made me sad 🙁 there will be no trick or treating in my area this year. perhaps instead i will make some halloween decorations – a halloween flag or something festive that can be enjoyed by people driving by.