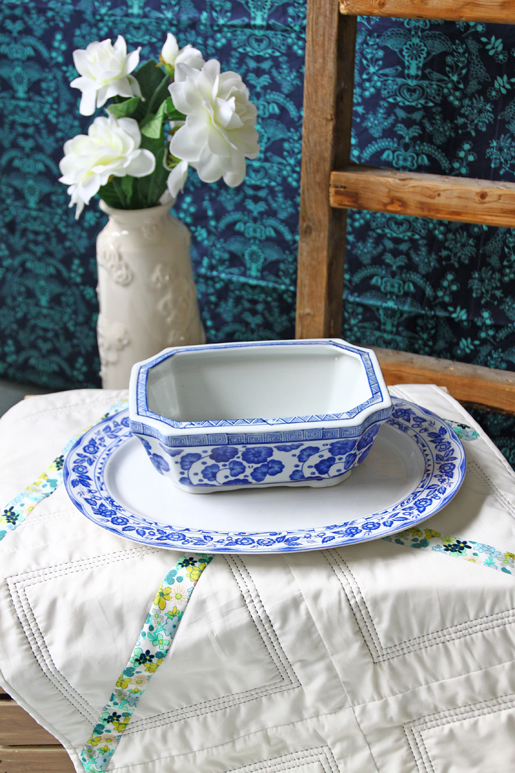
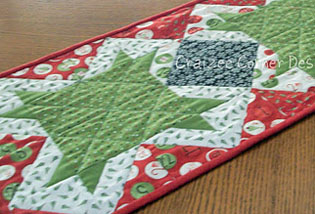
DIY Bluework Revival Table Runner
Antique quilting meets modern method. We all cherish hand-quilted antiques but we don’t always have the time to honor this wonderful tradition. Luckily, there is a faster way! Recreate the traditional look of bluework with a hand-look stitch on your sewing machine. Better yet, use the “irregular” version of the stitch if it’s available on your machine.
Revive tradition and create the heirlooms of tomorrow.
Supplies
- 2 yards of solid white fabric (Art Gallery Fabrics Pure Elements 408, “White Linen”)
- 1/4 yard of a small floral print (Carnaby Street by Pat Bravo, “Ladylike Green Tea”)
- One 25ʺ x 45ʺ rectangle of white cotton batting
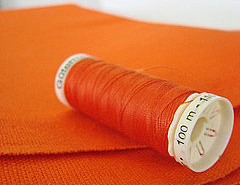
- Contrasting thread (Aurifil Mako 40/2, #2785, dark blue)
- Monofilament thread
- Rotary cutter and mat
- Clear acrylic gridded ruler
- Wash-out fabric marker
- Safety pins
- All-purpose presser foot (BERNINA Reverse Pattern Foot #1/1C)
- Walking foot (BERNINA Walking Foot #50, or BERNINA Reverse Pattern Foot #1D with Dual Feed engaged)
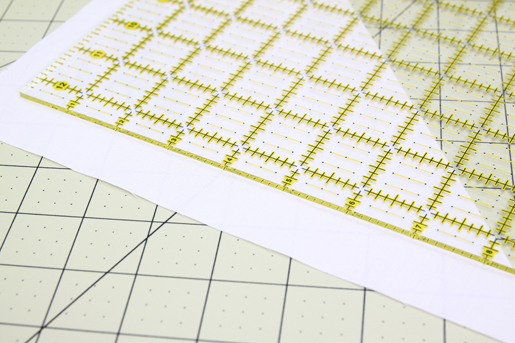
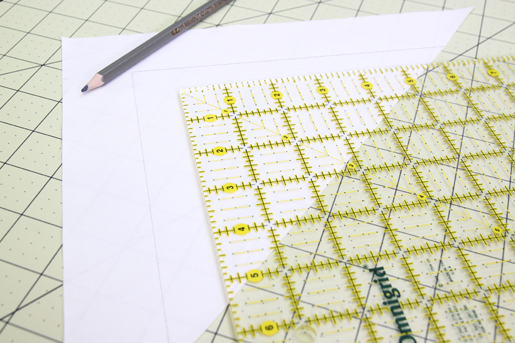
step 1) Cut the fabric
Cut the following:
- Eight 10-1/4ʺ squares of solid white
- Sub-cut once diagonally to make 16 triangles
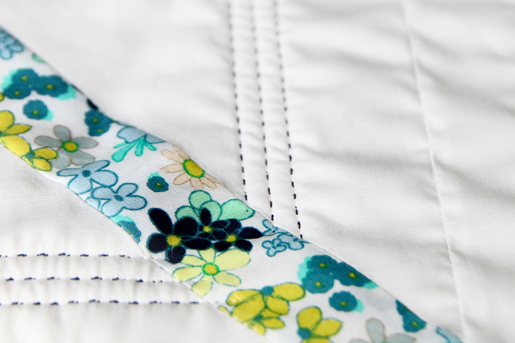
- Eight 1-1/2ʺ x 16ʺ strips of floral print
- One 25” x 45” rectangle of solid white
- One 25” x 45” of batting
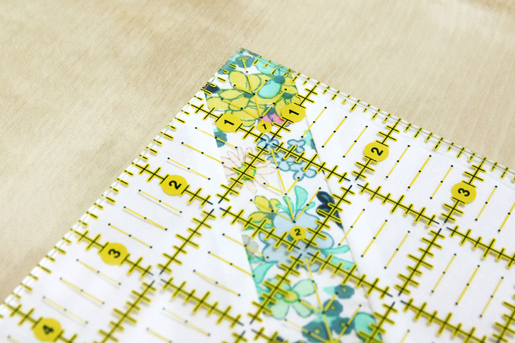
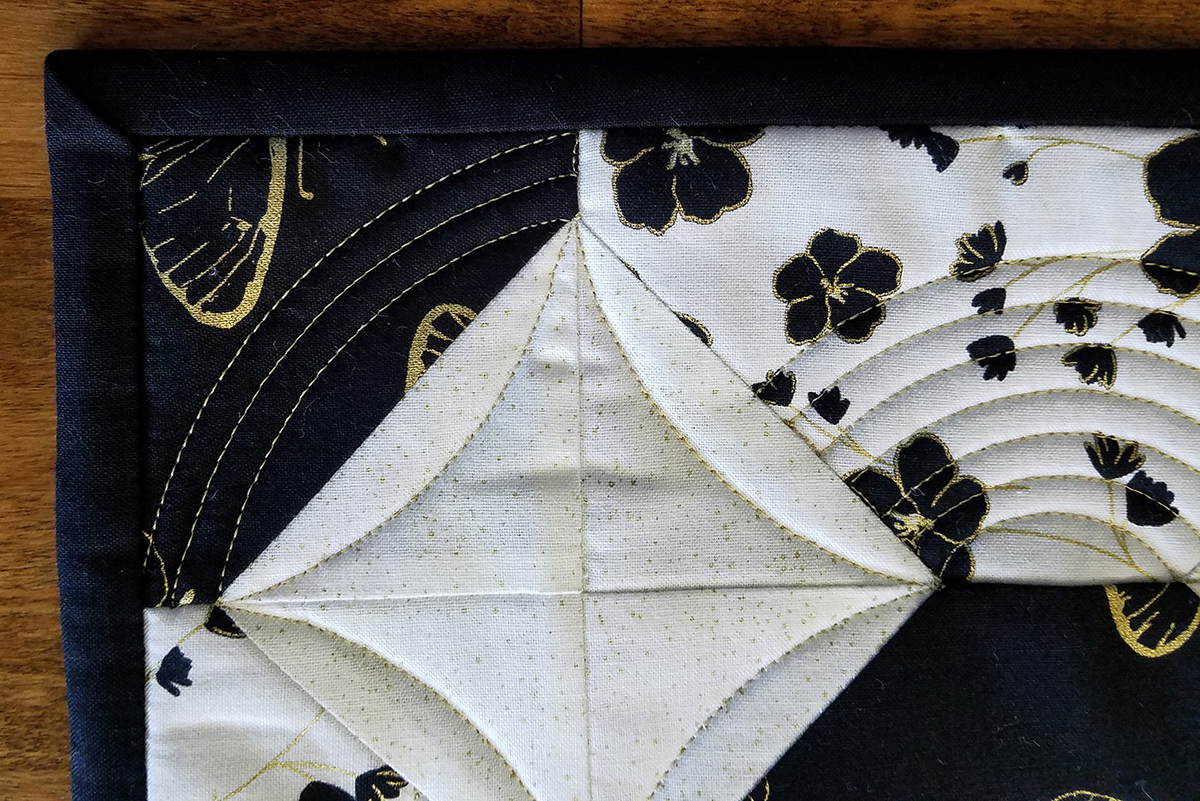
step 2) Mark the triangles.
On one large triangle, use a washout fabric marker to draw a line 1-1/2ʺ from one short side.
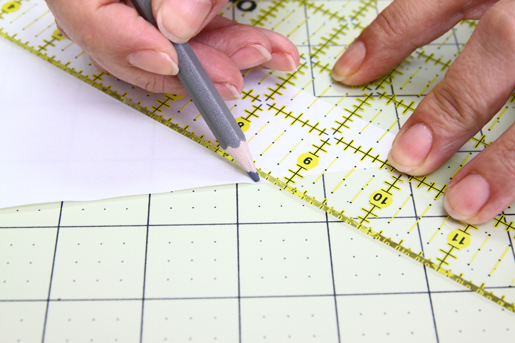
Repeat, drawing a line 1-1/2ʺ from the other short side of the triangle.
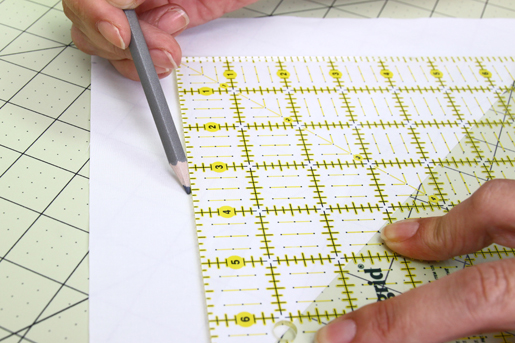
Draw two more lines on each side, spacing them 1/4ʺ apart.
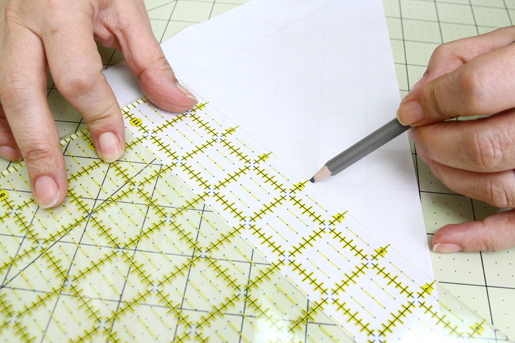
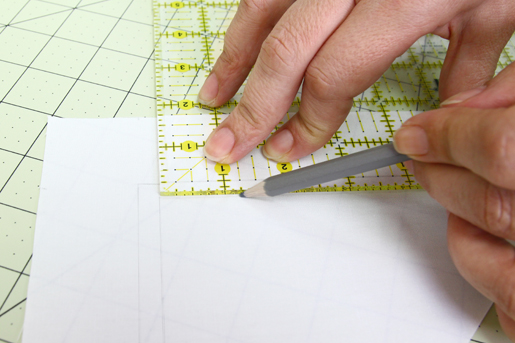
Repeat for each triangle.
Tip: For a more irregular, hand-stitched look, vary the amount of space between the lines.
step 3) Piece the blocks.
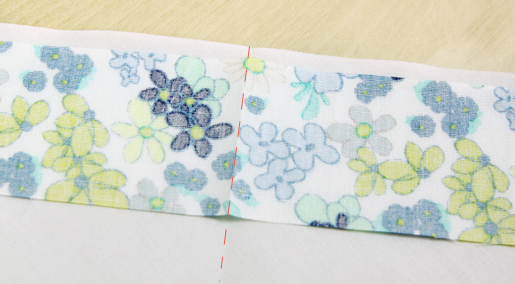
Take two marked triangles and one floral print strip.
Fold the strip in half; finger-press to mark the center.
Fold each triangle in half; finger-press to mark the centers.
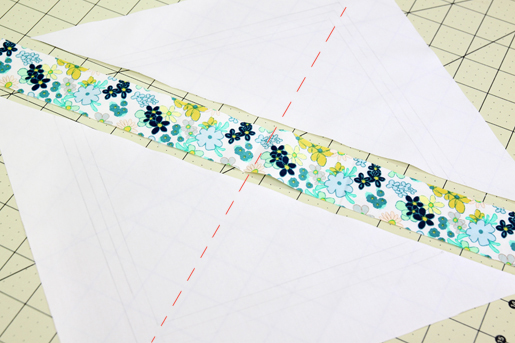
Pin the strip right sides together with one triangle, matching the creased centers and aligning the raw edges.
Stitch the strip to the triangle.
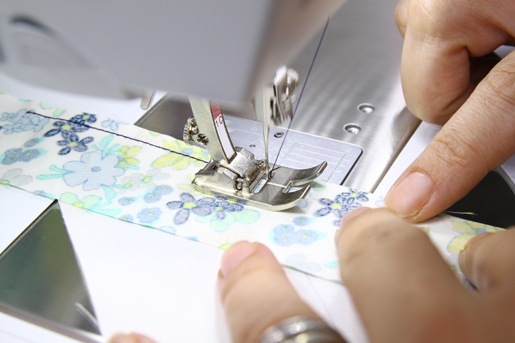
Repeat, stitching a second triangle to the opposite edge of the print strip, matching the creases and aligning the raw edges.
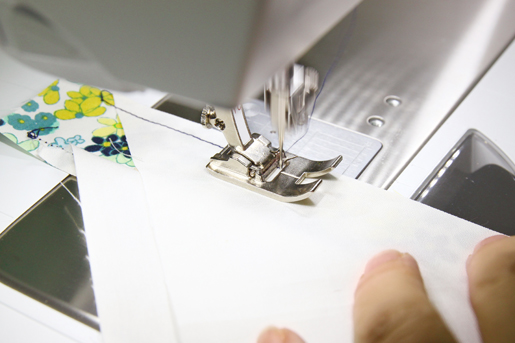
Using the rotary cutter and square ruler, trim the excess fabric from both ends of the print strip.
Repeat for the remaining pieced squares.
step 4) Assemble the top.
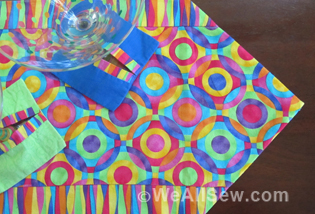
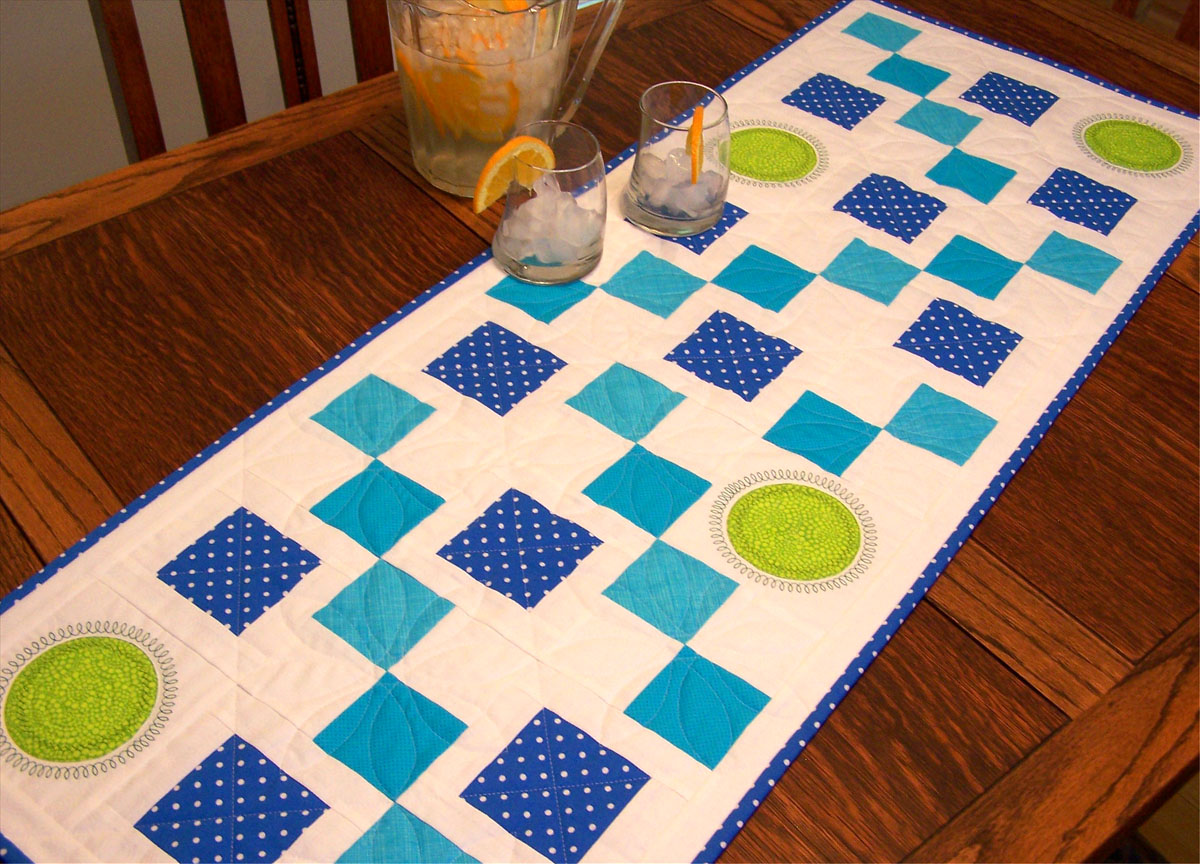
Using your design wall (or a large flat surface), play with the placement of the blocks, creating a pattern you like. I arranged mine as shown in the photo.

Stitch the blocks together using a 1/4ʺ-wide seam allowance.
Give the top a good press with steam.
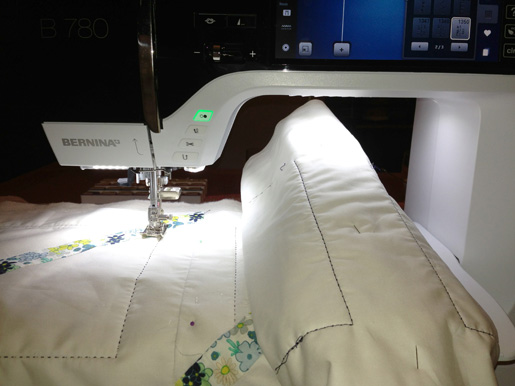
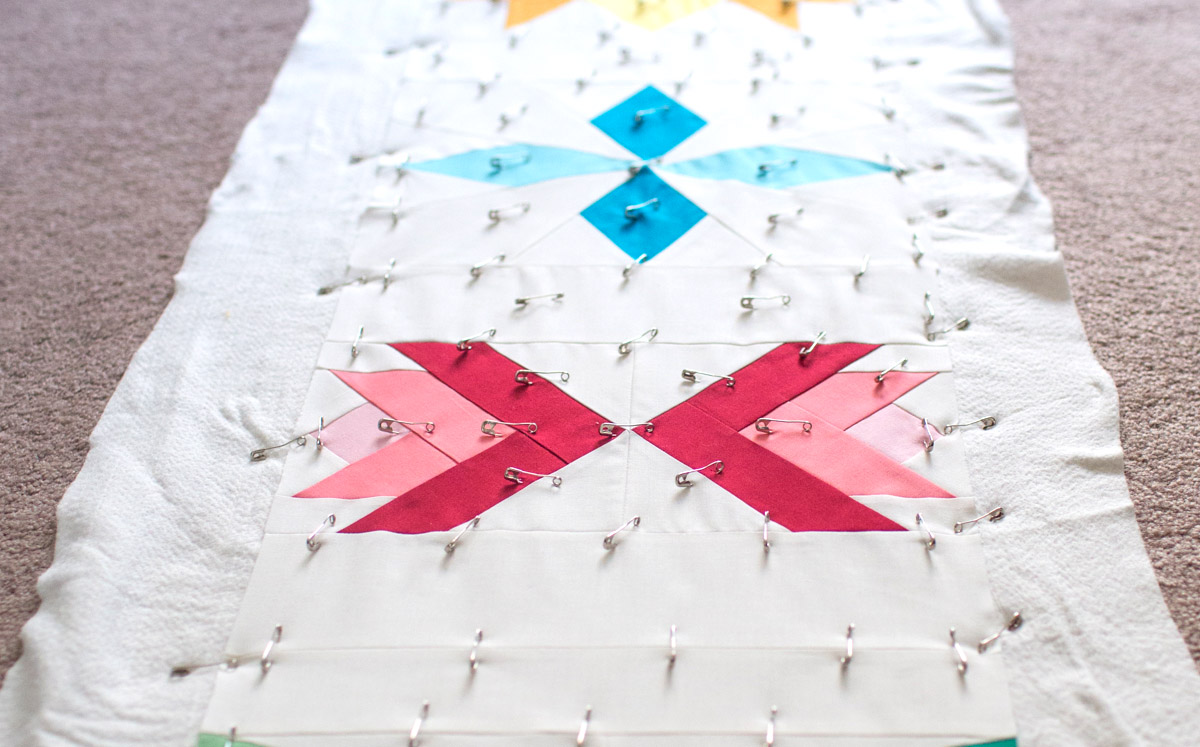
step 5) Quilt the layers.
Layer the following:
- Solid white backing, face down
- Batting
- Pieced top, face up
Pin through all layers, making a “quilt sandwich.”
Attach the walking foot to your machine (or attach Reverse Pattern Foot #1D and engage Dual Feed).
Tip: With BERNINA Dual Feed the top and bottom layers are fed simultaneously, making it easy to perfectly match stripes and plaids.
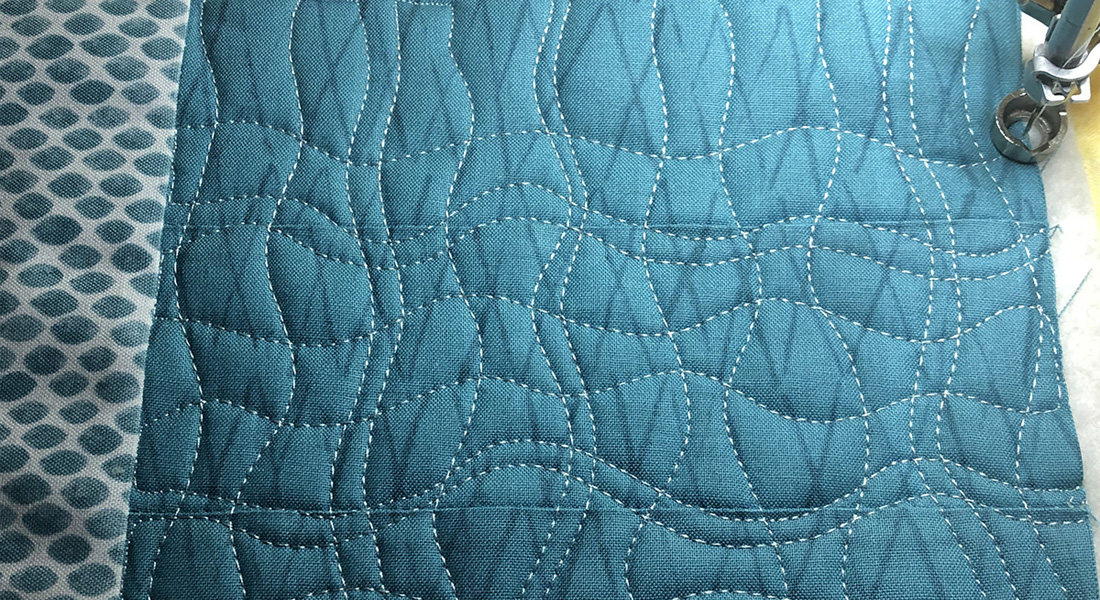
Select a handlook quilt stitch; adjust the settings as indicated in your owner’s guide.
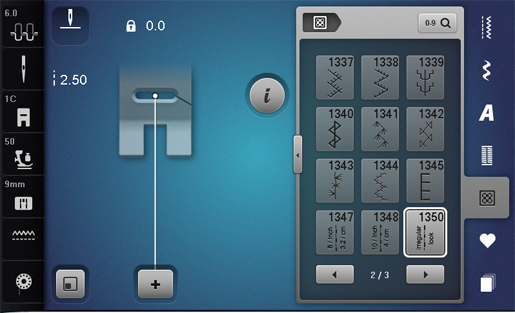
Tip: The handlook quilt stitch has infinite variations. I chose an irregular hand-quilt stitch, #1350 on the BERNINA 780. I love this stitch! It gives the same look as if you were quilting by hand. Make it longer or shorter as desired; I used a stitch length of 3.0 mm.
Check your stitch on a test “quilt sandwich.”
Stitch along the lines drawn on each of the blocks.
Hand-Look Quilting Tips
- Use a size 80/12 Microtex Sharp needle. It penetrates the fabric more easily, improving the stitch’s appearance.
- To show this stitch at its best, use monofilament thread in the needle. If that’s not available, use a fine thread that exactly matches the color of the top fabric.
- Use a bobbin thread in a very contrasting color.
- The needle thread tension must be tightened when using this stitch, pulling the bobbin thread to the top to create a stitch that looks “hand-stitched.” The default tension for this stitch is 6.0, but I found it useful to reduce the needle tension.
- Reduce the motor speed and stitch slowly.
- A very cool effect can be achieved by pressing the basting icon; this has a subtle look, as the stitches are very tiny.
step 6) Complete the quilt.
When finished quilting the runner, remove the marks from the stitching lines.
Bind the runner using your favorite binding technique.
Visit Pat at her website http://www.patbravo.com/index.html and at her Soulful Eyes blog http://patbravodesign.blogspot.com/
Used Products


What you might also like


4 comments on “DIY Bluework Revival Table Runner”
-
-
Hi, Suzi – The ends of Pat’s runner are square. The floral stripes aren’t quilted, just the triple-line squares. But you could add some stitch-in-the-ditch quilting; it wouldn’t affect the design. Jo
-
-
Hi,
I’m working on this now, it’s coming out lovely. I wanted to know which wash-out fabric marker do you use? I have a dozen different ones at home and some of them dry out instantly, some stick on the fabric and others don’t stay sharp!-
Let me see what I can find out – Jo
-
Leave a Reply
You must be logged in to post a comment.
Did you stitch around the blue flowered fabric (stitch-in-the-ditch)? Are the ends of the runner straight or curved?