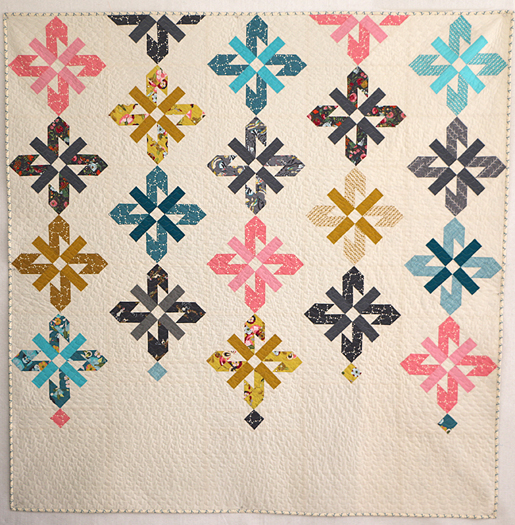
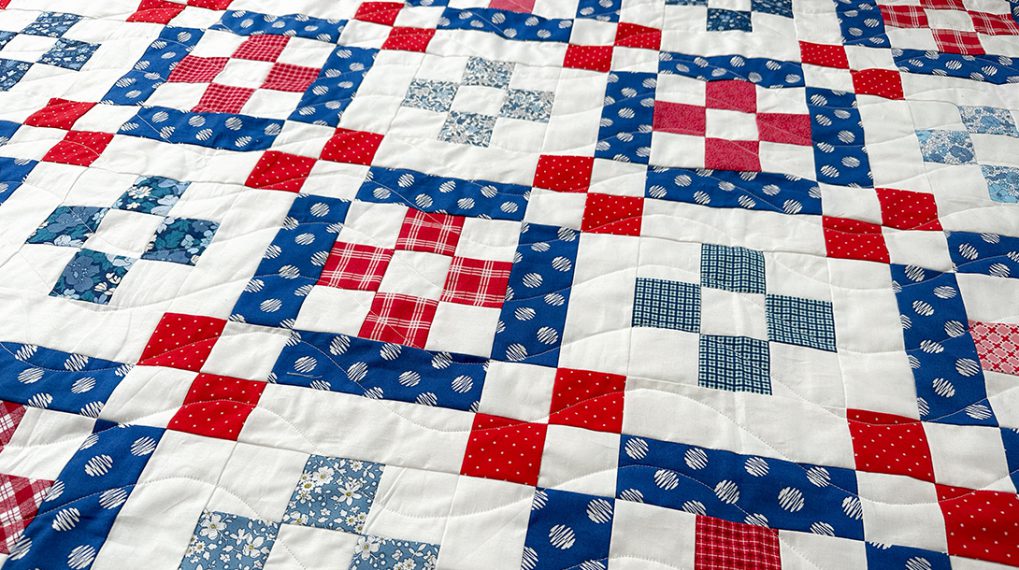
Chandelier Quilt Along: Week Two – Make the Blocks
Welcome to Week 2 of the Chandelier Quilt-Along! Today we’ll be making the blocks. For Week One, click HERE.
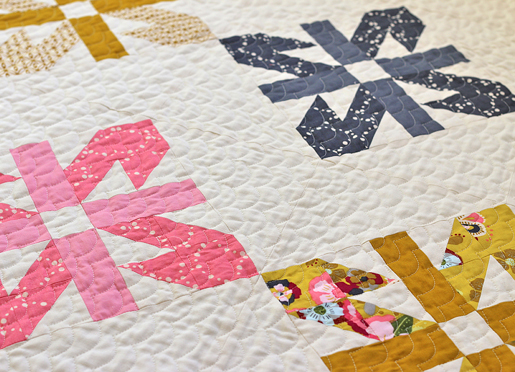
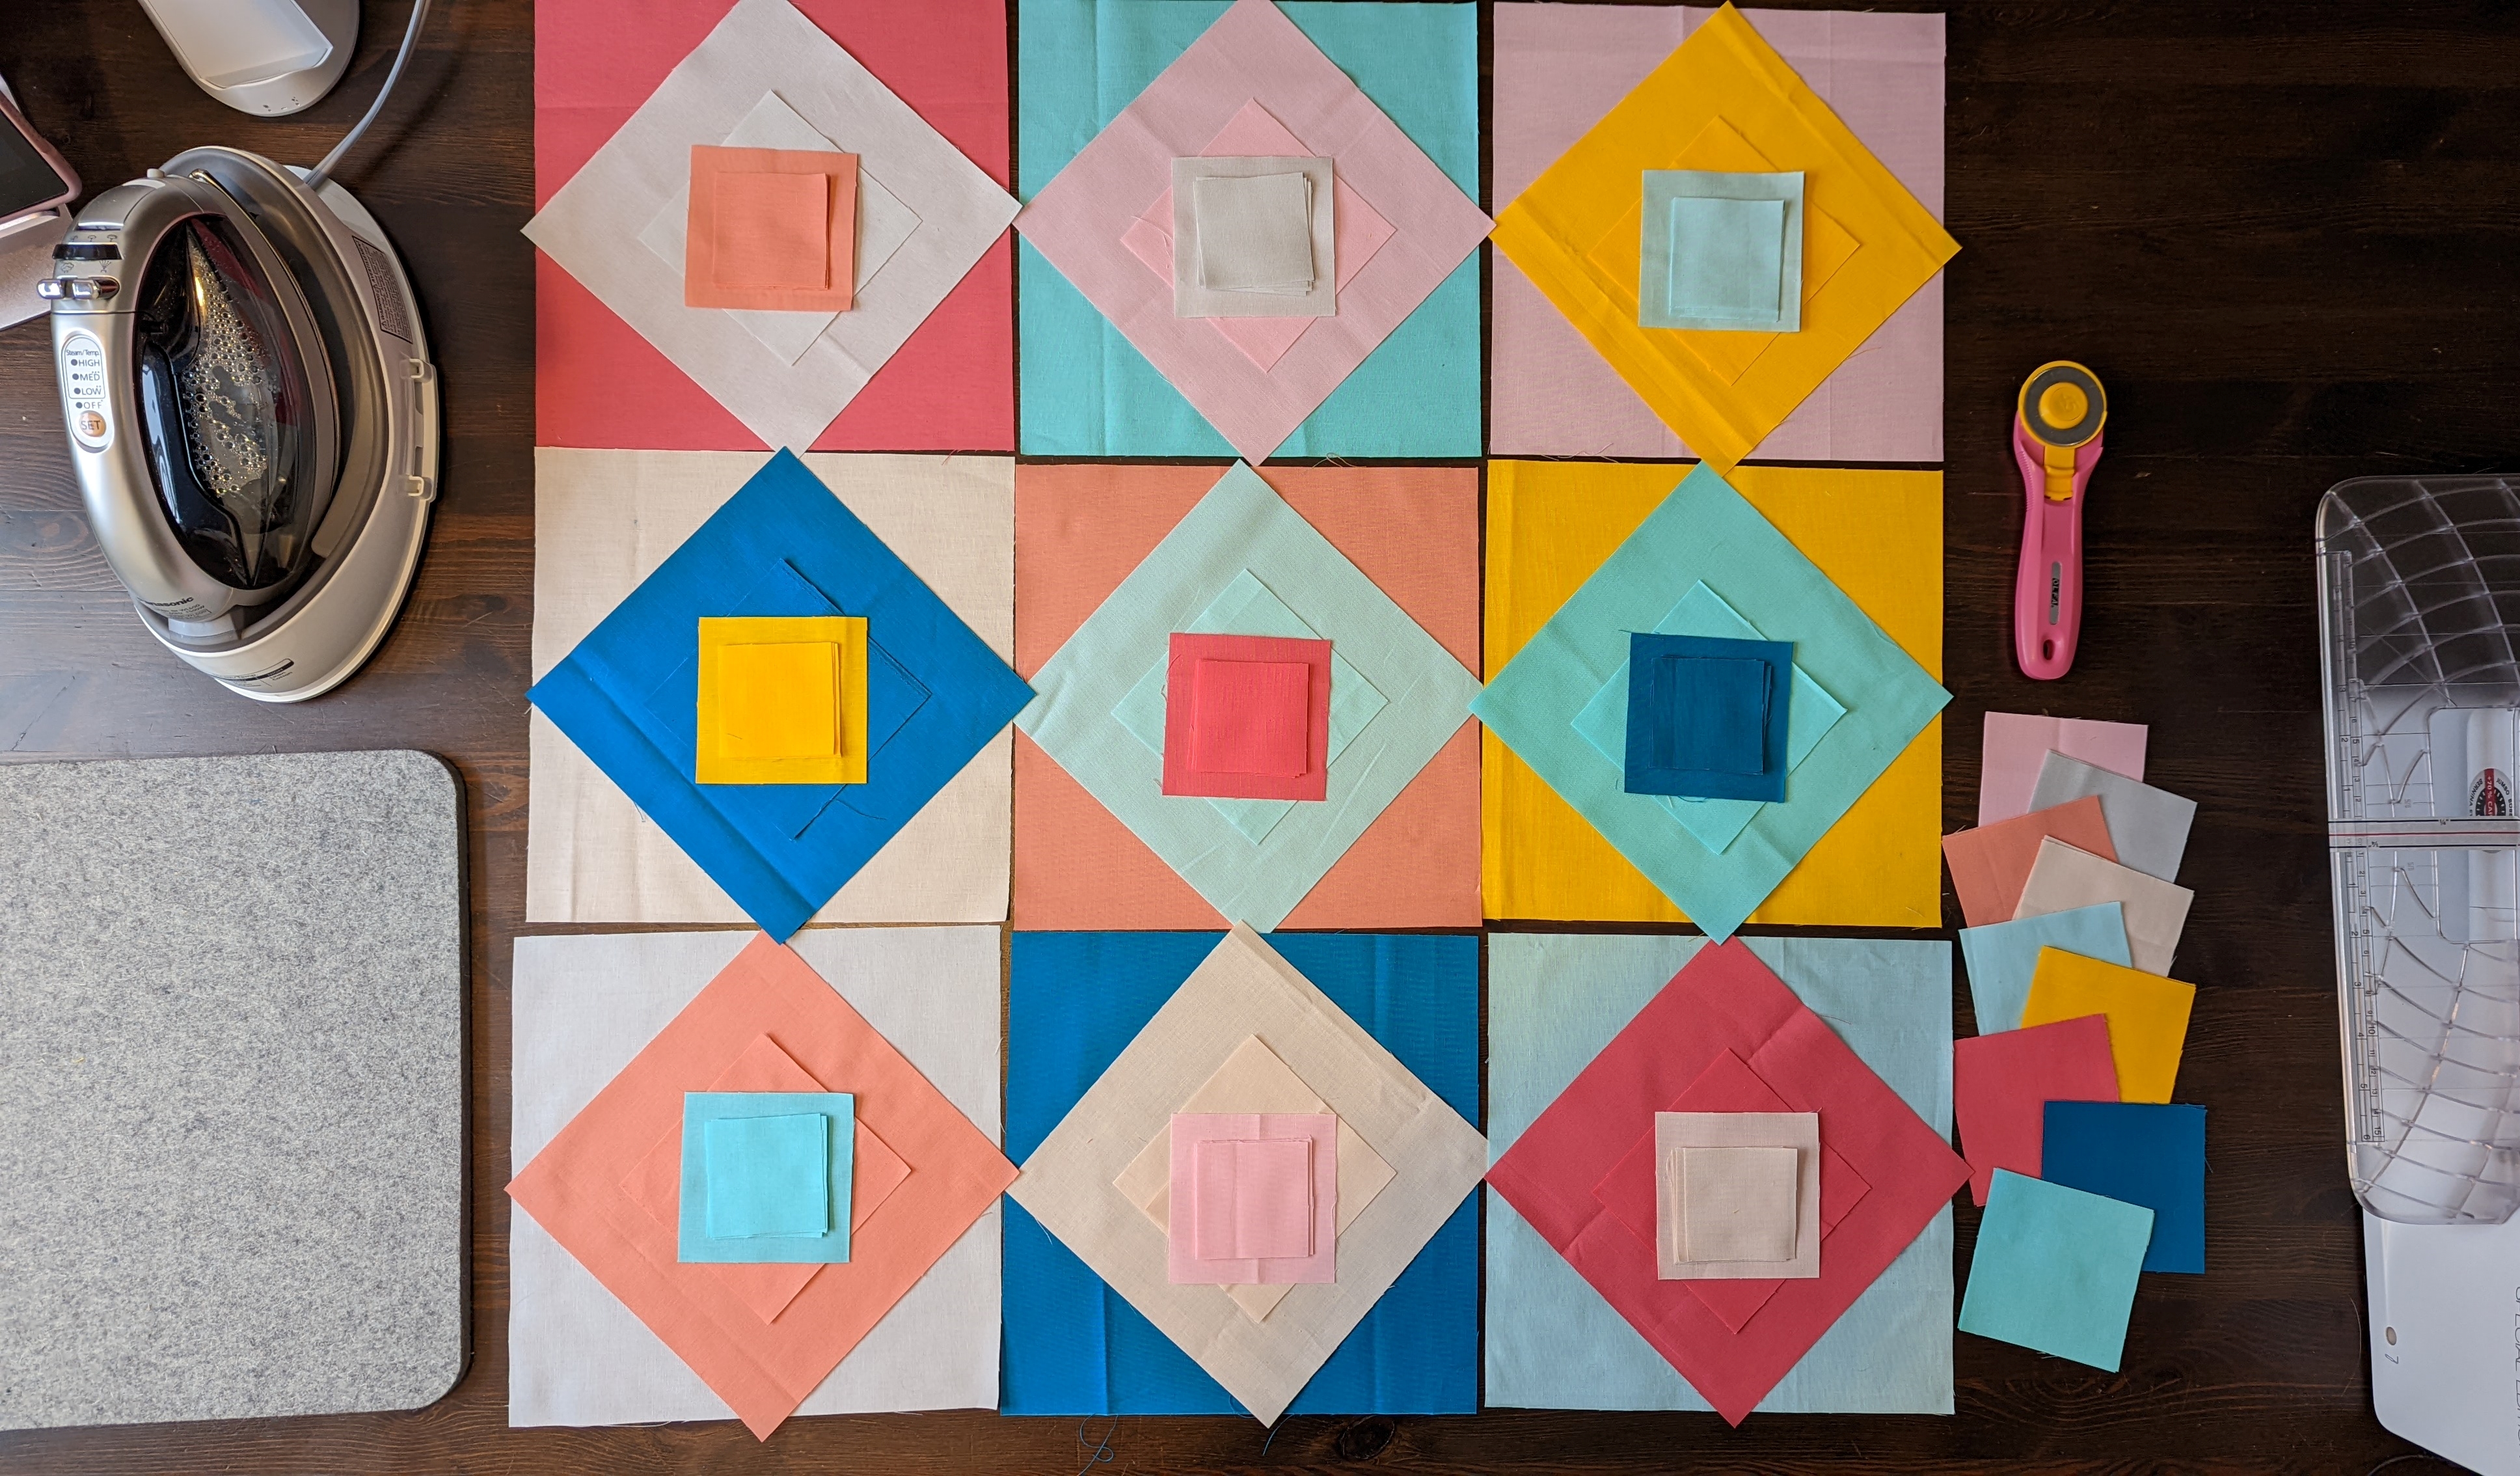
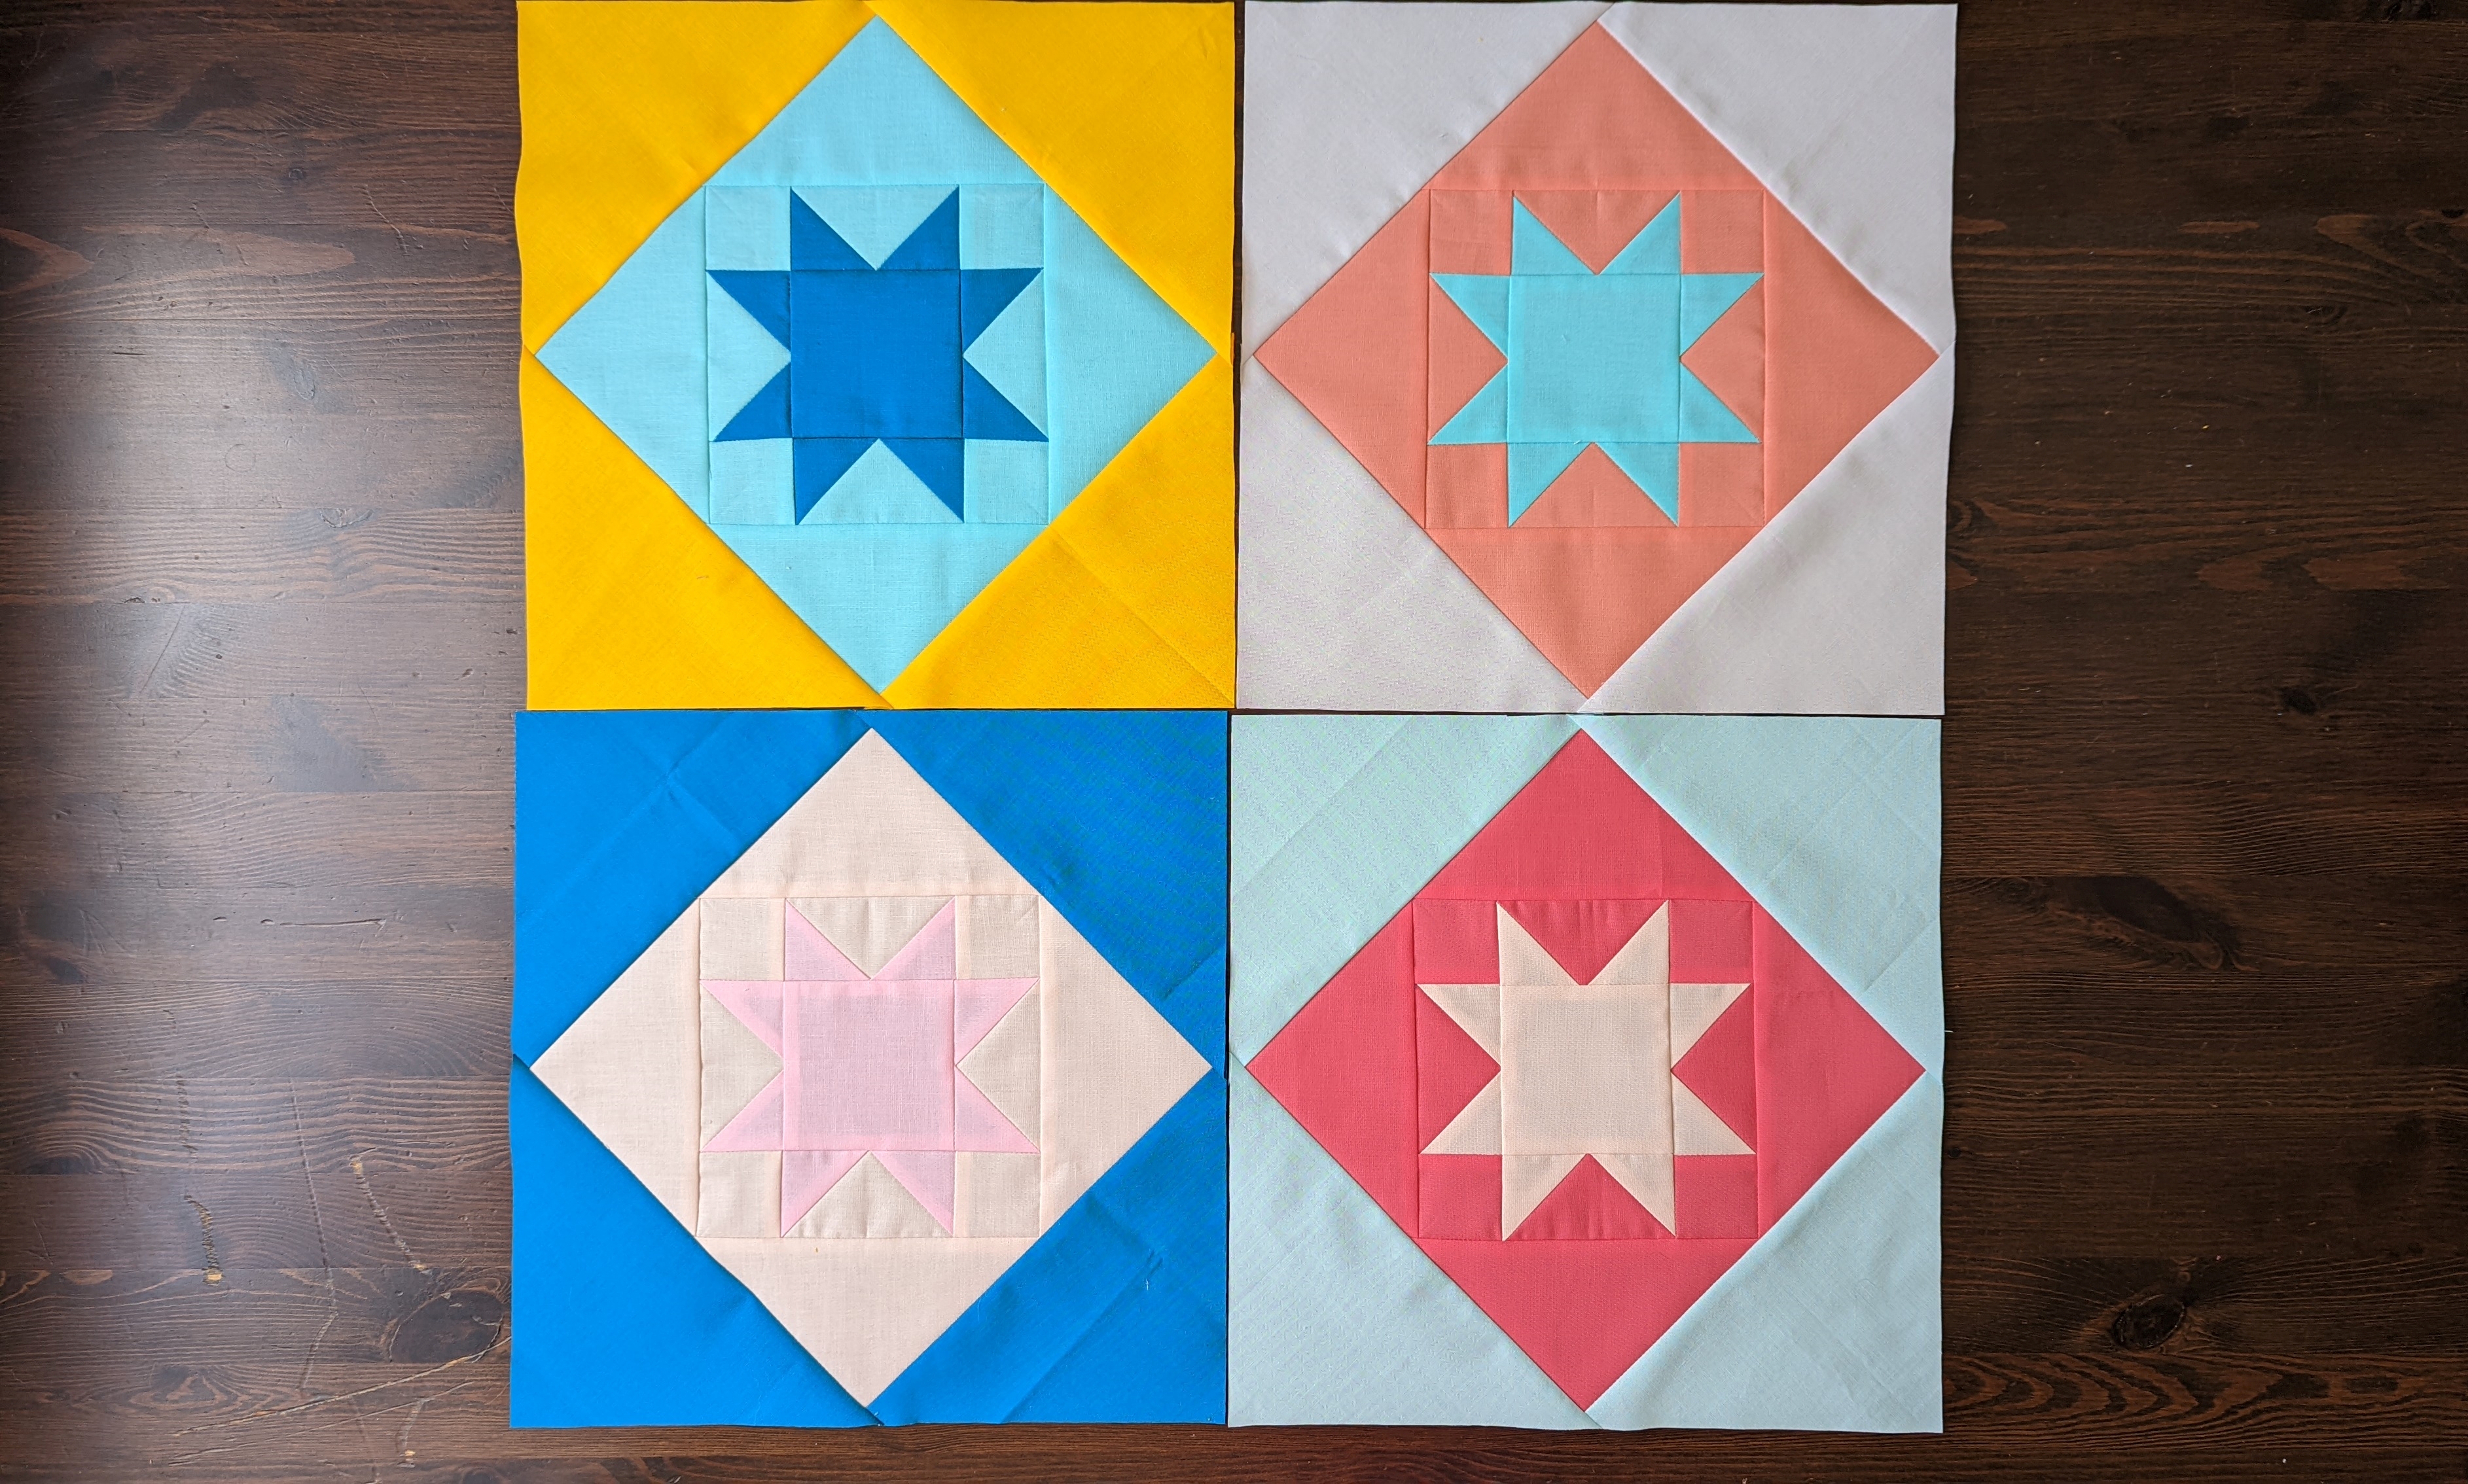
The Chandelier blocks are made as an inner block, which is then set on point within a larger square made up of four corner triangles. So, we’ll make the inner blocks first, and then I’ll show you how to add the corner triangles to complete the blocks.
First, a note about making half-square triangles (HSTs). These instructions use the 2-at-a-time method for making HSTs. There are numerous other ways to make HSTs, including 4-at-a-time and 8-at-a-time. I chose the 2-at-a-time method because 4-at-a-time results in HSTs on the bias, which I did not want for this quilt, and 8-at-a-time is an off-number for this pattern, which requires HSTs in multiples of 12 for each print. But feel free to make your HSTs any way you choose! You’ll just have to calculate fabric and cutting requirements accordingly.
Second, there are a few corrections to the cutting instructions that I need to draw your attention to. My apologies for these errors!
- From “Ripples in Pond”, you will need 11 squares 2-3/4″ x 2-3/4″, not 17.
- From the off-white solid, you will need 20 squares 1-3/4″ x 1-3/4″, not 18.
- From the off-white solid, you will need 115 squares 2-3/4″ x 2-3/4″, not 114.
- Cut an additional 5 squares 2-1/4″ x 2-1/4″ from 5 different prints. These will be used for the diamonds at the end of each row of blocks, which we will make in Week 3.
Okay, ready to get started?
Make the Inner Blocks
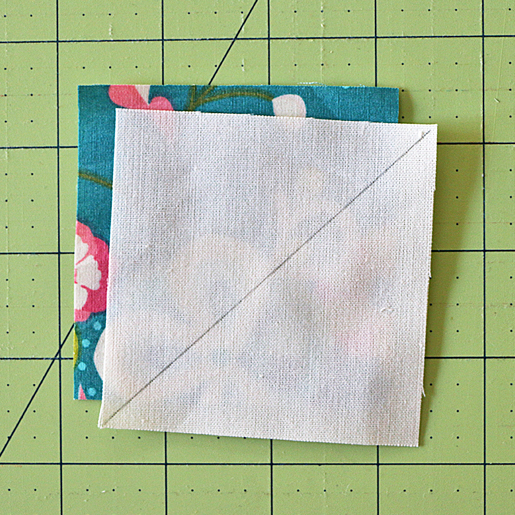
1. Set aside 1 of the 115 white squares 2-3/4″ x 2-3/4″ to use later, when we make the half-blocks at the top edge of the quilt.
2. Mark a diagonal line from corner to corner on the back of the remaining 114 white 2-3/4″ squares.
3. Pair each marked white 2-3/4″ square with a print 2-3/4″ square.
4. Sew 1/4″ away on each side of the marked diagonal line.
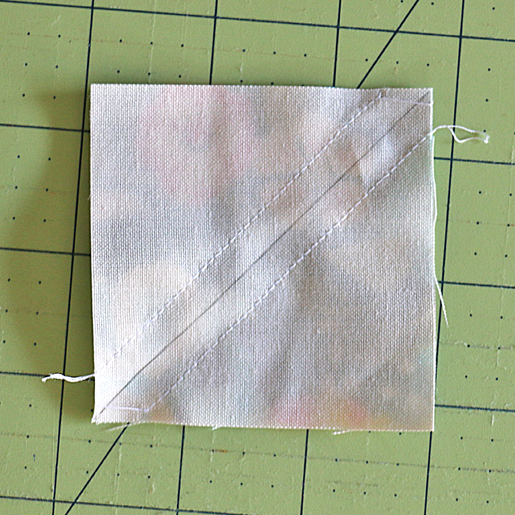
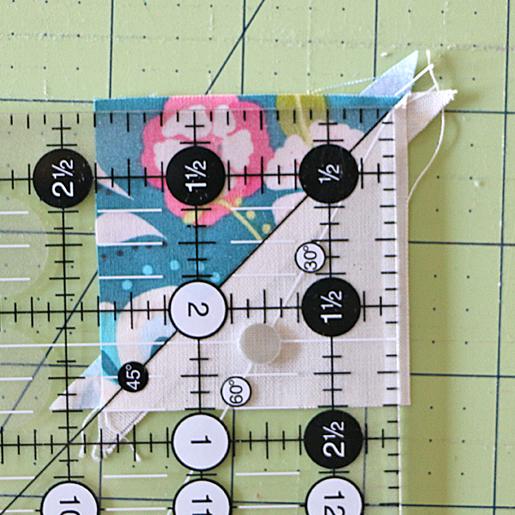
5. Cut on the marked diagonal line and press HSTs open (pressing seams open here will help you get more perfect points in a later step!). Use the 45-degree angle line on your ruler to square up each HST to 2-1/4″ x 2-1/4″.
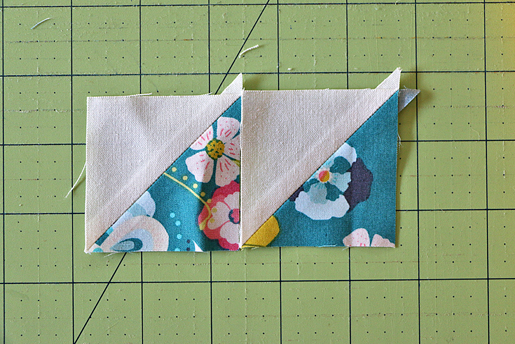
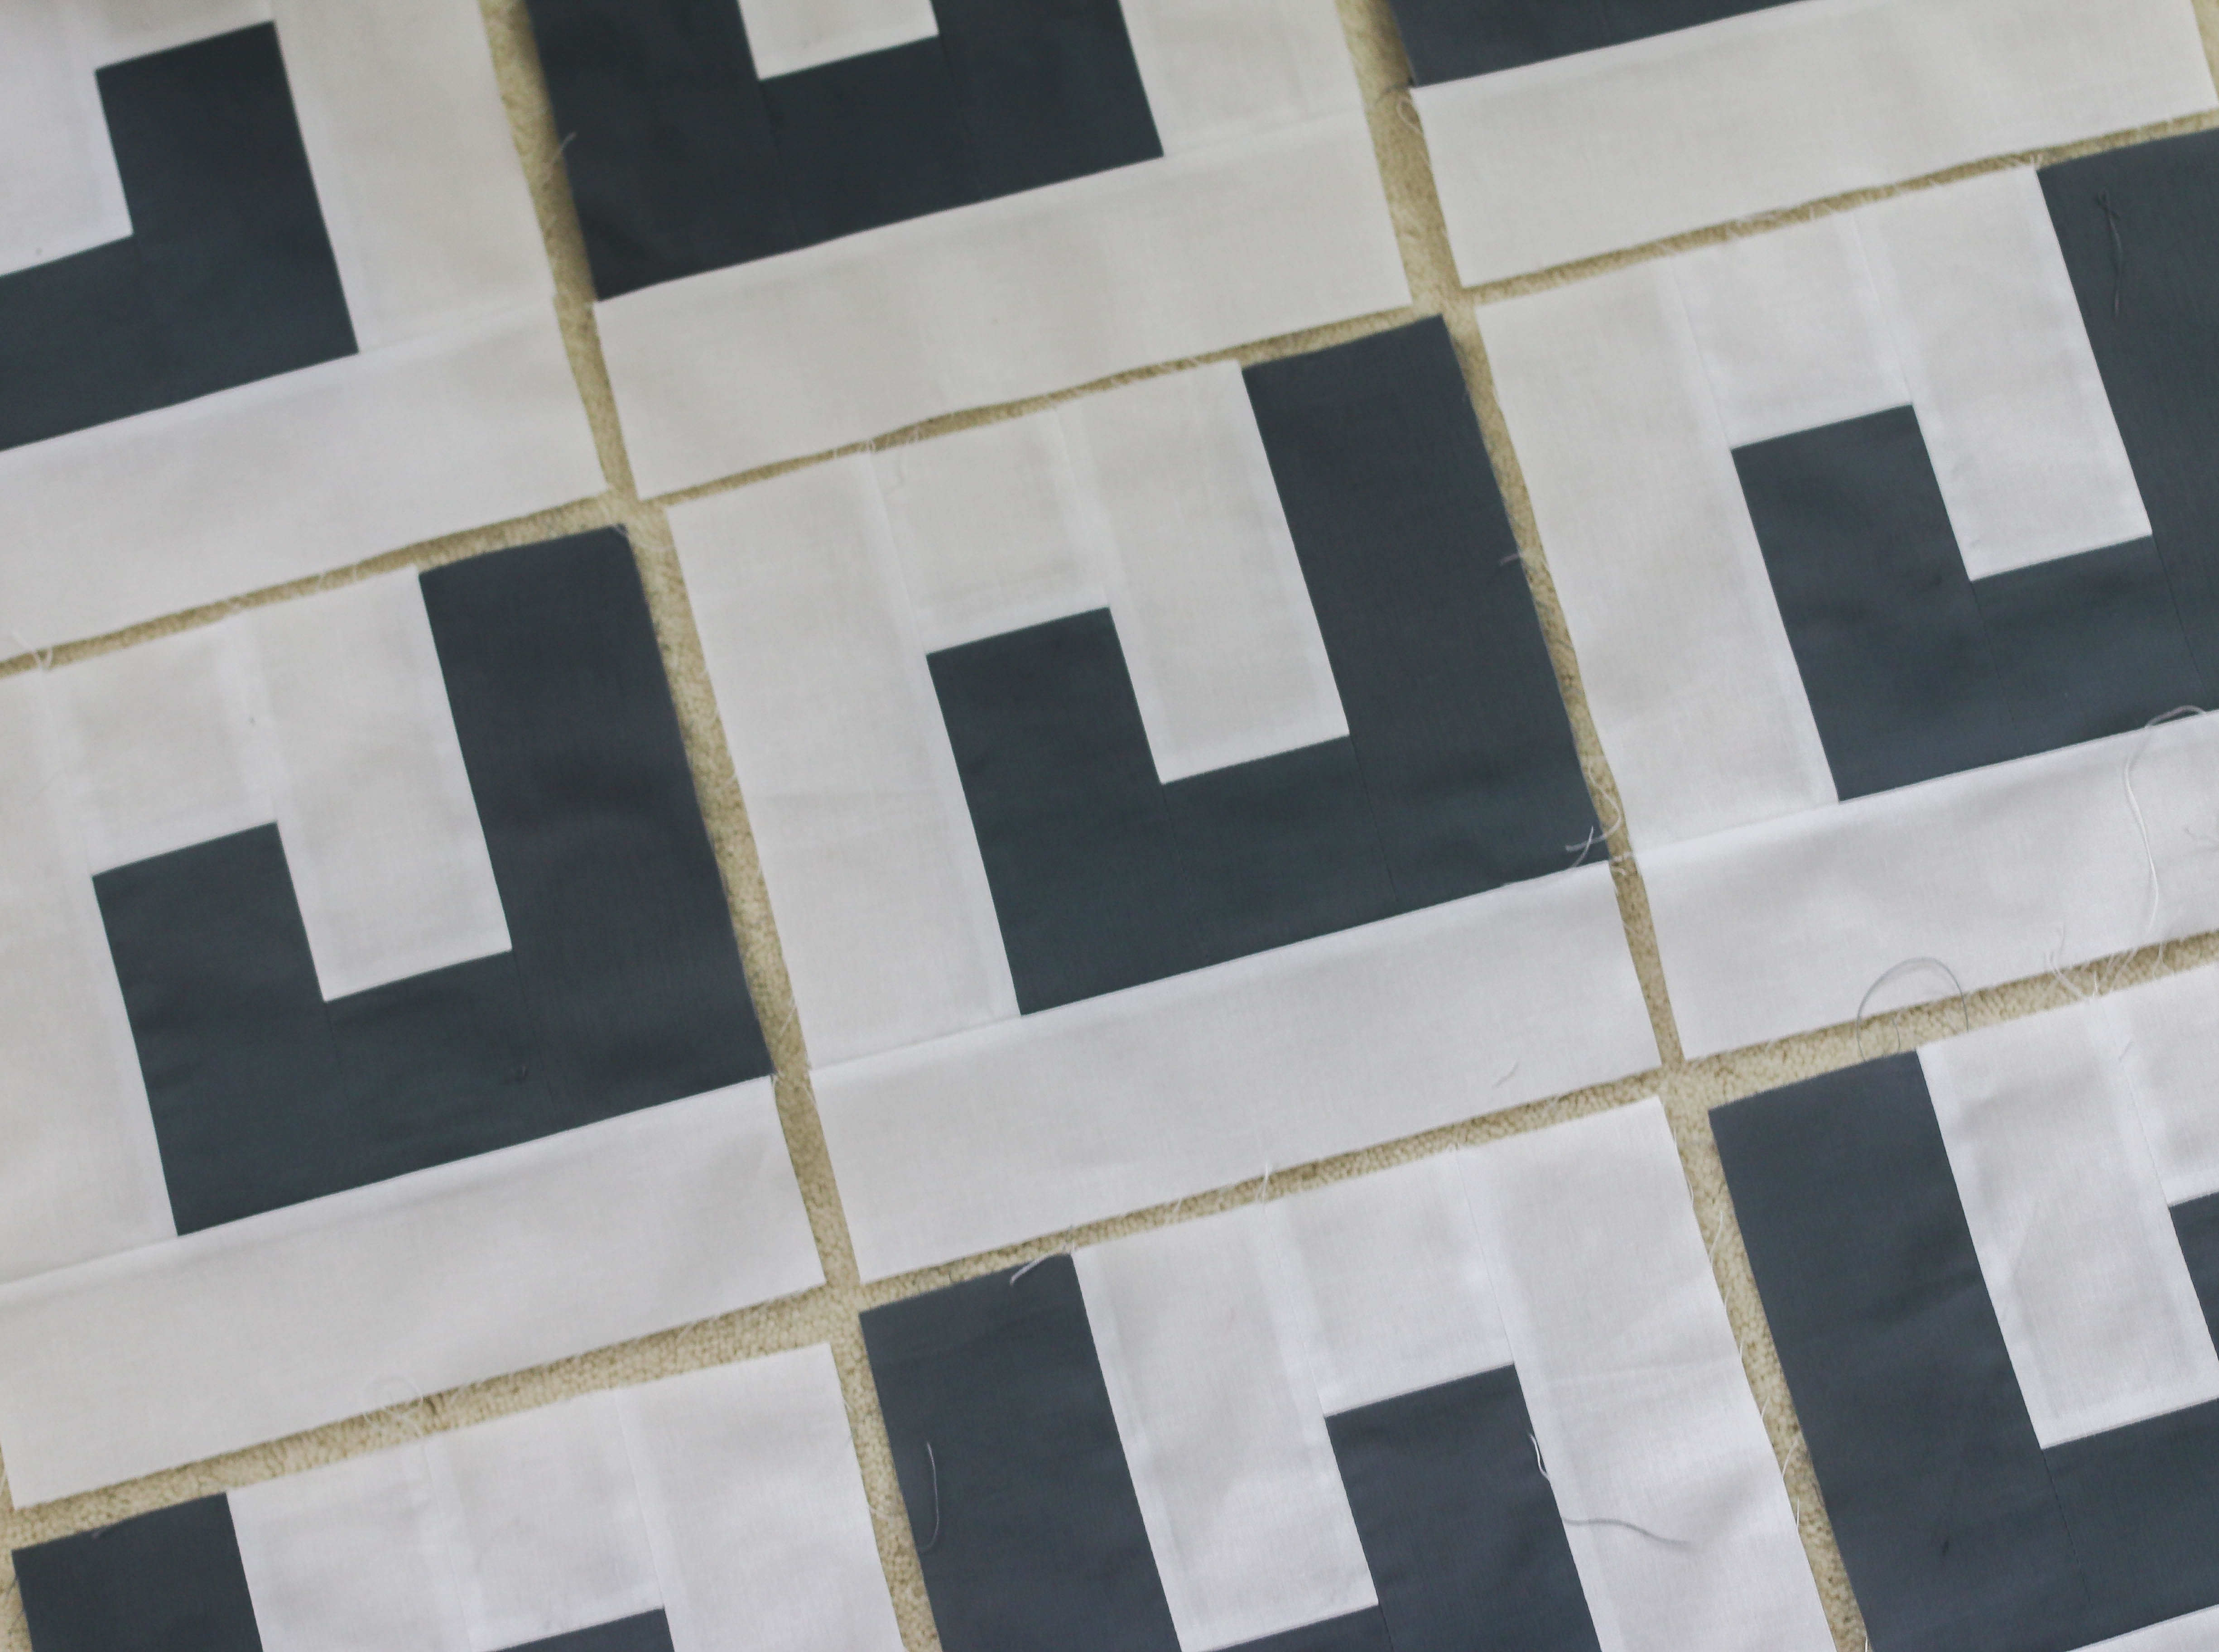
6. Arrange two HSTs of the same print side by side and sew together, as shown. (Be sure your HSTs are always oriented in the direction shown!) Press seam allowances open or toward the print.
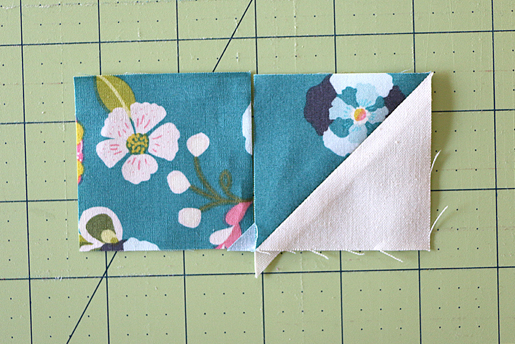
7. Arrange one HST and a 2-1/4″ square in the same print side by side and sew together, as shown. (Be sure the HST is always oriented in the direction shown!) Press seam allowances open or toward the HST.
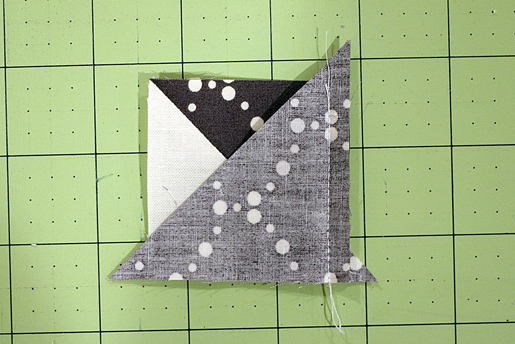
8. Arrange these 2 units as shown and sew together. Press seam allowances as desired. Your completed four-patch unit should measure 4″ x 4″.
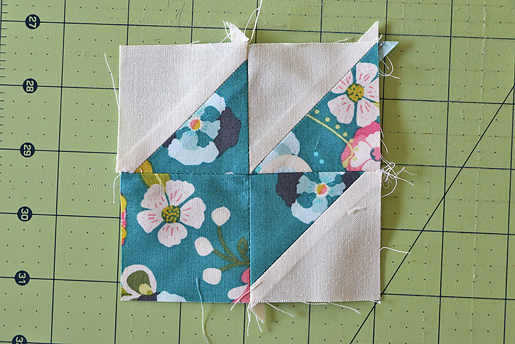
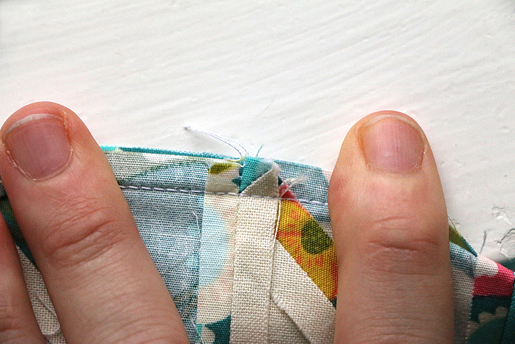
Tip: As you are sewing this seam, make sure you pass right through the intersection of where the perpendicular seam meets the bias seam of the HST (see photo). Pressing your HST seams open in Step 4 allows you to see exactly where this seam needs to go in order to get perfect points!
9. Set aside 2 HSTs in Ripple Rose (pink) and 2 HSTs in Ripple Pond (dark gray). These HSTs will be used later in the half-blocks at the top of the quilt. Discard one additional HST in Ripple Rose and one HST in Ripple Pond (since we needed an odd number of HSTs for these two prints, you end up with one extra of each).
10. With the remaining HSTs, repeat steps 5 through 7 to create a total of 74 of these 4-patch HST units (in various prints).
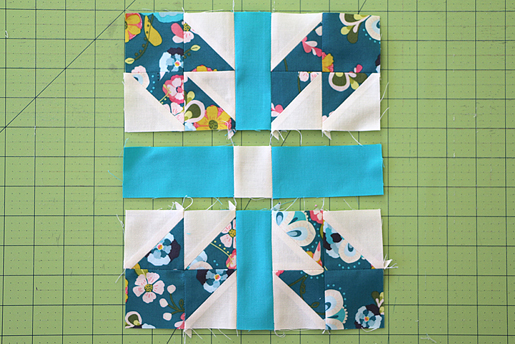
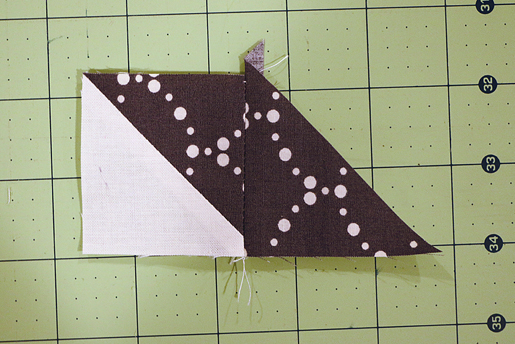
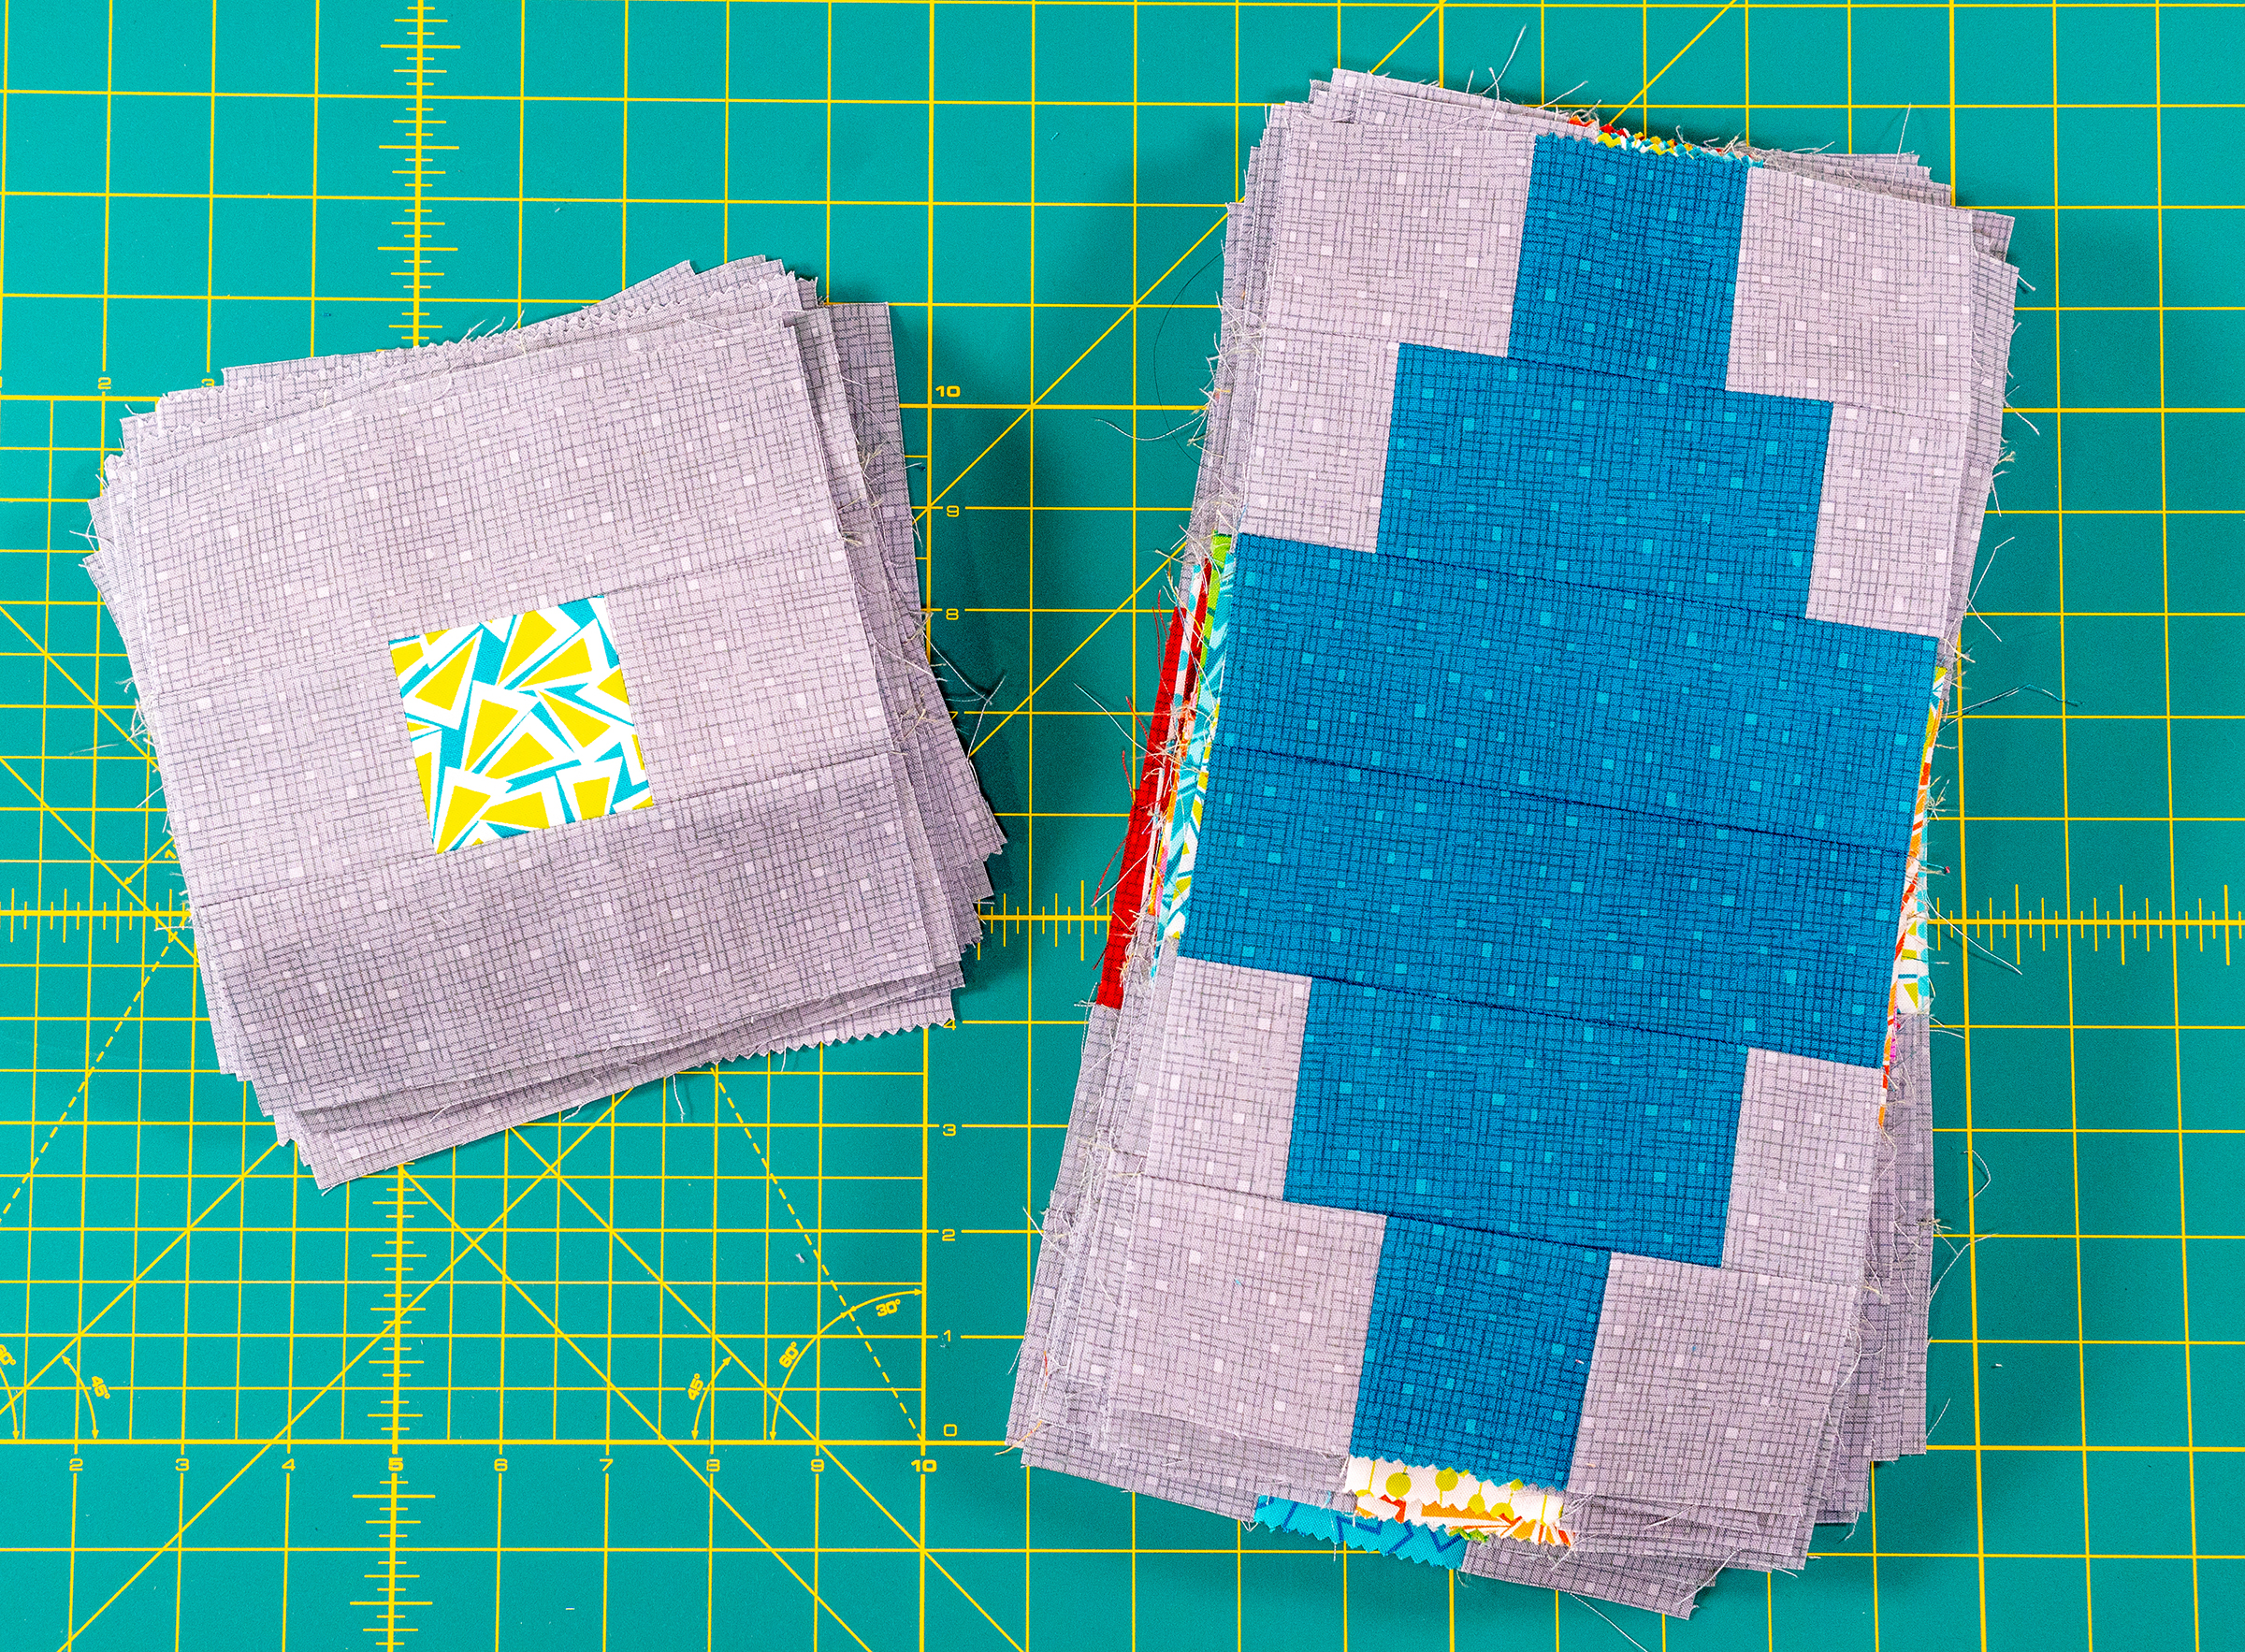
11. Arrange two HST four-patch units and 1 solid piece 1-3/4″ x 4″, as shown. Sew together. Press seam allowances open or toward the solid color. Make two identical units.
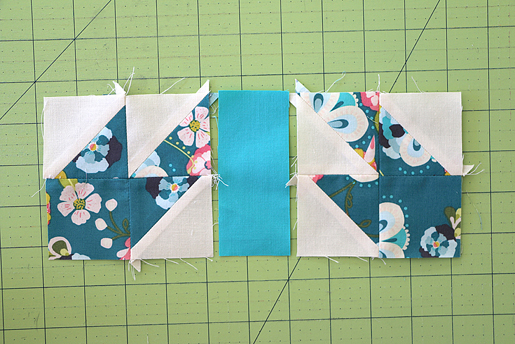
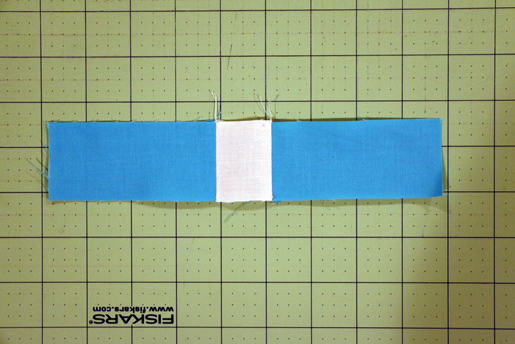
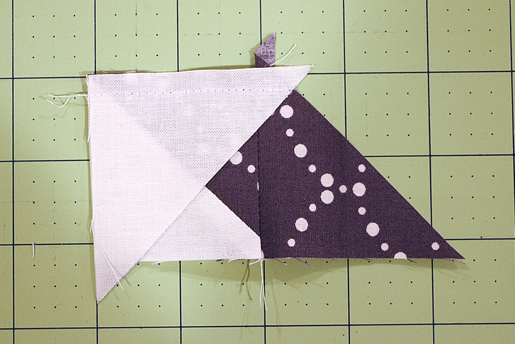
12. Arrange 2 solid color pieces 1-3/4″ x 4″ and 1 white piece 1-3/4″ x 1-3/4″ as shown, and sew together. Press seam allowances open or toward the solid color.
13. Arrange these three units together as shown and sew together. Press seams as desired.
14. The completed inner block should measure 8-1/4″ x 8-1/4″. Make 18 of these. You should have 2 four-patch HST units left over, one in Rose Ripples and one in Pond Ripples. Set those aside to make the half-blocks later.
Finish the Blocks
Now we’re ready to finish the block by adding the corner squares. At this point, the Chandelier blocks become a basic square-in-square block construction. The square-in-square is a versatile unit that appears in many quilts, so it’s a great skill to have in your arsenal. It can be a finicky block to piece accurately, but my tips should help you get your blocks just right!
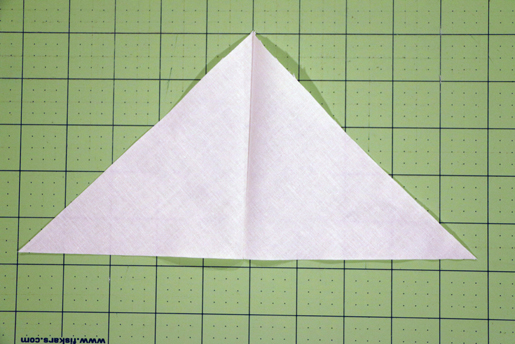
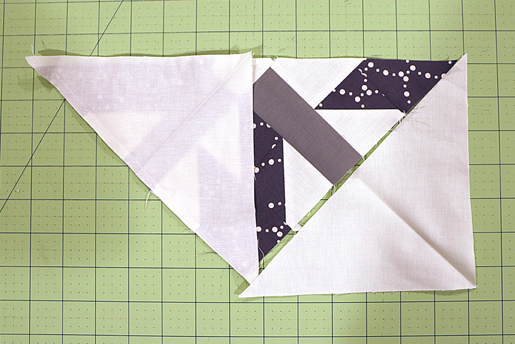
1. Fold your 7″ x 7″ triangles in half and press, as shown. We’ll use this crease mark as a centering reference point.
2. Now fold your inner blocks in half and press to crease.
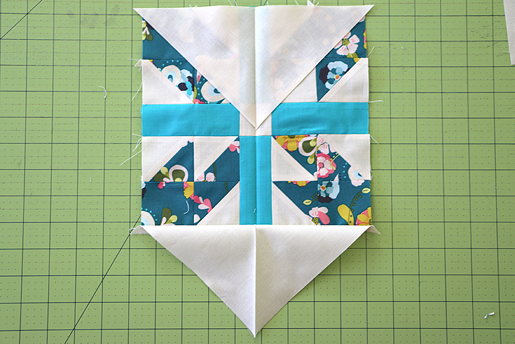
3. Line up the long edge of one of your creased white triangles with the edge of an inner block. Make sure the creases line up, as shown. Pin and sew together. Do the same with another triangle on the opposite side of the inner block. Press seam allowances open. (I prefer open seam allowances here for accuracy and to reduce seam bulk at the points.)
Tip: The white corner triangles are slightly oversized to allow for easier piecing, so don’t worry if it seems like the triangles are a little large—that’s why we pressed them in half to establish the center creases. That way you only have to worry about the center lining up, and we’ll trim the block down to size later.
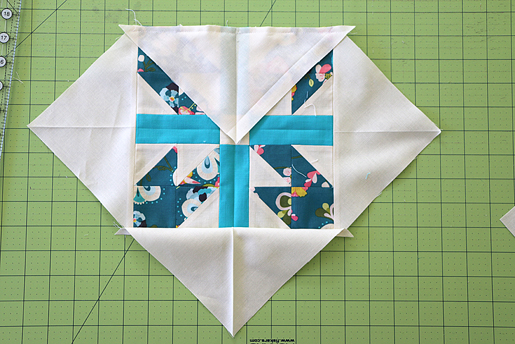
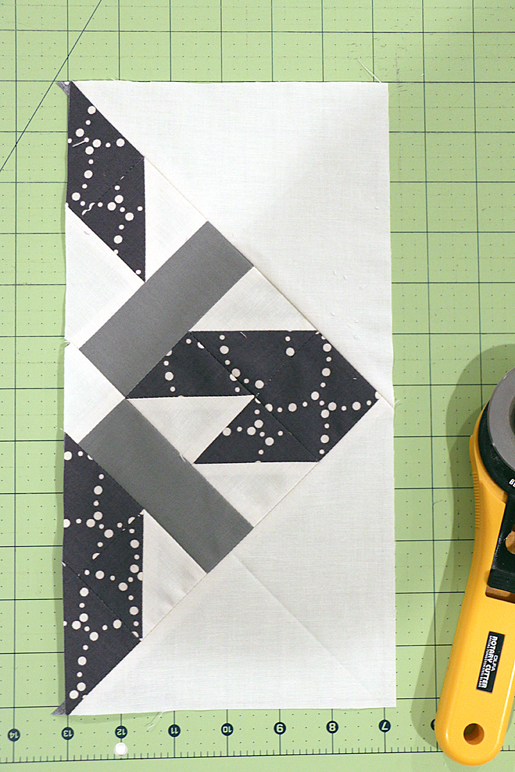
4. Press this entire pieced unit in half in the other direction, to create a crease going the other way.
5. Sew the creased white triangles to the remaining edges of the inner block, as shown. Press seam allowances open.
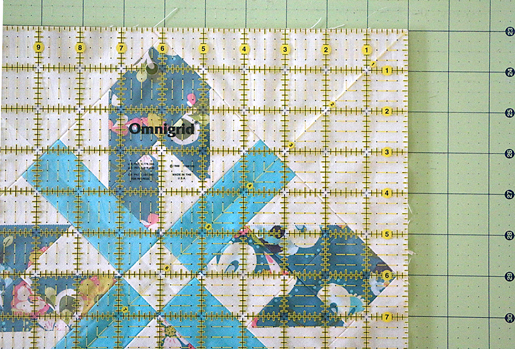
6. Square up your block to 12-1/8″ x 12-1/8″. (Sorry about the odd finished block size—I couldn’t figure out a good way around it!) Each point of the inner block should be 1/4″ from the unfinished edge of the block.
7. Make 18 complete blocks. (You should end up with 4 white corner triangles left over—set them aside for use in the half-blocks.)
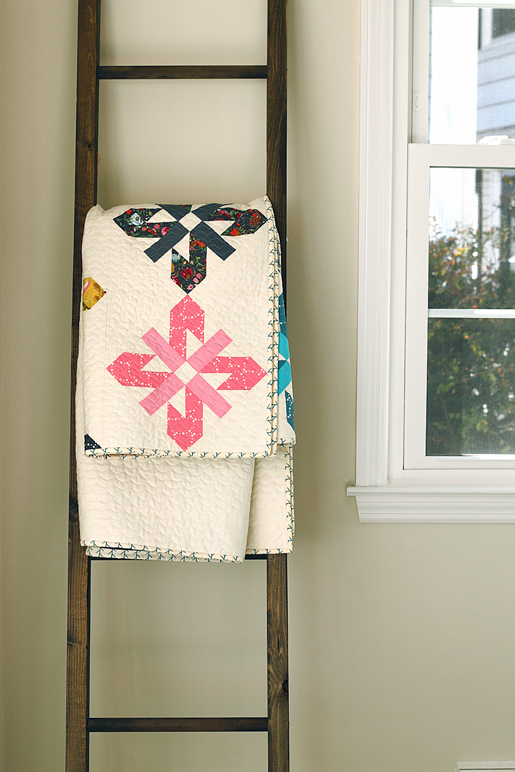
Make the Half-Blocks
The last thing we’ll do this week is make the two half-blocks that are at the top edge of the quilt. I love the look of half-blocks and use them frequently in my quilts—I love the way they make the quilt design appear to continue off the edges of the quilt.
For the half blocks, you will need the following:
- The two leftover 4-patch HST units (one in Pond Ripples and the other in Rose Ripples)
- The 4 remaining 2-3/4″ x 2-3/4″ print squares, cut in half diagonally from corner to corner to make 8 triangles
- The remaining white 2-3/4″ x 2-3/4″ square, cut in half diagonally from corner to corner to make 2 triangles
- The 2 remaining 1-3/4″ x 1-3/4″ white squares
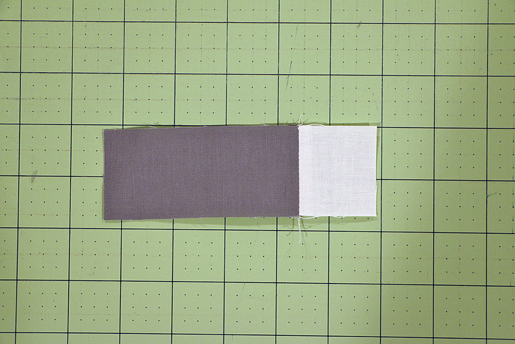
- The 4 remaining 1-3/4″ x 4″ solid color pieces (2 pink and 2 gray)
- The 4 remaining white 7″ triangles
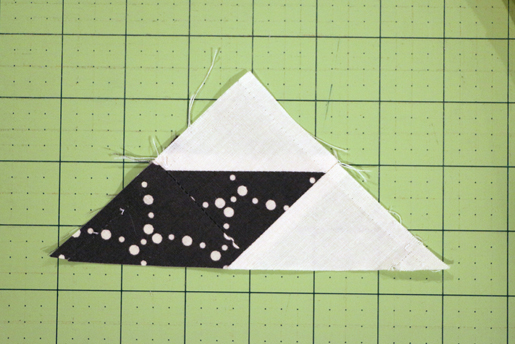
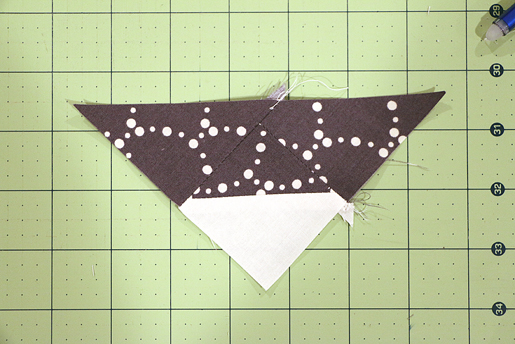
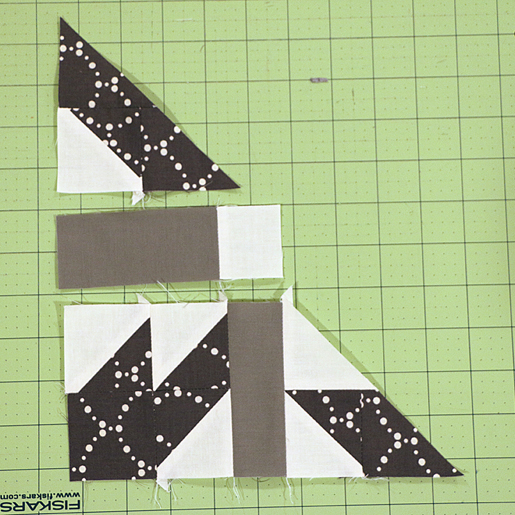
1. Pair one of the remaining HSTs with one of the triangles of the same print. The short sides of the triangle should be aligned with the edges of the HST, as shown in the photo. Allow the pointed ends of the triangle to hang over the edges of the HST.
2. Sew the HST and the triangle together so that it looks like this. Press seams open or toward the triangle.
3. Add one of the two white triangles you reserved from the Step 1 of Making the Inner Blocks. Lay it out as shown here, aligning the short edges of the triangle with the edges of the HST.
4. Press seams open or toward the triangle.
5. Repeat Steps 1 through 5 to make another unit with the same prints, but this time replace the white triangle with a second print triangle. The completed unit will look like this.
6. Lay out the two units you just made with one of the 4-patch HST units, 2 solid color 1-3/4″ x 4″ pieces, and 1 white square 1-3/4″ x 1-3/4″, as shown.
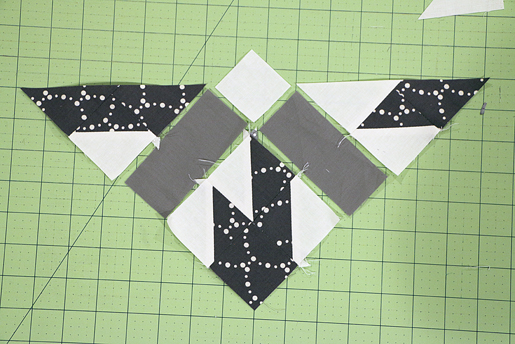
7. Sew the first three units together as shown. Press seams open or toward the solid color piece.
8. Sew the white 1-3/4″ square and the solid color 1-3/4″ x 4″ piece together as shown.
9. Sew all the three sections together as shown, pressing seams open or toward the solid color piece.
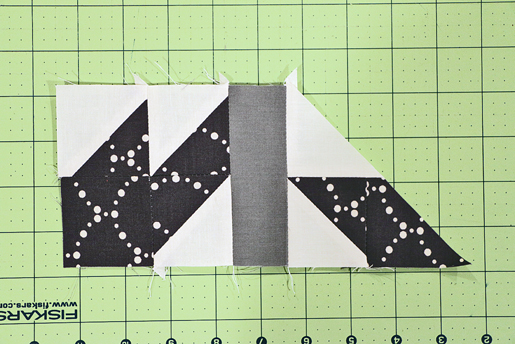
10. Complete the half-block by adding the corner triangles, as shown. Press seams open.
11. Trim down the half-block to 12-1/8″ x 6-1/4″. Be sure to trim 1/4″ from the point, as shown.
That’s it for this week! Next week we will again use the square-in-square construction to make the diamonds at the bottom of each row of blocks, and we’ll assemble the quilt top. I’ll also show you how to make the beautiful scallop quilting by using your walking foot and a decorative stitch on your machine.
And don’t forget to share your progress on Instagram! Hashtag #chandelierquiltalong and #berninausa. See you next Monday!


What you might also like


3 comments on “Chandelier Quilt Along: Week Two – Make the Blocks”
-
-
Love your design:) I have one pieced. If I can figure it out I’ll try to post a picture.
Thank you!! -
Pingback: WeAllSew « https://weallsew.com
Leave a Reply
You must be logged in to post a comment.
Love this quilt!!!!