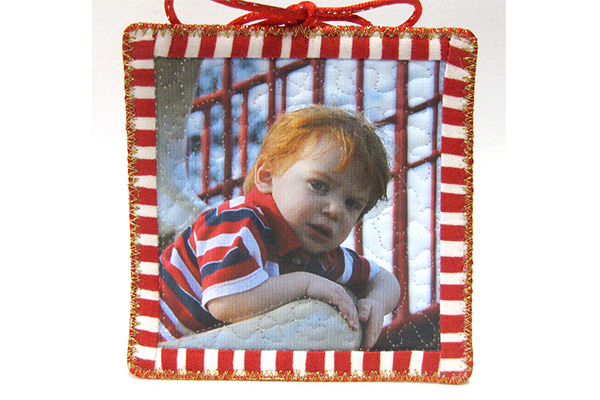
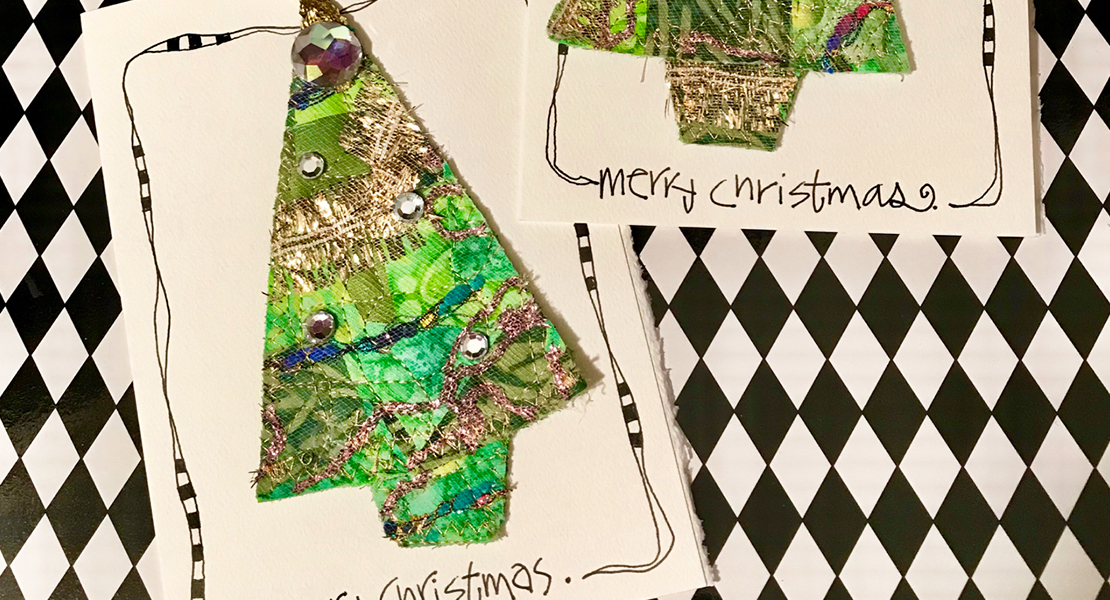
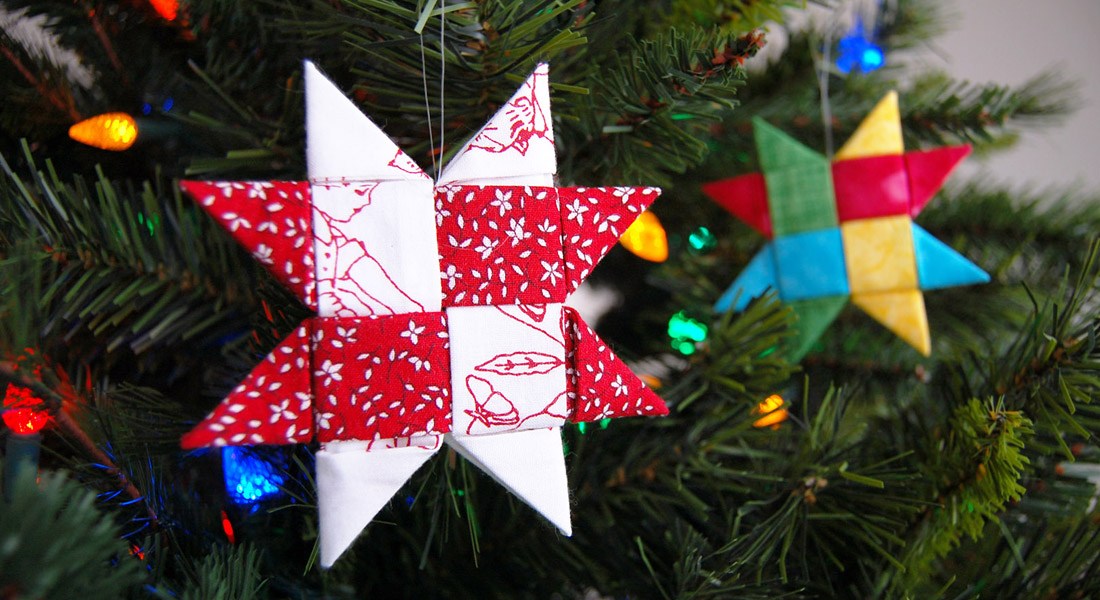
Make Your Own Christmas Tree Gift Tag or Ornament
A fun, quick, and super easy project from mixed media artist, Joanne Sharpe. Visit Joanne’s Whimspirations and Artful Quilt and Stitch blogs for more whimsical imspiration.
Many people prepare pans and plates full of gorgeous Christmas cookies for gift giving. Not me! I wish I loved to bake, but I like making art more. Across my counters are stacks of 4″ x 6″ muslin quilt sandwiches ready to transform into painted and embroidered ornaments or gift tags. It’s simple, fun and quicker than you’d think to make a give a gift tag/ornament handmade stitched treasure.
Supplies
- 3″ x 5″ or 5″ square (or any size you like) muslin quilt sandwiches (quilt batting between two layers of muslin), as many as you need for gift giving
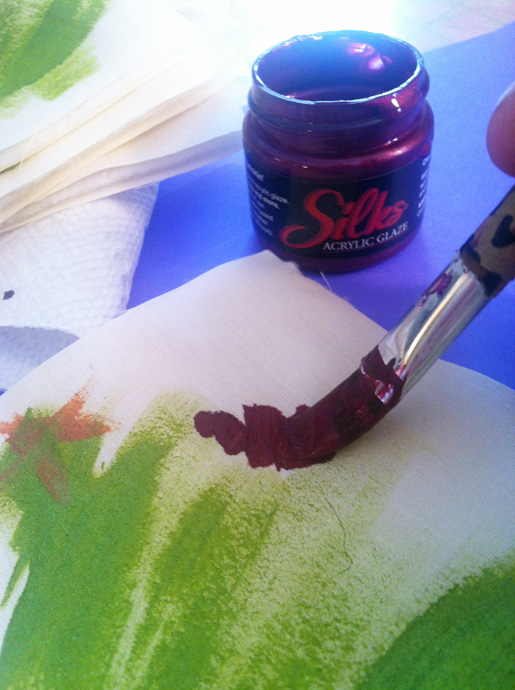
- Sparkle fabric paints in green, red, violet and gold (you can also use thin layers of inexpensive craft paint); I use a brand of paint called Silks by Colourarte
- Gold metallic threads (I used YLI Fine Metallic)
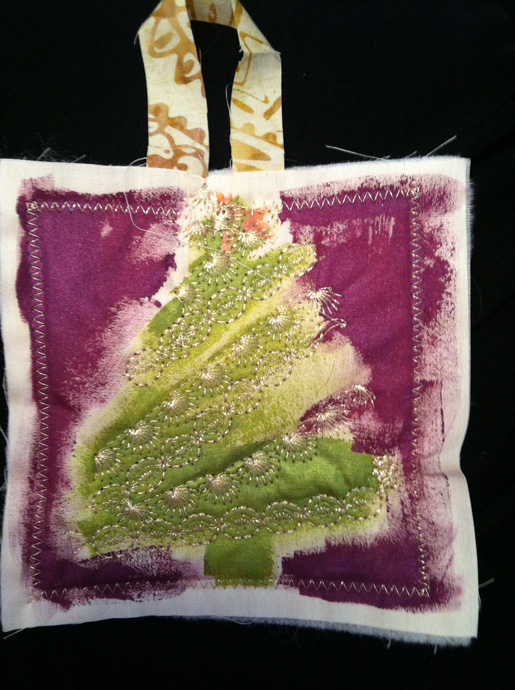
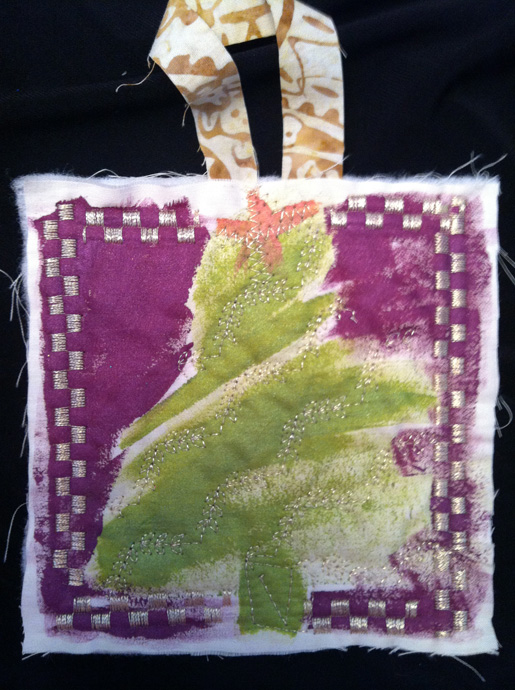
- Any colorful or gold thin ribbon or fabric strips for hanger loop
- Fabric paint brushes (my favorites are the sets by Tulip brand in the craft stores)
- Freezer paper
- Open-toe embroidery foot, such as BERNINA Open Embroidery Foot #20/20C/20D
Step 1) Paint the trees.
Cover your table with freezer paper to protect as you paint.
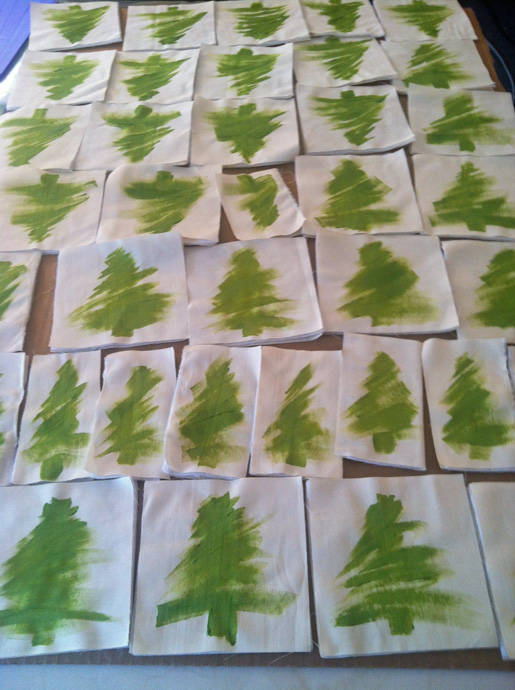
Prepare quilt sandwiches and arrange them in rows on the freezer paper.
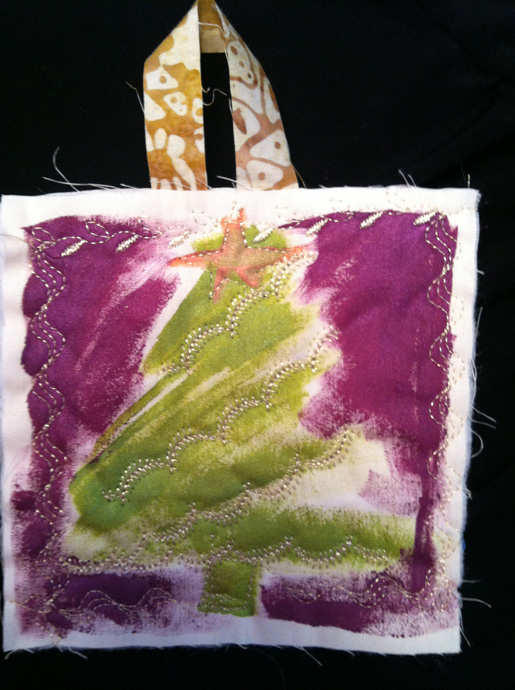
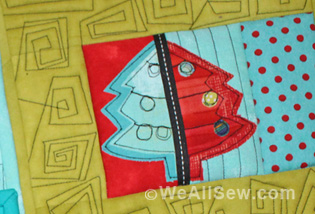
With green paint, lightly paint a loose, quick, whimsical Christmas tree in the center of a quilt sandwich. Think about just painting the letter “Z” repeatedly from the top to bottom. It’s even better when your brush strokes have a “scruffy look” as shown in the photo.
Paint a tiny gold star at the top, making an asterisk (*) shape.
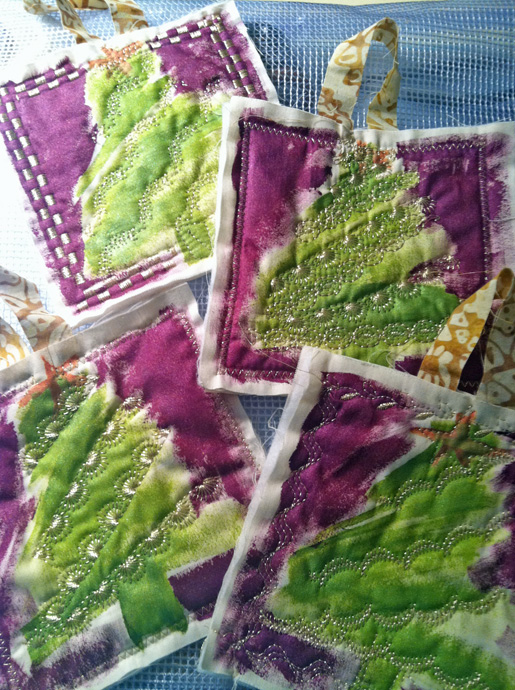
With red or violet paint, loosely fill in the negative space around the tree as shown in the photo.
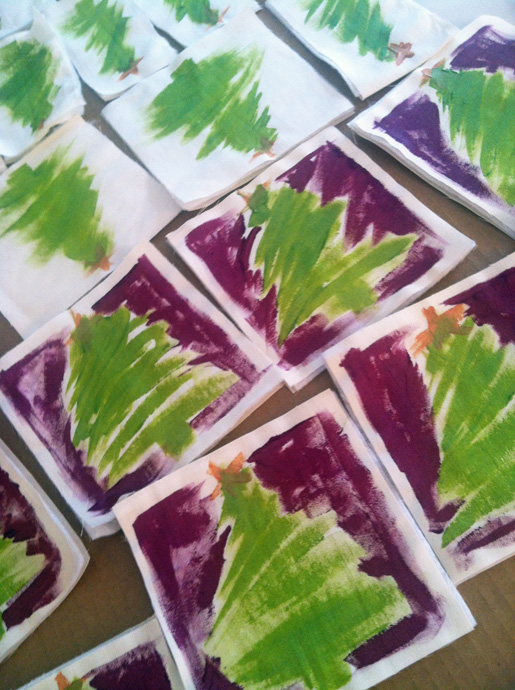
Let the pieces dry overnight! Patience is key – you don’t want to sew over wet paint!
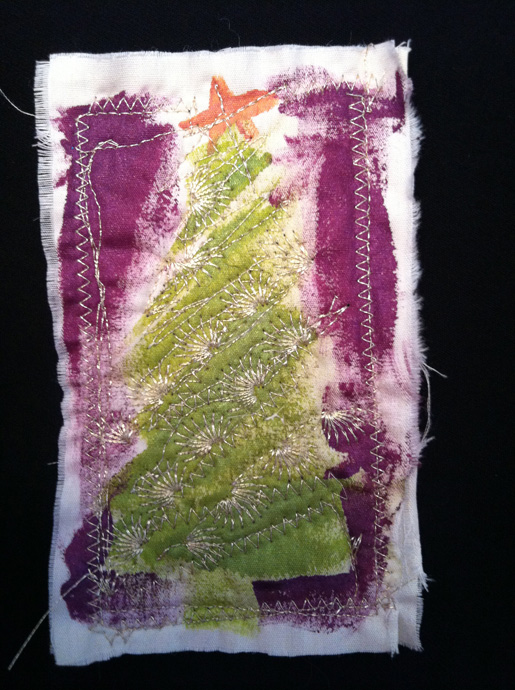
Step 2) Embellish with decorative stitches.
Now decorate your trees! Before stitching, place your ribbon inside the sandwich to create a loop for hanging. Use one pin to secure.
Thread your machine and bobbin with the gold thread.
Use assorted decorative embroidery stitches to add the tree garlands. Choose any decorative stitch from your sewing machine’s stitch menu. Slowly sew on top of the tree shape, going back and forth in a diagonal motion to suggest decorated tree garland.
Step 3) Finish your gift tag or ornament.
Run a straight stitch around all edges, sewing 1/4 from the raw edges; do not trim the raw edges. Or use a decorative stitch to “frame” the border.
Trim and neaten up stray threads.
Sign and date the back and you’re done!

You’re ready to give a one-of-a-kind, handmade treasure.
This project provides a great opportunity to discover the many artistic elements right in the stitch menu. You’ll be amazed at how much “art” is in your BERNINA. I’m a big fan of using decorative stitches, using
them in unconventional ways, “seeing differently” with the potential for creative elements and expression.
Enjoy the art in free motion and Happy Holidays!


What you might also like


2 comments on “Make Your Own Christmas Tree Gift Tag or Ornament”
-
-
Love this idea, could also create other holiday themes gift tags.
Leave a Reply
You must be logged in to post a comment.

This is great!! Thanks for sharing : )