How To Sew a Binding Bag
Here’s a very handy project from Christine Conner from Amélie Scott Designs.
One of my favorite items in my studio is my little Binding Bag. It holds everything I need to bind a quilt: needles, needle threader, binding clips, small scissors, and thread. The only thing I have to round up when I’m getting ready to hand bind a quilt is my Binding Bag, my quilt, and a big comfy chair.
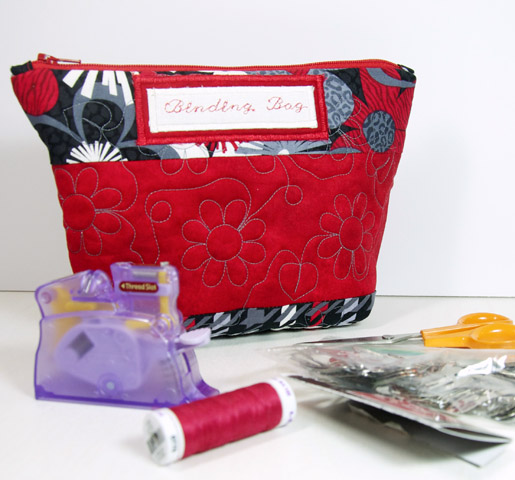
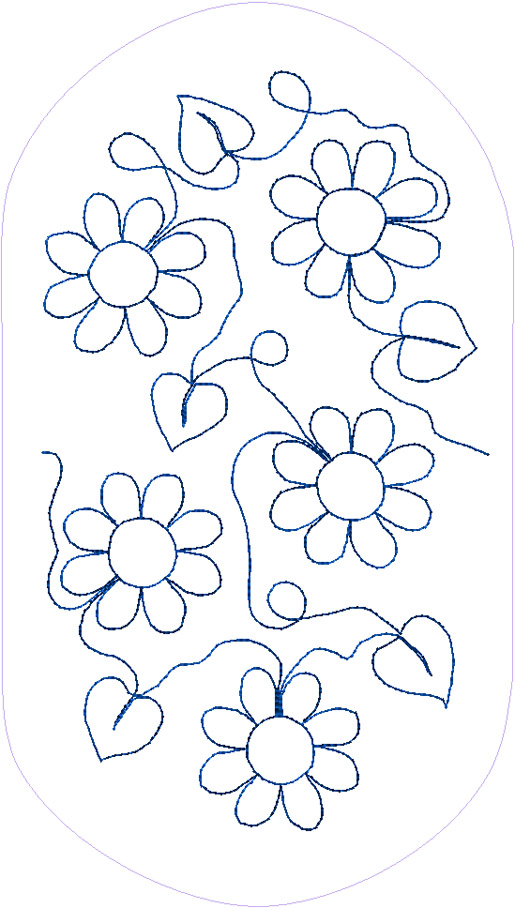
For this project, I also created an edge-to-edge quilting design for machine embroidery that you can download for free in EXP format (pictured below). The design was created specifically for the Oval hoop. Instructions for embroidering in this project are for the BERNINA 880. Free motion quilting is fun (if you know how to do it), but this design will make your bag look extra special.
I hope you have as much fun making the Binding Bag as I had creating the patterns, design, and videos. Of course the BERNINA 880 makes it so easy, and so much fun! Keep your eyes open for a blog post to follow that includes three easy to follow videos that show you how to complete important parts of this project.

Materials:
- 1/8 yard each of 3 different fabrics
- Two 4″ x 8″ scraps of fabric (white & red-for label)
- Two 4″ x 8″ scraps of fusible webbing
- 15″ x 22″ fabric for lining
- 15″x 22″ piece of batting
- Thread for quilting and piecing
- 14″ zipper
- Temporary spray adhesive
- Water soluble marking pen
- Stabilizer, like a medium weight cut-away
Optional:
- Dowloand the Quilting Flower Design here.
Note: For our sample we used prints from the Boy Meets Girl Collection by Kanvas.
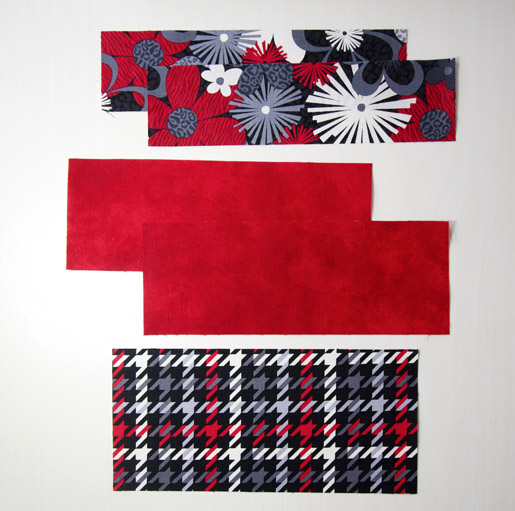
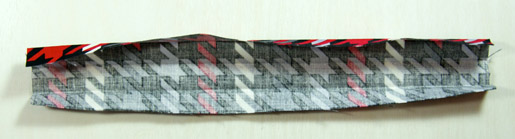
1) Cut two 2-1/2″ x 9-1/2″ rectangles for top of bag (flower print). Label this part “Piece A.” Cut two 3-3/4″ x 9-1/5″ rectangles from solid fabric. Label this as “Piece B.” Cut one 4-1/2″ x 9-1/2″ rectangle for the bottom of the bag (twill print). Label this as “Piece C.”
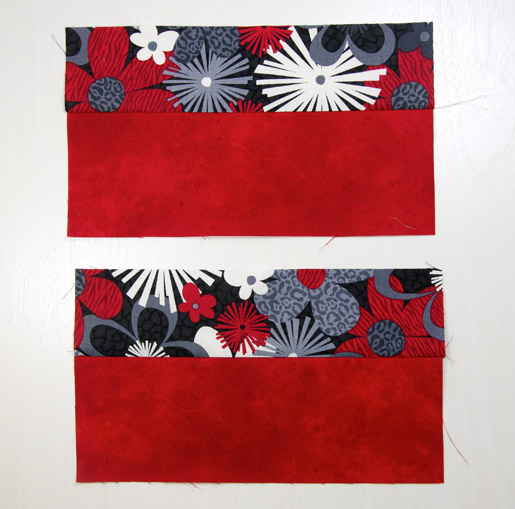
2) Sew the 9-1/2″ side of Piece A to the 9-1/2″ side of Piece B using a 1/4″ inch seam allowance. Press seam towards Piece A. Repeat with the other two pieces.
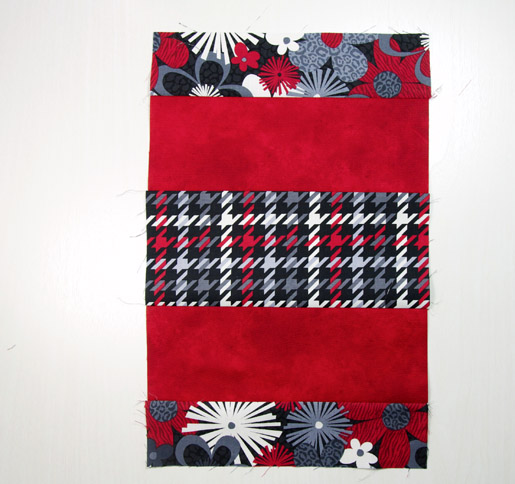
3) Sew the 9.5″ side of each piece B to each 9.5″ side of Piece C. Press seams toward Piece C. The sewn section should measure 15″ x 9-1/2″ when complete.
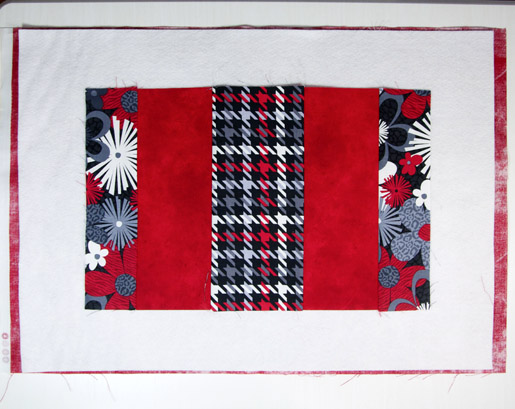
4) Place the lining on your cutting table, with wrong side facing up. Lay the batting on top. Place the outer bag section that you just made in the middle. Pull back the outer bag section halfway, and spray with temporary spray adhesive. Repeat with the other half.
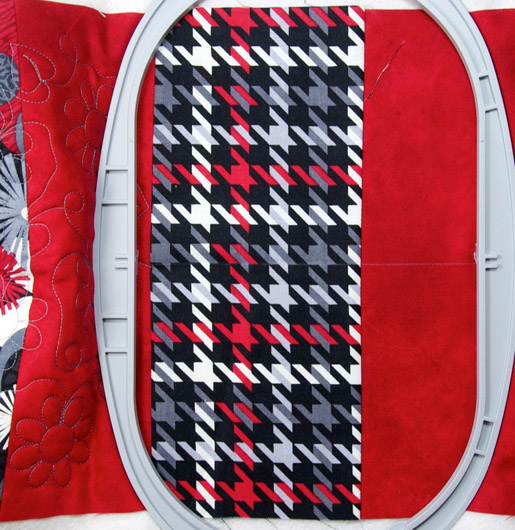
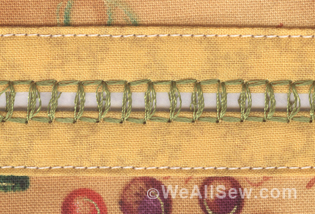
5) Quilt the bag. You can use the free embroidery design included with this project with your BERNINA embroidery machine to quilt the project, or use free-motion quilting with your sewing machine. (This is a great opportunity to try out your BERNINA Stitch Regulator for free-motion quilting!).
If using your BERNINA embroidery machine, you will be using your Oval hoop. Follow the instructions to load the design into your machine. Use a water soluble marking pen or to mark the horizontal middle of the outer bag section. Note: You will be stitching 3 designs across the width of the layered fabric.
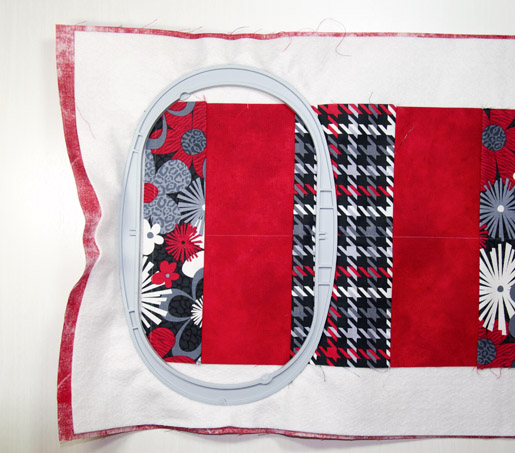
If embroidering with your BERNINA machine with the automatic thread cutting feature, be sure to deactivate thread cutting for this project. If the threads are cut engaged, there won’t be enough thread to secure the finished stitches. Since the quilting design is a straight stitch, you do not need to thread the bobbin for embroidery. Open the embroidery design in your machine. Lay the inside of the hoop on the left edge of the outer bag section. Center the hoop on the horizontal middle line. Place hoop in machine. Bring the bobbin up by turning the hand wheel towards you. Hold both the top thread & bobbin thread, and start the machine.
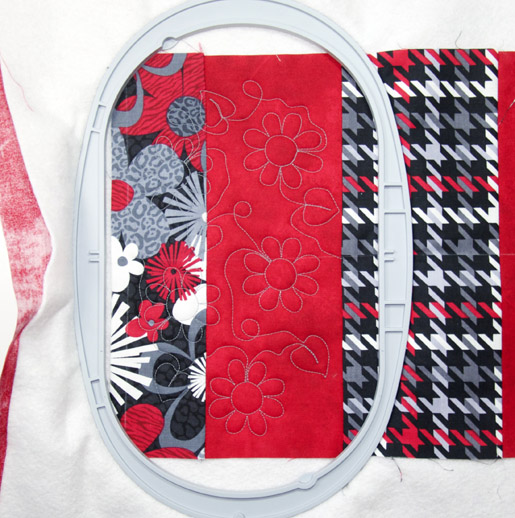
The machine will stitch the first design. Bring the top threads to the back with a needle, and tie a square knot on the lining side. Remove the fabric from the hoop.
For the second hooping, place the inside of the hoop 3/8″ to the left of the end point of the last design, with the middle of the hoop still centered on the horizontal middle line that you drew in step 7. Select the Move Hoop icon on the screen, and use the knobs to move the X and Y positions until the needle is right over the end point. Bring the bobbin up, and start the machine.
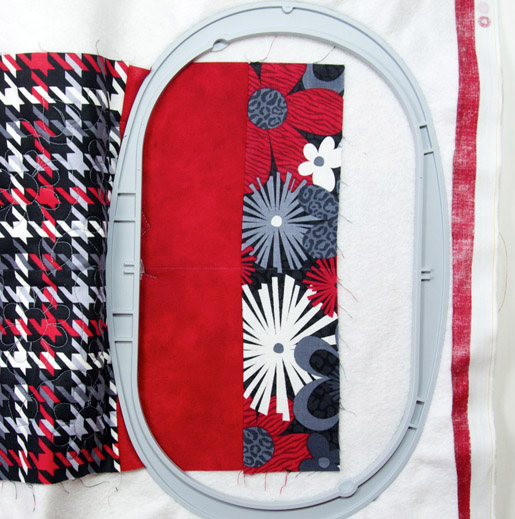
Repeat the same process as in Step 9 & 10 for the last hooping. Make sure the edges are spray basted down well. As you can see in the photograph, the right edge is not hooped. Make sure to watch the machine, so that the edges don’t flip over.

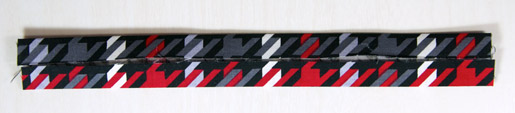
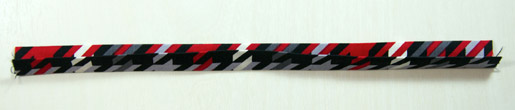
6) Trim the excess batting and backing with a rotary cutter. The rectangle should be roughly 9-1/2″ x 15″ when trimmed. Note: Often, quilting draws the quilt top inward, and can change the size of a project. The rectangle for my bag was 9-1/2″ x 14-3/4″ after I finished quilting it. So don’t worry if your rectangle is a slightly different size.
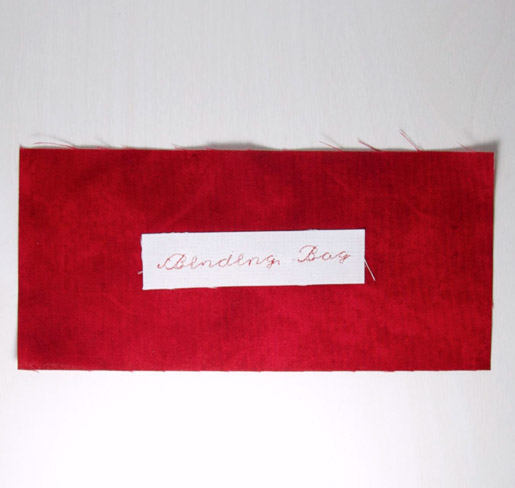
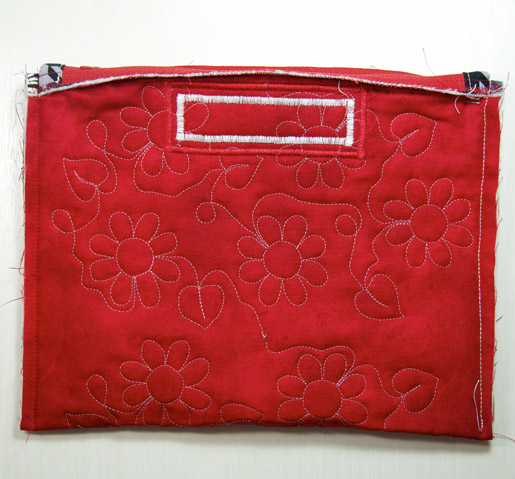
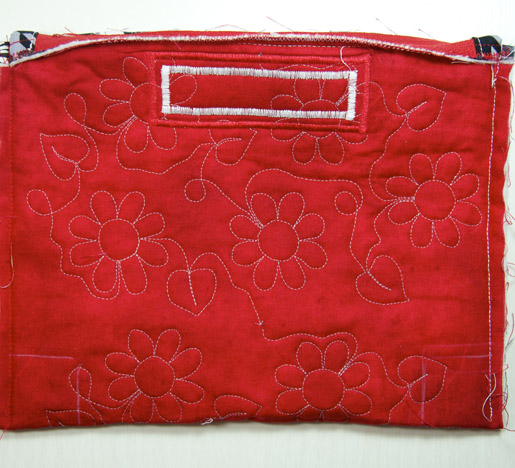
7) Stabilize the 4″ x 8″ scrap of white fabric. The rectangle will be cut to size after we have stitched out the wording. In sewing mode, select an Alphabet that has both upper and lower case letters. Program the words “Binding Bag” into your machine. Stitch out the letters. Press fusible web to the back of the wording. Trim the fabric, so that it is 1/4″ larger than the lettering on all 4 sides. Fuse onto a solid fabric scrap.
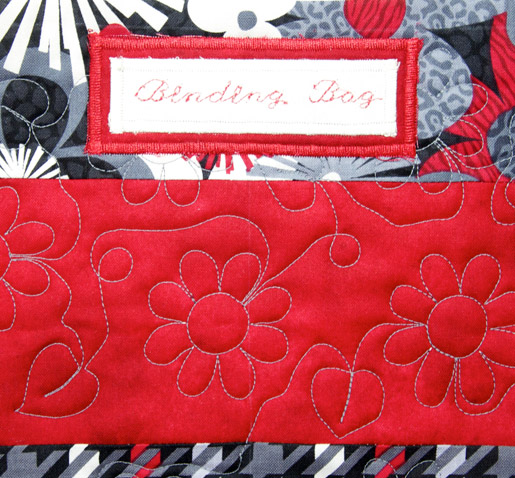
Press fusible web under the solid fabric. Trim the solid fabric scrap so it is 1-1/2″ x 4″ or 1/4″ larger on all four sides of the white fabric. Fuse to the outer bag, in the center of the flower fabric and 1/4″ above the seam where the flower fabric meets the solid fabric. Satin stitch around both fabrics, matching bobbin thread to lining.
8) In this next step, we are going to add a small piece of fabric to each side of the zipper, to give it a real professional look. Take a 2″ x 6″ scrap of the fabric you used for Piece C. Press in half, with wrong sides together. Open it back up. Press both long edges to the center crease. Press in half again.
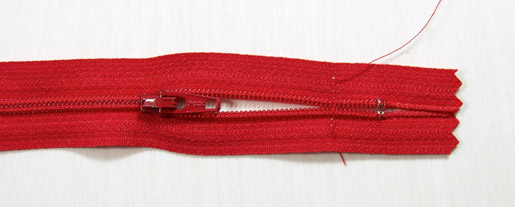
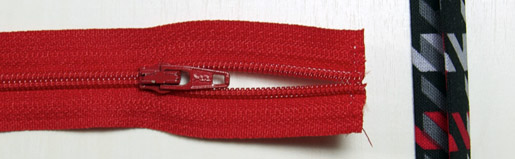
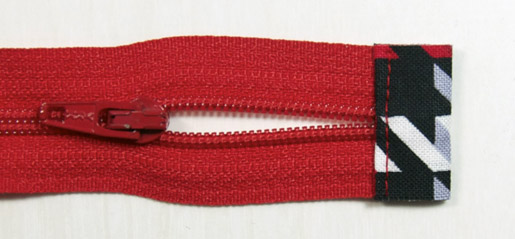
Un-zip the zipper so that the zipper pull is 2-3″ away from the end of the zipper. While holding the end pieces of the zipper together, sew a line over the teeth, going back and forth a couple of times. Trim the about 1/8″ off the end of the zipper, and place the edge inside the folded fabric piece you created in step 15. Edge-stitch the fabric, and trim the excess fabric with scissors.
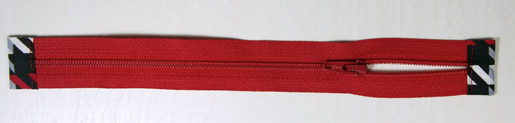
Mark a line 9″ from the end you were just working with. Cut along this line, and immediately place the second end inside the other folded strip. Edge stitch as before.

Note: The zipper needs to be 1/2″ smaller than the width of the bag.
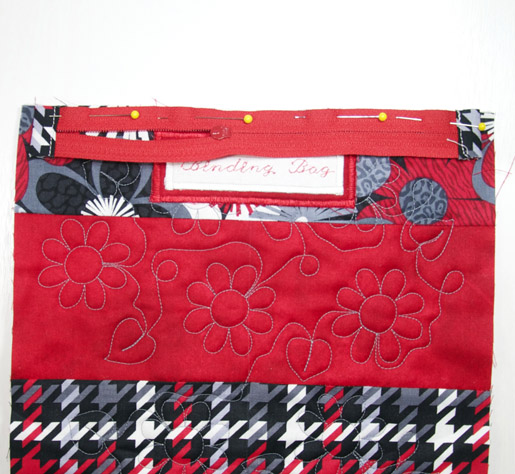
9) Lay the zipper on top of the short edge of the bag, just above the label. Center the zipper on the short edge, with the zipper head face down. Remember, the zipper will be 1/2″ shorter than the edge of the bag. Sew in place with your zipper foot or 1/4″ foot. You will need to move the zipper head out of the way, so start with the zipper fully un-zipped, and then about halfway down the seam, zip the zipper closed. Press the zipper up and the seam toward the body of the bag.
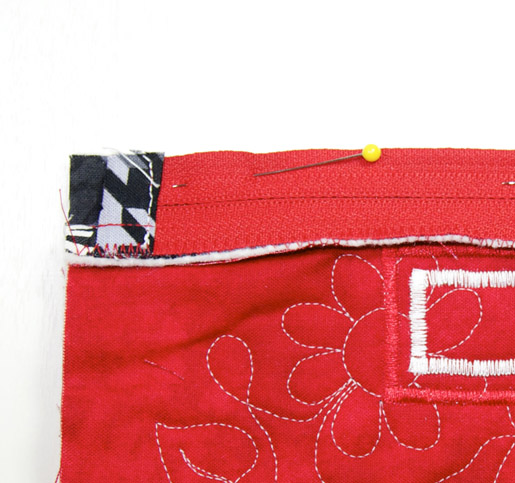
Lay the rectangle on a table with the outer bag facing up, and the zipper closest to you. Take the end of the rectangle with the zipper, and fold the rectangle in half, so that the wrong side of the zipper is at the top, and even with the raw edge of the quilted fabric. Sew in place with a 1/4″ seam. You can use your zipper foot, but I like to use my Patchwork foot #57D with guide along with the dual feed engaged. Remember to un-zip the zipper as you get close to the zipper head.
10) For this step, make sure the zipper is un-zipped most of the way. Sew the bag sides together with a 1/4″ seam. Start from the folded end of the bag, and sew up to the zipper end of the bag. Note: Be sure that you don’t catch the finished edges of the zipper in the seams. Also, having the BERNINA Dual Feed engaged will make sewing over the bulk a breeze.
11) Draw 1-1/4″ square at the bottom corners of the bag, using the side seam and the bottom as one two of the lines in the square.
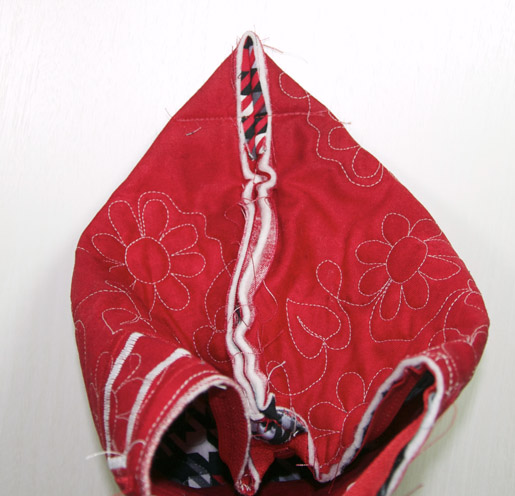
Pinch the corners of the bag, so that the side seam aligns with the bottom fold of the bag. The lines you drew in step 21 will create a straight line. Sew across the line. Trim off the triangle, leaving a 1/4″ away from the seam. Repeat for the other side of the bag.
Turn the bag right side out. You project is complete.
Enjoy!


What you might also like


12 comments on “How To Sew a Binding Bag”
-
-
I’m glad you liked the project. I had fun designing it too!
-
-
Can’t download the flower meander-just get hieroglyphics!
-
BERNINA posted some information about how to download the files. See comment # 4.
-
-
Is anyone having trouble downloading the free design? All I get is computer language when clicking on the link.
-
I was getting the same problem. So I deleted the file name in the link and went here:
https://weallsew.com/wp-content/uploads/sites/4/dl
Then I was able to save the file to my computer and was able to open with the V7 Software.
-
-
Dear WeAllSew fans,
here are some steps on how to open the design file:
Step 1:
On the link to the design, right click and save as in a folder you can access later.Step 2;
Open your BERNINA Software program (ArtLink or BERNINA Embroidery Software) to open the design.Step 3:
Because the software defaults to only opening .ART files, you will need to select the .EXP option from the “Files of Type” drop down menu. The design is then displayed in the preview window and you will be able to open it.Have fun!
-
Down loading the free design does not seem possible on my iMac.
-
Can not download the free design file after logong in.
Help
Thank you
RITA CANTRELL
EMAIL [email protected] -
Great tutorial, Christine! Can’t wait to try it. Lots of work went into this and it shows. Thank you!
-
Where do I find the edge to edge design mentioned in the instructions for the Binding Bag? I have tried several times and have not been able to find it. Thanks for your help. Connie
-
Hi there,
The link is under “Options” which is right after the “Materials.”
-
Leave a Reply
You must be logged in to post a comment.
Thank you for the design and the tips. Love the project and hope to be able to make one for myself soon!