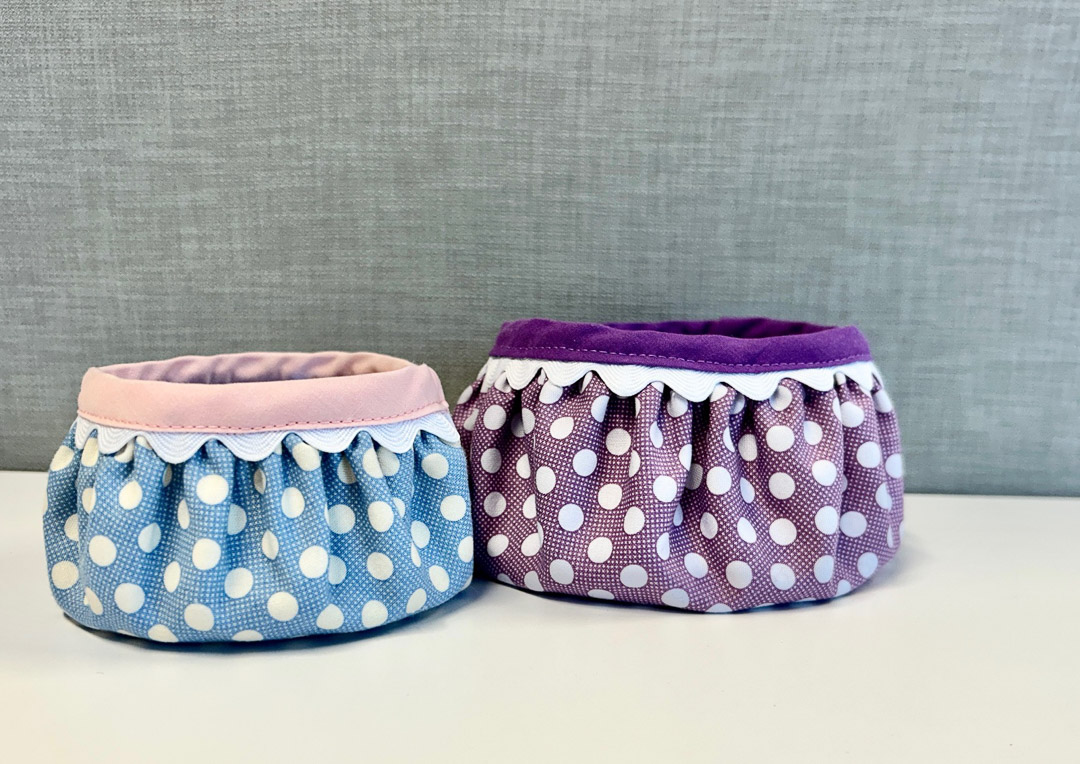
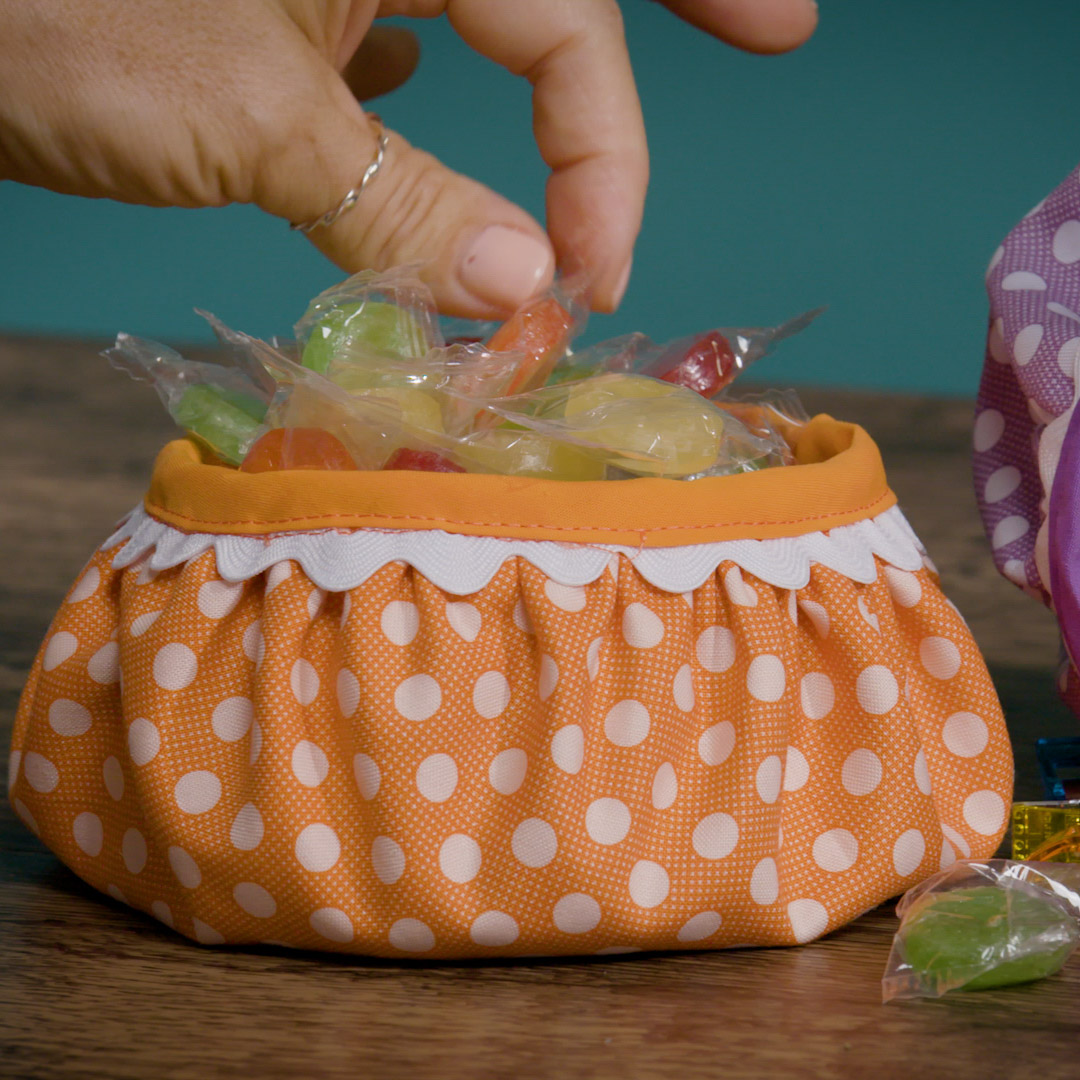
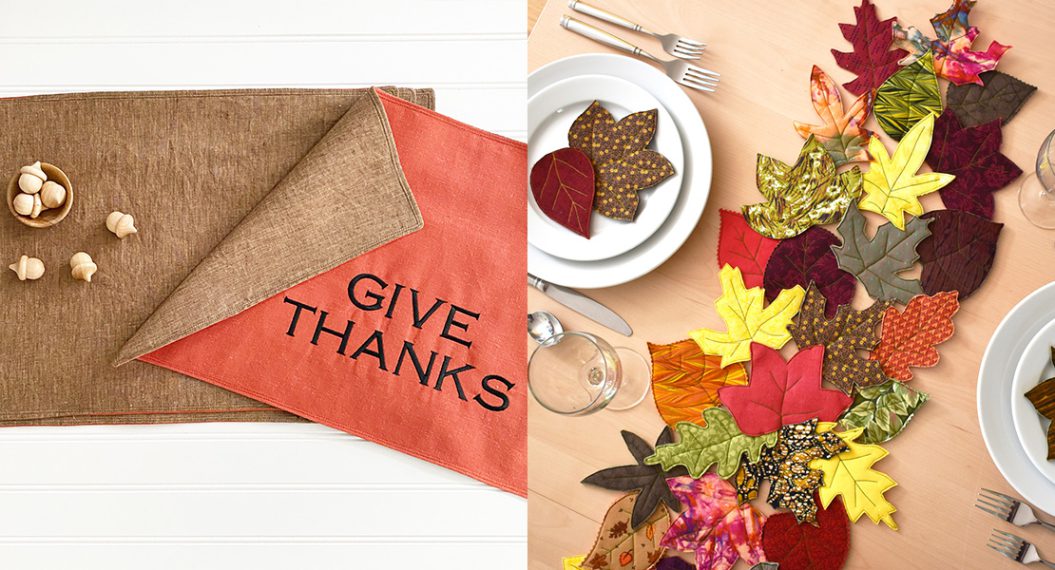
Fast & Fun Fabric Bowls
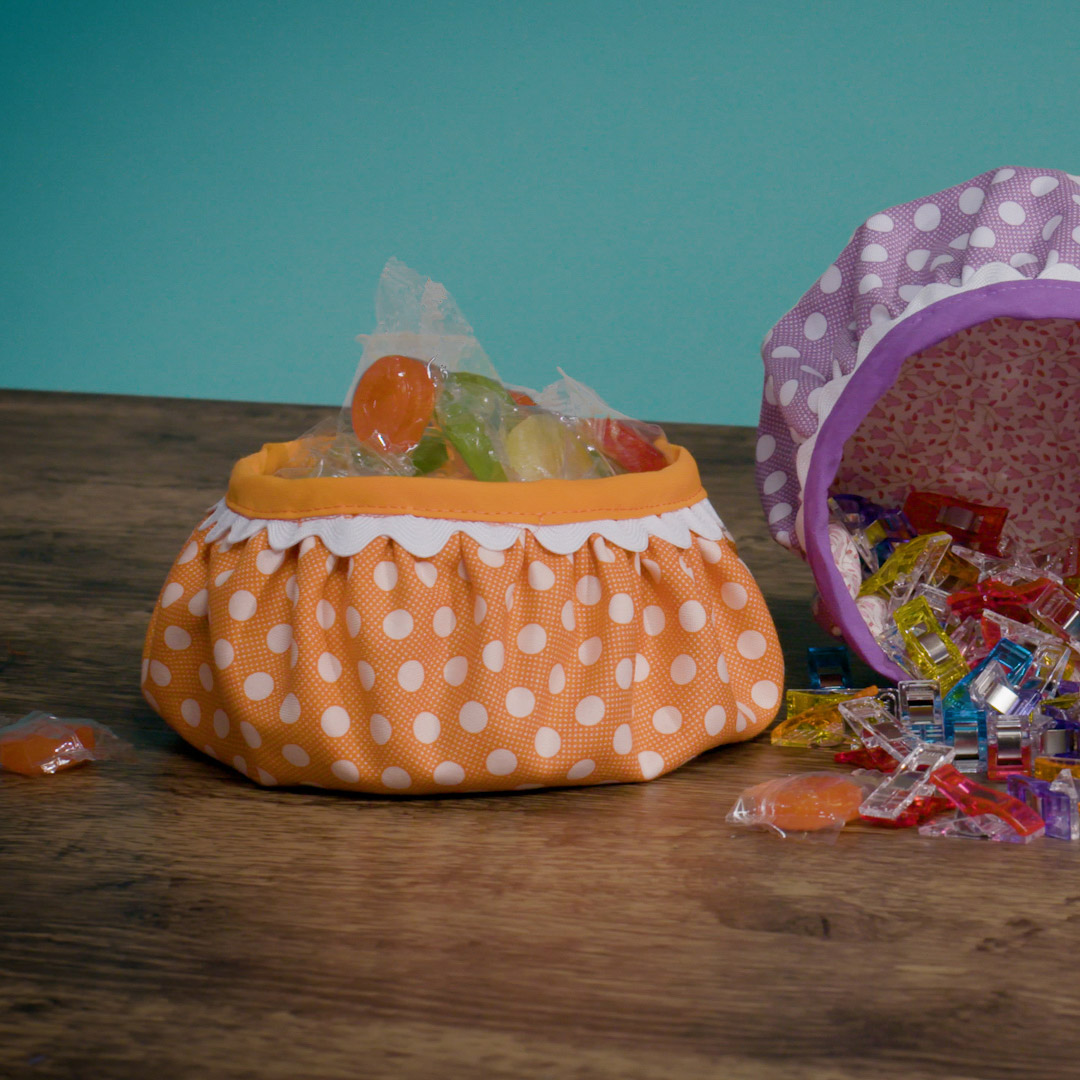
Did you know the BERNINA Circular Embroidery Attachment #83 can stitch fun fabric bowls in the time it takes you to read this blog post? With that attachment as your secret ingredient, you’ll be amazed at how quickly these stitch up. You can make different sizes to nest together, change the look depending on the season or occasion, and fold them flat for travel. If you don’t already have the Circular Embroidery Attachment #83, read on and see why you need one in your sewing room!
Materials for Sewing a Fabric Bowl
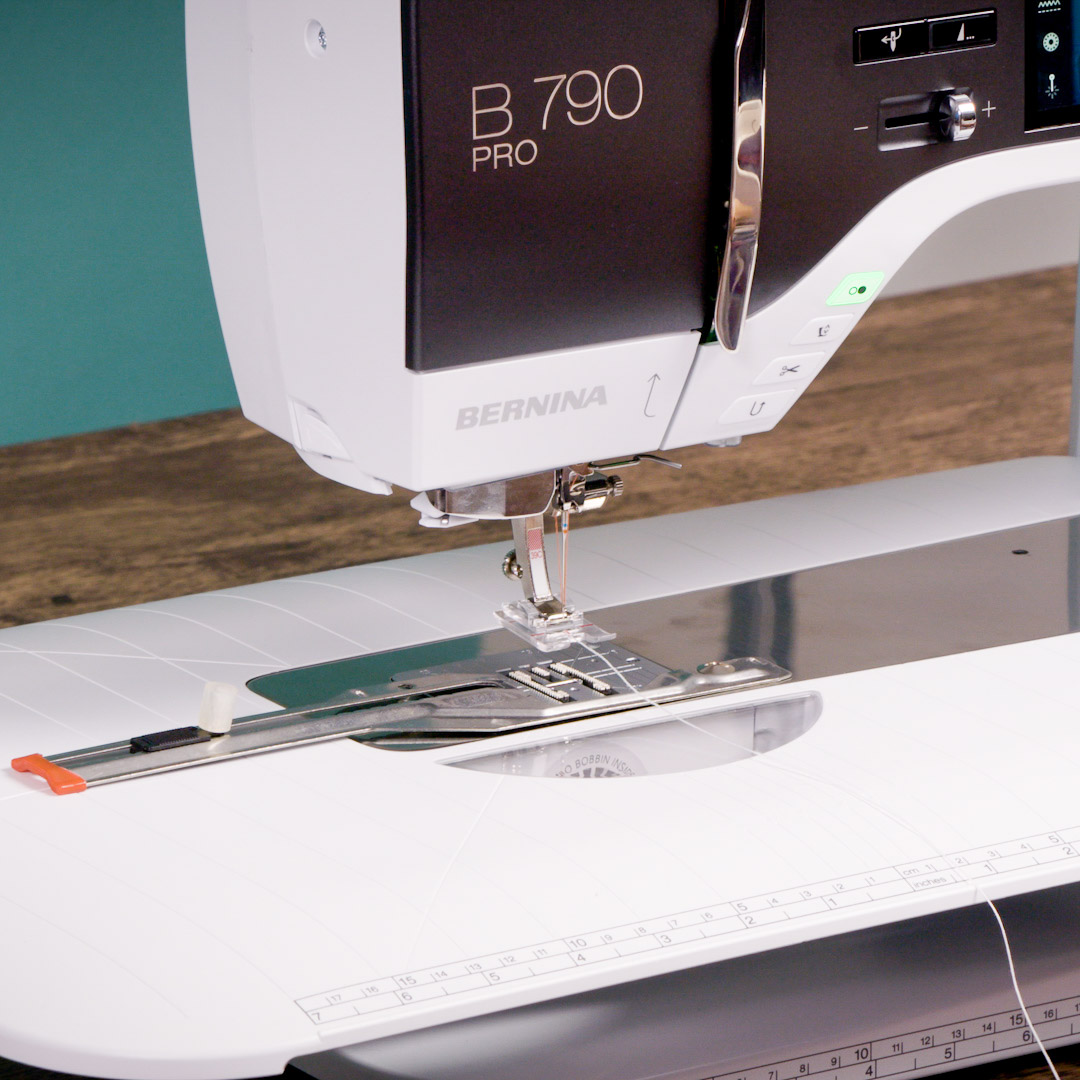
- BERNINA 790 PRO
- Clear Embroidery Foot #39C
- Circular Embroidery Attachment #83
- Walking Foot #50
- (2) 12” x 12” fabric squares
- (1) 12” x 12” Shape Flex stabilizer
- (1) 15” rick rack – standard size
- Mettler Cotton thread, 50 wt, bias tape color
- Mettler Cordonnet thread or similar
- Temporary marker
- Stiletto
- Aleene’s Stiffen Quik Spray
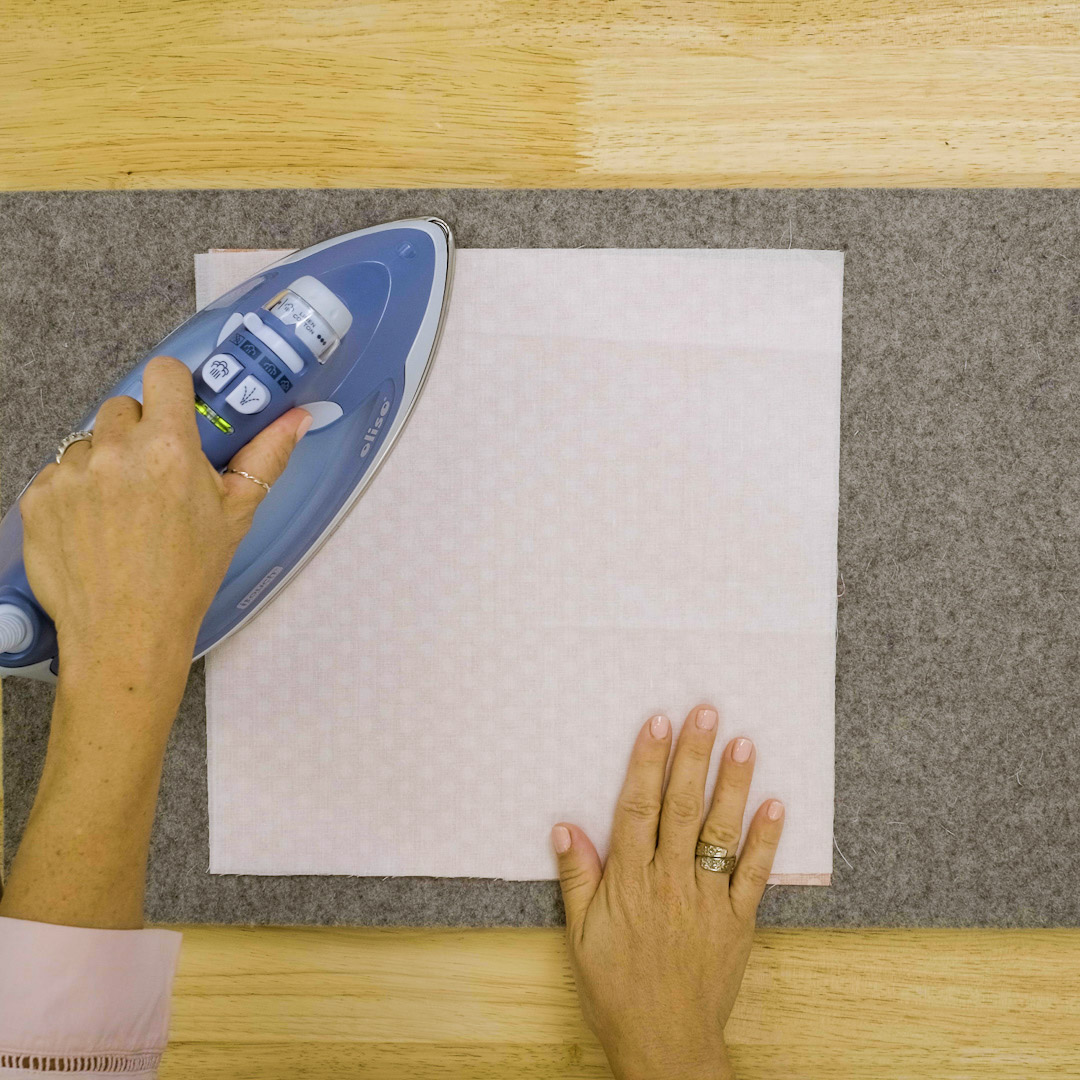
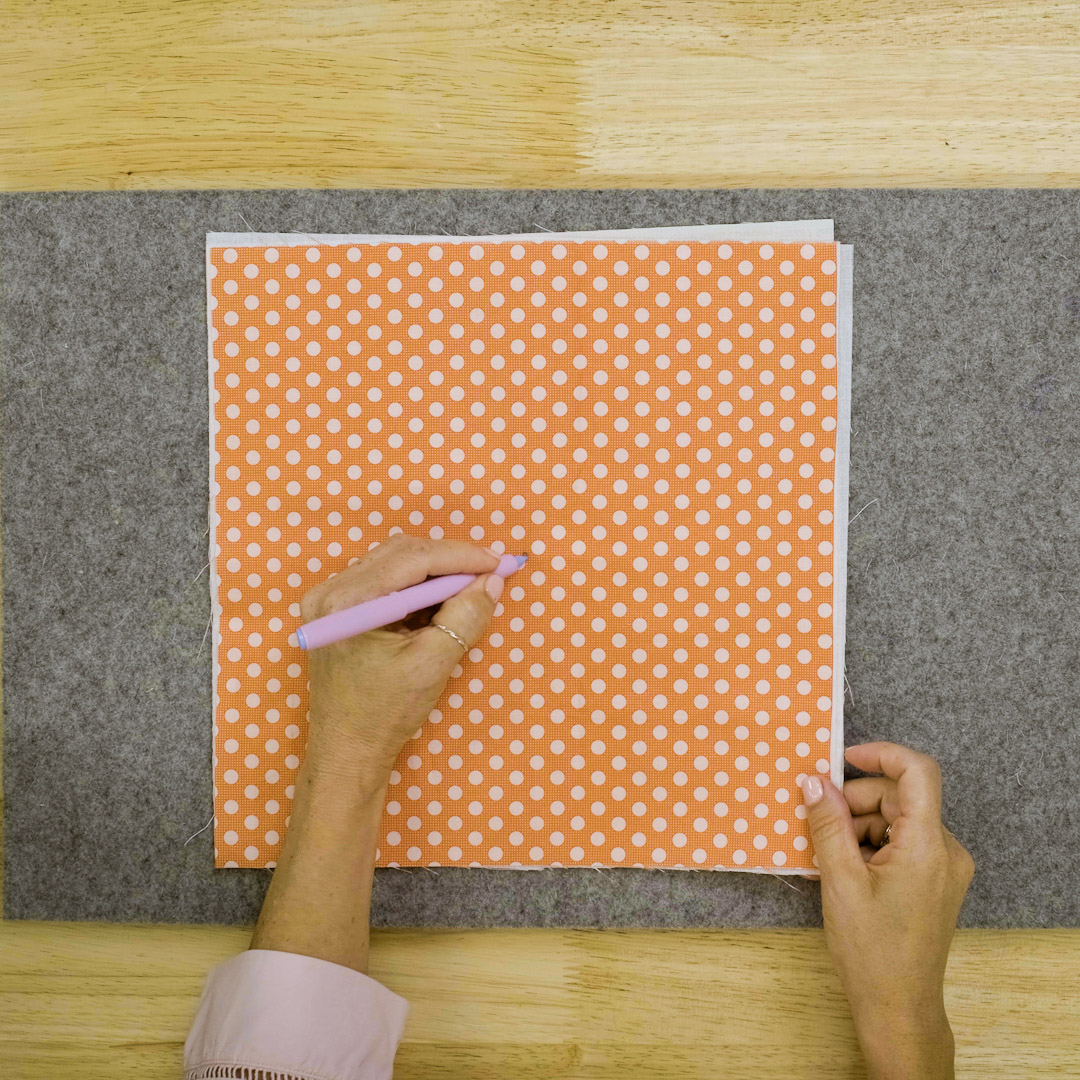
Step 1: Prep Fabric
Place one fabric square wrong side up on a pressing mat. Place Shape Flex on top of the fabric with fuse side down. Press, following the Shape Flex instructions to fuse. I like to press this way so if any fuse melts off the fabric, the sticky residue ends up on the pressing mat and not my iron!
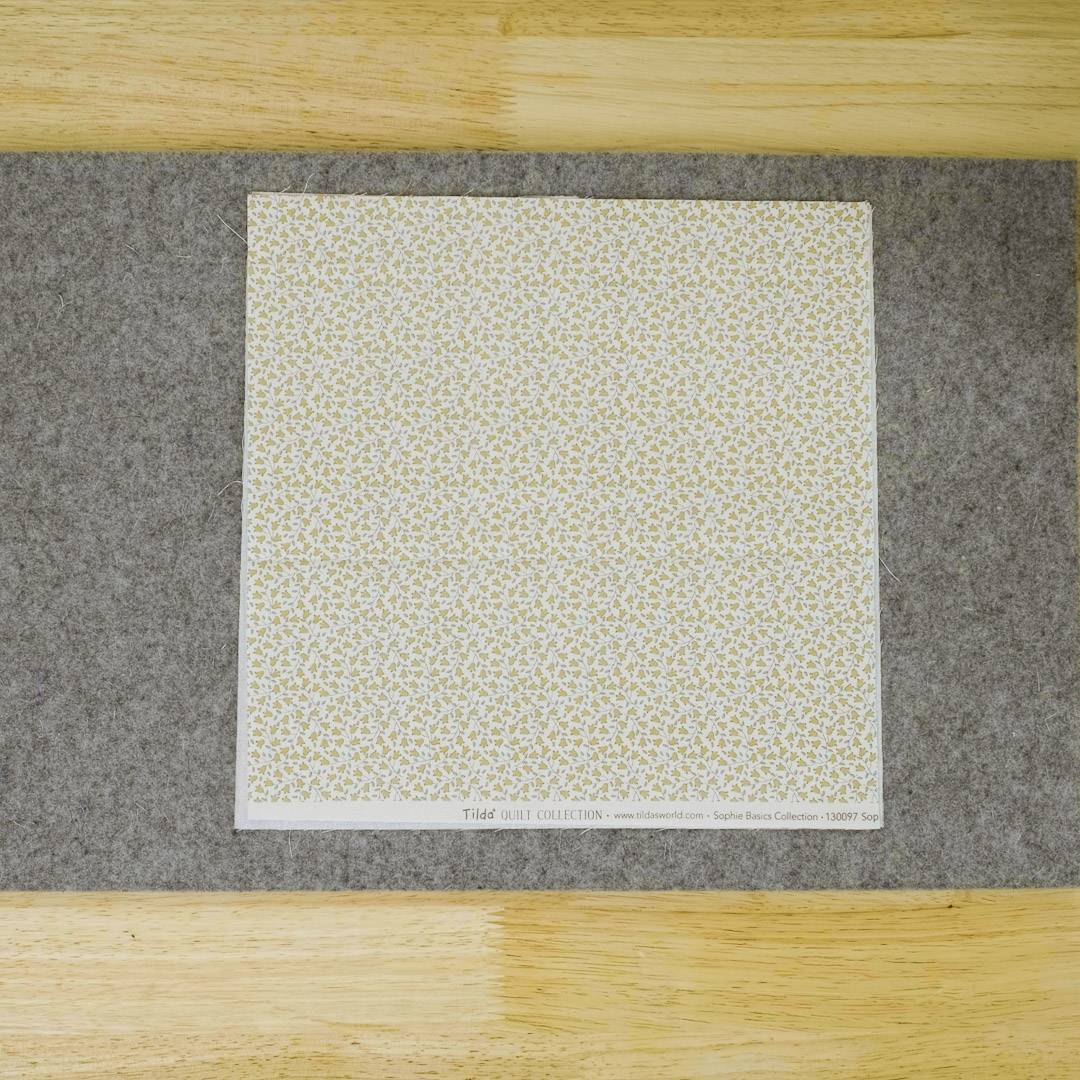
Next, place the second square of fabric on top, right side up. Are you familiar with Tilda fabric? It’s a Norwegian fabric company with the most whimsical and charming cotton prints. Check out tildasworld.com.
Fold fabric layers in half lengthwise and widthwise.

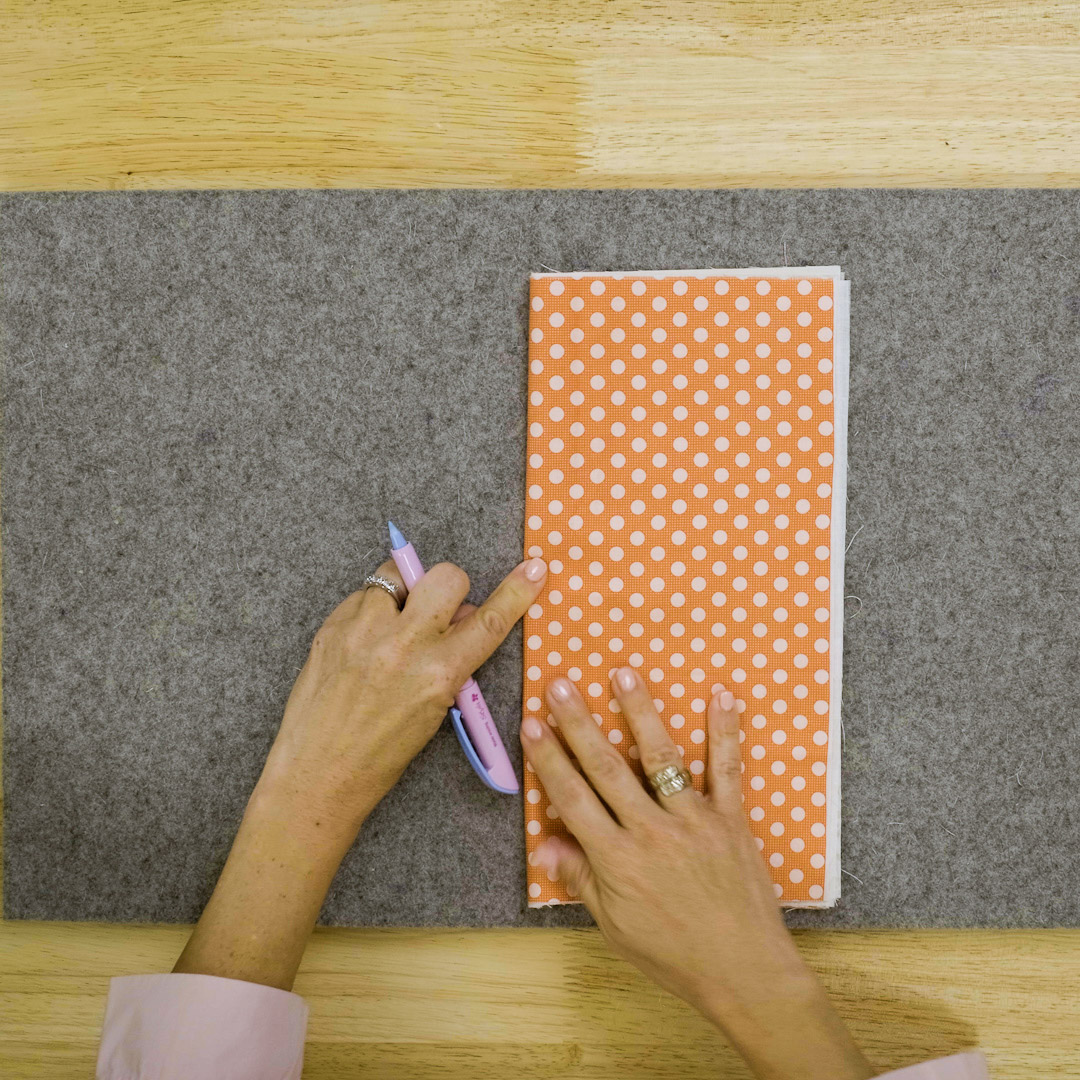
Mark center with a temporary marker.
Step 2: Attach Foot #39C and Attachment #83
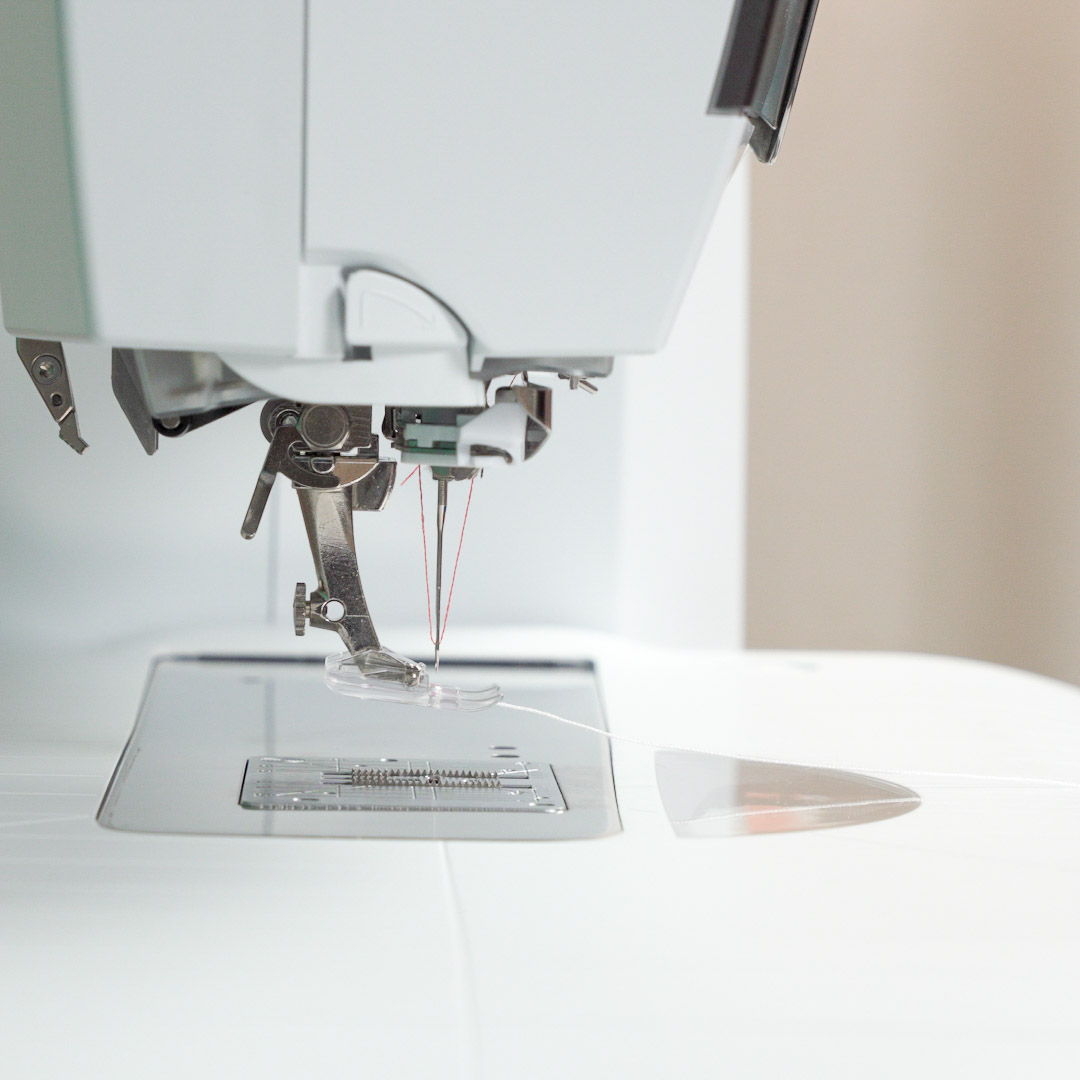
The Clear Embroidery Foot #39C has many advantages, including a small hole located at the front of the sole. Insert Mettler Cordonnet thread or similar-sized cord through the hole.
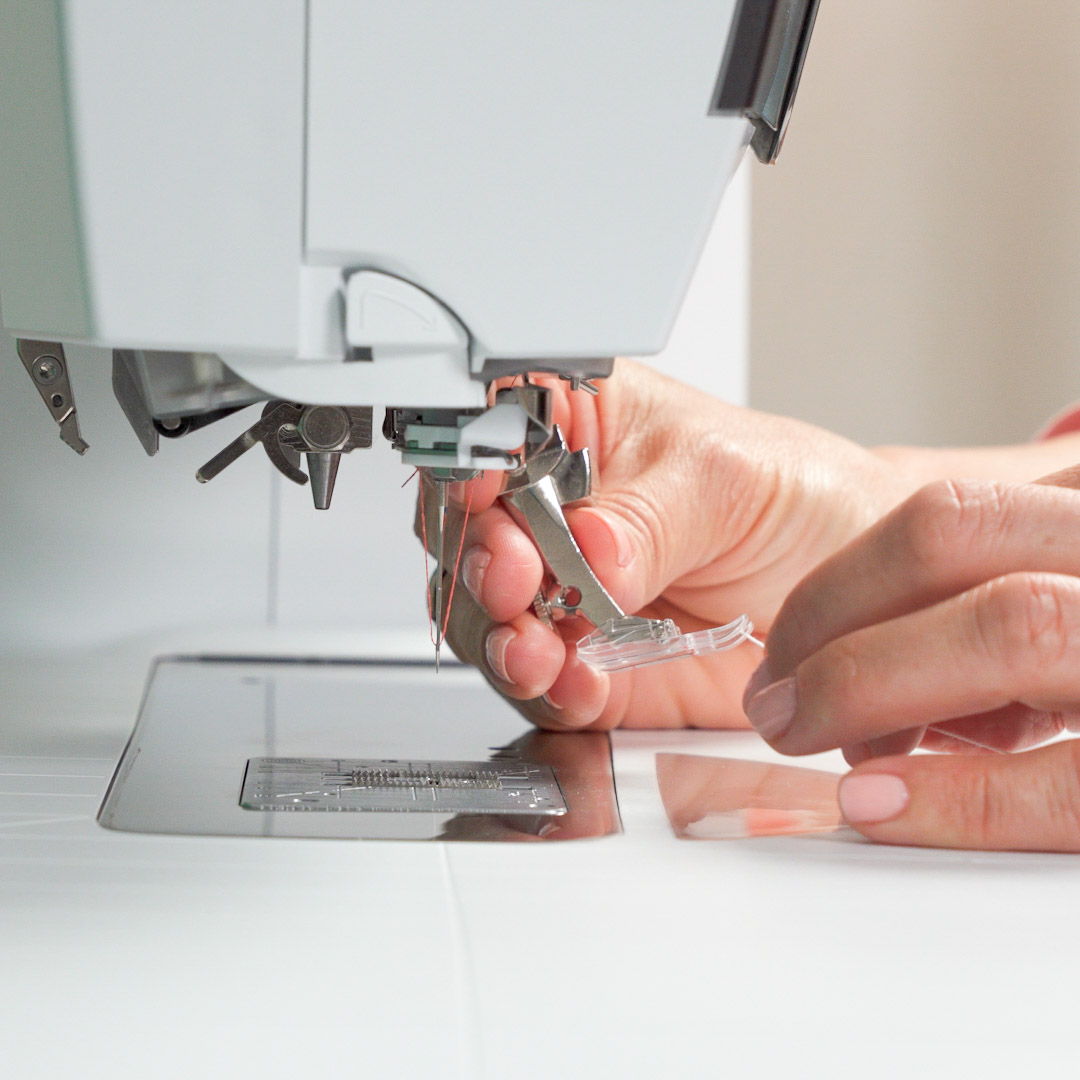
Bring the thread to the back a few inches and attach the foot to the machine.
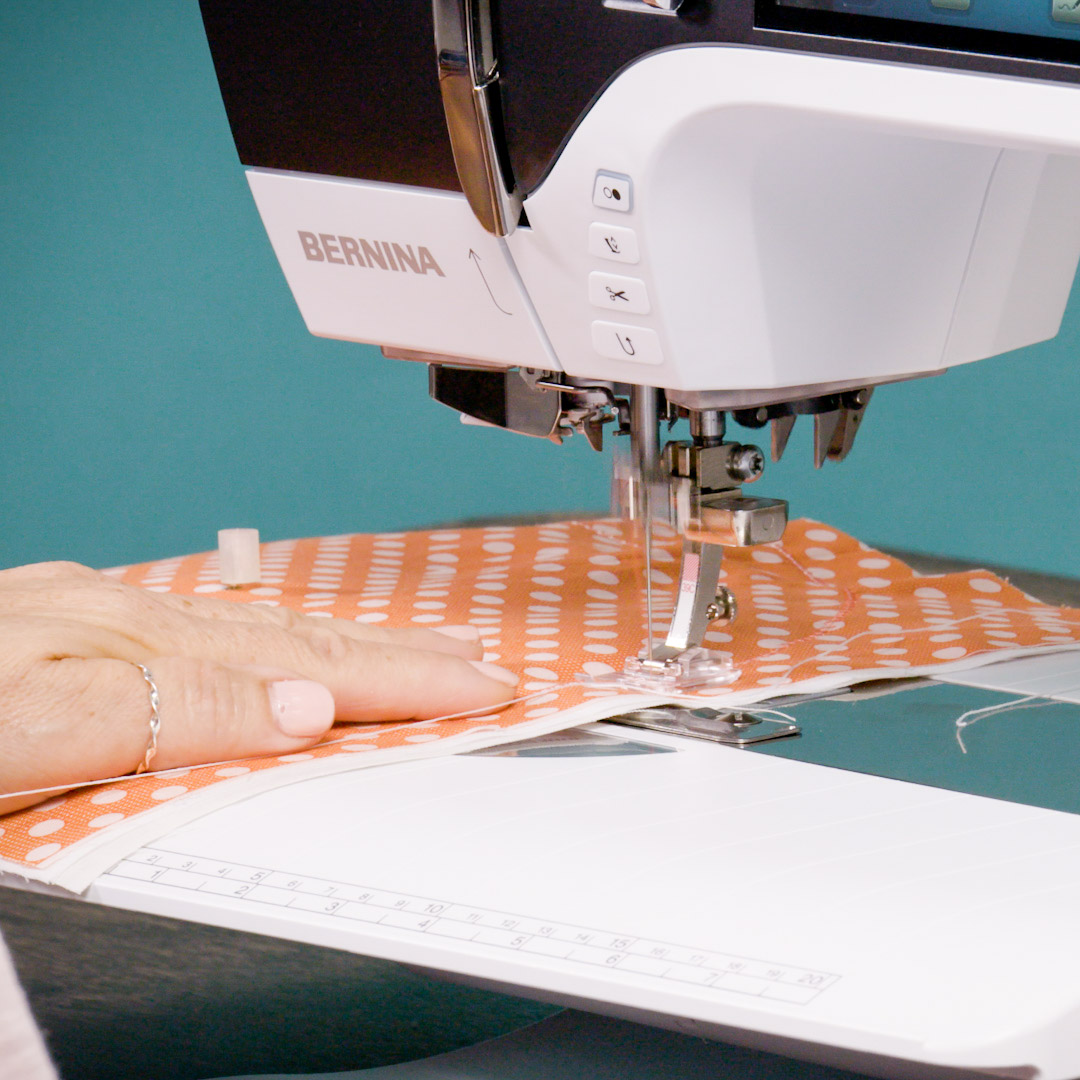
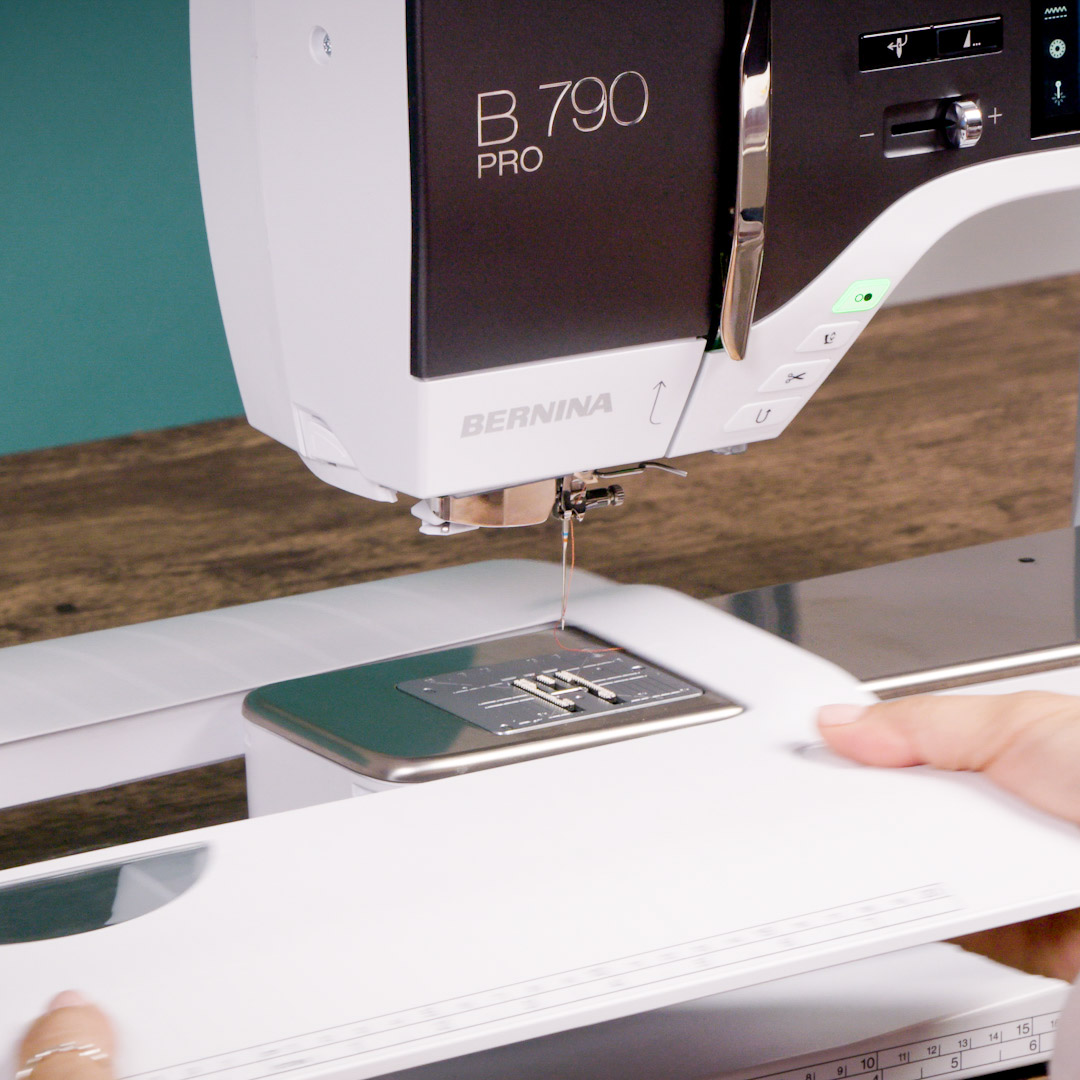
Circular Embroidery Attachment #83 attaches to the freearm of the machine. On the freearm, there are two holes to the right of the stitch plate. Place the attachment on top of the freearm, matching the hole in the attachment with the left hole in the freearm (see picture below). Insert the screw and tighten with the small screwdriver (both come in the box with the attachment).
Did you know most BERNINA feet can be used with Circular Embroidery Attachment #83? Think texture with piping and couching feet. How about cording feet? So many possibilities! Check out this eBook for different techniques using Attachment #83.
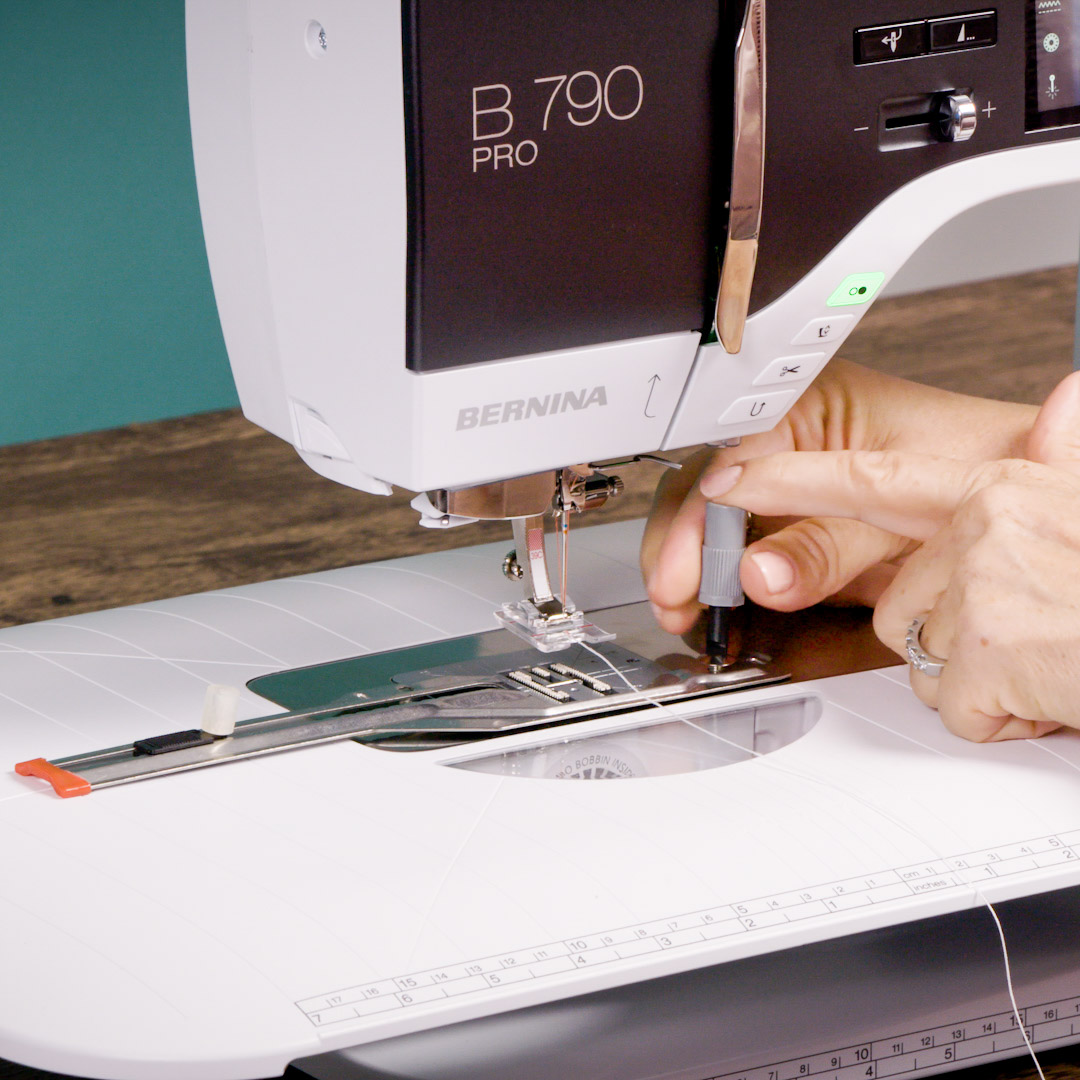
Step 3: Couch Cord
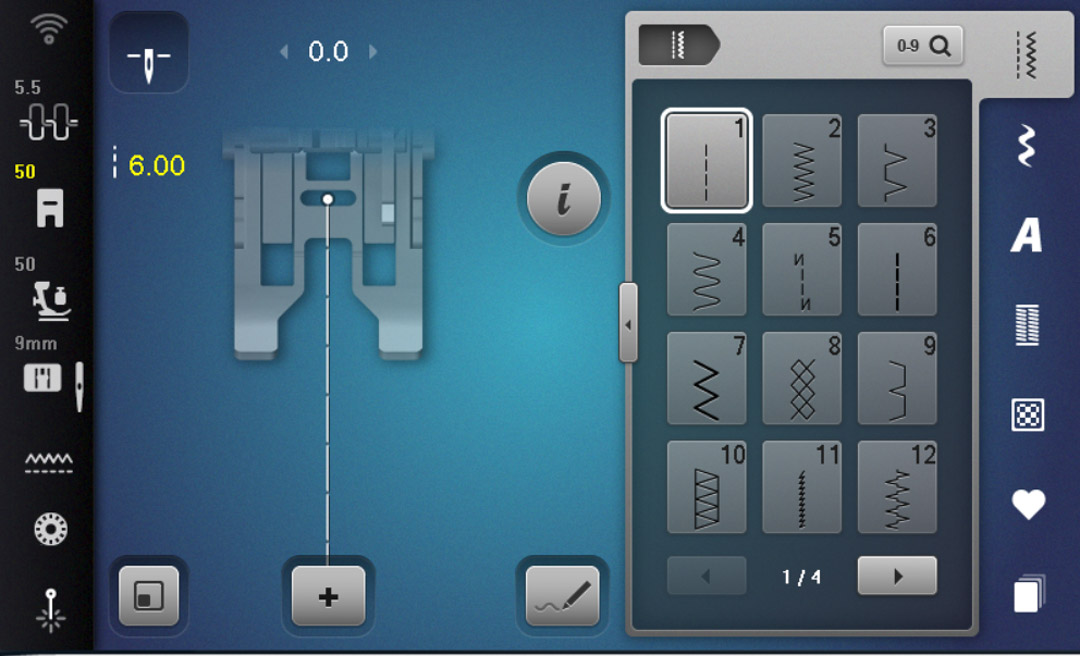
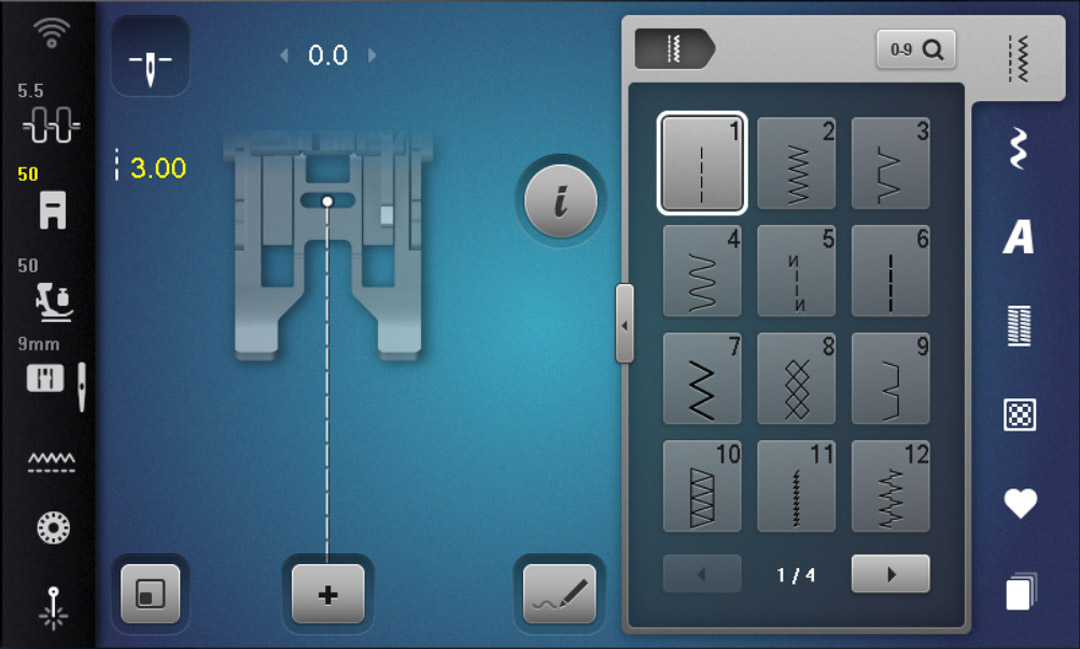
On the machine screen, select Foot #39C and Zig Zag Stitch #2. Increase stitch length to 2 mm.
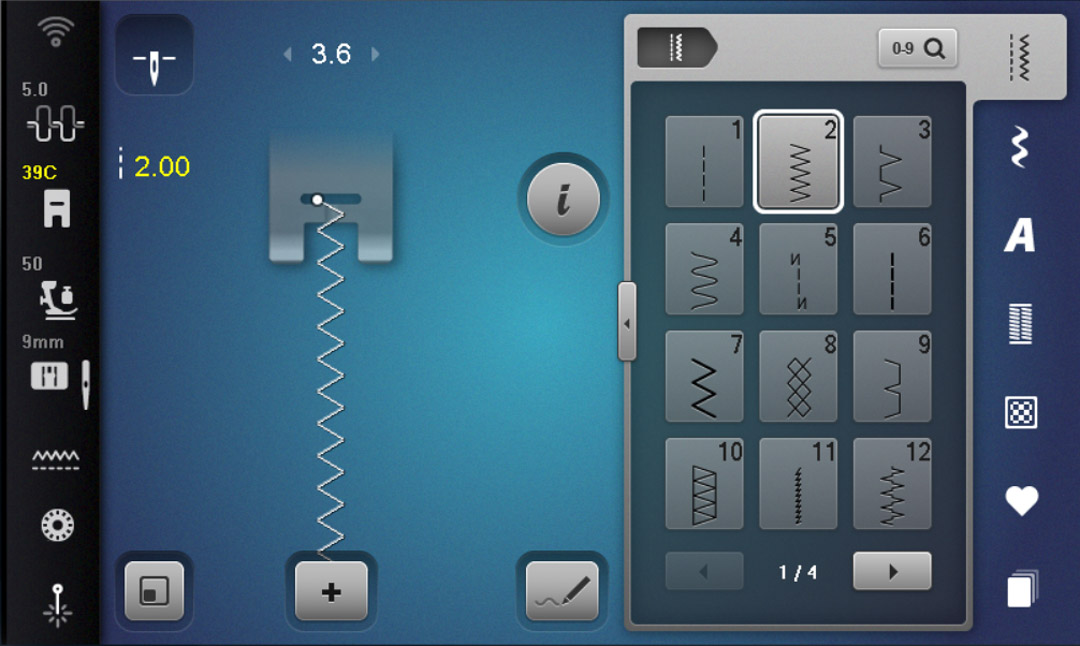
Move the slider on Attachment #83 all the way to the left. Remove the rubber end and place the fabric through the pin at the center mark. Place the rubber end back in the pin. Lower the presser foot and notice where it lands. Is it on the fabric? Raise the presser foot and rotate your fabric, making sure the foot is under the fabric all the way around. You are not sewing yet — only checking placement.
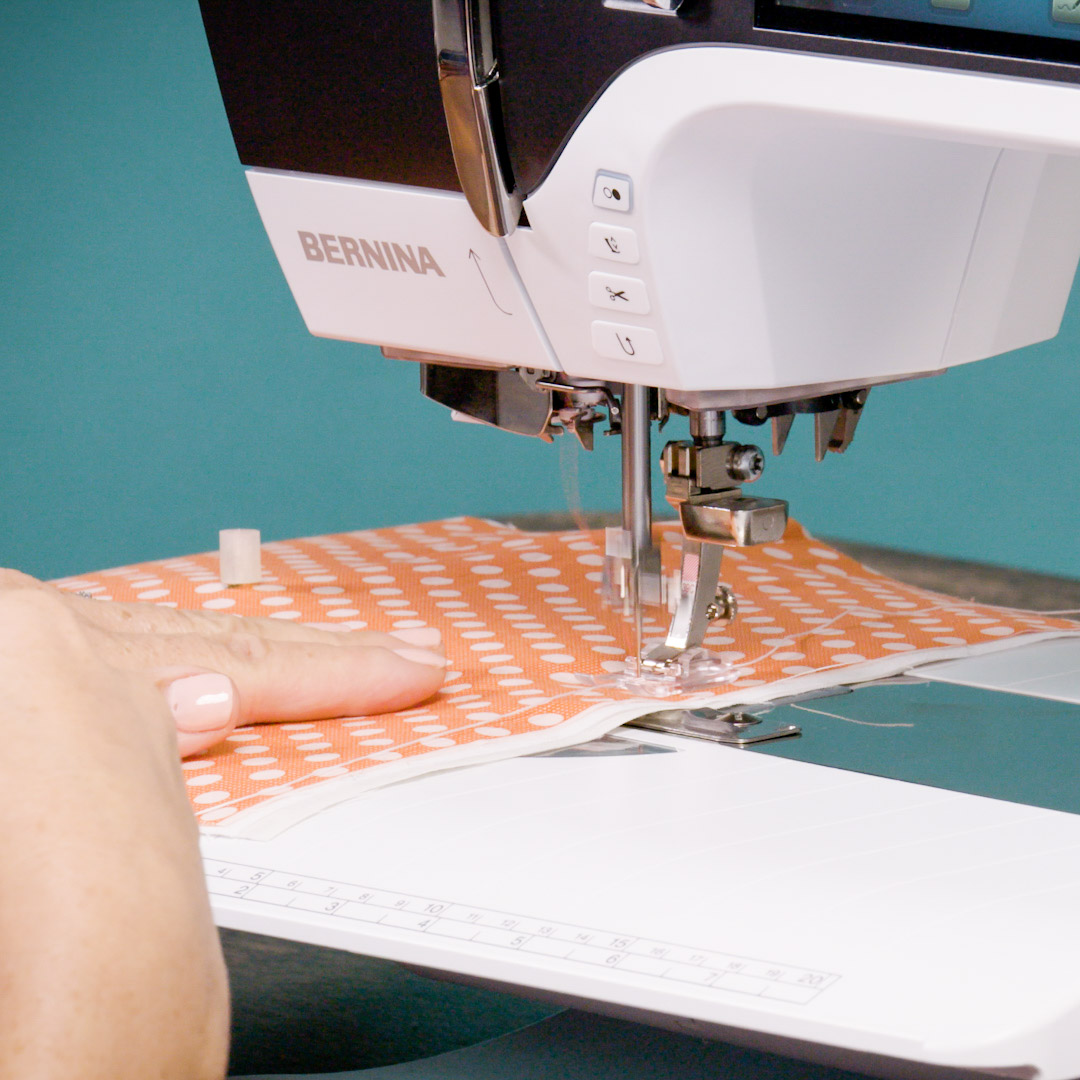
Traditional couching requires sewing slowly to make sure the needle doesn’t stitch in the cord. If it does, it’s not possible to gather the fabric. With Foot #39C, you don’t have to watch the cord so diligently. The hole in the sole guides the cord, keeping it center so the needle will not catch the cord. Start sewing and watch Foot #39C couch for you!
Continue until you’re a couple of stitches from the beginning. Remove the fabric from the attachment and cut the cords, making sure you have 3-4” of excess cord at the beginning and end.
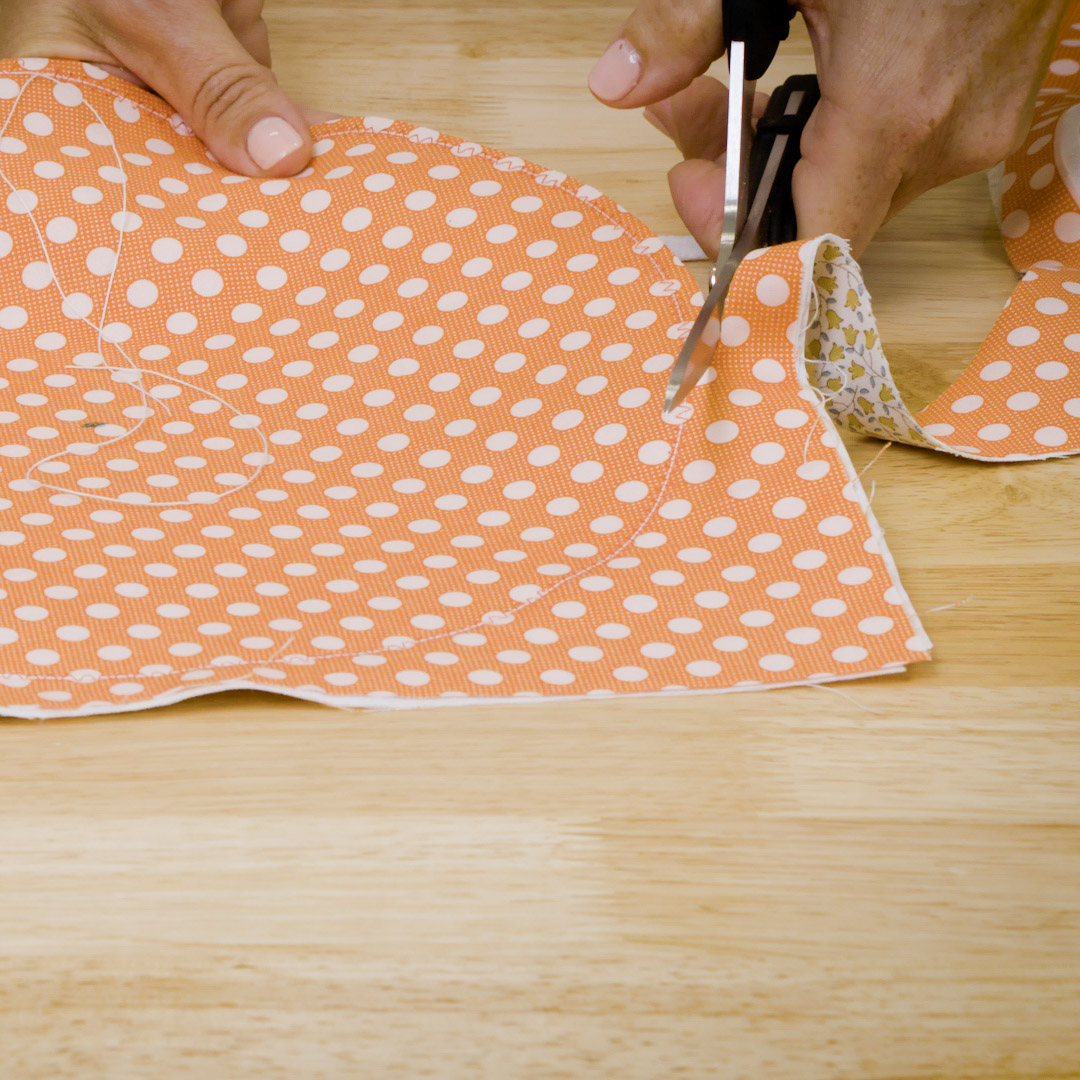
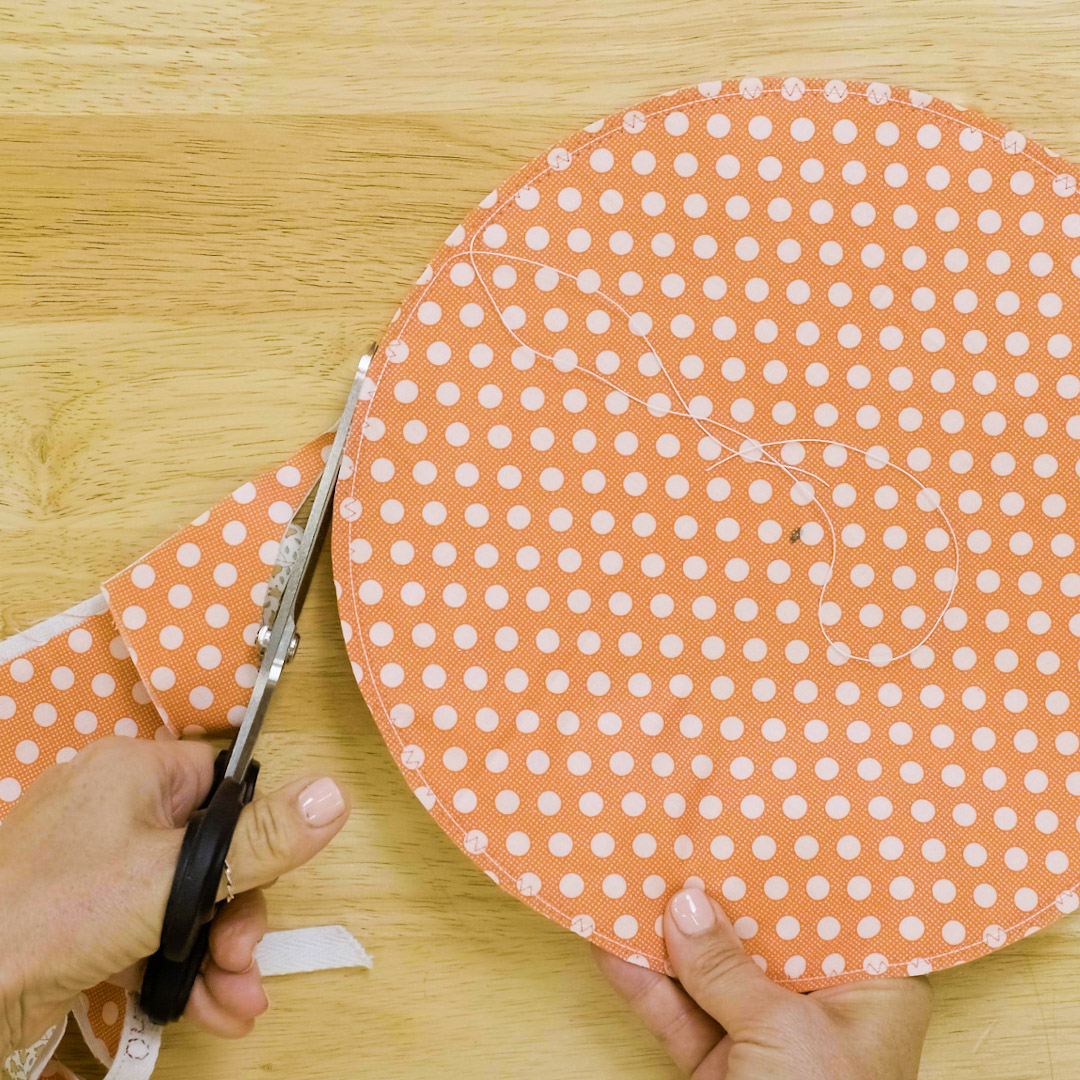
Step 4: Cut out Circle and Gather
Trim around the circle without cutting into the stitches (yes, I’m left-handed!).
Holding the two cord tails in one hand, start gathering the fabric.
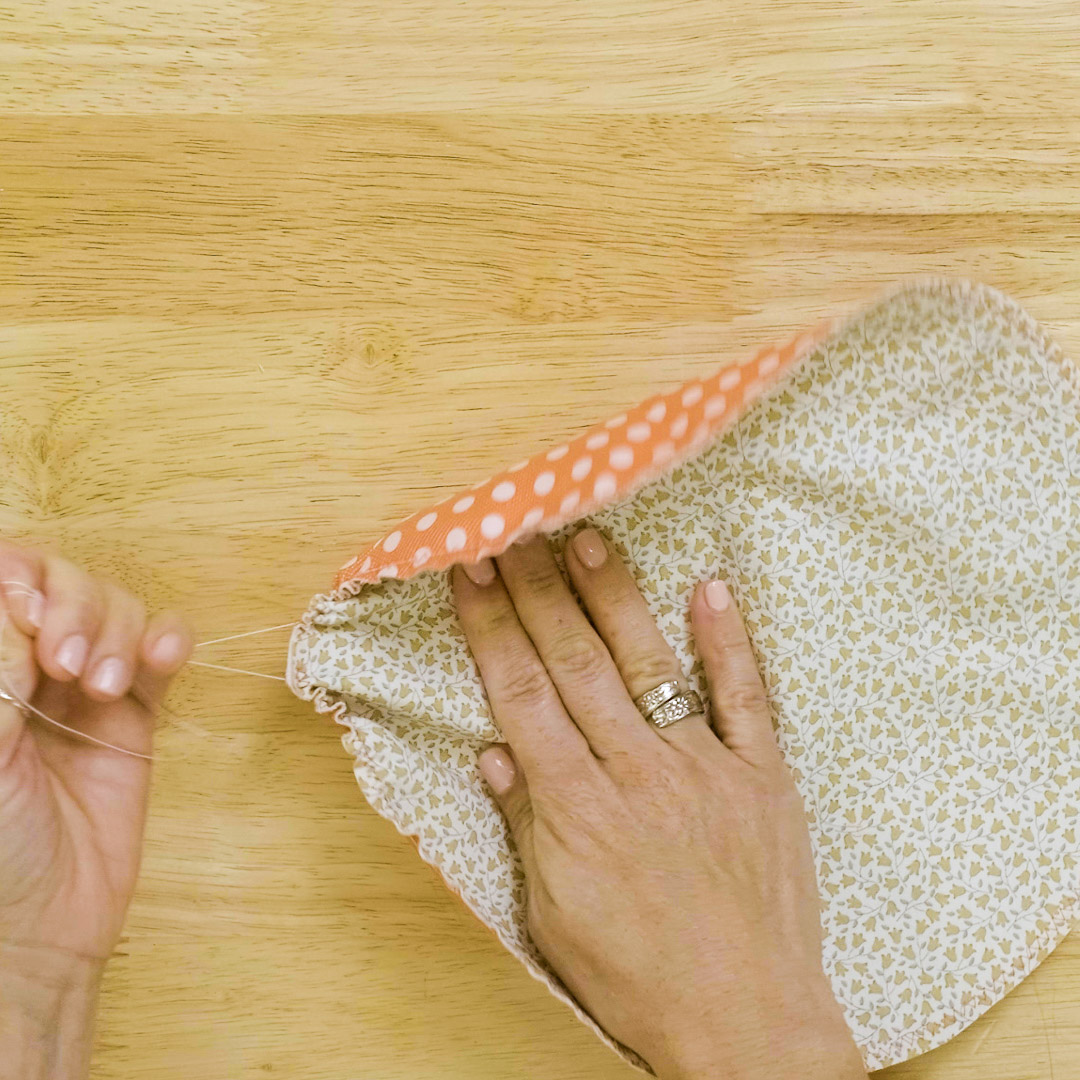
Continue gathering the fabric by distributing the gathers evenly around the entire perimeter.
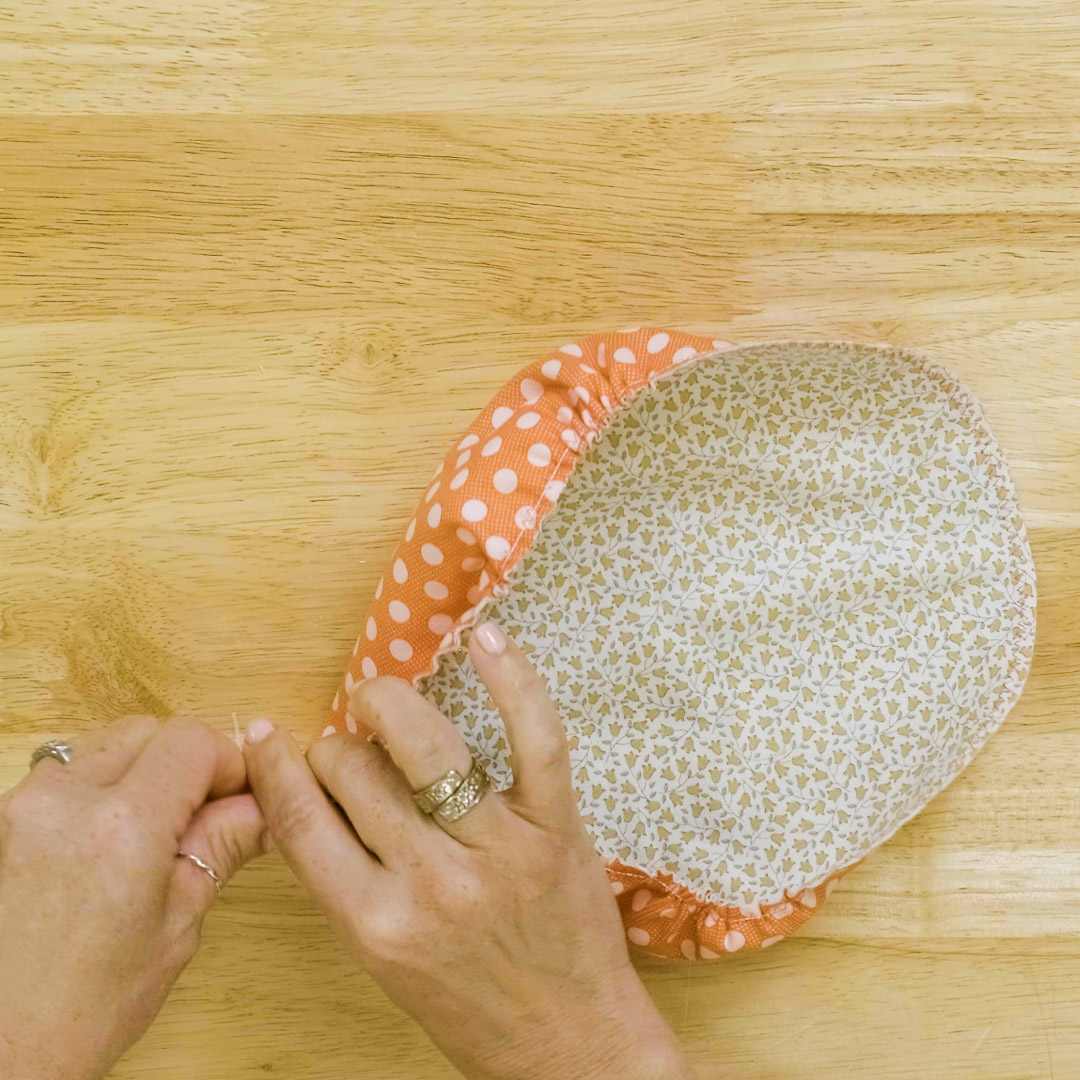
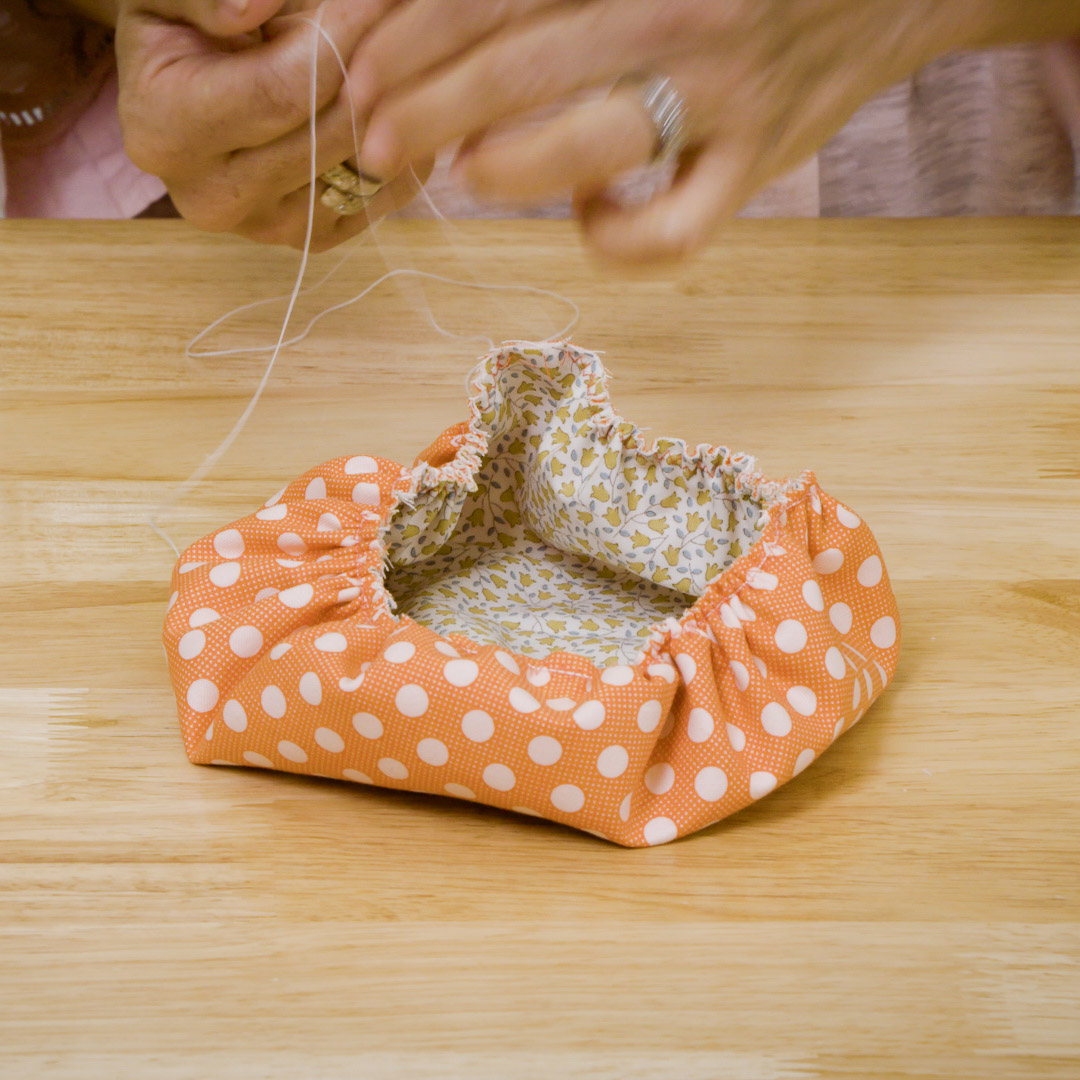
When you are happy with the amount of gather, tie the cord tails into a knot. Don’t worry about how your bowl looks at this point. It will begin to take shape soon.
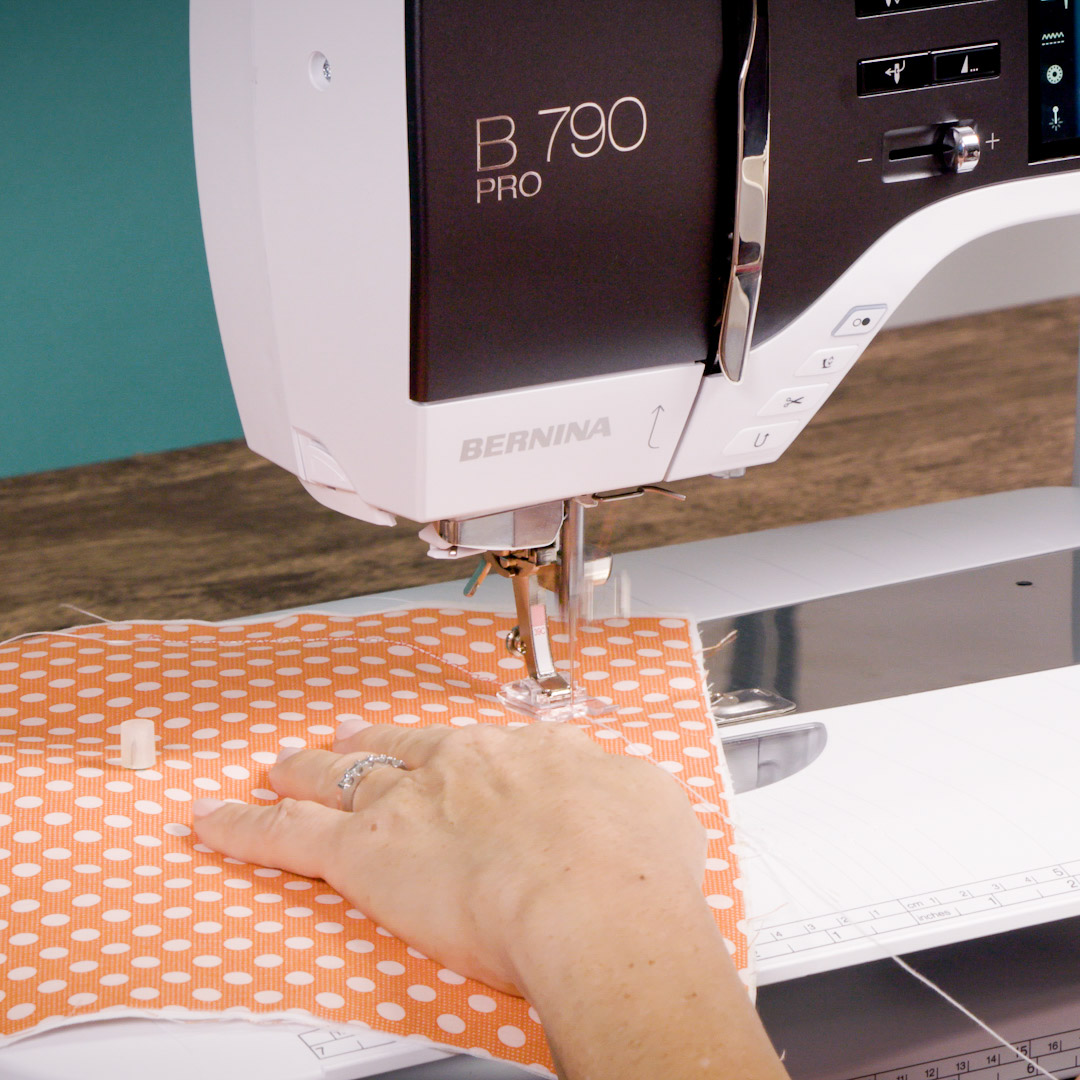
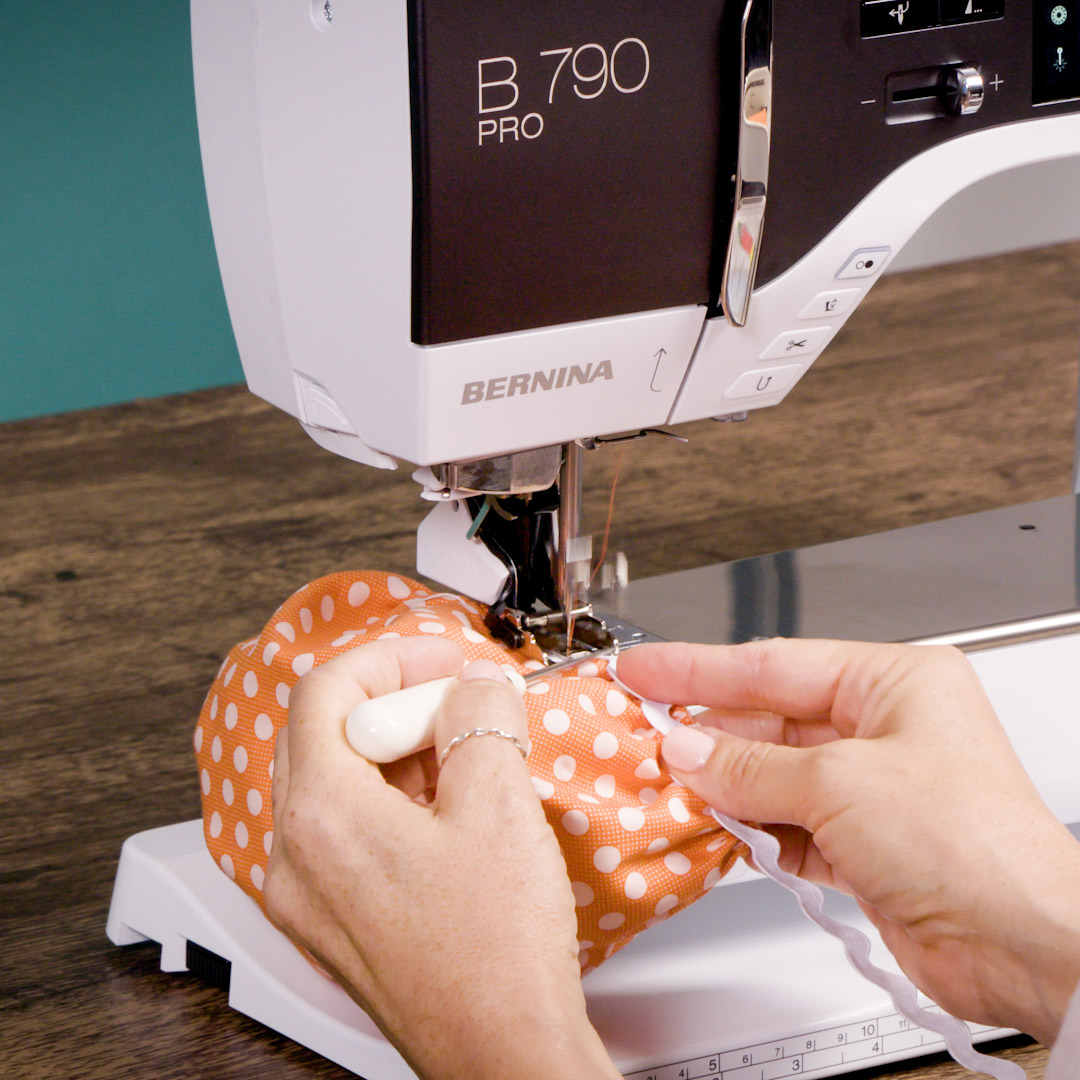
Step 5: Attach Walking Foot and Rick Rack
Attach Walking Foot #50 to your machine. On the machine screen, select Foot #50 and Straight Stitch #1. Increase stitch length to 6 mm for a basting stitch.
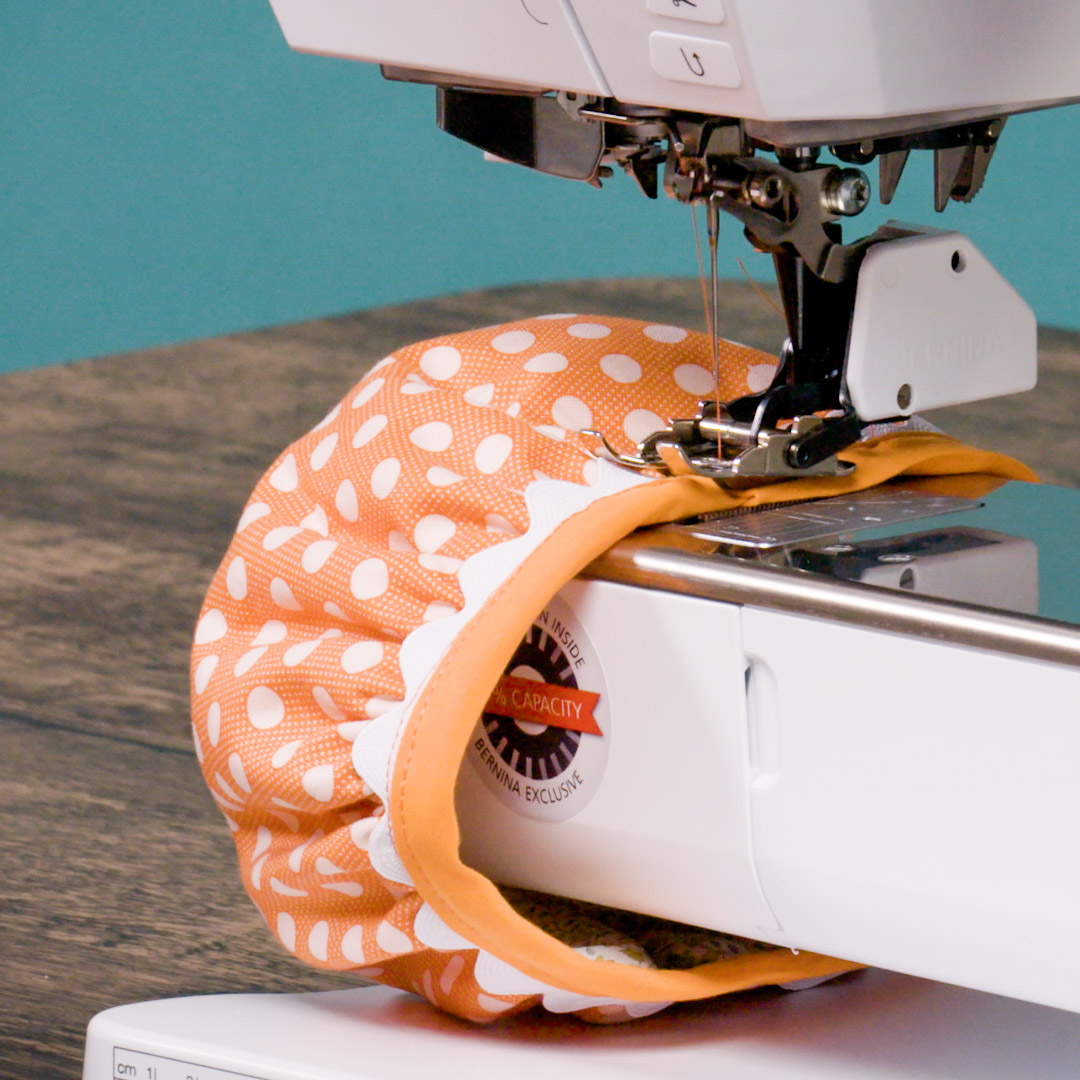
Remove the Slide-on Table. The exposed freearm allows us to stitch easily around the edge of the bowl shape.
Starting at one end of the rickrack, place the uppermost curve along the raw edges of the fabric. The picture below gives you an idea of placement.
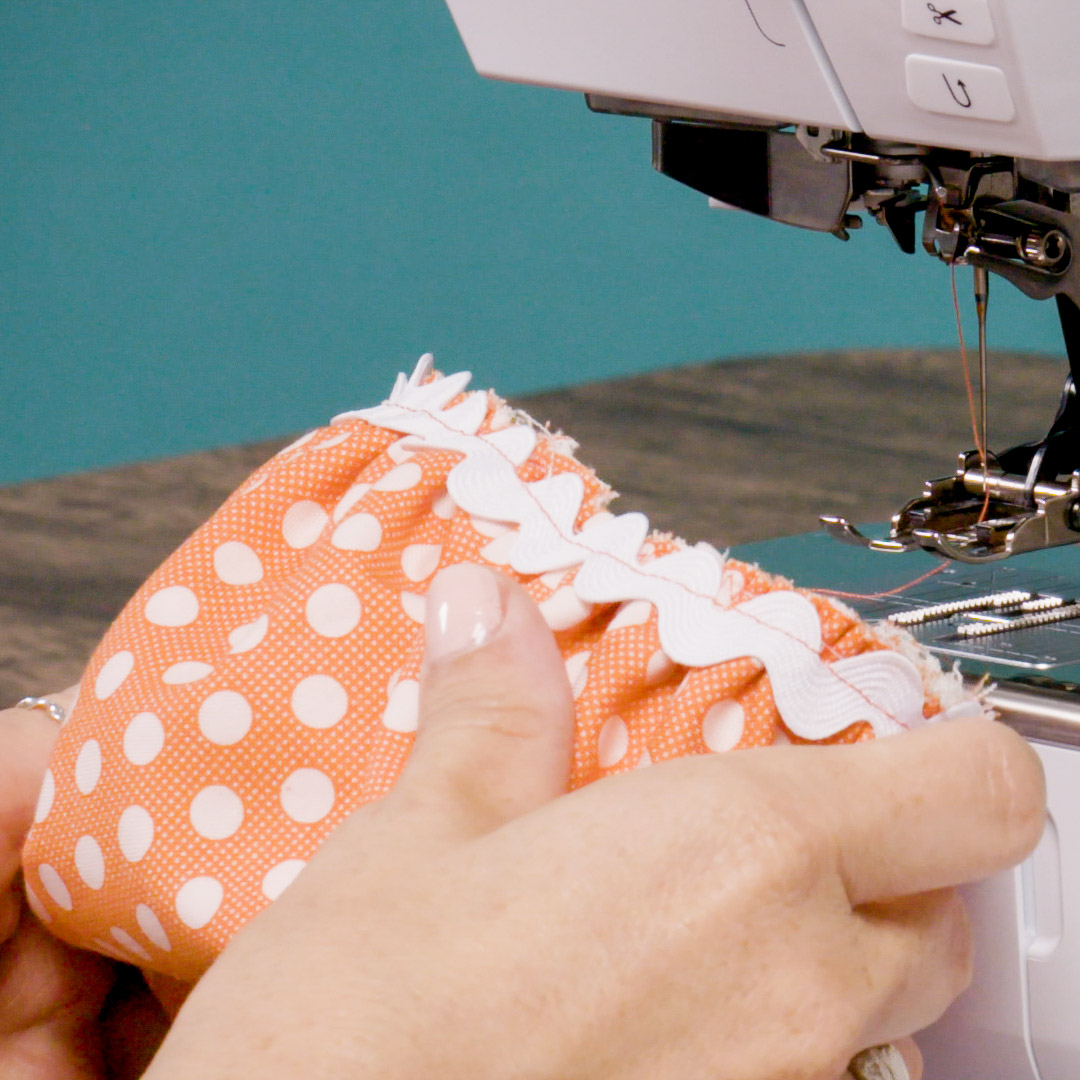
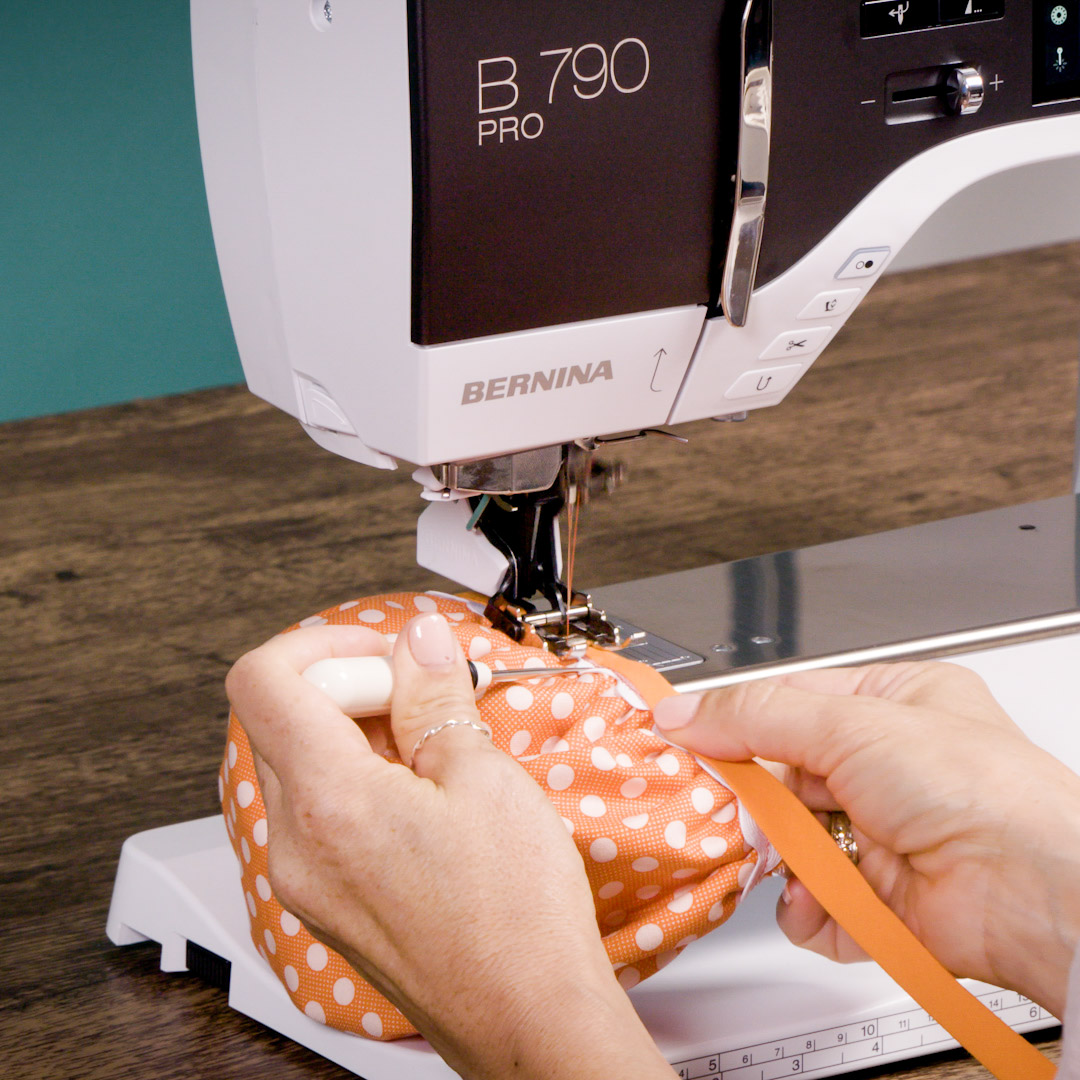
Stitch down the rickrack using the 1/4” mark on the foot as your guide. Use your stiletto to keep the rickrack aligned with the raw edges.
Stitch back to the beginning and cut, leaving 1/2” excess. Fold under the end of the rickrack and stitch down.
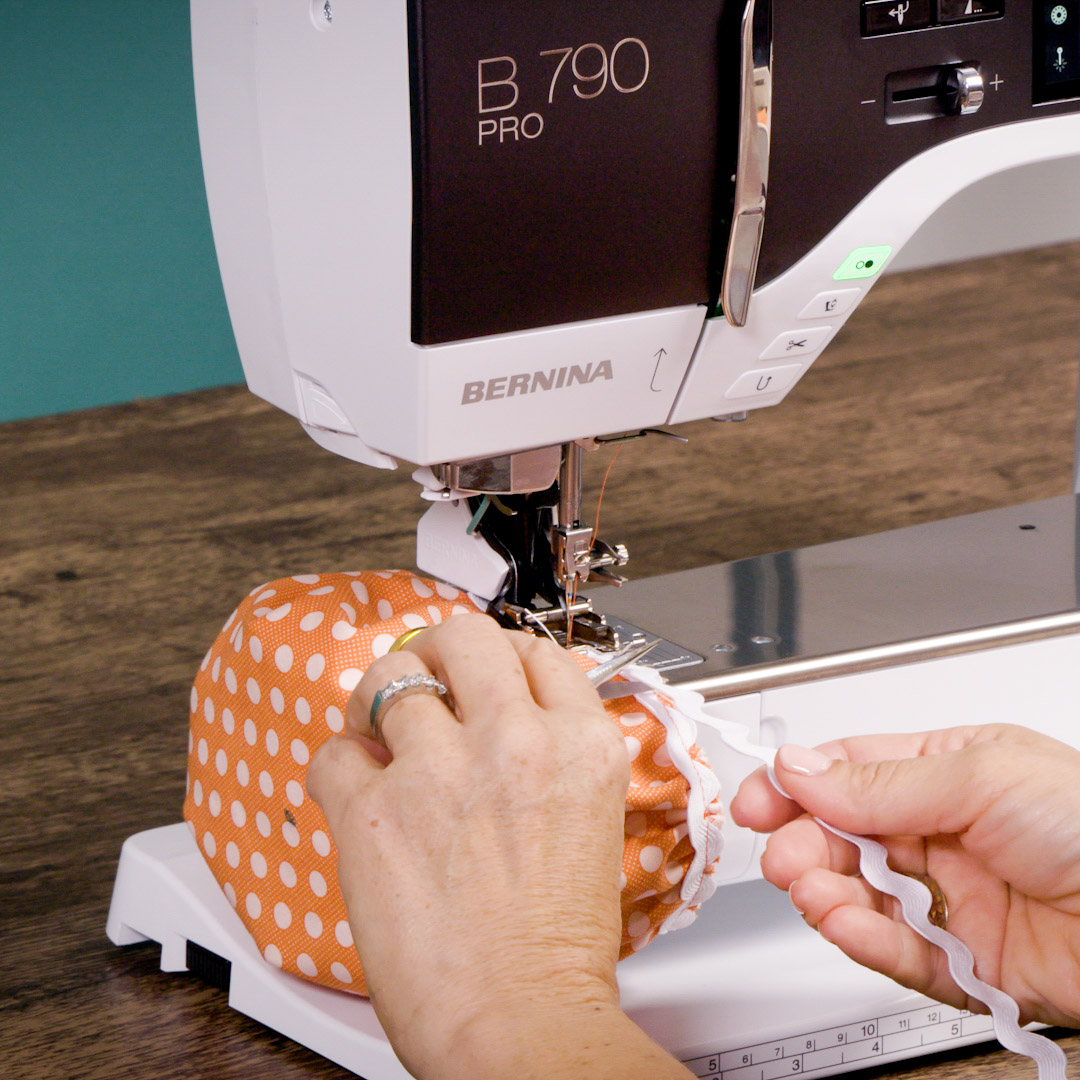
Step 6: Add Bias Tape
On your machine screen, change the stitch length to 3 mm.
Cover the raw edges and part of the rickrack with the bias tape. We have several layers here, but BERNINA Walking Foot #50 is designed for lots of layers! Place your project under the foot at the 3/8” mark on the stitch plate. Check needle placement. Adjust needle position, if necessary. Start stitching and see how easily Foot #50 sews through all layers.
When you near the starting point, cut and fold under the end of the bias tape. Stitch down.
Step 7: Shape Bowl
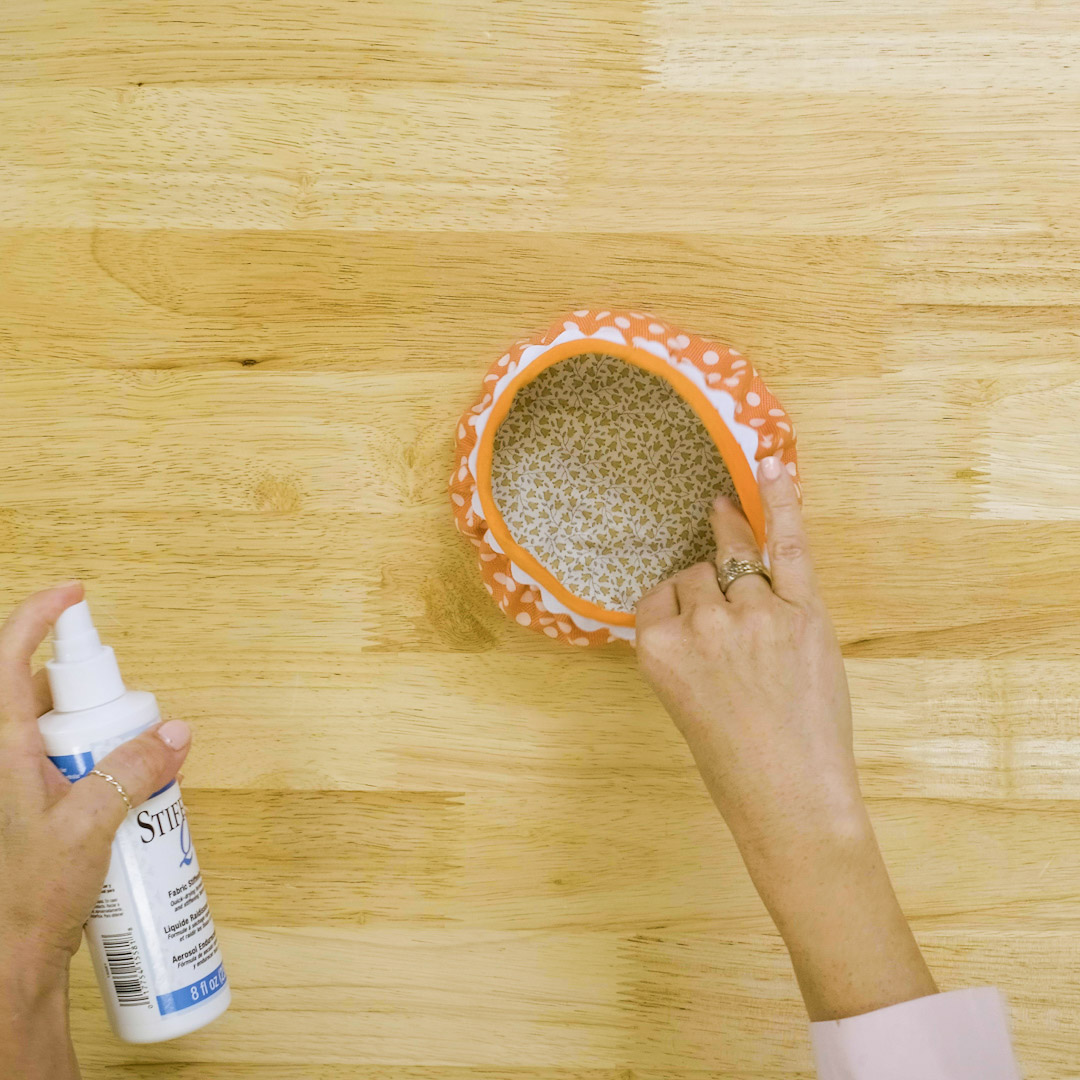
This bowl is starting to take shape! To really get the shape you want, use a stiffener spray. I am using Aleene’s Stiffen Quick Spray. Spray the bowl several times to moisten the fabric. Shape the bowl and then let it dry. It’s not permanent, so you can always reshape later.
Base Option
If you want to add a base to the bottom of the bowl, you can easily use Attachment #83 to create one. Determine the diameter of your bowl base. Cut out a piece of fabric and stiff stabilizer, such as Décor Bond, about 2-3” bigger than the diameter. Place the fabric on top of the stabilizer and secure it to Attachment #83. Adjust the slider to the approximate diameter and stitch. Remove and trim around the stitches to create a circle.
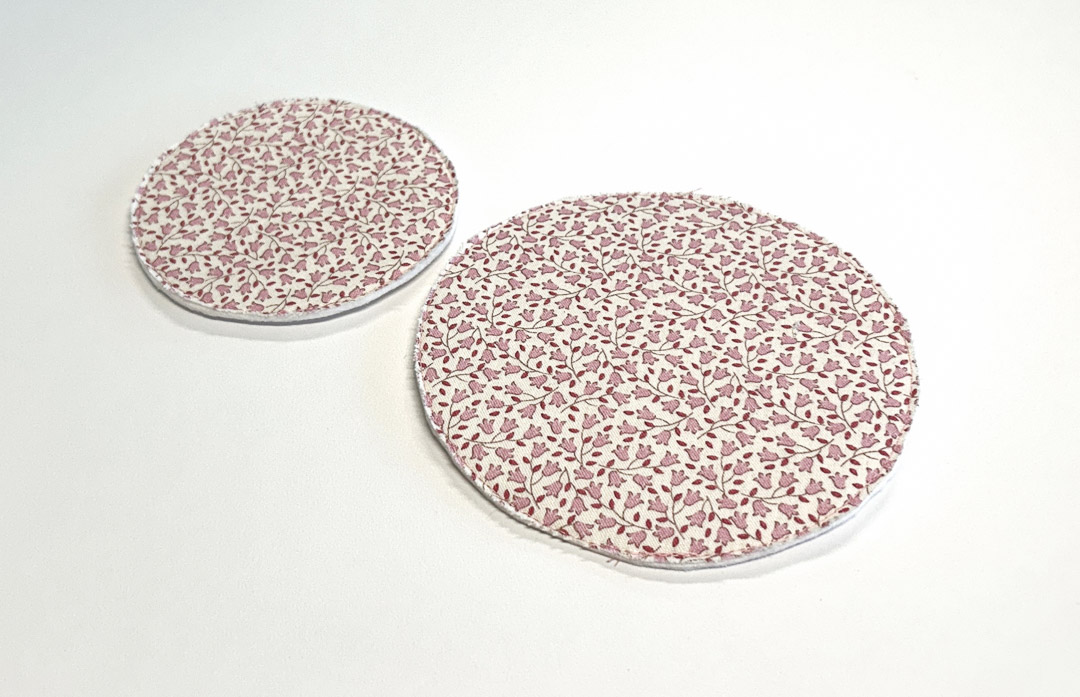
Insert the new base into bowl!
With BERNINA Clear Embroidery Foot #39C, Circular Embroidery Attachment #83, and Walking Foot #50, these fabric bowls are easy and fun! Most likely, you already have at least one of these feet. I highly recommend all three in your sewing room. There’s nothing to it but to do it!


You always have delightful projects, but how is a person to make them when it’s impossible to print the directions. elaine