Hot Hair Tools Bag Tutorial

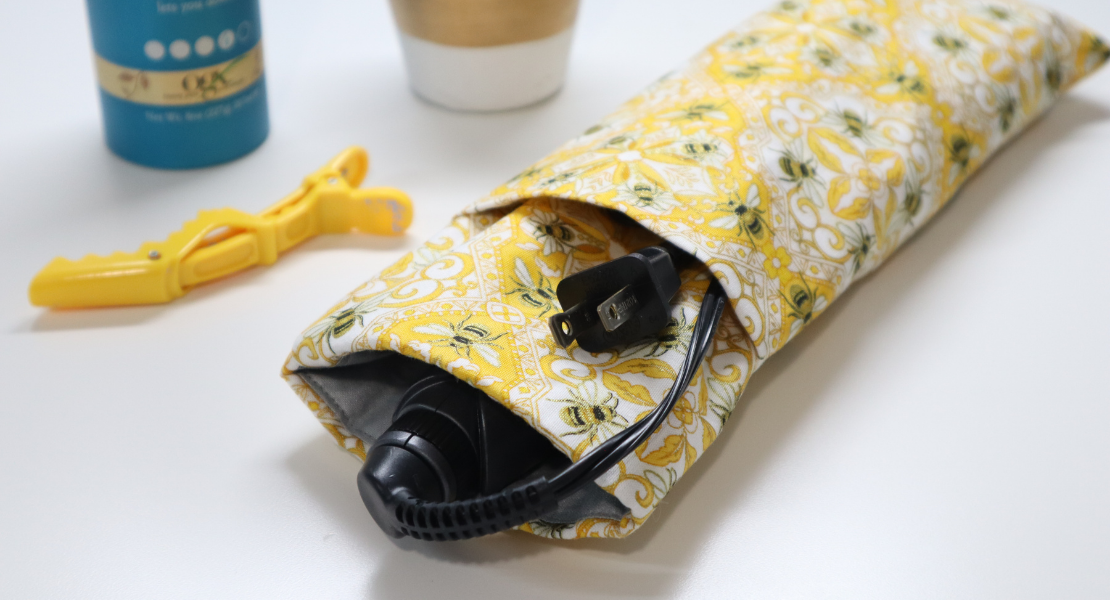
As someone who travels a lot for work, I’m constantly looking for the perfect travel organization sets and tools. And as I was practicing longarm quilting with insulated batting, I knew I had to make myself a hot hair tools bag to travel with. It took a few tries to get the sizing right, but I’m happy with the outcome and love having a bag that I can keep my straightening iron, hair brushes, and other hot tools in while traveling.
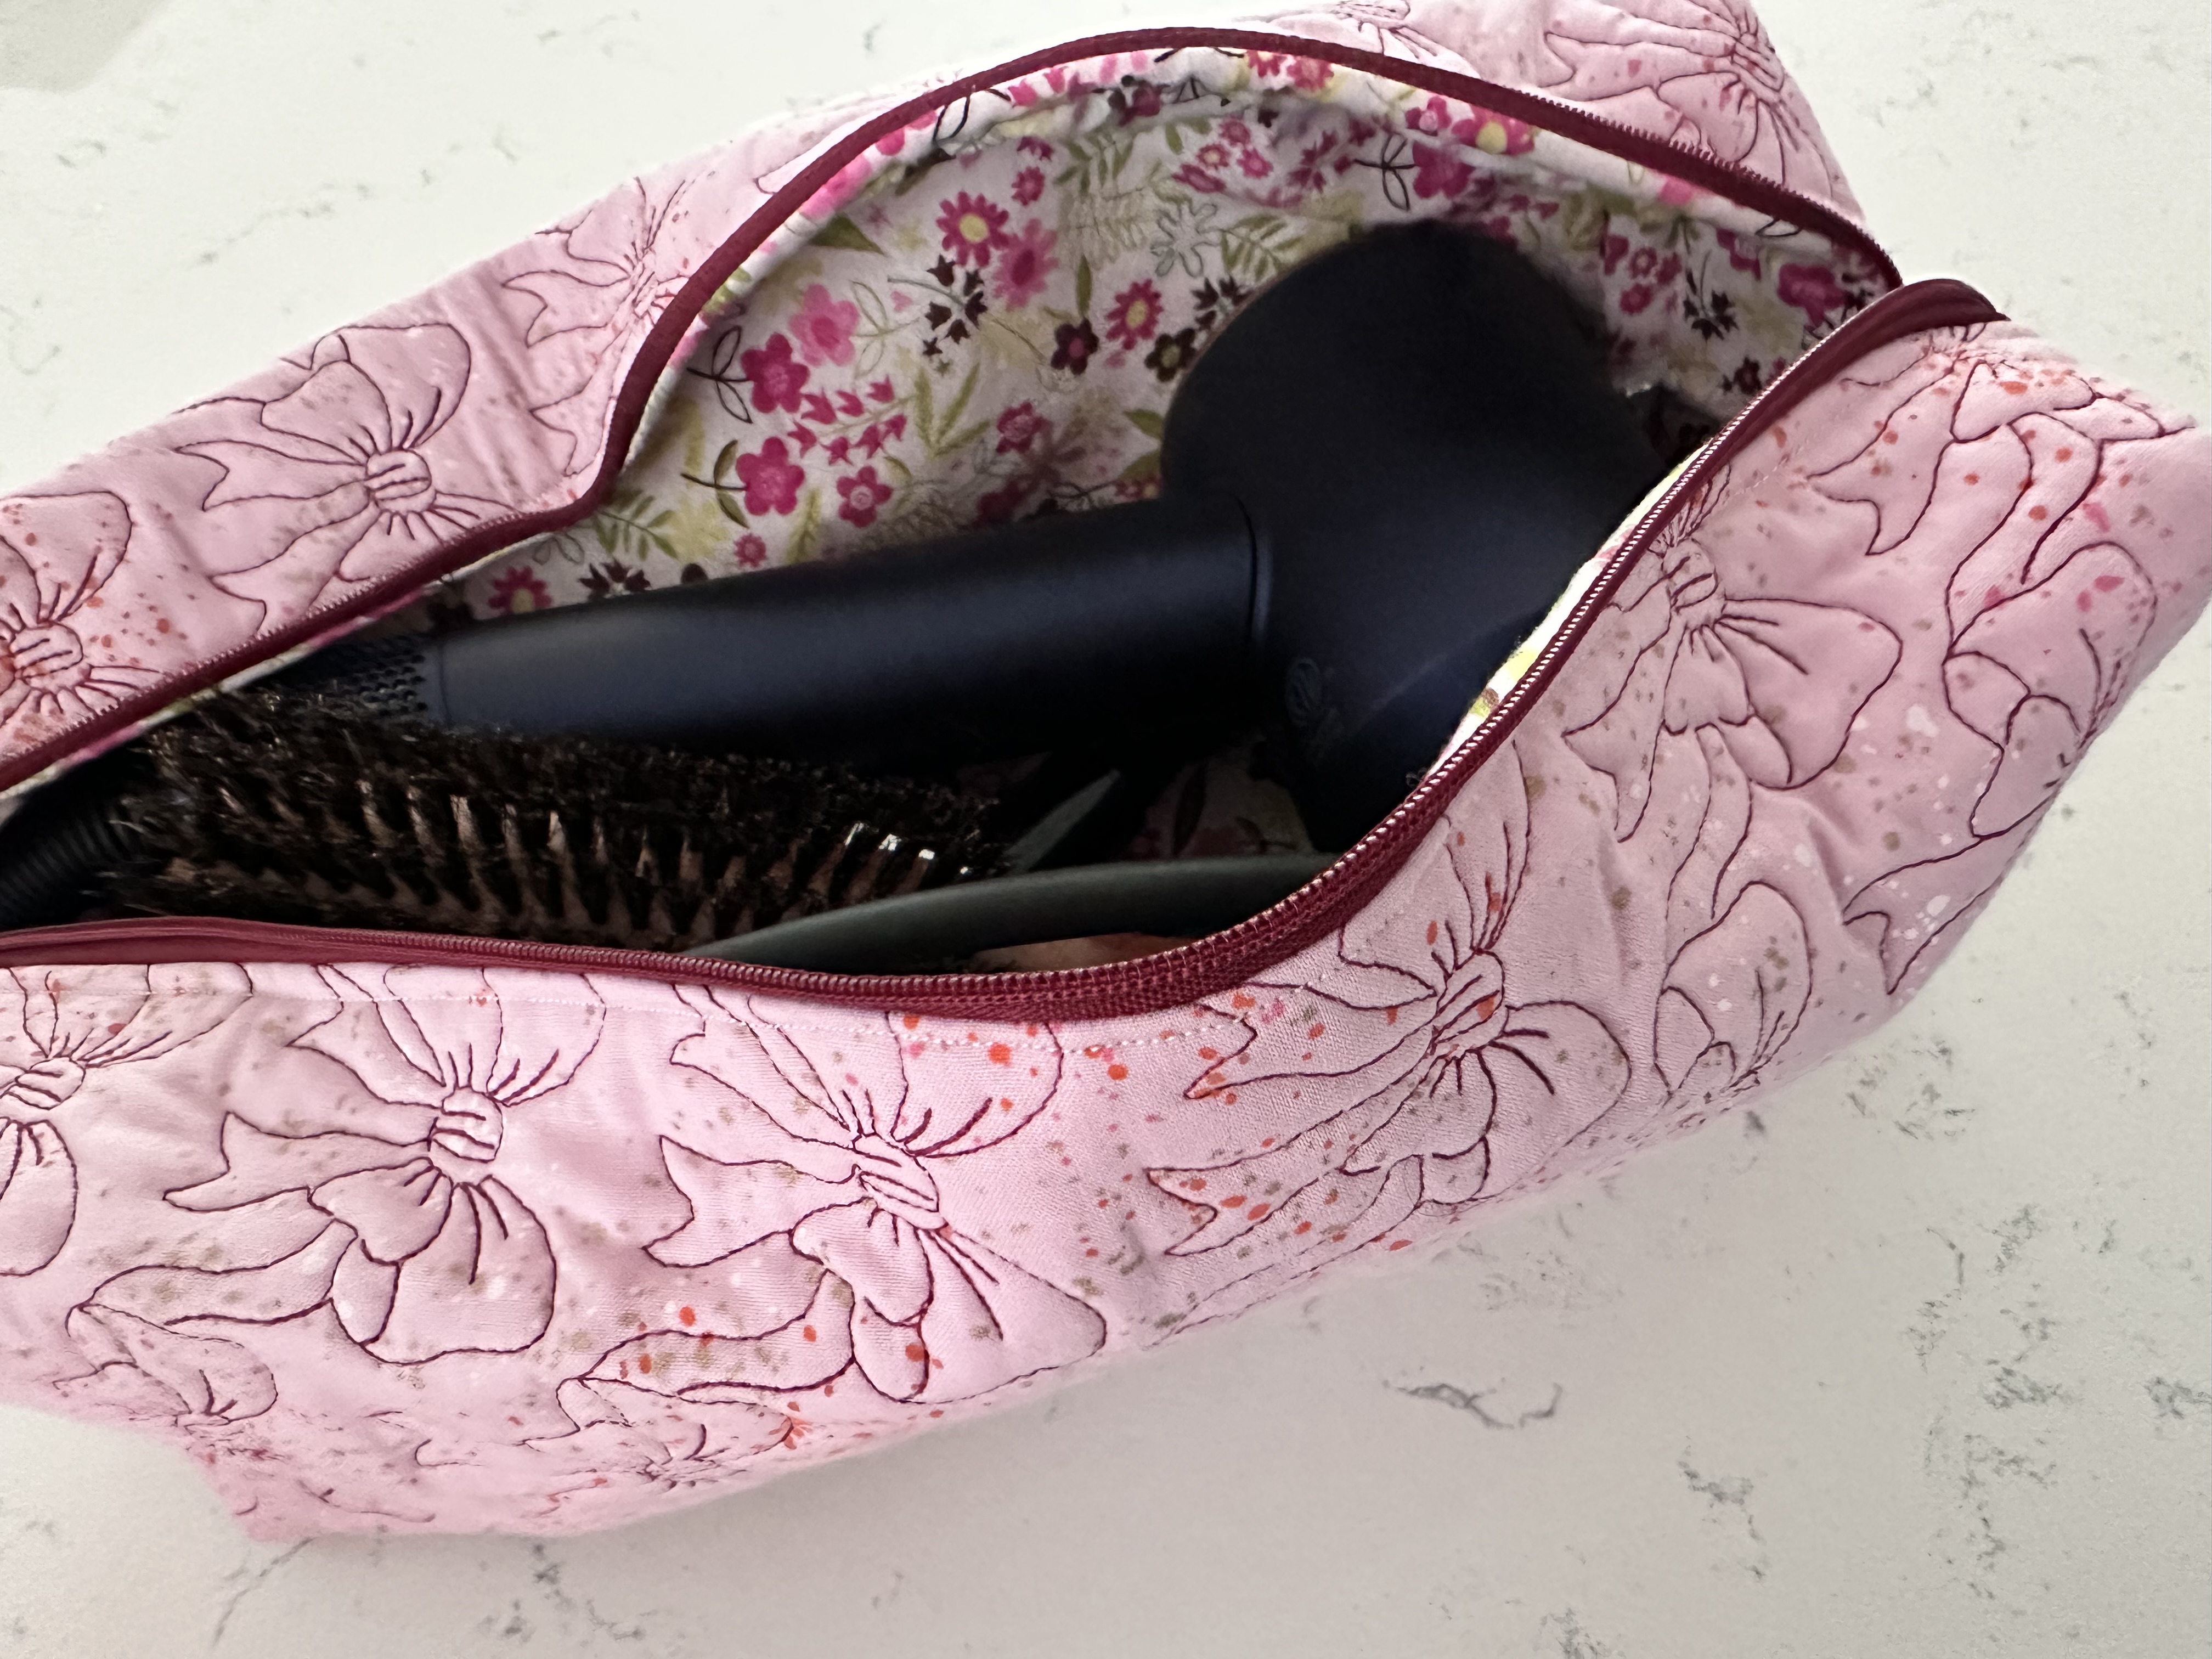
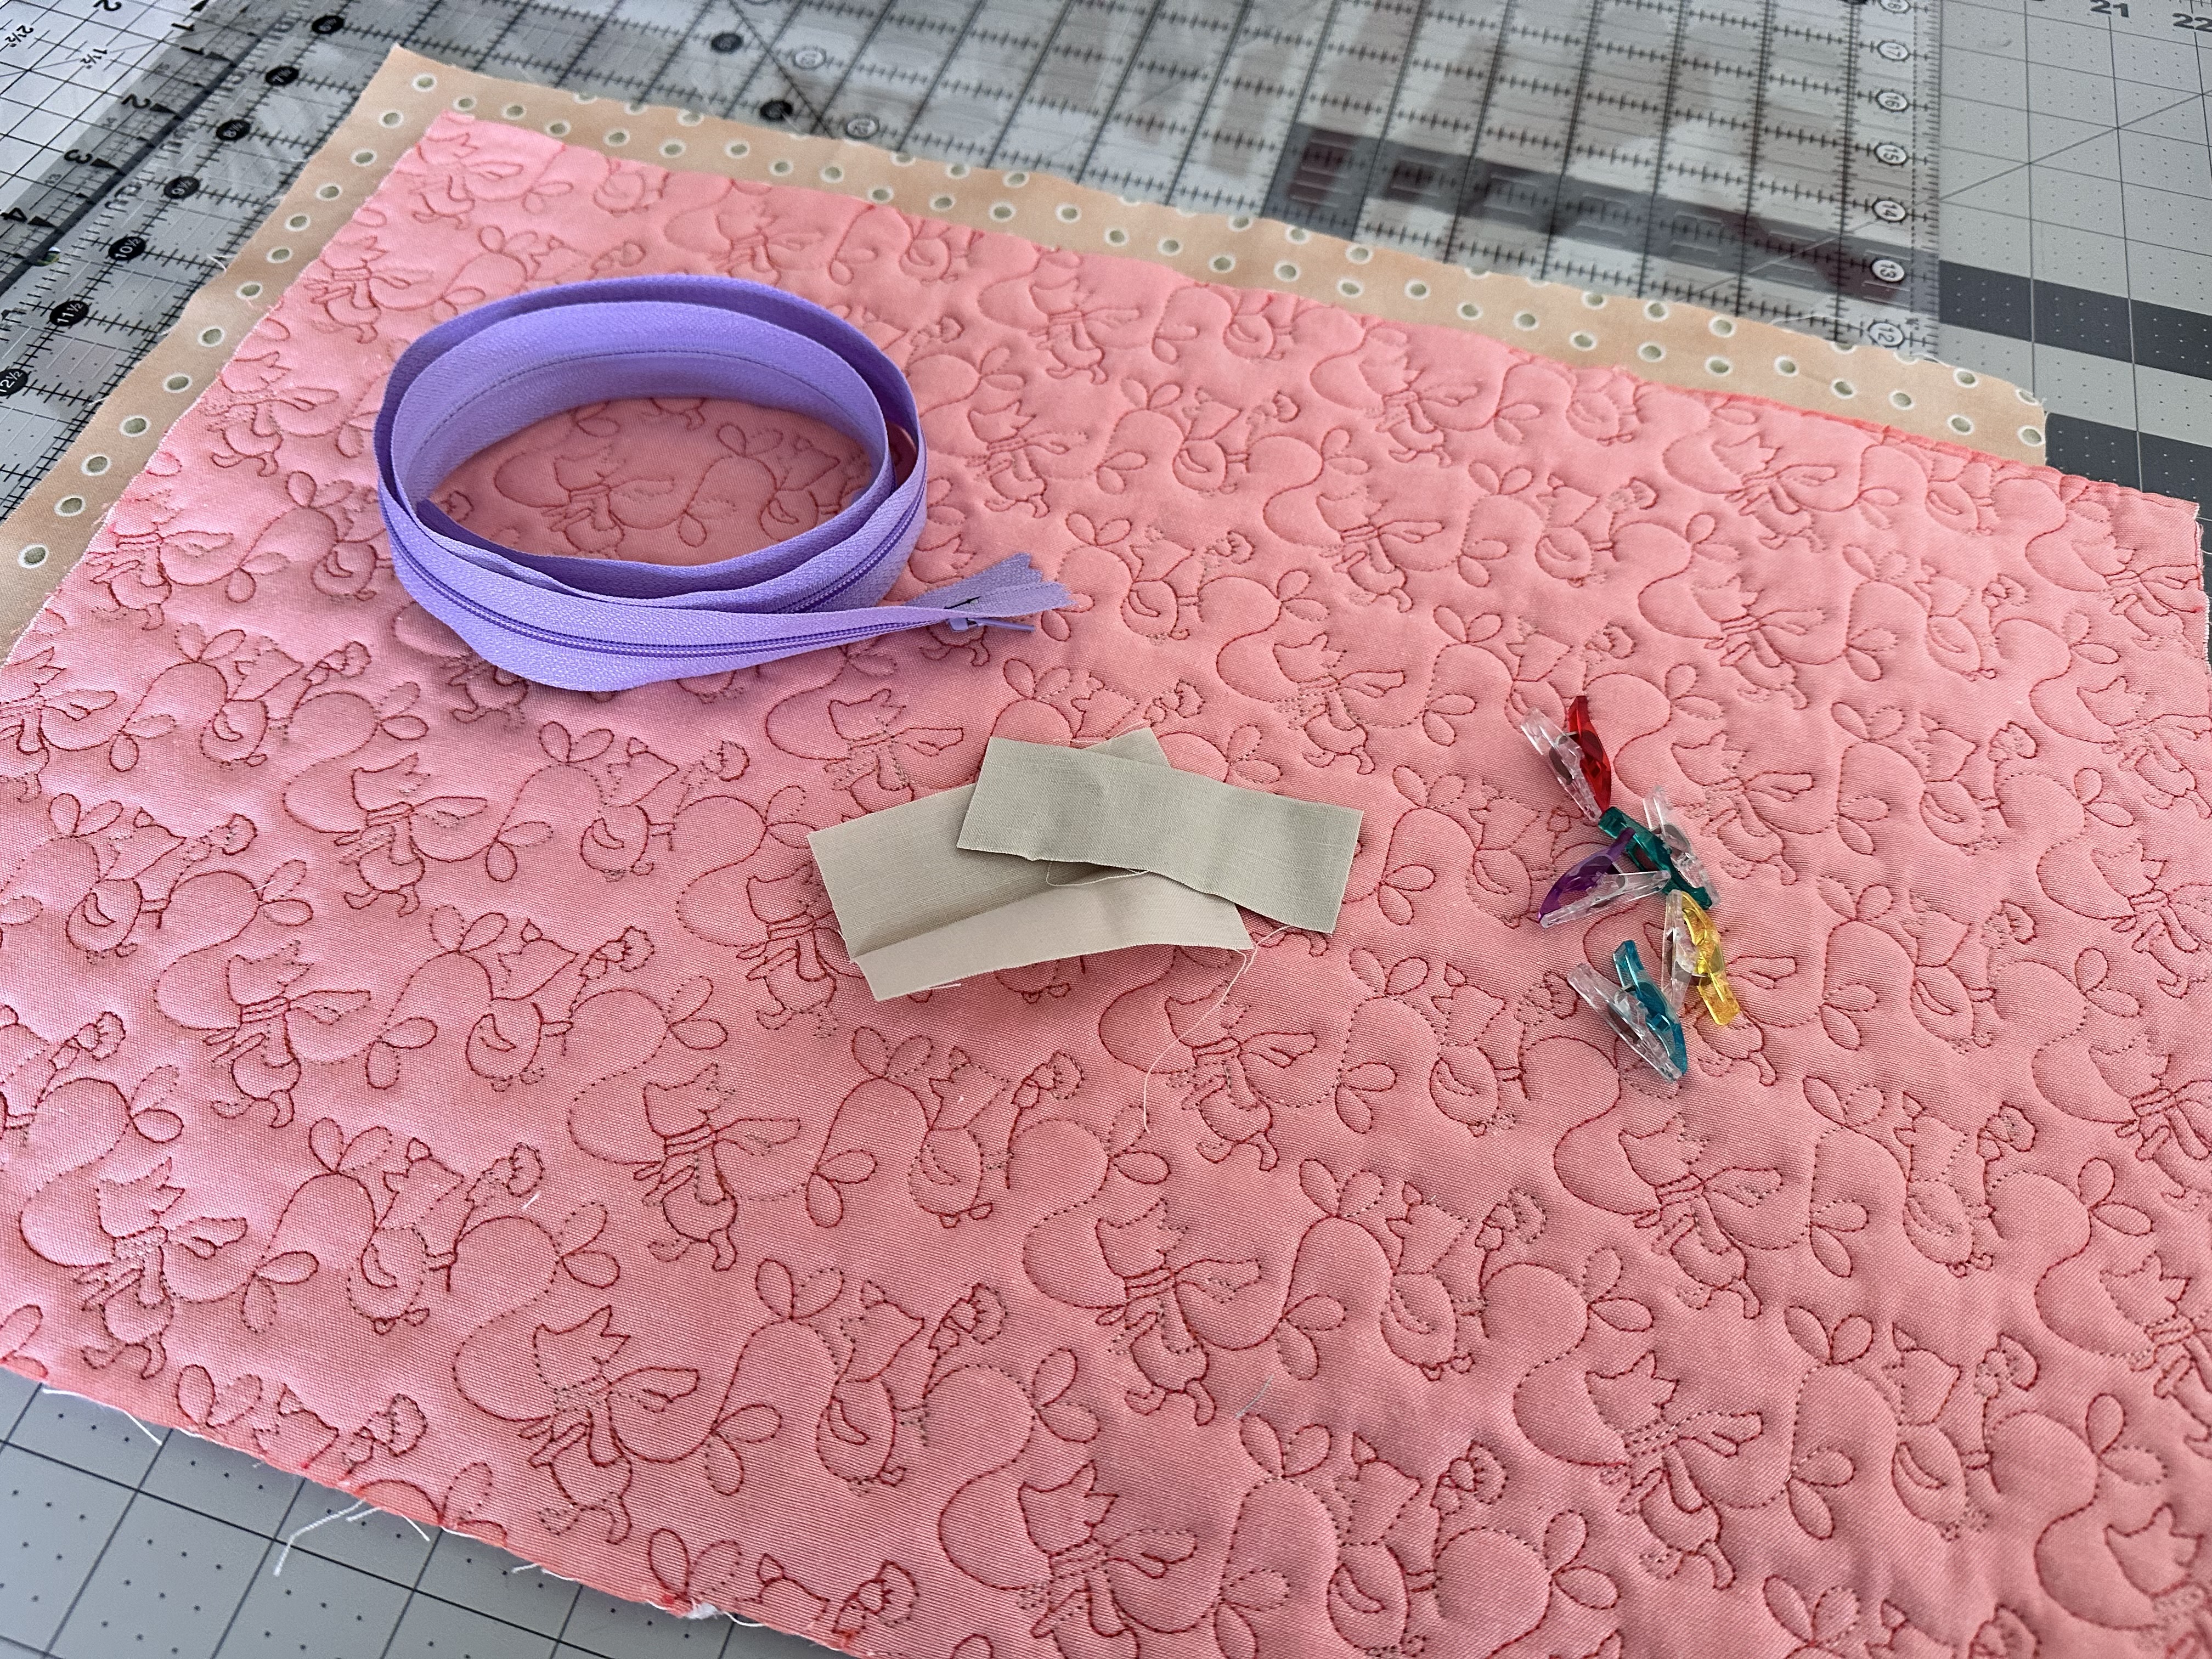
Materials Needed to Make a Hot Hair Tools Bag
- 18.5” x 12.5” quilted outer fabric, quilted with insulated batting (see tutorial on how to quilt with insulated batting)
- 18.25” x 12.25” piece of fabric for the inner liner
- Two 2 ½” x 2 ½” pieces of fabric for the pull tabs at the end of the zipper (Or you can use some leftover binding fabric like I am using here.)
- One 24-26” zipper (I like a much larger zipper to make the sewing easier, but you can use a zipper as short as 20”)
- Sewing supplies: Binding clips, thread, scissors, zipper foot, thread, etc.
*Note: For a slightly larger Hot Tools Bag, you can also scale up the 12.5” to a 14.5” width to give your bag a little more width and height. Just replace 12.5” to 14.5” in the instructions below.
Prepping Your Materials
- Review the tips and tricks on the WeAllSew blog around quilting with insulated batting and quilt up your outer fabric and trim to 18.5” x 12.5”
- Cut your lining fabric to 18.25” x 12.25”. I personally prefer to cut my lining for bags at about a ¼” smaller on the width and length to allow for the slight variation from the inside and outside of the bag, which reduces buckling in the liner.
Piecing Your Bag
- Lay your outside, quilted fabric face up with the 18.5″ width at the top. Place your zipper face down towards the quilted fabric and then place the lining on top of the zipper, right side of the fabric down (right sides together). Clip the zipper and fabric together along the long side of the fabric to prepare to sew it to one side of the zipper.
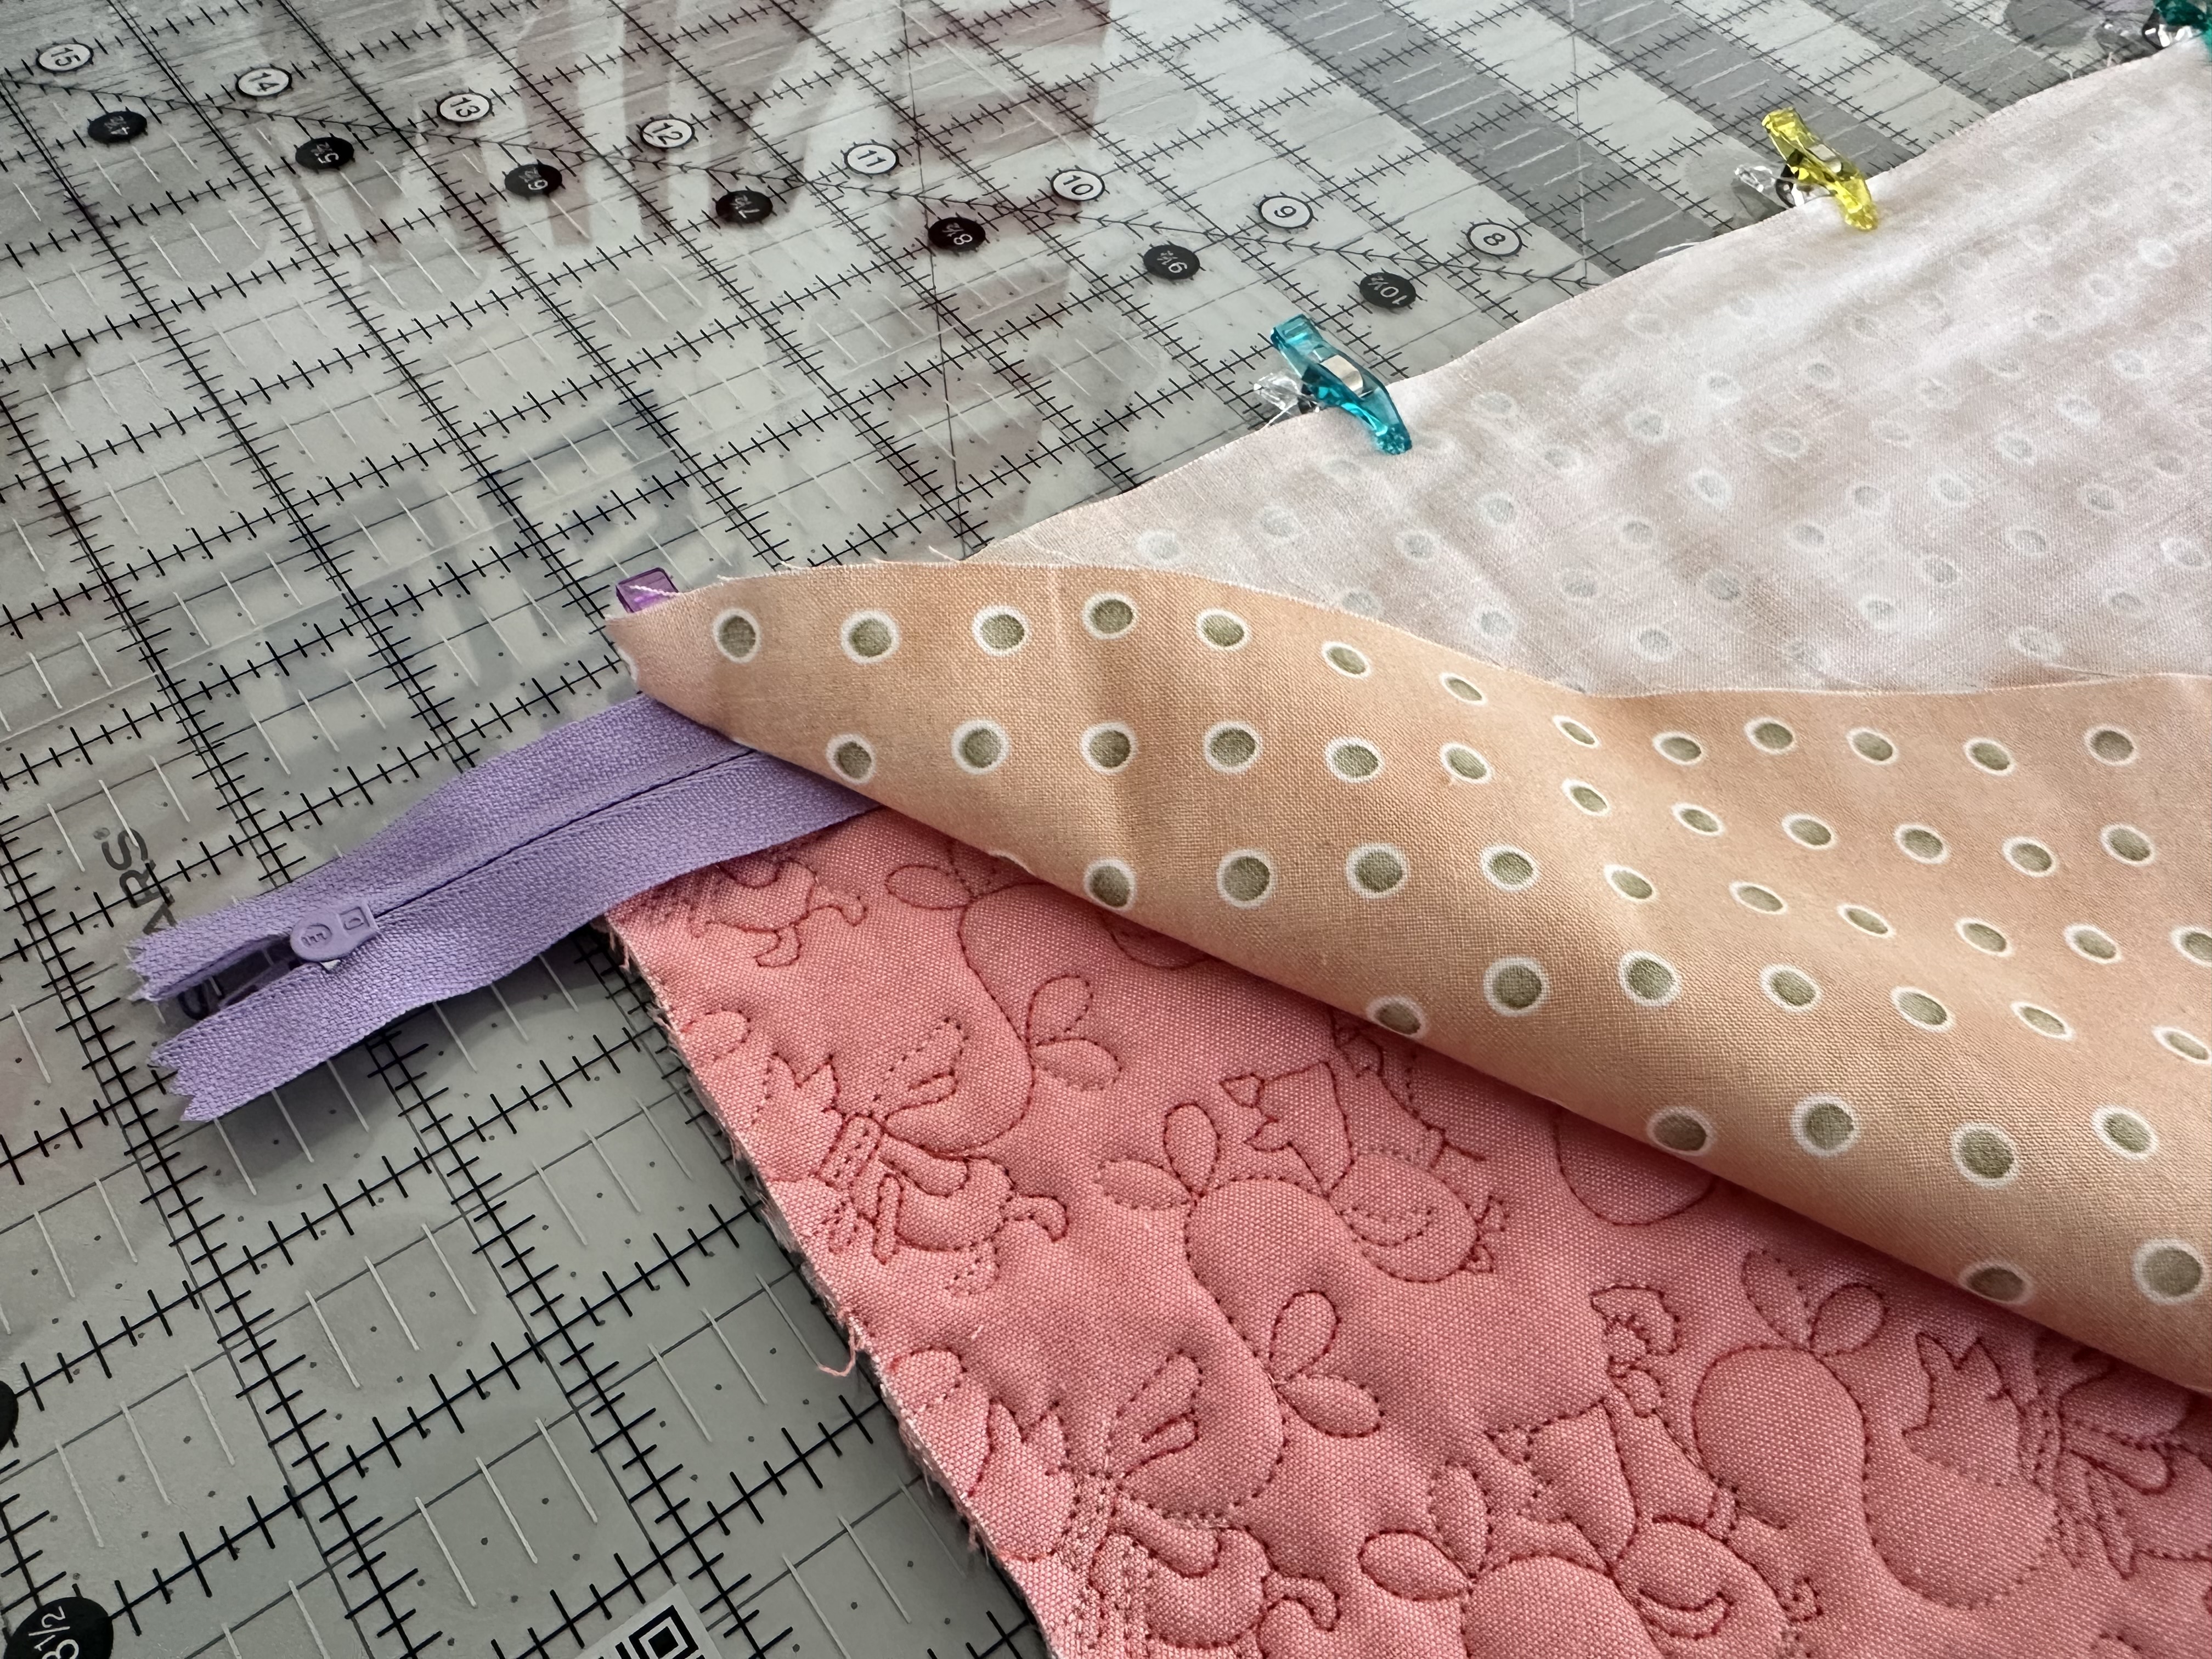
- With your zipper foot attachment on your domestic sewing machine, sew down the length of the zipper. Your needle should be aligned to the left of the zipper foot, or closest to the zipper teeth.
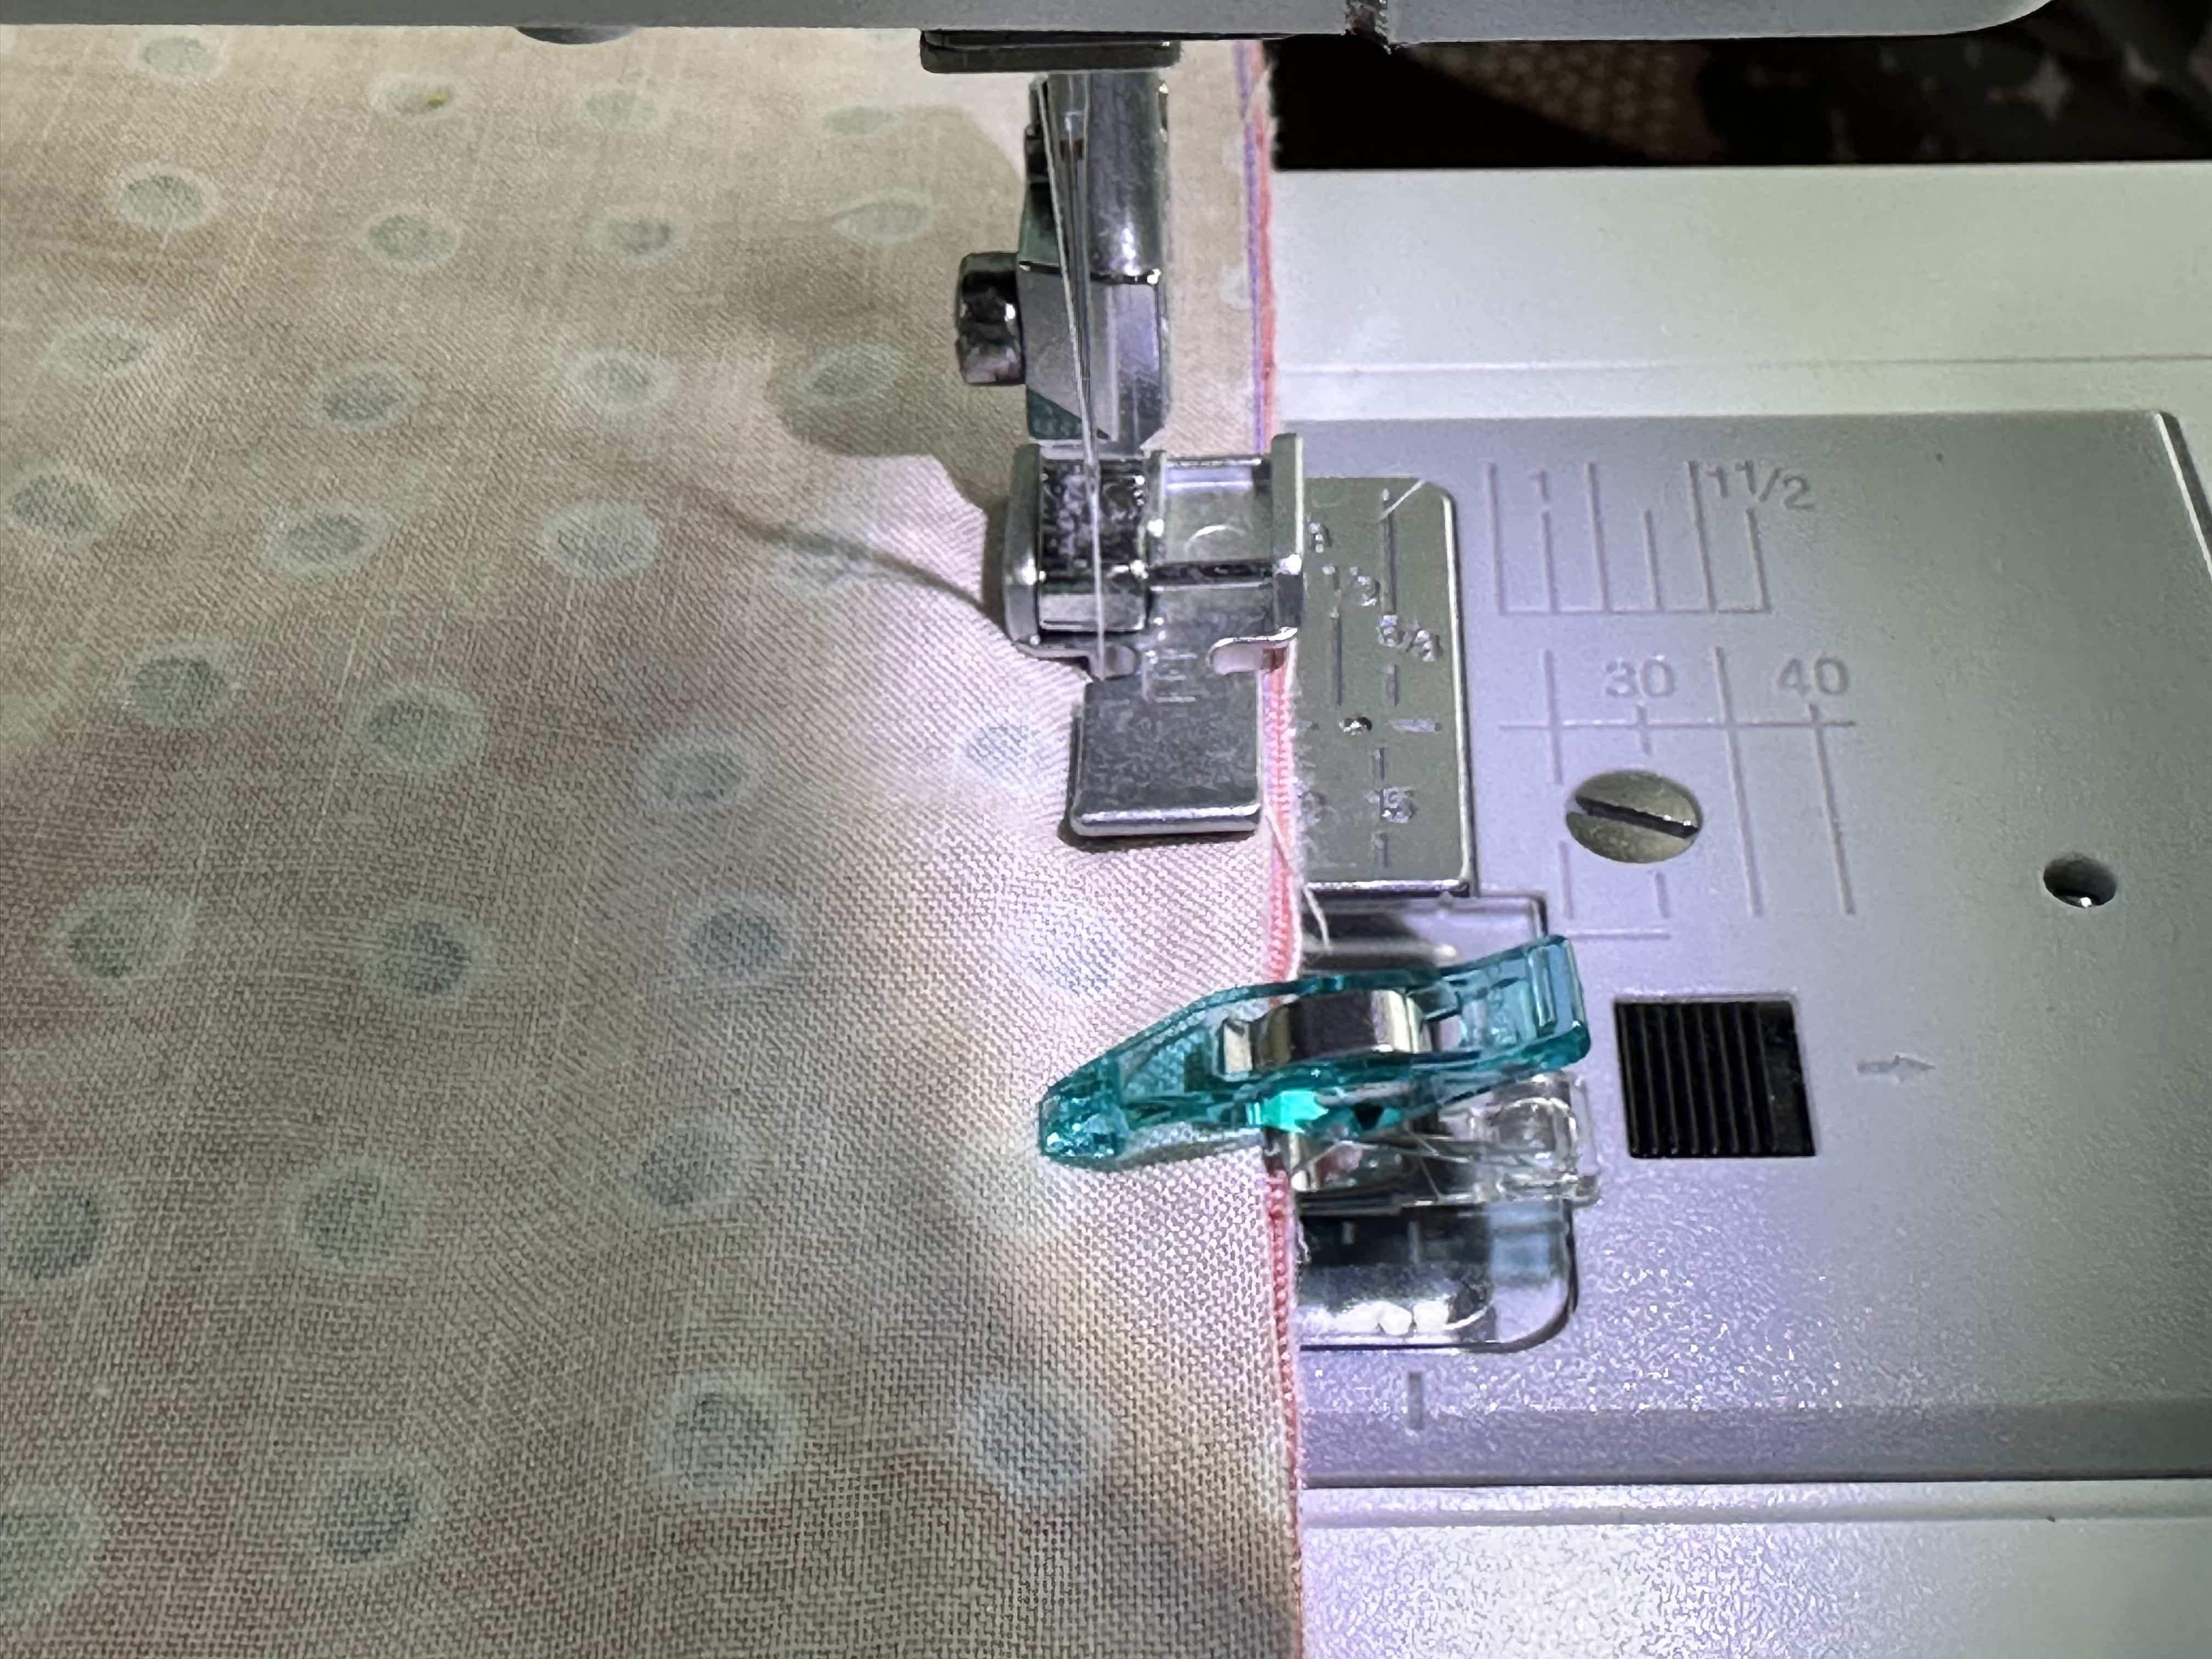
- Open up your piece and unzip the zipper fully. This will make the next step easier. Place the wrong sides together and clip them together to create a tight fold away from the zipper. Move your needle to the right size of your zipper foot and sew along the zipper outside to keep everything in place.
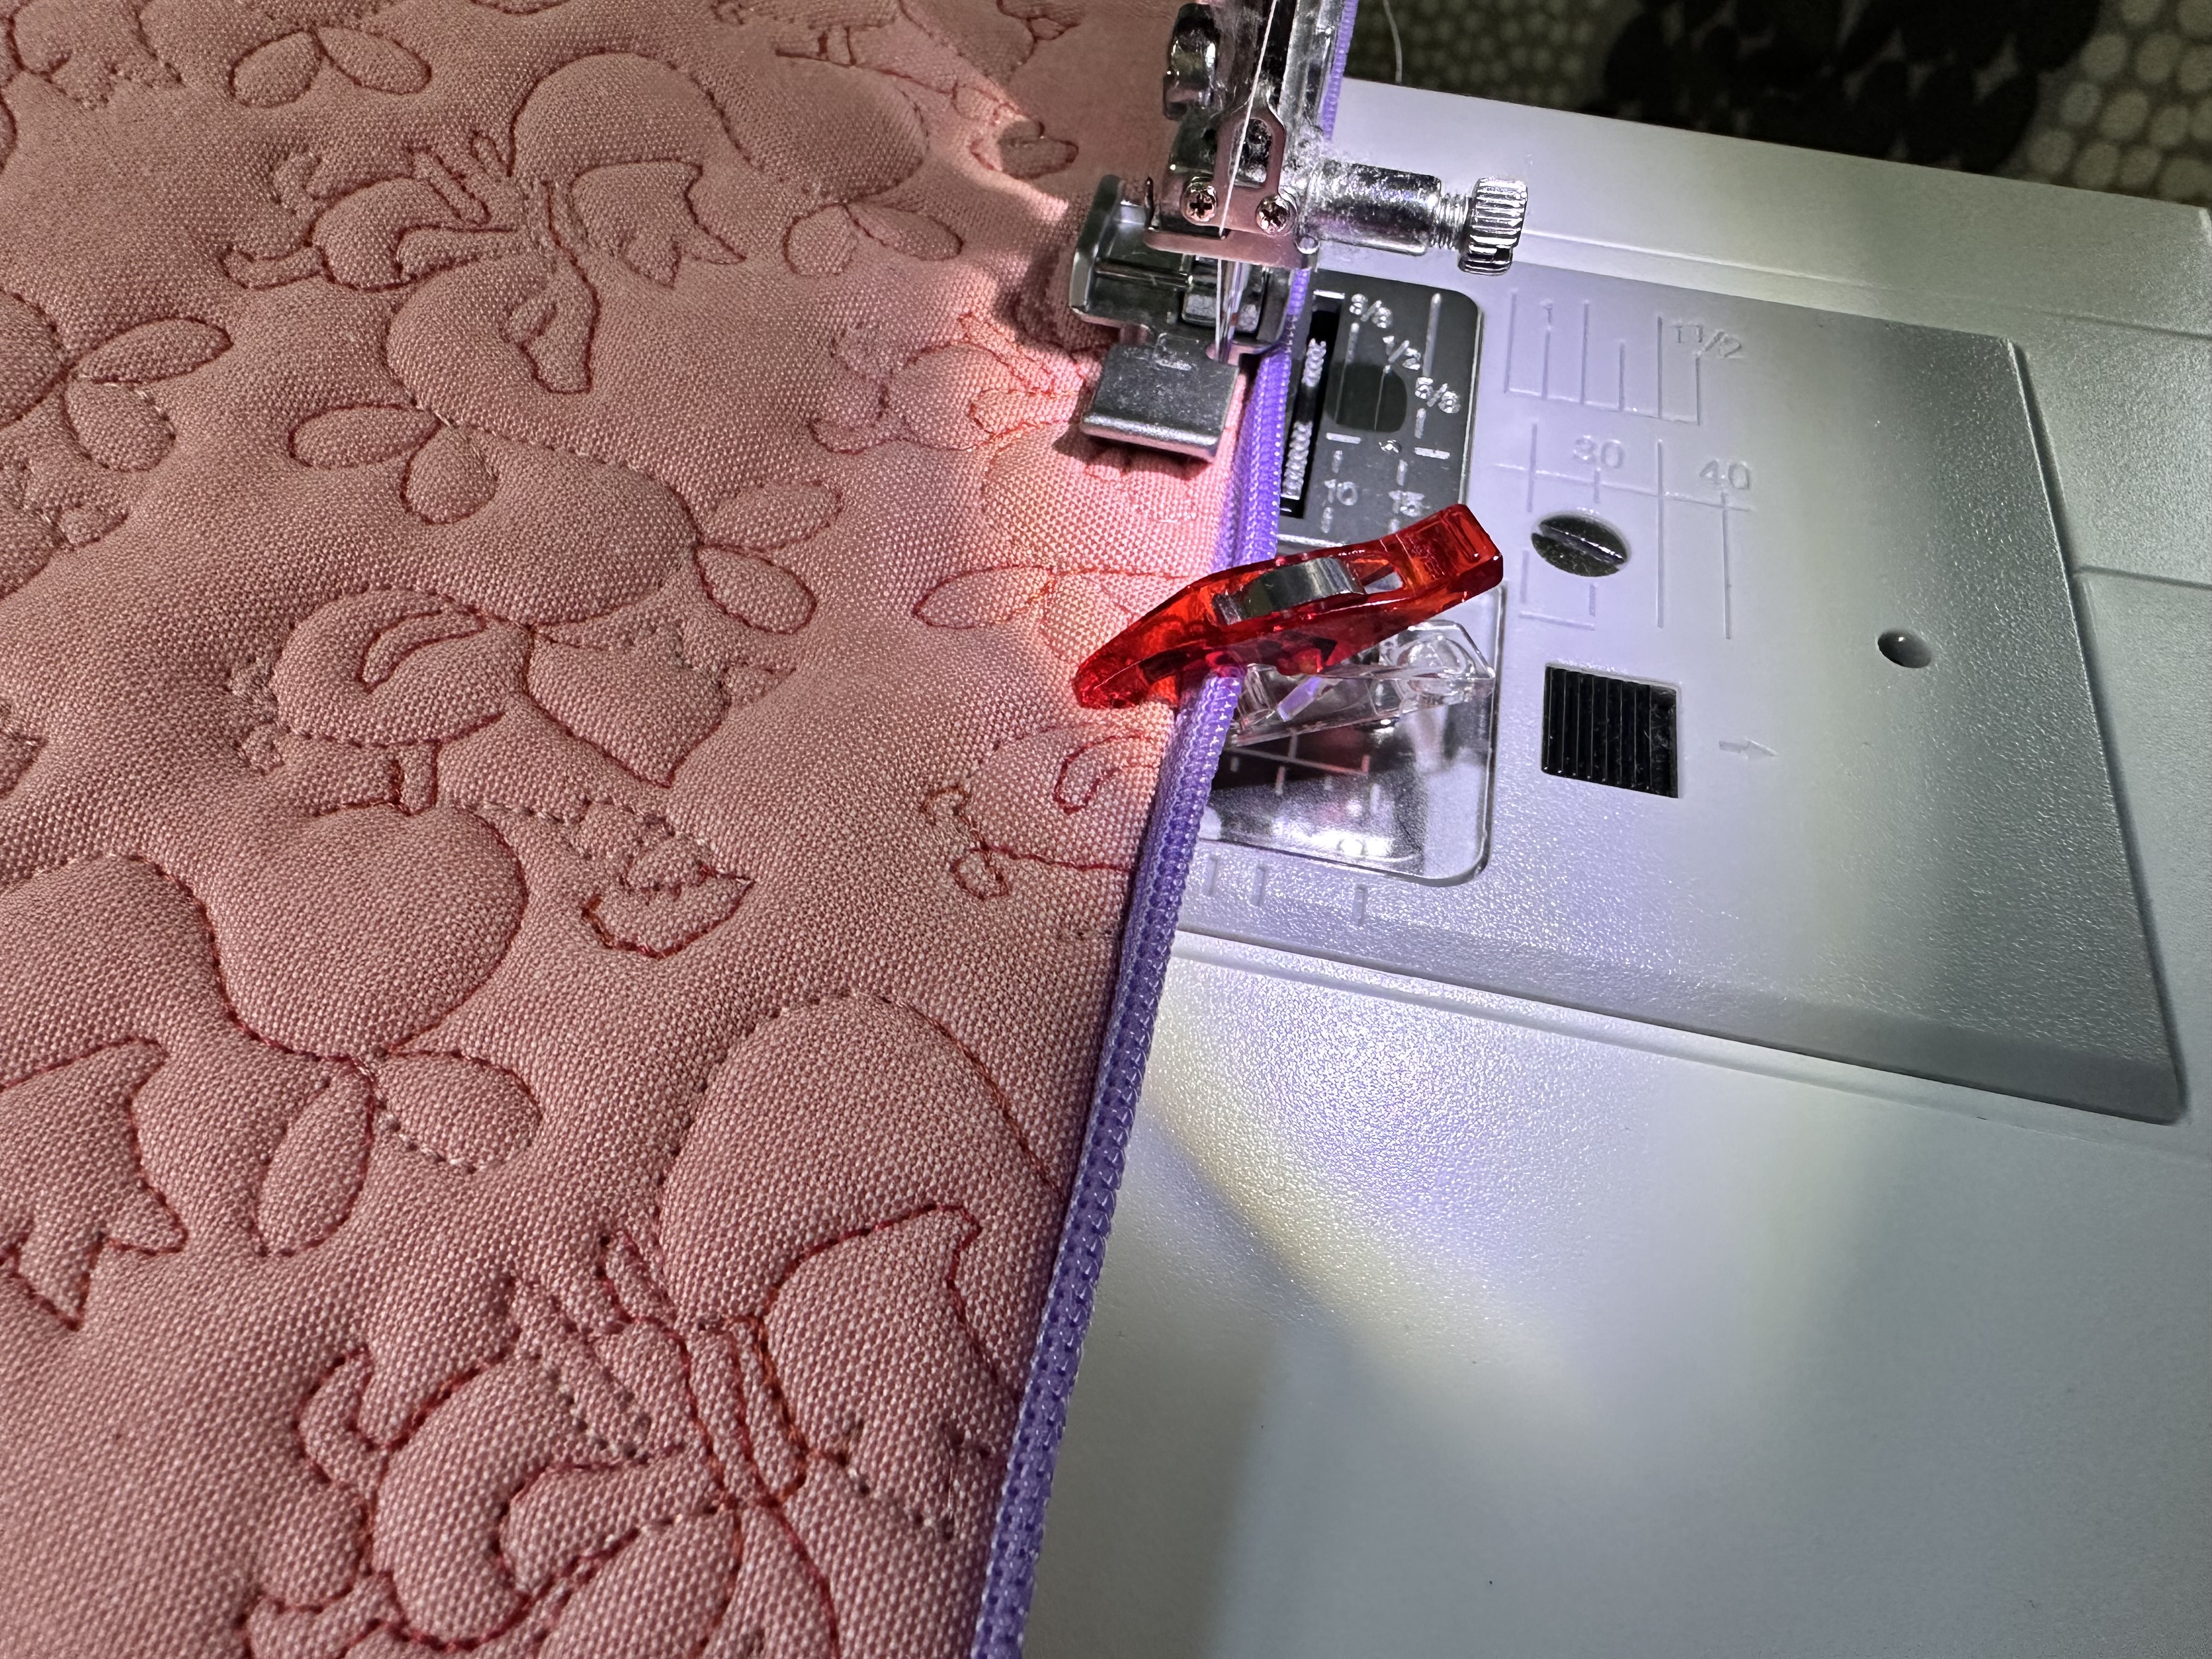
- Re-zip your zipper to prepare for the next step. Below is what your piece should look like so far.
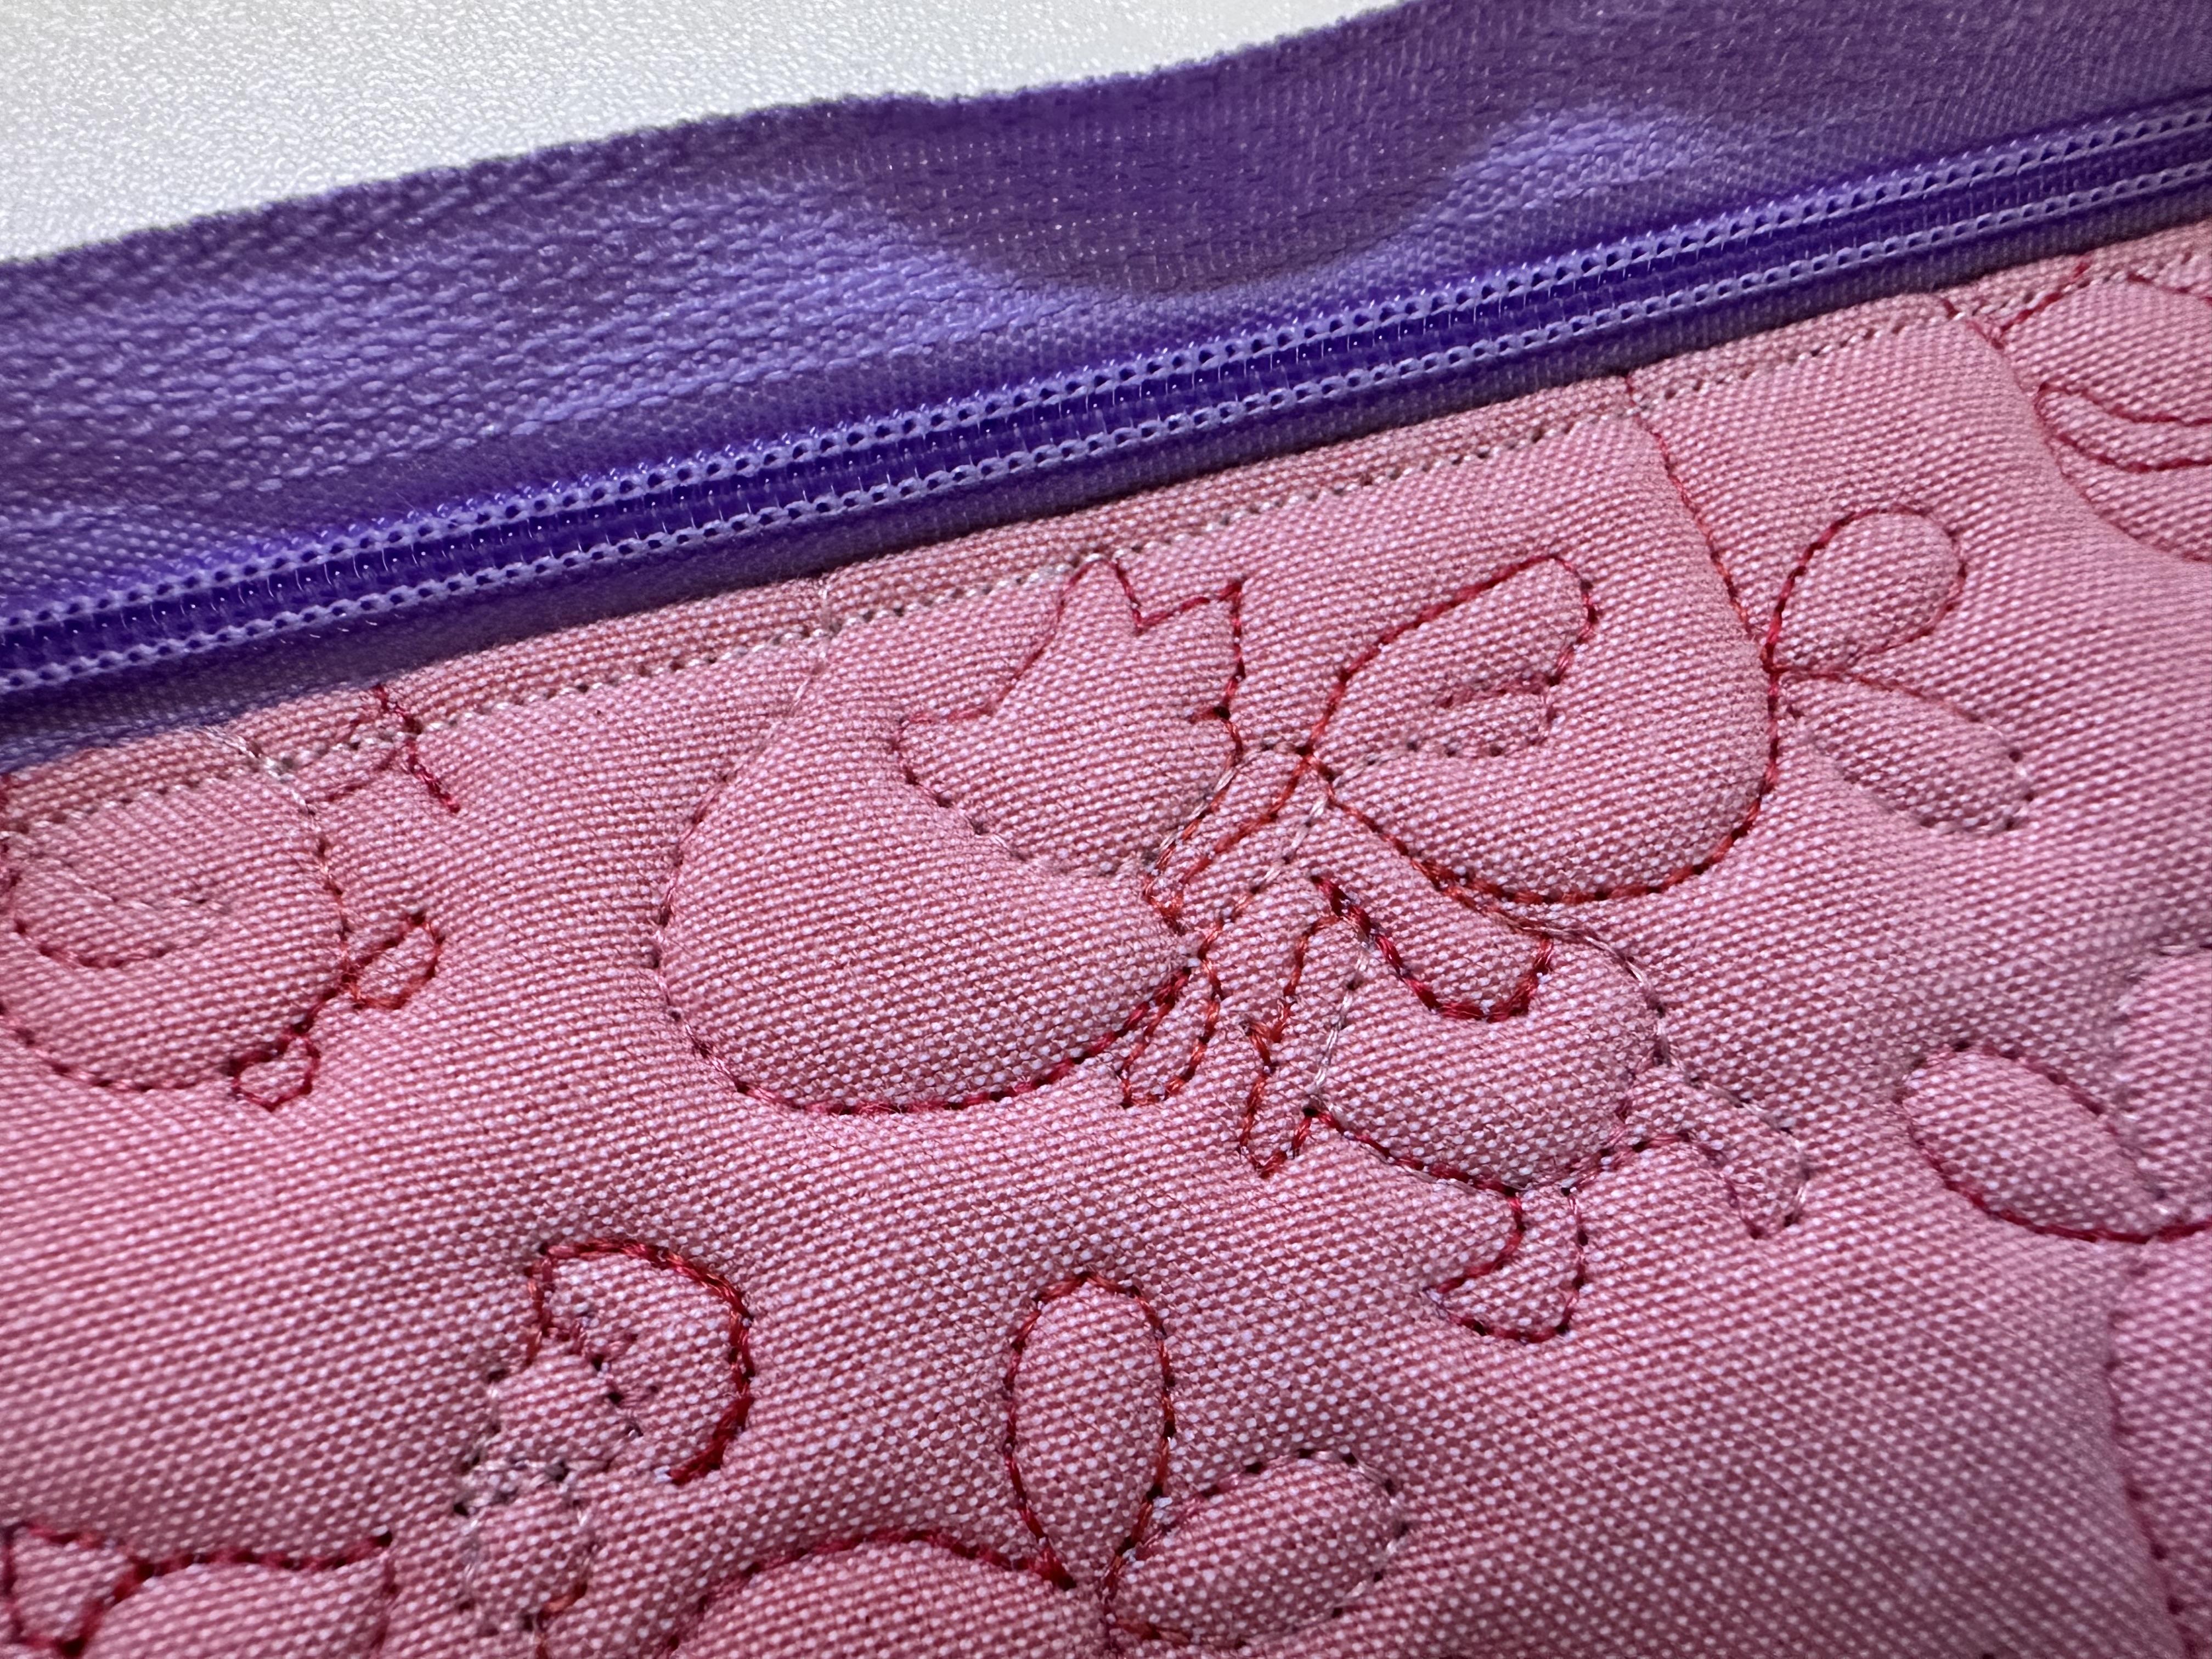
- Fold your outer fabric up so that the edge of the unsewn 18.5″ side is aligned with the top of the zipper, with the right side of the zipper facing the outside of the outer fabric. Fold the liner fabric, right sides together, and place the 18.5″ unsewn side of the lining fabric along the wrong side of the zipper.
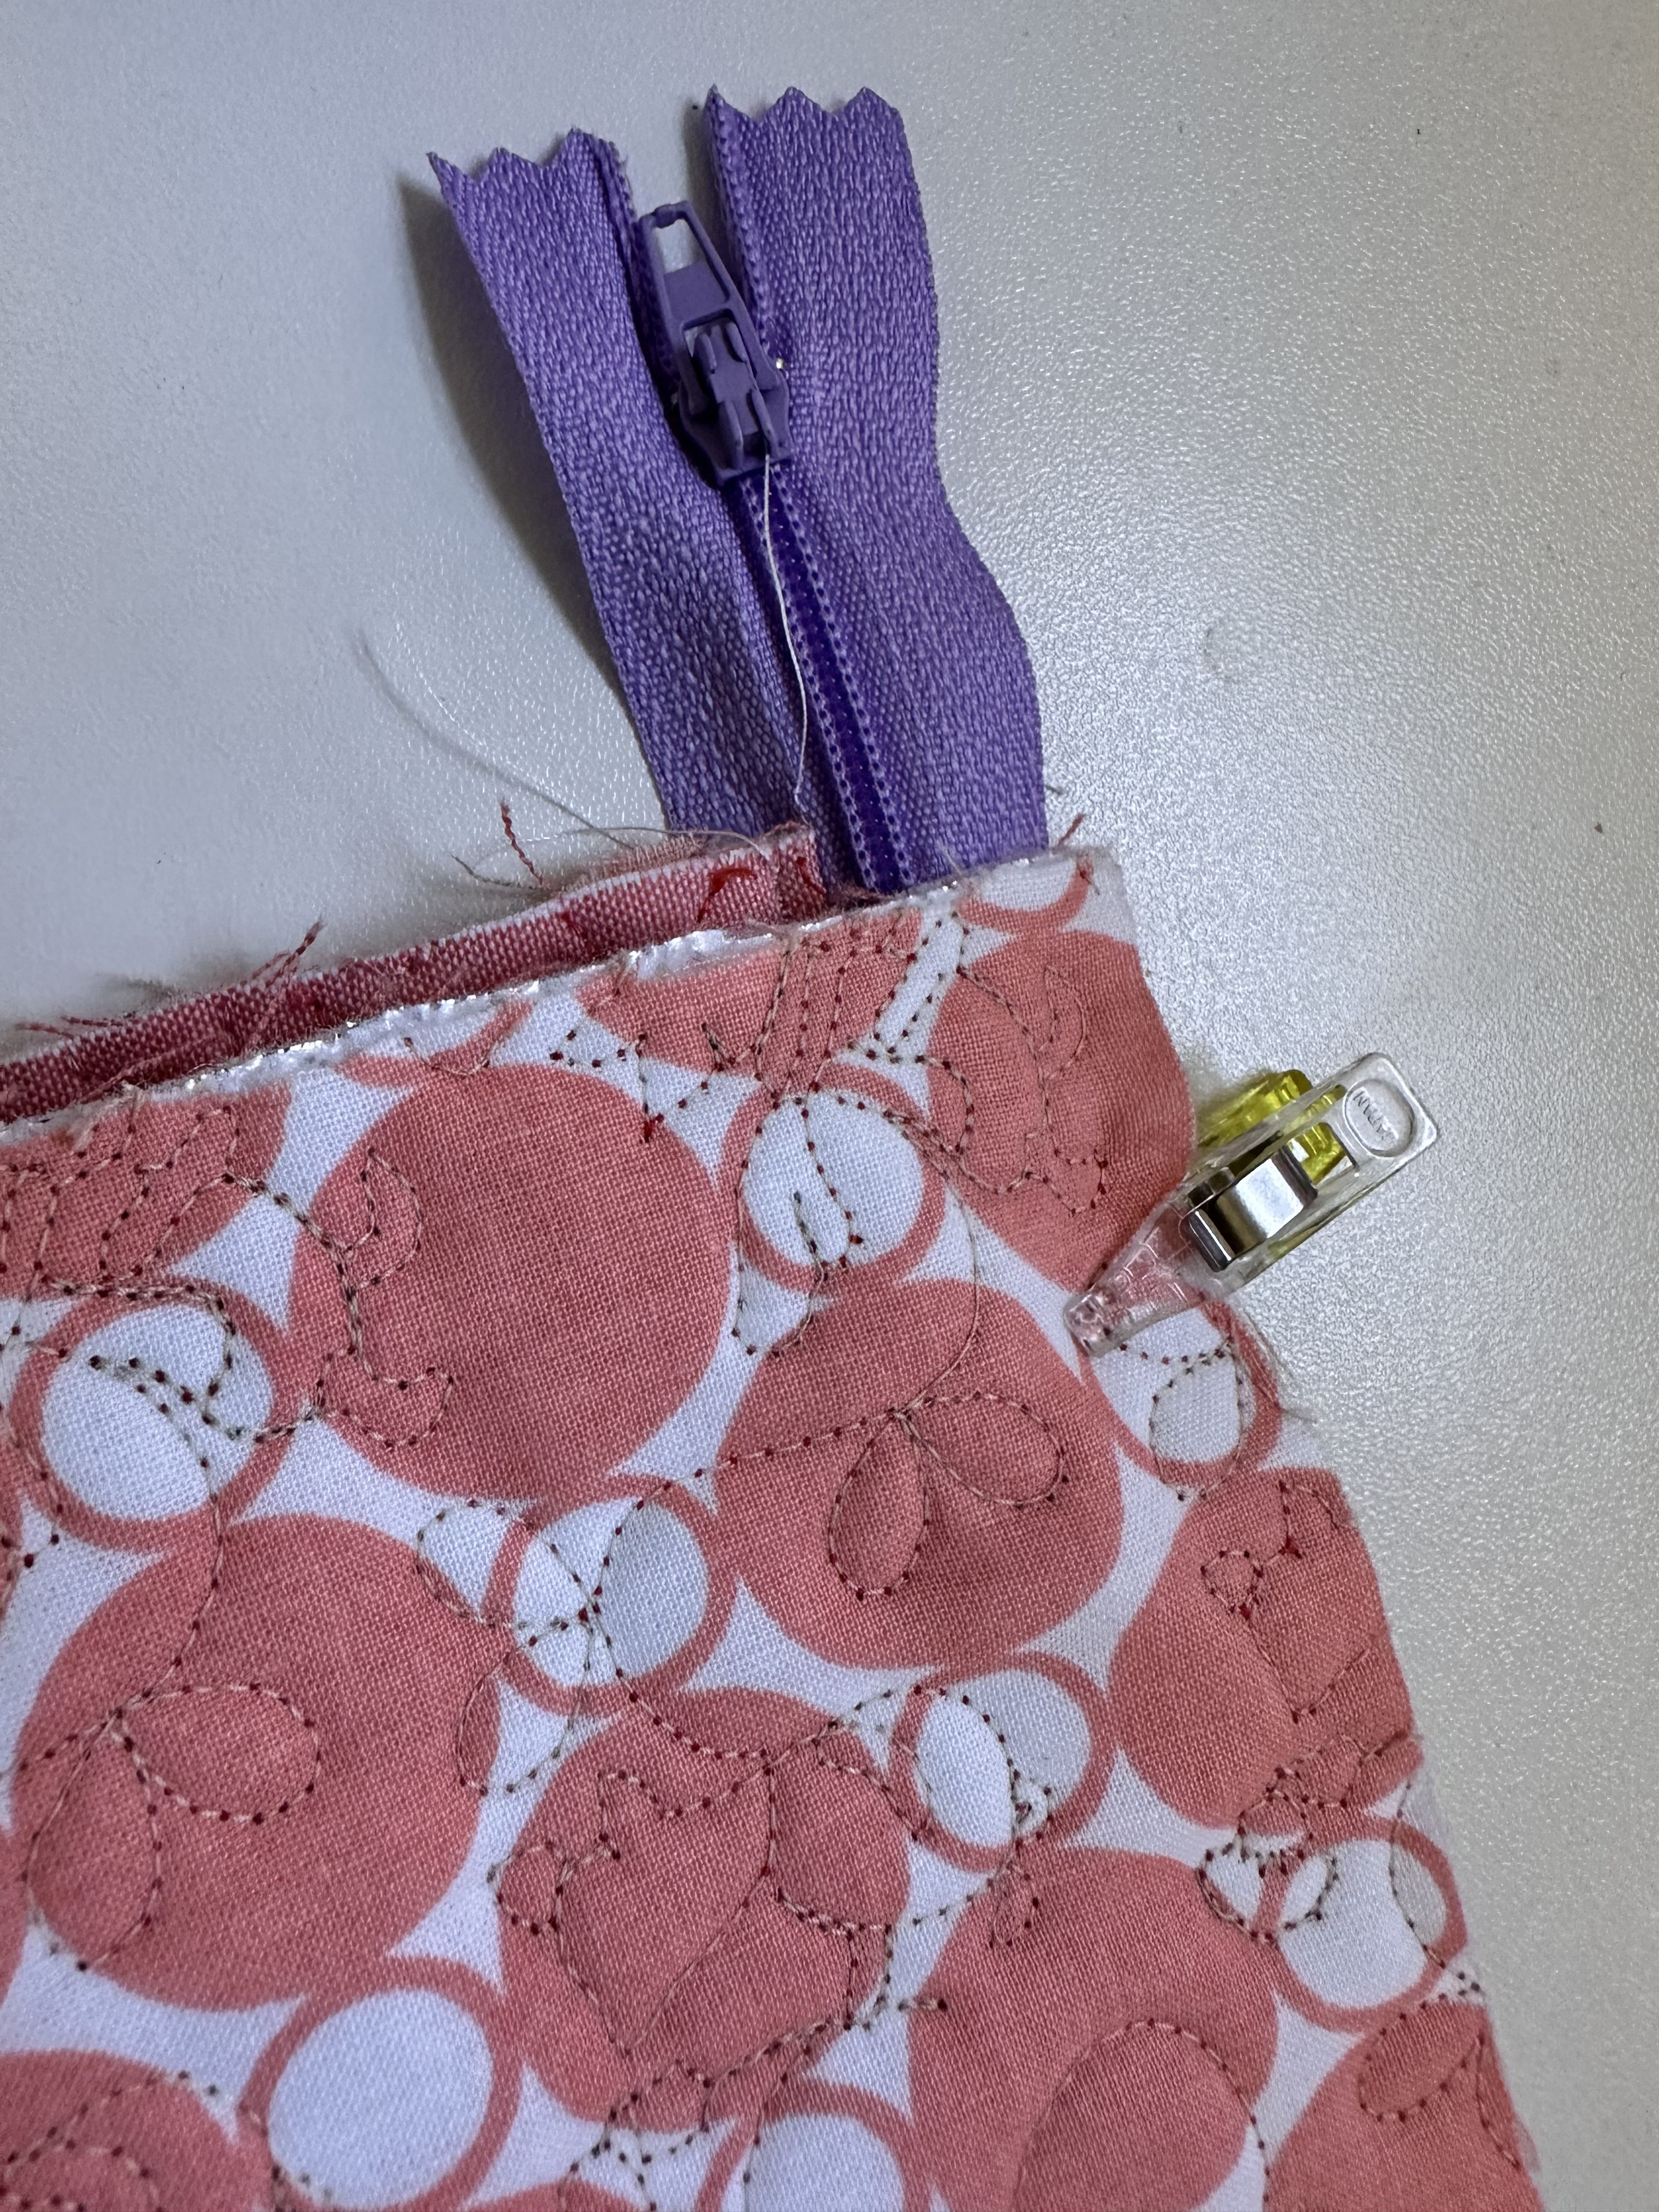
- Sew this seam using your zipper foot with the needle on the left side of the zipper foot like in step 2.
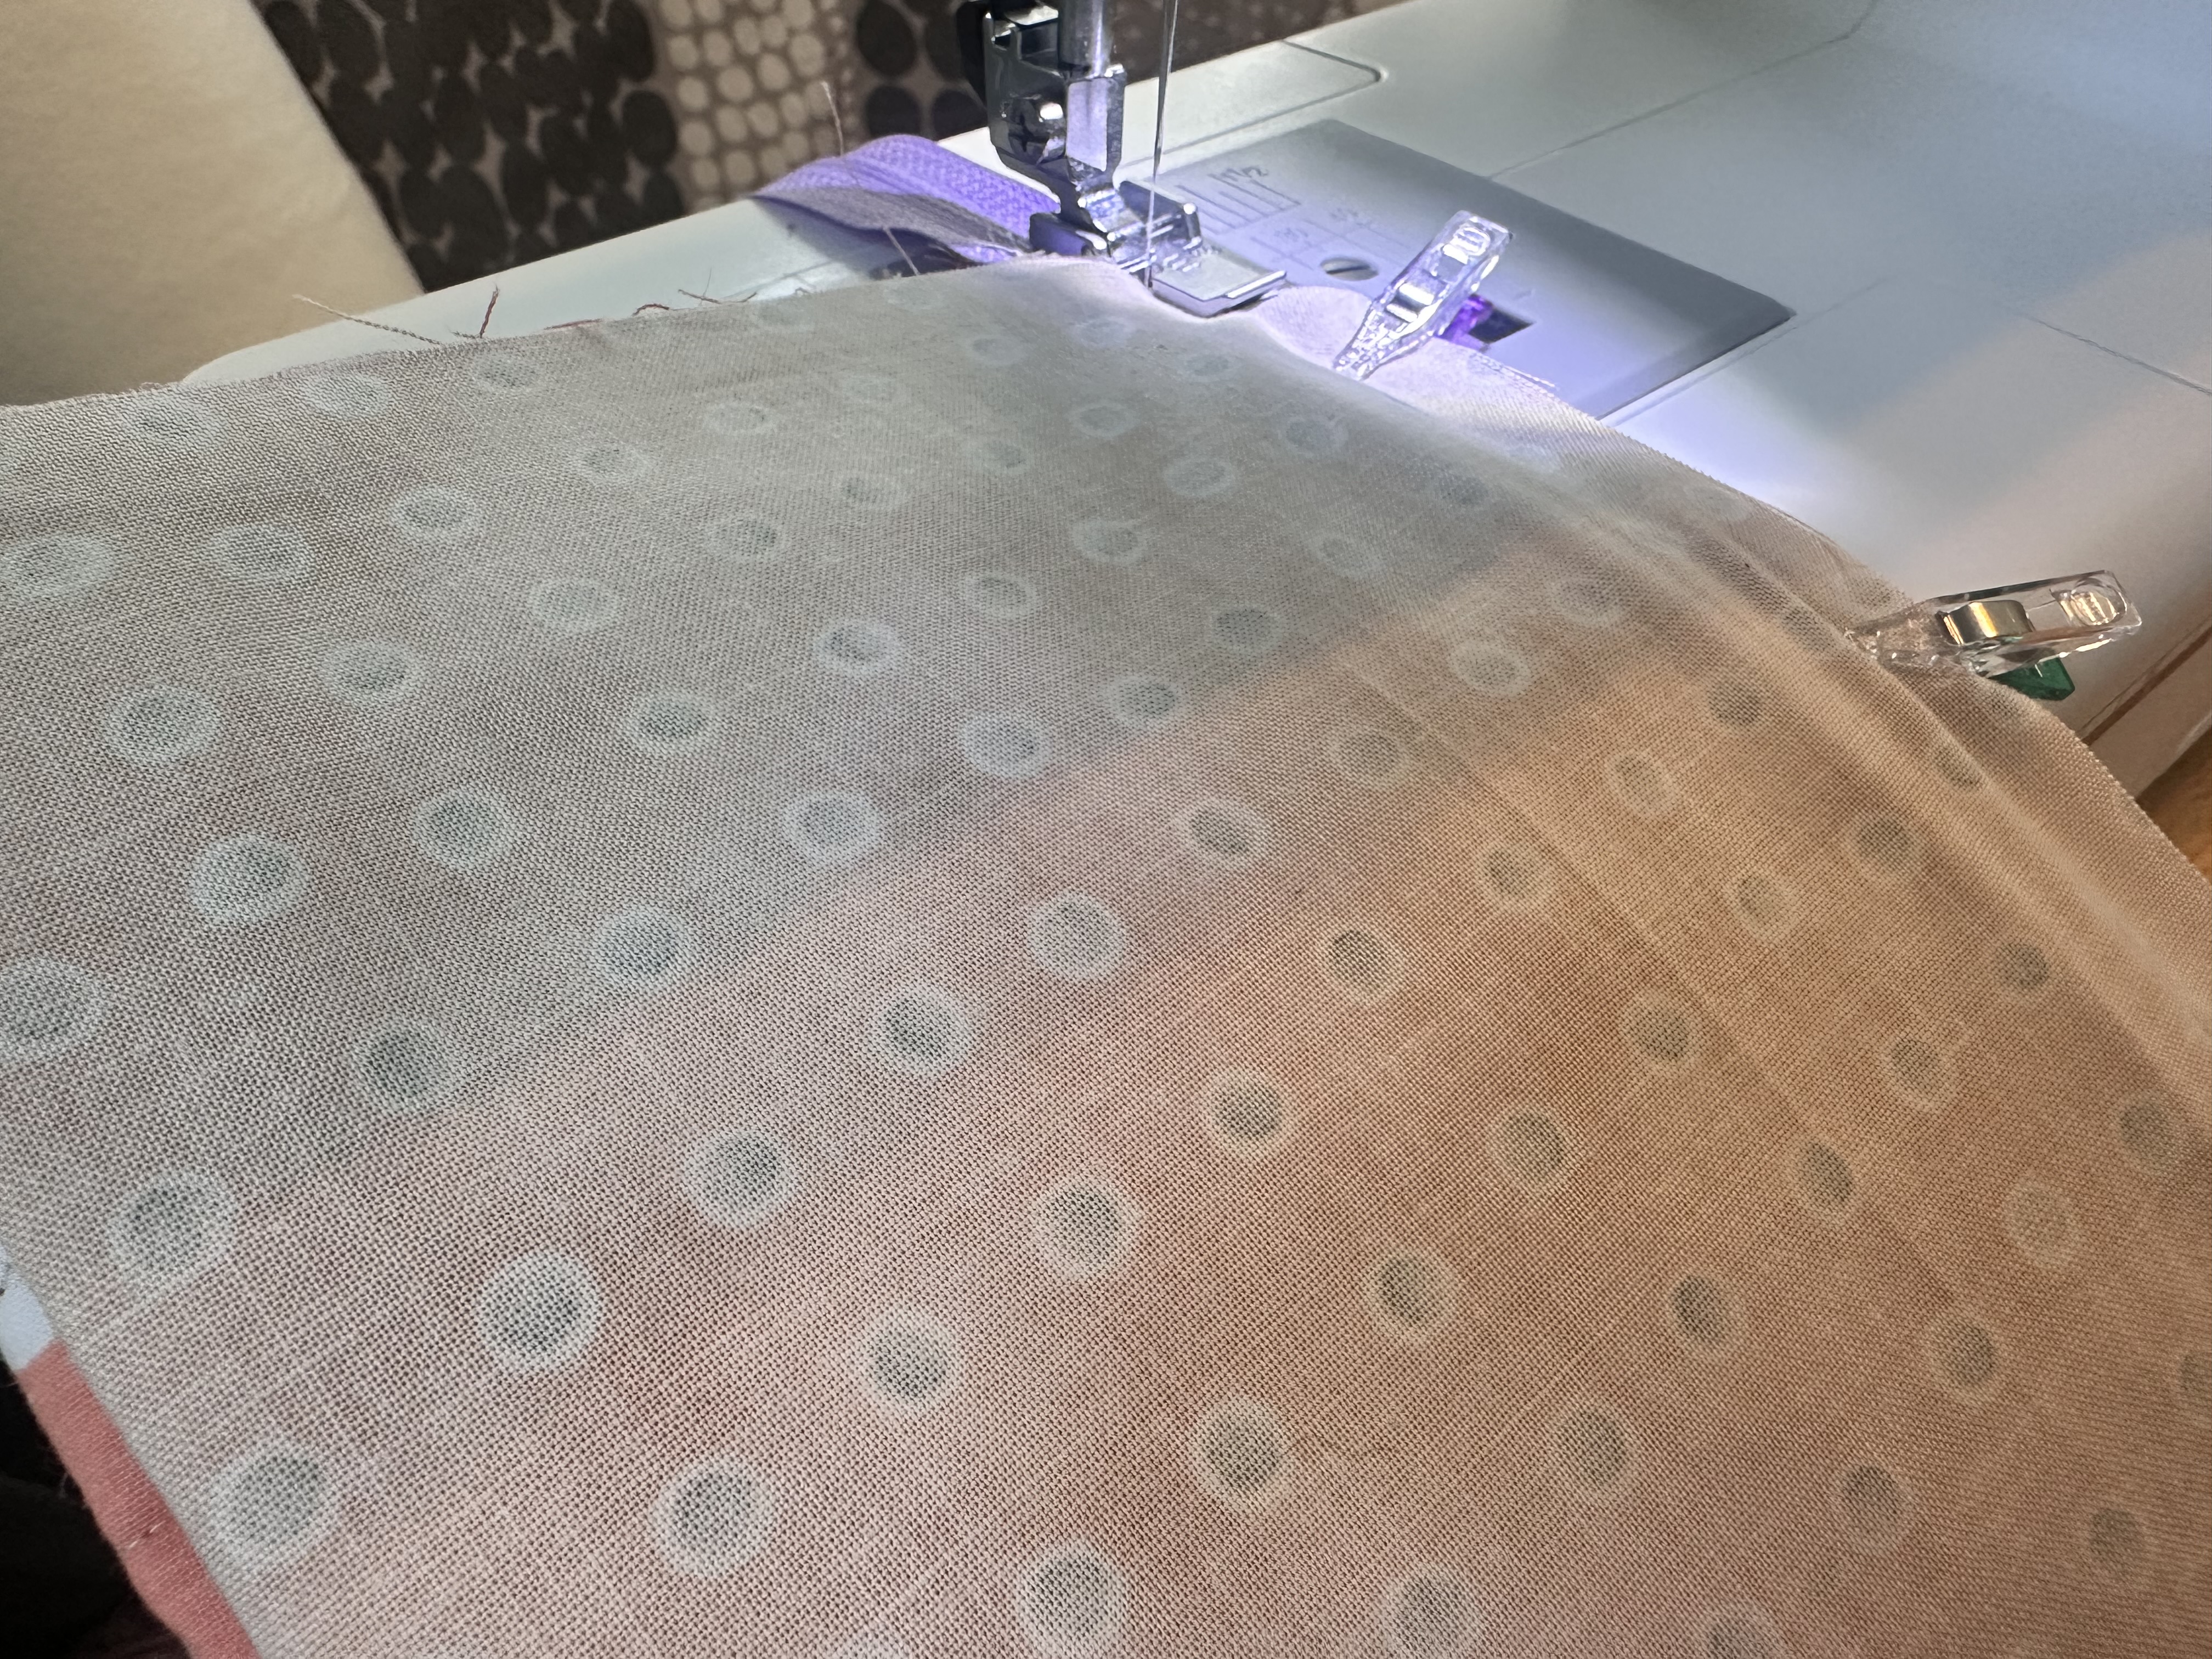
- Unzip your zipper, then turn the pouch right sides out and open it flat. Clip along the zipper to make sure the lining and outer fabric are away from the zipper. You can see why having a much longer zipper helps here. If you use a shorter zipper, it might be more difficult to open up the pouch and sew along the zipper. Not impossible, just a bit more tricky.
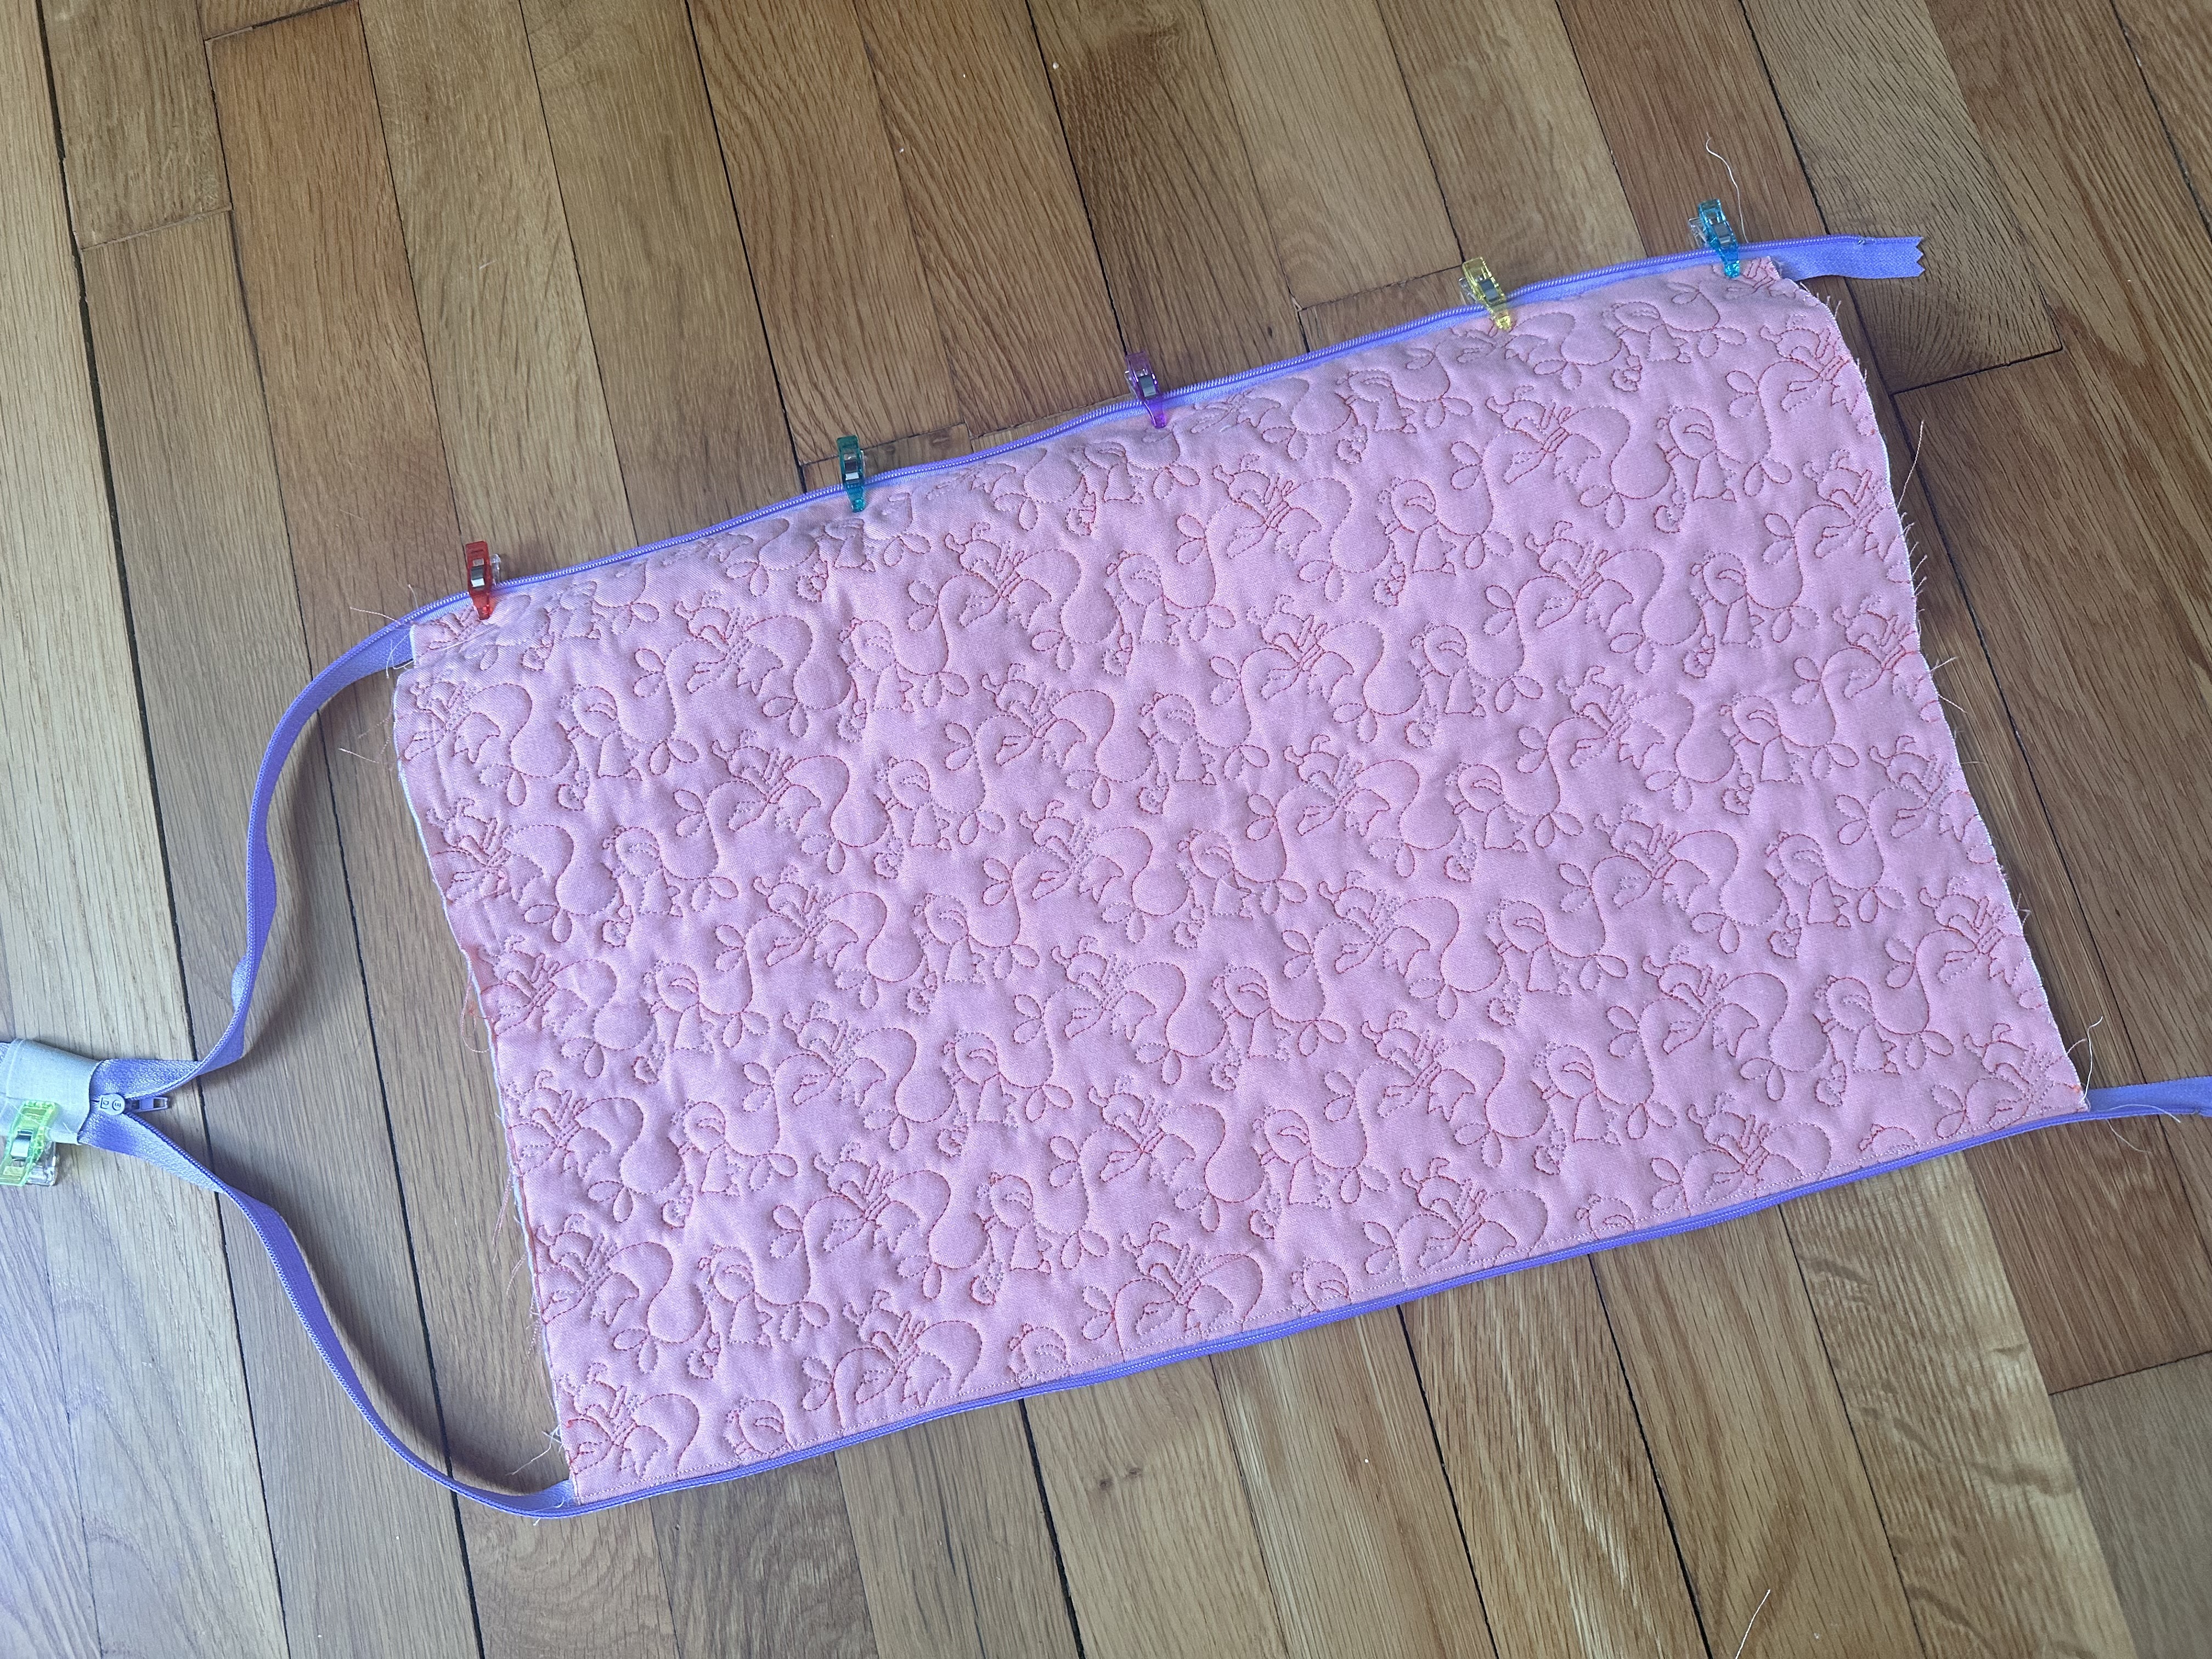
- Sew along the other side of the zipper as you did in step 3.
- Zip your pouch back up and fold it perfectly in half to find the center and clip the pouch together, aligning the zipper to the center point.
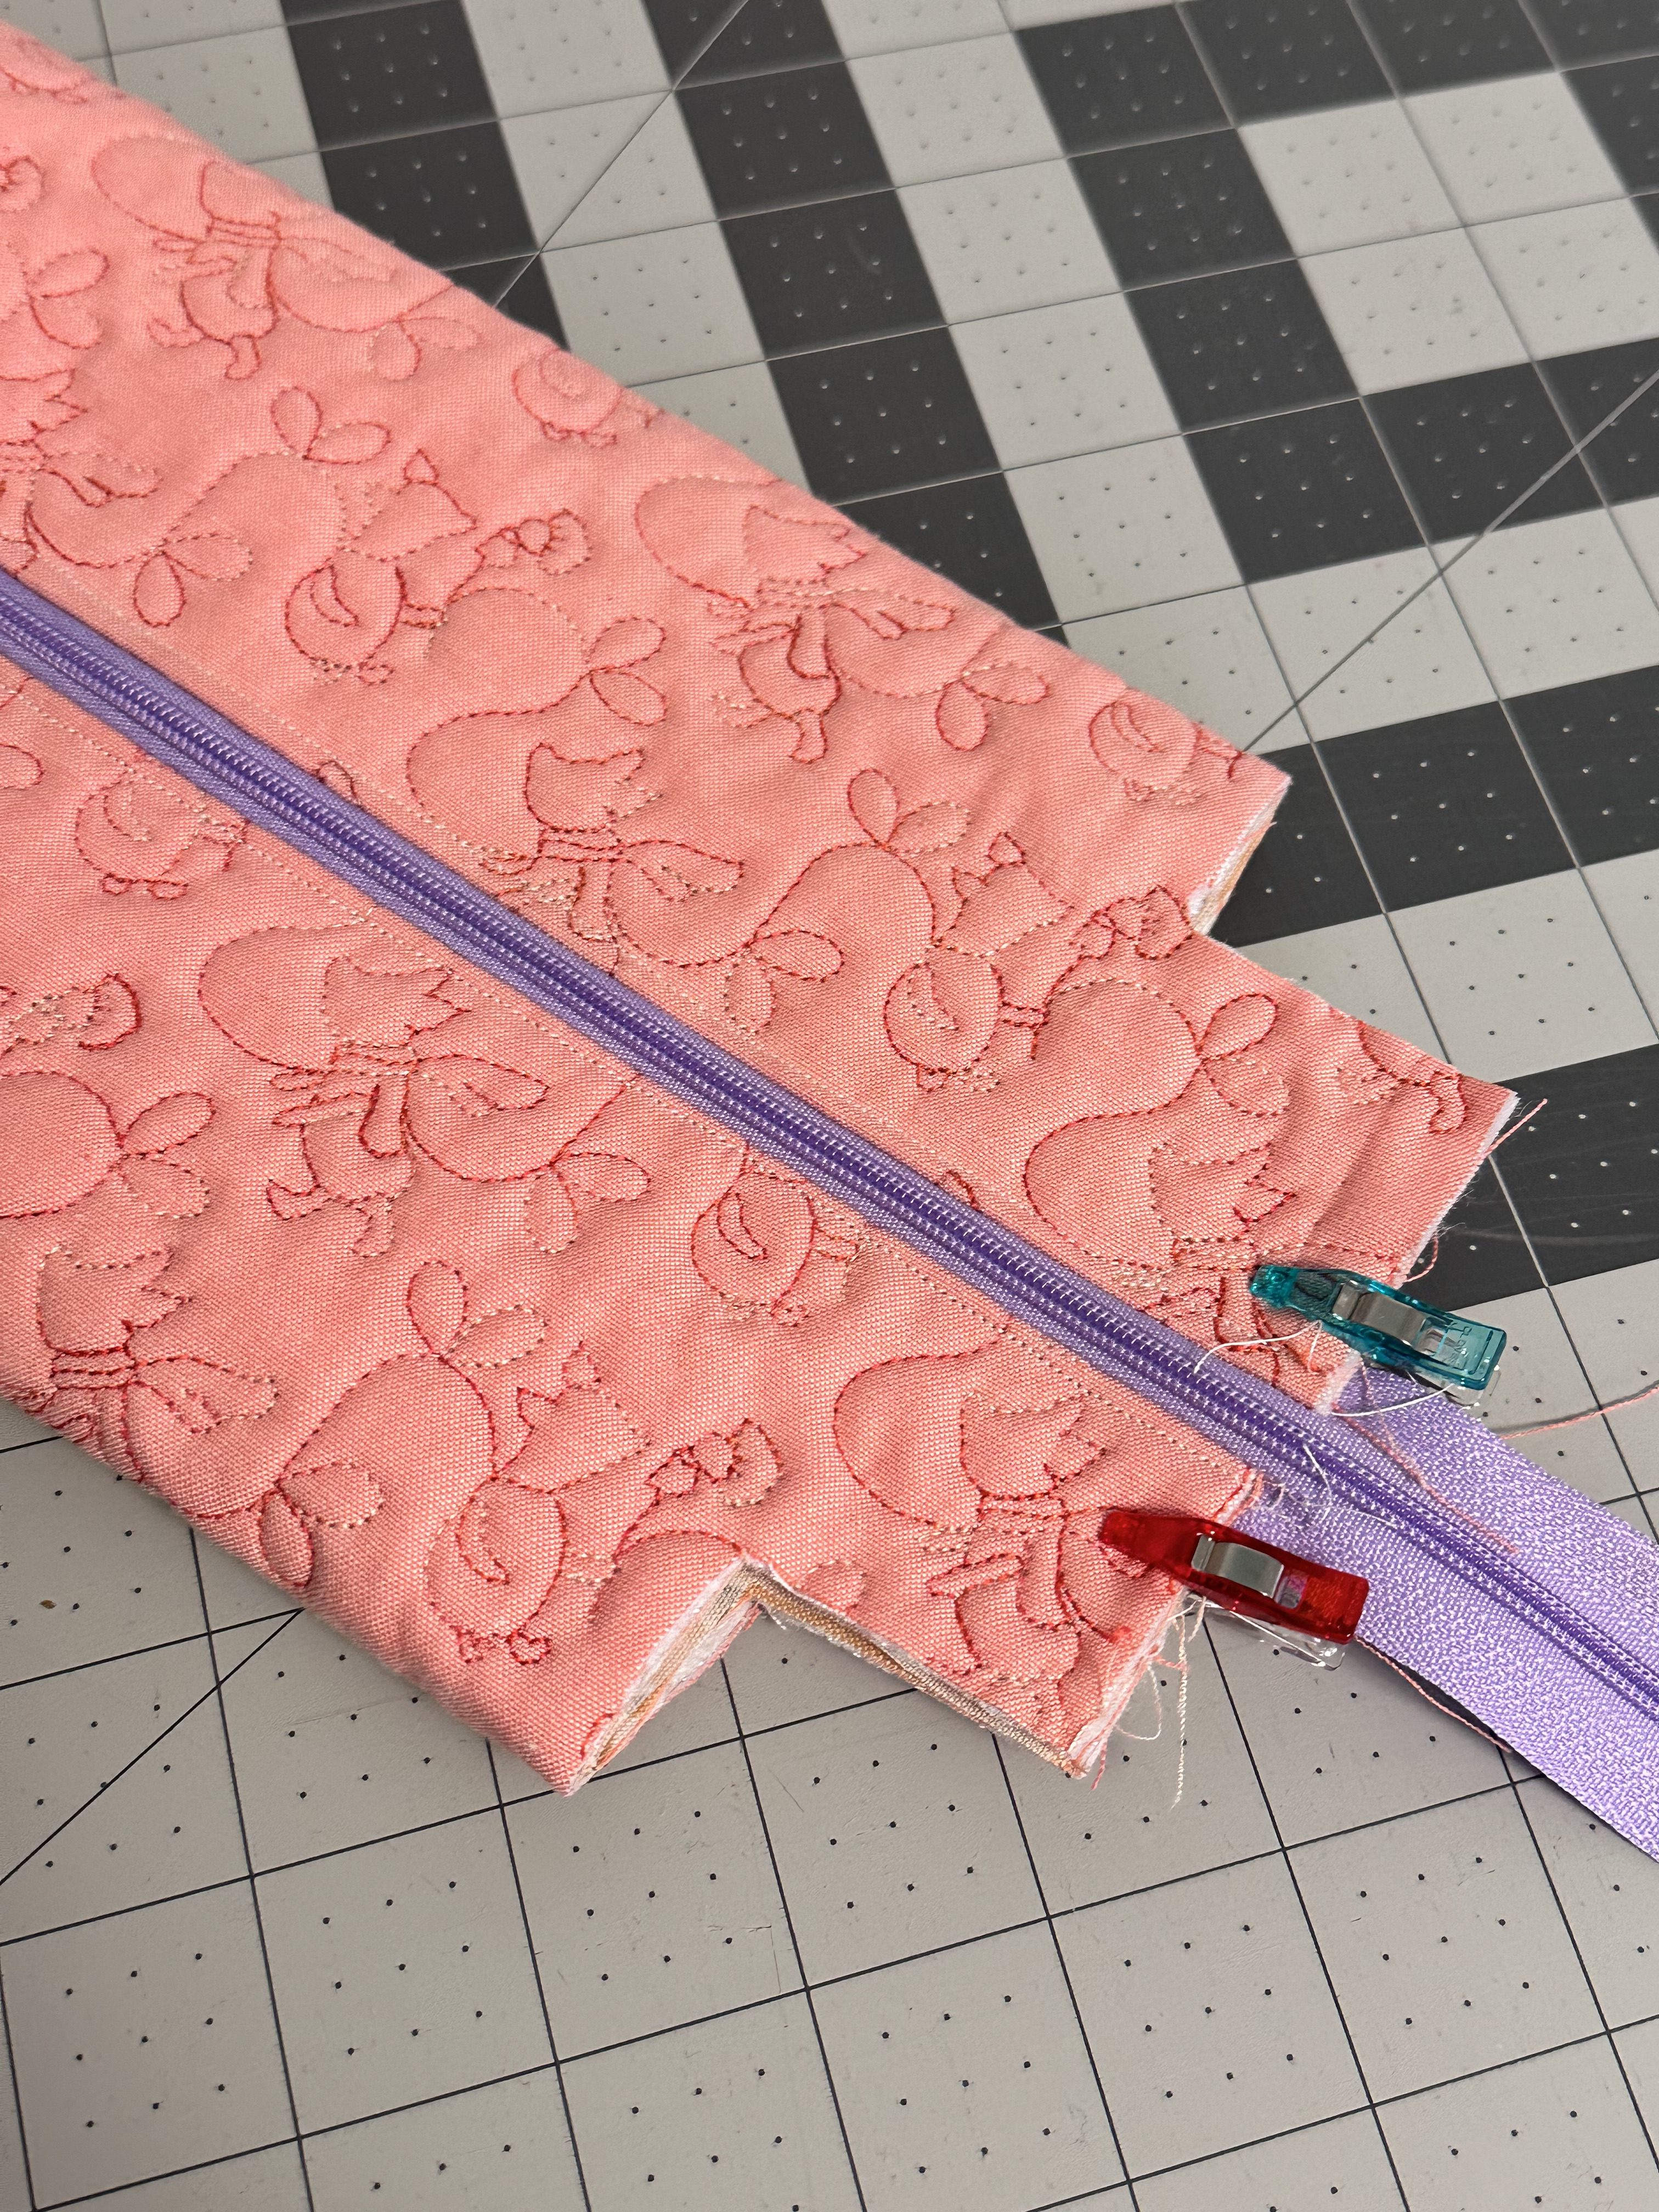
- Out of each corner, while the pouch is clipped in half, cut a 1.5″ x 1″ rectangle. Cut through all four layers when folded – the outer and liner fabrics. If making the larger pouch, cut your rectangles 2″ x 1.5″. The longer side will always be on the longer side of the pouch, regardless of the size you’re cutting.
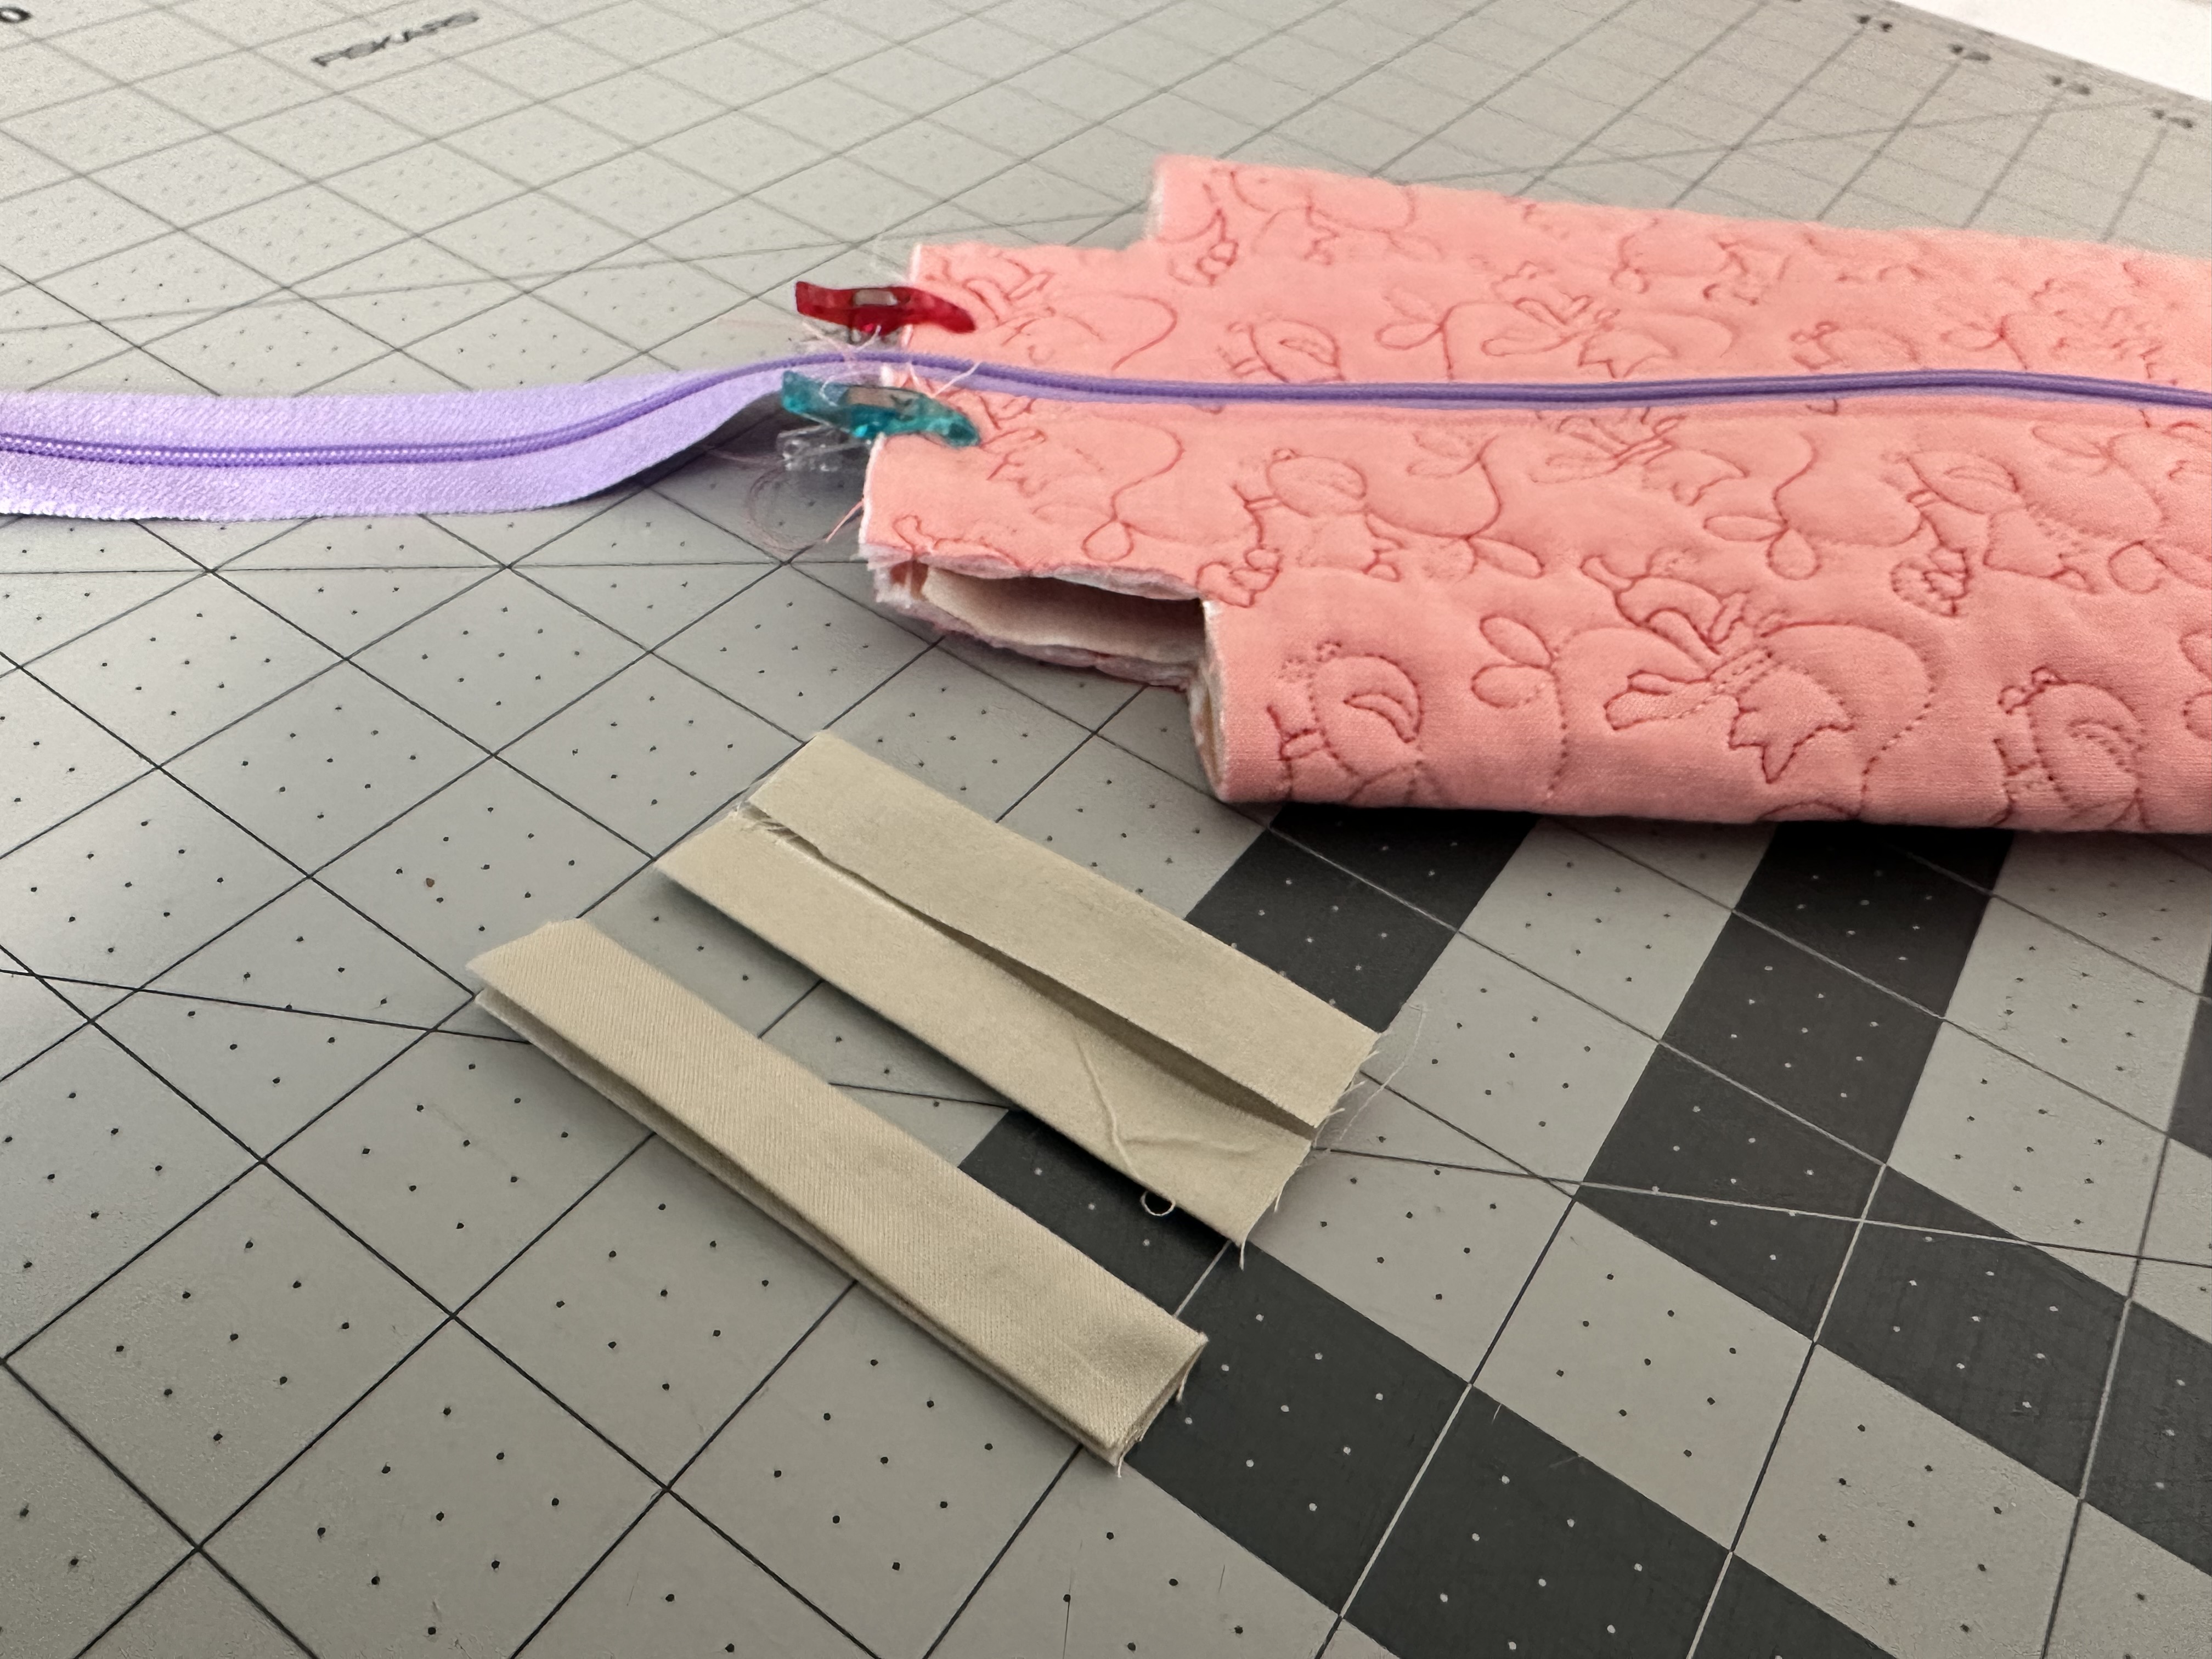
- Now it’s time to make your zipper pull tabs. I used leftover binding that was 3″ long for my pull tabs, but if you’re using cut fabric, cut your pieces to 2.5″ square. Basically, you have a little flexibility to use the fabric size you have on hand. Fold these tabs in half and then in towards your fold like you’re making double-fold binding like in the picture below.
- Attach your zipper tabs to the top layer of the outer fabric/lining/zipper only. You don’t need to sew this down too much; a basting stitch is fine to keep it in place. Make sure your zipper is inside the pouch and not beyond the fabric. I like to fold the opposite side of the pouch back when tacking these pull tabs onto my pouch. Repeat for both sides of the pouch.
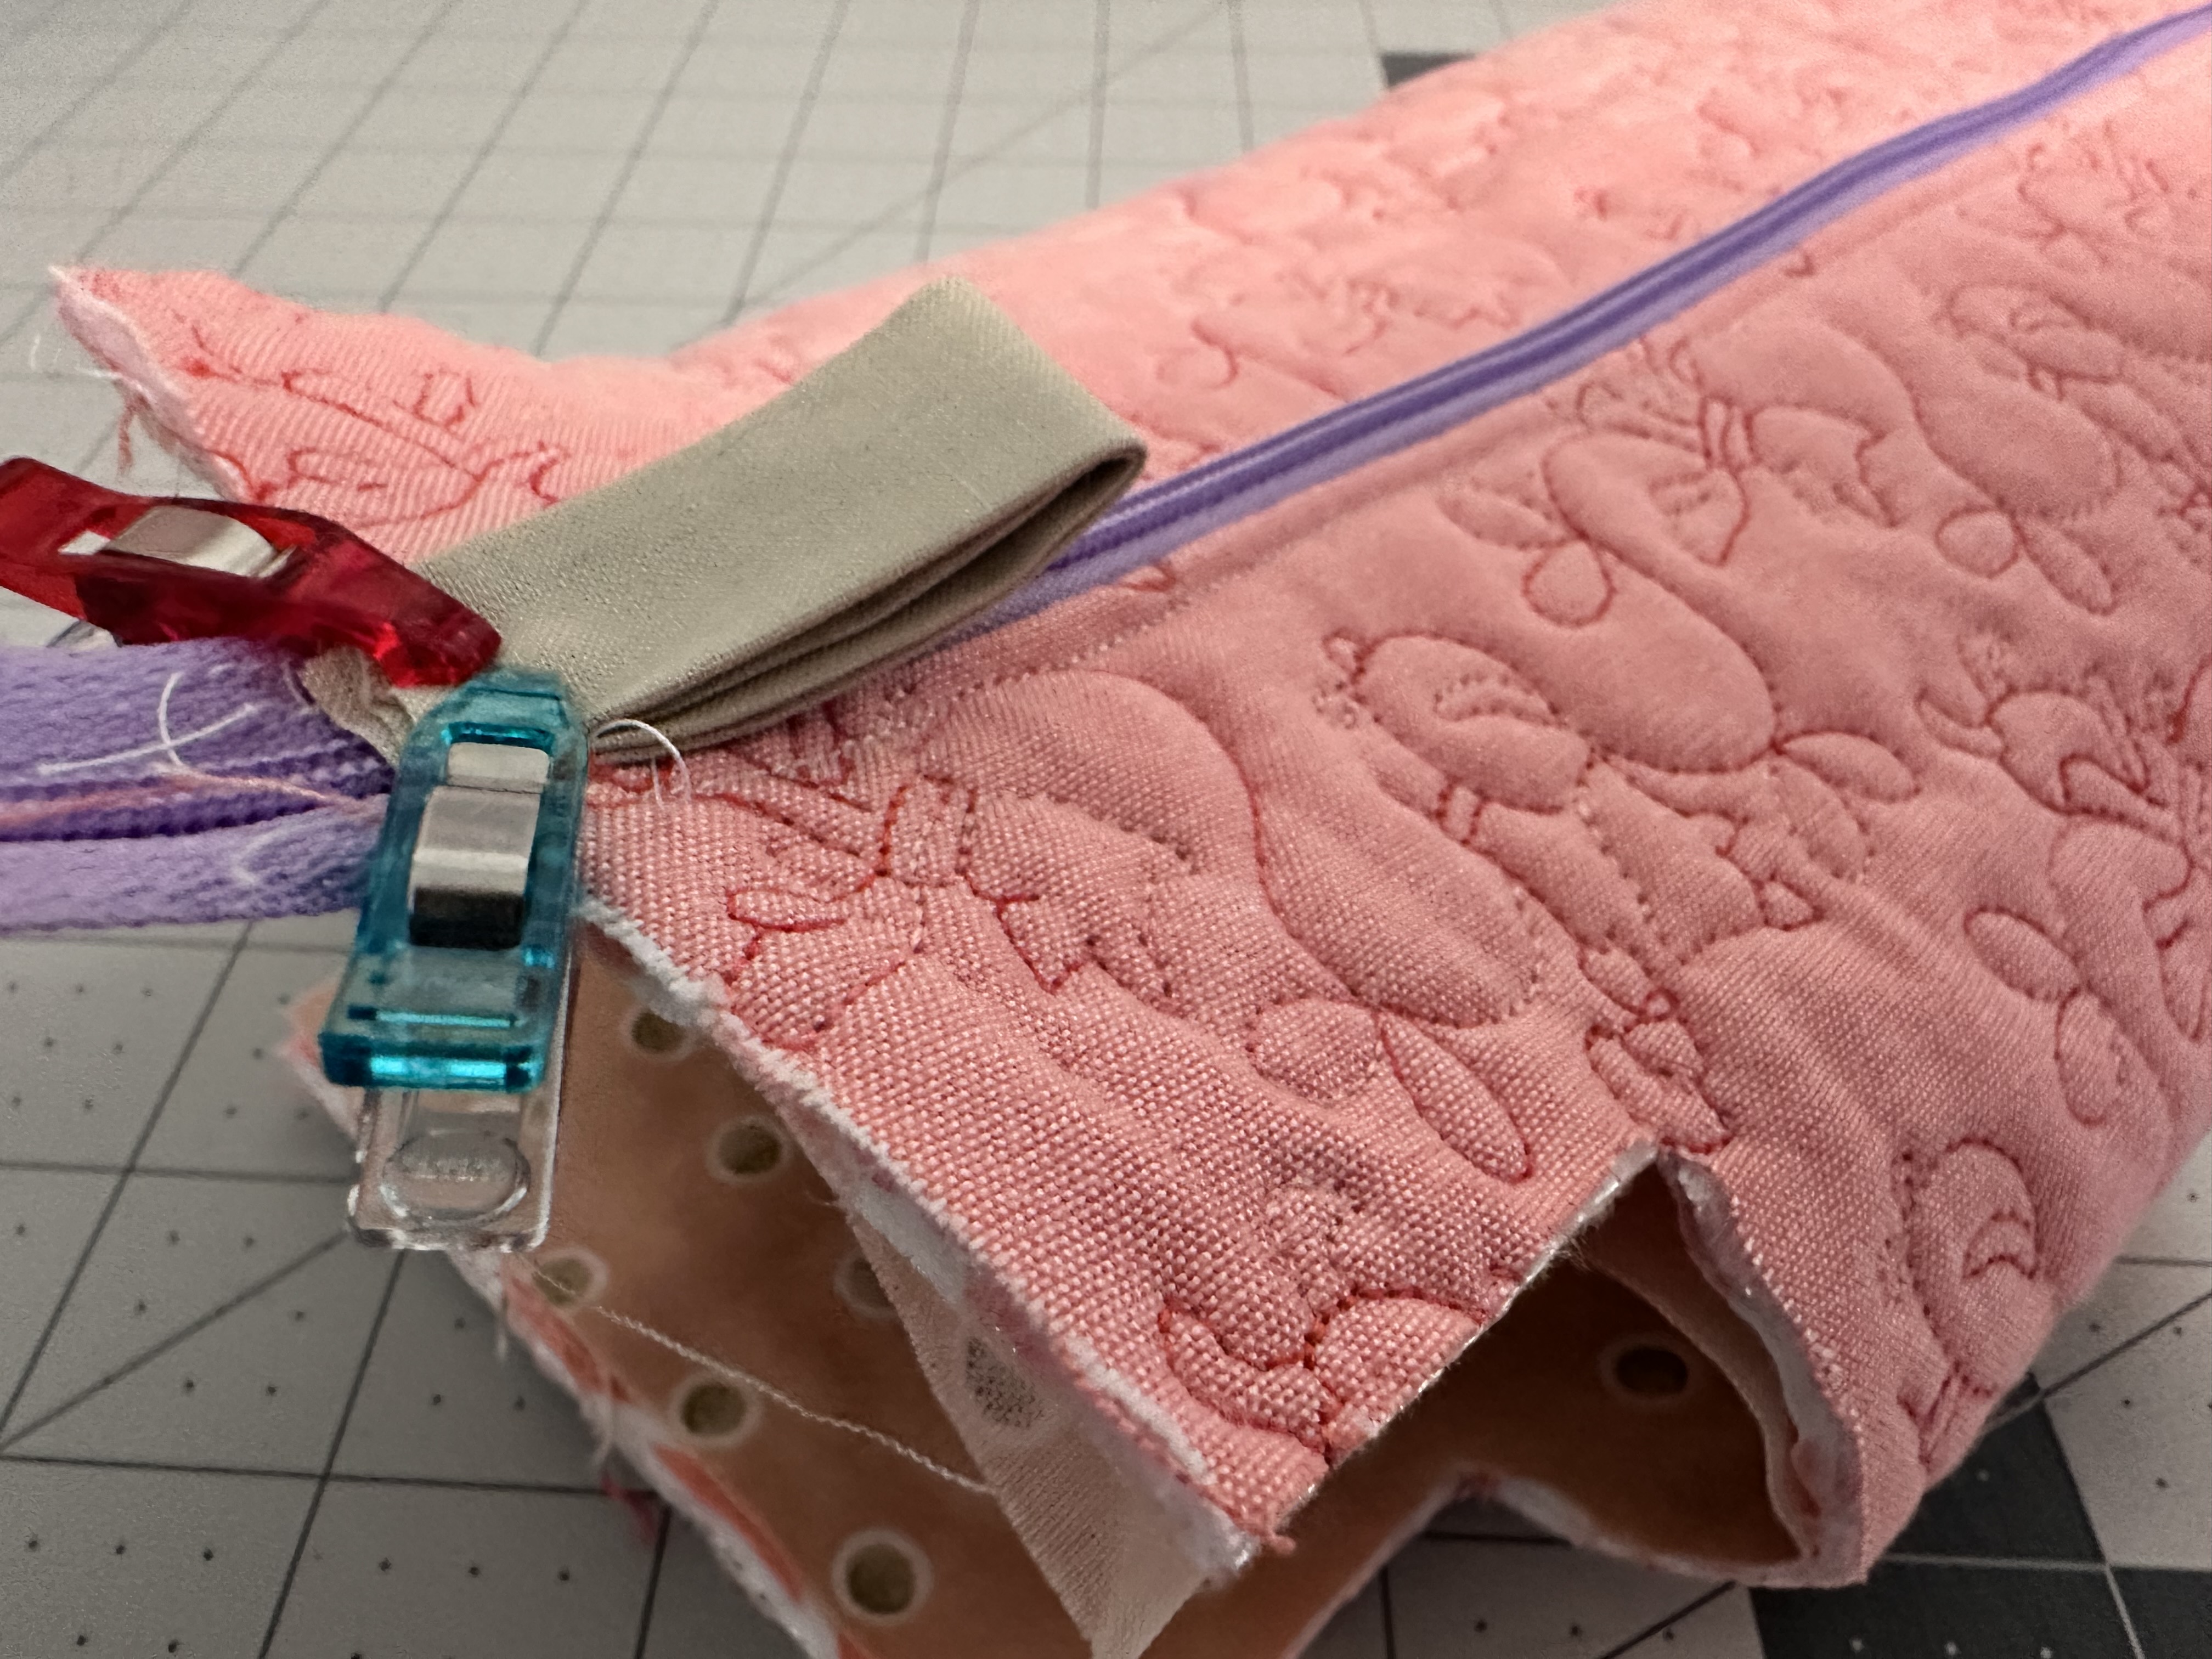
- Trim off the excess zipper on either side of the pouch.
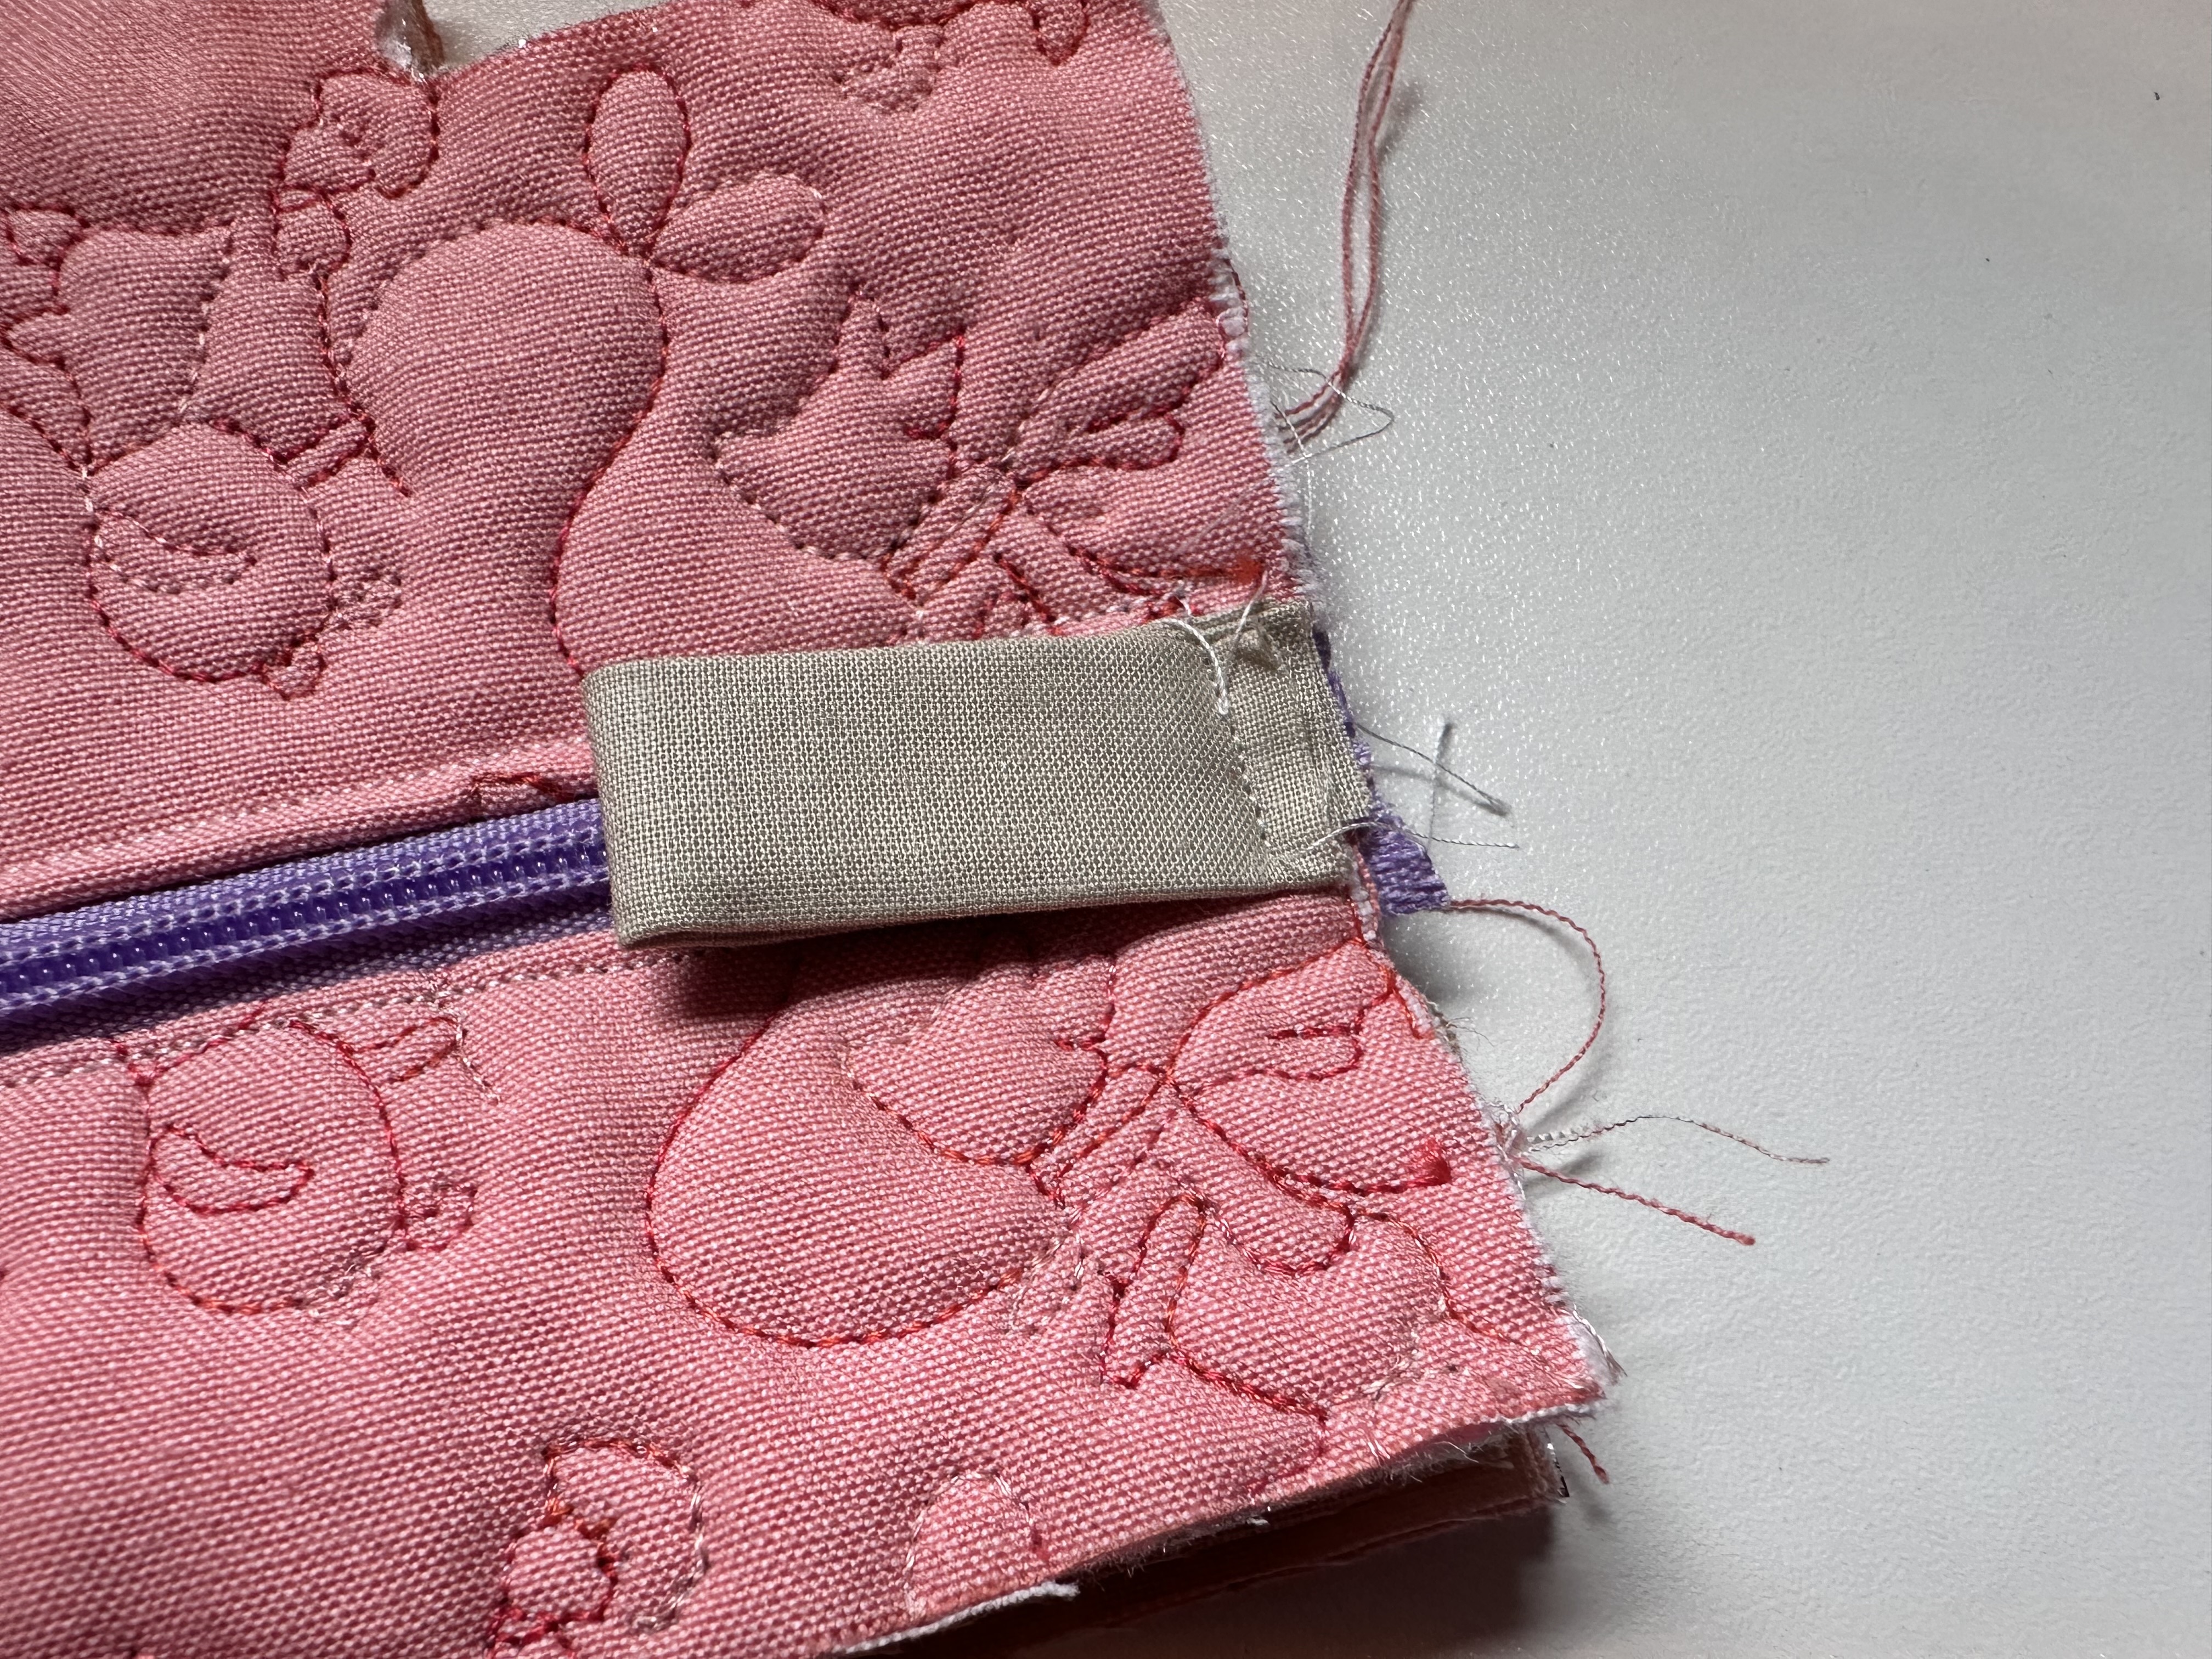
- Flip the pouch inside out with the right sides of the pouch facing each other and the right sides of the liner facing each other.
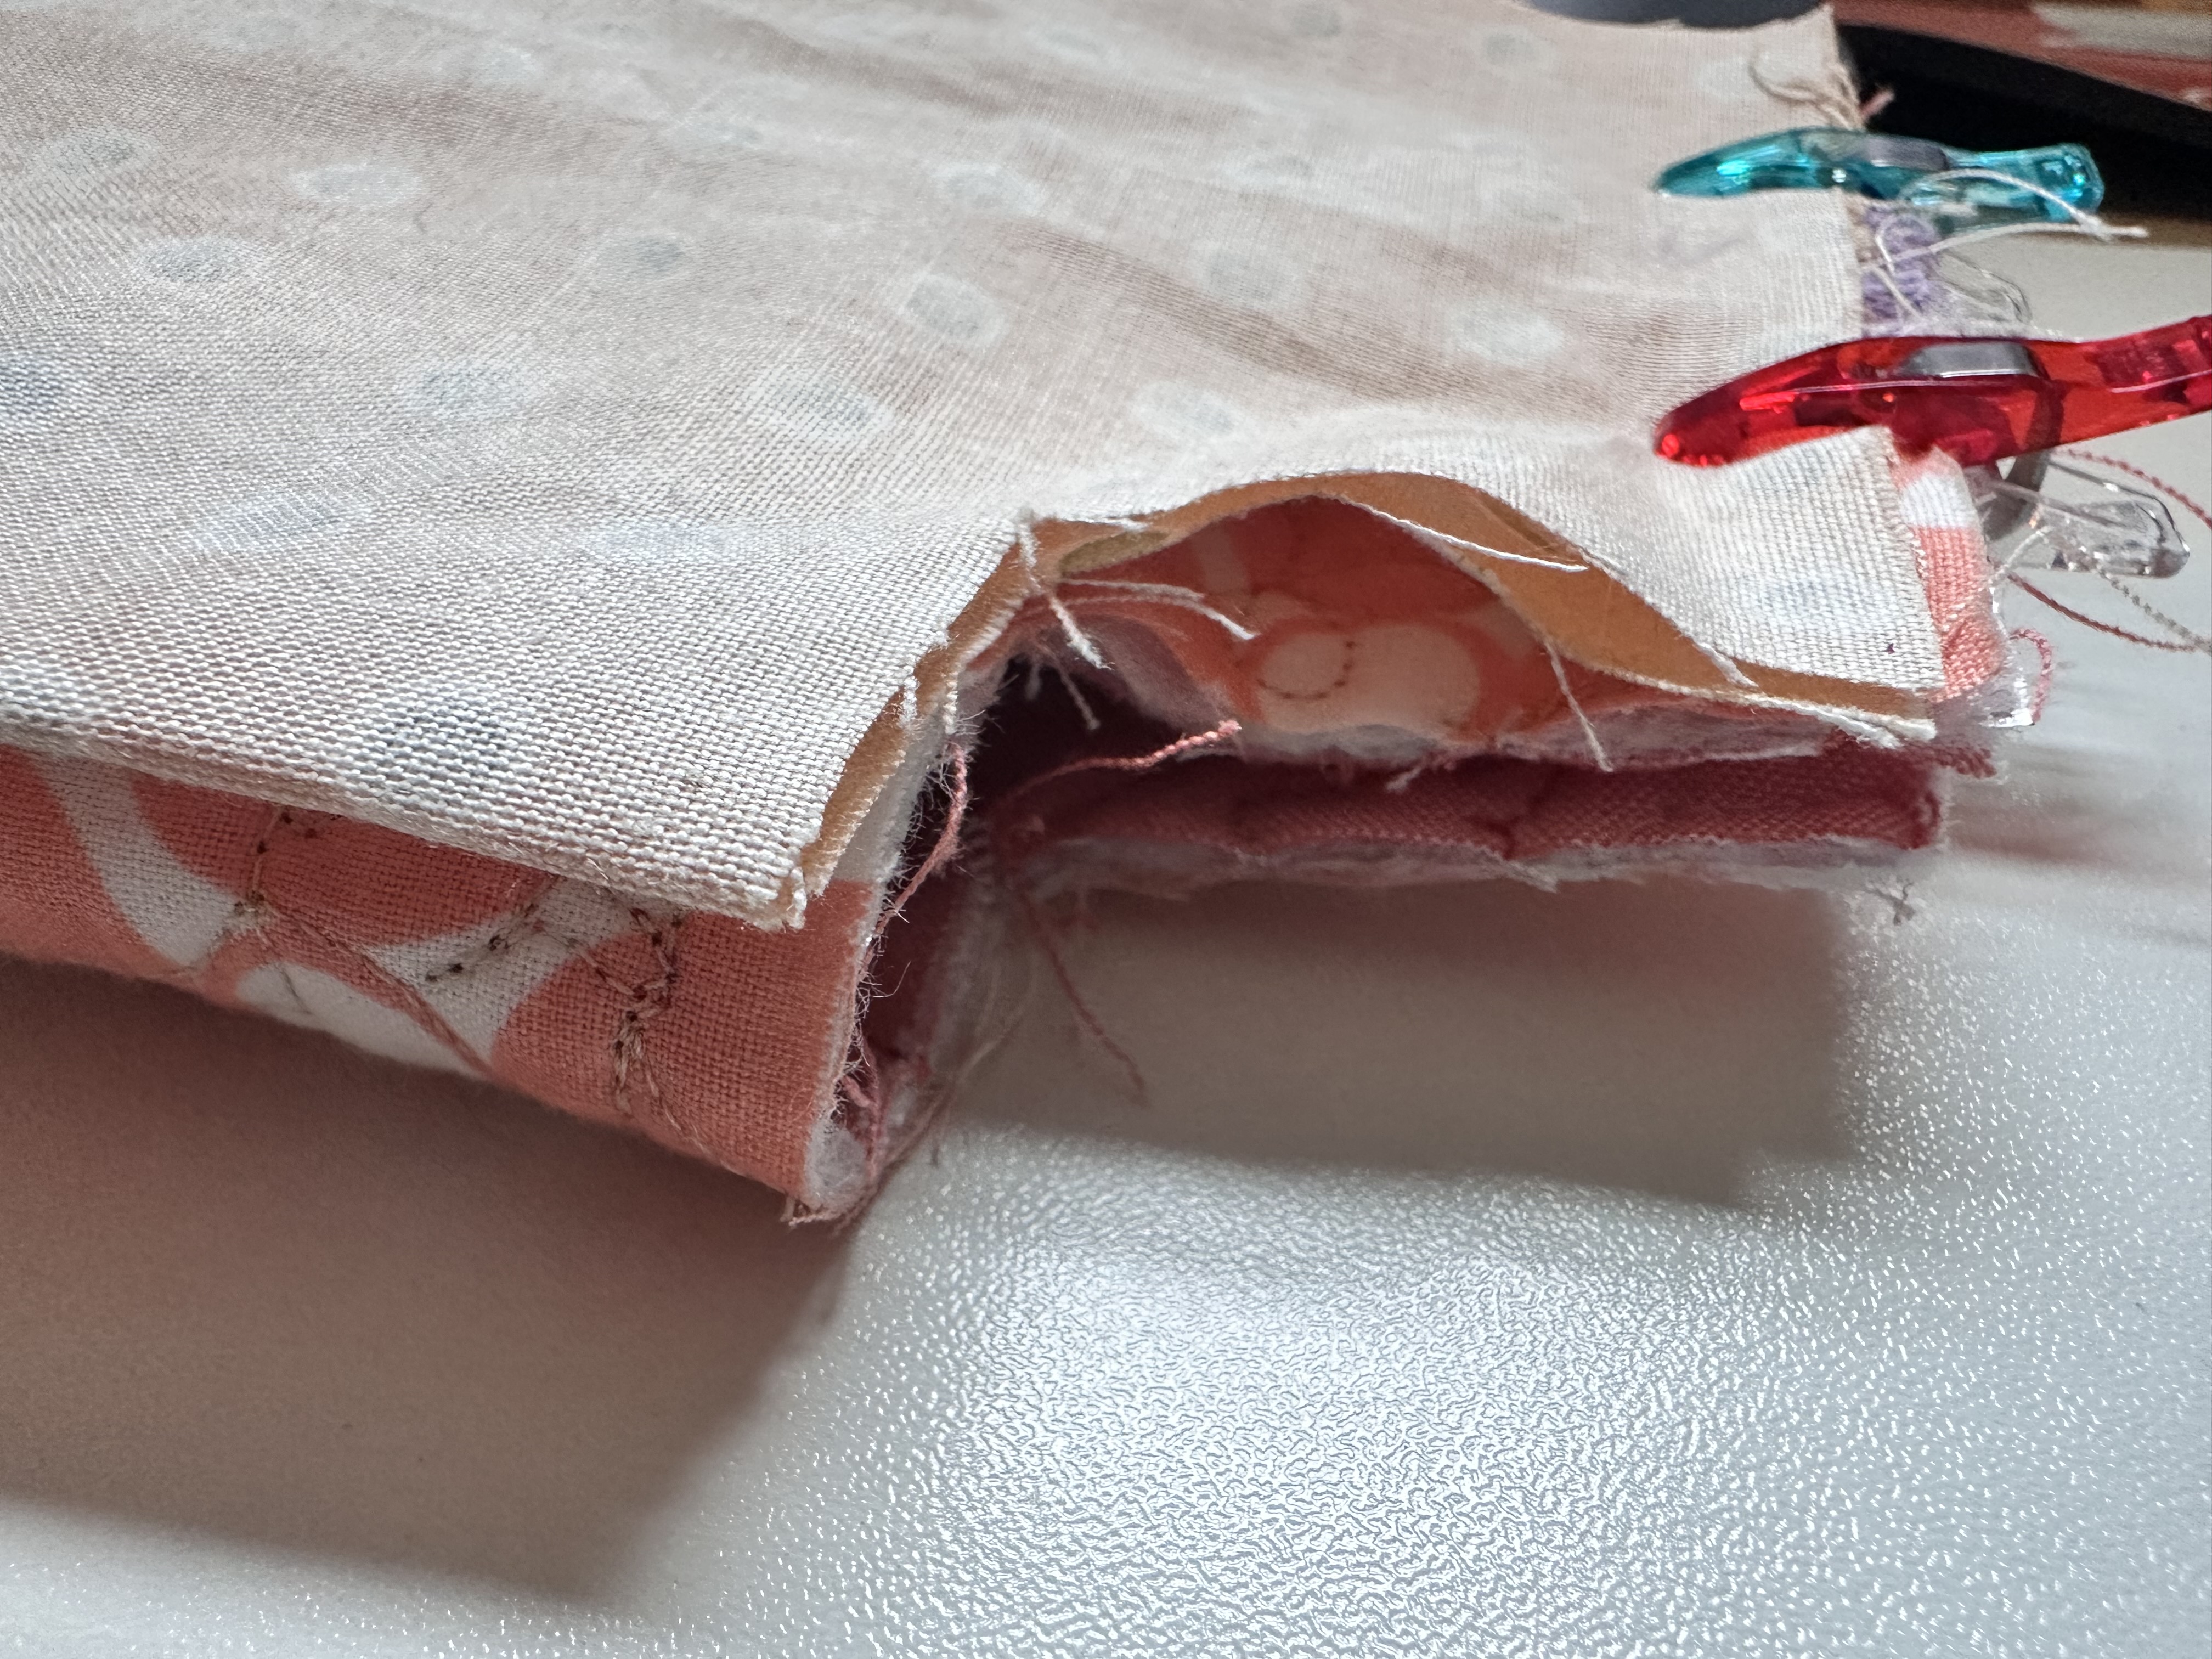
- Sew along the two clipped edges.
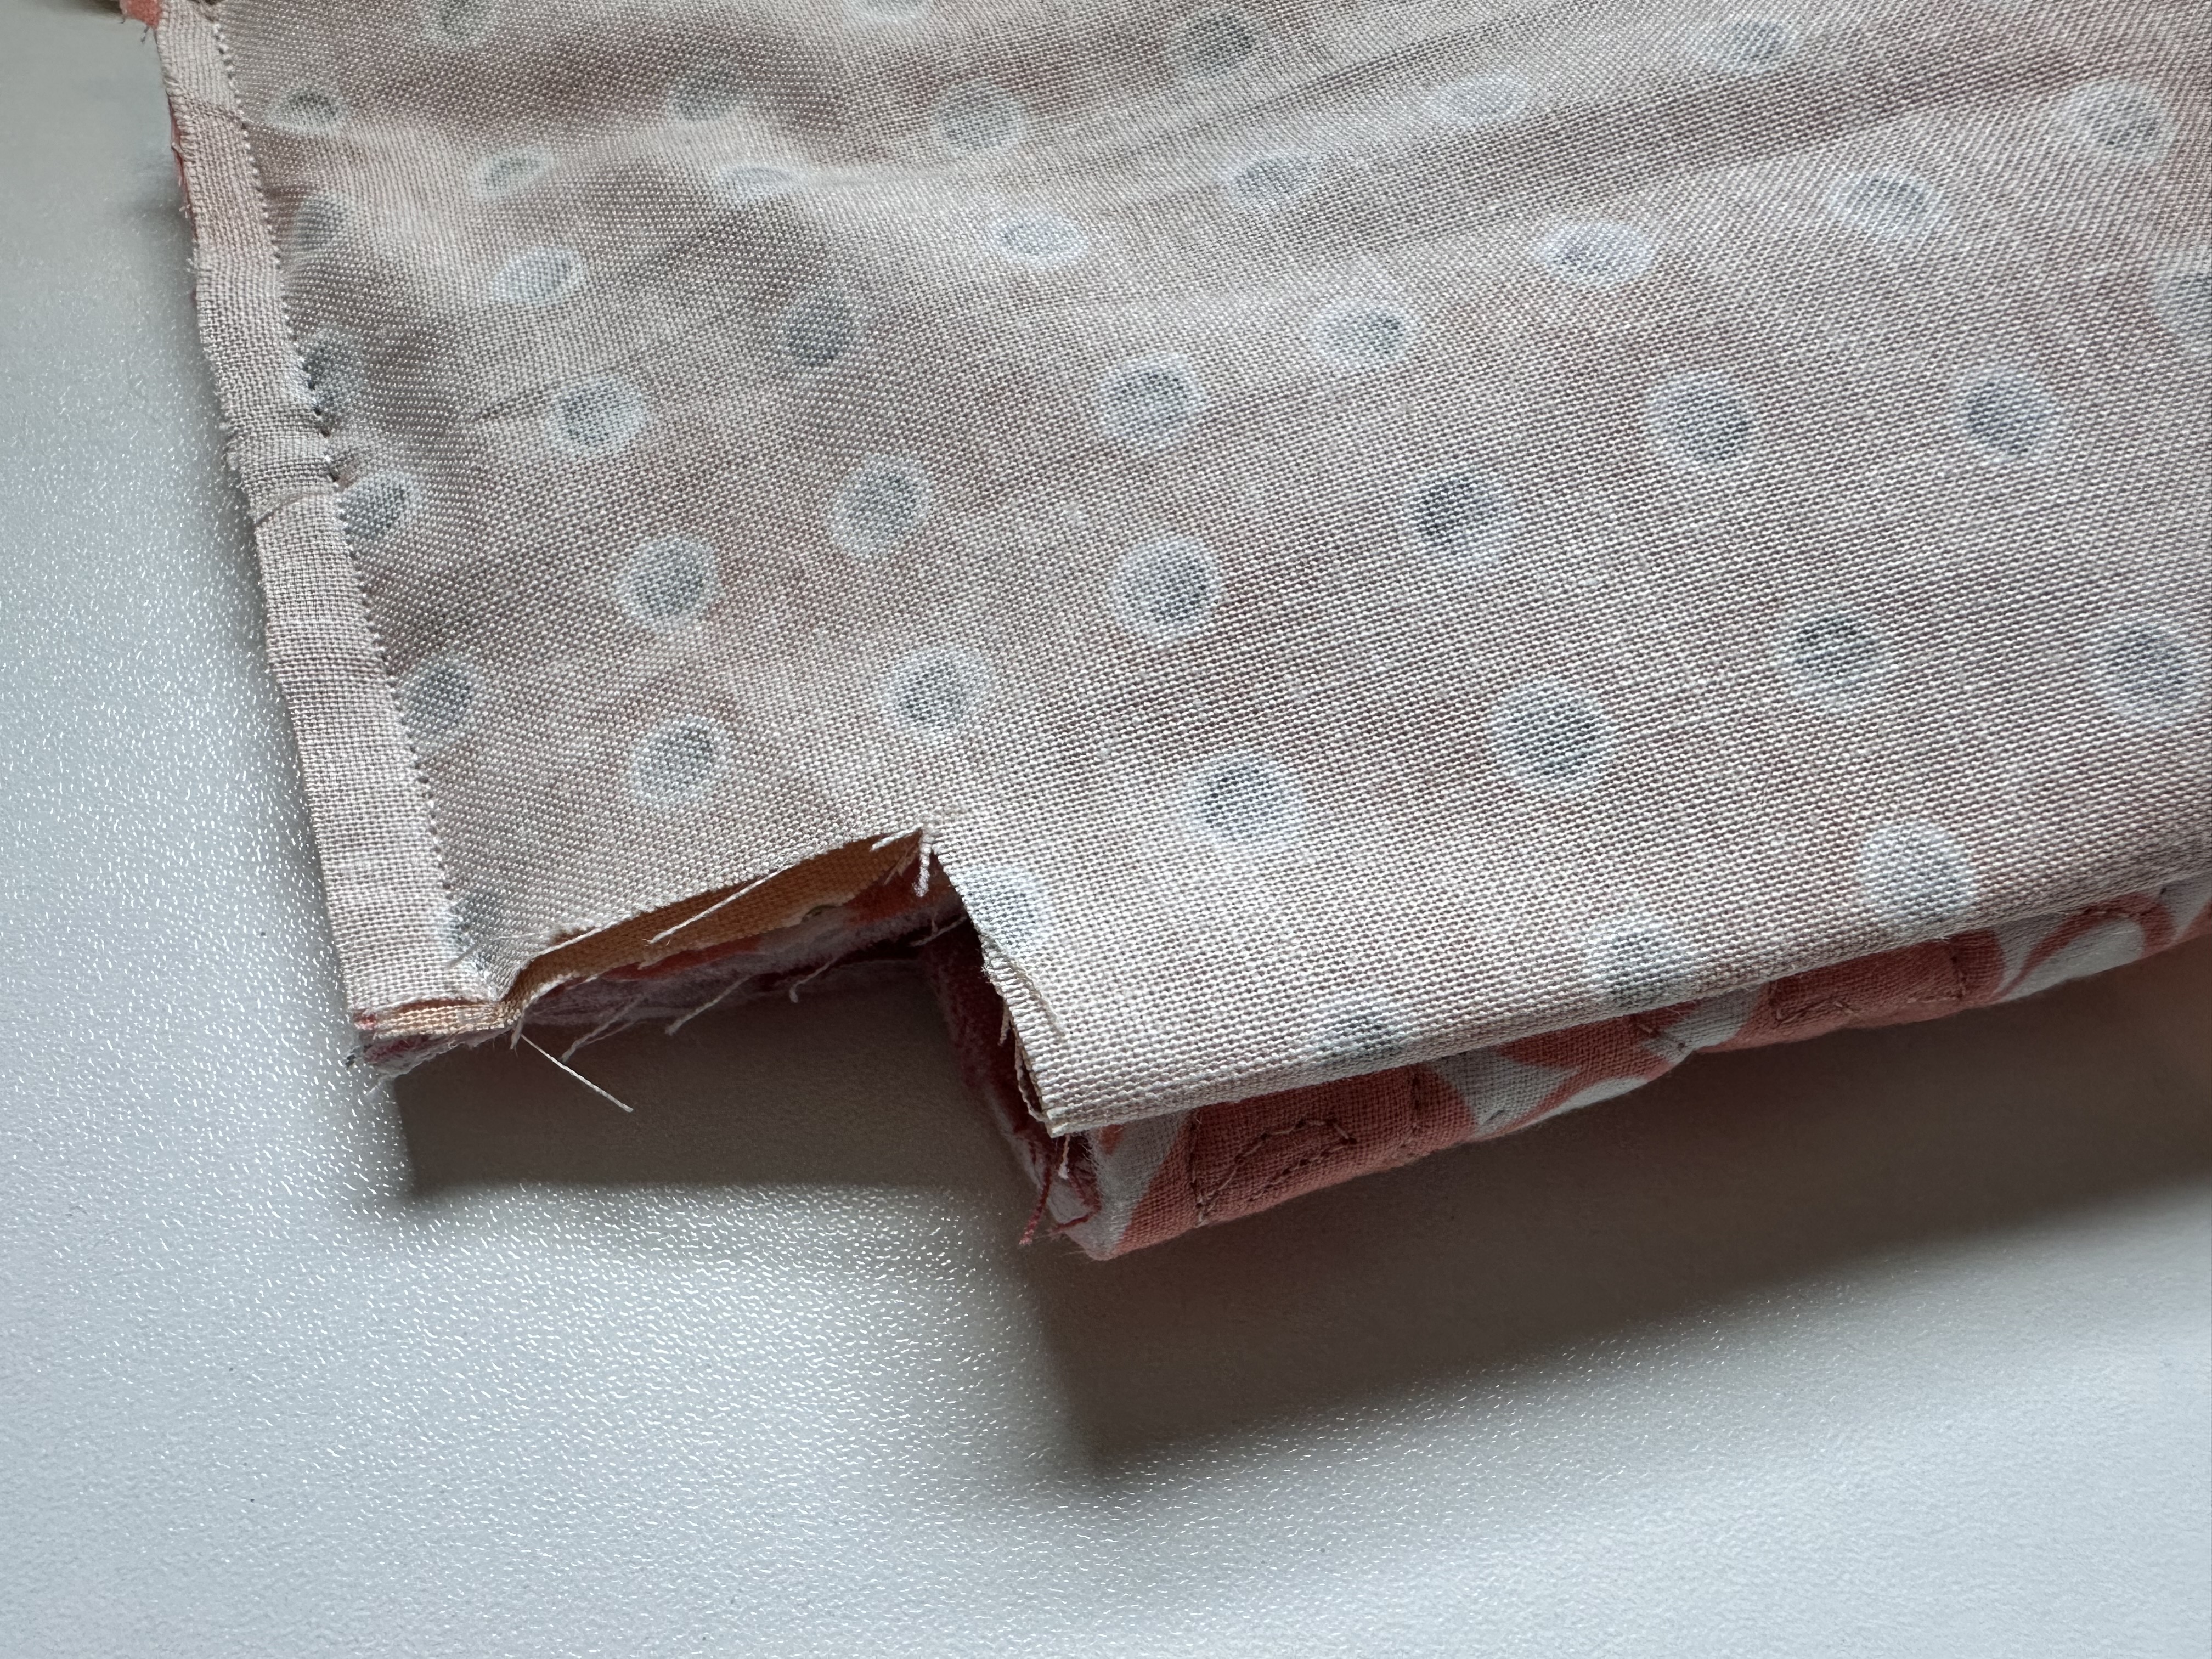
- This piece is probably the trickiest part, but with a little patience, it helps make the pouch take shape, and with this technique you won’t have any raw edges on the inside or need to add any sort of double fold binding to the inside. Open up one of the cut corners and start to pull the pouch through the outer layer.
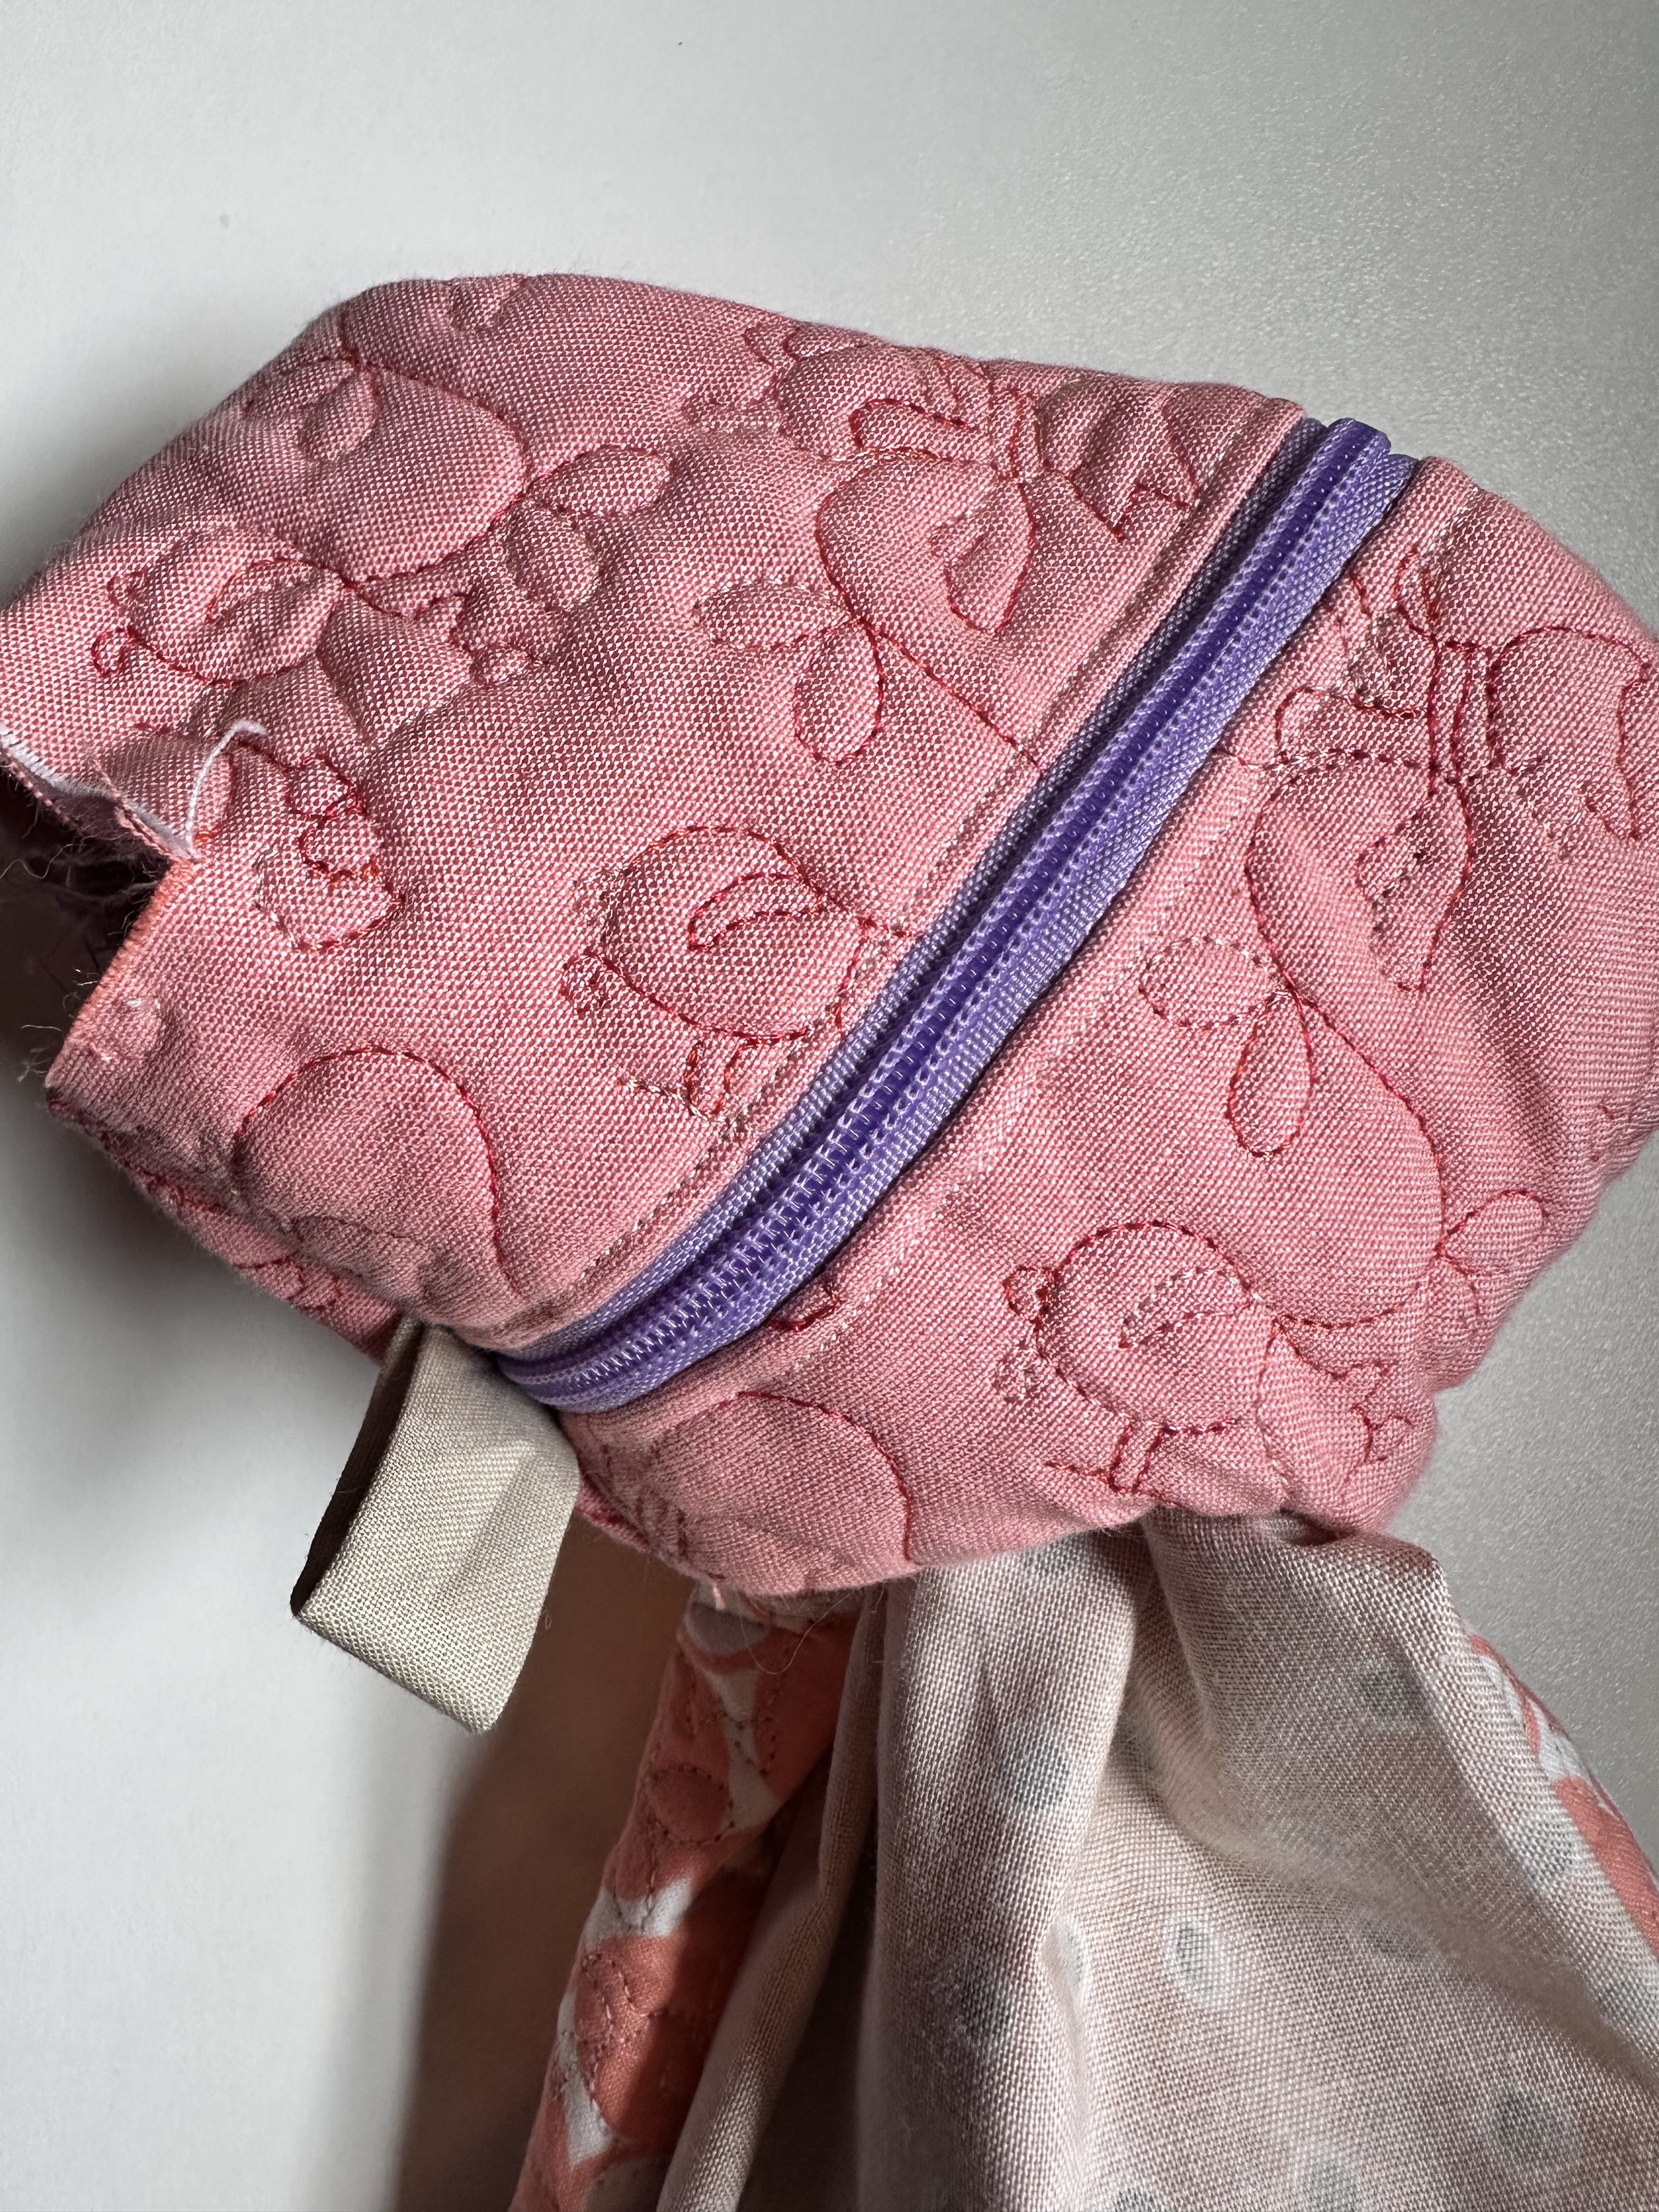
- Pinch the corners closed and clip them.
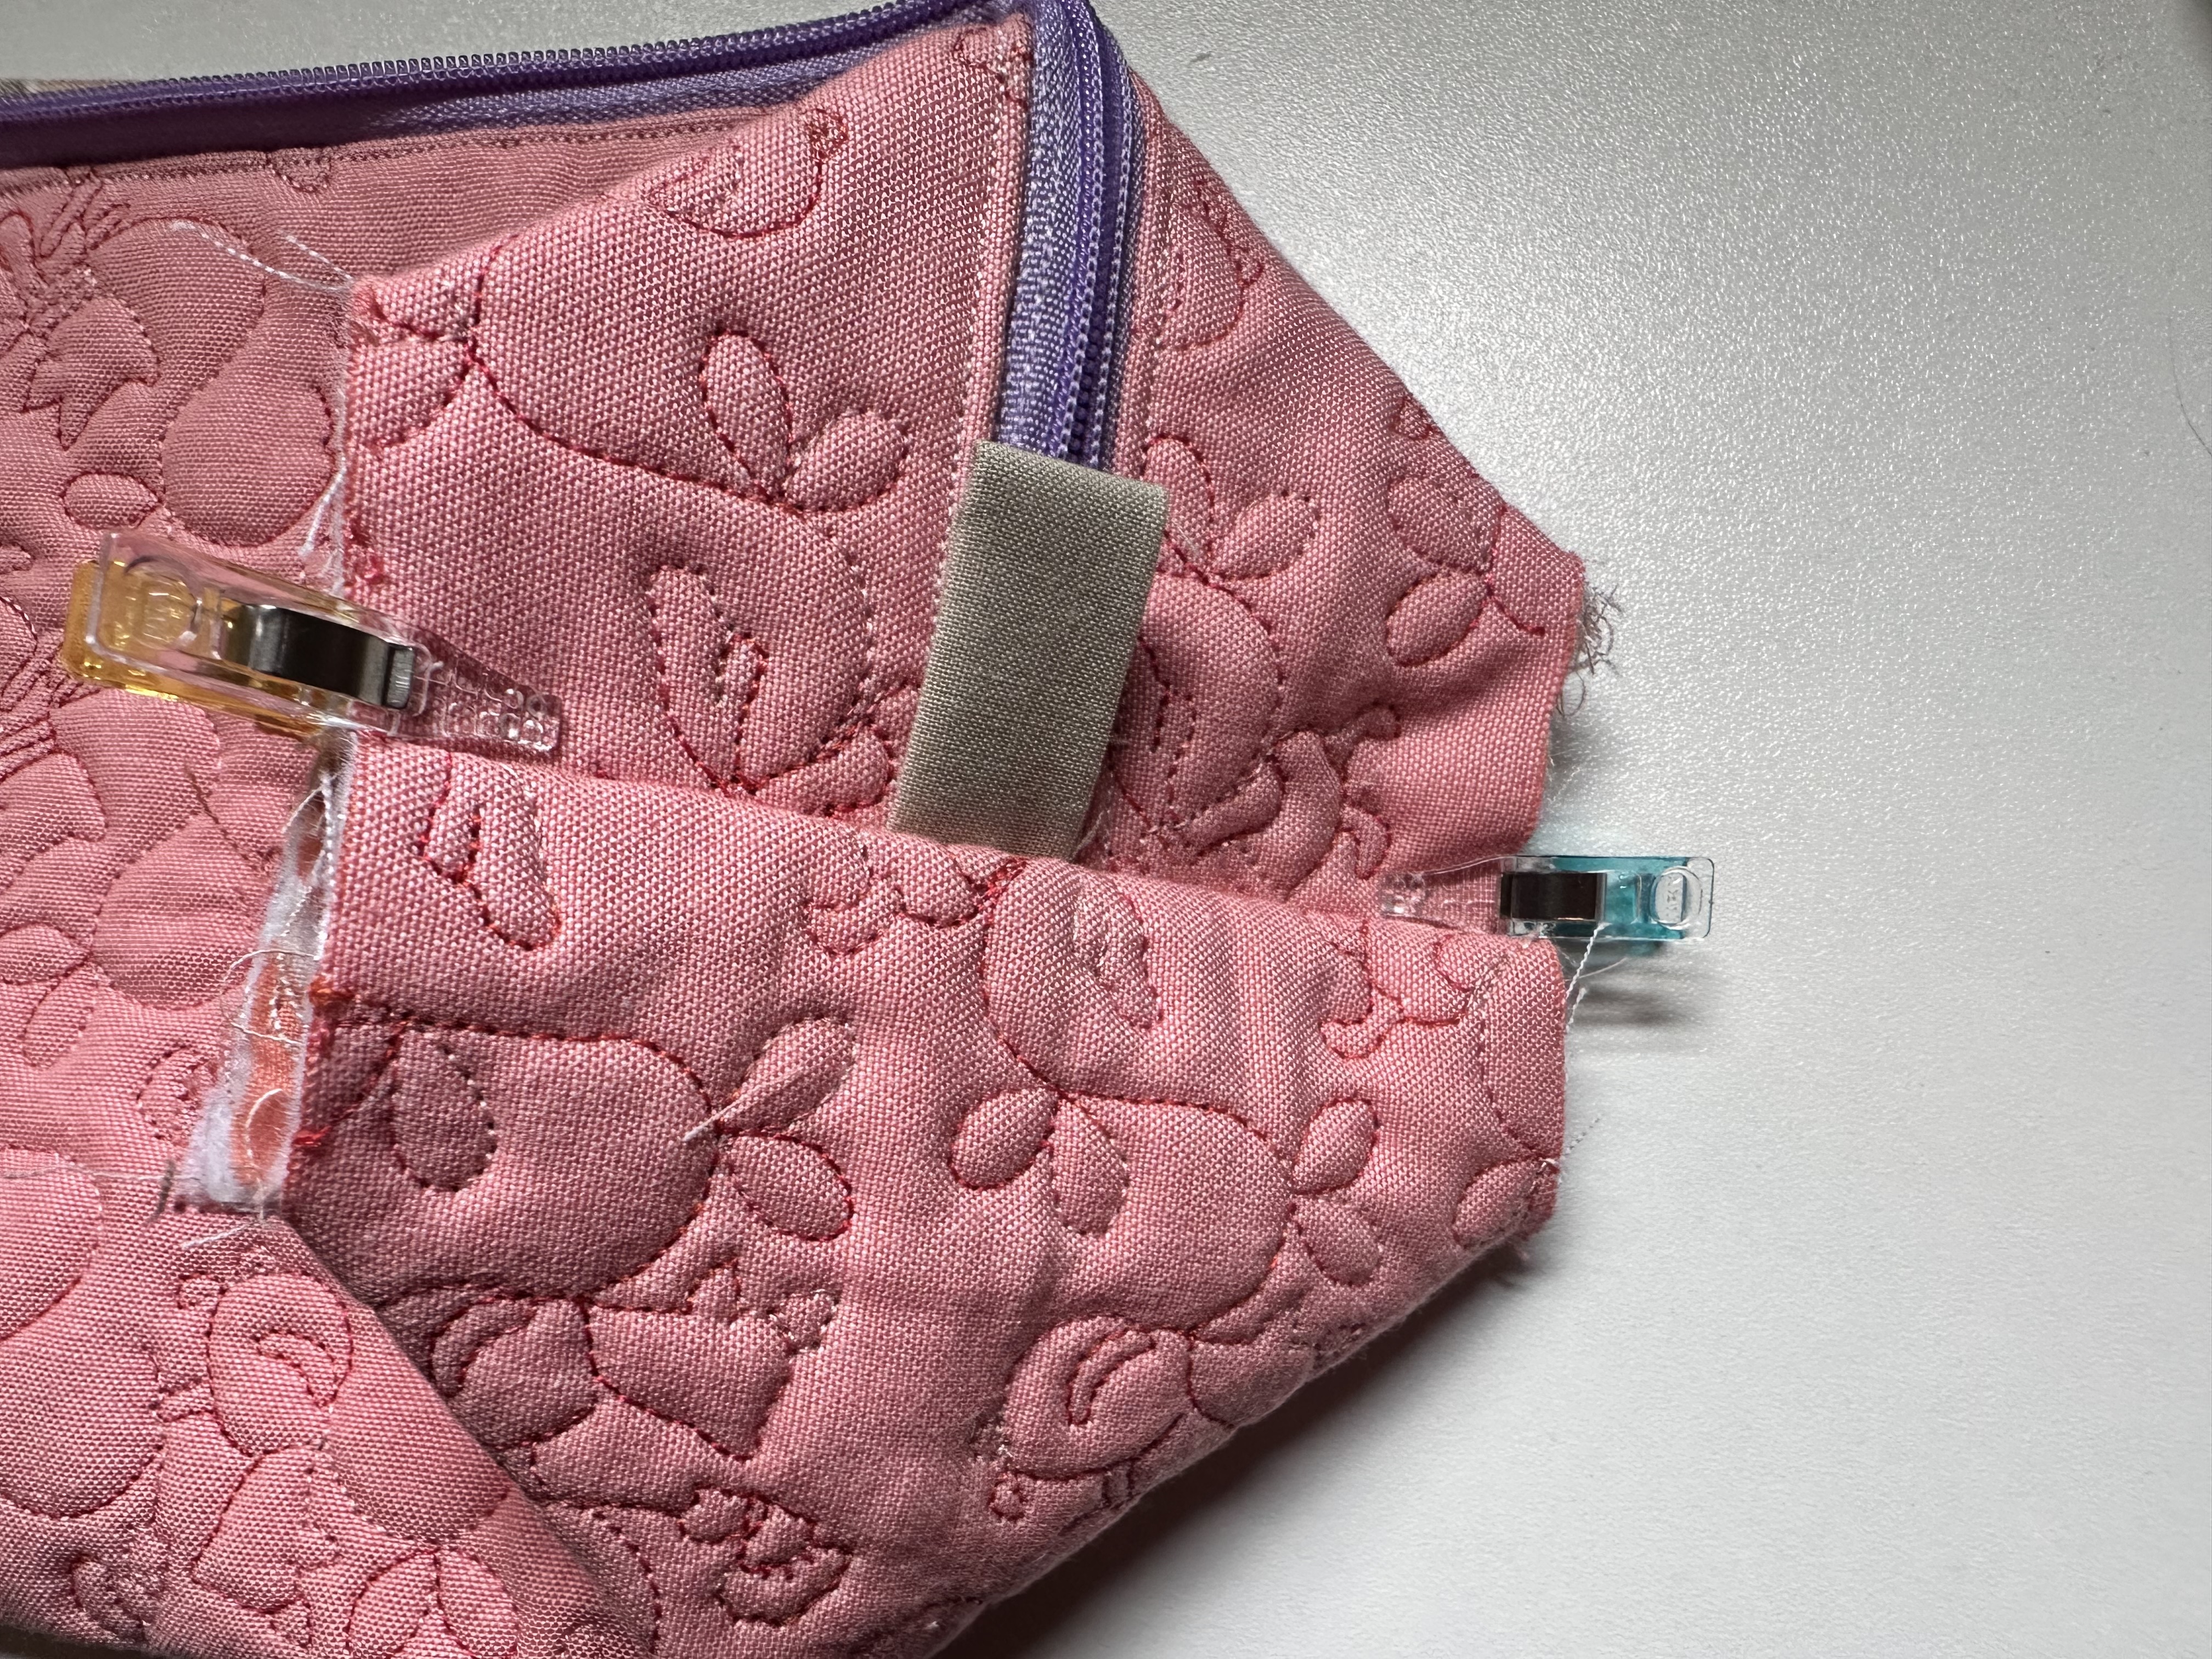
- Sew each corner closed using a 1/4″ seam. Trim down to an 1/8″ seam after sewing. Yes, your raw edge of the seam is currently on the outside, but we’ll fix that shortly.
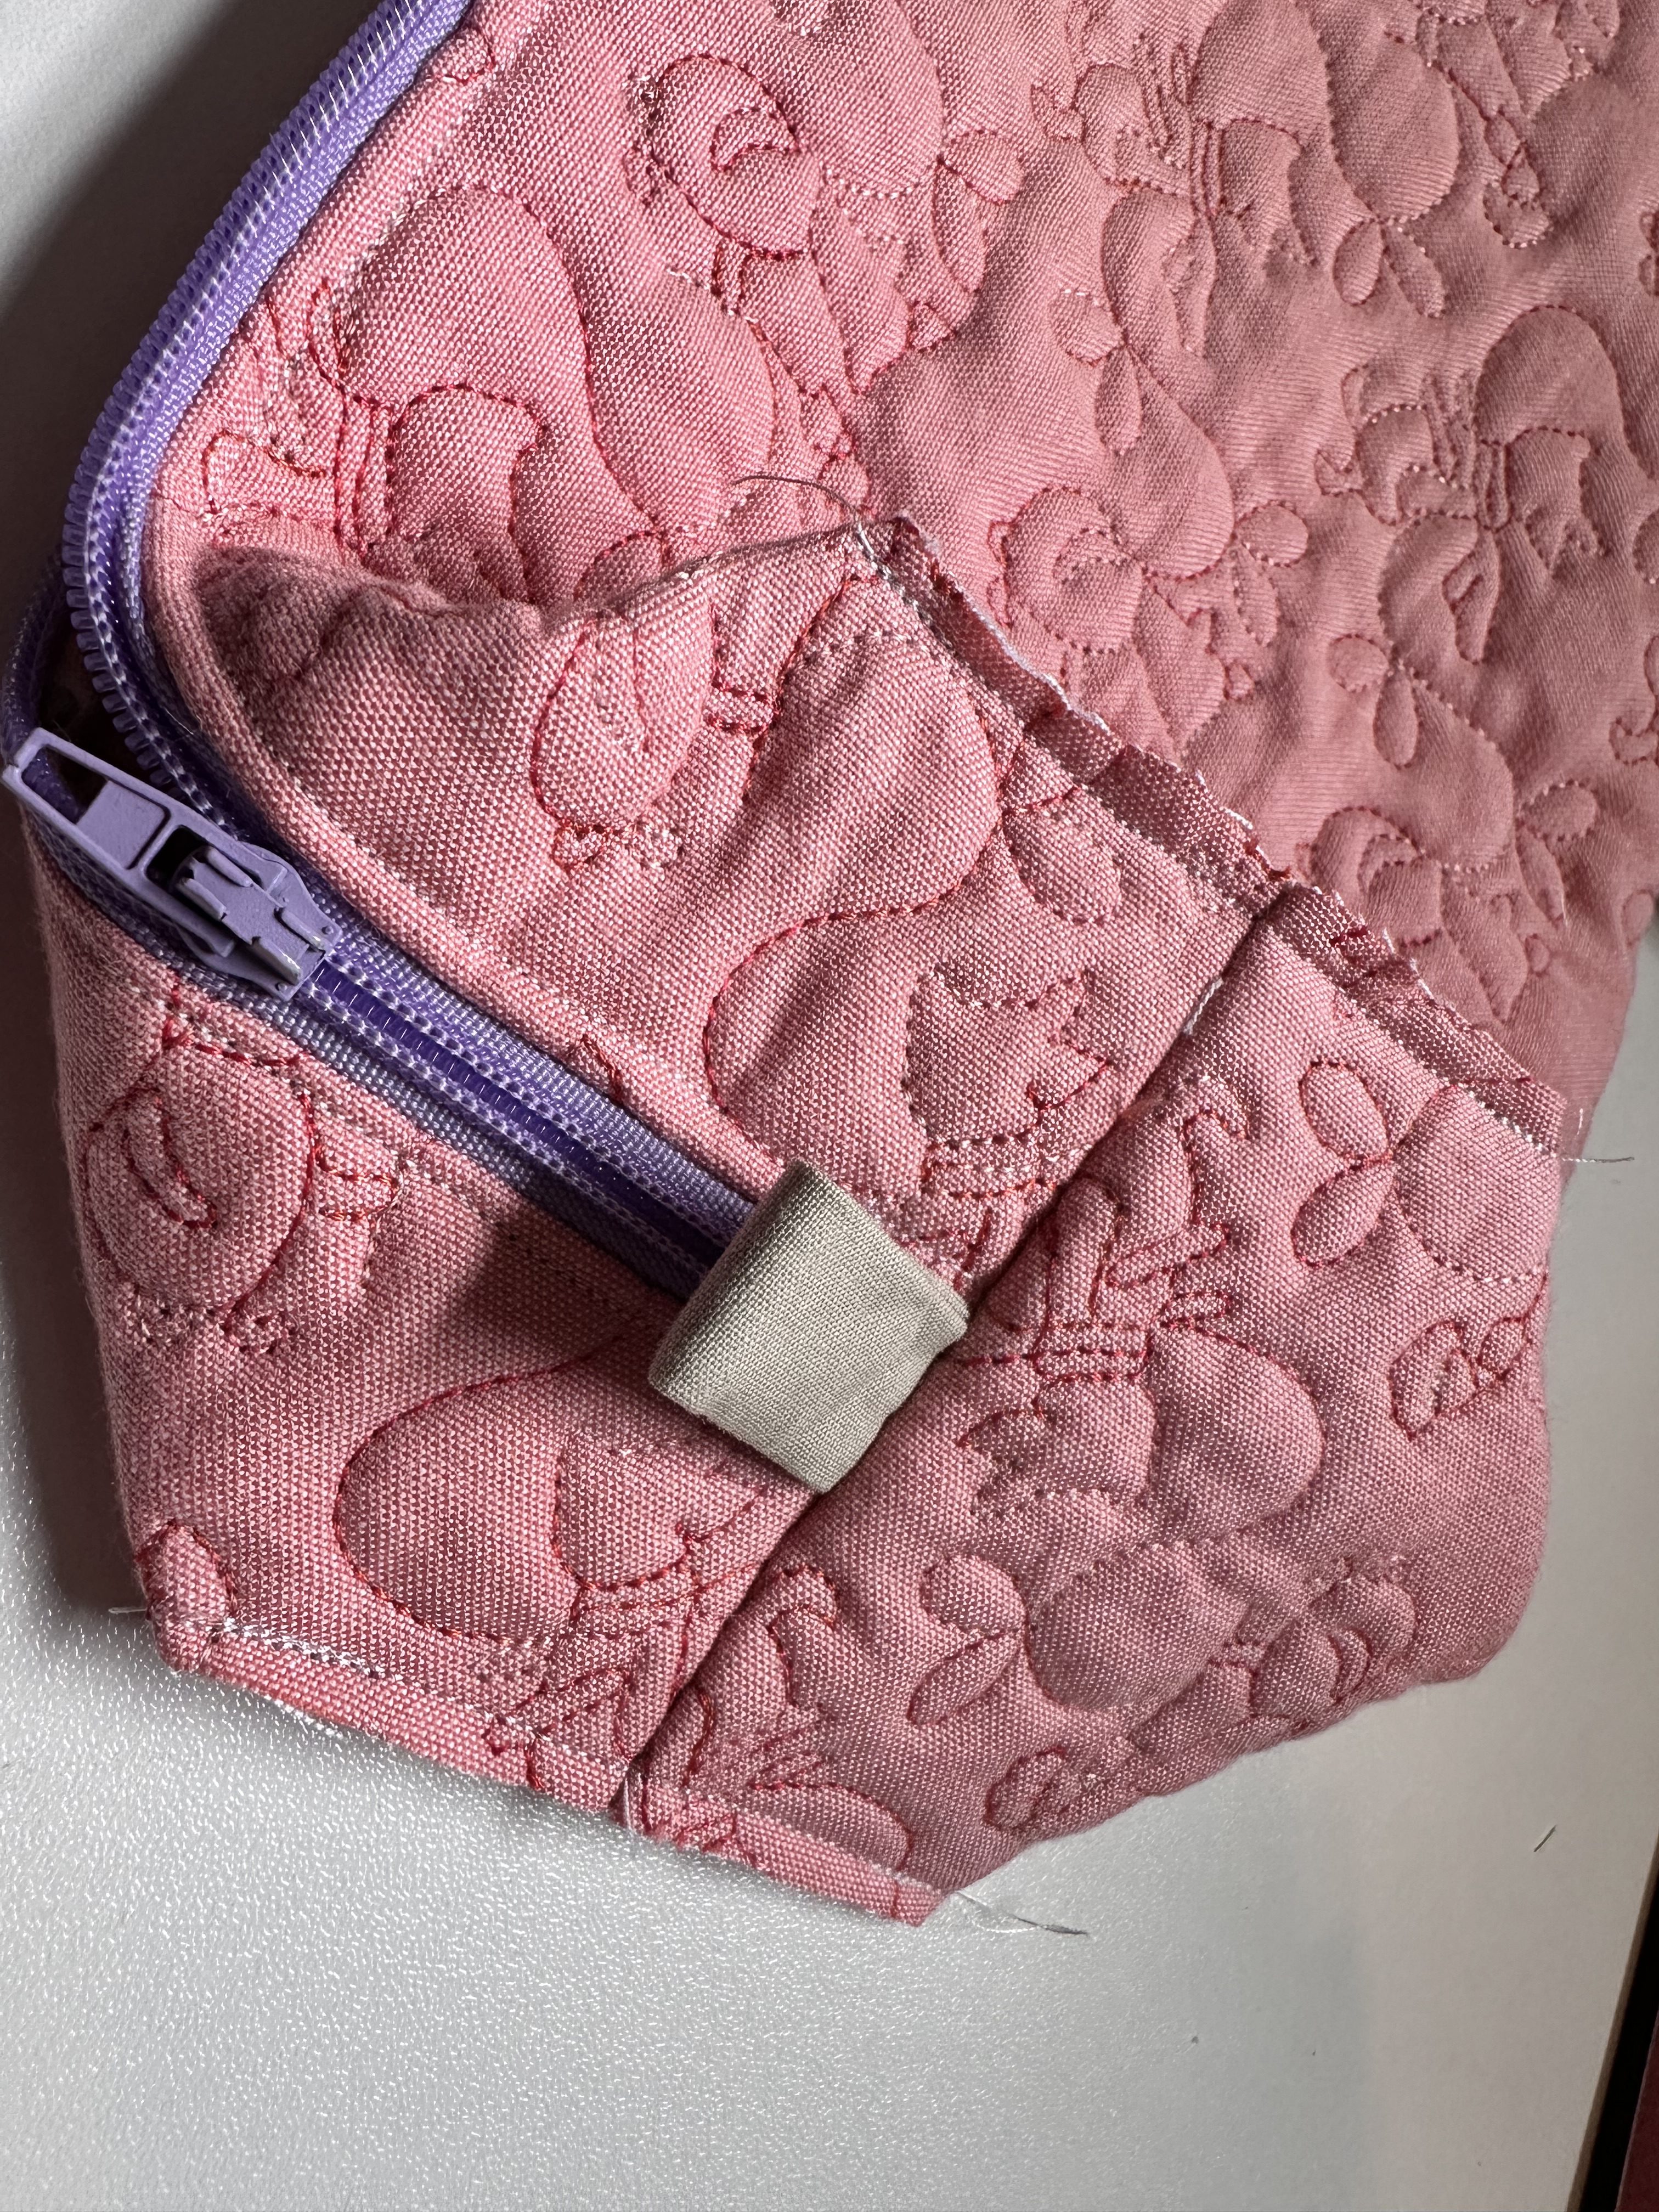
- Turn the pouch inside out. Push out the corners of the pouch and clip them with your binder clips.
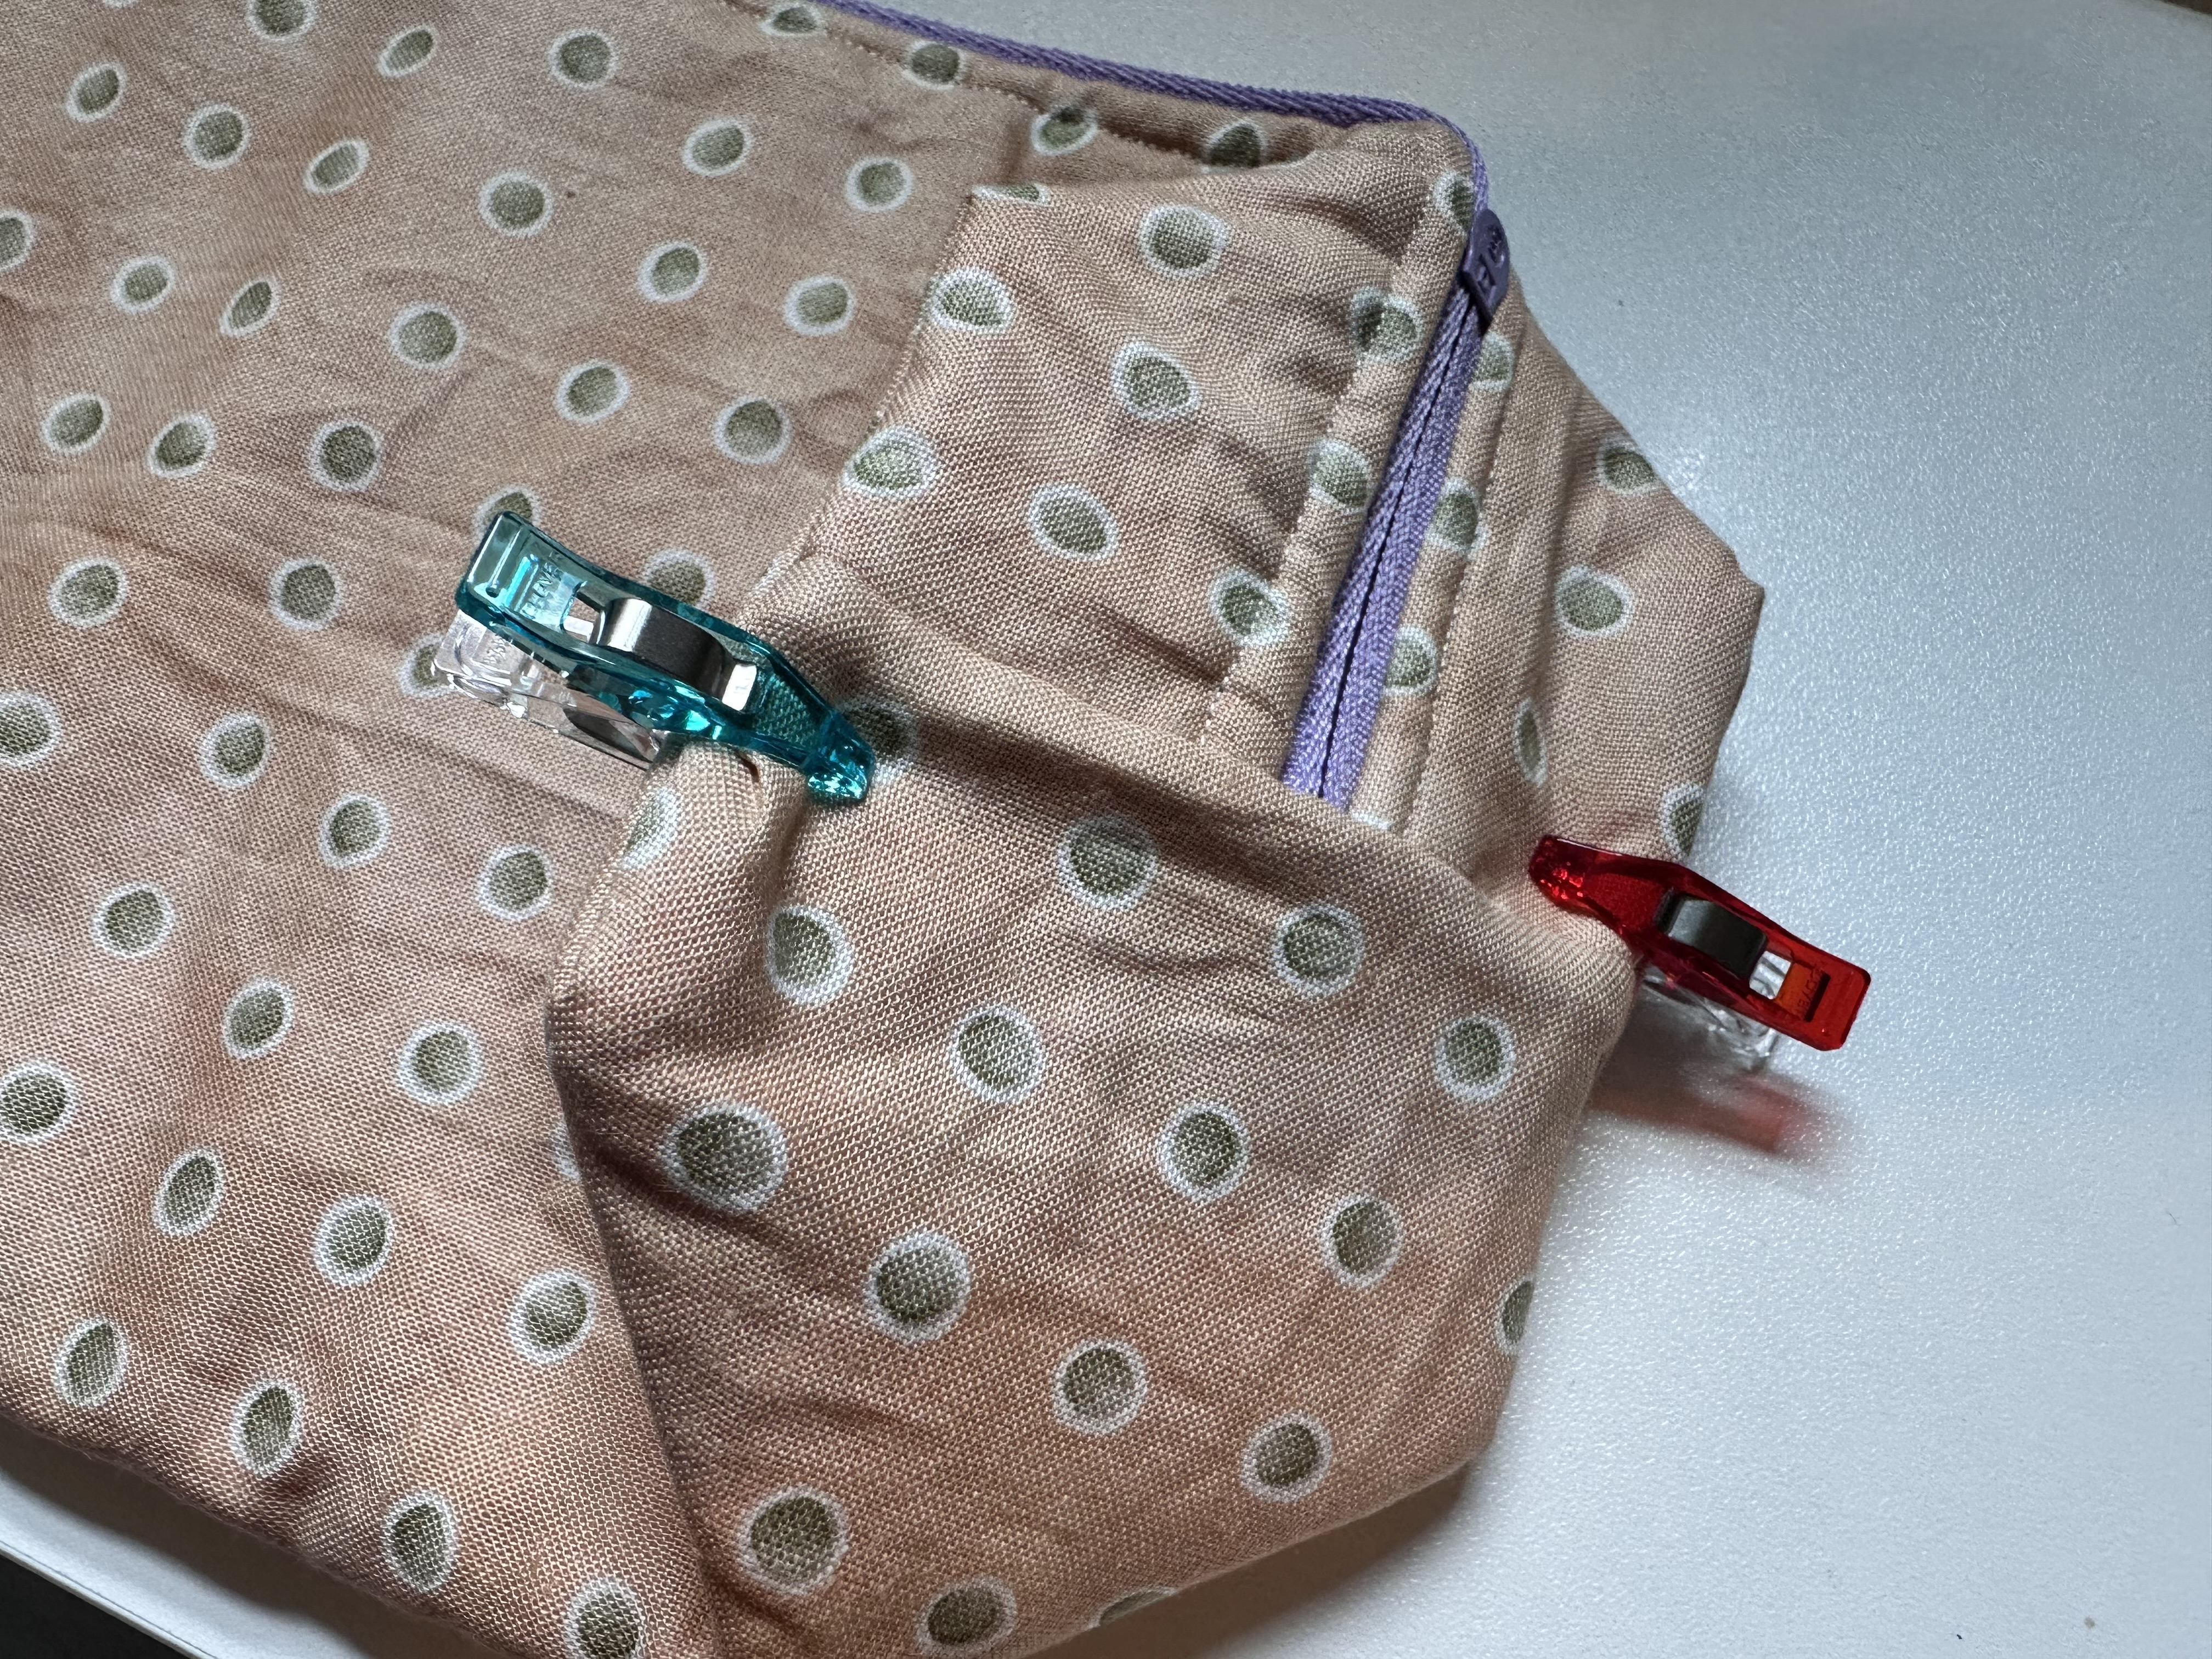
- Sew along each corner with a 3/8″ seam. This slightly larger seam means that we’ll lock in the raw seams when we flip the pouch back, right side out again.
- Flip the pouch right side out and begin to enjoy your hot hair tools pouch!
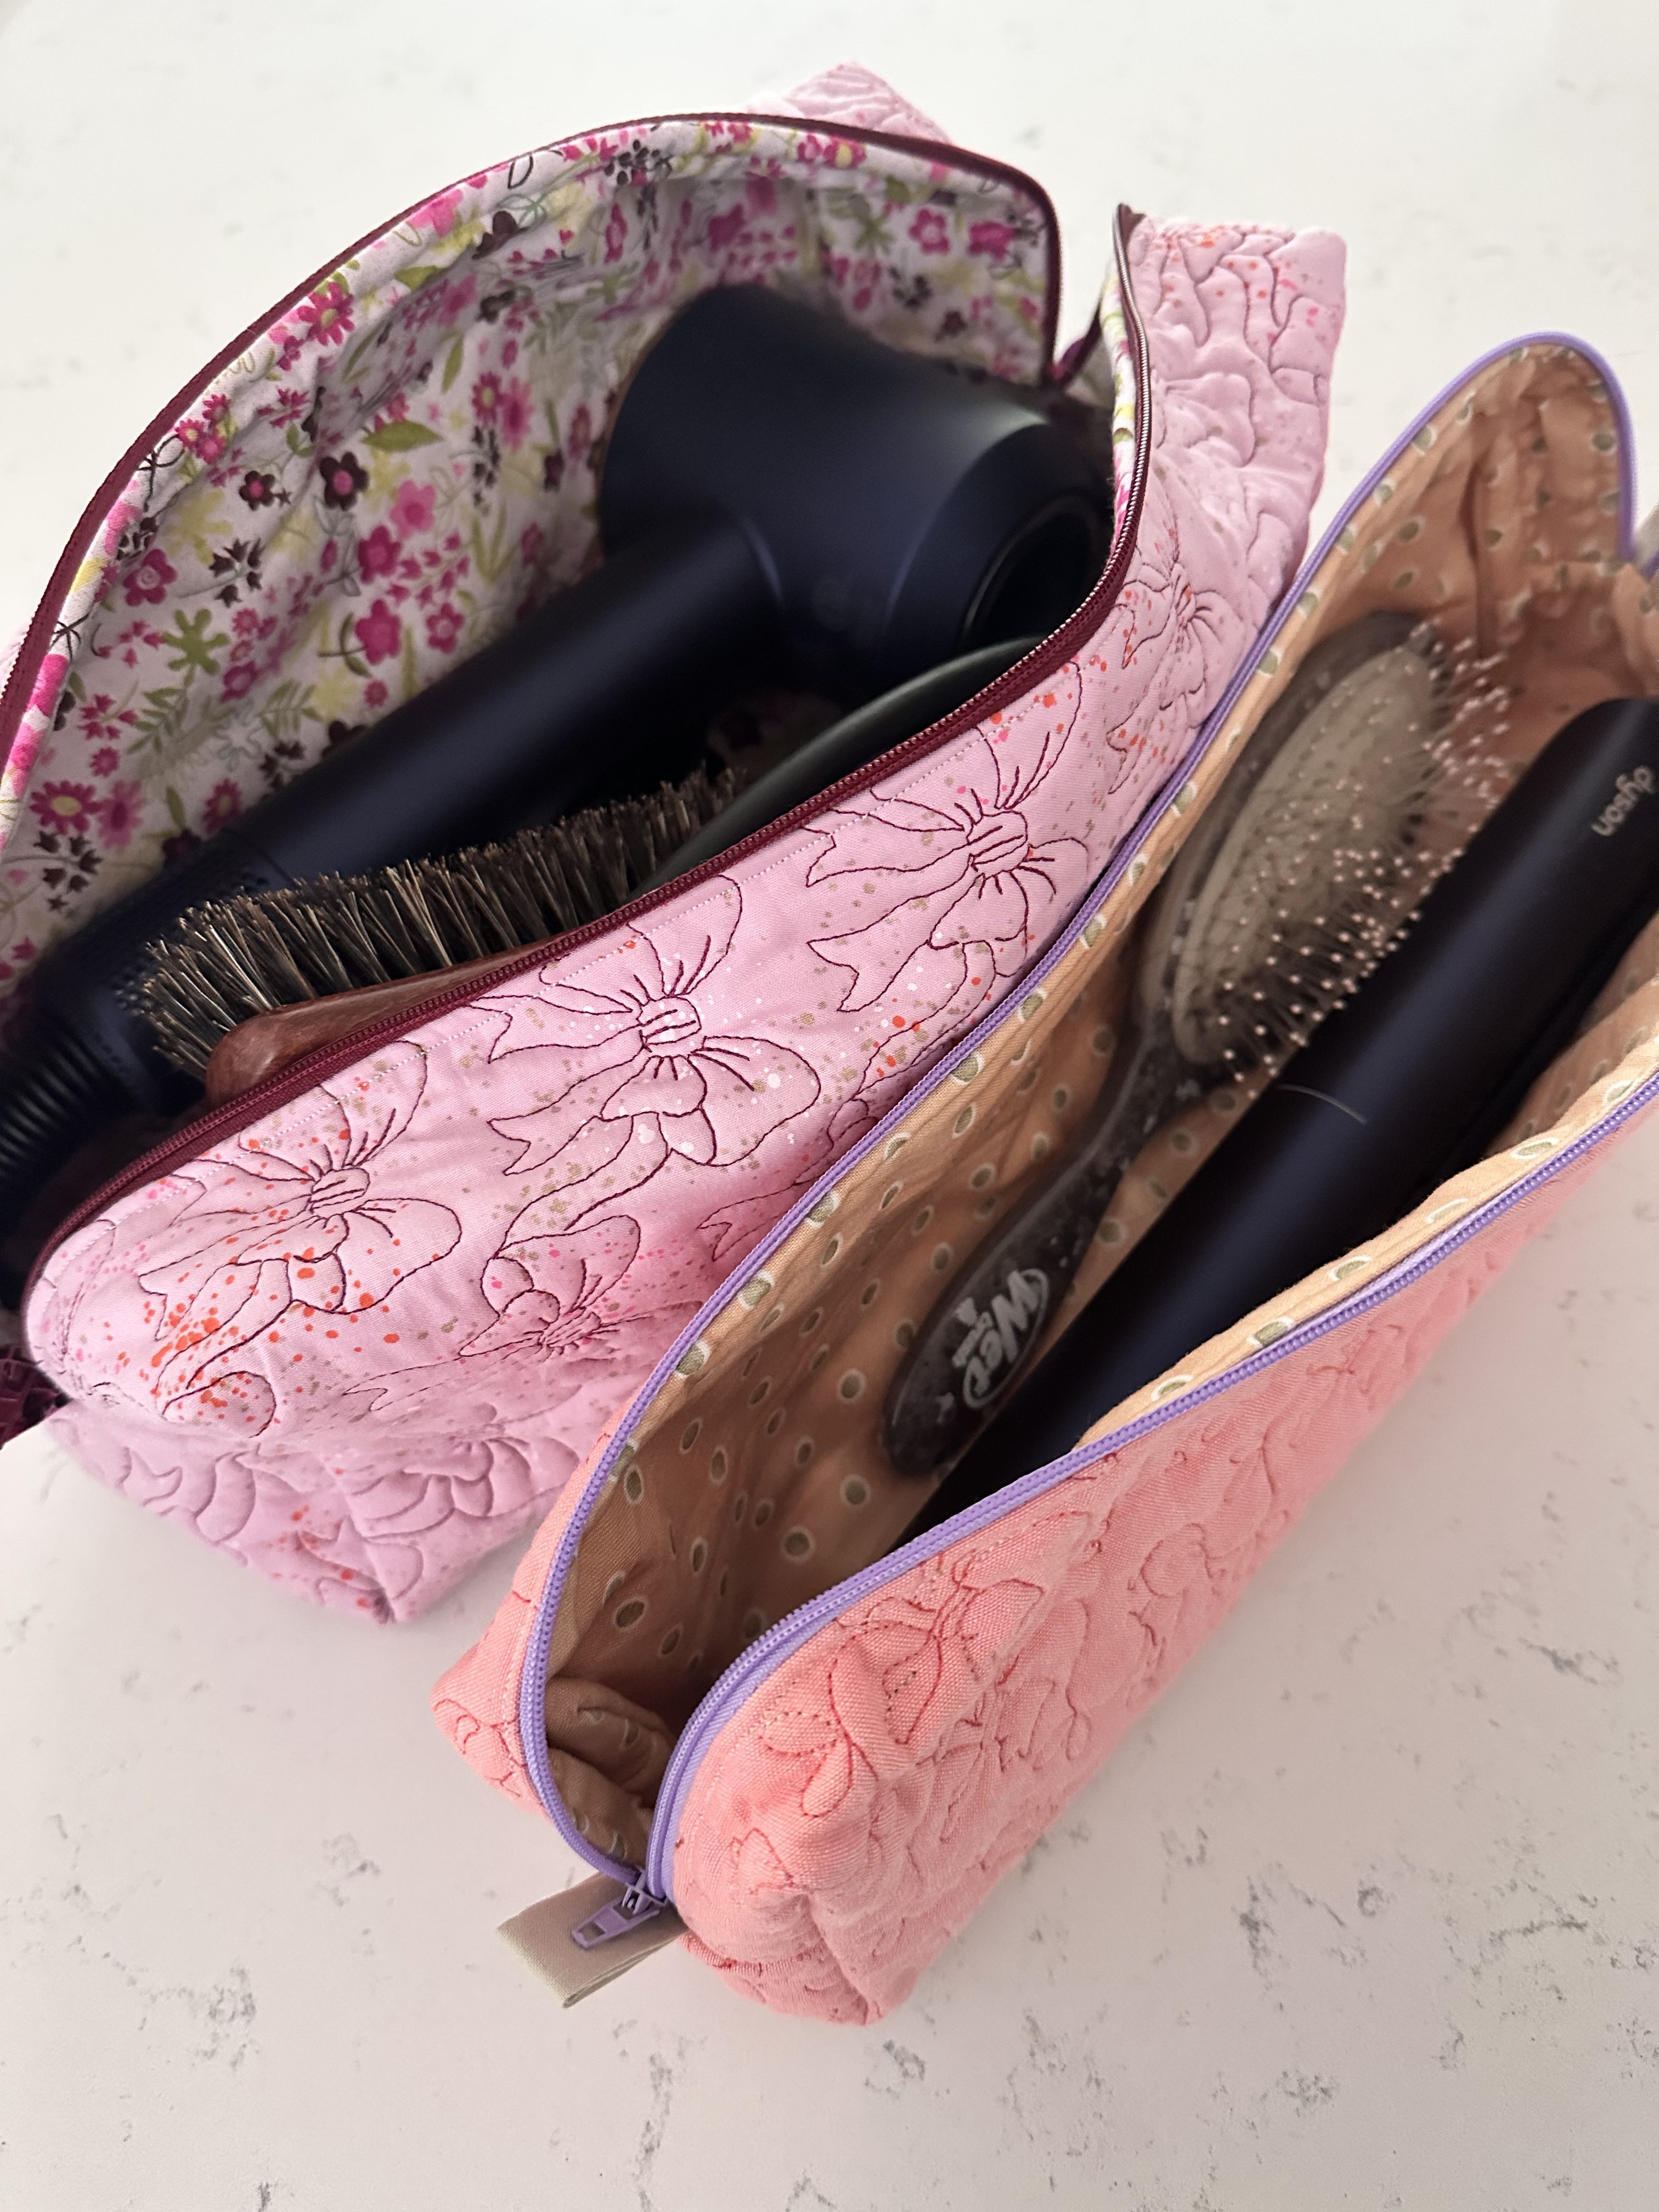
Let us know if you make one of these pouches!
Used Products
What you might also like
2 comments on “Hot Hair Tools Bag Tutorial”
-
-
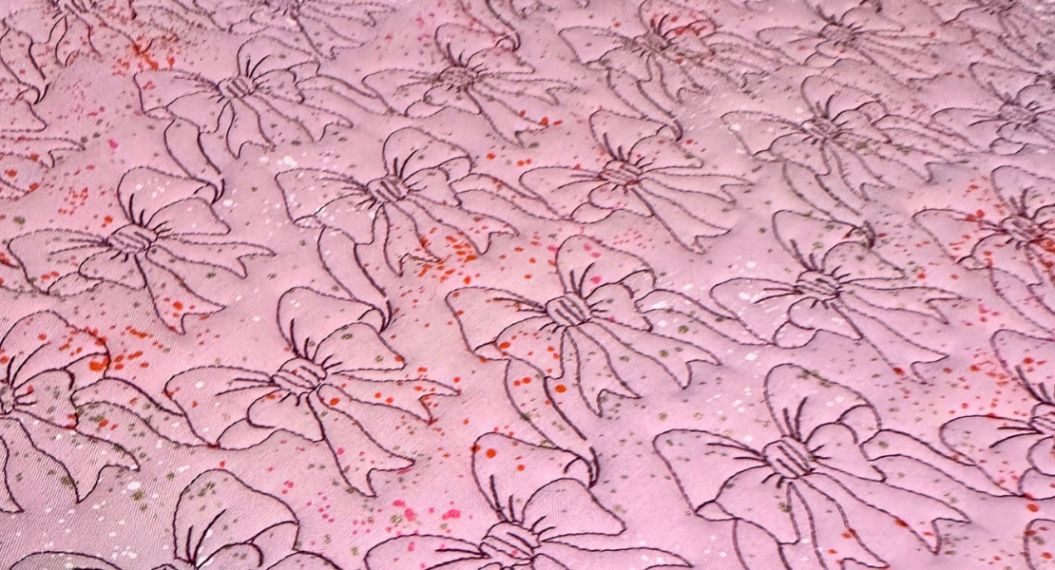
What is the design for the allover bow quilting design?
Thanks
Leave a Reply
You must be logged in to post a comment.

Insulbright would of been nice addition Put tools in hot and not worry about
Bottom good technique:-))