Beginner Apron on a Serger, Part Two
I hope you had fun making the beginner’s serger apron. Let’s revisit that project and step it up a little. Refer to the original instructions for supplies, cutting and assembly. I will give directions here on when, where and how to add some decorative elements in the form of decorative stitches and embroidery…and maybe a little bling!
Thank you to OESD for providing the embroidery design from the Fall Glitz Collection 12314. You can download the files from the embroidery design link. It will be in a zipped file. When you extract it you will have four items. The file with the .art extension can be opened in software. The other three files (.exp, .bmp and .inf) can be loaded directly into your BERNINA machine and are stitch-ready.
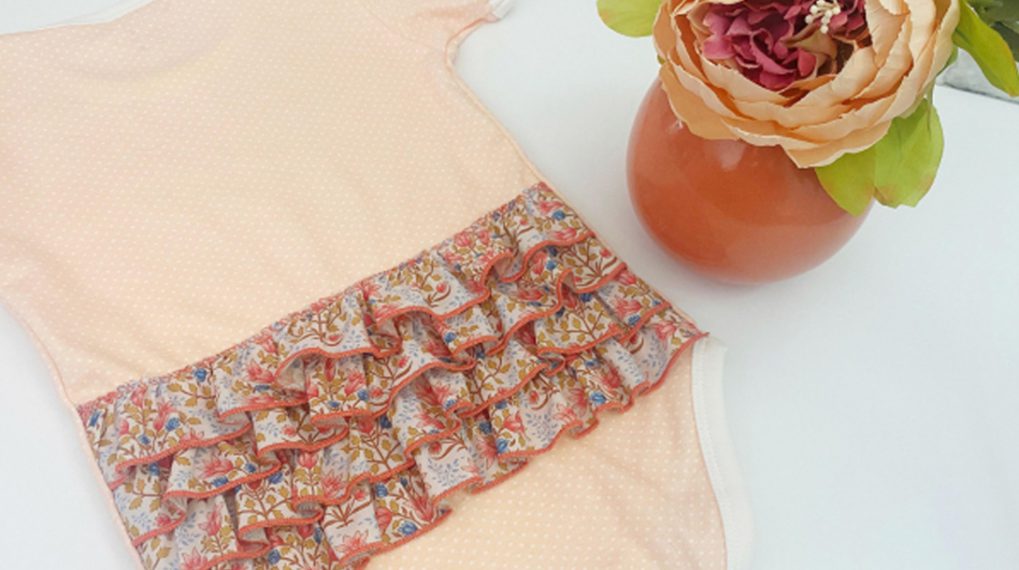
So let’s get started! I am using some cotton-linen blend fabrics, as well as quilting cotton. Again, pre-washing is recommended. The cotton-linen also needs a good press after washing.
Seam allowances are 1/4″, just skimming the fabric with the knife blade.
Supplies
In addition to the supplies listed in the original post, you will need:
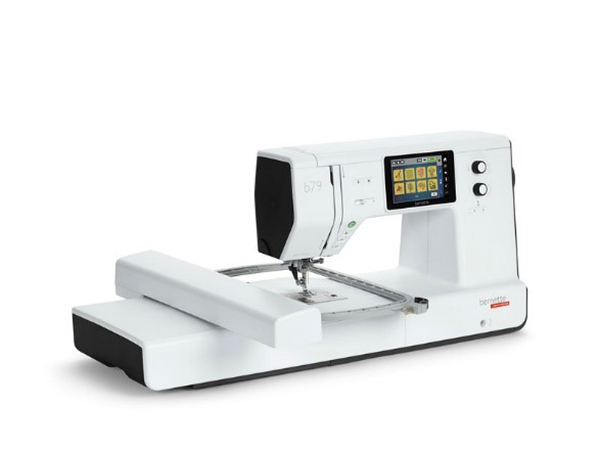
- bernette 79 sewing and embroidery machine
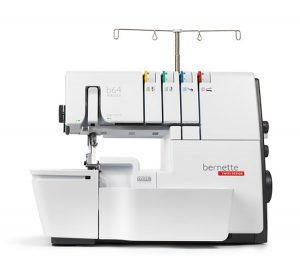
- bernette 64 AIRLOCK overlocker
- Embroidery design
- Isacord thread (0453, 0622, 0940, 1061, 1312, 1355, 3971)
- Silk-Finish Cotton Mettler Thread 40 wt in two colors that will coordinate with fabrics chosen and will show on the pocket
- Bobbin thread (I used Eversewn Polyester Bobbin Thread White 60wt)
- Schmetz 90/14 Topstitch Needle
- 80/12 Sharp Embroidery Needle
- OESD Ultra Clean and Tear Stabilizer 10” X 10 yd.
- OESD StabilStick Tear Away Stabilizer, either 15” or 20” wide
- OESD StabilStick Template Sheets
- BERNINA ARTlink 9 Software (free download)
- Hot Fix crystals (Optional)
- Bejeweler Pro (Optional)
- Basic sewing/serging/embroidery supplies

Cutting
Cut the fabric pieces as directed in the original post.
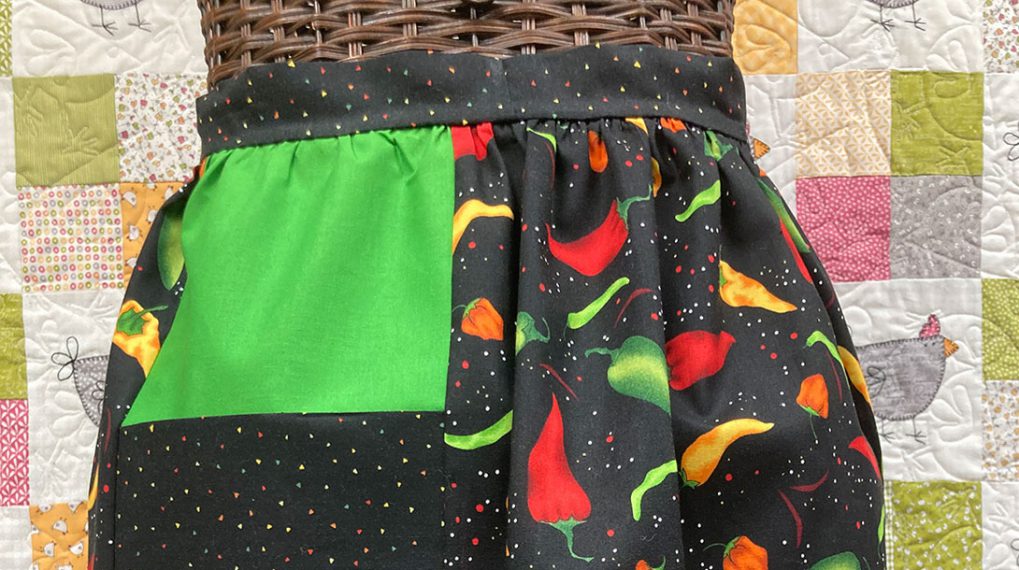
Note: I chose to use a directional fabric (pumpkins) for Fabric #2 this time. I increased the amount purchased for this piece to ½ yard.
Pocket Decorative Stitching
Press the 7” x 15” pocket fabric in half WRONG sides together to make a 7” x 7 ½” folded pocket piece. Then open the pocket out again and place an 8” square of OESD Ultra Clean and Tear stabilizer on the wrong side of the pocket front. It is always a good idea to use stabilizer to support your decorative stitching, just like you do for embroidery. OESD Ultra Clean and Tear is the perfect one to use. When you are done stitching, it tears easily away.

Let’s go to the machine and set up our stitches. I am using the bernette 79 sewing and embroidery machine. It has a very cool feature called Stitch Designer! We are going to edit a couple of built in stitches to make them work perfectly for our project.
First Decorative Stitch
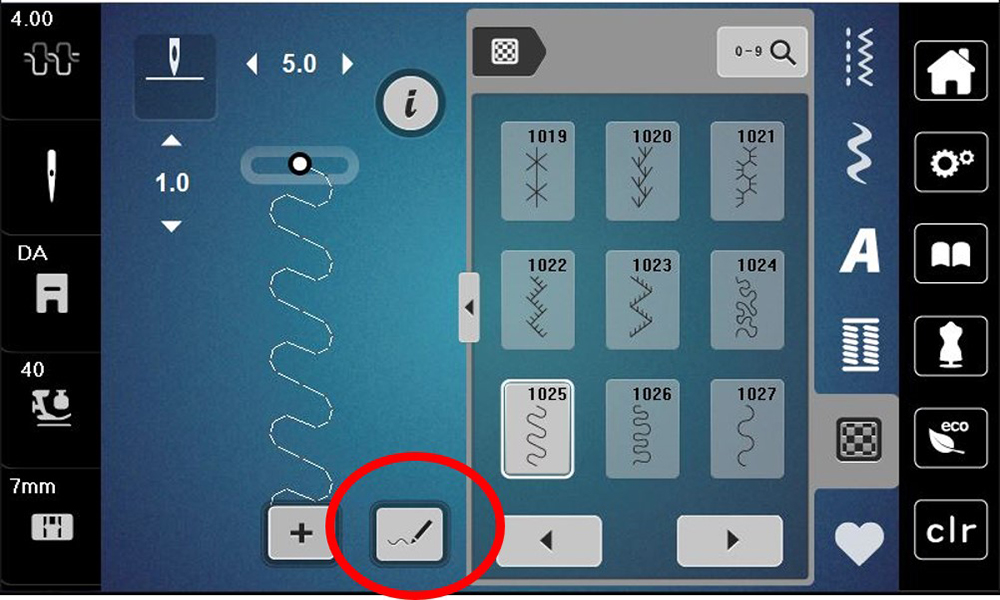
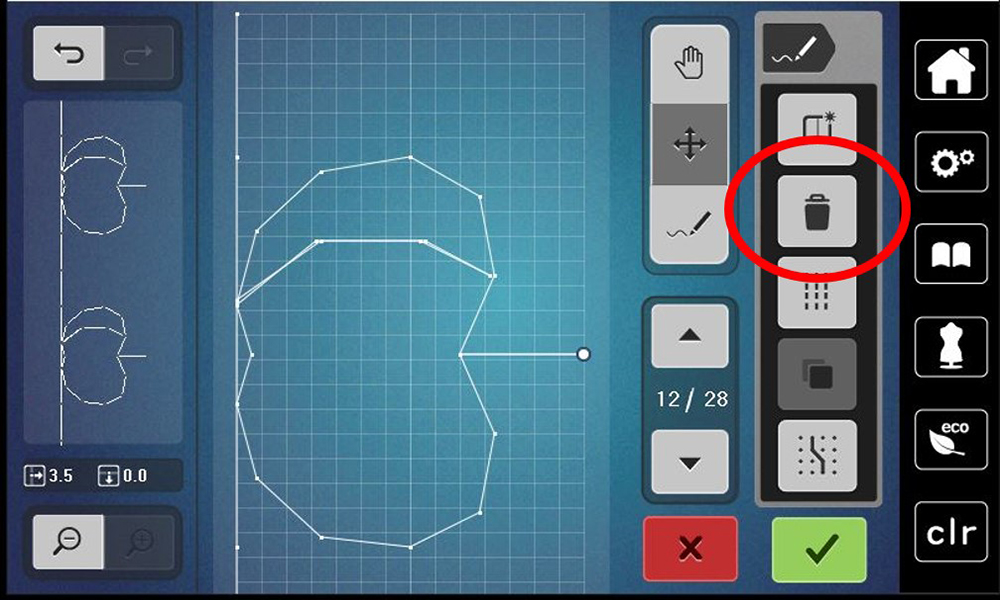
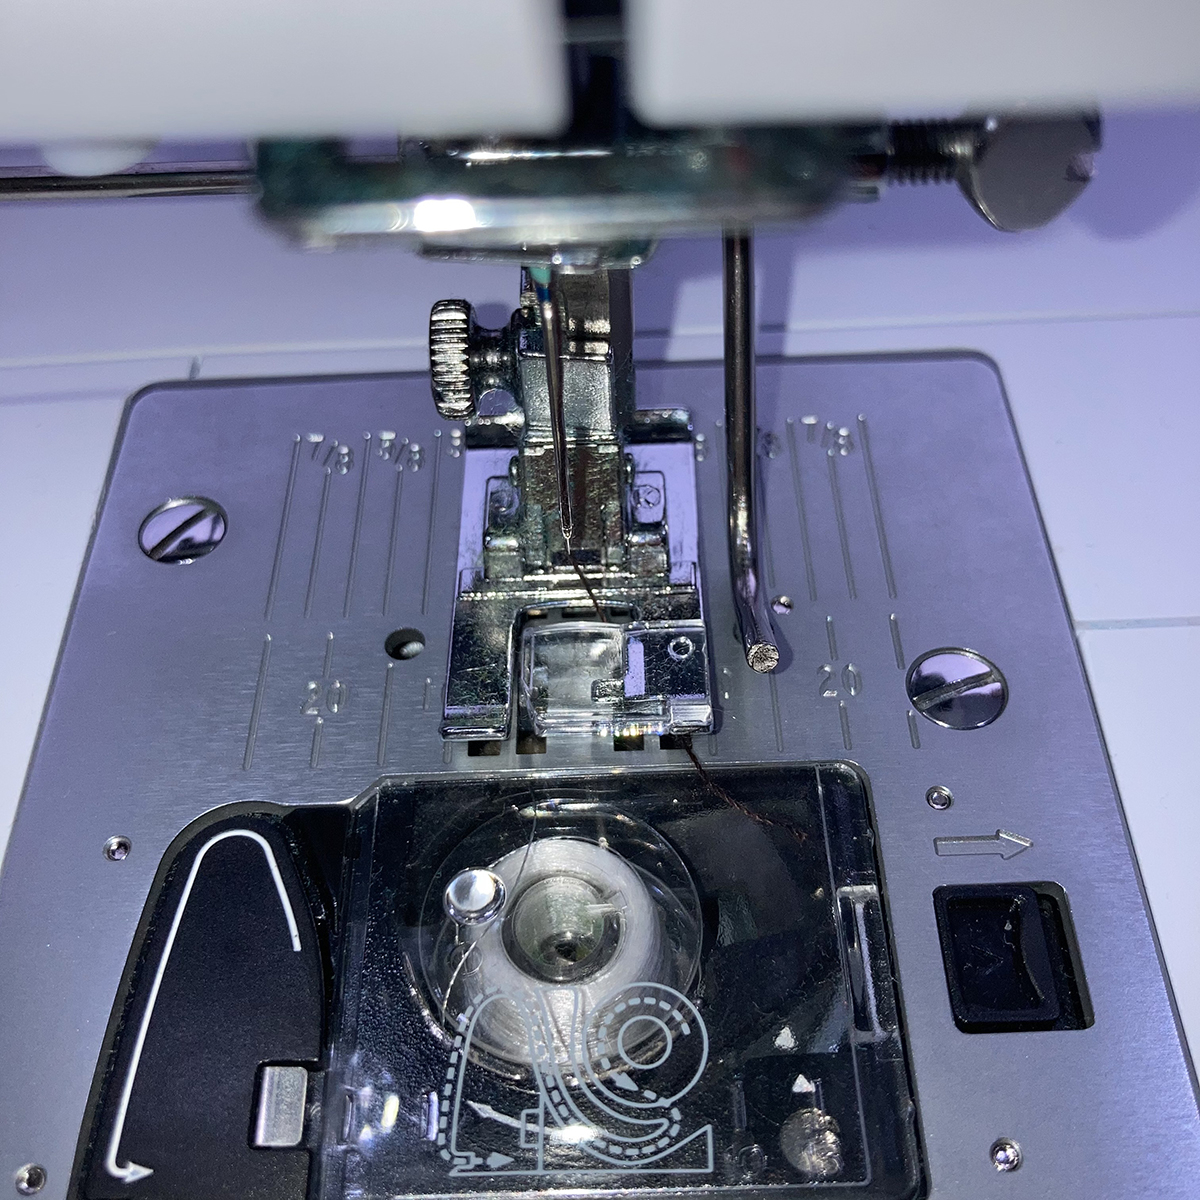
In the Quilting Menu, select Stitch #1025. Then open Stitch Designer. It is the icon circled below.
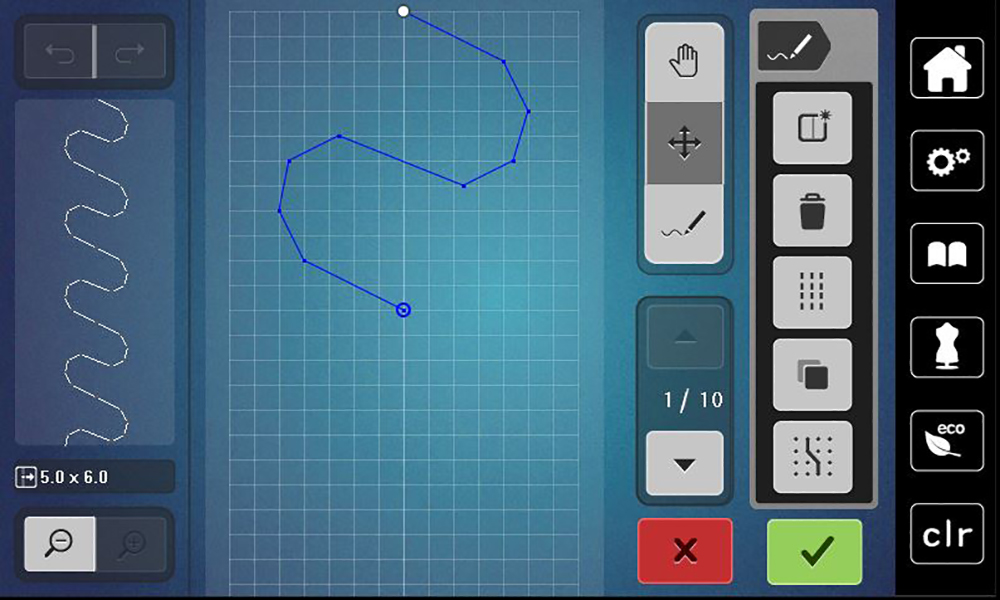
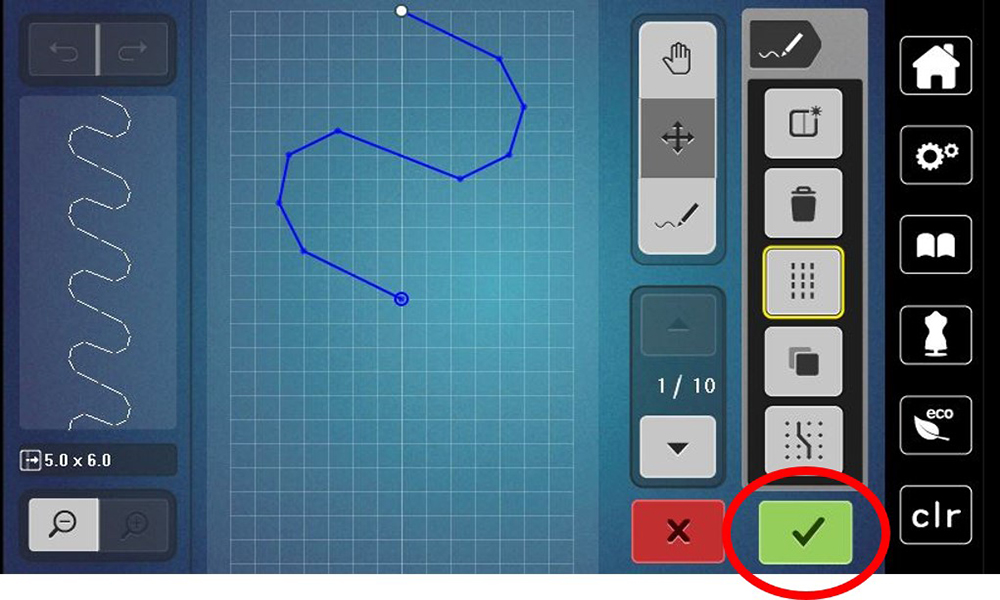
Click on the “Up” arrow (circled) until all of the stitches are selected and blue.
Make sure the “Move” icon is active (dark gray) when you do this.
![]()
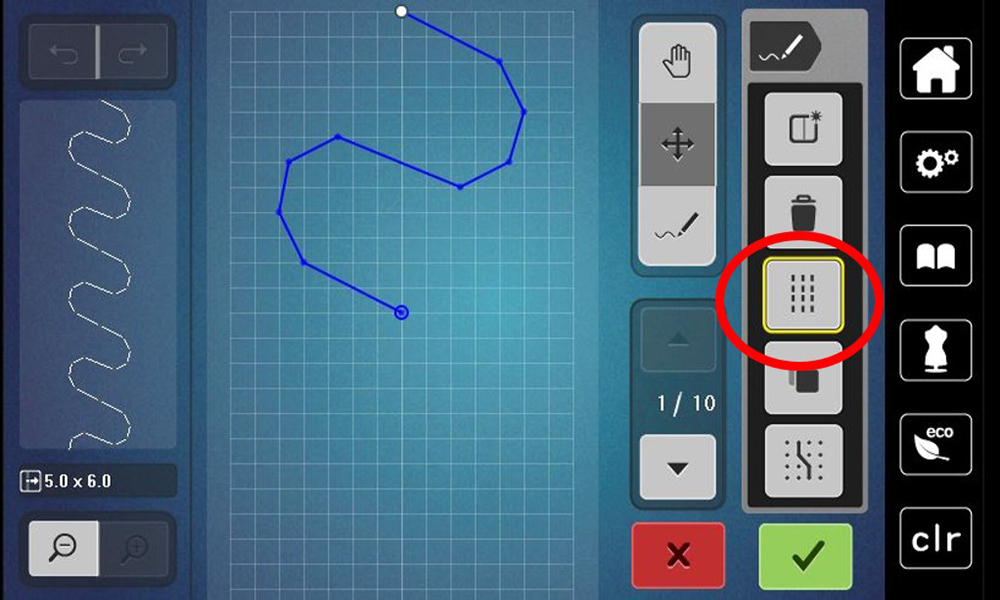
Select the Triple Stitch icon. Then click on the green check to confirm.
Let’s go ahead and save this stitch by clicking on the heart and then the folder with the arrow going into it.
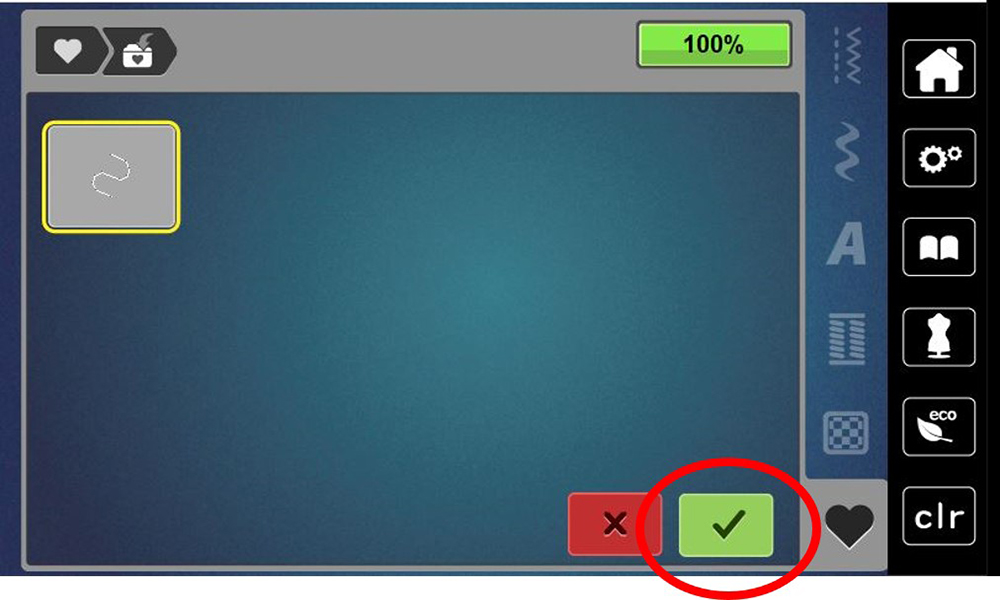
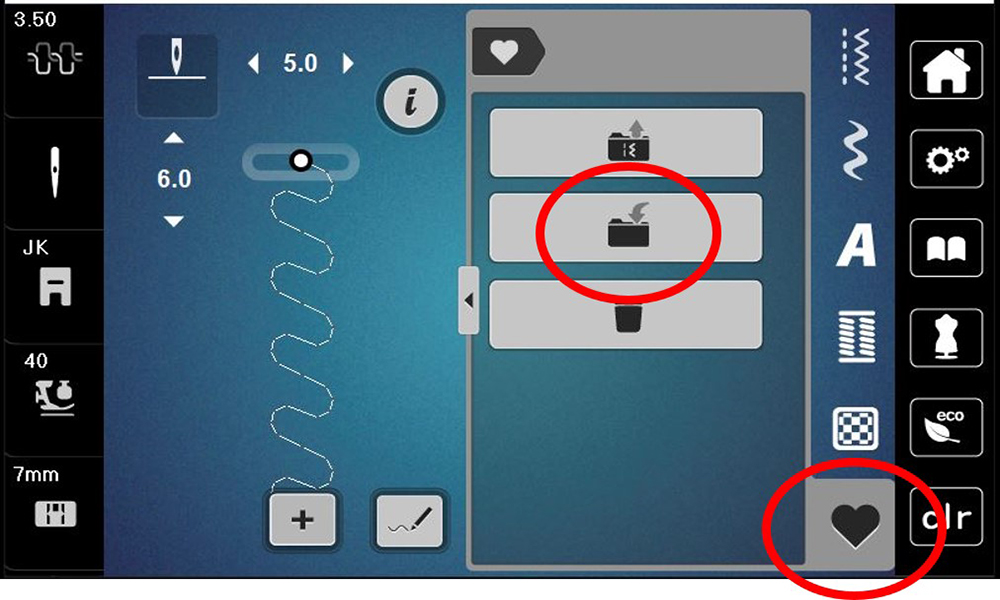 Click on the green check and your design is saved in the machine’s permanent memory.
Second Decorative Stitch
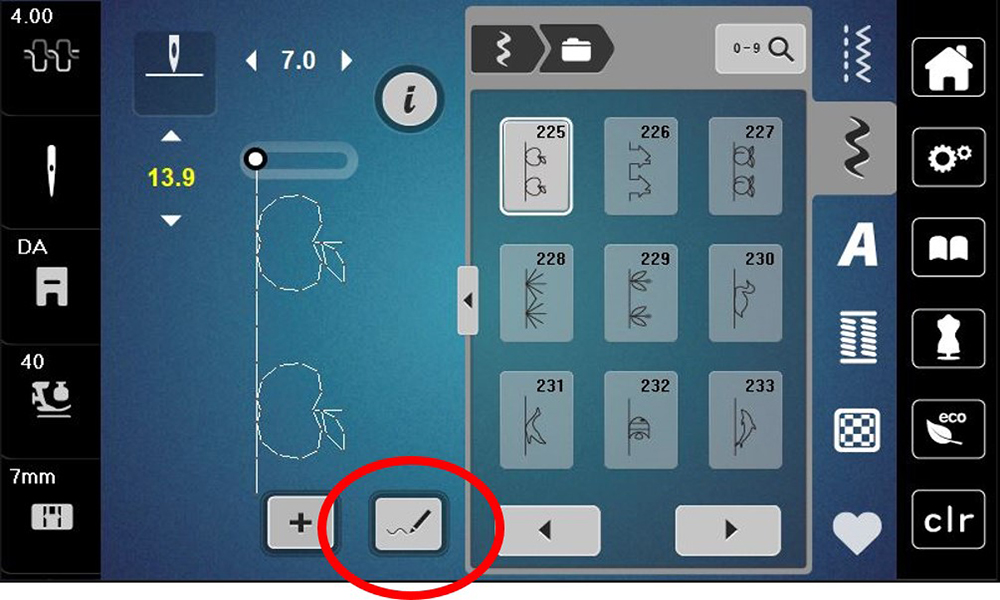
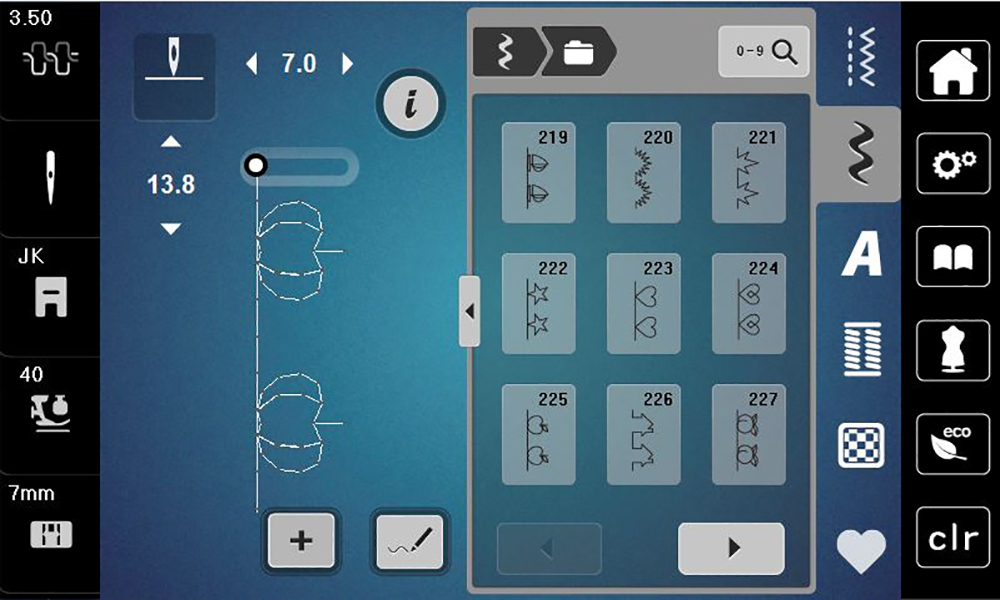
Now we are going to edit one more stitch in Stitch Designer. Click on Decorative Stitch Folder 219 and select Stitch #225, the apple. Increase the Stitch Length to 13.9. This stretches the apple shape a little bit. Then select Stitch Designer.
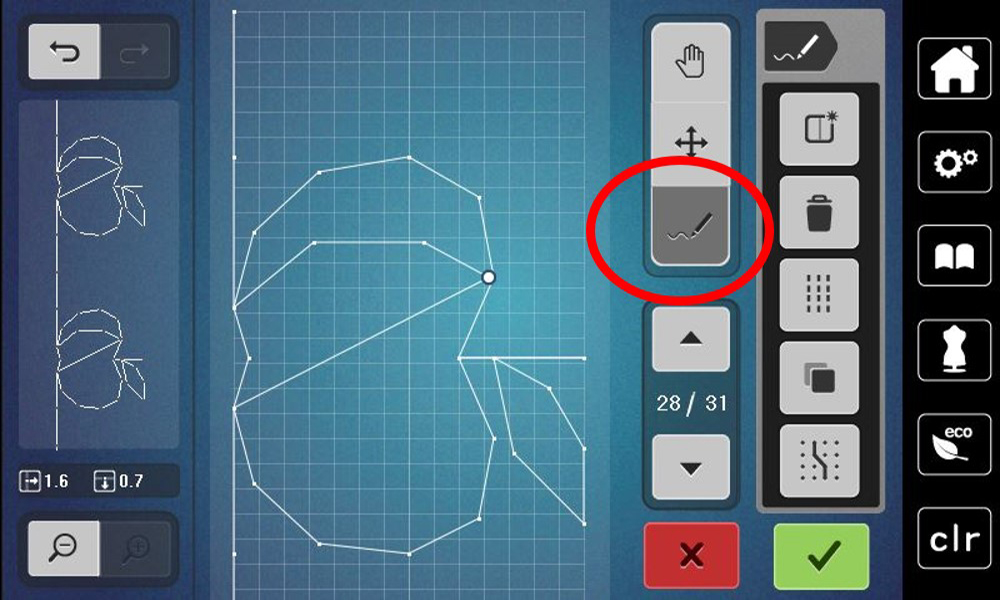
We are going to turn this apple into a pumpkin! Are you ready? Back up to stitch 25 using the “Up” arrow as we did before. Make sure the “Move” icon is dark gray.
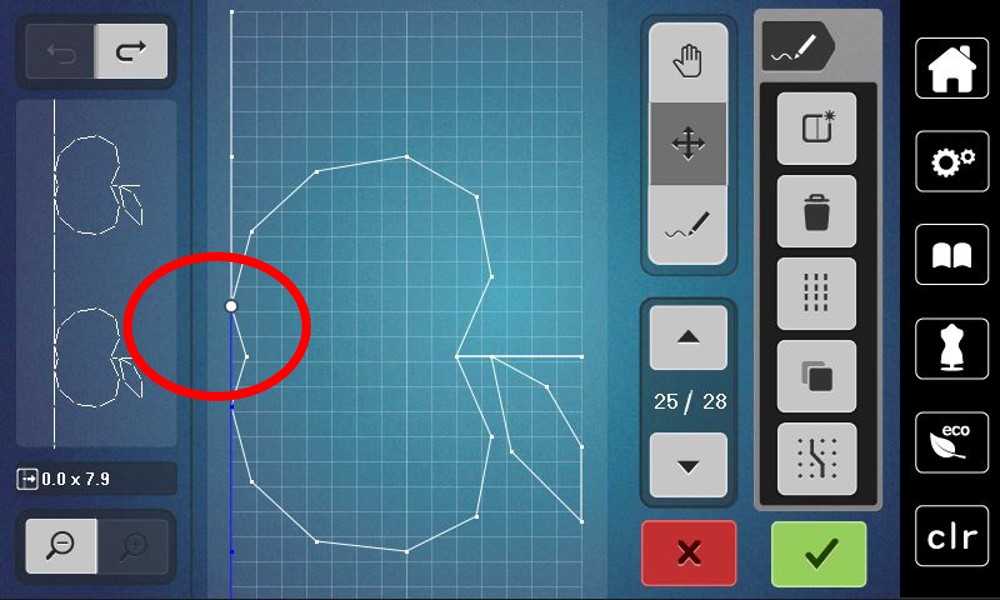
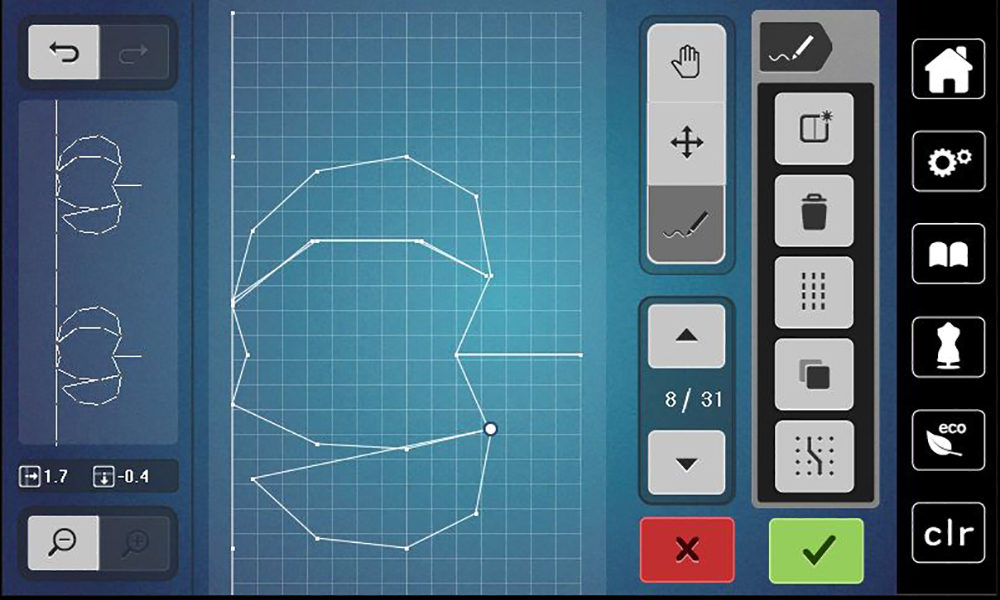
Select the “Pencil” (the icon will turn dark gray when selected) because we are going to add additional stitches. Make a curve as shown with three clicks, ending at the point just above the stem. Then go back down to the starting point, clicking on the same points you just made. Don’t worry about that extra line you see at the beginning…it will go away. The larger white dot on your design indicates your current position.
Select the “Move” icon again and select the stitch point where the leaf joins the stem (stitch 18).
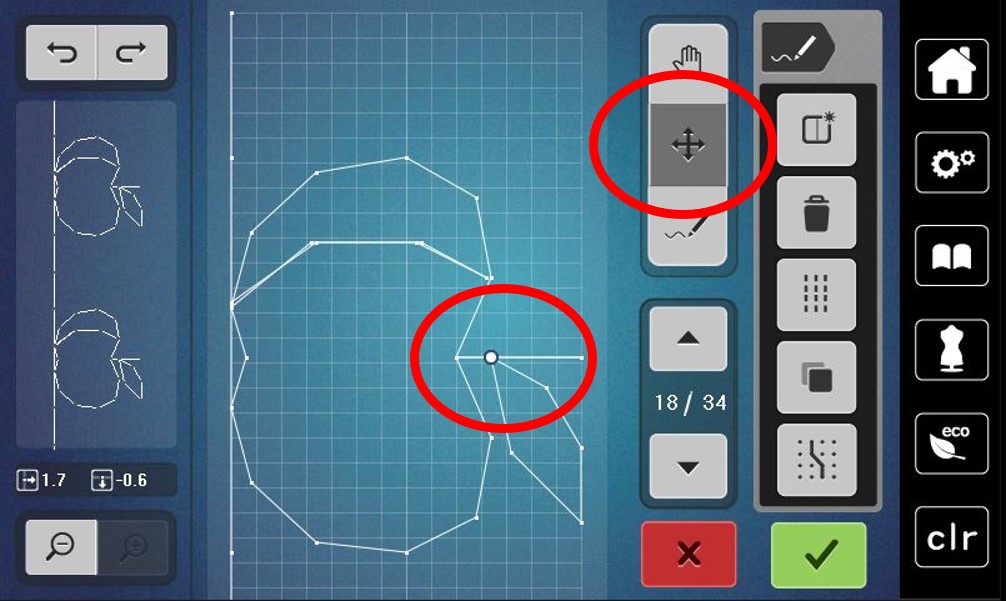
Touch the Delete icon (trashcan) 6 times to delete the leaf and the stitch in the middle of the stem.
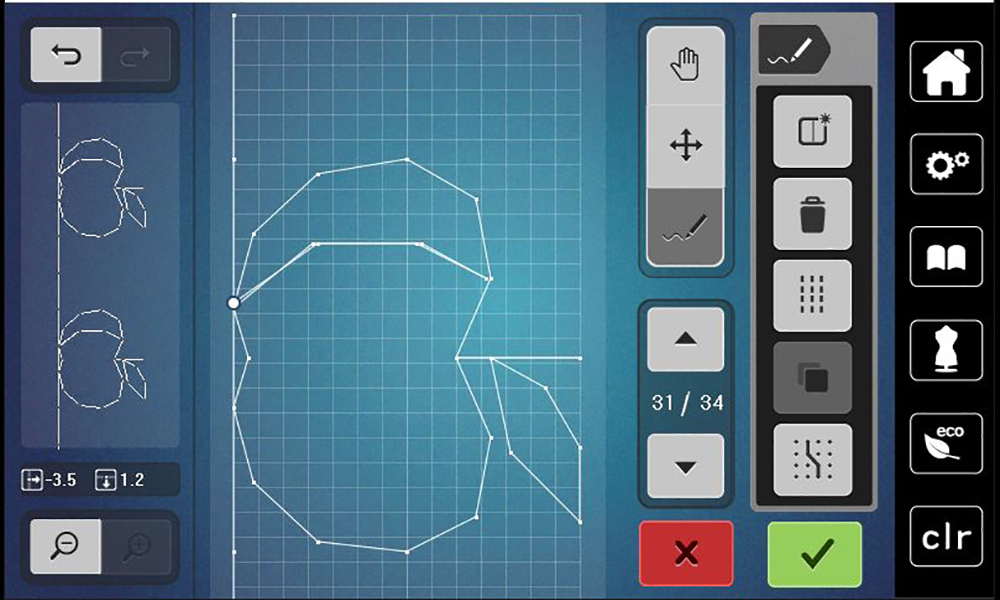
Let’s add a line on the other side of the pumpkin. Use the “Up” arrow to navigate to stitch 5, and then select the “Pencil” to get ready to add stitches.
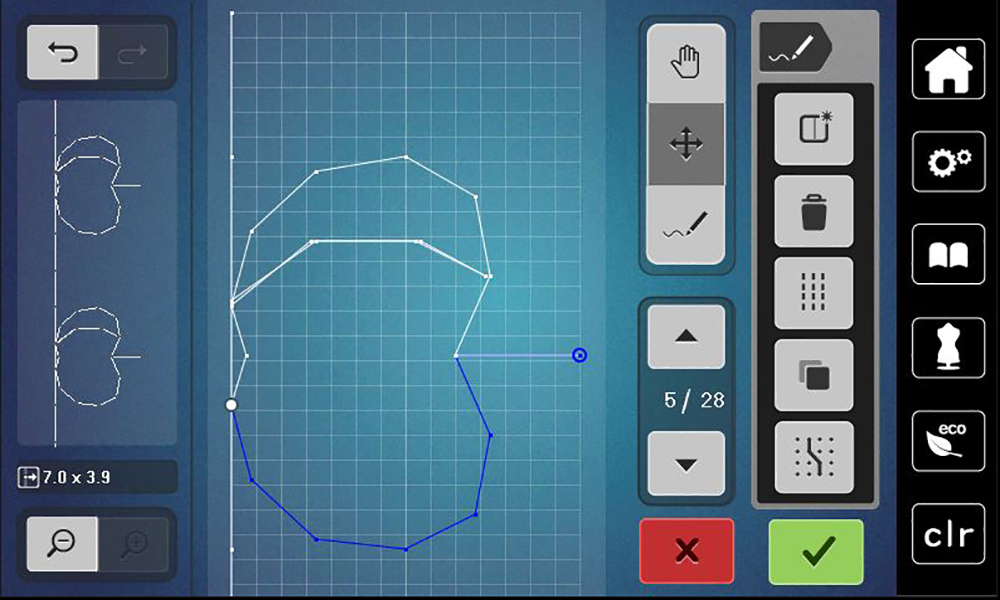
Just like we did before, add three stitches to the top and then come right back down to where you started. Once you have done that, click on the green check to confirm.

What a cute row of pumpkins! And wasn’t it easier to edit a stitch than to draw one from scratch? Go ahead and save to permanent memory just as you did with the other decorative stitch.
Pocket Stitching
Install the seam guide so that it is ½” to the right of the needle.
For the first row of stitching, guide the seam guide along the center fold of the pocket as shown. You will stitch through only ONE layer of fabric with the stabilizer underneath.
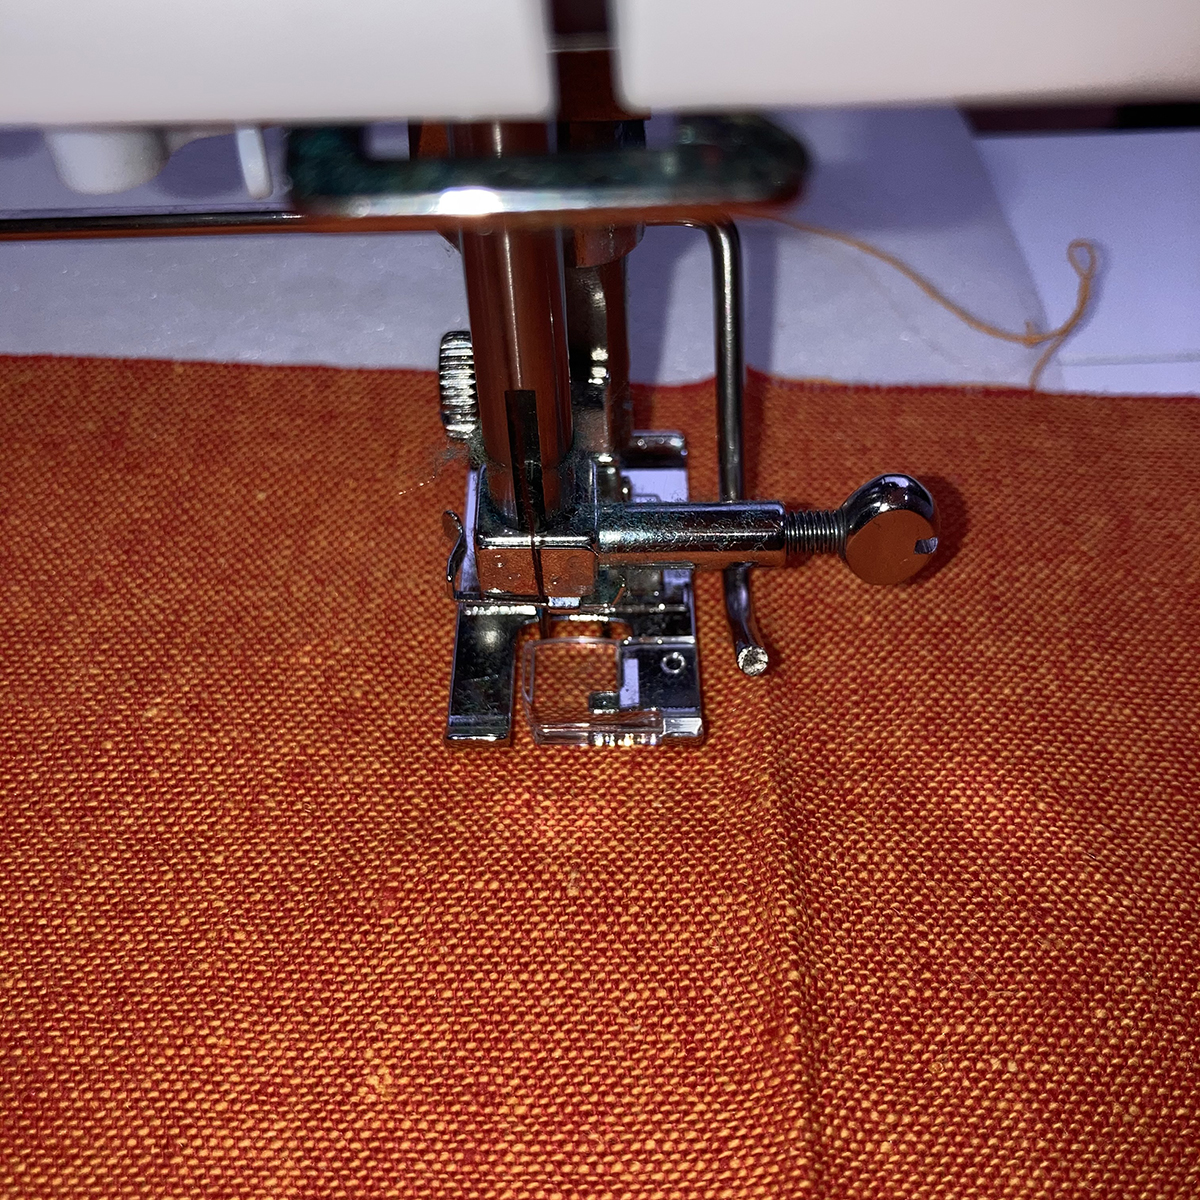
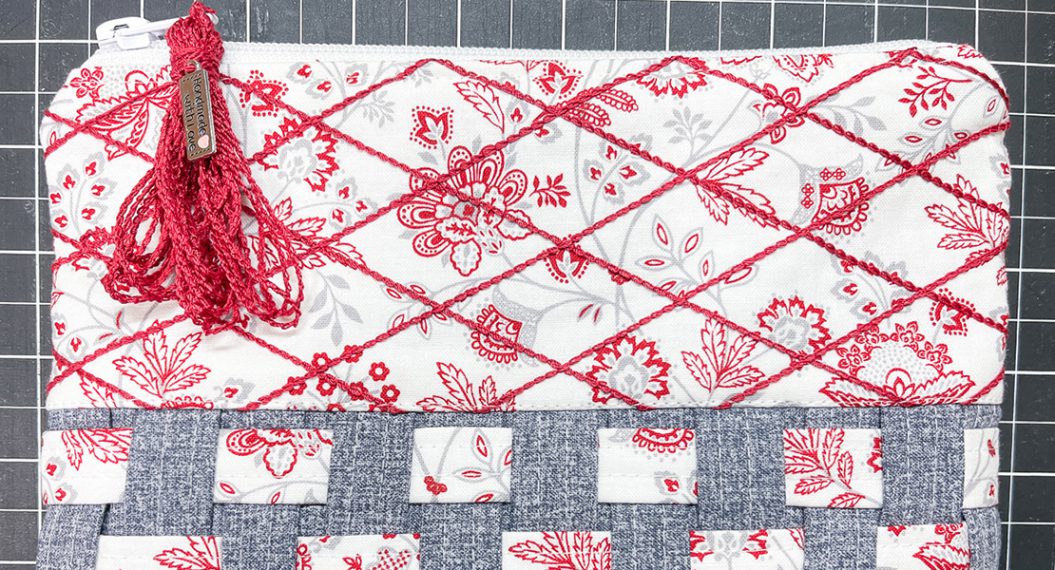
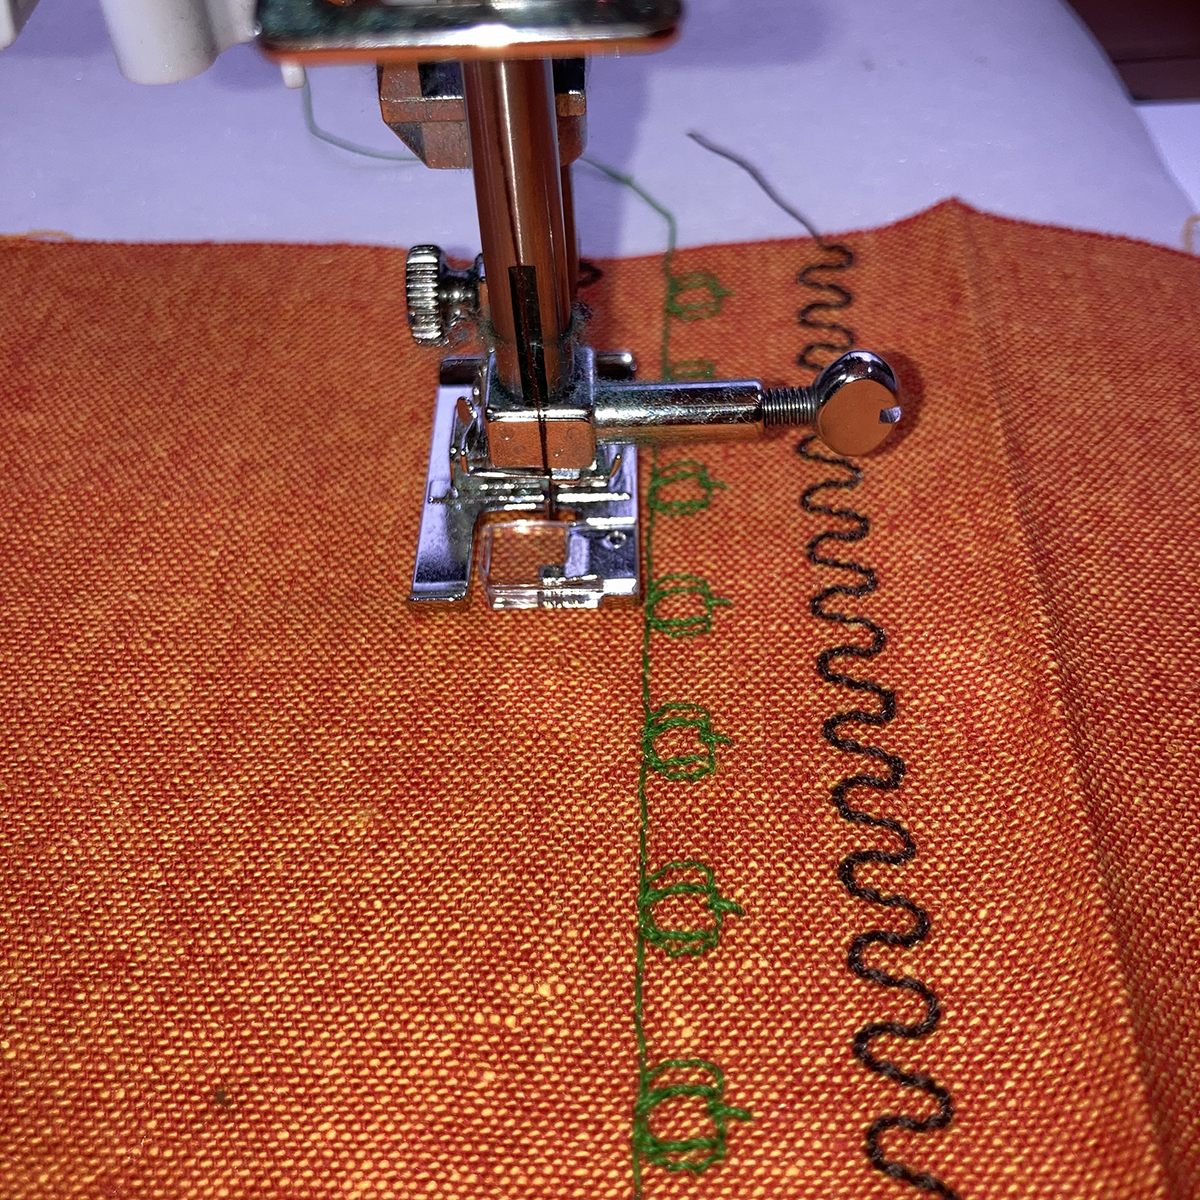
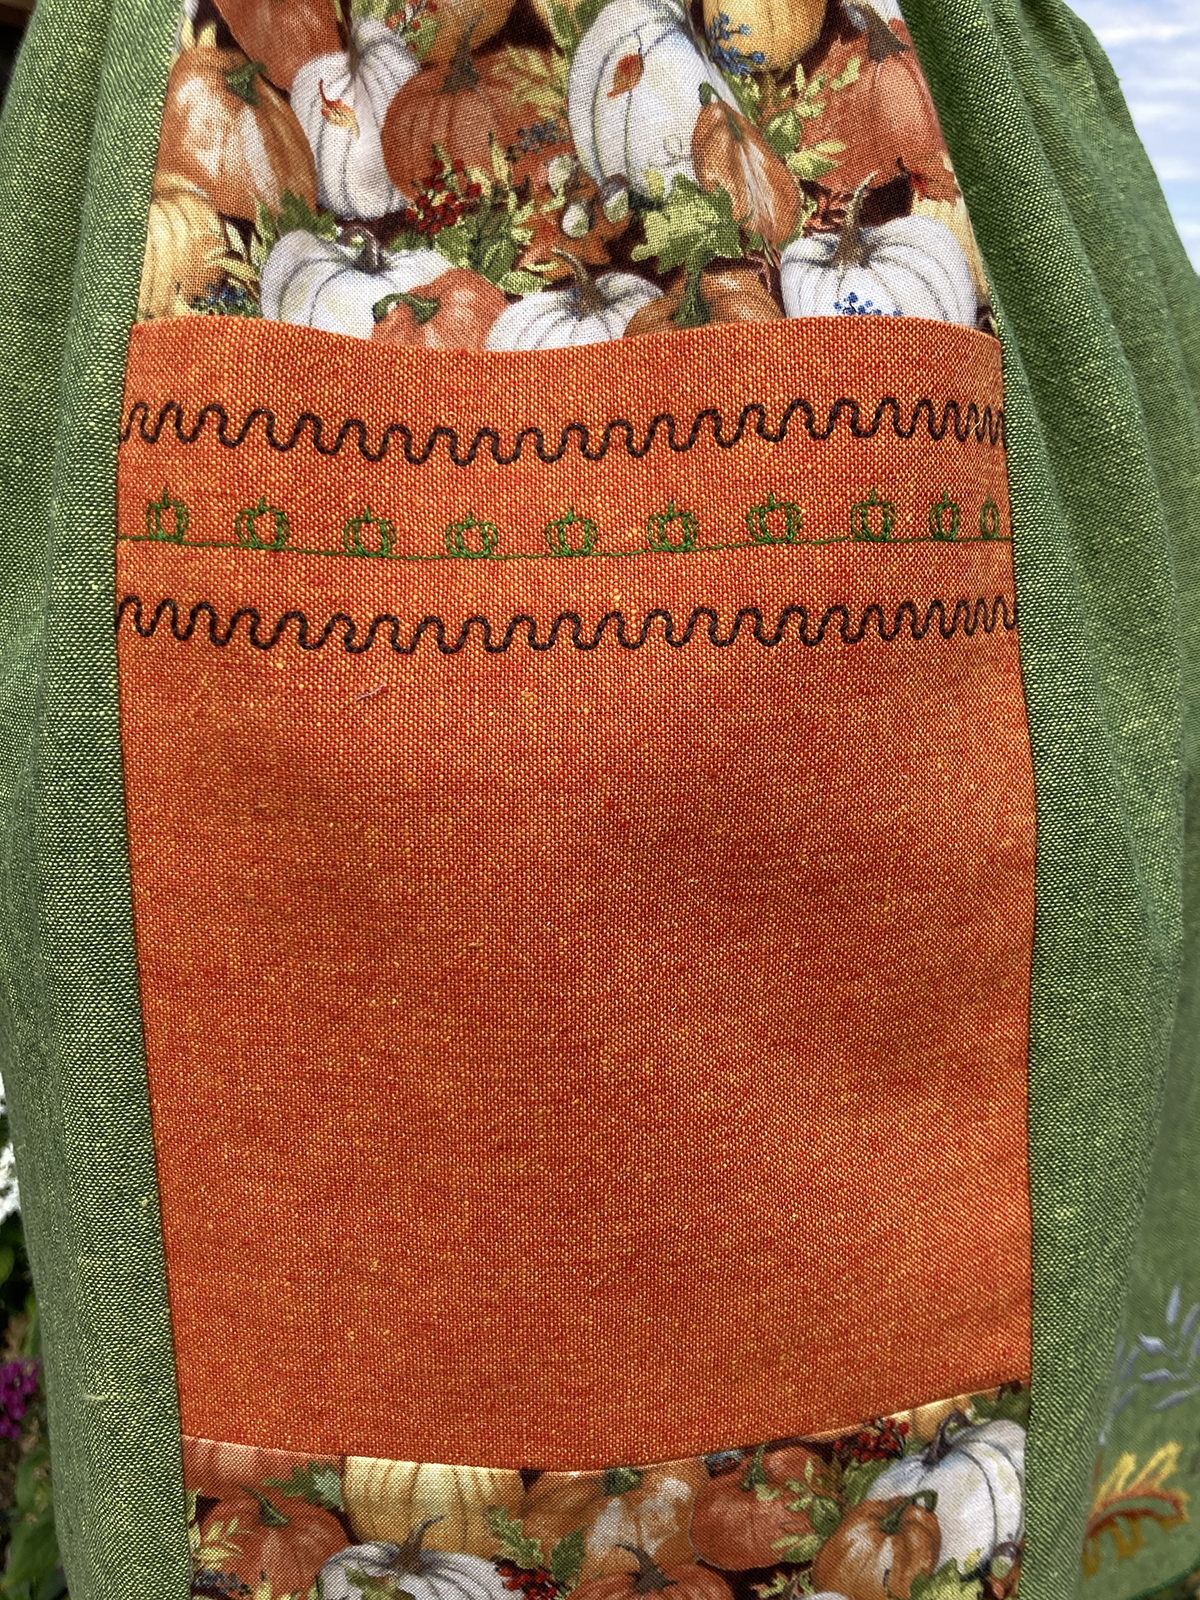
The first row of stitching will be the first stitch that you saved, the triple wavy stitch. Install the 90/14 topstitch needle. I used brown 40 wt Silk-Finish Cotton Mettler Thread in the needle and 60 wt white Eversewn Polyester Bobbin Thread in the bobbin. This bobbin thread is a finer thread and did not pull to the top and is lint free. It has become my new favorite bobbin thread for decorative stitching and embroidery! The second row of stitching will be the pumpkins, and I switched to green thread in the needle and used the right edge of my presser foot to guide along the previous stitching. The third row is the wavy stitch again in brown and I guided the pumpkin stitching along the right edge of my presser foot.
Remove the excess stabilizer and fold the pocket in half wrong sides together and set aside.
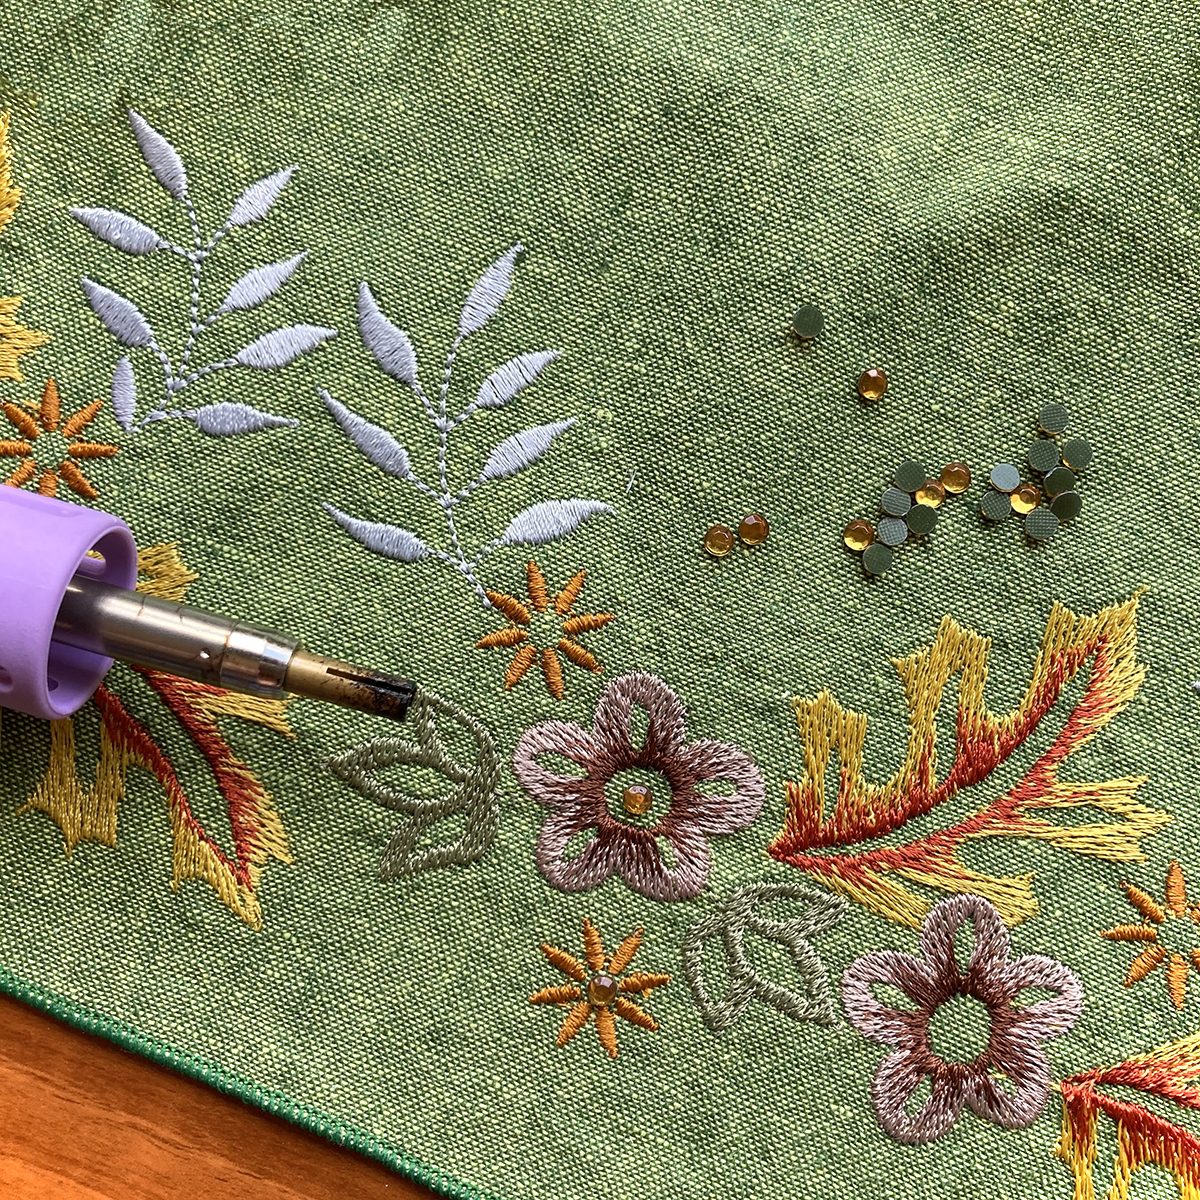
Embroidery Border
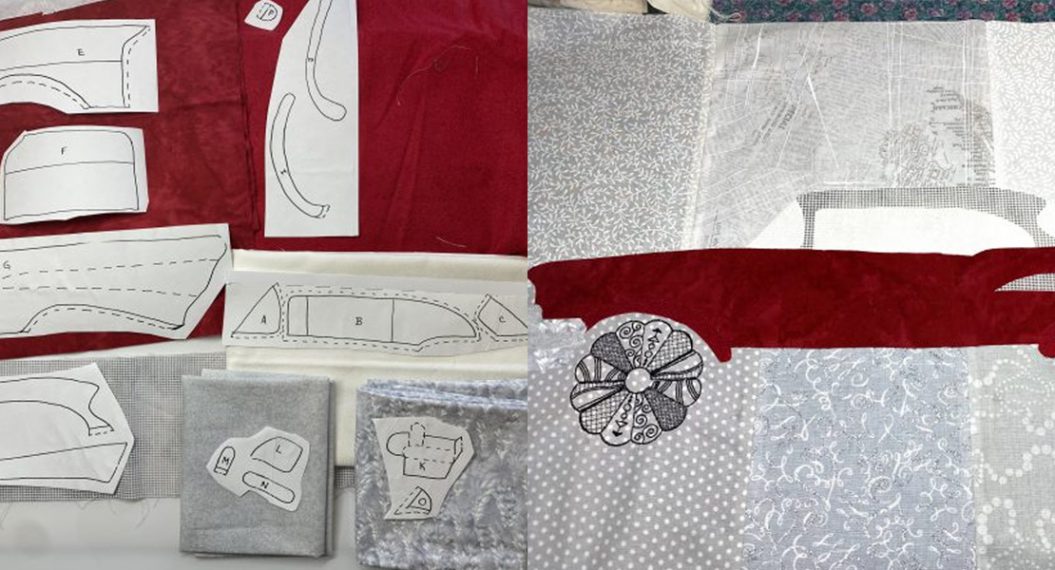
We are now going to make a border along the bottom of the main apron pieces. You will stitch the single design four times on the large piece and one time on the smaller. To make it easier, print out five copies of the design onto the STABILIZER side of OESD StabilStick Template Sheets.
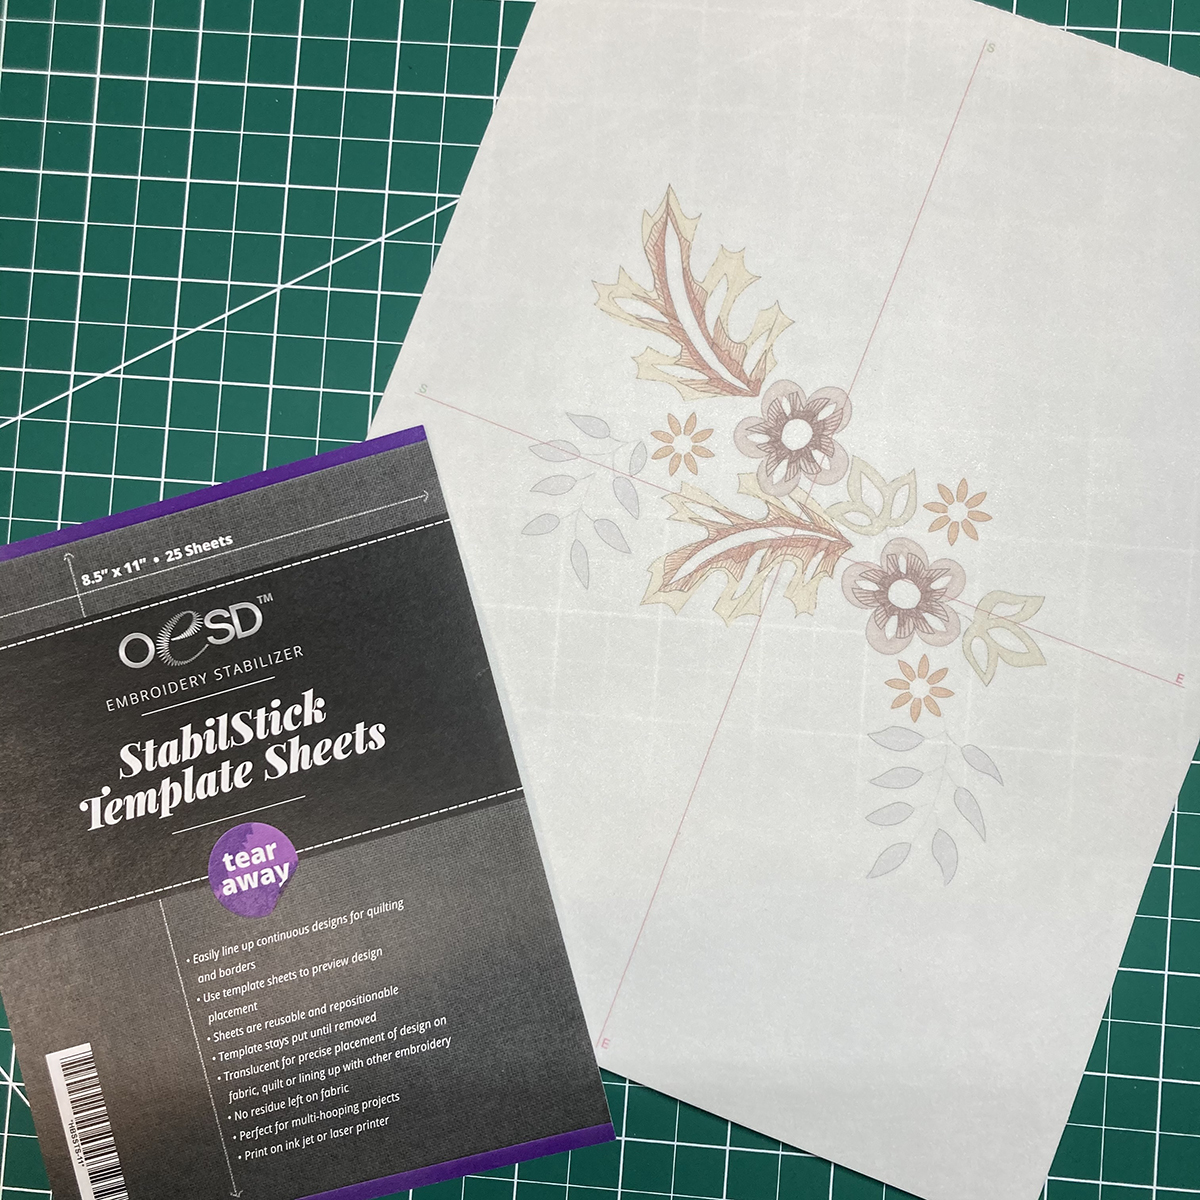
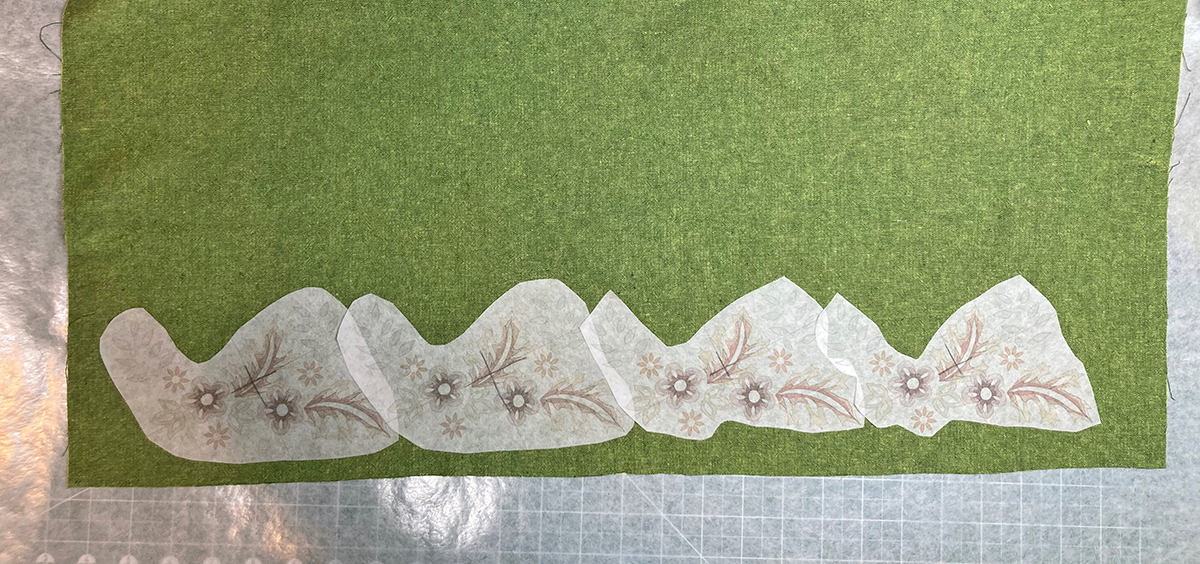
Trim closely around the design. Peel off the paper backing and stick to your fabric in the desired location, evenly spaced. (I placed all my designs going in the same direction.) The bottom of the designs should be about 1” from the bottom of your fabric and about 1” away from the left and right edges of the fabric. Using templates helps to preview exactly where the designs will go and the stickiness holds them in place during hooping without moving. You will need software to print the templates. If you do not own software, download the free ARTlink 9 from the BERNINA website. This is a great software for simple editing of designs, previewing designs, and printing templates.
Tip: The template sheets are quite sticky at first. I removed some of that by pressing and releasing the sticky side a couple of times on some fabric. This makes it easier to remove from the fabric I will be embroidering. Also, when printing the template, be sure to have your start and stop points in the center of the design. You set this up in the Design tab of the software. This will give you centered cross-hairs on your design. You can change the start/stop to the beginning and ending of your design after printing the templates.
You can see from the picture above how I placed my designs. Also, notice that I used one LONG piece of OESD StabilStick Tear Away Stabilizer. I positioned my fabric so that there were a couple of inches of stabilizer showing on each side and at the bottom of the fabric. By using one long piece, I’m actually saving on stabilizer use and all I have to do is re-hoop at the next position. I found one layer of stabilizer adequate for the design and the cotton linen fabric I was using.
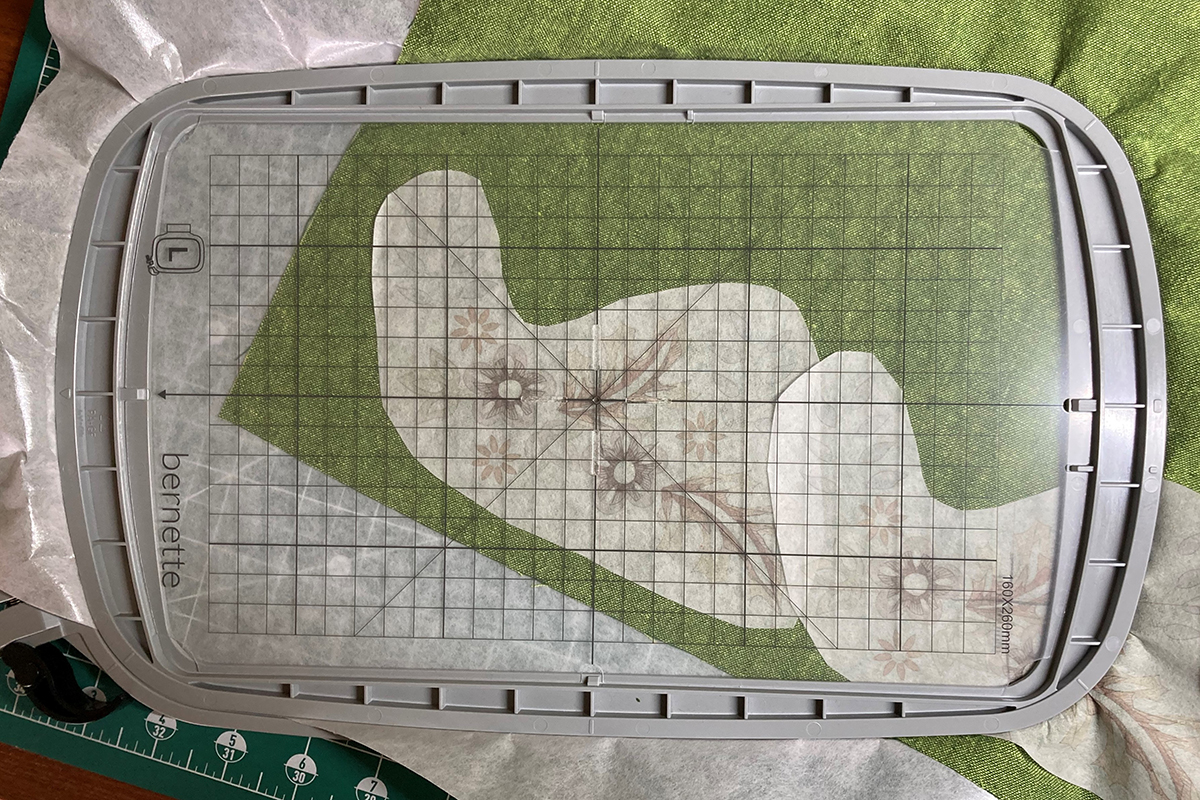
You will use the Large Oval Hoop (160 x 260). Place the template in the inner ring, and align hoop’s center crosshairs with the center crosshairs of the first design and hoop. Attach the hoop onto the machine. Adjust the design placement as needed. Before stitching the design, remove the plastic template AND the StabilStick Template Paper (you do NOT want to embroider through either of these!).
Note: Before attaching the hoop, be sure to install the embroidery foot, embroidery bobbin case and the straight stitch plate on the bernette 79. It’s pretty nifty that the machine will guide you through this once you attach the embroidery module! Embroider the first design using the 80/12 embroidery needle and the thread colors as directed.
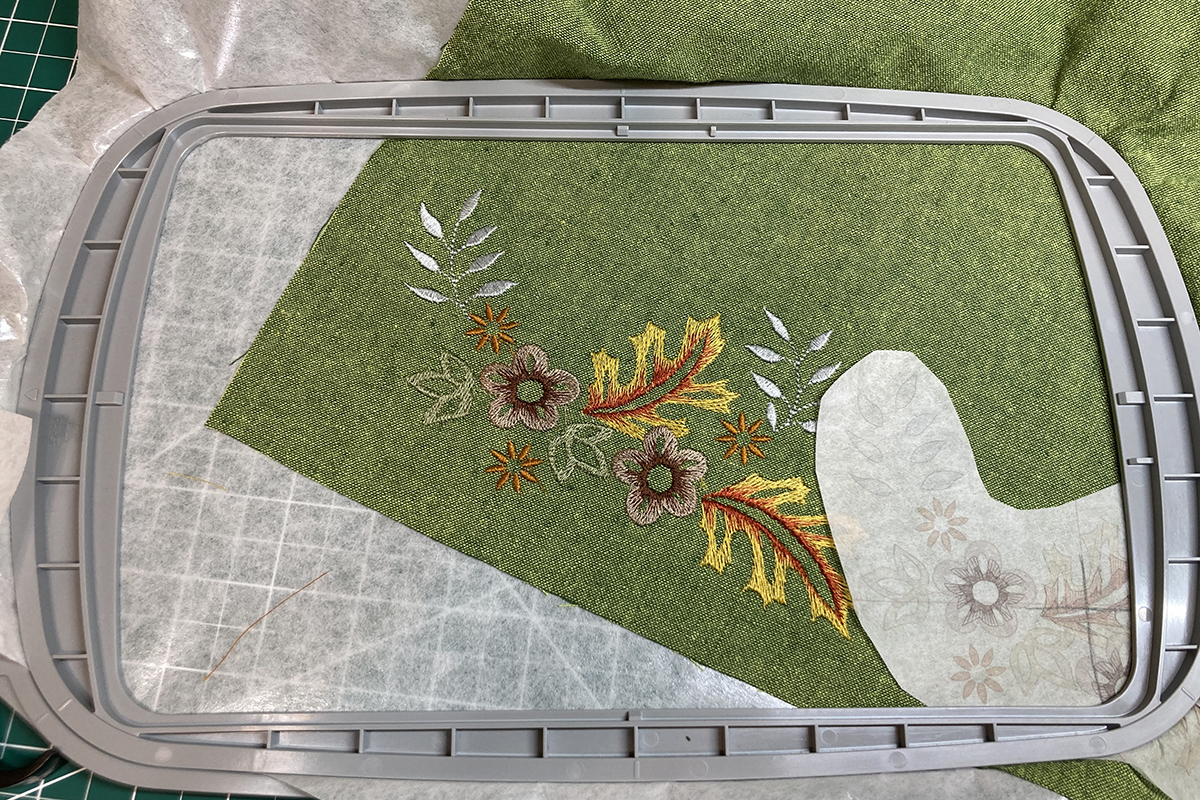
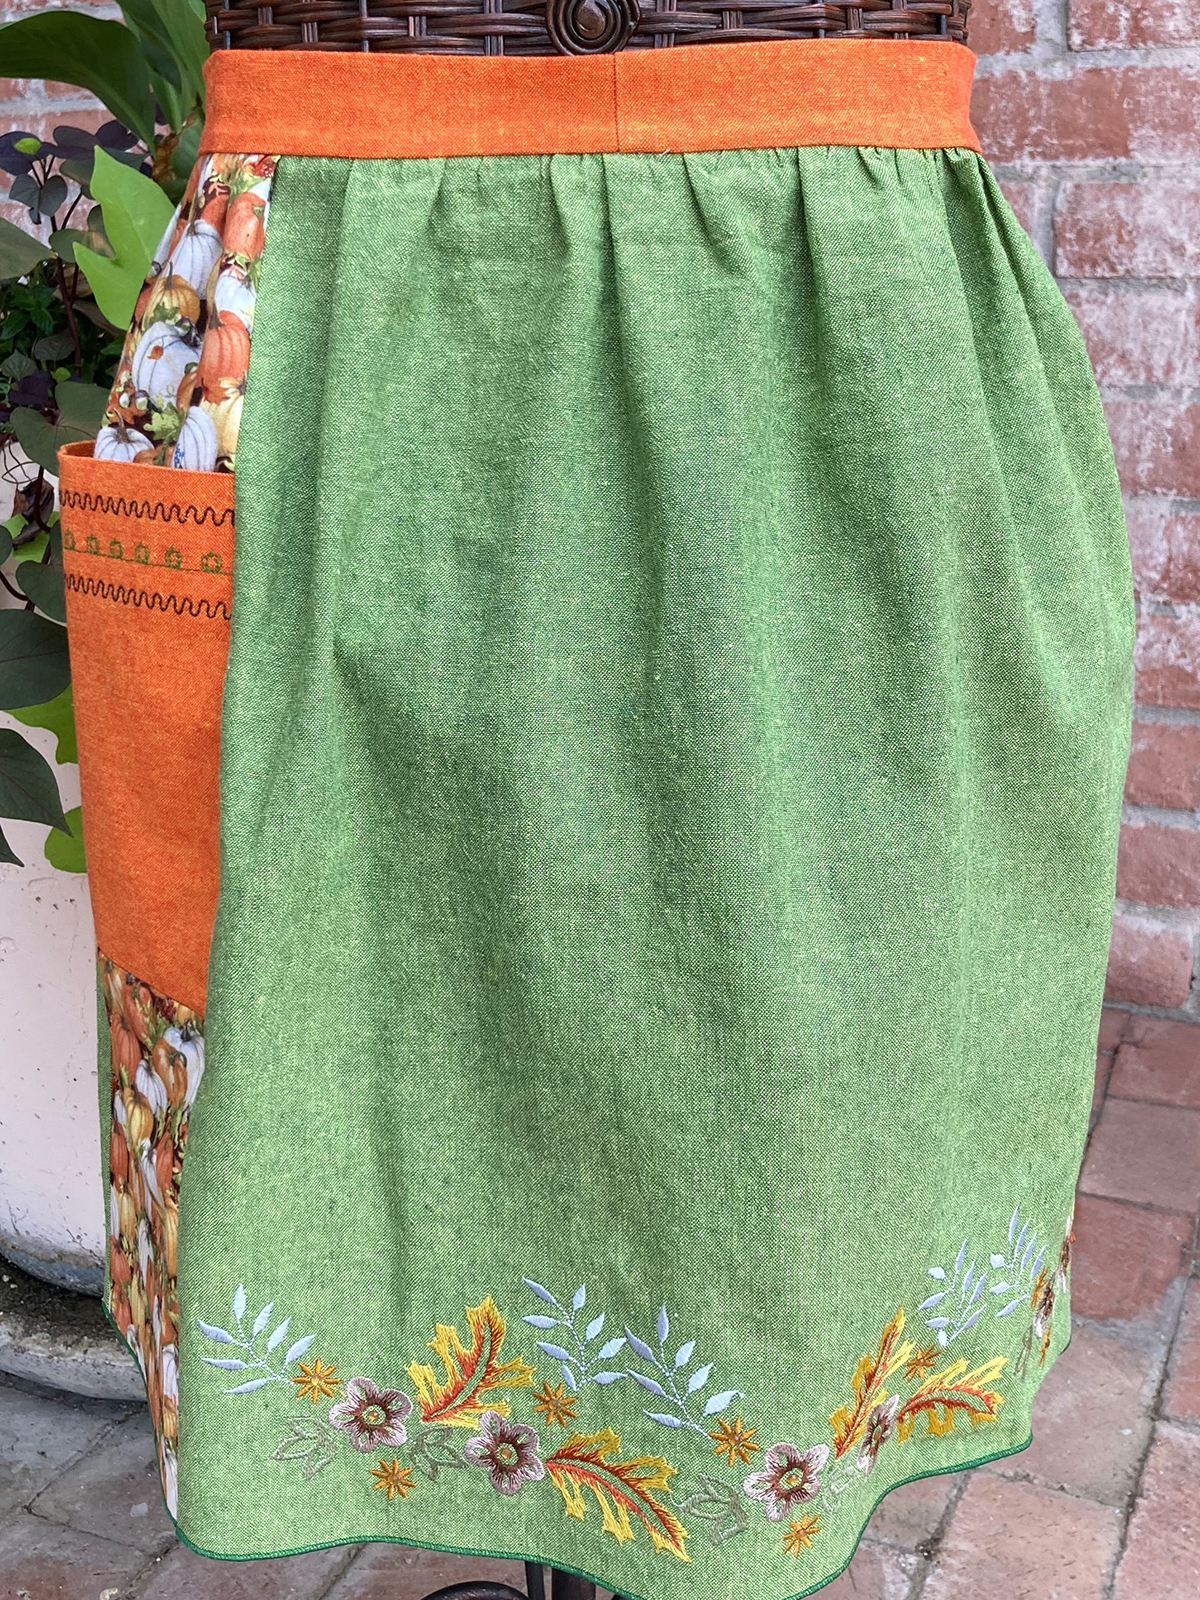
Continue along the bottom edge of the fabric in the same manner until you have stitched four designs to make a border. Stitch one design on the bottom of the other main apron piece. Carefully remove the excess stabilizer.
Now that your fabrics are stitched and embroidered, go ahead and assemble as directed in the previous blog post.
The final step is optional…adding a little bling with Hot Fix crystals and a BeJeweler. The crystals go in the centers of the large brown flowers and small gold flowers. I love a little sparkle!