BERNINA Anniversary Quilt-along: Part 6
Welcome back to the last installment of the BERNINA 125th Anniversary Quilt-along! Are you ready to quilt? I’m BERNINA Expert, Amanda Murphy, and quilting is my favorite part of the process! This month, we are going to look at the quilting on the Anniversary Quilt in more detail. Of course, there are so many ways to quilt this quilt so feel free to put your own spin on your version!
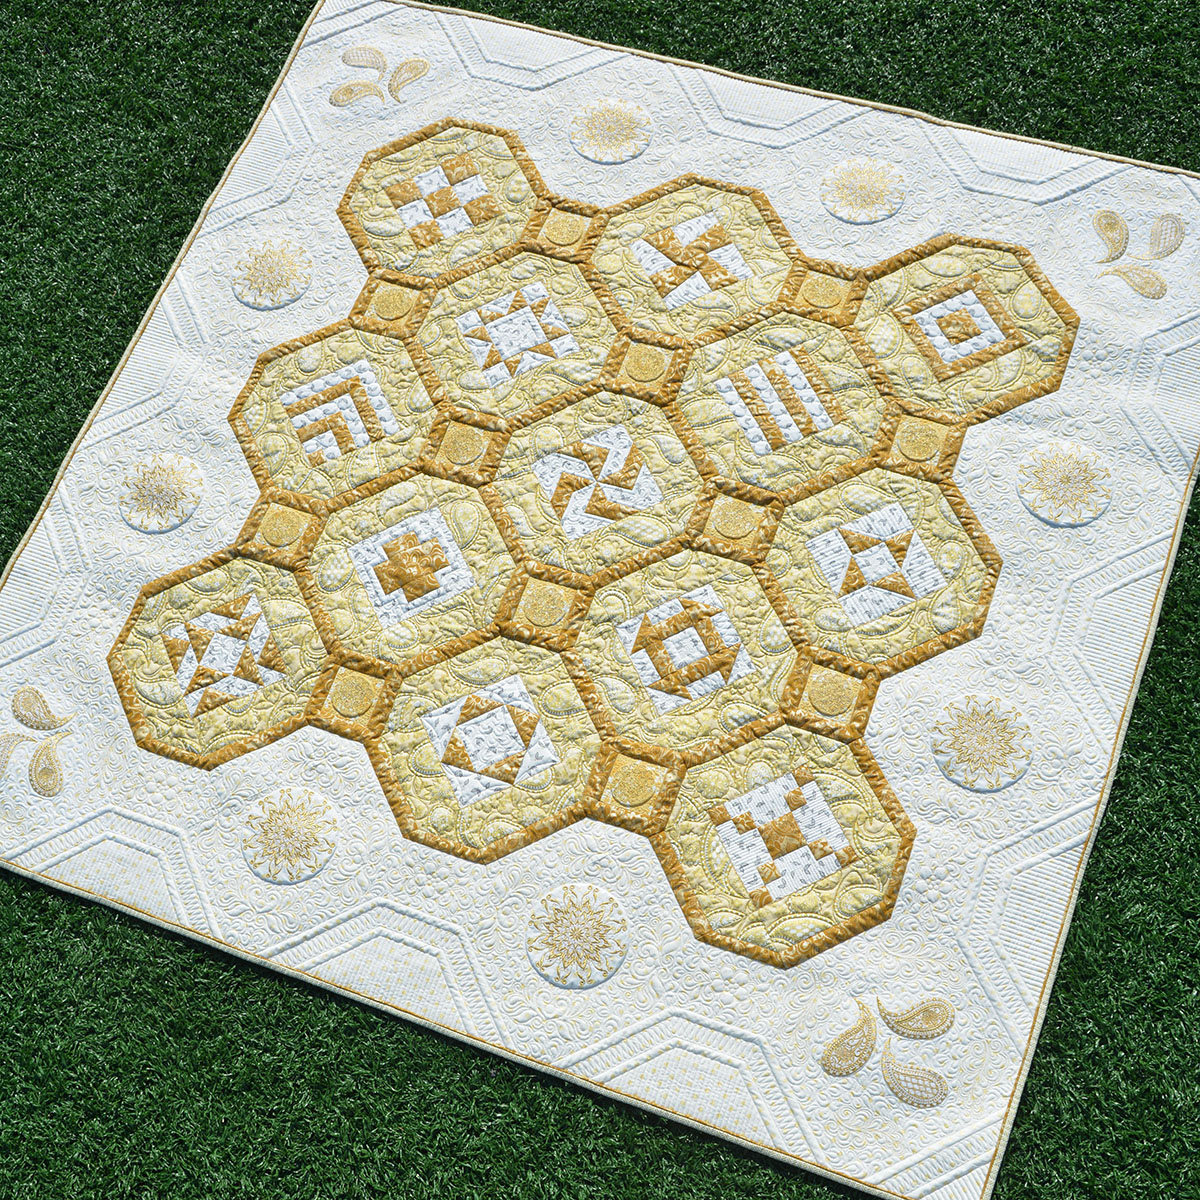
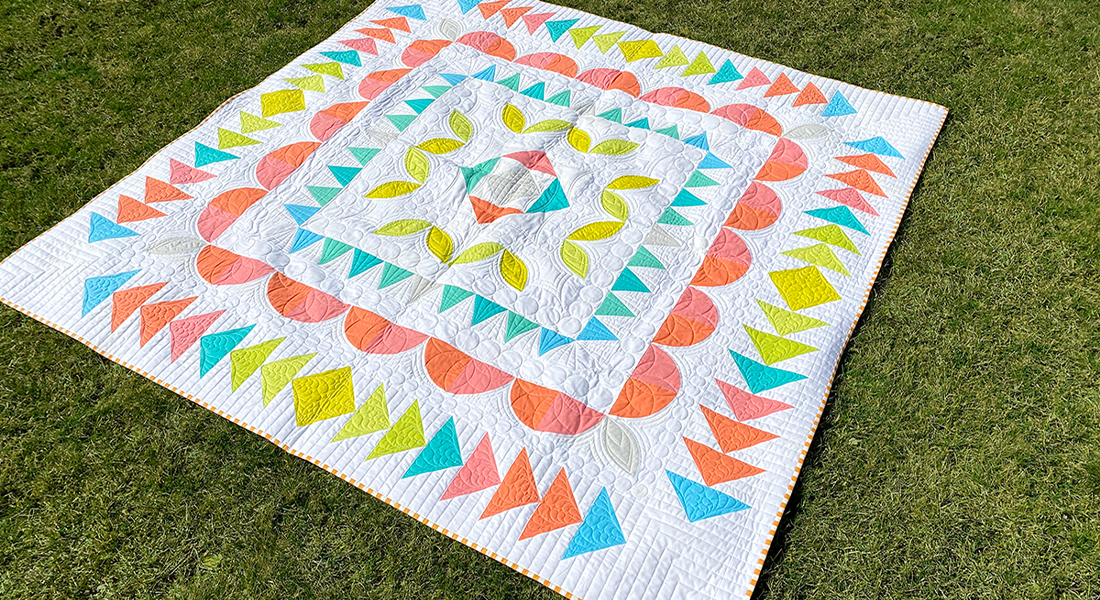
The BERNINA 125th Anniversary Quilt.
In my pieces, I typically love to contrast organic free-motion shapes with geometric rulerwork. And if the rulerwork can enhance the piecing that is optimal!
The Jubilee Ruler Set can be used to quilt around each embroidery if desired. They are available at your local BERNINA store. If you prefer to quilt without the rulers, you can simply free-motion closely around the embroideries.
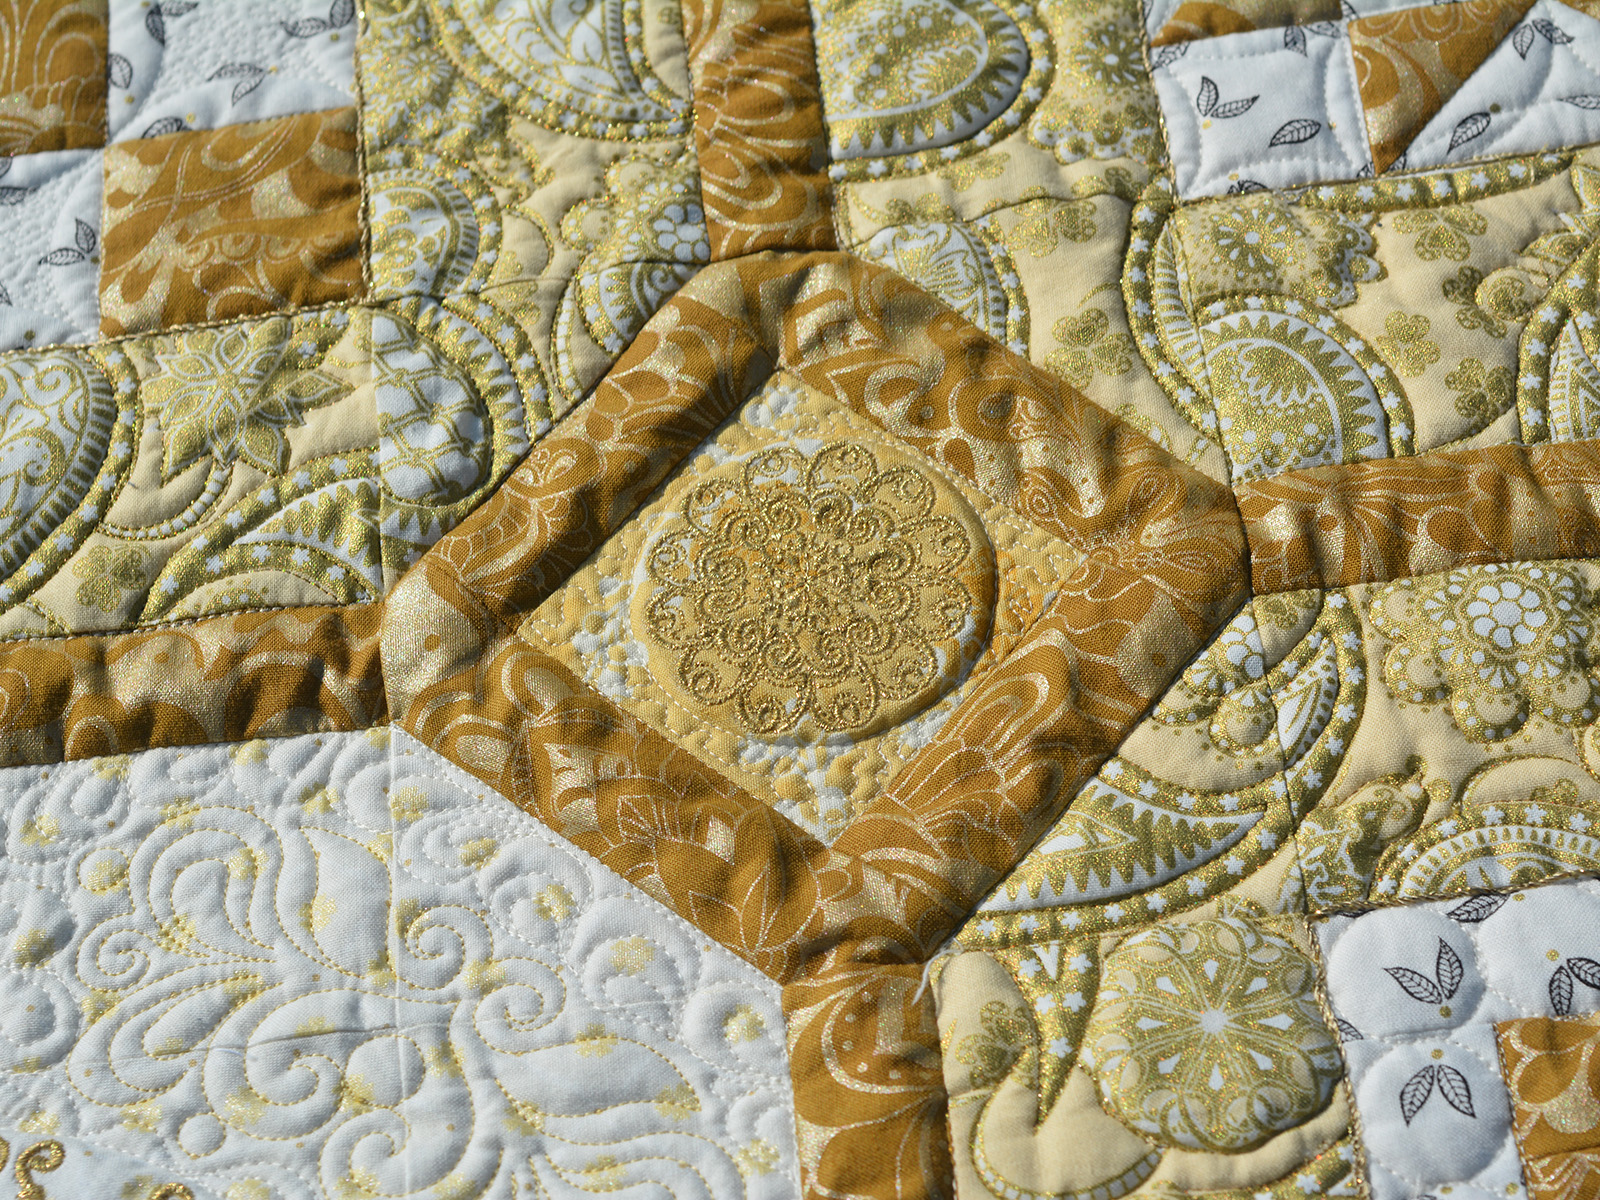
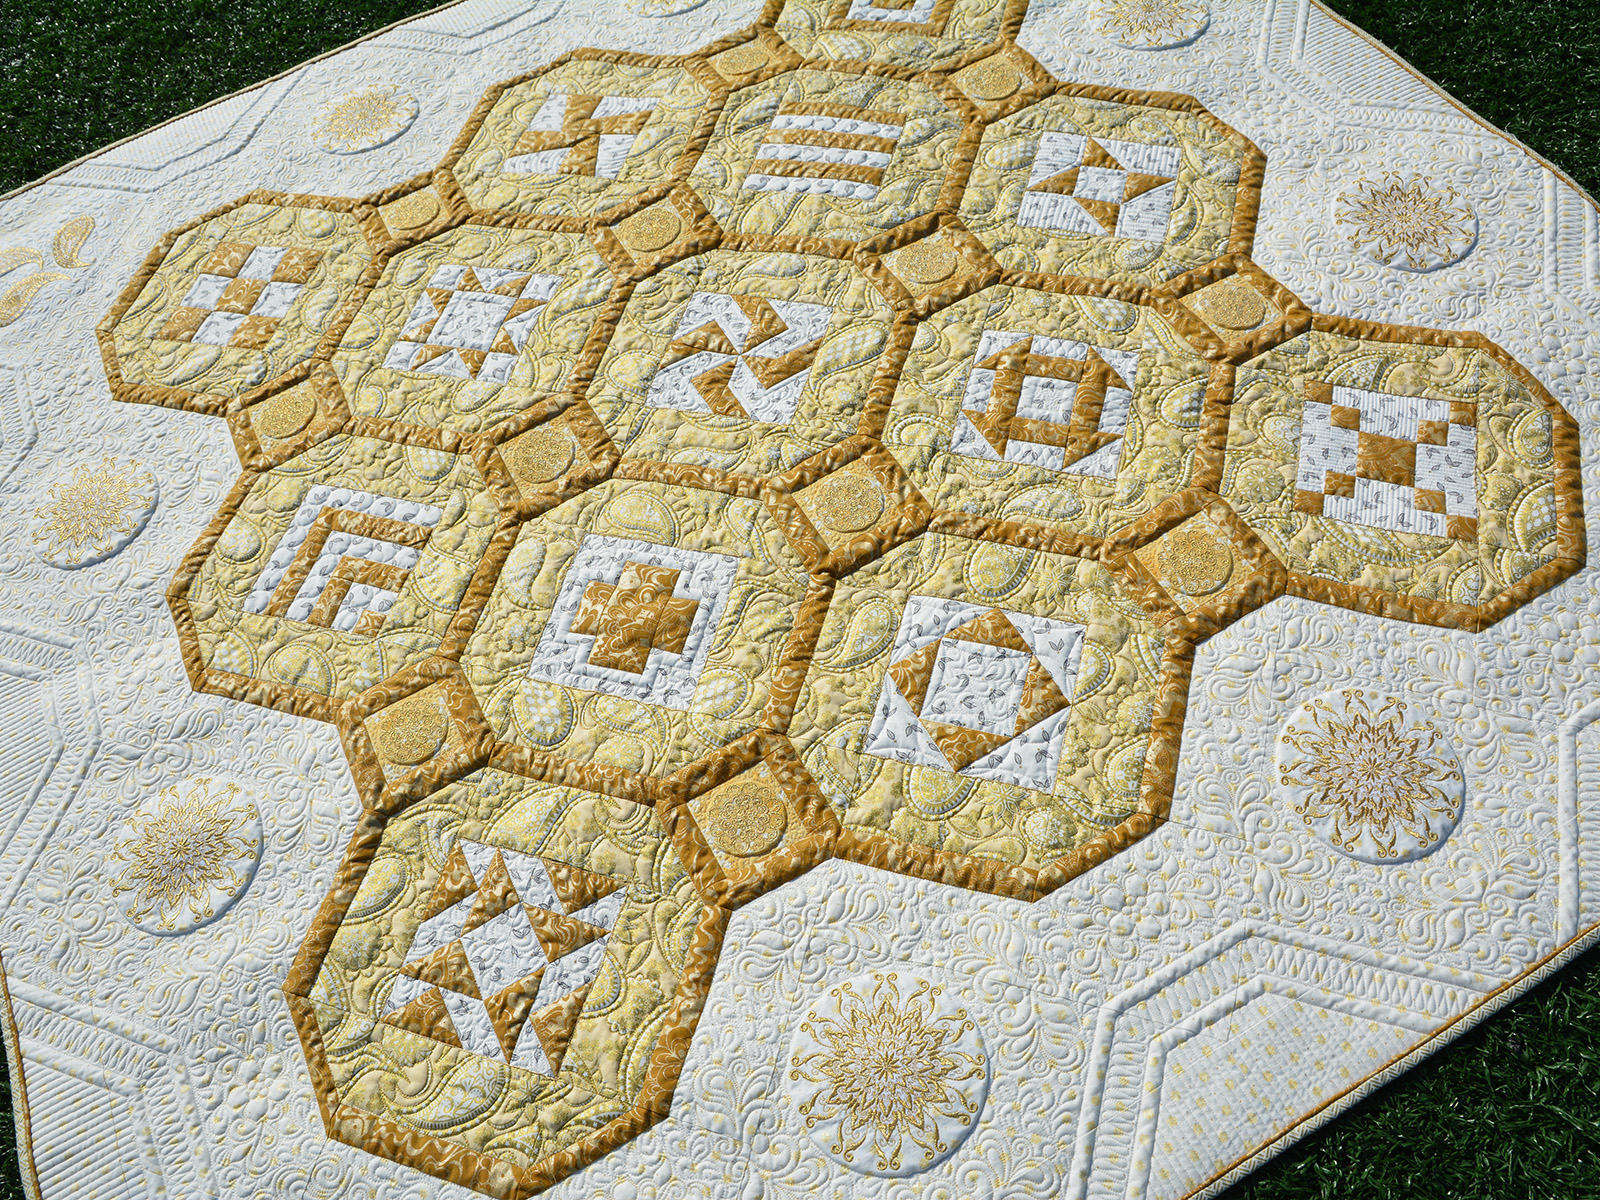
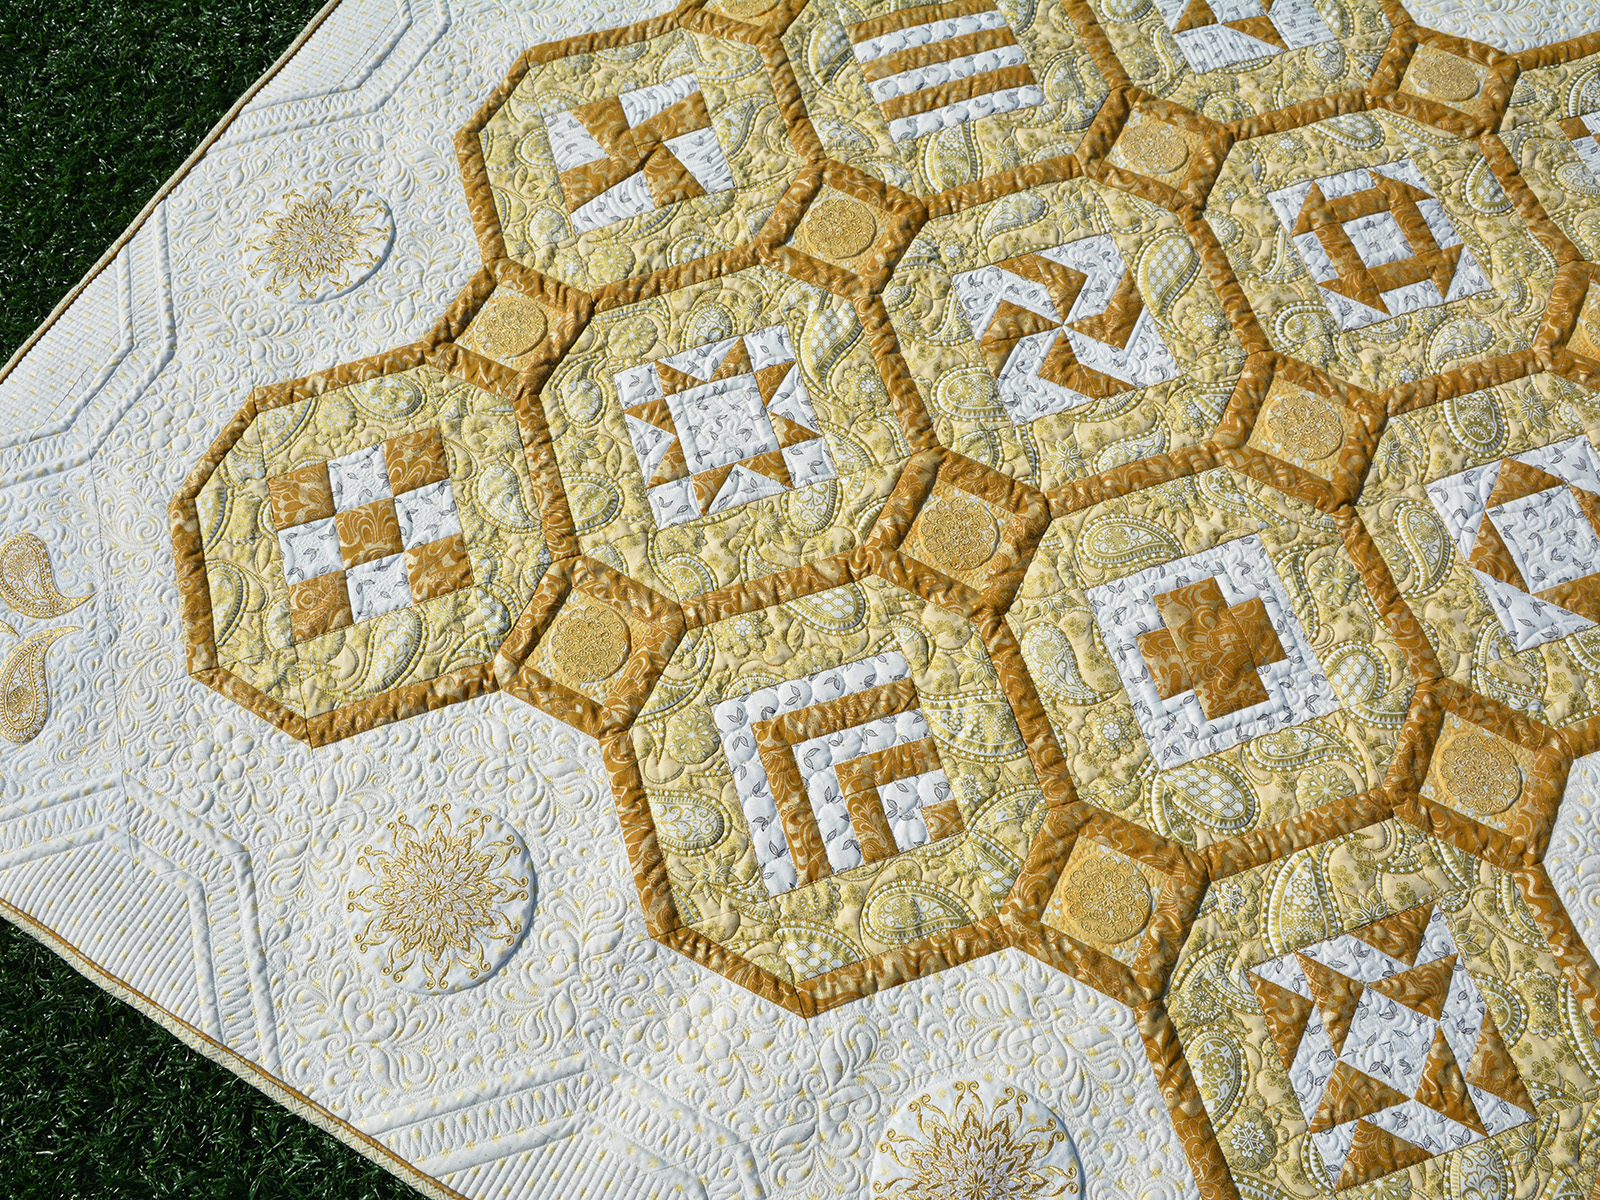
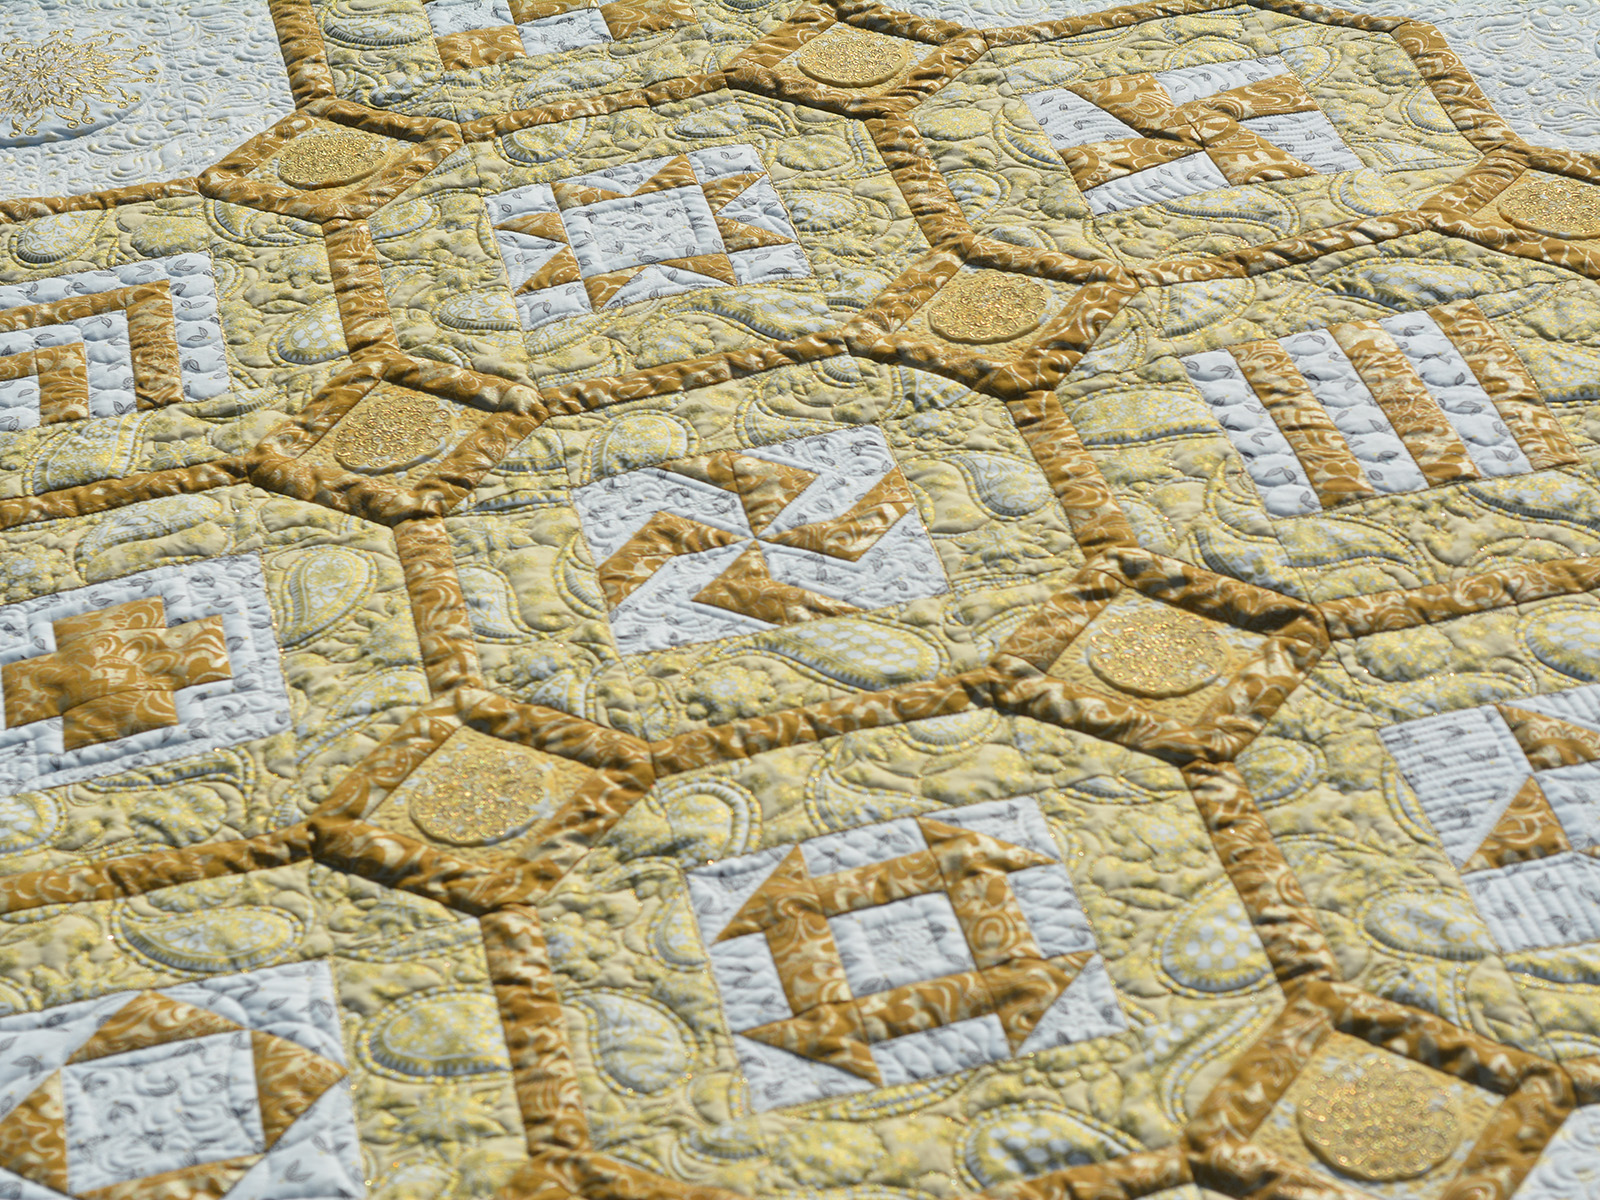
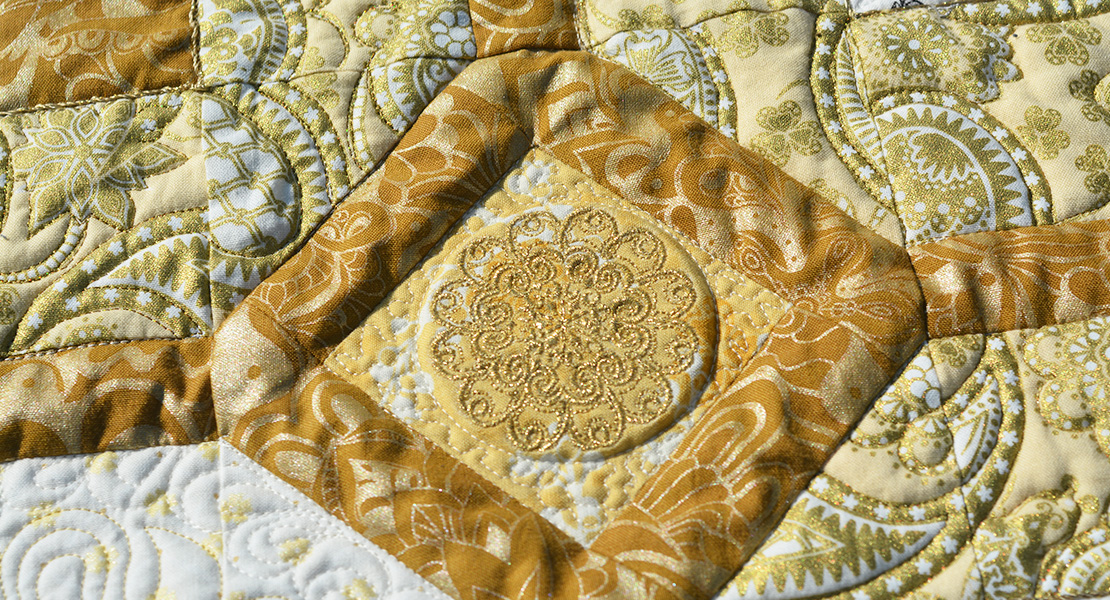
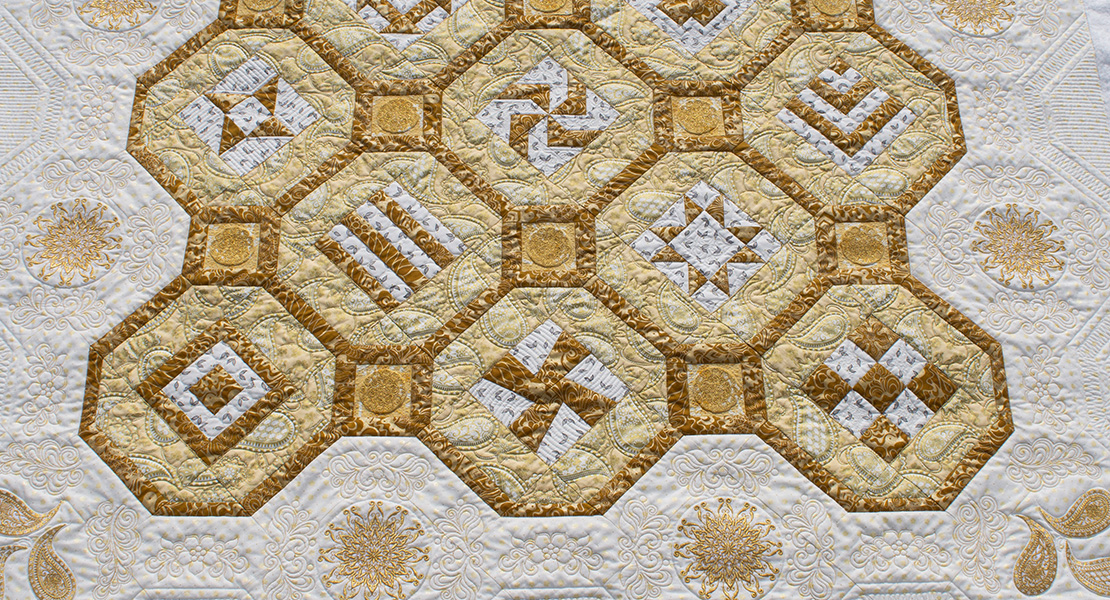
The cornerstone embroideries on the BERNINA 125th Anniversary Quilt. In this version, I used a Jubilee ruler to go around the motif and then stippled around the edges of the block.
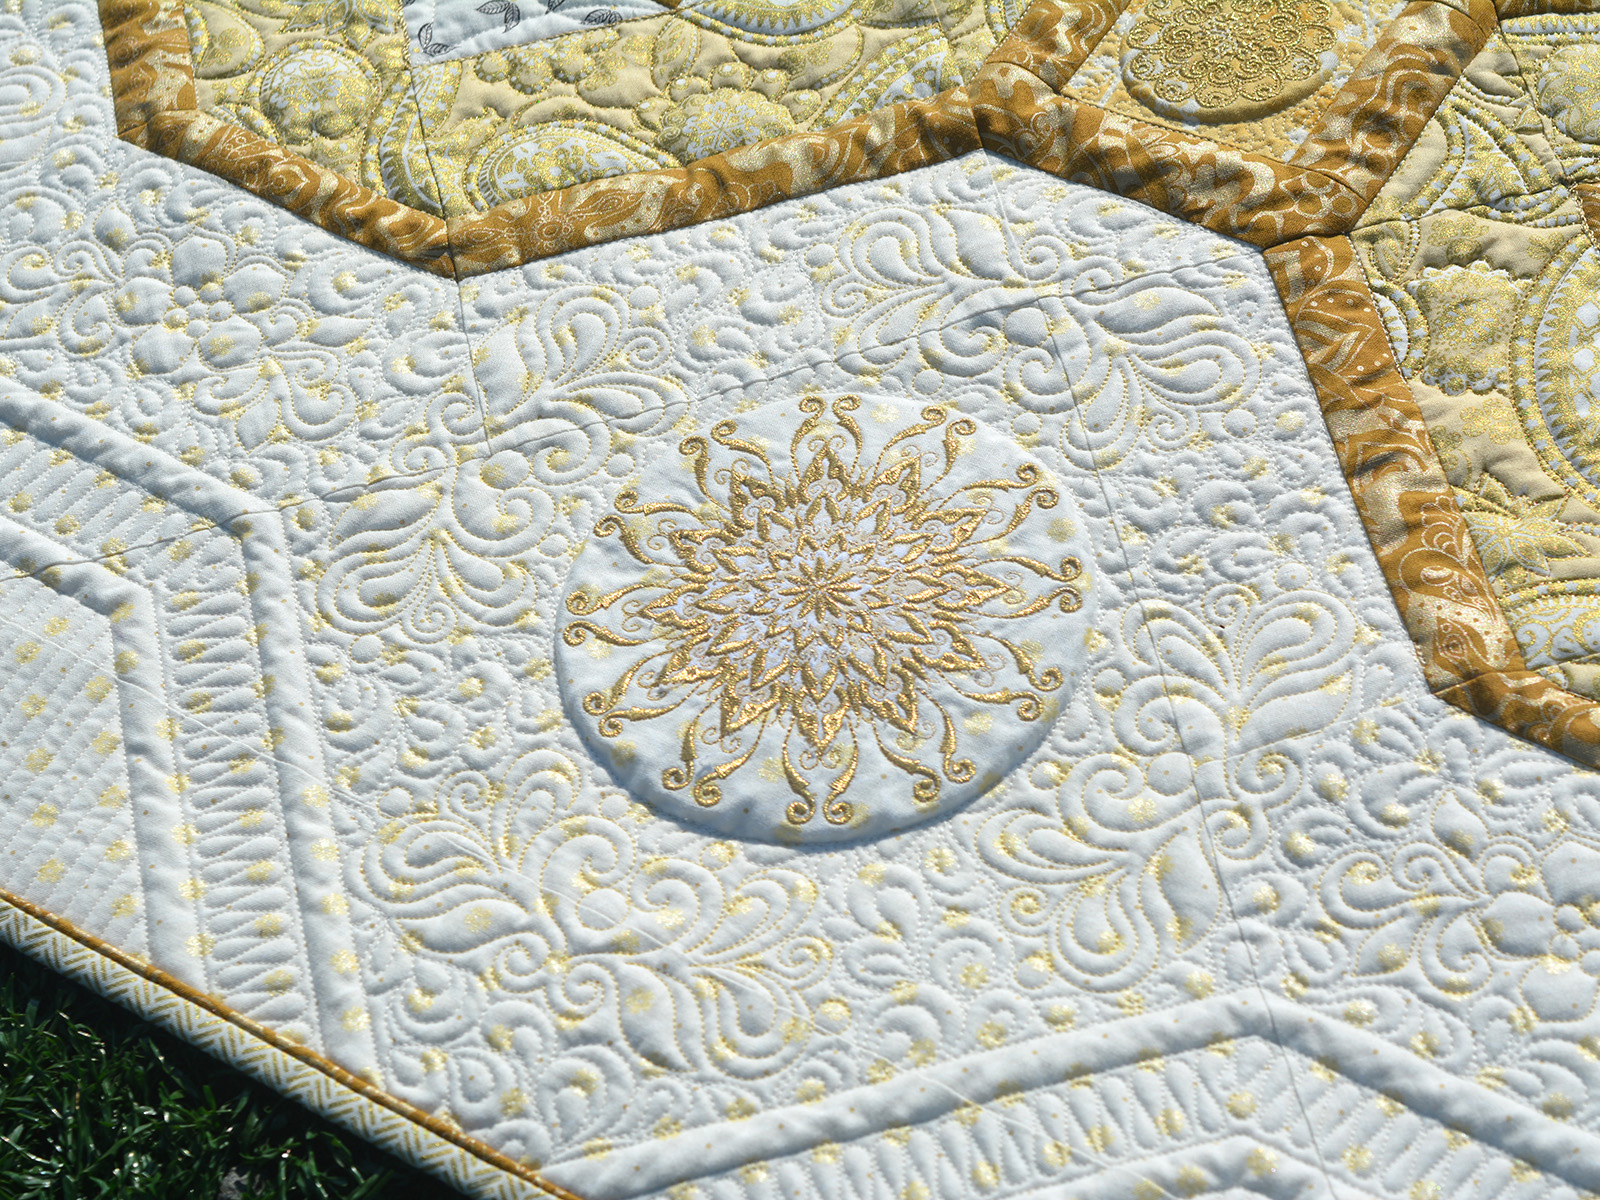
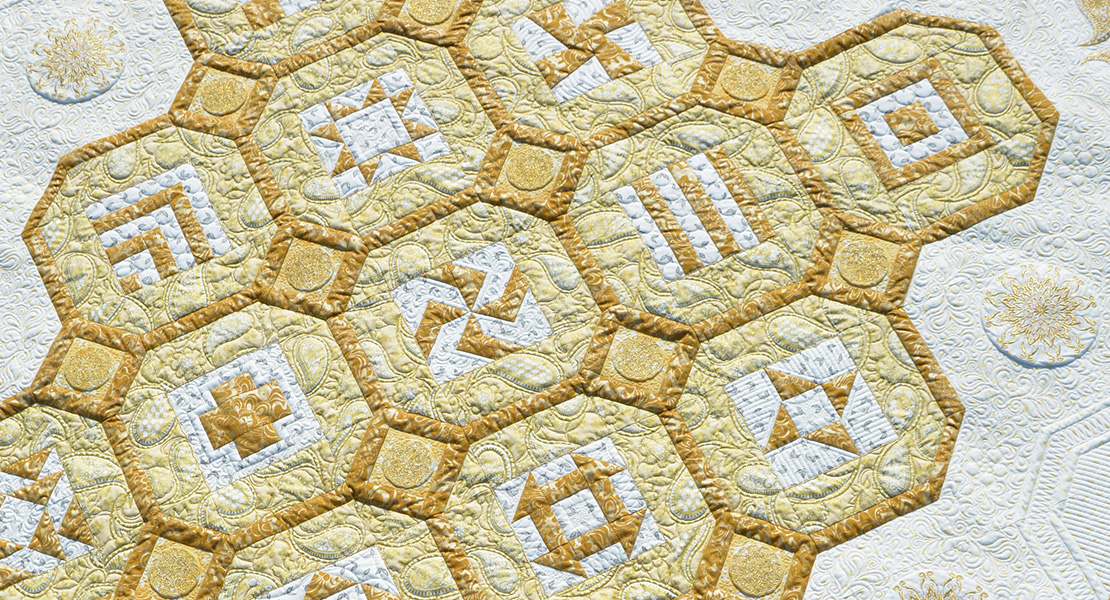
The side border embroideries on the BERNINA 125th Anniversary Quilt. In this version, I used a Jubilee ruler to go around these motifs and later added digitized motifs and free-motion.

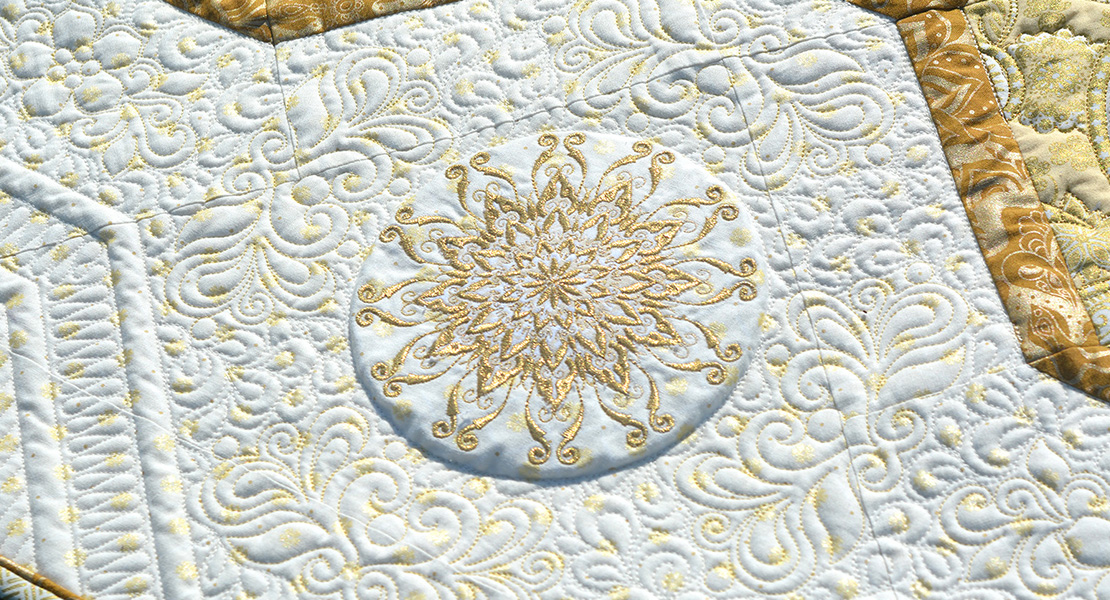
This is the original version of the quilt, which now resides in Switzerland! When I made this version I didn’t have rulers, so I free-motioned around the embroidered motifs.
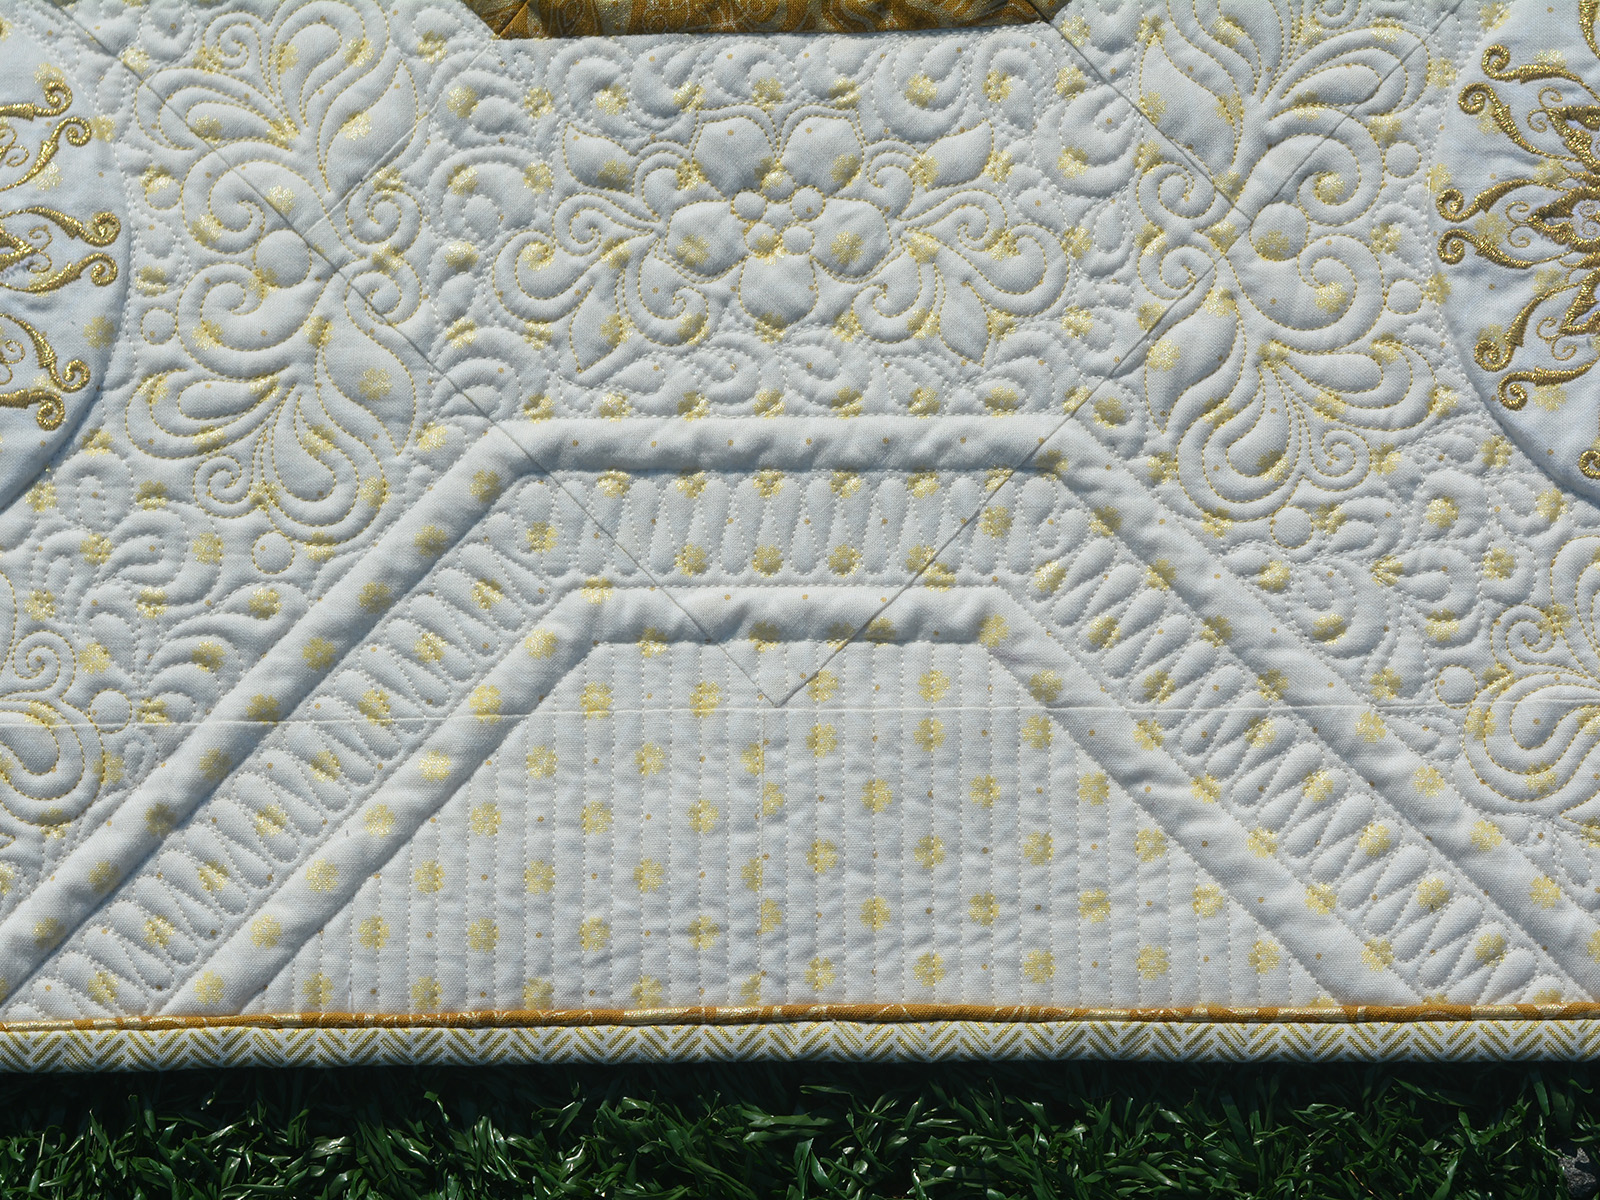
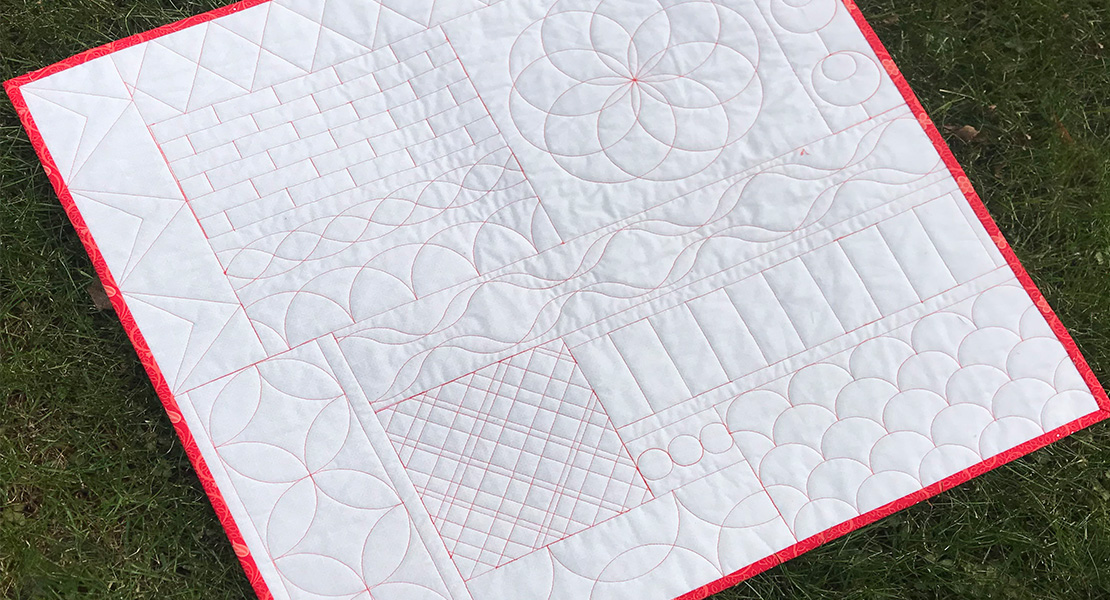
One of the things I love most about this quilt is how the quilting in the border reflects the octagonal piecing of the quilt’s center. You can accomplish this (and the stitch-in-the-ditch work) with a simple straight line quilting ruler and the BERNINA #72 Adjustable Ruler Foot. Or you can use a walking foot. I prefer a ruler foot, even on a domestic machine because it means I don’t have to rotate my quilt top. If you have a BERNINA Q Series on a frame, you can quilt these large trapezoid and triangle motifs and their fills using files in the Jubilee Embroidery Collection.

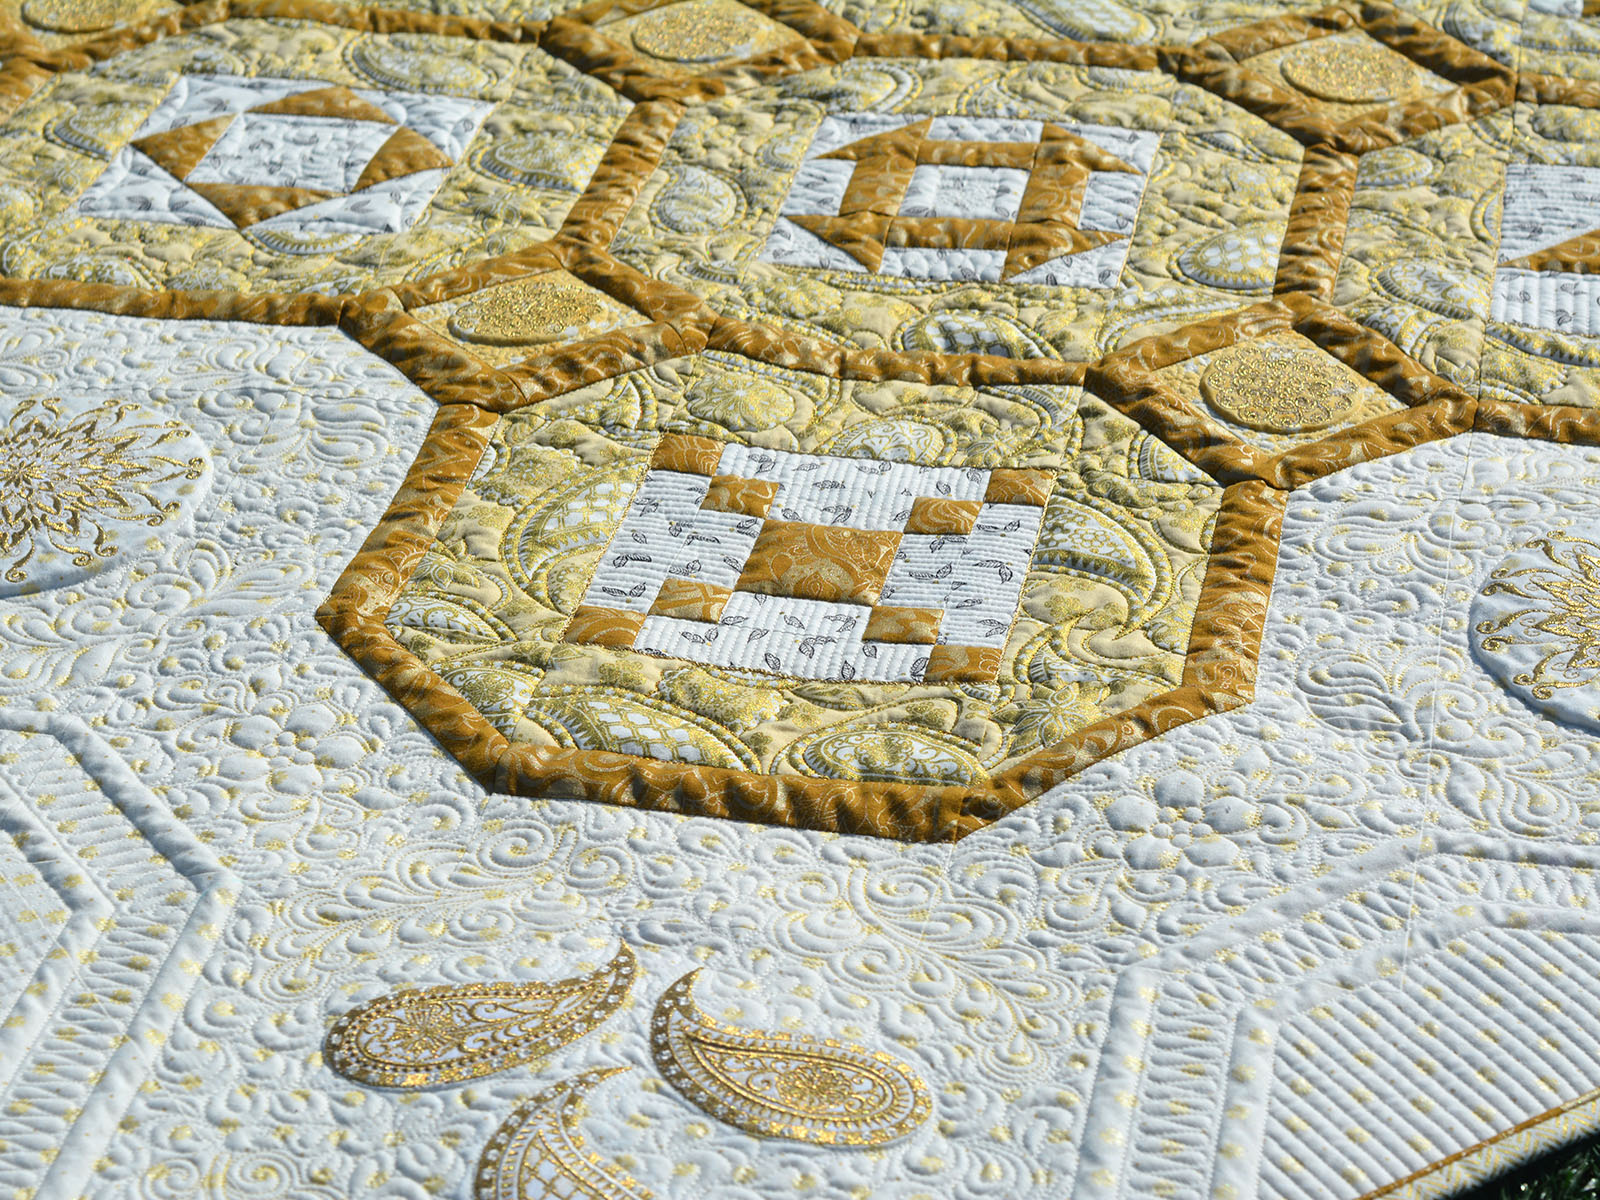
The digitized floral quilting motifs in the border are also available in the Jubilee Embroidery Collection by OESD. These motifs are digitized for BOTH longarm and domestic embroidery machines.
You can download the quilting files for embroidery machines and longarms here.
So after all that eye-candy, are you ready to get started?
Here is a PDF of the instructions that you will need to complete this month’s work, but make sure you read on because I give additional tips and information in this post. There are also videos toward the bottom of the post.
If you choose to quilt your Anniversary Quilt in a similar fashion to mine I’d recommend the following quilting order.
Quilting Order on a Domestic Machine
- Quilt all the way around the quilt top, in the area that will be later covered by binding, with long basting stitches. This is to help ensure the backing fabric does not peel away from the quilt sandwich. The first time I made this quilt I did this in Isacord 0101. The second time I used Aurifil 2026 in 50 weight.
- Continuing on with the same thread, quilt “in-the-ditch” to outline the octagonal framework using a quilting ruler and the BERNINA #72 Adjustable Ruler Foot. Really, I prefer to quilt right along the ditch, a hairline away from the diagonal frame itself, so that the stitches melt into the seam.
- Quilt around and inside the pieced blocks. See the DETAILS video at the bottom of this post for ideas.
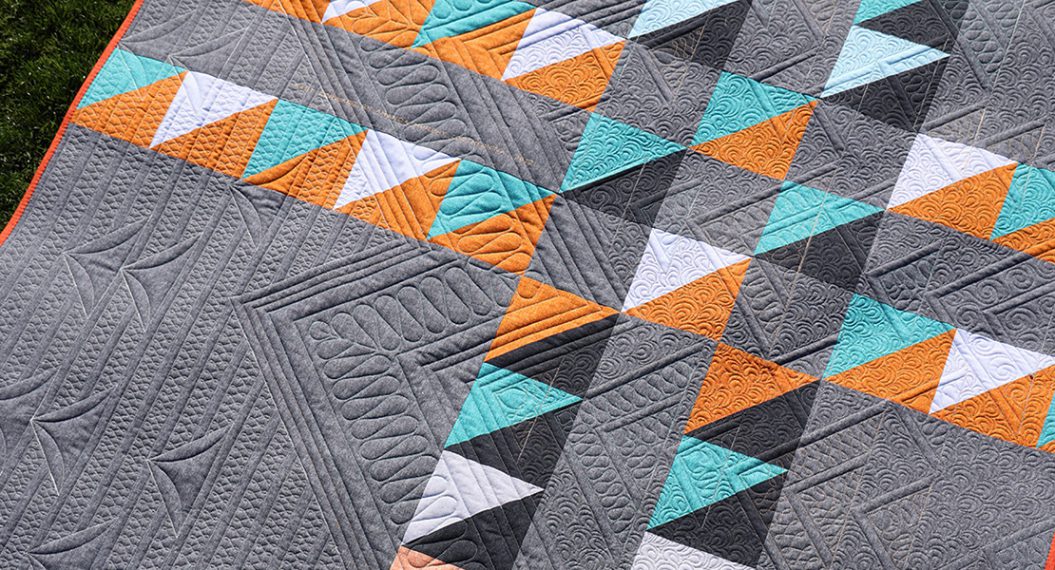
- At this point you will have nothing in the border. To keep my pieces nice and square, I like to get a little quilting everywhere before I start my denser motifs, so I’d recommend quilting the channels that form the triangle and trapezoid shapes in the border. Refer to the diagrams in the PDF for the placement of these motifs. Use your seams and a ruler with a 45 degree line to line things up.
- Quilt around the side border embroideries. This can be done with or without a ruler depending on the look you are going for. A Jubilee ruler set is available at BERNINA stores. It contains circles that are exactly the right size for these embroideries! If you like the style of the bigger circle, you can purchase a full set of my Good Measure Circle Rulers from Brewer Sewing through your BERNINA store. To learn more designs you can do with circle rulers, you can reference this video or watch the videos for my BERNINA Rulerwork Sampler.
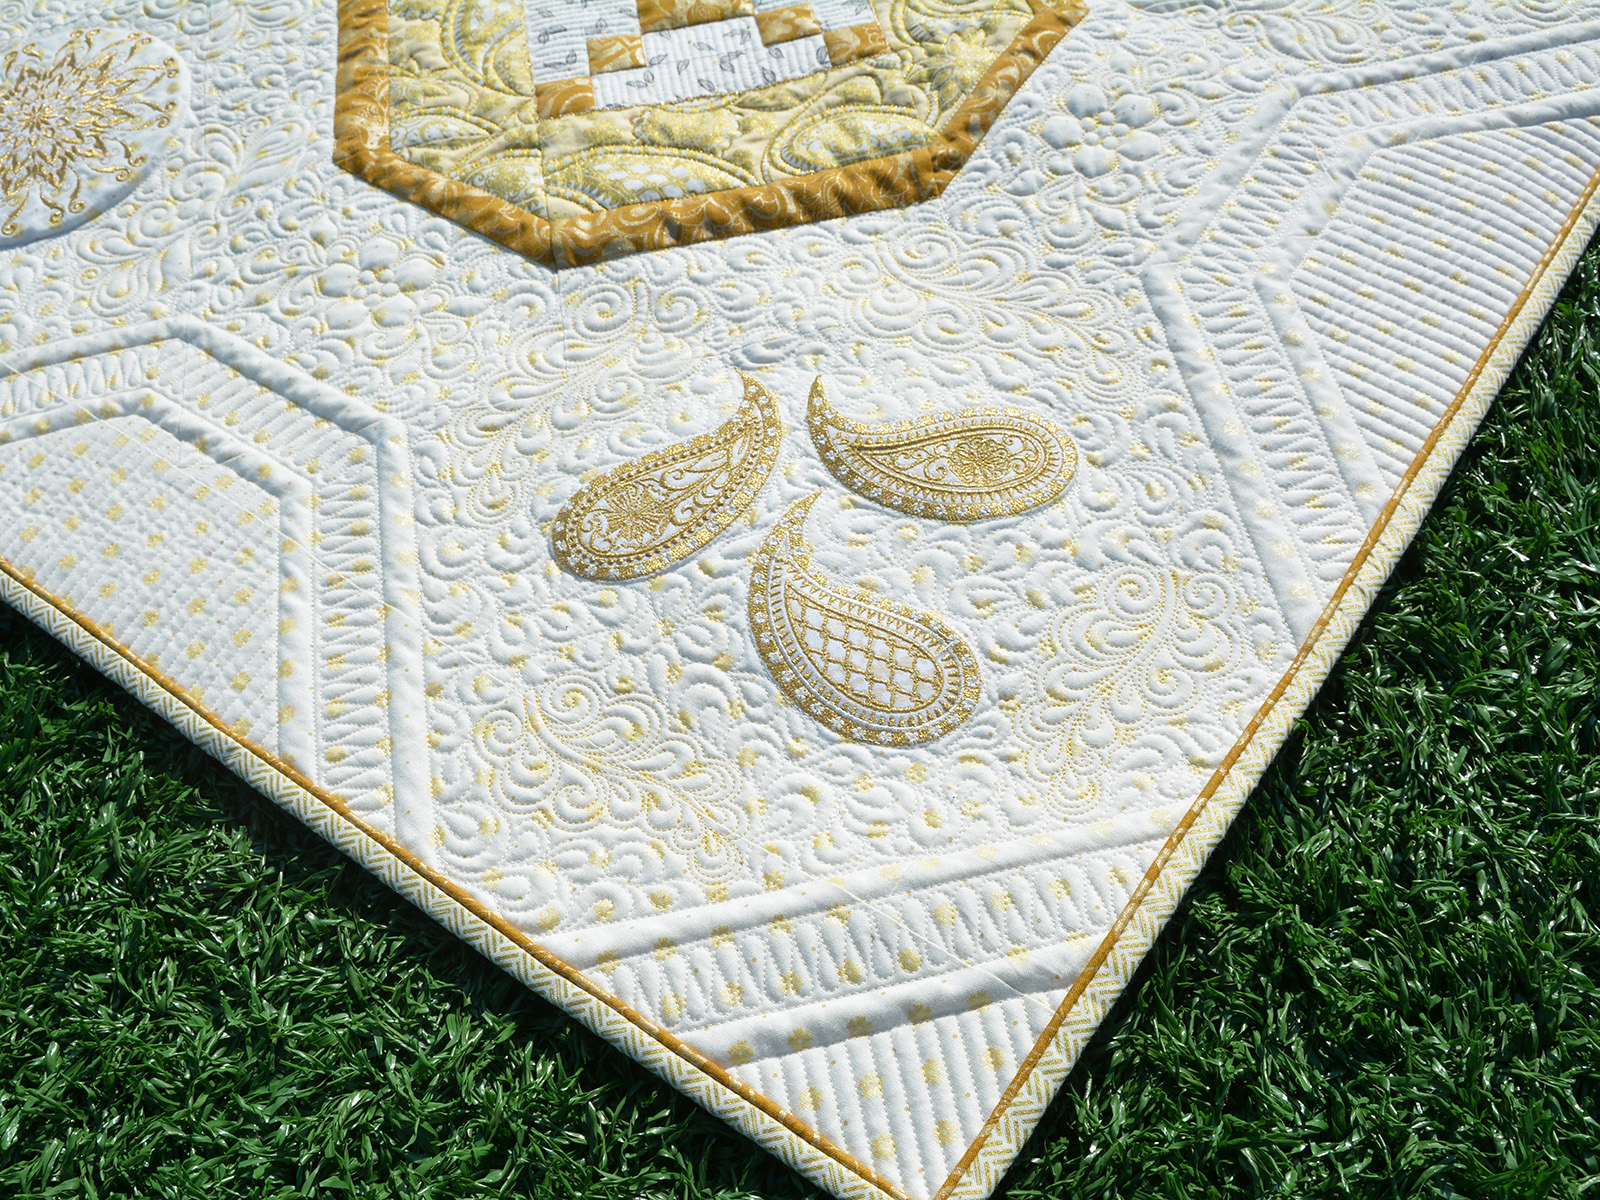
- Free-motion quilt around the embroidered paisleys in the border corners.
- Quilt around the small cornerstone embroideries and then continue on to fill their background with a small stipple.
- Quilt the inside of the blocks as desired. I used the smaller circle in the Jubilee ruler set to travel from corner to corner in several of the blocks. See the DETAILS video for reference.
- Change the top thread to Hologram 8155 and quilt the paisley areas that surround the blocks, loosely following the pattern on the fabric.
- If desired, you can use Couching Inserts for the BERNINA #72 Adjustable Ruler Foot to couch Dazzle 1000 from Wonderfil around the pieced blocks using Isacord 0721. You can also do this step at the end of the quilting process. The Dazzle thread must feed in from the direction toward which you are sewing to make this work. I put the Dazzle on a thread stand so that I could control the direction of its feed. Watch the finishing video below to see how I did this.
- Optional digitized quilting designs for both longarms and domestic embroidery machines are available in the BERNINA exclusive Jubilee Embroidery Collection by me for OESD. If you would like to incorporate them I would recommend printing them out on template paper first and using the templates to accurately place the embroidery motifs. With Isacord 0721 in the top and bobbin, embroider these designs.
- Change the top and bobbin thread back to Isacord 0101or Aurifil 2026. Fill the 1” channels on the triangle and trapezoid border motifs with ribbon candy or loops or just a simple back and forth quilting. This will make the 1/2” channels puff out and contrast with the free-motion to come.
- Quilt simple straight lines 1/4” apart inside the border triangles and trapezoids.
- Fill the rest of the border with your favorite free-motion fill. I used an open petal/paisley pattern. Look at the highlights video below if you’d like to see more.
- Square up and trim the quilt top.
- Make the cording.
- Apply the cording and then the binding. I recommend pinning or clipping the cording around the quilt before sewing, rather than just laying it along the quilt top edge and then sewing it on. If you don’t pin it is likely that it will be applied too tightly and the quilt top edge won’t want to lay flat when finished.
Quilting Order on a Longarm Machine
To quilt the BERNINA 125th Anniversary Quilt on a BERNINA 20 or Q24 longarm you will have to start at the top and work down. When quilting a heavily quilted piece on a longarm I still like to do basic quilting first, then do another pass with medium fills, and a final pass with small fills. Sometimes I might do 4 or 5 passes for a really densely quilted piece like this one. You can roll your quilt to the top each time and work down or you can work back and forth, up and down the quilt top, as I do. The key is to get enough quilting in the first pass so that the quilt doesn’t fold onto the bars, and add a consistent amount of density to the entire quilt with each pass. Therefore I recommend the following:
- Work down the quilt quilting the basic quilting lines in a first pass. With the quilt top mounted on the top fo the frame, baste around the top edge in Isacord 0101 or Aurifil 2026 in 50 weight, as far as you can go without rolling the quilt. Put on the side clamps. Then stitch around the trapezoid and triangle shapes in the borders either with rulers or using the longarm files in the BERNINA Jubilee Embroidery Collection. Don’t forget you can use the Marker feature in the BERNINA Q-Matic software to aid in placement! Use rulers or free-motion quilt around the border embroideries as well, but don’t fill in the rest of the border on the first pass or it will be difficult to keep your quilt square.
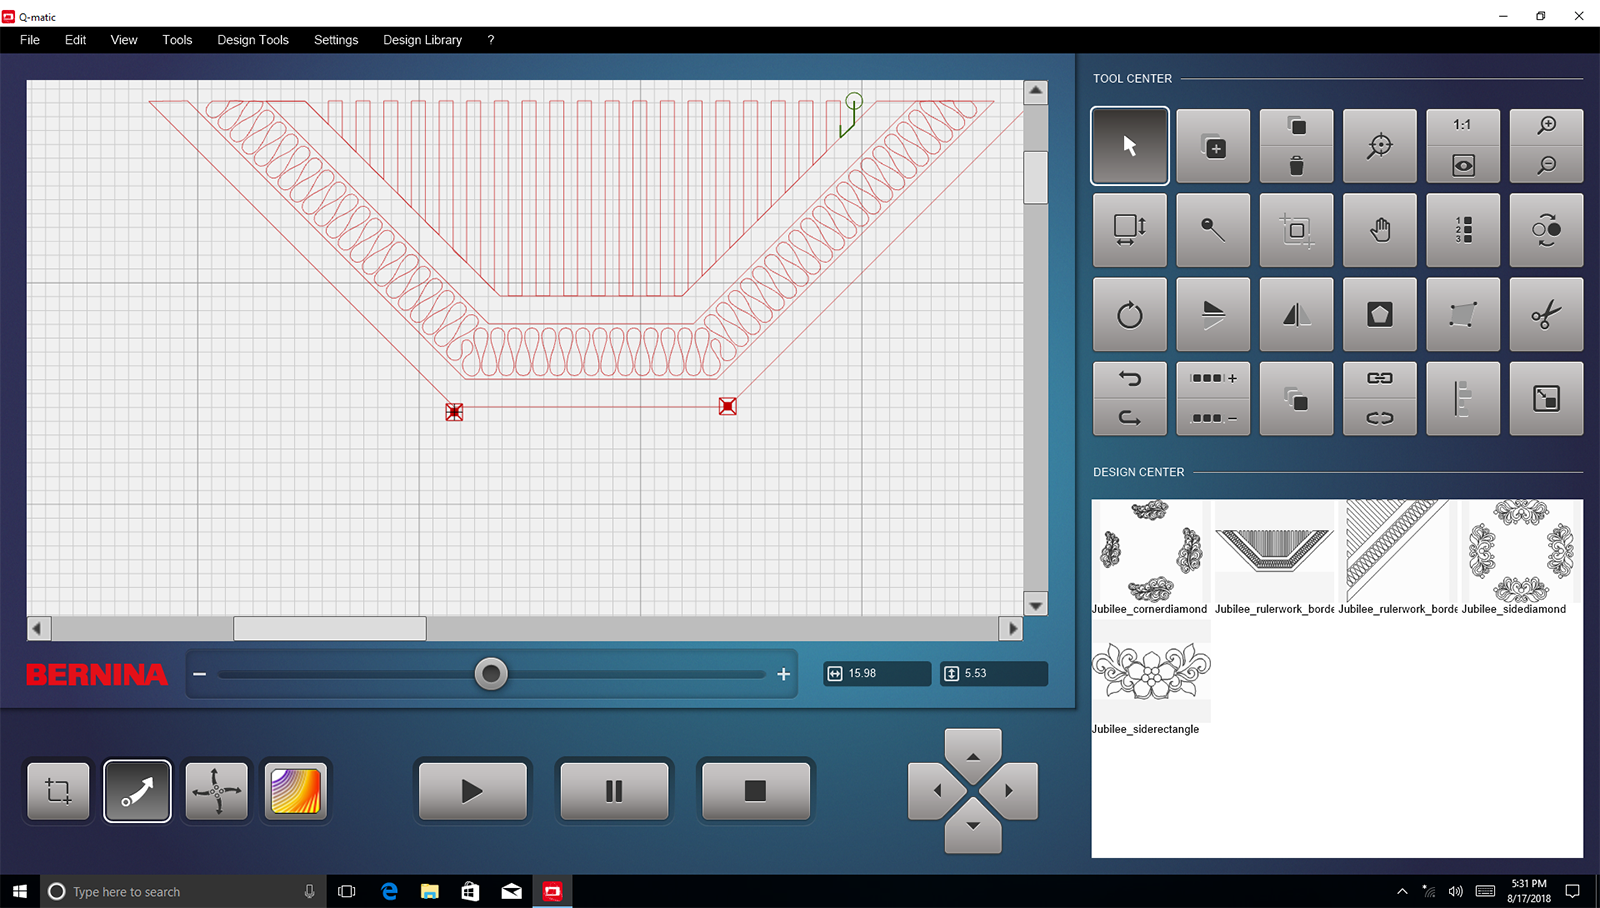
Using markers to place the trapezoid border motifs in the BERNINA Q-Matic software. I deleted the lines I used to connect the markers before quilting.
- Continue working down the quilt top, basting as you go, then attaching the side clamps, and then doing the basic quilting. In this first pass I quilted the triangle and trapezoid motifs in the borders, the octagonal framework, around the border embroideries, around the cornerstone embroideries and their background, AND around and inside the pieced blocks. Refer to the DETAILS video at the bottom of this post.
- Work back up the quilt top quilting the paisley areas using either the same thread or Hologram 8155 in the top, loosely following the pattern on the fabric.
- Start quilting down the quilt again. This time quilt all the placed digitized floral border motifs using Isacord 0721 in the top and bottom. These motifs are optional but if you’d like to incorporate them they are available in the BERNINA Jubilee Embroidery Collection by OESD. I used the Q-Matic software Marker feature to place markers around my embroidered motifs on screen so I could be sure I was placing the digitized designs centered around the embroideries!

Using markers to place the floral side border motifs in the BERNINA Q-Matic software. I deleted the lines I used to connect the markers before quilting.

Using markers to place the floral corner border motifs in the BERNINA Q-Matic software. (I deleted the lines I used to connect the markers before quilting.)
- Change the top and bobbin thread back to Isacord 0101or Aurifil 2026. If you chose to use a straight line ruler for the straight line quilting in the border work back up the quilt filling the 1” channels on the triangle and trapezoid border motifs with ribbon candy or loops or just a simple back and forth quilting. Quilt simple straight lines 1/4” apart in the triangles and trapezoids themselves.
- Make a final quilting pass, filling in the rest of the border with your favorite free-motion fill. I used an open petal/paisley pattern but a small meander or delicate loops would workas well.
- Take the quilt off the frame. Return to your domestic machine. If desired, use Couching Inserts in the BERNINA #72 Adjustable Ruler Foot to couch Dazzle 1000 around the pieced blocks using Isacord 0721.
- Square up and trim the quilt top.
- Make the cording.
- Apply the cording and the binding. Refer to the FINISHING video at the bottom of this post.
HIGHLIGHTS from the Process of Quilting the BERNINA 125th Anniversary Quilt
I’m quilting on a BERNINA Q24 longarm on a frame in this video.
Details of the quilting on the BERNINA 125th Anniversary Quilt, Including the Blocks
FINISHING the 125th Anniversary Quilt: Couching, Cording, and Binding
We can’t wait to see the final quilts on the WeAllSew community section and to award the great prizes.
Contest rulers can be found here.
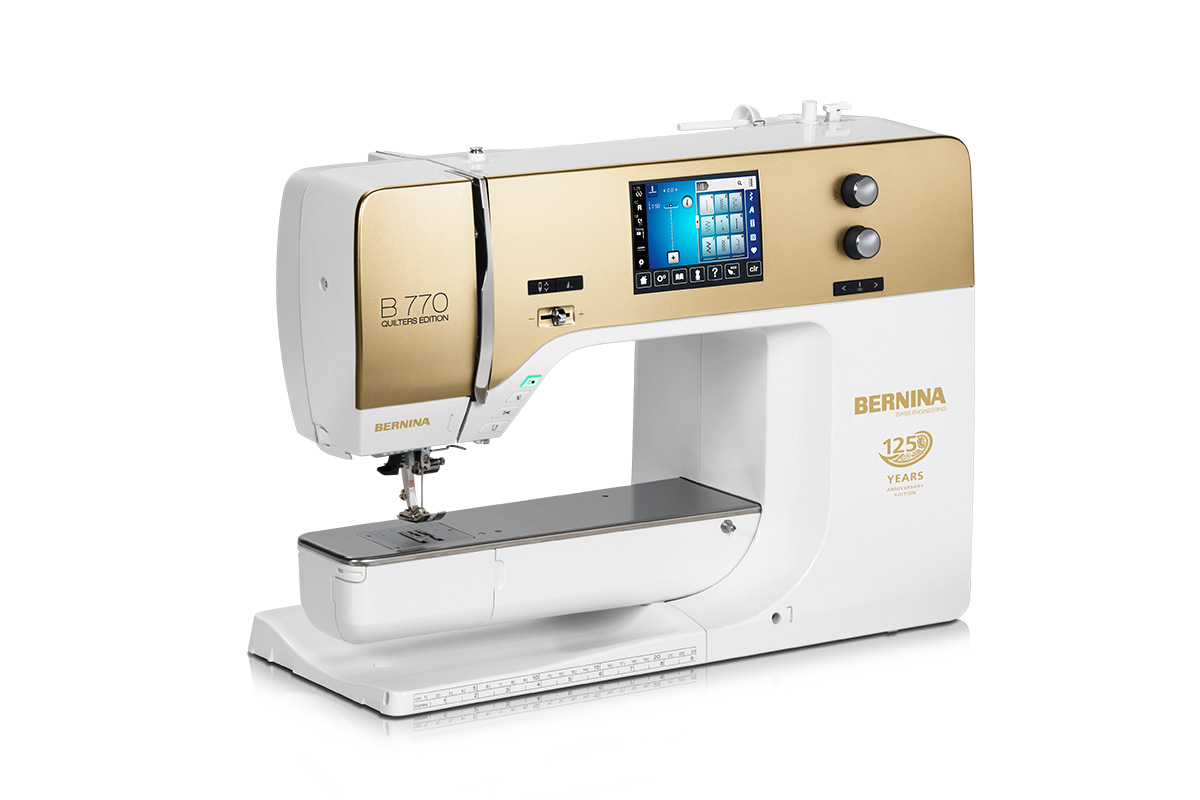
Grand Prize: A BERNINA 7 Series Anniversary Edition machine!
First Runner Up: BERNINA L 460
 First Prize: The BERNINA 125th Anniversary Quilt Kit
Second Prize: The Golden BERNINA 125th Anniversary PresserFoot #1 in a Commemorative Tin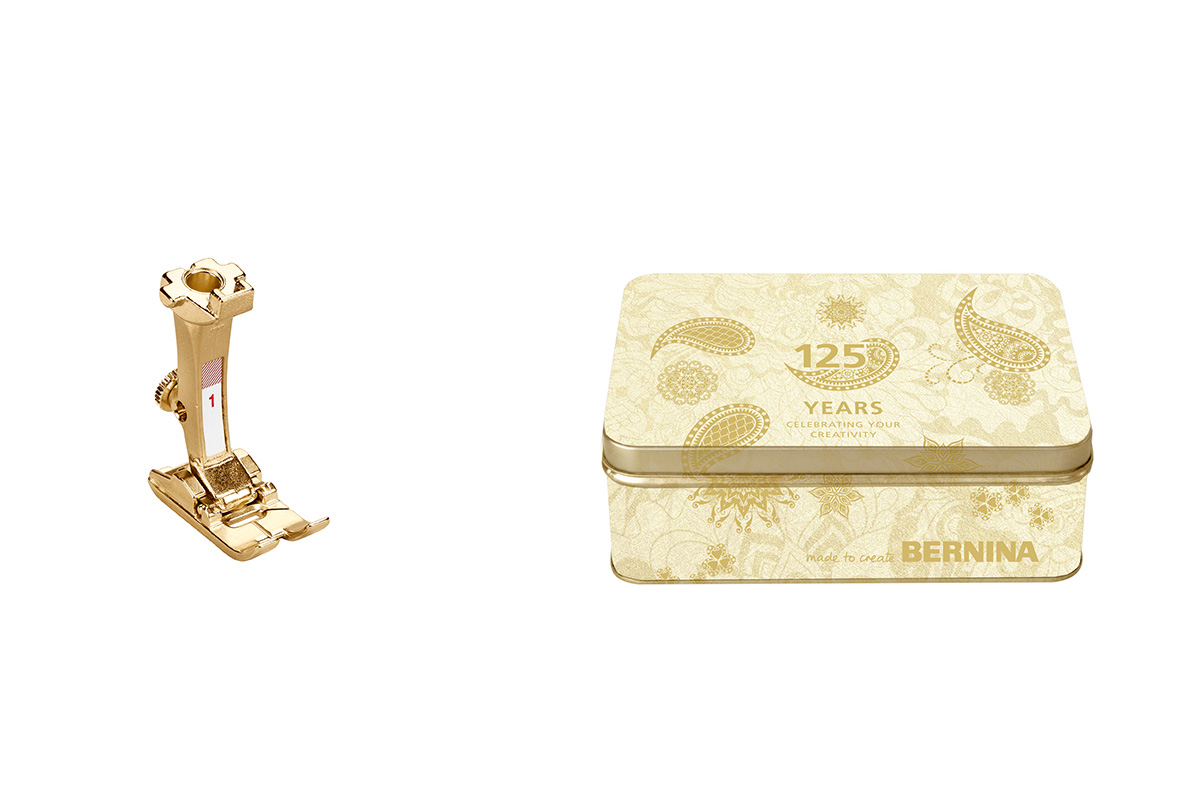 Third Prize: The BERNINA 125th Anniversary Rulerwork Ruler Set (set of 3 rulers).

I really hope you have enjoyed quilting the BERNINA 125th Anniversary Quilt-Along as much as I enjoyed designing it! Please join me over in my Facebook Group, Quilting with Amanda Murphy or subscribe to my blog over at blog.amandamurphydesign.com and I’m sure I’ll see you back on WeAllSew sometime soon as well!
Happy Anniversary to our favorite sewing machine company BERNINA!
Amanda Murphy
BERNINA Expert/Quilting and Longarm Spokesperson

What you might also like


6 comments on “BERNINA Anniversary Quilt-along: Part 6”
-
-
I have a Handiquitter Fusion Longer and I can’t find the quilting File on the jump drive- Can I not quilt the designs with the fusion
-
-
i take it we hoop the motifs in the borders and embroidery these?
-
I’m having a heck of a time getting the cording to couch. It seems too thin although I special-ordered the same cording. It will work in one direction but not left or right, even though i’m working the cord in the direction i’m going. Would probably work better with a thicker cord. I’ve learning so much on this quilt but this was frustrating.
-
I’m sorry you are having problems – I would have used a thicker gold thread if I was able to find one, but the one I used was the thickest true metallic I found. Honestly one of the advantages of couching on a domestic machine (as opposed to a longarm) is that you can move the couching thread. I don’t know if you have finished the motifs but maybe try moving the thread so it is always feeding from the direction that you are moving the quilt. So if you are going to the right have the cord feed from the right etc. I hope this helps!
-
-
Trying to find out— I screwed up one of the embroidery triangles for Fabric D. I have 32” left after cutting everything in the cutting instructions. Are there more borders, bindings to cut later? Or, am I good to redo this block?
Leave a Reply
You must be logged in to post a comment.

Amanda Murphy – I missed the instructions for where Fabric G is used. Is it only under the embroidered paisleys? I don’t see it in any of the photos.