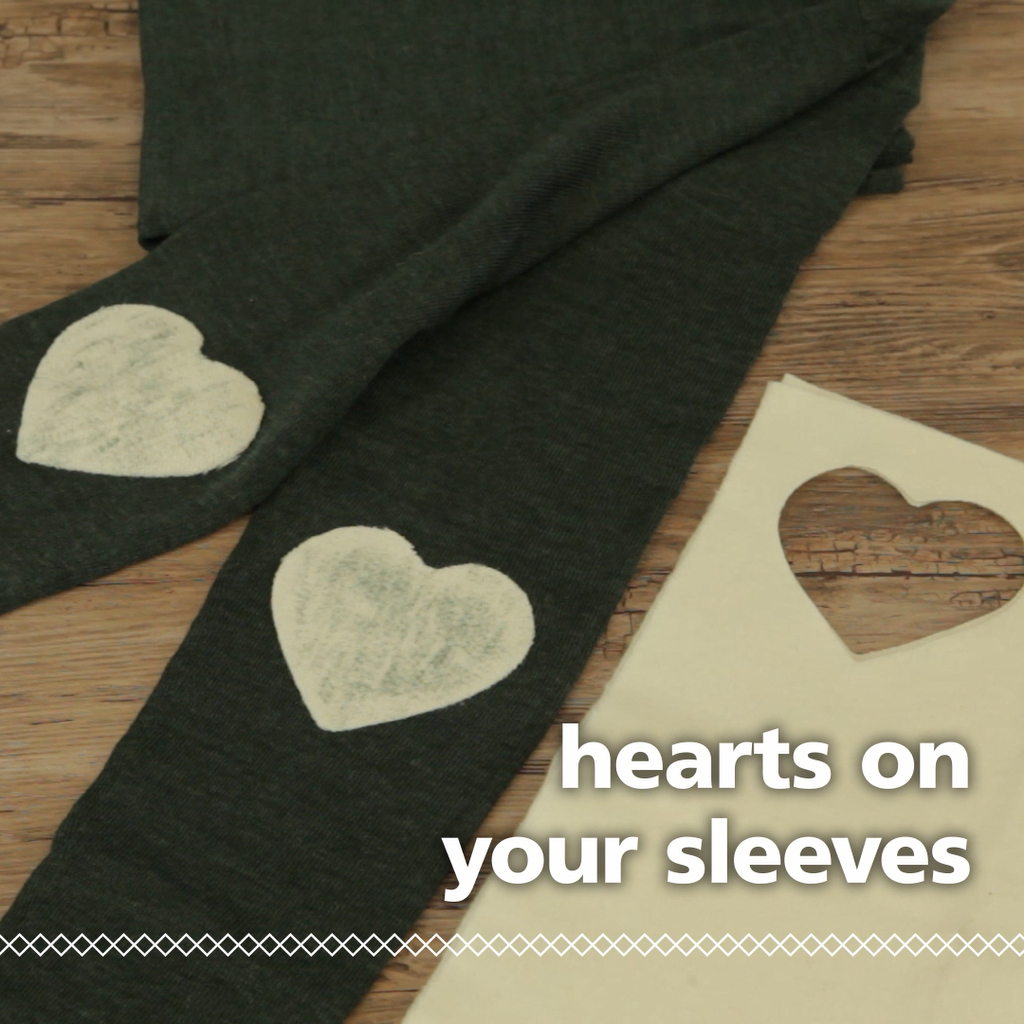
Felted Elbow Patch
A Heartfelt Embellishment
Believe it or not, but there are crazy things you can do with a sewing machine that aren’t sewing. They don’t even use thread or feed dogs. If this sounds totally baffling to you, give needle felting a try!
Felting is a process of matting wool (or other fibers) together to bind them into one solid piece of cloth. There are a few different processes to achieve this but they all require some roughing-up of the fibers to get them to bind together. Think about what happens when you wash and dry a wool sweater in a washing machine/dryer—not only does the wool shrink but it stiffens up and all the yarns eventually become one solid piece of wool.
Today we’re going to focus on needle felting. In this method, needles with teeny tiny barbs are used to punch in through the layers of wool (or fiber) and back up to bind the tiny fibers together. And lucky for us, BERNINA has a machine accessory to do this for us!
Today, we’re going to use needle felting to add elbow patches to a wool sweater. You can add patches to a new sweater for more decorative purpose or use this method to patch up a long-loved sweater that’s starting to wear out. Hooray for mending and upcycling!
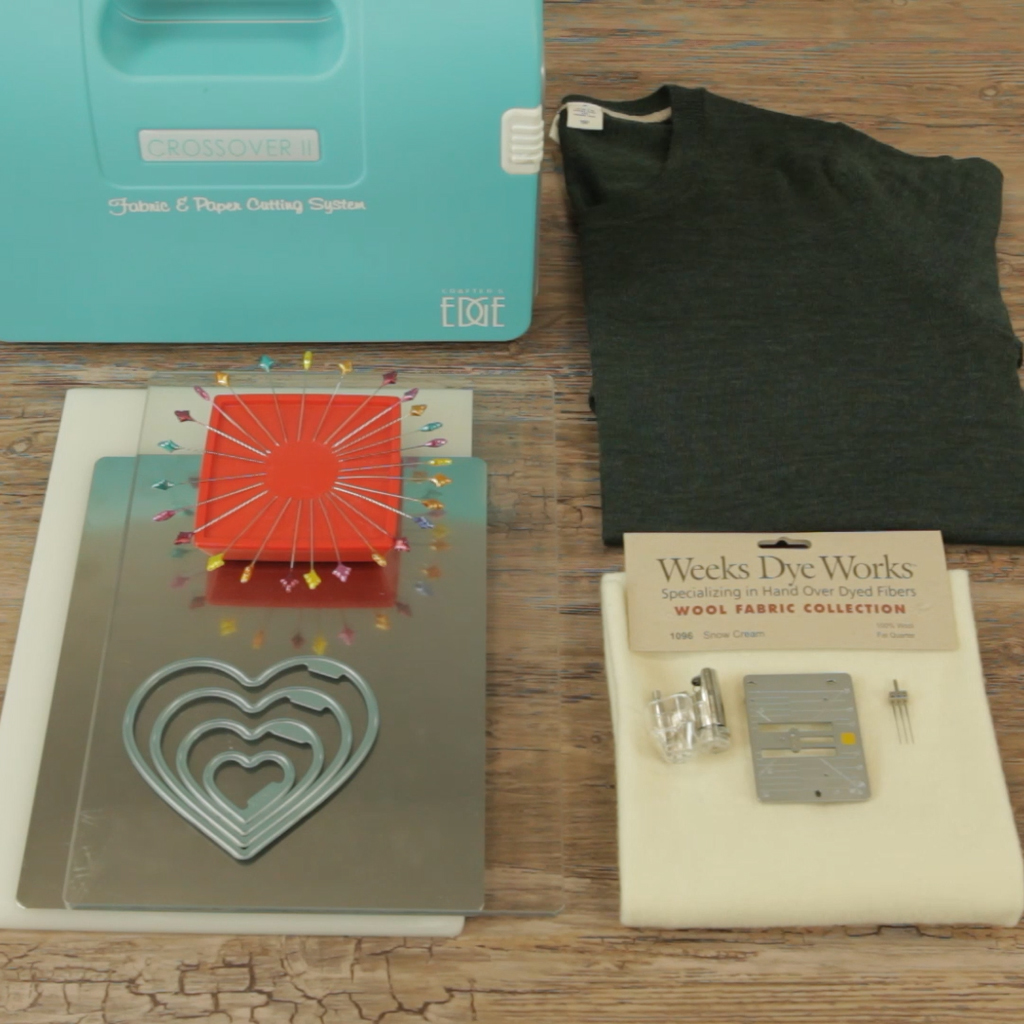
Materials for Felting Elbow Patches
- 100% wool sweater
- Wool felt
- Crafter’s Edge Crossover II die cutting system
- Pins & pin cushion
- Iron
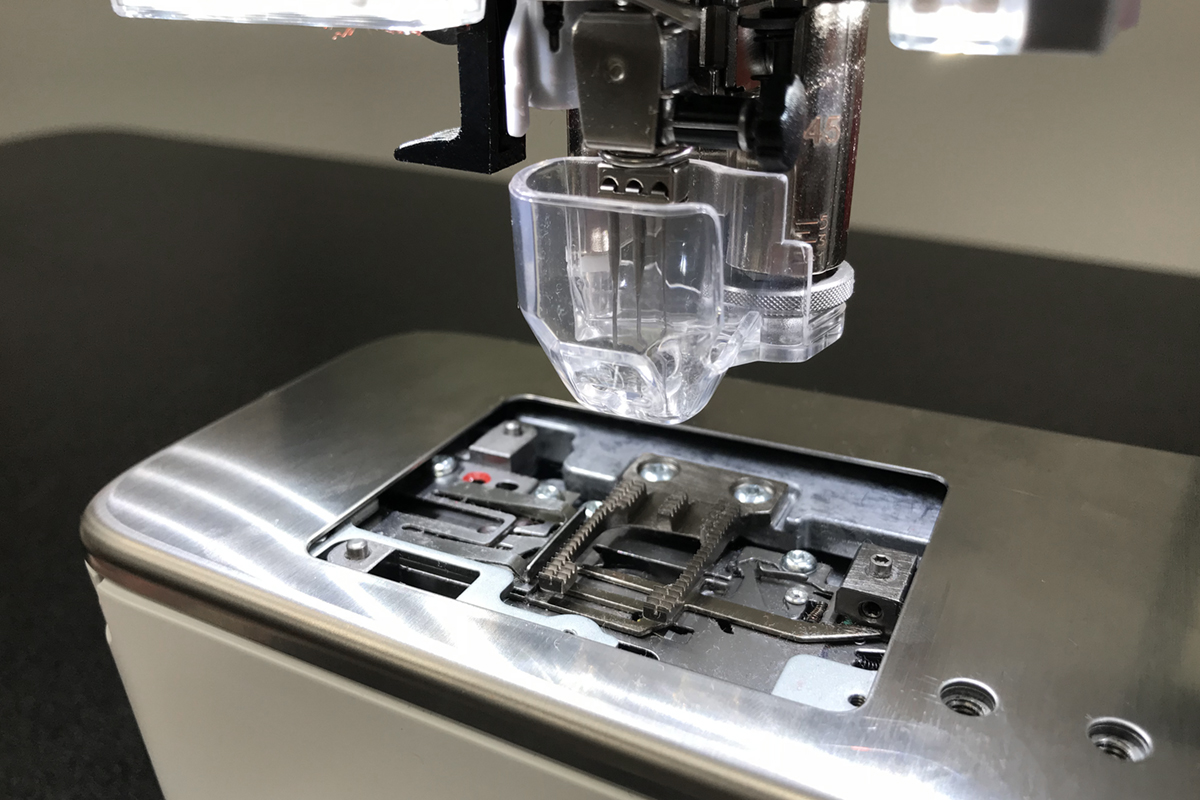
- Needle-punch tool and corresponding stitch plate
- B 570 QE
Steps to felt elbow patches
Step 1. Mark patch placement
The first thing we need to do is assess our sweater to determine where the elbow patches will go. Try your sweater on and mark a point about an inch below the point of your elbow, flat against the back side of your arm. I used a straight pin to do this but if you’re not interested in living as dangerously as I am, you could use a safety pin or some washi tape.
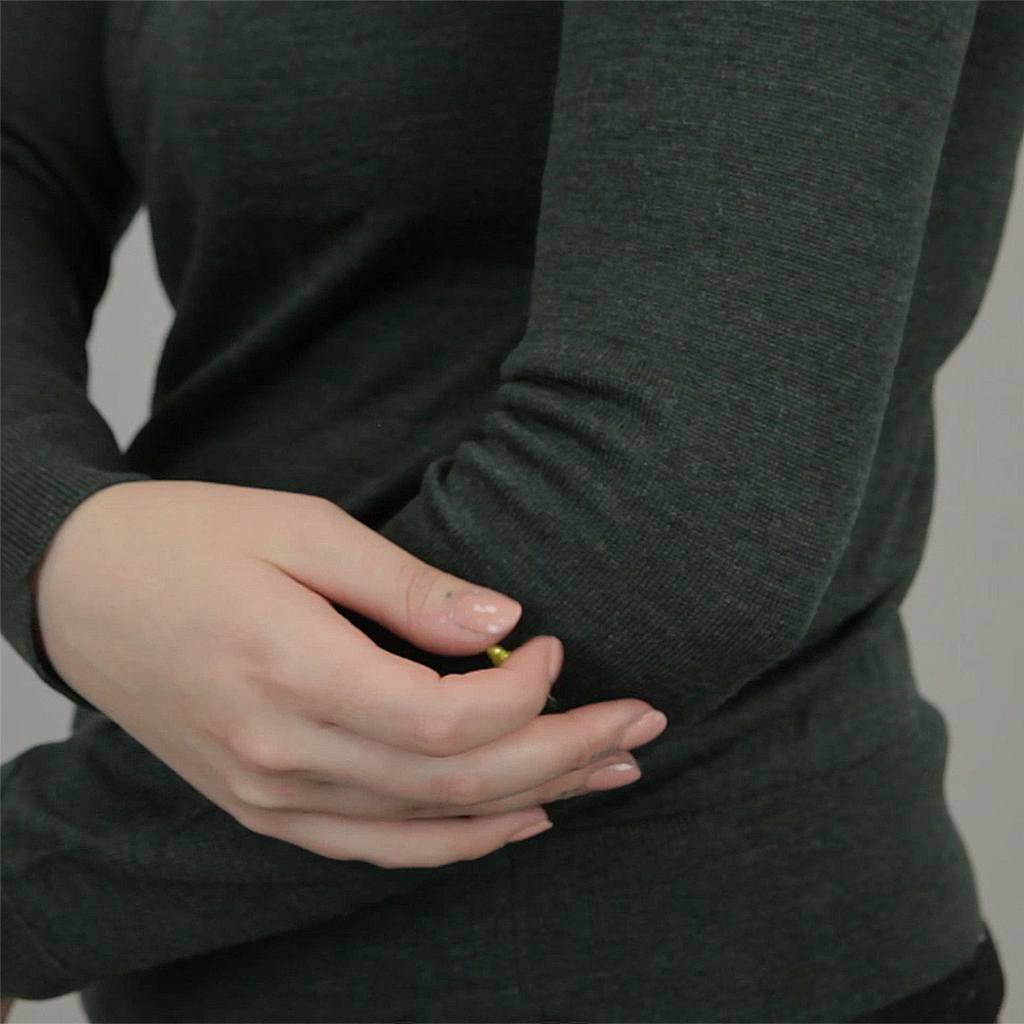
You only really need to mark one arm—we’ll measure how far that mark is up from the edge of the cuff and make a matching mark on the other arm. This is mostly for symmetry’s sake but also because pinning with your non-dominant hand might be a little too dangerous.
If you’re mending an existing wool sweater, you probably would not need to do this: the sweater will tell you where the patch needs to go.
Step 2. Cut the wool
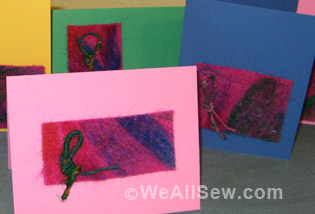
Next, we’ll use a die cutter to cut out our felt patches. When it comes to cutting irregular shapes (like these adorable hearts) it’s possible to cut by hand but I prefer the precision of a die cutter. I can trust the lines will be smooth and both of the elbow patches will match!
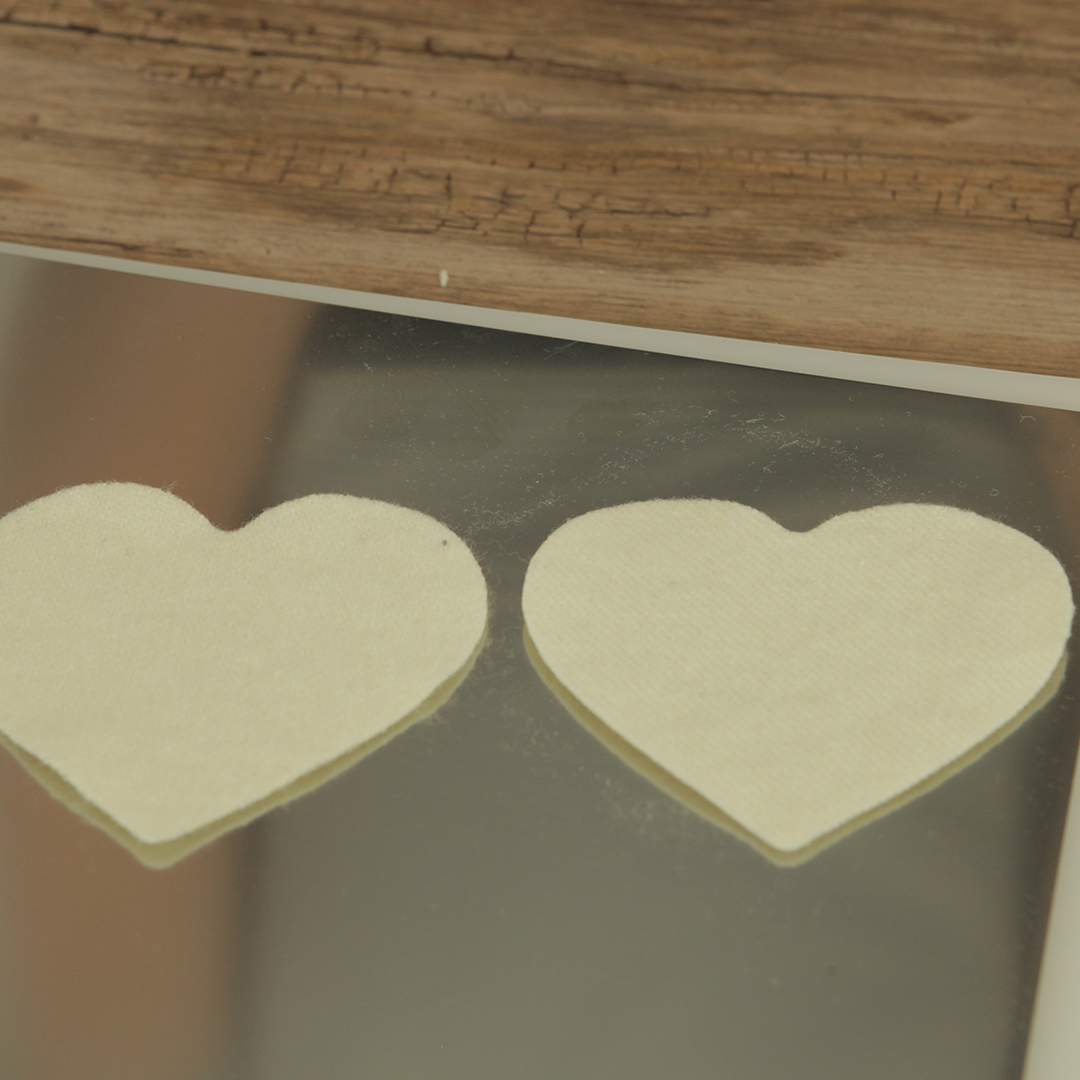
Take a look at the set of heart shaped dies and choose which size is most appropriate for your sweater. I opted for a medium sized heart.
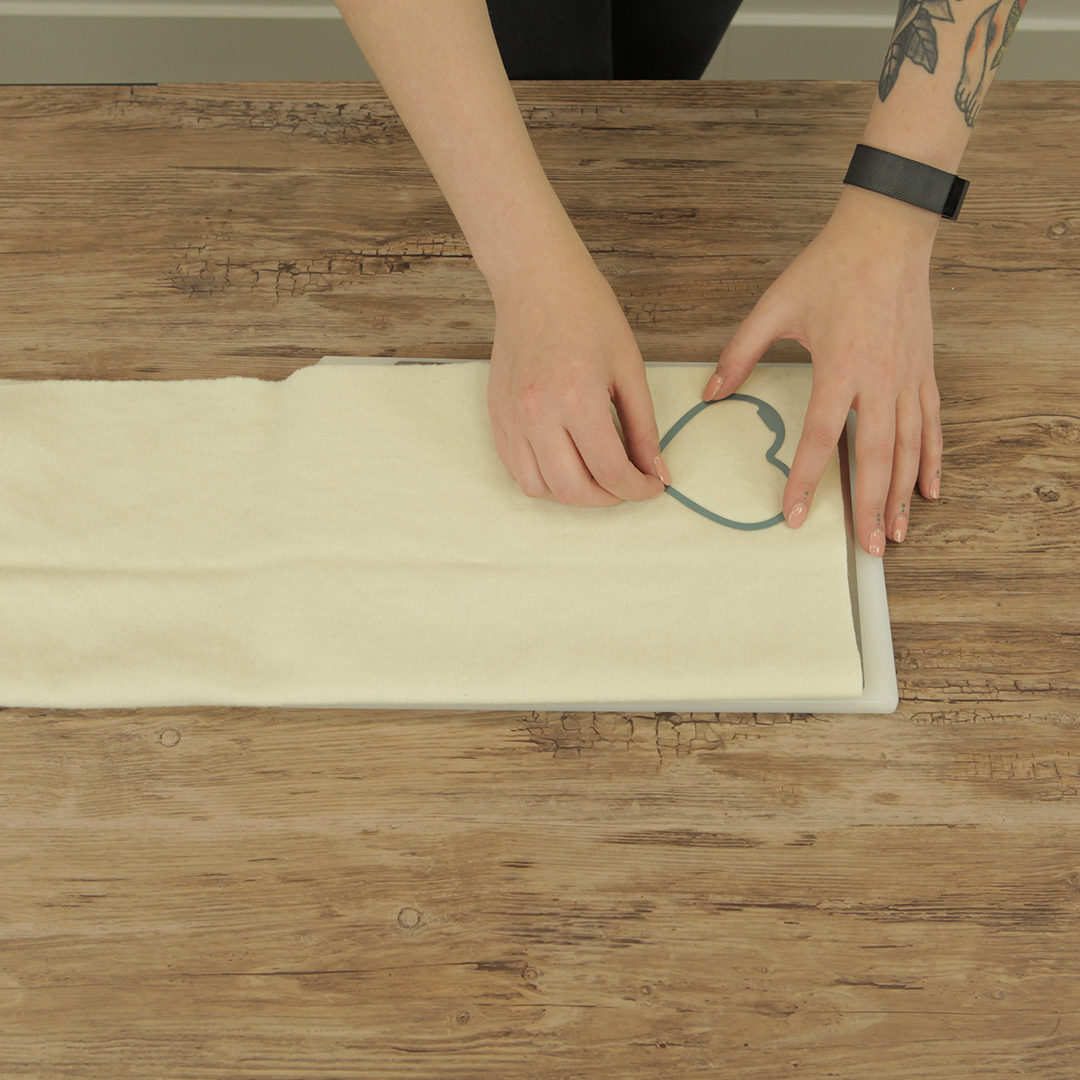
Next, layer your fabric on top of the metal cutting plate (you can easily cut two layers of wool), then your heart shaped die on top of that with the cutting edge down. Last, layer the clear plate on top.
Adjust the pressure on the die cutting machine. You need enough pressure to make sure the dies cut properly but not so much that the plates can’t move through the machine. Then, line up the plates and roll them through!
After passing through the machine, you’ll have two perfectly cut heart patches.
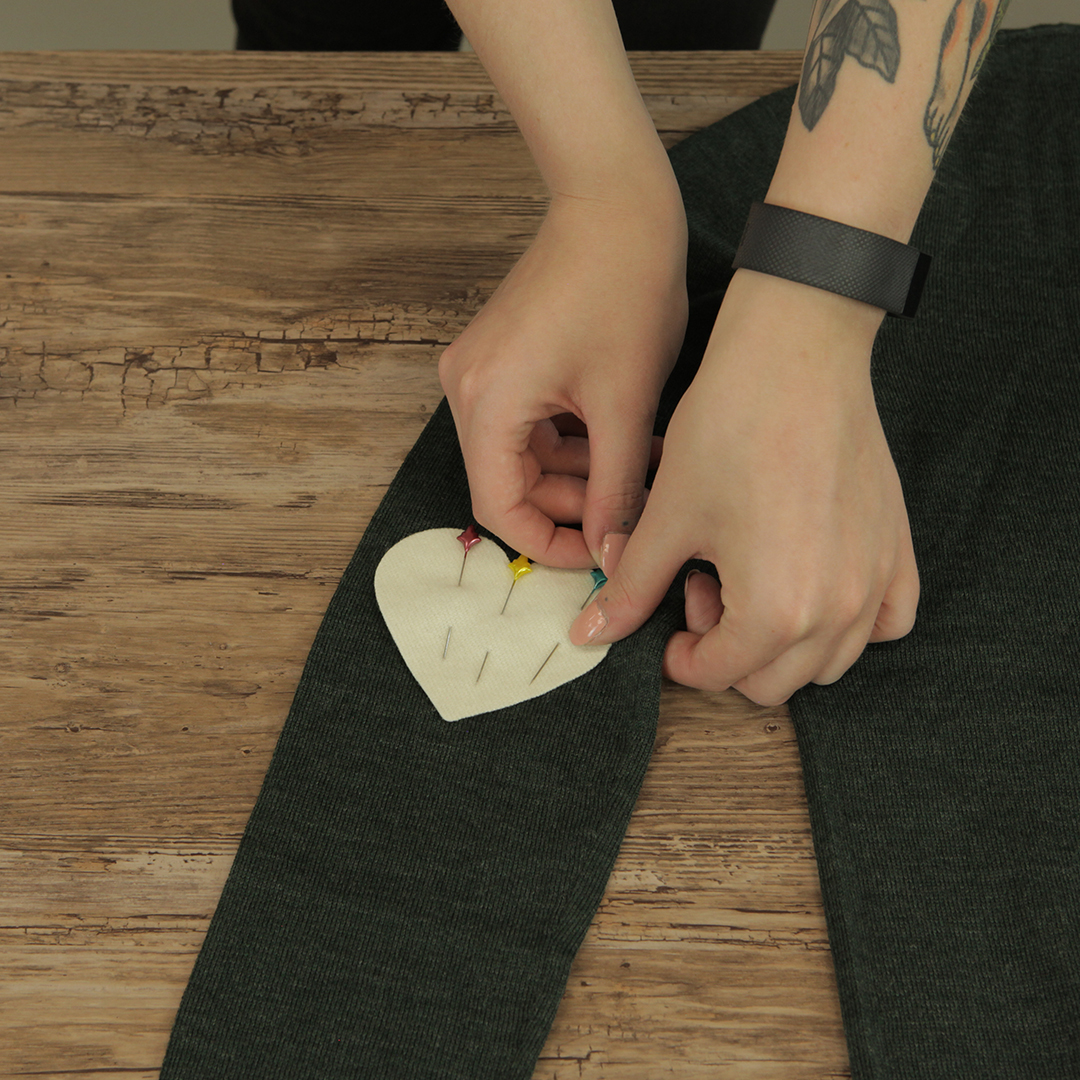
Step 3. Pin in place
Take your heart patches and set them in place on your sleeve. Align the bottom point of the heart with the marked point on the sleeve and make sure it’s lined up vertically straight down the sleeve. Pin in place (be sure to only pin through one layer of the sleeve!) and remove your marker. Repeat the process for the other sleeve.
Step 4. Setup your machine
Felting, or needle-punch, is a bit of an unconventional machine technique because it requires no thread! Because of this, there are a few settings we want to make sure we take care of on our machine before we get to work.
First, unthread your machine if it already has thread in it. Friendly reminder: never pull thread backward through the machine (i.e. pulling your thread spool off and pulling thread out with it). Snip your thread at the spool and pull it through from the needle. It creates less lint in the machine and can prevent jams! While we’re unthreading, be sure to pull the bobbin out of the bobbin case too.
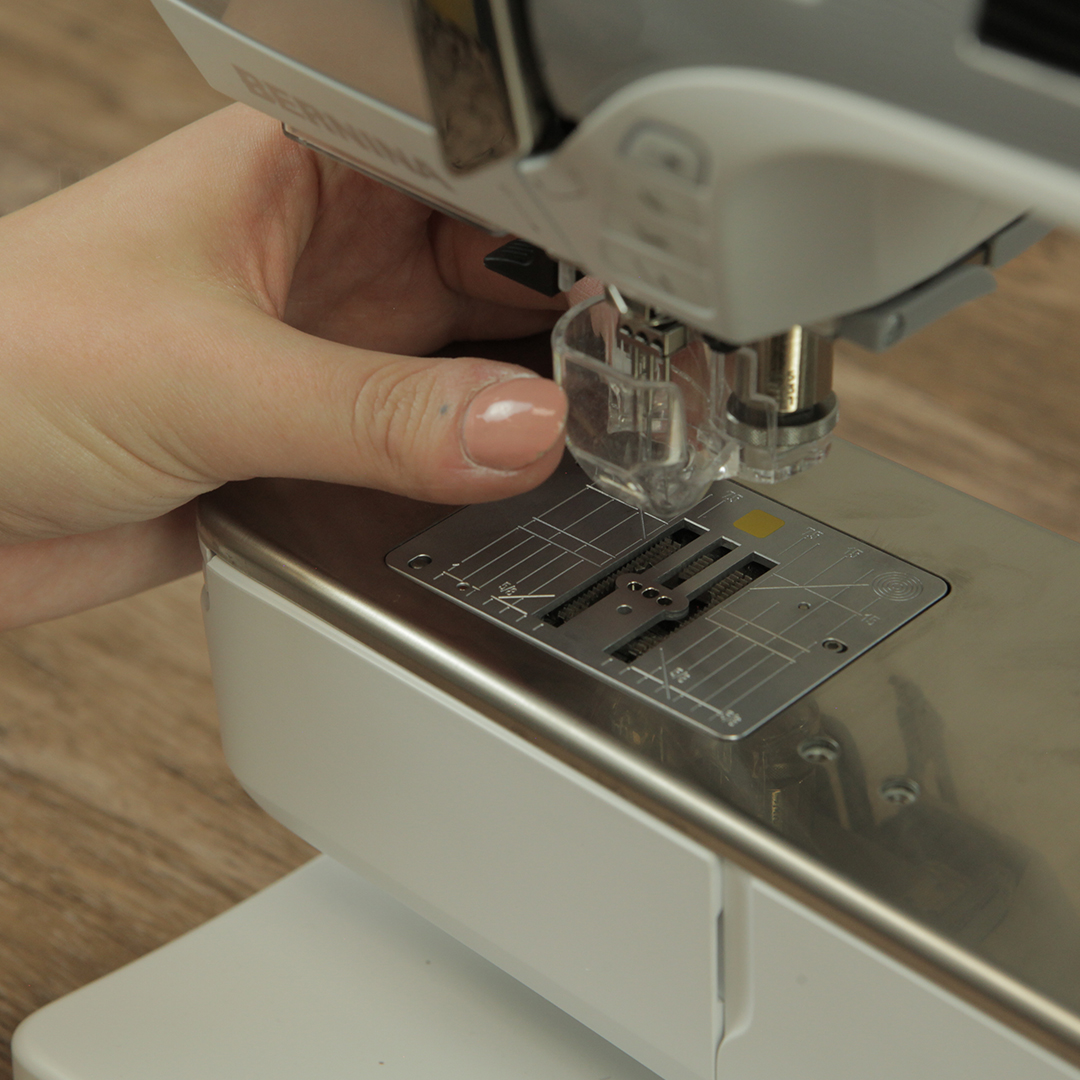
Attach the needle-punch accessory to your machine. This includes inserting the appropriate needle, attaching the finger guard, and swapping out the stitch plate.
On our computerized machines, there are a few other setting changes to make before we start. Since we’ve removed all thread from the machine, we want to turn off our thread sensors for both the upper thread path and the bobbin. If we don’t turn these off, our machine will stop every few stitches with a warning or error message.
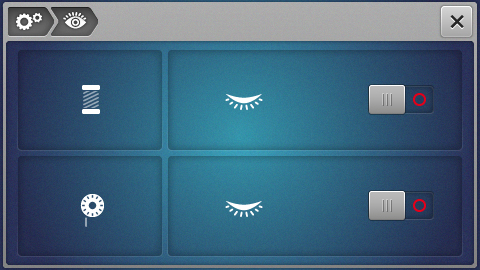
The last step is to lower your feed dogs! This is a free-motion technique so we want to make sure those are down.
Step 5. Start felting
We’re ready to start felting! Slide your sweater sleeve on to the free arm so that the patch is underneath the needle. Start felting in the center of your patch and work your way out to the edges.
Move your sleeve around in a variety of directions—I usually start with a quick pass in straight lines back and forth to begin securing the patch in place and then use small circular motions to really secure things down.
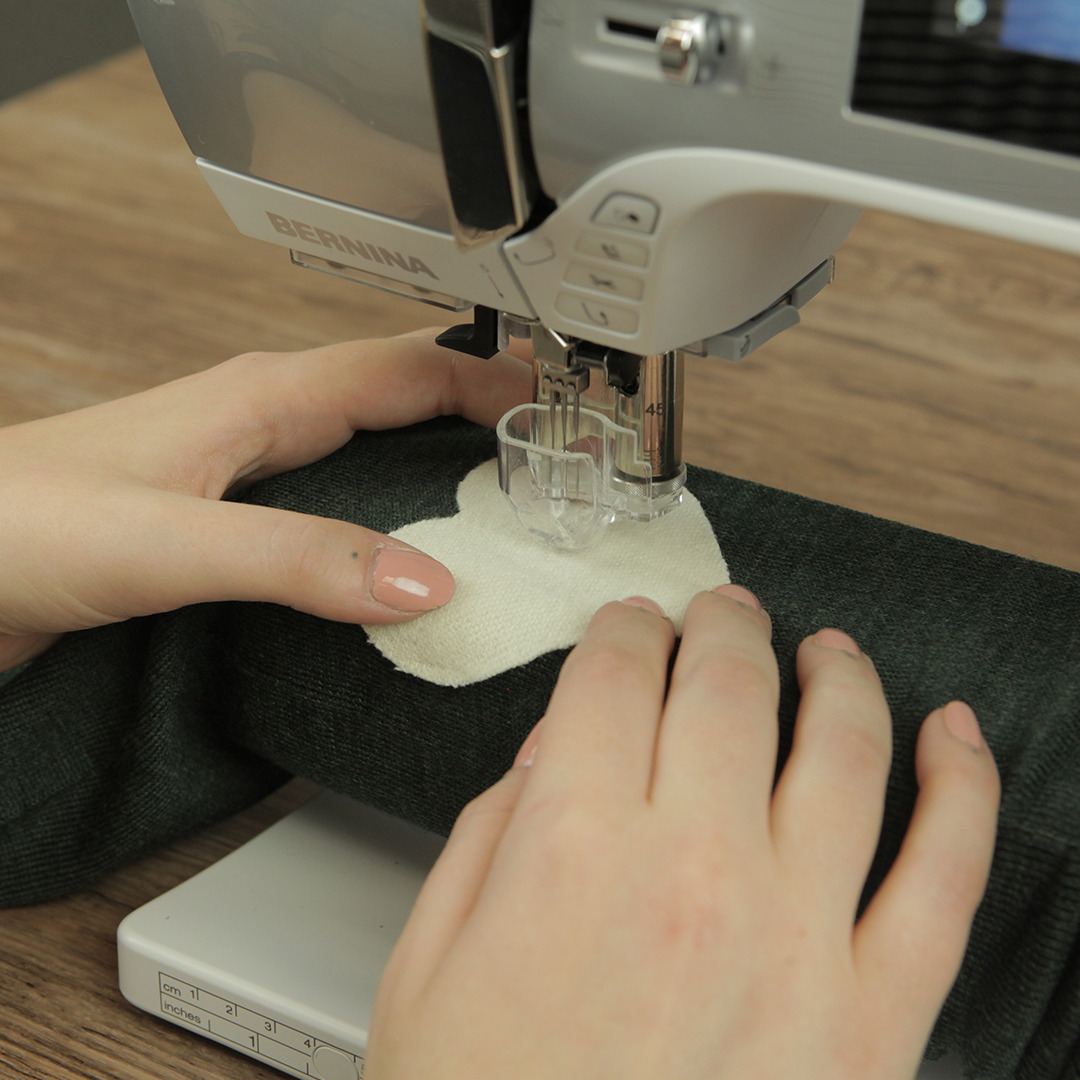
Don’t be afraid of speed with this technique! The faster the needle moves, the more you embed the patch’s fibers into the sweater. Same thing goes for doing multiple passes over the patch. The more you work on it, the more secure it will be!
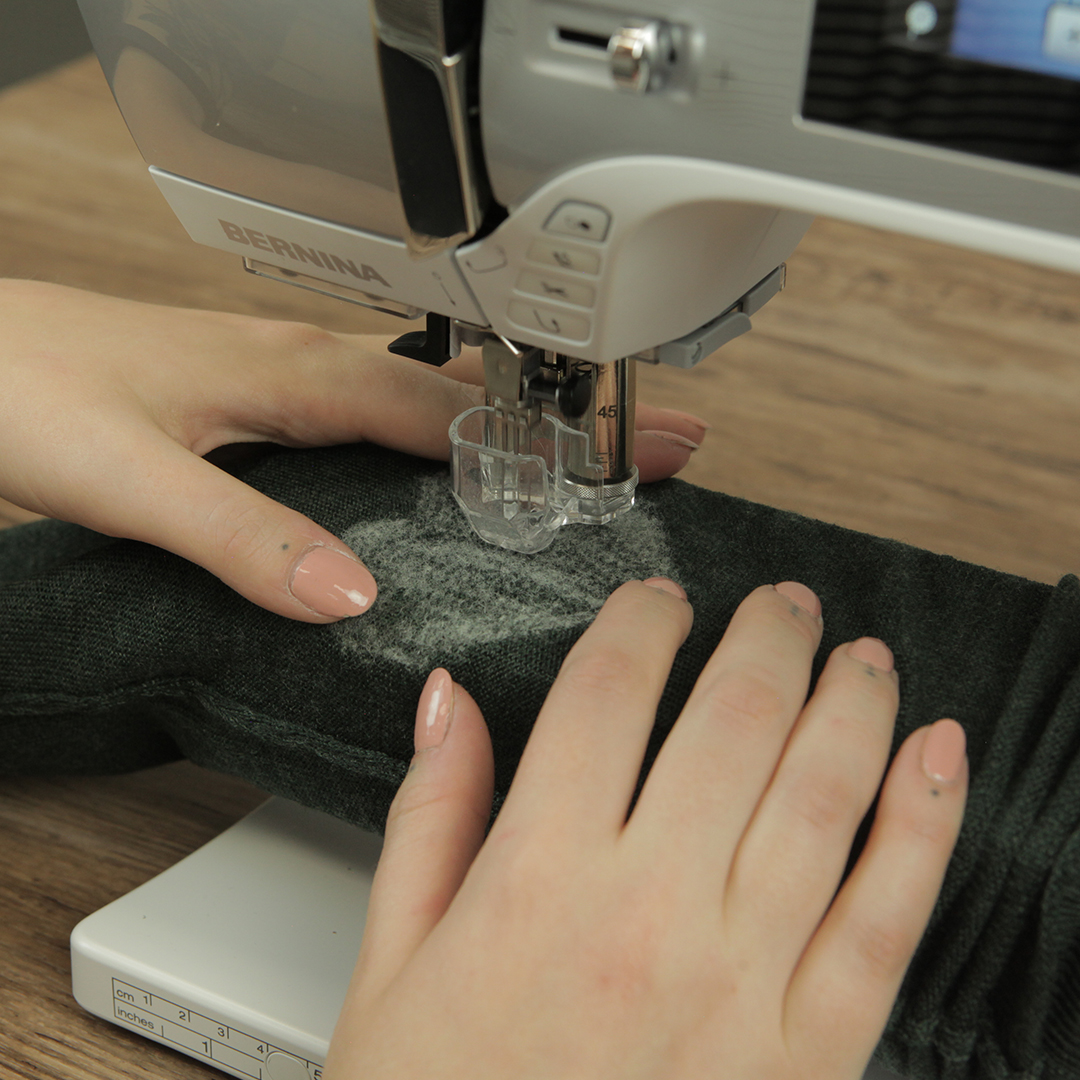
Step 6. Flip and felt again
Once your patch feels pretty secure, flip the sleeve inside out and repeat the process felting from the back side. In our first pass, the felting needles punch the patch’s fibers down into the sweater but this time, we’ll be punching the sweater’s fibers into the patch. Some may find this step unnecessary but I like the added security.
Step 7. Press/block
If you’ve ever knit with wool, this step may sound familiar! After felting the patch in place, flip the sleeve right side out. Lay the sleeve on your pressing board as desired (smooth, flat, straight and undistorted) and gently press with steam. This helps lock in your wool fibers and maintain the shape of the patch.
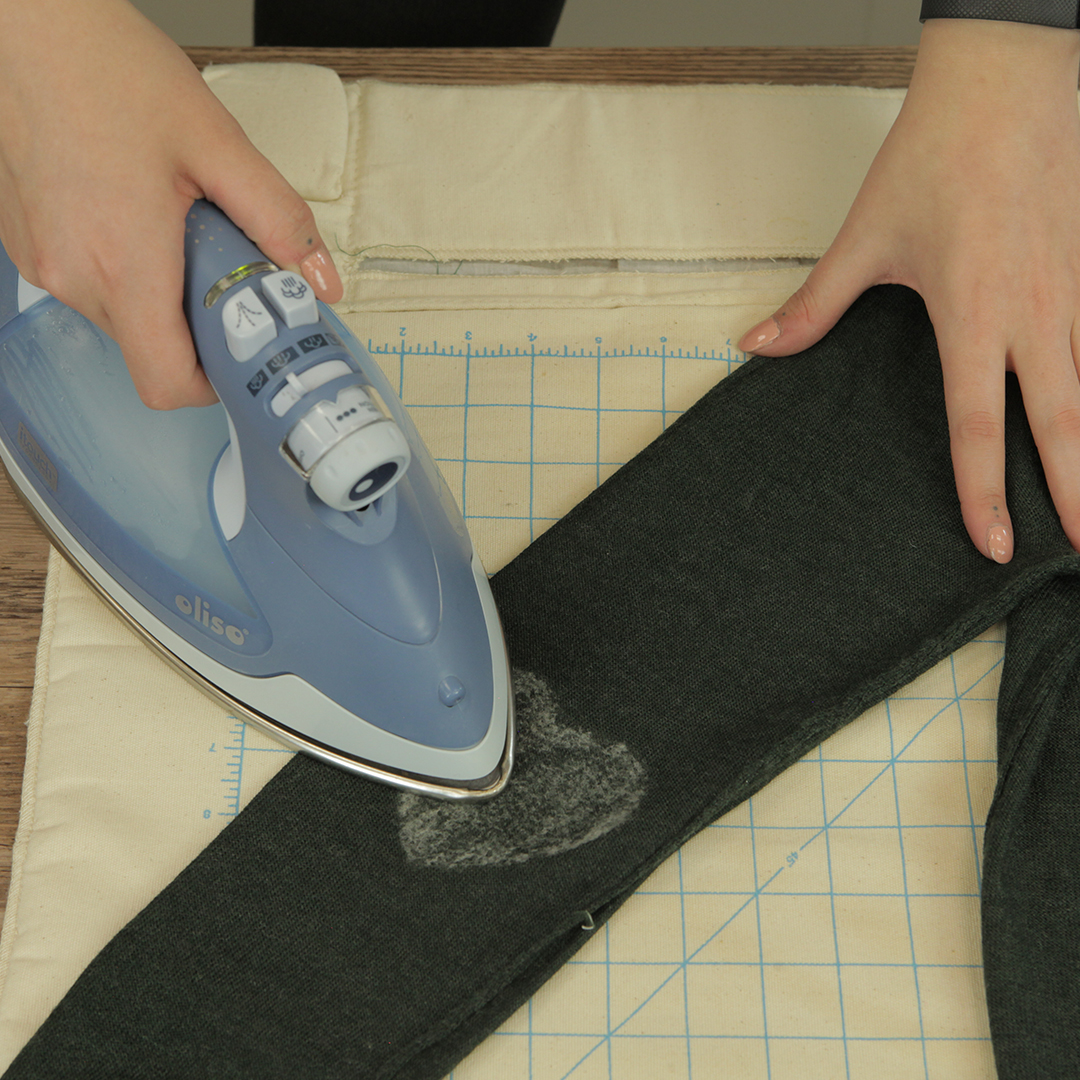
Ta-da! Cozy goodness! And if you’re adding on to a worn out, beloved sweater, a few more years have been added to its lifetime!
Step 8. Clean up
Okay, I know we said we were done. But the trouble with needle felting is that it makes a mess of your machine. When you’ve wrapped up, be sure to thoroughly dust out your machine particularly in the bobbin area. As soon as you open up the bobbin door, you’ll likely have wooly fuzz billowing out of your machine.

To clean this area, open up your bobbin area the way you would for oiling. Remove the stitch plate, remove the bobbin case, press the release lever on the left to flap down the fastening bracket, and remove the hook. Use a soft lint brush to sweep out the debris as best you can. Never use compressed air in your machine!
Now you can truly say you’re finished. Slip your sweater on and keep cozy this winter!