Pojagi Patchwork Suncatcher
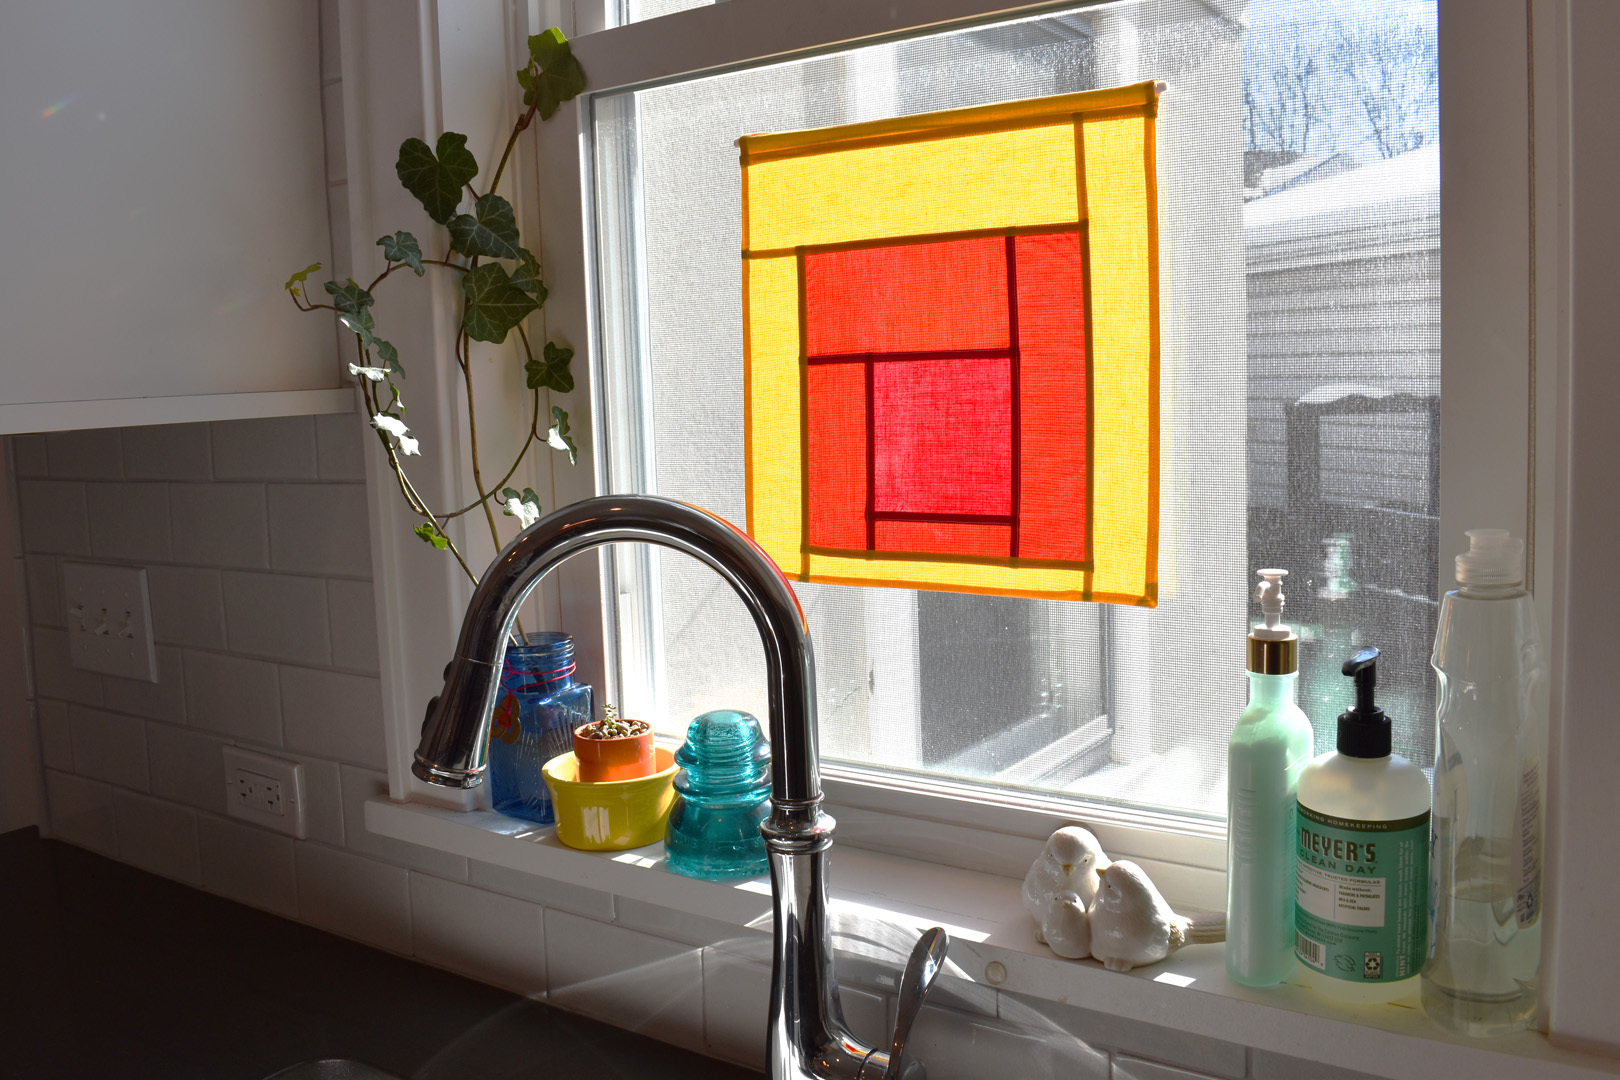
Use your sewing machine to add a pop of color to any window! Learn how to make a Pojagi Patchwork Suncatcher finished with machine stitched pojagi seams.
Pojagi (sometimes bojagi) is the Korean tradition of sewing together small scraps of fabric to create larger pieces of cloth, with a finished look on both sides. Korean pojagi cloth is used to cover or wrap everything from everyday items to special gifts.
There are many methods to machine stitching pojagi seams (you can read about a similar method using the Lap Seam Foot #71 here), but this method is a simple way to get started. Once you get the hang of it you can use this skill to create small blocks, or even a larger piece of cloth. Let’s get started!
Materials to Make a Pojagi Patchwork Suncatcher
- 3 different solid colored fabric fat quarters (I use red, orange, and yellow)
- One 1/4″ dowel rod for hanging
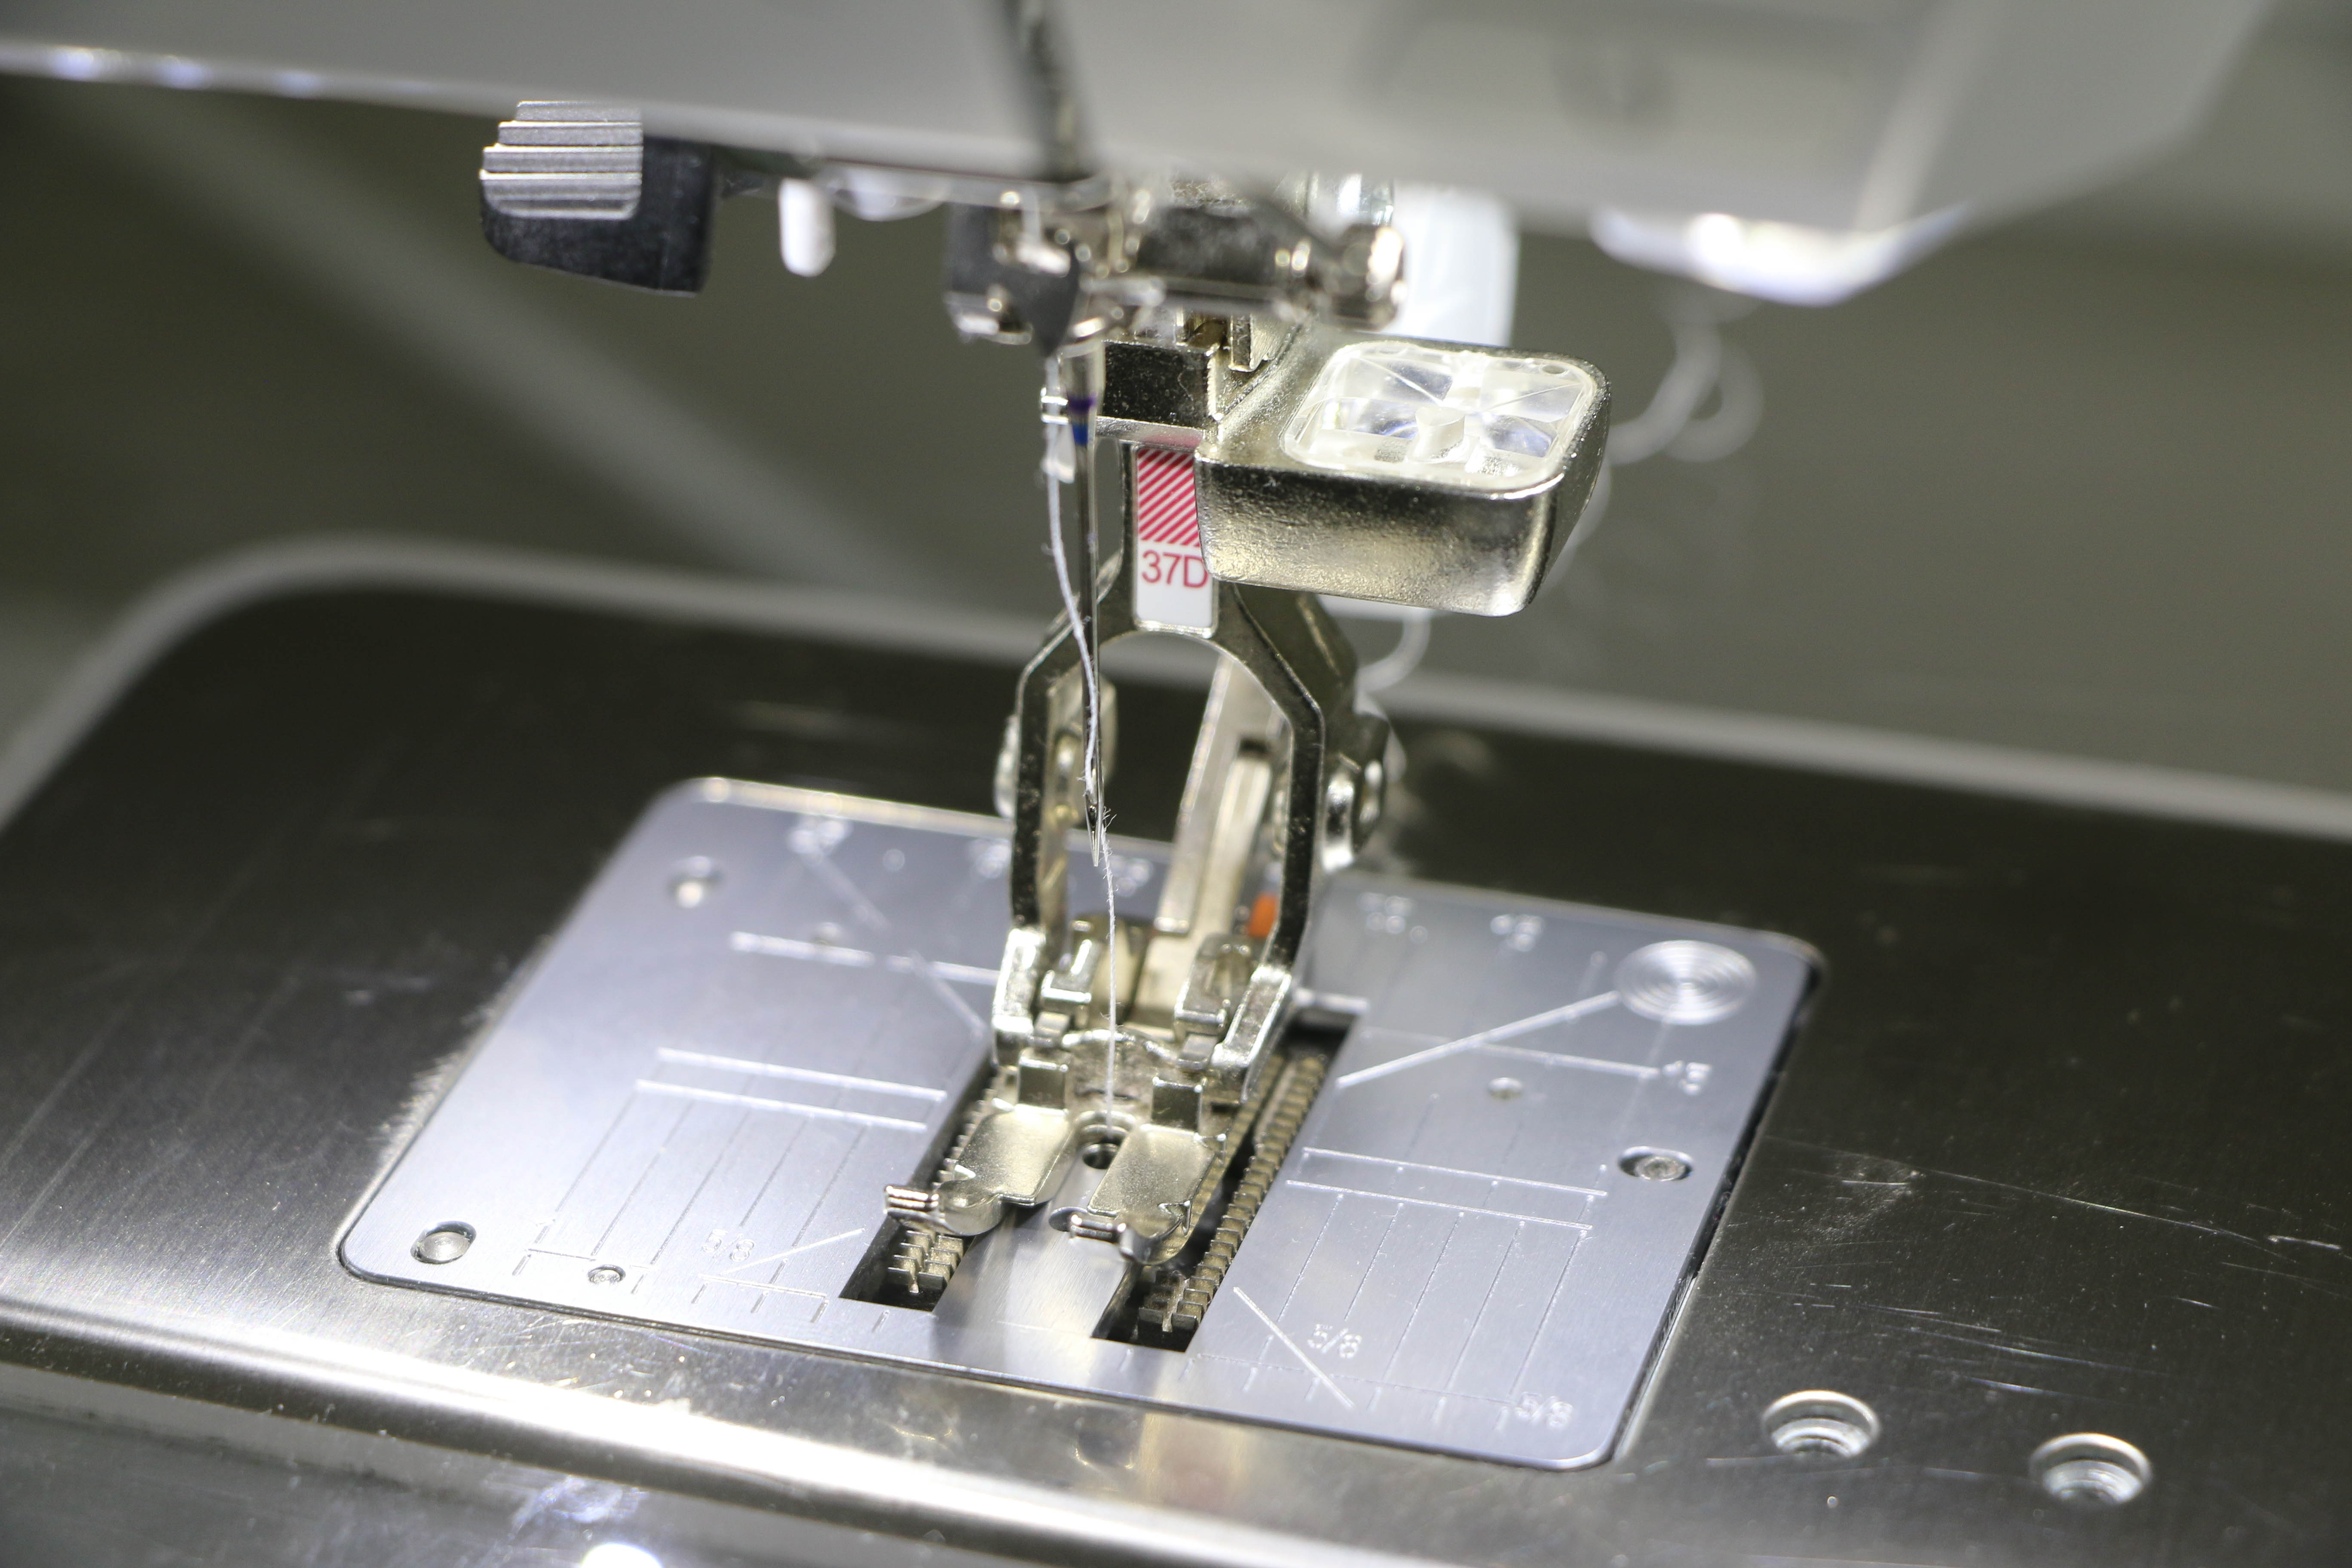
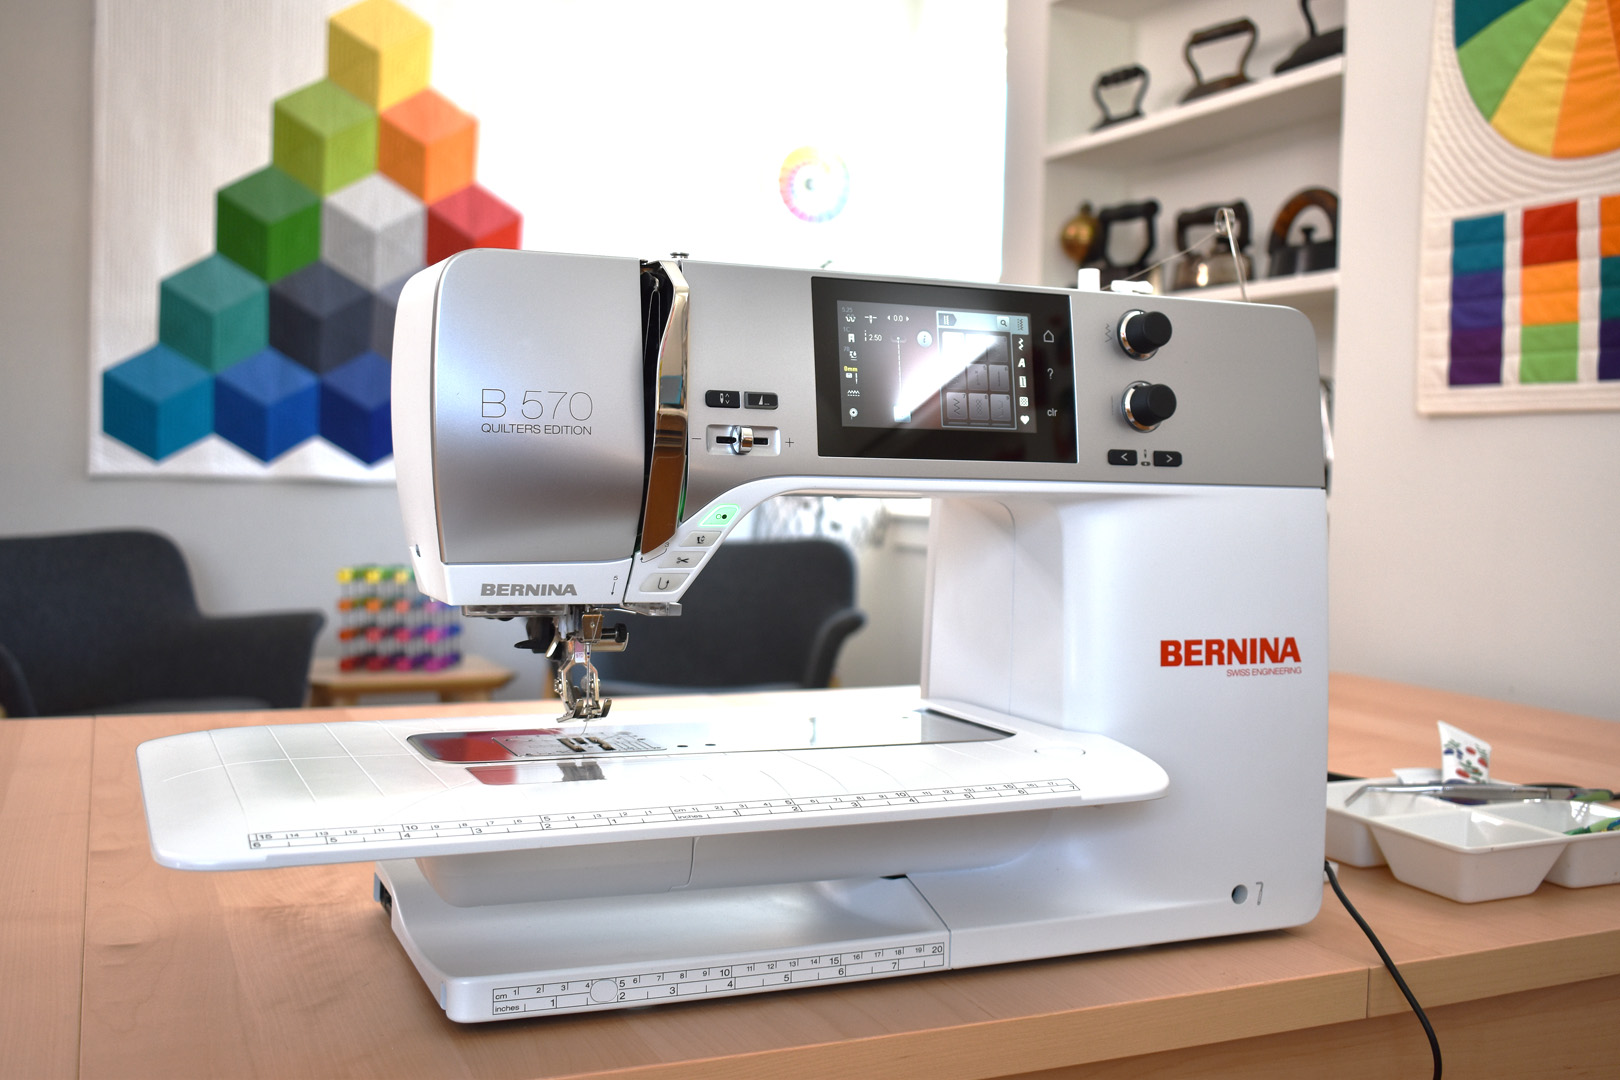
- Sewing machine (I use a BERNINA 570 QE)
- Quarter-inch seam foot (I use the Patchwork Foot #97D)
- Straight stitch needle plate
- Size 75/11 sharp sewing machine needle
- 50 weight cotton thread in a neutral color
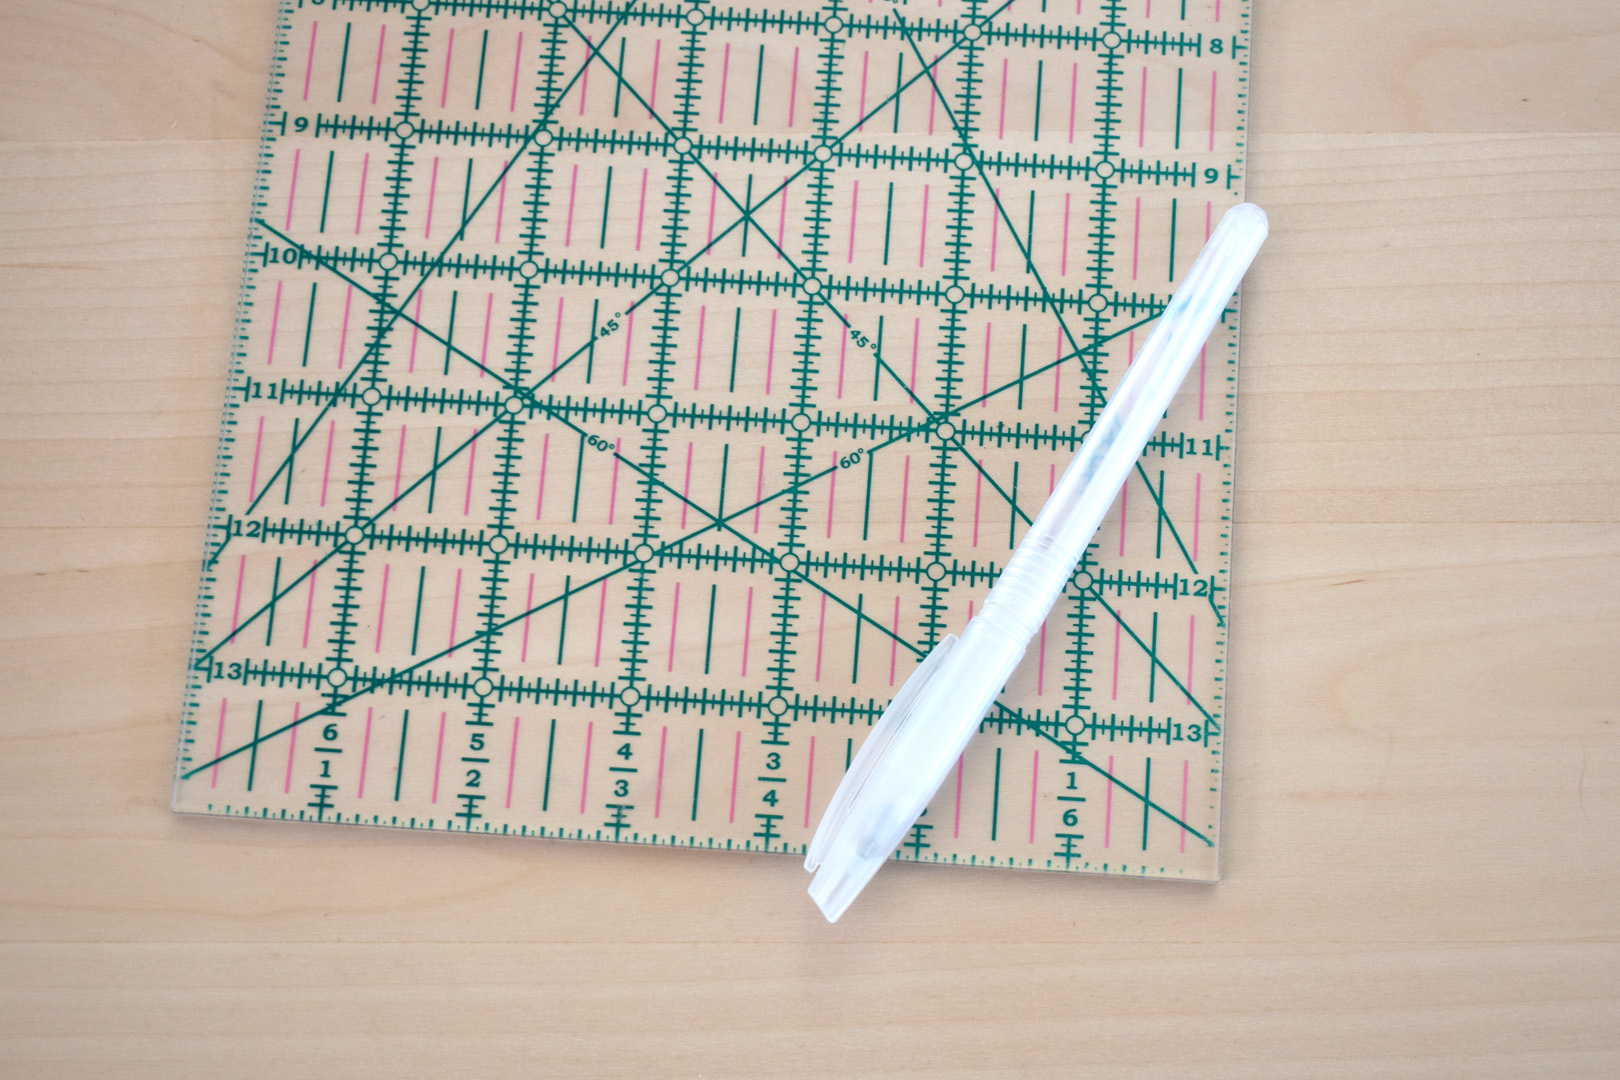
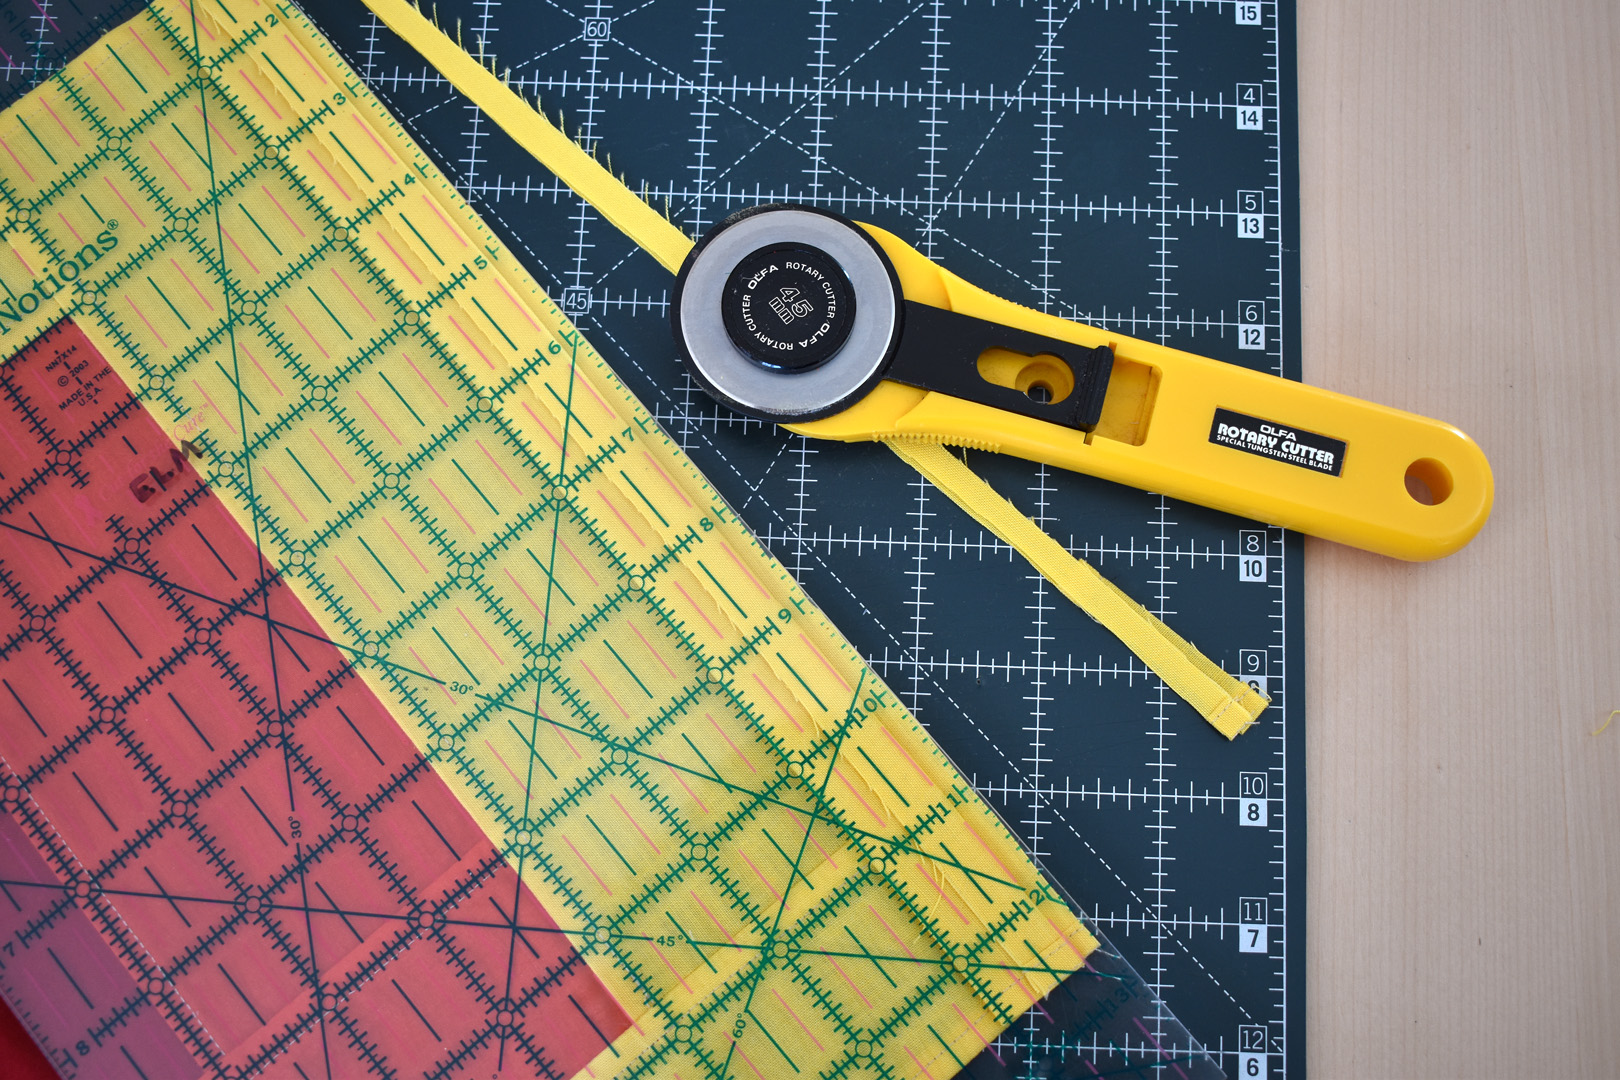
- Large cutting mat, small cutting mat, rotary cutter, 6″ x 24″ quilting ruler, small quilting ruler
- Iron and pressing surface
- Basic sewing supplies
Cut the patchwork pieces to make a Pojagi Patchwork Suncatcher. This patchwork square is a simple, updated log cabin block. Follow the diagram below for cutting and piecing the simple block.

Cut the fabrics as follows:
- Red fabric cut 5″ x 5″
- Orange fabric cut 5″ x 2″
- Orange fabric cut 3″ x 6″
- Orange fabric cut 7″ x 4″
- Orange fabric cut 3″ X 9″
- Yellow fabric cut 9″ x 2″
- Yellow fabric cut 3″ x 10″
- Yellow fabric cut 11″ x 4″
- Yellow fabric cut 3″ x 13
Also, cut one piece of yellow 2 1/2″ x 13″ for the top hanger.
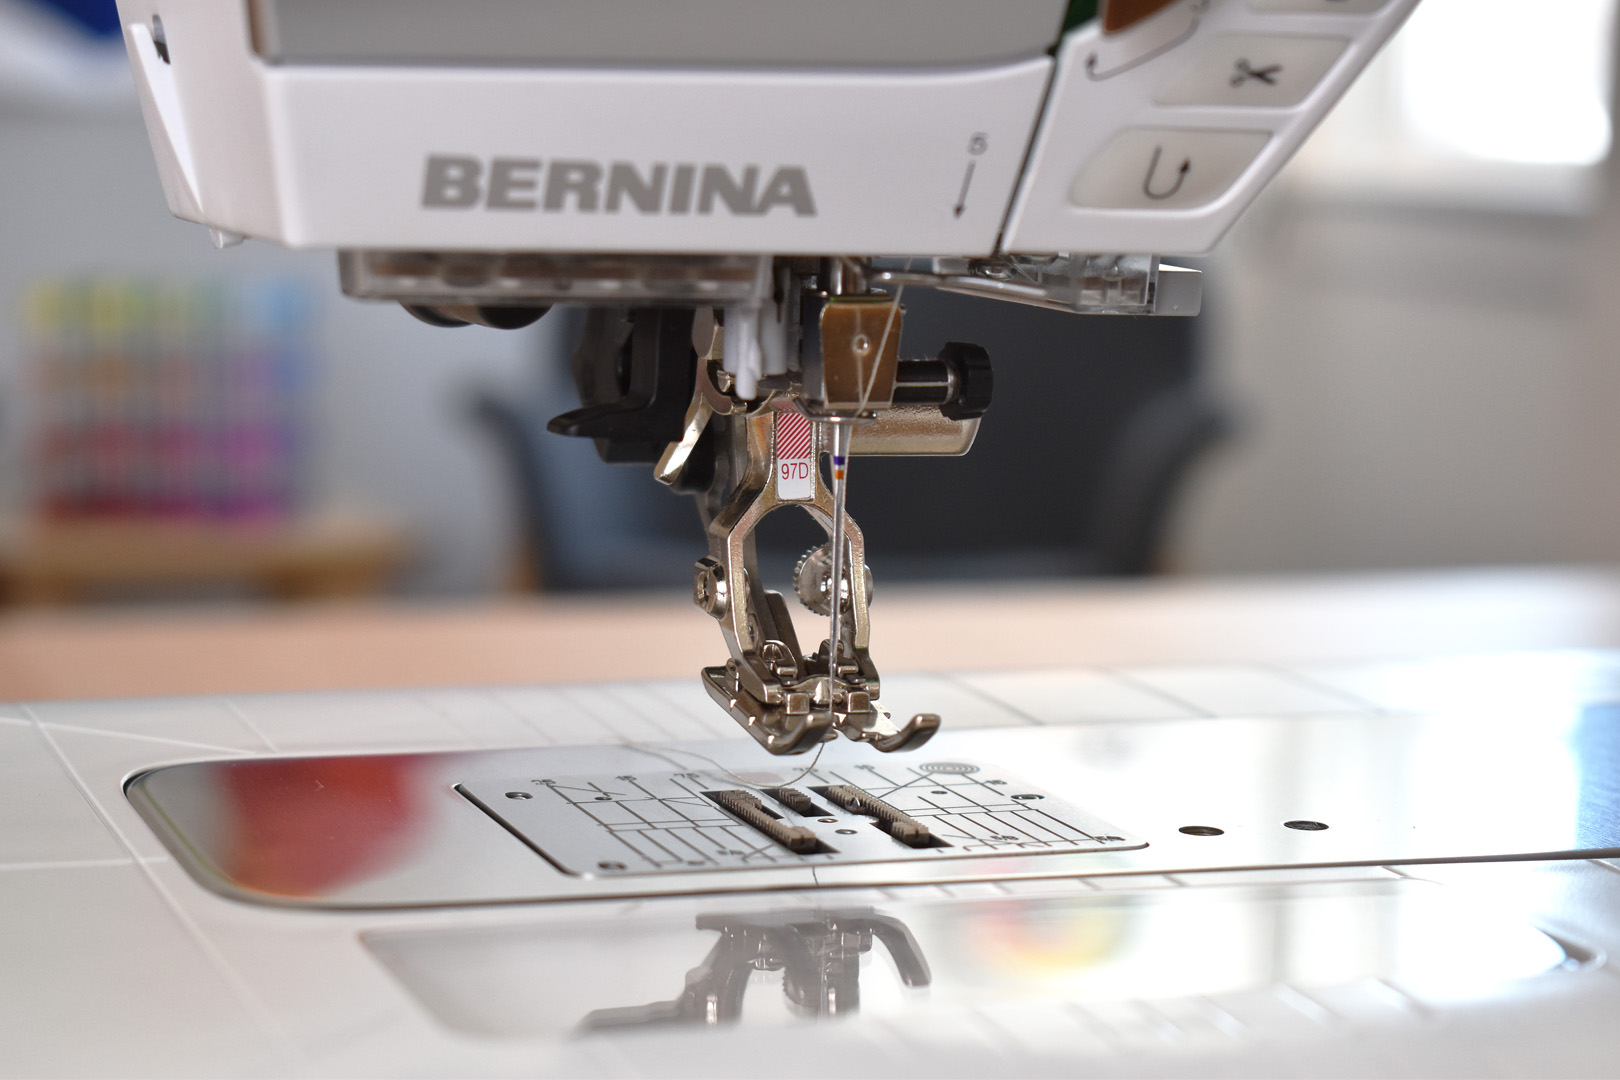
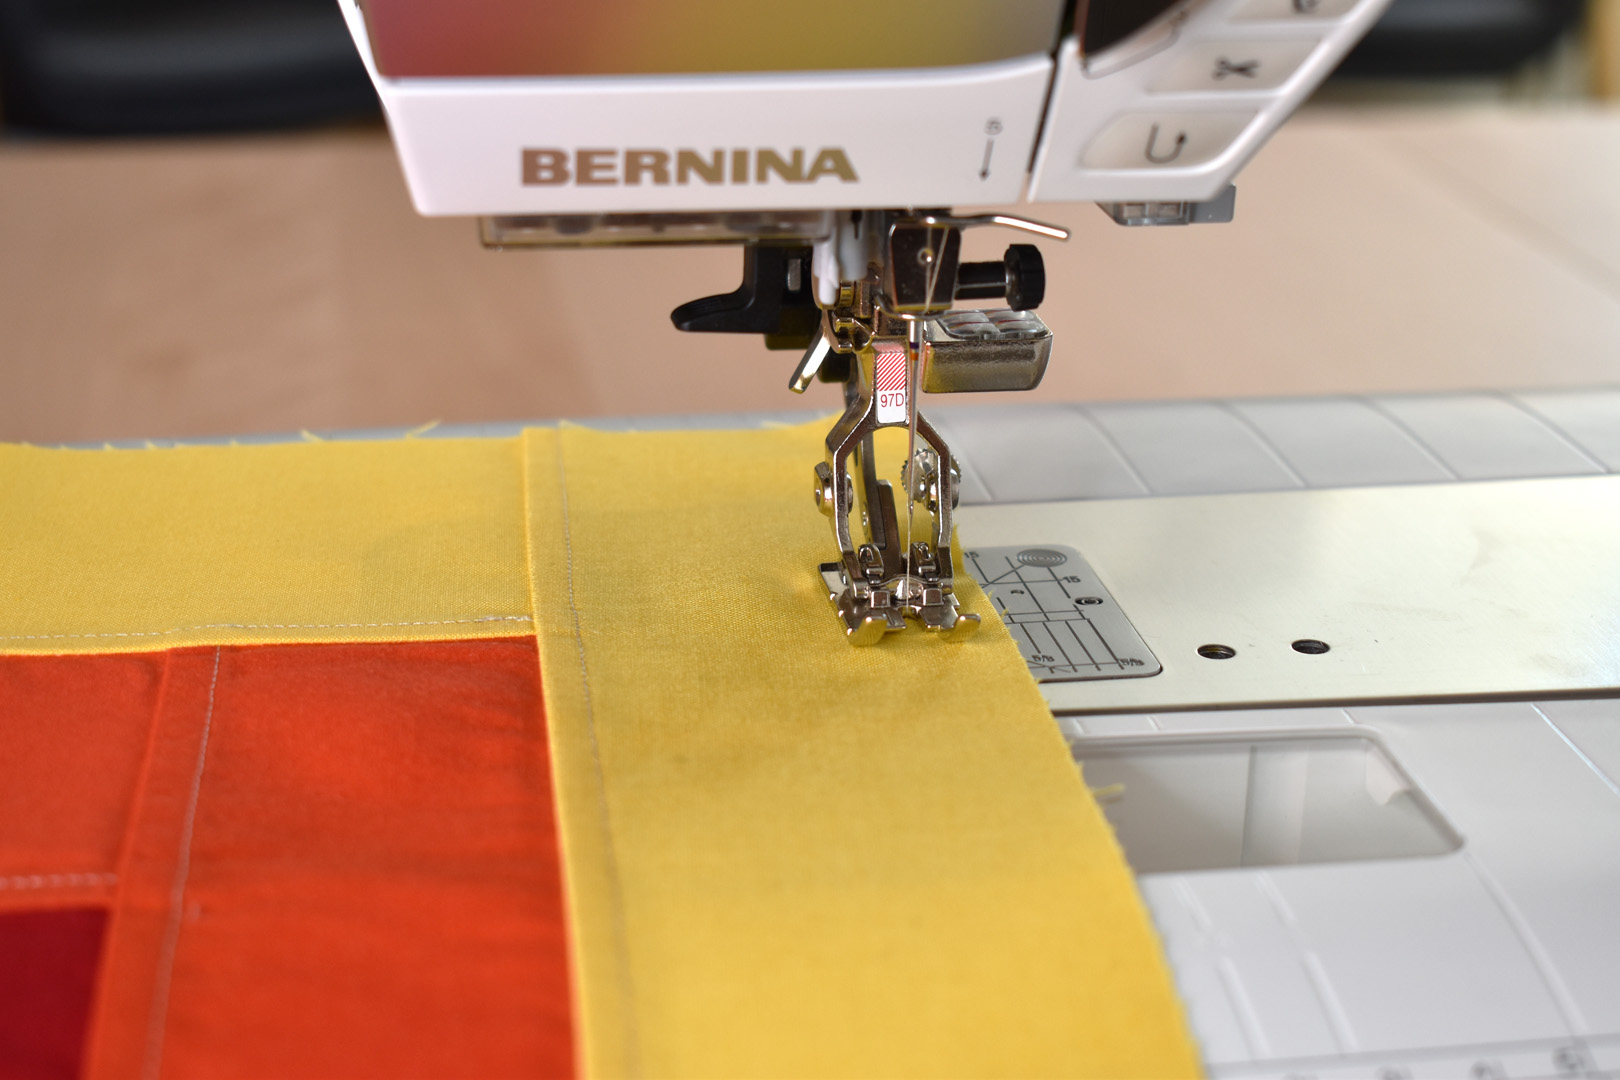
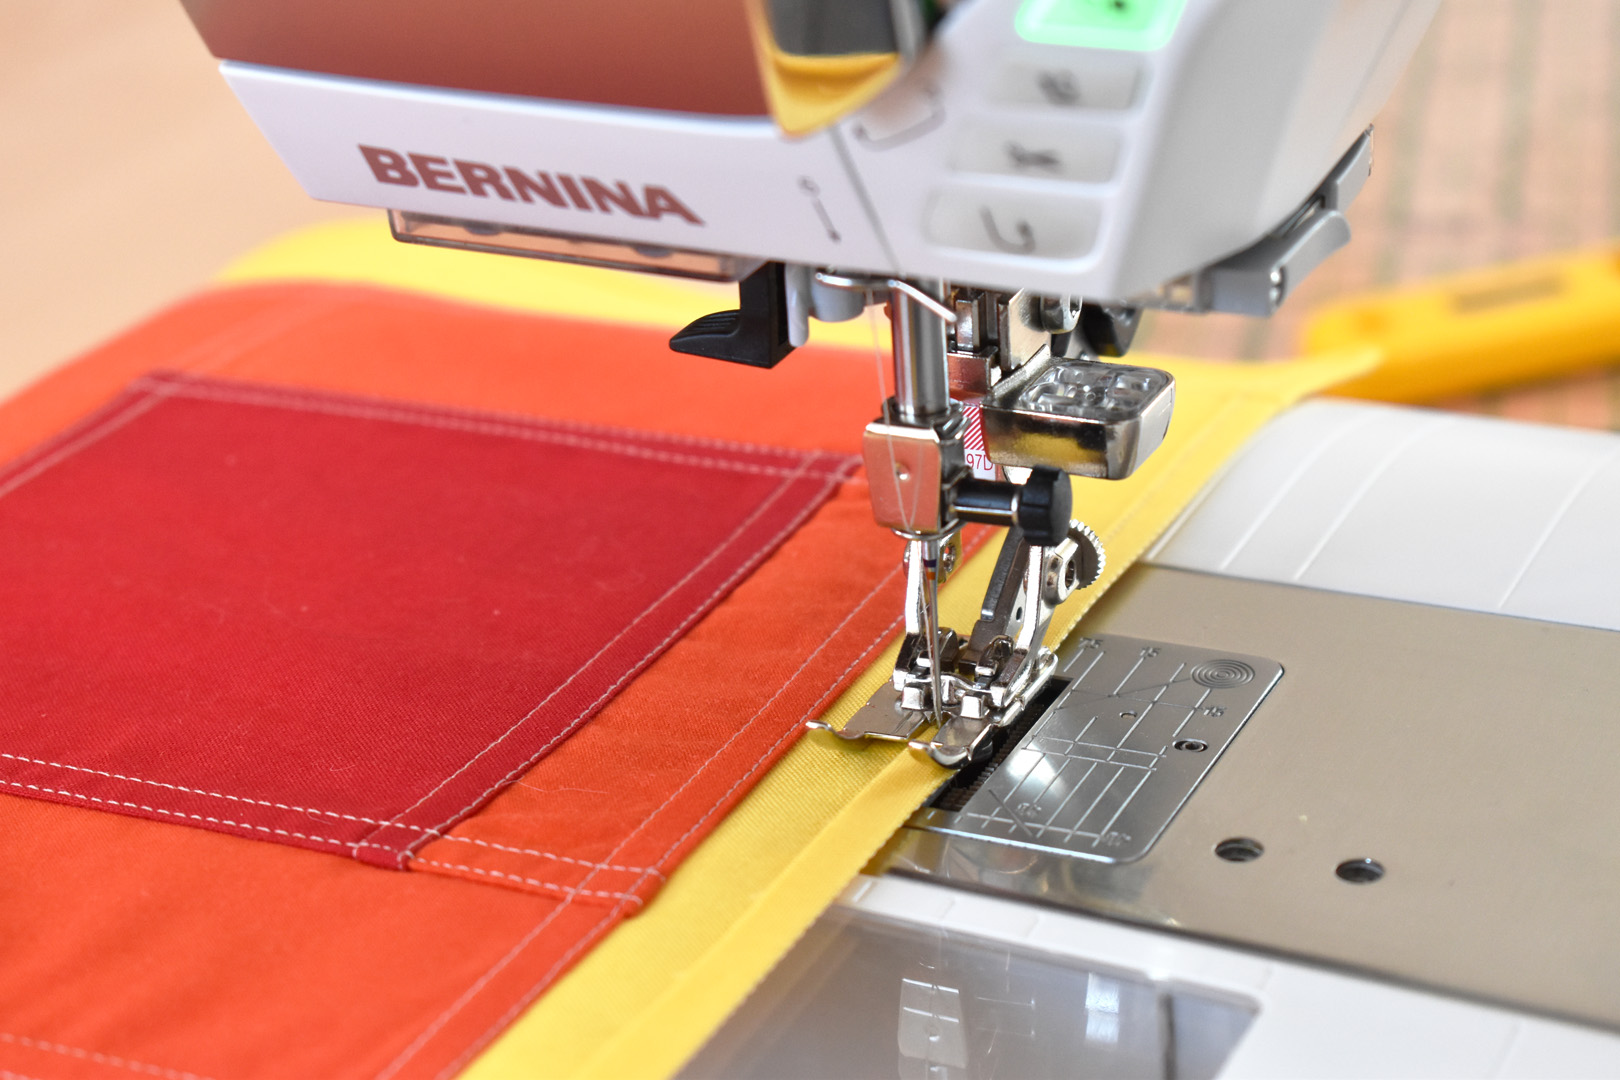
Set up your sewing machine with a quarter-inch foot, straight stitch needle plate, new sharp sewing machine needle size 75/11, and 50 weight cotton thread in a coordinating or neutral color (I’m using a cream-colored thread). The thinner weight cotton thread will help reduce a bit of bulk in the seams.

Next to your sewing machine you will need a small cutting mat, rotary cutter, small ruler, seam roller, and thread snips for trimming the seam allowance during the sewing process.
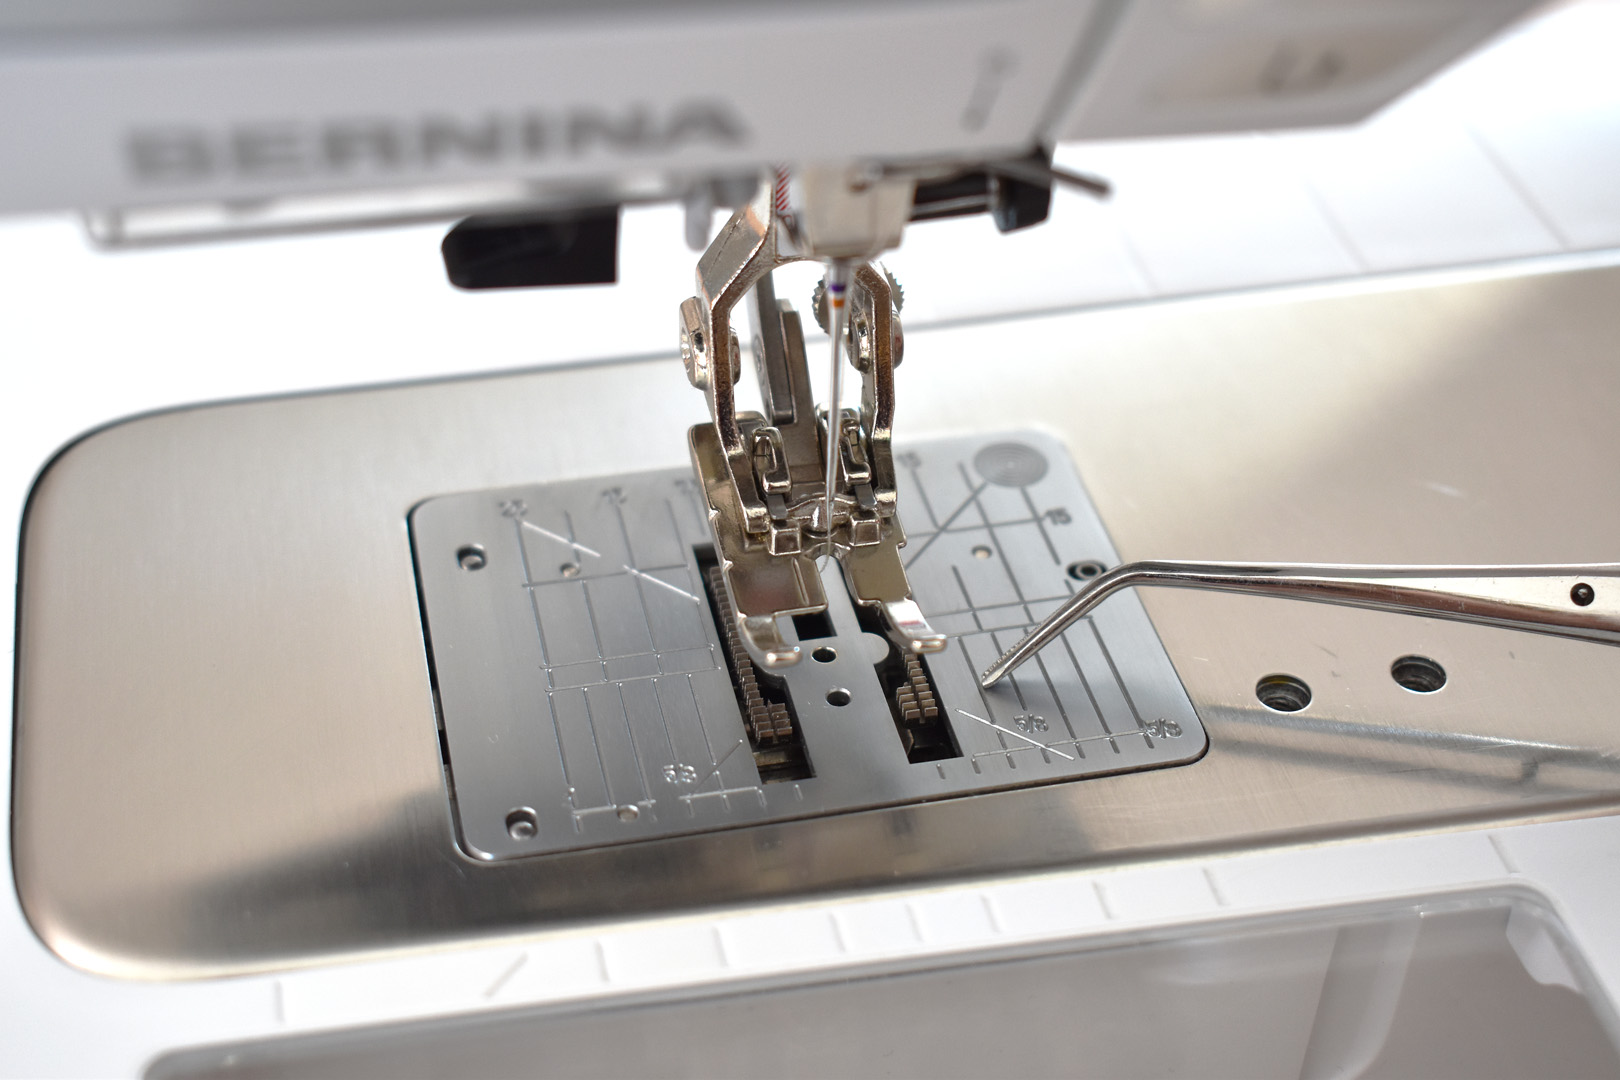
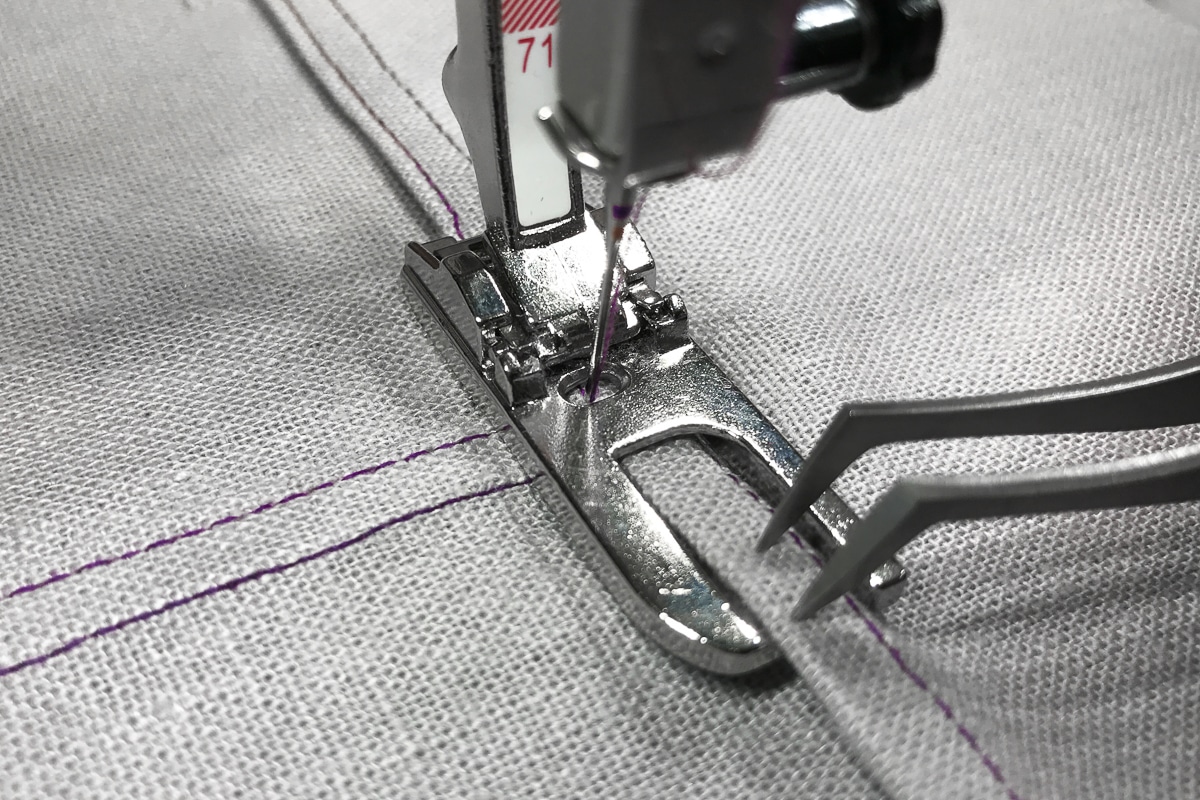
Take note of where the 1/2″ seam line is marked on the stitch plate; all seams will be sewn with a scant 1/2″ seam allowance. The 1/2″ seam mark is directly to the left of the 5/8″ seam line. A “scant” seam is sewn a tiny bit smaller than the full seam allowance, so line up the fabric edge over a little bit from the 1/2″ seam mark and not on top of it.
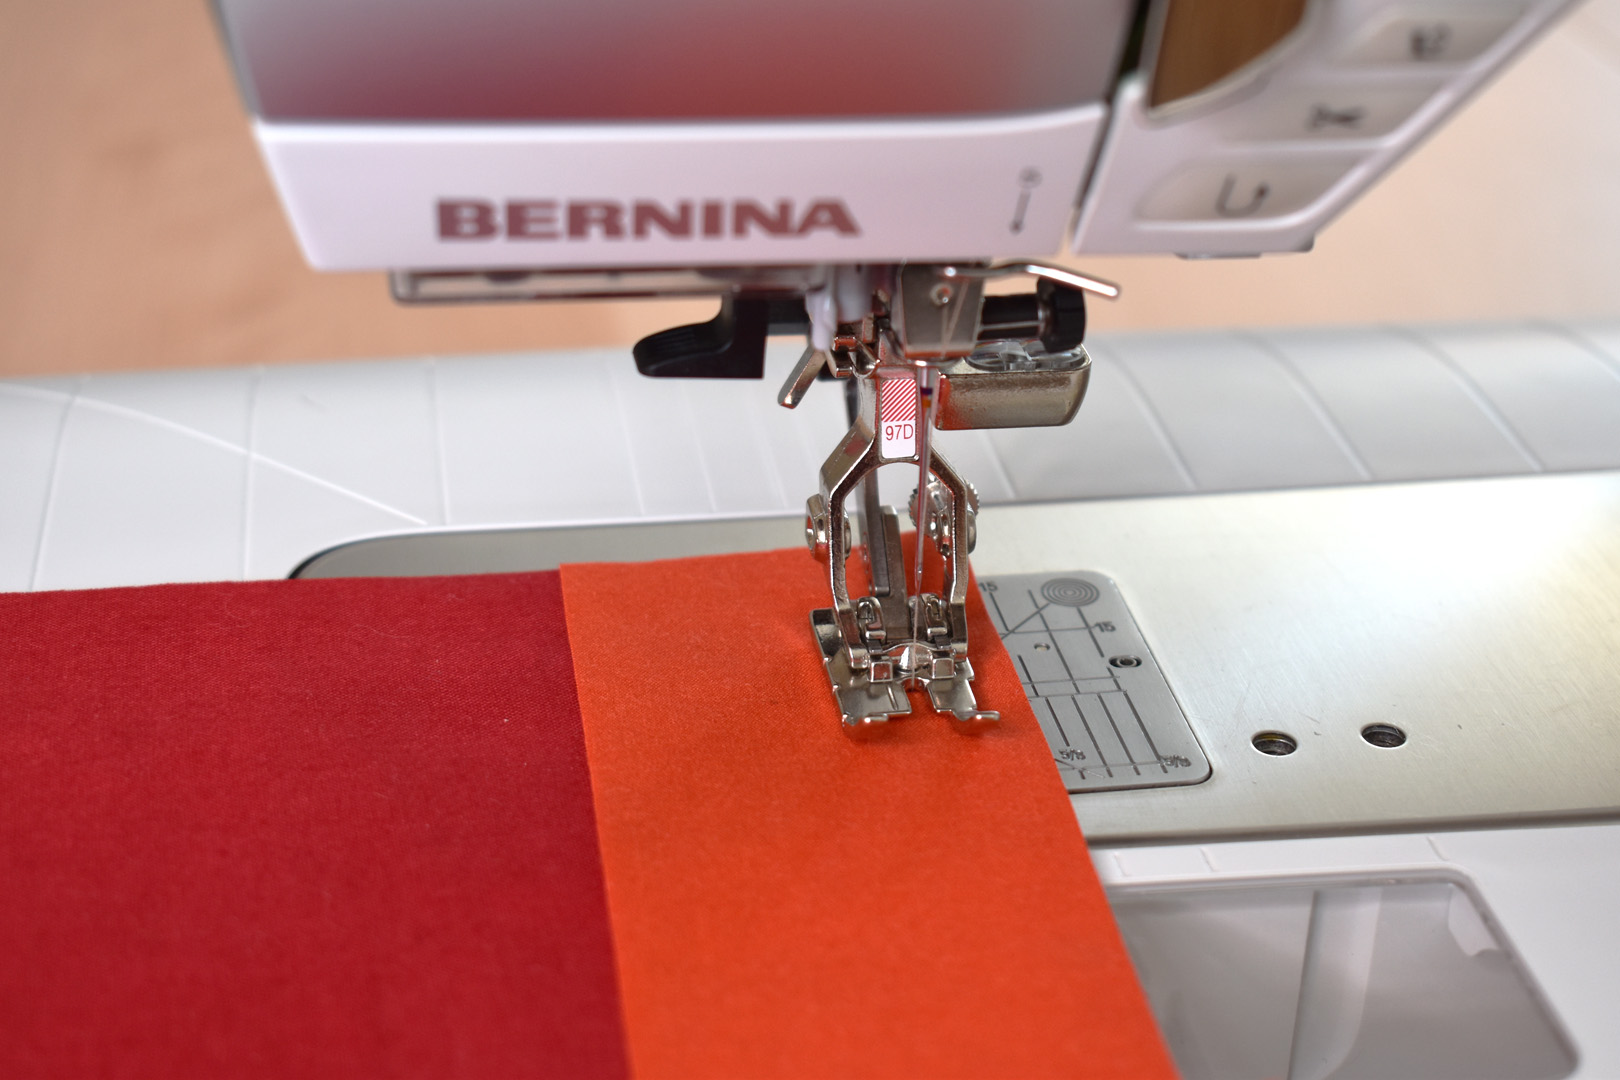
Sew the first seam (refer to the diagram above numbered in the order pieces are sewn together). Begin with the center piece #1 and join piece #2 along one edge with a scant 1/2″ seam.
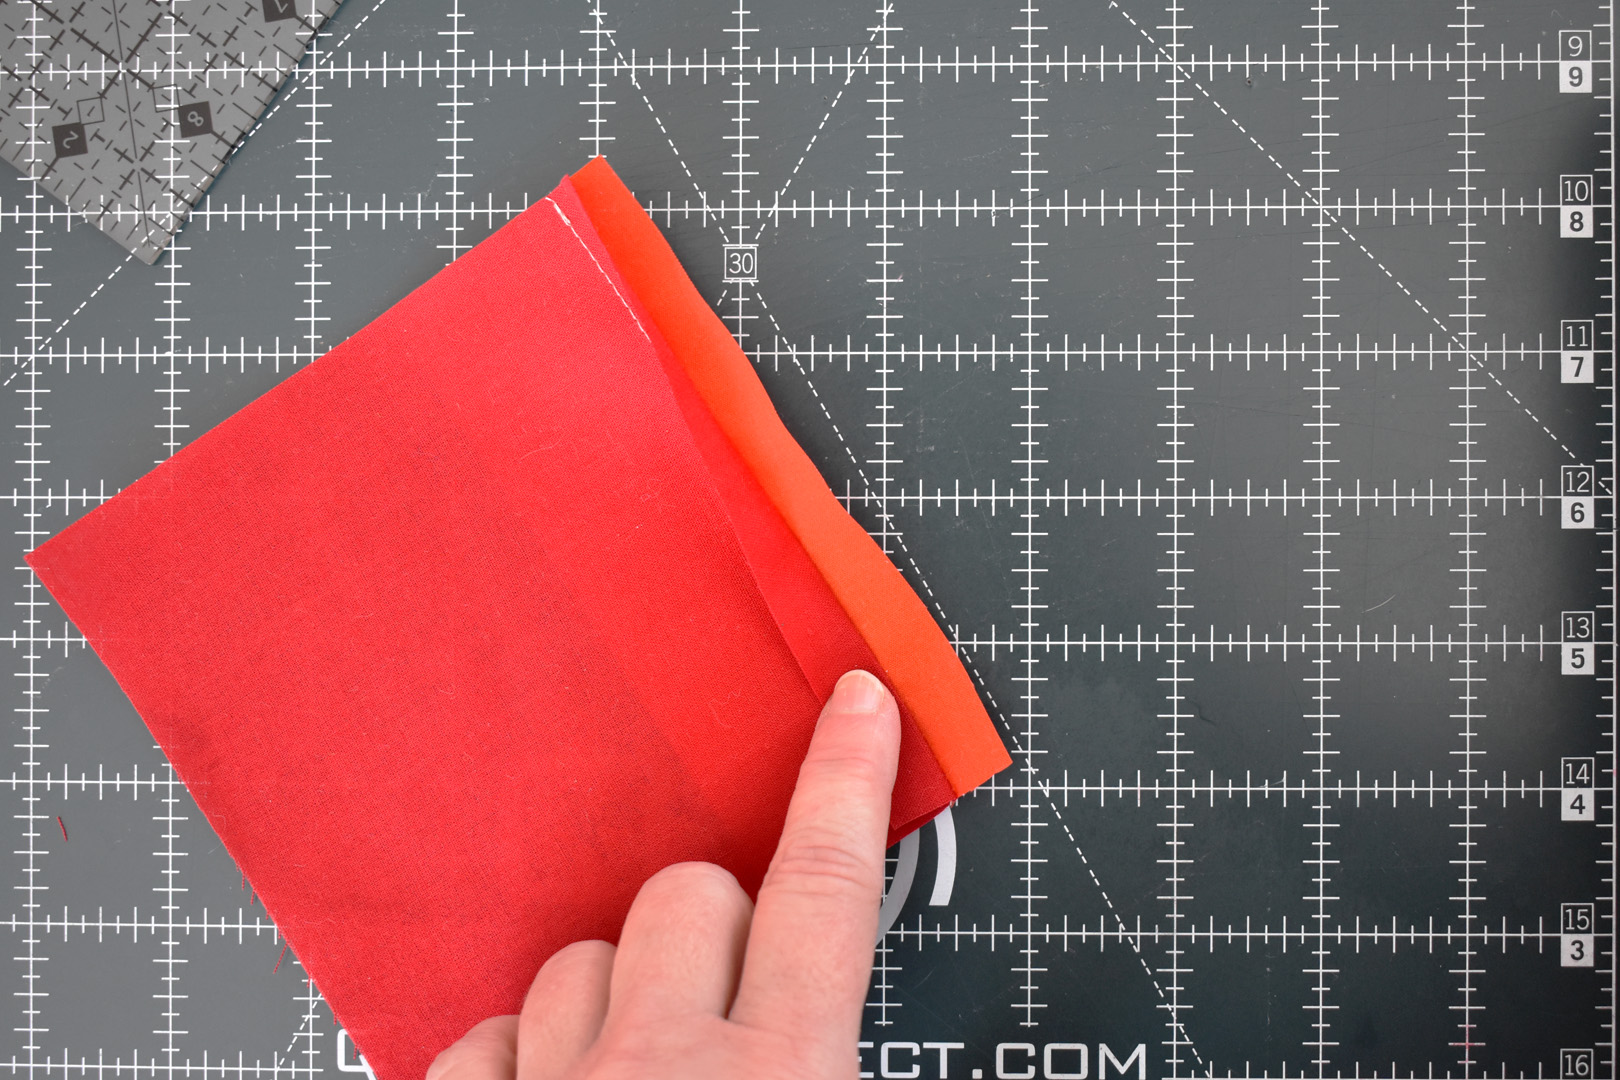
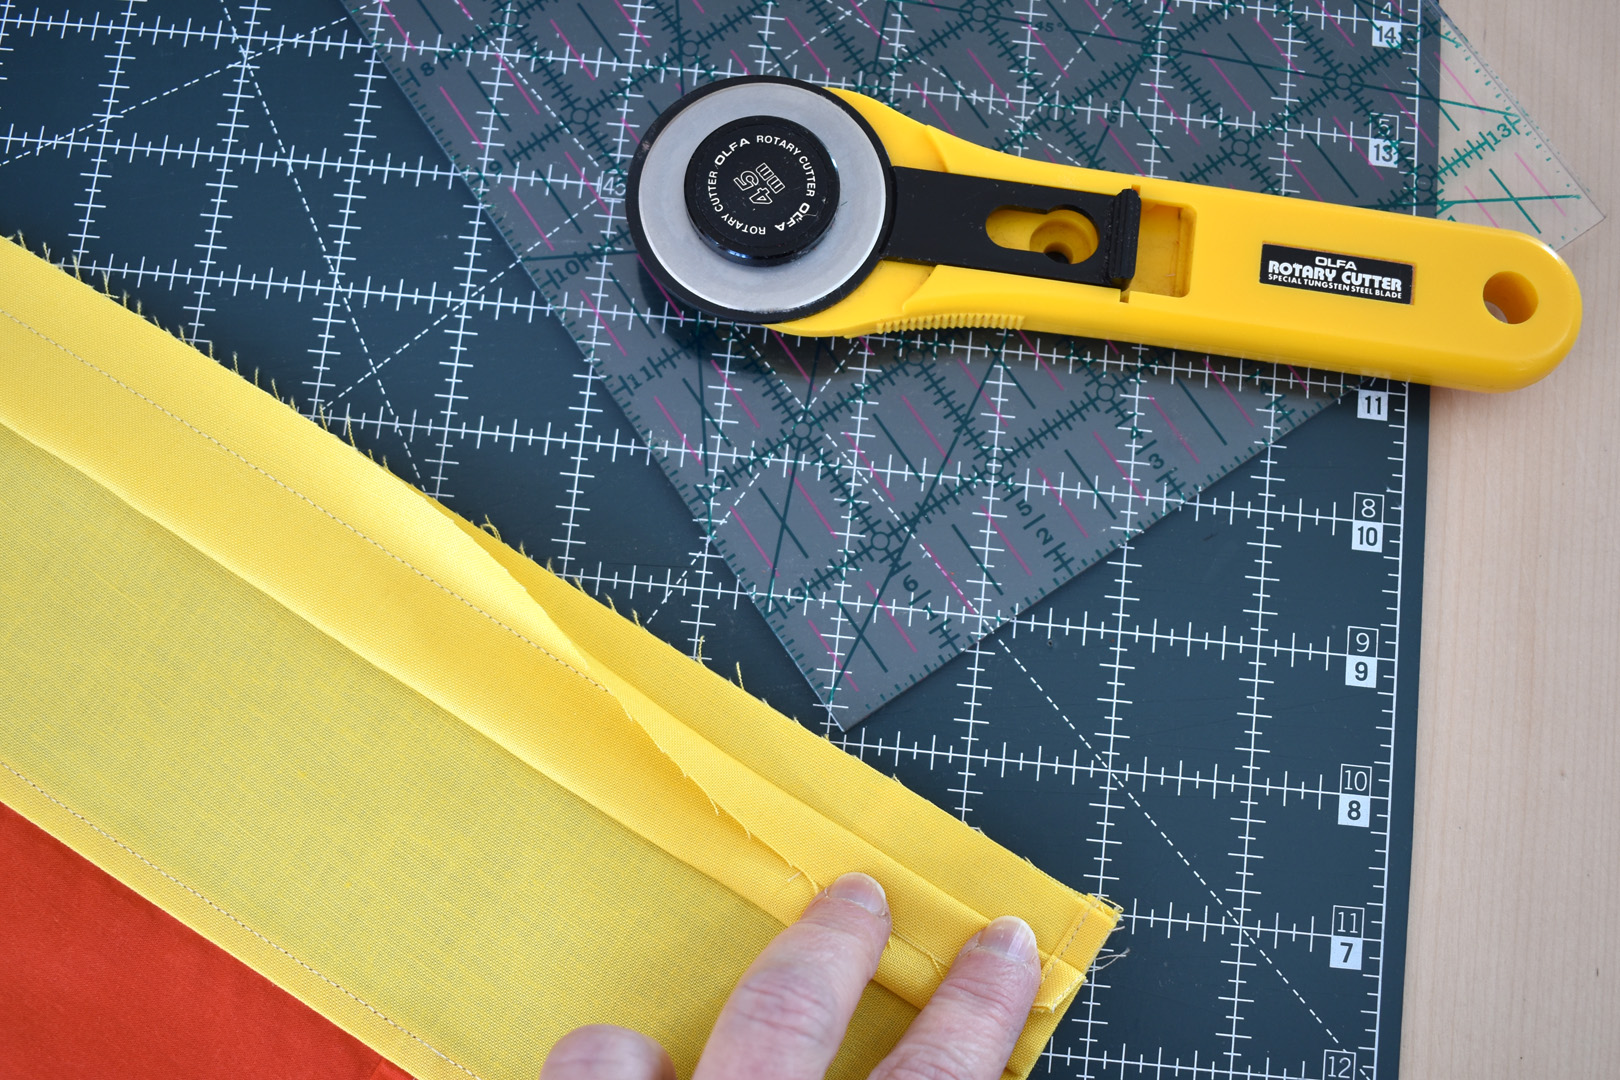
Prepare the seam for stitching. Place the fabric down on the cutting mat, center square side facing up. Fold back just the top layer of the seam.
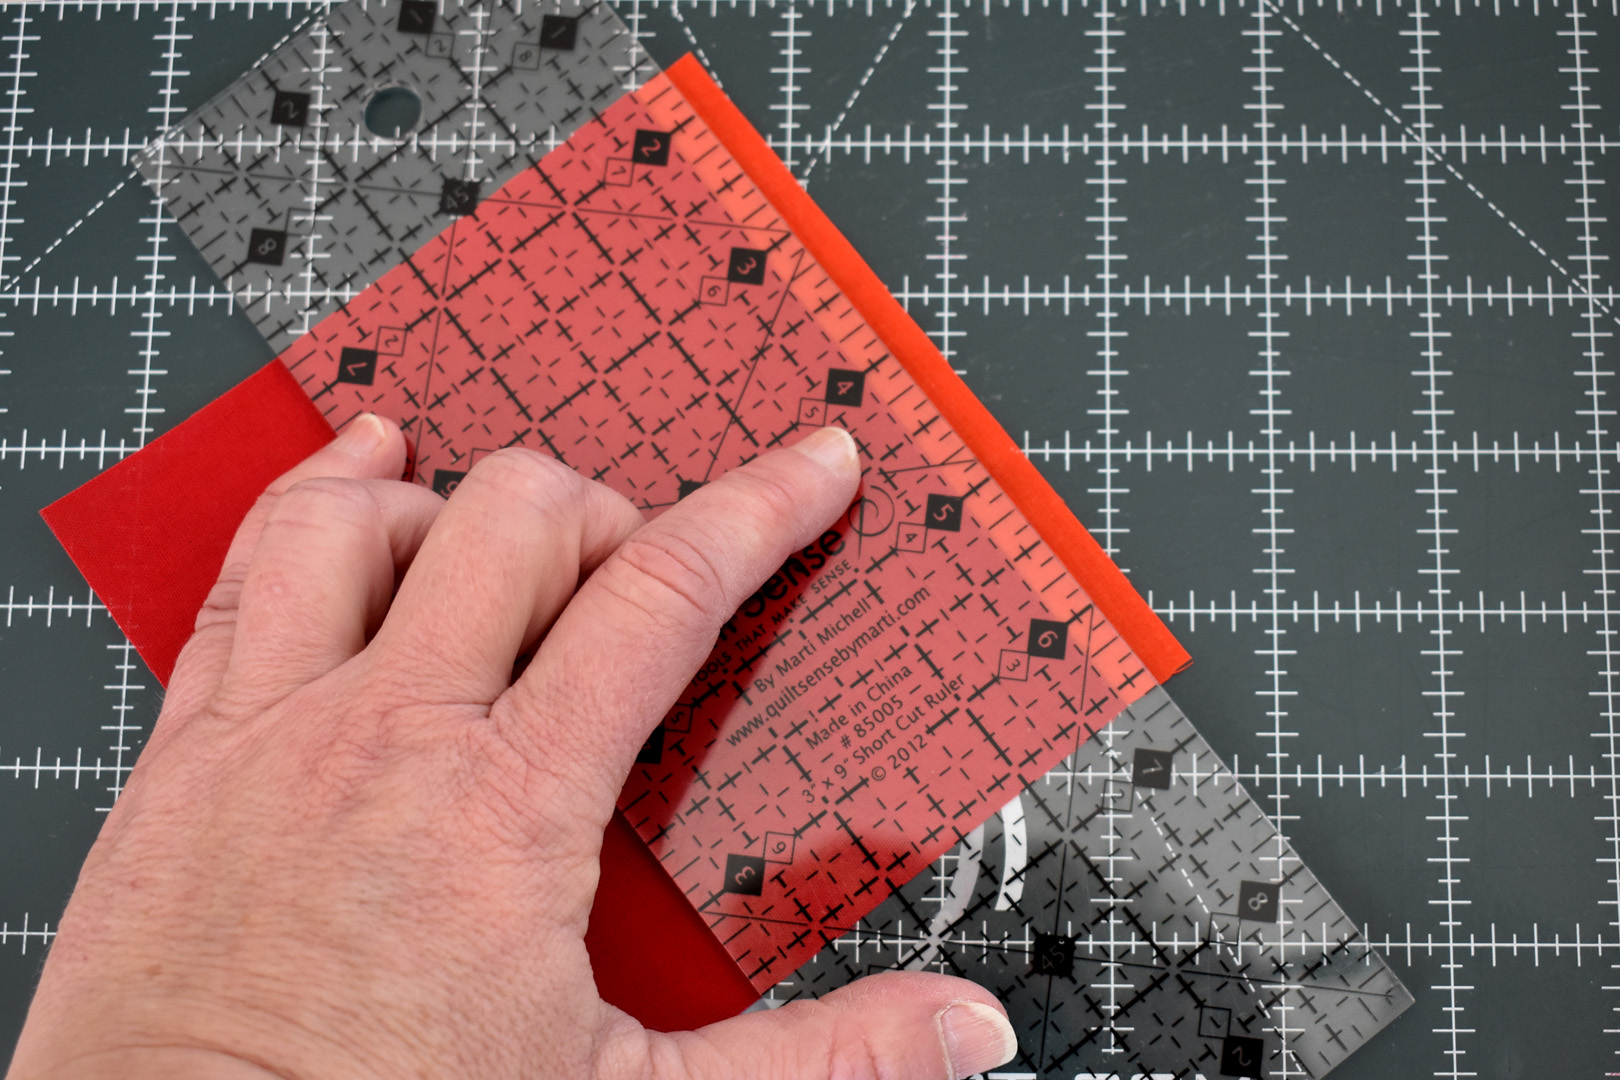
Place the ruler over the seam. Measure a scant quarter-inch from the seam edge (less than the quarter-inch mark on the ruler, but not as much as the eighth-inch mark).
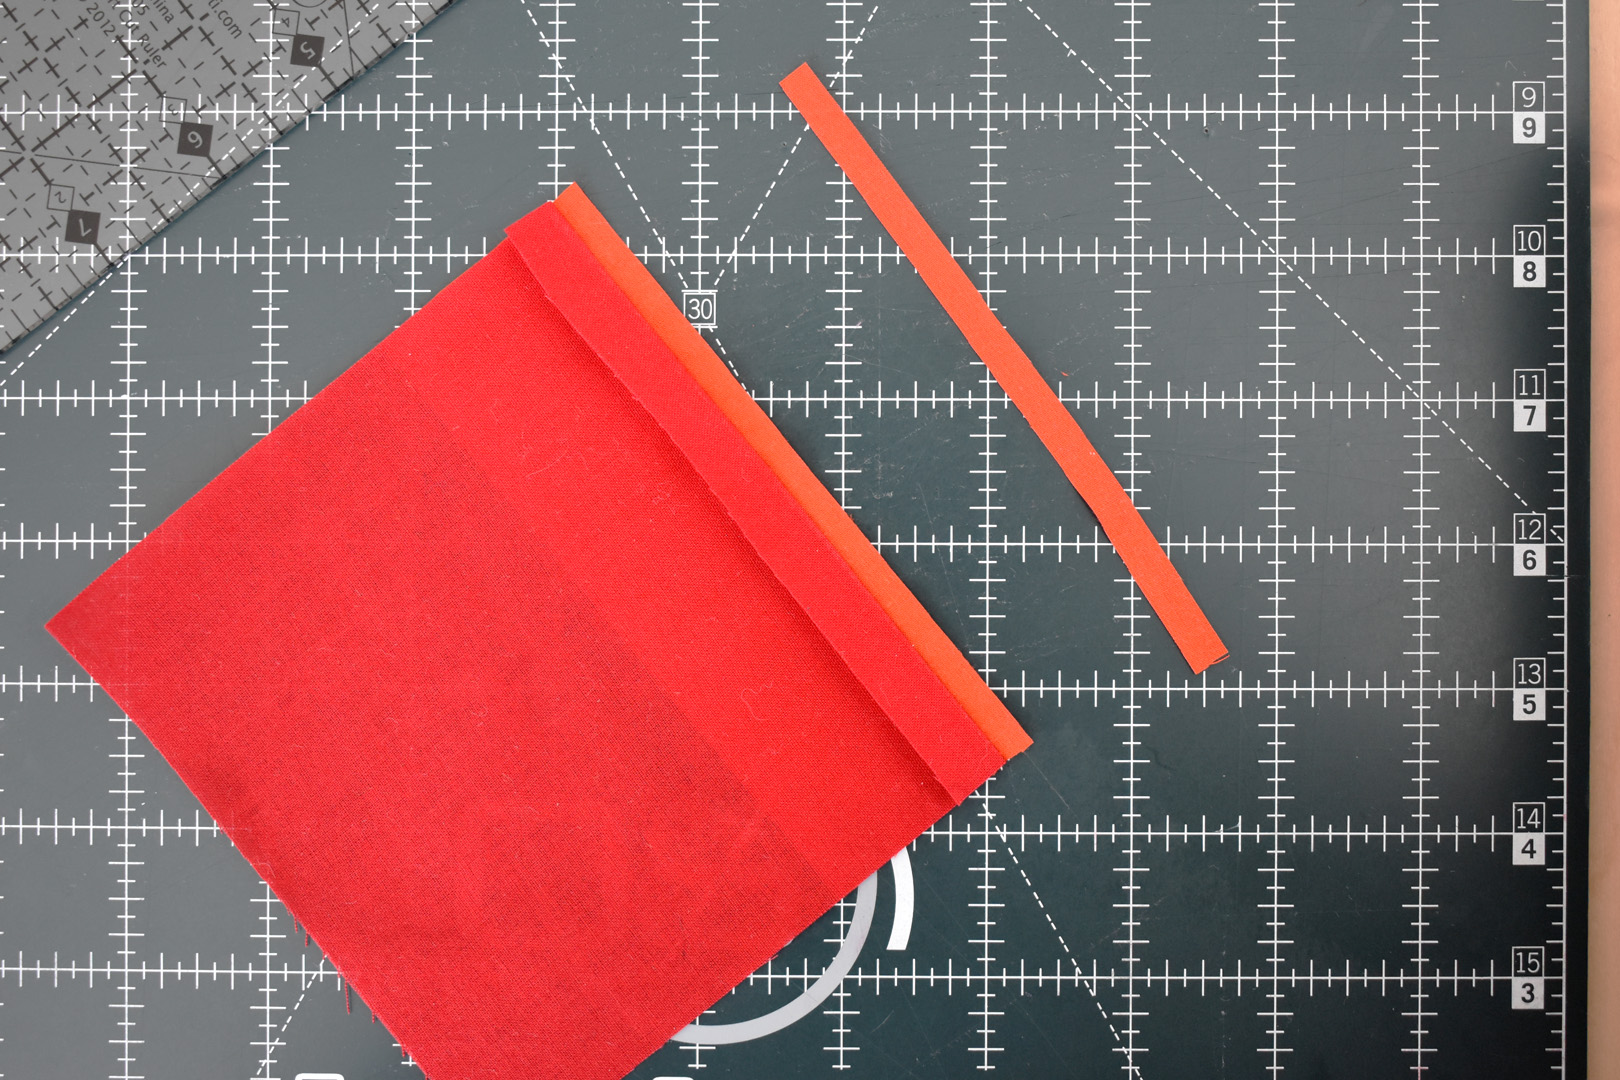
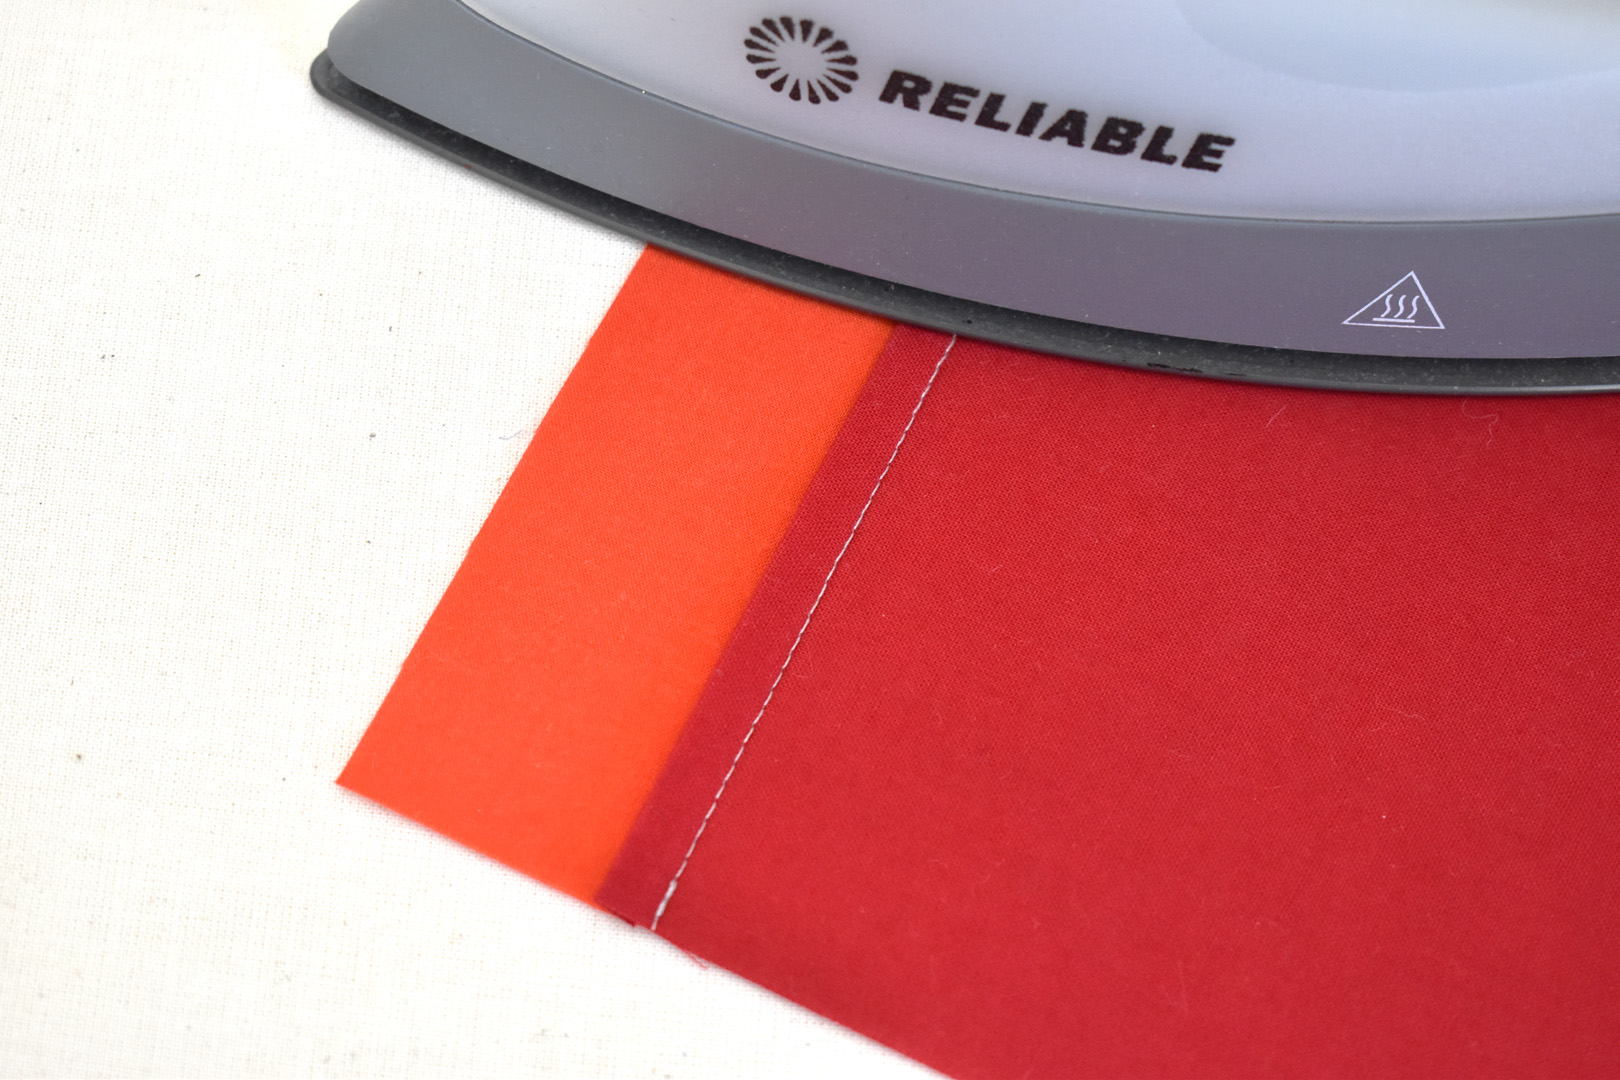
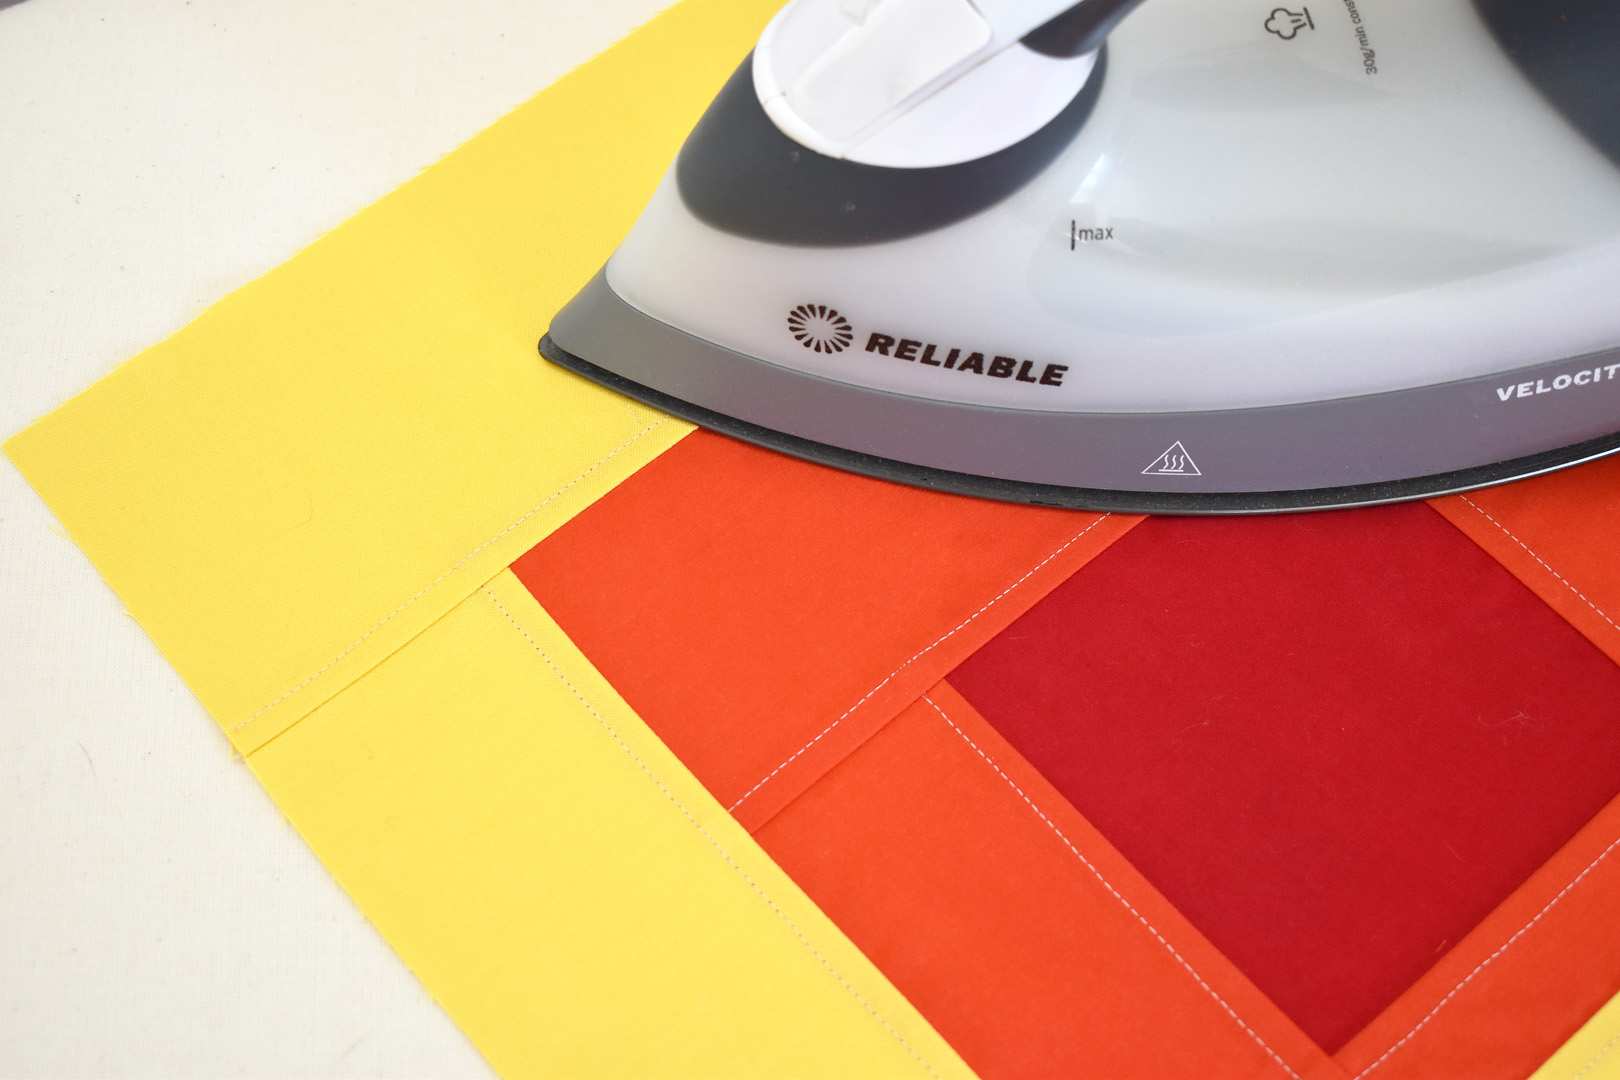
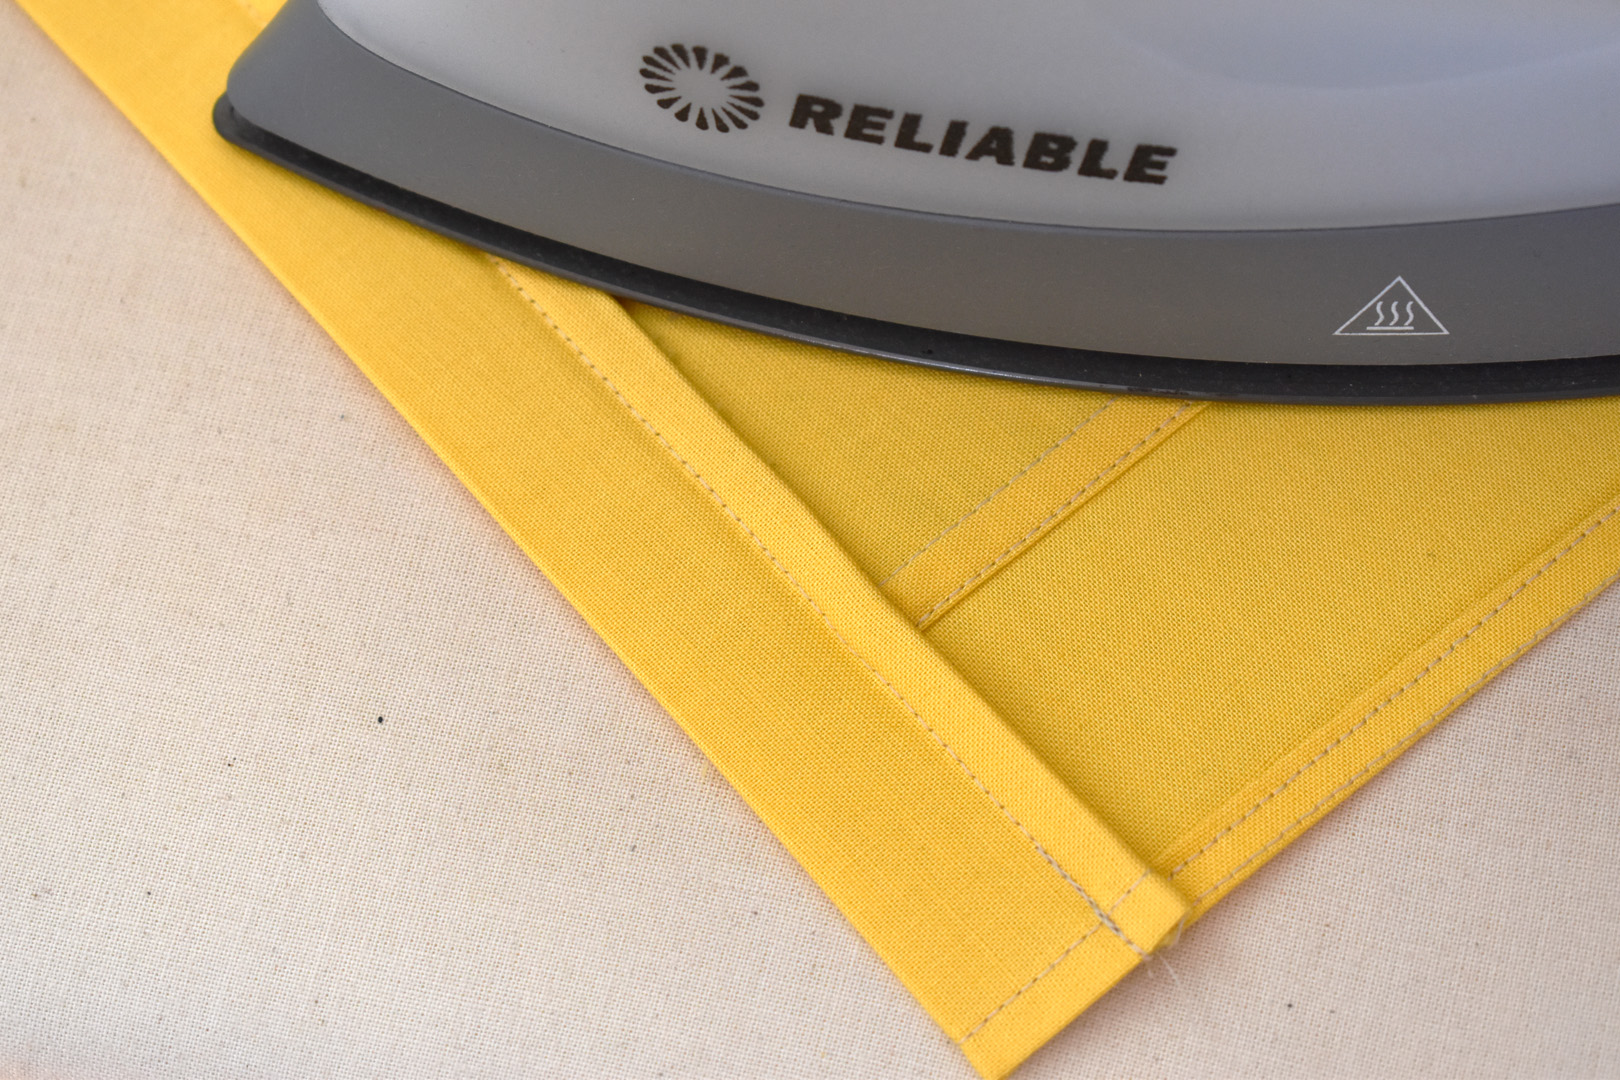
Trim the bottom seam allowance. Take the patchwork to your pressing surface to prepare the seam for the next step.
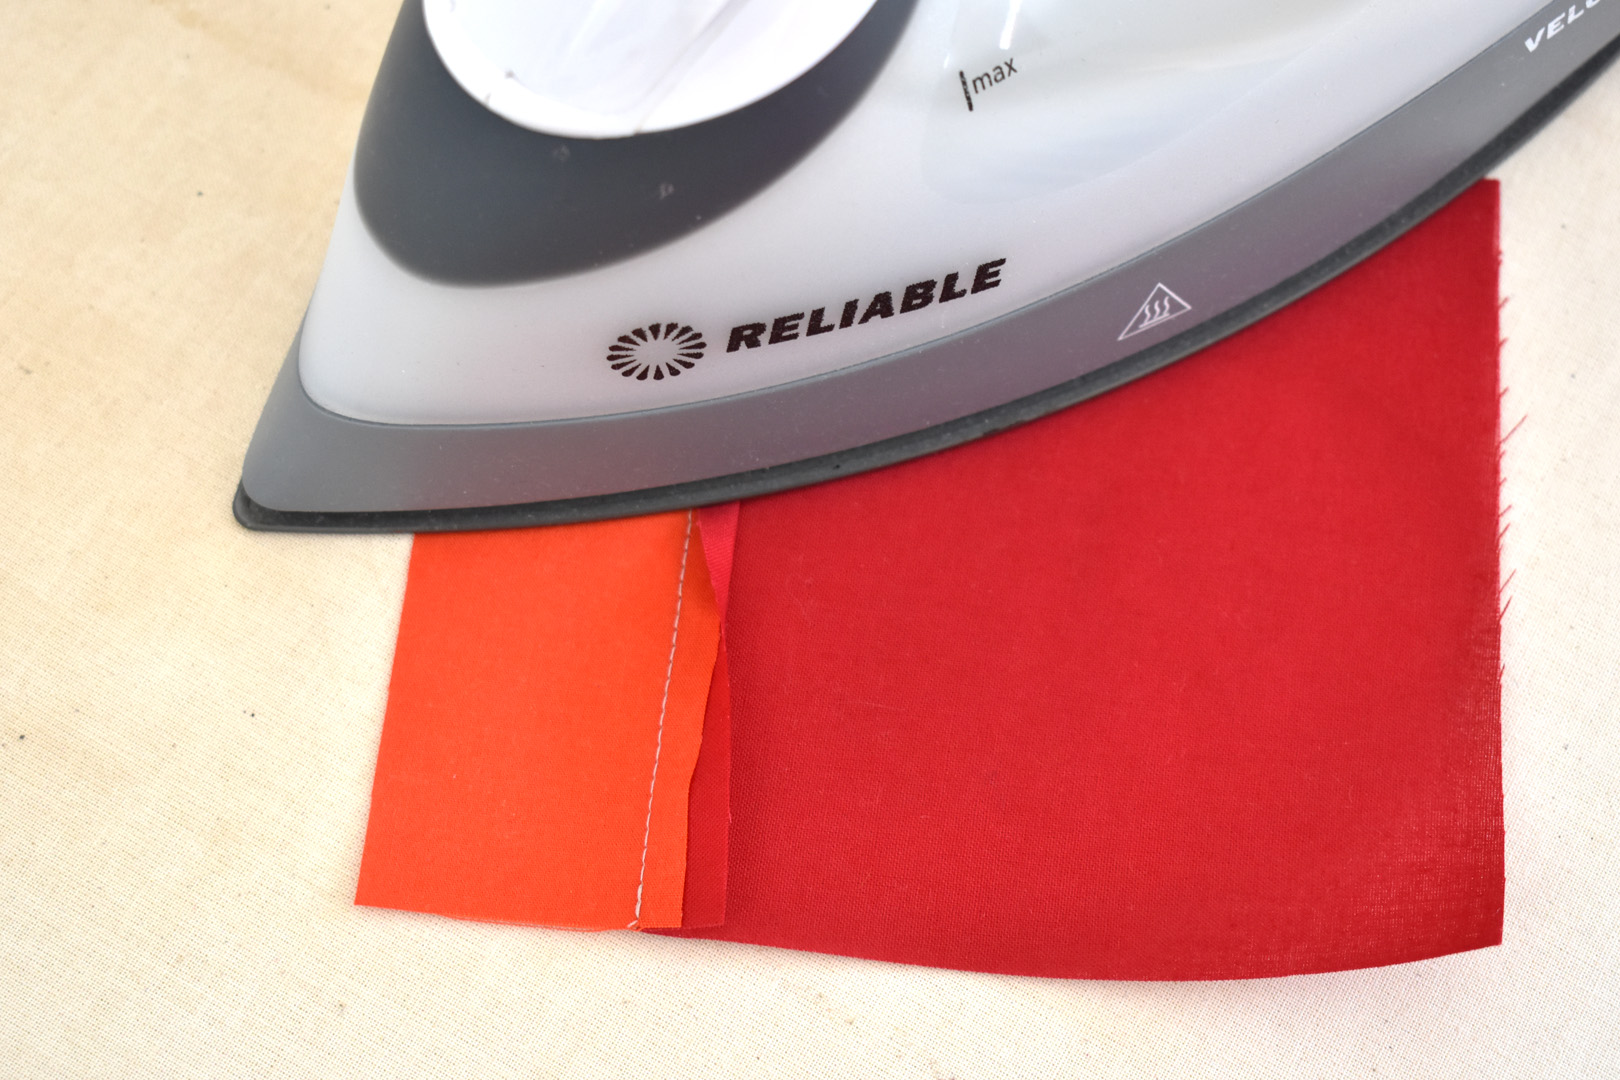
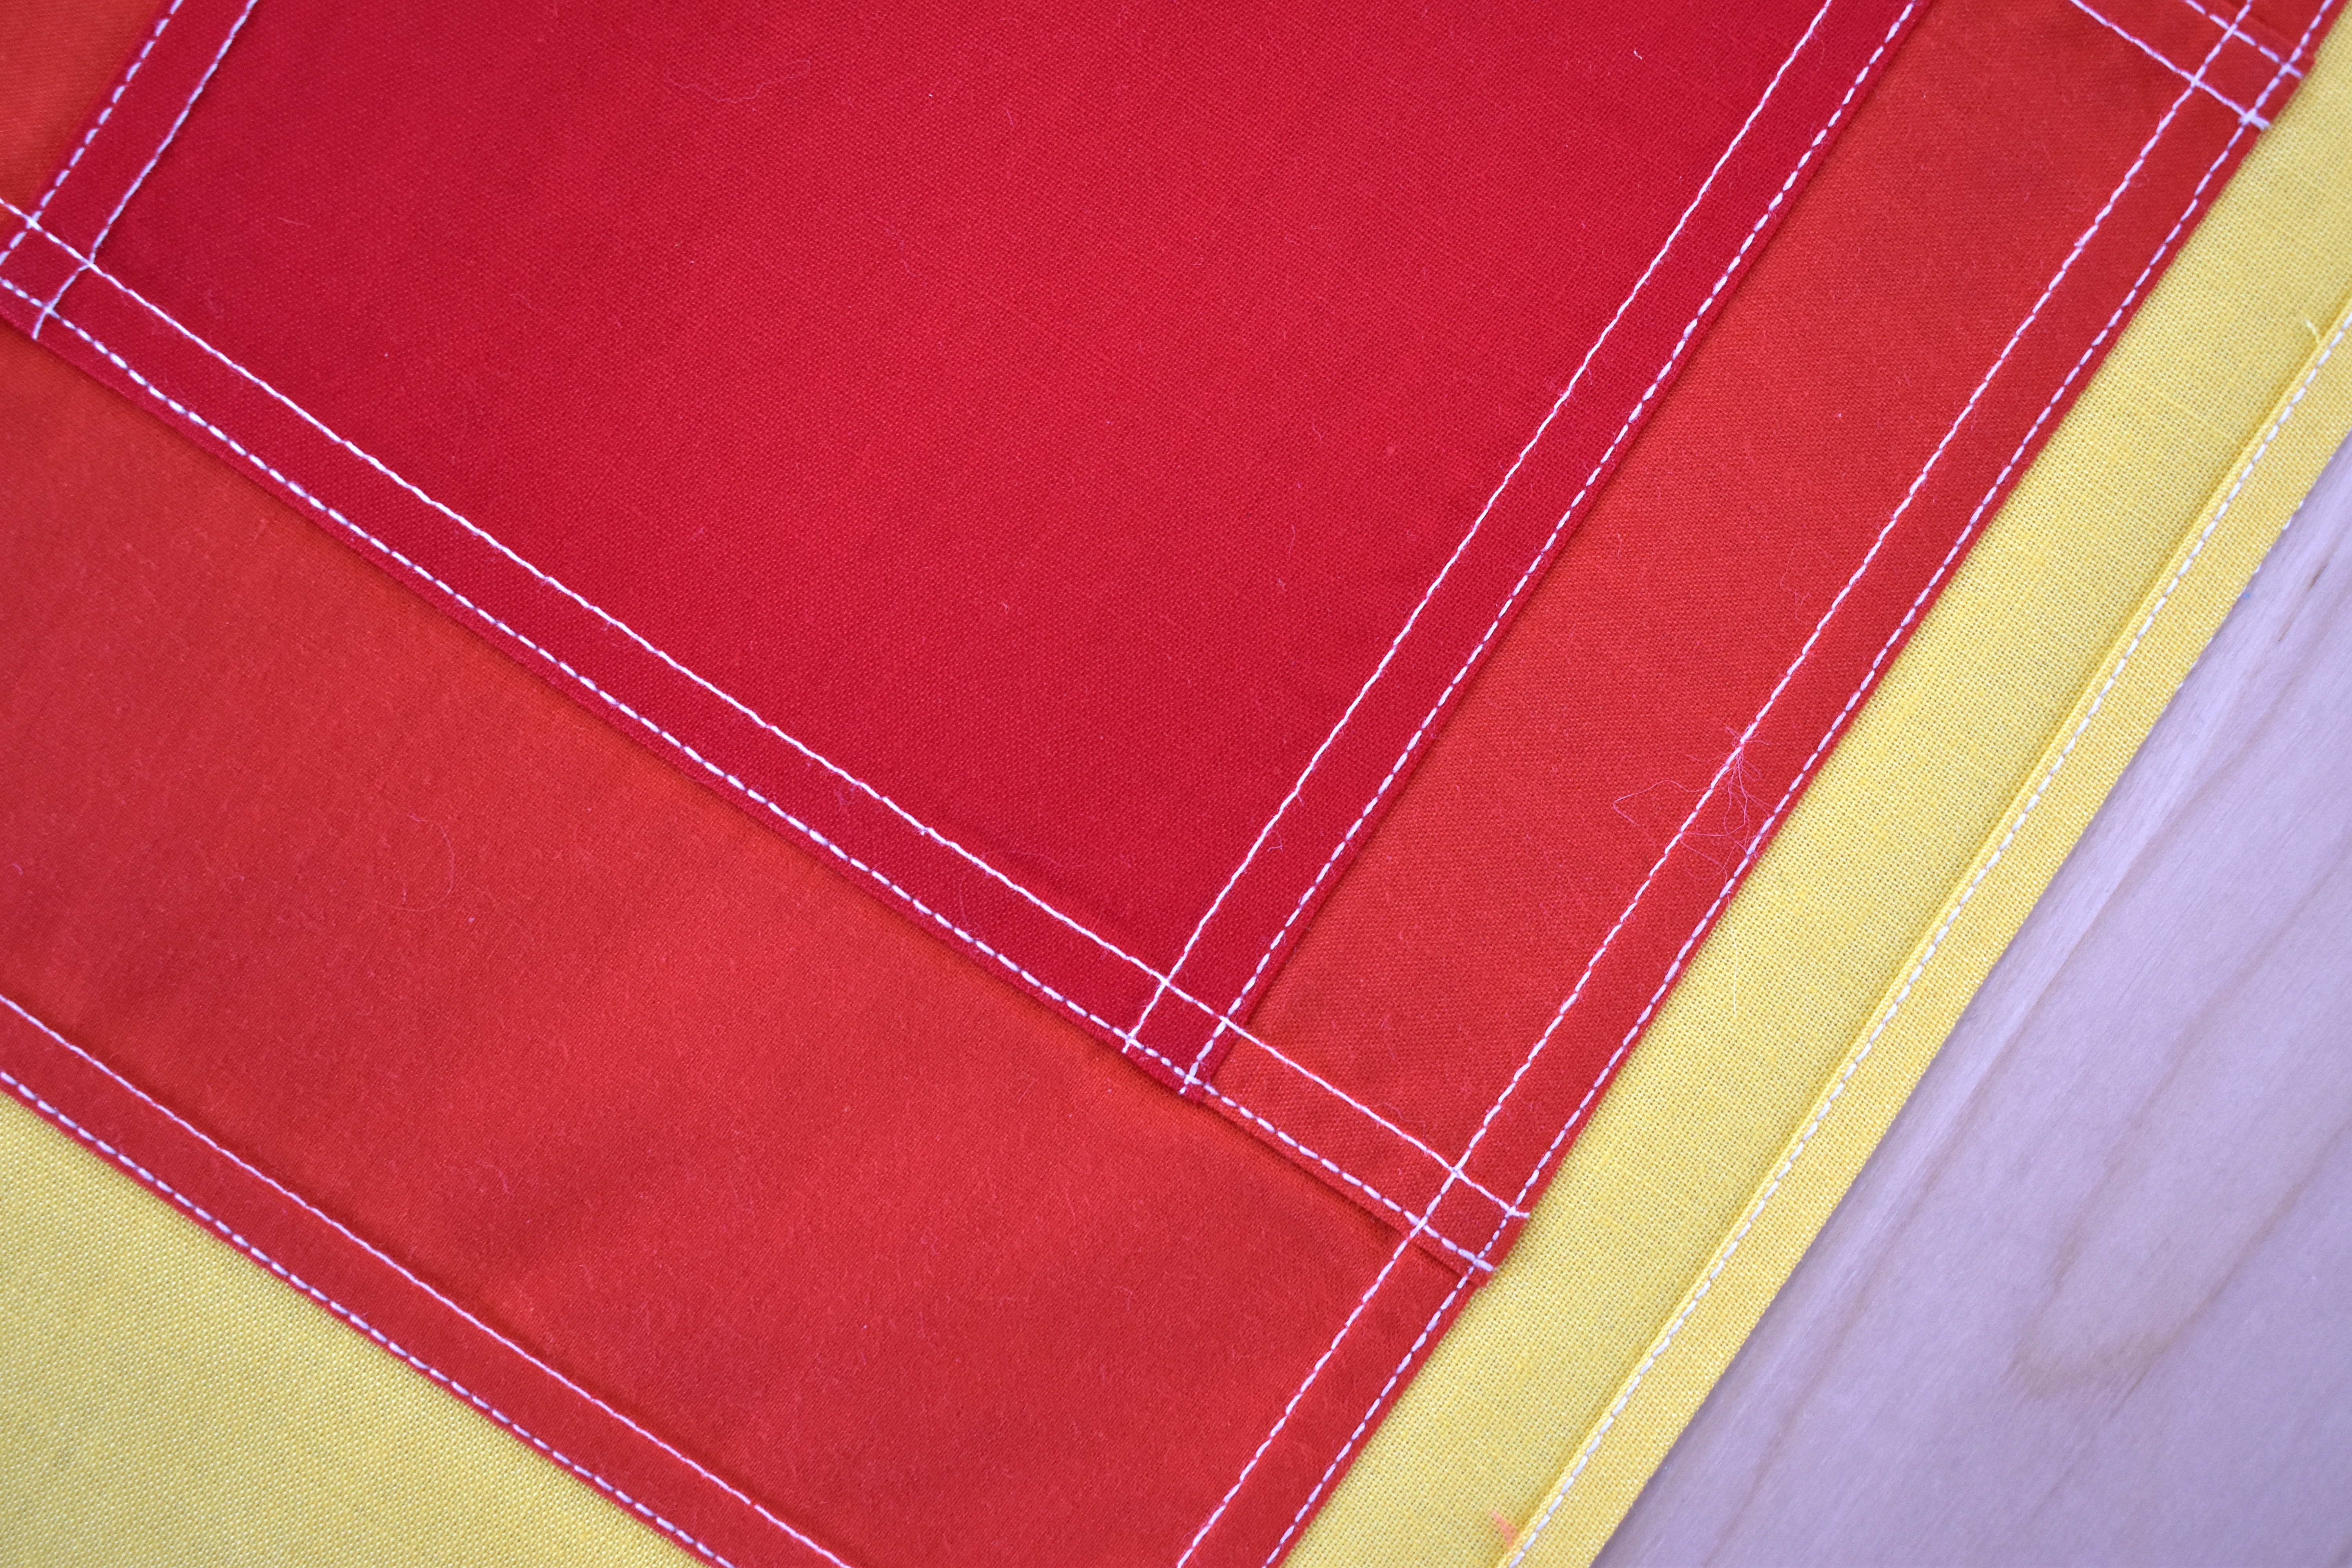
First, press the seam allowance towards the red center. Then fold the longer seam allowance (the red fabric) over the trimmed seam allowance. Aim to match the top edge of the long (red) seam just below the stitch line. Press into place. Be careful not to push or press the folded seam over the stitch line or it won’t fold cleanly in the next step.
Fold the pressed seam over to the other side and press well. Now the raw edges are inside the folded over seam.
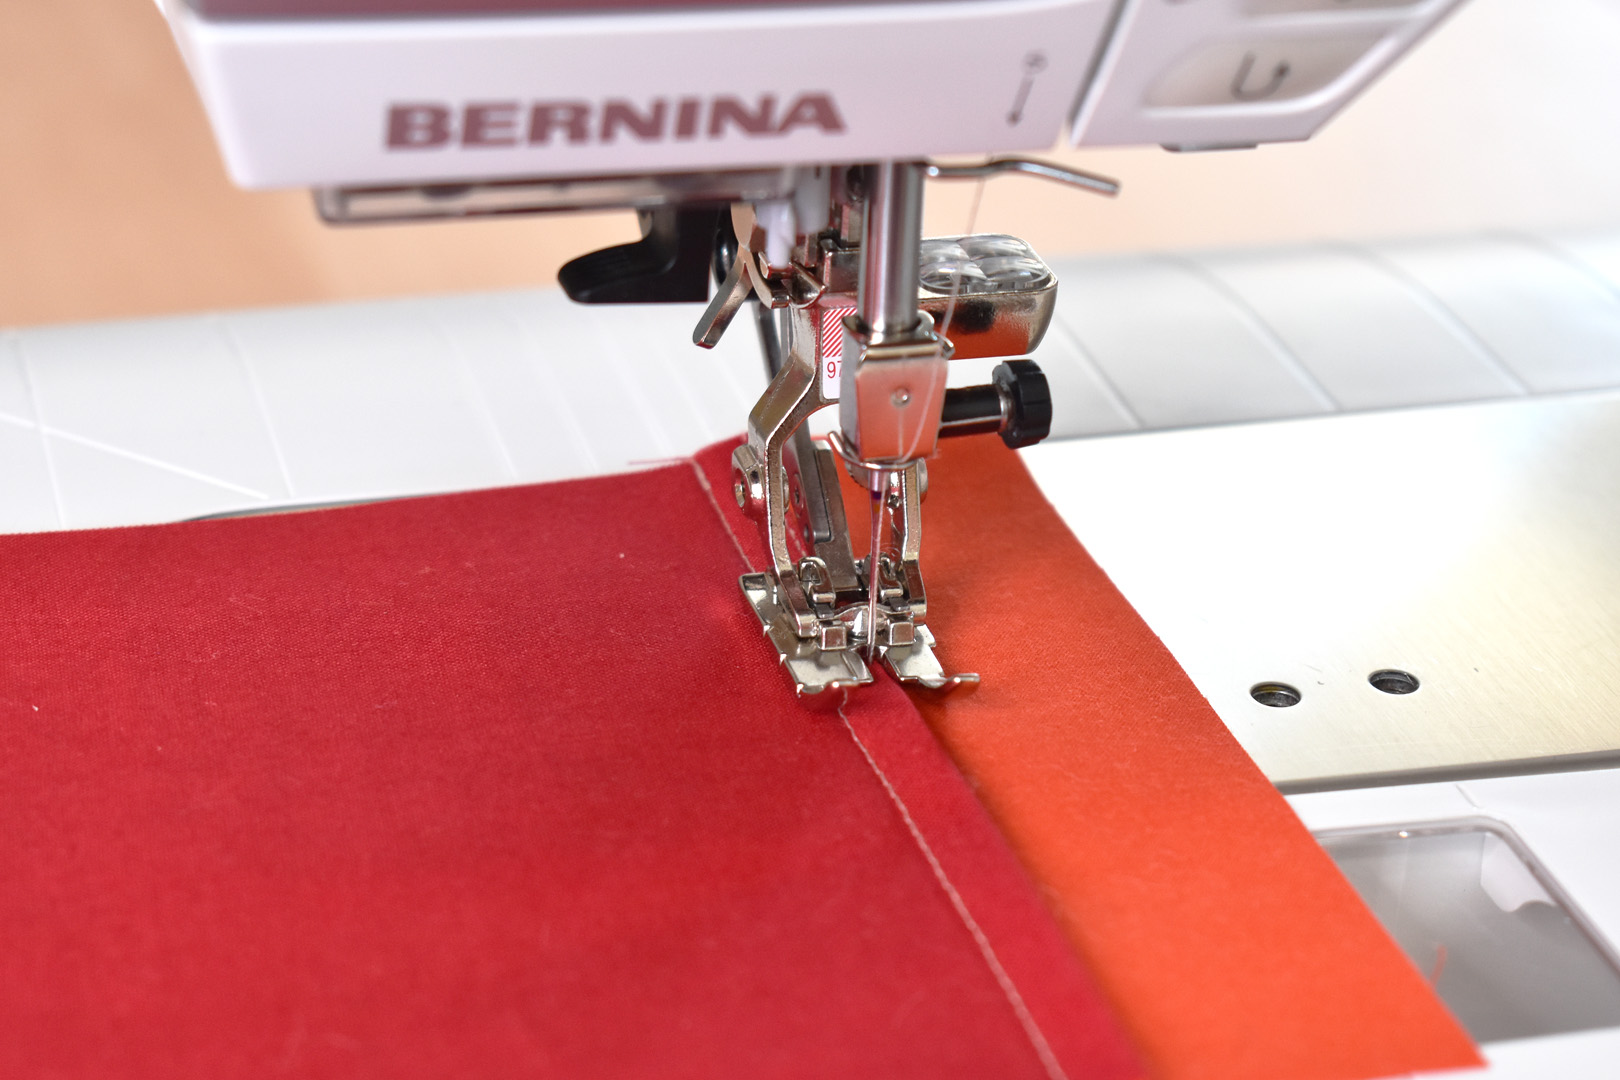
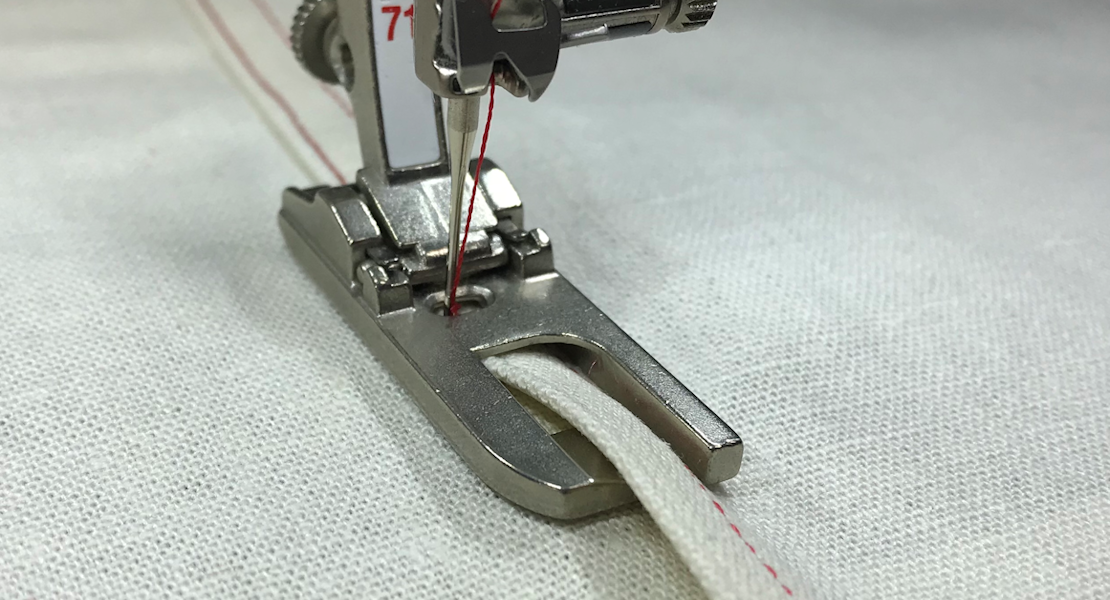
Stitch the seam down on the folded edge. Use the Patchwork Foot to help guide you by watching where the folded edge is feeding through the foot; try to keep the folded seam edge lined up with the foot edge to the right of the needle.
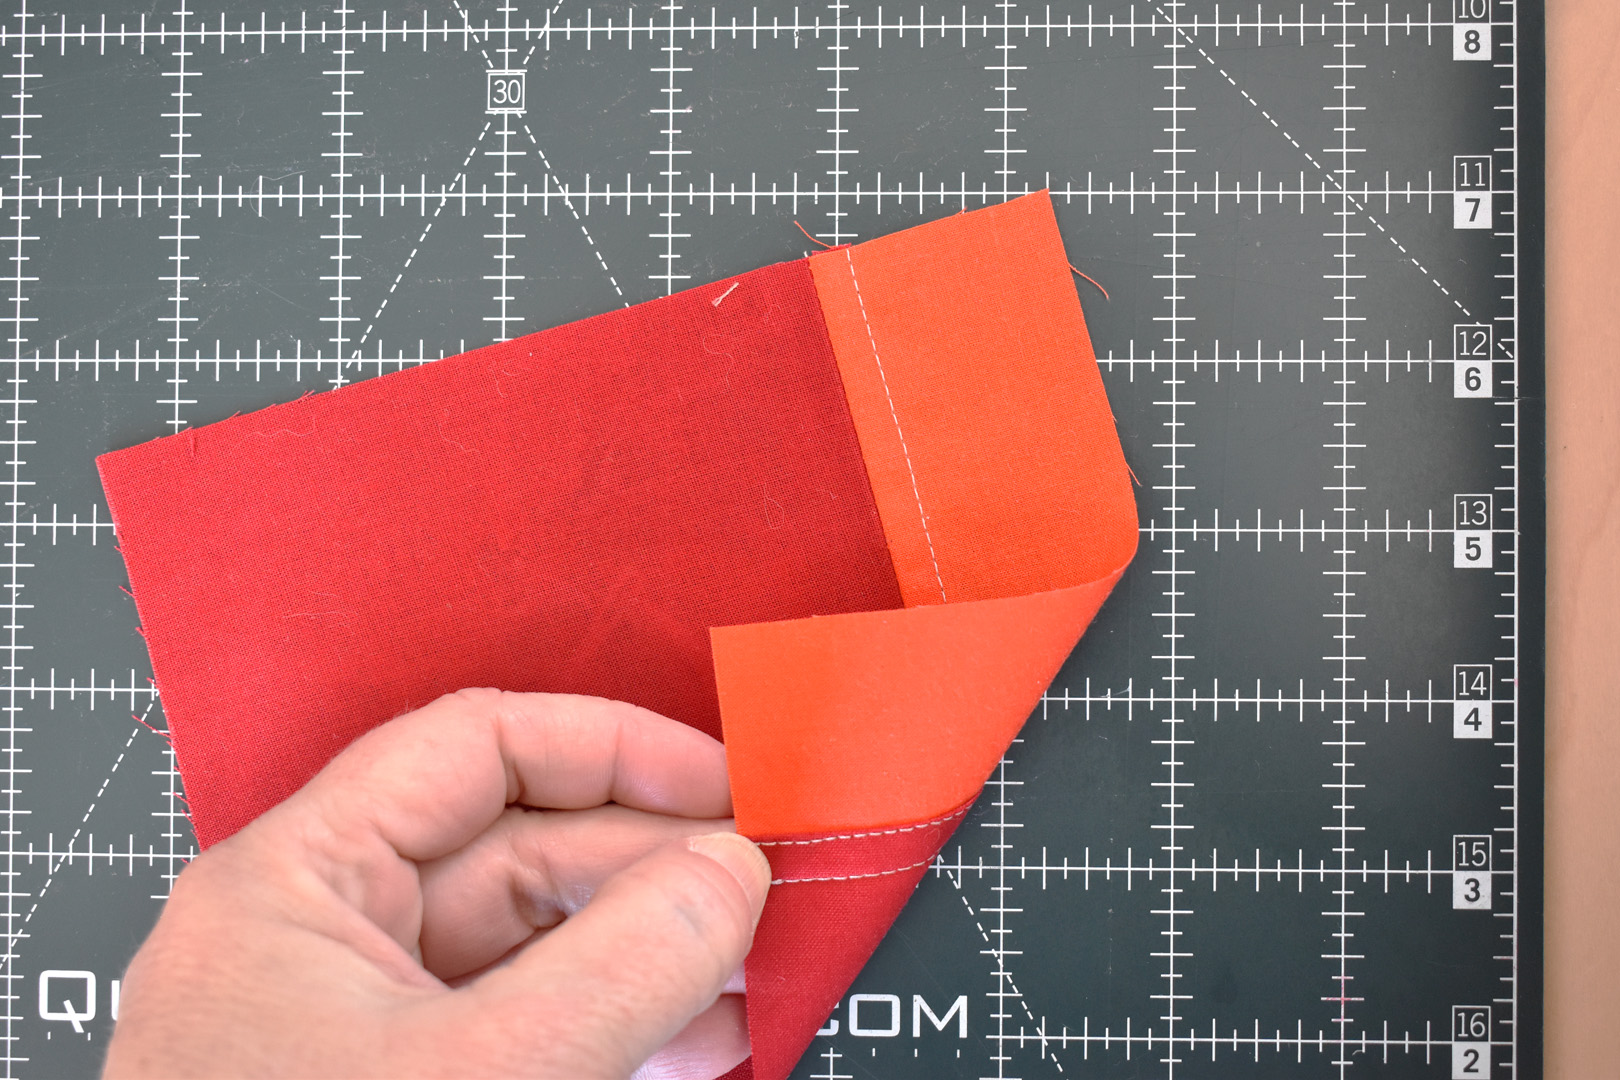
The first seam is finished! Next, add piece #3 following the same steps above (refer to the diagram above to keep track of where you are in the patchwork process). Notice with piece #3 added you will start to sew over other seams. Slow down when sewing over the thick seams, use a Dual Feed foot if you have one, and if you need it use your Height Compensation Tool to get you over the seam hump.
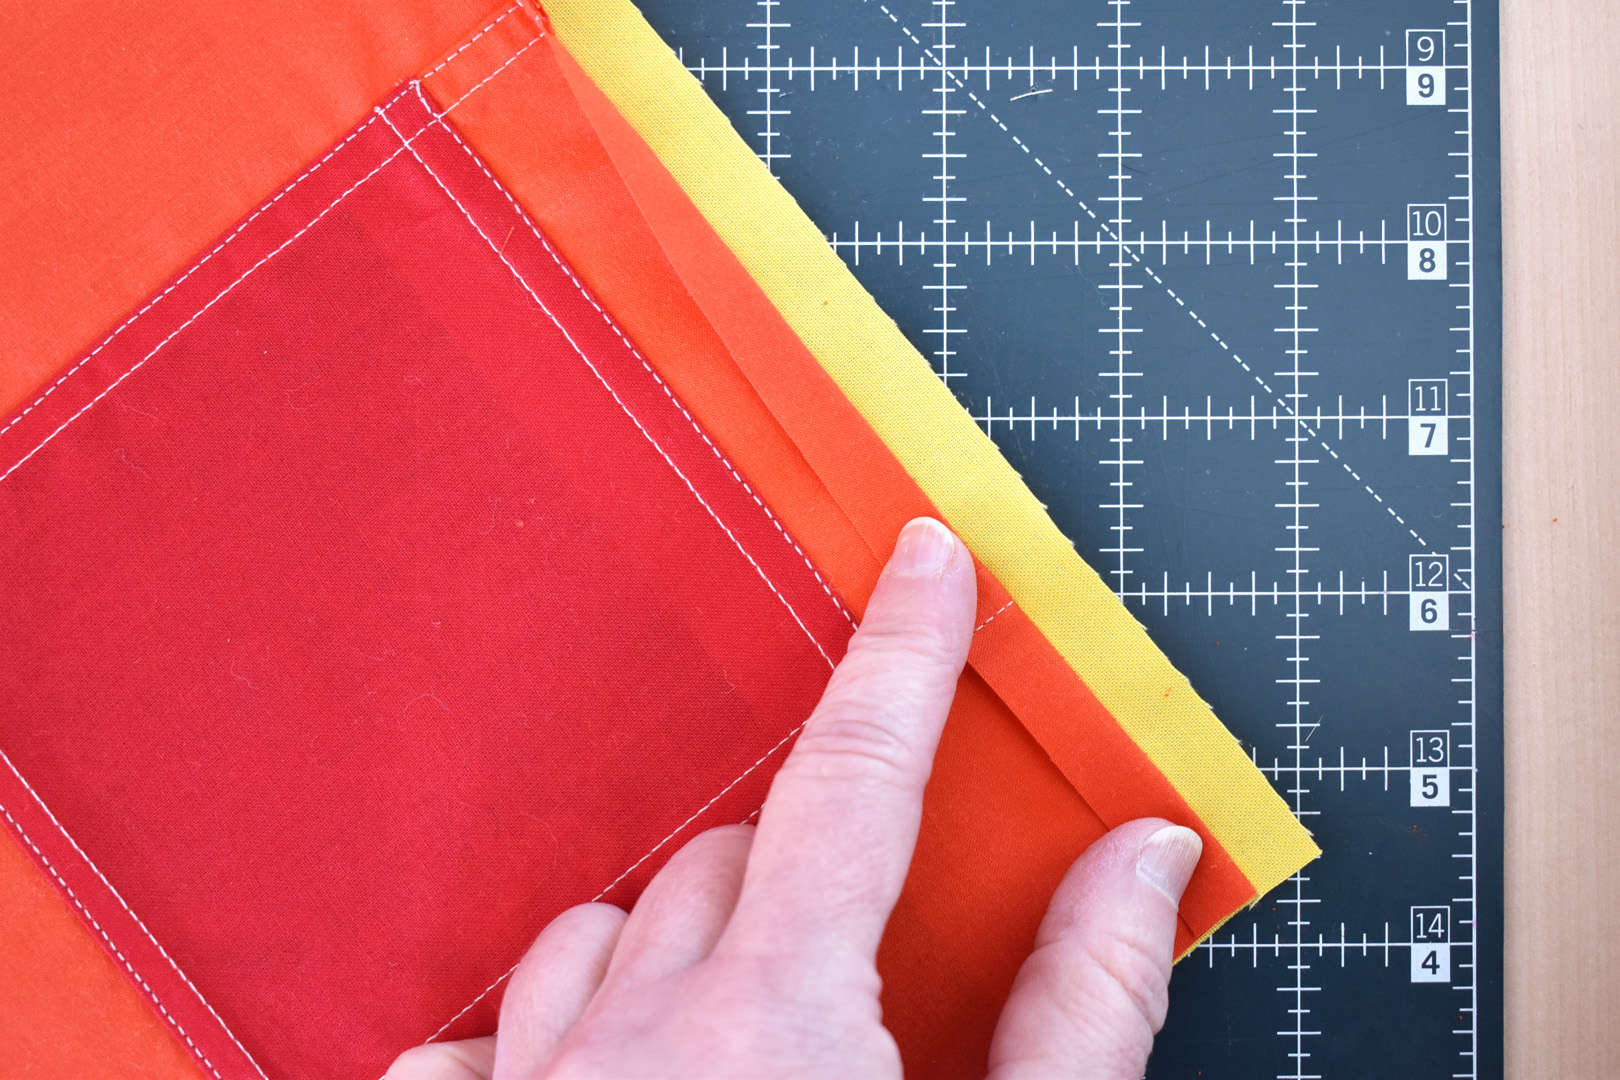
As you continue to add pieces to the patchwork, remember to always trim the seam allowances with the red center facing you.
After sewing all the patchwork seams together give the finished piece a nice pressing before finishing the edges.
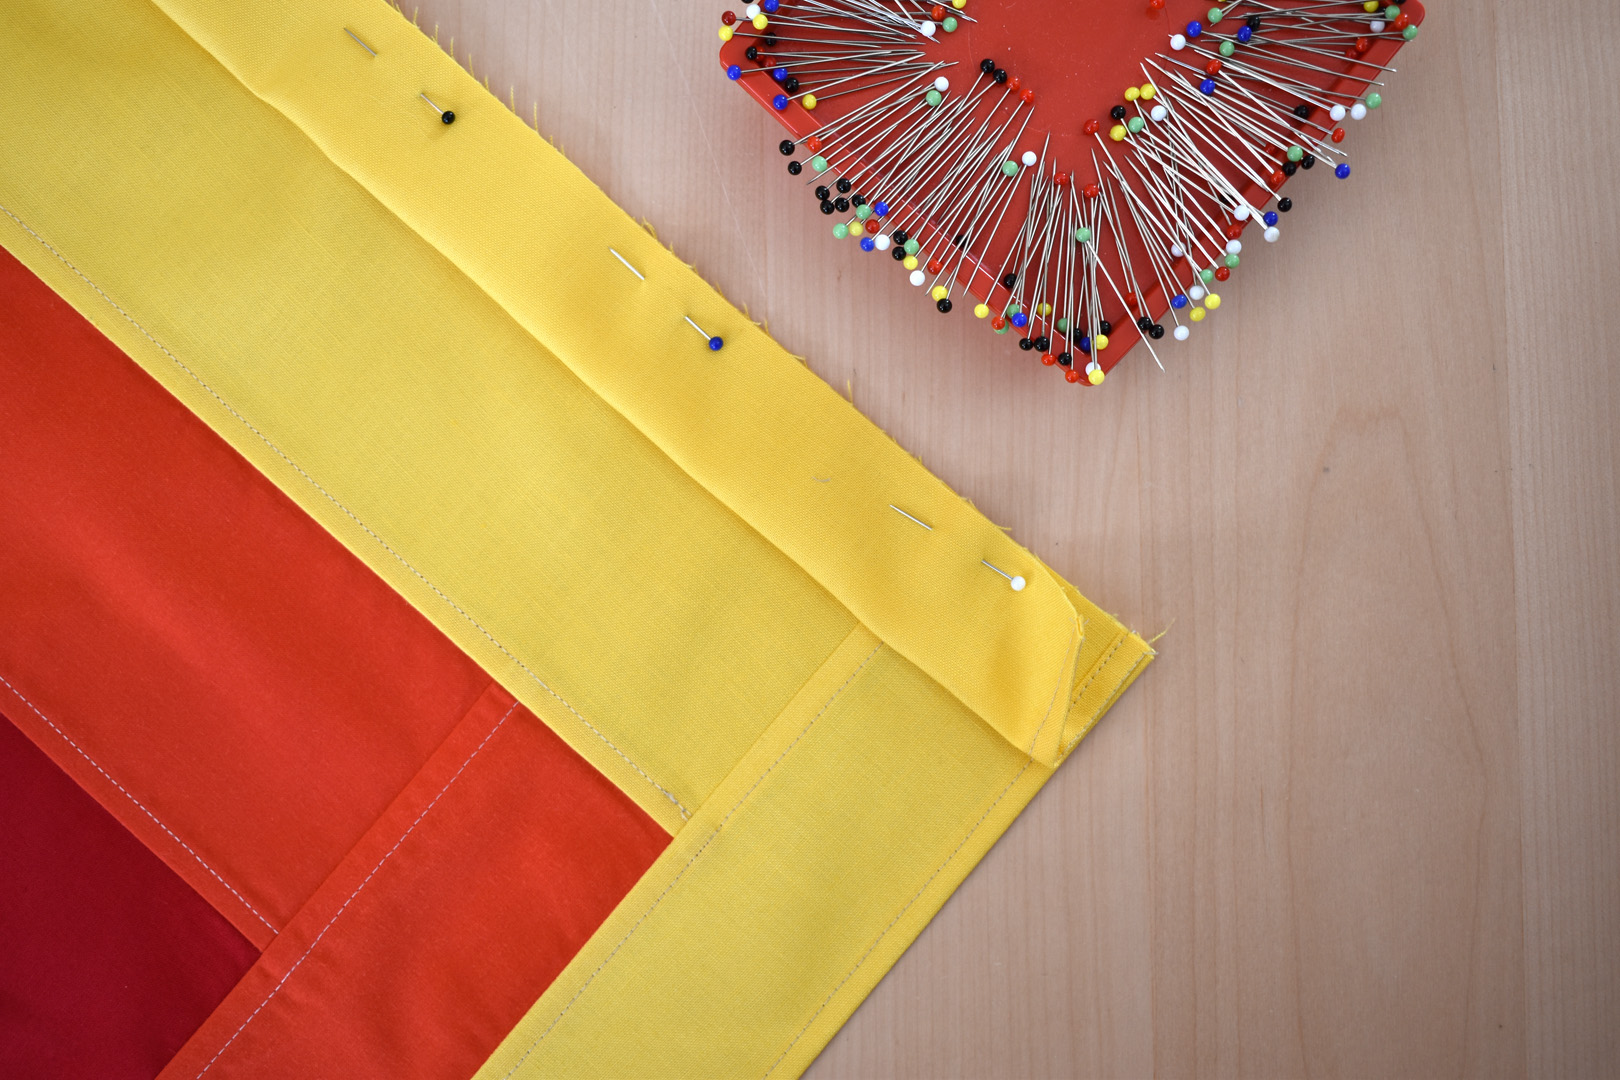
You will stitch a 1/2″ line around the side and bottom edges of the block to act as a pressing guide. Use a ruler and a fabric marking pen (that you tested on your fabric so you know it won’t stain) to create a clear line to follow. I used a white pen that disappears with heat (it doesn’t show in the photographs but is enough of a line for me to follow).
Stitch around the sides and bottom of the block, making sure to stitch completely down each side from beginning to end. Also, stitch the same 1/2″ line on both short ends of the 2 1/2″ x 13″ piece for the hanger.
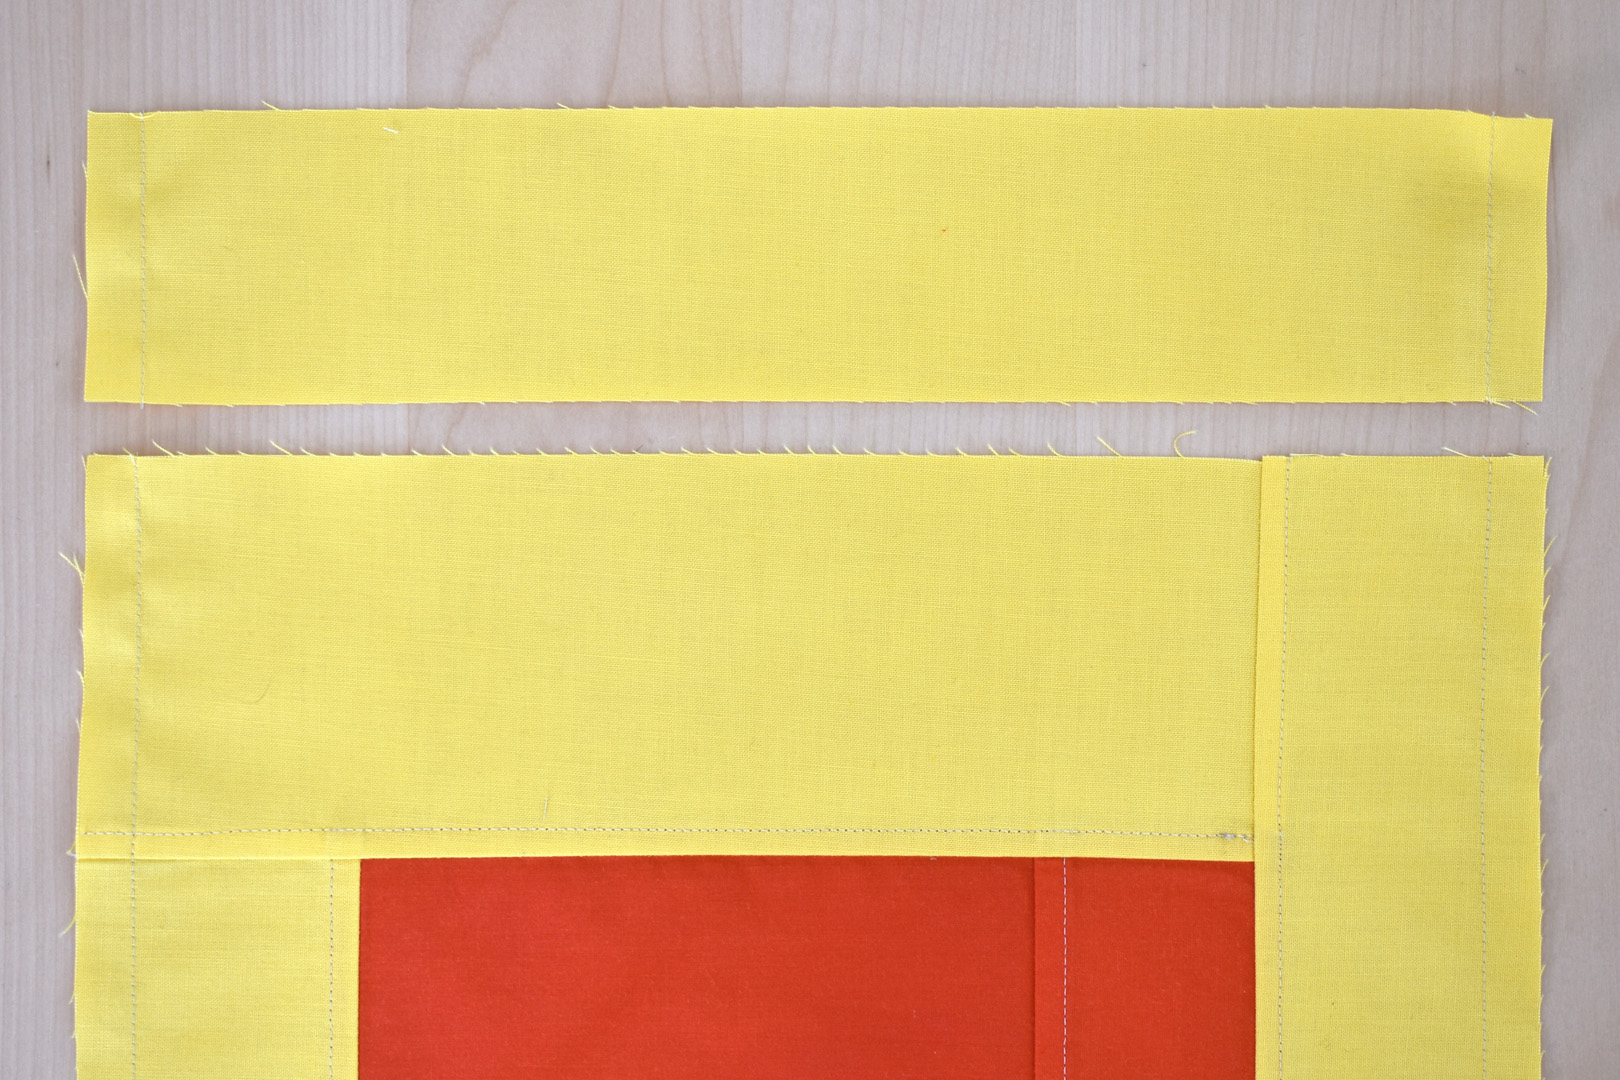
Press edges towards the back of the block along the stitched edges. Remember also to do this for the small hanger piece.
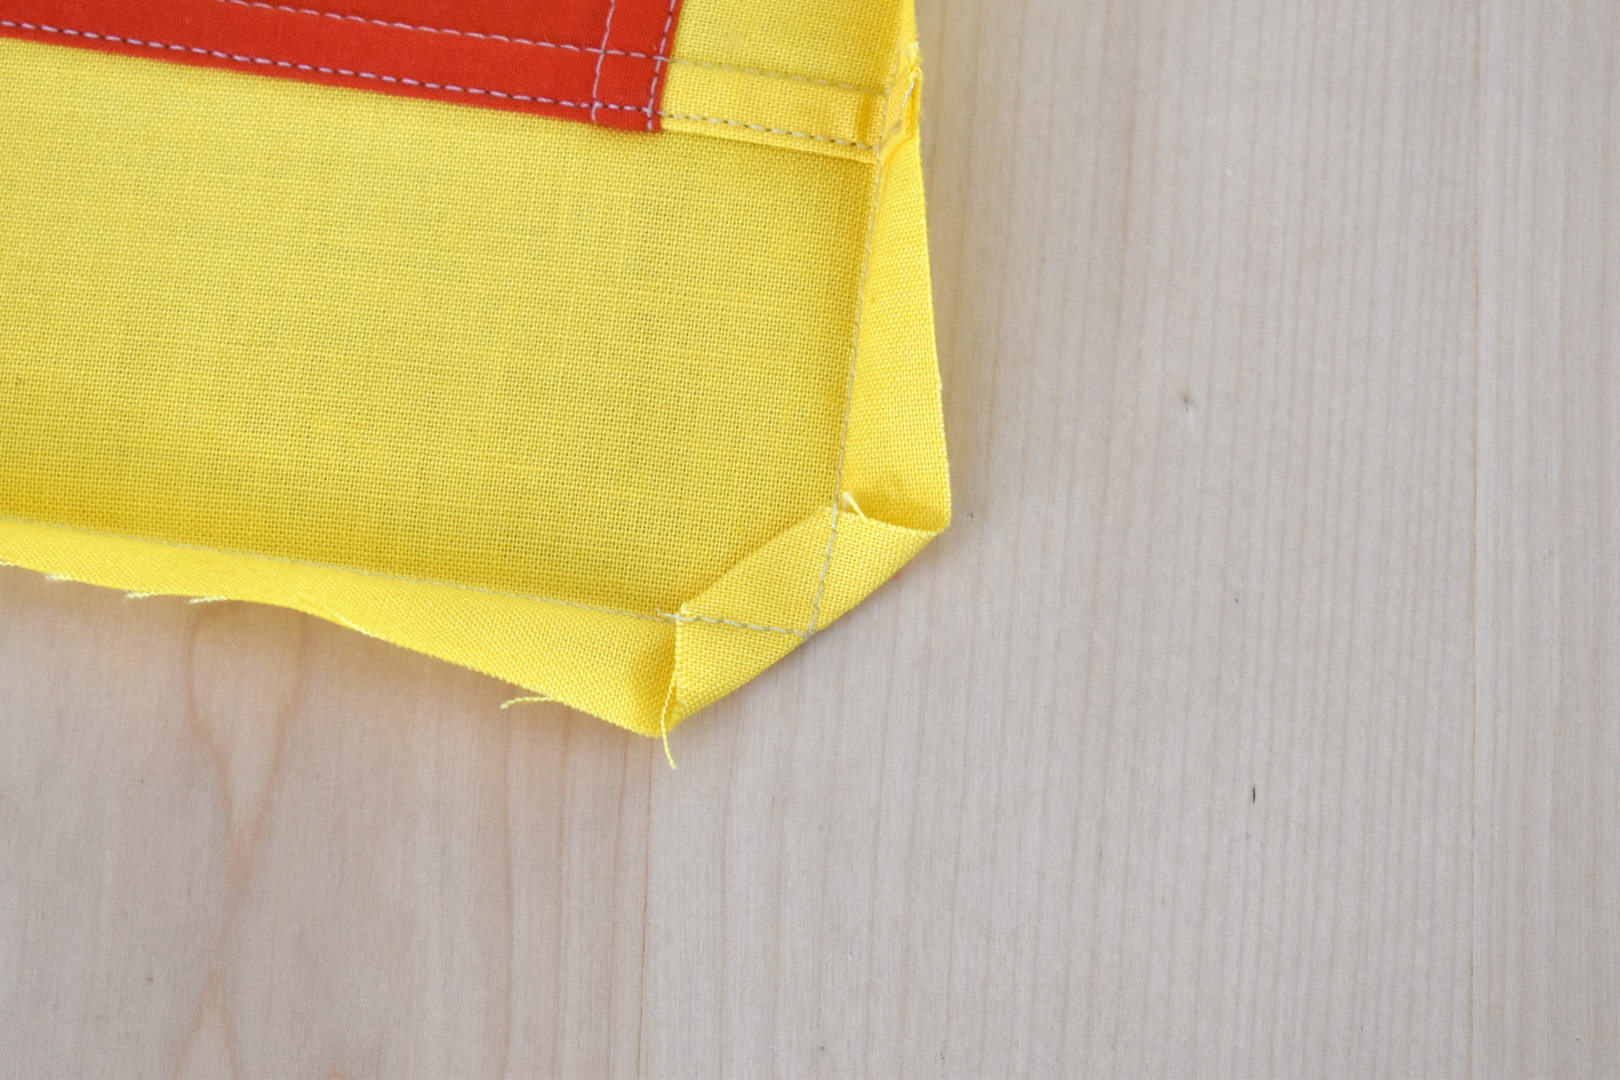
When it comes to the corners, fold the point to the stitched corner, then fold over again until you see the corner stitching meet up with the side stitching. Press in place. Next, fold the raw edges in towards the stitching and press in place around all edges. Remember to also do this on the short ends of the hanger.
Stitch the edges down around the block and the ends of the hanger.
Now we’ll attach the hanger to the top of the block. You will notice the seams in the block and the hanger have a right side with just one line of stitching by each seam, and a wrong side with two lines of stitching by each seam. Fold the hanger strip in half, wrong sides together, and pin to the right side of the block matching top raw edge (just like the photo above). Stitch the hanger to the block with a 1/2″ seam.
After stitching the hanger to the top of the block, set the block on your cutting mat right side up. Fold only the top seam allowance over to reveal the bottom two layers of seam allowance.
Trim both the bottom layers to a scant quarter inch from the seam.
Treat this seam just like the other seams in the project, pressing the top seam allowance over the bottom layers, and stitching down the seam on the folded edge. Cut the dowel rod to size, leaving a tiny bit hanging out on each side of the block to tie monofilament.
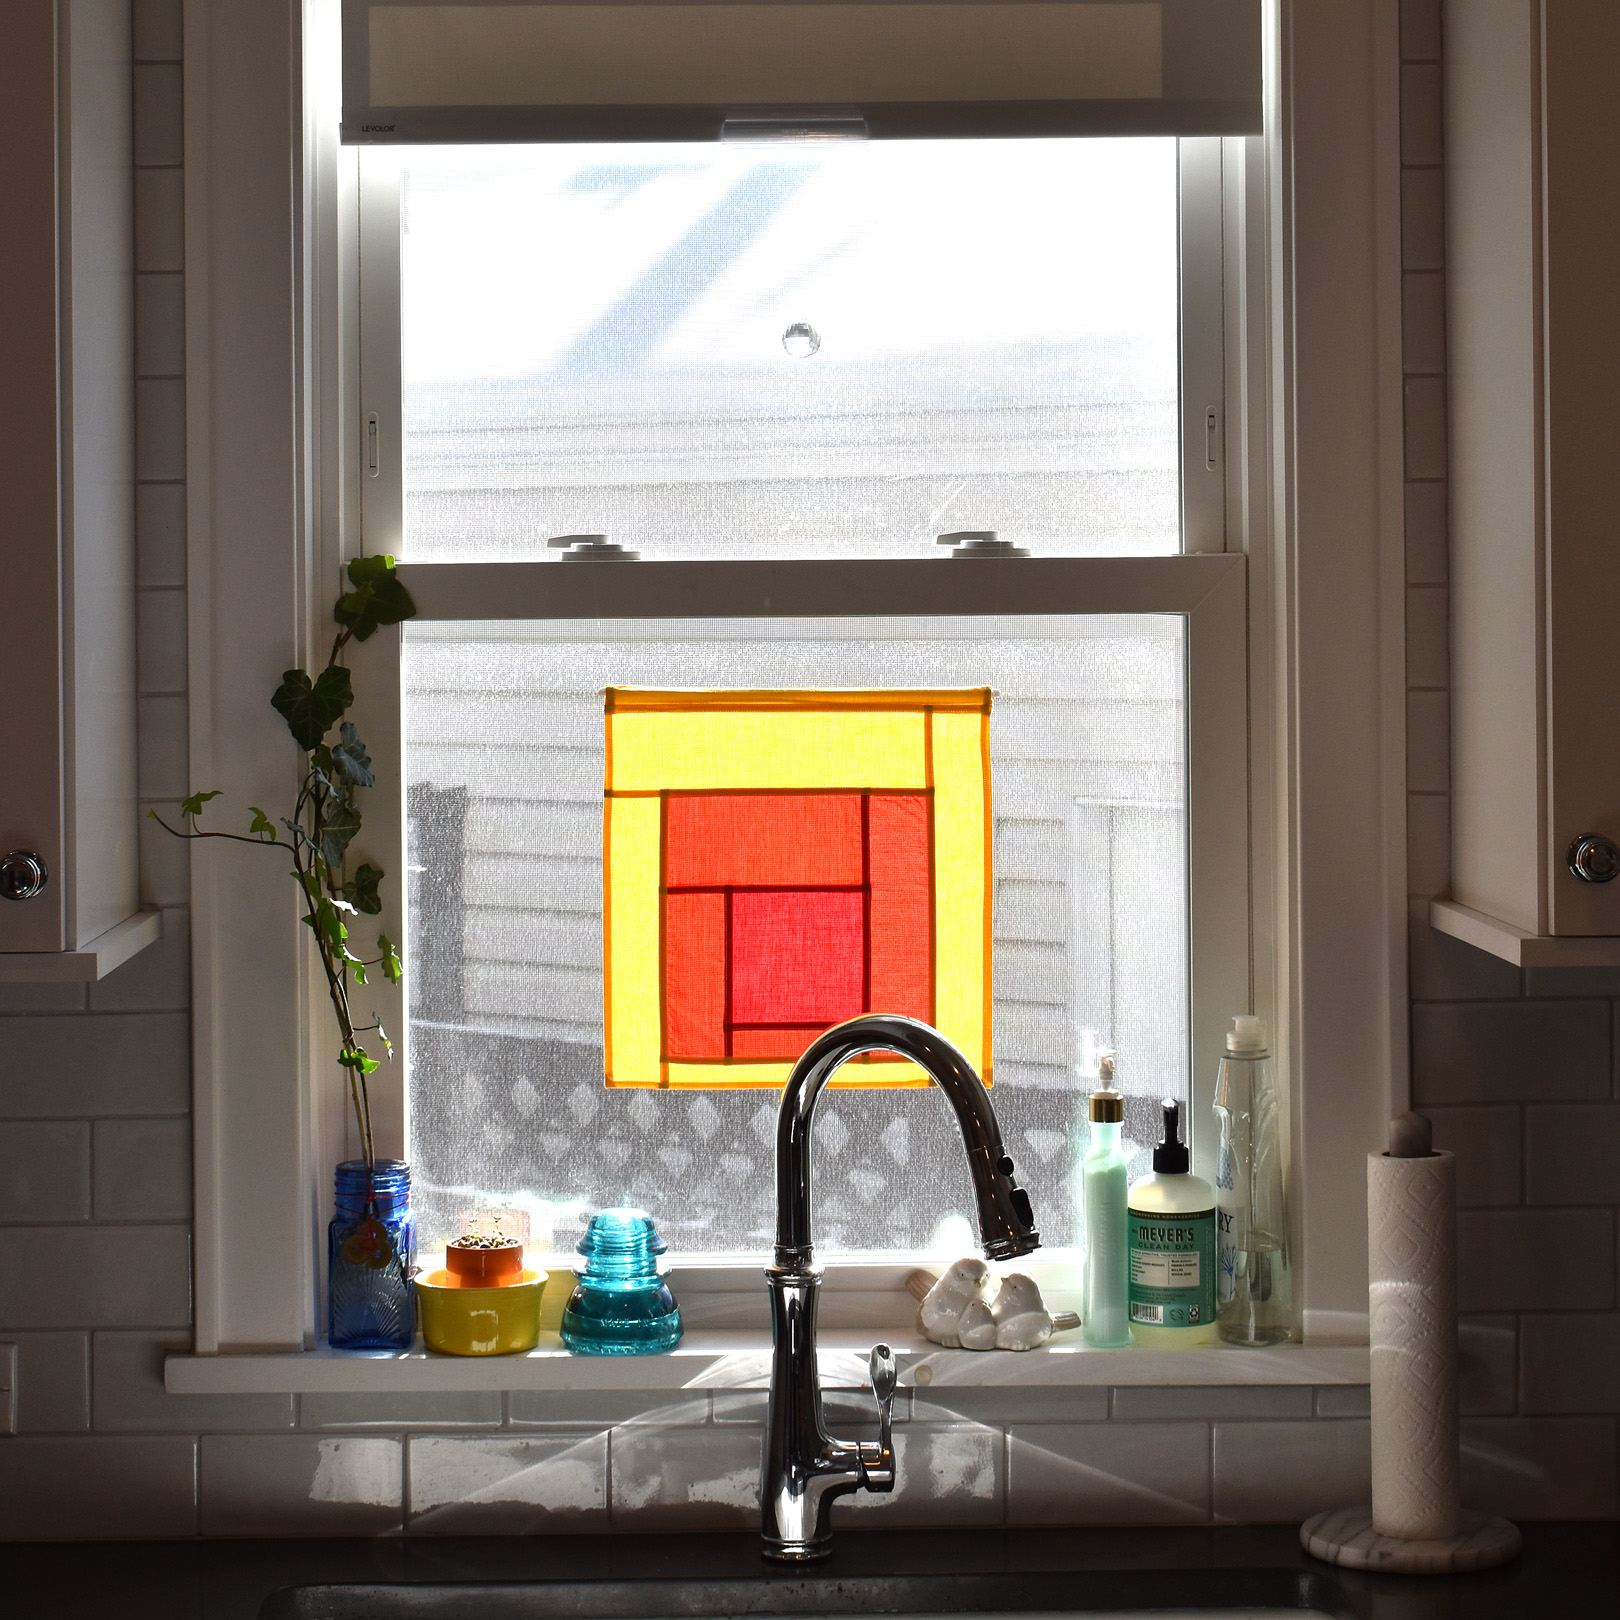
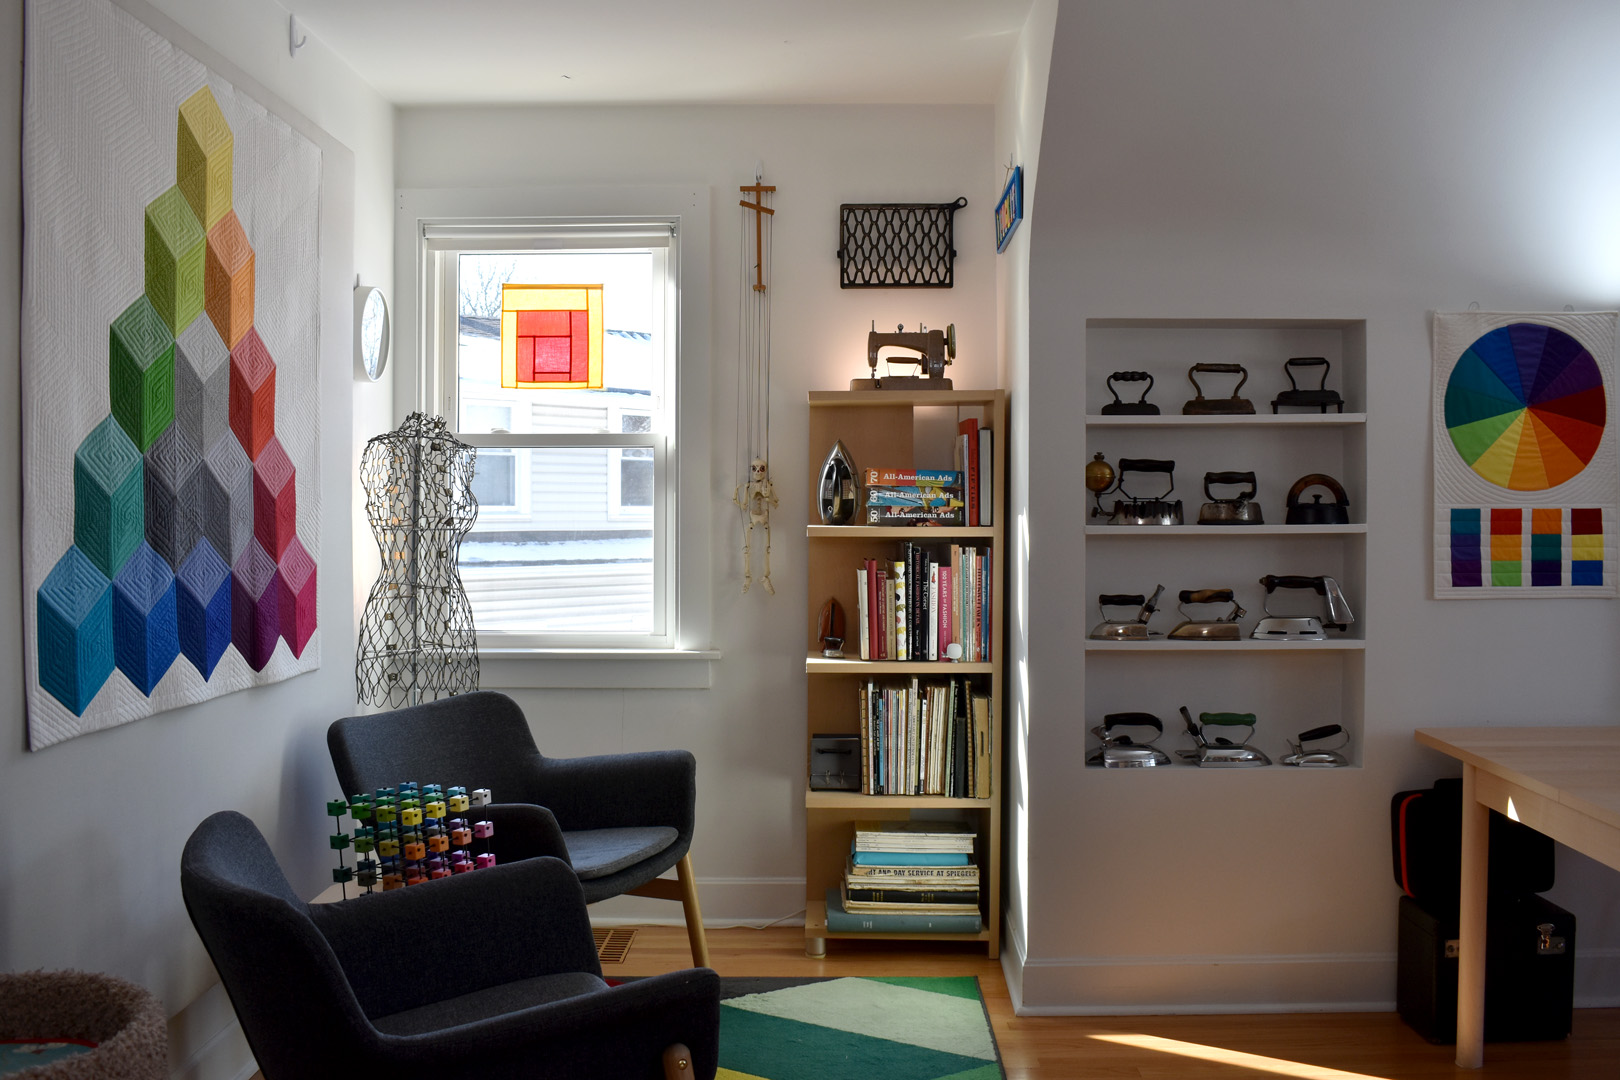
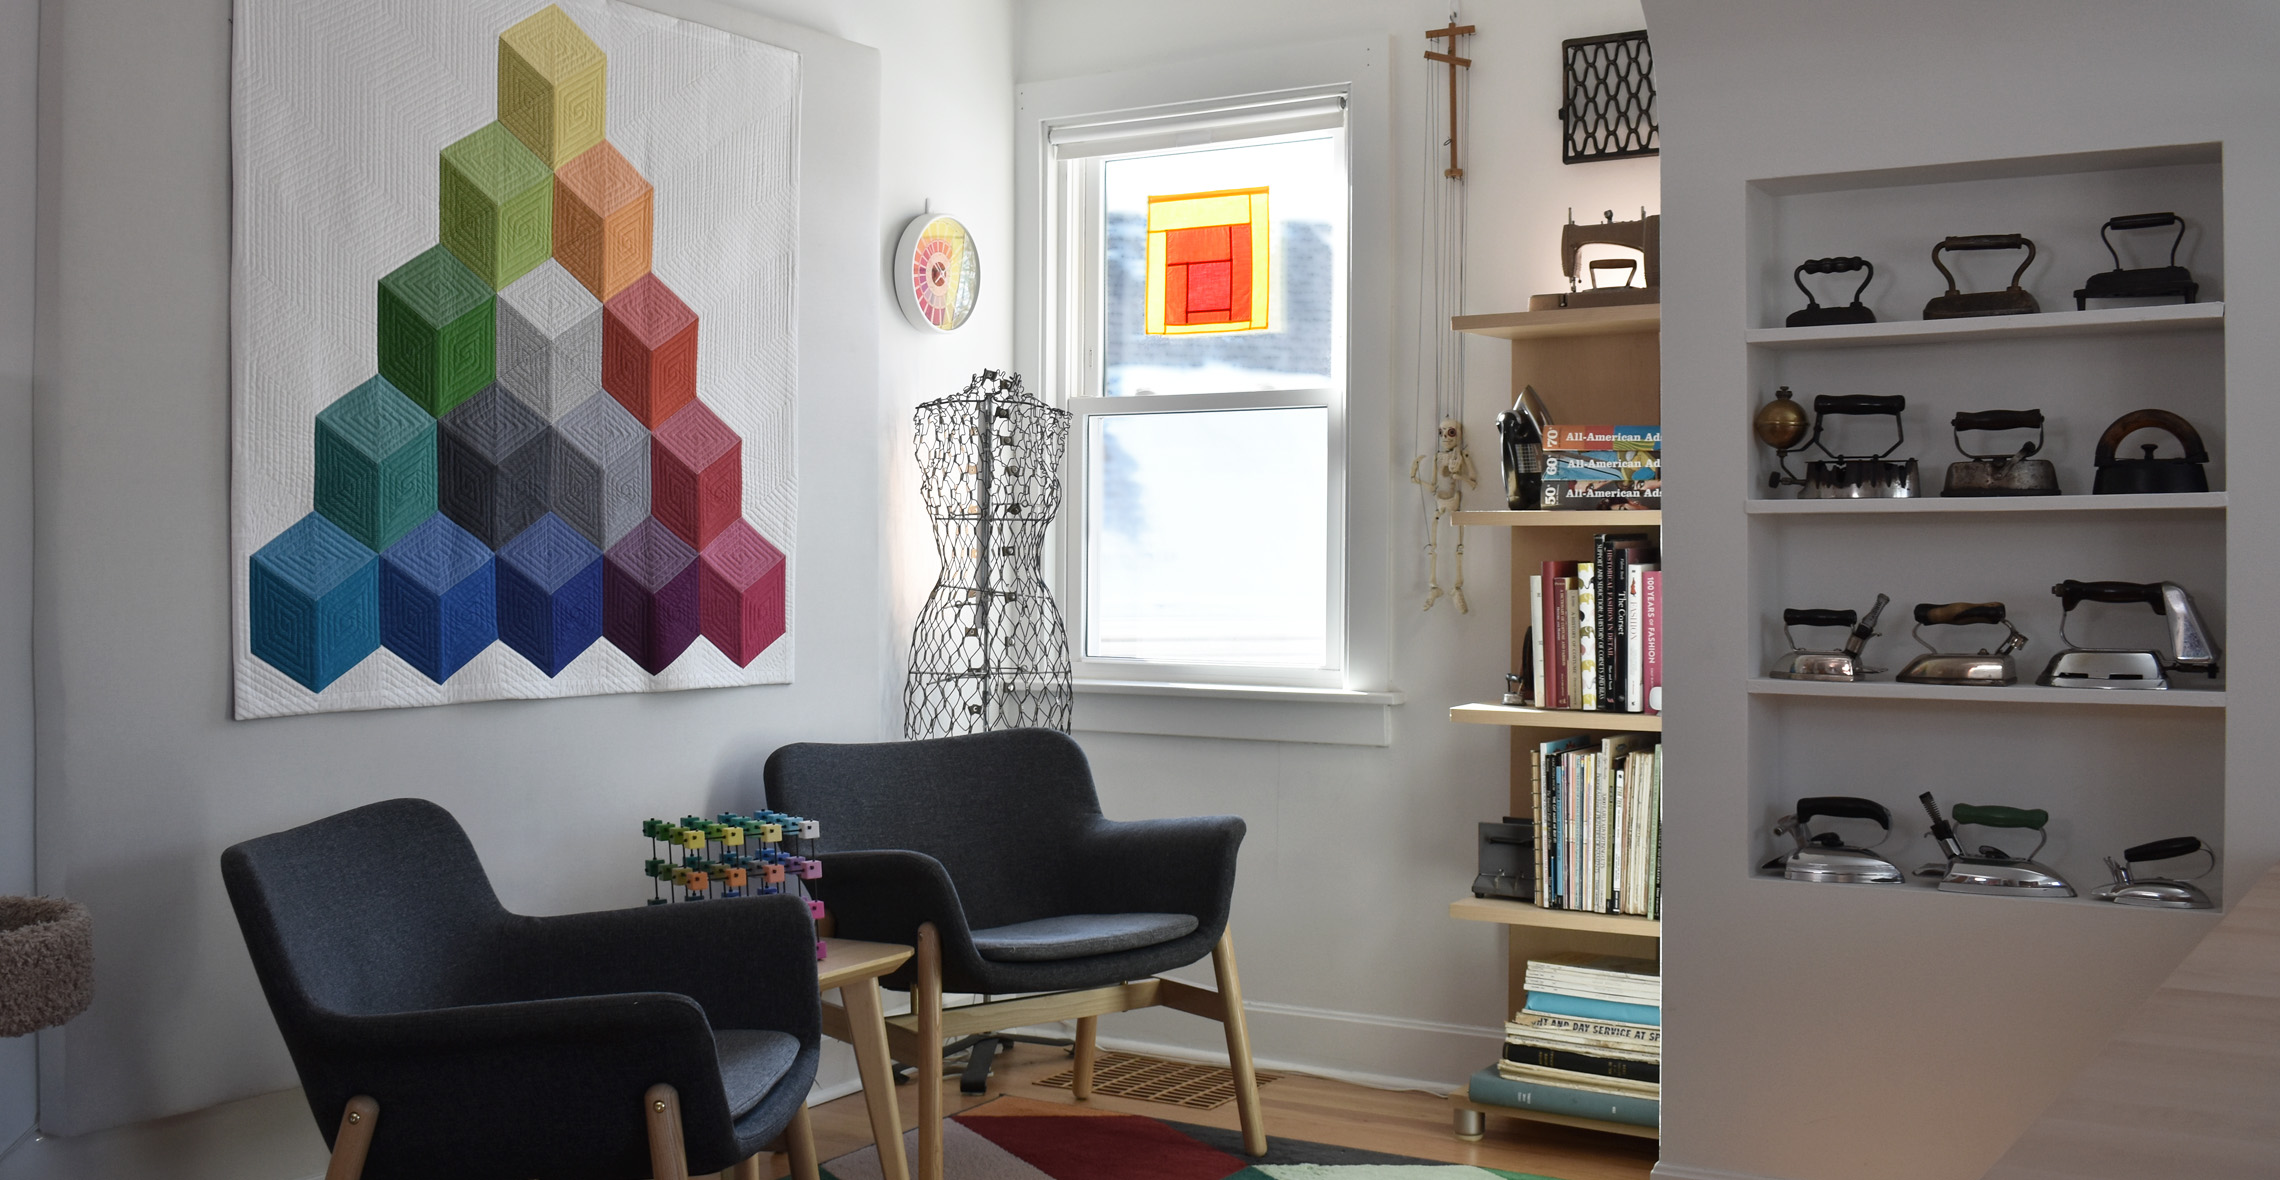
Hang in any window and enjoy!
This little block really brings a feeling of warm sunshine on these cold Chicago winter days! Last but not least, remember that sunlight has the power to eventually fade the colors in fabric if exposed for too long. So, if you make a block that you really love, enjoy it for a week or two in the window and then hang it out of direct sunlight to keep the colors fresh.