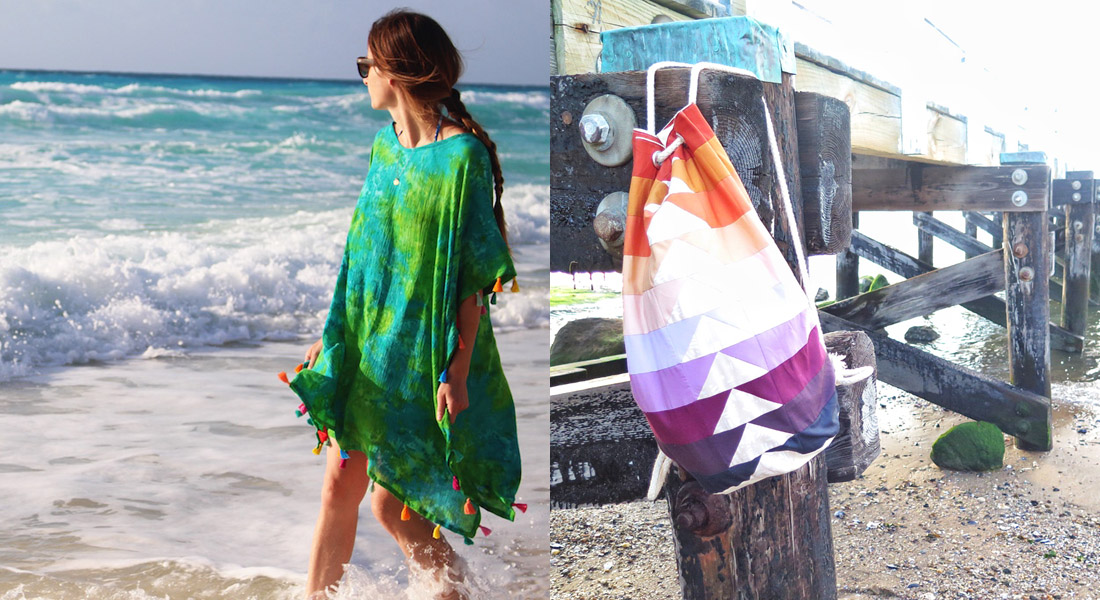
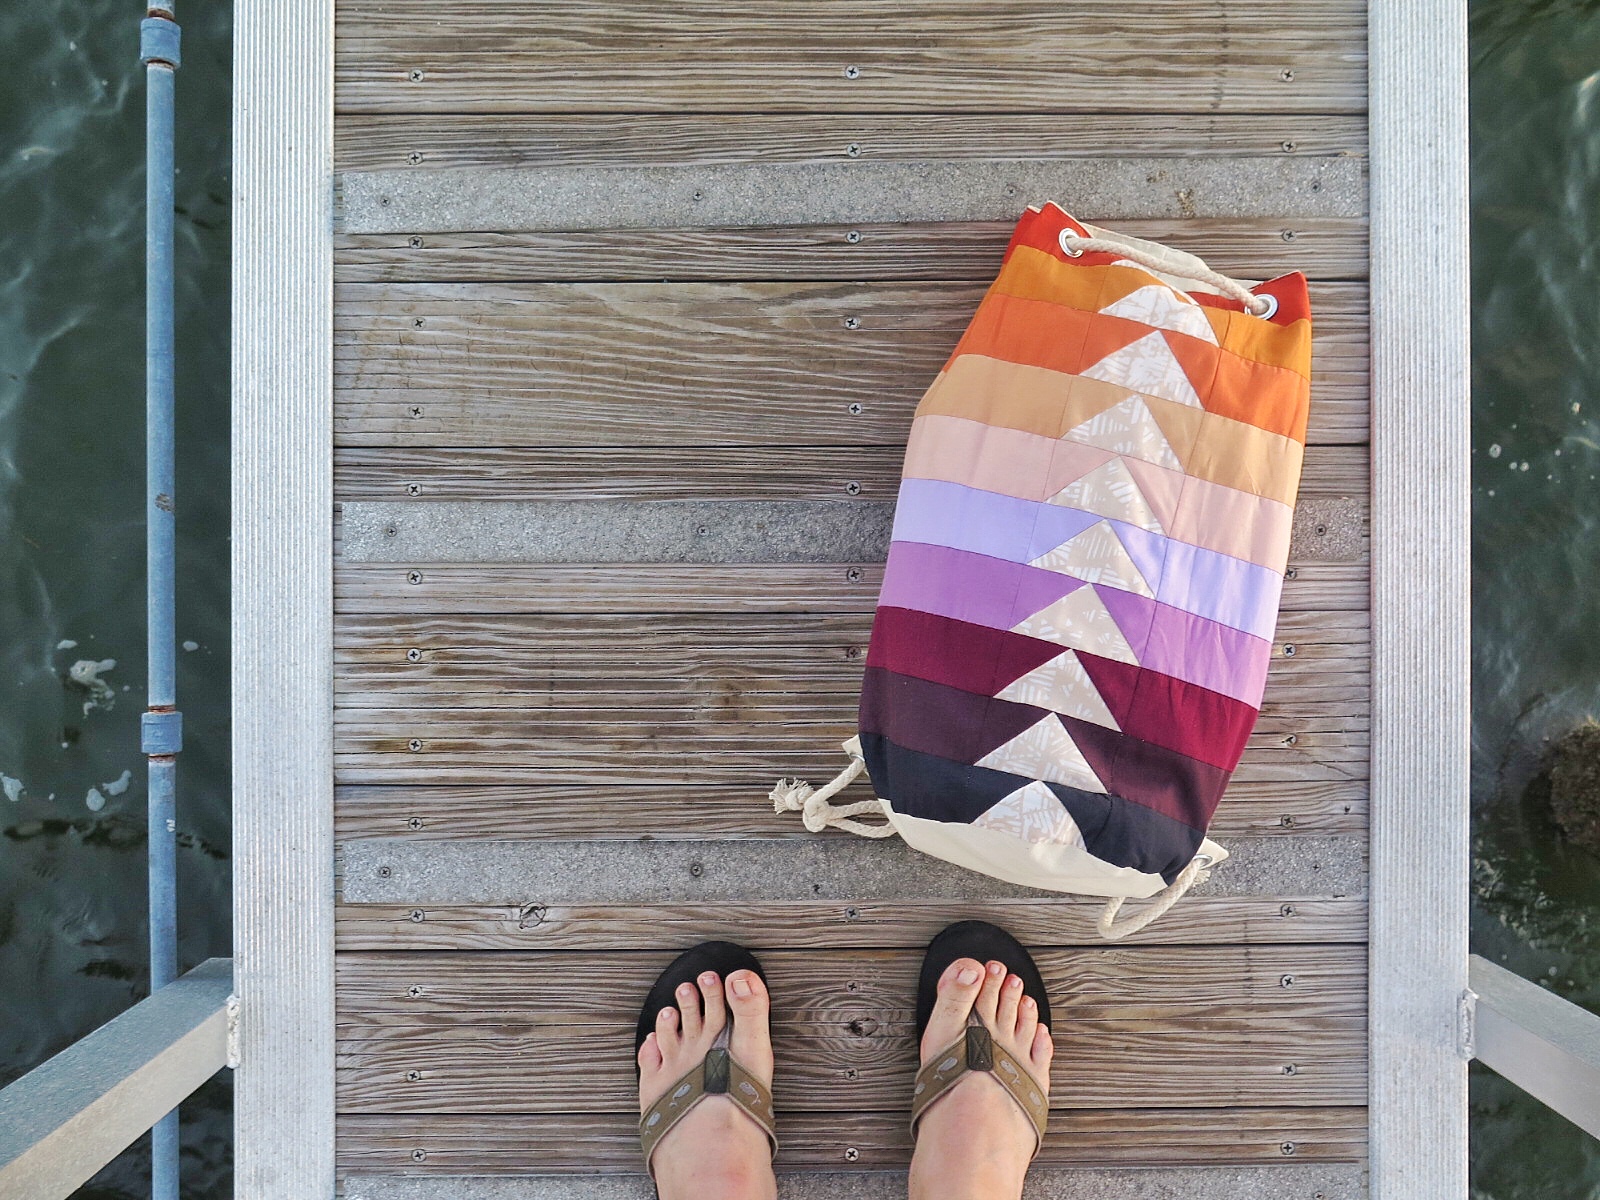
Flying Geese Patchwork Bag
I don’t know about you, but as soon as summer hits I am outside as often as possible. The moment it is warm out, I call a friend, grab a bag, and am off on a new adventure. I have wanted to make a bucket bag for such a long time. They are trendy, but also so functional. I could never find a pattern for one that was quite what I liked, though. So I thought I would try my hand at making my own.

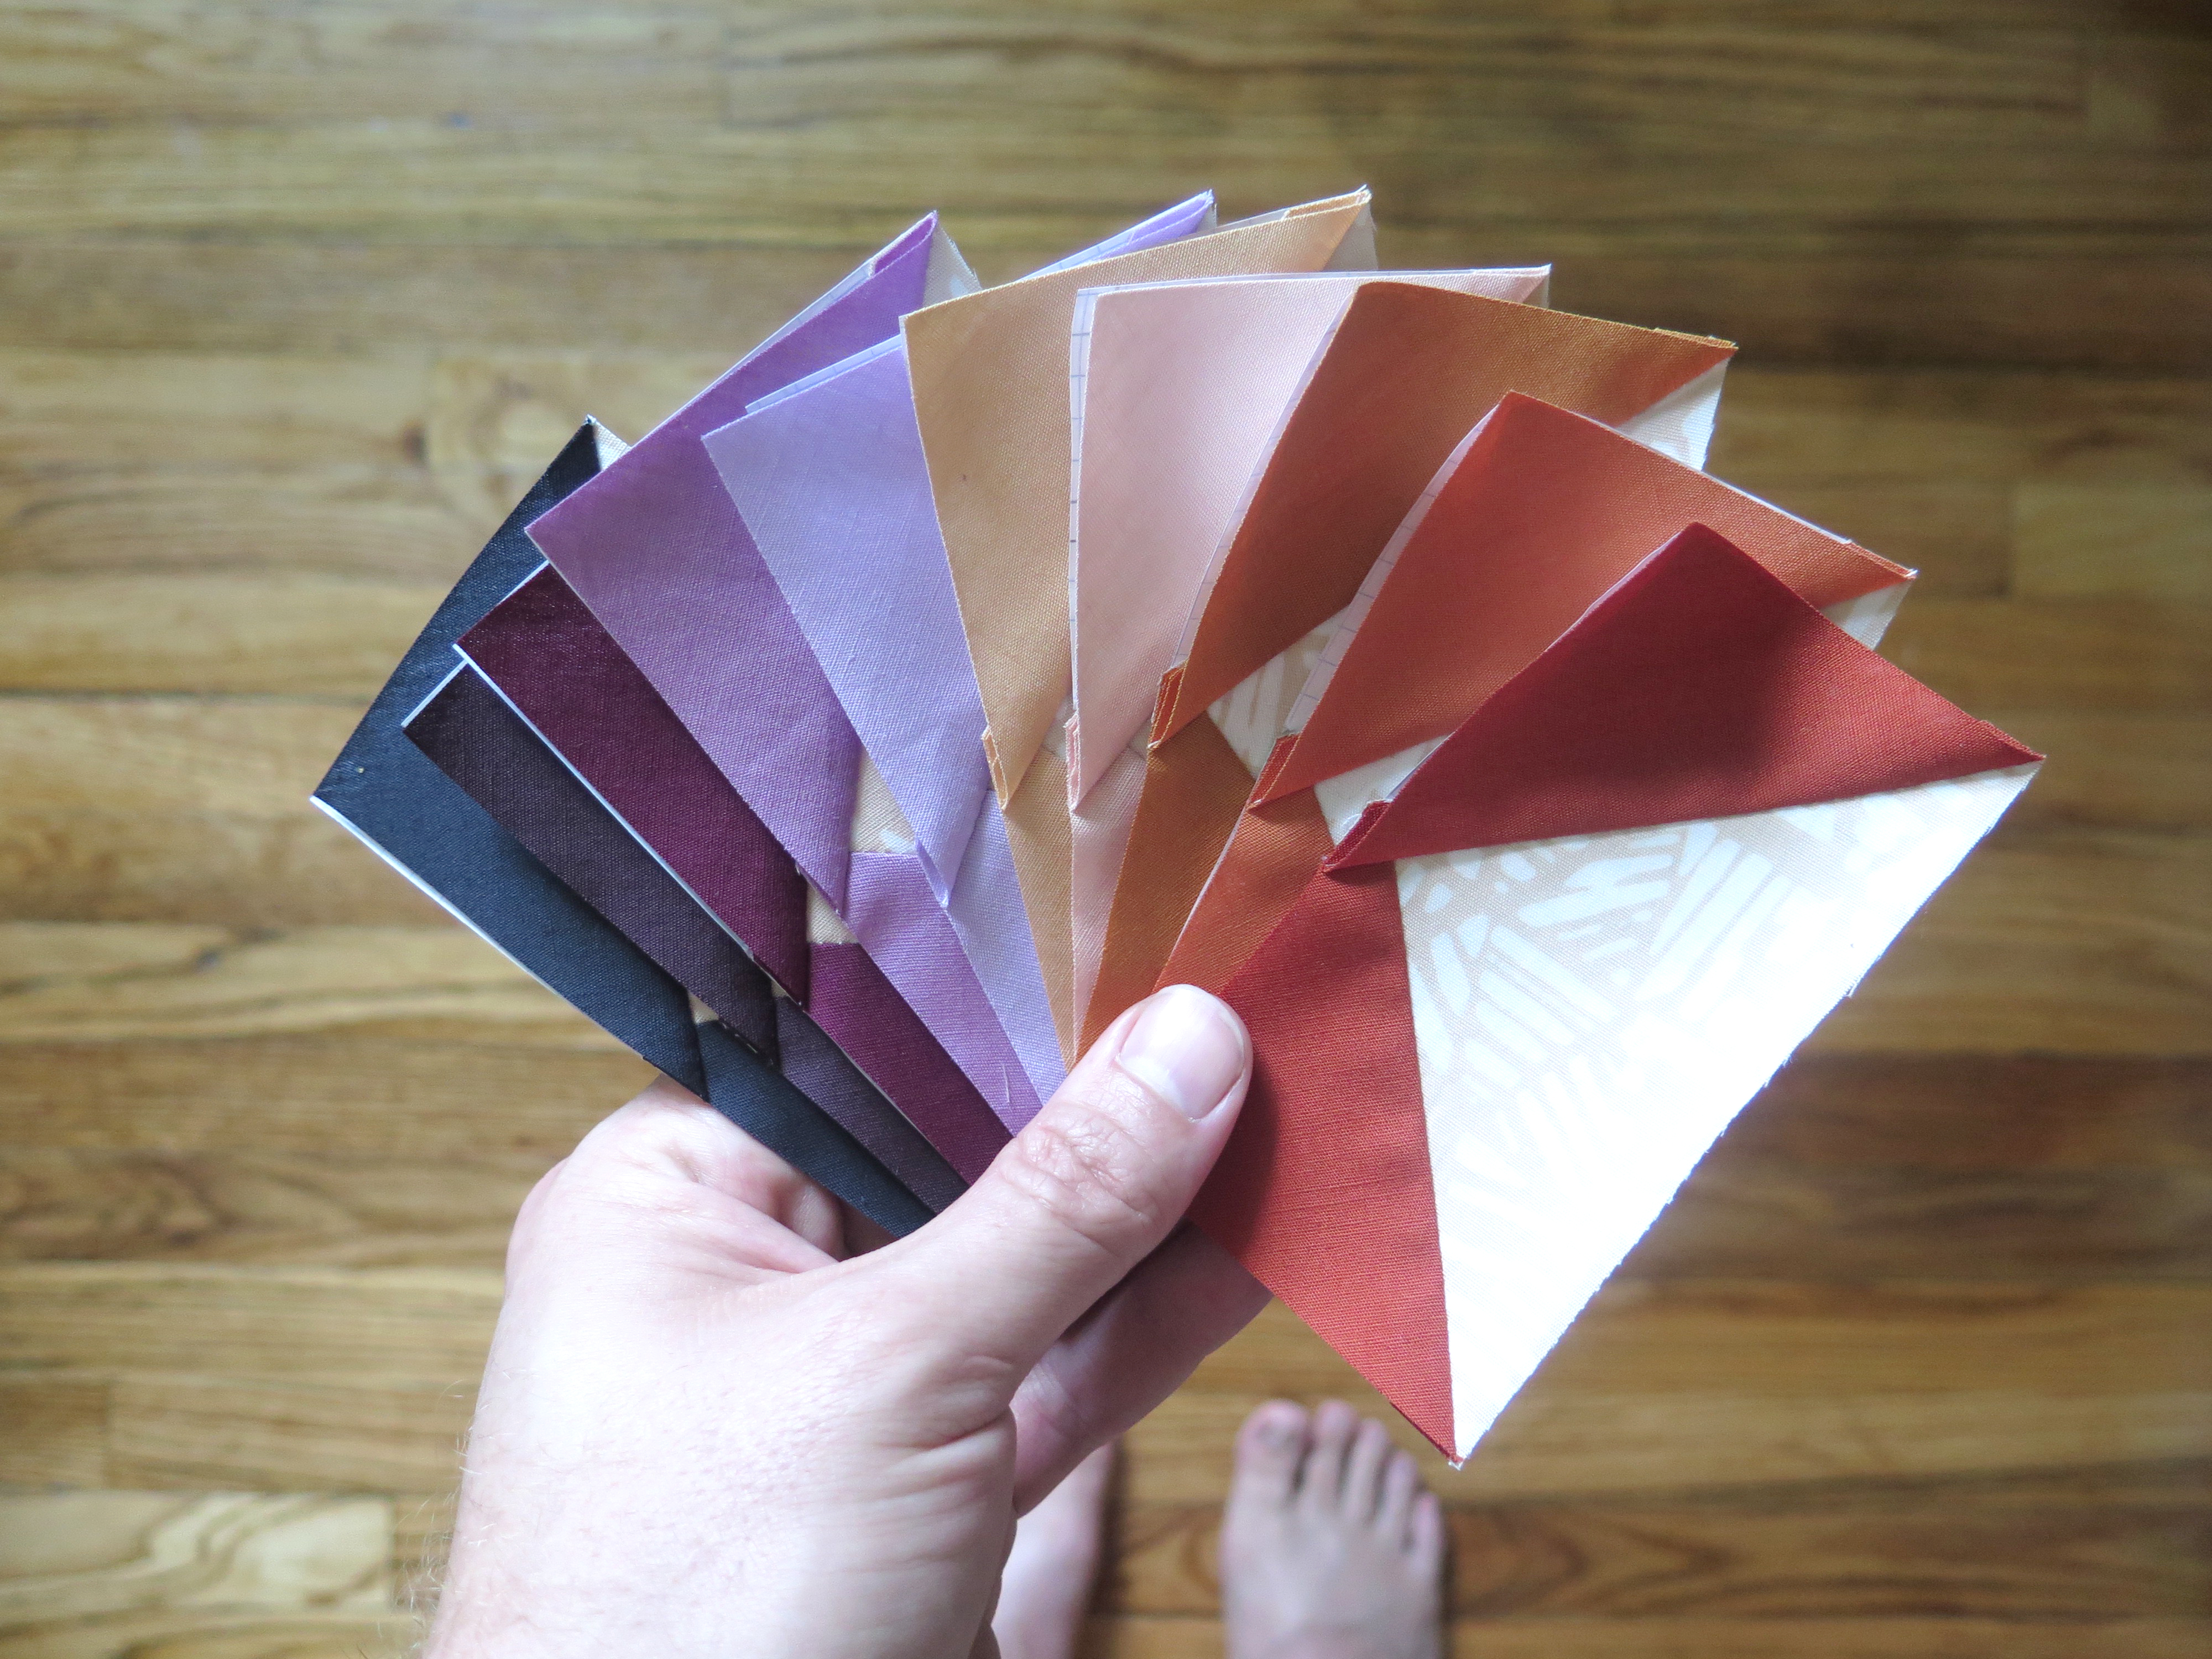
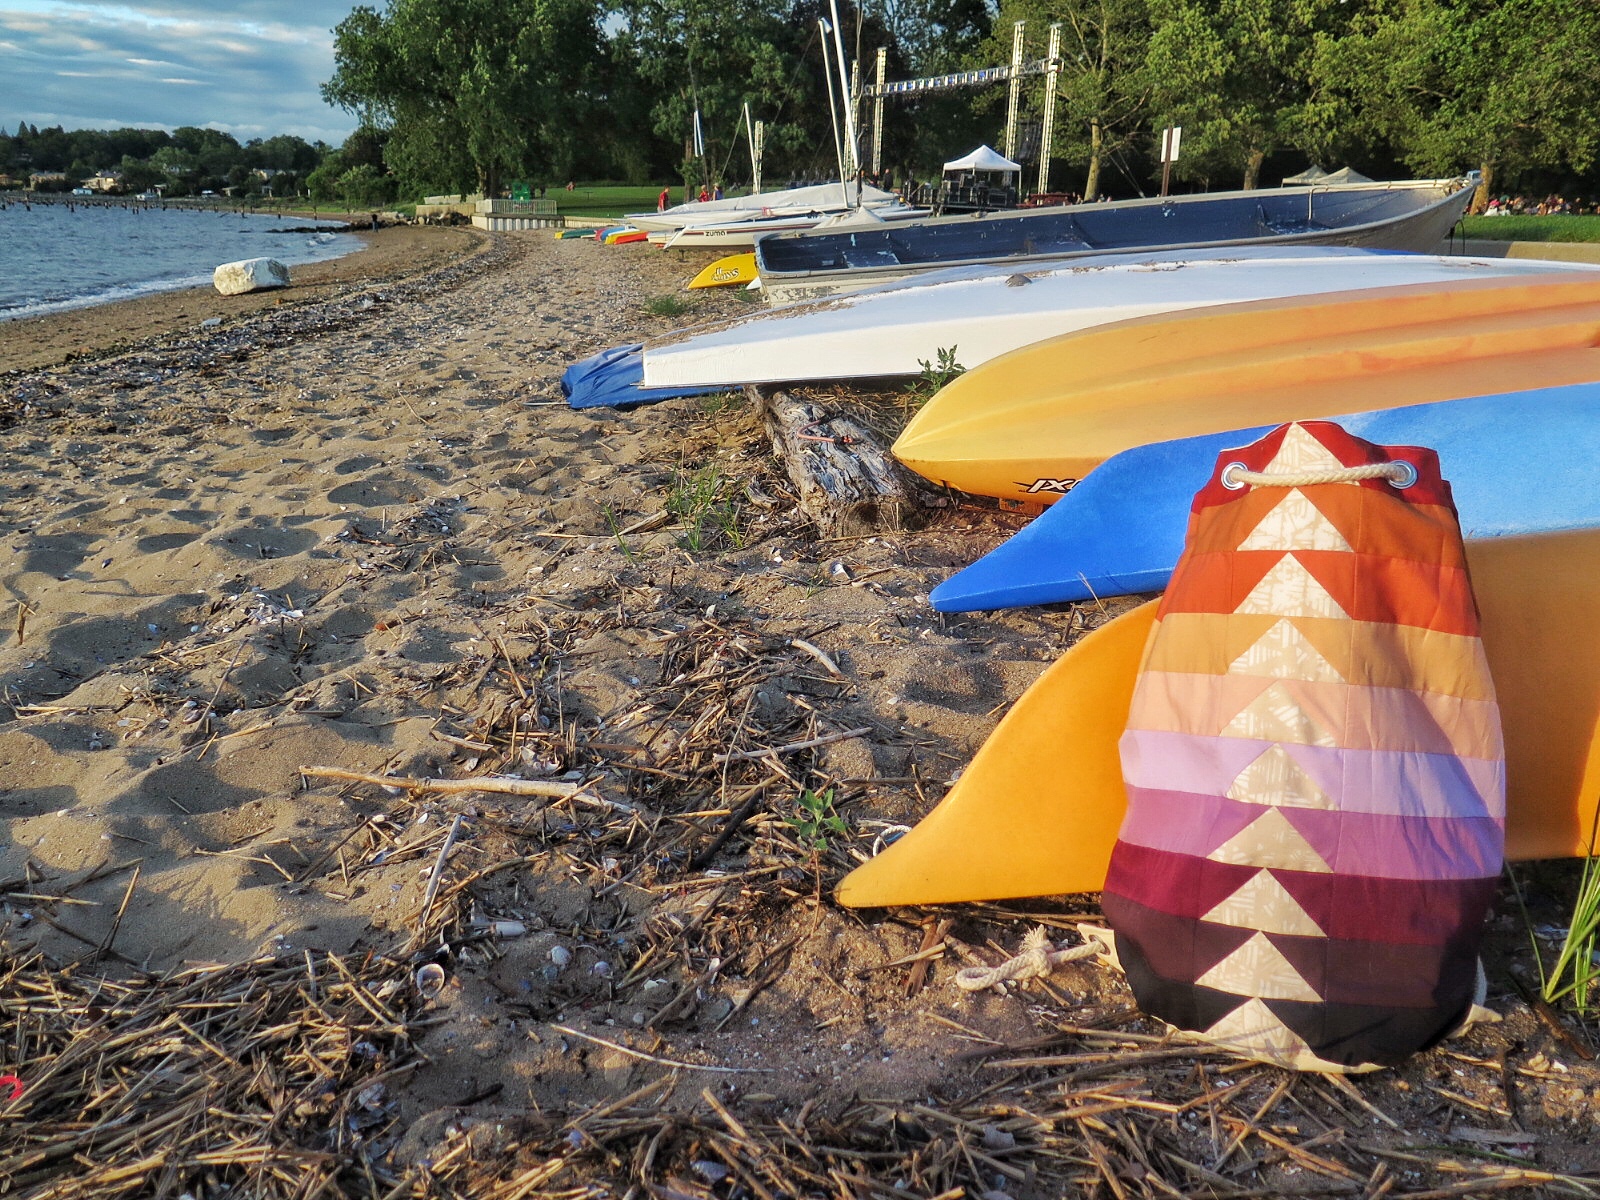
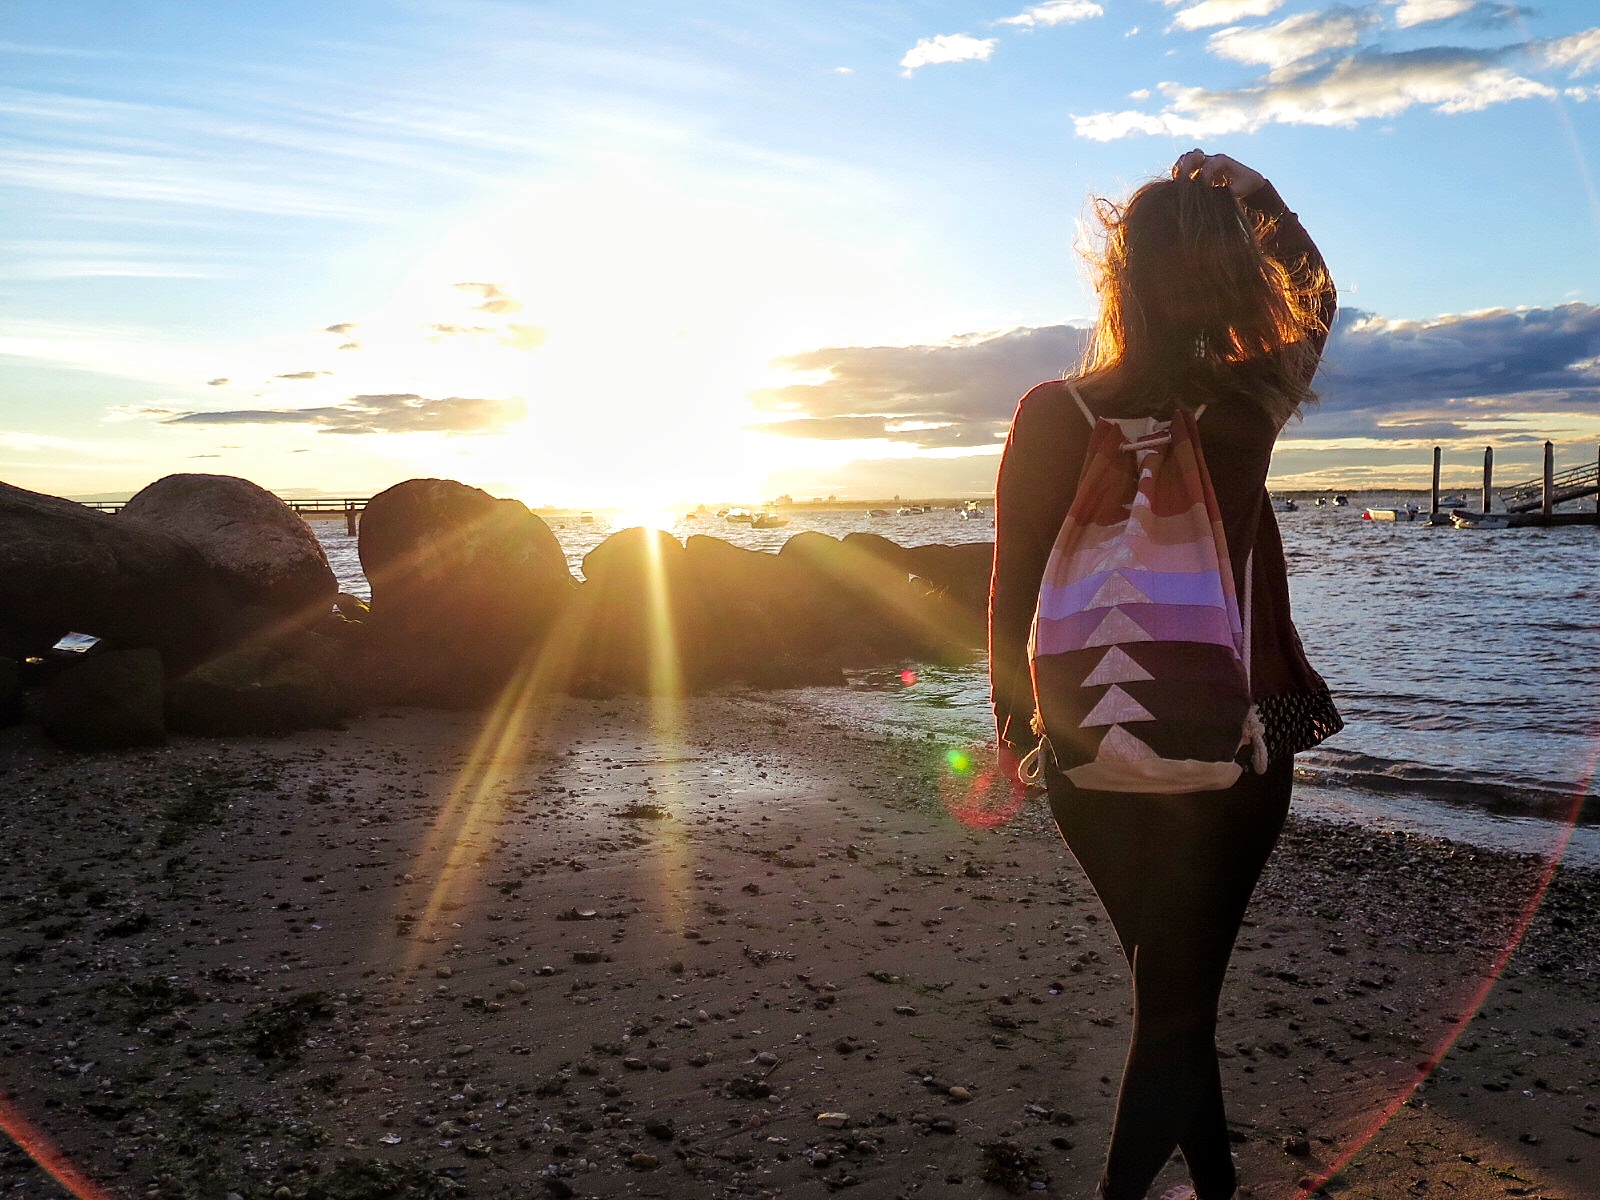
There are fewer things in this world that I love more than flying geese and summer. So it was only natural that when the warm weather was finally here I would make a bucket bag combining both. I knew right away where I would draw my inspiration from: summer sunsets. What on earth is more beautiful that the calming swirl of a pink, orange, and purple sunset?

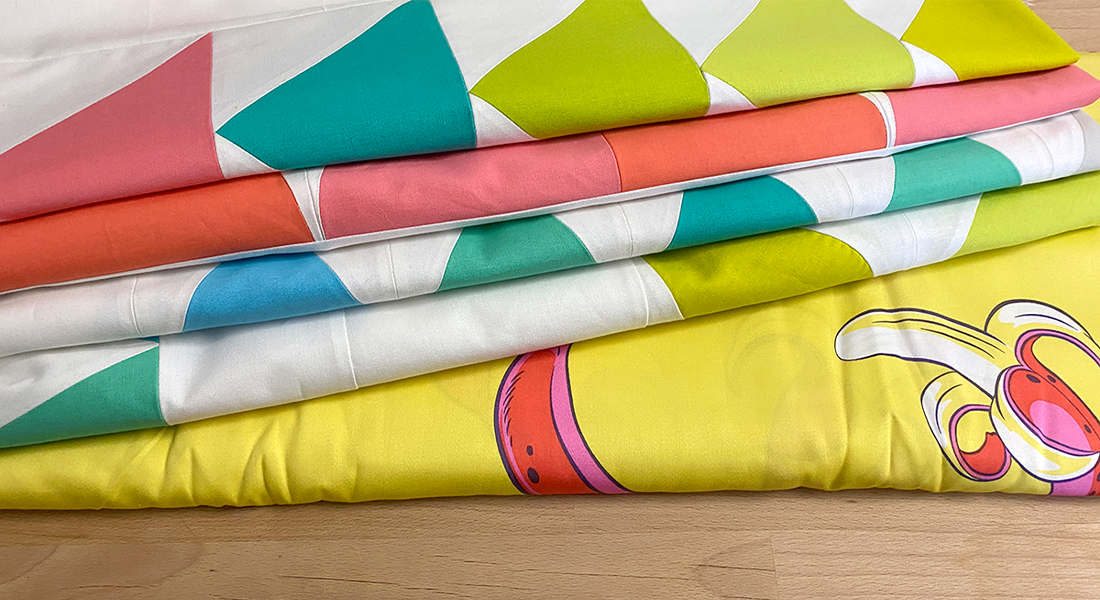
I am always sewing with prints so I thought I would simplify a bit and go with a palette of solids with just a smattering of print for visual interest. I decided to cut into my stash of Me+You’s Indah Solids and Indah Batiks. They come in so many stunning colors. I love these solids, so soft and saturated.
The thing that I love most about this project is it is so versatile. I have provided the framework for this flying geese rendition, but the possibilities are endless. You could turn an orphan block into a panel for it, do it in one solid material… So many options.
Let’s get started!
Materials to make a Flying Geese Bucket Bag:
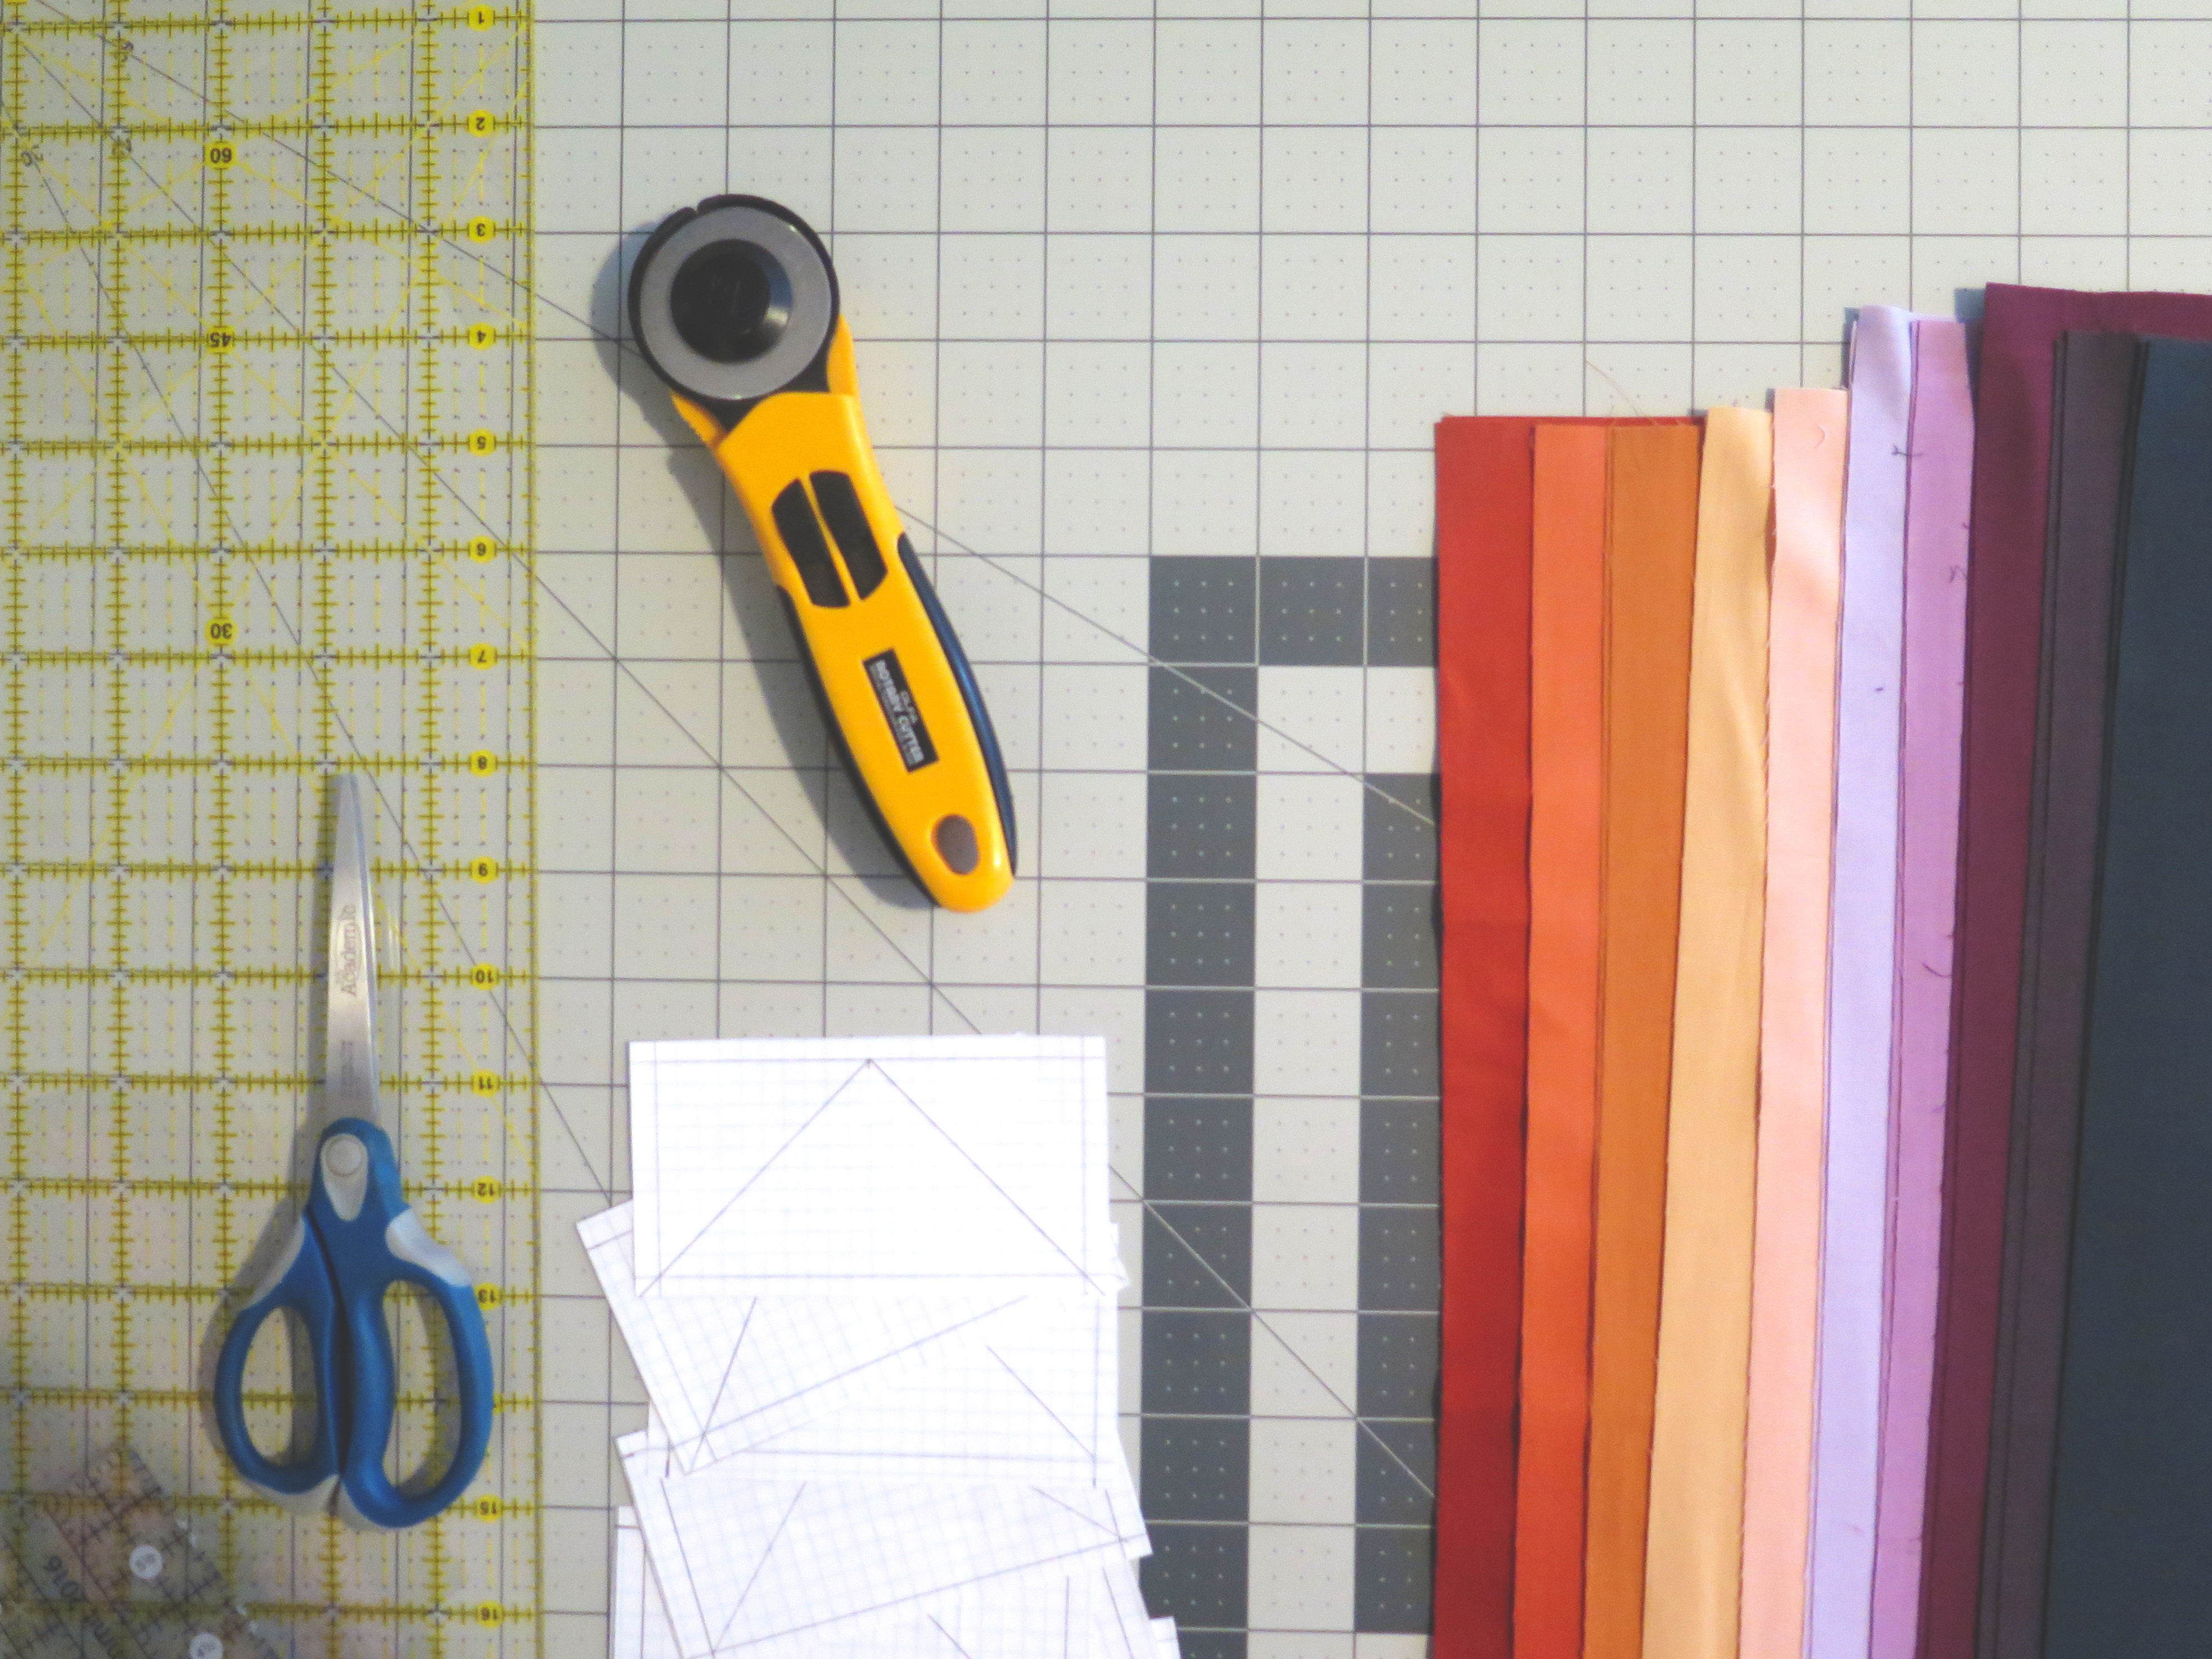
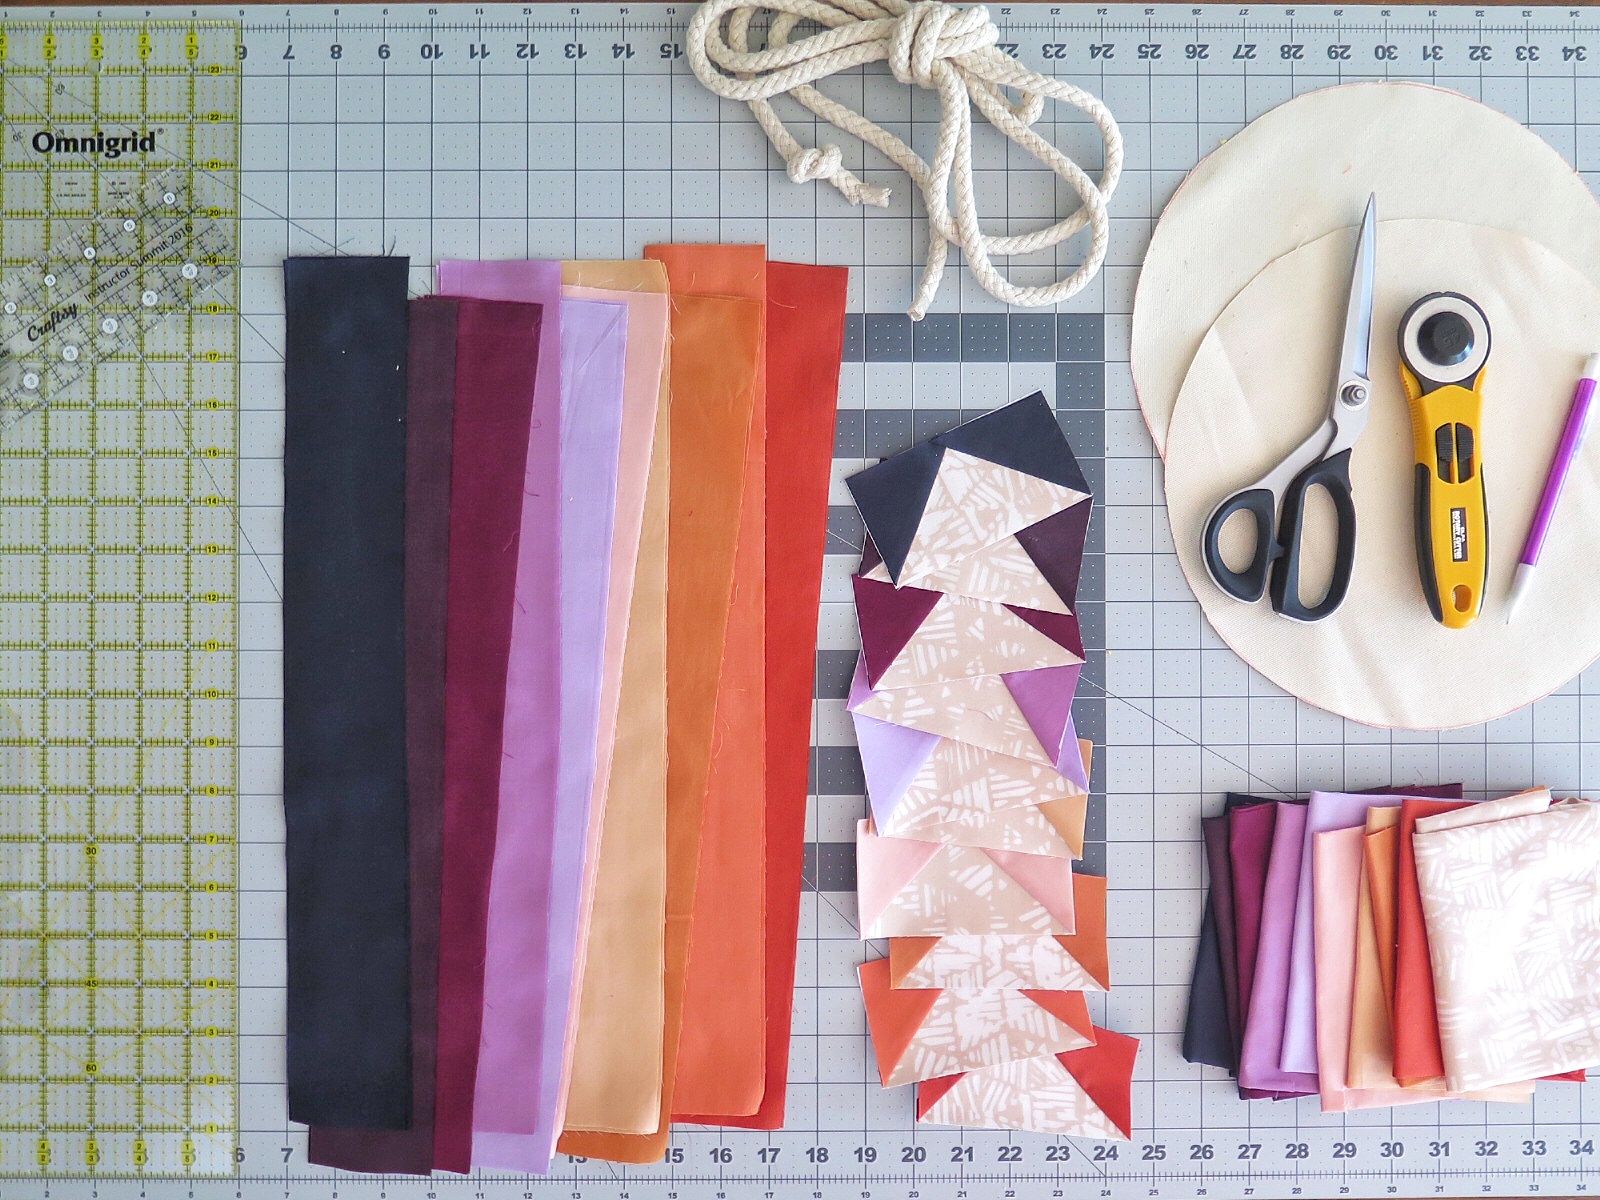
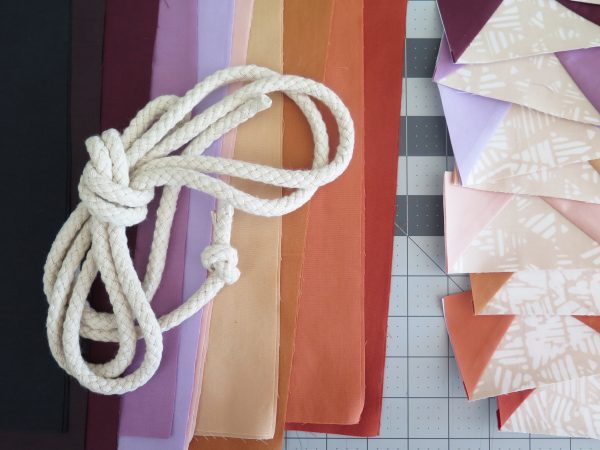
- Assortment of 11 fat quarters, 10 solids and 1 print for geese
- 3/4 yard of wide canvas or other heavyweight cloth for lining
- 10 Dritz 0.44″ Metal Grommets
- 2 1/2 yards of twisted cotton rope
- Round 10 1/2 inch plate
- Flying Geese Paper Piece Template
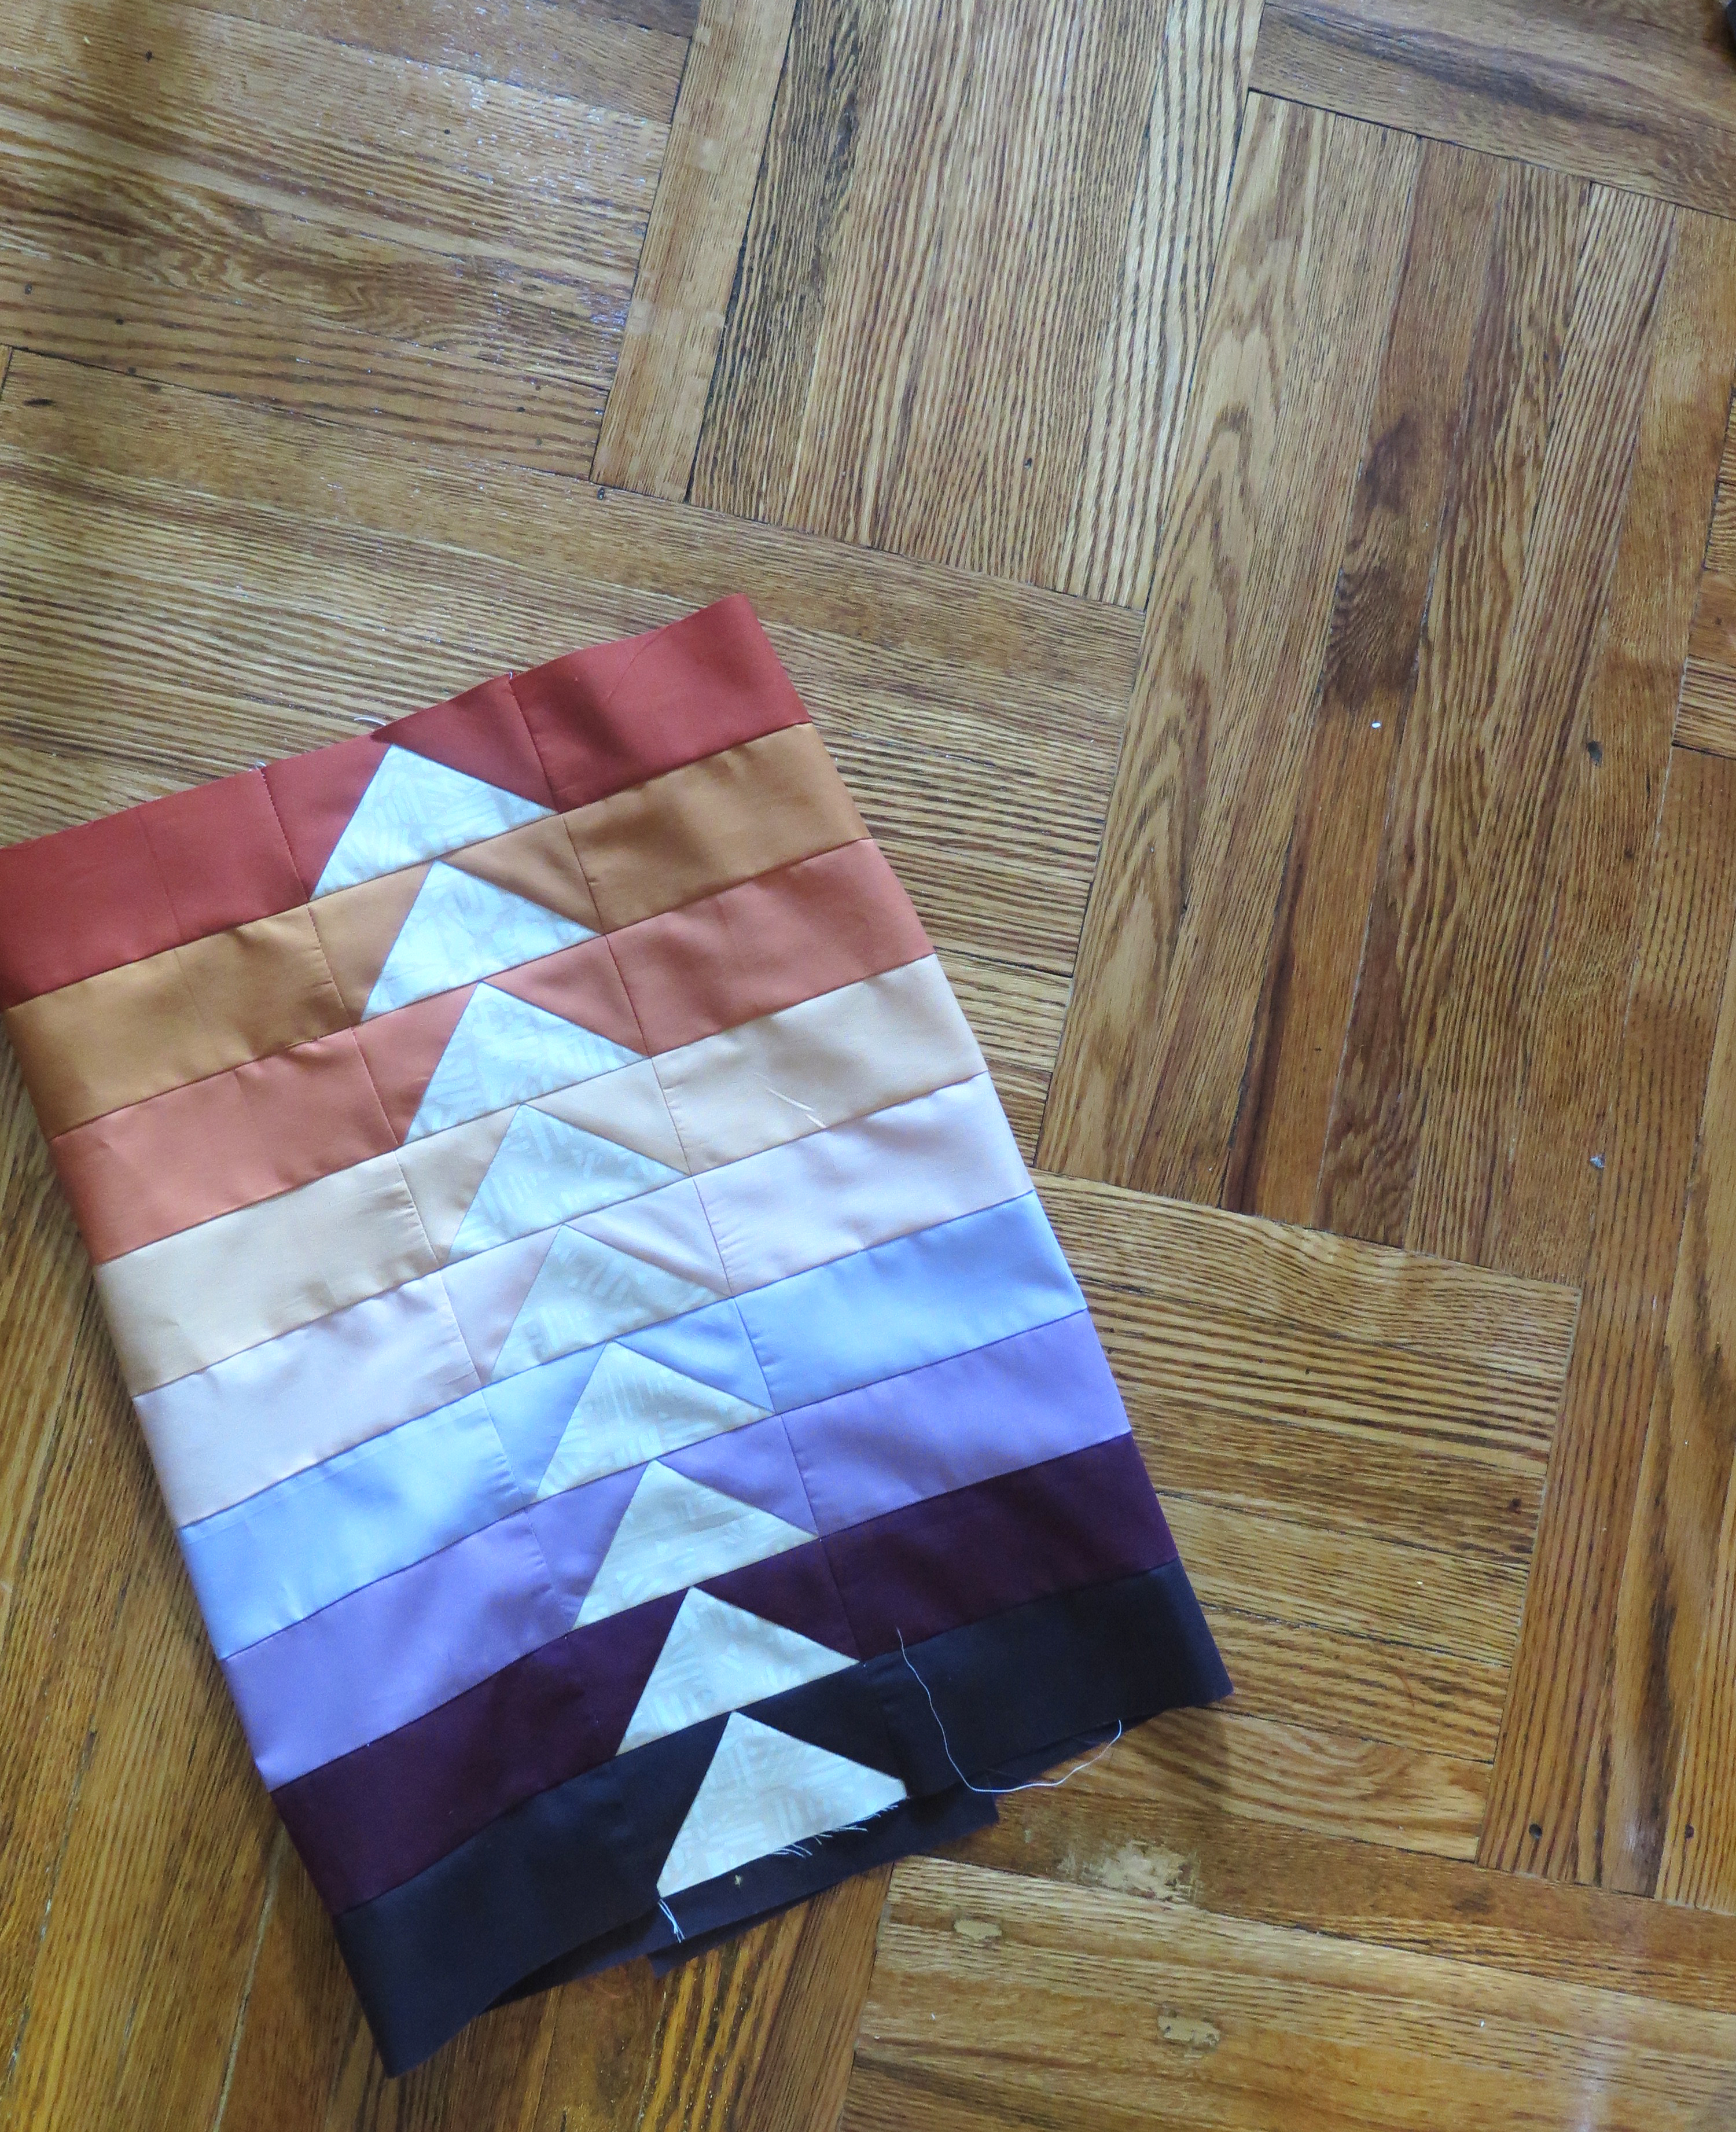
To start, cut 2 sets of 2 1/2″ x 15 1/2″ strips from each solid fat quarter, except for the piece that will be your bottom stripe. For the bottom stripe, cut 2 6 1/2″ strips and 2 9 1/2″ strips.
Next, grab your 10 1/2″ plate and trace it on your lining fabric like so…
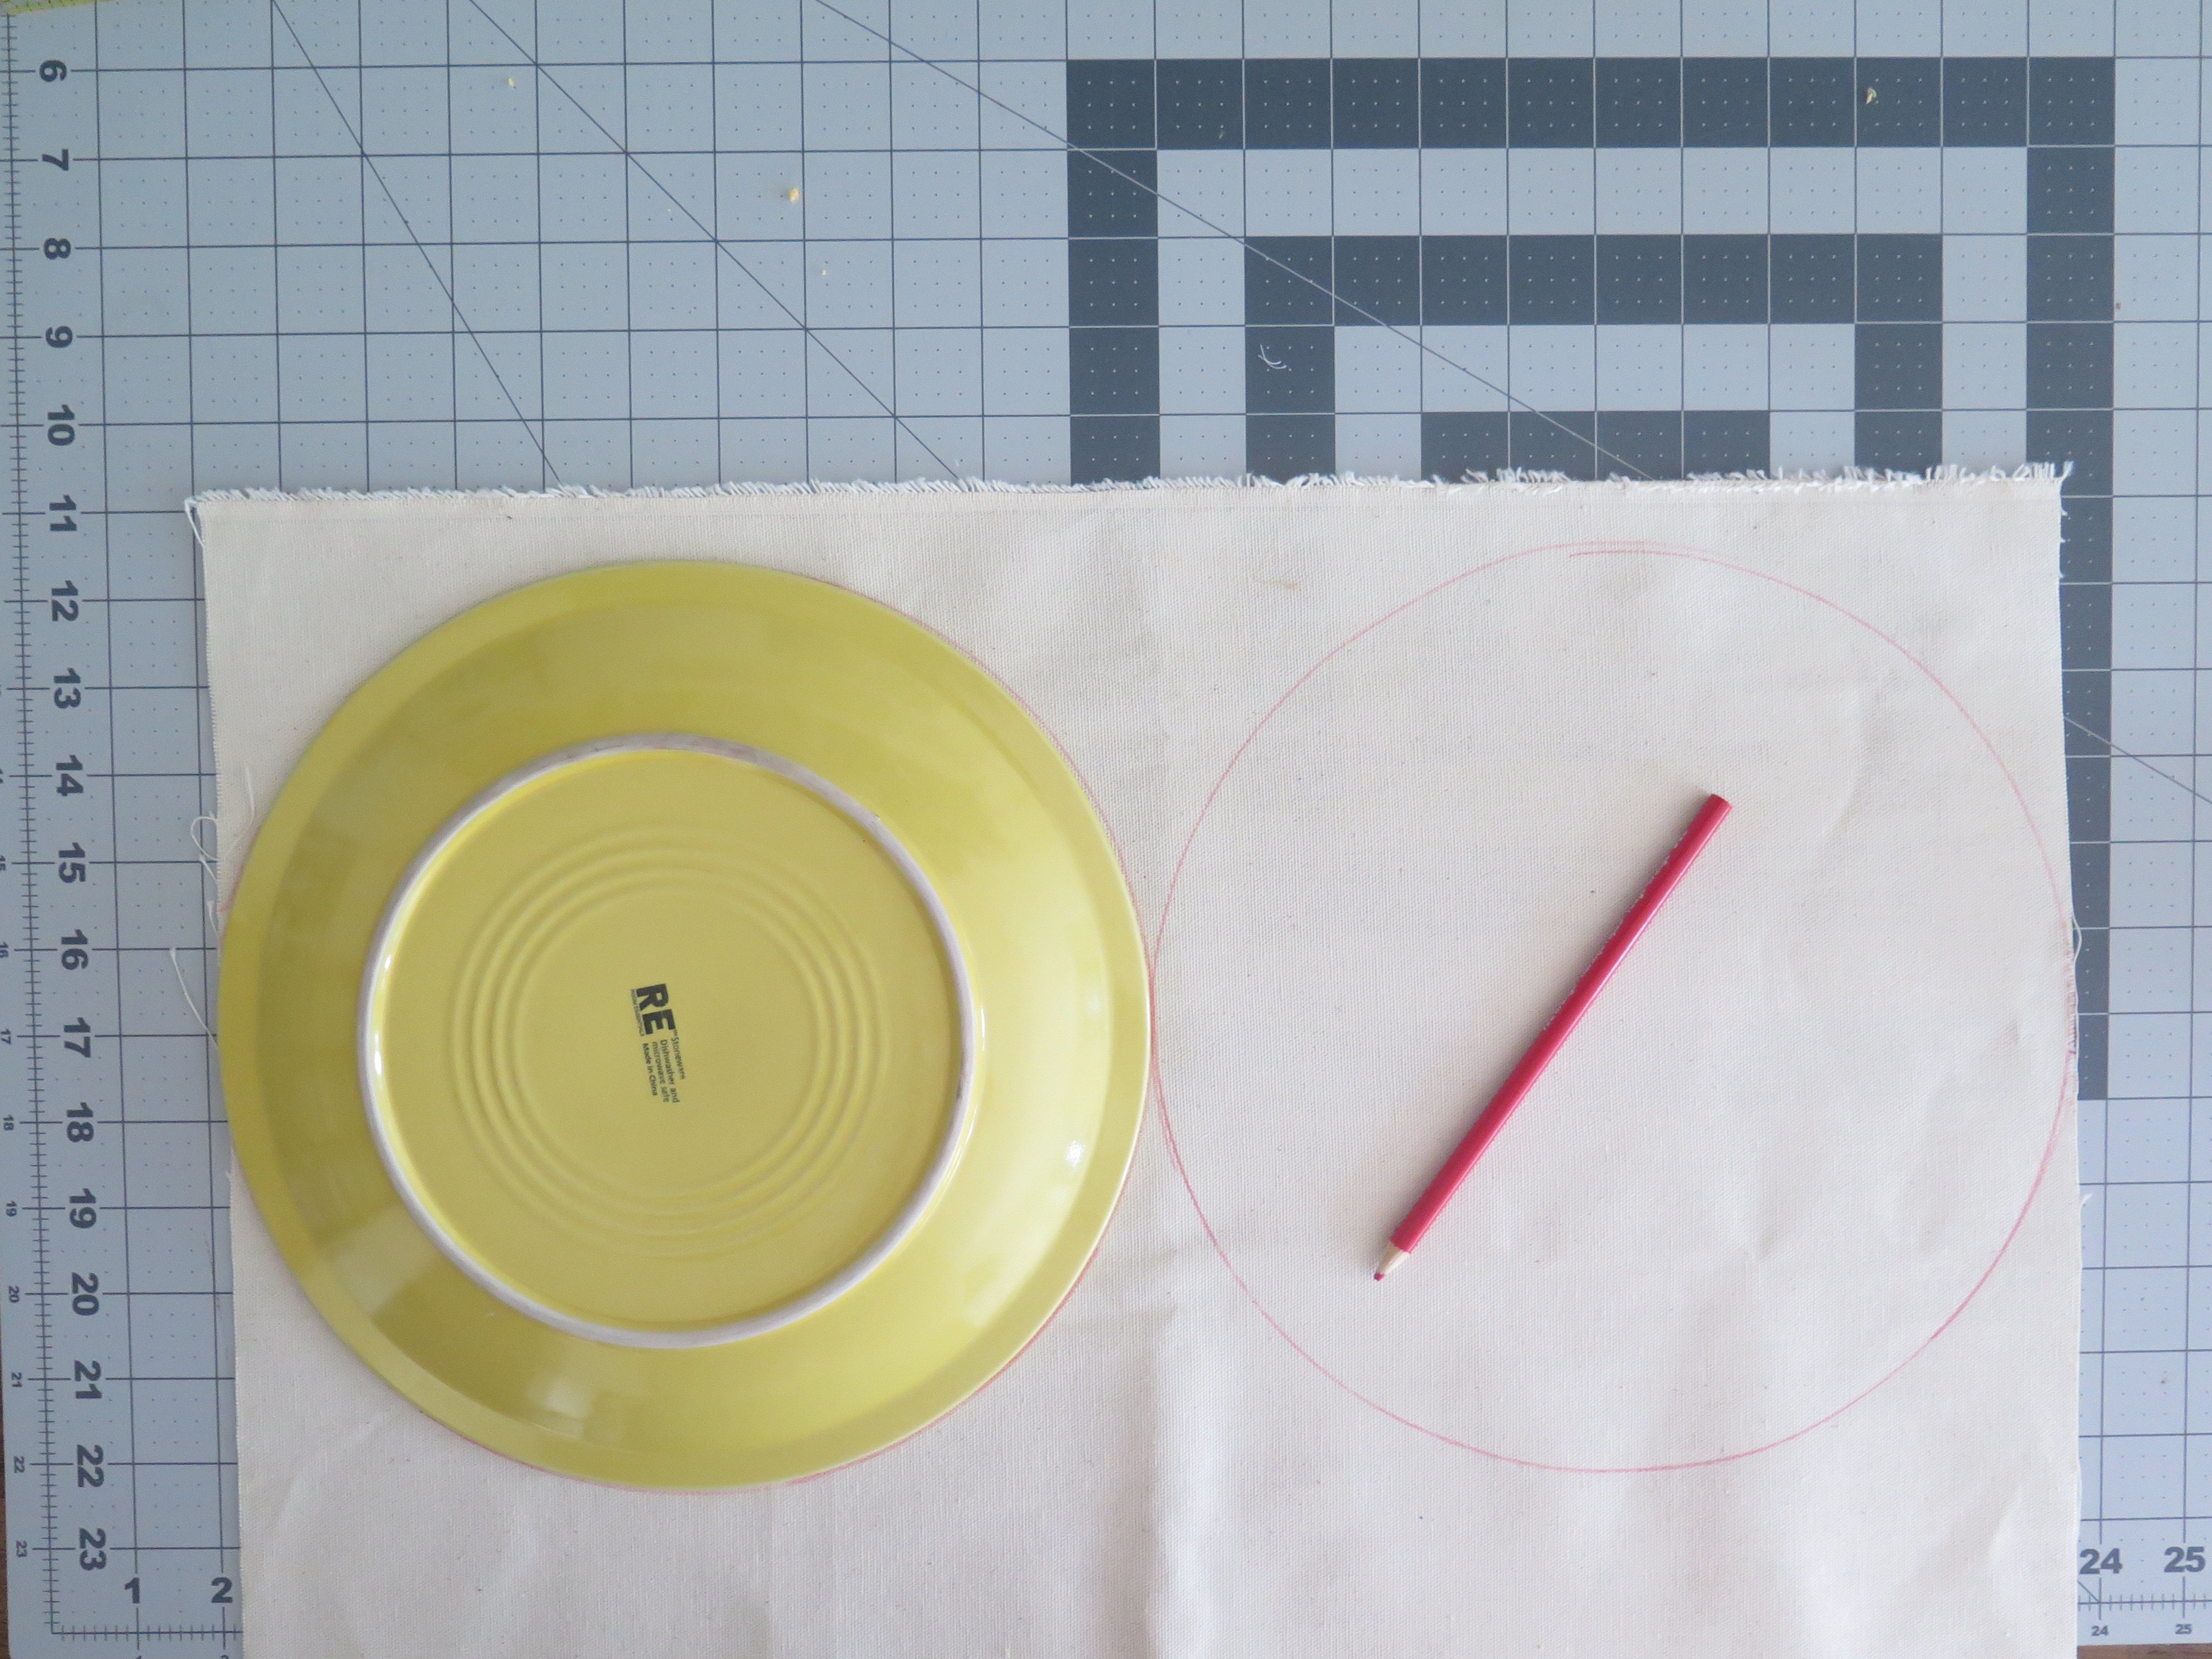
Cut out the circles and set aside. Next up, cut 4 2 1/4″ x 2 2 1/2″ squares from the canvas and set aside. Next, cut a 20 1/2″ x 34 1/2″ piece of canvas.

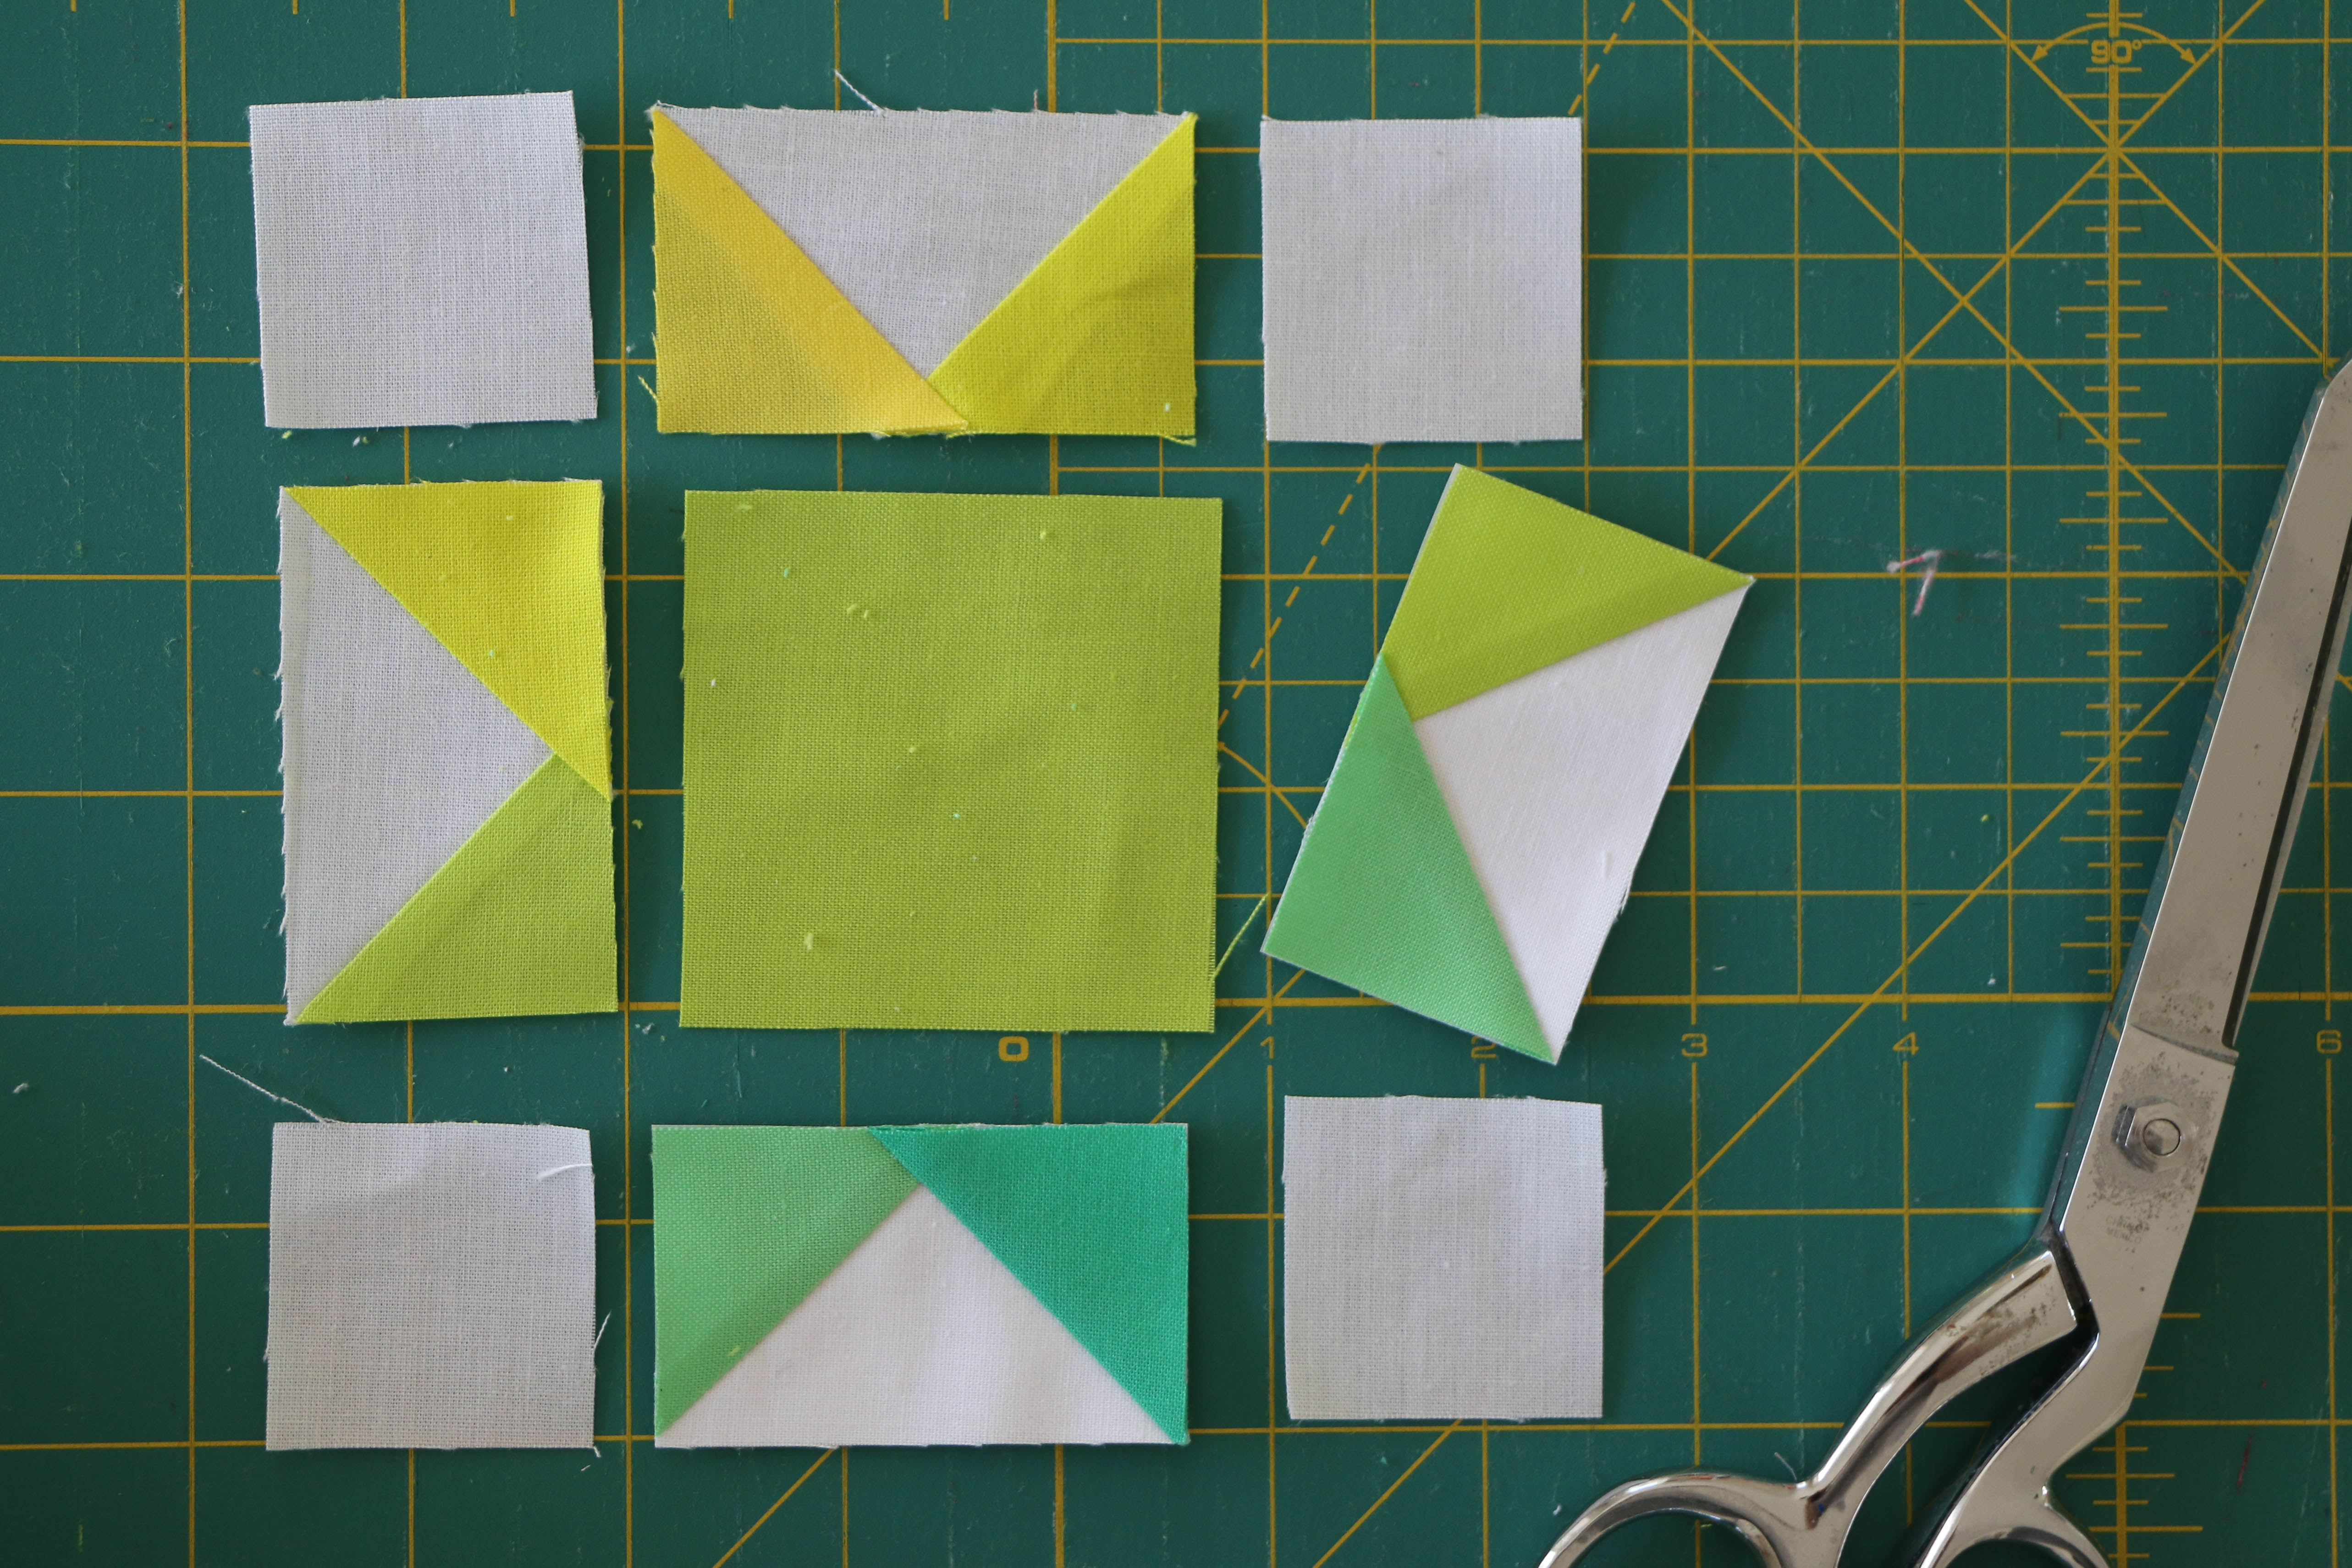
Make your flying geese. There are so many ways to make flying geese. When I only have a few to make for a project I paper piece them. Since they are the main focal point of this bag, you want to be sure they are precise. You’ll find a paper piecing template for the geese in this pattern. (If you have never paper pieced, check out this great tutorial by Jennifer Mathis of Ellison Lane.)

For your geese, use the print you have chosen for your geese’s center and use scraps from the fat quart solids for the background. You will make ten of these, one for each solid color you have chosen.
Once you have removed your paper from the geese, sew each one in the middle of your two 15 1/2″ long strips (for the bottom strip of your bag, attach the 9 1/2″ long strip and set aside). Be sure to match the background color of the geese to the strip color (or go super scrappy and mix them up!).
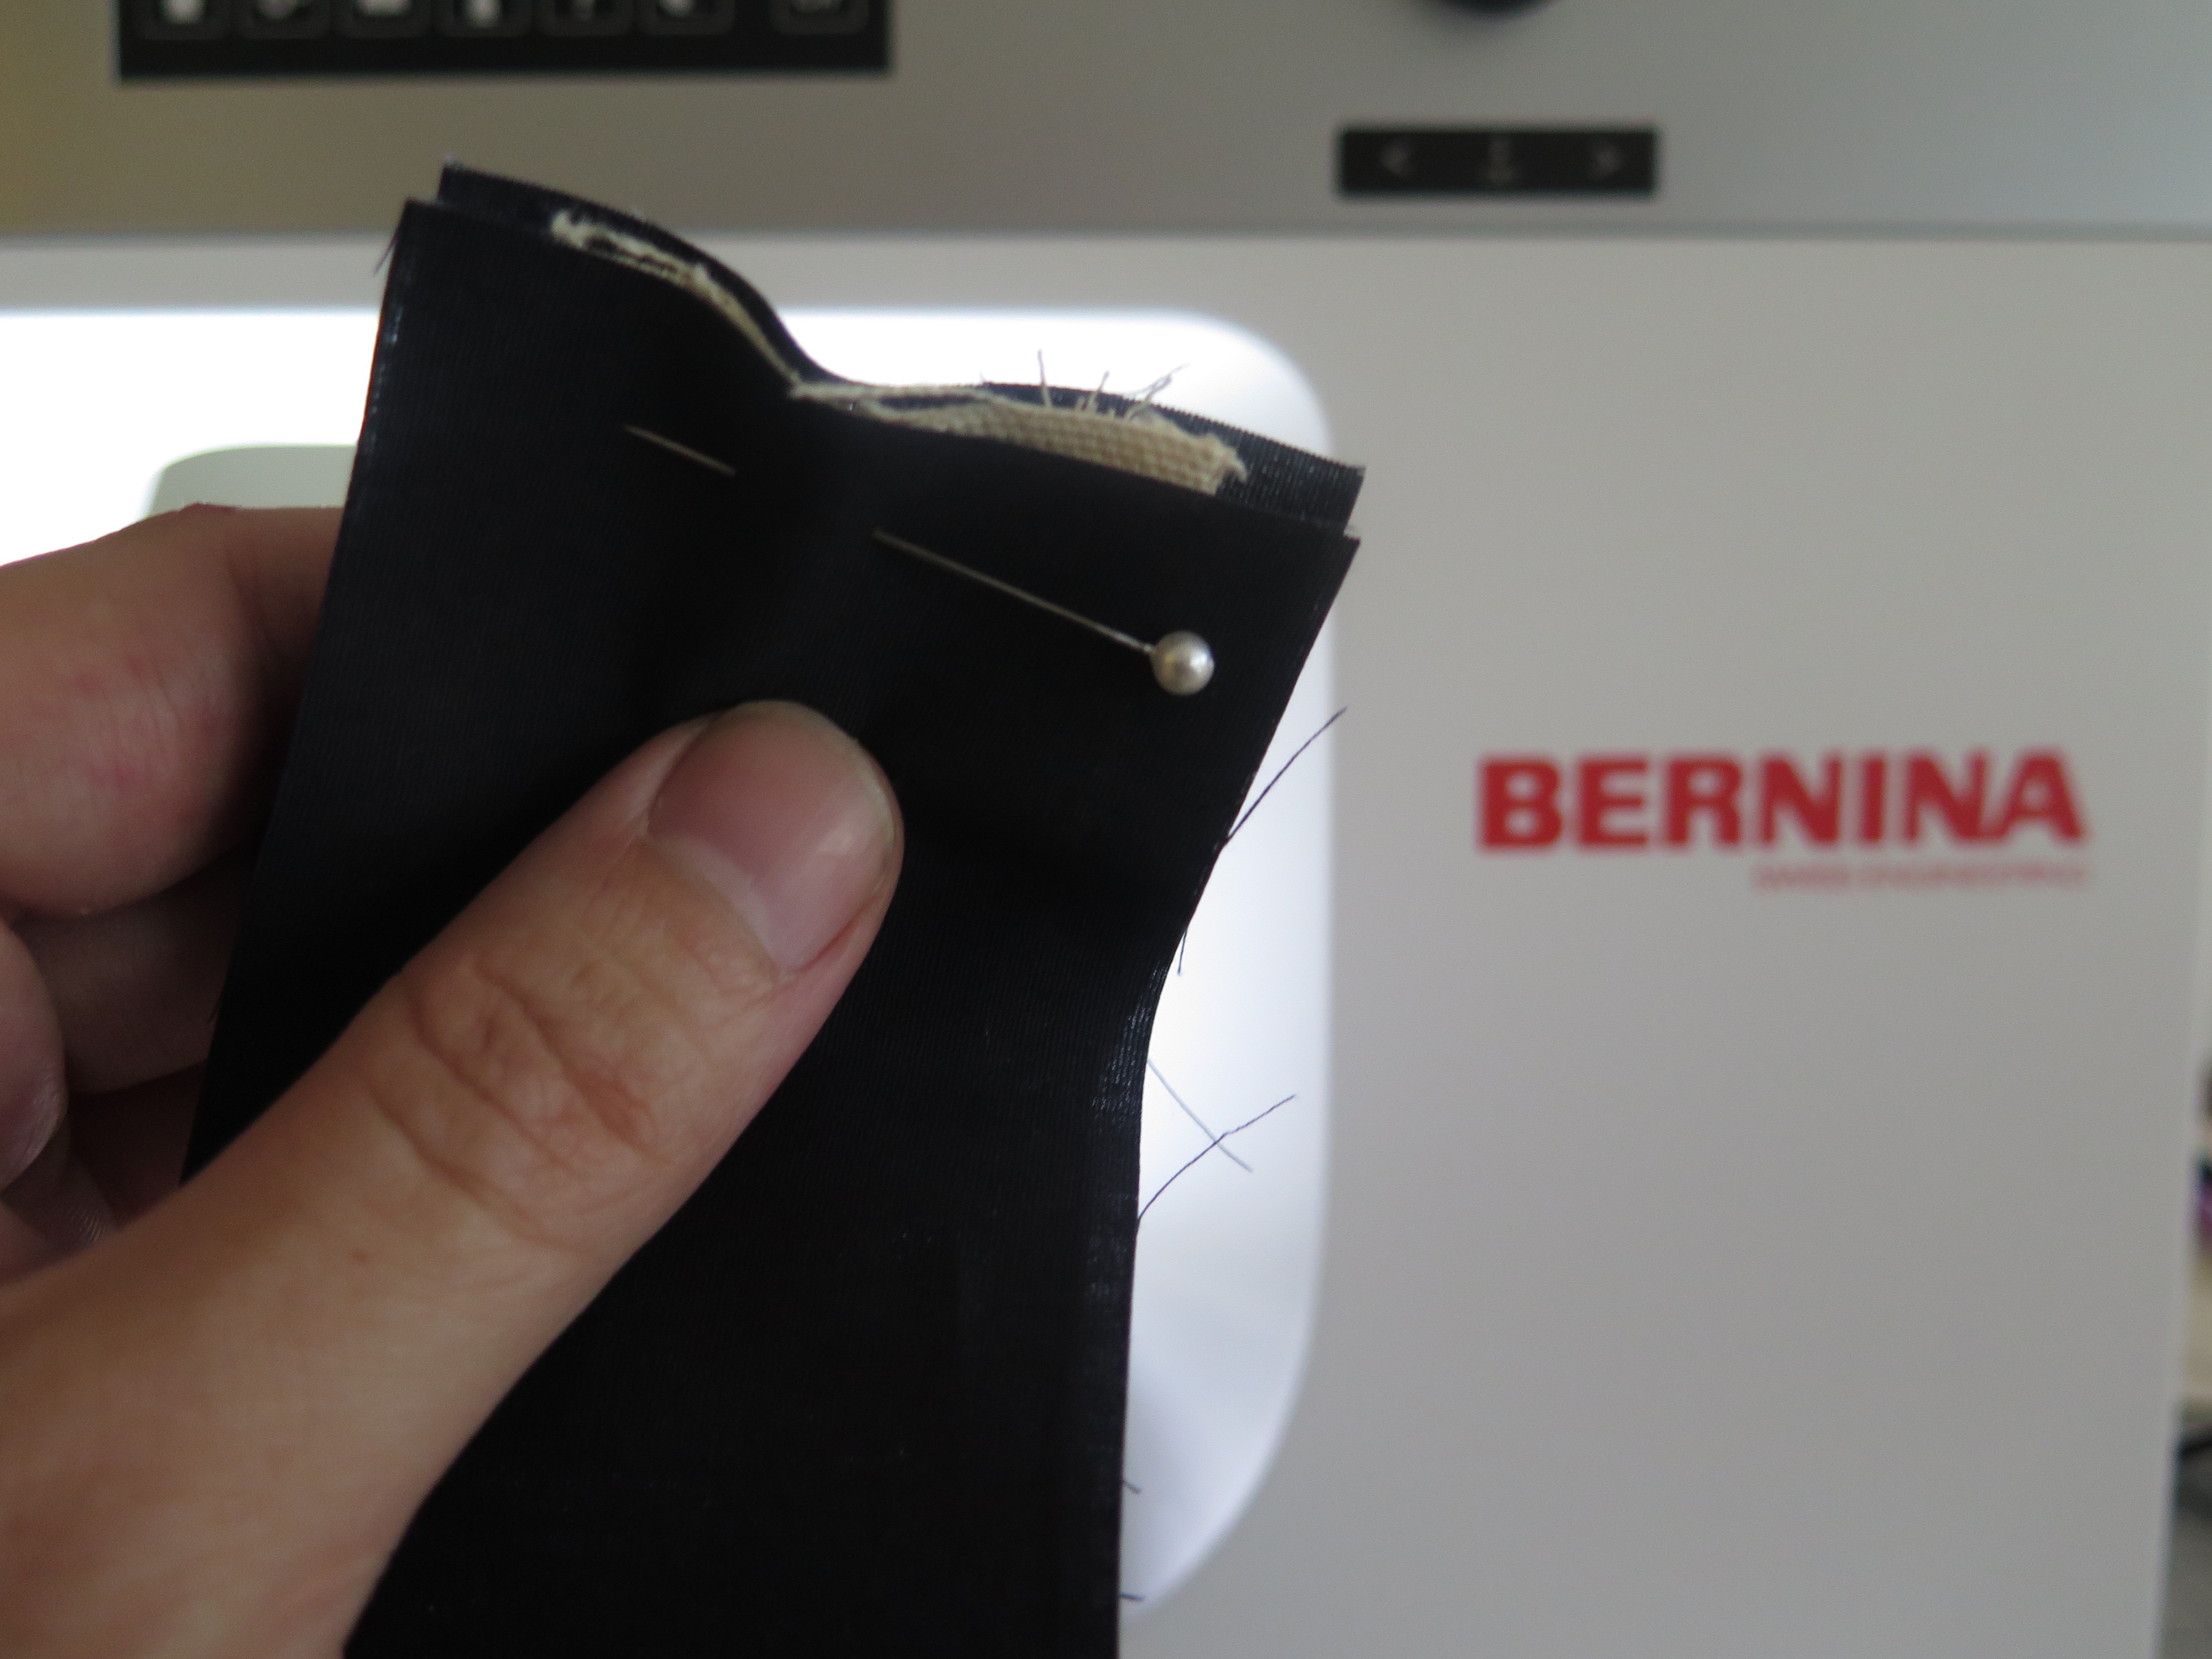
Sew your strips together (all but the bottom stripe) using a 1/4″ seam. Pin your seams so they match up. I used Patchwork Foot #97D with seam guide for this part. Points always come out perfectly!

Your piece should measure 18 1/2″ x 34 1/2″.
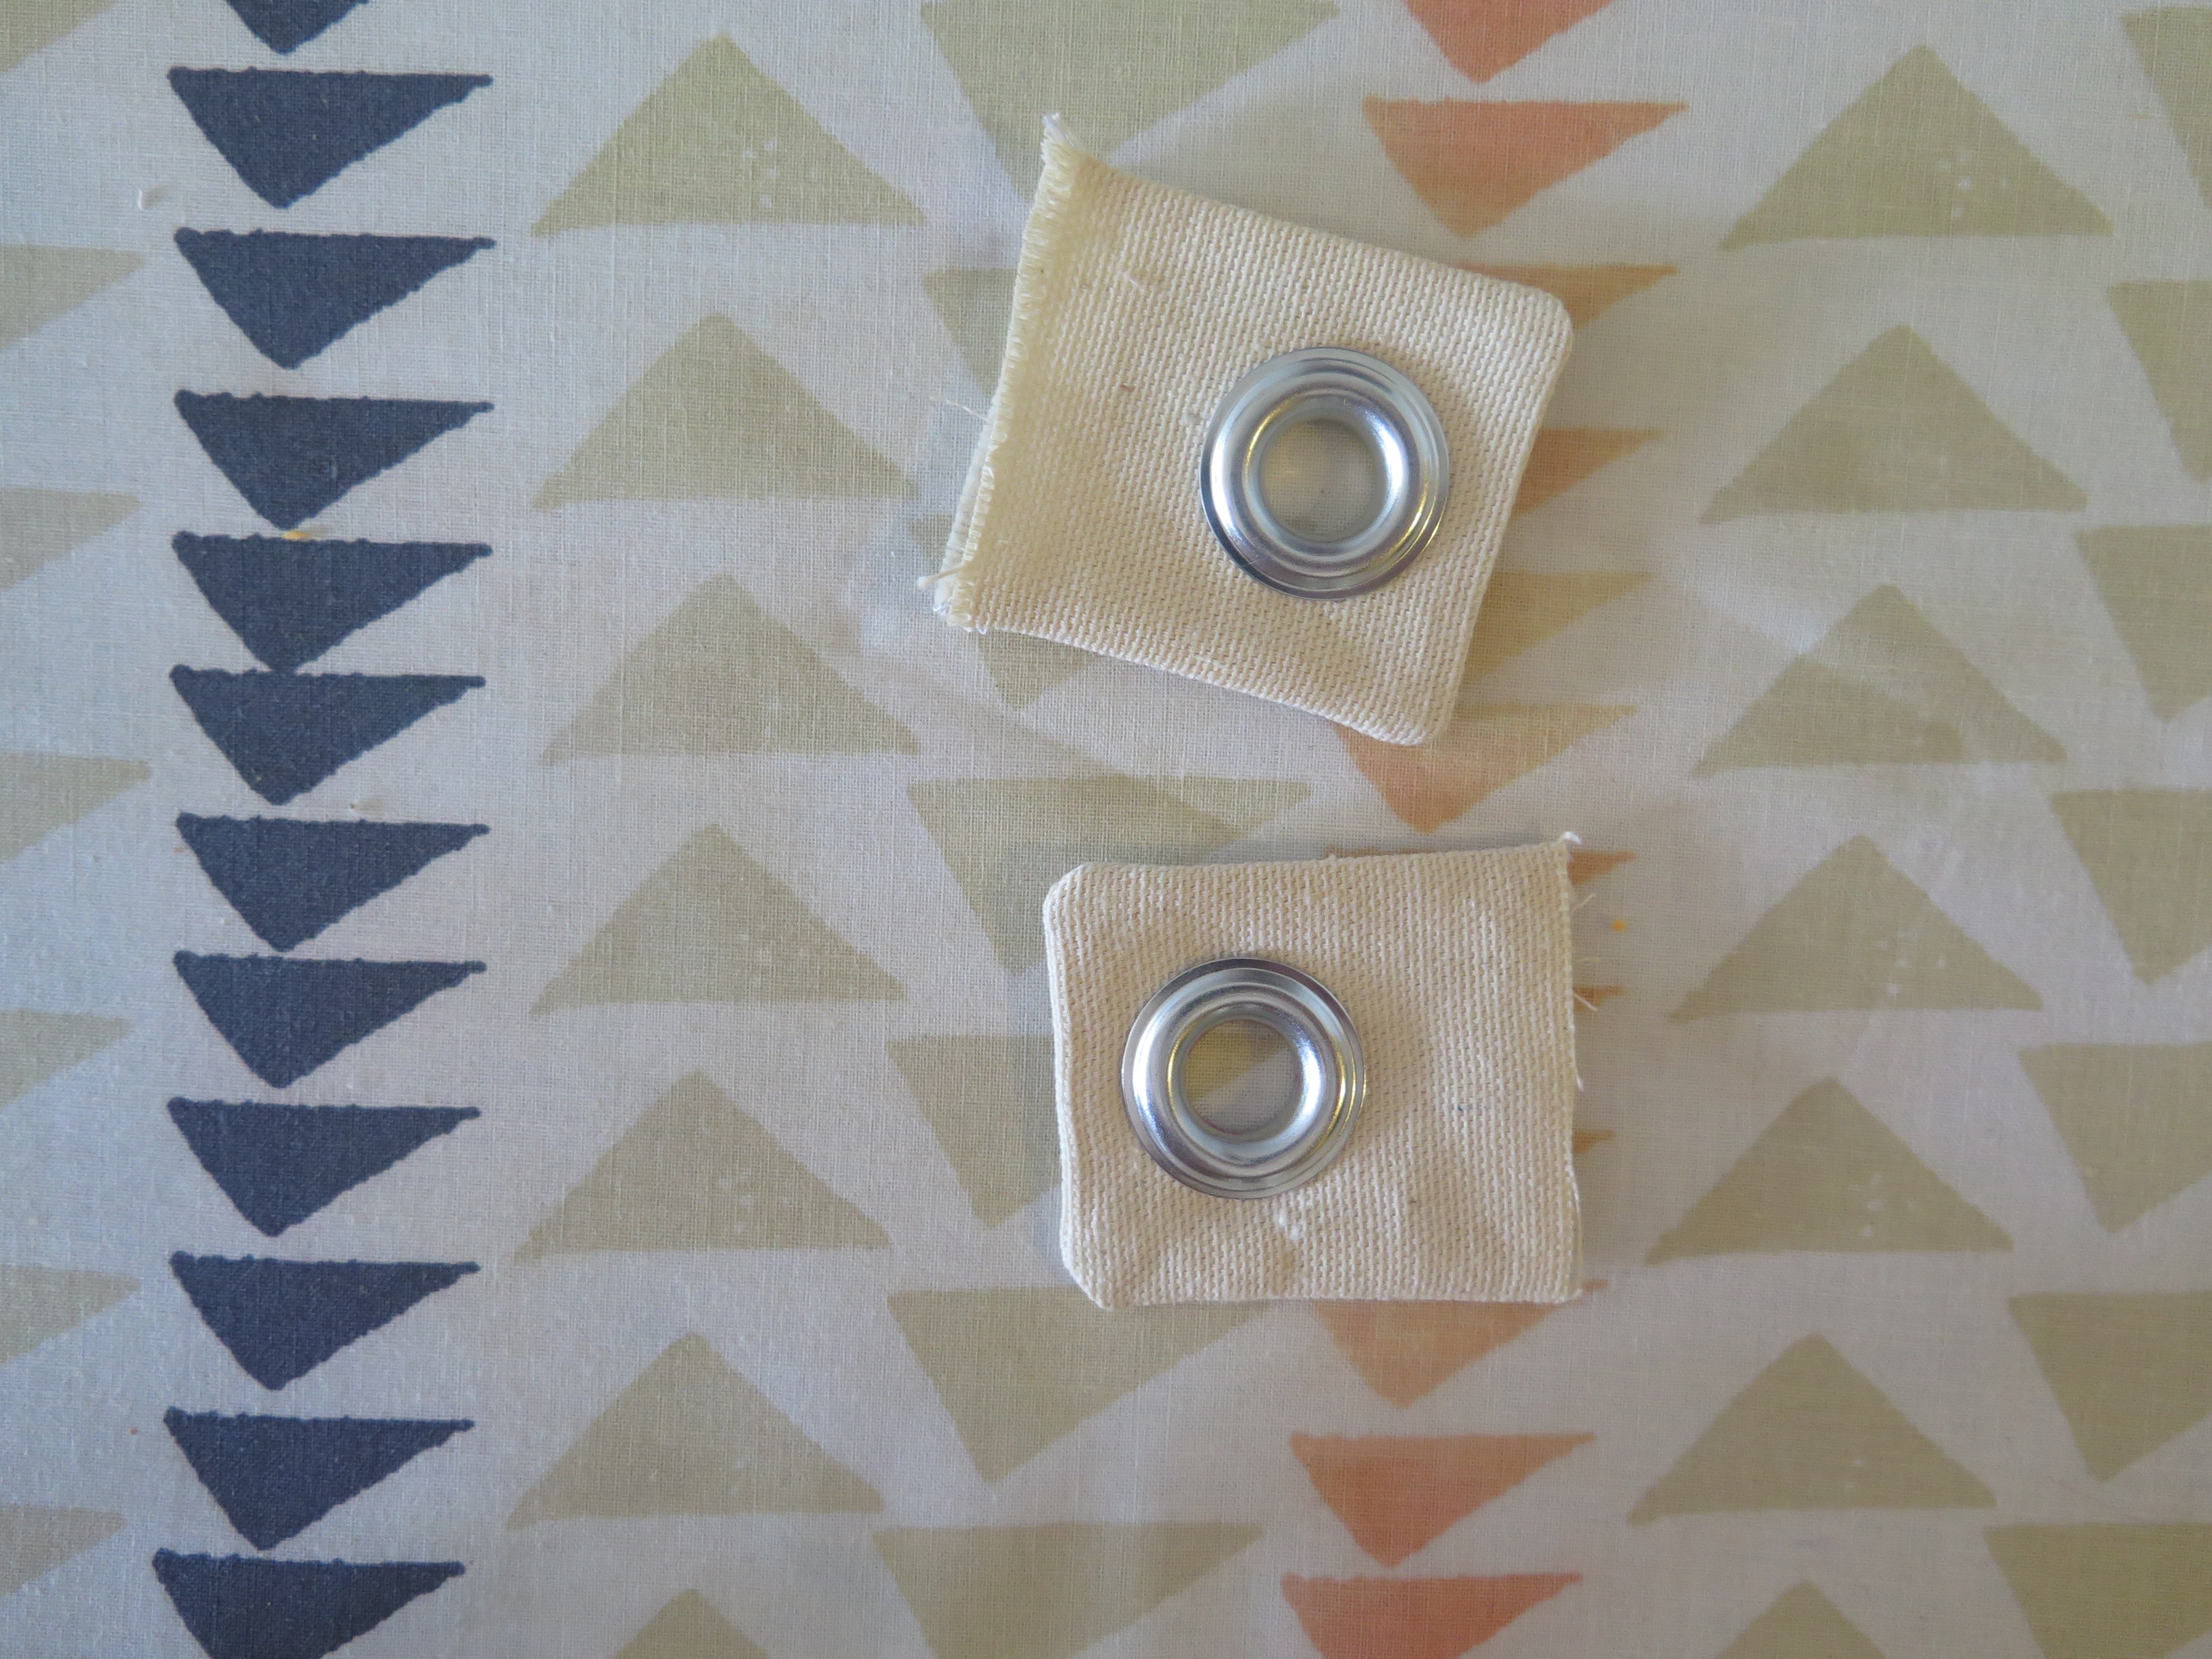
Remember those 4 2 1/4″ x 2 2 1/2″ canvas pieces? Grab those guys and sew together three of the sides with a 1/4″ seam allowance to make two tabs, leaving one of the 2 1/4″ sides open. Trim off some of the seam allowance and flip them. Press your seams.
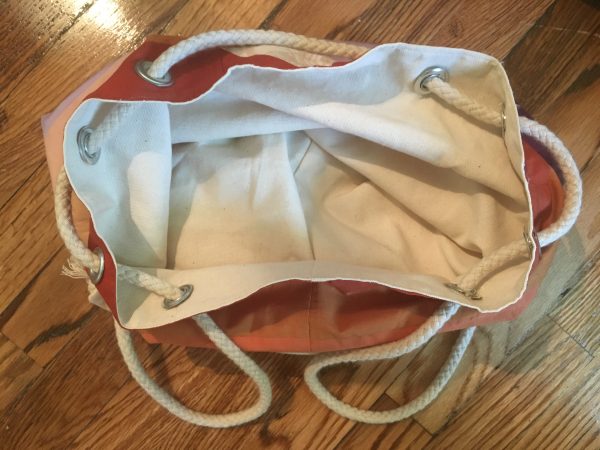
Time to grommet! Use the instructions on the box to add grommets to the tabs. I placed mine just over 1/4″ from the finished edge, centering it from the top and bottom. This was my first time using grommets and it was so easy. It gives such a polished look to the bag.
Grab your last strips (your bottom stripe). Pin the 6 1/2″ strips to either side of the goose strip, placing the grommet tab in the center.
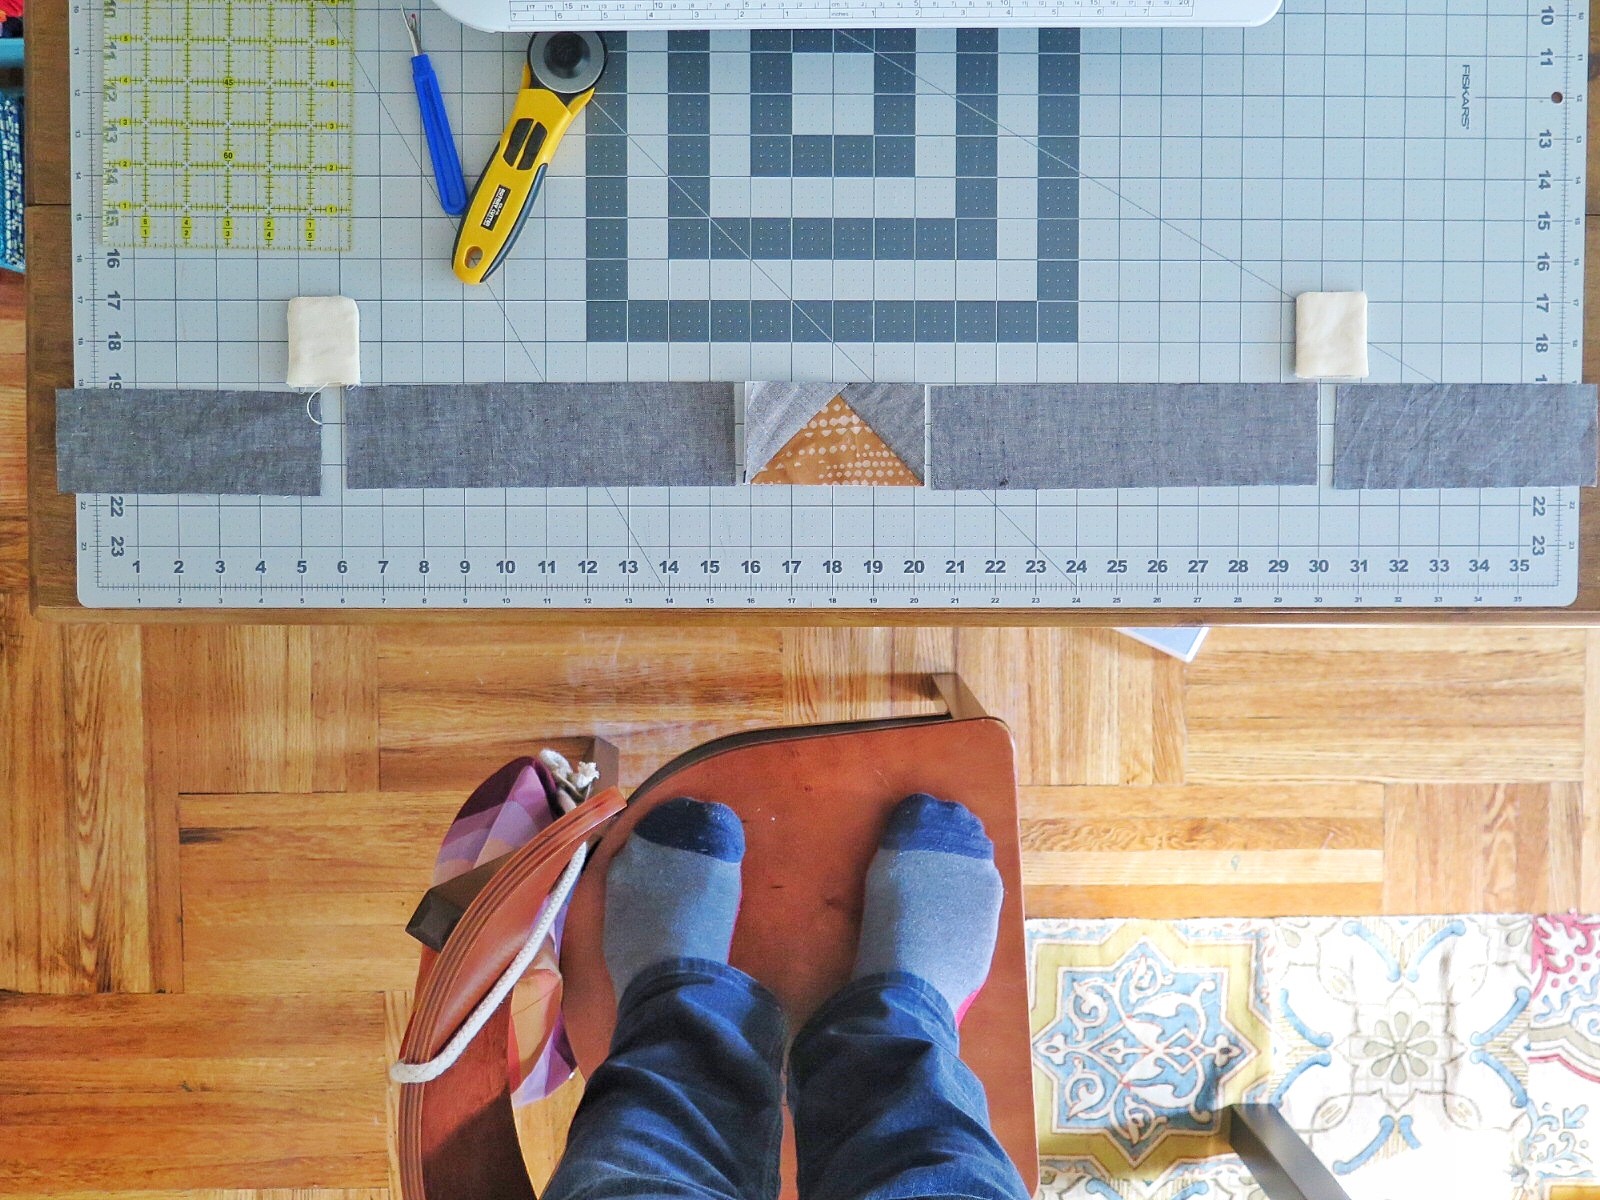
Here is the layout for the bottom stripe of the bag. From left to right, the order should be 6 1/2″ strip, tab, 9 1/2″ strip, goose, 9 1/2″ strip, tab, 6 1/2″ strip
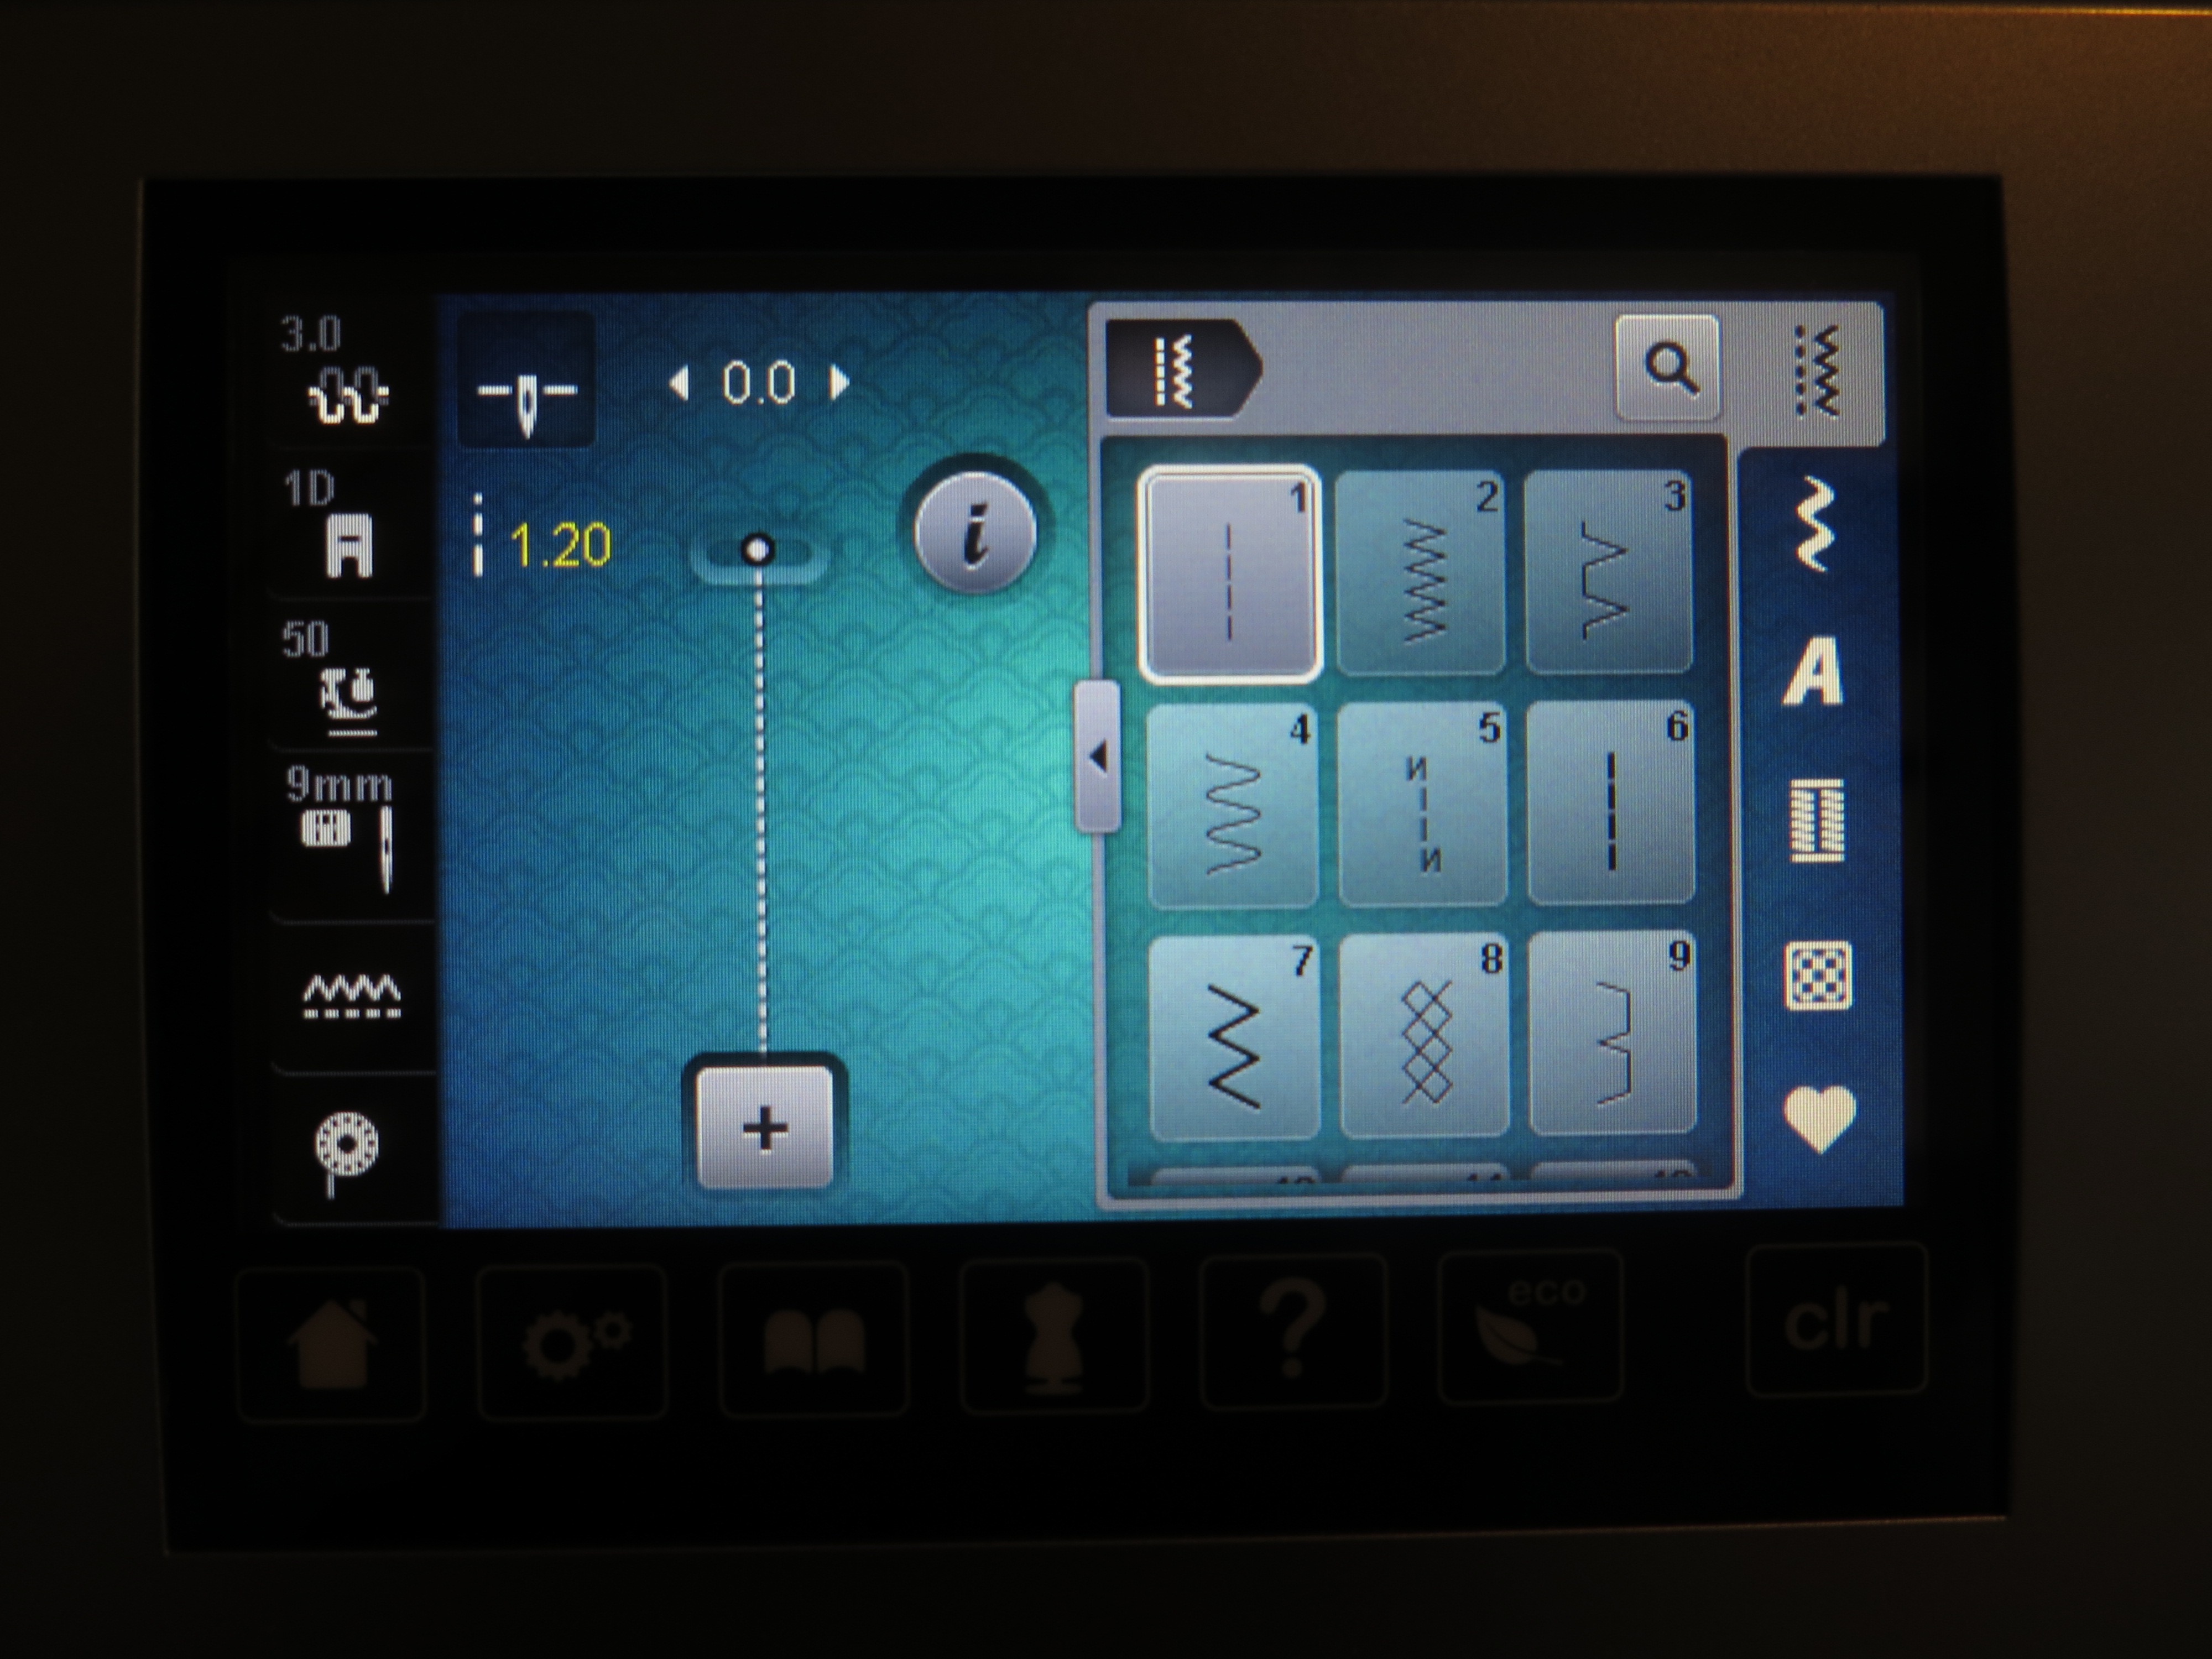
Lower your stitch length to 1.20mm. Sew with a 1/4″ seam allowance. I went back and forth a few times to give it strength.
Add your last strip to the 18 1/2″ x 34 1/2″ piece (be sure when you are adding the strip with the tabs that you are careful not to catch the tabs in your seam).
Your piece should now measure 20 1/2″ x 34 1/2″. Right sides together, sew up the 20 1/2″ side of the panel. Pin your seams so they match. Use a 1/2″ seam allowance, keeping your stitch length at 1.20mm. When you are done, flip it around and press your back seam.
Congrats! Your now have a flying geese tube! Now make a canvas tube by sewing your 20 1/2″ x 34 1/2″ piece of canvas in the same manner as the flying geese tube.
Grab those canvas circles and pin one to the bottom of each tube like so…
Fold your circle in half and press it so you have a visible crease. Unfold it and fold it again, bringing the creases together. Press again. You now have a a circle with four wedges. We’ll call each of these creases “corners.”
Now you’ll create four corners on your tube. Start with the outer part of the bag. At the bottom of the tube, bring the back seam to the center of the goose and press the sides of the bag, creating two corners. Now fold the bag the other way and crease bottom of the center of the goose, creating a corner. The seam is your fourth corner.
Now match the corners of your circle with corners of the bag, starting with matching the back seam to one of the corners and moving around the bag. Now pin within each of these wedges liberally. The more pins the better! It should look like this.
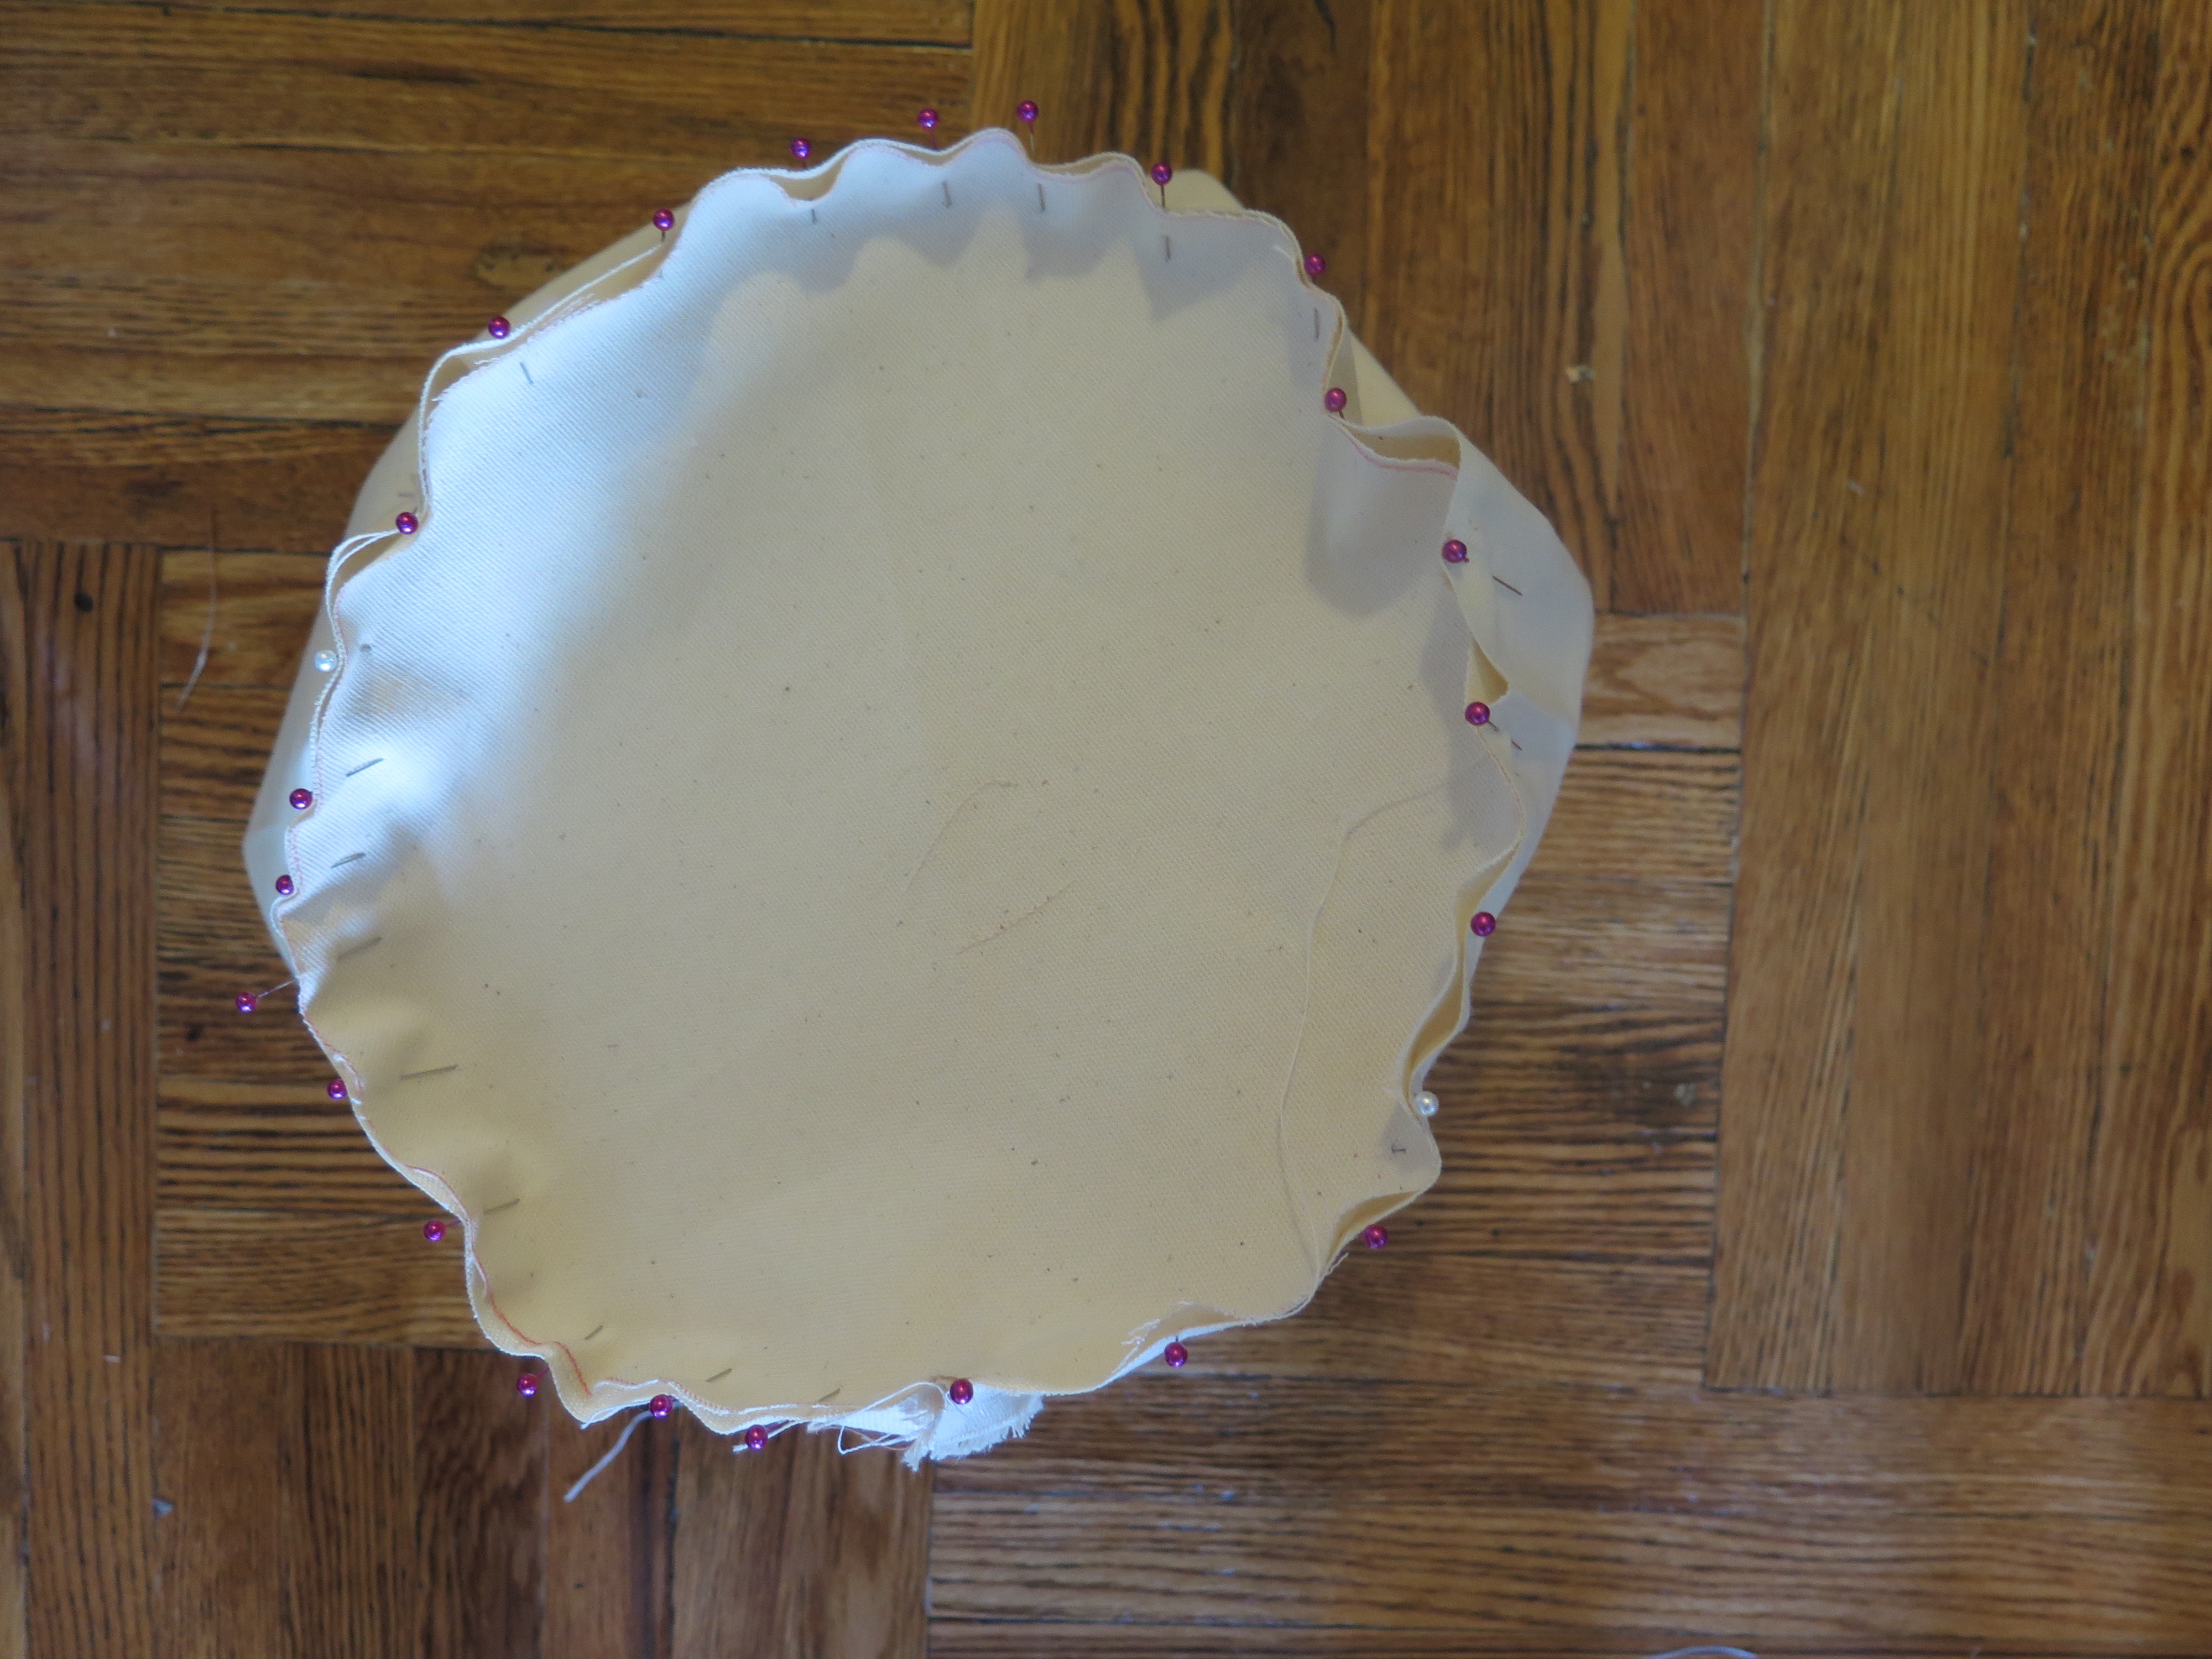
Slowly and carefully, with a 1/4″ seam, sew the bottom of the bag to each tube. Turn inside out and press the seam at the bottom of the bag.
Now comes the tricky part. Right sides together, put the outside of the bag (the geese part) inside the canvas lining. Your geese bag should be inside out, as will the canvas bag (canvas on outside, geese on inside).
Keeping your stitch length at 1.20mm, sew 1/4″ around the top of the bag, leaving a gap of about 4″. Flip your bag so the geese are on the outside and the canvas on the inside.
You’re almost done!
Press the top seam, ironing the 1/4″ seams of your gap down. Top stitch the opening very close to the edge. I top stitched around the entire top of the bag to give it a finished look.
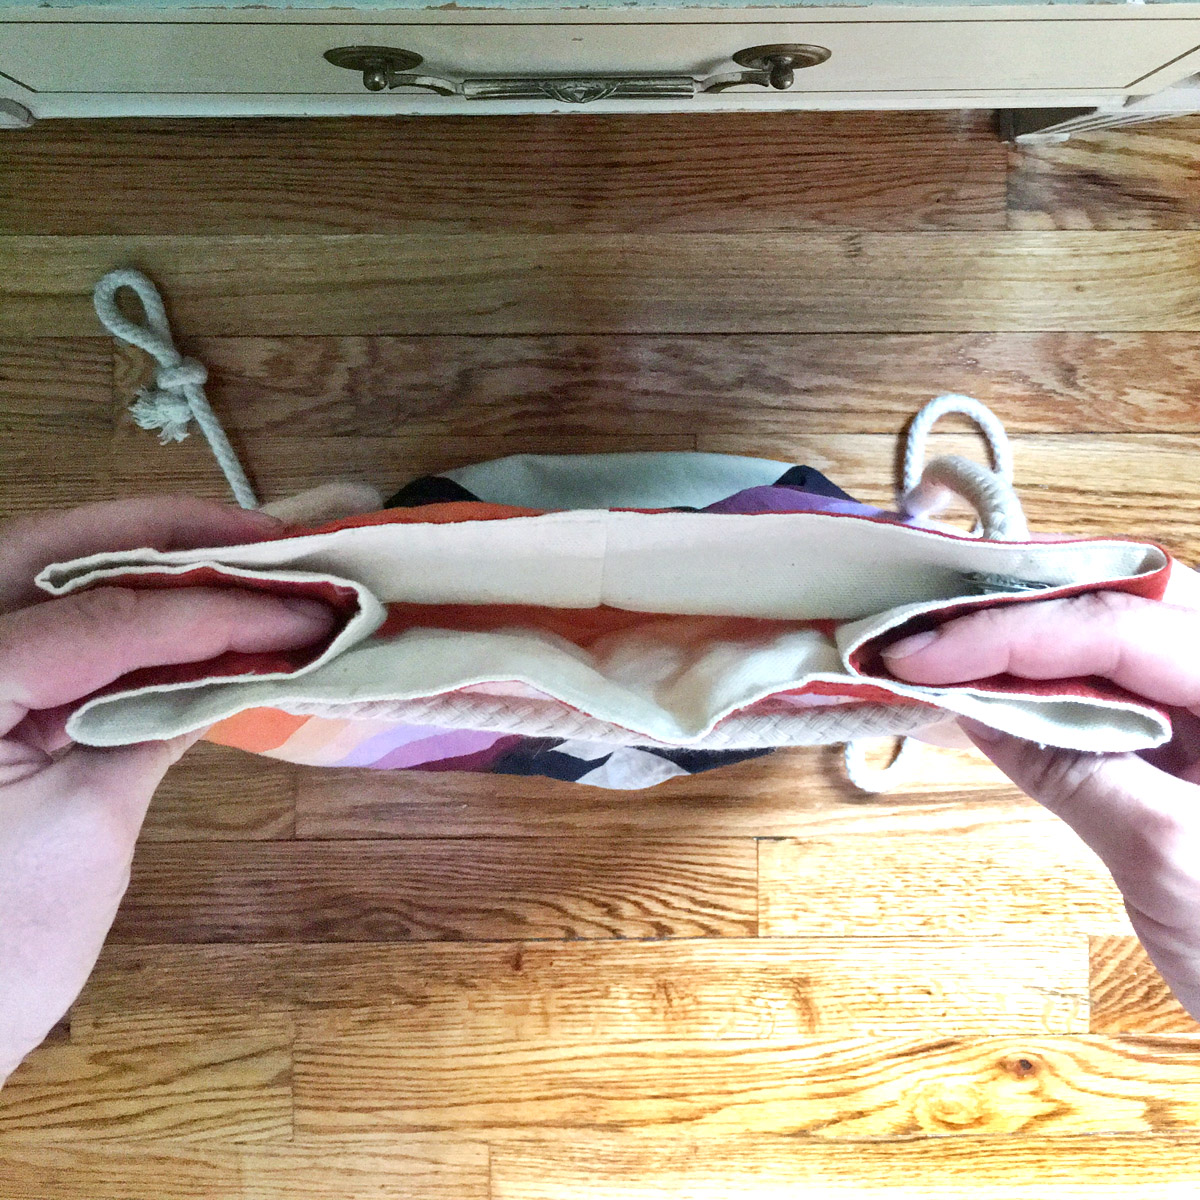
Grommet time redux! To place the grommets along the top of the bag, do as follows:
- Hold the top of the bag flat in hands (as pictured above).
- With your index finger, fold the edges of the bag in between the front and back of the bag.
- The left side should look like a Greek E and the right a mirror image of it.
- Place four grommets on top of one another on either side.
- From the center of the front and the center of the back, your grommets should be about 4″ on either side, the next two about 3 inches from that.
Now lace your rope through the grommets. On either side of the geese on the front, lace the rope from the left and the right. Then take the rope down to the bottom tabs. Adjust to right size. When you knot the rope, the knot should be on the front of the bag.
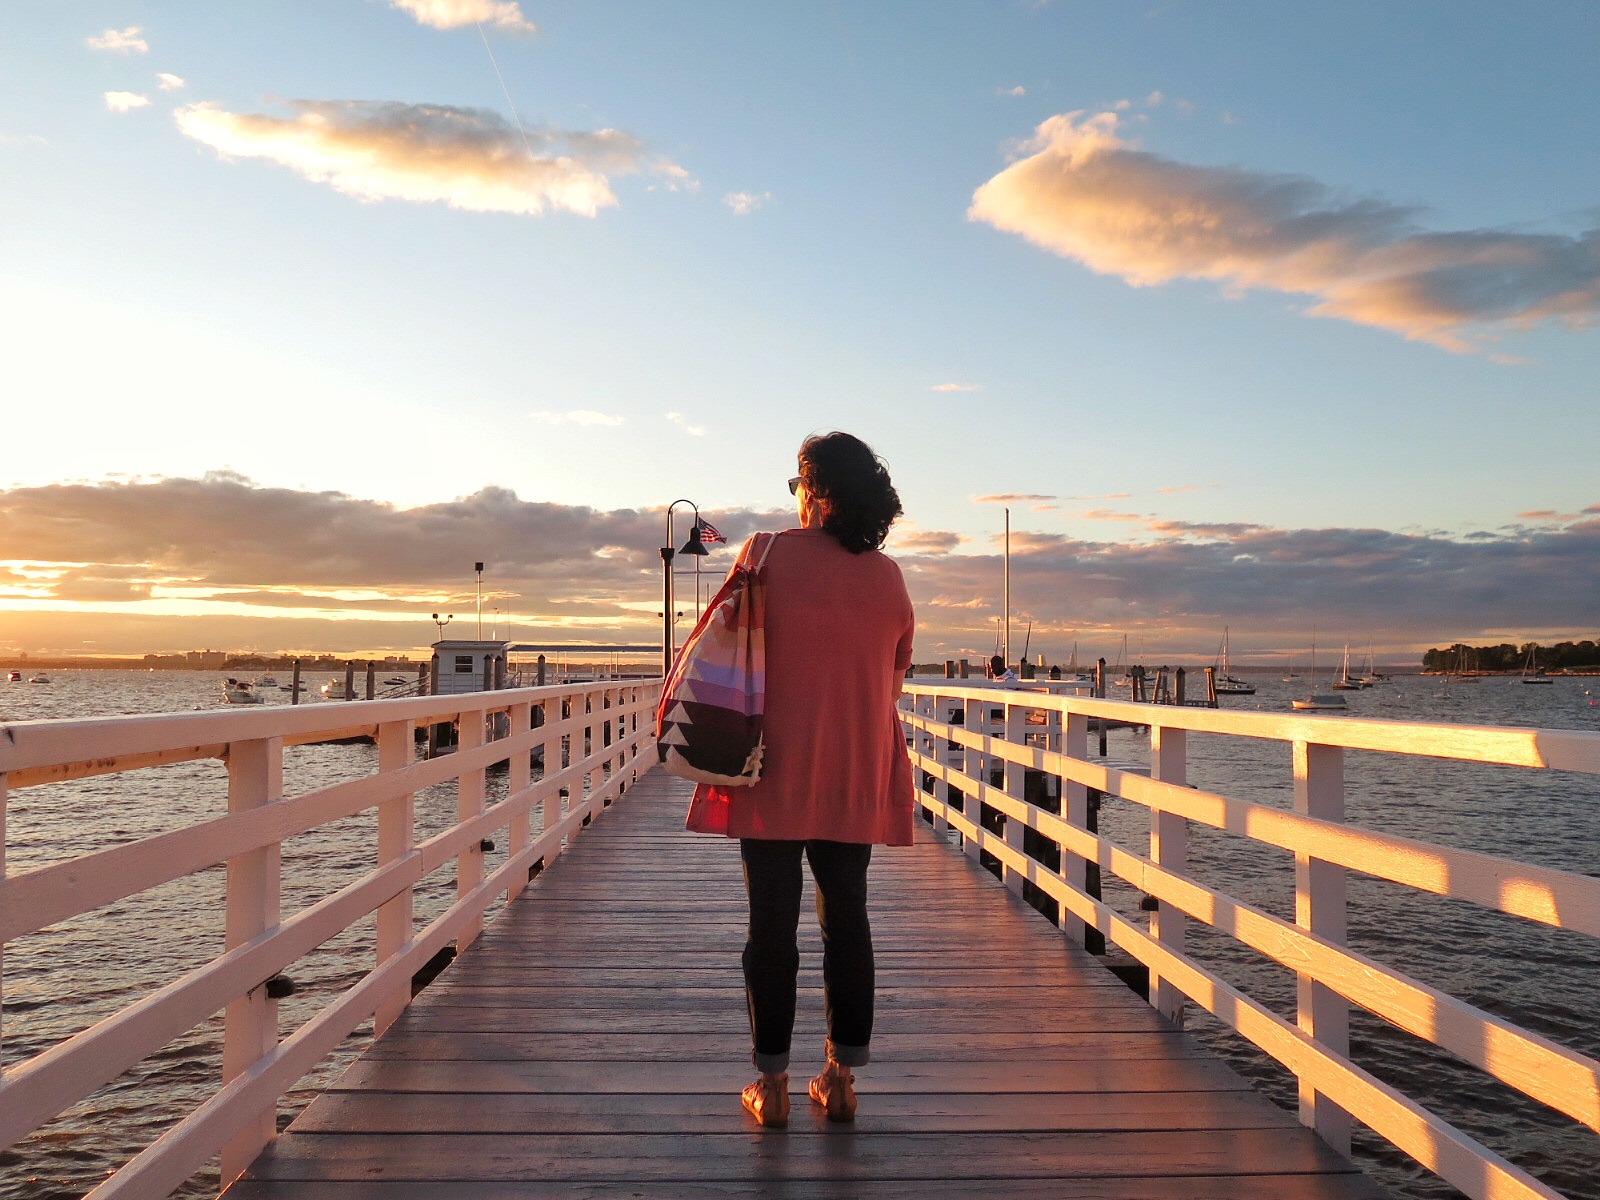
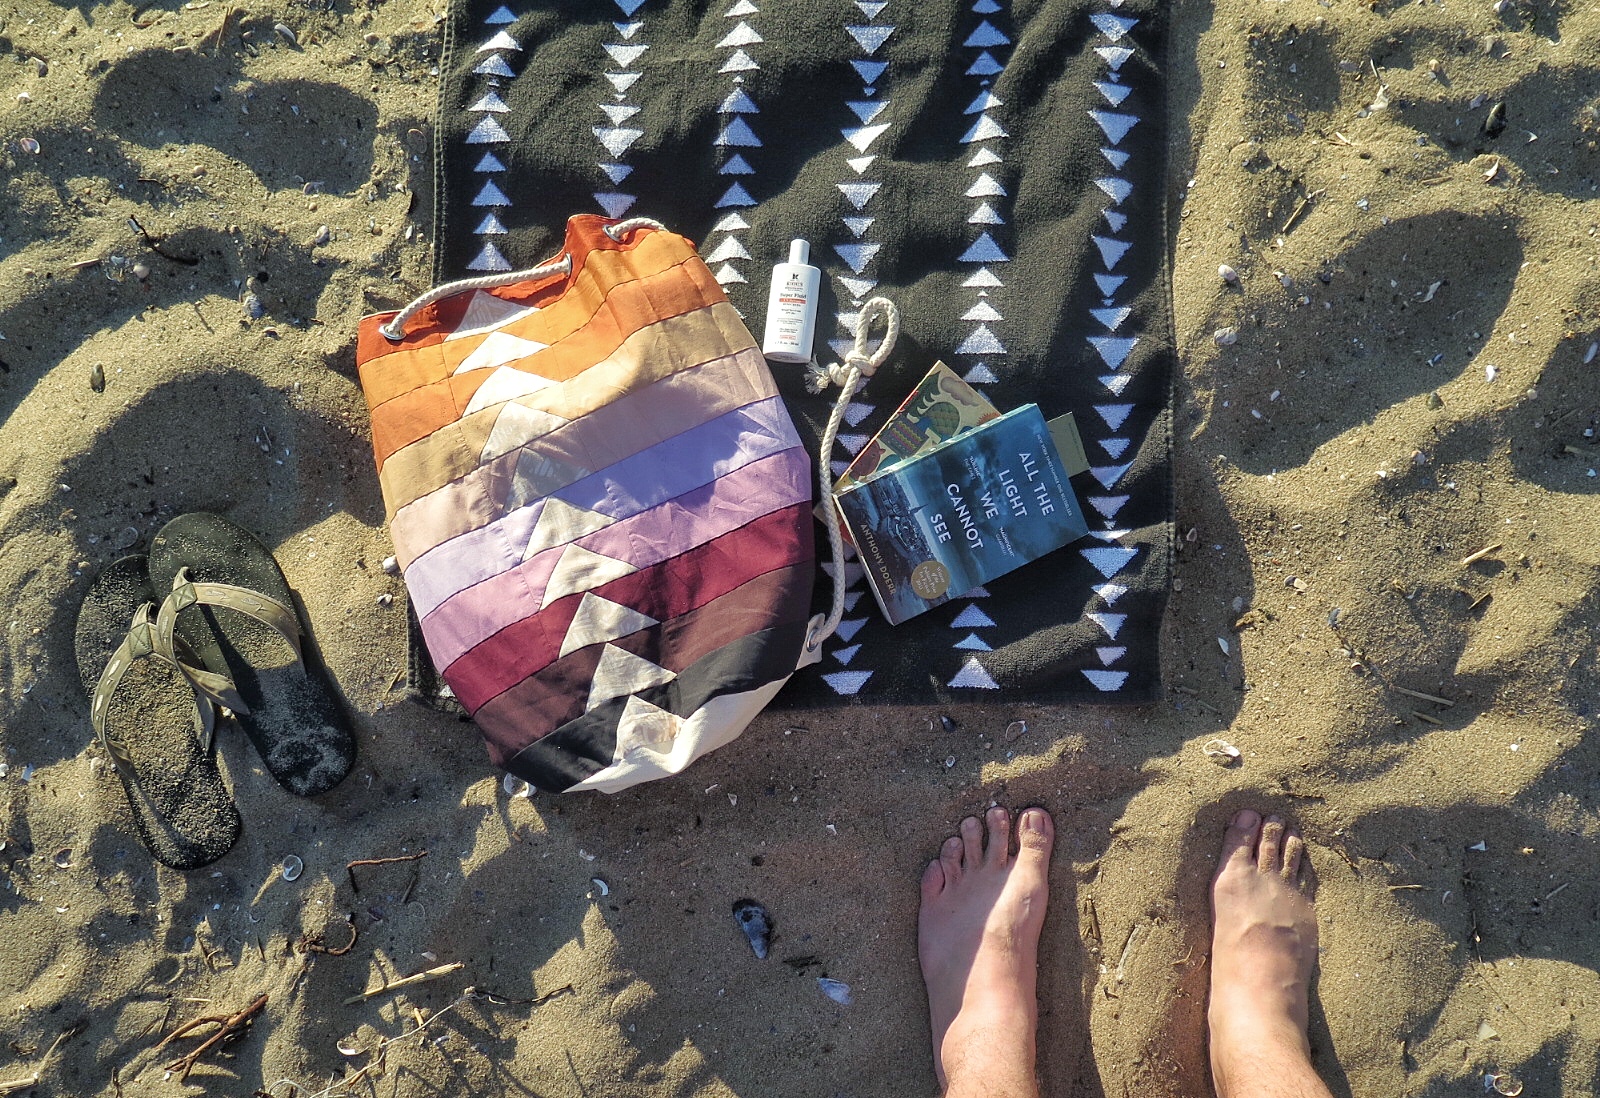
Last step (and I think the most important one), GO OUTSIDE! Get to the beach and have an amazing summer!
TIPS & TRICKS
- Have fun with this project! Try using different piecing techniques to make your outer panel. A quilted version would be awesome (that’s next on my list)!
- This pattern is so easy to modify and make all your own. You can easily change the measurements to make a smaller version for a kid’s beach bag or a larger version for a laundry bag.
- A solid fabric version (no piecing on the panel) only took me an hour and a half. Just add a row at the bottom for your tabs (you can even just add the tabs when you are sewing the tube onto the circle). Pick an awesome fabric and you have a stellar and quick birthday gift!
- Play around with the placement of the tabs to what you like. For my original prototype, I placed the tabs closer to the geese (toward the front of the bag) so that the bag would theoretically pull into my body more instead of pulling down. The next version I made I placed the tabs closer to the back seam. Experiment with where you think the tabs would work best for you.
- Try a reversible version of the bag! Do something cool with the front and back of the bag.
- Since the closure for the bag is the bag straps themselves, the rope slides around a lot when you take the bag on and off. Try stitching the rope down between the grommets on the front of the bag to stop the rope from sliding.
I hope you enjoy this tutorial as much as I enjoyed making it for you.
This was my favorite tutorial to make so far.
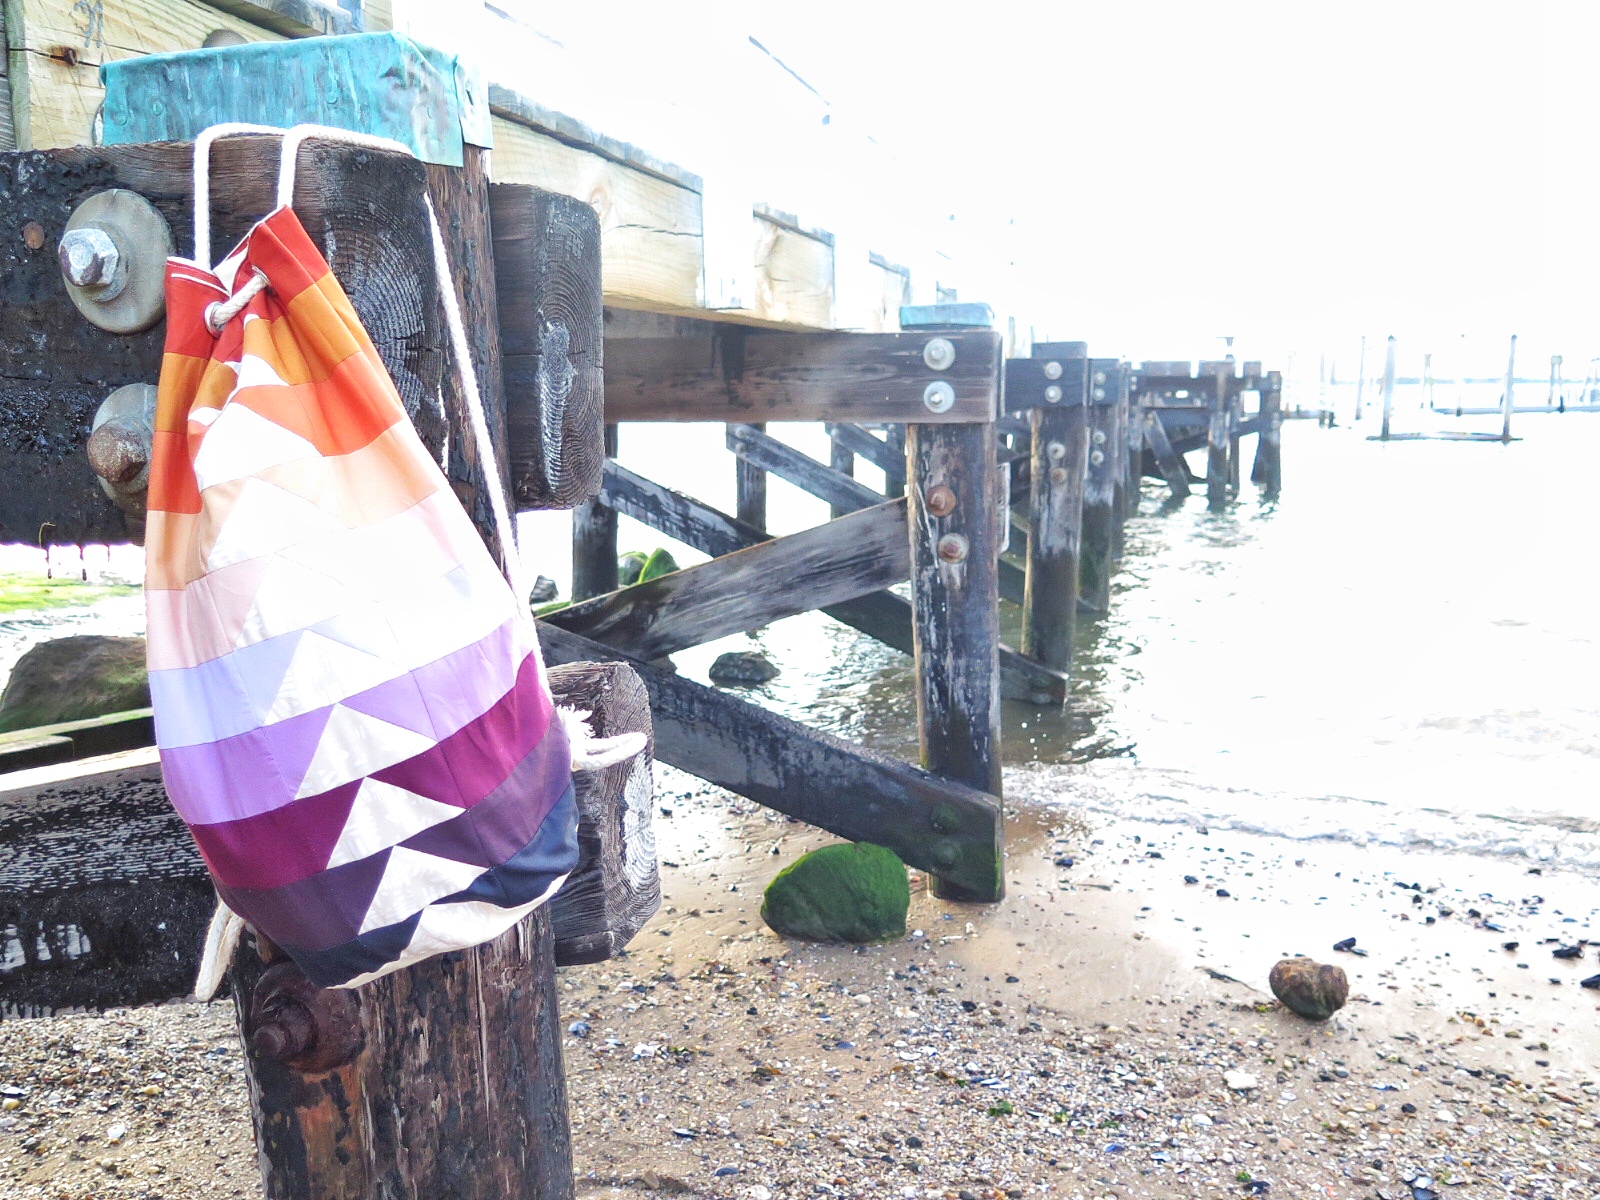
And certainly my favorite to photograph…
Interested in making your own bucket bag? Join me in a sew-along and make your own version of the bag! You can do a flying geese rendition like this one or make it all your own. It’s such a fun, easy project to make. All you really need is a panel measuring 20 1/2″ x 34 1/2″. There are so many ways to customize this project. Later this week I’ll announce the details over on my Instagram page: @giucy_giuce. Who knows, maybe there will even be a giveaway… ::hint hint::