How to add Appliqué to a Dress
When I was a kid I loved Sundays. It wasn’t just that I didn’t have to go to school. It was because that was the day that my mom and I would scour the neighborhood for garage sales. Normally I hated getting up early but I loved searching for things in dusty boxes even more than sleeping in.
I loved finding old photo albums and getting a glimpse into stranger’s lives through images of their intimate moments and cherished memories.
Often I’d find the albums at estate sales of people who’d passed away and it made me sad to think about how there was no one left to hold onto the albums and pass along the family memories to the next generation.
Also on the top of my list was vintage clothing. This was the 1980’s and there was still so much vintage clothing around from the 1950-1970’s. Lovely cashmere sweaters, beaded party dresses, old rock and roll concert shirts and bright flowered muumuu’s. The only problem was that lots of these clothes had been stored in an attic for years and weren’t in the best condition. My mom had taught me how to sew and sometimes I could fix a tiny hole with a few stitches but often there were too many holes or the stains were too big. When that was the case I’d sew on some appliques and give new life to a dress or sweater that otherwise would have ended up in the trash.
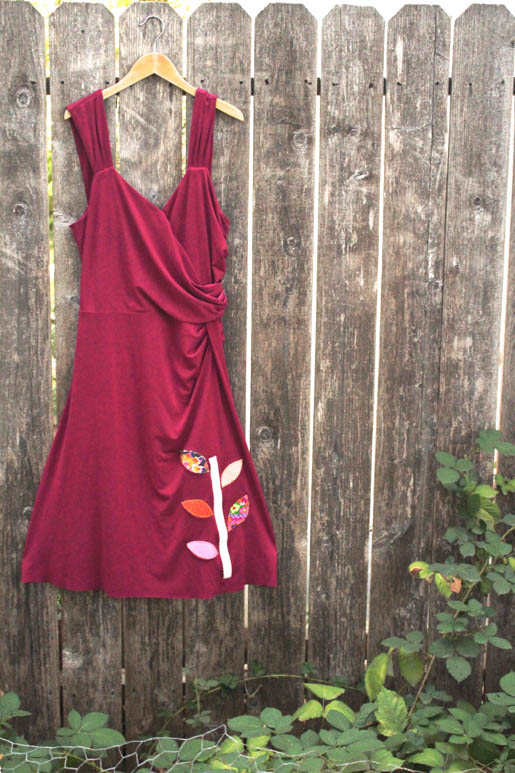
Recently one of my favorites dresses got into a scuffle with a Sharpie marker. I couldn’t bear to let it go. I remembered my appliqué addiction born of childhood garage sale finds and set out to make my dress wearable again. One of the things I love about appliques is that you can make them out of just about any fabric or shape so they’re versatile enough for pretty much any garment or style. So, next time you’re about to drop off one of your favorite shirts or jeans at the thrift store, think twice and put an appliqué on it!
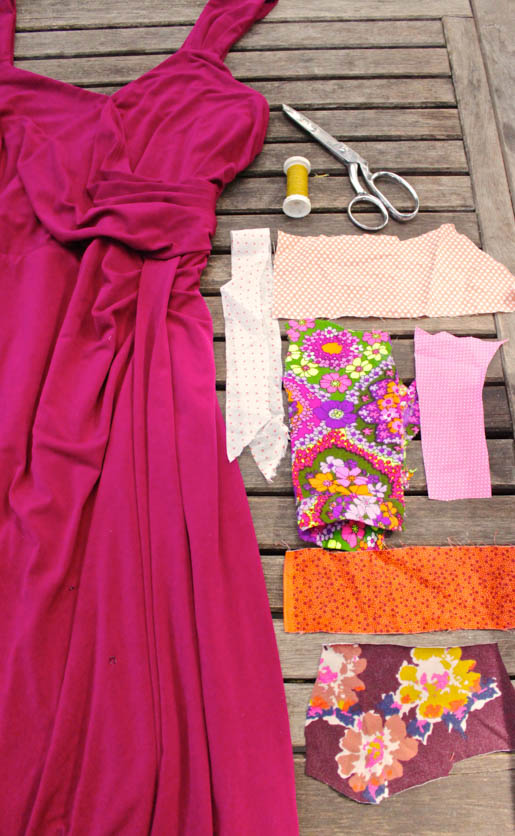
Materials:
- Any garment you need to cover stains, holes or spots on
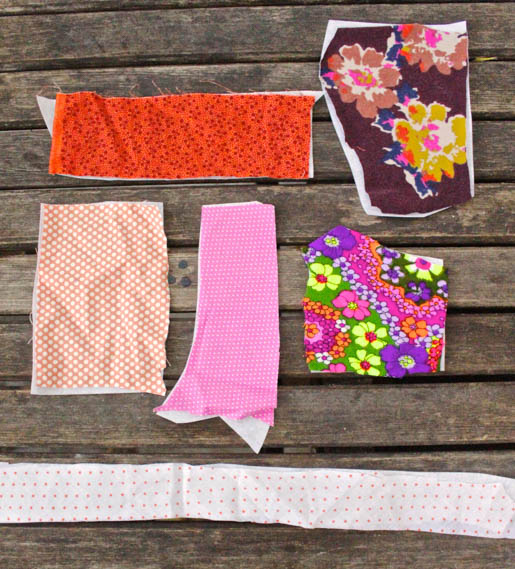
- Scrap fabric pieces to create your appliqués
- Iron on interfacing (The size of interfacing depends on the size of the appliqués you’re creating).
- Thread
- Scissors
- Iron
- Ironing board
- Sewing machine
- Pins
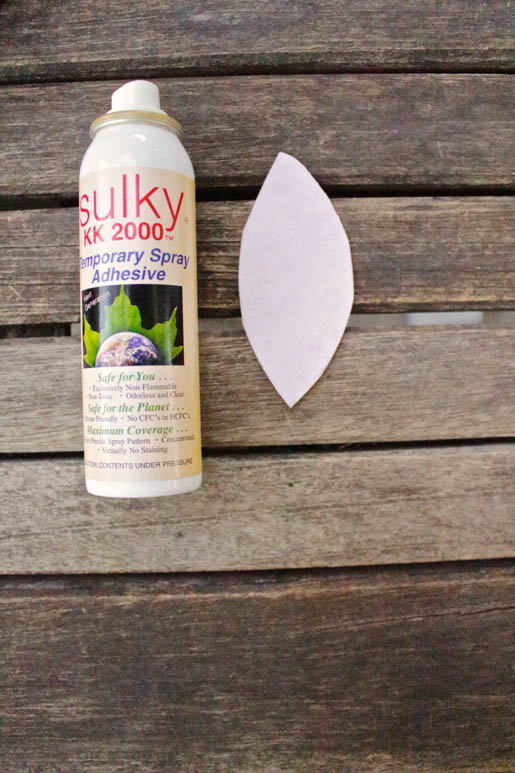
- Spray glue
Instructions:
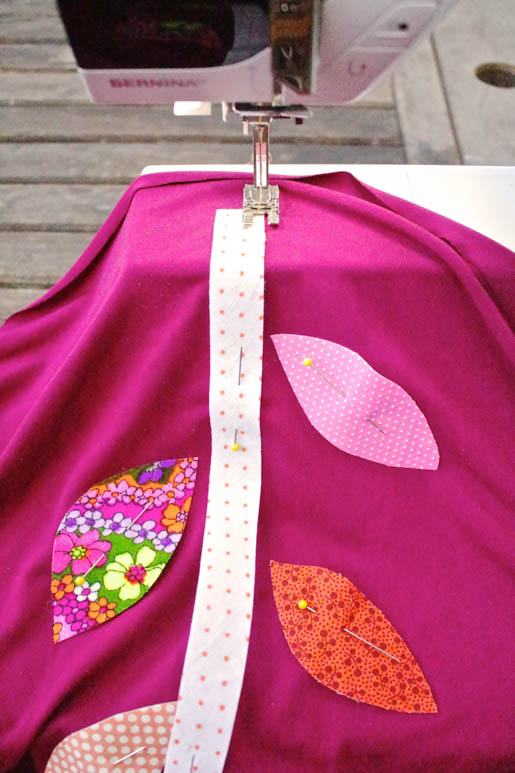
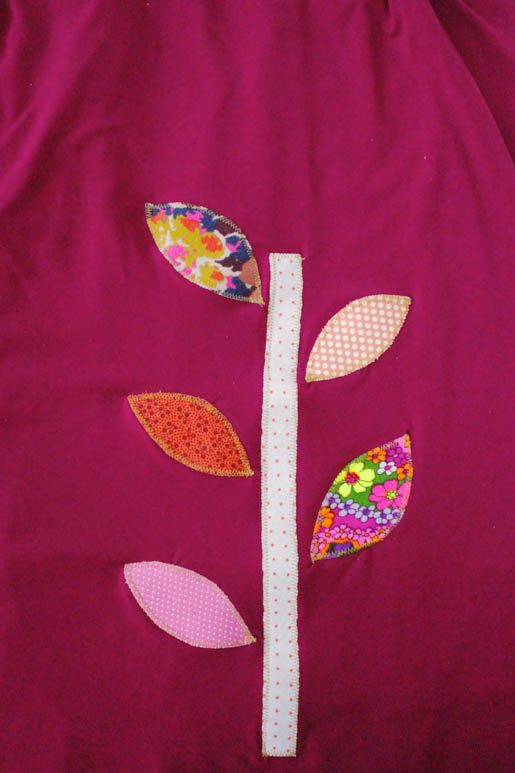
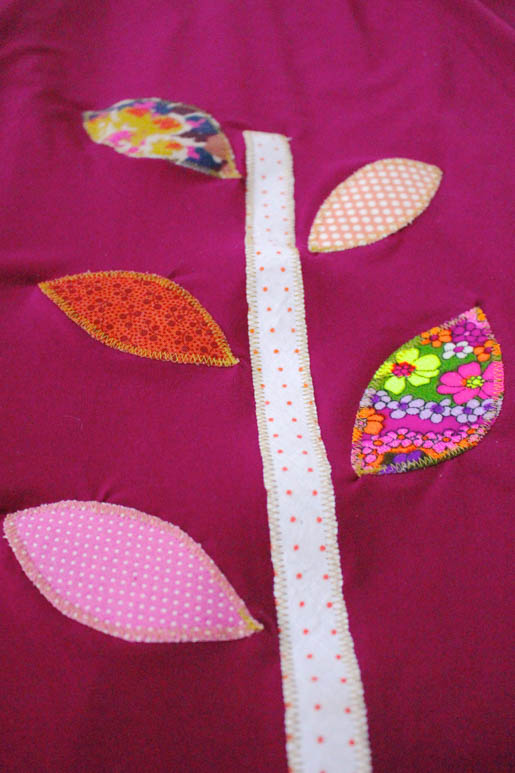
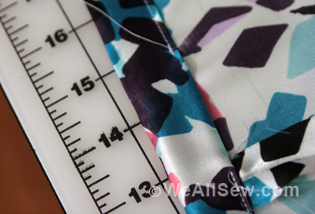
1. Assess the holes, spots or stains on your garment and brainstorm some ideas for appliqués that will cover them. The stains on my dress were all in one general area but a bit spread out so I opted for a stem and leaves so I could cover the random stains with the edges of the leaves.
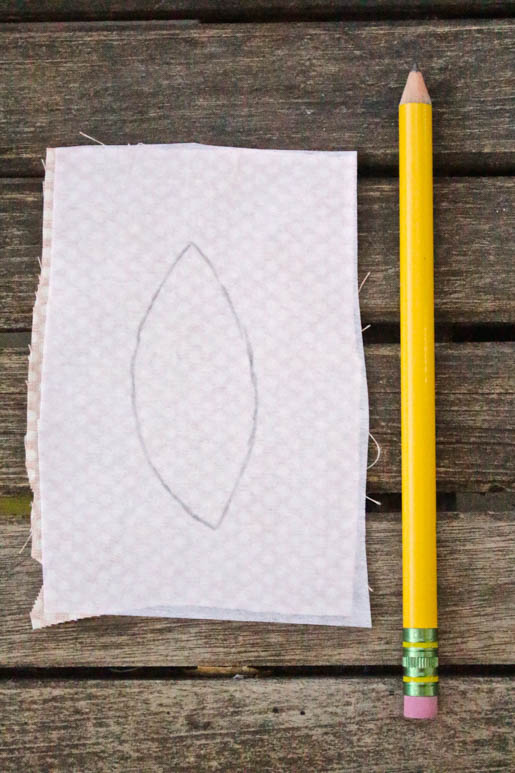
2. Once you decide on a design. You can cut templates for your appliqués by tracing the shapes onto paper or you can draw them freehand on the back the interfacing after you iron it onto your fabric.
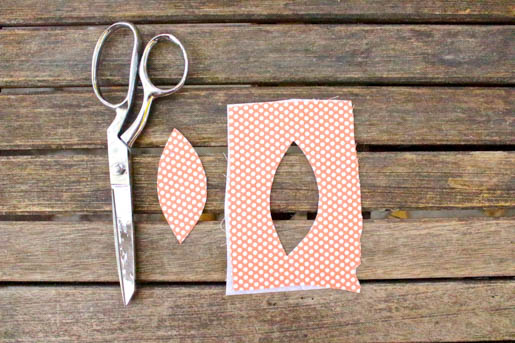
3. Cut pieces of interfacing that are the same size as you fabric scraps.
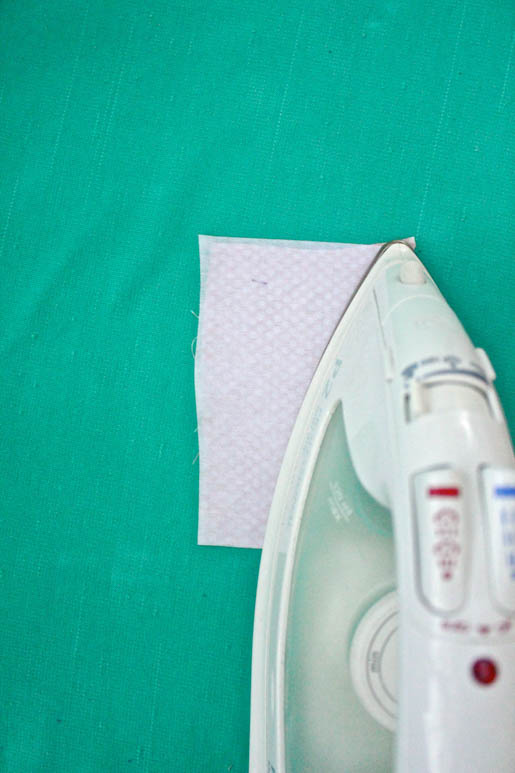
4. Iron the interfacing onto the wrong side of your fabric pieces.
5. Use the templates you created or draw your appliqué shapes freehand on the back on the interfacing.
6. Cut our your appliqués.
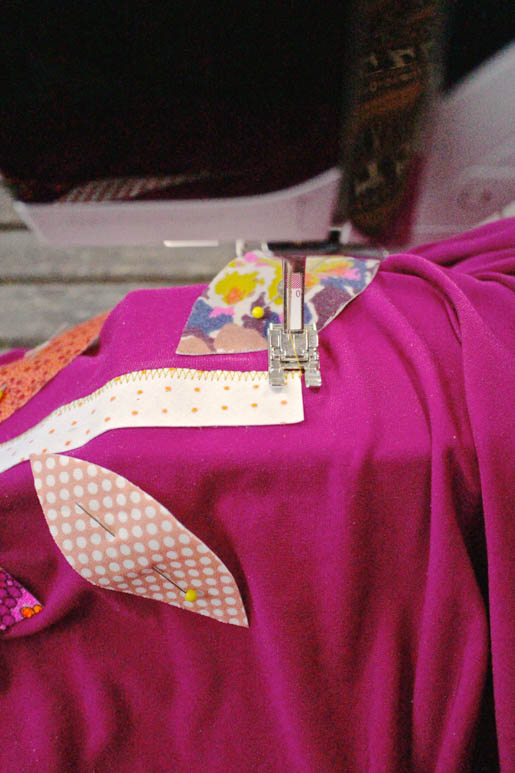
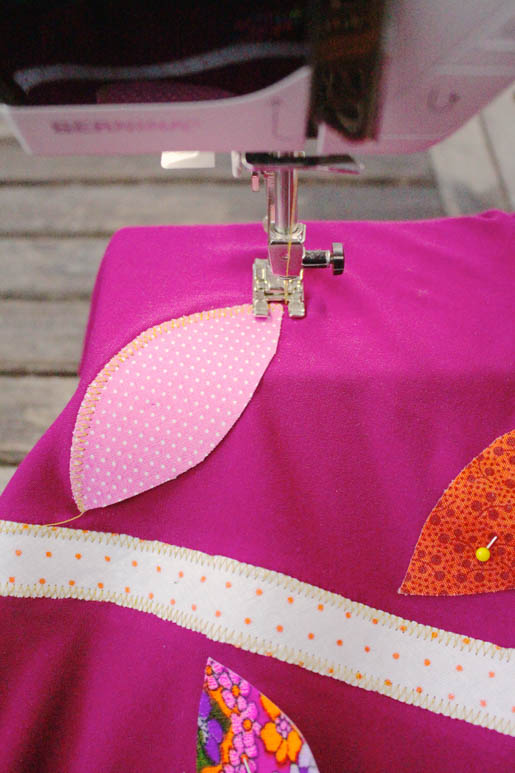
7. Position your appliqués onto your garment and affix them with non-permanent spray glue and pins.
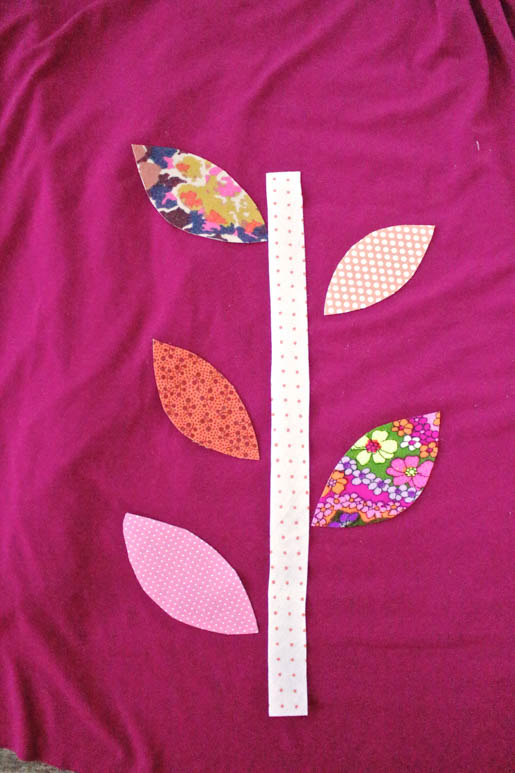
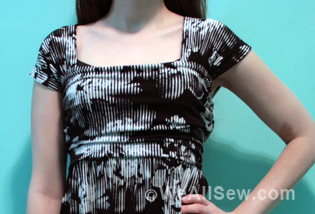
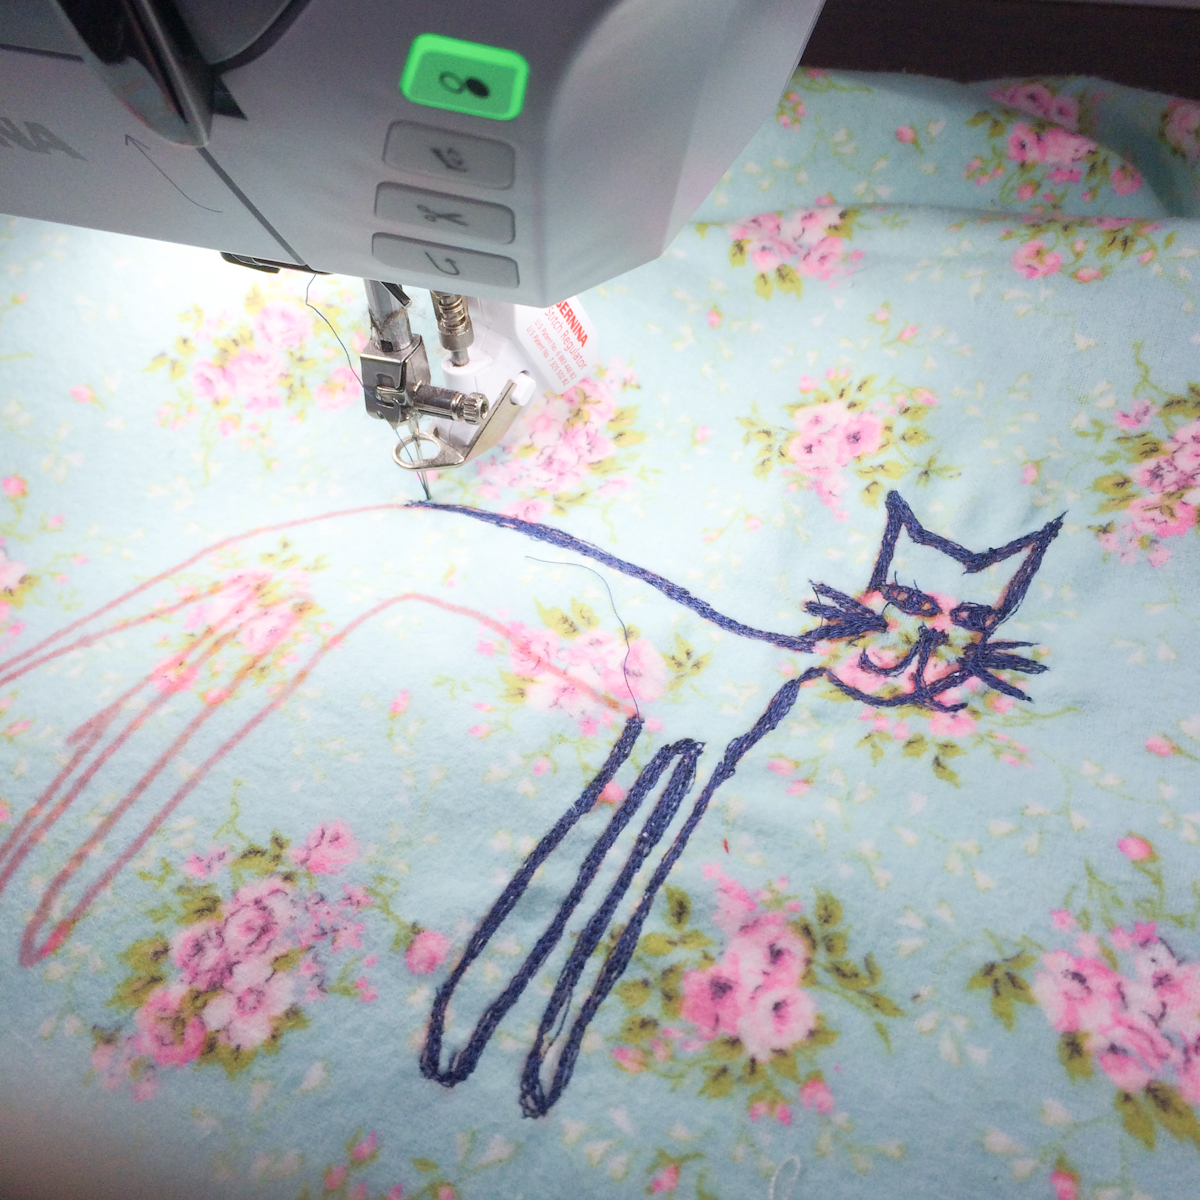
8. Sew your appliqués onto your garment. I used a stitch length that was just over 1 and a 4 ¾ stitch length on the BERNINA 380.
And here it is! The finished appliqué.
Used Products


What you might also like


2 comments on “How to add Appliqué to a Dress”
Leave a Reply
You must be logged in to post a comment.

Great tip. I also have used machine embroidery to hide various boo-boos. Thanks!