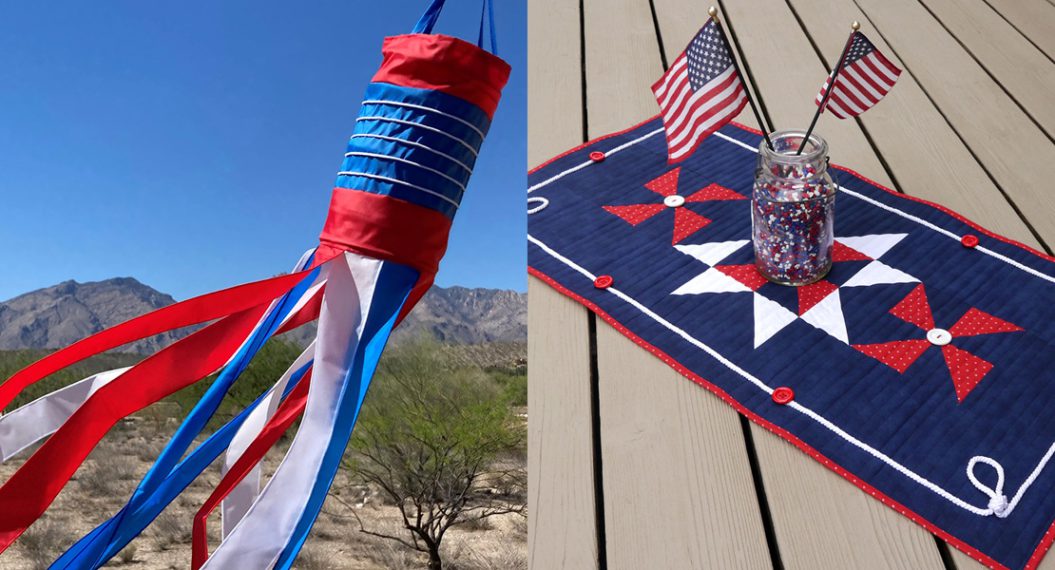
How to Sew a 4th of July Bunting
The 4th of July is one of the most popular holidays in our family. It may have something to do with the heat finally arriving in Chicago, our annual trip to northern Michigan or the anticipation of watching small town fireworks over the lake. Last year at WeAllSew, I shared directions to make my Summer Sparkler Quilt. This year I’m continuing the tradition of decorating for the holiday, with instructions to make your very own 4th of July Star Bunting.
Star Bunting Tutorial
Pattern by Faith Jones, Fresh Lemons Quilts
Finished Length: 9 feet, 11 triangles
Fabric Requirements:
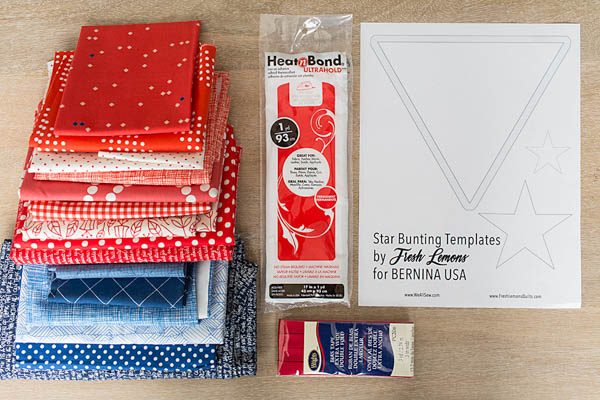
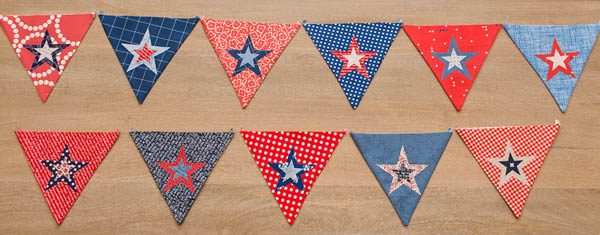
For my Star Bunting, I used a scrappy mix of about 15 red, white and blue fabrics. You can use fabrics from your stash, scrap bucket, or even a layer cake.
For the Triangles:
- 22 fabric pieces, at least 8″ x 9″
For the Stars:
- 11 fabric pieces, at least 4″ x 4″
- 11 fabric pieces, at least 2″ x 2″
Additional Supplies:
- StarBuntingTemplate, Printed at 100% or Actual Size
- 3 yards of 1/2″ wide double fold bias tape—purchase or make your own
- Thermoweb Heat ‘n Bond Ultra Hold Iron-On Adhesive
- Pen
- Scissors
- Turning Tool (optional)
- Rotary cutting, quilting ruler, quilting mat (optional)
- Sewing Machine, I sew on a BERNINA 750 QE
Instructions:
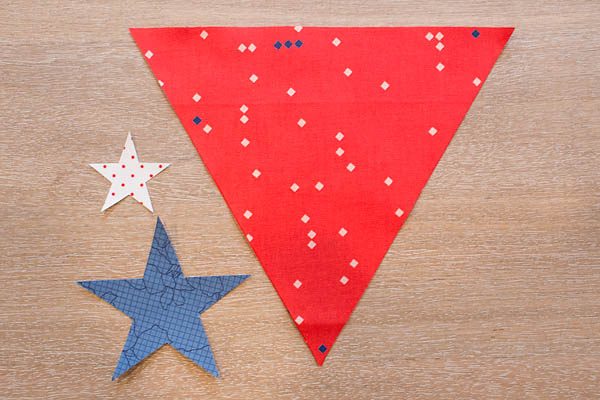
- Cut the triangle and two stars from the Star Bunting Template.
From Triangle Fabric Pieces:
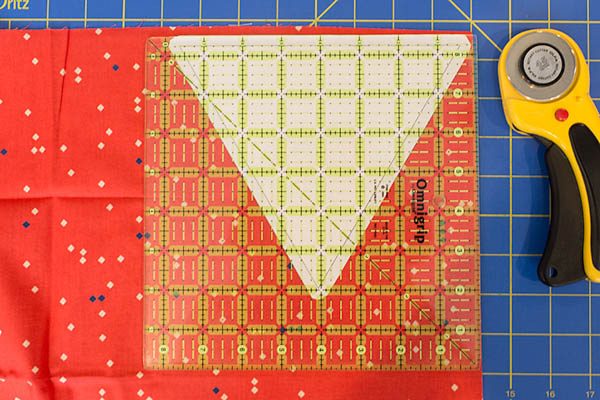
- Using the triangle from the template, cut out (22) triangles from your fabric. For my bunting, the front and back of each triangle bunting segment is the same fabric. I cut 2 triangles from 11 fabrics.
You can trace the template onto the fabric and cut out using fabric scissors, or optionally, use a quilting ruler and rotary cutter.
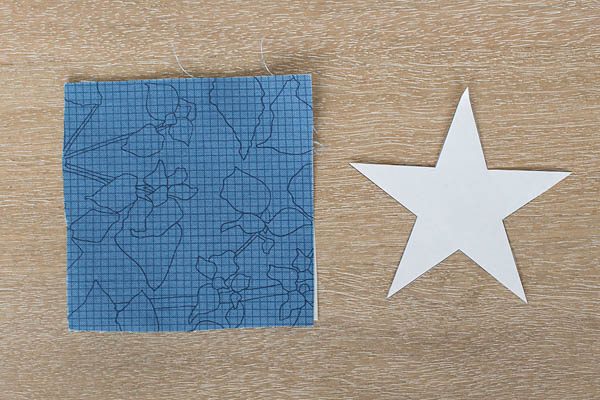
From Star Fabric Pieces:
- Select your 4″ x 4″ fabric pieces for 11 large stars and 2″ x 2″ fabric pieces for 11 small stars. Following the manufacturer’s directions, apply the Heat ‘n Bond Ultra adhesive to the back of the fabrics.
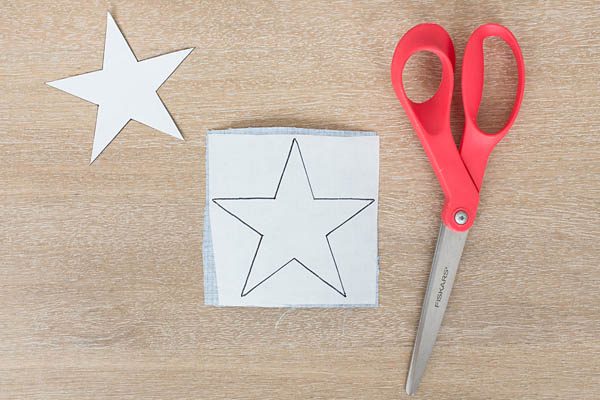
- Trace the star templates onto the adhesive paper back on the back of the star fabric pieces.
- Cut out the stars.
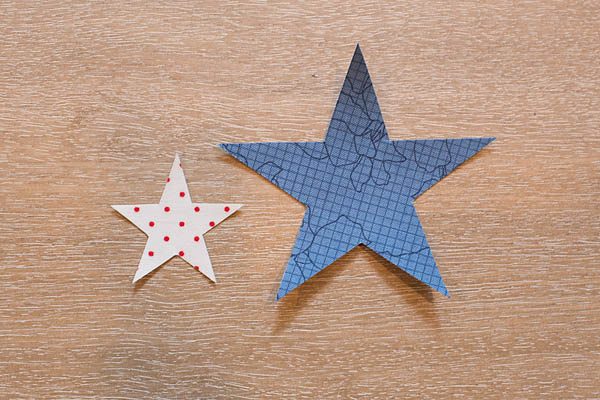
- Mix and match your fabrics and create (11) sets 2 bunting triangles, 1 large star and 1 small star.
- Select two fabric triangles. Place the wrong sides together. Stitch down 2 of the sides, 1/4″ away from the edge of the fabric. Leave the top open.
I chose to stitch all the way down on one side, and then all the way down on the second side, creating an “X” at the bottom point. If you would rather stitch your first side and stop 1/4″ away from the bottom point, pivot, and then stitch 1/4″ back up the second side, you may do that as well.
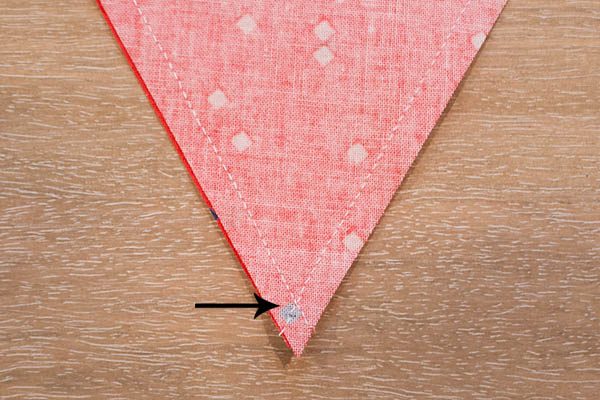
- Clip the point, just below where your seams cross or pivot.
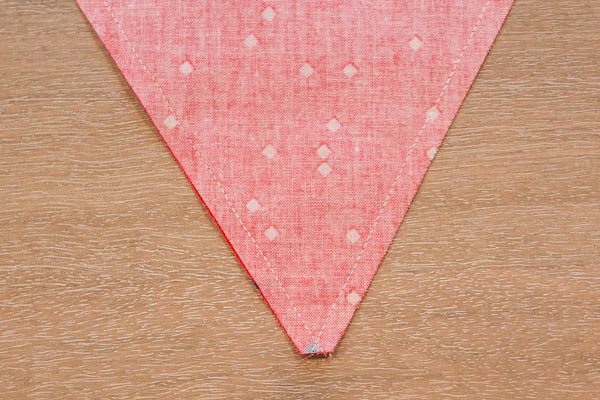
- Flip your triangles right side out through the top, unstitched opening. You may find it helpful to use a pencil or small stick to push out the bottom-stitched point.
- Select your large star. Peel off the paper Heat ‘n Bond backing. Place the star on the triangle bunting, at least 3/4″ below the top of the triangle to allow for the bias tape later. I placed my stars with their bottom points about 1/8″ away from the lower sides of the triangle.
Select your small star. Peel off the paper Heat ‘n Bond backing. Place the smaller star centered on top of the larger star.
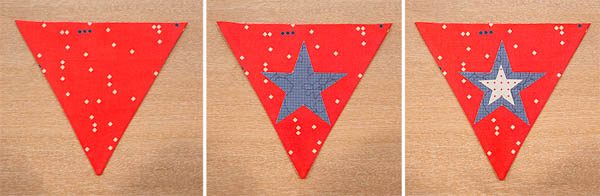
Following the Heat ‘n Bond Ultra manufacturer’s directions, adhere the stars to the triangle.
- Repeat steps 7-10 to create an additional 10 triangle/star components for a total of 11 segments.
- Remove your bias tape from it’s packaging. Fold in half and mark the midway point.
- Select a finished bunting triangle. Open your bias tape, place the bunting triangle inside, centered at the bias tape midpoint, and fold closed. Pin into place.
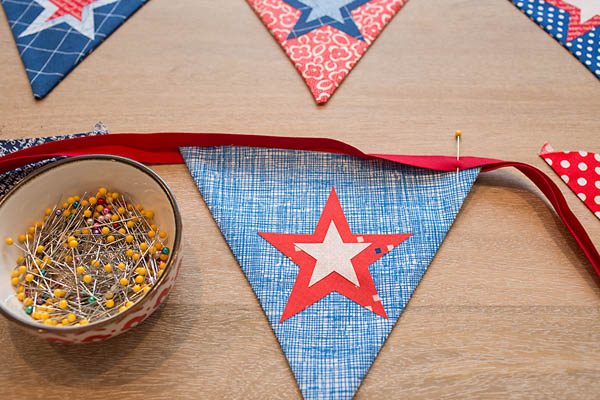
I used three pins per bunting triangle.
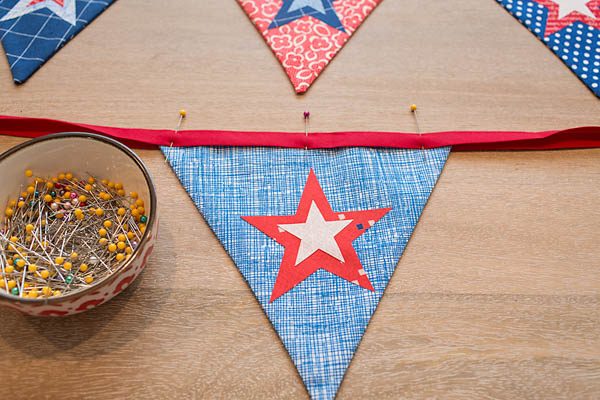
- Working your way to the right and left of the center bunting segment, pin the remaining 10 bunting segments into place.
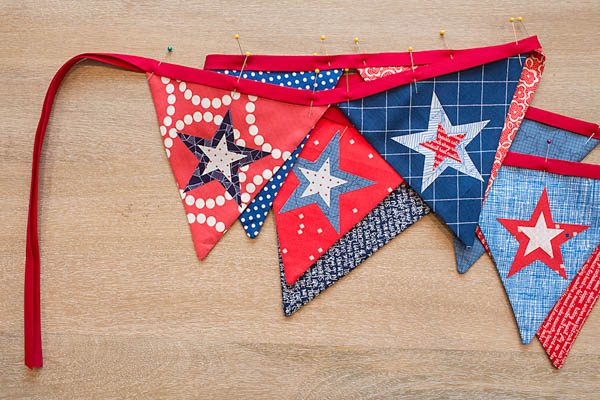
You will be left with a bit of bias tape at each end of your bunting, which will allow you to tie it to posts and railings.
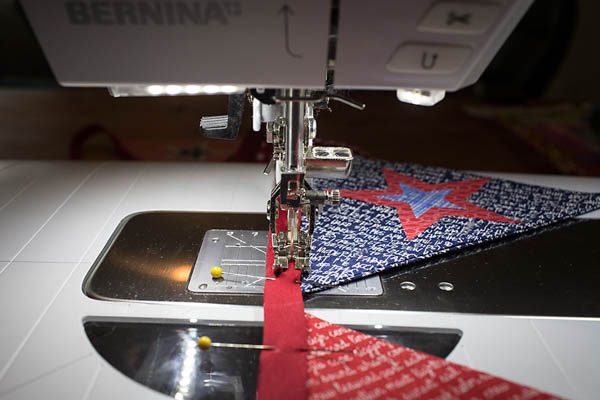
- Using a straight stitch, stitch the bias tape closed, 1/8” away from the side that opens. Backstitch to secure the beginning and end of the bunting.
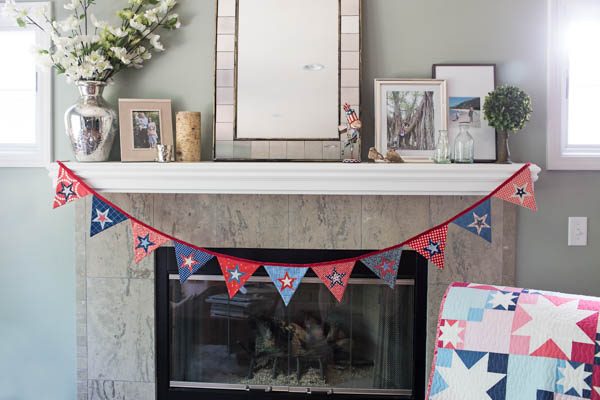
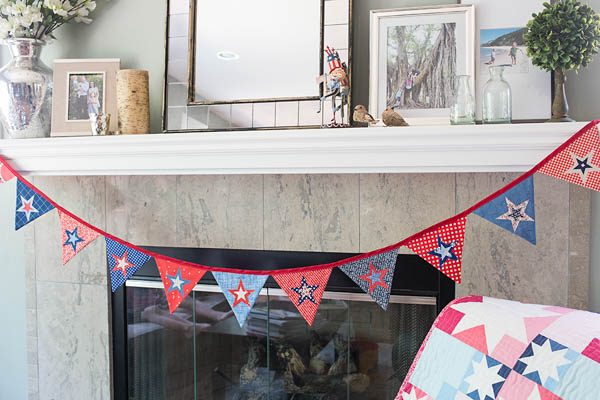
Hang your Star Bunting and enjoy!


One comment on “How to Sew a 4th of July Bunting”