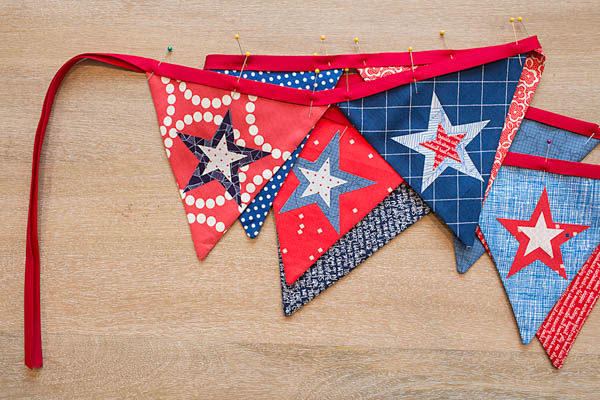
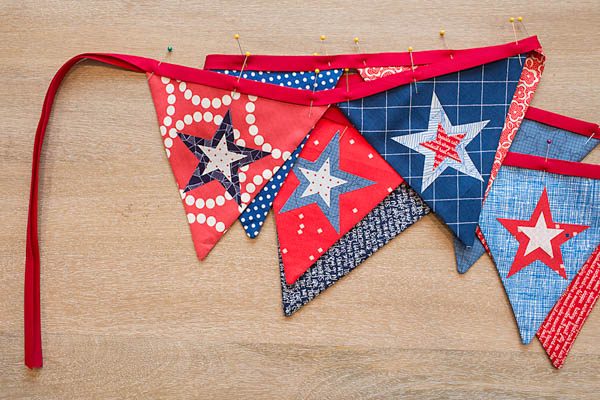
Quick 10-Minute Bunting
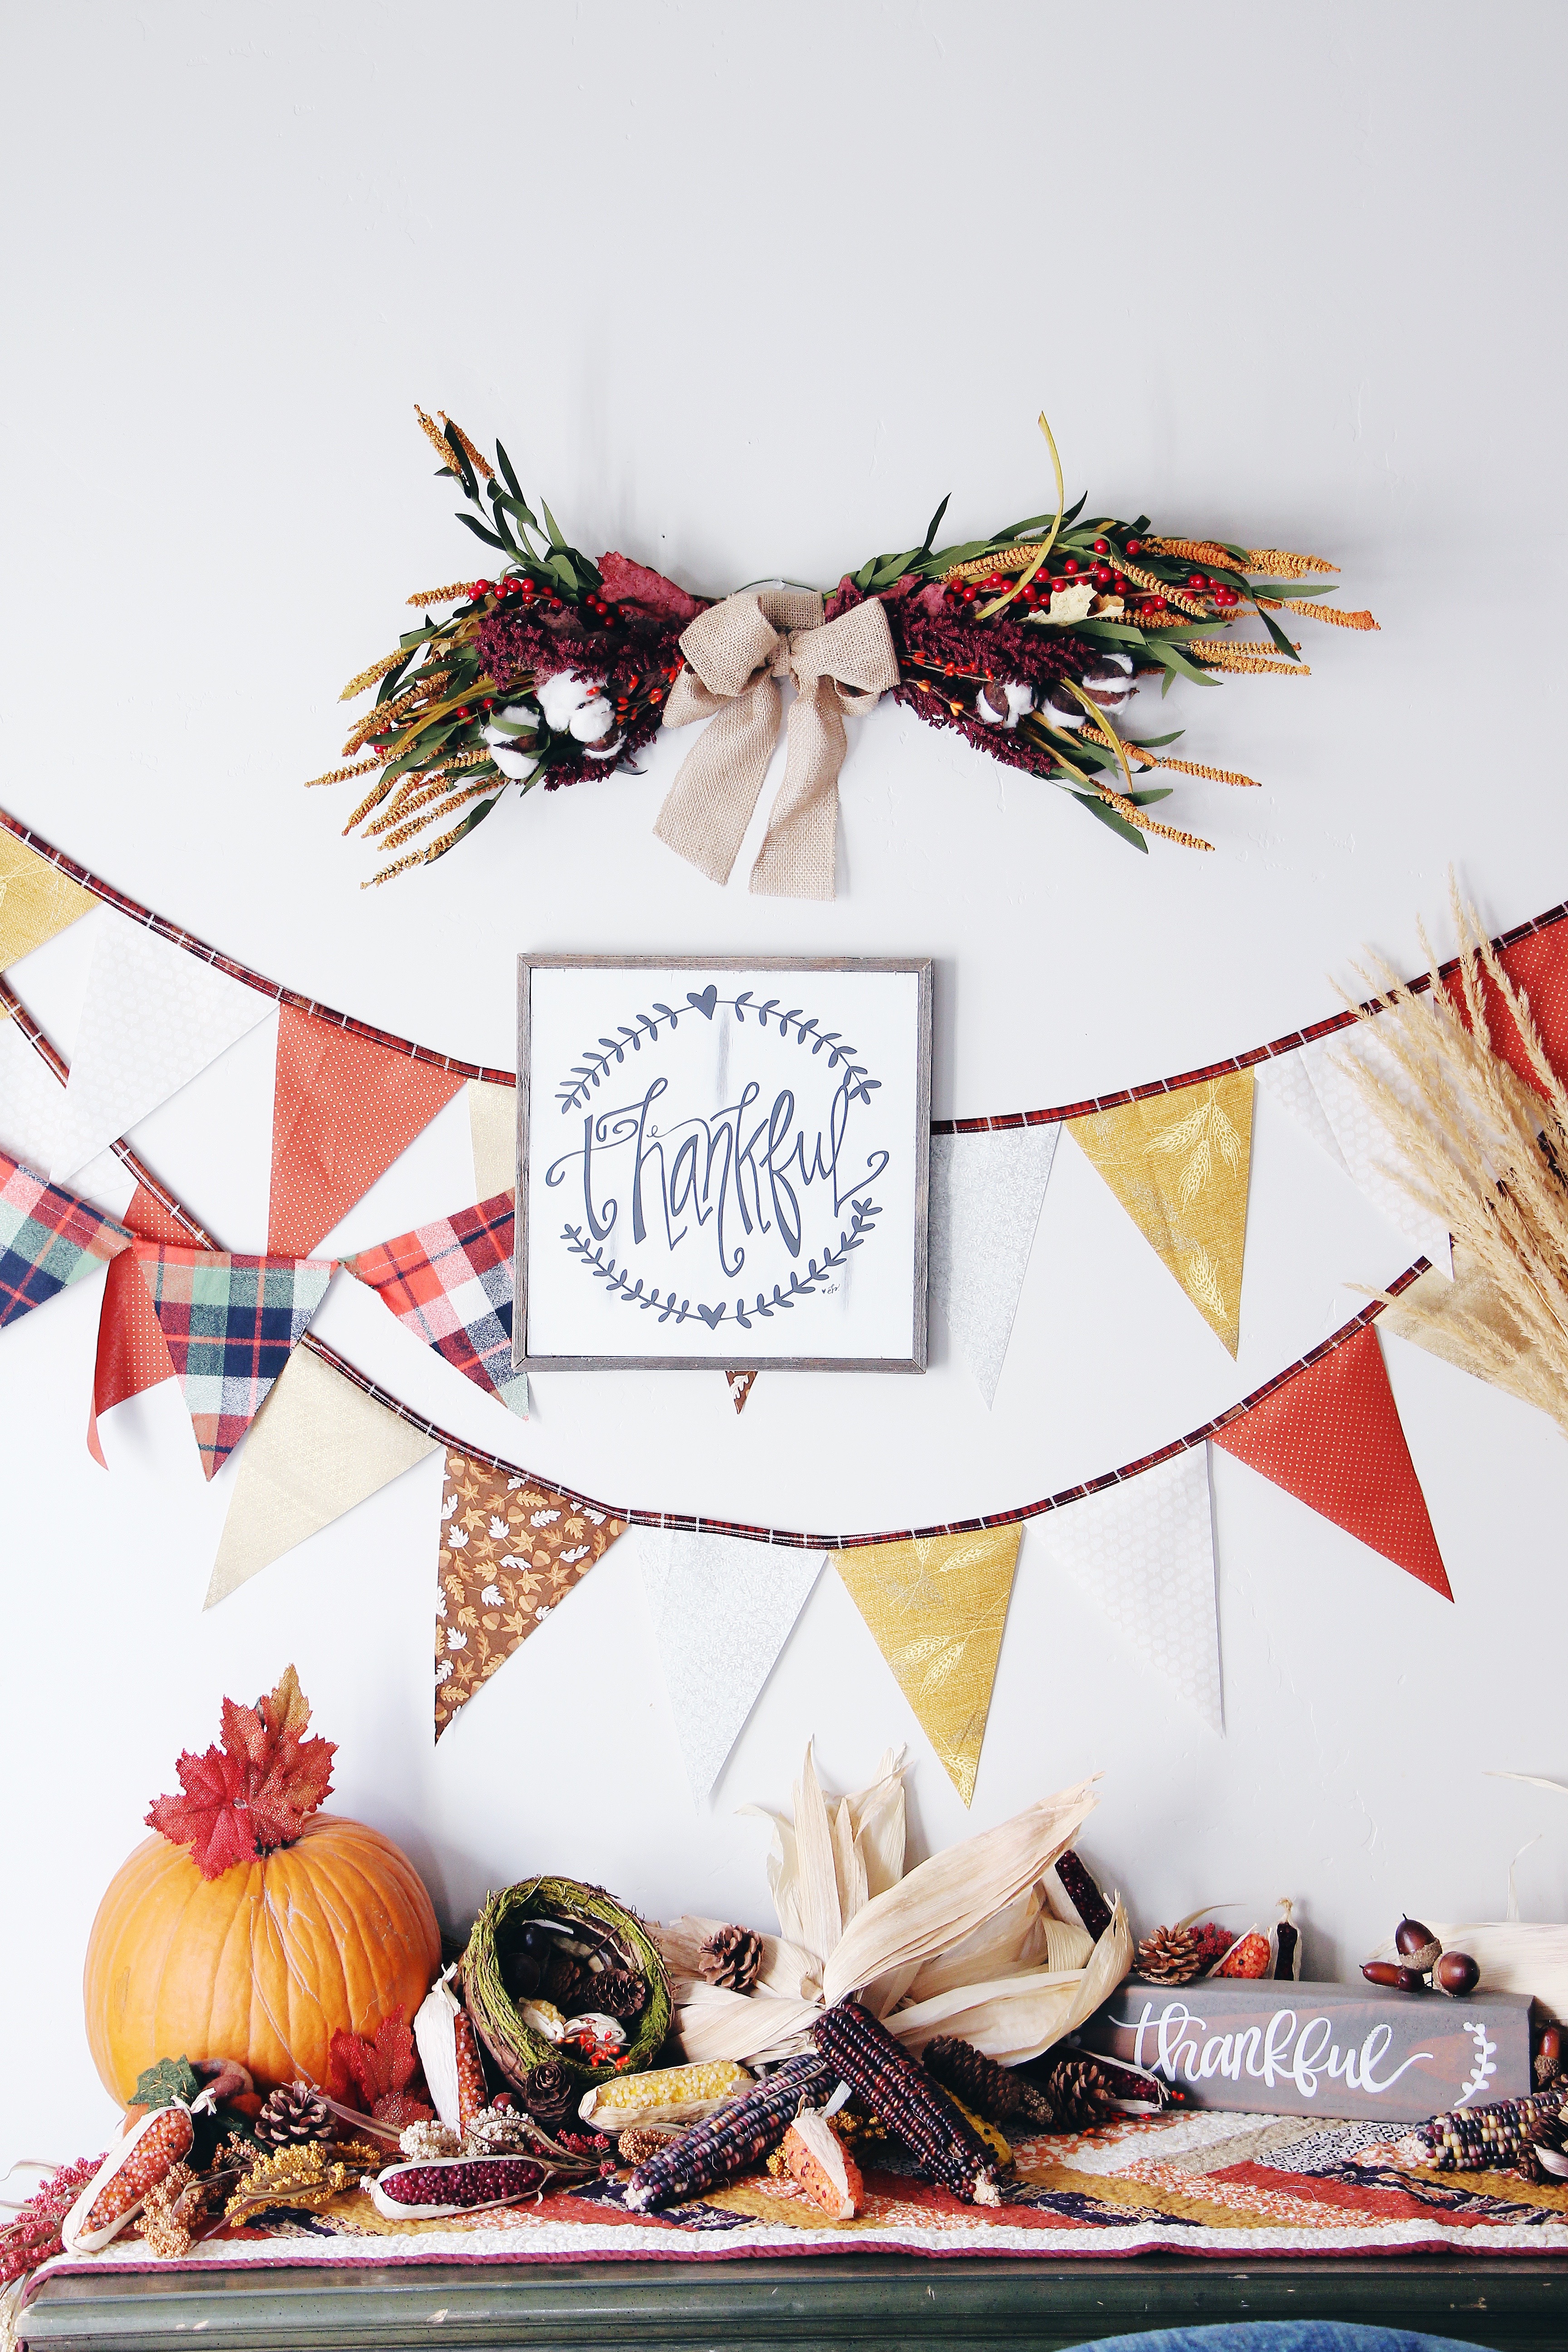
I’m sure I’m not the only crazy person who is constantly adding more decorations at the 11th hour. It’s probably why I have such a love for bunting; it’s a simple piece of decoration that really gives just the right touch to any occasion! Last month I made this “Quick 10 Minute Bunting” to drape around presents for my son’s birthday. Then I made a few more for the 4th of July, and this month I’m at it again for Thanksgiving. But, not only am I making some for myself, I decided it’s the perfect neighbor gift during this weird holiday season of 2020.
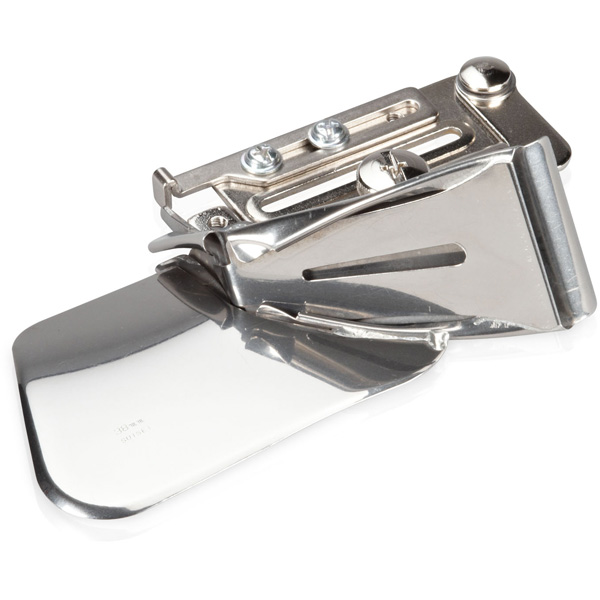
I will admit, bunting wasn’t always the fastest decoration to to create . You need to make the bias tape first. But man-o-man, I cannot brag enough about the Binder Attachment #88. Since we only have 10 min lets jump right in!
Materials to Create a Quick 10 Minute Bunting
- BERNINA sewing machine ( I sew on a 530 Swiss Edition)
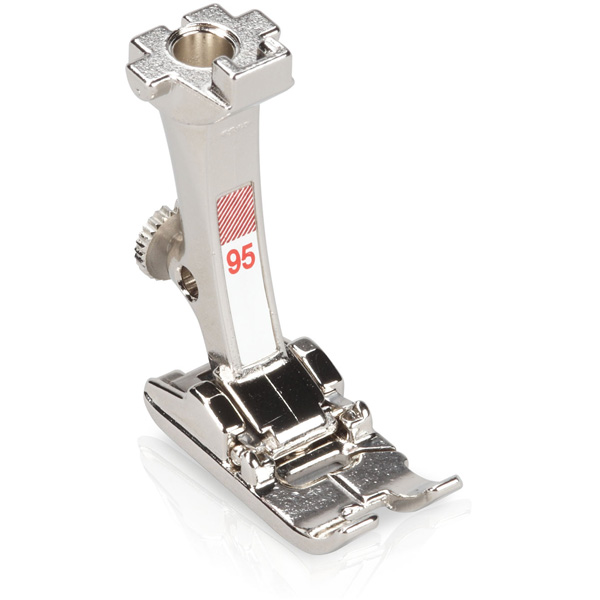
- Binder Foot #95 along with Binder Attachment (I’m using the #88 in 38mm)
- Holiday Bunting template
Fabric :
- 1 1/2″ in strip WOF (amount dependent on how long you want yours to be)
- two to five 1/4 yd varying fabric colors for flags
Tools for Pattern
- Paper, Pencil, Ruler
- Laminator (optional)
Tools for Project
- Cutting Mat, Rotary Blade, Ruler
- Awl or Large Needle (for guiding fabric)
- Pins and Fabric Marker (if combining strips of 1 1/2″ WOF)
- Scissors or Snips
- Matching Thread
First things first, we need to make a pattern. You can do any size—whatever is pleasing to your eye—or a combination of several. Just another reason I love Bunting—its versatile, I’ve done so many! For this one I chose to do a long and lean flag.
Instructions for Bunting Pattern
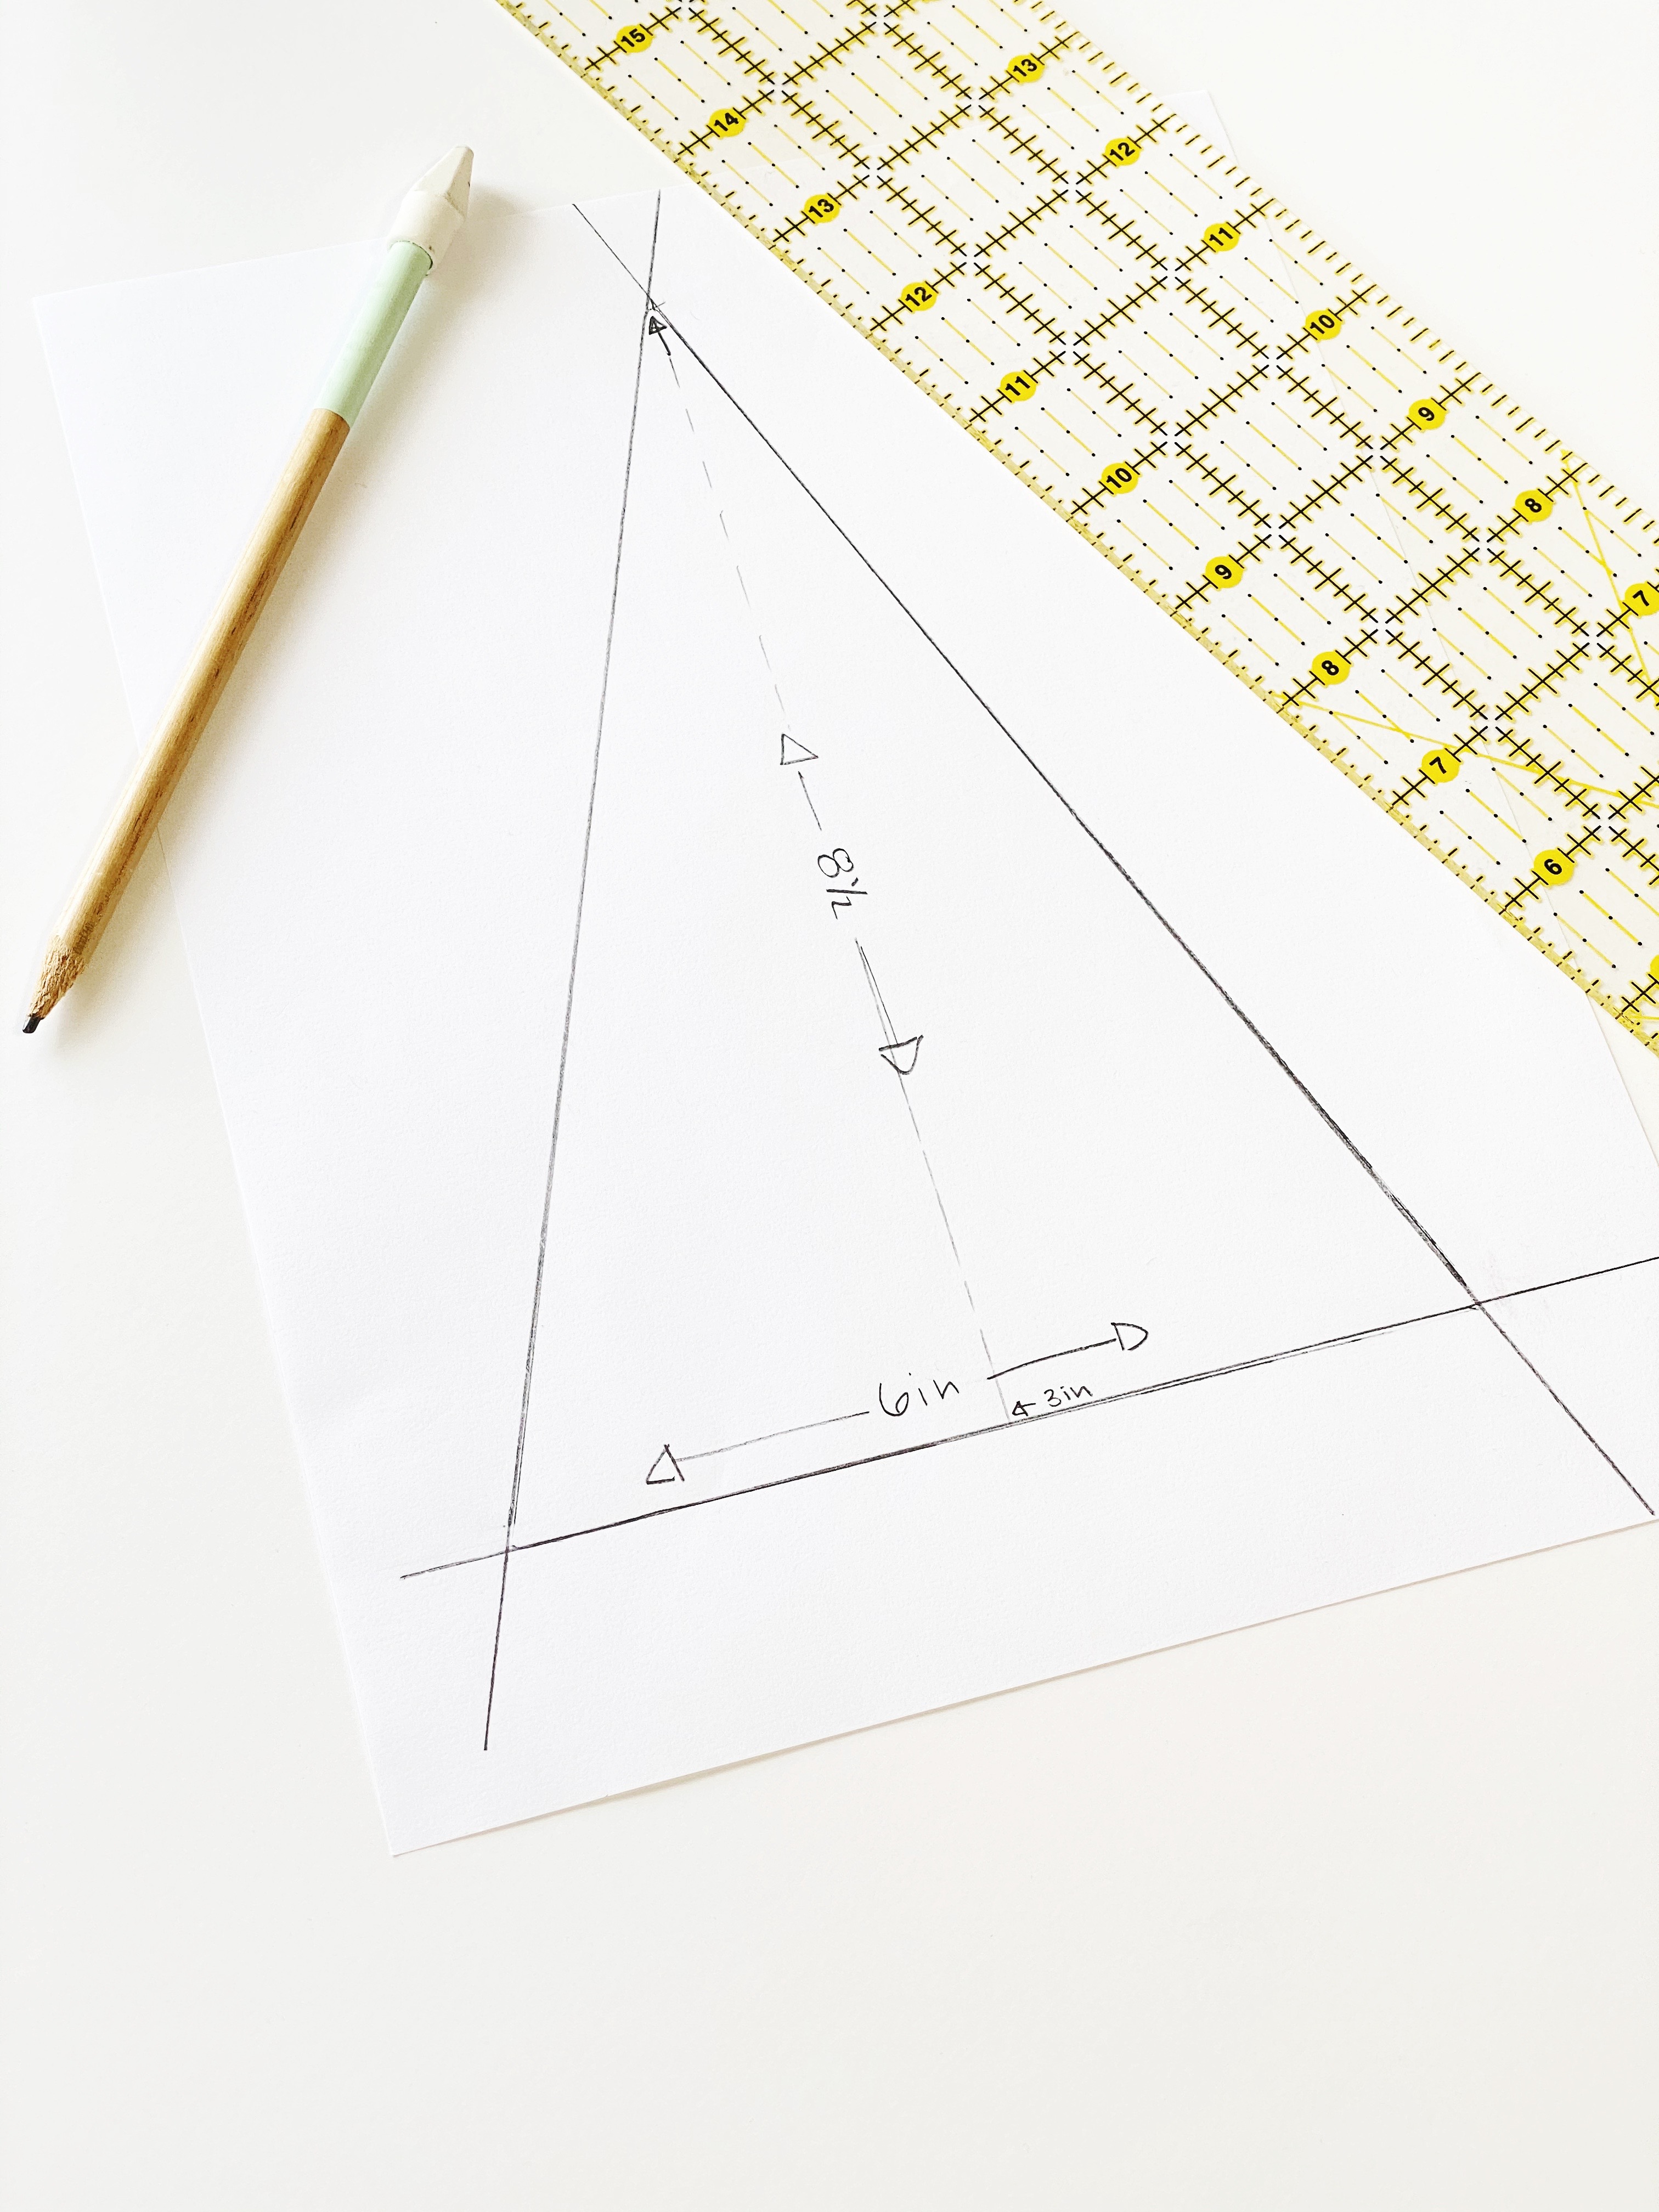
Draw a straight 6” horizontal line
Mark the center of that line at 3”
From center mark, draw a straight vertical line 8 1/2″ long
Draw a line to connect the end of the 8 1/2″ line to each end of the 6” line
Cut out my now beautiful triangle and laminate it! You don’t have to laminate yours if you don’t want; it’s an extra step I like to take if I know I will be using the same pattern multiple times… and if that was WAY too much math for you, just follow the picture…or if you have a printer you can just skip all that and print this
If you have never used or seen the Binder Attachment used for this project, please check out a more in-depth tutorial here.
Instructions for Bunting
Pick as many Different Fabrics as you would like
Cut your fabrics into strips 8 12″ WOF for flags.
Stack your flag fabric to cut, using a ruler to guide over your pattern template. This will give you a cleaner line and save your pattern for future. I also like to use a paper weight to insure zero movement when cutting stacked fabric.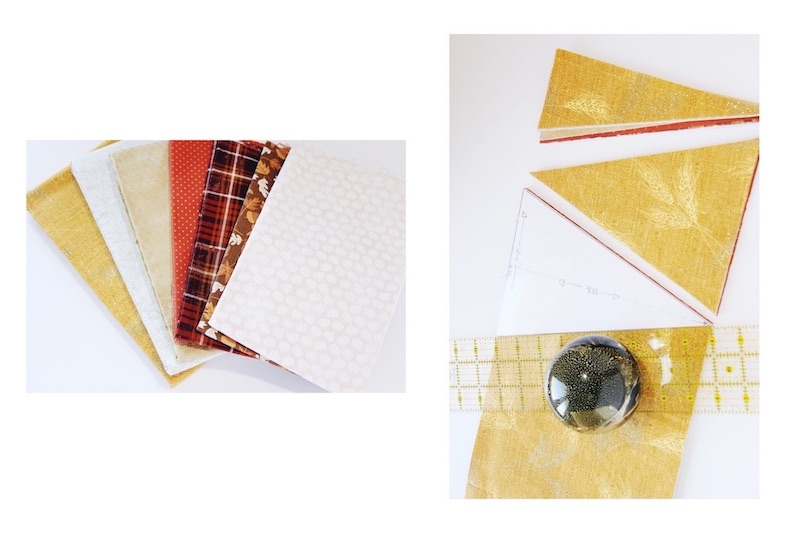 Cut 1 1/2″ WOF for binding.
Combine/Attach the 1 1/2″ strips together.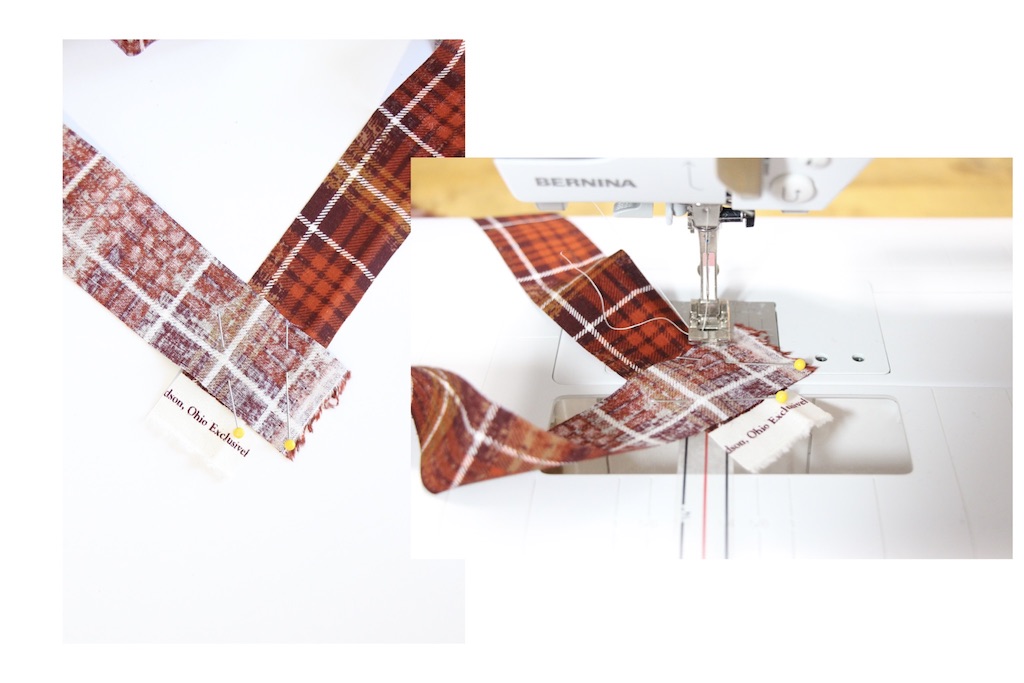
Feed your 1 1/2″ strip into the Binder Attachment and pull fabric through the binder attachment leaving a lead; slide the binder attachment into position placing the lead fabric under the #95 Binder Foot.
Move needle two spaces over, and increase stitch length to 2.80-3.00 (optional).
Put presser foot down and start sewing.
Leave about 12-18inches before adding bunting flags, alternating colors and overlapping slightly
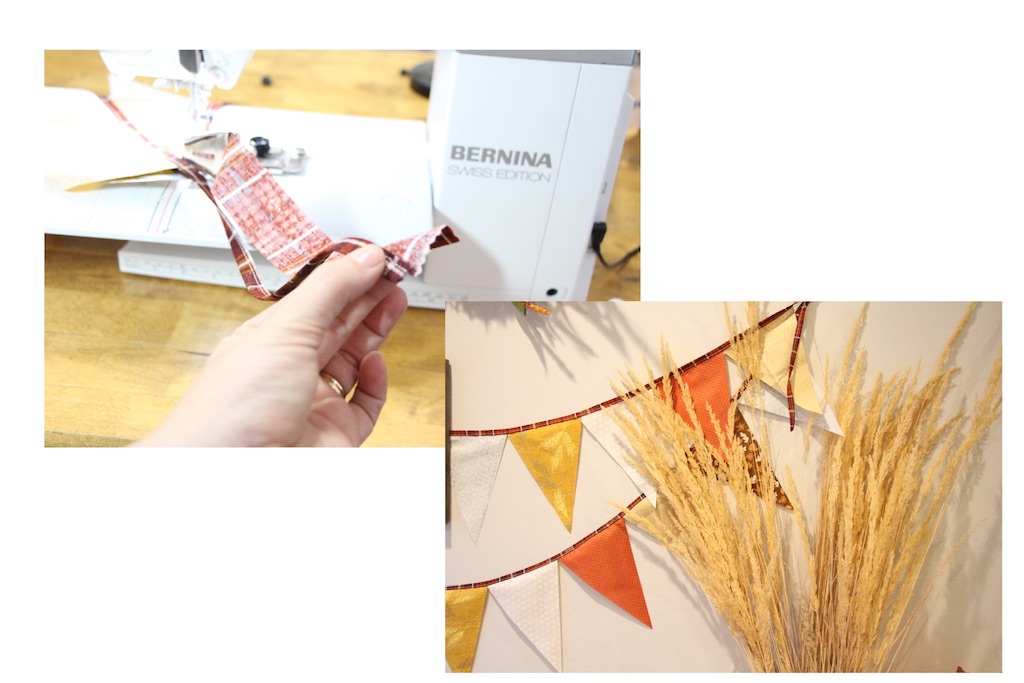
Add flags until you have about the same amount of tail as you do lead. Continue sewing your tail until you run out! and you are done!
One Quick 10 Minute Bunting done and Ten more to go!
Used Products

What you might also like


4 comments on “Quick 10-Minute Bunting”
-
-
I’m sorry you feel that way, I’ve never found that to be true. I’ve made dozens of quick buntings over the years even before i had that amazing Binder Attachment and have never experienced fraying. I think if they were a heavy used item for sure the edges would fray, but being that they are simple decor hanging from a wall they seem to hold up excellent. But you could alway increase the template by 1/4 in on each size sew two right sides together and turn plus press. It would be a little more work but it take care of the concern of the fraying edges fro you!! Hope you make them i would love to see!!!
-
-
I just got the #88 …..
32 and 38 ml size ….
So quick and easy to do ..although I did have trouble finishing off on a placemat ….is there an easier way to finish…
Thanks bonniw-
bonnie so sorry for the late response, when I end this project I just sew it all the way through to the end of the tail and usually add a little knot at the end to hold it. its not a needed step but it can add a finished touch.
-
Leave a Reply
You must be logged in to post a comment.

I like the se of the binder to make this quick. I am disappointed in the disposable aspect of the project… without doing something to those edges they will fray and look ragged after a little use/ storage. I realize an edge treatment will take more than 10 min