Passiflora Quilt Along, Part 2: The Center Block
Welcome back to the Passiflora Quilt Along! If you missed the kickoff post for this series, you can find it here.

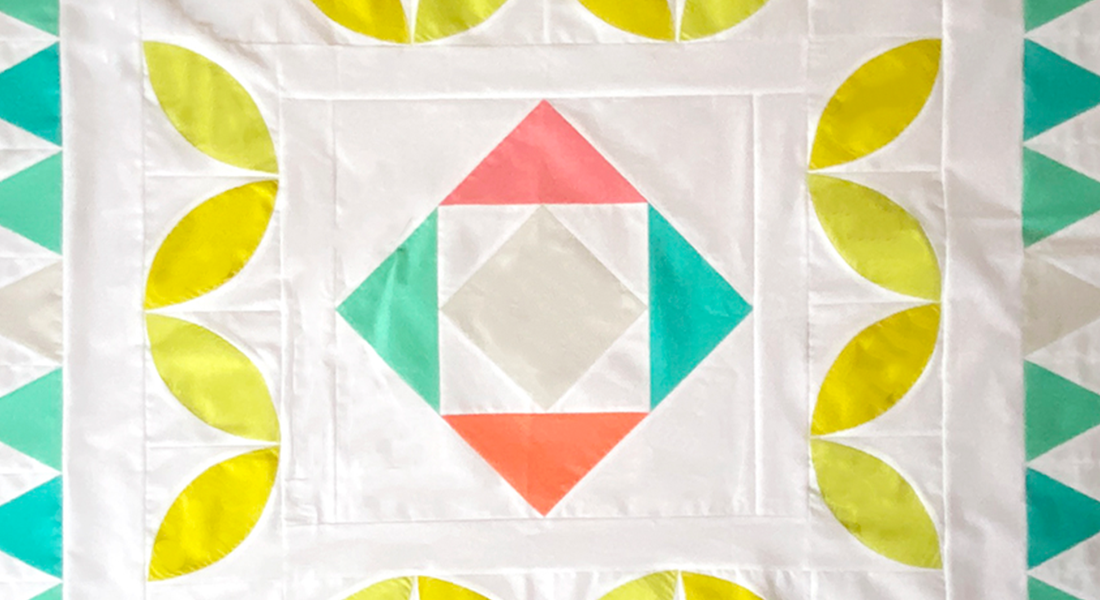
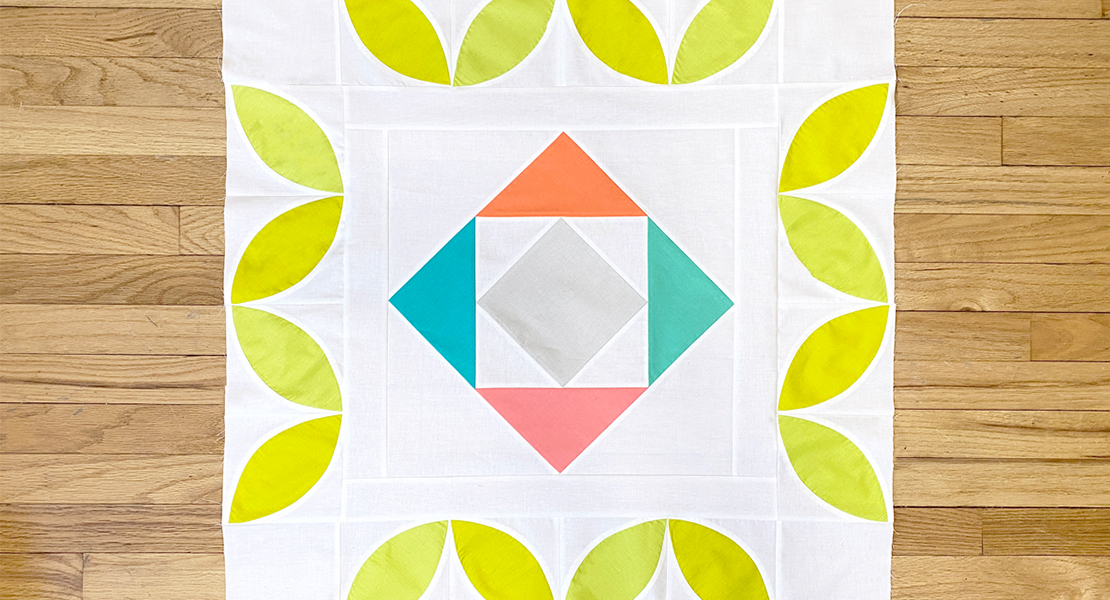
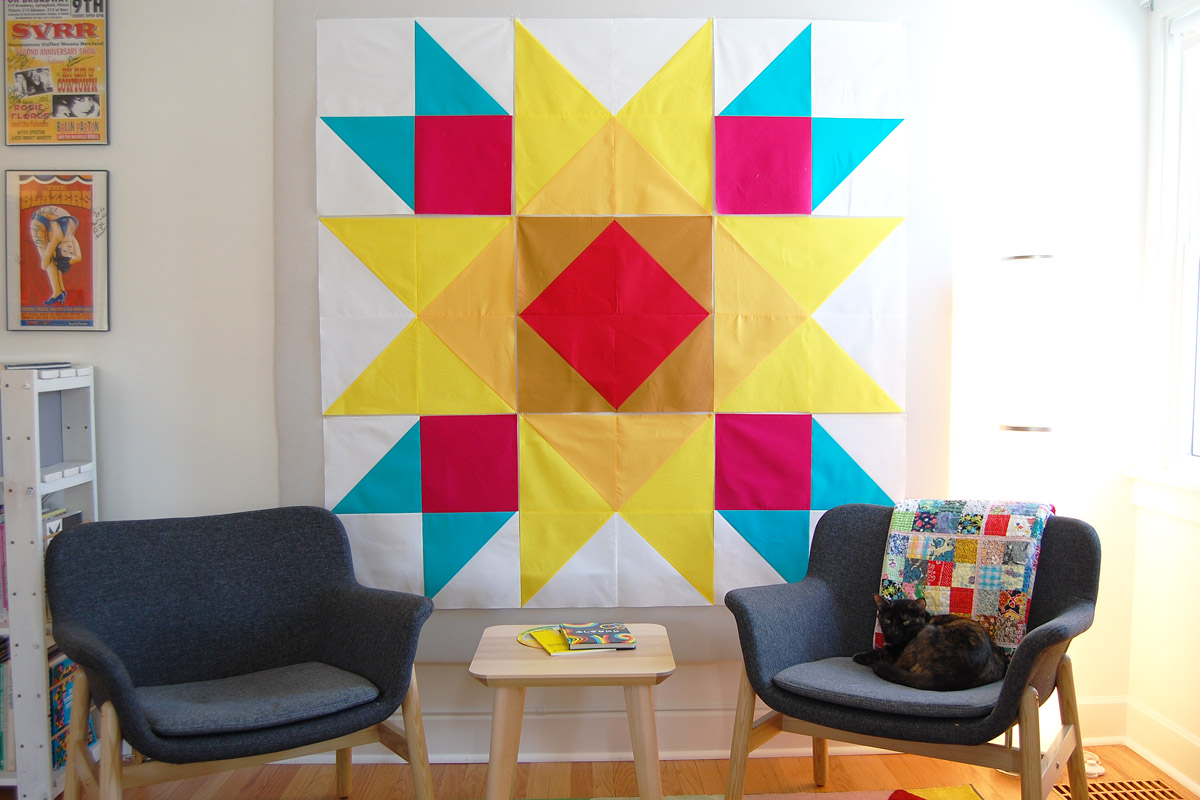
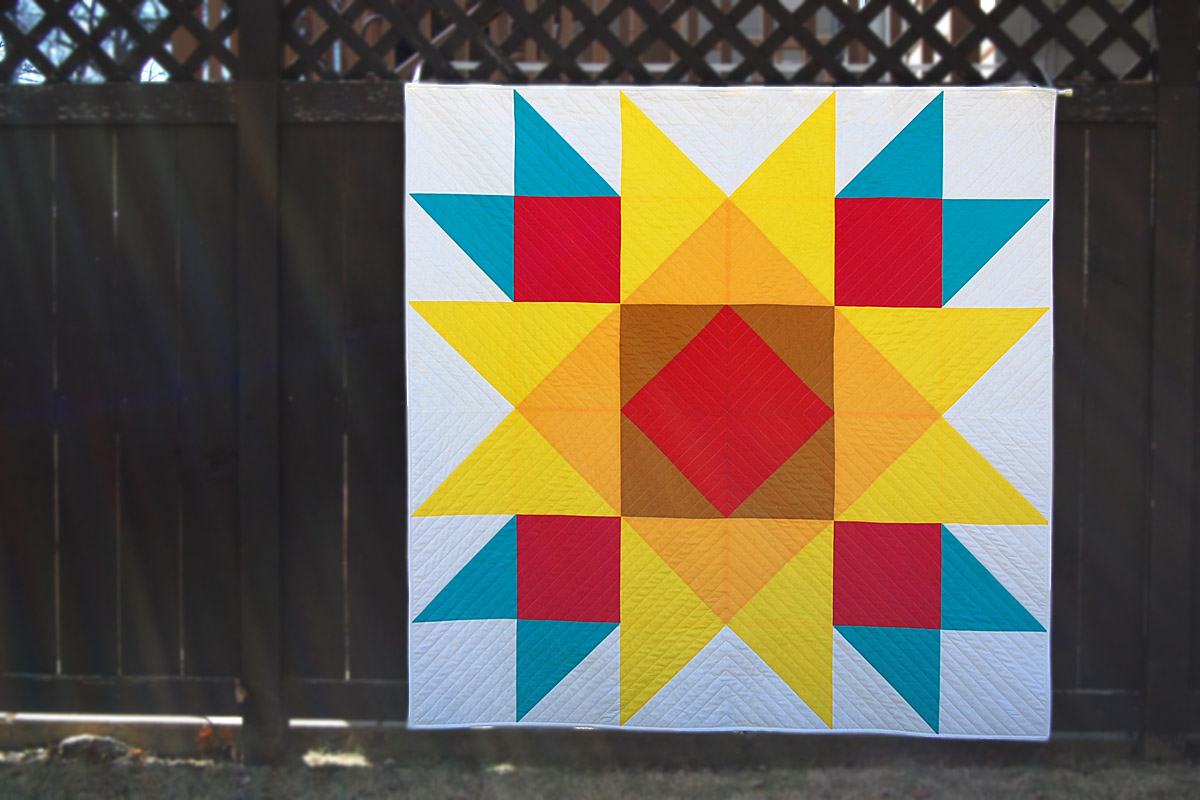
This month, we get to start sewing! We’ll be starting with the center of our medallion which is a big square-in-a-square block. This is very simple block and a great way to ease into this quilt! We’ll end up with a 16 1/2″ square (finishing 16” in the quilt). Let’s gather up our supplies:
- Piecing thread – I’m using Mettler Metrosene in white. I like to use polyester thread for piecing, but it’s all about personal preference. Just be sure to use something relatively fine, like a 50 or 60 wt thread.
- Straight pins
- Starch-alternative pressing spray – my favorite is Flatter. All of the Flatter scents smell amazing, and they also offer a fragrance free option. Lacey is my favorite scent; it smells like bergamot and fresh laundry.
- Stiletto – I’m using the Tula Pink Hardware Stiletto. I love that the pointed end can be detached then flipped inside the handle for safe storage.
- Thread snips or scissors
- Seam ripper (a prayer you don’t need it!)
Give your machine a dusting, a drop of oil, a fresh needle and bobbin, and let’s get started!
-
Cut all fabrics
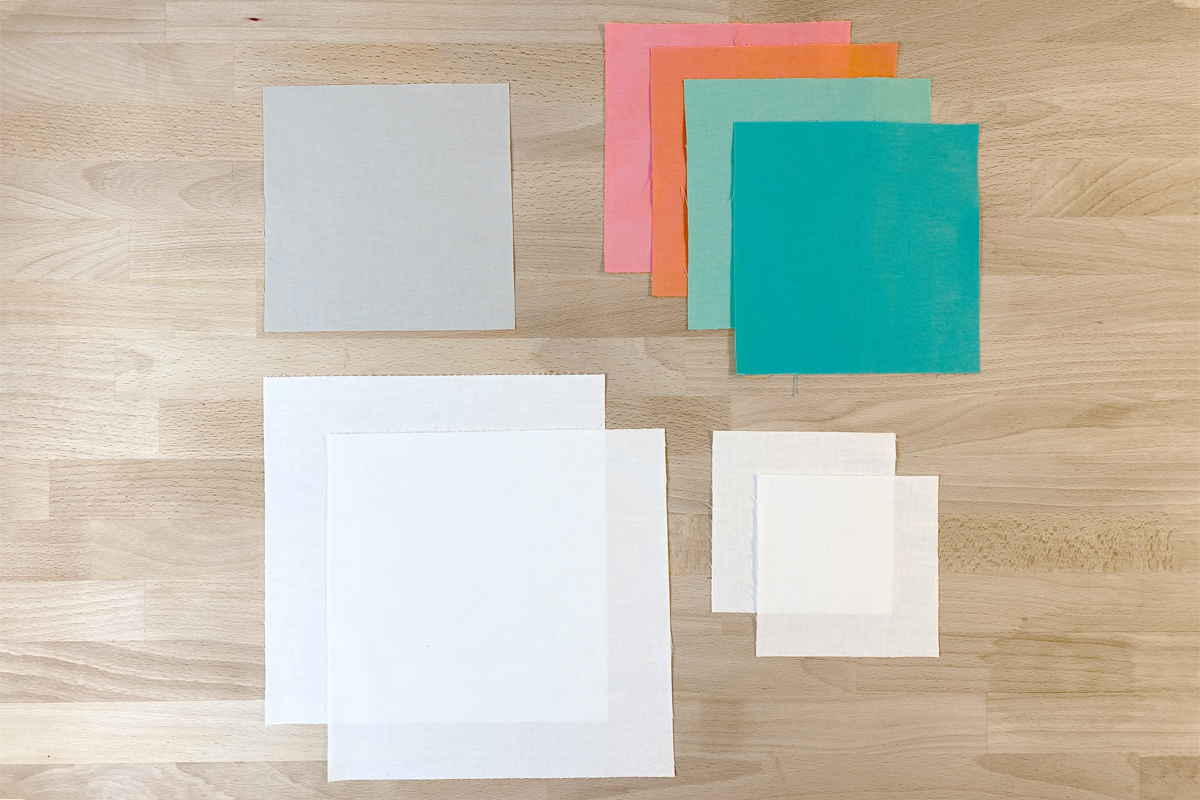
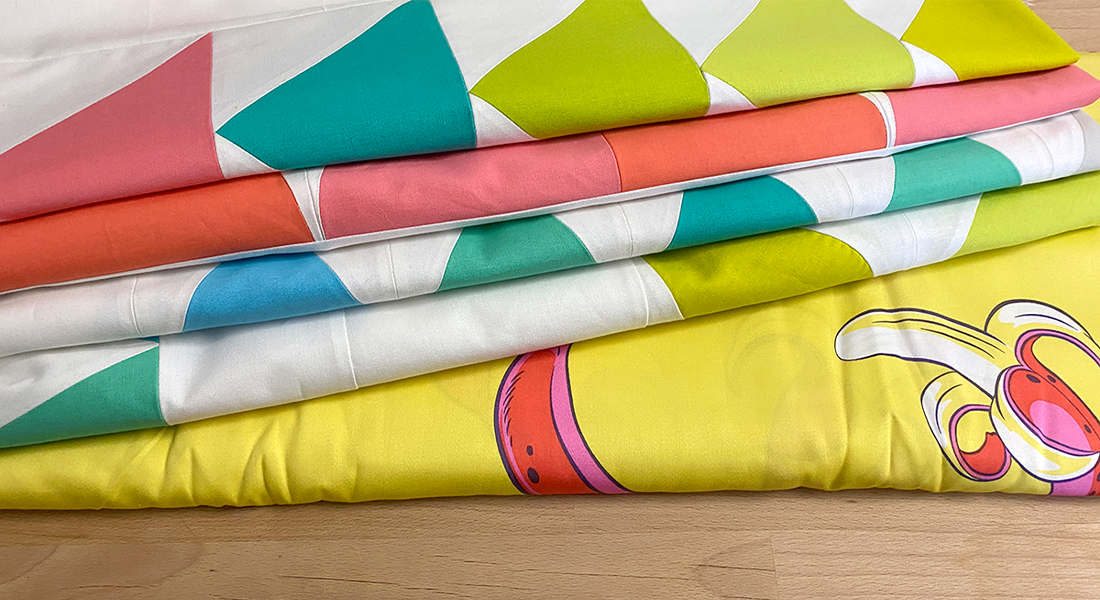
Cut all six colors to the following sizes:
- Color #9 (Putty) – one square 6 1/8” x 6 1/8”
- Color #1 (Persimmon) – one 7” square
- Color #2 (Taffy) – one 7” square
- Color #6 (Julep) – one 7” square
- Color #7 (Aegean) – one 7” square
- Background (white) – two 5 1/2” squares, two 9” squares
Press all the squares well with a dry iron and a starch-alternative spray.
Then, cut all of the squares that are not the center square (colors #1, 2, 6, 7, and background) diagonally at a 45 degree angle to create two triangles from each square. Pressing these pieces with a starch-alternative before cutting will help them retain their shape and reduce warping along the freshly cut bias edge.
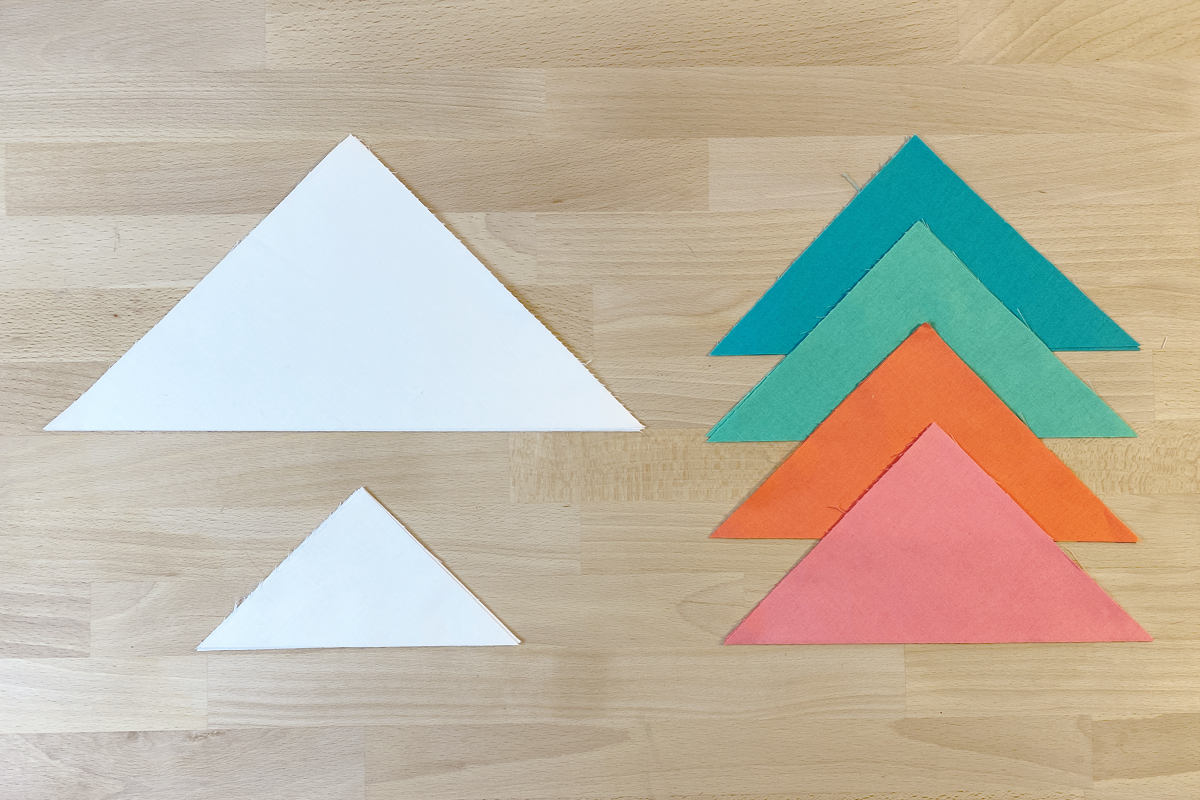
Your center square (color #9) should remain whole.
-
Piece the first square
Take one of the small background color triangles and place it right sides together with the center square (color #9), aligning the bias edge with one of the straight edges of the square. Pin in place.
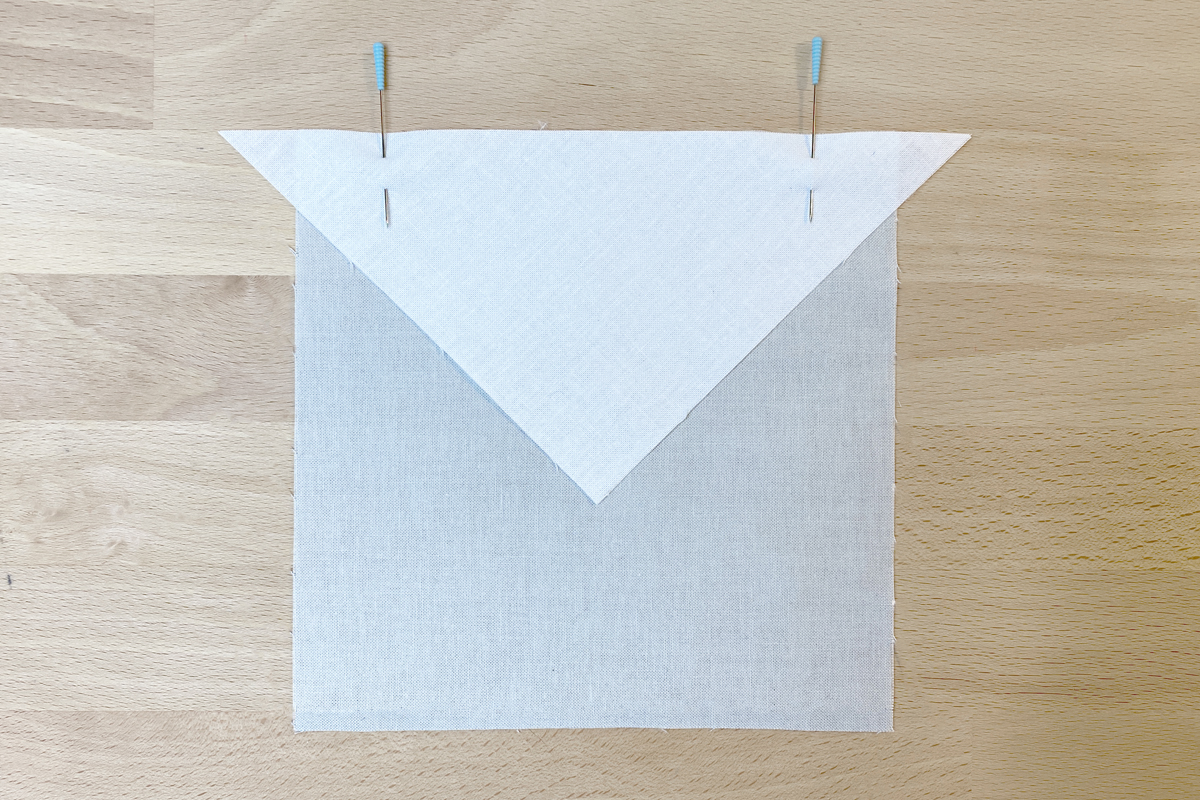
Repeat with another small triangle on the opposite side of the square.
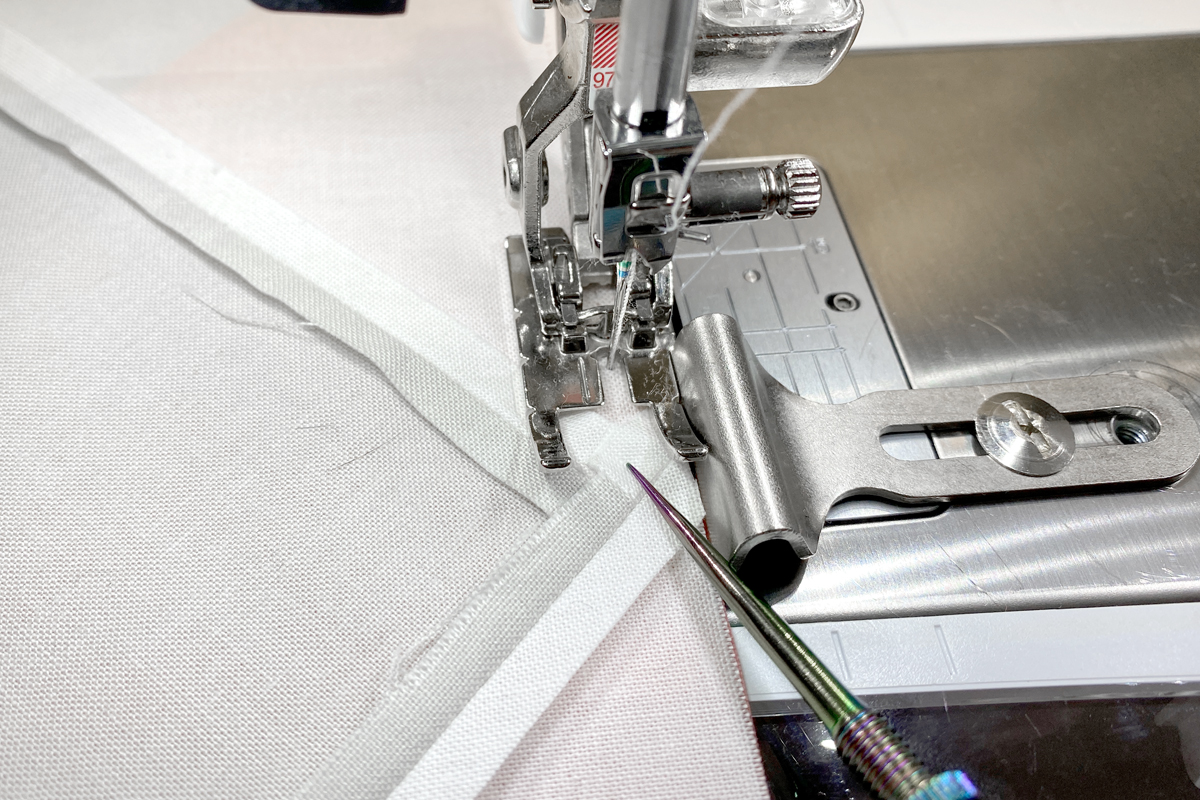
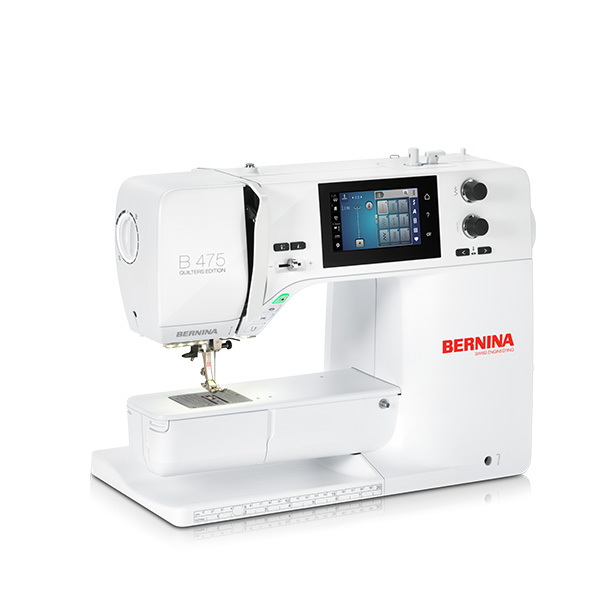
Attach 9 mm Patchwork Foot #97D (or other appropriate patchwork piecing foot) to the machine. To aid in stitching along this bias edge, with lots of potential for stretching or warping, using Dual Feed (on models with the Dual Feed feature) is going to help make sure my top layer of fabric (the bias edge) is moving under the presser foot at the same rate as the bottom layer of fabric.

One more precaution to take when sewing a bias edge is to reduce presser foot pressure. Lightening the pressure on your presser foot will help prevent the fabric from being stretched as you stitch as well. I have reduced the pressure to 35 on my BERNINA 790 PLUS, which is about 30% less than my machine’s normal setting. I will also reduce my stitch length to about 1.8 mm.
Place the block under the presser foot and lower the foot. For a perfect 1/4″ seam allowance, the raw edge of your fabric should be just aligned with the edge of your presser foot—not peeking out the side, but not falling too far to the left under the foot. When you find your precise 1/4″, attach the seam guide to the machine.
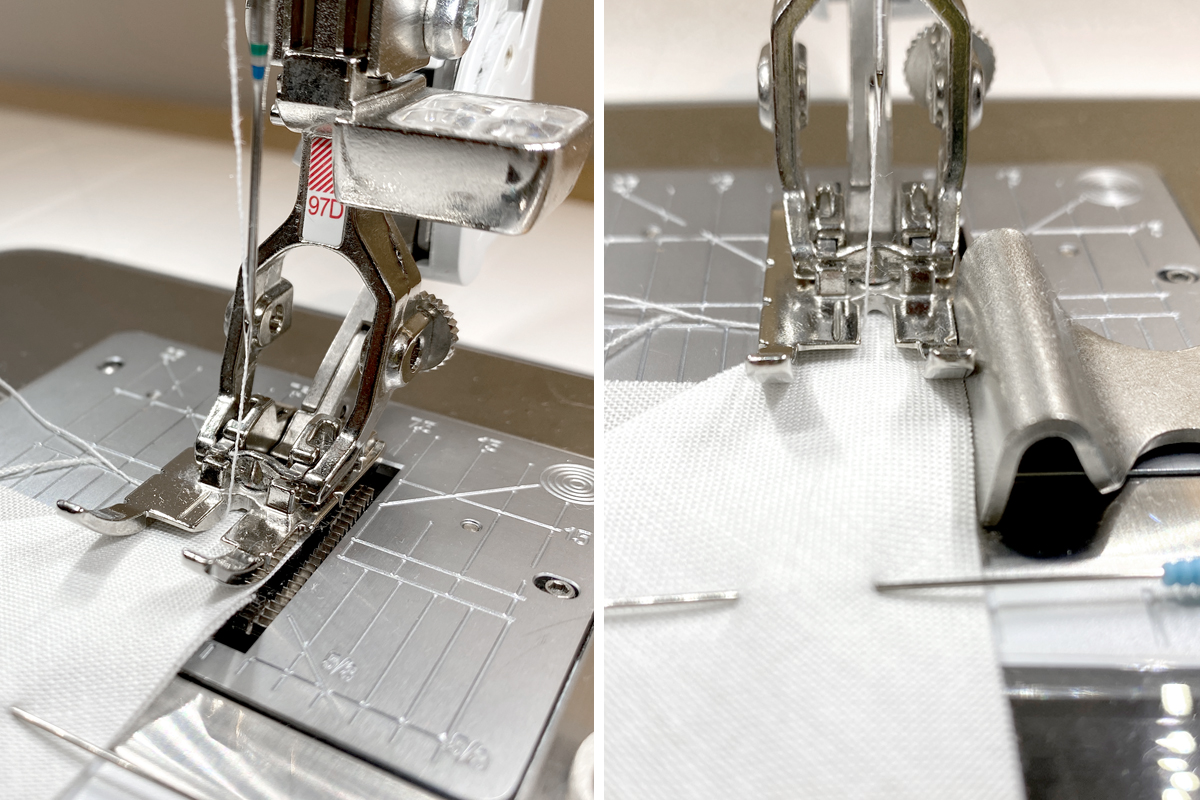
Sew down each pinned edge. Be sure not to stitch over your pins!
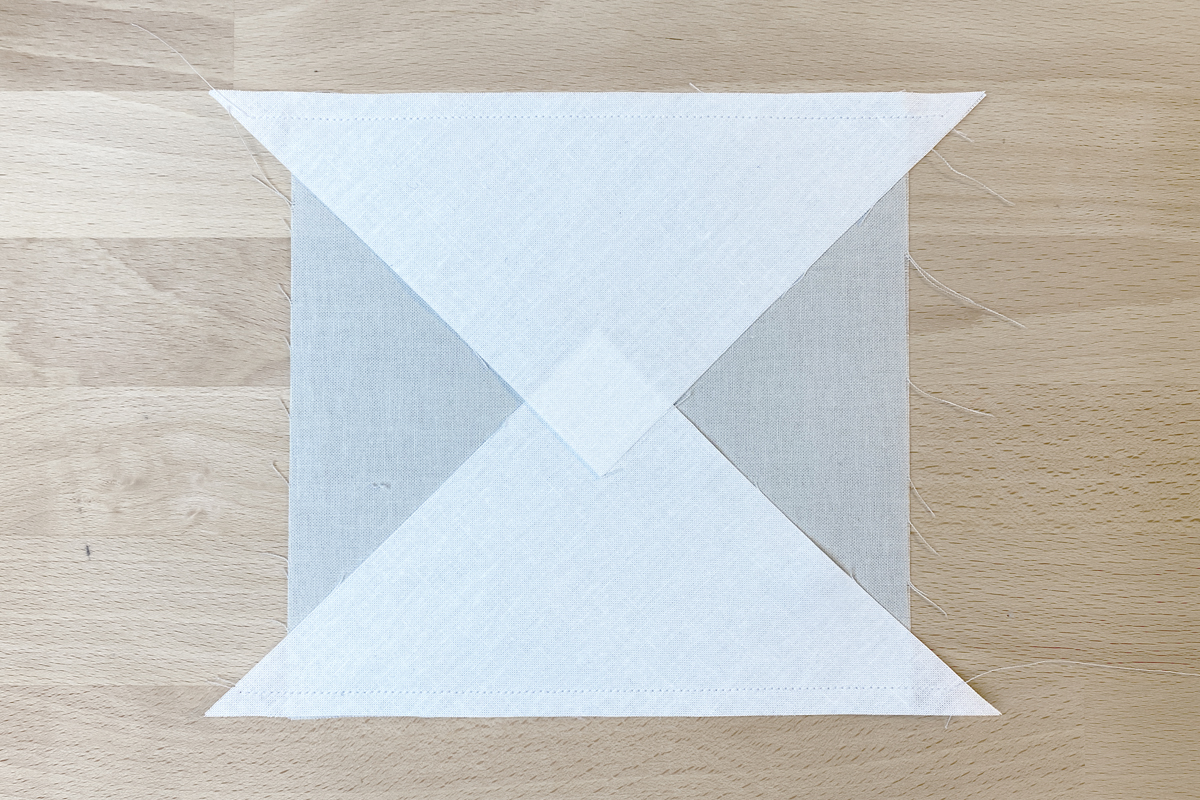
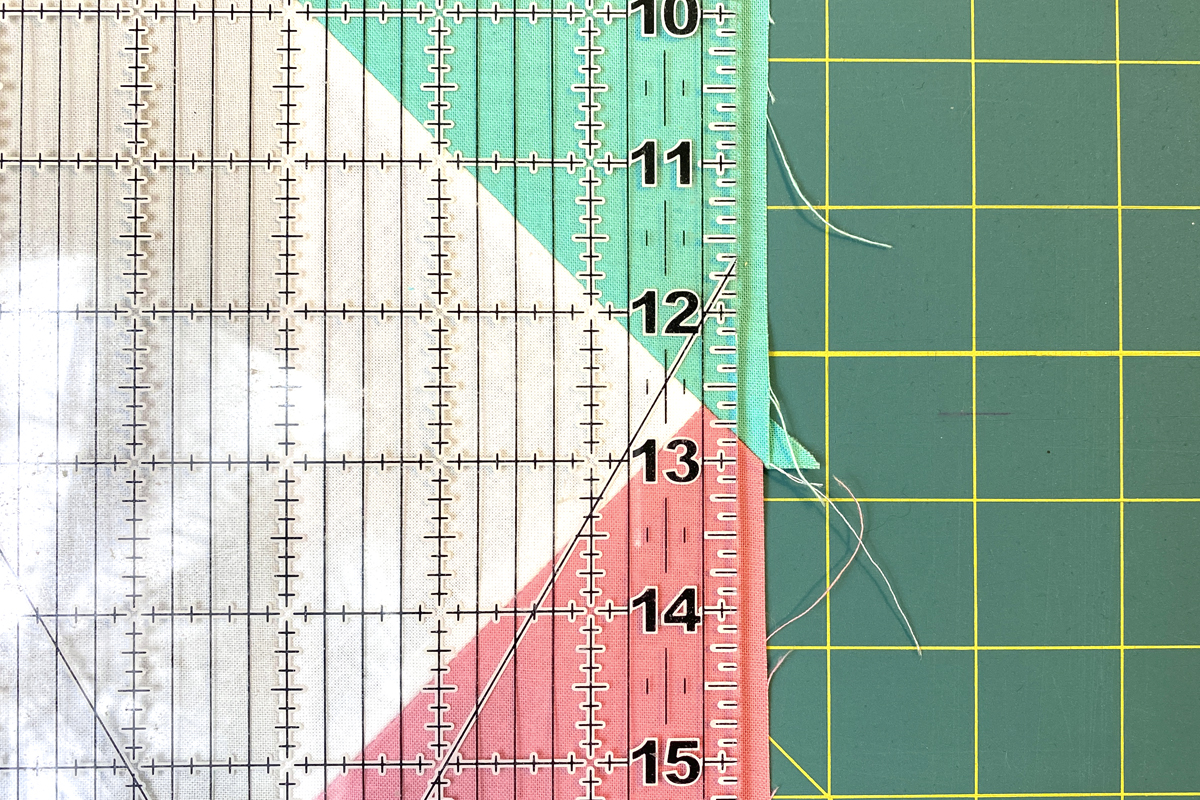
Press the background triangles away from the center square. Press the seam allowances open. Trim the excess background fabric to line up with the center square.
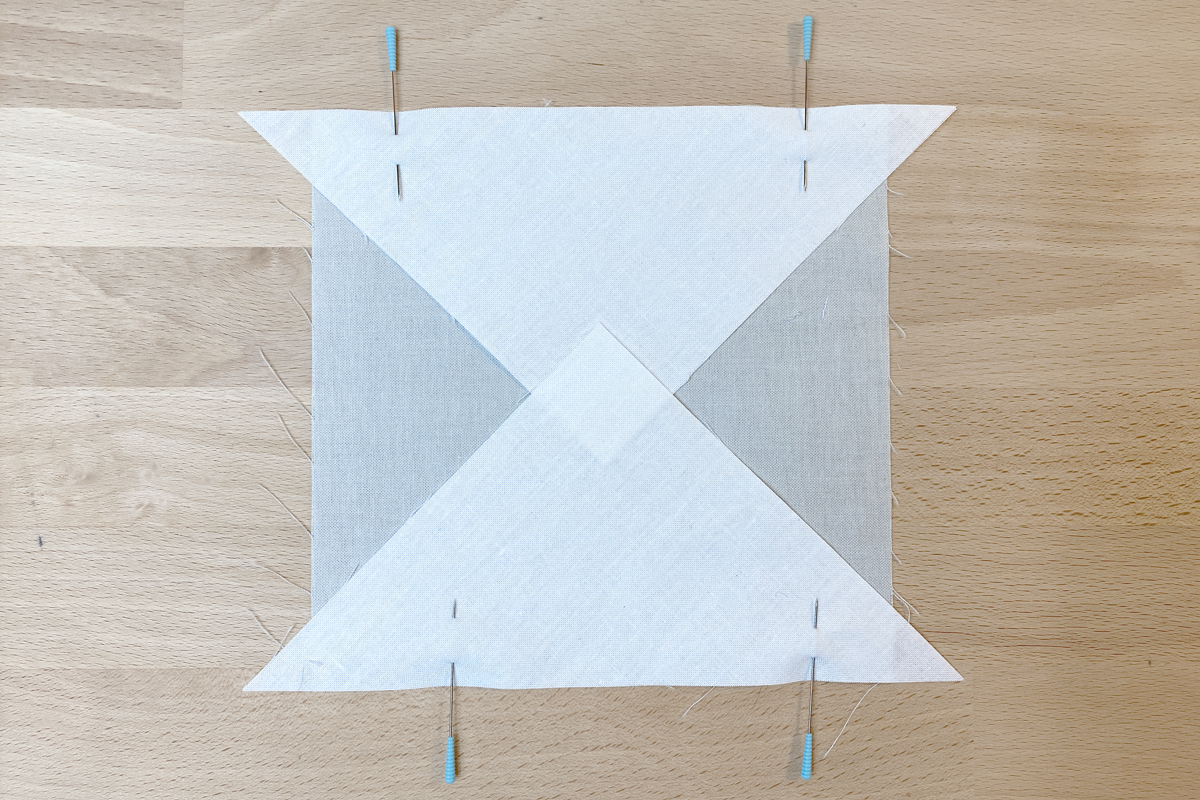
Repeat this process with the remaining two small background triangles along the other two raw edges of the center square.
Square up this block to 8 1/2″ x 8 1/2″. The points of the center square should measure about 1/4″ from the raw edge of your block.
-
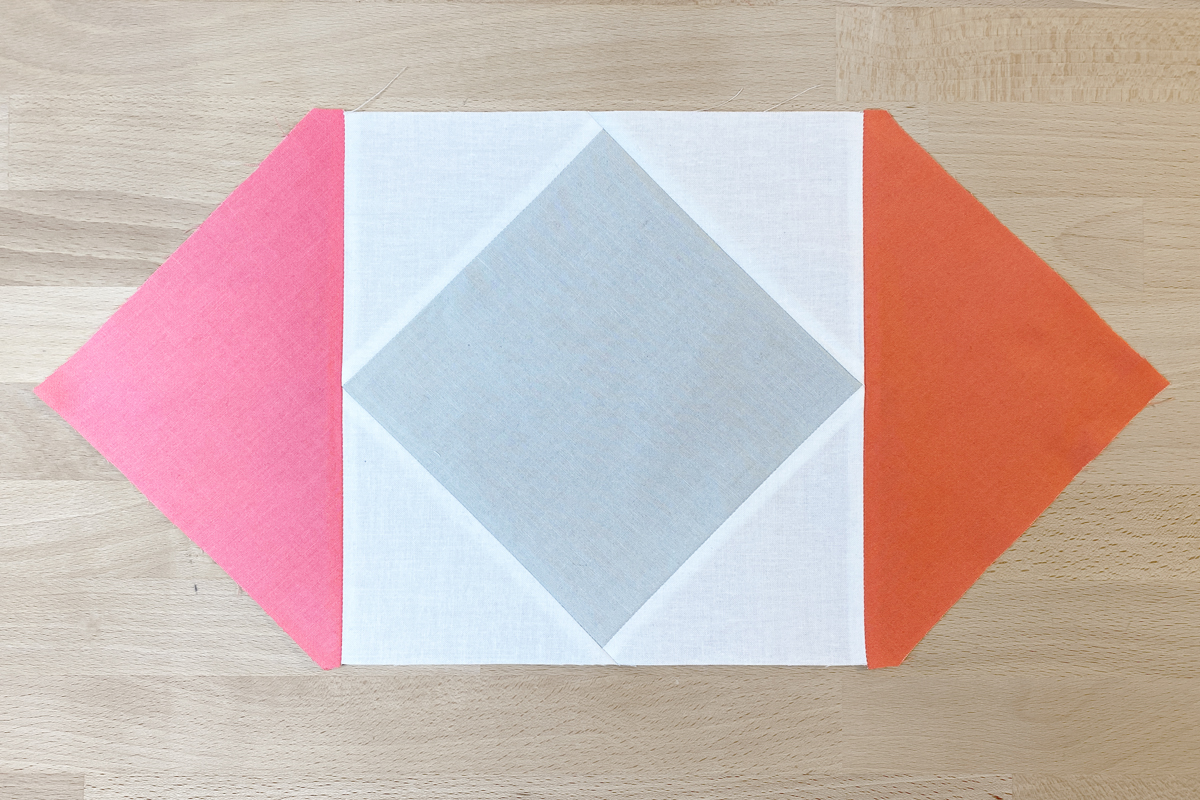
Second square
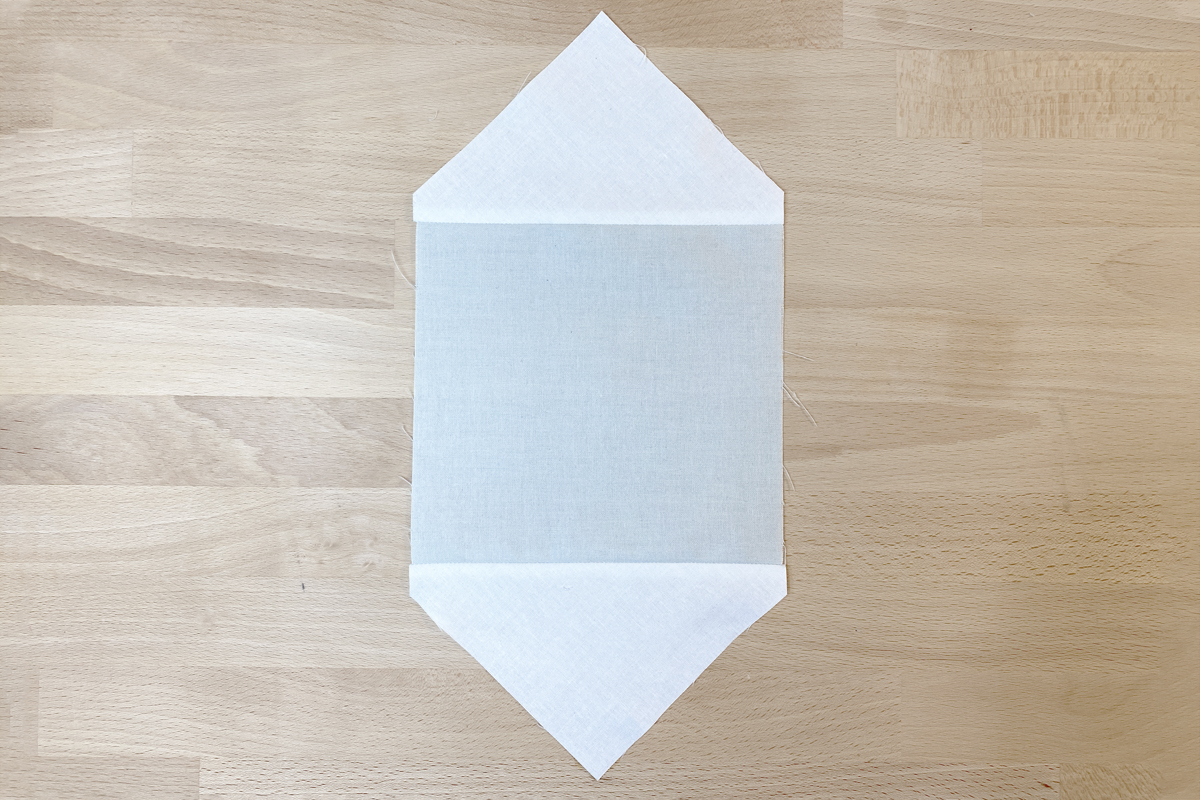
Now we will create another larger square, using the block we just completed as the base. This will come together in the same process as the first block. The first triangles to pin and stitch down will be colors #1 and #2, placed opposite each other. Again, trim the excess keeping in line with the base block.
It may be helpful to piece these seams with the pieced center block up and the bias cut triangle against the feed dog. Then, as you approach and stitch over seams, you can use a stiletto to make sure your seam allowances stay flat and open inside the sewn seam.
Then, colors #6 and #7 are stitched on the remaining two sides. Again, press all seam allowances open as you go.
With all four sides stitched and pressed, square up the block again. As you trim each side, make sure that your points line up exactly 1/4″ from the raw edge.
Square up this block to 11 7/8” x 11 7/8”.

-
Last square
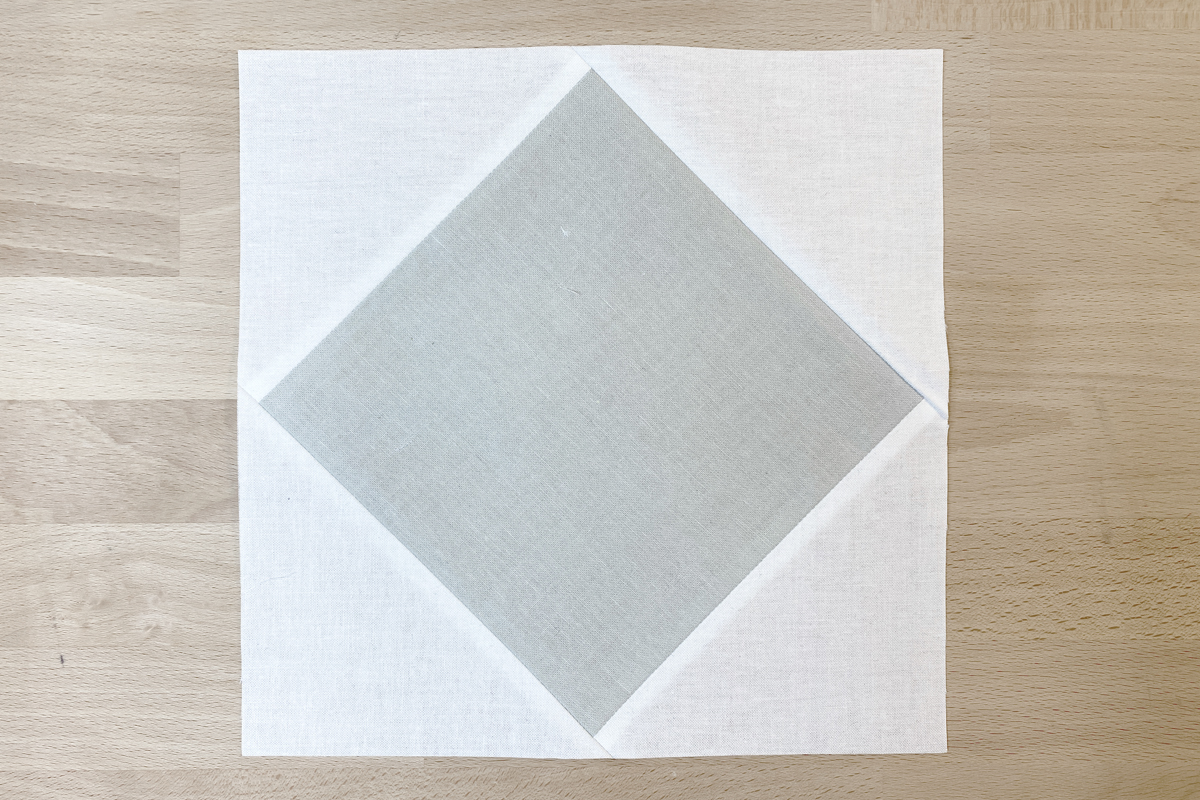
We have one last round to make with this method! This time, use the large triangles of your background color in the same process as the previous two rounds, sewing two opposite sides at a time and pressing seam allowances open.
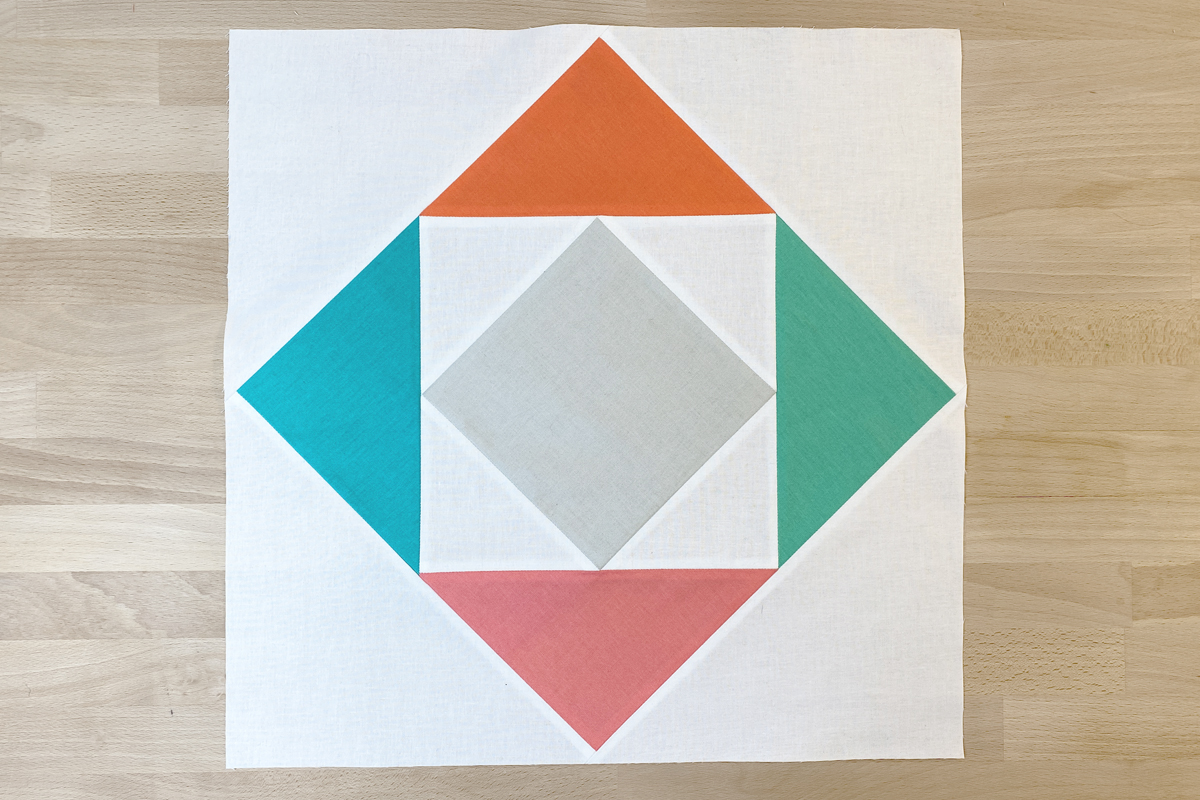
Finally, square up to 16 1/2″ x 16 1/2″. Give the whole block a good press with a dry iron and a bit more of your starch-alternative pressing spray. The center block of our medallion is done!
I’ll see you back here in December when we start the first round of our medallion!

Passiflora Quilt Along
Used Products


What you might also like


2 comments on “Passiflora Quilt Along, Part 2: The Center Block”
-
-
I have the same question as above I really hope that Bernina answered this question back in November, and we just can’t see the response. Please post so we all can have the answer
Leave a Reply
You must be logged in to post a comment.
Month 2 of the Quilt-along has no “downloadable link” in a pdf format to print off while we sew. The first posting (fabric requirement) has a link to get the pdf to print out. Am I missing something? Thanks