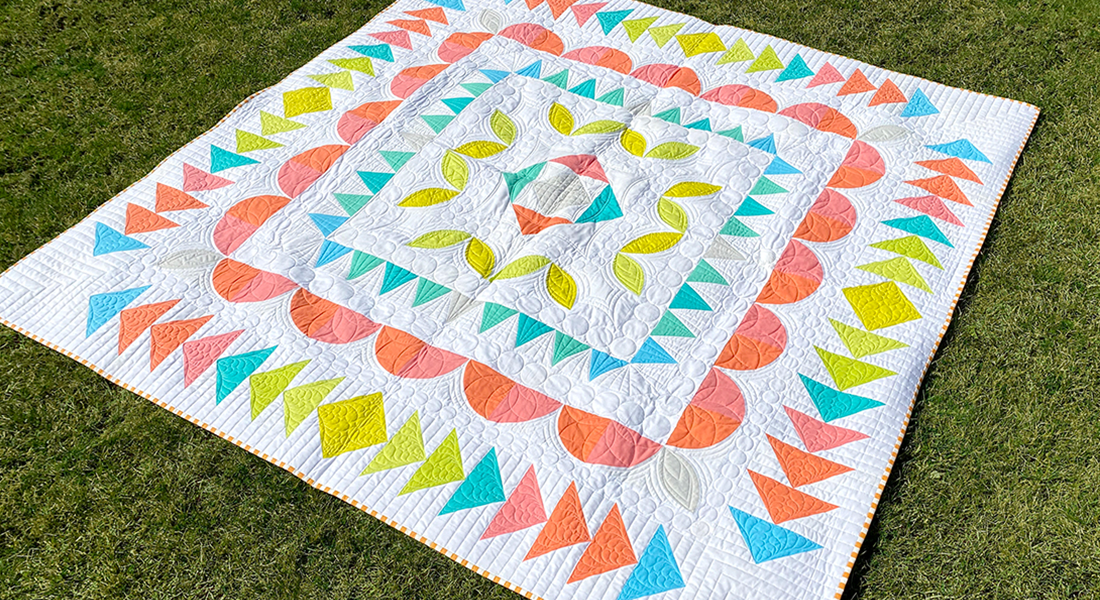
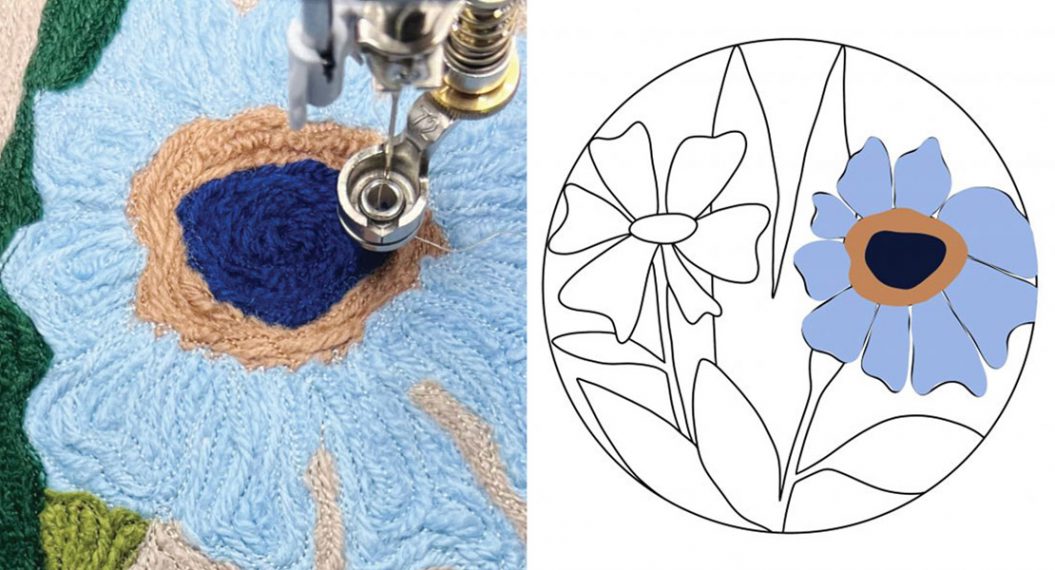
Passiflora Quilt Along, Part 4: Round Two
Welcome back to the Passiflora Quilt Along! If you’re just joining in, you’ll want to visit the previous posts in this series to catch up:

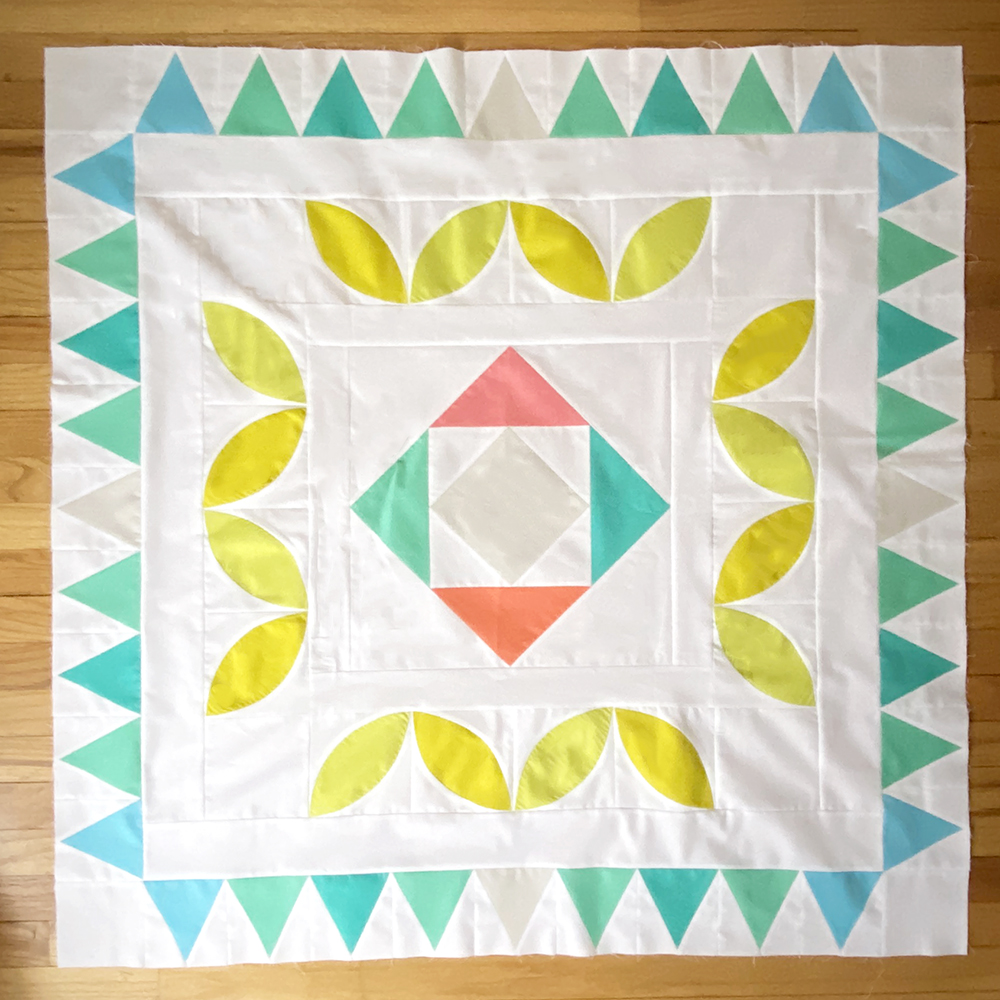
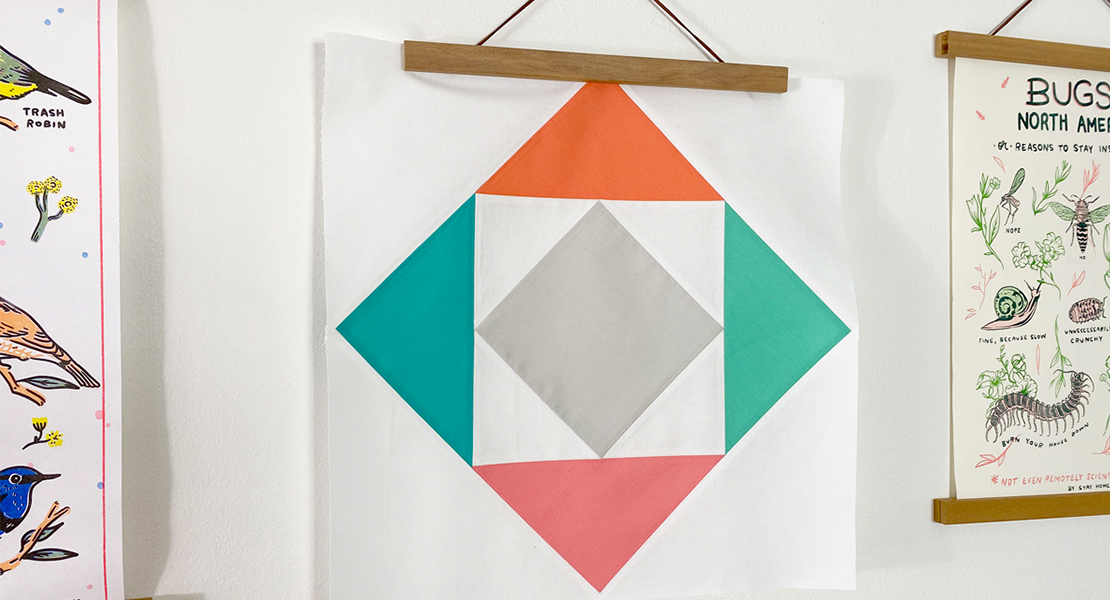
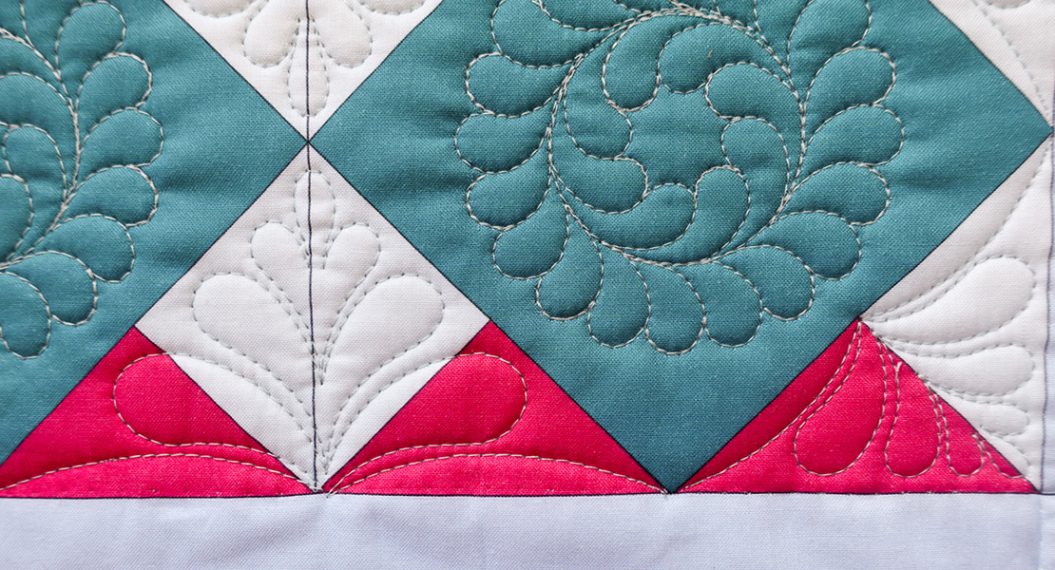
This month we will continue building on to what we’ve pieced on our quilt so far: the center block and first round of the medallion.
Our round this month is created with triangles! These blocks look simple but are trickier than they seem because two sides of our triangles are sewn on bias edges that create an opportunity for stretching and shifting. As we’re piecing, I’ll share some tips on how to keep your edges stable in the process.
To create these triangle blocks, you will trace and cut templates for the triangle and the background. I have intentionally built in a larger seam allowance around the outside of the pieced block. This way, if you do struggle with any sort of stretching or shifting, you have some wiggle room to square up and trim down to the appropriate size.
Download the PDF pattern template HERE.
-
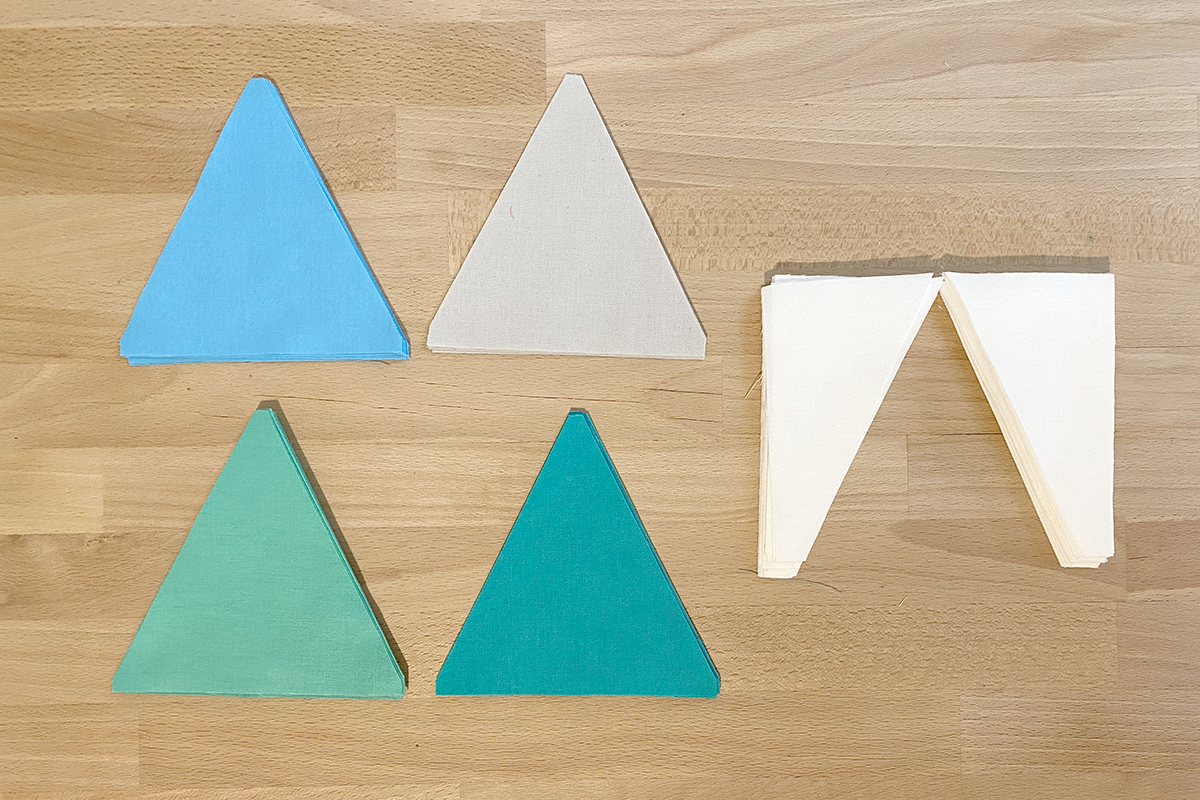
Cut all fabrics
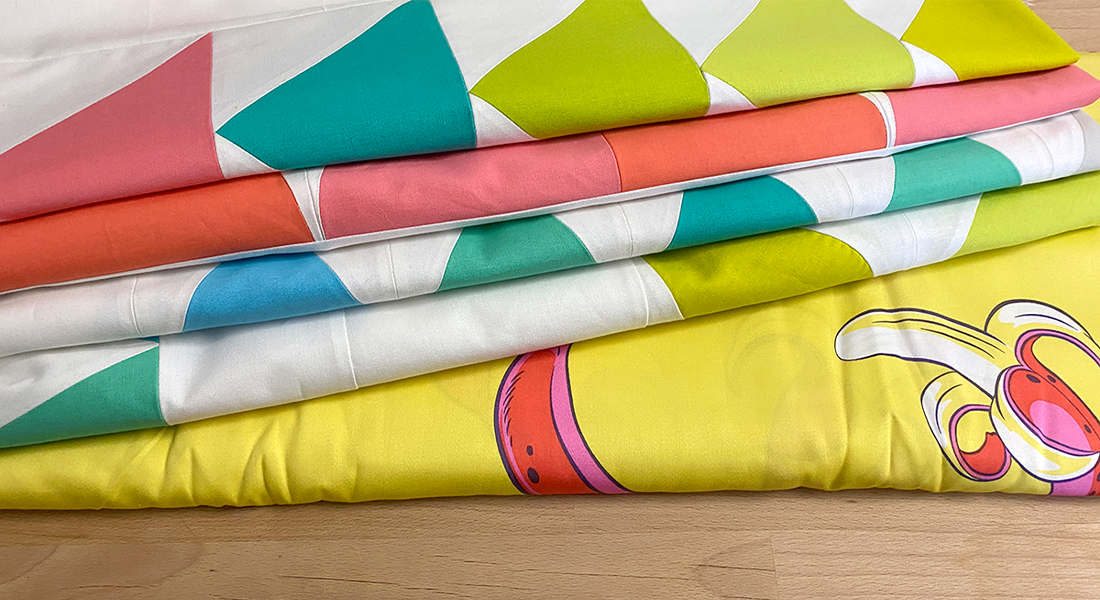
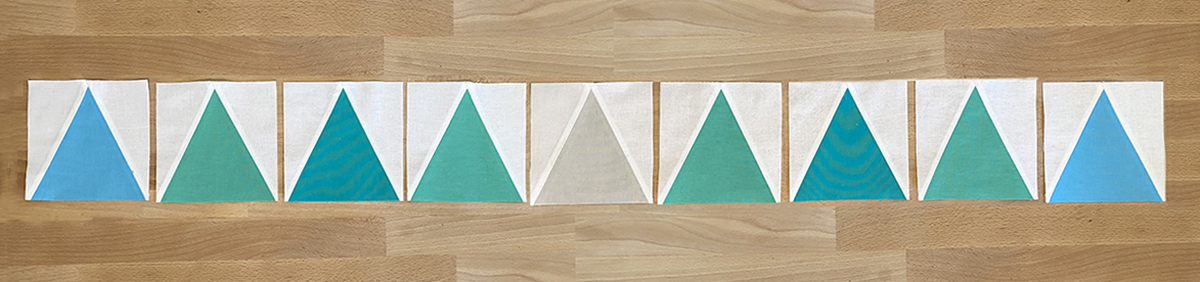
Five fabrics/colors are used to construct this row. Cut your fabrics to the following:
- Color #6 (Julep)
- 16 of Template A
- Color #7 (Aegean)
- Eight of Template A
- Color #8 (Cerulean)
- Eight of Template A
- Color #9 (Putty)
- Four of Template A
- Background (white) –
- 72 of Template B
- Four 4 1/2″ squares
- Four strips 3 1/2″ x WOF
Both of our template shapes nest neatly together and can be sub-cut from 5” strips of fabric with very little waste.
-
Assembling the blocks
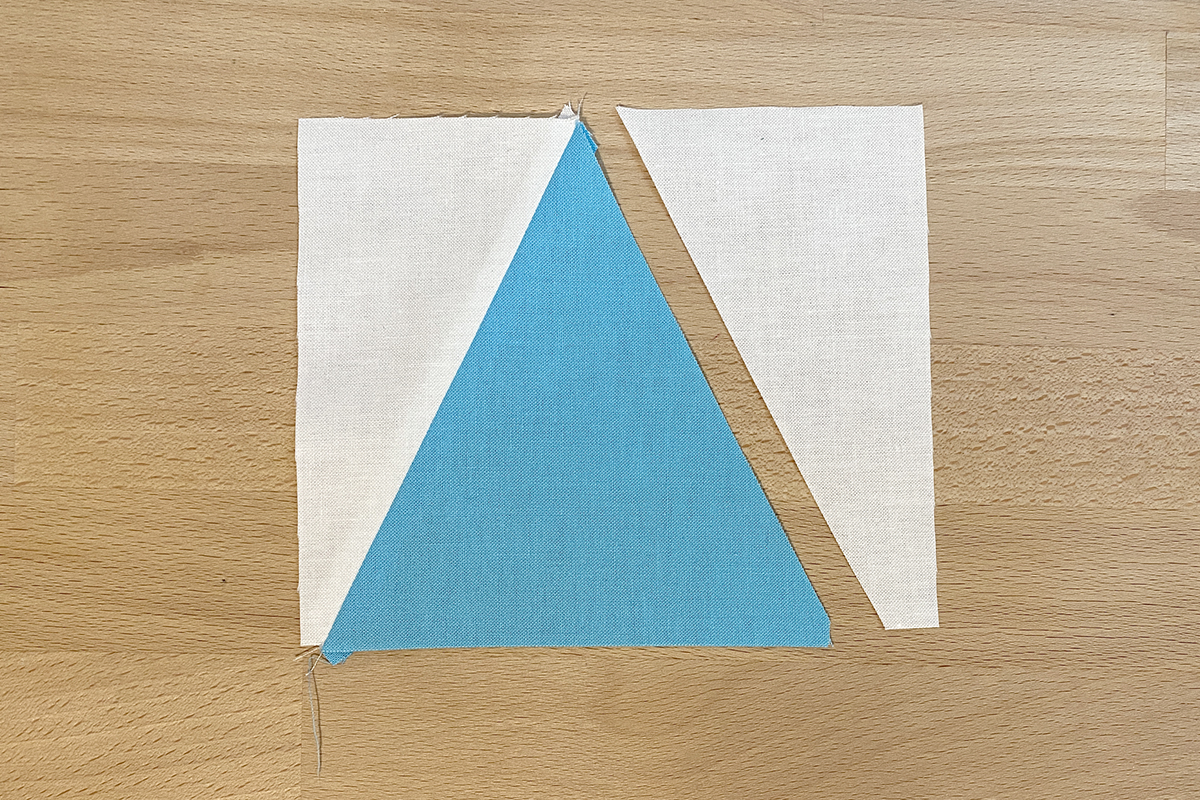
Each triangle block is comprised of one Template A piece and two Template B pieces. First, line up one Template B piece along the left side of a Template A piece.
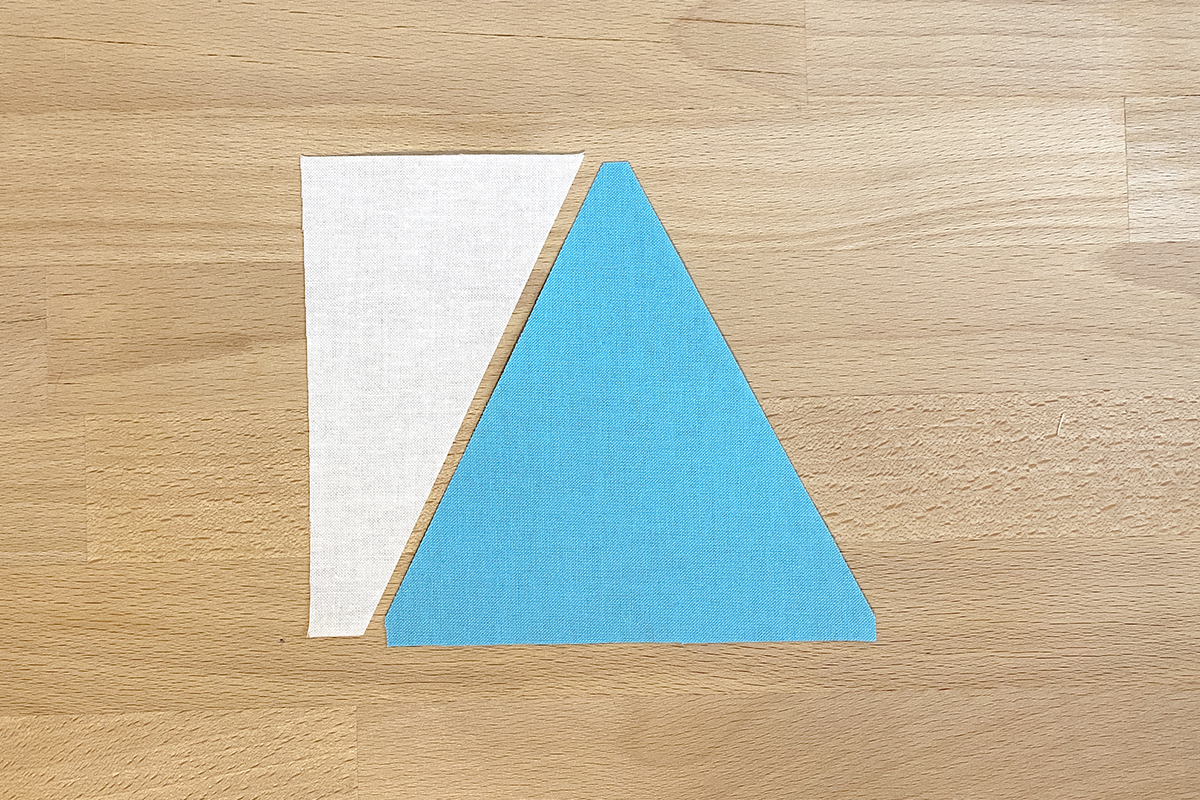
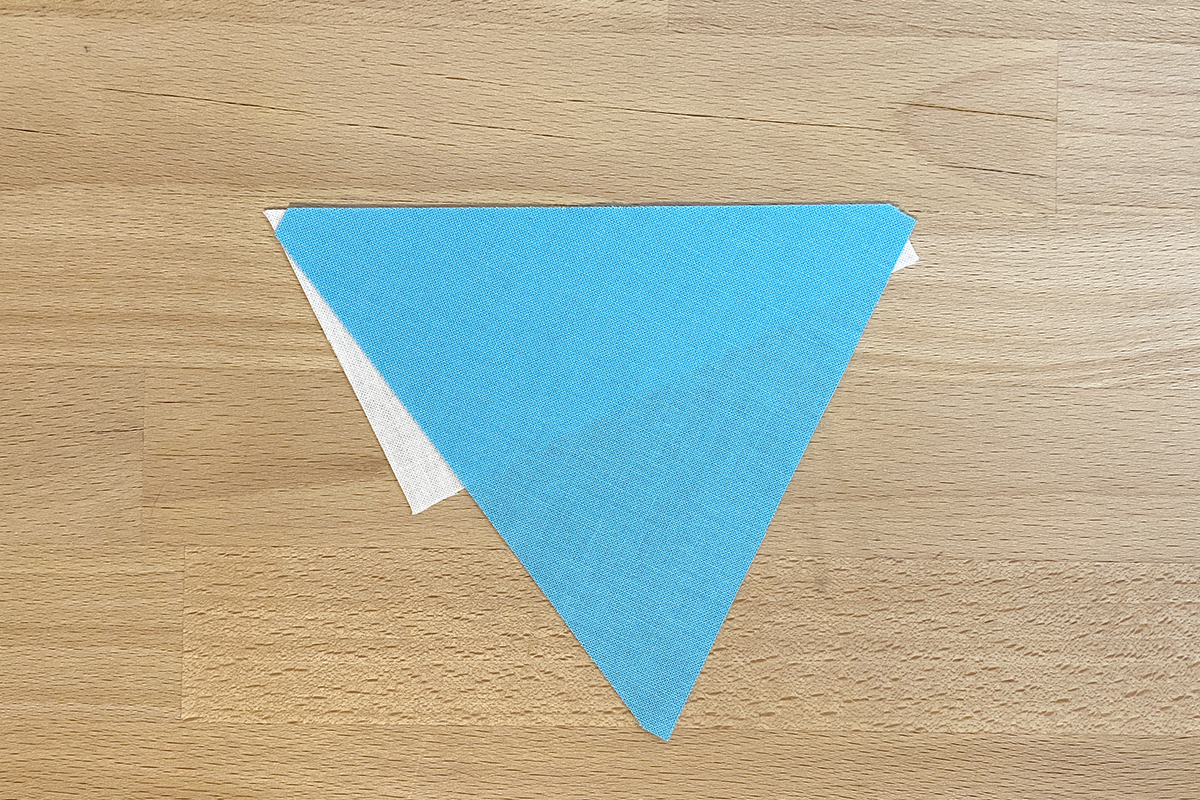
Place the two pieces right sides together aligning the matching angled edge. Note the beginning and ending points where the pieces will not match exactly.
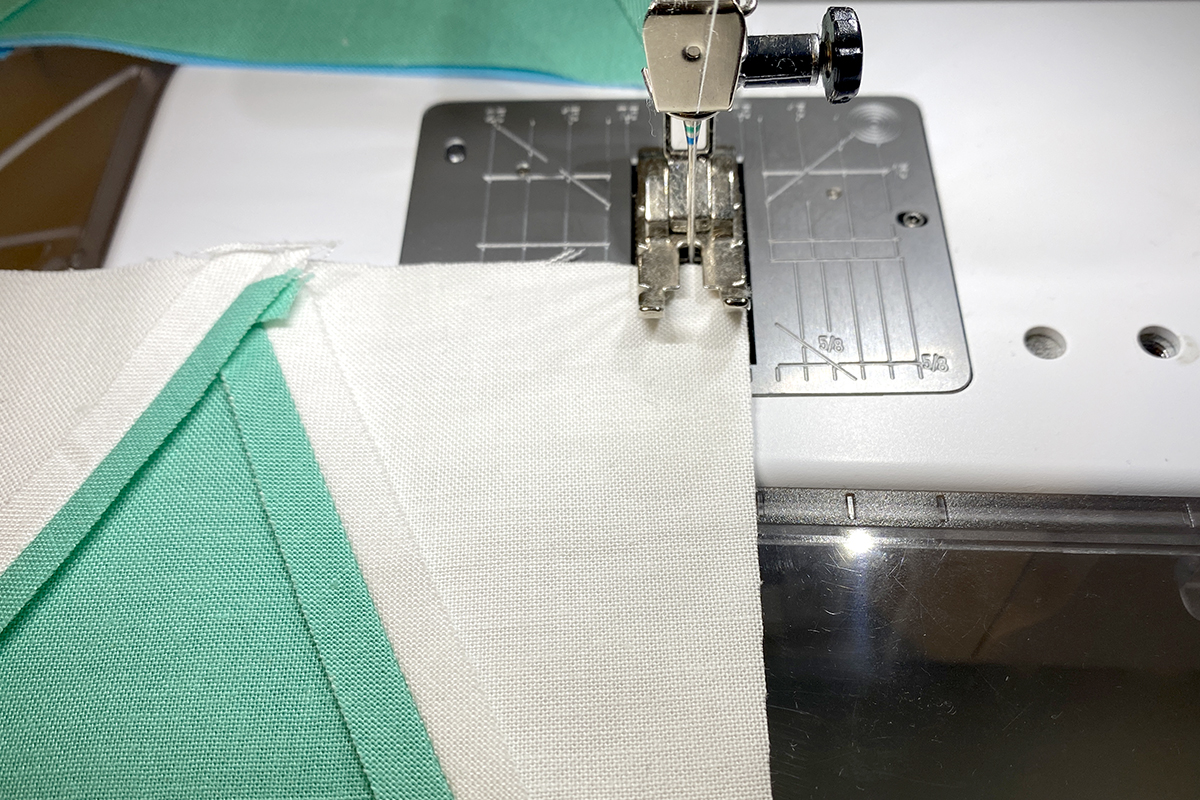
Now place the block under the presser foot, aligning the raw edge with the 1/4″ mark on the stitch plate and/or the edge of your patchwork foot. This month, I am working on my BERNINA 475 QE and using BERNINA Patchwork Foot #37.
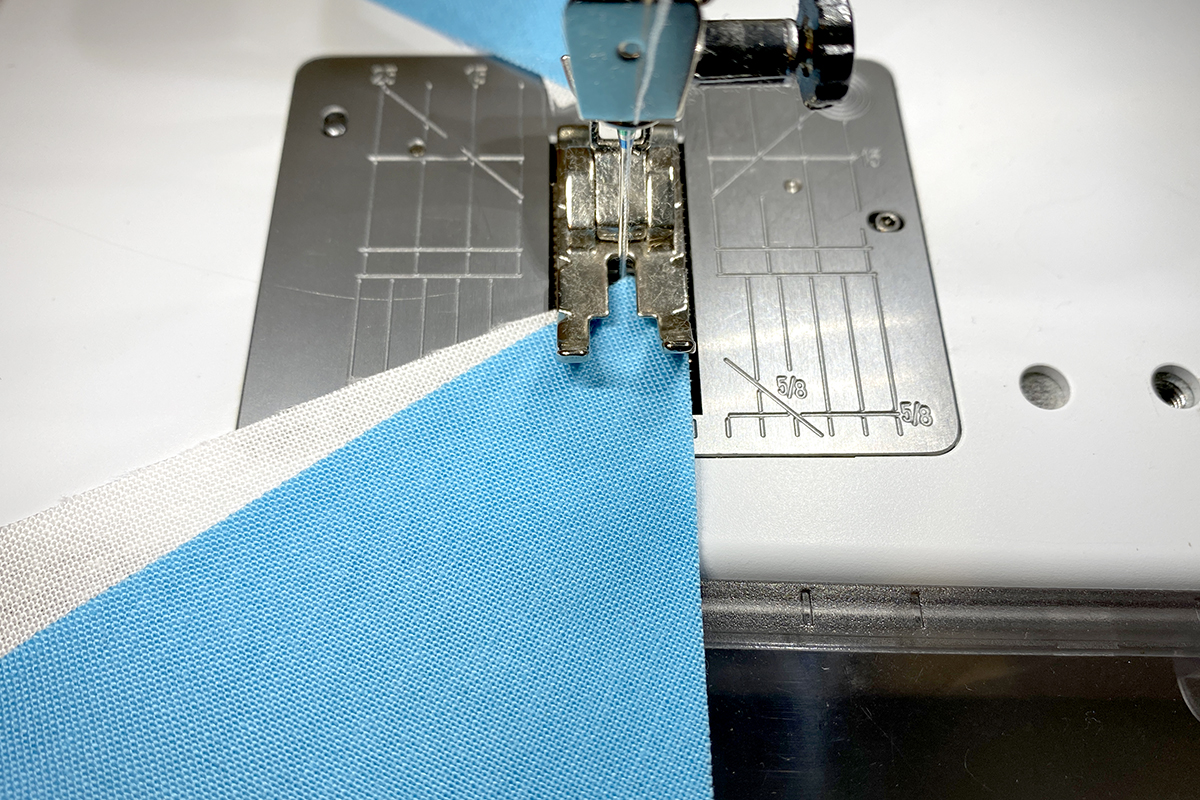
As I mentioned, sewing these bias edges can sometimes result in stretching or shifting. There are a few things we can do to prevent this from happening.
The first thing is to reduce our stitch length. Using a short stitch means your feed dogs are moving the fabric through in shorter strokes, which reduces the likelihood of our fabric shifting out of place.
Next is to reduce the presser foot pressure. With less pressure on the fabric between the presser foot and feed dogs, our fabric sees less stress and can move under the foot with less resistance.
Finally, using Dual Feed will majorly improve the feeding of your fabric under the foot. Dual Feed helps pull the fabric under the foot from the top side. If you’ve ever sewn a seam, gotten to the end, and noticed the top layer of fabric has stretched longer than the bottom layer, you know exactly why this tool is such a game-changer! Note that Dual Feed is NOT the same as a walking foot, but a walking foot could be used here if you were working on a machine that does not have Dual Feed or if you were working with a particularly slippery or finicky fabric. A walking foot will have significantly more control and precision than Dual Feed. Because we’re working with quilting cotton, which is a fairly stable-bodied fabric, a walking foot would really be overkill in this situation. But that option is there if you find you’re struggling with your fabric warping in these seams.
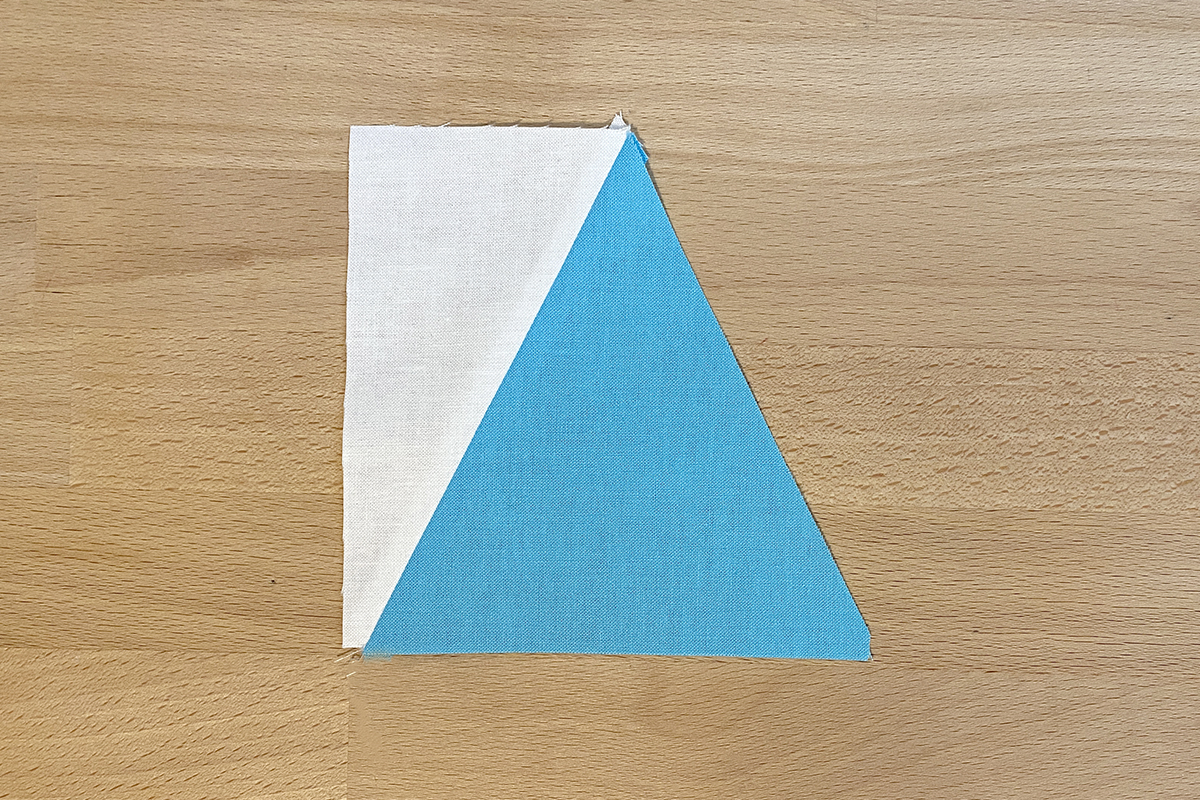
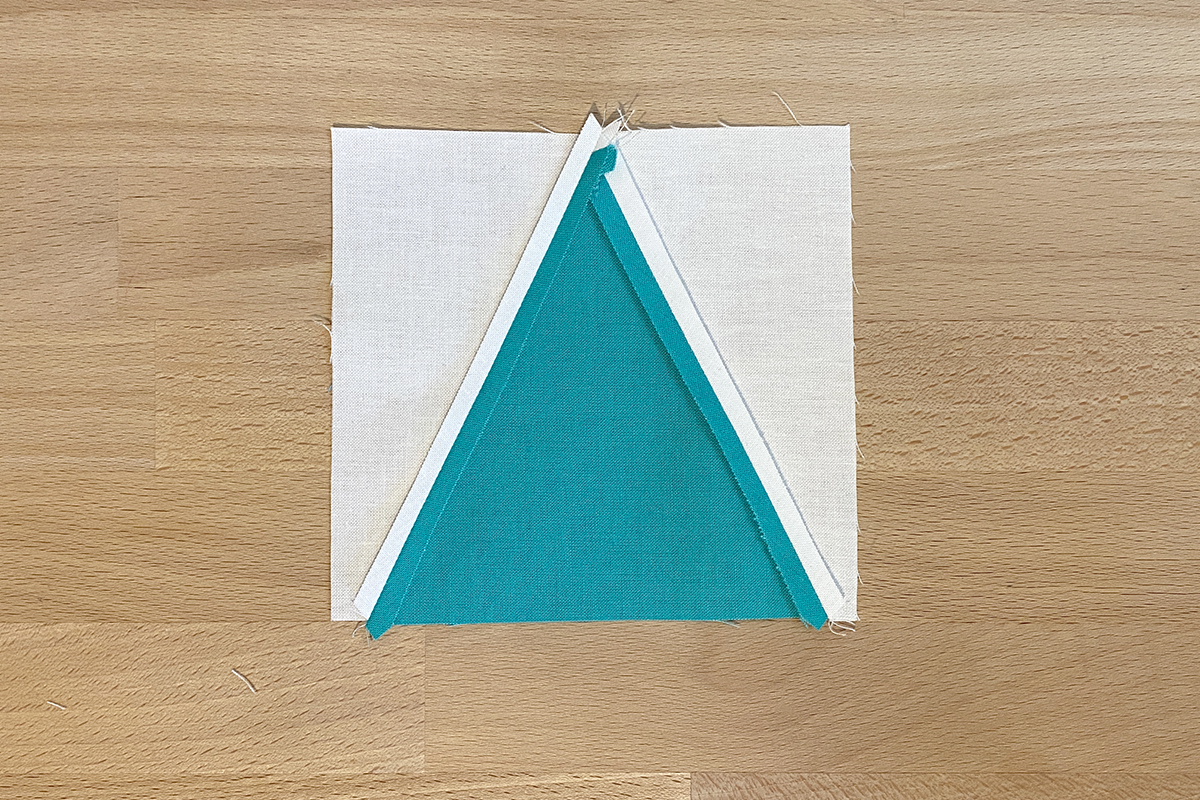
With your stitch set up for success, sew down the first side of your triangle. When your seam is stitched, press the seam allowance open.
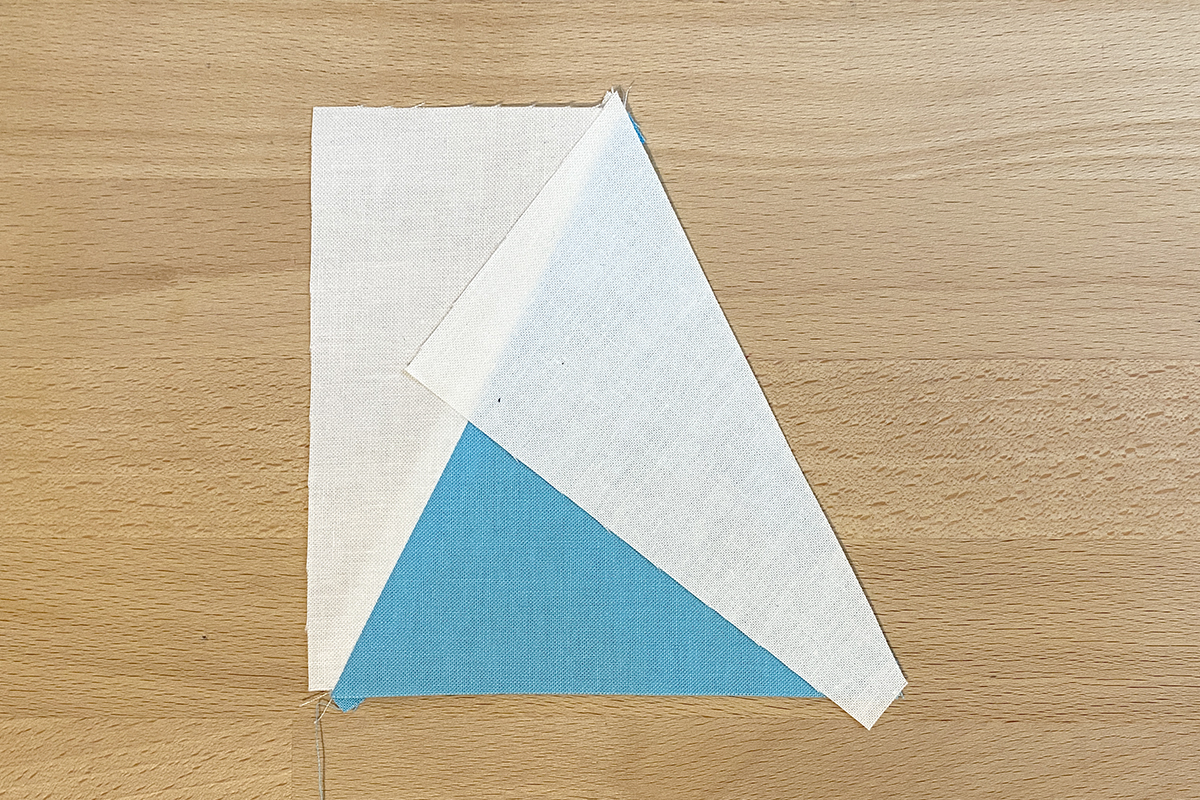
Next, align another Template B piece with the right angle of the triangle.
Then, place the second Template B piece right side down on top of the triangle. Align the top points together as illustrated here.
Place the block under the presser foot, aligning the raw edge with the 1/4″ mark on the stitch plate and/or the edge of your patchwork foot. Your seam should begin at the top edge in the point illustrated below. You can lower your needle to make sure this is lined up precisely.
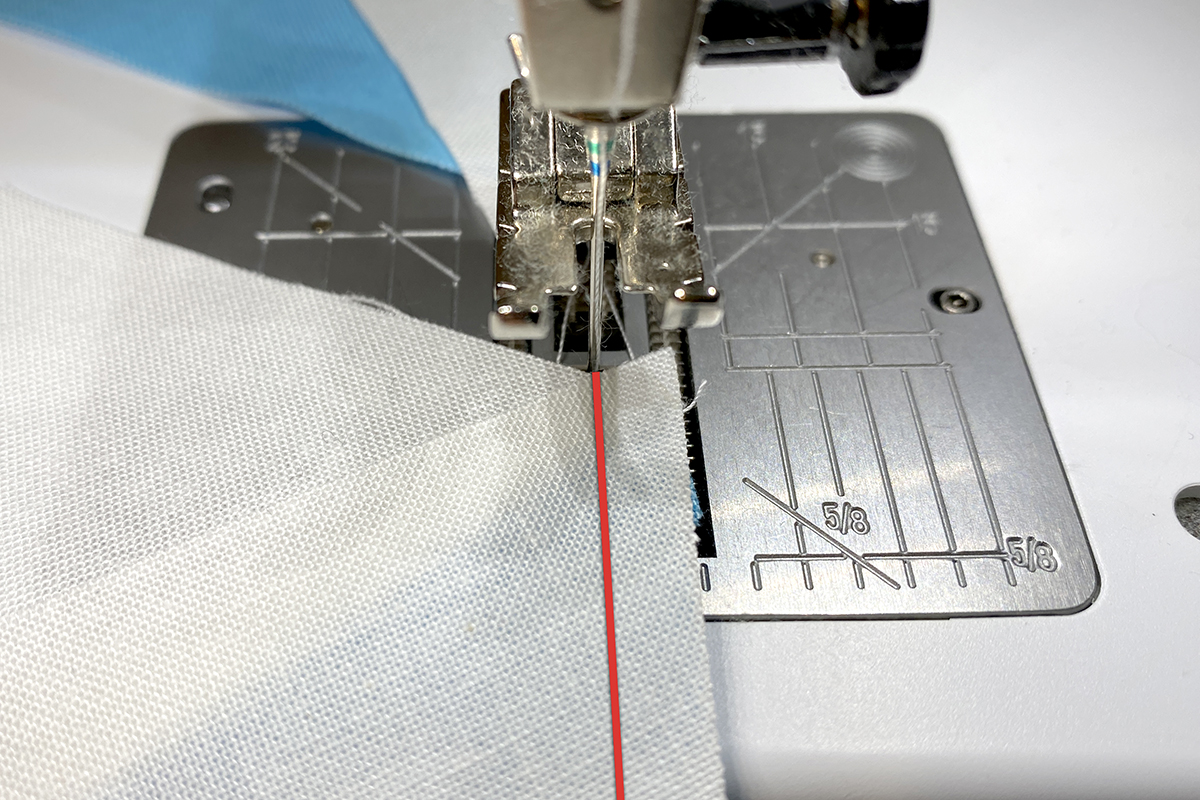
Stitch down this side with a 1/4″ seam allowance. The endpoint of your seam will stitch through the point where the edges of the two pieces cross, as illustrated below.
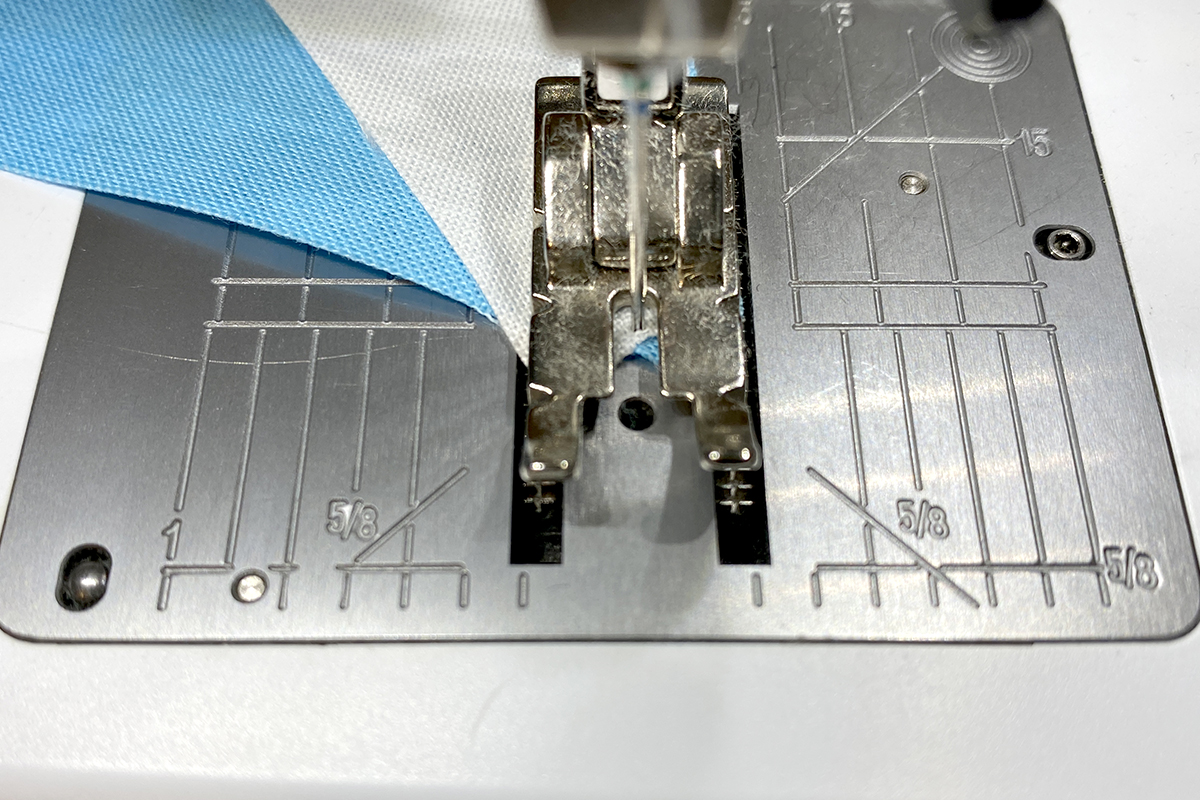
When you finish stitching, press the seam allowance open.
After your first block is pieced, finish assembling the remaining 35 triangle blocks. I highly recommend chain piecing these!

-
Square up blocks
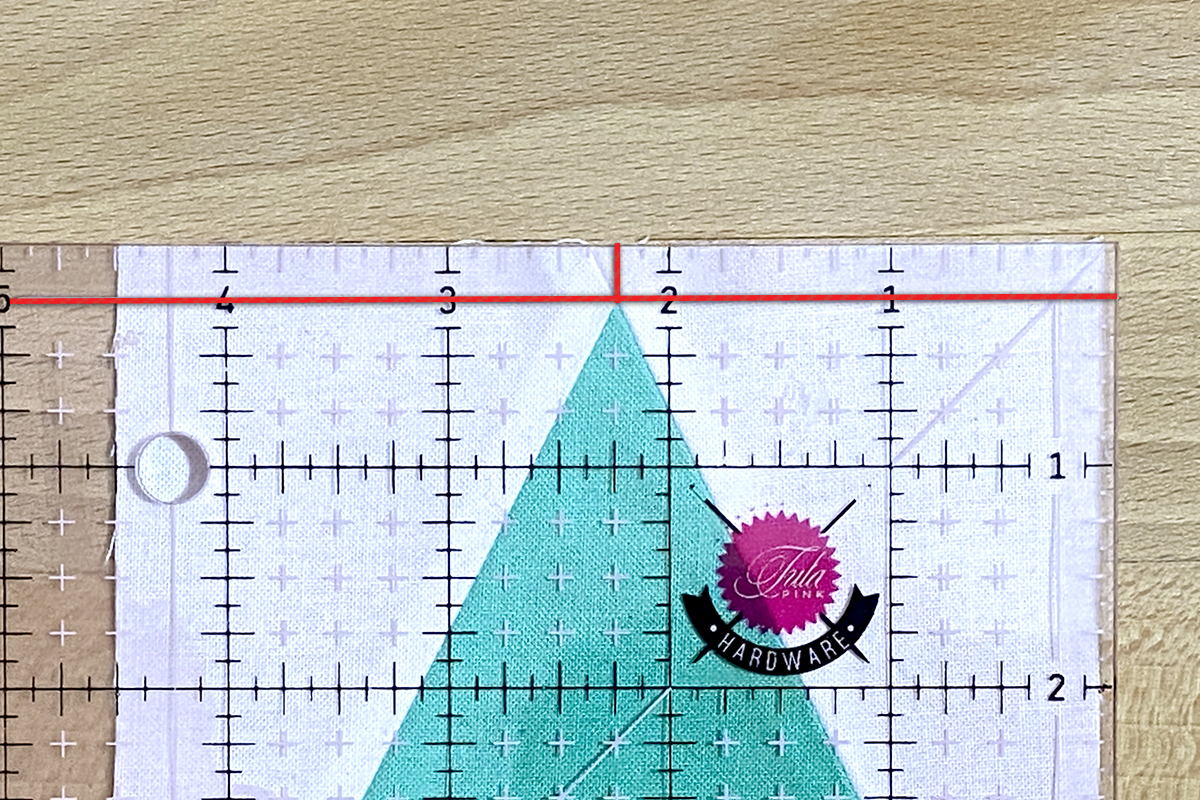
Next, we need to trim our blocks to size and square them up. Each triangle block needs to be trimmed to 4 1/2″ x 4 1/2″. The most important seam allowance to consider around the edge of our block is the top, along the point of the triangle.
Use your ruler to align the top point of your triangle 1/4″ down from the top edge and 2 1/4″ in from the right edge of the ruler.
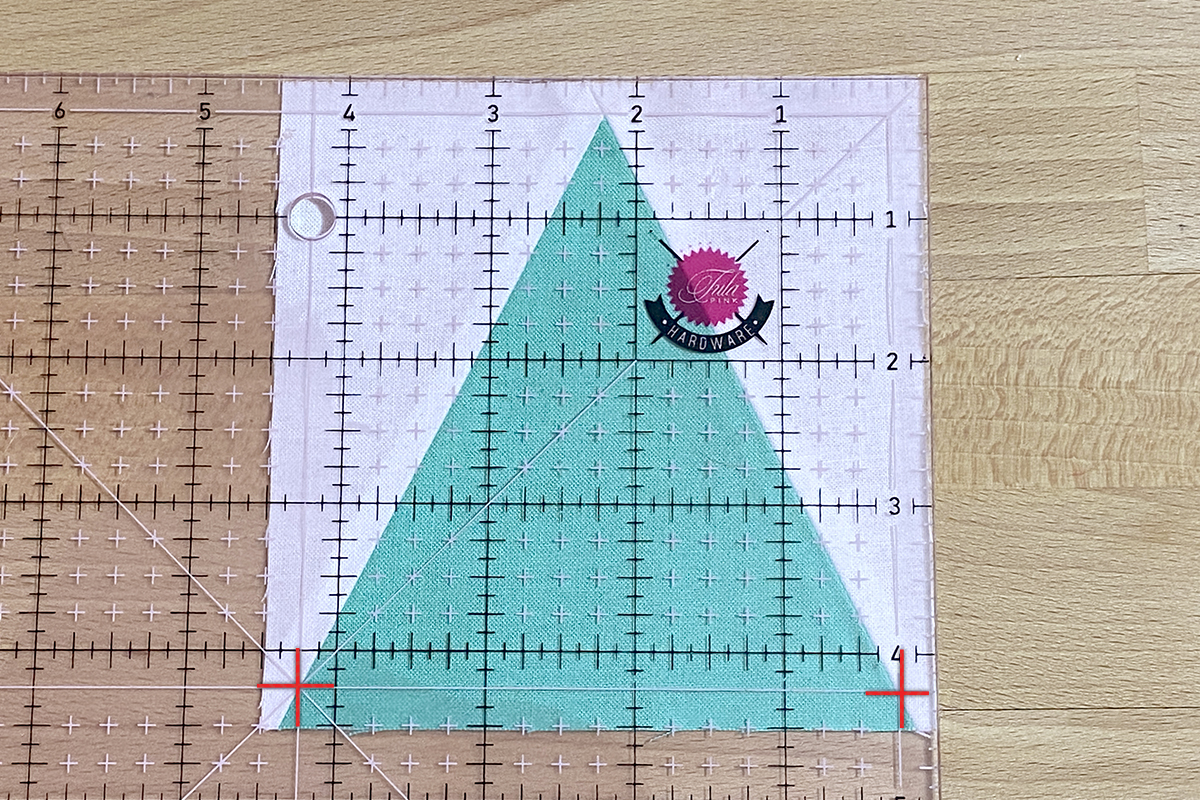
Then, align the right and left edges of the triangle to intersect with the 1/4″ line and the 4 1/4″ line respectively. Trim the top and right side edges.
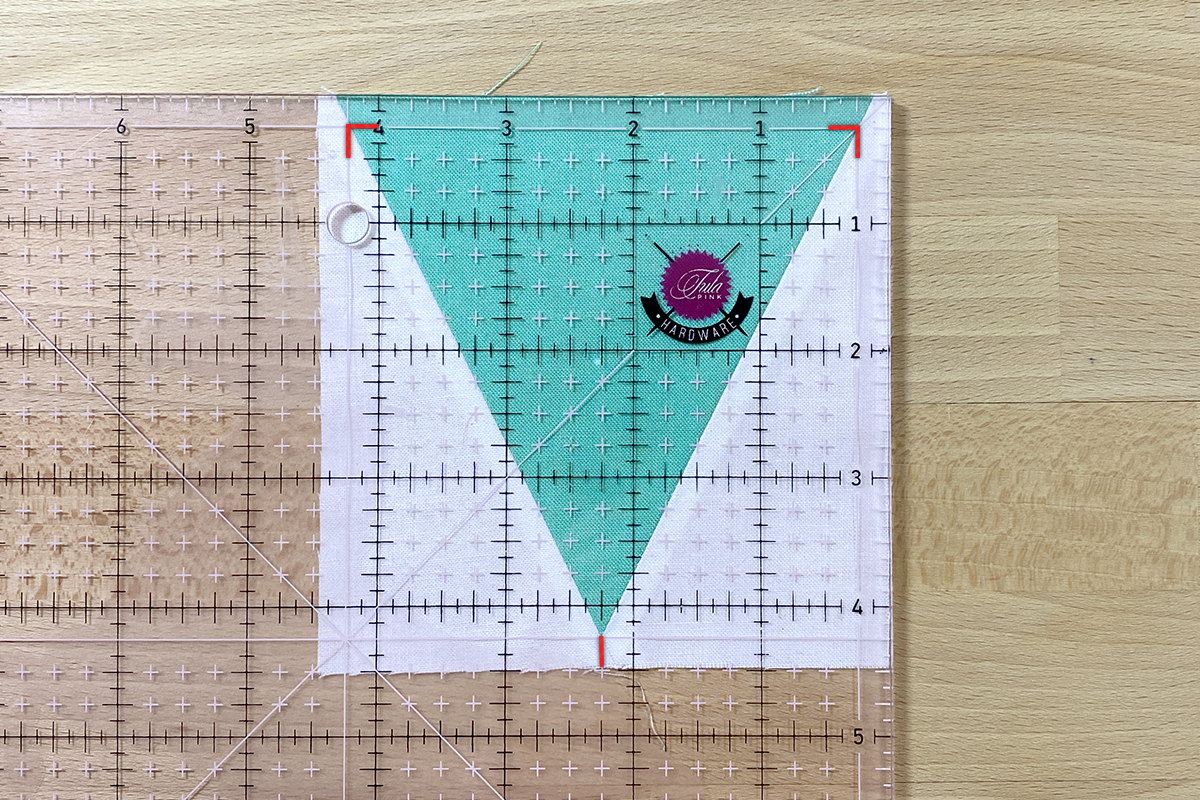
Rotate the block 180 degrees, aligning the freshly trimmed sides with the 4 1/2″ lines in and down. Double check that your top point is again lined up at the 2 1/4″ marking and the edges of the triangle land 1/4″ in from all raw edges.
-
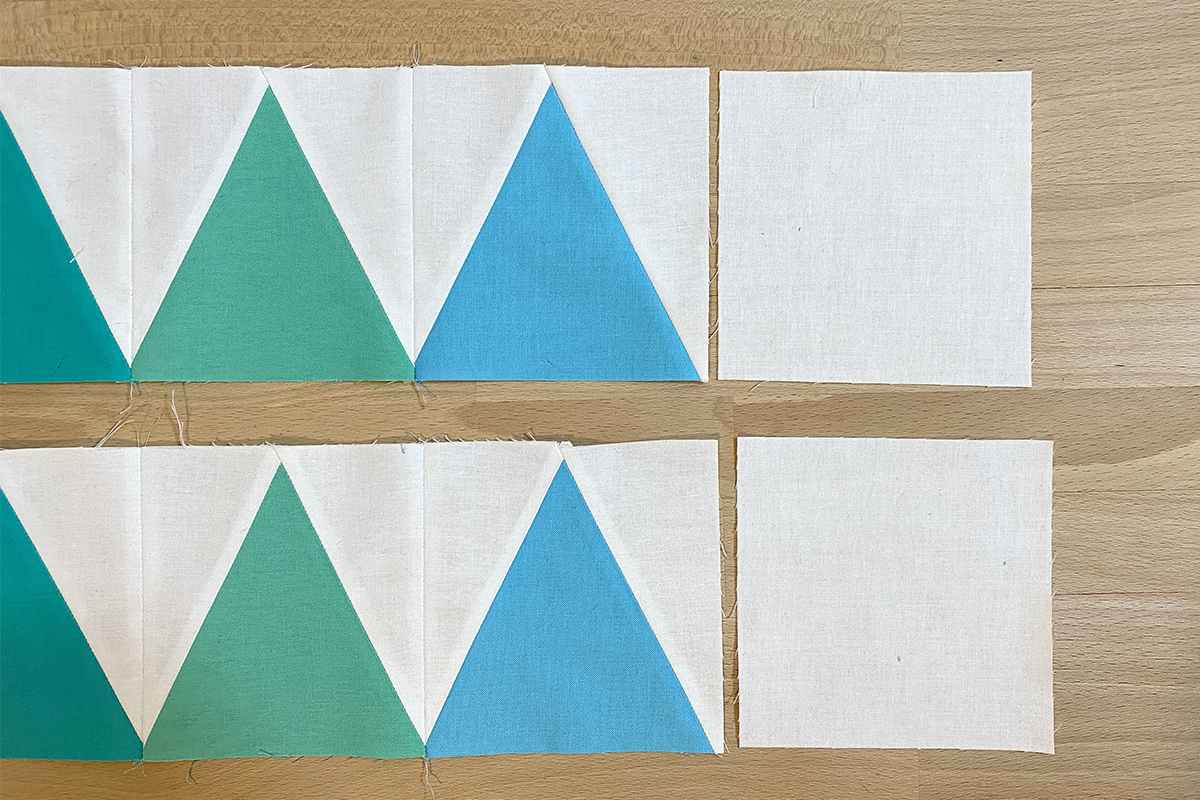
Piece rows
With all the blocks stitched and squared up, we can now assemble our rows! Line up your blocks in the order they should ultimately be sewn.
Sew the blocks together in pairs with a 1/4″ seam allowance. Press seam allowances open.
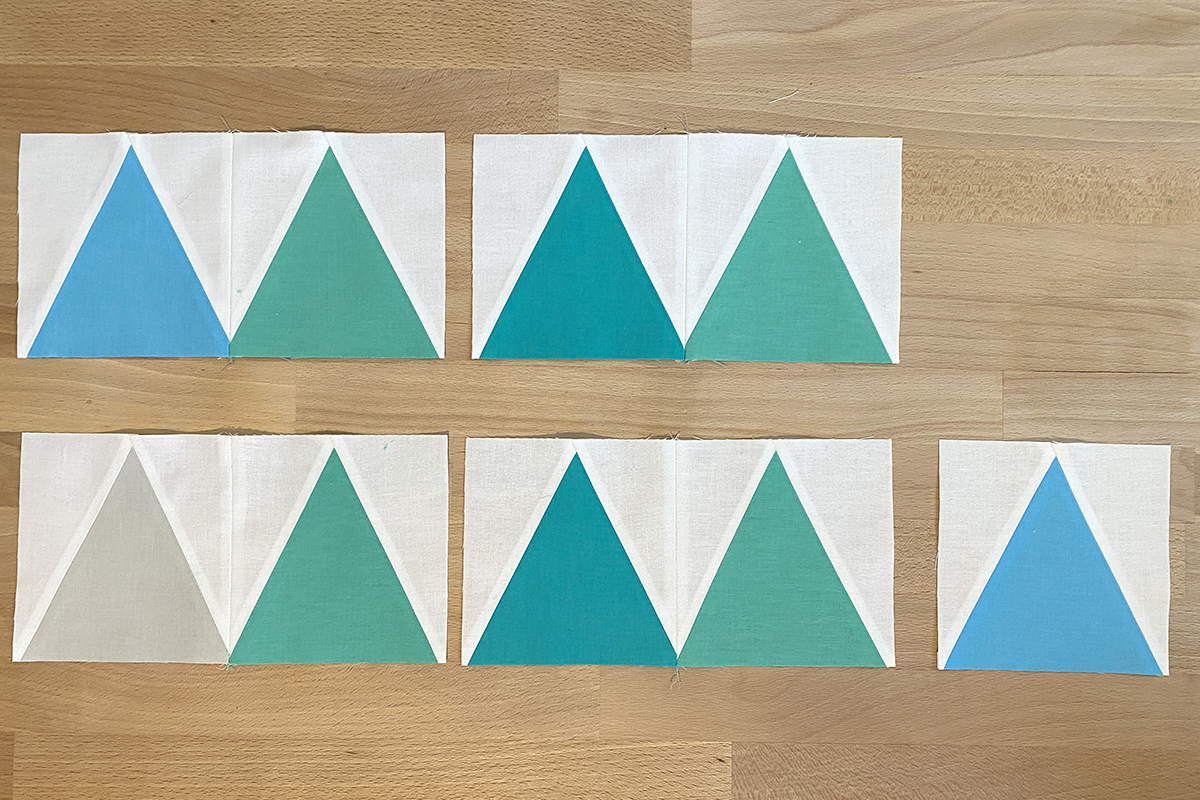
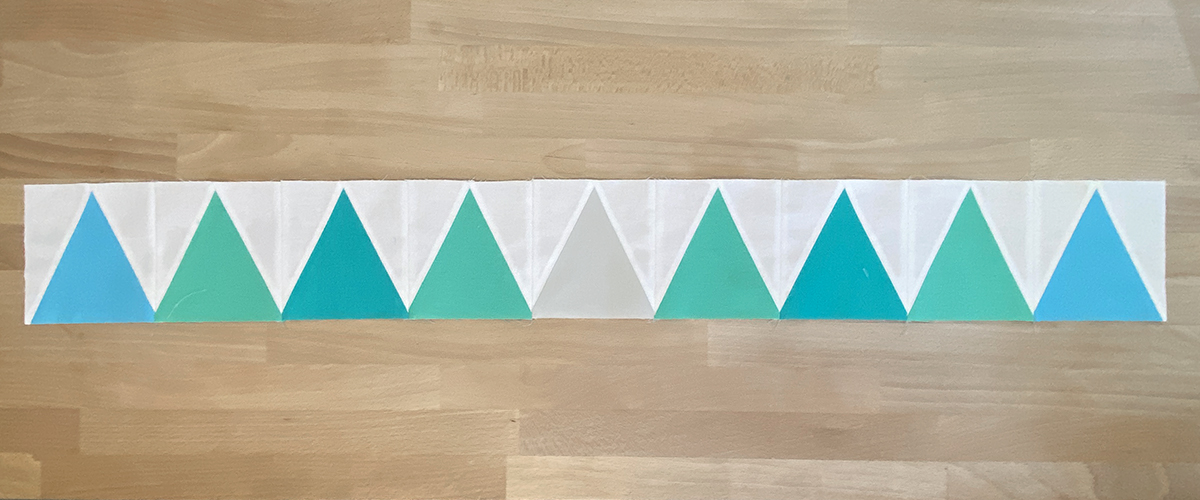
Then, sew the pairs together until they ultimately come together in a complete row.
Repeat for the remaining three rows. On two of the finished rows, stitch a 4 1/2″ square of solid background fabric on to either end for the cornerstones of the round.
The two rows with cornerstones should measure 44 1/2″ long and the rows without should measure 36 1/2″ long.
-
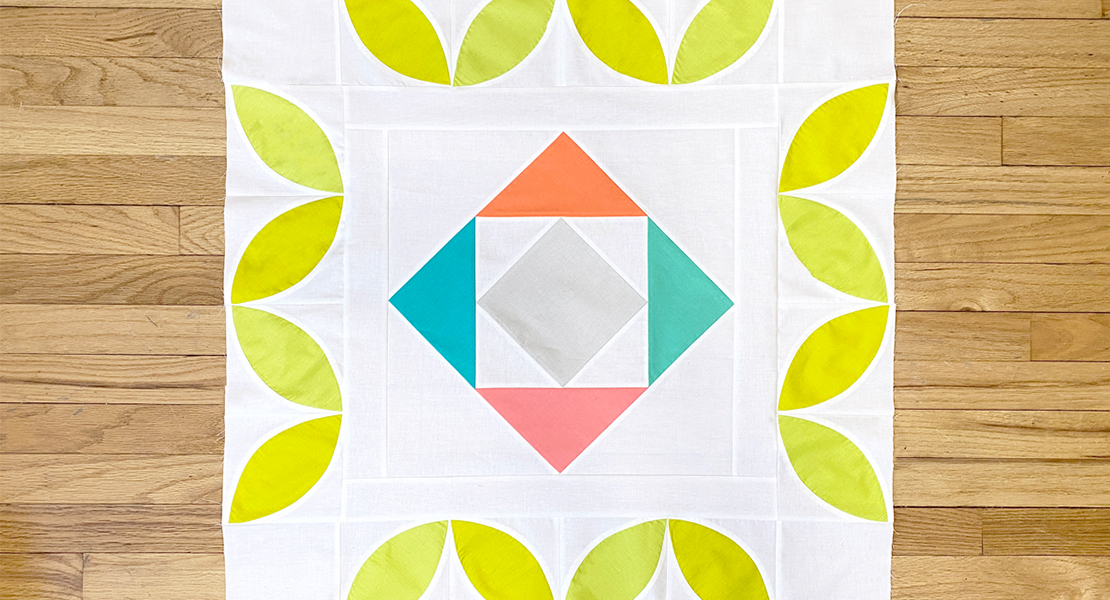
Adding on to the medallion
Before we attach our triangle round, we need to add sashing on to the medallion around the outside of our orange peel round.
Our first round (orange peels) should measure 30 1/2″ currently. From the 3 1/2″ wide strips of backing fabric, cut two 30 1/2″ long strips and two 36 1/2″ long strips.
Pin the shorter strips to the left and right sides of your medallion and stitch with a 1/4″ seam allowance. Press the seam allowance toward the sashing.

Then, add the longer strips of sashing to the opposite sides. Again, press the seam allowance toward the sashing.
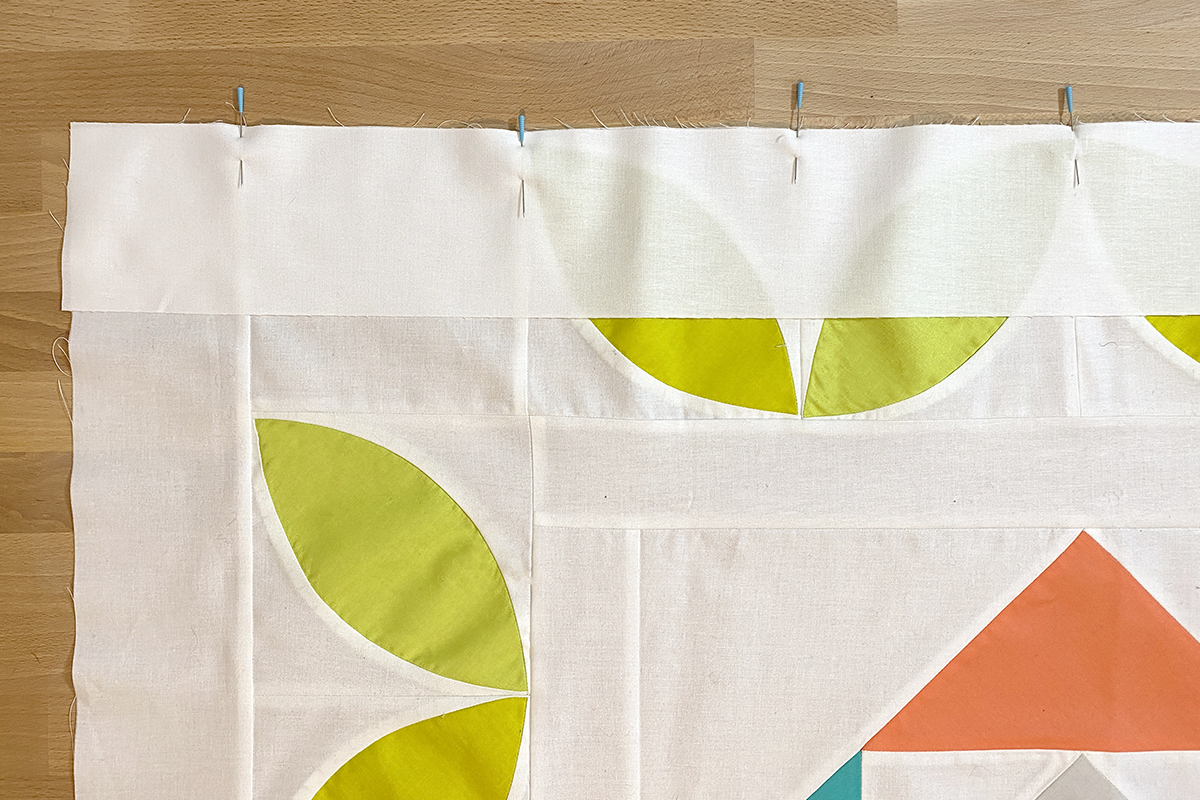
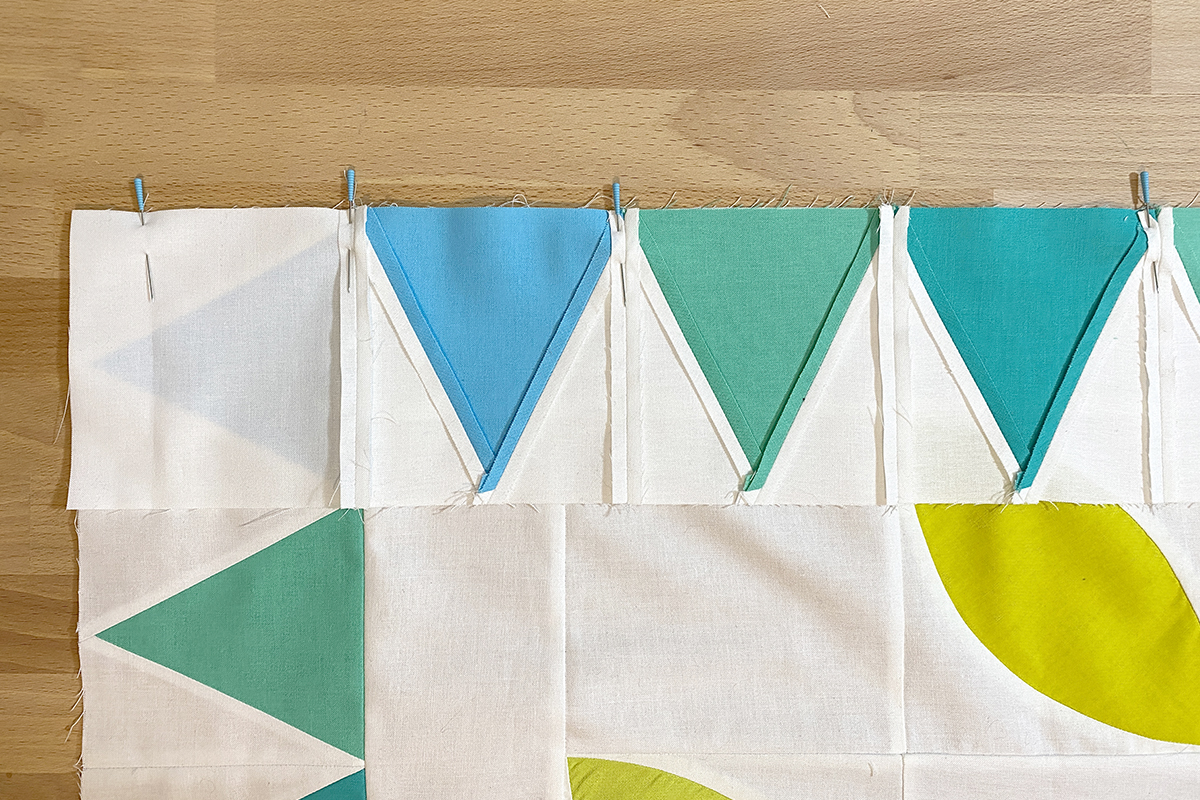
Now, pin the two triangle rows without corner stones to opposite sides of the medallion (the sides you sewed the first two strips of sashing to.) Sew this seam with a 1/4″ seam allowance and press the seam allowance open.
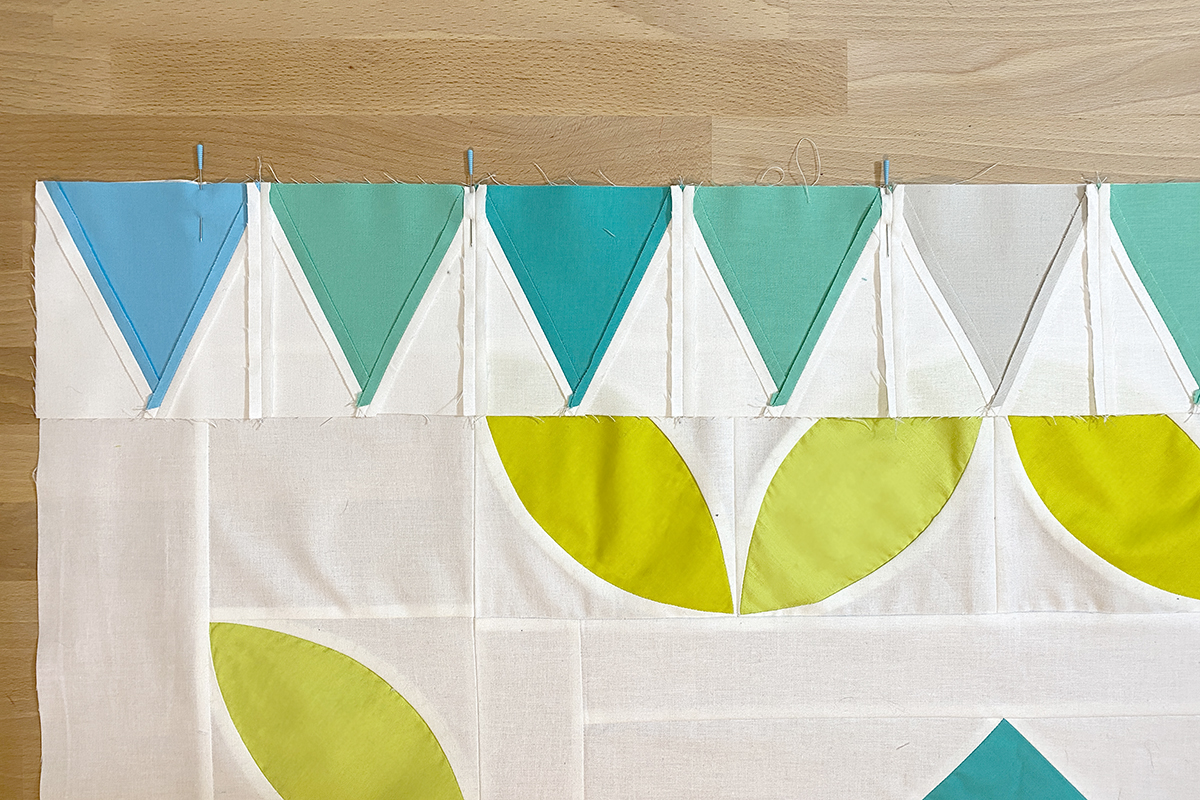
Finally, add the triangle rows with the corner stones. The cornerstone seams sound match with the seams attaching the perpendicular rows to the medallion.
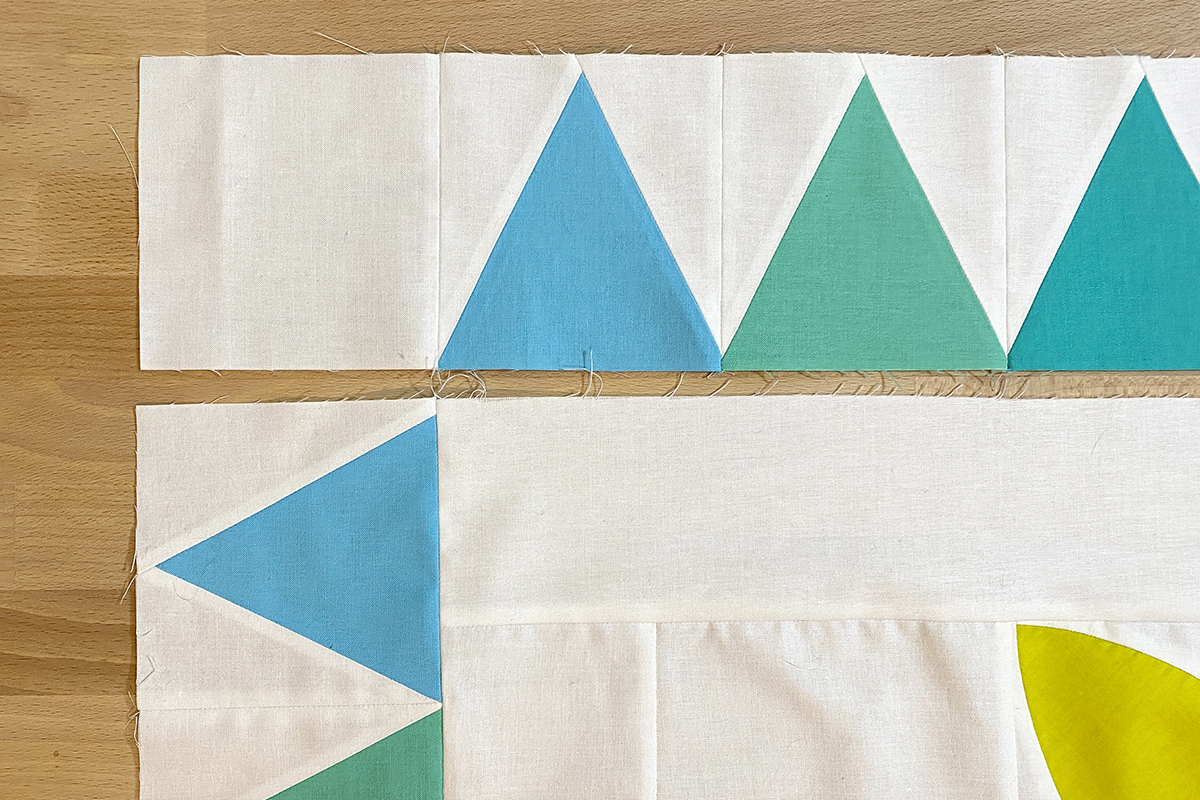
Place the row and medallion right sides together and pin. Then stitch the row and press the seam allowance open.
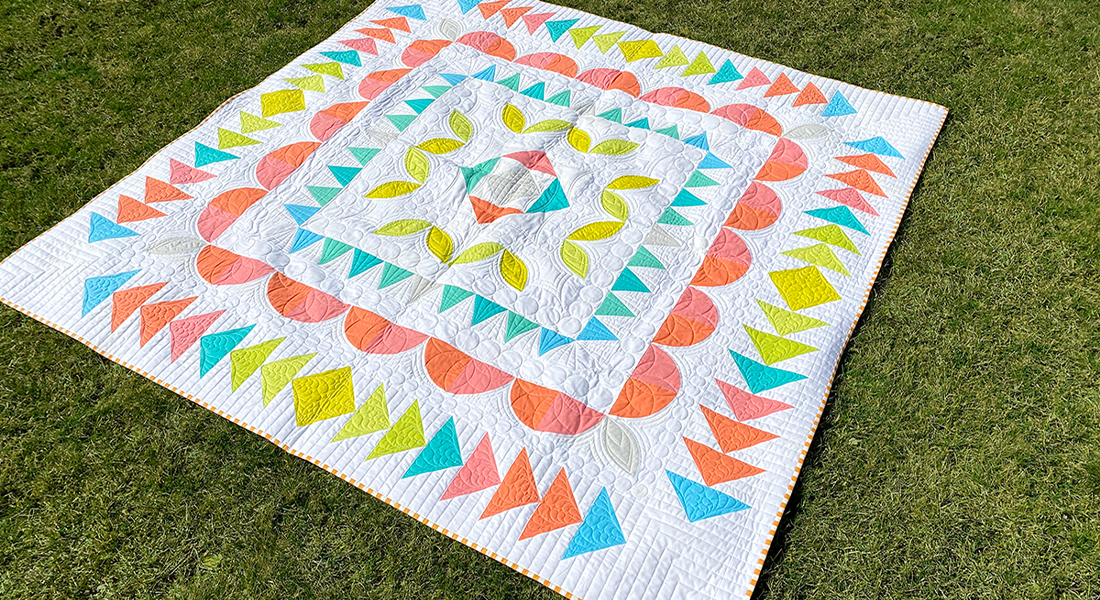
This round of our medallion is now complete! See you back here next month for our third round: Drunkard’s Path blocks!