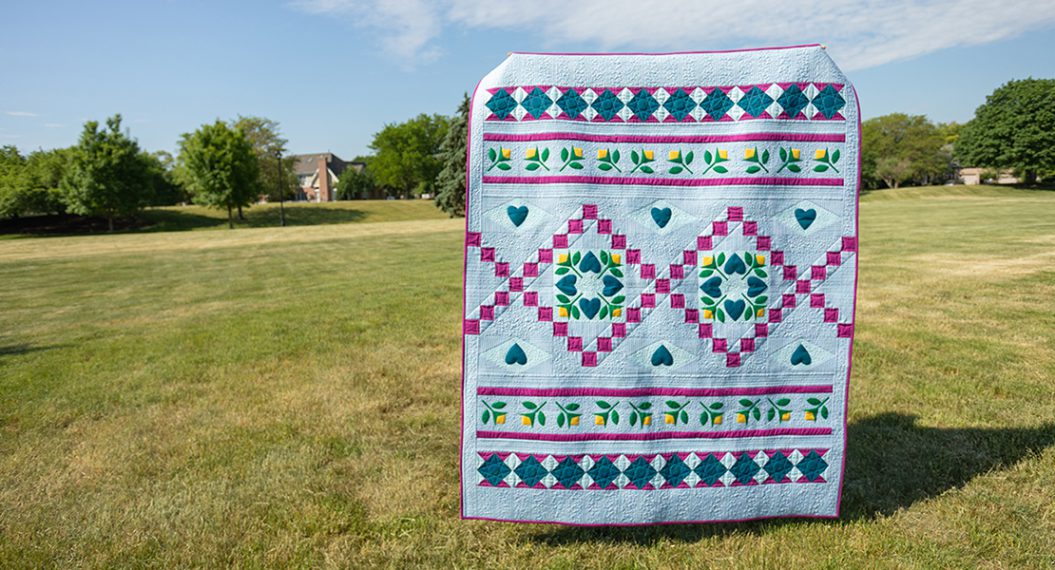
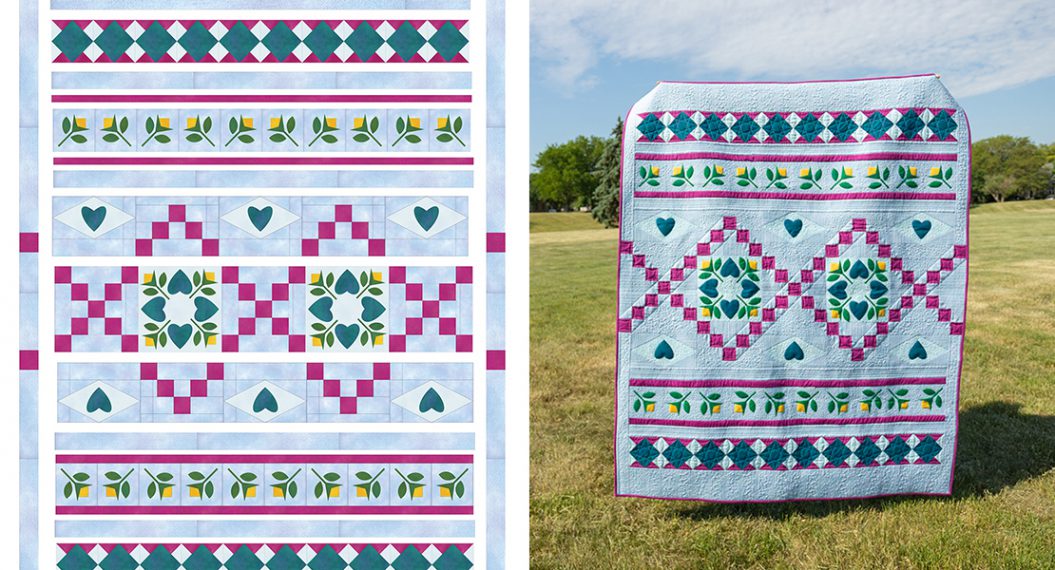
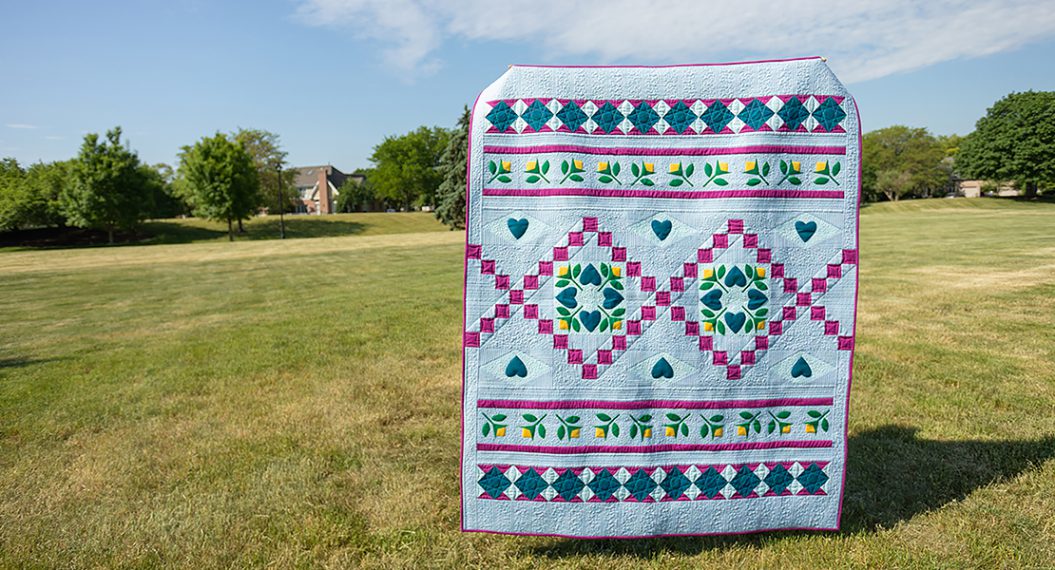
Jump for Joy Quilt Along, Part Two: Raw Edge Fusible Appliqué
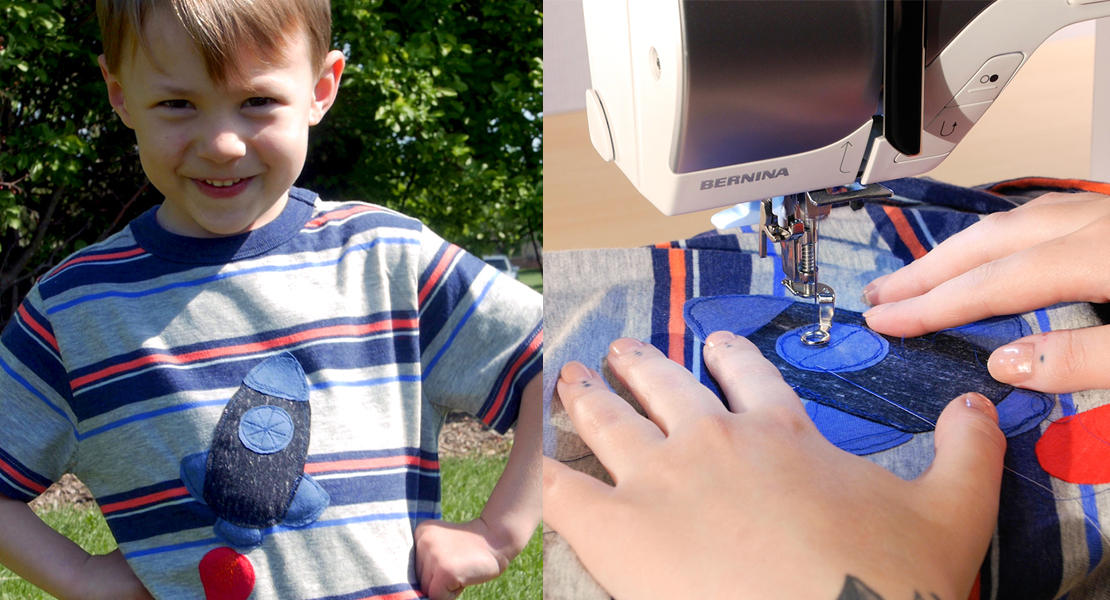
This month of the Quilt Along includes detailed instructions to make the three blocks in the Jump for Joy quilt that feature raw edge fusible appliqué. If you aren’t familiar with it, raw edge fusible applique is the method of preparing a fabric shape at its finished size, adhering it to a base fabric and securing it with stitching around the raw edges. Skills you will learn include: preparing applique templates, working with fusible web with paper release, securing edges with a machine blanket stitch, trimming oversized blocks to a perfect size.
If you missed part one of the Jump for Joy Quilt Along, here is the direct link to the first post which includes the fabric requirements and cutting instructions. This month you will be using the following pieces: A squares, B rectangles, C triangles, D triangles, E strips and F squares.
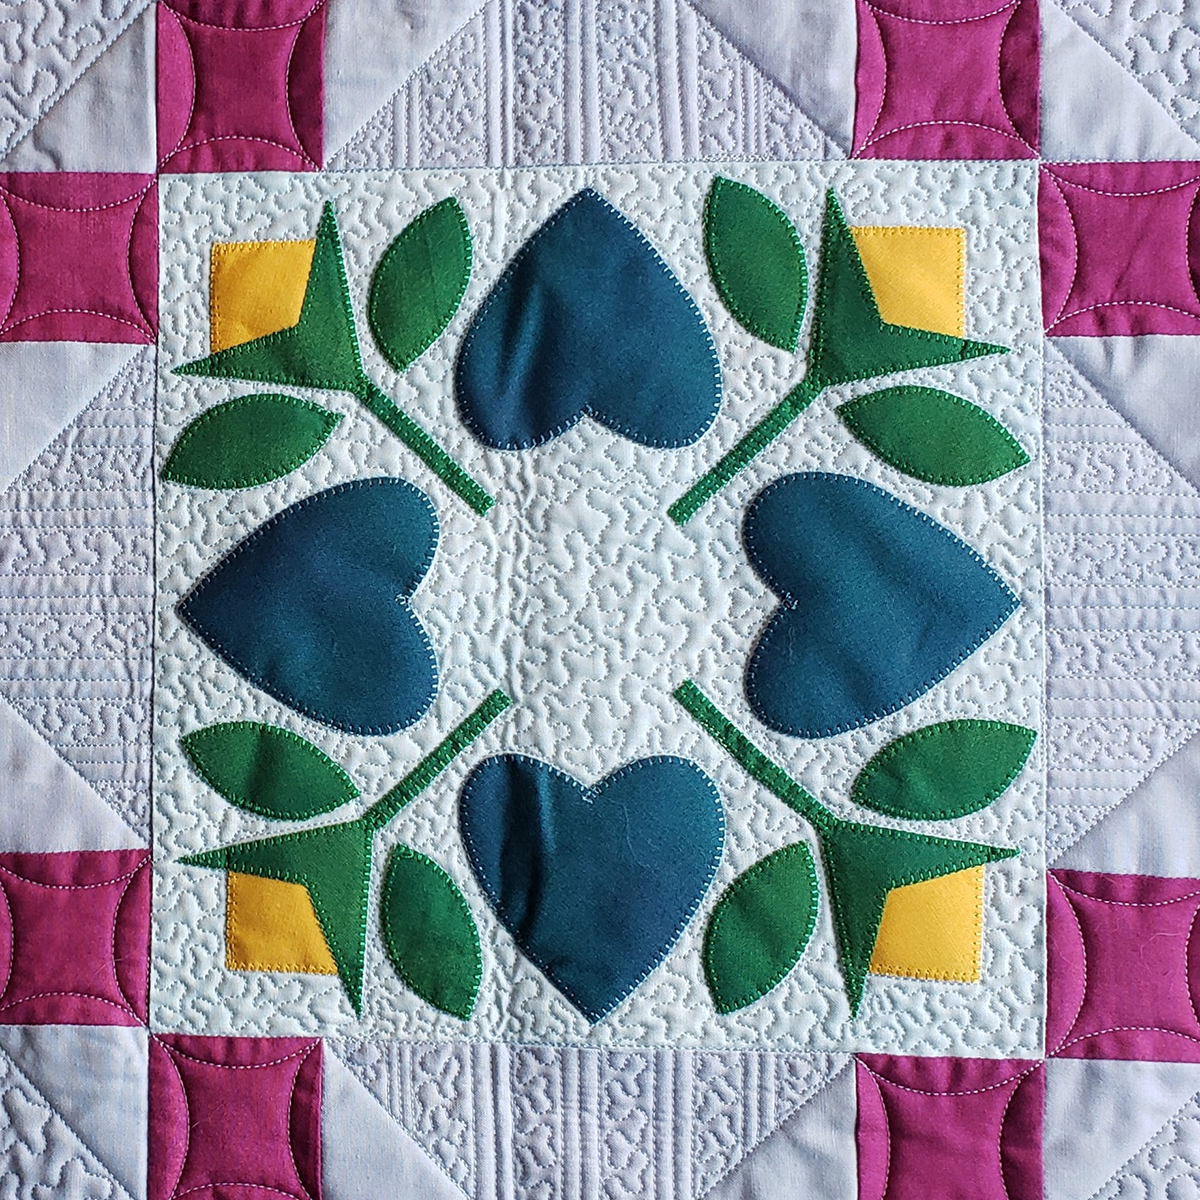
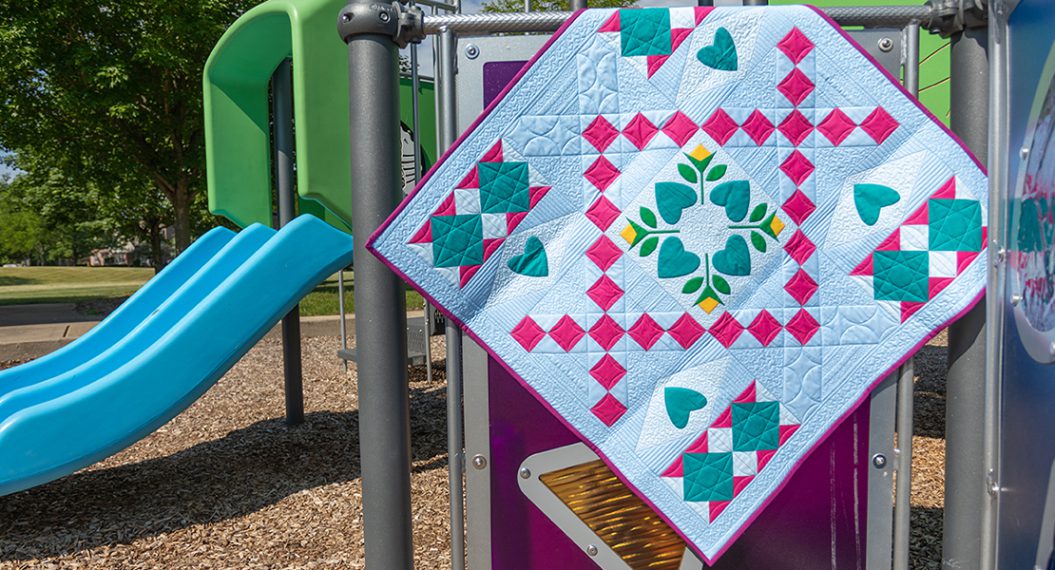
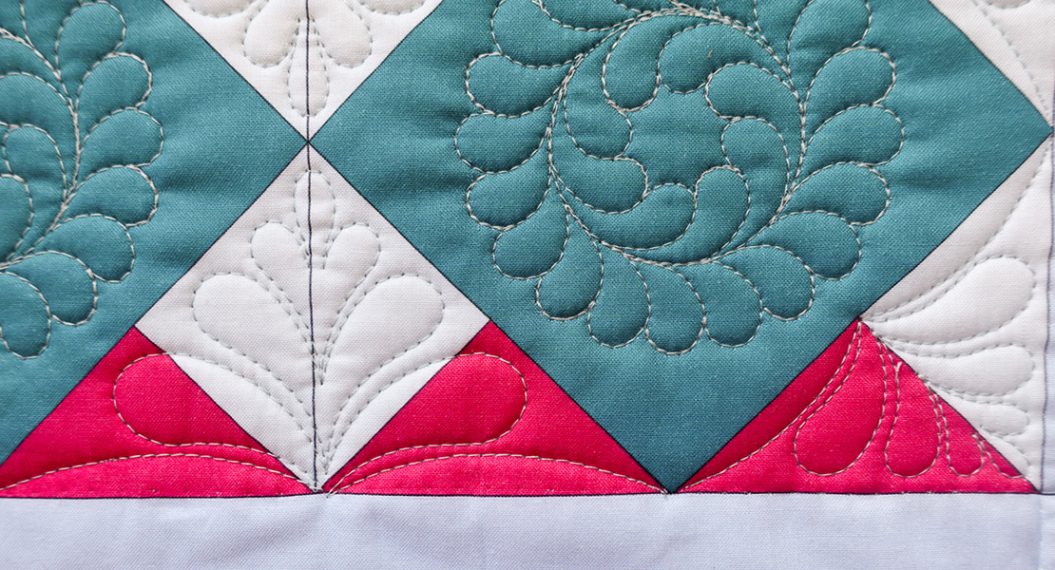
Heart & Flower Appliqué Block
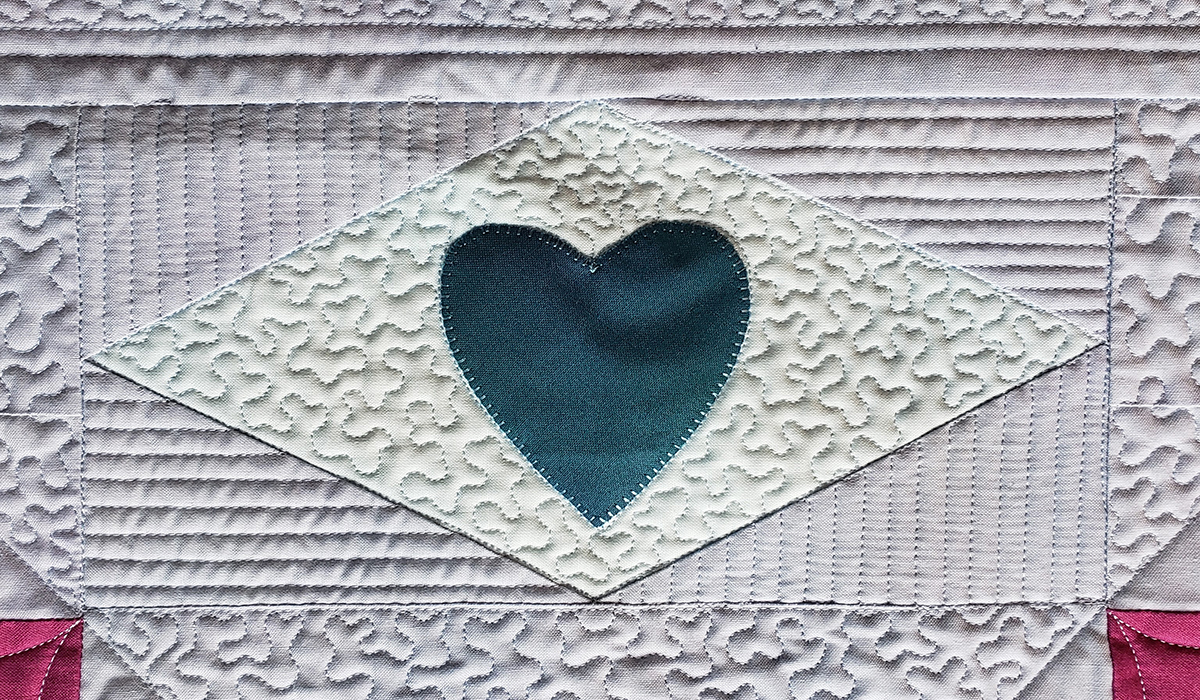
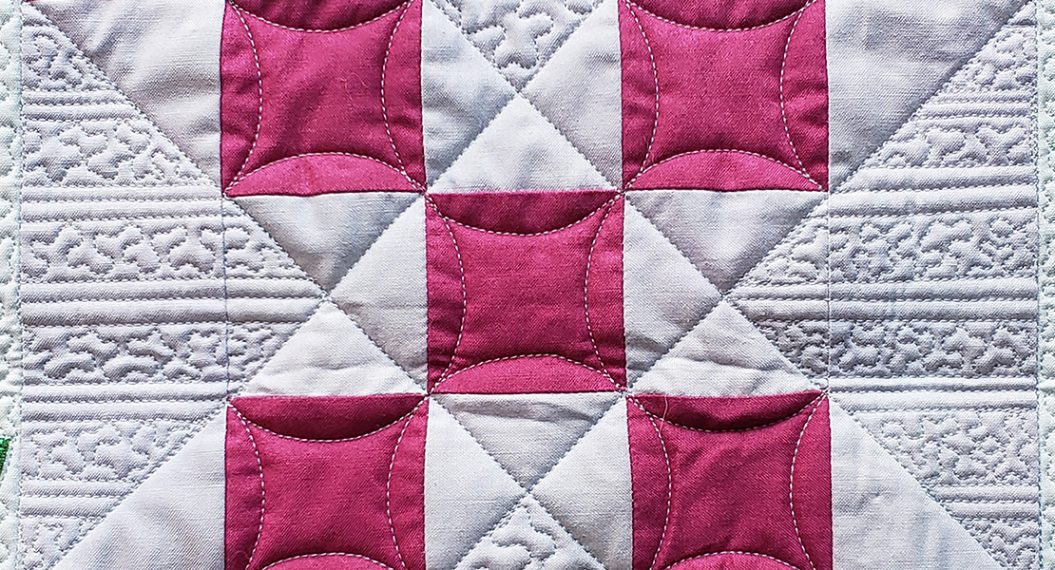
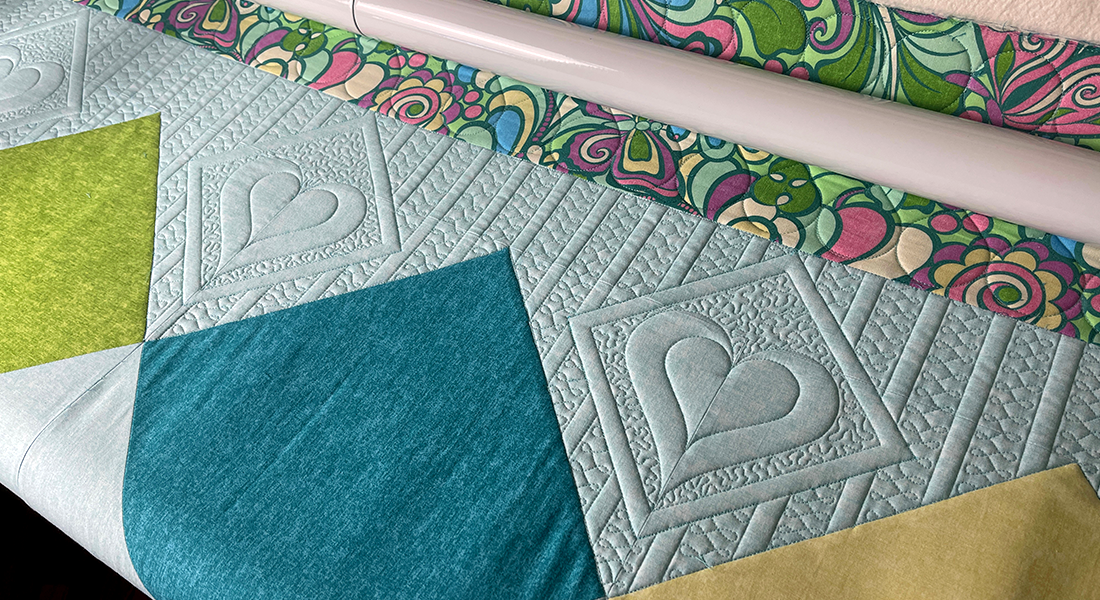
Diamond Heart Appliqué Block
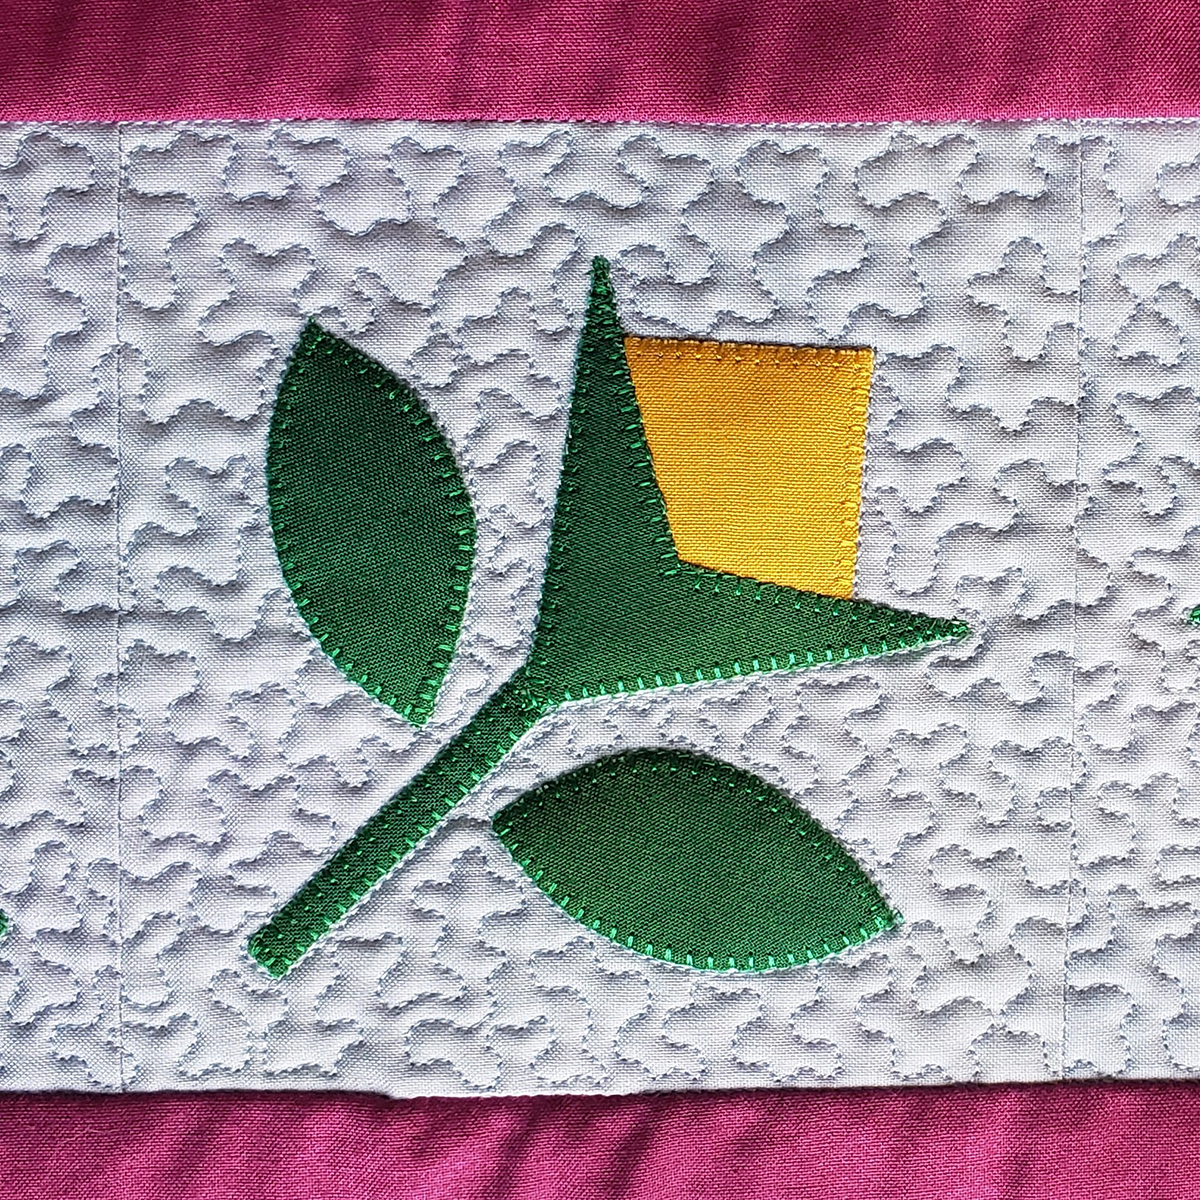
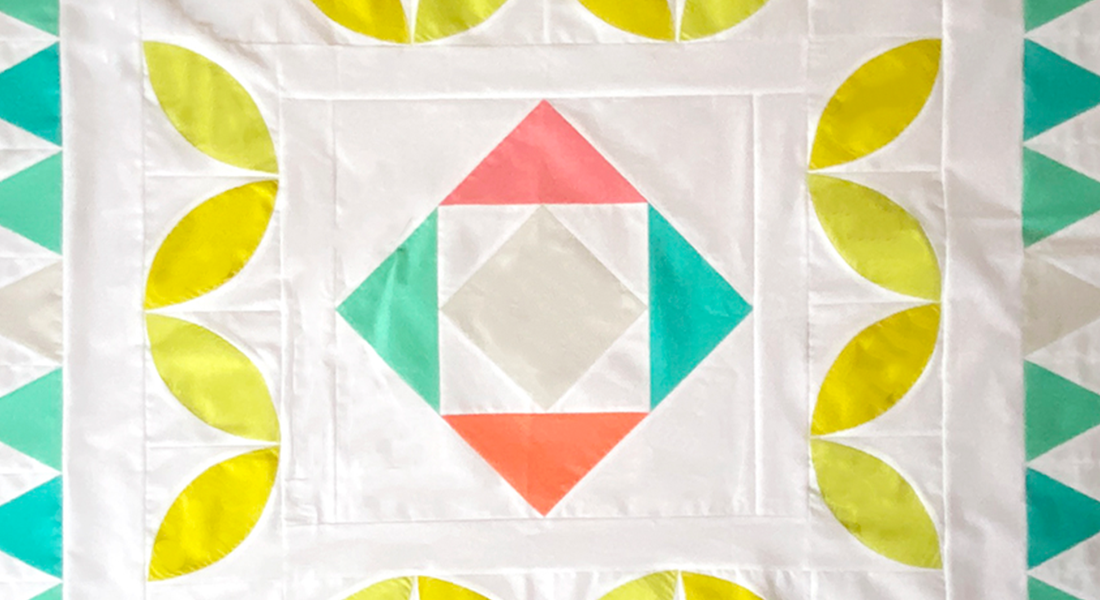
Floral Appliqué Block

Materials Needed
- BERNINA 790 PRO
- BERNINA Open Embroidery Foot #20
- Month 2 Pattern, Template Shapes & Cutting Template Download
- Cardboard or Template Plastic (Dritz Clear Template Plastic)
- 18” wide fusible web with paper release (Steam-A-Seam 2)
- Piecing thread – Mettler Silk Finish Cotton 1081
- Appliqué thread – Isacord (3 colors to match Fabrics D, E and F) 4032, 5515, 0608
Many BERNINA dealers have everything you need to make the quilt; the fabric, the supplies as well as the machines available for you to purchase. If you don’t already shop there, here is a link to the dealer locator to find the closest one to you.
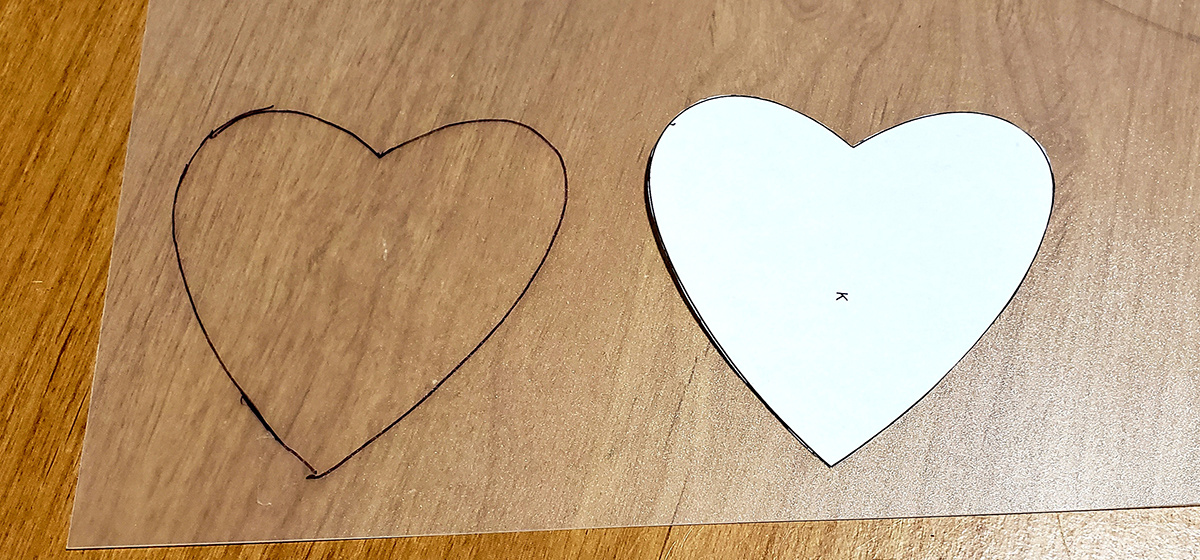
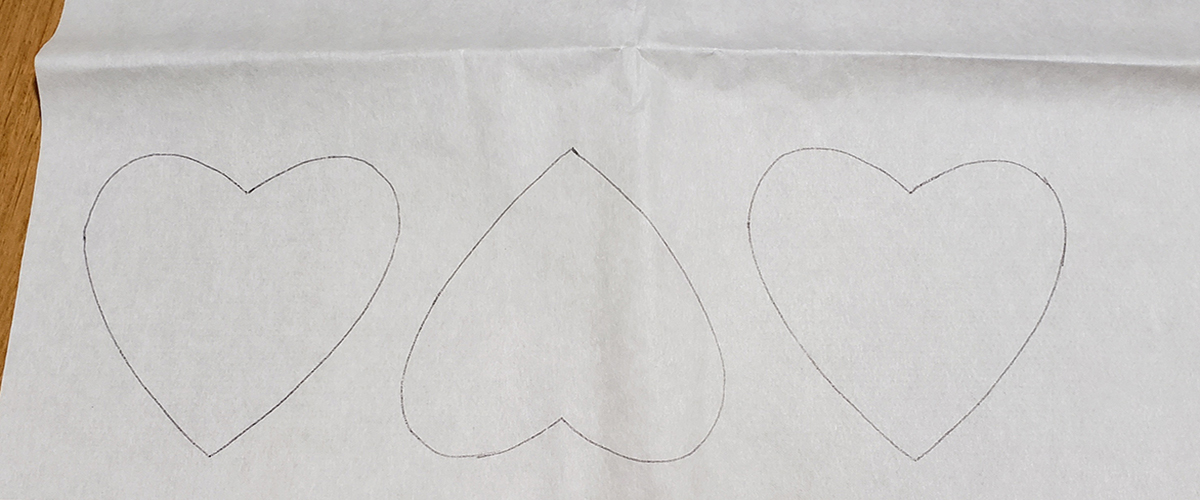
Step 1: Preparing the Templates
From the pattern, print on single side of paper with print settings at 100%. Using utility scissors, cut out the template shapes on the solid line.
With the template plastic, draw around the shape using a permanent marker. Cut out the shape on the inside of the drawn line.
Note: Be mindful of your drawing and cutting. If you aren’t precise with the lines and cutting, you can easily end up with shapes that are too large and don’t fit as planned within the space.
Step 2: Drawing the Shape on the Fusible Web
Fusible web with paper release has a paper layer on one or both sides of the fusible net, depending on the brand.
You will trace the template onto the paper side of the fusible web referring to the number needed as indicated in the pattern. When tracing the templates, the same concept applies – nice neat line that you can easily cut later.
Leave ½” spacing between shapes. This will allow you to easily cut out the shapes.
Next, you will apply the fusible to the wrong side of the fabric.
Referring to the pattern, select the fabric, place on ironing surface, right side down. Press to remove any wrinkles and to warm the fabric.
Position with fusible down on the wrong side, refer to manufacturer’s instructions and fuse in place.
Allow to cool and cut out each shape on the inside edge of the drawn line and set aside.
Step 3: Arranging and Fusing Shapes on the Background Fabric
The background pieces have been cut oversized, so you will be arranging from the center, fusing, stitching and then trimming to final size.
Referring to the block diagram in the pattern, select the applique shapes as well as the background needed for the block.
Remove the paper and position the shapes on the wrong side of the background fabric. Once satisfied with the arrangement, fuse in place. Remember the background will be trimmed to the finished size after machine stitching, so be sure that all shapes are fused at least ½” inside of the finished size.

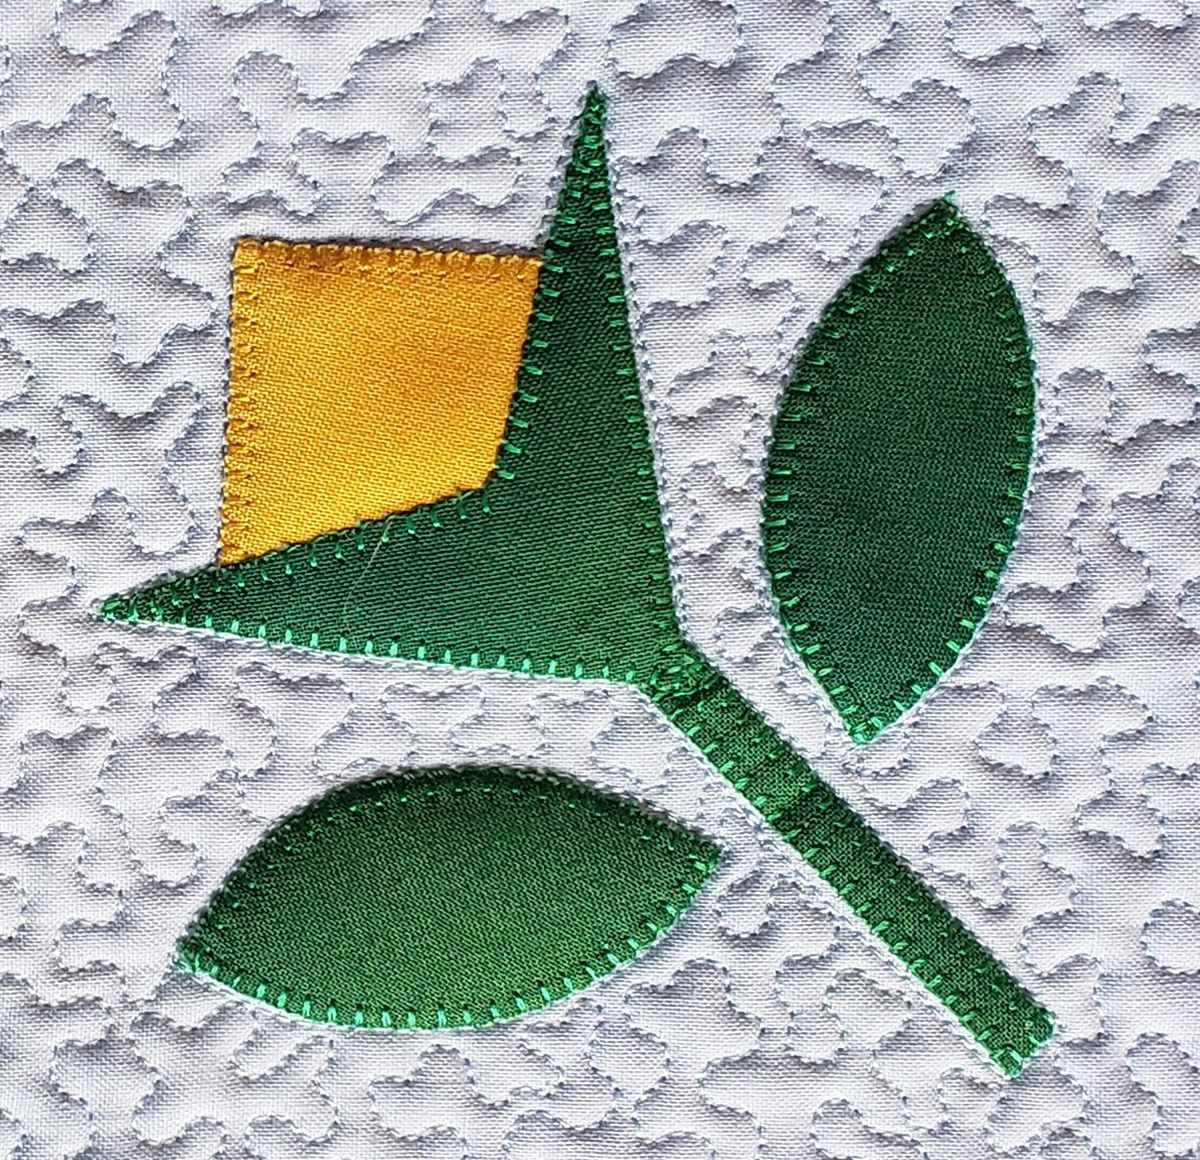
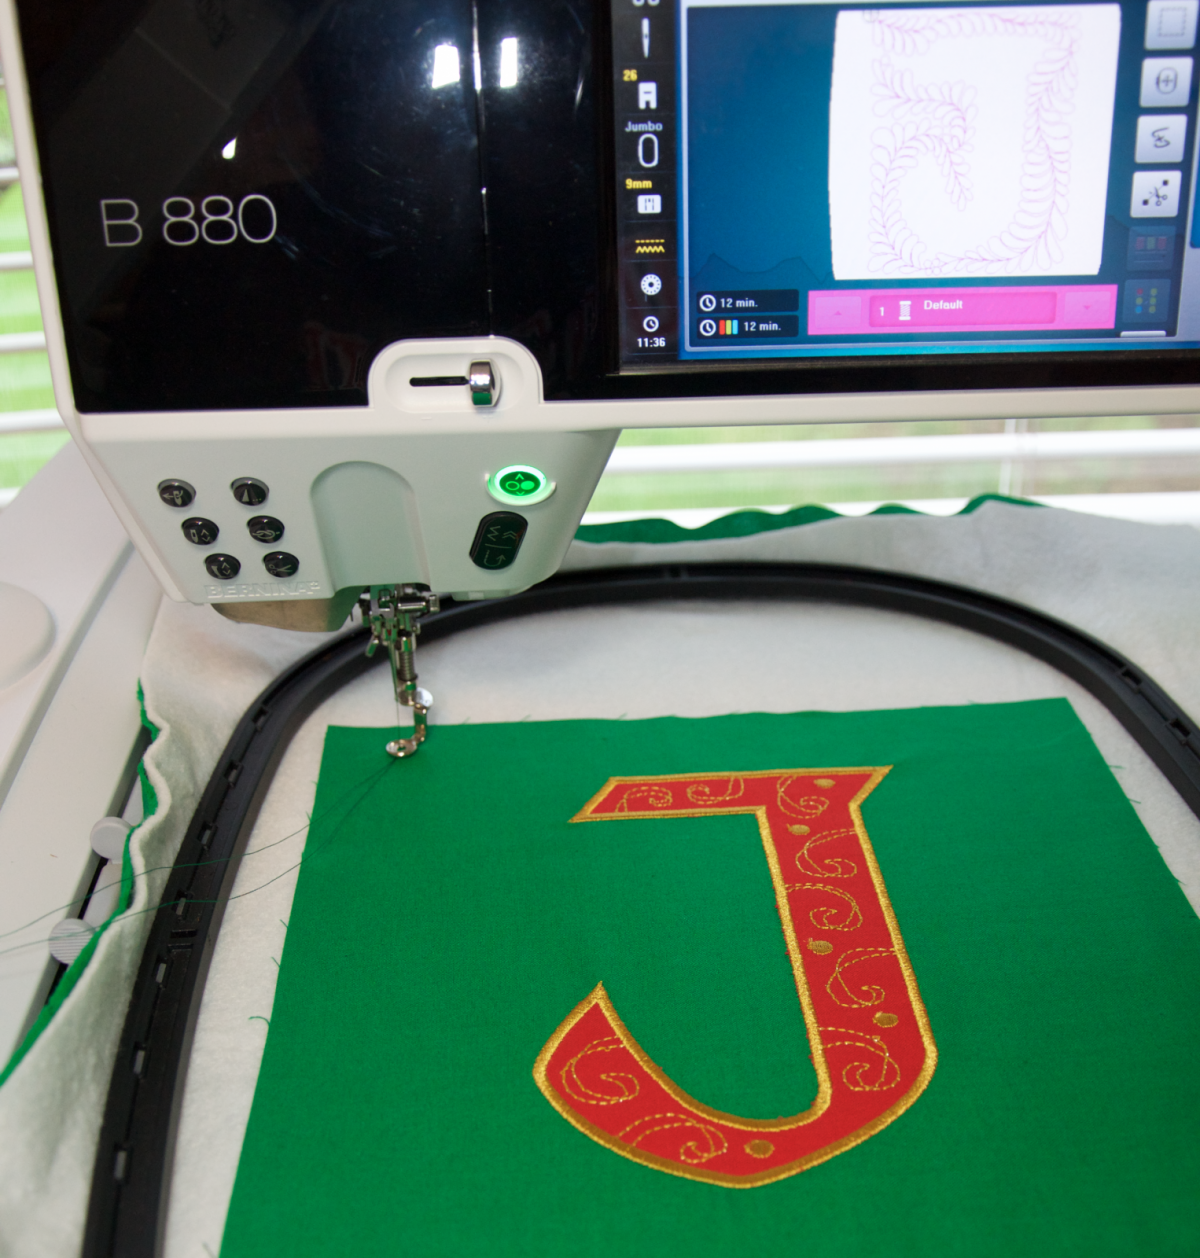
Step 4: Securing the Edges With a Machine Blanket Stitch
There are several options for securing the edges of the applique templates, a reduced straight stitch, a satin stitch or a machine blanket stitch. My favorite is the machine blanket stitch. On the BERNINA 7-series machines, the machine blanket stitch options are located in the 1300 folder of quilting designs. You can make adjustments to both the width and the height of the stitch as desired. I opted for a 2.5 mm x 2.5 mm stitch.
I chose to match the applique thread to each fabric for a subtle look but you could easily use a contrasting or variegated thread for a bolder looker.
If you need help with learning raw edge fusible applique, reach out to your local BERNINA dealer and ask about quilting classes that they offer. If you don’t already shop there, here is a link to the dealer locator to find the closest one to you.
Step 5: Trimming to Size
The last step is to trim the stitched block to the correct size. Snip all the threads and give it a final pressing as the machine blanket stitch can pucker the background fabric a bit. Using a cutting grid and rotary cutter, reference the size in the pattern for the specific block and center your cutting grid to trim the excess fabric from the sides. And now you have a perfectly sized and perfectly center block.
That’s it for today! This is a quilt along that you will definitely want to participate in and be sure to share it with all your quilting friends and quilt guilds. Quilting is always better with a friend.
Next month, you will start working on the chain blocks using traditional patchwork techniques. See you then!
Used Products

What you might also like


One comment on “Jump for Joy Quilt Along, Part Two: Raw Edge Fusible Appliqué”
Leave a Reply
You must be logged in to post a comment.

I’m not sure my templates are correct as there was no 1” box. The large diamond measures 10 7/8 from point to point. The example shows this diamond vertical on the page yet when I print it, it is set at an angle to fit the paper. I’ve used both my laptop and my iPad with the same results. I hope someone can answer my question. Thanks