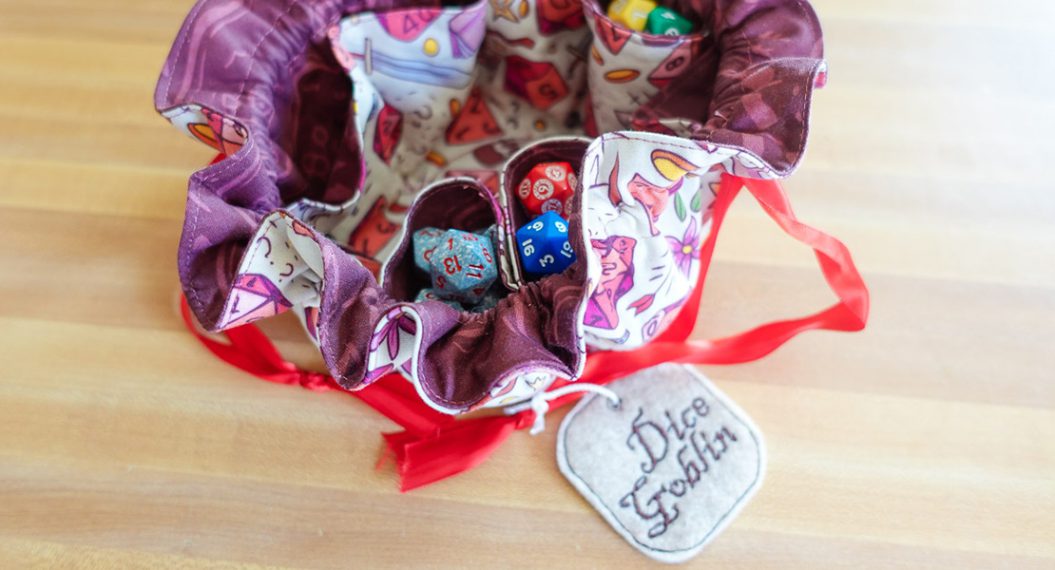
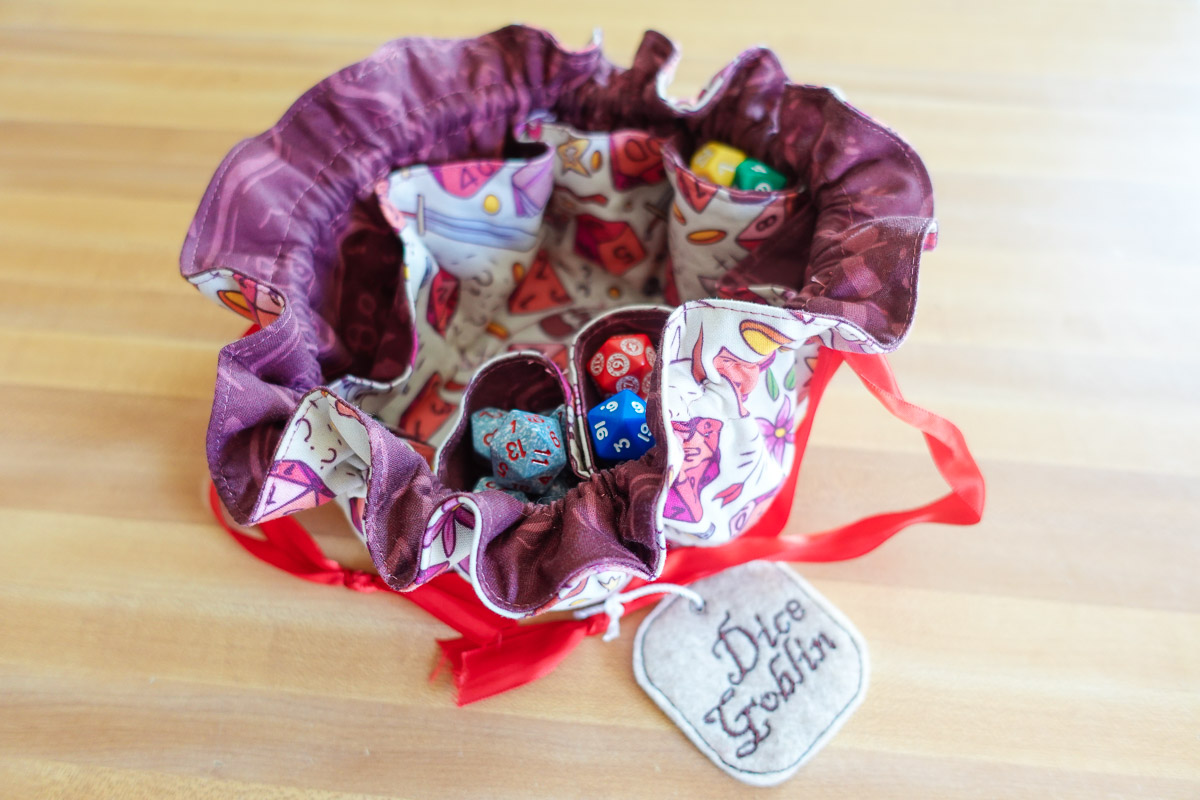
Sew Your Own D&D Dice Bag
There is nothing more fun than when two of my hobbies collide. Like when I get to use my knitting stash for free-motion couching or when I get to sew something cute and useful for another hobby I have. I especially love it when my nerdy world and sewing world blend together. Let’s blend yours, too! You can sew your own Dungeons & Dragons dice bag, which is sure to be a hit with your adventuring party!
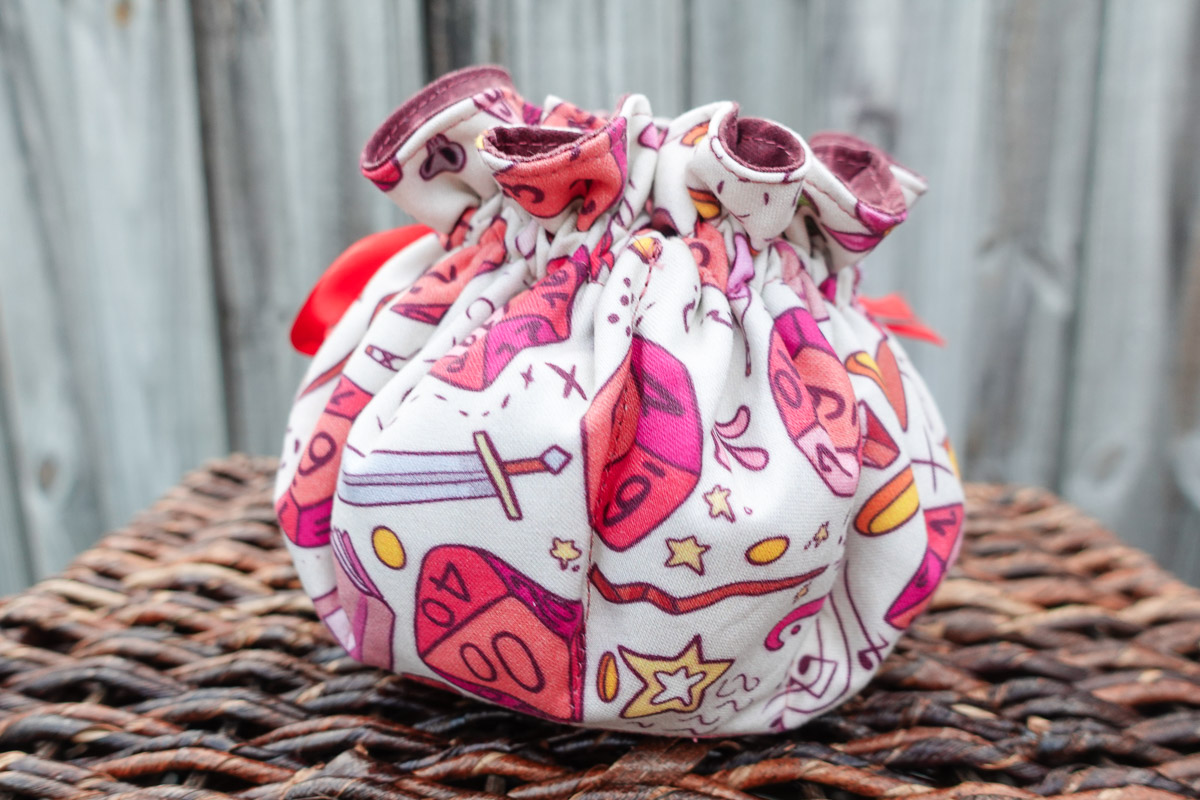
I also added a little Dice Goblin tag so you can let everyone know about your unhealthy obsession with collecting new dice. In a future blog post, I’ll show you how to make this tag with a free embroidery design as well.
Not into Dungeons and Dragons? That’s ok! This dice bag pattern is great for holding jewelry, makeup and more. Plus, it’s so fun to make, you’ll love how fast this project comes together.
Materials to Sew Your Own D&D Dice Bag
- bernette 79
- Zigzag Foot (DA)
- Zipper Foot (JB)
- Buttonhole Foot with Slide (RJ)
- Fabric: Suggested fabrics: medium-weight wovens such as quilting cotton, twill, canvas, velvet, or corduroy. It is recommended that beginners avoid stretch materials.
- Bag Fabric: 1/2 yard
- Lining Fabric: 1/2 yard
- (Optional) OESD Fusible Woven Interfacing: 1/2 yard (Skip if using heavier-weight wovens, fabrics that cannot be ironed, or specialty fabrics such as velvet or corduroy)
- OESD Fiber Form: 6” x 6”
- 80/12 Microtex needle
- Sewing thread
- (2) cords or ribbons, 45” long
- Marking pen
- Fabric scissors
- Wonder Clips or sewing pins
- Iron
- OESD Expert Point and Press
- Safety Pin or Bodkin
- Glue stick or basting spray
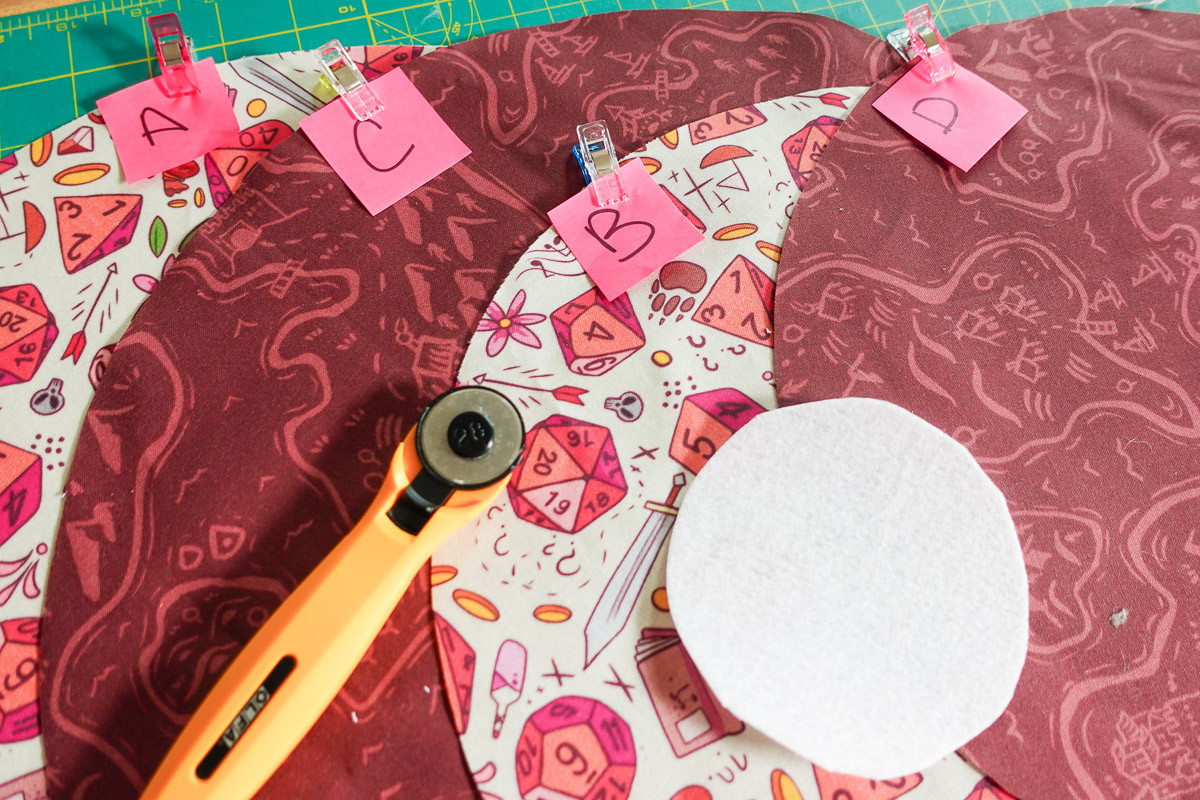
Print and assemble the three circle templates (included): Large Circle Template, Medium Circle Template and Small Circle Template

Step 1: Prepare the Machine and Fabric
Attach Buttonhole Foot with Slide (RJ) and Insert 80/12 Microtex needle. Thread the needle with sewing thread and wind bobbin with thread to match.
Press fabric to remove all wrinkles and creases.
Cut pattern pieces using included templates:
- Bag Fabric: One Large Circle (A) and one Medium Circle (B)
- Lining Fabric: One Large Circle (C) and one Medium Circle (D)
- Fusible Interfacing (if applicable): One Large Circle
- OESD Fiber Form: One Small Circle Template
If using fusible interfacing, fuse it to the wrong side of Piece A, per manufacturer instructions.
Tip: These instructions can get a little confusing with all the different circle pattern pieces. To make things easier, mark each individual pattern piece with their corresponding letters (A, B, C and D). You can use sticky notes or pin pieces of paper to each piece with the letter that matches the pattern piece.
Fold the Medium Circle Template along the dotted lines and use that to mark each segment on piece B. This will make eight equal pockets on the pattern piece.
Mark the buttonhole placements on the right side of piece A.
Use the Large and Medium Circle templates to mark the center 2” cut line on the wrong side of both lining fabric pieces (C and D).
Step 2: Sewing the Dice Bag
Sew the two 1/2” buttonholes on the right side of the bag fabric piece A. Cut out the buttonhole centers, being careful not to rip the stitching of the buttonhole.
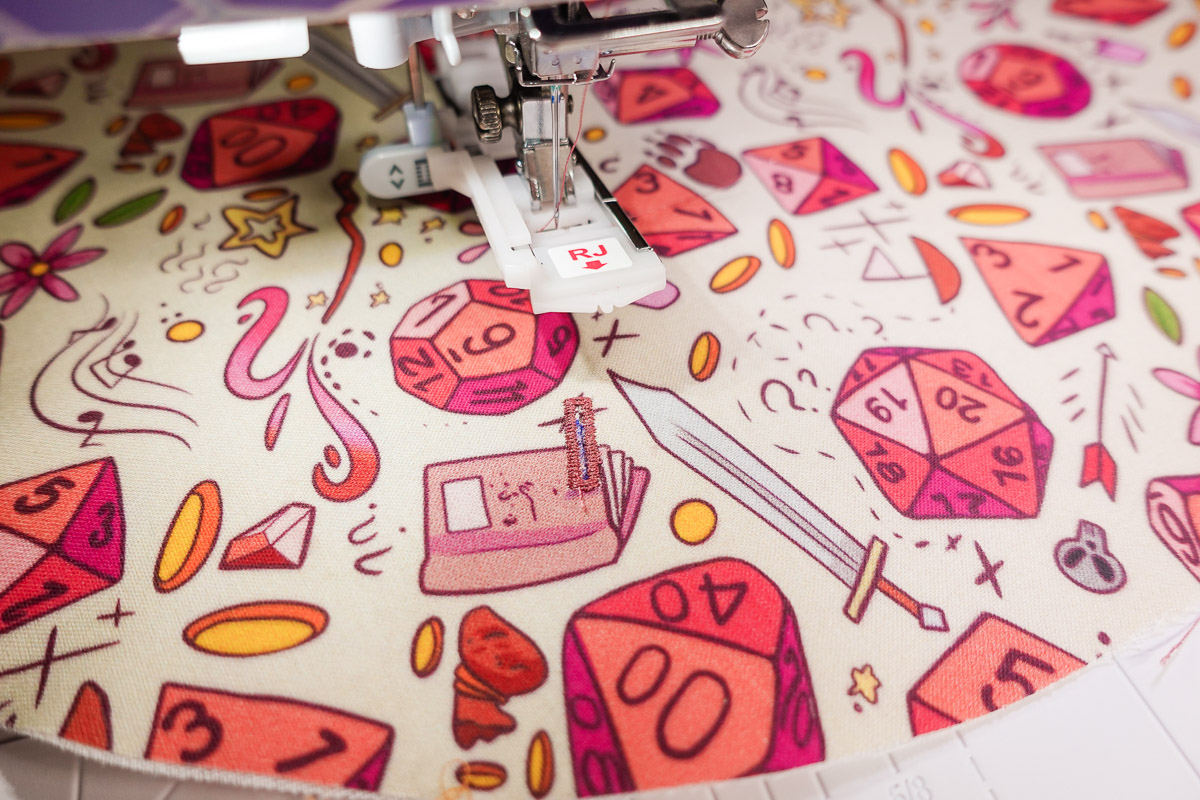
Remove Buttonhole Foot with Slide (RJ) and attach Zigzag Foot (DA).
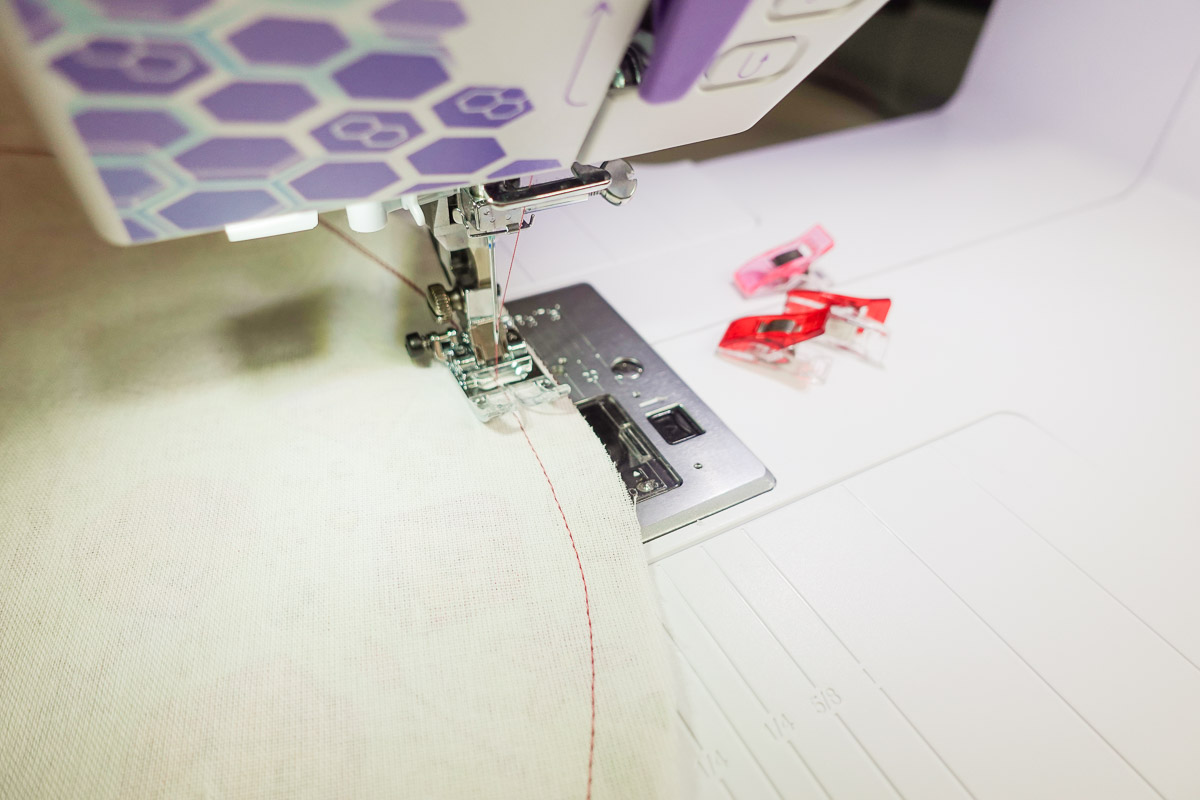
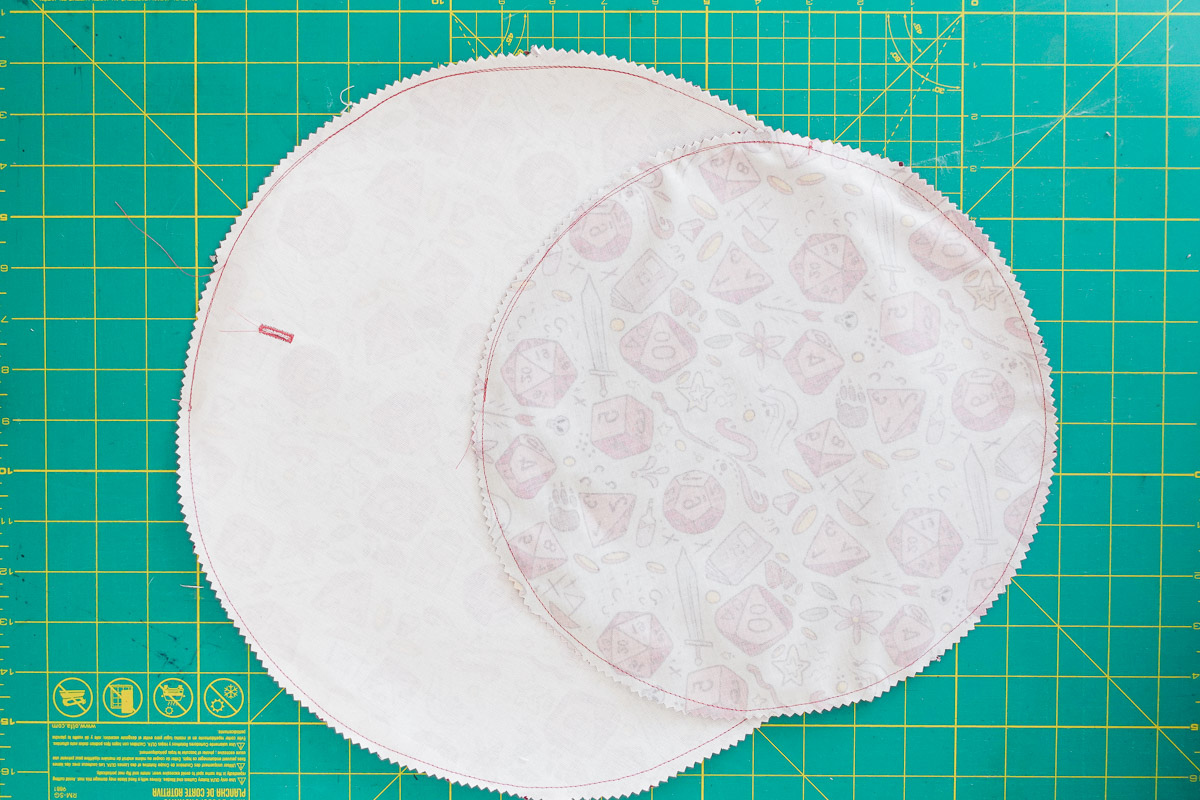
Place pieces A and C right sides together and sew all the way around with a 1/2” seam allowance without leaving a gap in the stitching. This is now the Large Circle. Repeat with pieces B and D to create the Medium Circle.
Cut notches around both circles or cut the excess seam allowance with pinking shears, being very careful not to cut the stitching. This will help the curves look smoother once the circles are turned in the next step.
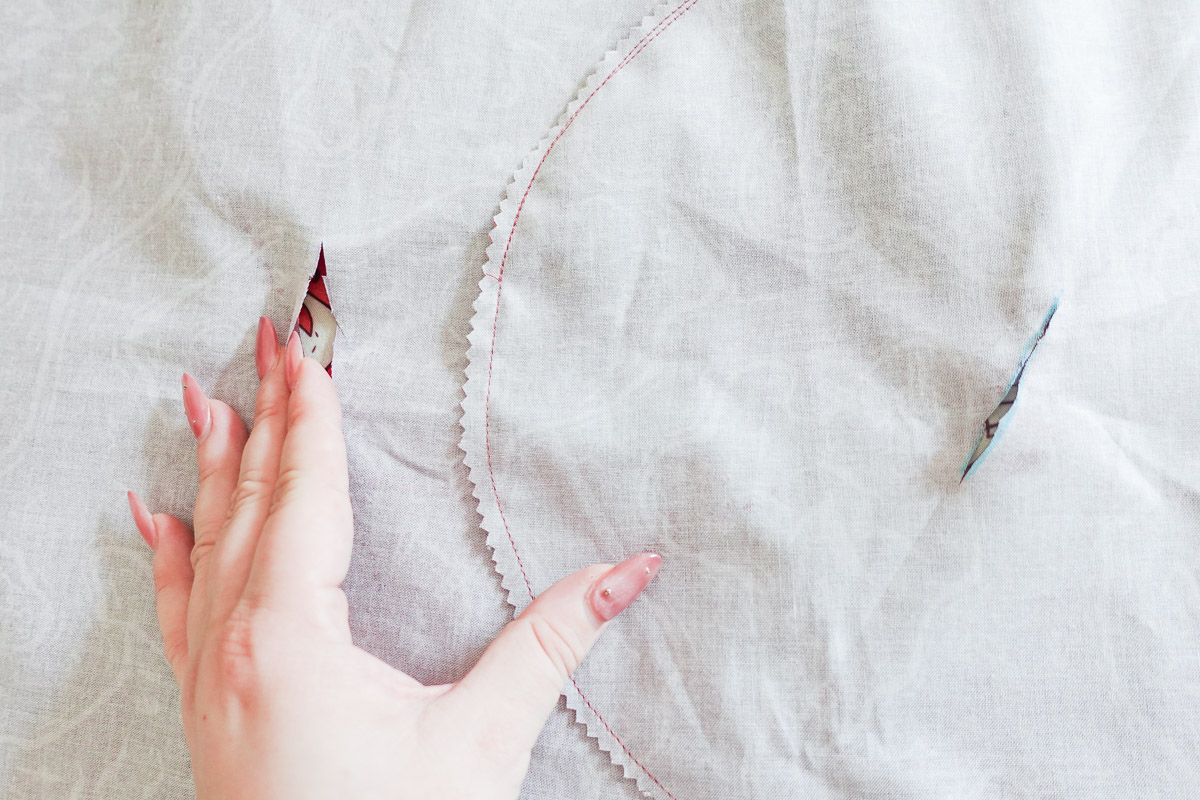
Next, let’s cut the 2” line on the Lining fabrics (C and D). Pull apart the pieces of fabric of the Large Circle to ensure you have only the lining fabric (C side) and cut the line carefully. DO NOT CUT THE BAG FABRIC PIECE. If the bag fabric piece gets snipped, then you will, unfortunately, have to start over or mend the bag fabric. Repeat for the lining (D side) of the Medium Circle.
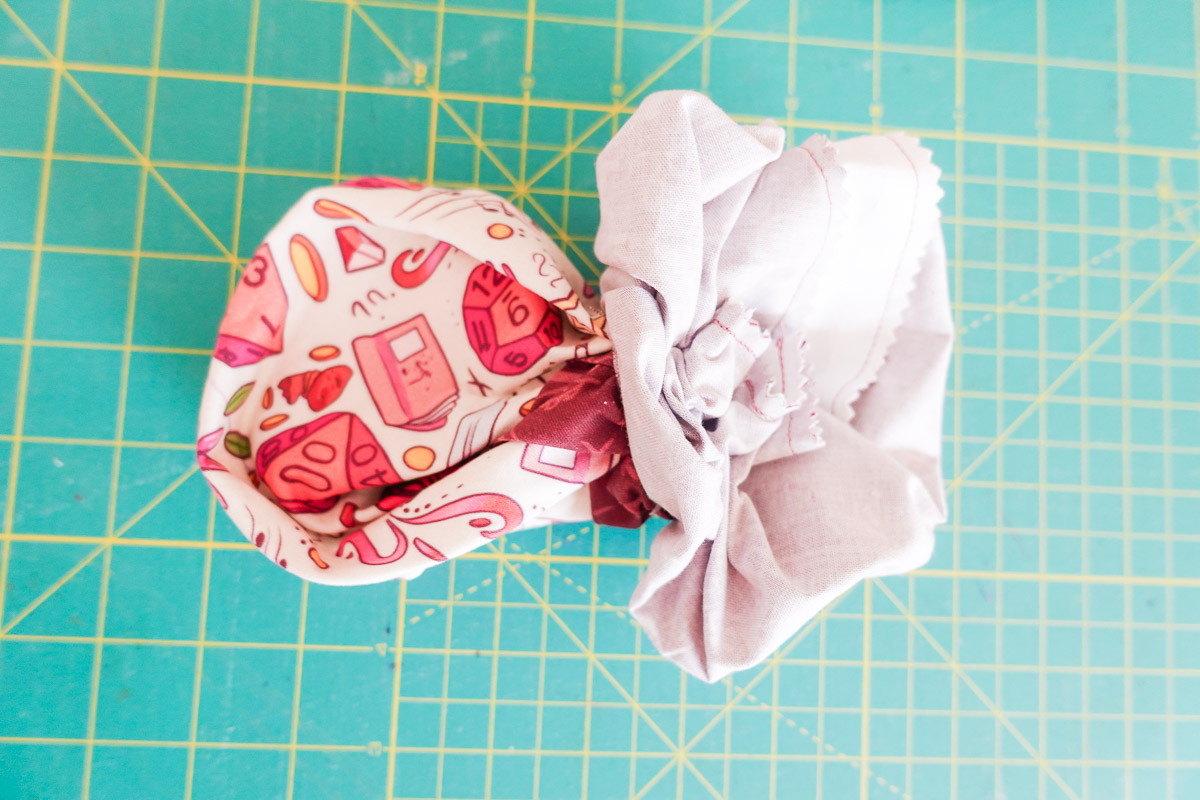
Turn the circles through the holes in the lining; use a chopstick or point turning tool to help work the seams out. Take your time to work the curves and press thoroughly, ensuring this is done well.
Optional: After ironing and working of the seams, iron a 2 1/2” piece of iron-on adhesive tape over the cut line for turning on both circles to prevent the fabric from unraveling. You can also use a 1” x 2 1/2” scrap of fusible interfacing if you don’t have iron-on adhesive tape.
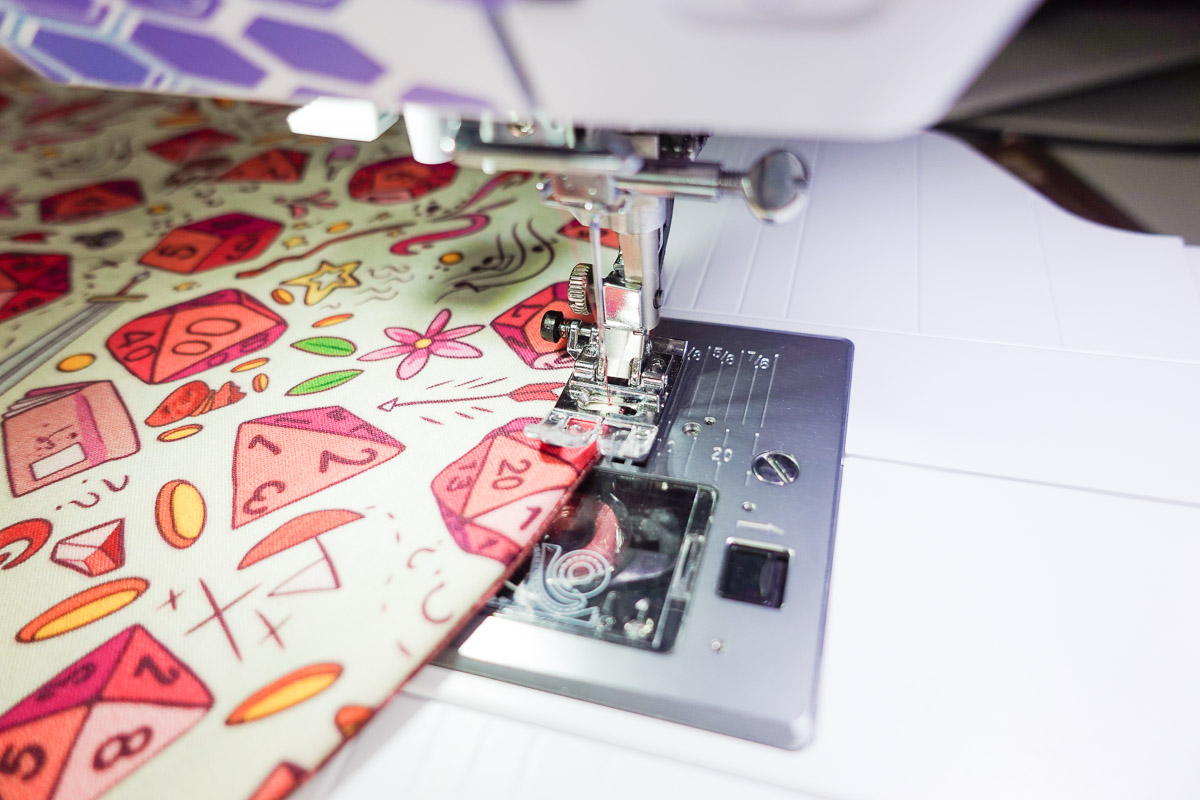
Topstitch both circles 1/8” from the edge.
On the lining fabric (C) side of the Large Circle, mark the center length and width. Mark the center of the OESD Fiber Form Circle the same way.
With the lining fabric facing up, center the Fiber Form onto the Large Circle. Use the glue stick or basting spray on the back of the Fiber Form piece to baste it in place.
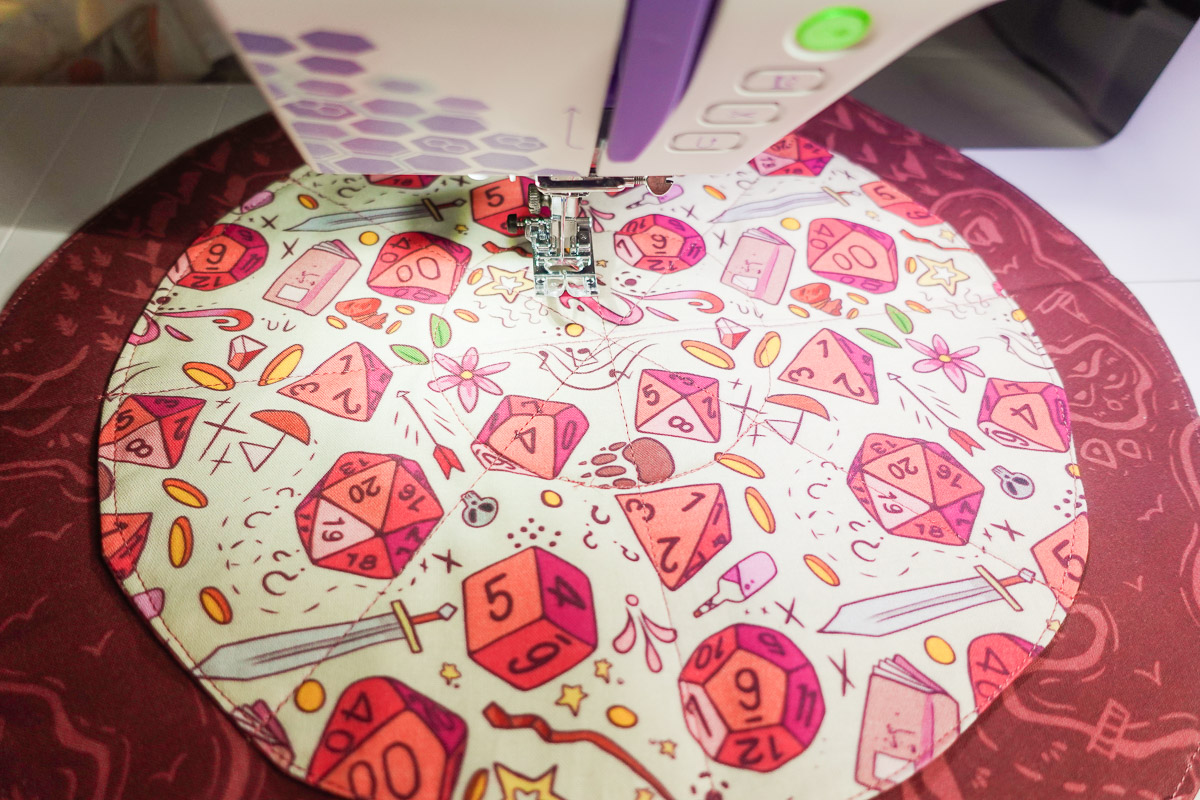
Center the Medium circle, bag fabric (B) facing up, on top of the Fiber Form and Large Circle. Change foot to Zipper Foot (JB), attach it on the left side of the foot, then move the needle to the left-most position. Stitch around the Small Circle to secure it in place. It’s okay if the needle goes onto the fiber form occasionally, but ideally, you want the stitching to remain just off the fiber form to hold it in place.
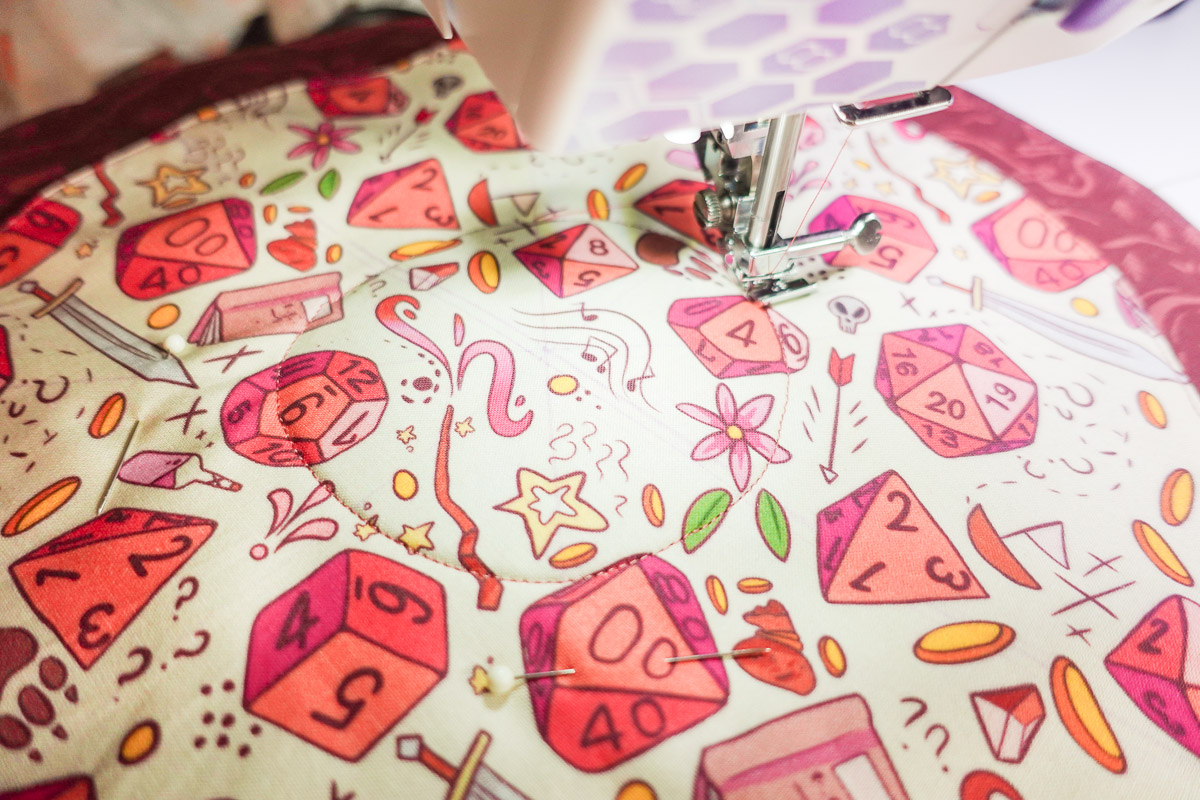
Attach the Zigzag Foot (DA) and reset to the center needle position. Sew along the pocket line marks on the Medium Circle. Be sure to backstitch at the beginning and end of each line and start and stop 2-3 stitches off the pocket piece—this will ensure the pockets stay secure, with even the heaviest dice being tossed in them.
Step 2: Add Ribbon
Next, we will create a channel for the ribbon to cinch the bag.
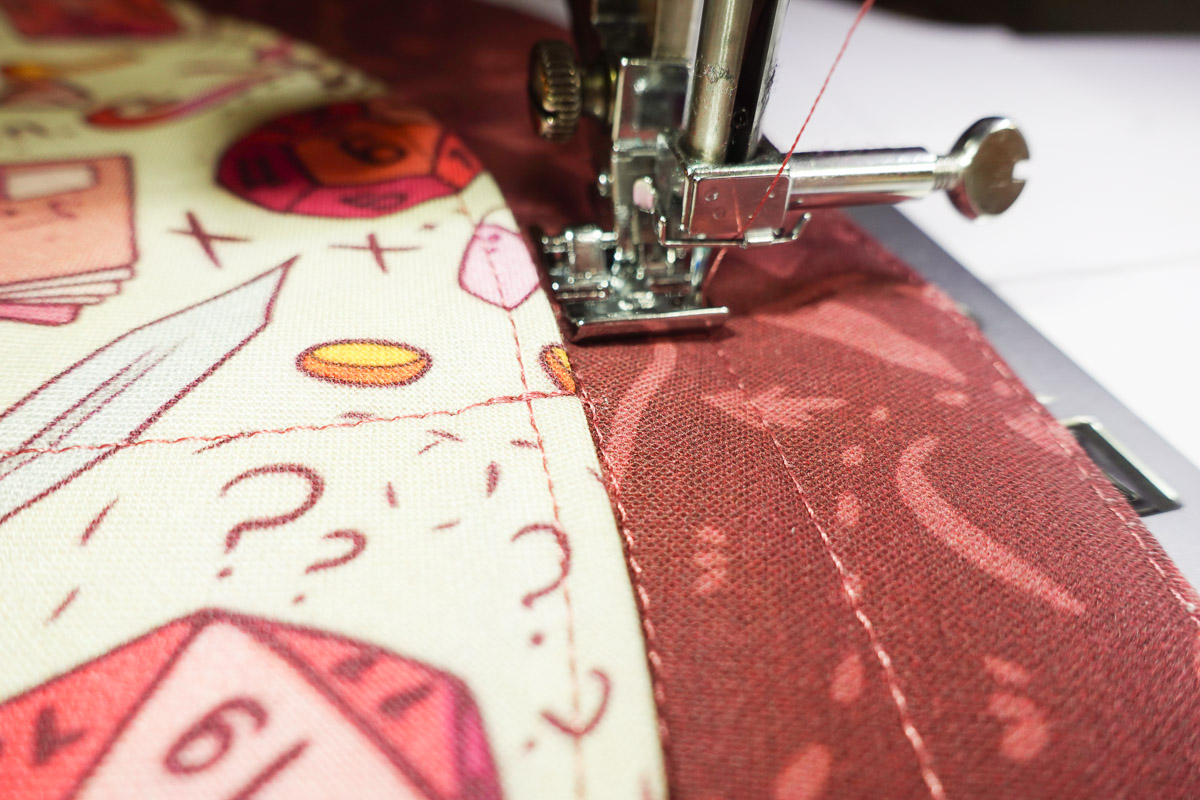
Attach the Zipper Foot (JB) onto the left side of the foot, then move the needle to the left-most position. Stitch just around the outside edge of the Medium Circle, 1 1/2″ in from the edge of the Large Circle. Stitching around the medium circle should enable you to just skim the inner edge of the buttonholes.
Be very careful that you don’t stitch over the buttonhole openings or close any of the eight pockets. I marked mine with pins so I could double-check them as I got close. One was perfect, and the other was way off—that’s okay! I stopped and started my stitching line on either side of the buttonhole and kept moving. So, if yours is off, too, don’t sweat it! You’ll still get a gorgeous bag.
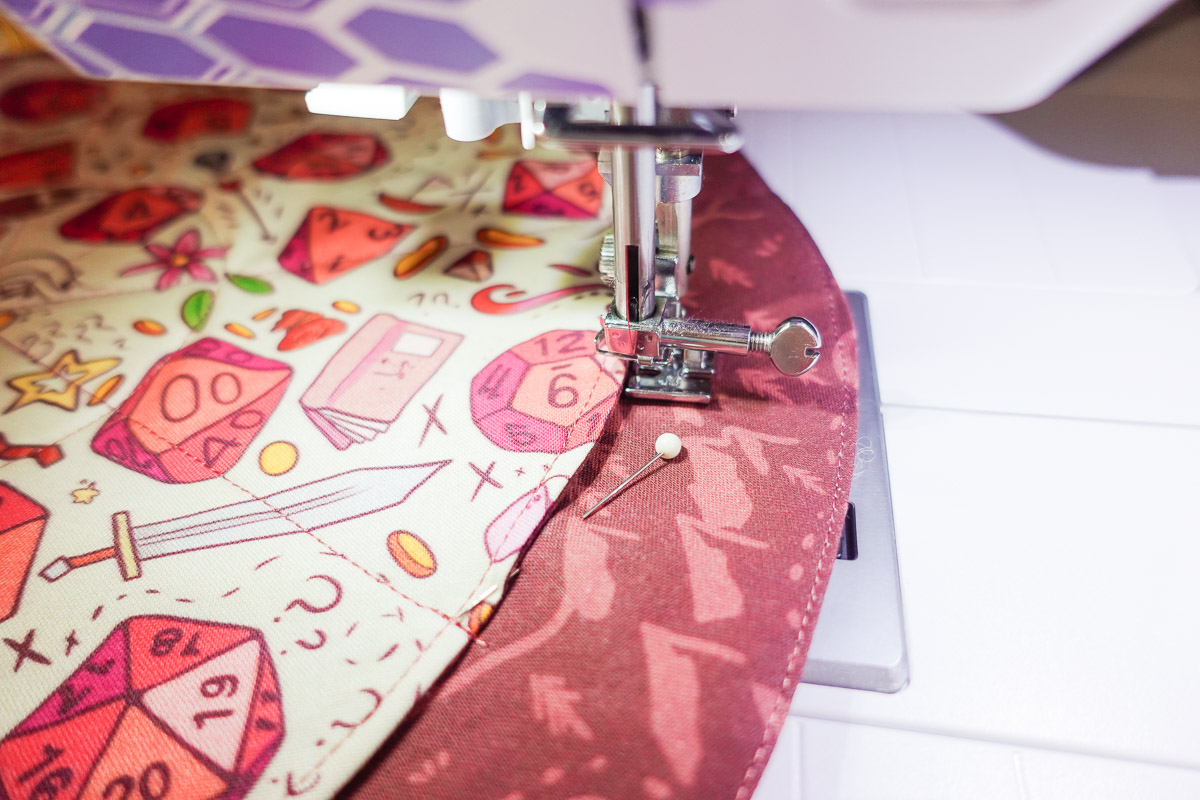
Attach the Zipper Foot (JB) onto the right side of the foot and set the needle to the far-right position. Stitch around the Medium Circle again, just skimming the outer edge of the buttonholes (ensure you don’t stitch over the buttonhole openings). This creates the ½” channel for the ribbon or cording.
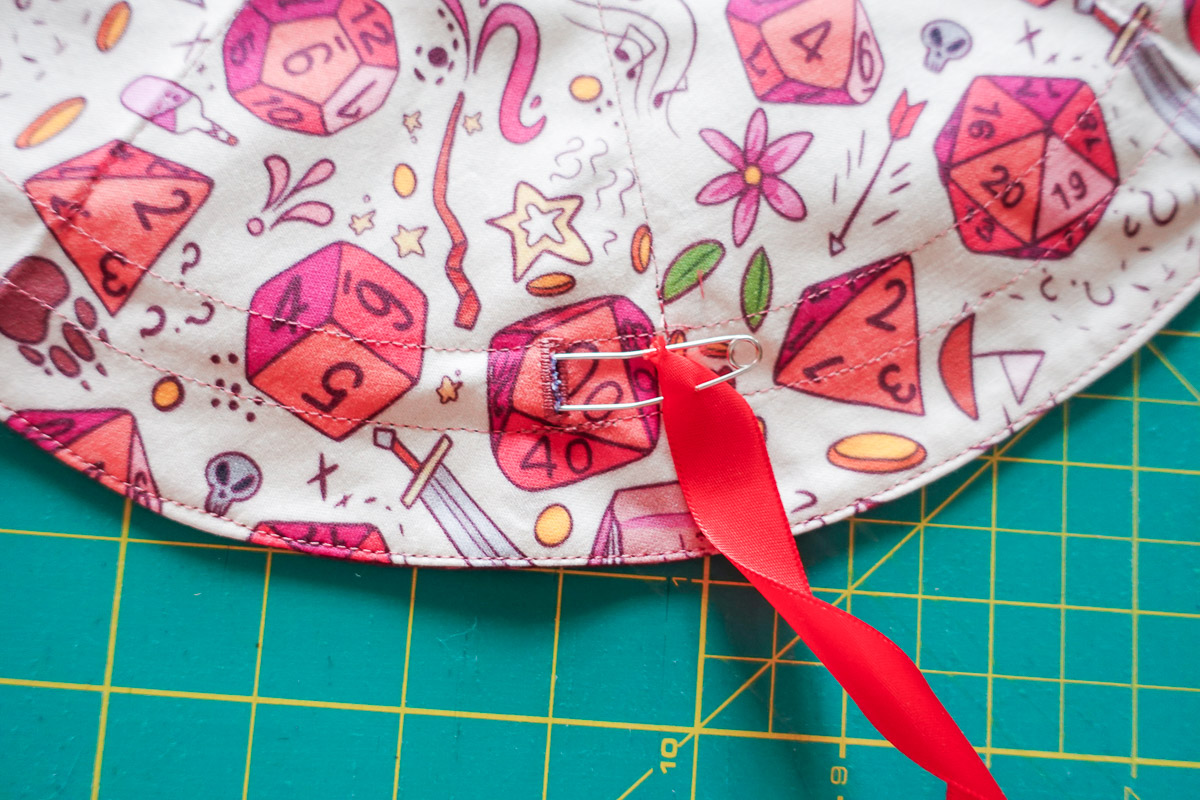
Attach the bodkin or safety pin to one end of one cording or ribbon piece. Feed it through the buttonhole, skip the buttonhole opposite, and come back out the same buttonhole where it was fed through.
Repeat for the second buttonhole with the second ribbon or cording piece.
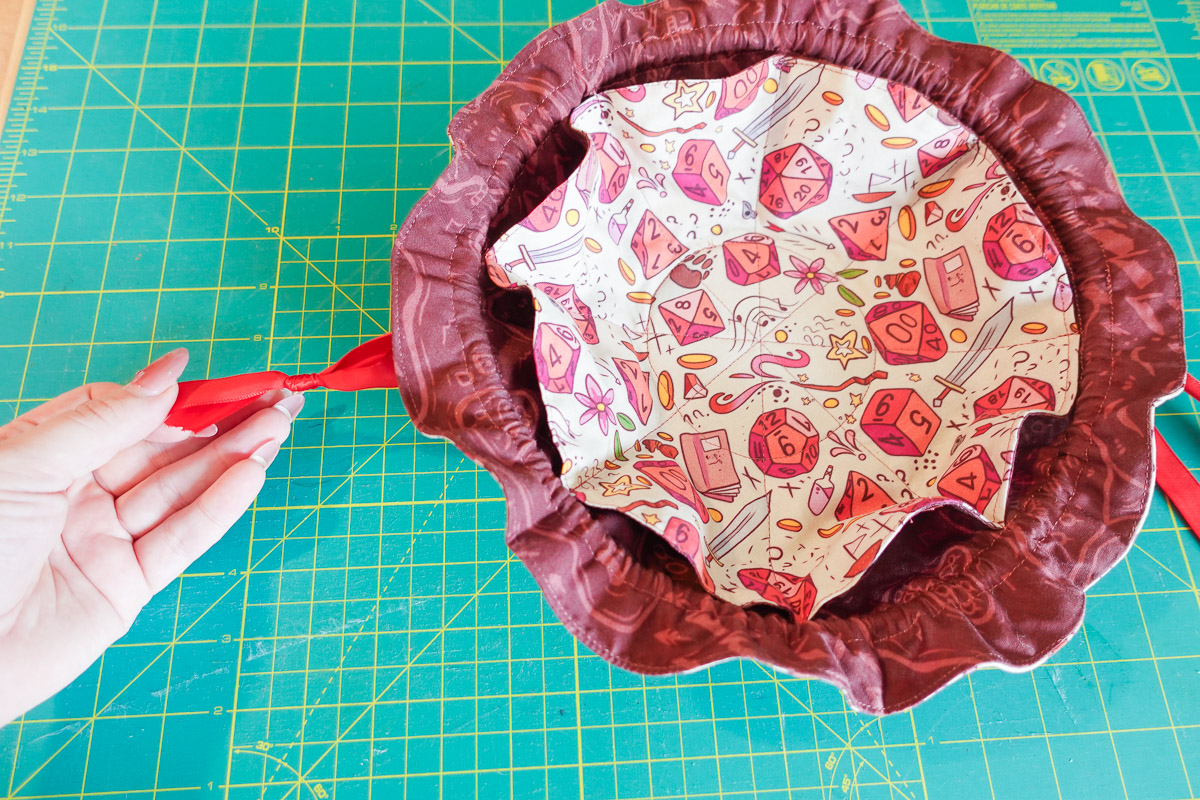
Take your time to adjust the ribbons so they are even. This could take a while to adjust if you have ribbon that is a little too thick for the channel, like I do here. I finally got the side even and laid out so the dice bag was nearly flat before tying off the ribbon ends and cutting any excess. This will ensure you have enough ribbon to fully open the dice bag to use as a dice tray or just to fully access the whole bag.
Cut ribbon to desired length. Tie the ribbon ends together or add a cord lock.
Finished!
Now that you’ve made one dice bag I think it’s time to make one for every member of your adventuring party! How great would a green velvet dice bag be for the Druid in your life? Or maybe get some cute musical fabric for your group’s Bard?
This pattern is also easily resized—just make the circles bigger or smaller in proportion with one another (example: size every circle up 2 inches) and sew it up the exact same way I do here!

Looking to make more cool bags with your bernette? Check out this post to learn how to make a Vinyl Zip Pouch on your bernette or this super cute Cat Zipper Pouch. Can you imagine making them to look like the cats in your life? How fun.
Want to learn more about this bernette 79? This post, Why I Love My bernette 79 by Ambassador, Candice Odeen, is chock full of great information that will help you get to know the machine and how to use it.
Happy sewing!