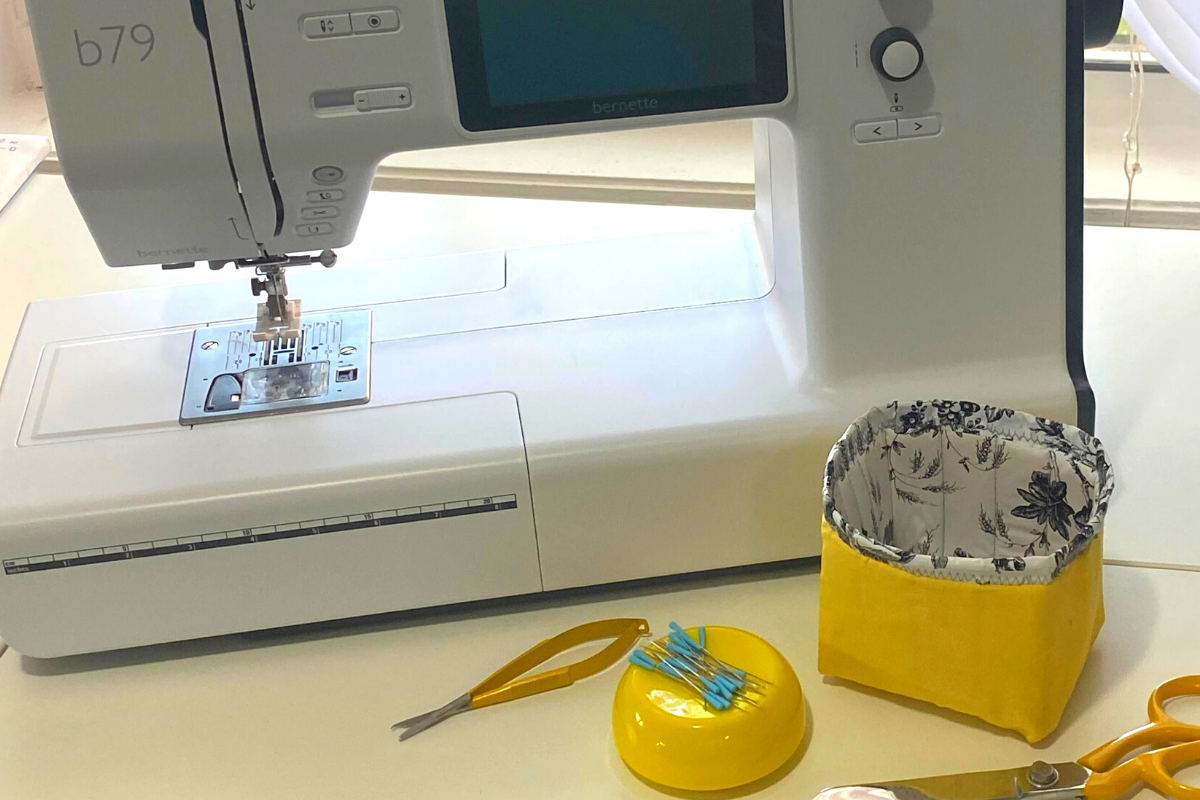
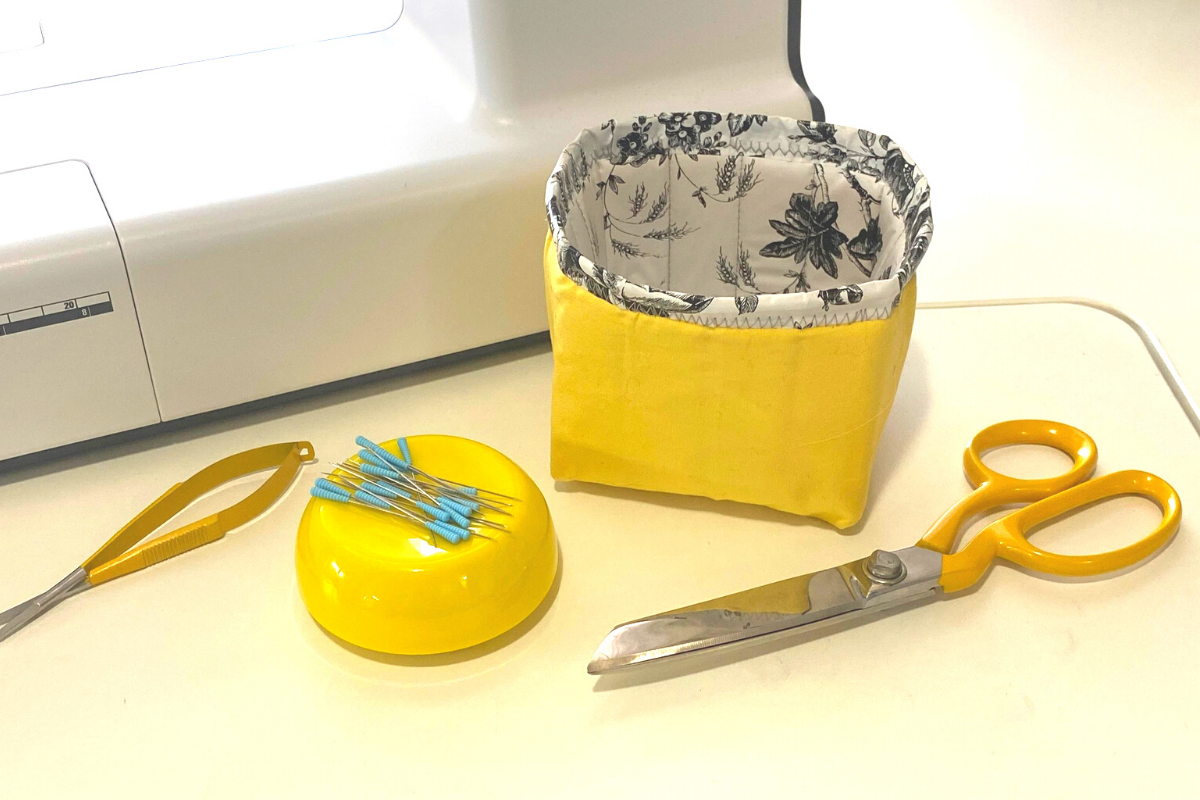
Thread Catcher with Contact Paper Lining
Thread is just part of the sewing journey but we don’t want to take it when we leave the house! Whether you are a seasoned sewist or brand new to this wonderful hobby, you surely can relate to the opening sentence. We snip, clip, toss, and do our best to get rid of the thread tails we no longer want but sometimes you just got to toss them into a place that is going to be easy to clean up. In today’s blog, I’m using my bernette 79 to stitch a simple but highly useful thread catcher. The lining is made of contact paper I got at the Dollar Store. It has a peel-away paper with a low adhesive back and it’s ideal for a thread catcher lining since it’s smooth and easy to remove the threads from inside, and it’s pretty too!
Hello my Sewing Bees, my name is Sue O’Very owner of Sookie Sews and BERNINA Expert. You can find me on Instagram at @SookieSews, my website SookieSews.com, and on my YouTube Channel SookieSewsTV.com where I have hundreds of sewing projects, machine sewing patterns, embroidery designs and In-the-hoop projects. Ok, let’s get stitching!
Materials and Supplies to Sew a Thread Catcher
Measurements are Width by Height
- (1) 8″x10″ Foam i.e. Soft and Stable from ByAnnie.com
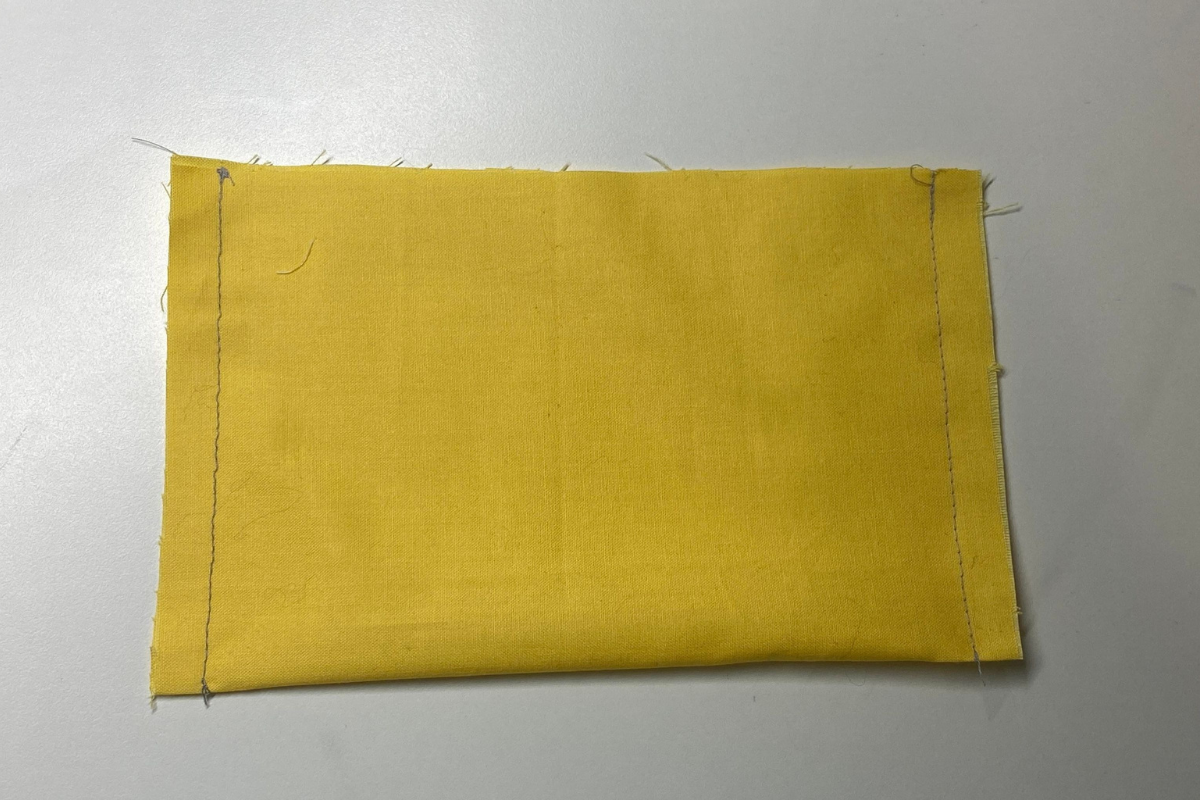
- (1) 8″x10″ Outside Cotton (Yellow)
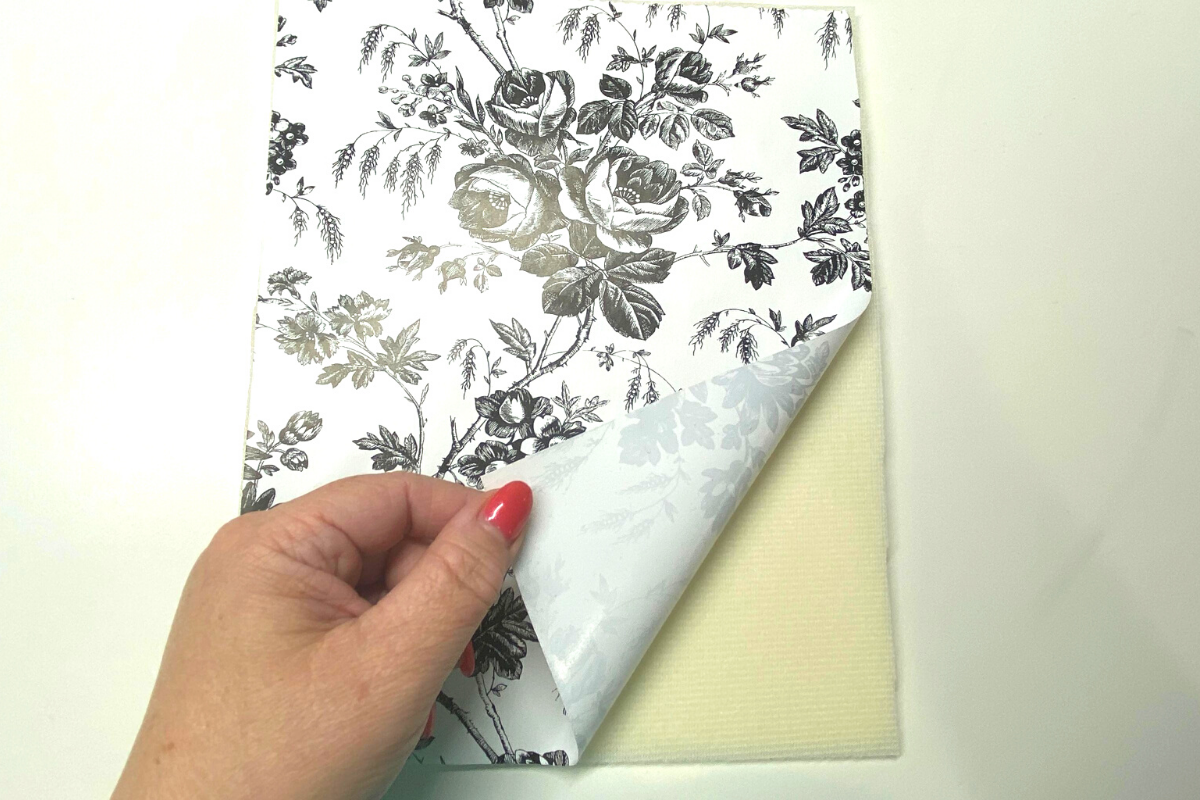
- (1) 8″x10″ Lining – Contact Paper (White with black flowers)
- (1) 1″x18″ Outside binding – Contact Paper – folded in half lengthwise
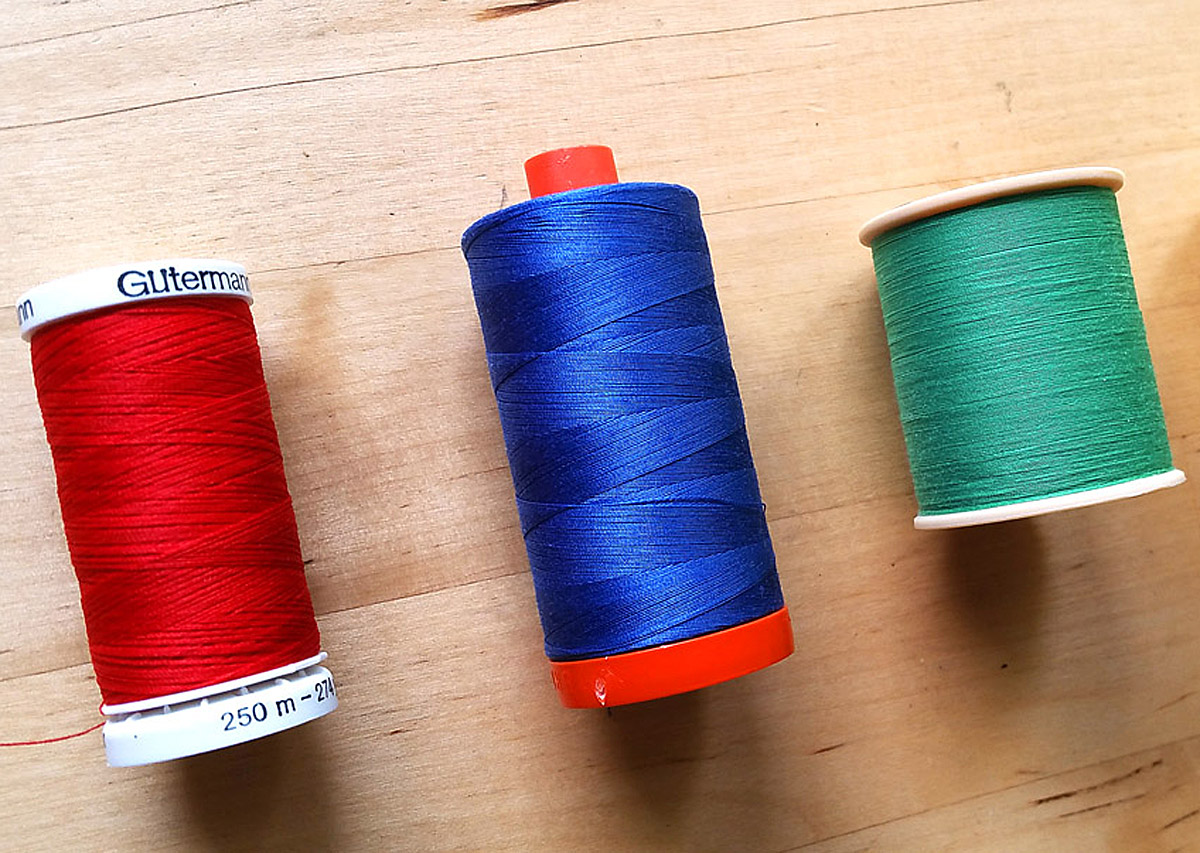
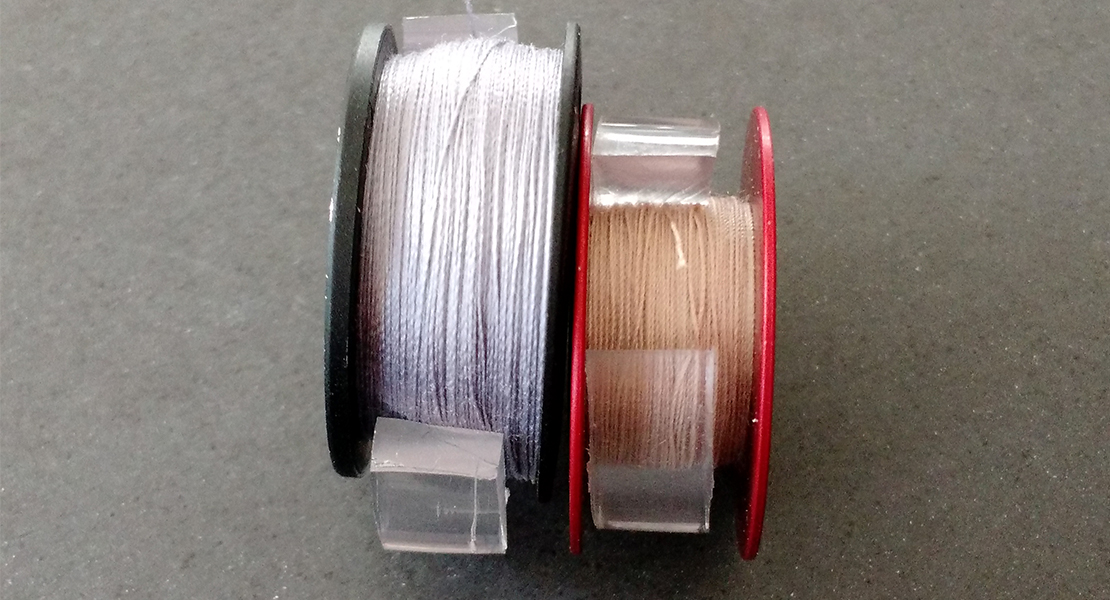
- All purpose sewing thread Mettler Silk Finish with matching bobbin
- Vinyl Needle 70/10
- Fabric shears
- EZ Hook n Snip i.e. Sookie Sews
- Rotary Cutter, mat, ruler
- Magic Pins
- Wonder Clips
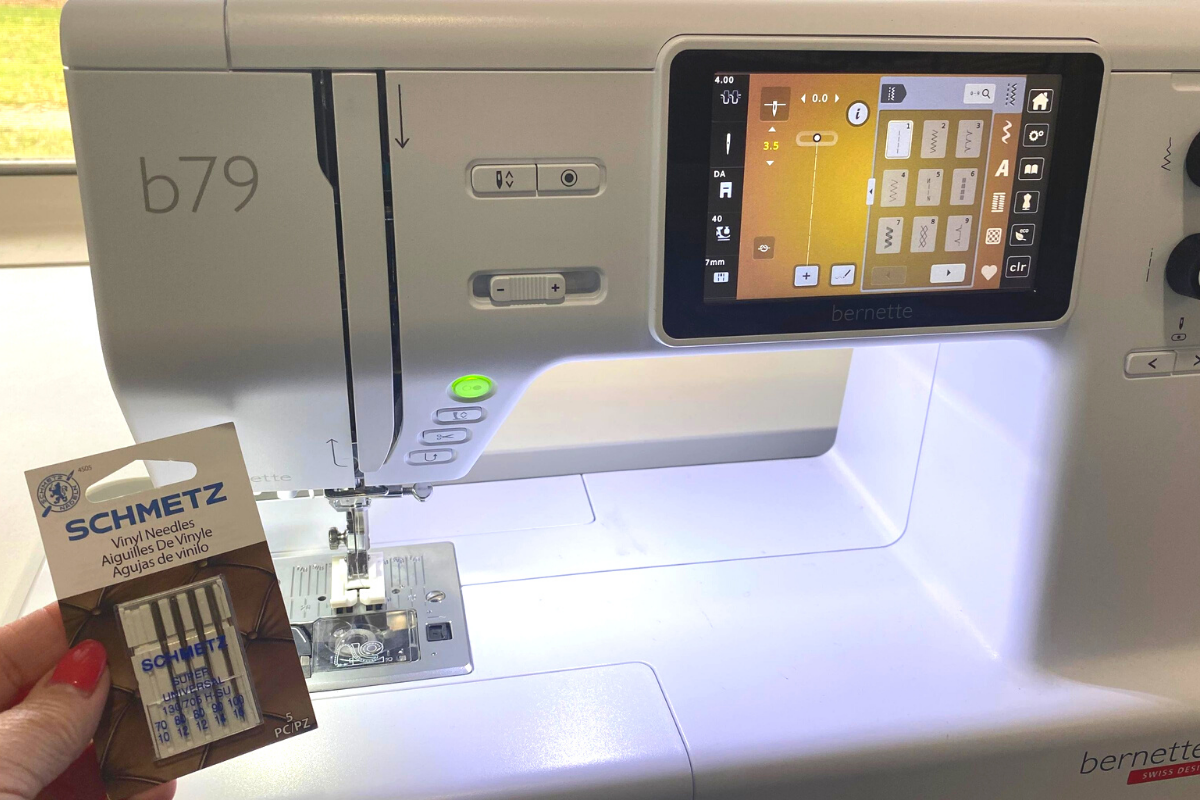
- bernette b79
- Zigzag foot with Non-stick sole
- Quilt bar
Steps to Sew a Thread Catcher
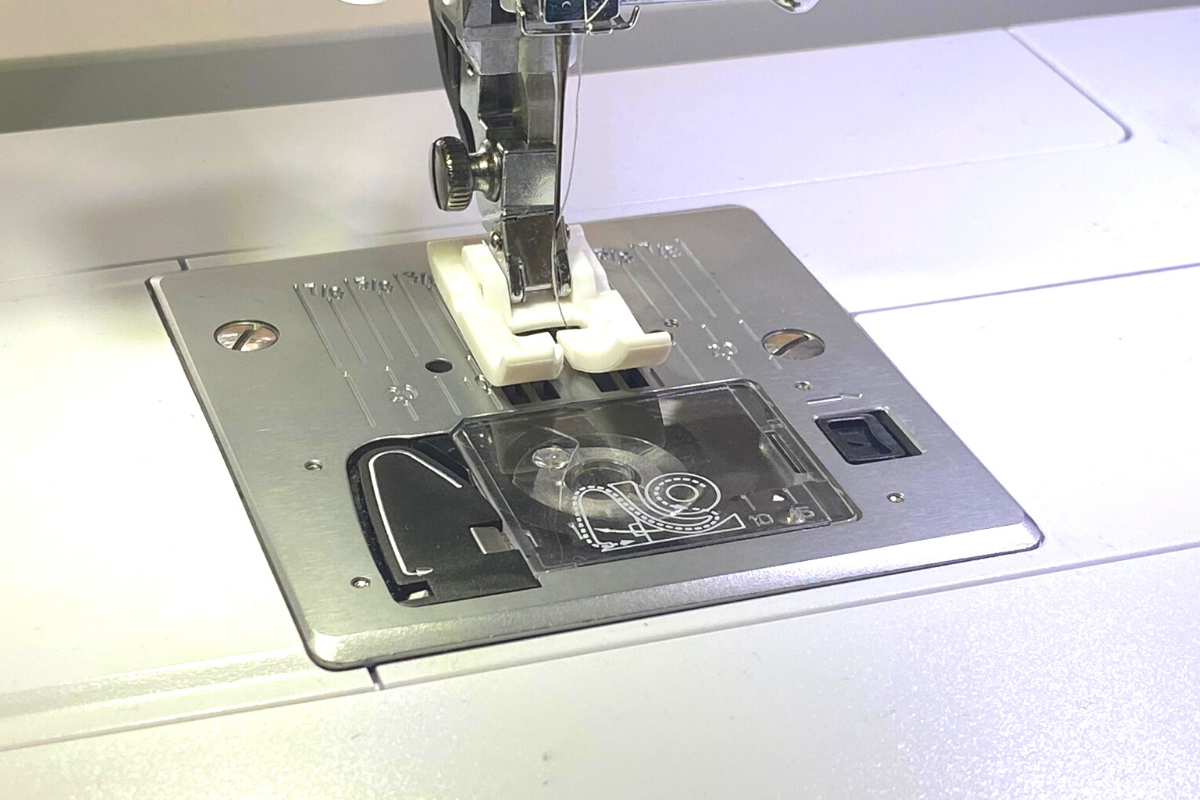
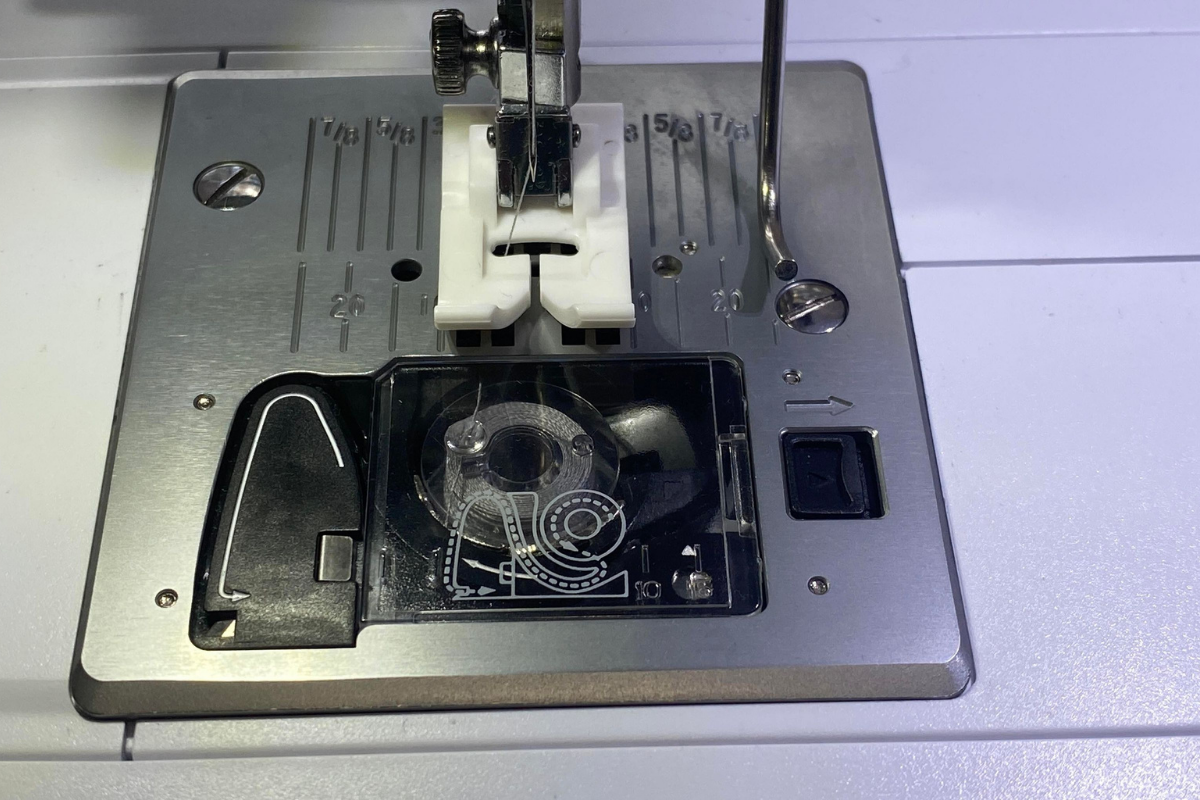
- Set the machine up with the Non-stick sole presser foot, Vinyl needle, thread in the top and in the bobbin. Select a straight stitch with 3.5 length.


- Peel away the paper from the wrong side of the contact paper and place the sticky side on the foam.

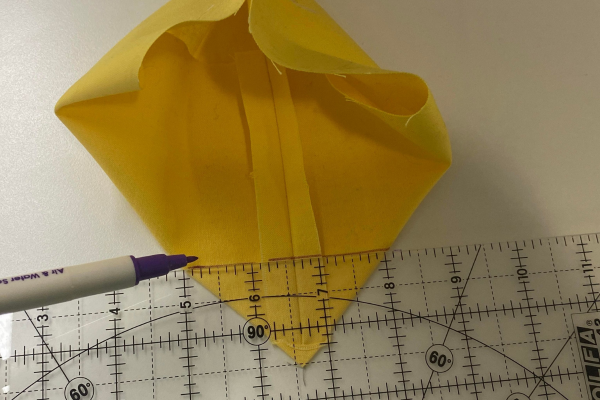
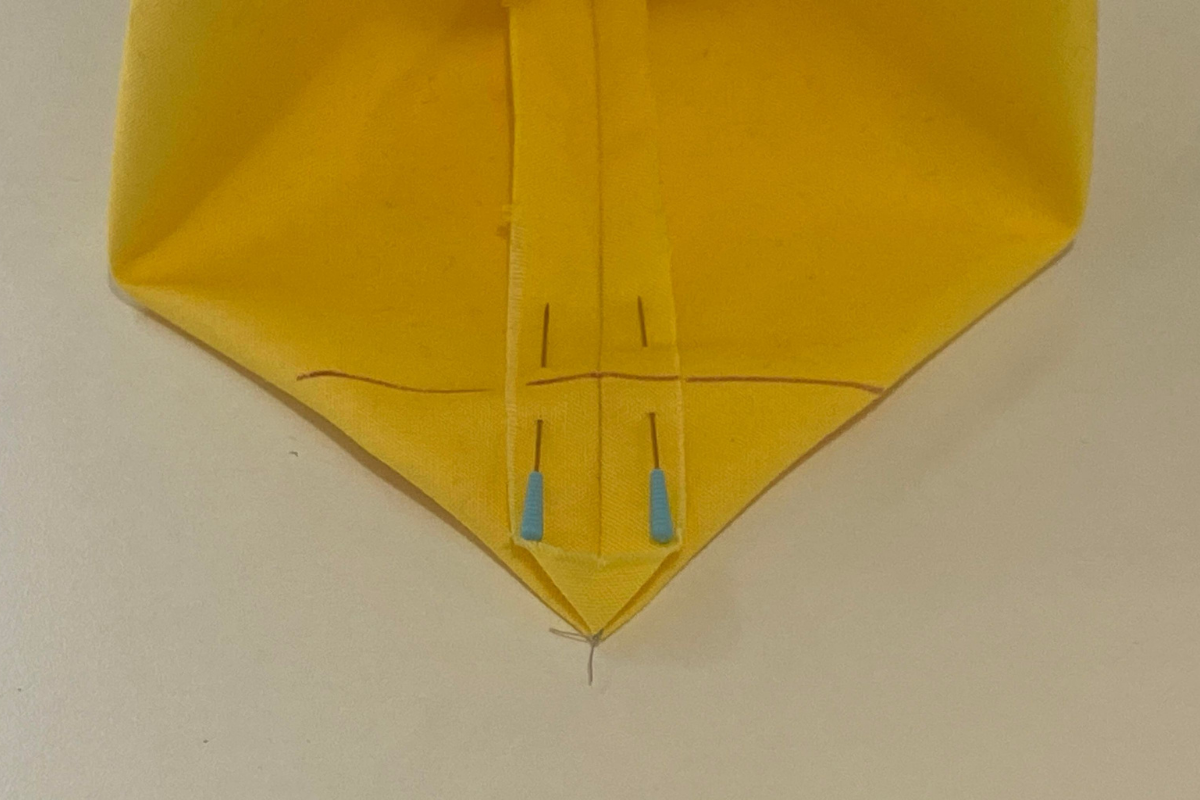
- Find the center of the 8″ width (4″) and mark from top to bottom with straight pins.
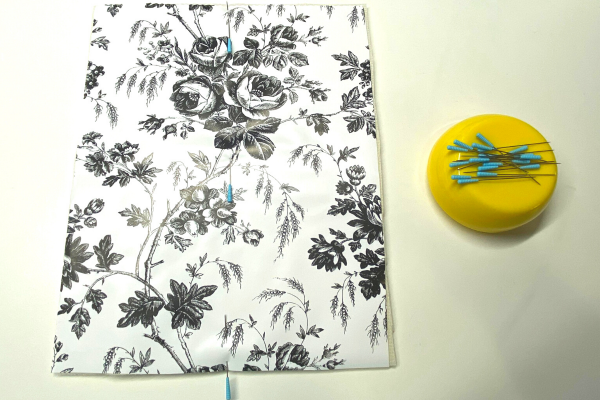
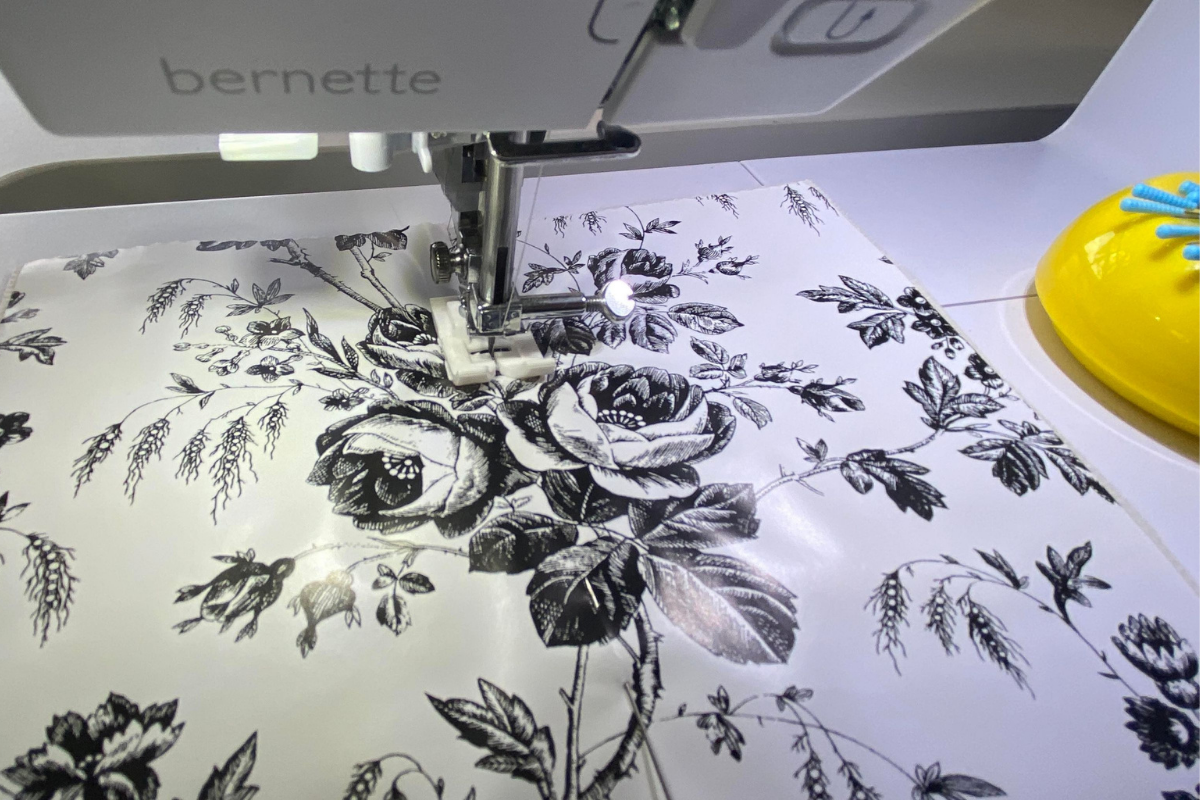
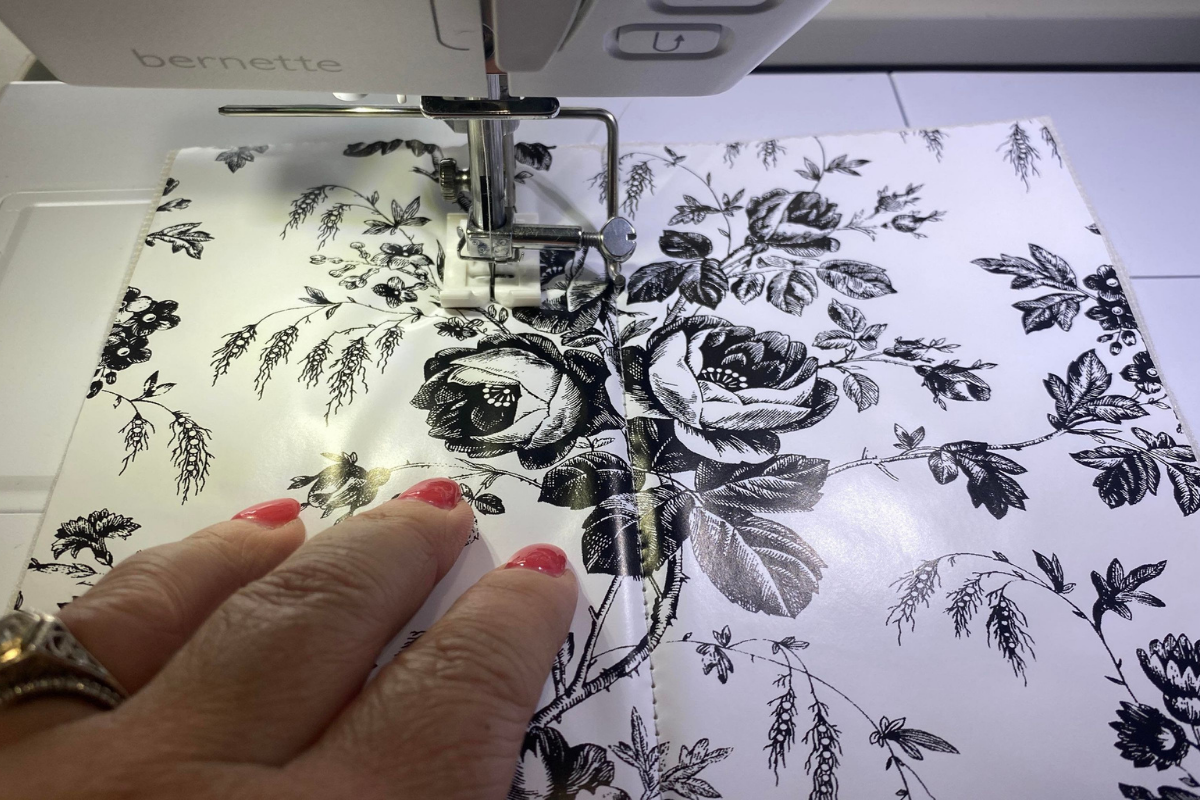
- Sew down the center with the contact paper right side facing up, remove pins as you stitch cut the thread at the bottom.

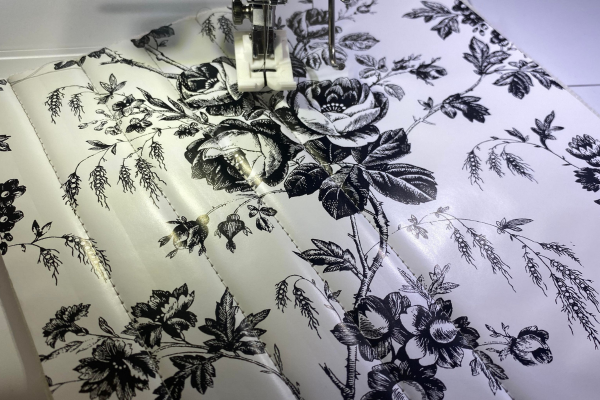
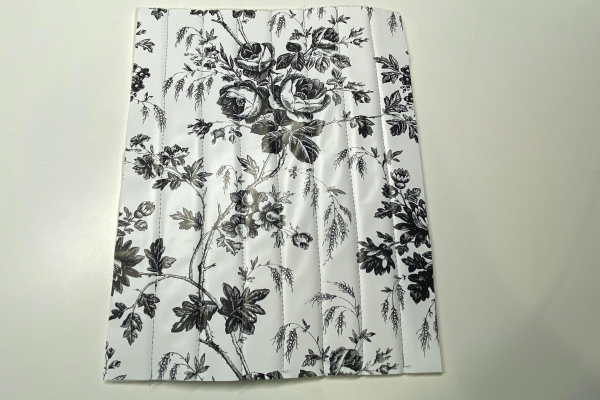
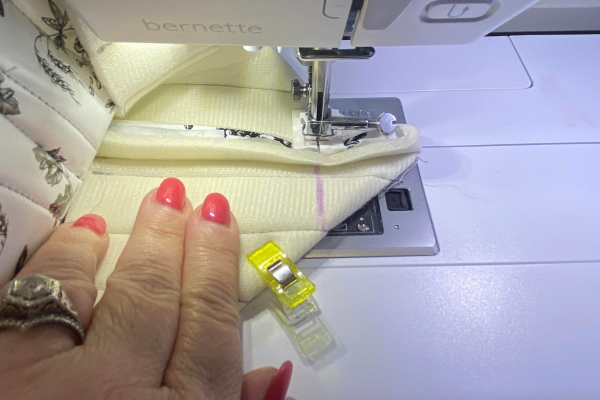
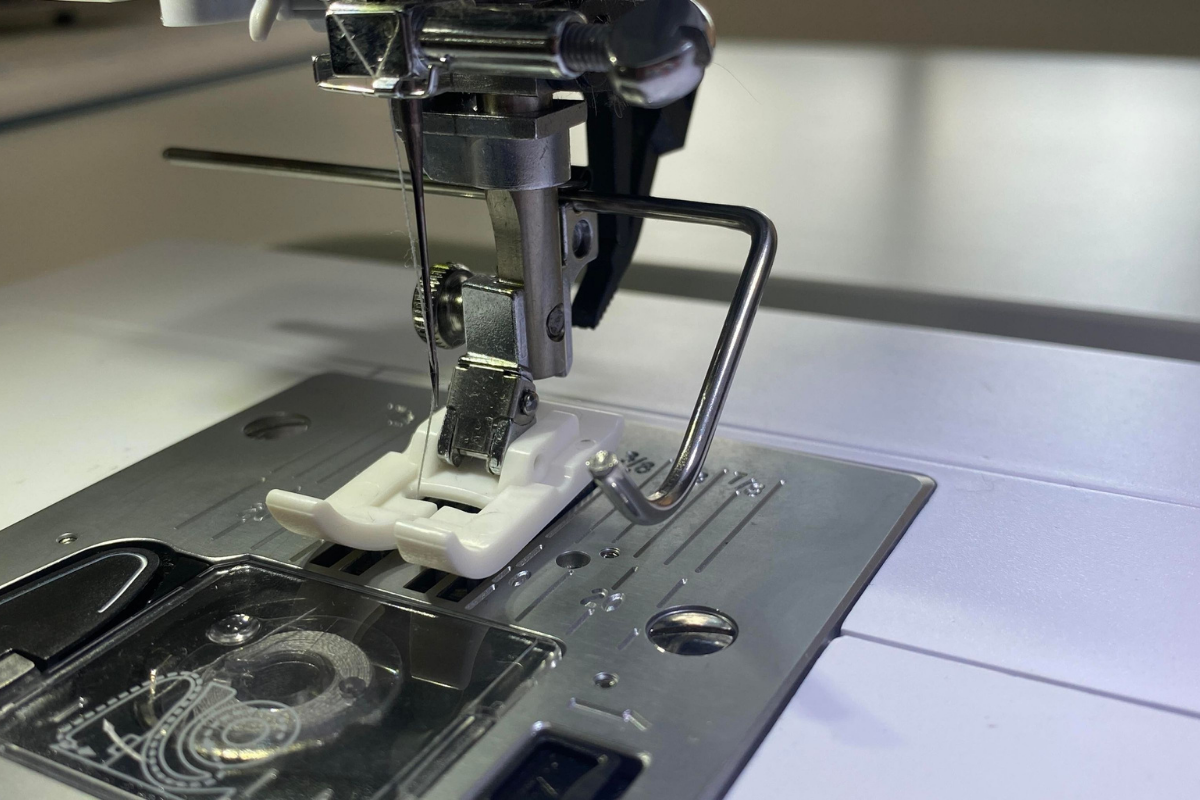
- Add the quilt bar and set it on the 1″ mark on the throat plate.

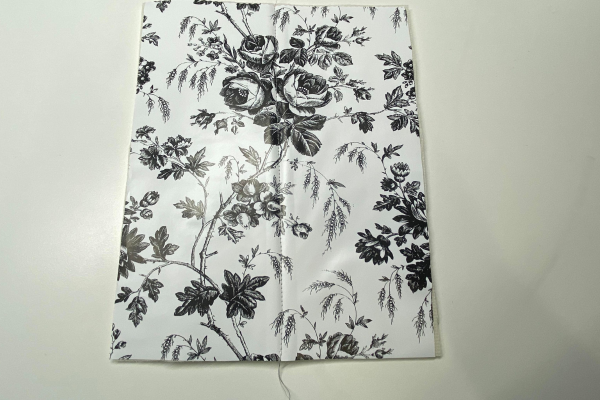
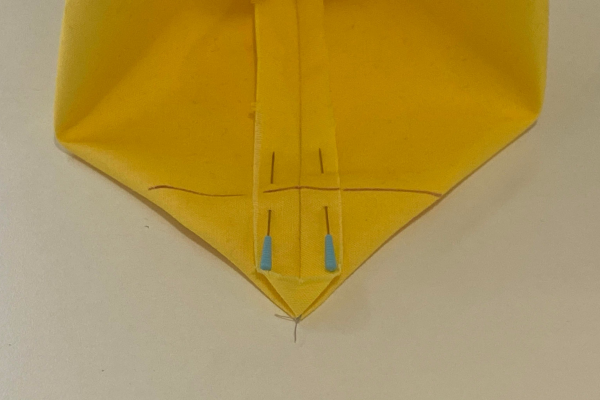
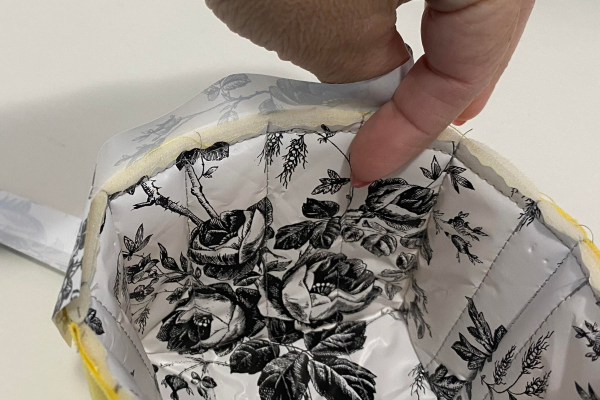
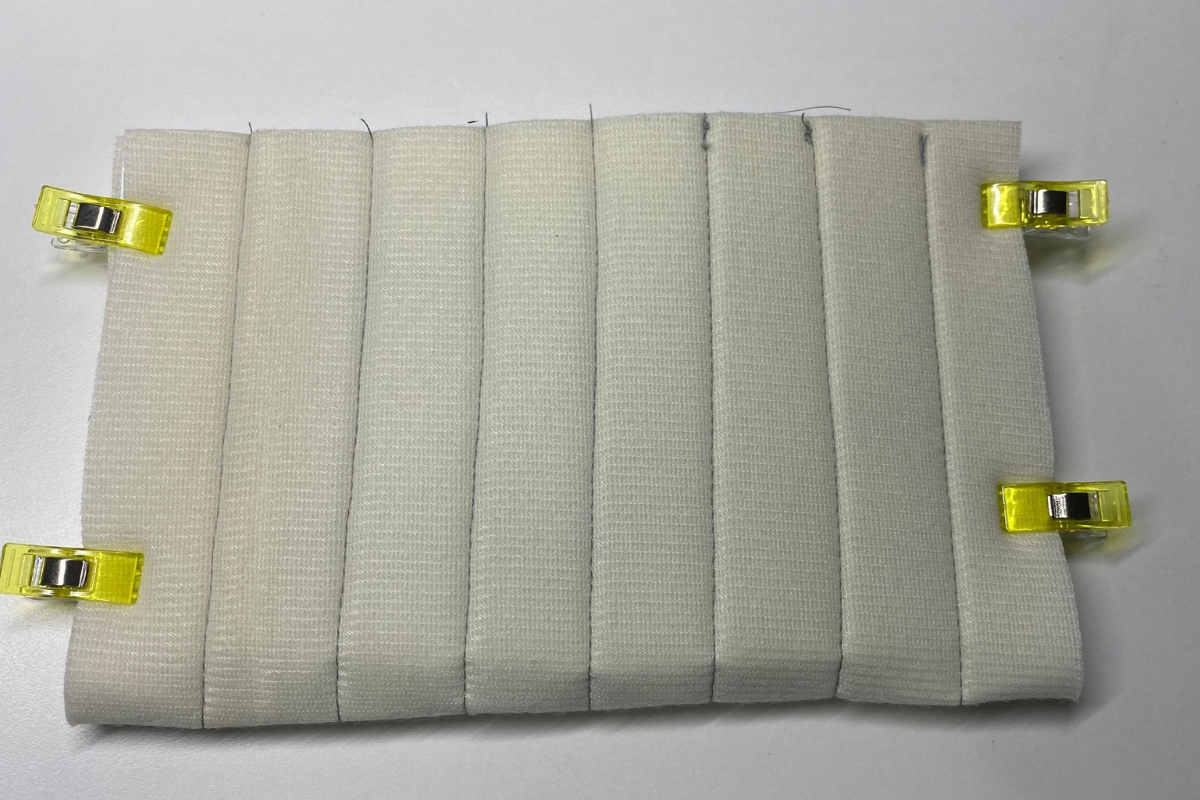
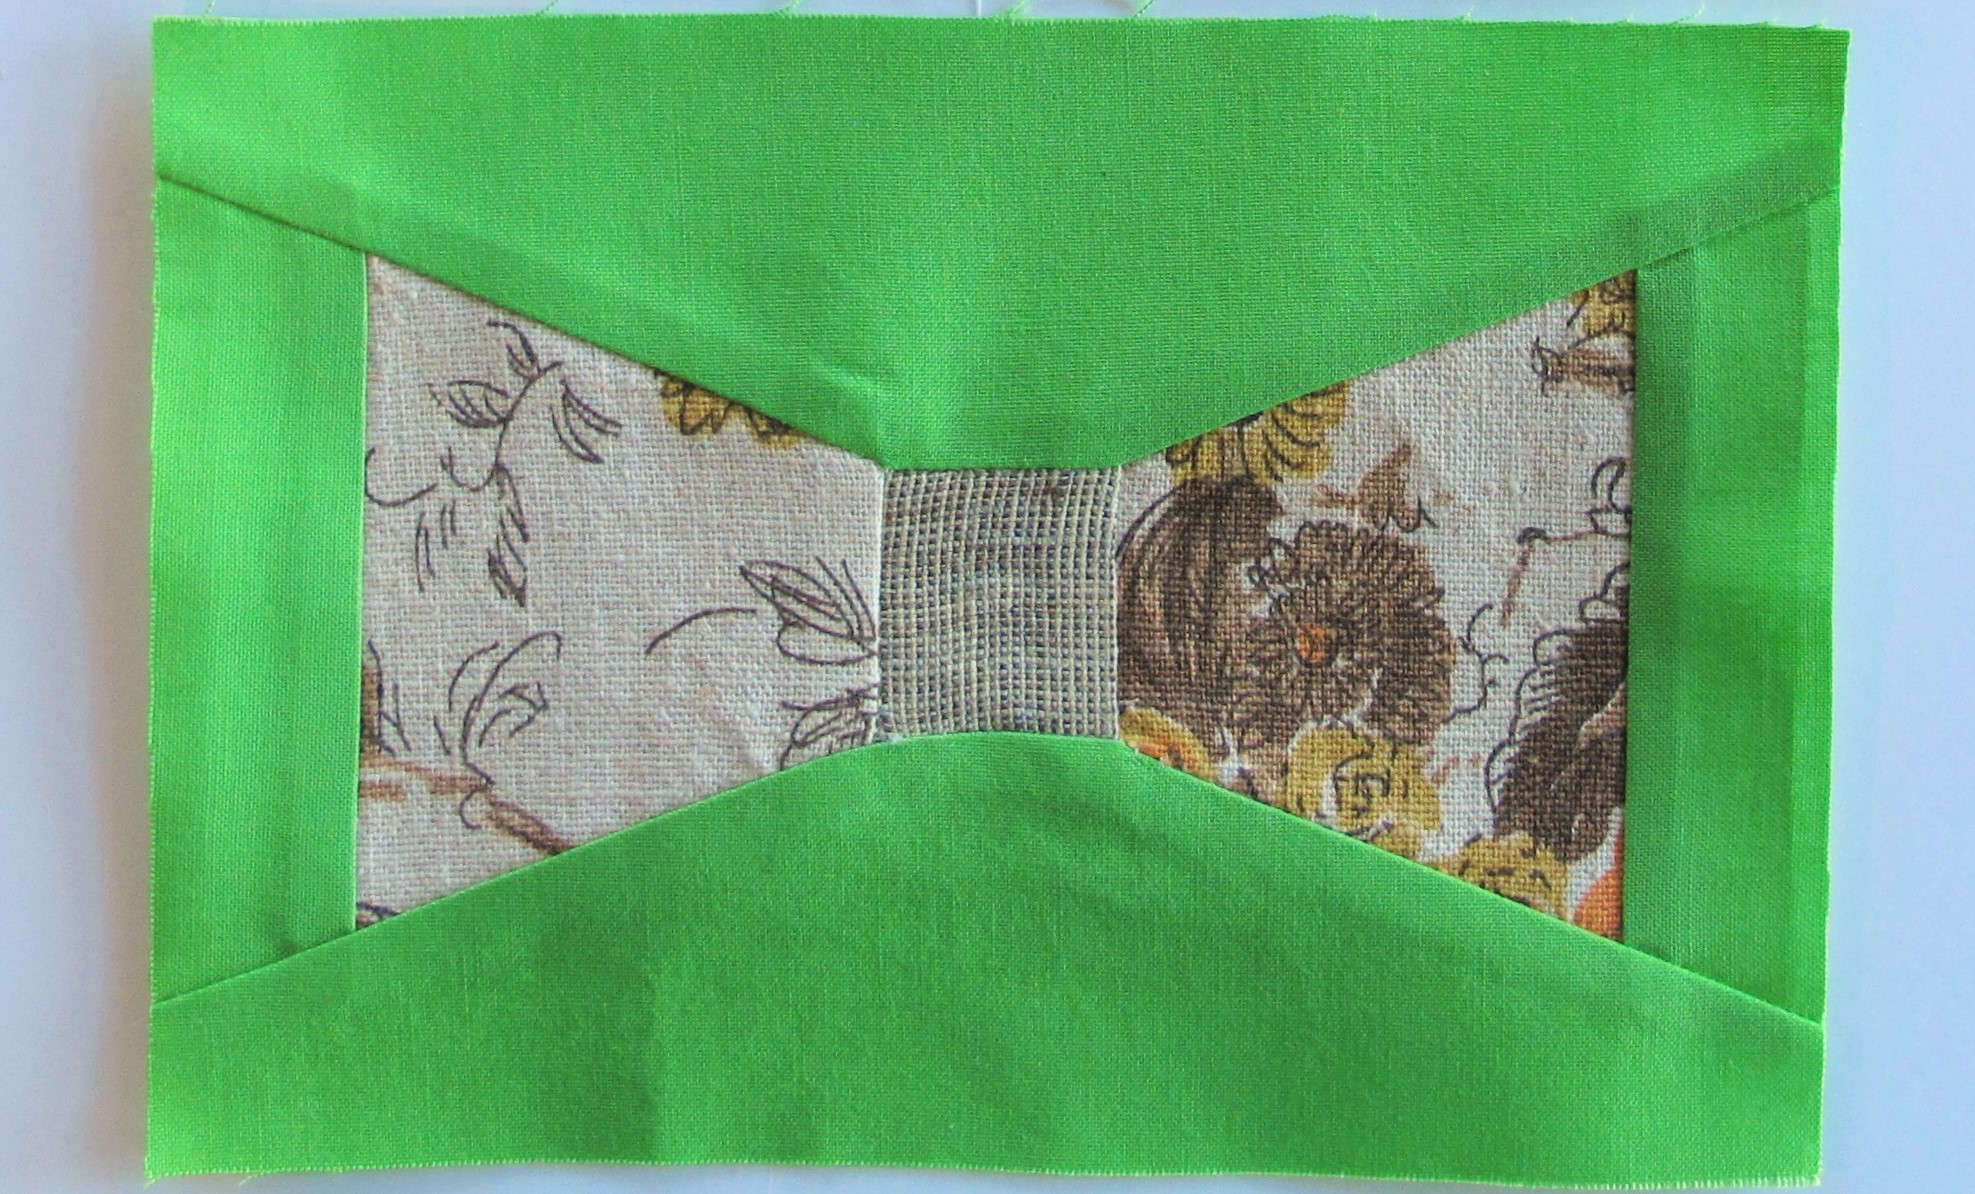
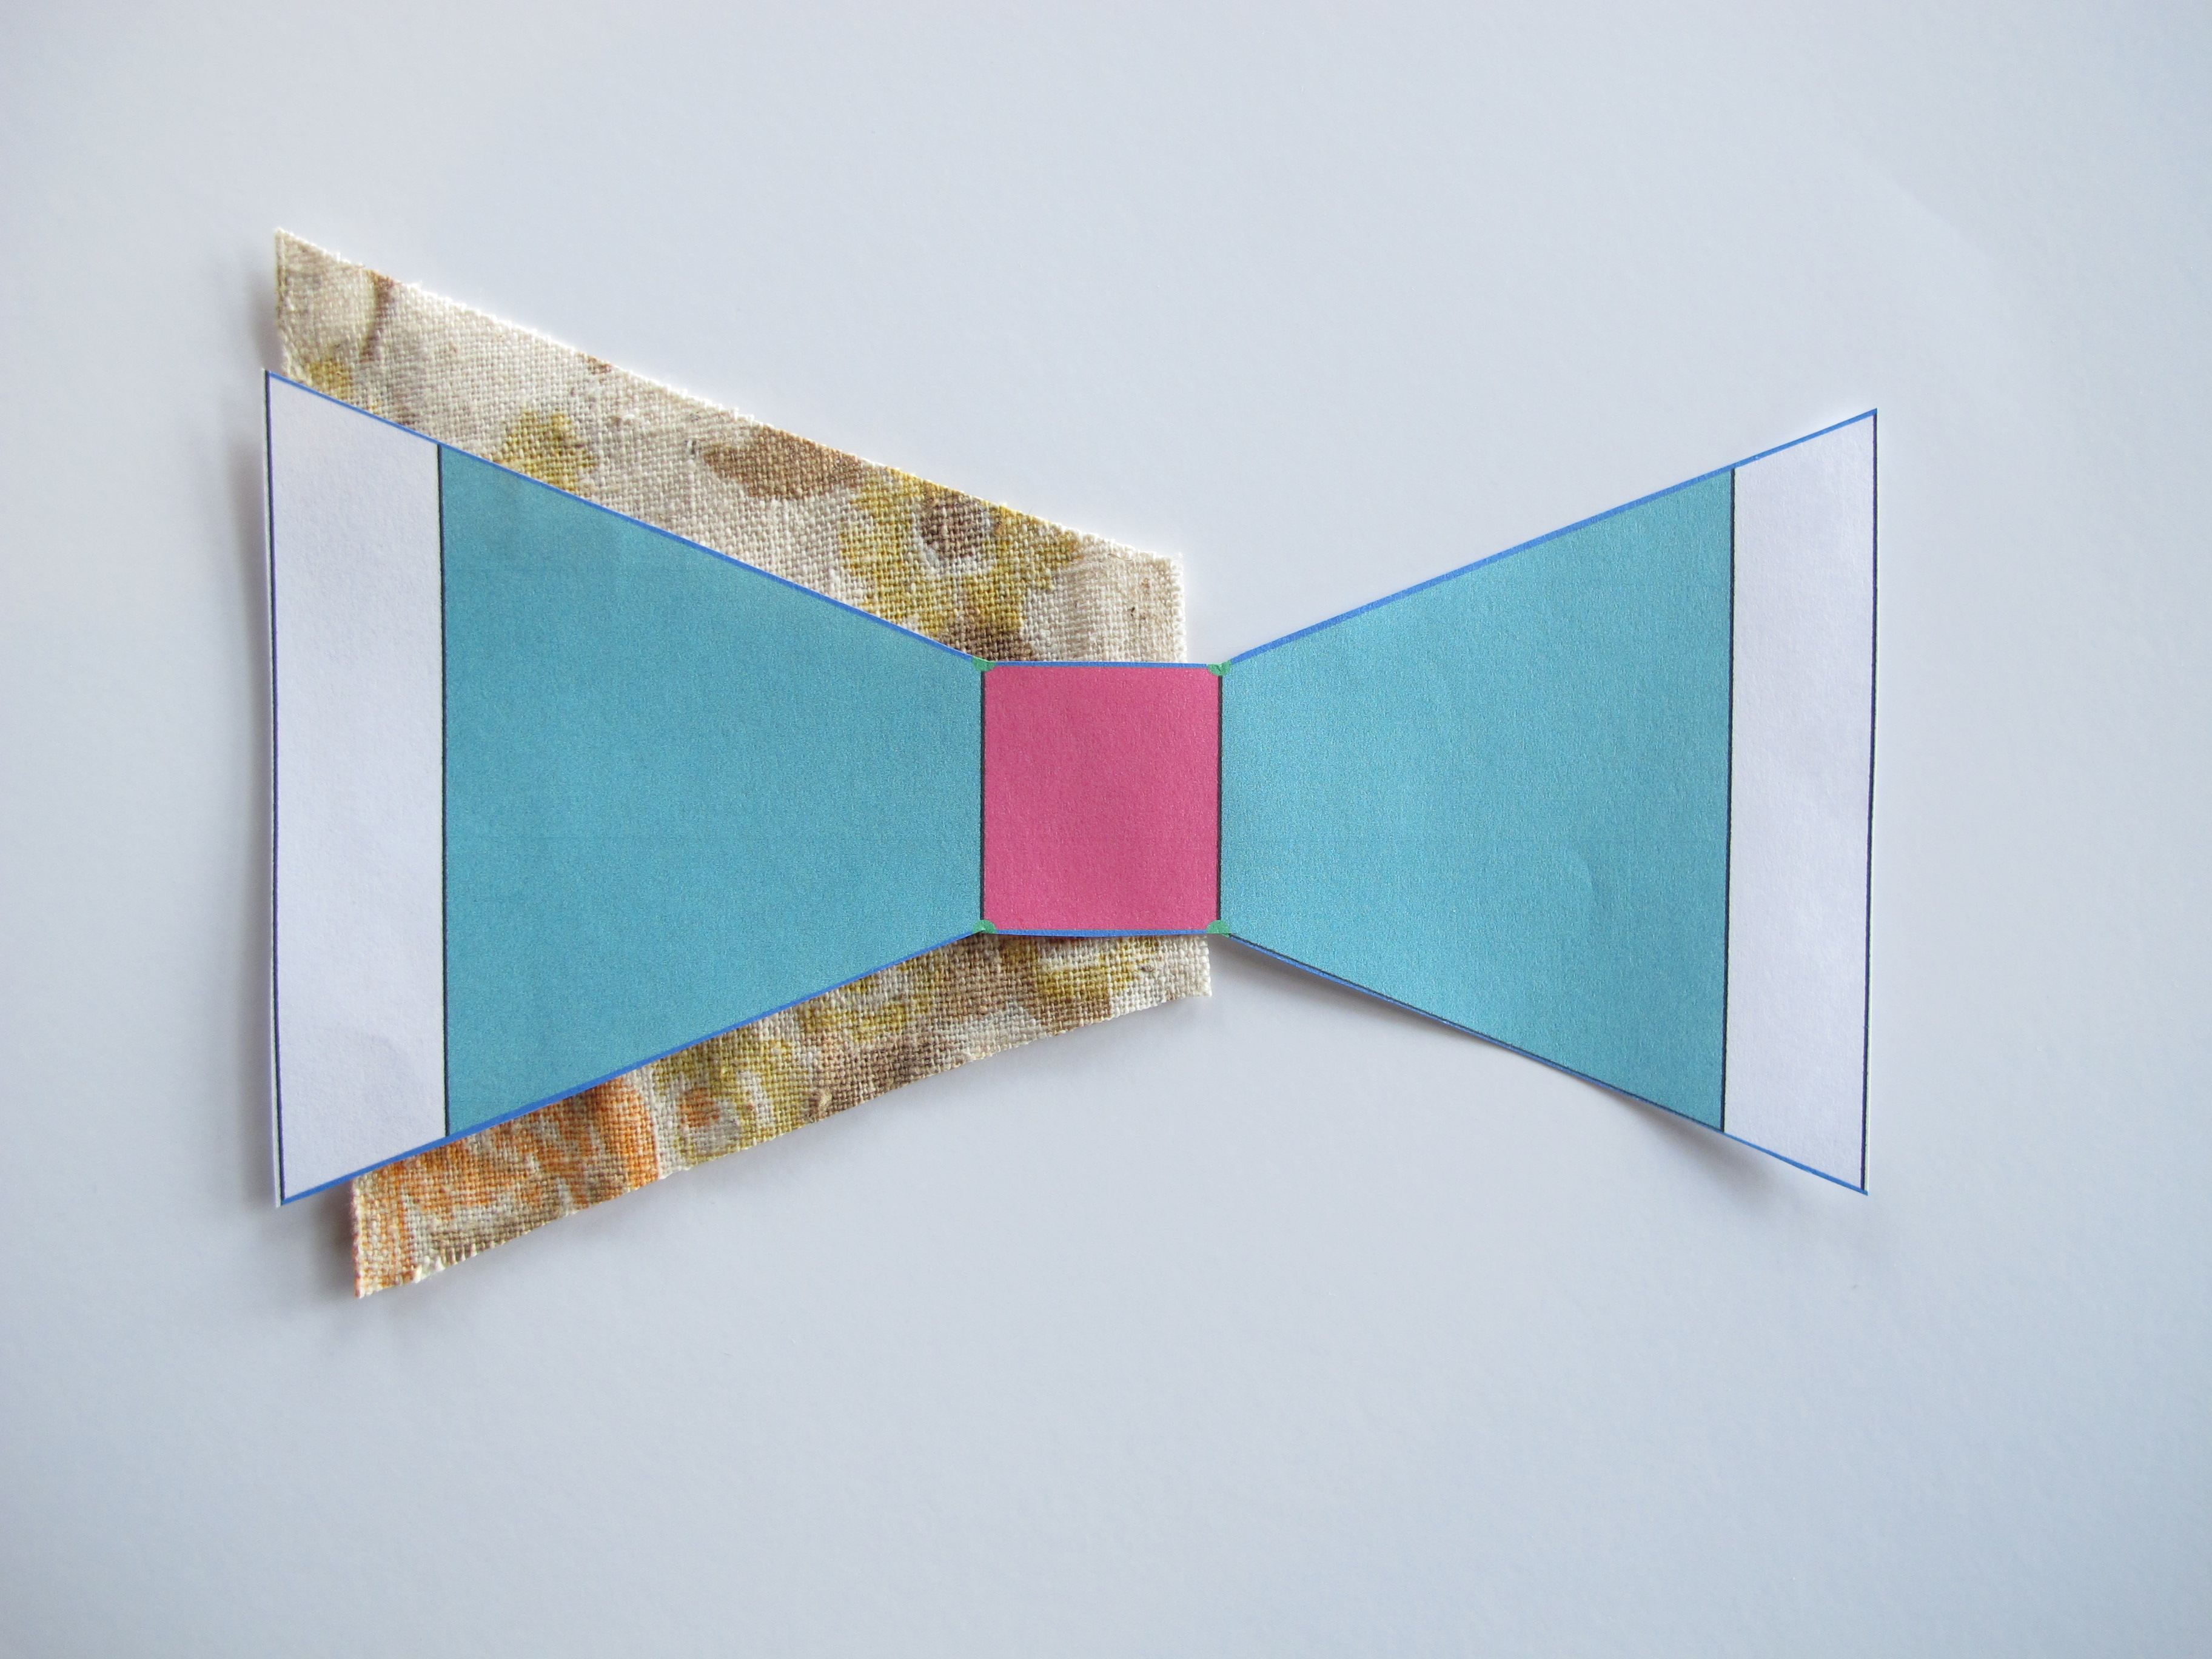
 6. Line the bar with the center row and sew 6 more rows, 1″ apart from one another, for a total of 7 rows. Remove the quilt bar. This is the Lining!

- Adjust stitch length to 3.0. Fold the Lining right sides together and hold the sides together with Wonder Clips and sew sides with 1/2″ seam allowance.

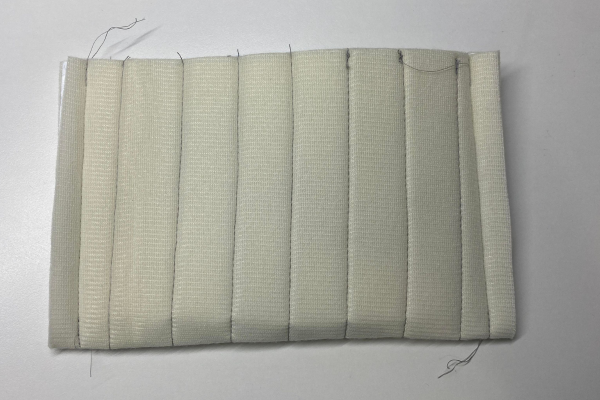
- Finger press the side seams open.
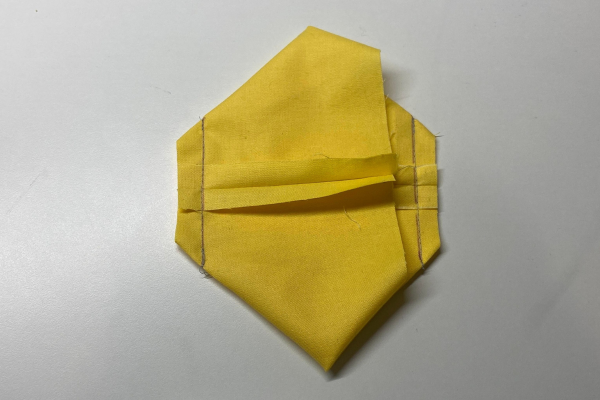
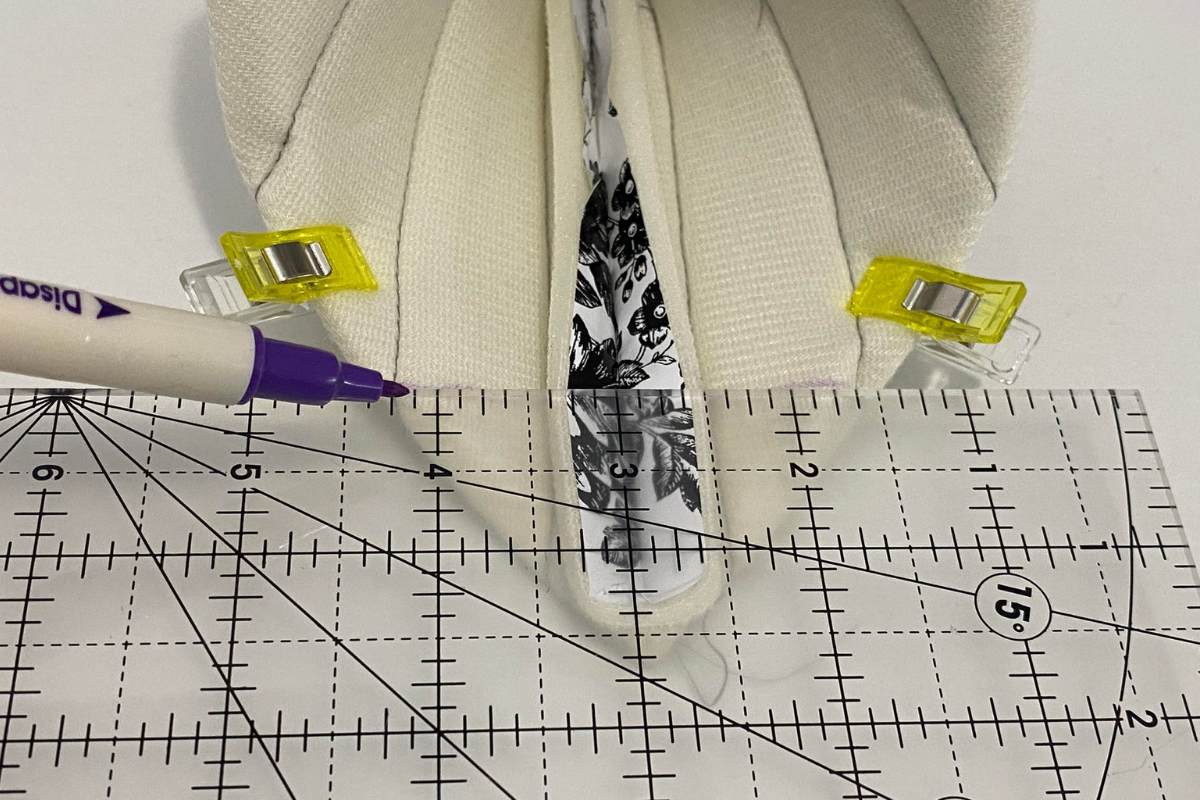
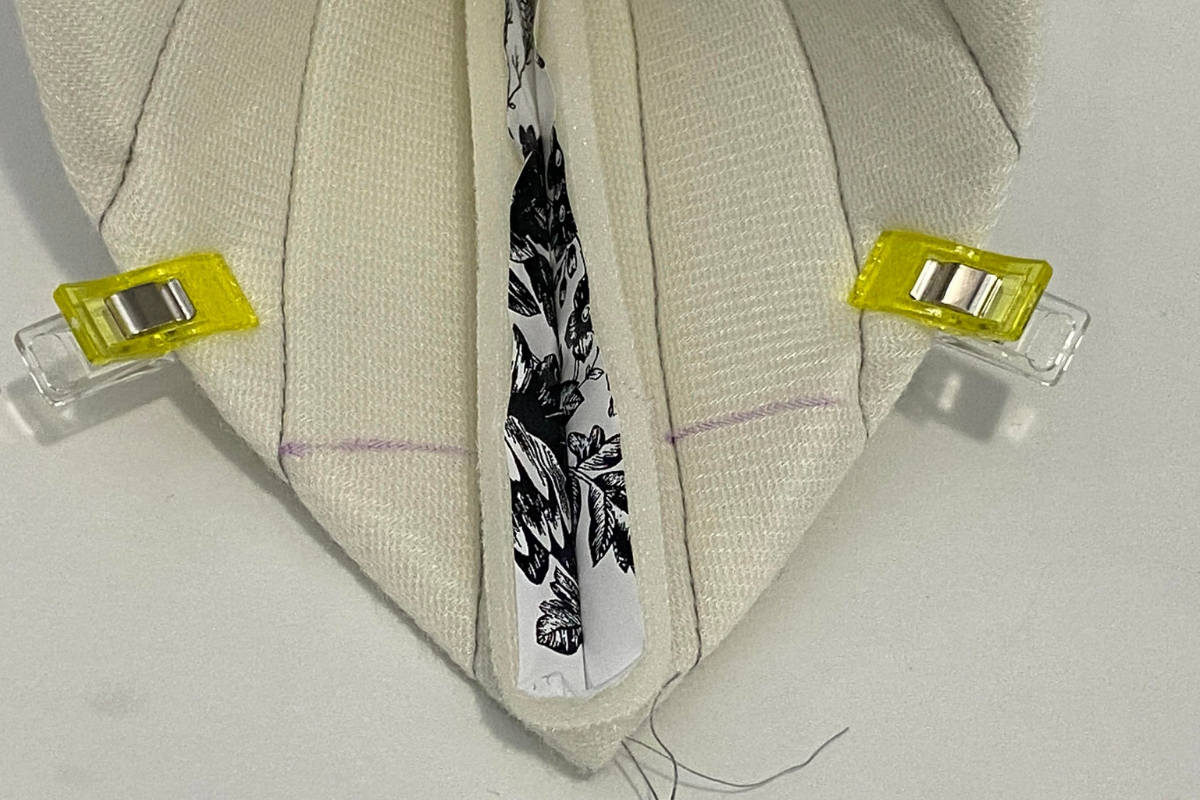
- Now it’s time to create a “triangle box corner” bottom to our thread catcher. This is what will allow it to stand up by itself. Flatten the side seam over the bottom fold and form a triangle shape at the bottom of the side seam. Use Wonder Clips to hold it in place. Mark 1-1/2″ from the bottom of the side seam stitching across to form the “triangle”. Sew directly over the line.


- Repeat on the other side.
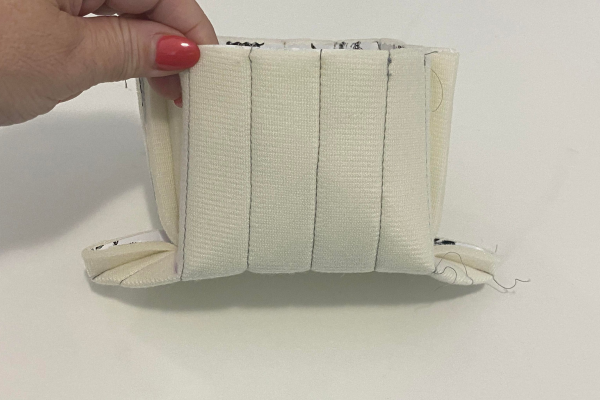

- Cut through all layers to remove the bulk of the “triangle box corner” down to 1/2″. Repeat on the other side.
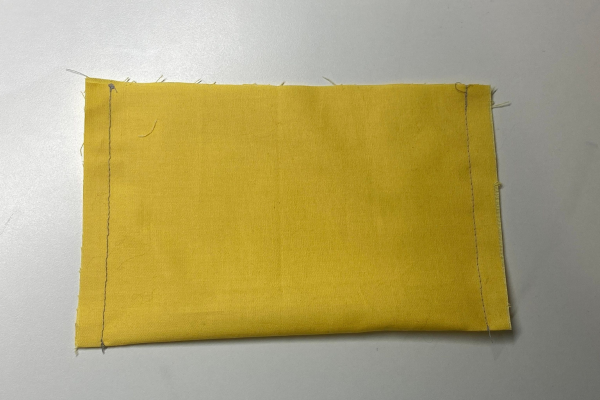
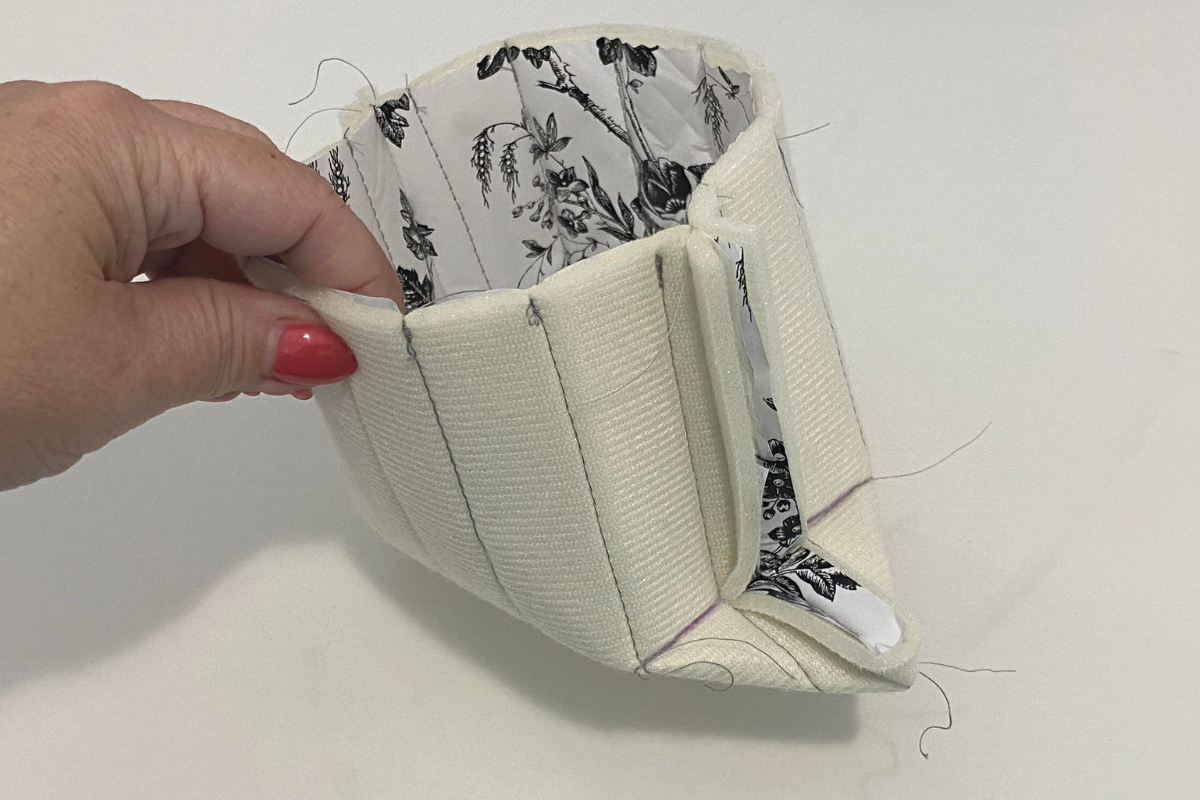
- Now it is time to sew the outside. Fold the outside right sides together and sew 1/2″ seam allowance on the sides.
- Finger press open. Now it’s time to create a “triangle box corner” bottom for the outside material just like you did for the lining. Flatten the side seam over the bottom fold and form a triangle shape at the bottom of the side seam. Use pins to hold it in place. Mark 1-1/2″ from the bottom of the side seam stitching across to form the “triangle”. Sew directly over the line and repeat for both corners.

- Cut seam down to 1/2″ seam allowance to reduce bulk.

- Turn outside right side out.
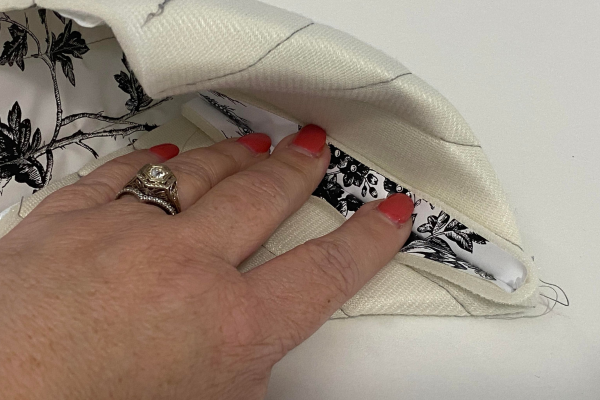
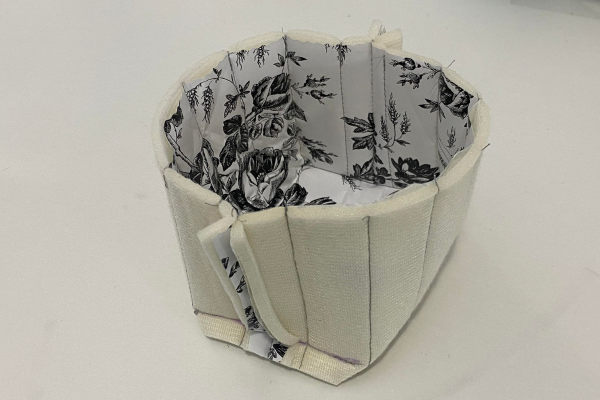
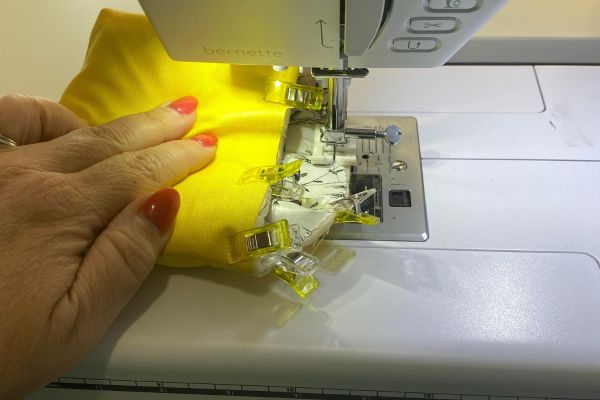
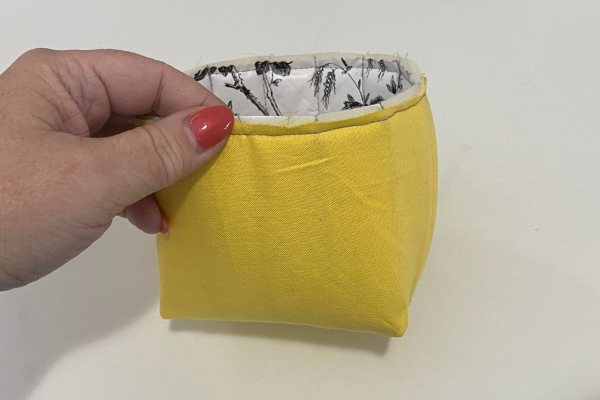
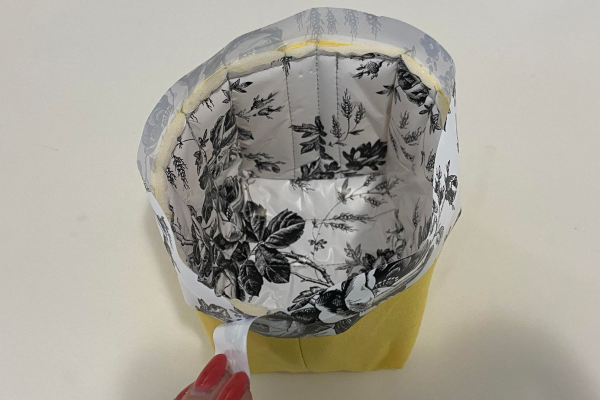
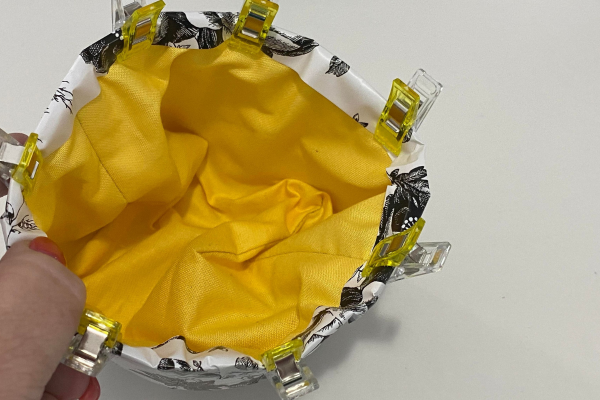
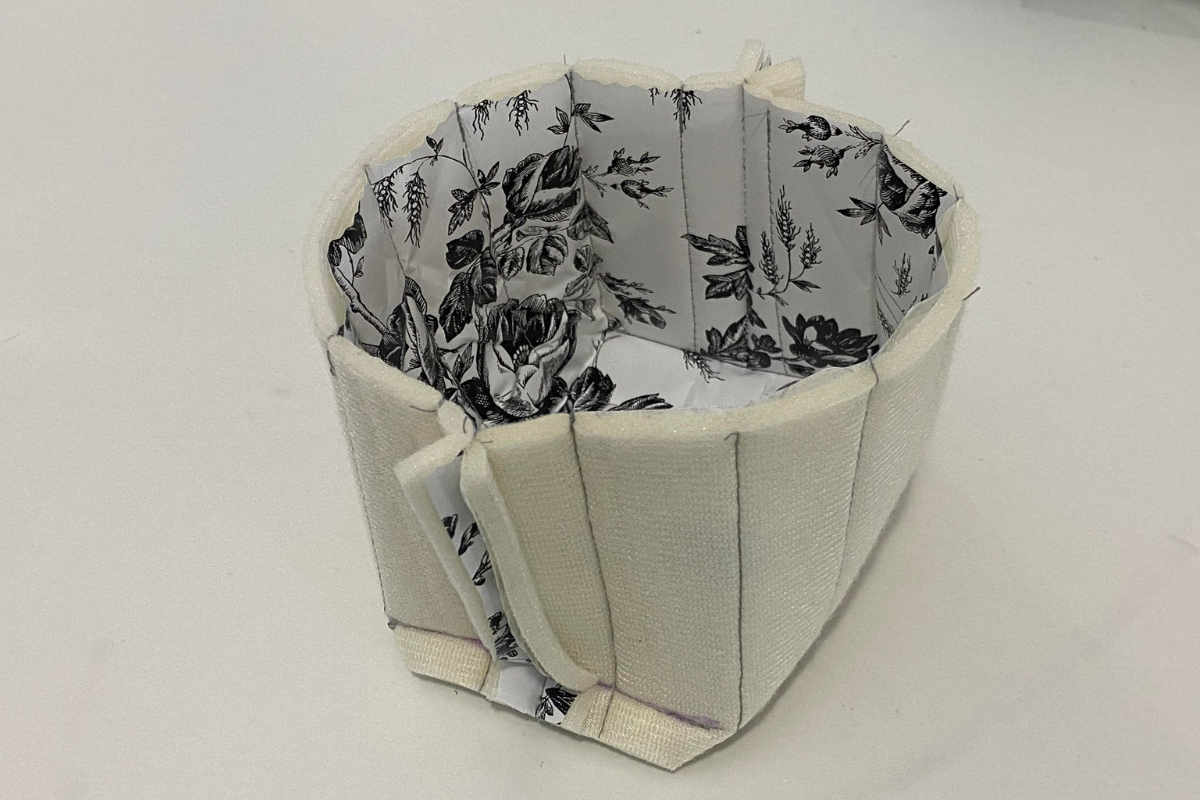
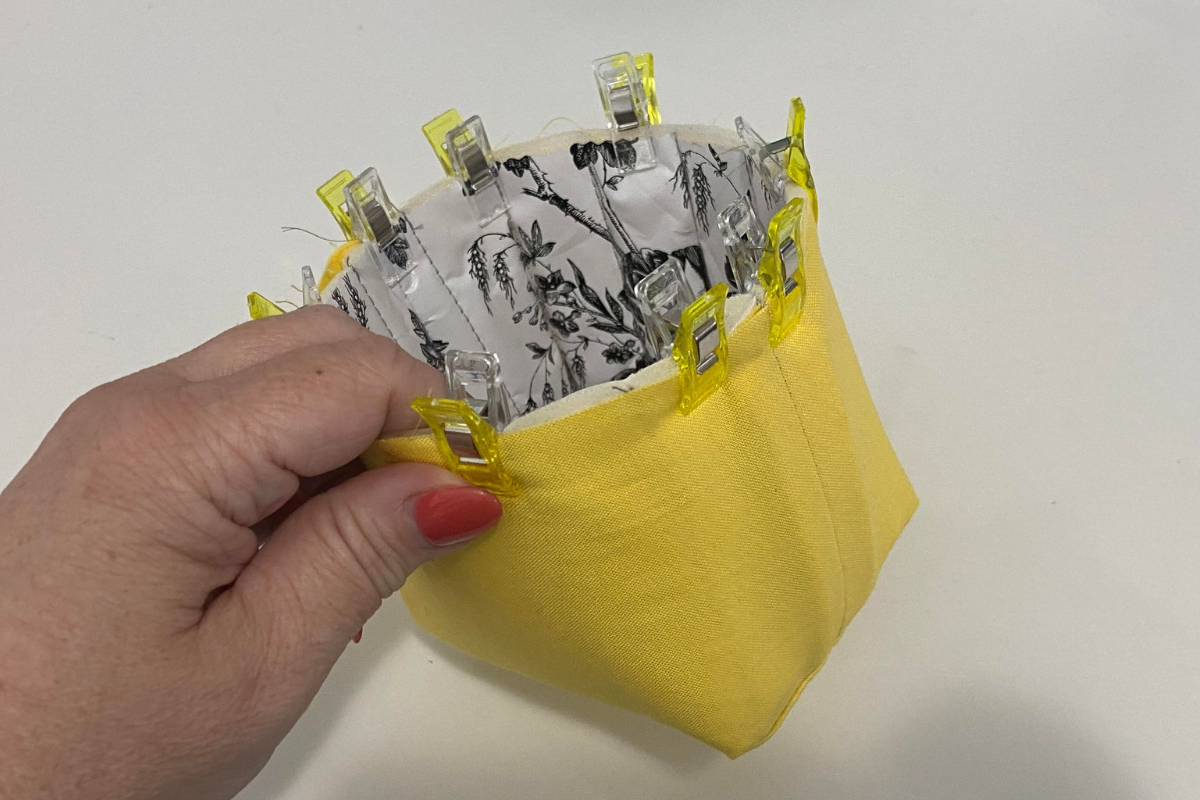
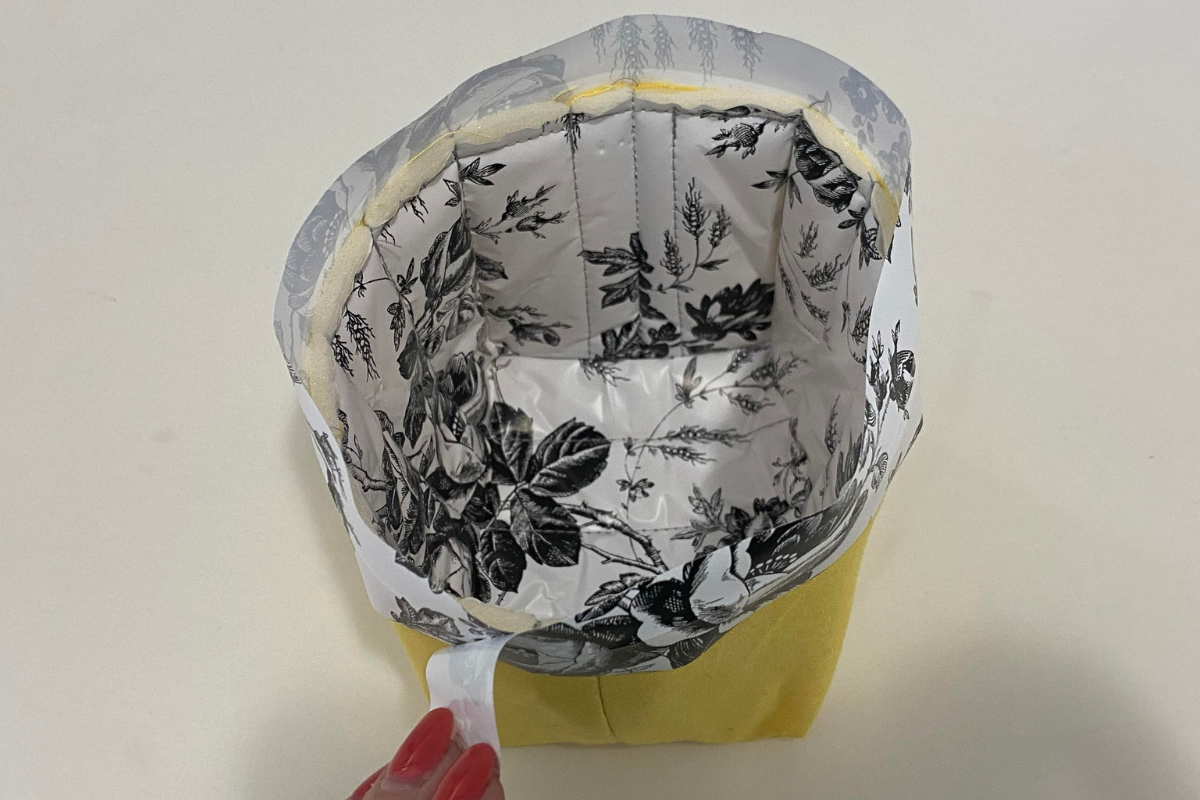
- Insert the lining into the outside. Push the corner bottom seams so they lay flat on the bottom base of the thread catcher, for both the outside and lining. Align the top raw edge for both the outside and lining. Clip all around the top.
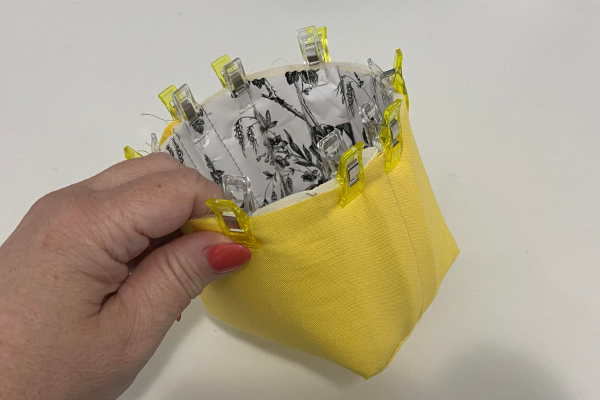
- Baste around the top with a 1/4″ seam allowance.
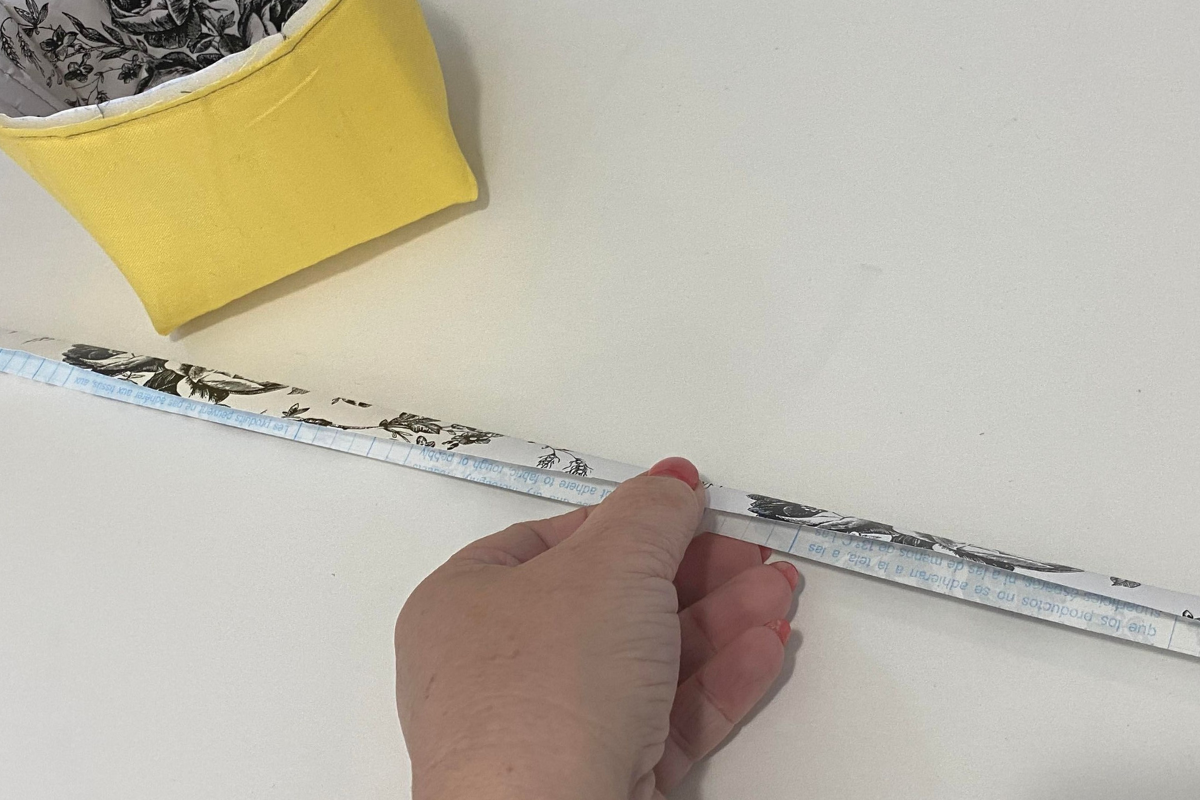
- Fold in half lengthwise the 1″x18″ binding made of contact paper right side out.

- Peel away the paper and be careful not to let the sticky side touch itself. Begin placing the binding at one of the side seams with the fold on top.

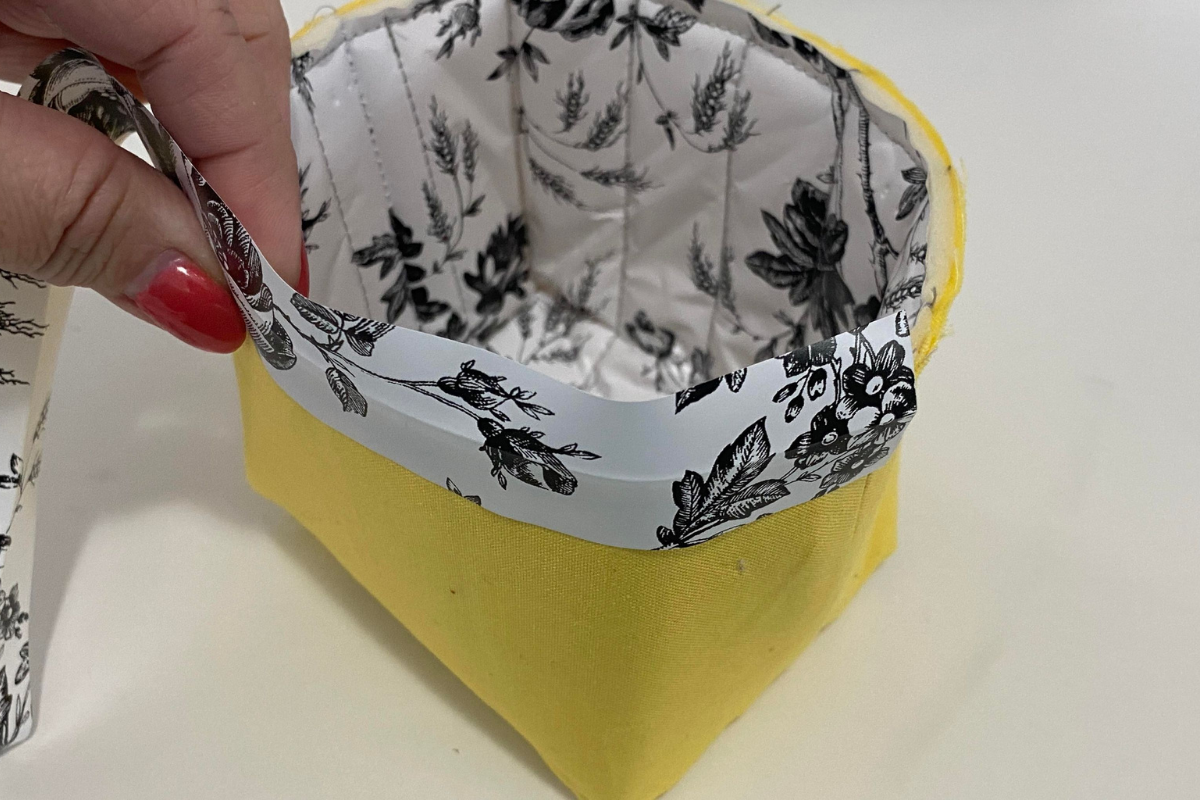
- Press the binding only to the outside all the way around.
- When connecting to the other side, cross over the binding about 1/2″ and cut the leftover.
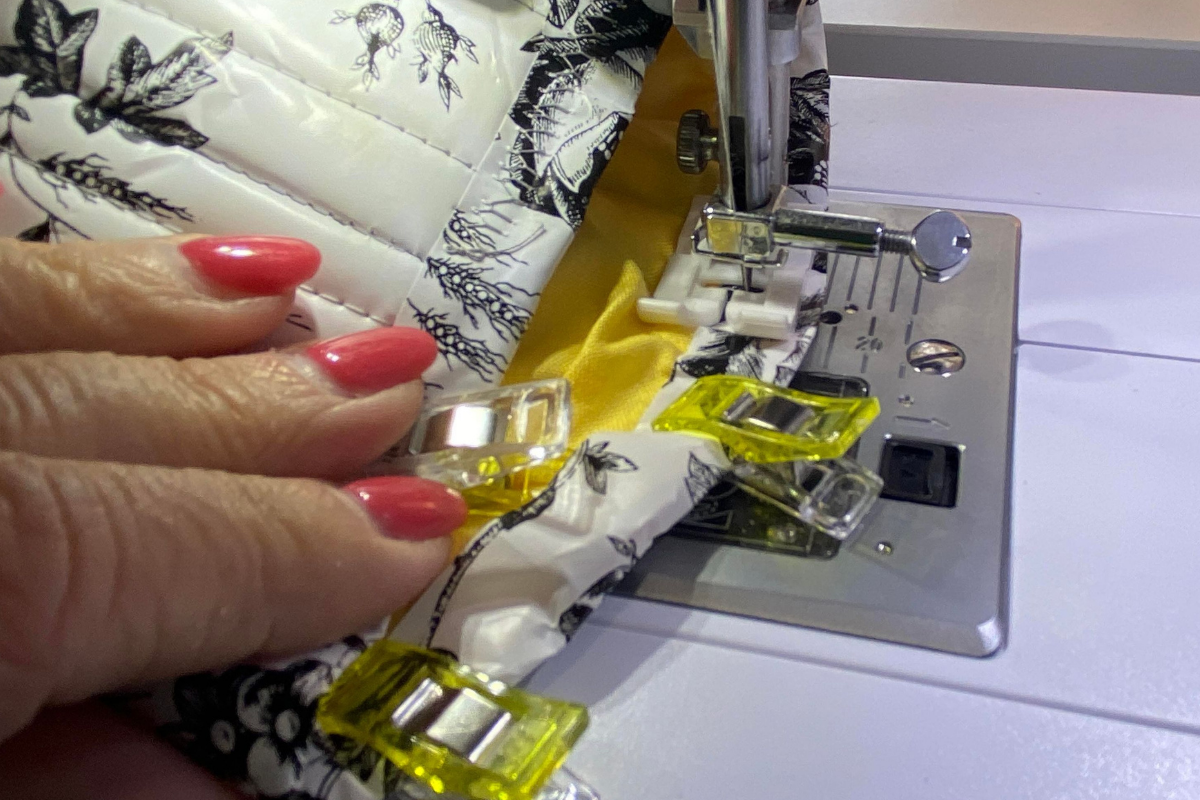
- Fold the inside of the binding to the lining and press. Hold with Wonder Clips.

- Turn the catcher lining side out to get it under the needle more easily.
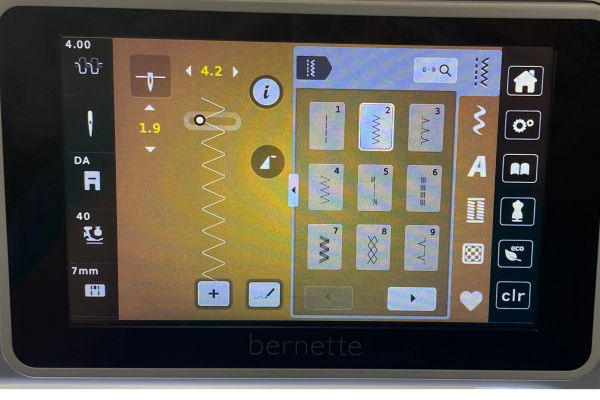
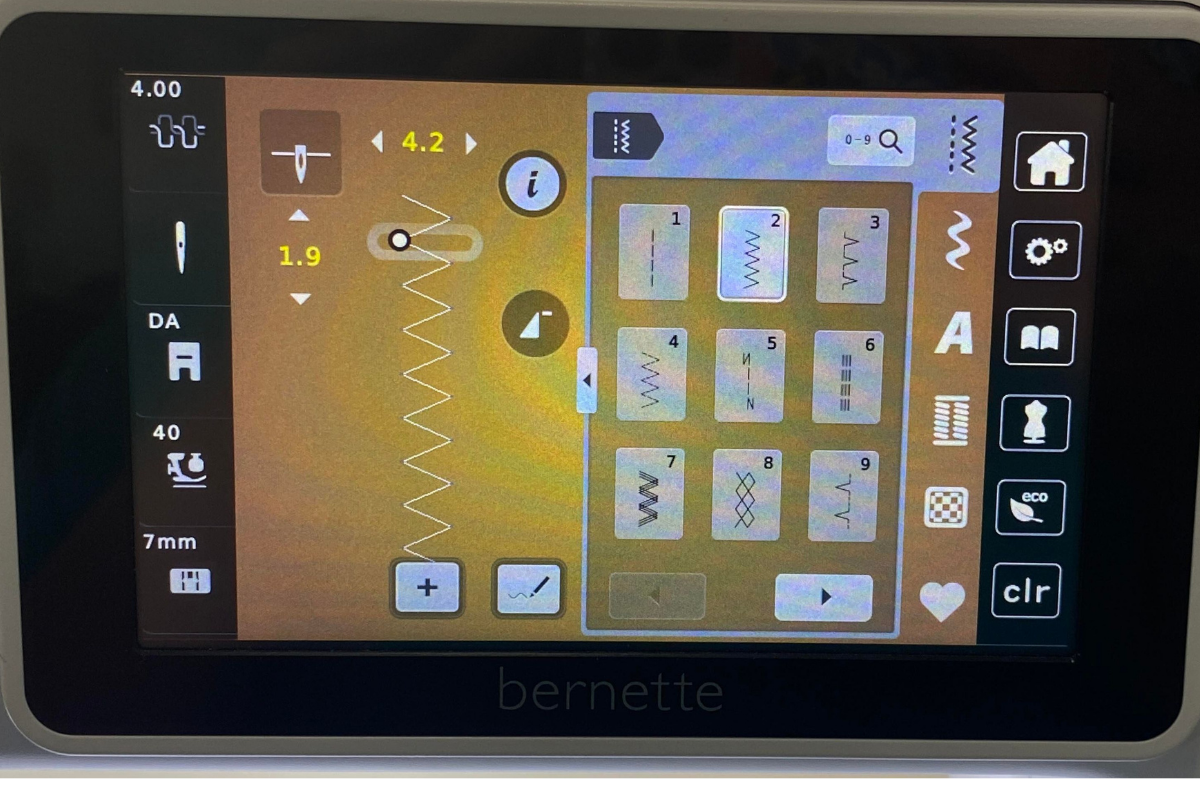
- Set Sewing machine up with zigzag, W 4.2, L 1.9. Begin stitching at the side seam and stitch covering the raw edge of the binding.

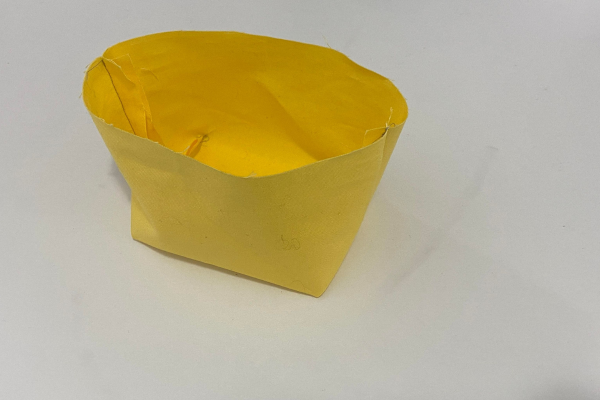
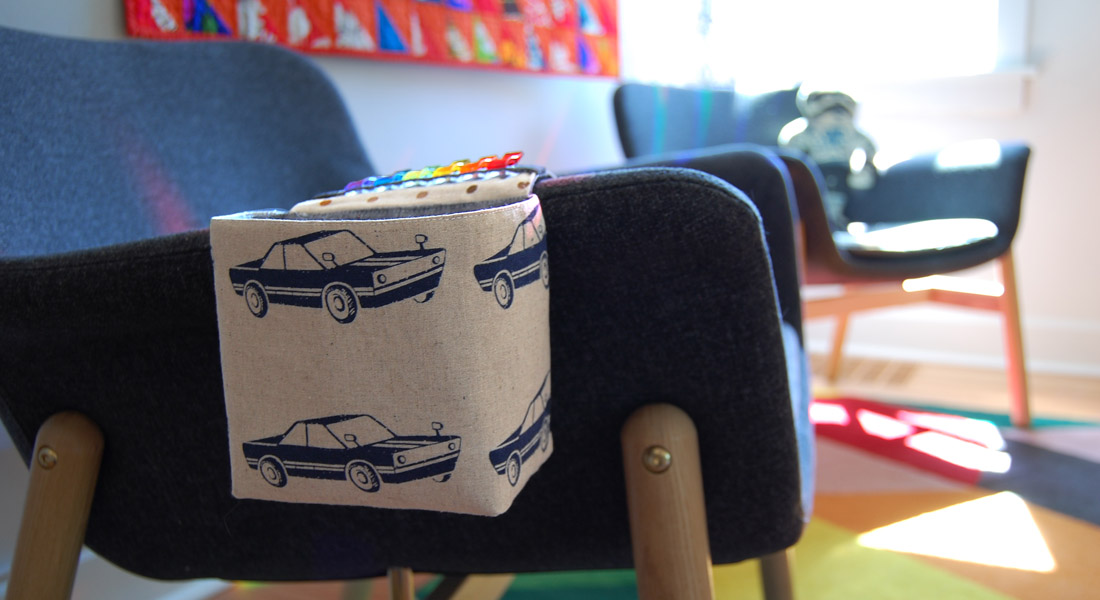
- When finished stitching, carefully press with medium temperature iron. Keep next to your sewing machine or Serger when sewing, serging, or machine embroidery to catch all those extra threads! Now you will be able to easily scoop out the threads for clean up thanks to the contact paper lining.


I hope you enjoyed this easy sewing project and make one for yourself, and more for your stitching friends. When you make yours, please snap a shot and tag me @SookieSews and @BERNINAUSA!!
Used Products

What you might also like


One comment on “Thread Catcher with Contact Paper Lining”
Leave a Reply
You must be logged in to post a comment.

can you just use any generic quilt bar with the bernette 79?