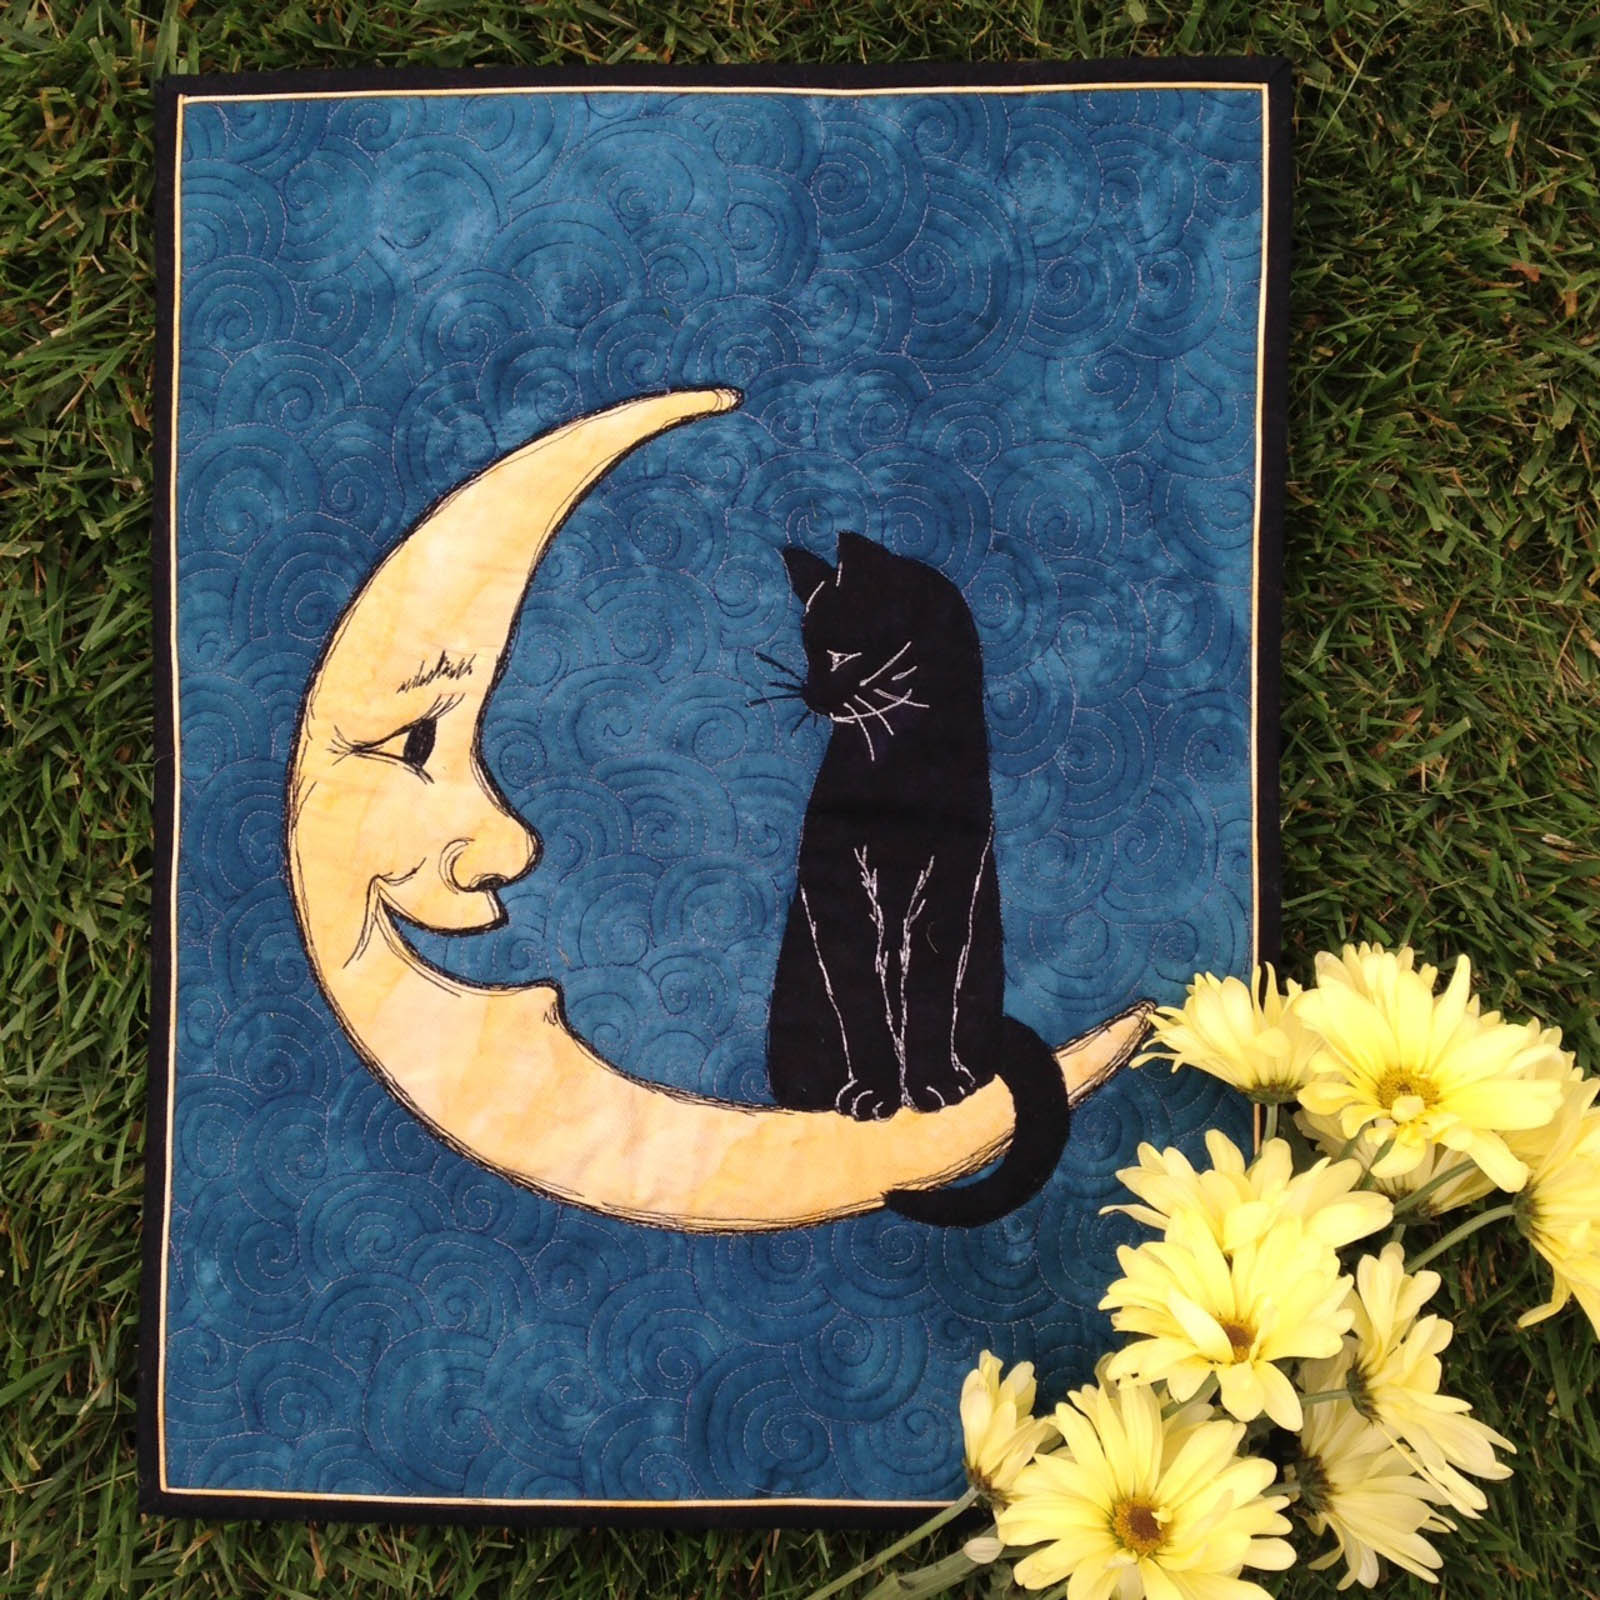
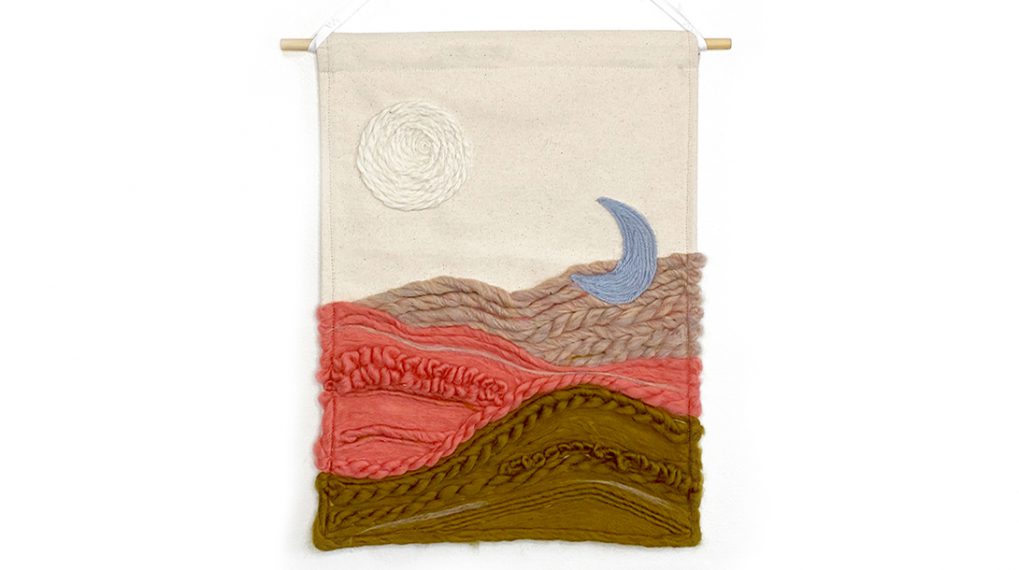
Hello Mr. Moon Wall Hanging
My name is Teri Henderson Tope and I am a BERNINA Ambassador from Columbus, Ohio.
Sometimes I have the urge to just finish something. As predominantly a quilter, my projects often are long and involved. Every once in awhile I just have the need to make something start to finish. This wall hanging is just one-of-those kinds of projects. Do-able or stitchable in a day or maybe a weekend, this project can easily be ready to decorate for my favorite time of year.
I love free-motion threadwork and usually work on portraits. Oftentimes, my work is done stitching black thread on a white background. Sometimes, a piece just needs a little color. Hello Mr. Moon is a small wall hanging that incorporates my love of thread work, a couple of fabric choices,and best of all, you can easily finish it quickly.
So I’m calling this technique free-motion appliqué and would love to hear what you think about it.
The “Hello Mr. Moon” wall hanging finishes at 16”x 20” and uses free-motion appliqué on domestic machine.
Materials to Create the “Hello Mr. Moon” Wall Hanging
- 1 fat quarter background fabric
- ½ yard moon and piping fabric
- ½ yard cat and binding fabric
- 2/3 yard backing fabric
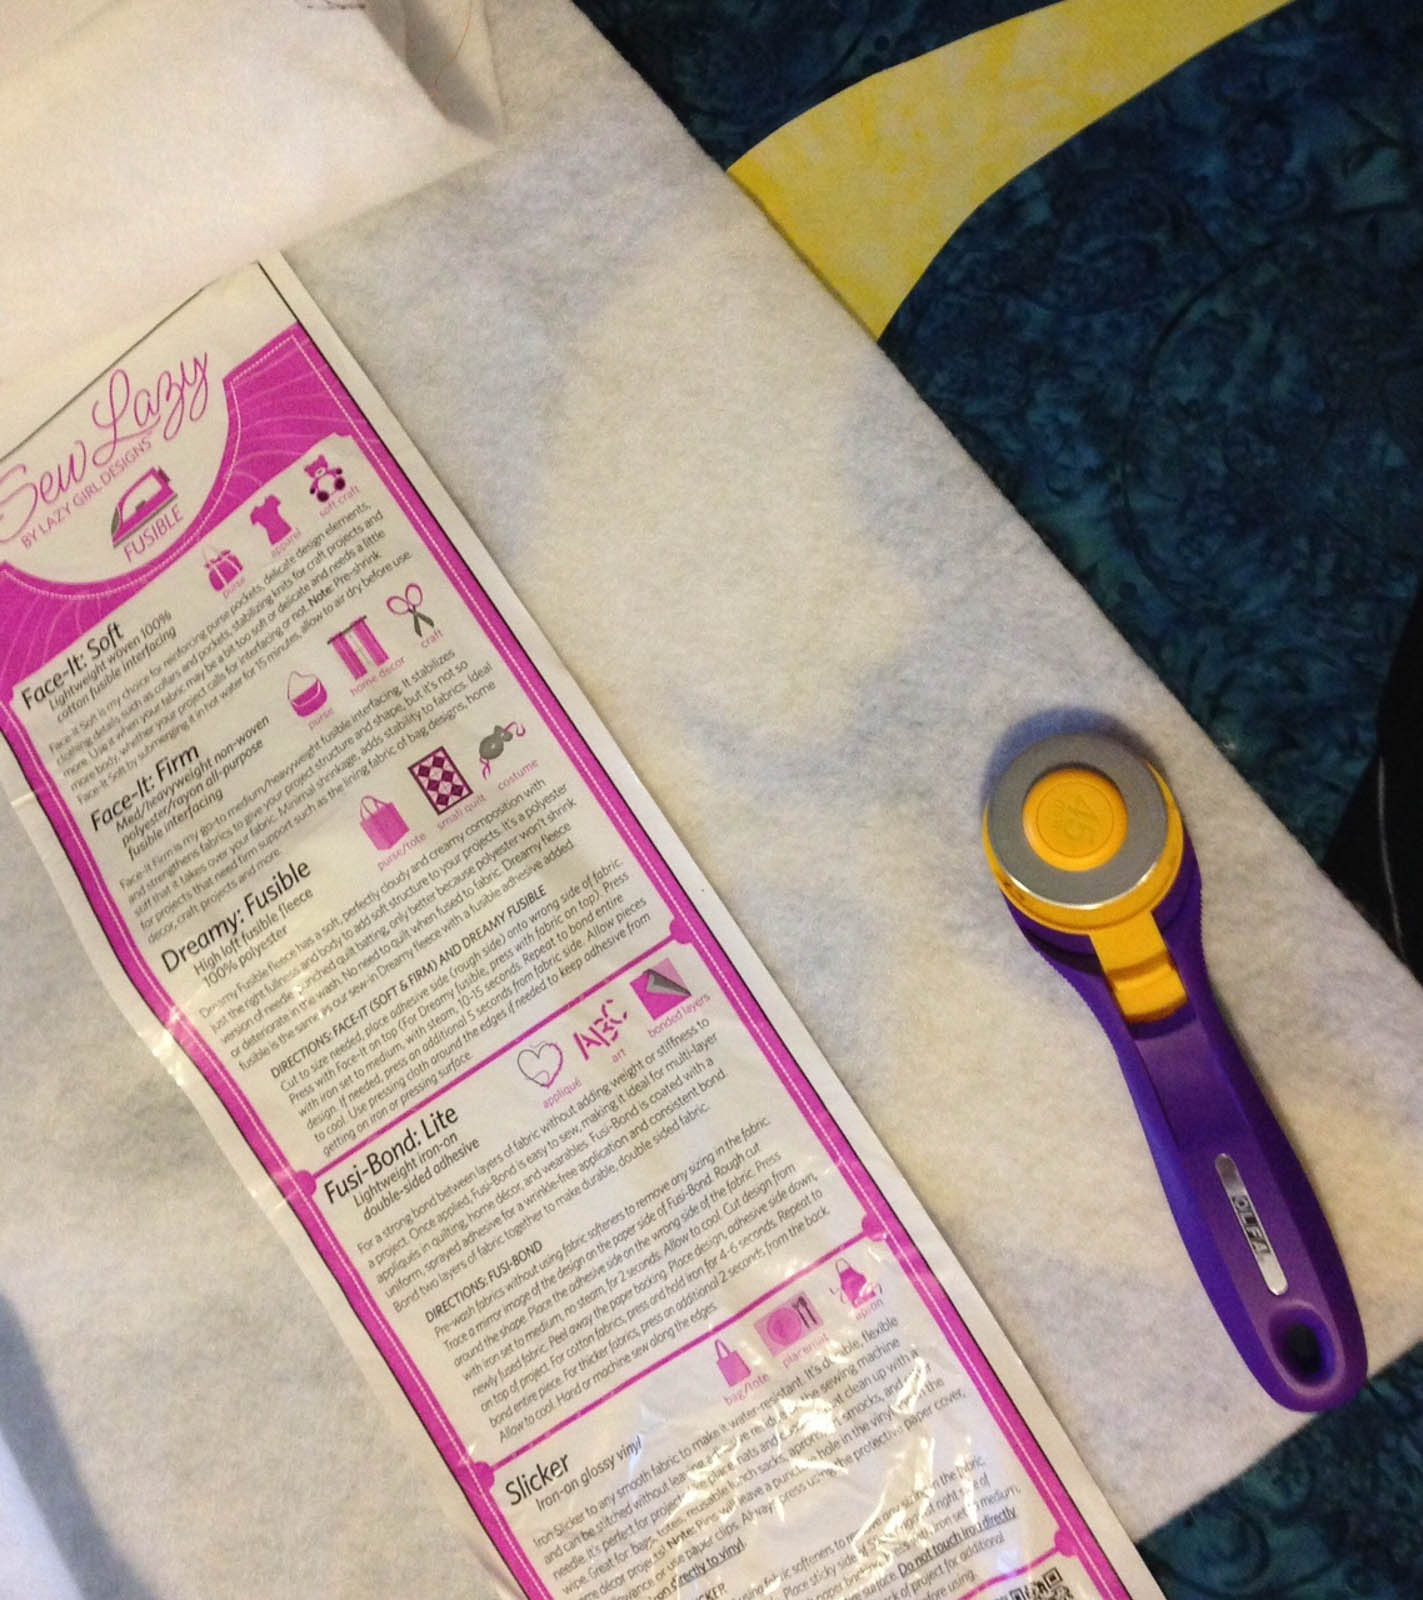
- 2/3 yard fusible fleece
- ½ yard lightweight fusible web
- Thread to match appliqué, quilt and binding (I used black, yellow, grey and variegated blue)
- 2-1/2 yards piping cord
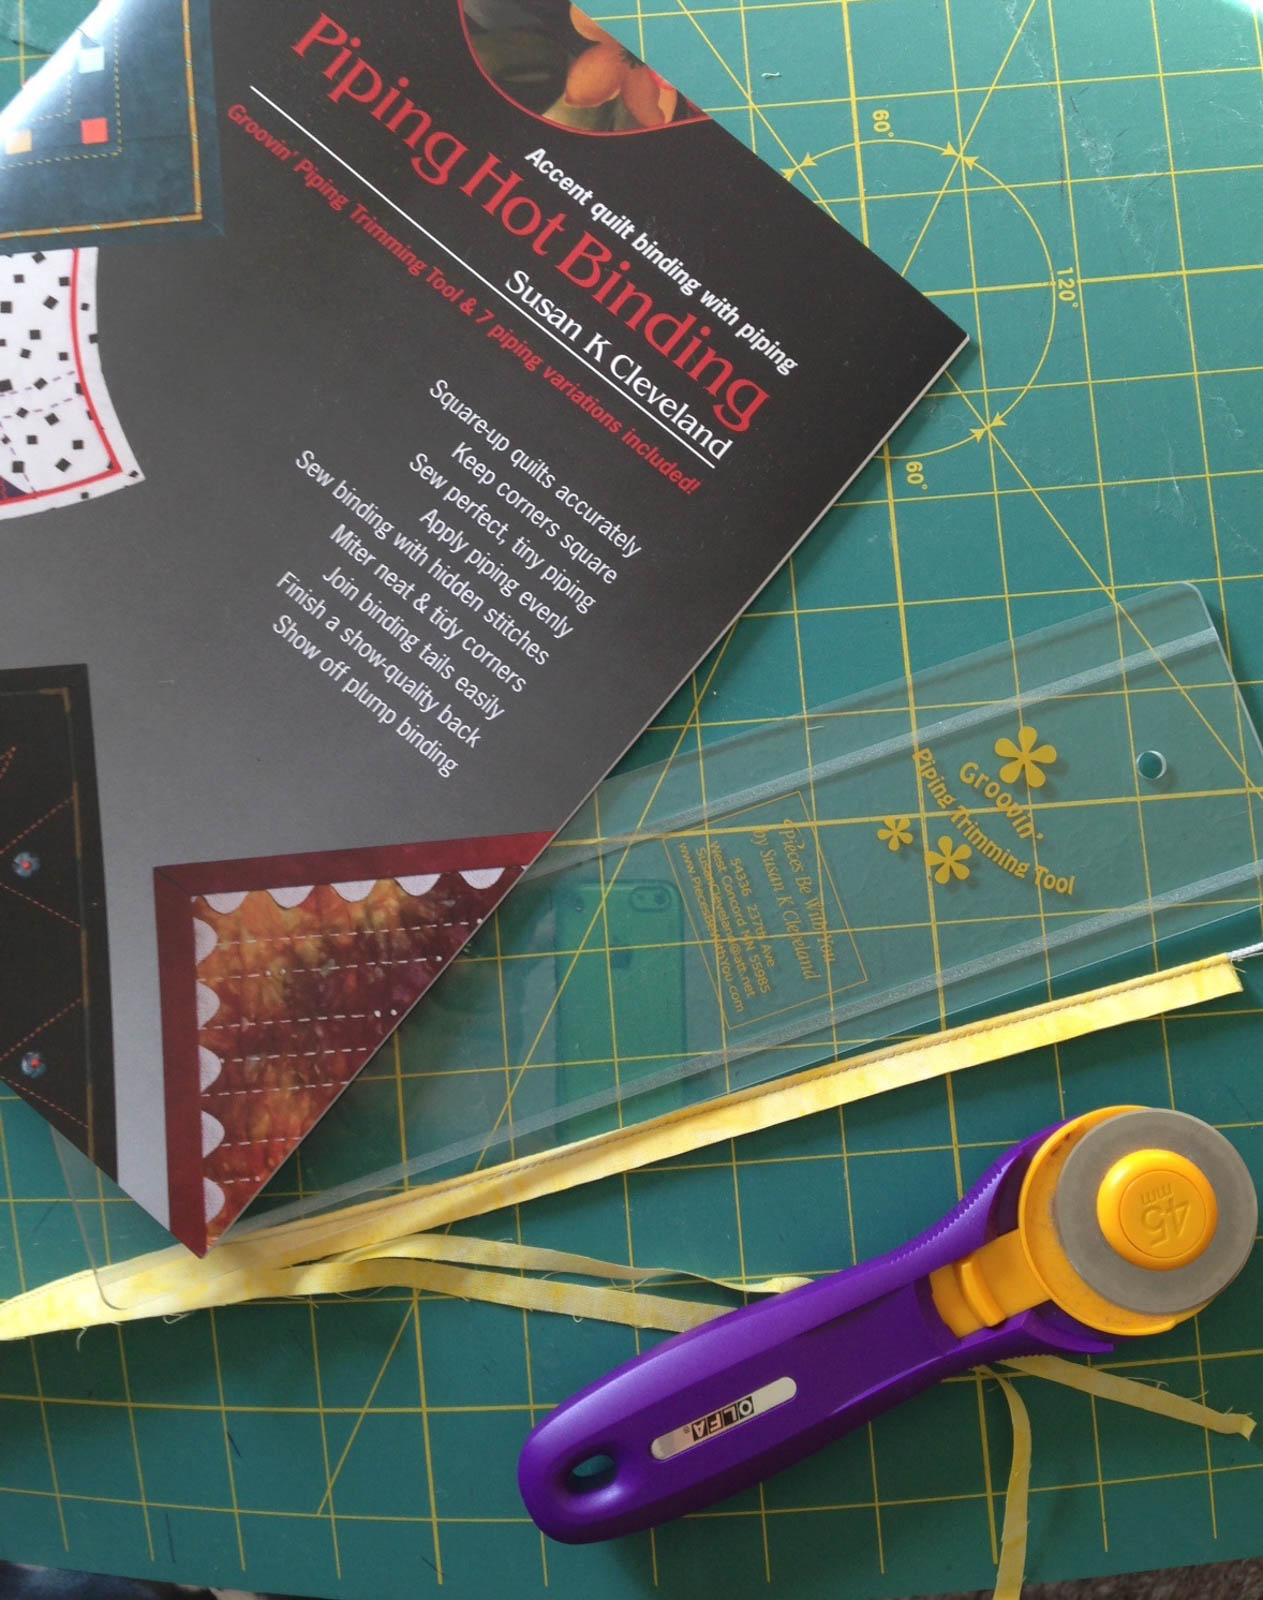
- Piping Hot Binding tool
- Wonder clips
- Schmetz Gold Titanium Embroidery Needles Size 90/14
- Darning foot #9 (or free-motion foot of your choice)
- Appliqué foot #23
- Patchwork foot #97D foot or Walking foot #50
- Fine tip black marker
- Iron and ironing surface
- Chalk pencil
- Blue water Soluable pen
- Basic sewing supplies
- Hello Mr. Moon Pattern
Instructions on How to Create the “Hello Mr. Moon” Wall Hanging
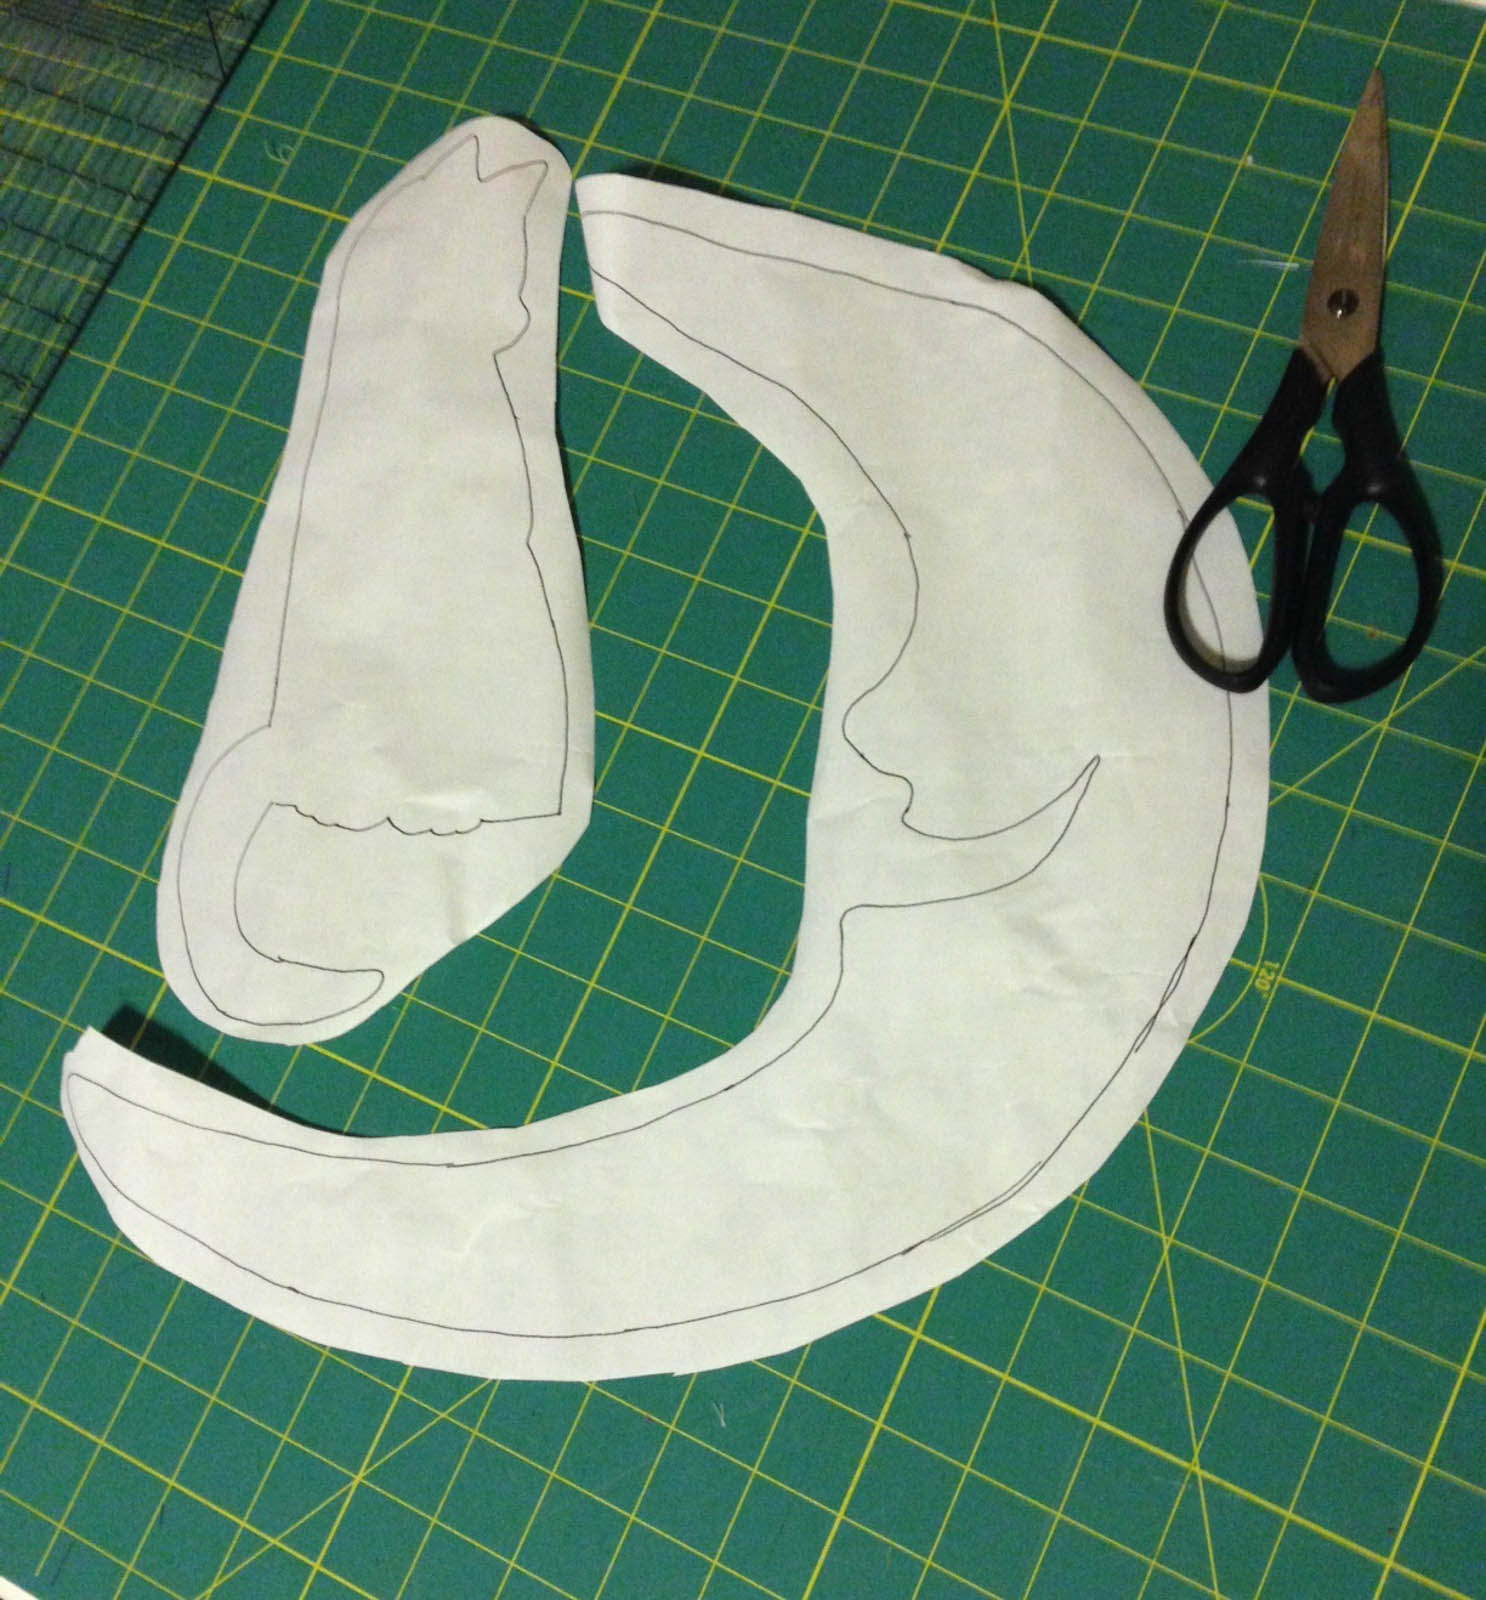
Print out and trace the appliqué patterns onto paper side of fusible web with fine tip black marker. I prefer the marker as a pencil can smear and leave residue on my iron. Also notice that when tracing I disconnected the kitten from the moon and that the images are in reverse of the finished wall hanging.

Roughly cut the appliqués outside of the drawn line. Remember to use those paper scissors.
Meanwhile, on a rotary mat cut three pieces of yellow fabric 1-1/4″ x width of fabric for piping and cut three pieces of black fabric 2-1/2″ x width of fabric for the binding.

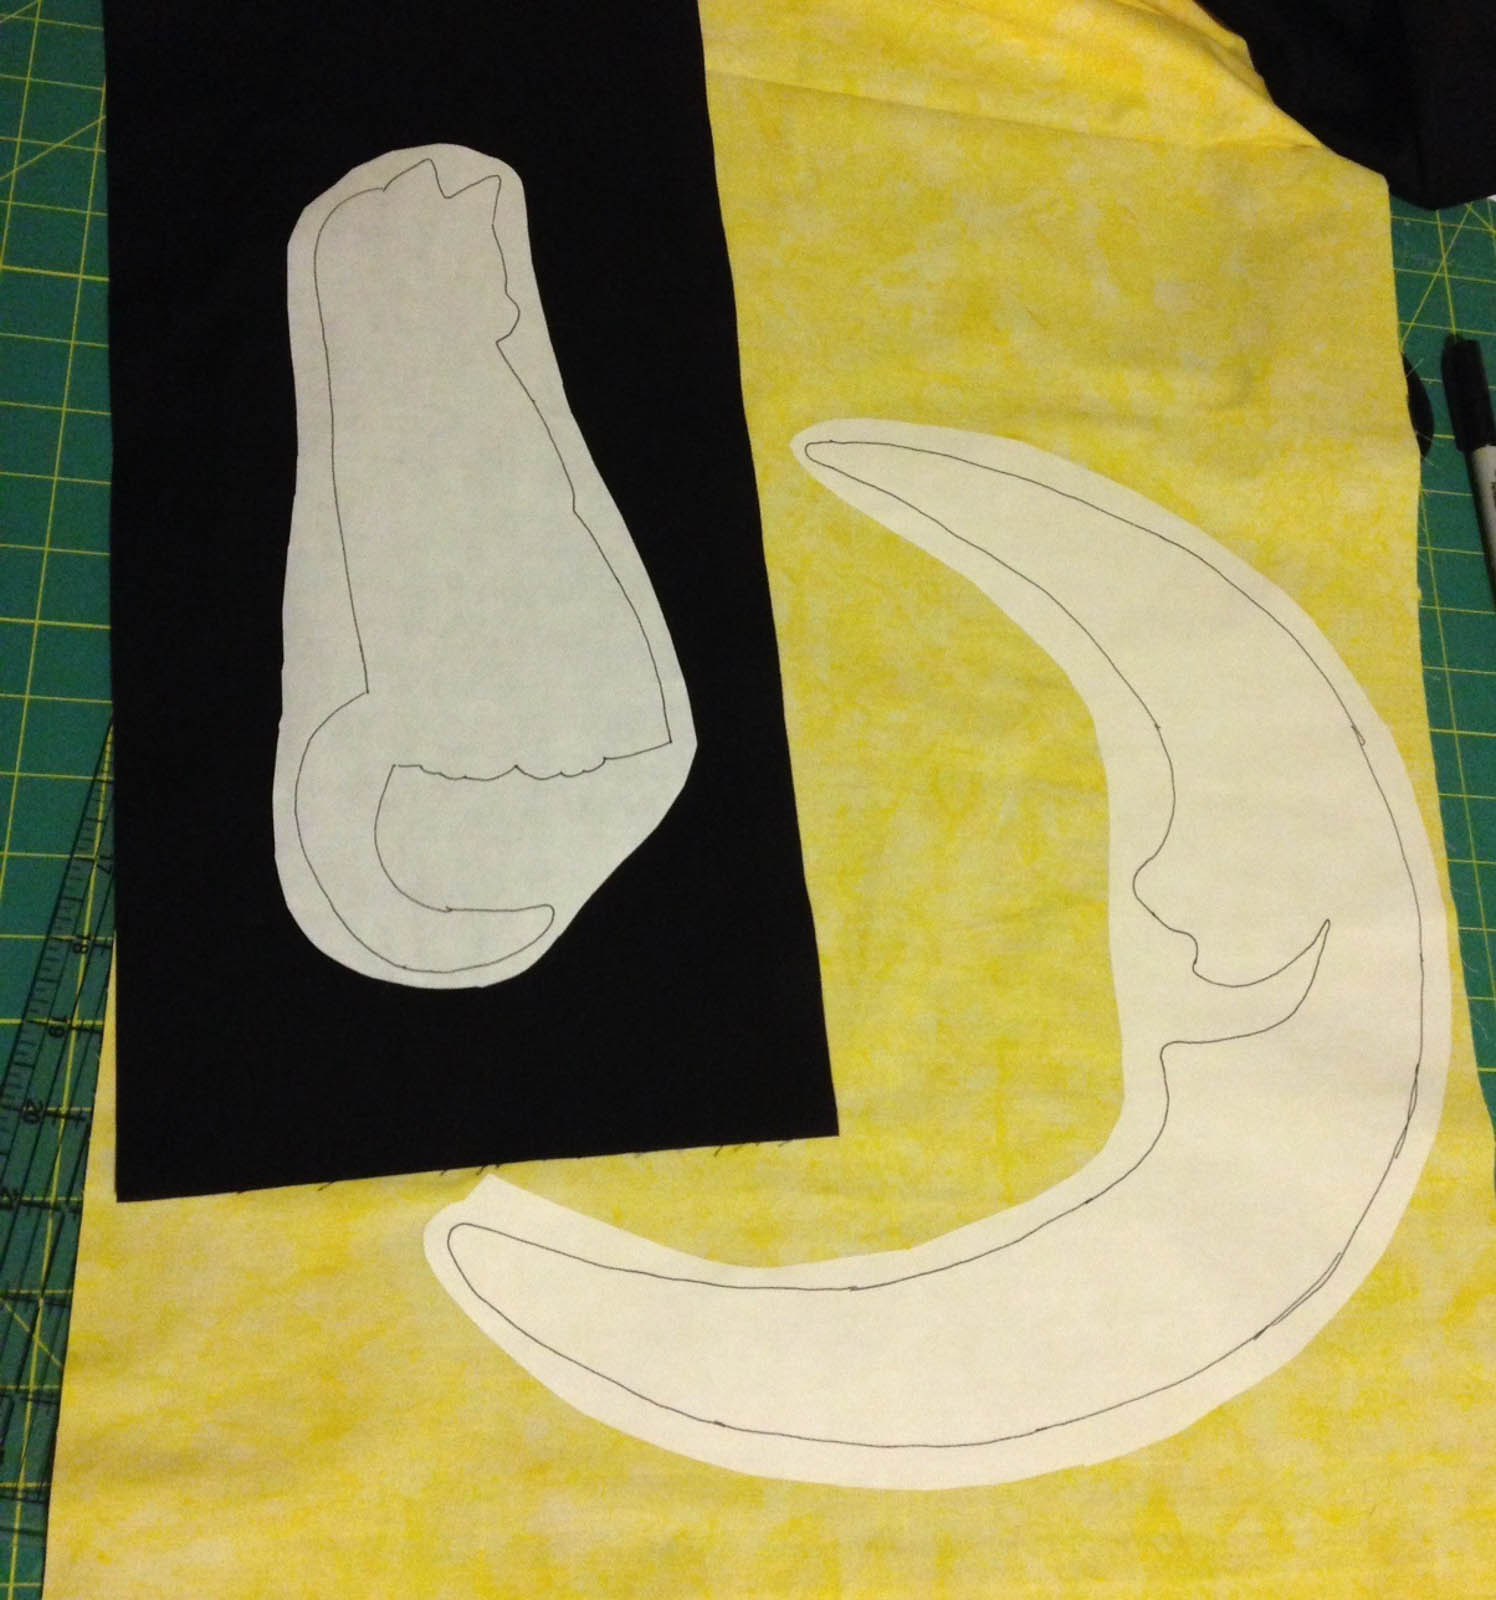
Fuse the web cutouts according to the manufacturer’s directions to the wrong side of the remaining pieces appliqué fabrics.
Cut the appliqués out on the drawn line.
Using a light box and pattern, trace interior features of the kitten and Mr. Moon onto the right side of the appliqués. You will need to flip the paper pattern so that the right side faces down on the light box as the pattern prints out in reverse. Trace the features using a chalk pencil on the black fabric and blue water-soluble pen on the yellow moon.
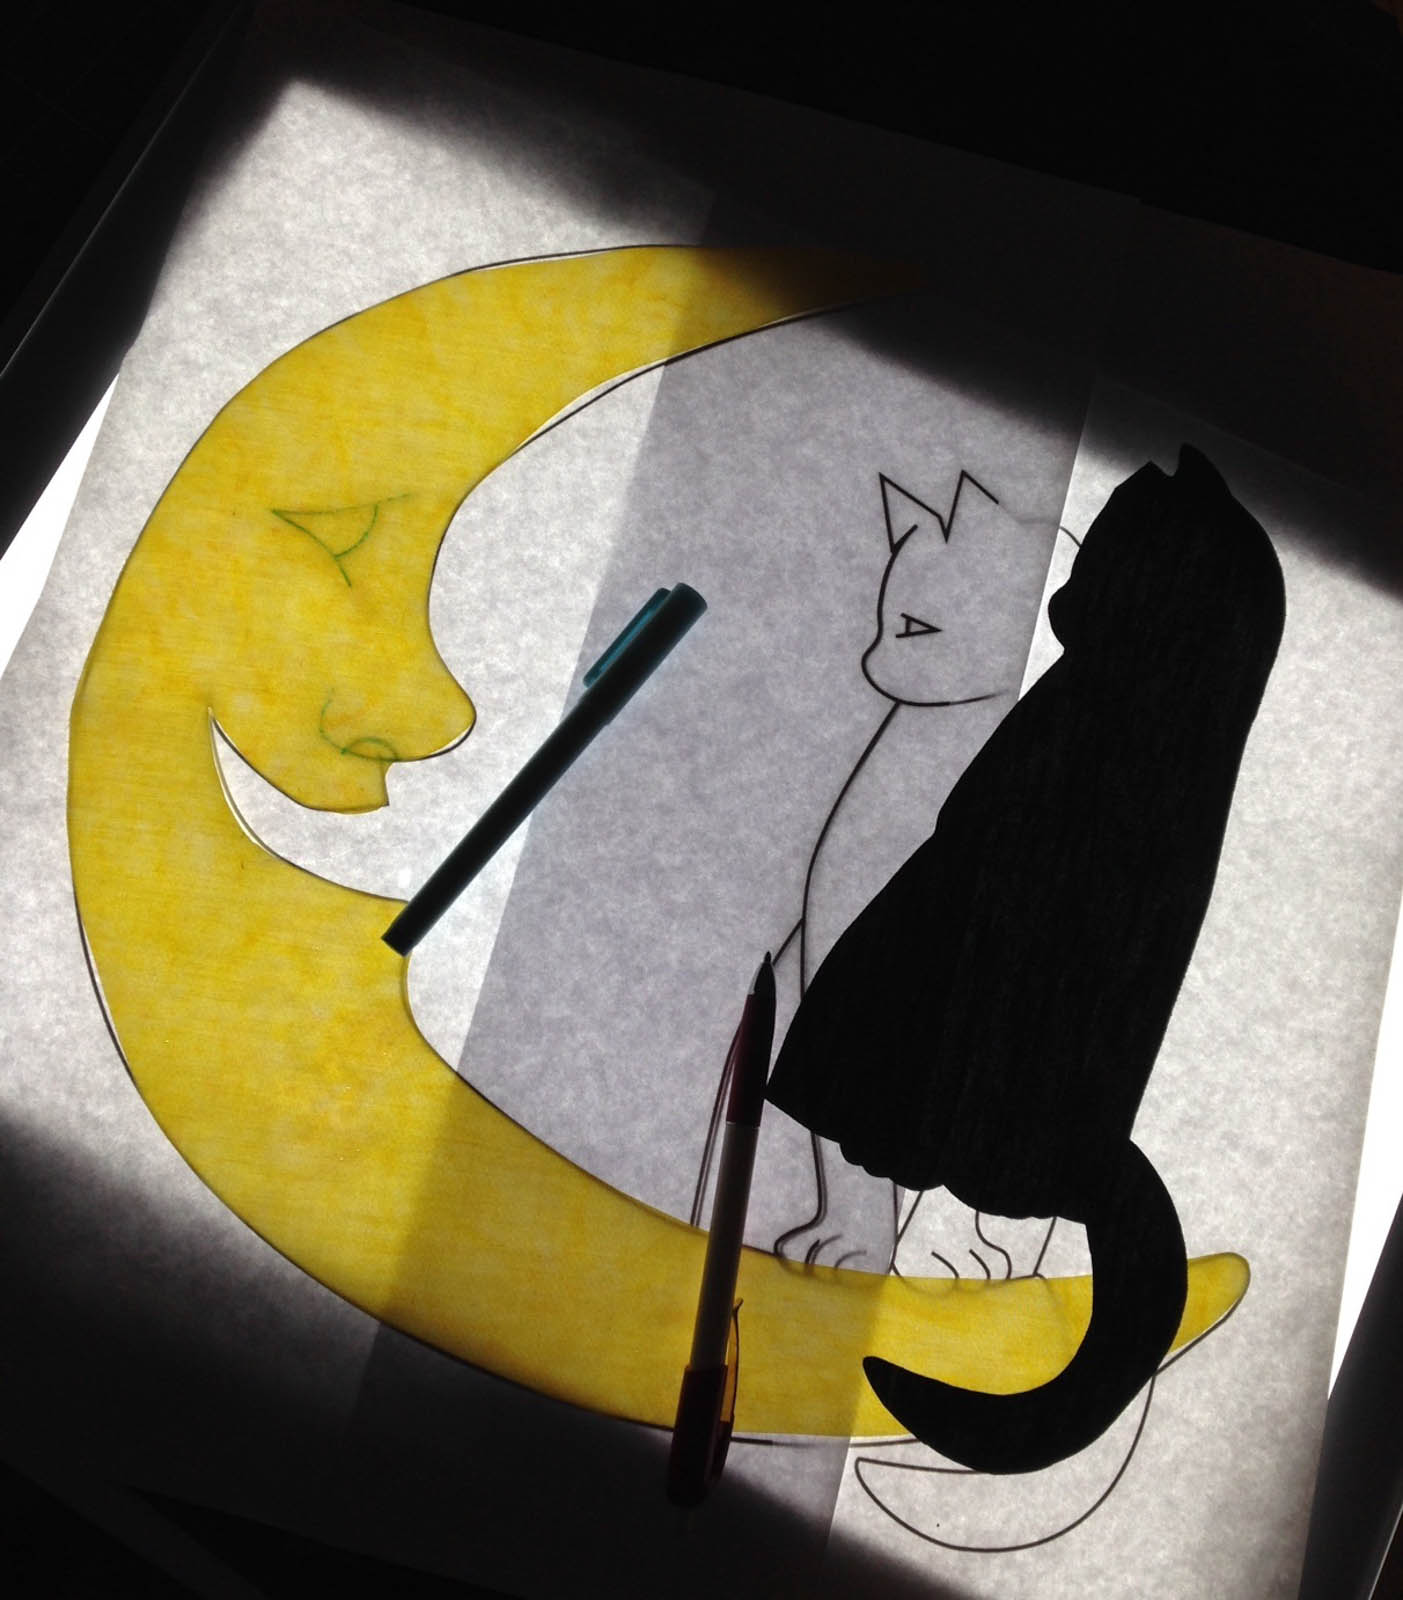
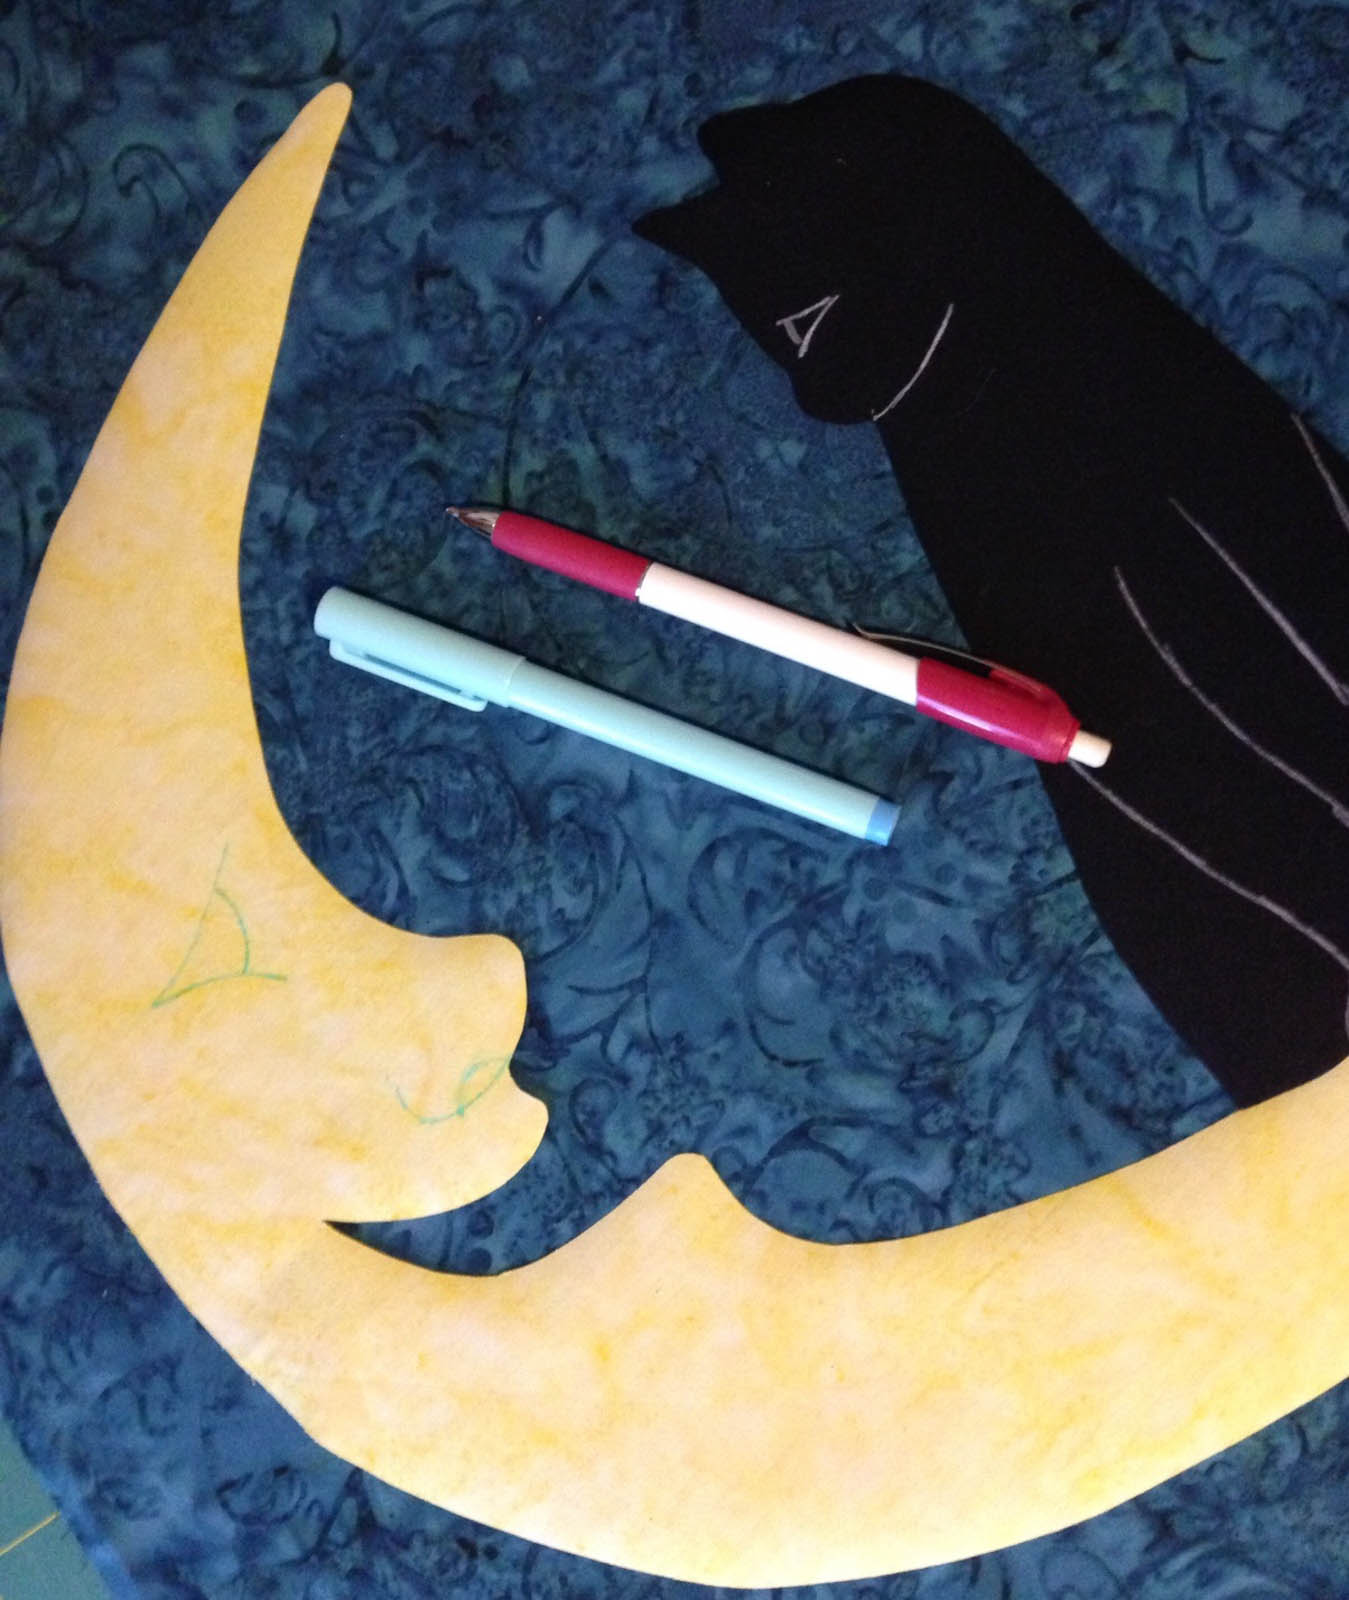
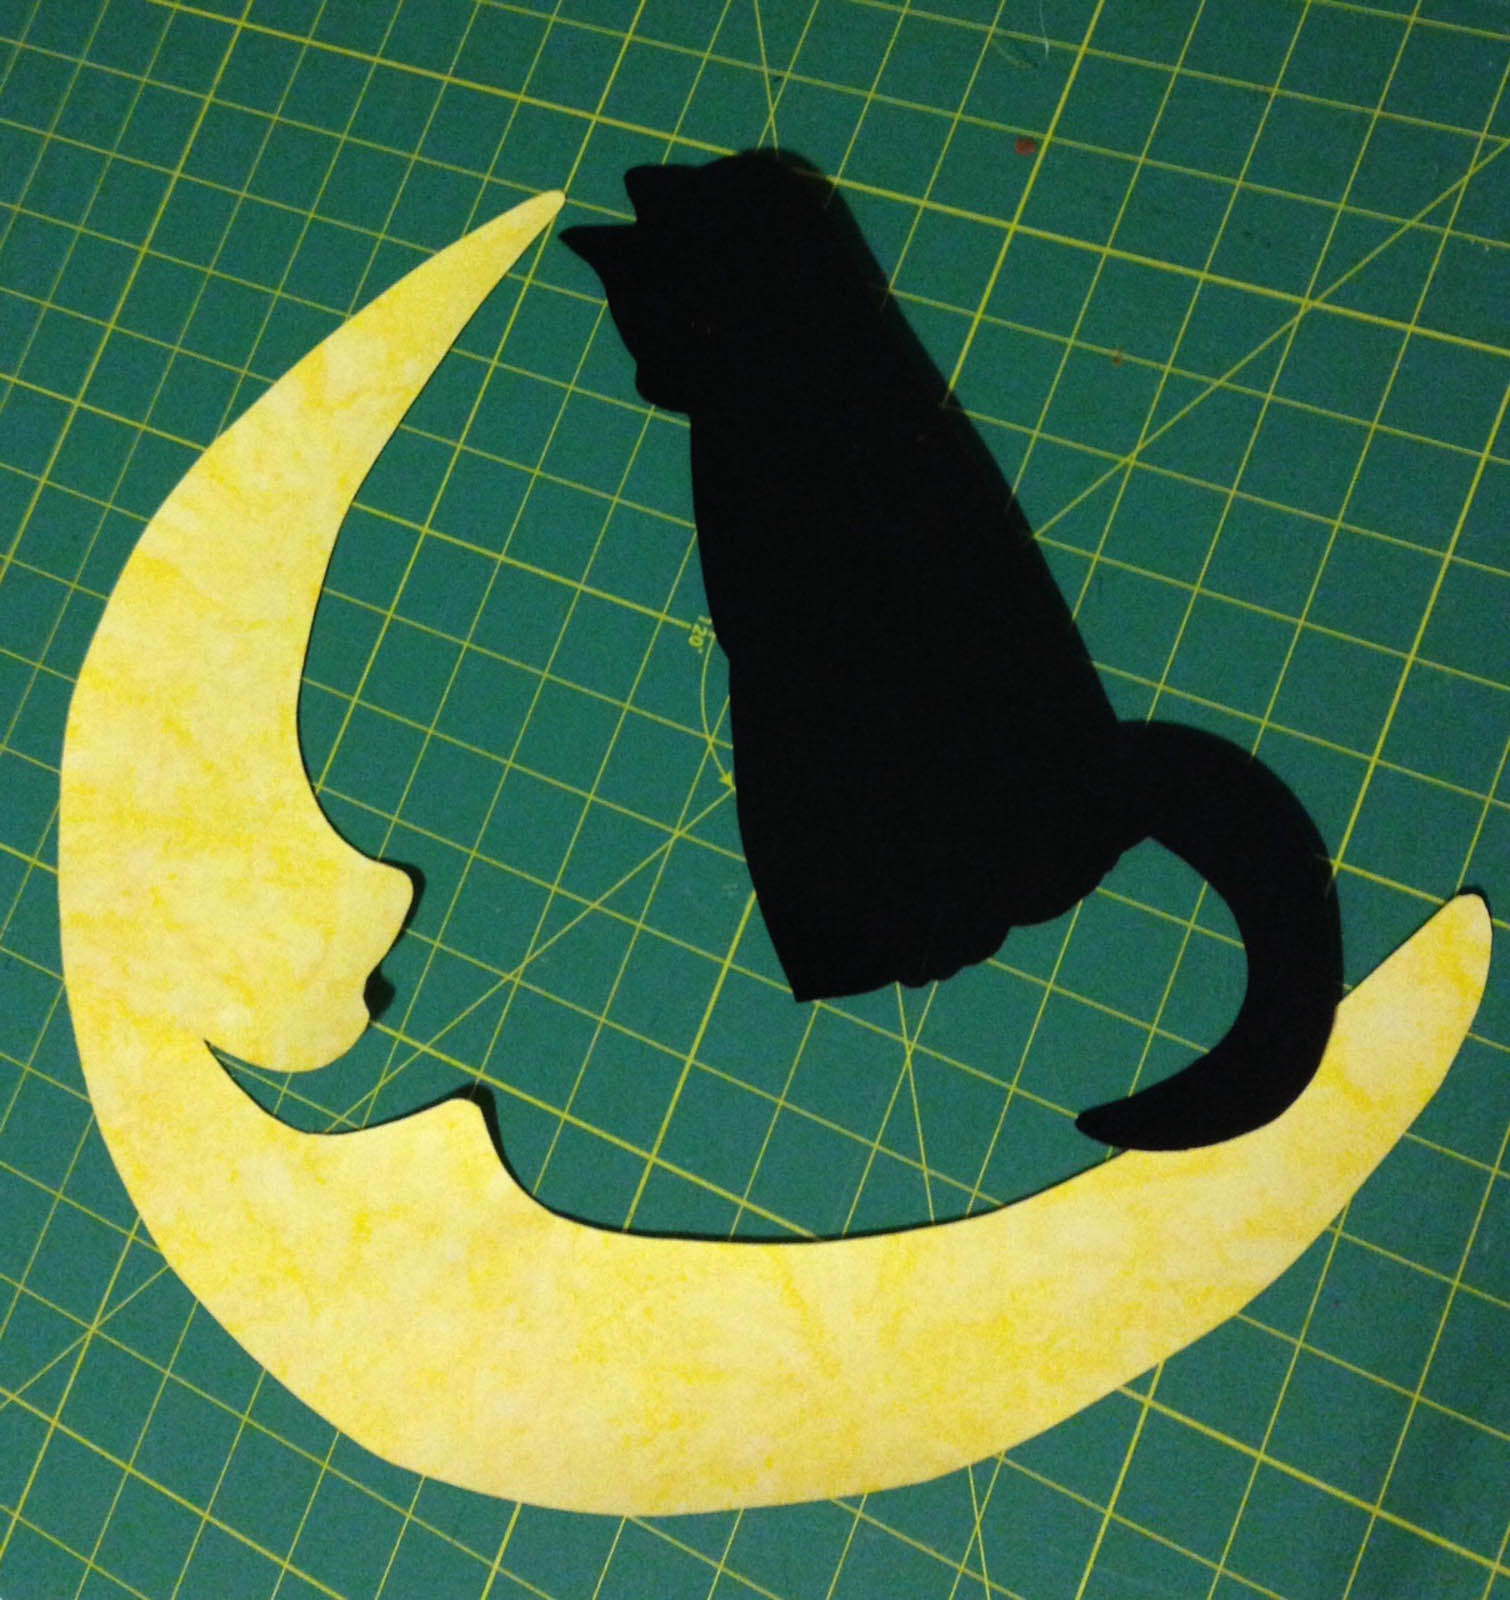
Remove the paper from fusible web on the back of the appliqués.
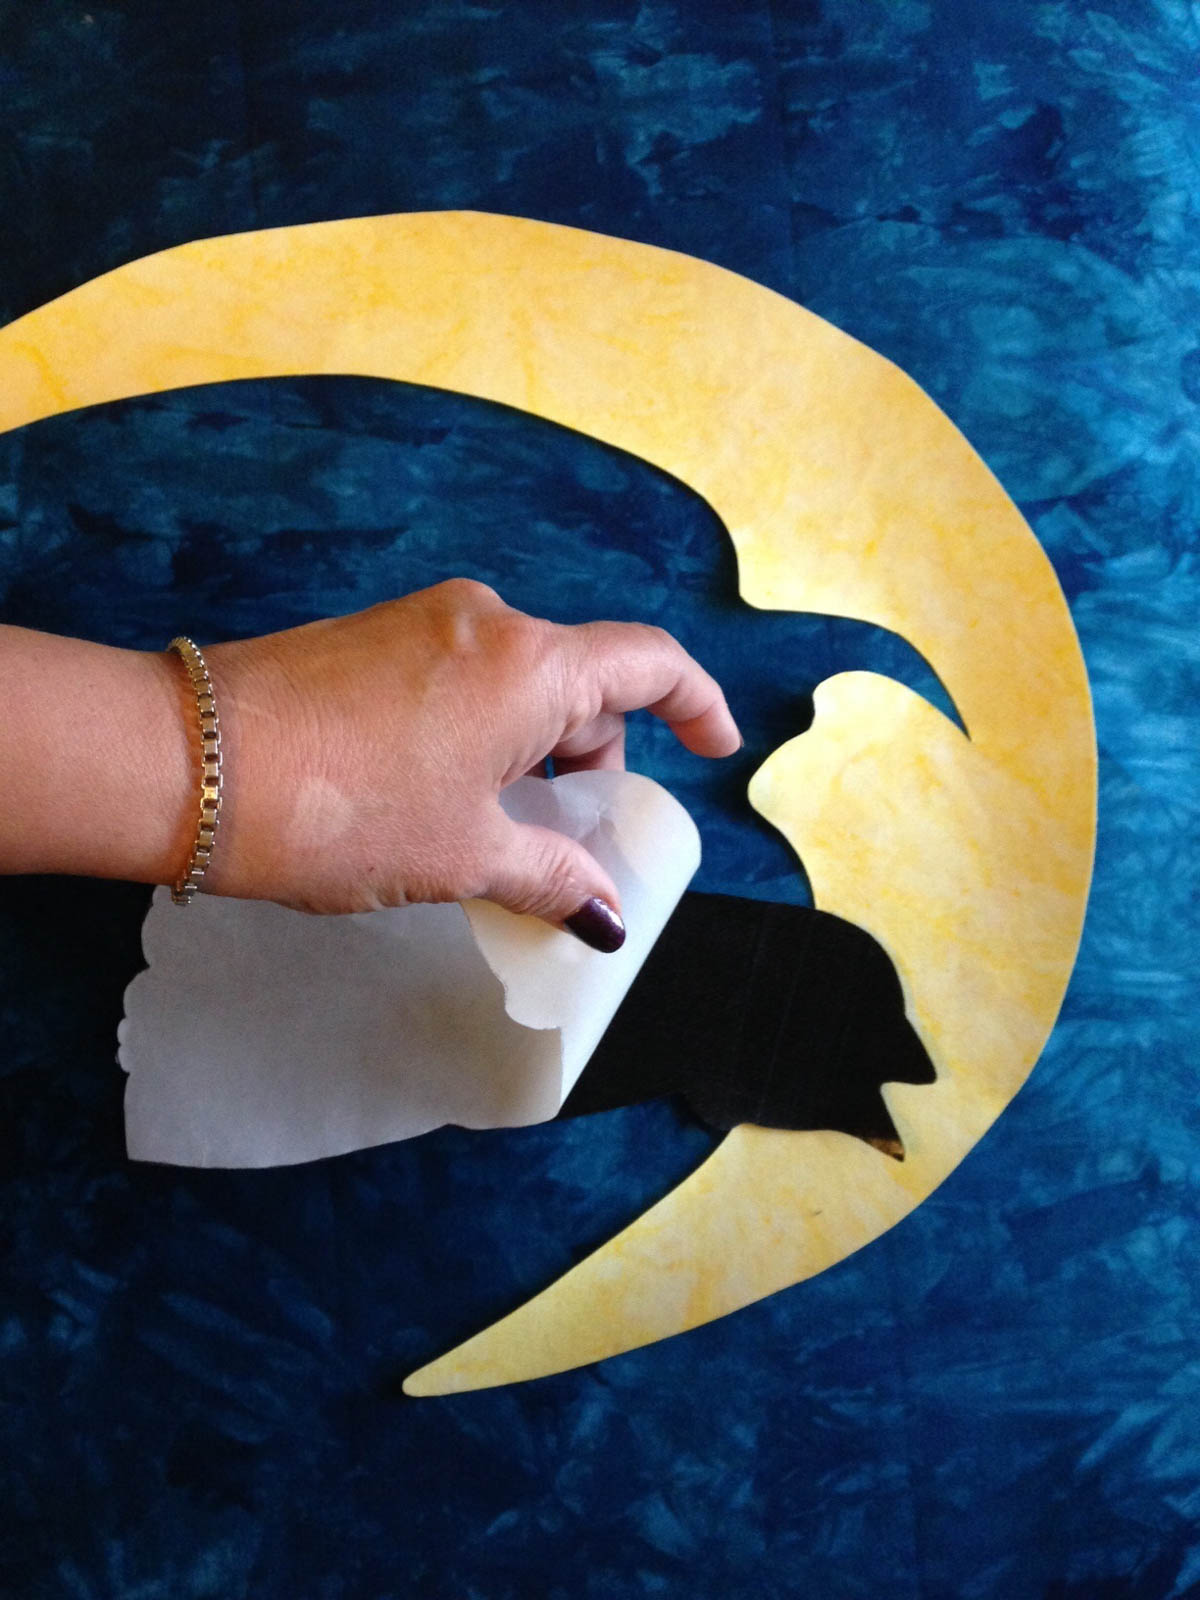
Place appliqués onto the background fat quarter and press into place with iron. Don’t worry about setting that blue pen, we are going to free motion over it and cover it in thread.
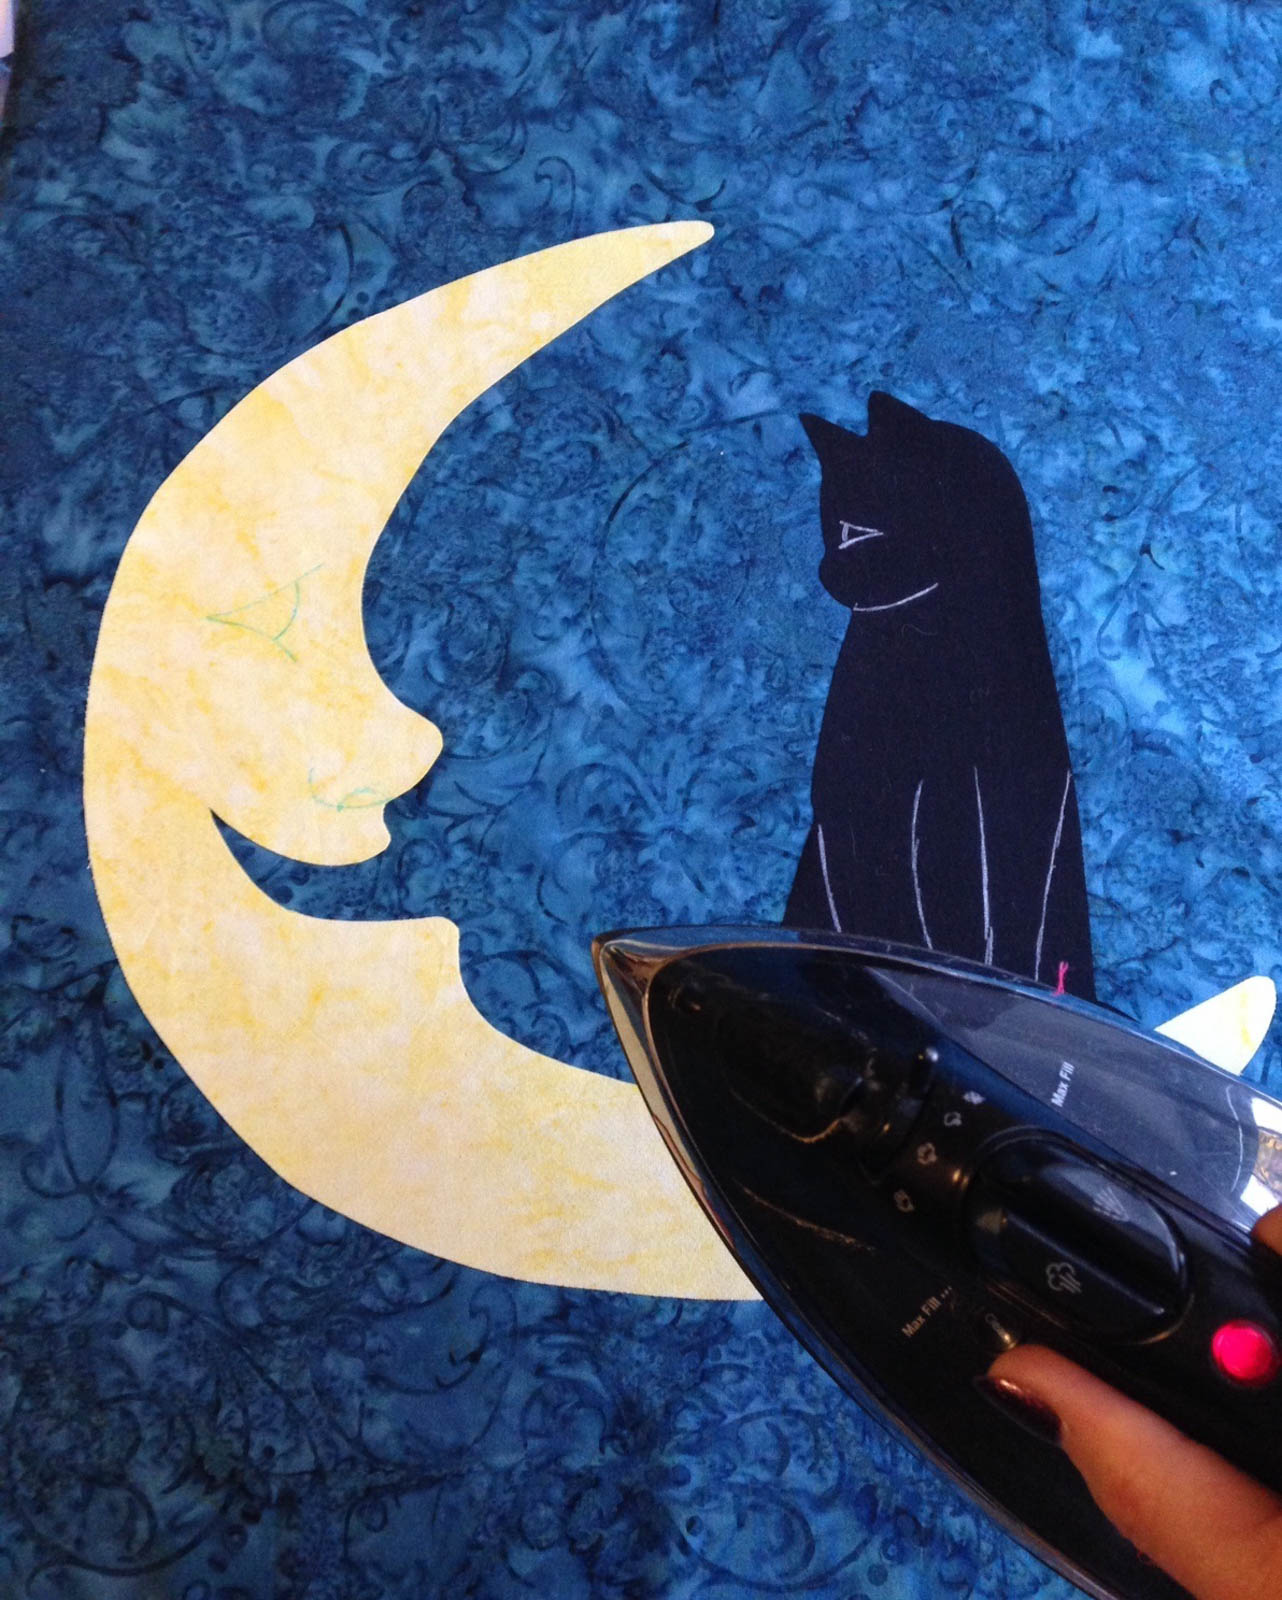
Cut a piece of backing and a piece of fusible batting 18″ x 22″. This is roughly the same size as the quilt top. Because we are fusing the pieces together, there is no need to make backing and batting larger than our top. We will also be squaring up the quilt after all thread work and quilting is complete. Make a quilt sandwich with backing fusible fleece and quilt top. Press all the layers together.
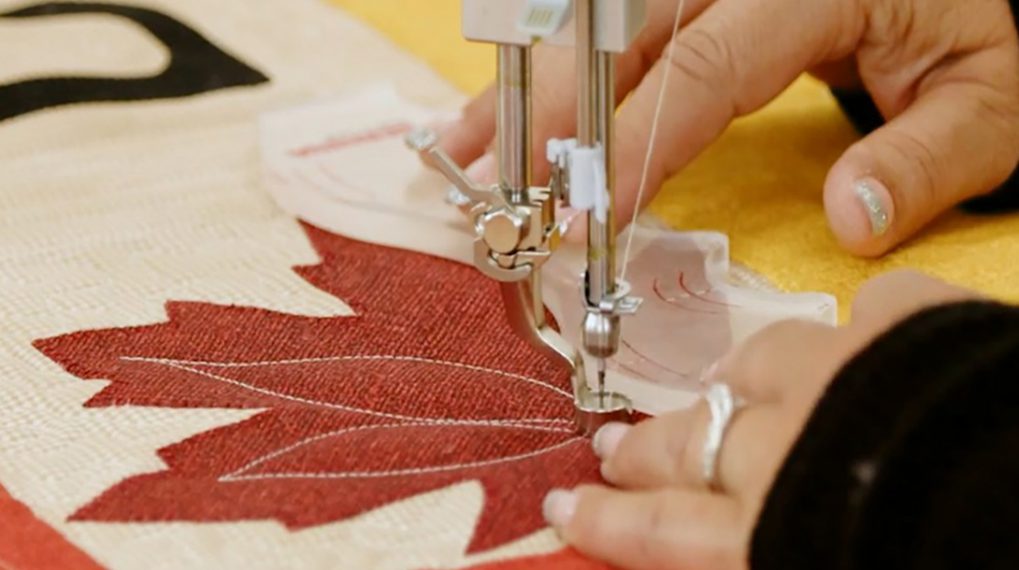
Attach the free-motion foot to the sewing machine and thread machine with black thread on top and in the bobbin. Use a Schmetz Gold Titanium Embroidery Needles Size 90/14 for stitching through the appliqué and quilt sandwich. The fusible web does not build up on this needle. Lower the feed dogs on the sewing machine. Free-motion stitch around all the appliqués and features. I like the hand drawn look that can be achieved by stitching over raw edges and lines several times. In fact the messier you stitch the better. Just remember to keep your stitches nice and even in length.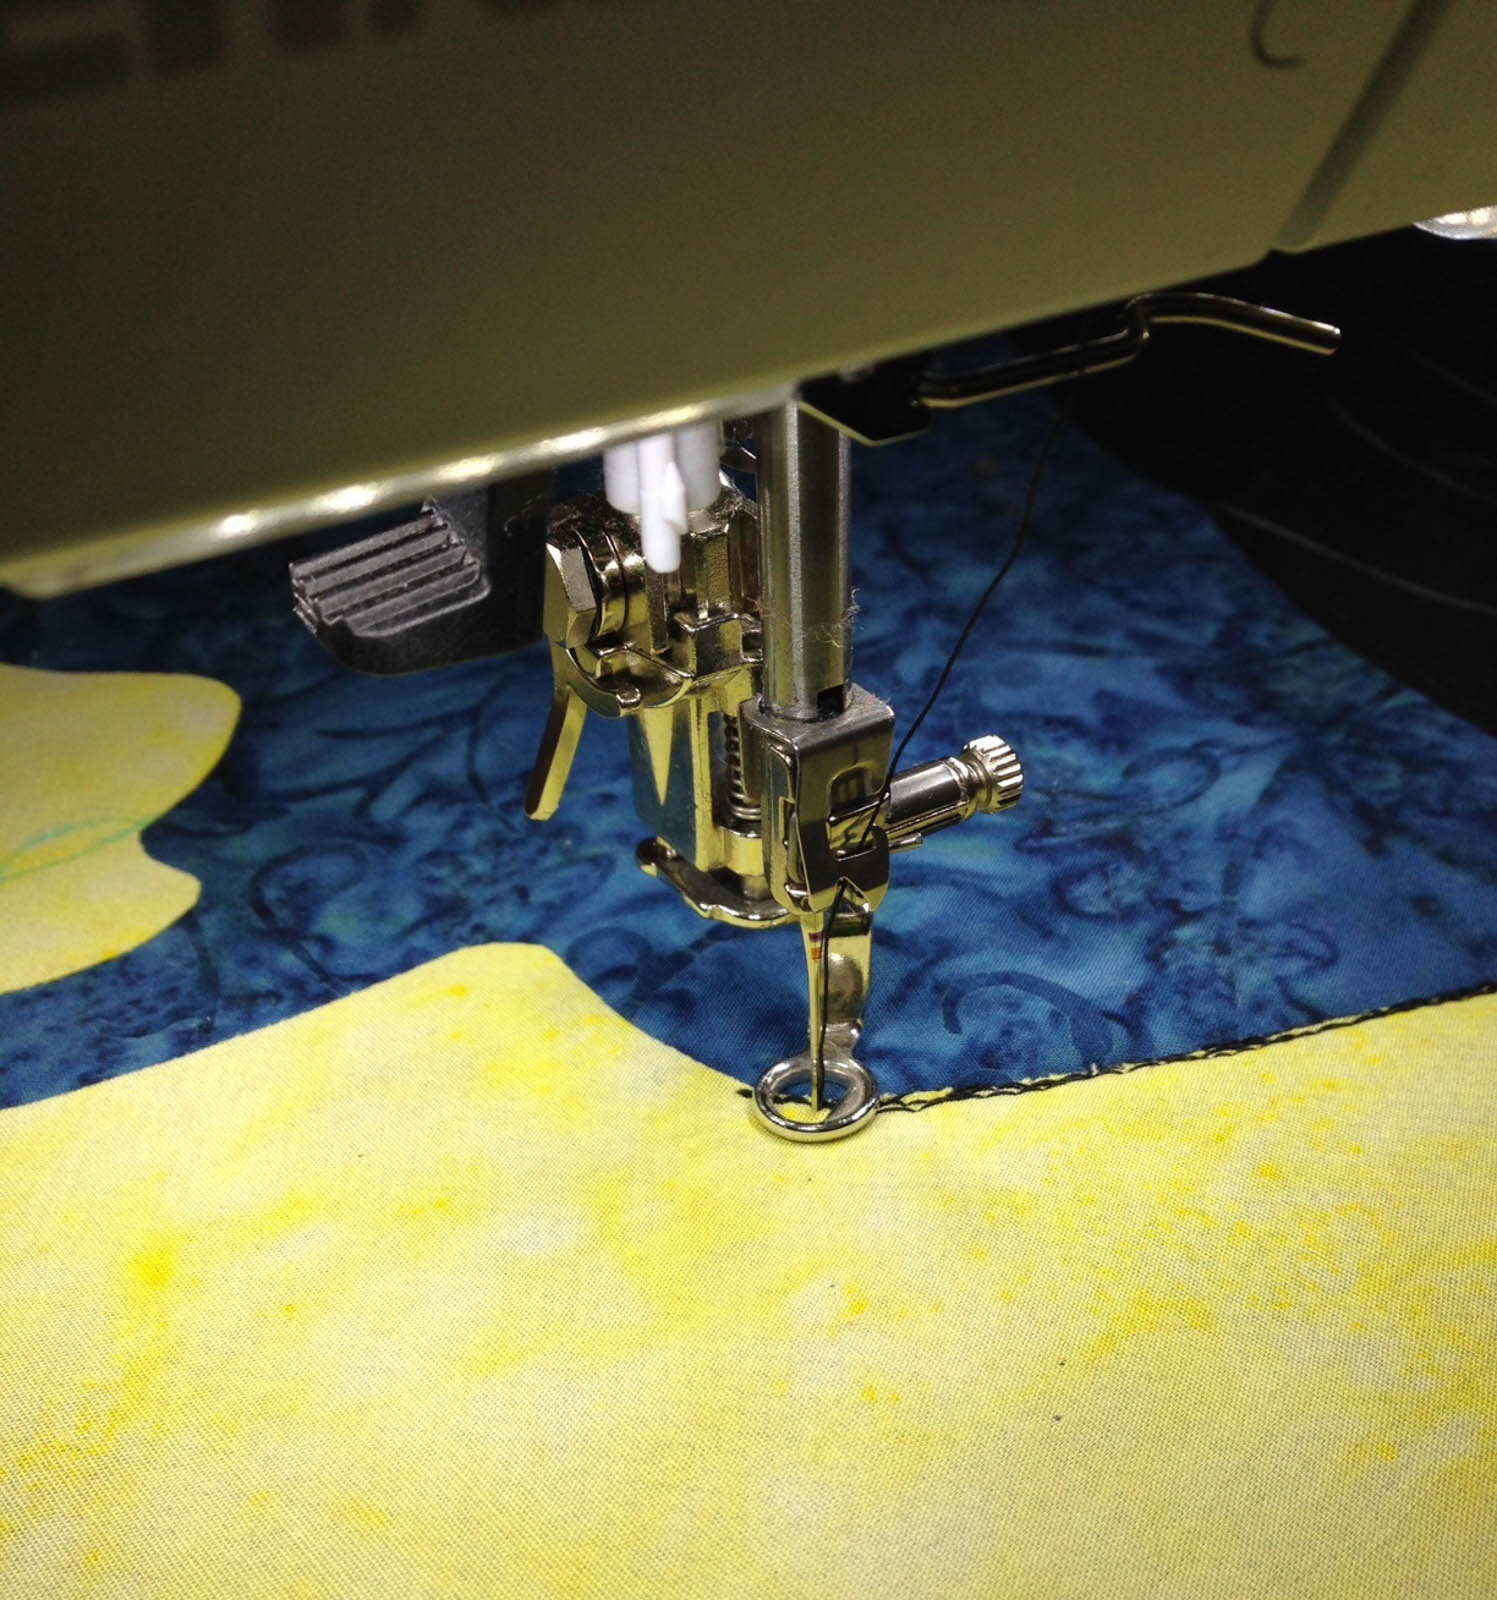
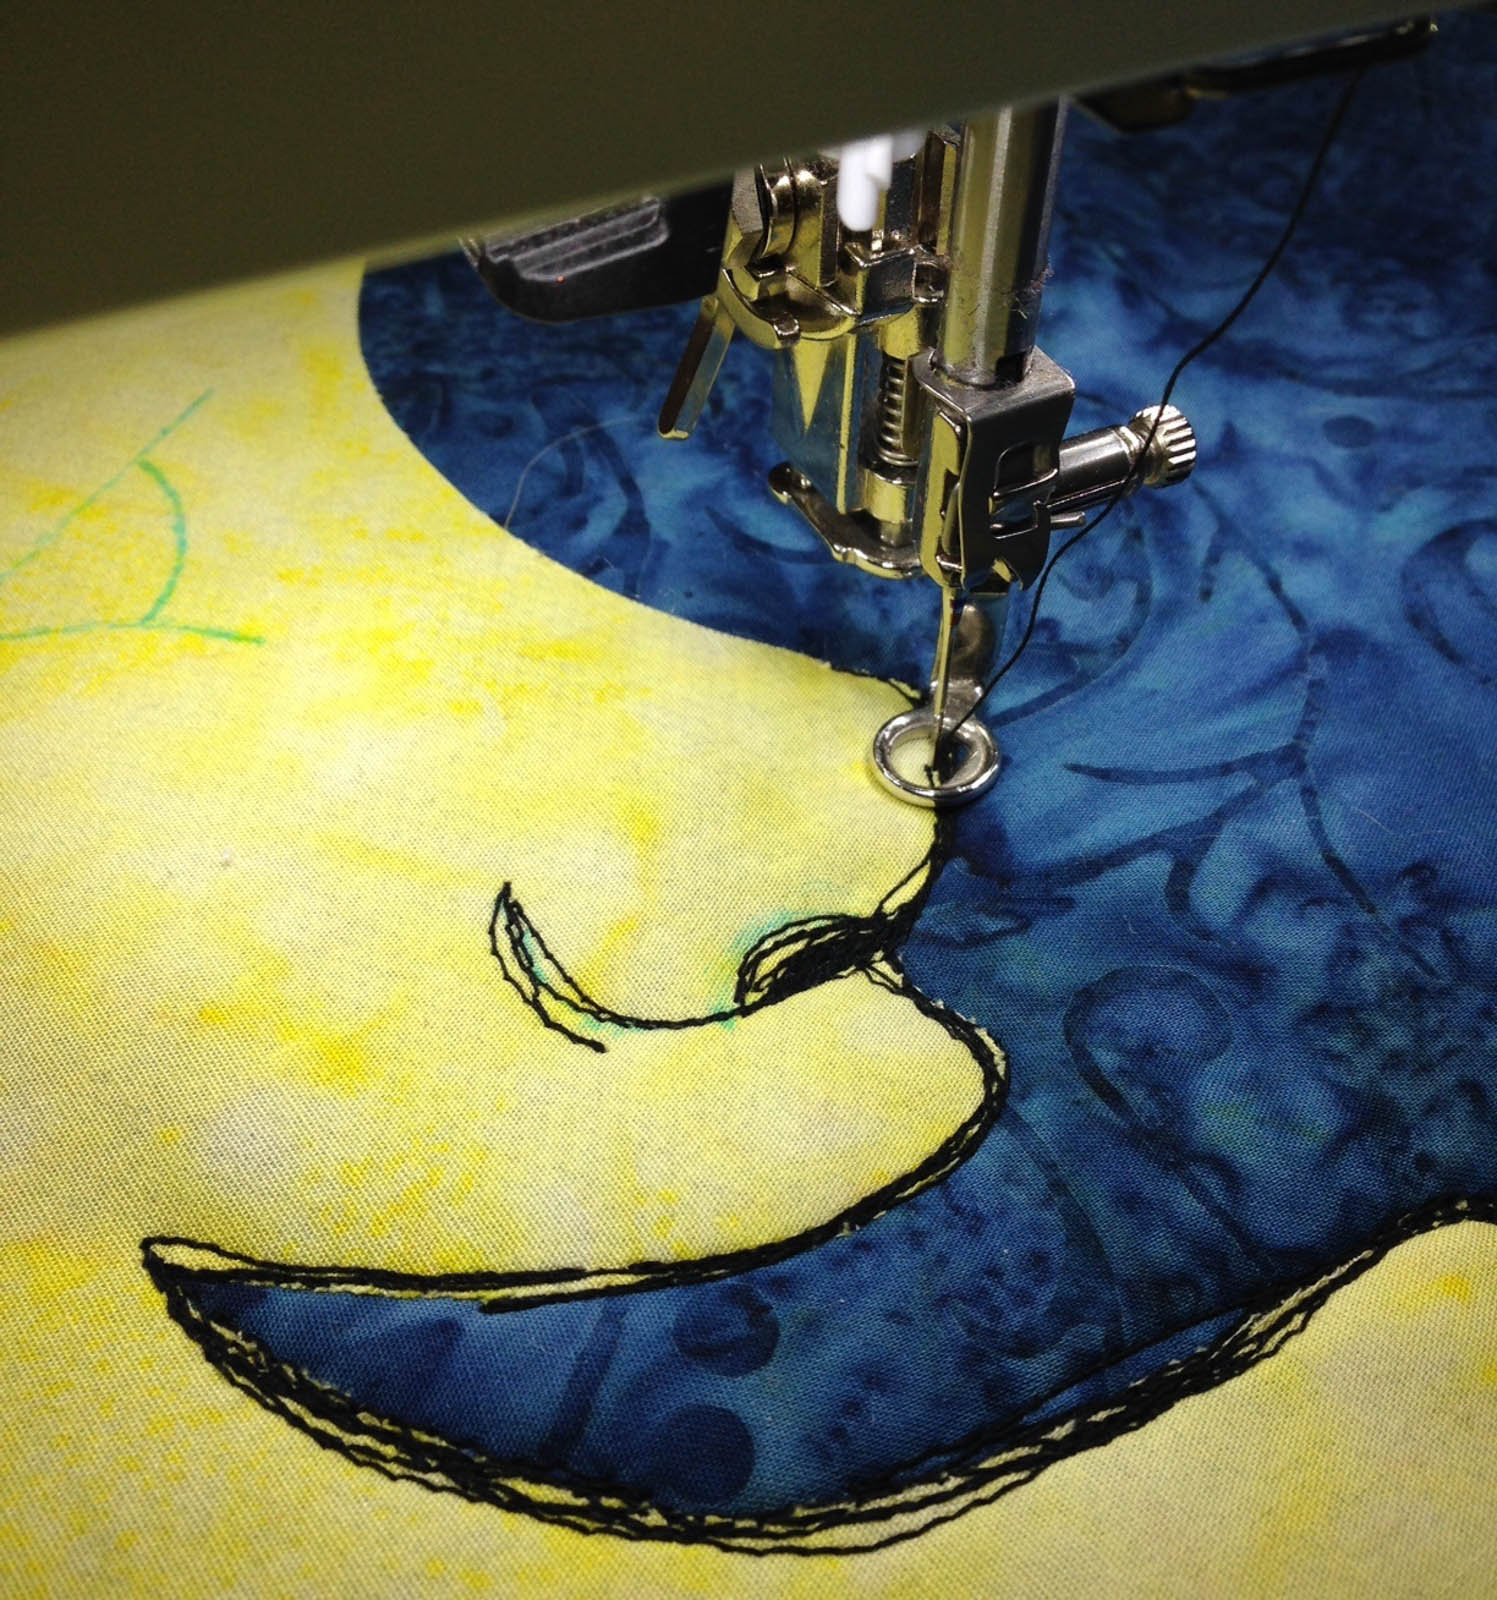
Change out thread to grey and stitch detail and features onto kitten.

After appliqué thread work is complete thread machine with quilting thread and quilt the wall hanging. I had a little fun with the quilting by adding swirls that remind me of Van Gogh’s Starry Night.

After all threadwork and quilting is complete square up wall hanging, sample is 16″ x 20″ and prepare to add piping.
Cut the three strips of yellow 1-1/4″ fabric into four sections. Two strips should measure about 23″ x 1-1/4” and two strips 19″ x 1-1/4”. Cut four pieces of piping cord 2″ longer than each of the strips of fabric. Press the 1-1/4″ fabric strips in half wrong sides together.
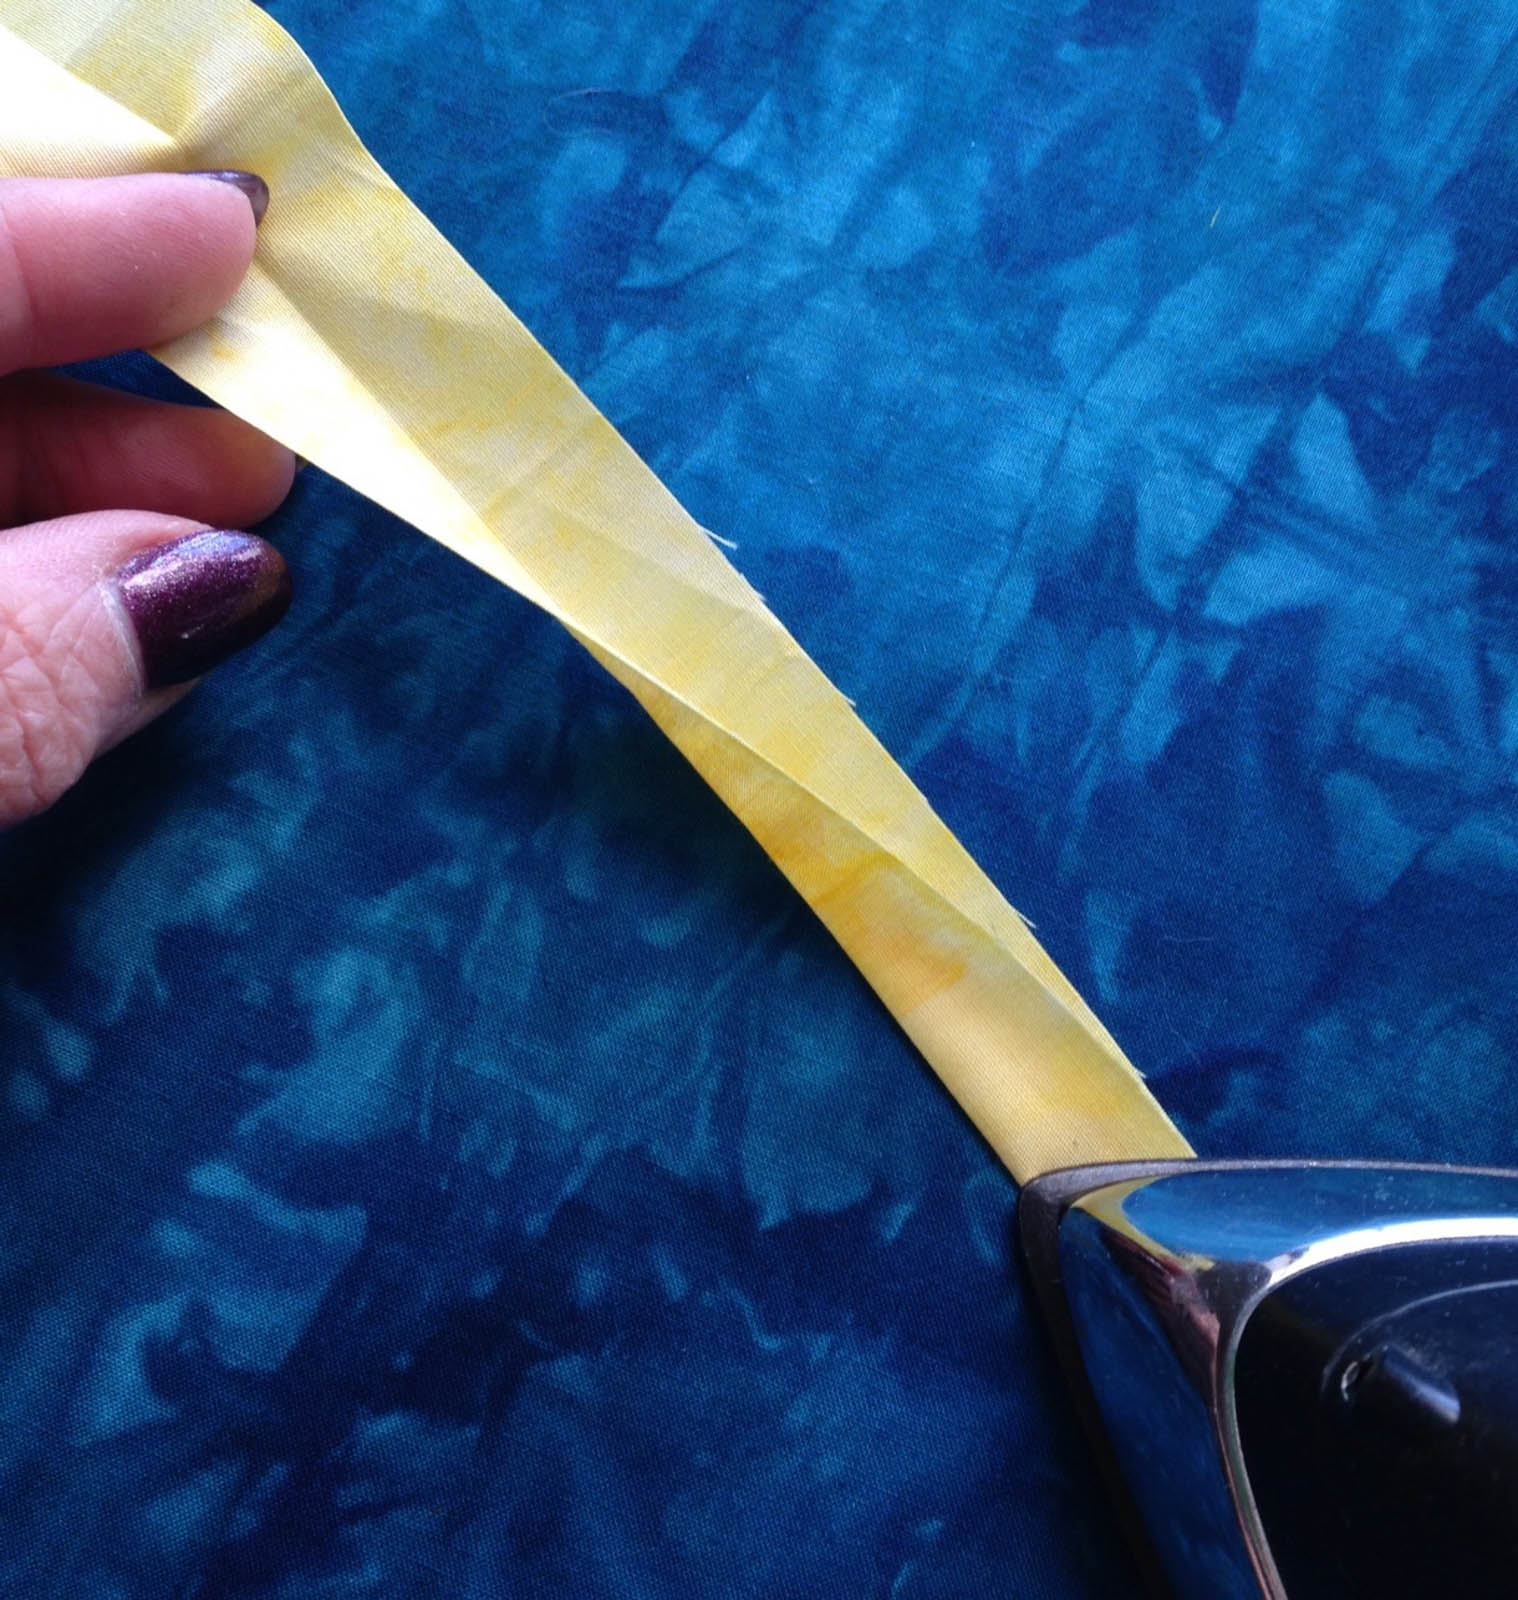
Place piping cord into fold of yellow strips of fabric and refold so that cord lies inside against the folded edge.
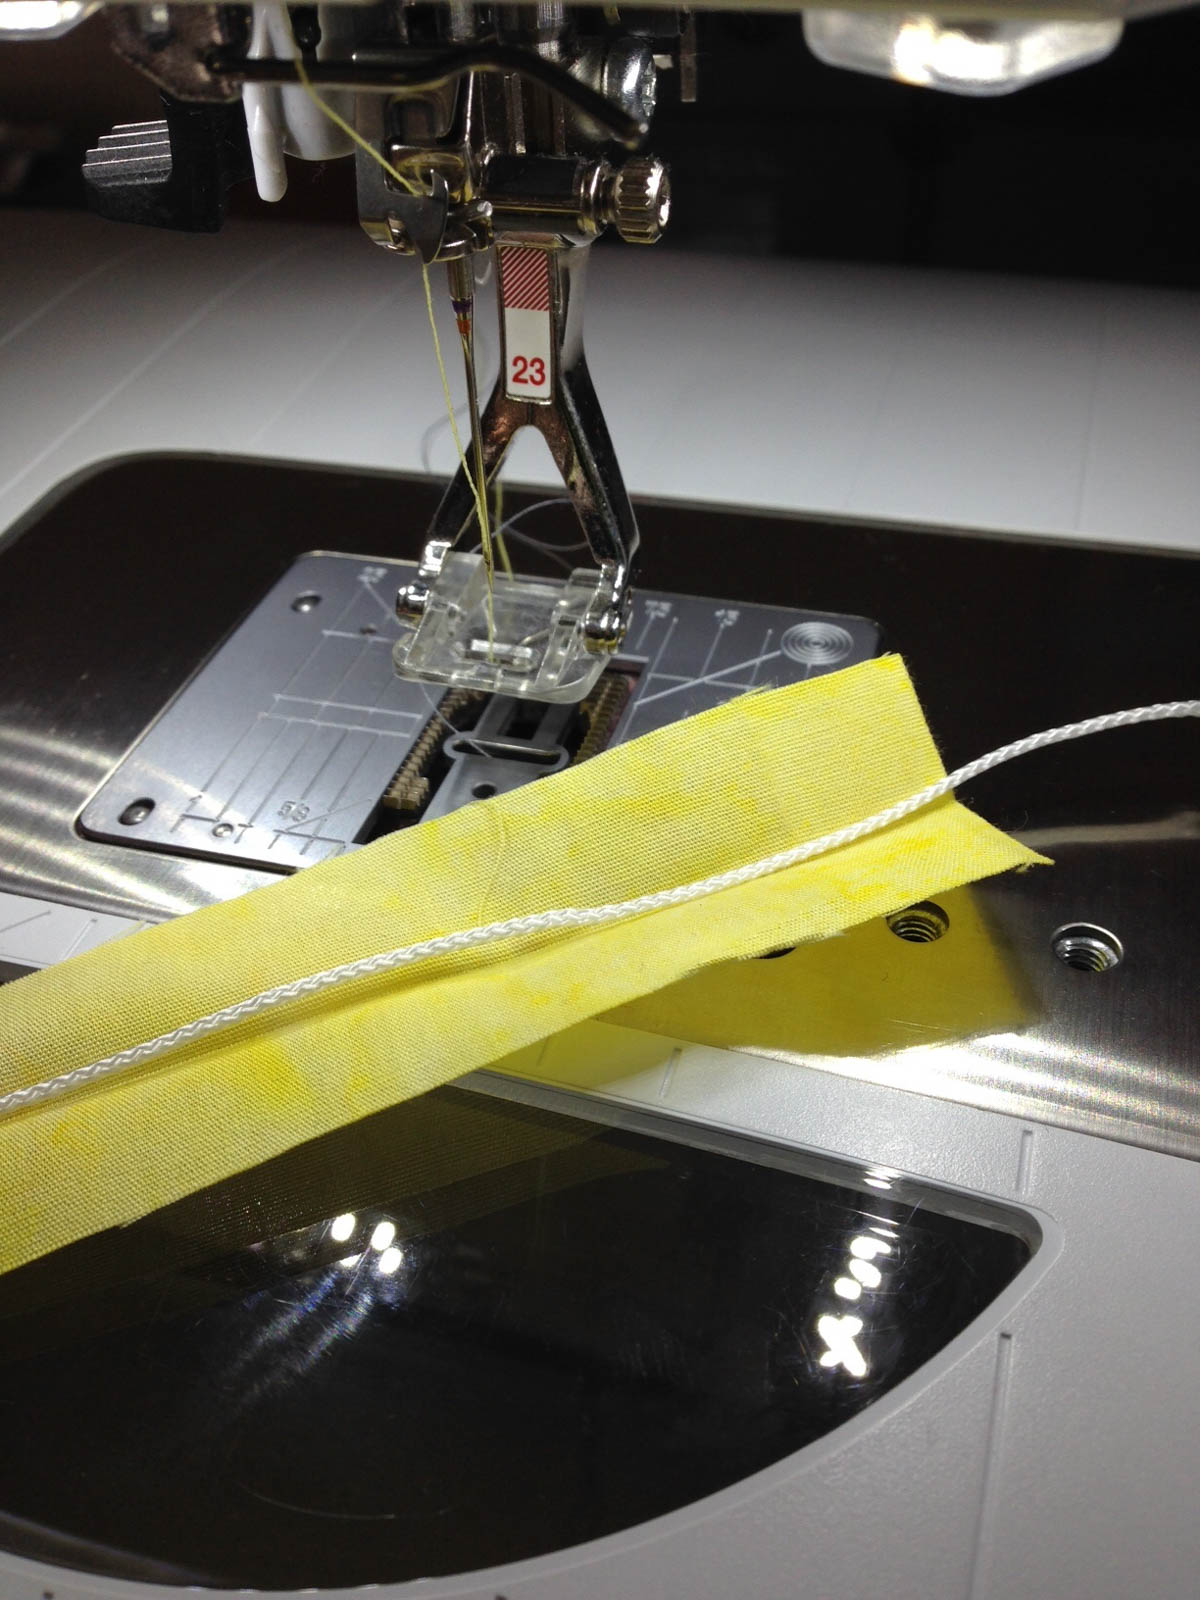
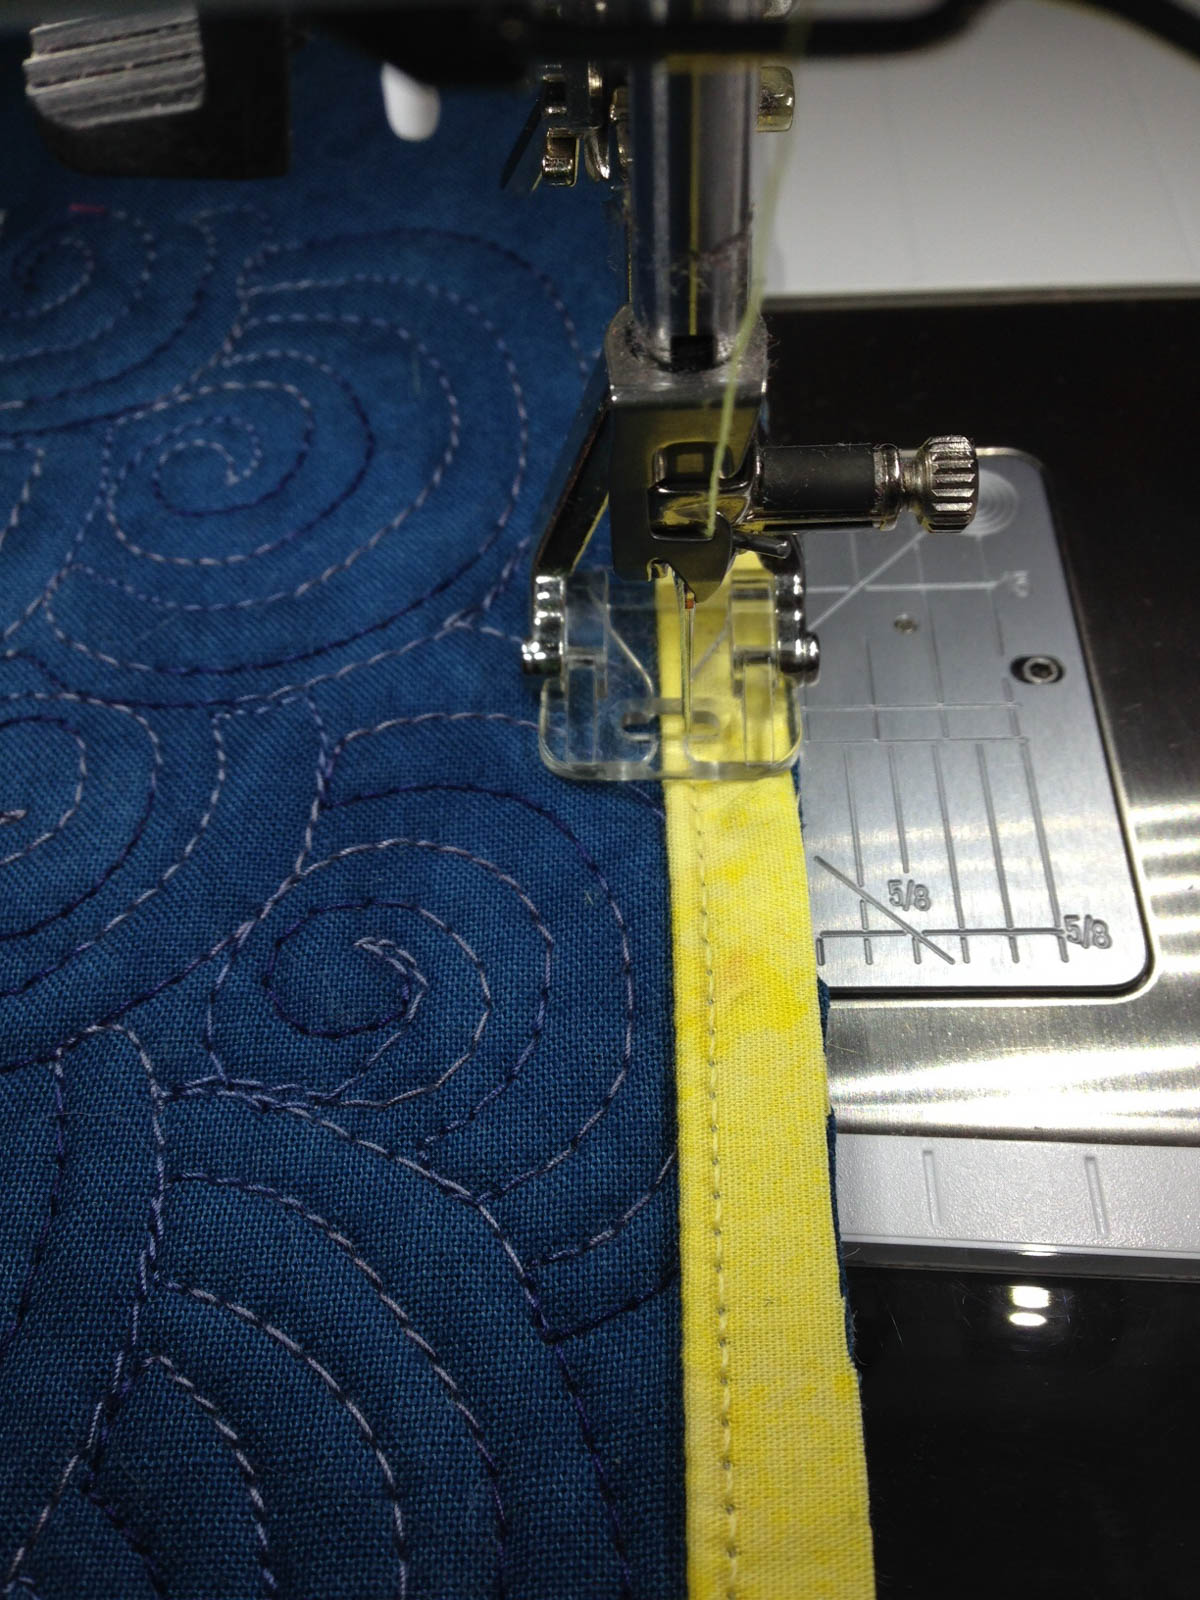
Thread the sewing machine with yellow thread top and in the bobbin. Attaching Appliqué foot #23.
Place fabric strip under foot of machine and adjust the needle to just to the right of covered cording. The cording should be nicely tucked into the indentation of cording foot. Stitch all four cording strips.
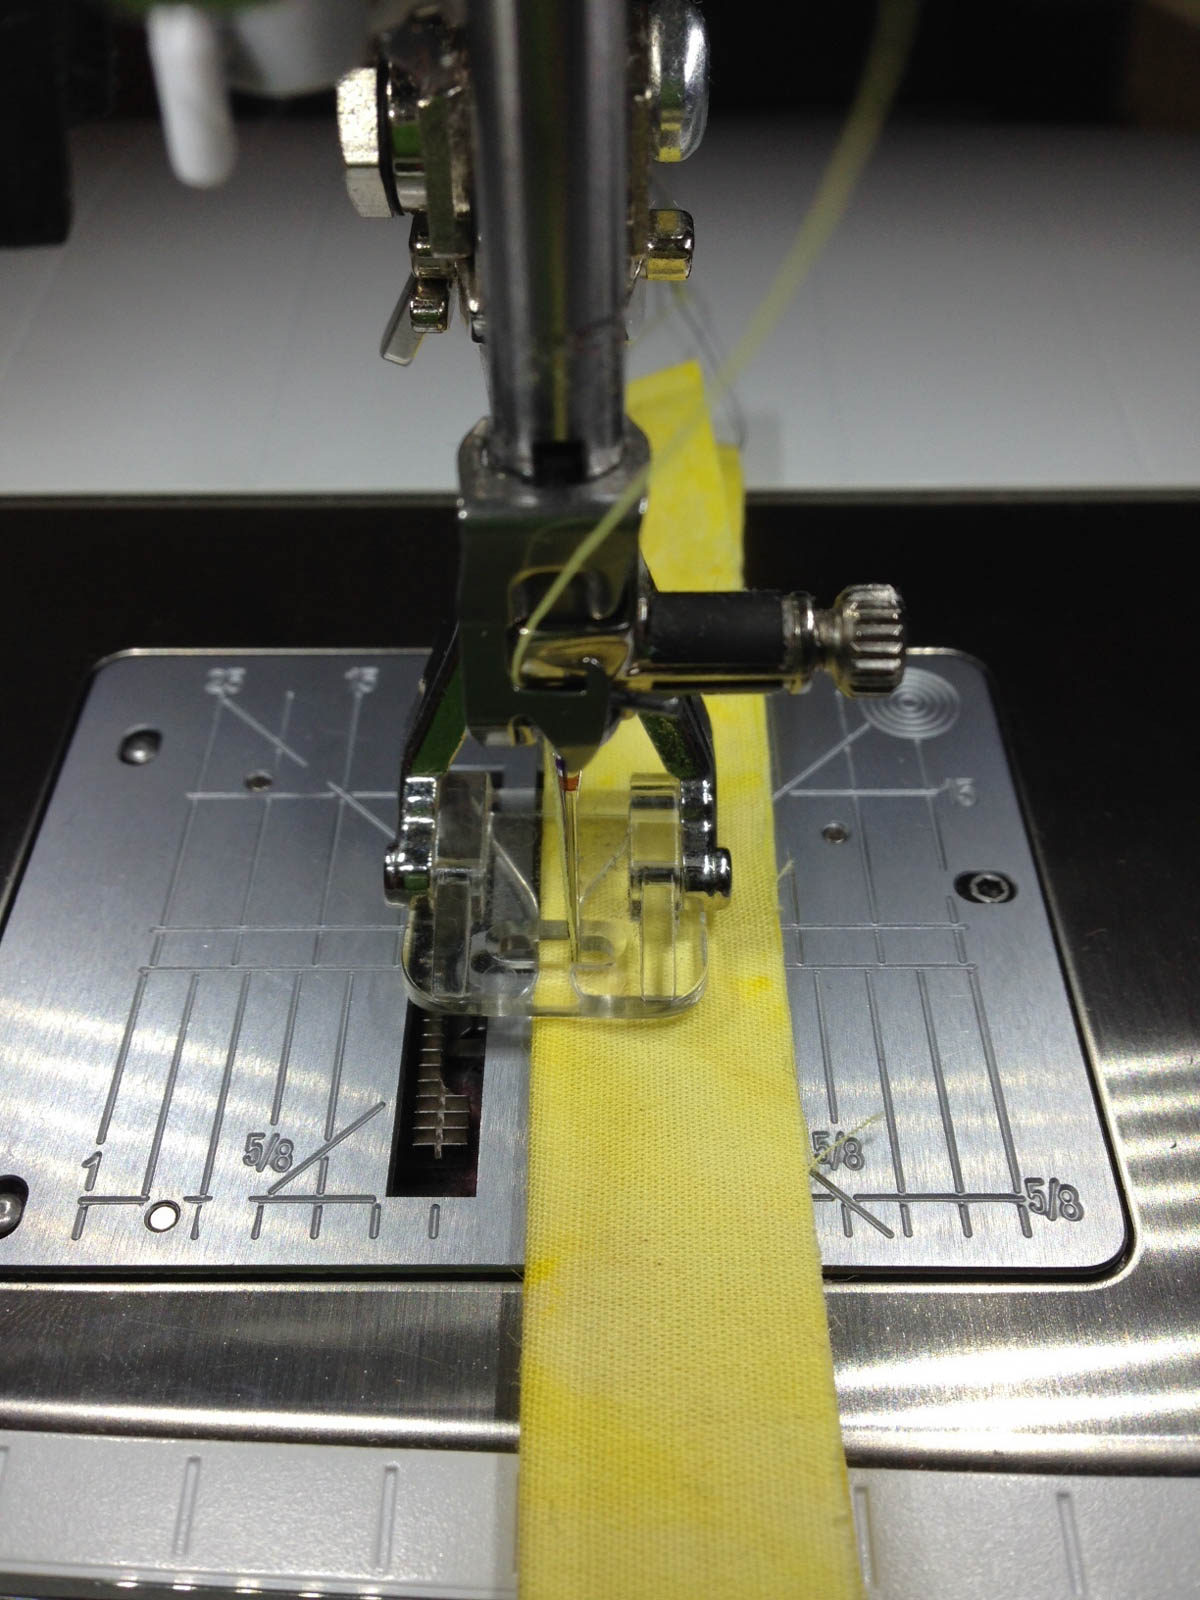
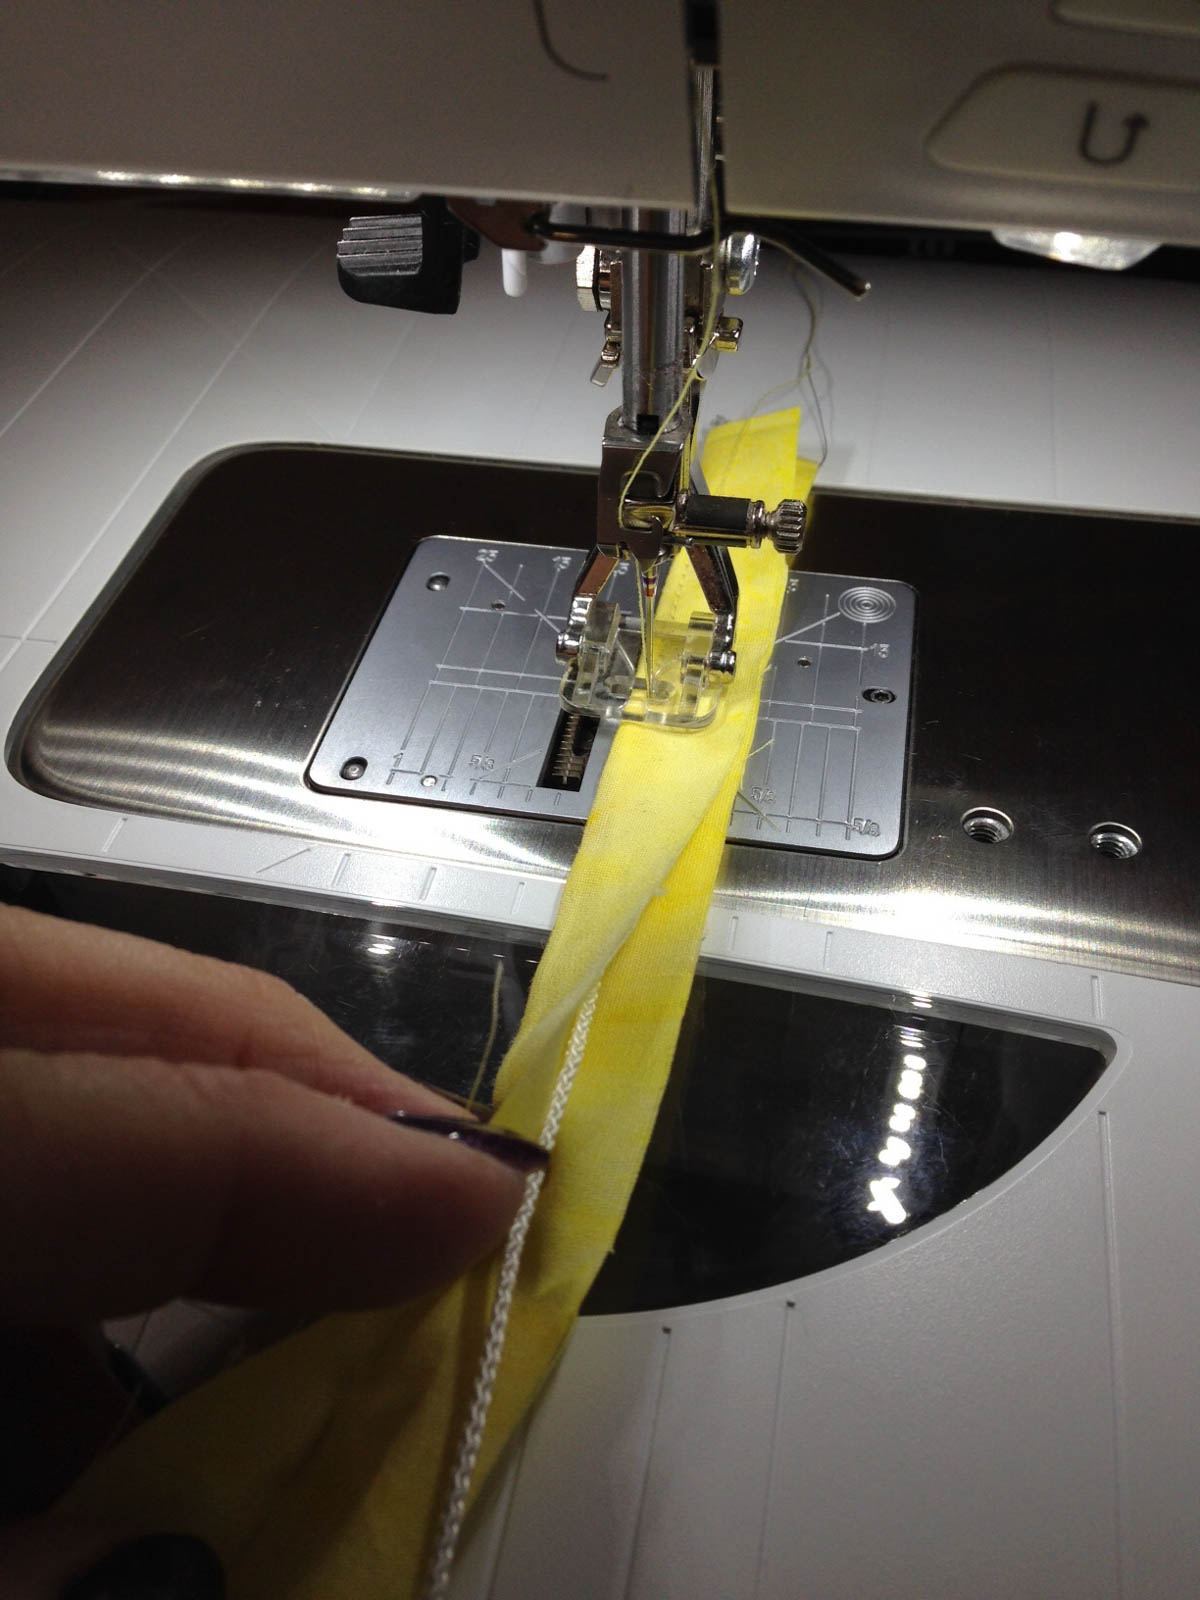
Trim down the stitched cording with the Piping Hot Piping tool by Susan K Cleveland to a perfect ¼″.
One section at a time, stitch the piping to the front of the quilt still using the Appliqué foot #23.
Stitch the three strips of binding fabric end to end creating one long piece of binding. Press the strip in half right sides together. Place binding on right side of quilt over the piping hold in place with wonder clips or pin.
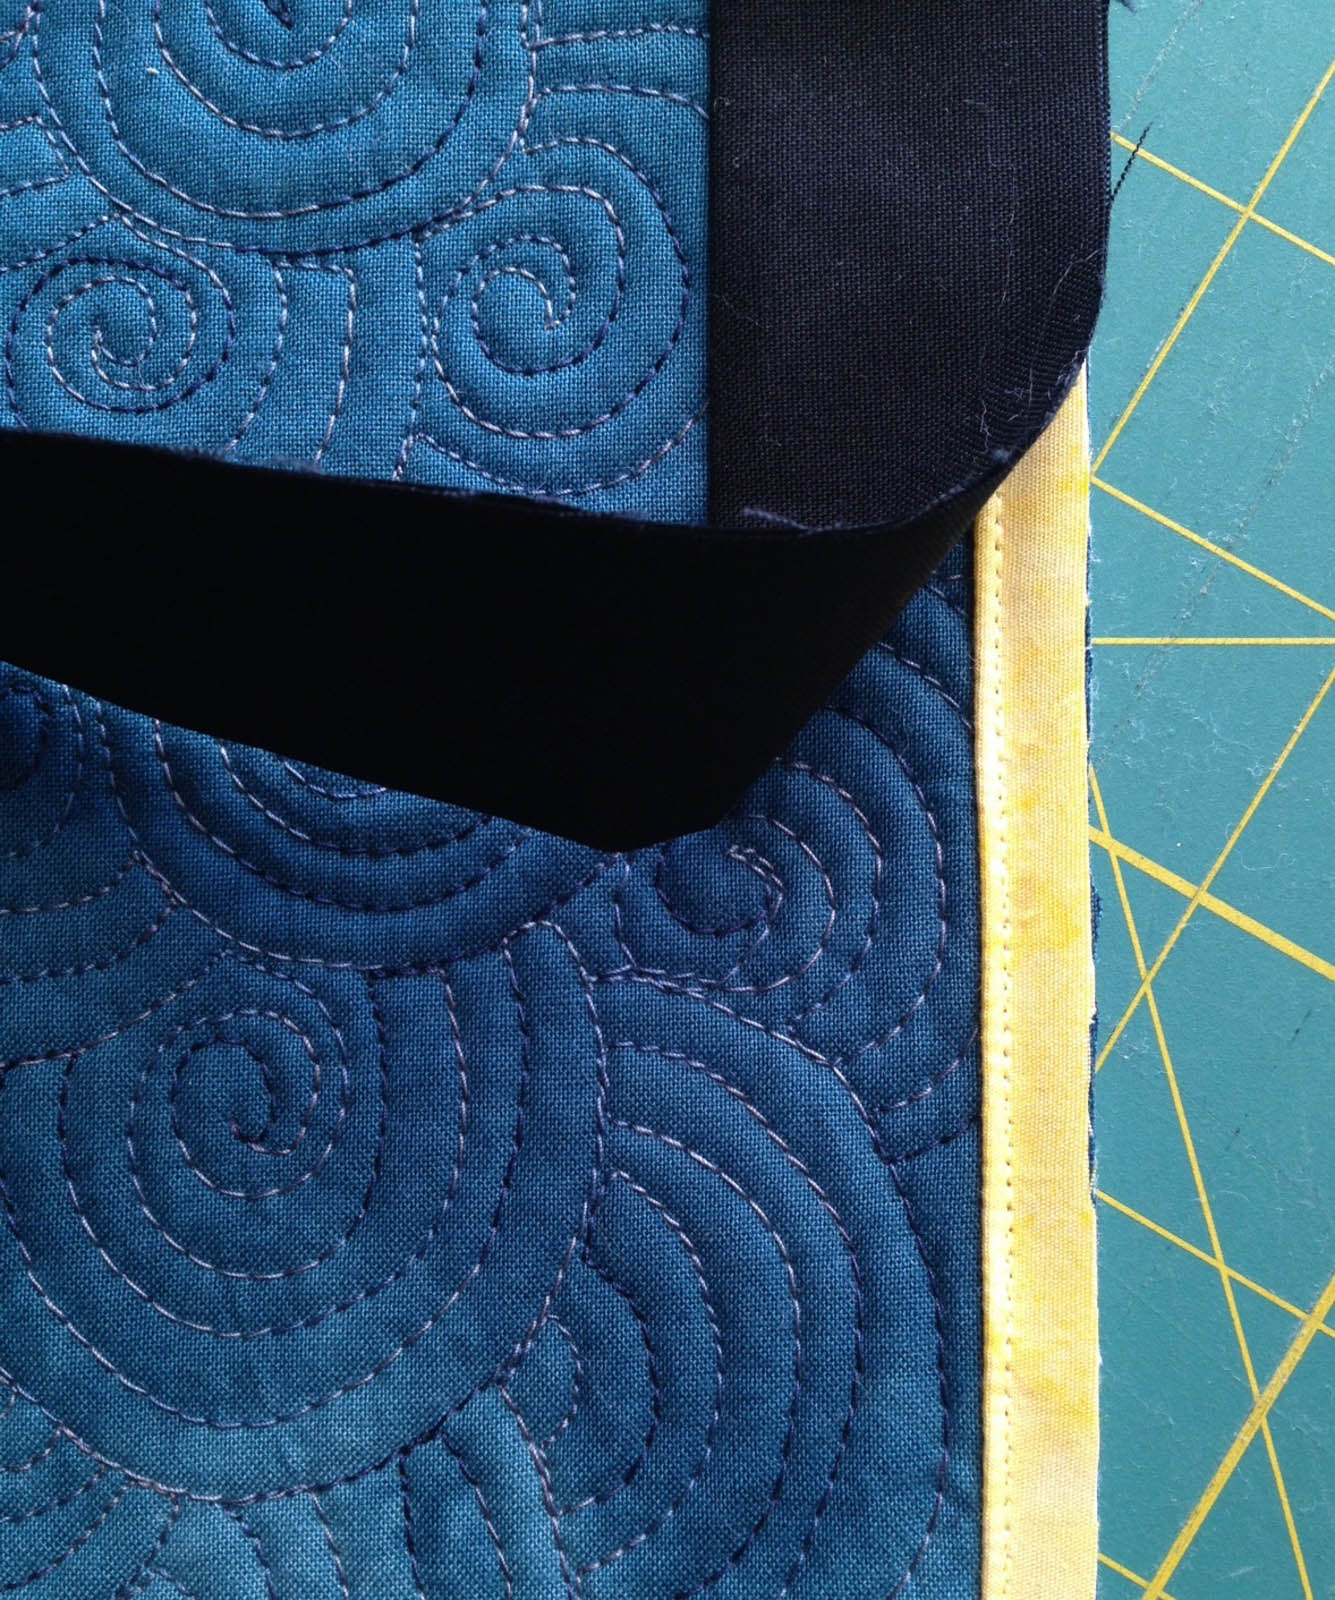
To stitch the binding in place change the foot on sewing machine to Patchwork foot #97D foot with Dual Feed engaged or Walking foot #50. Turn the wall hanging over and stitch on the backing side. Place needle just to the left of the line of stitching made to attach the piping.

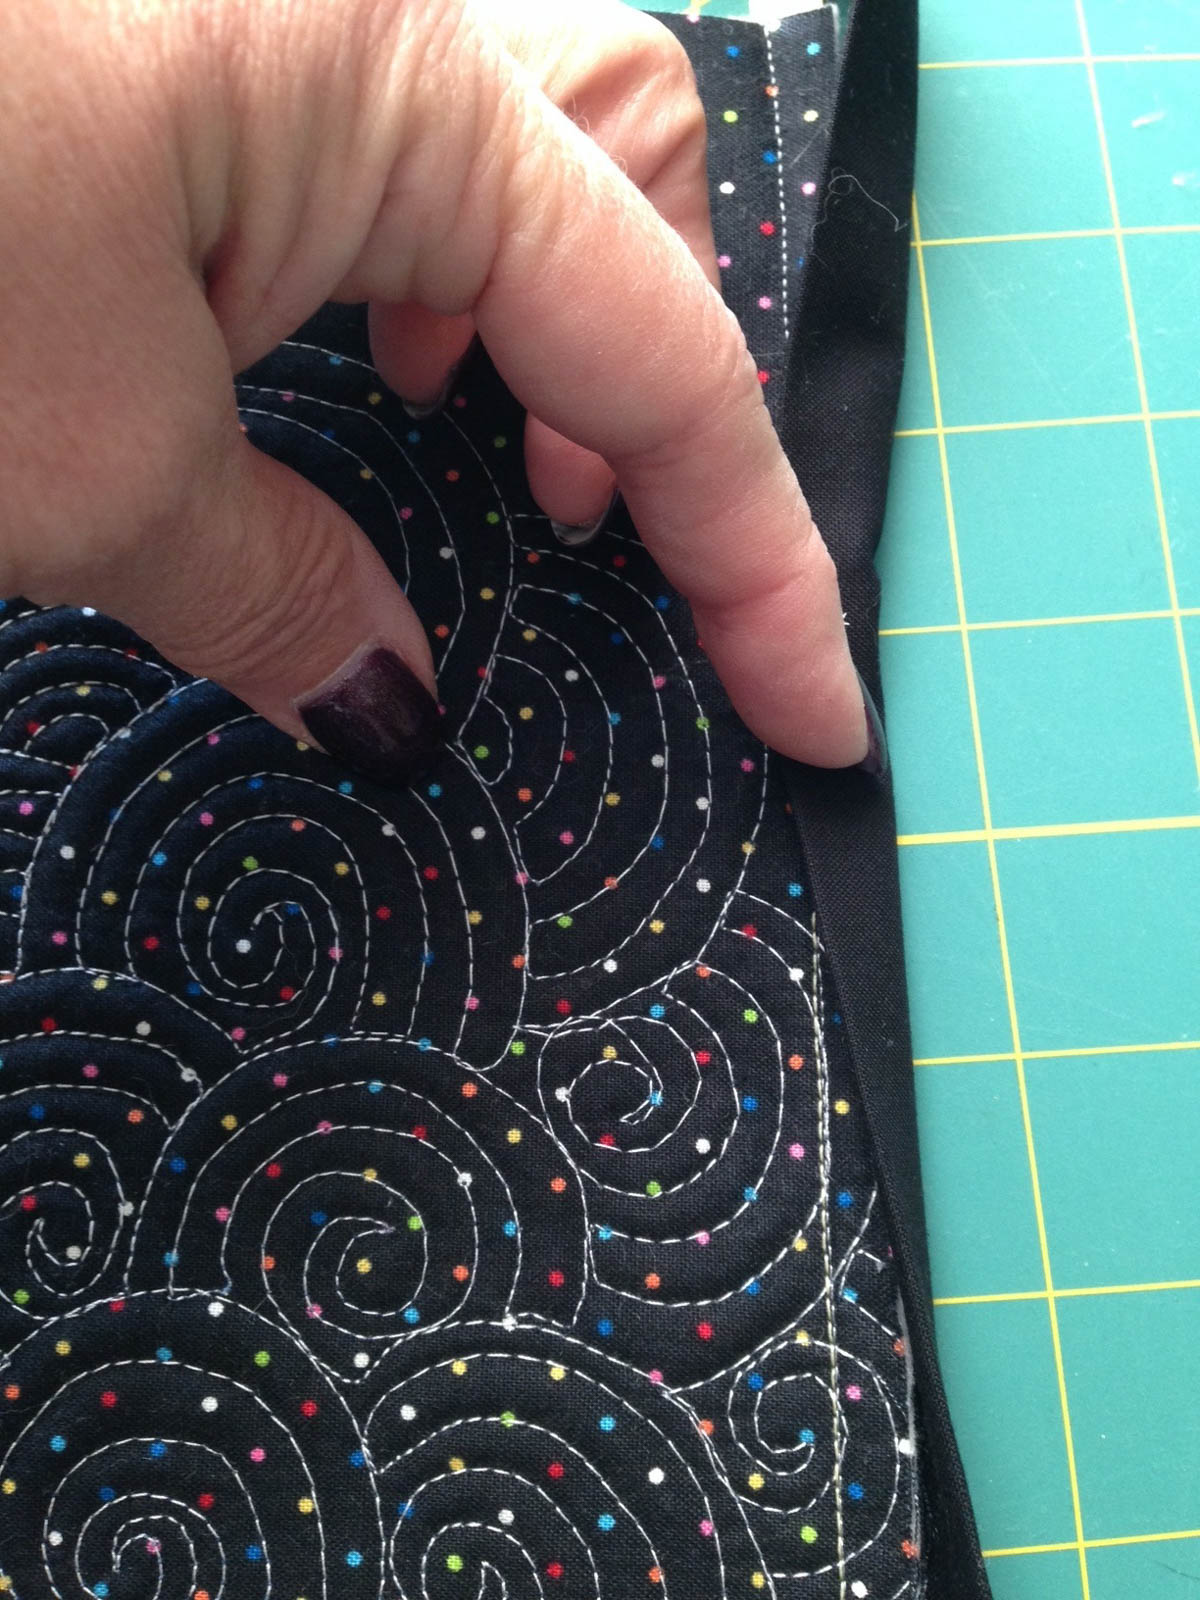
This image shows what the binding should look like on the front of your quilt.
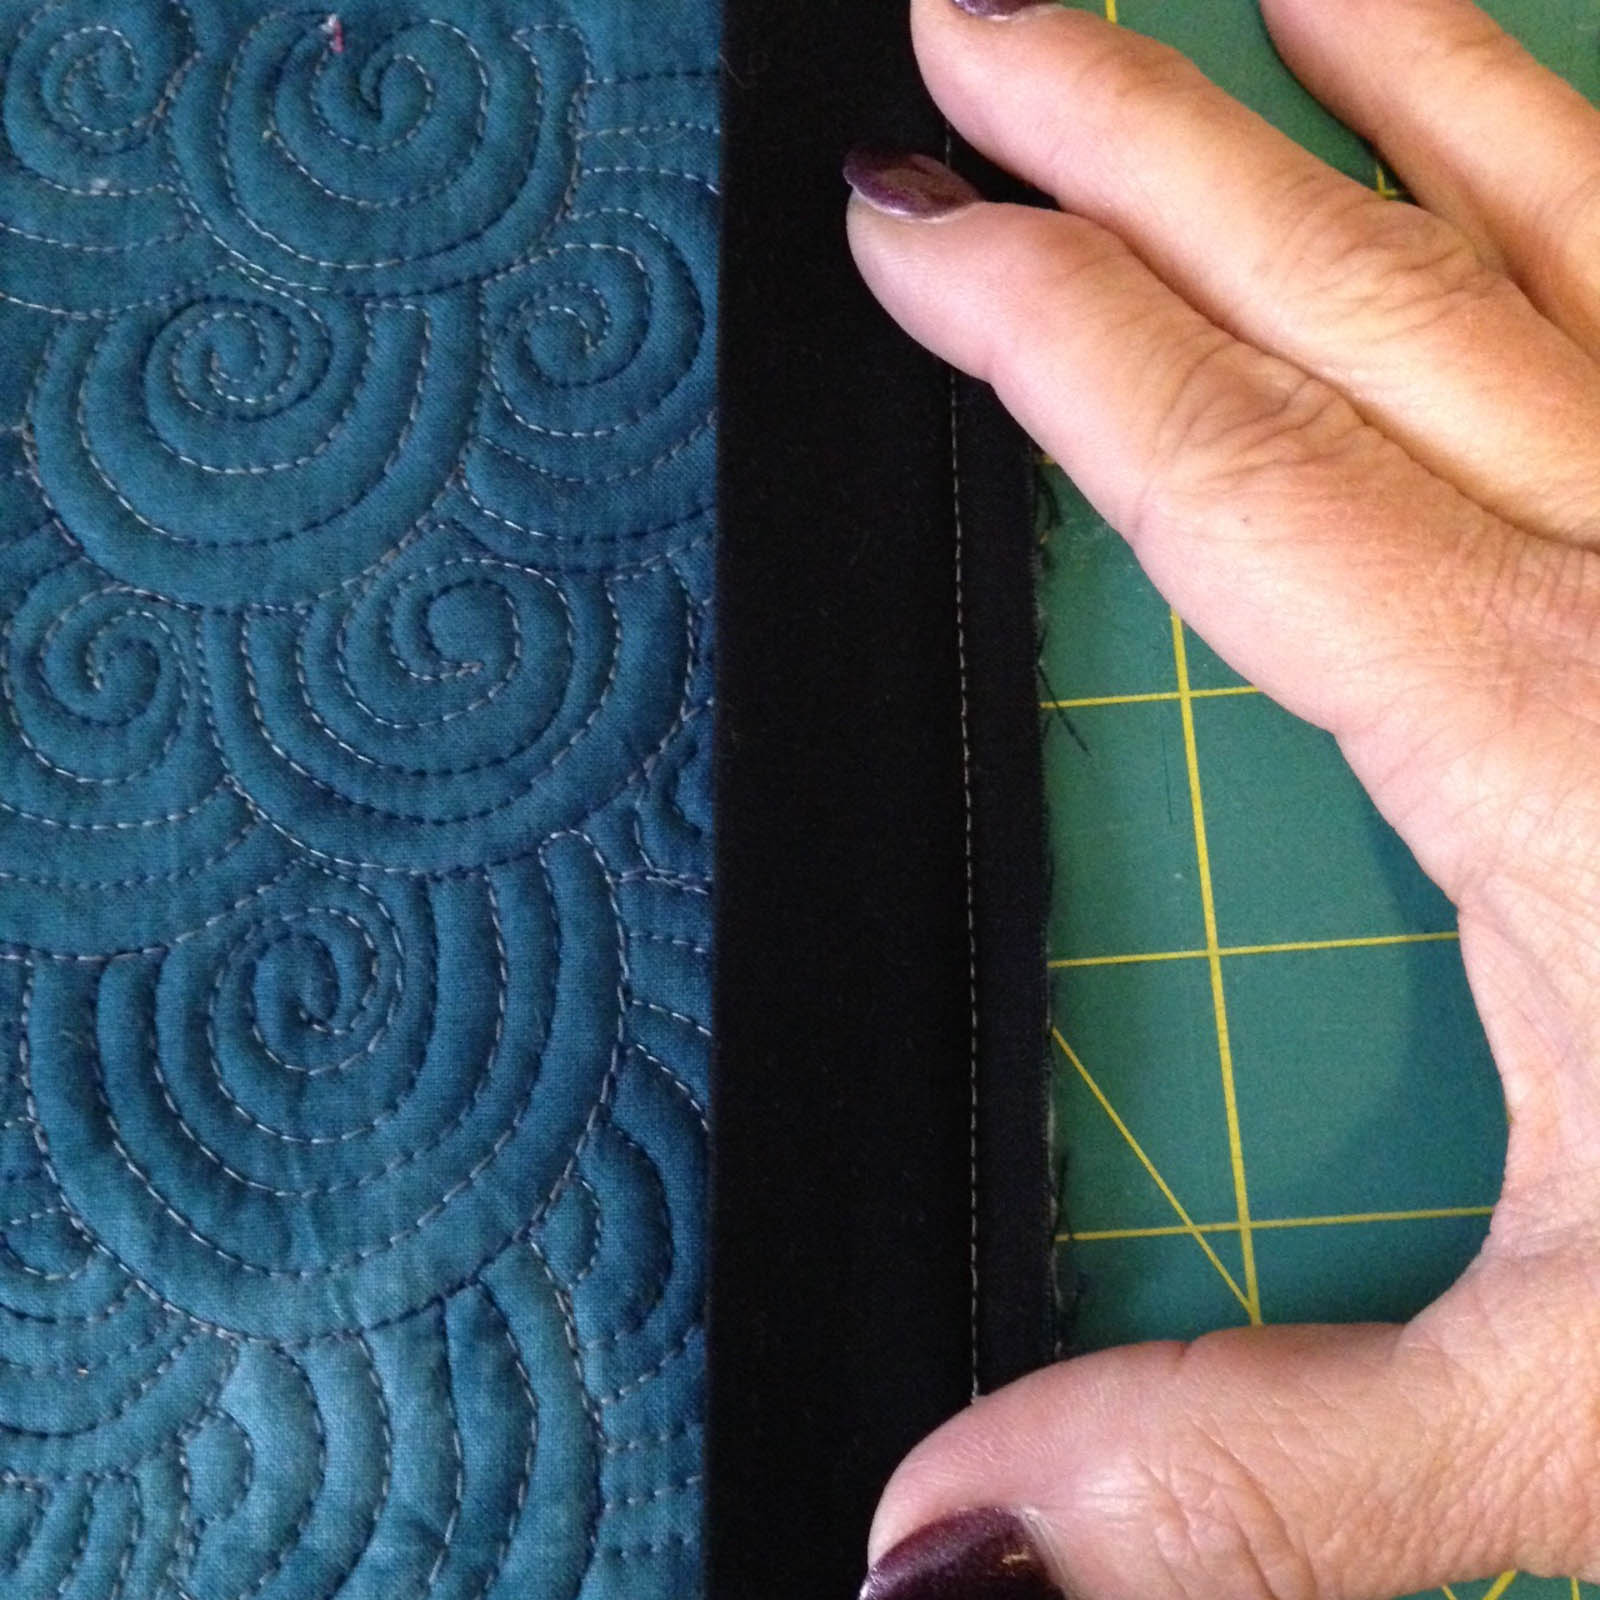
And this image shows what the piping looks like on the front of the quilt. I love how neat and clean this looks and it adds such a finishing touch to the wall hanging.

Fold binding to the back and hand stitch to finish the edge.
Enjoy your “Hello Mr. Moon” wall hanging.


What you might also like


11 comments on “Hello Mr. Moon Wall Hanging”
-
-
It’s the last item on the supply list.
-
-
To jmsweeny:
If you return to the top to the “Materials List” you will see the pattern at the end of the list. Click on this and it will take you to the pattern so you can print it out. I, also, do not draw well 🙂 -
The bottom of the moon and cat’s tail I can’t get to print. I even put legal size paper but no luck?
-
You print both sheets and line up the cat with the lines of the moon and then trace each one separately.
-
I had to save the document in order to print it. It does print smaller but I can enlarge it on a commercial printer if I need to.
-
-
I would like to see how your corners turned out. How did you sew the binding on the corners and still show the yellow cording?
-
Mwilliams, each side has an individual piece of piping. You will make four pieces of piping and stitch them each on one at a time. The corners overlap. Karen K Buckley has a great book and tool that I use. “Piping Hot Binding”. I hope this helps!
Teri Tope
-
-
Great pattern but disappointing to have to reduce the size significantly to include everything.
-
I printed both pages with no problems. You line up the two pages overlapping on the lines of the cat and moon and then trace each one separately. Your printer must not be set at full size.
-
-
I just made this wall hanging yesterday, going start to finish in one day. I really didn’t think it possible for me to make it that quickly but I did it. A very fun, quick, and freeing project. I LOVE the fact that permission is given to be messy on the applique steps, because when it comes to free motion, I’m really not very good. Messy I can do with aplomb! My coworkers simply love the end result, and tonight I’m presenting it to my sister and her sons as I made it to honor a beloved cat they recently lost. I did add a white chest, tip of tail, and muzzle (though did it in light grey and then messy stitched over it to tone it down) to give the kitten more Jasper-like markings. I also used a charcoal faux burlap print for the kitten to infer Jasper’s grey tabby coloring. All in all, a wonderful project to make, even for people who “can’t” free-motion quilt! Wish I could attach a photo for you.
Leave a Reply
You must be logged in to post a comment.
I like this pattern, but where are the pattern pieces to print. I do not draw well.