How To Make A Fabric Scandinavian Heart
Make a set of these Scandinavian hearts with this tutorial from quilt artist Charlotte Warr Anderson.
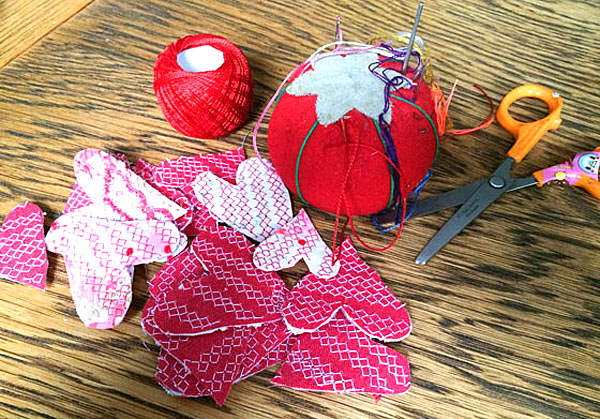
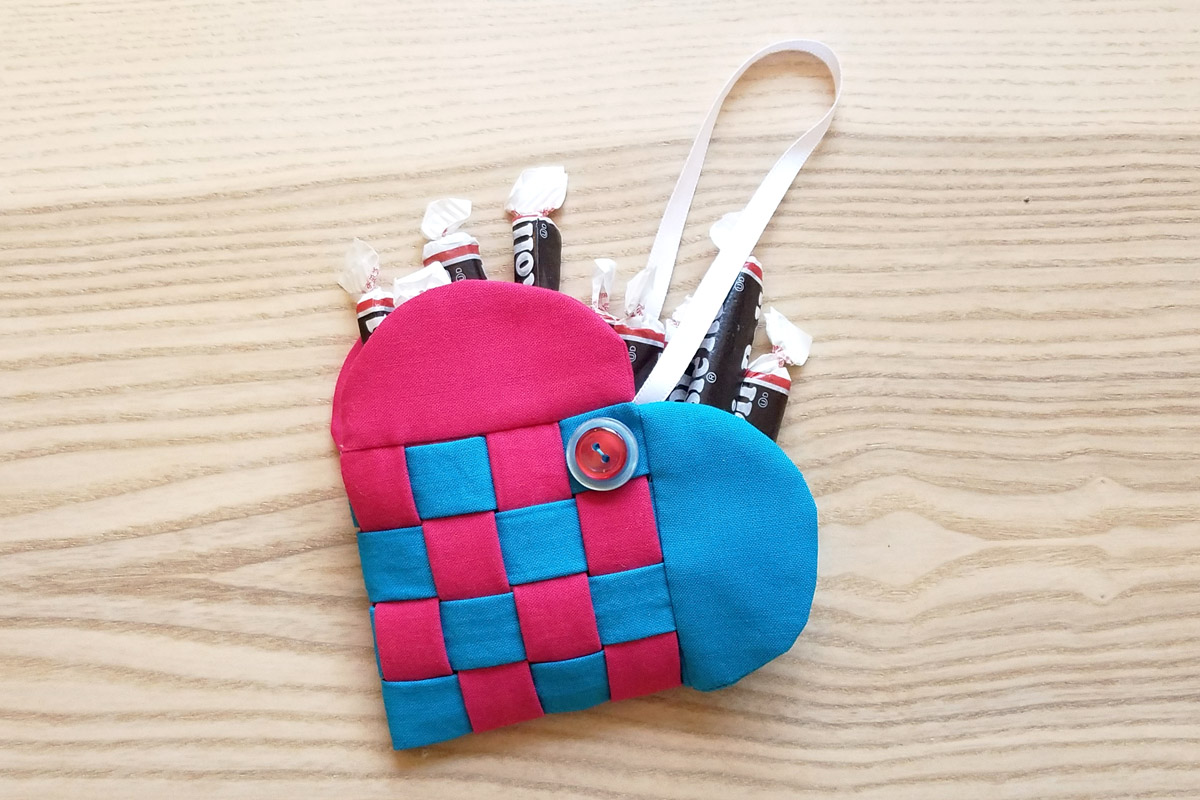
Scandinavian Hearts are a popular holiday item. It is an old Scandinavian tradition to make woven paper or felt hearts to fill with candies or nuts and put on the Christmas tree. They tend to be ubiquitous. Perhaps you made them in school out of paper. I made a stenciled version for Christmas ornaments. I’ve seen YouTube videos where the hearts are made with felt. All of these materials, paint, paper and felt, turn out well. But they are simple to create and not necessarily worthy of keeping indefinitely.
I propose that one can use a fancier fabric, do a bit more finishing and decorative work, and create a keepsake; a gift that someone will be willing to stash amongst personal treasures. I enjoy utilizing other than cotton fabric so I’ve picked satin for my heart.
Materials to make a fabric Scandinavian heart:
- 6″ x 45″ strips each of red and white satin, or colors of your choice (The red satin I bought did not have as much body as the white. I used a light weight, non-woven, iron-on interfacing to stabilize the red fabric and give it a similar weight to the white.)
- 7″ square of medium weight iron-on interfacing
- 4″ x 3″ template plastic
- Thread to match
- Small tassel and 8″ cord
- Download the Fabric Swedish Heart Template
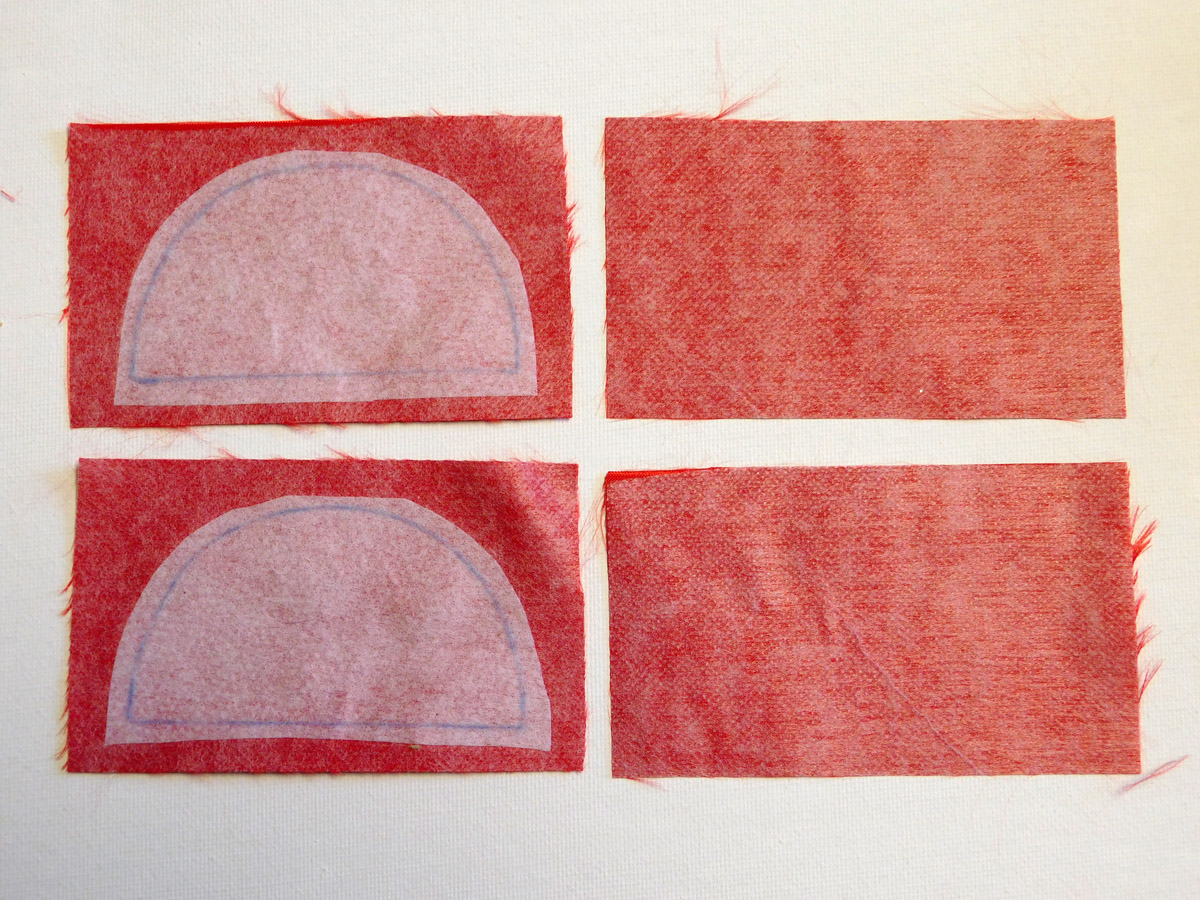
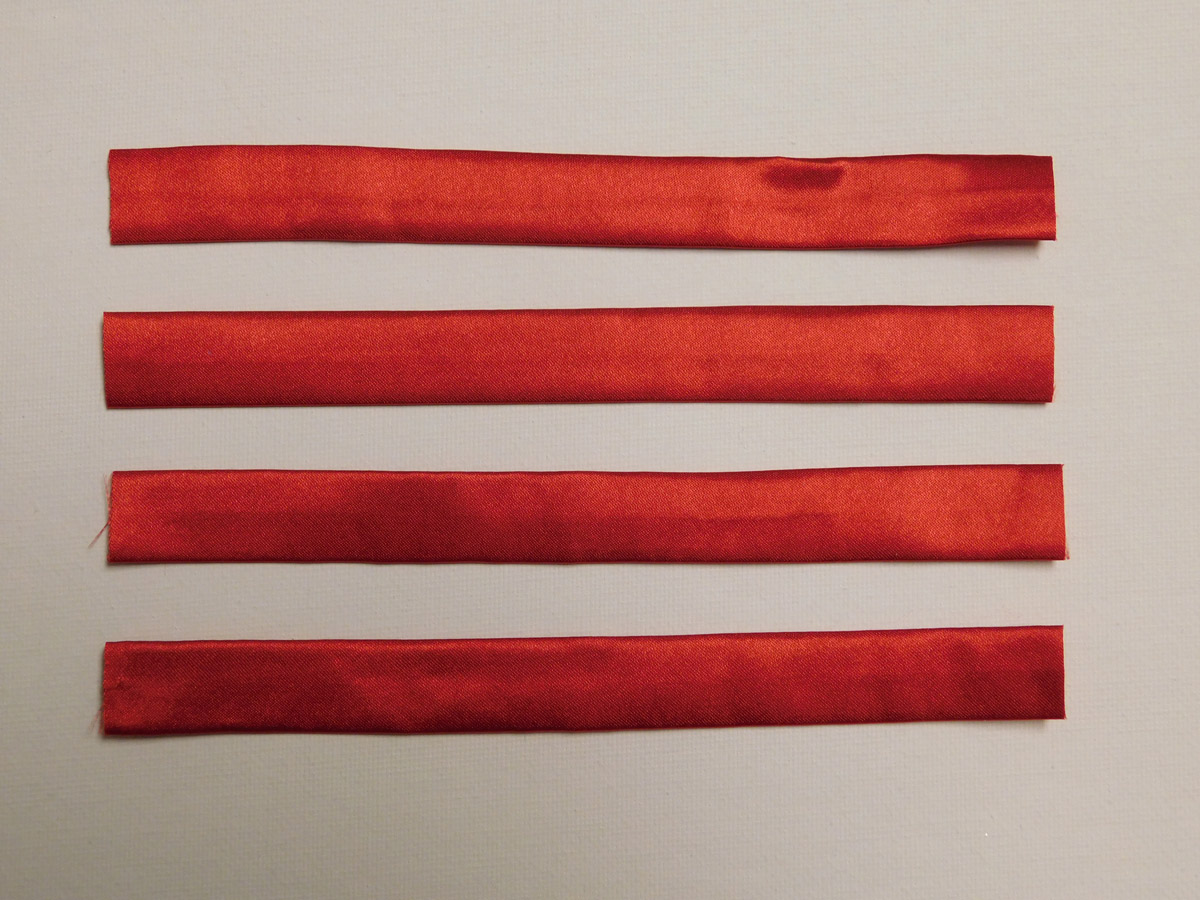
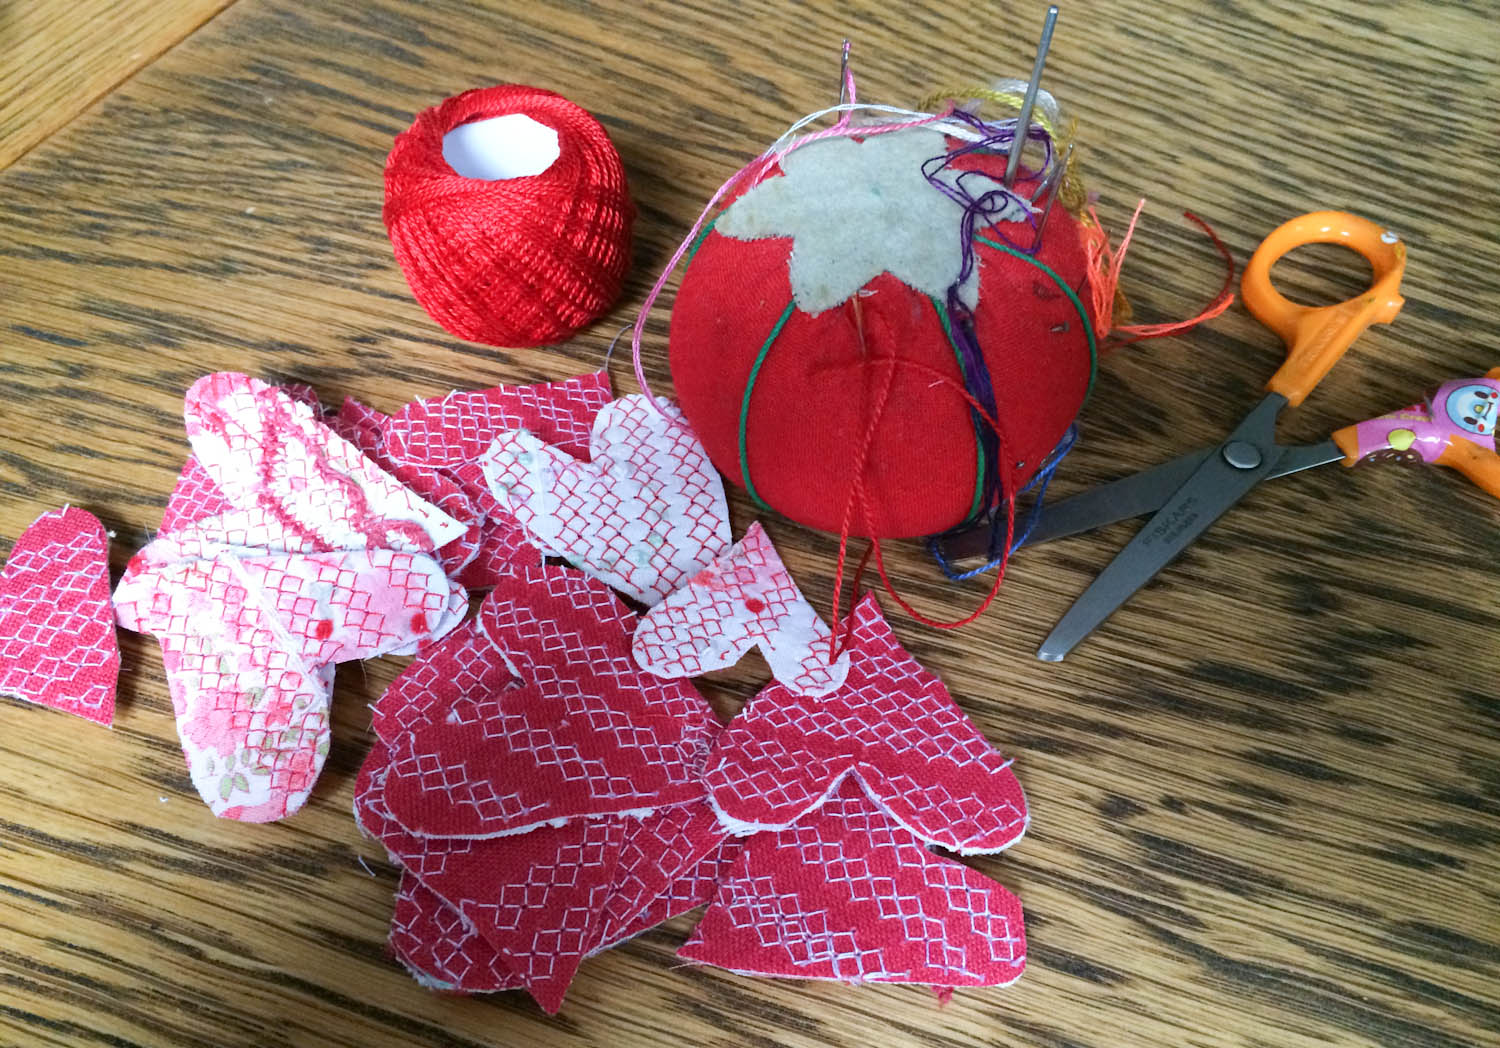
Trace pattern on the template plastic and cut the shape out. Cut 4 rectangles of each color of satin 4″ x 3.5″.
Trace the template on to the medium interfacing 4 times with approximately ½” between them. Cut them apart leaving ¼” outside the lines for seam allowance.
Iron 2 of these on the red and 2 on the white. The other 2 rectangles do not need to have the pattern drawn on them.
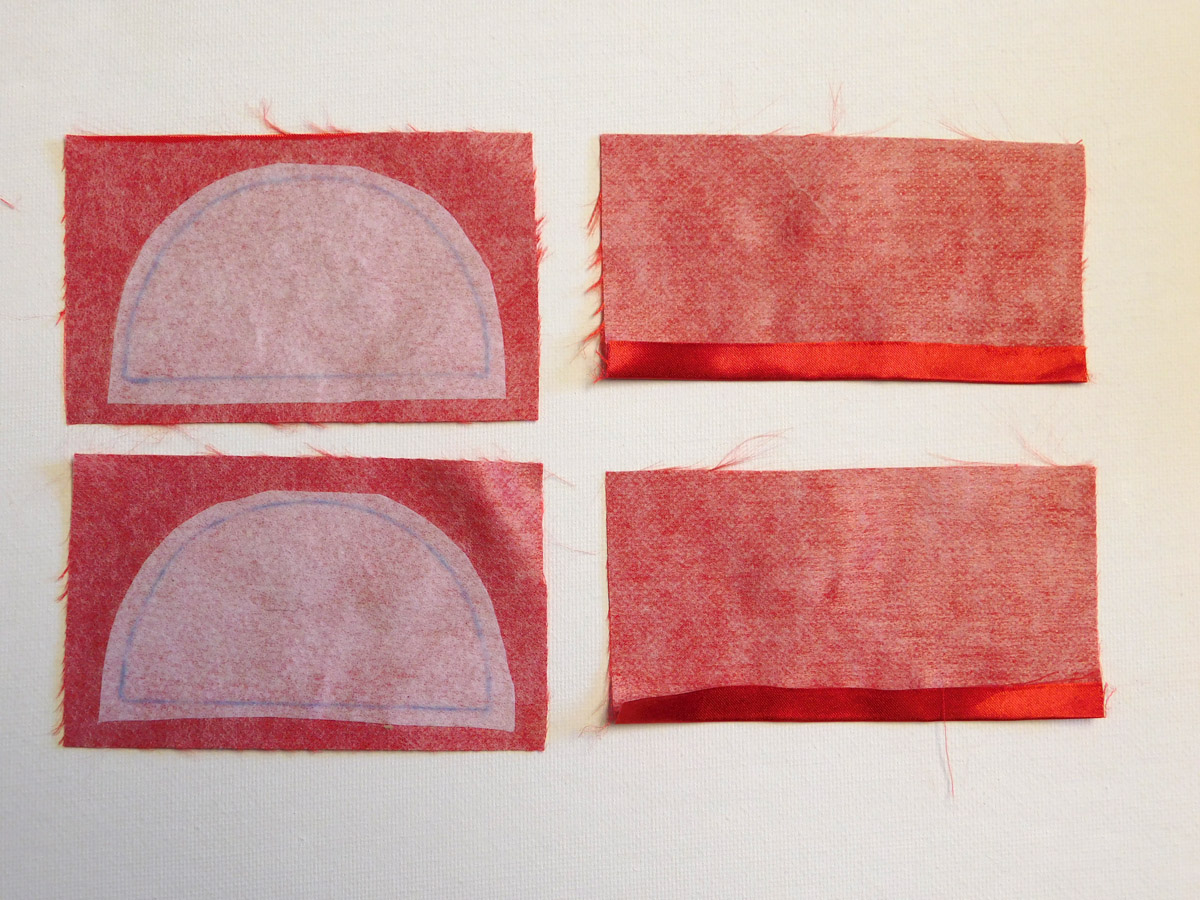
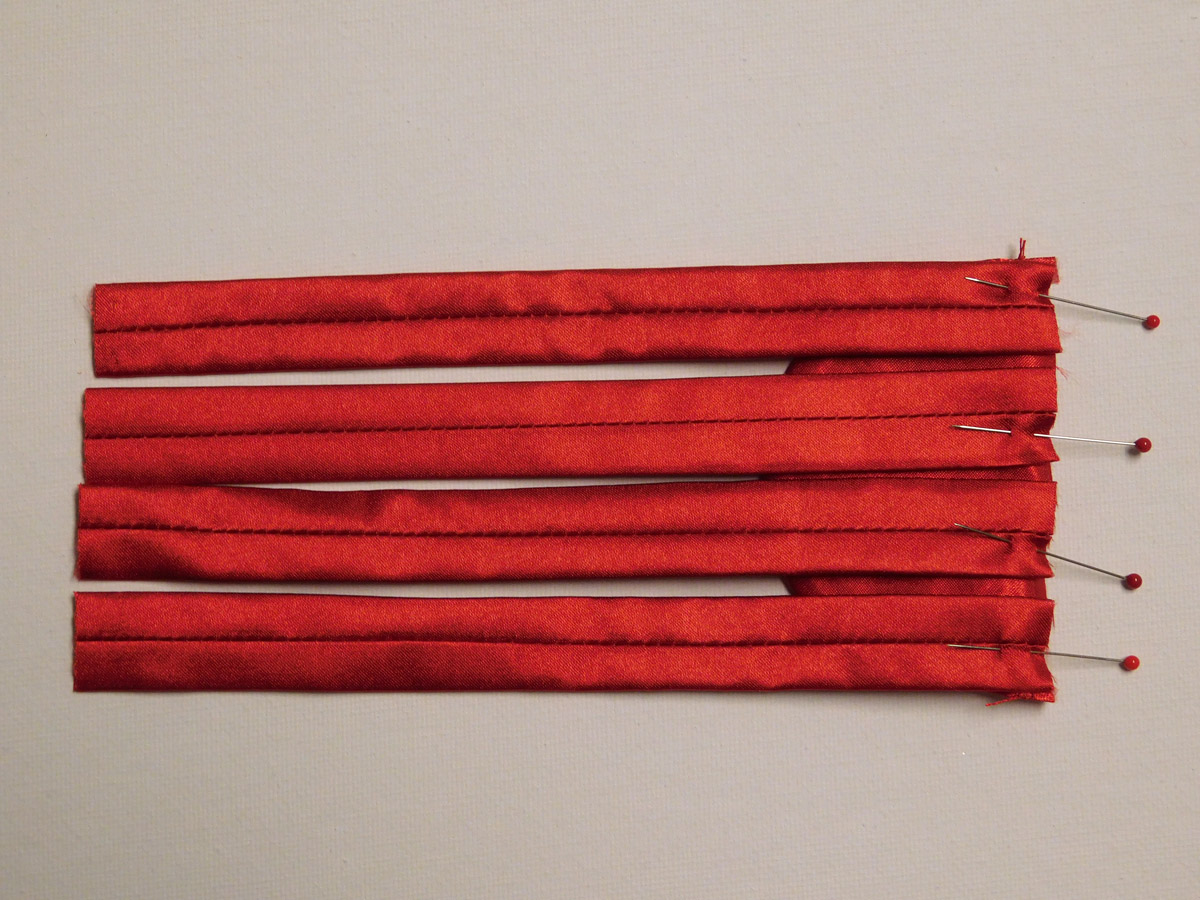
The red section will be illustrated now. Make a ¼” fold on the long side of the rectangles without the pattern. Press the fold in place.
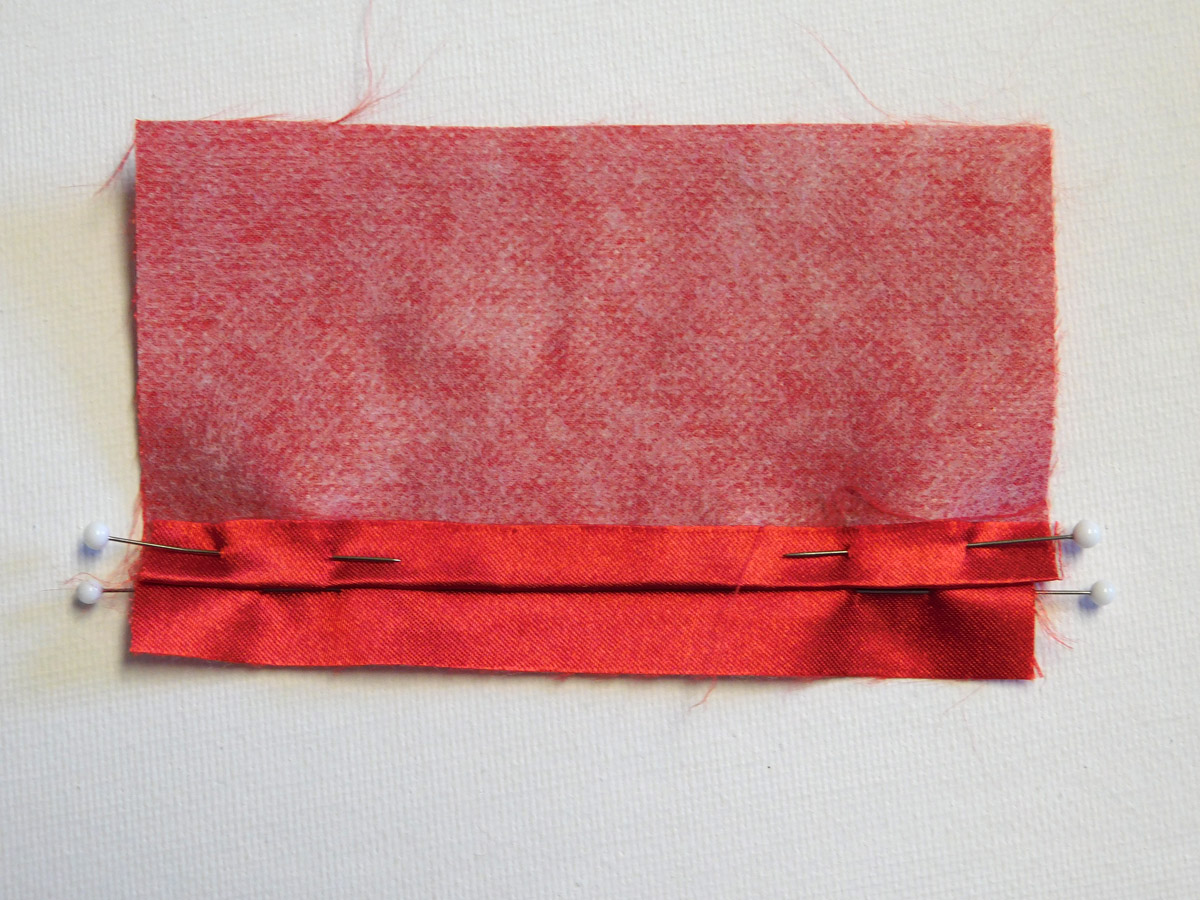
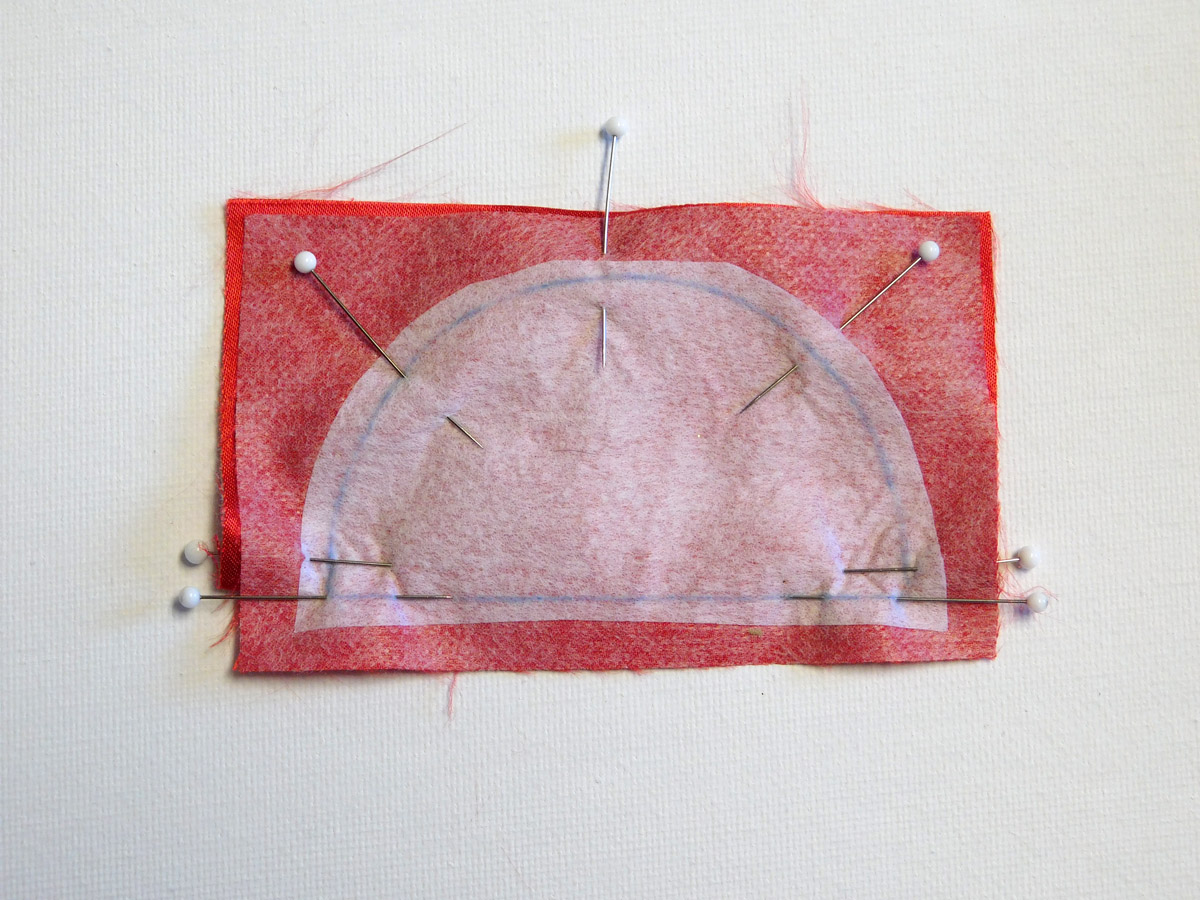
Place pins parallel to the straight line on the interfacing through the single piece only.

Use these pins to align the folded edge of the second rectangle to the straight line.
Pin around the half circle making sure both layers are flat.
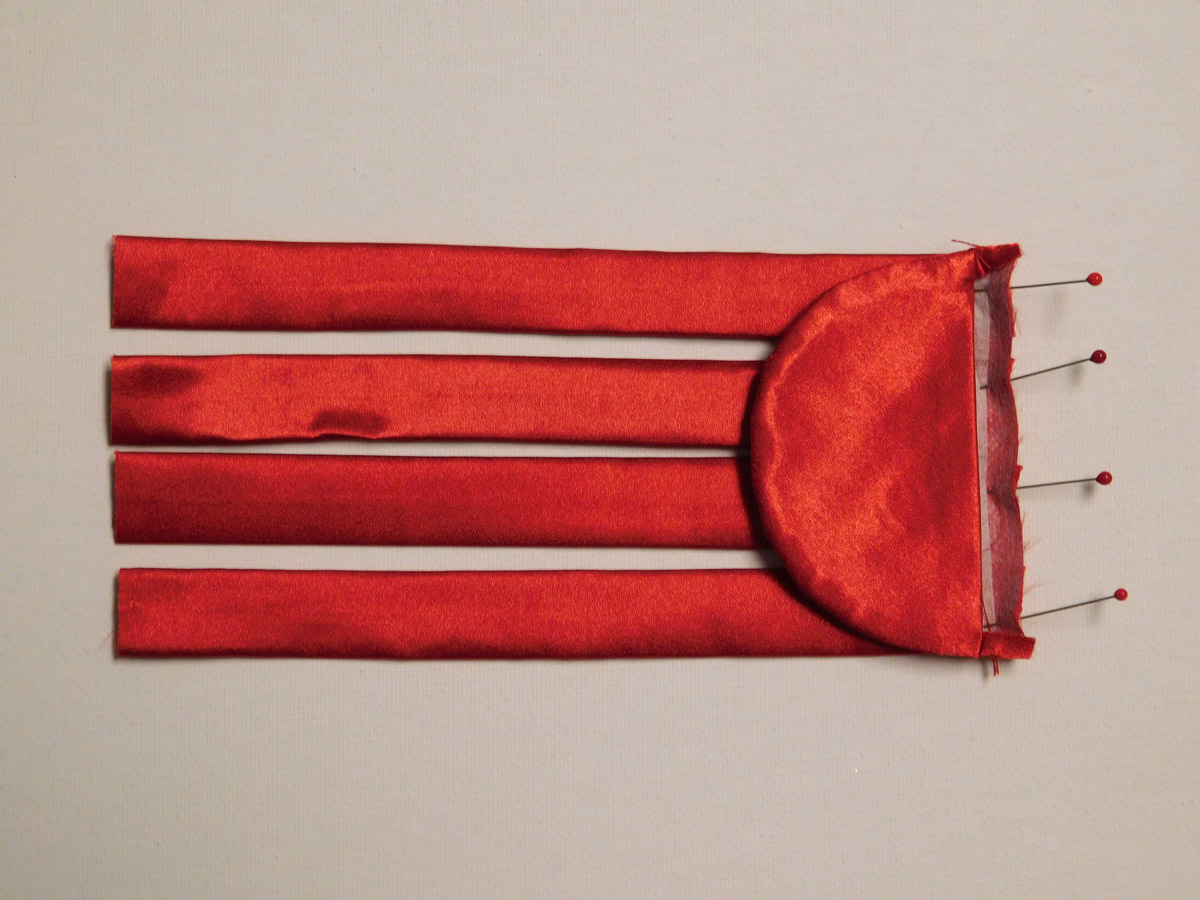
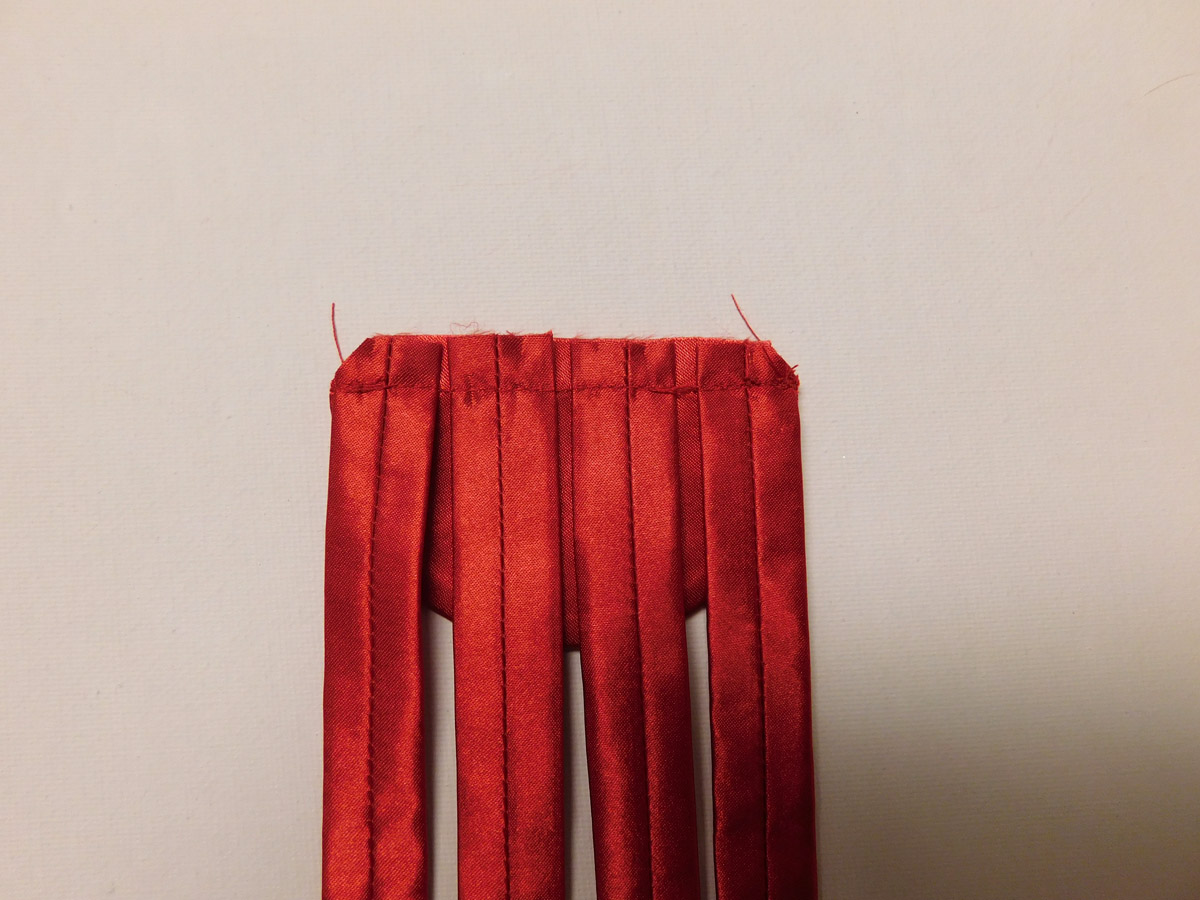
Starting at the edge of the fabric stitch around the half circle and stitch off the other side.
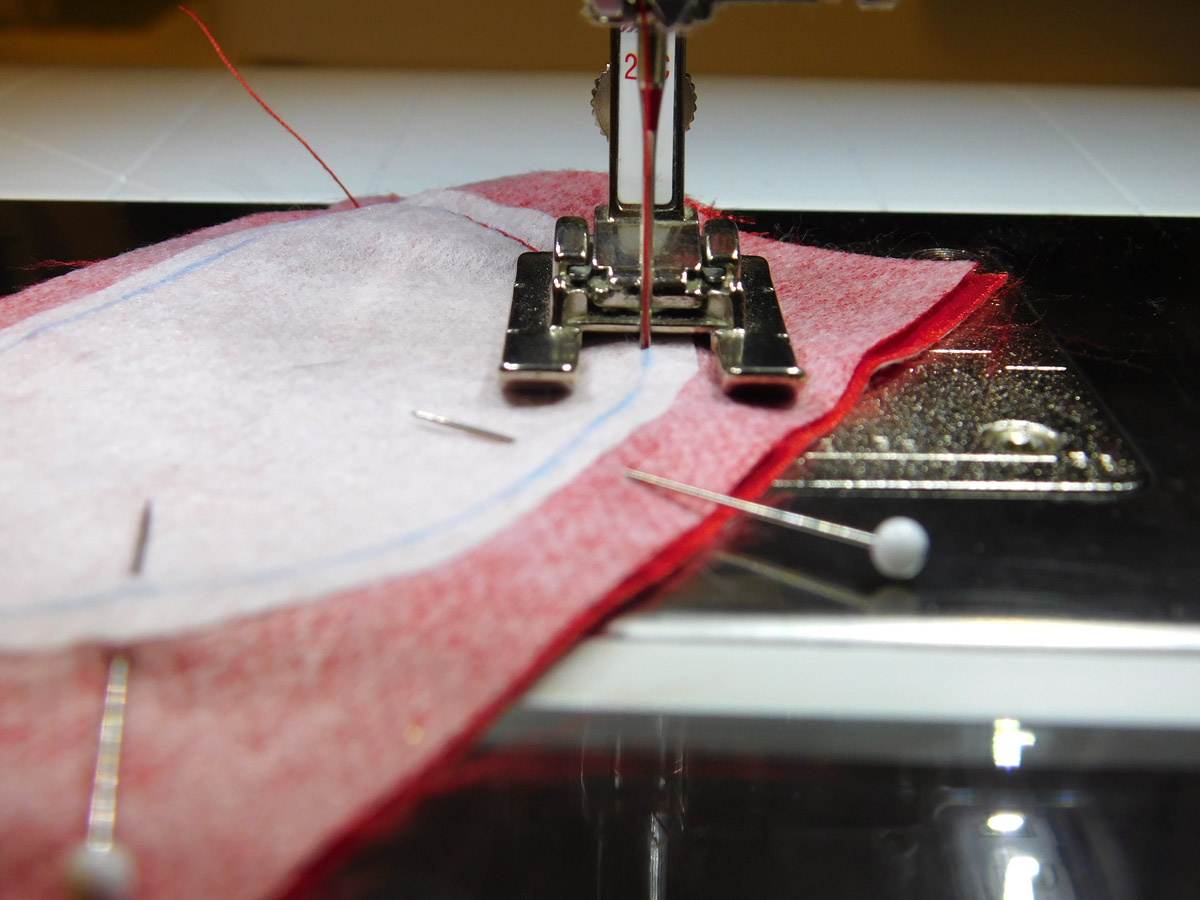
Use presser foot #20 so you can see to stitch exactly on the drawn line. Do not sew along straight edge.
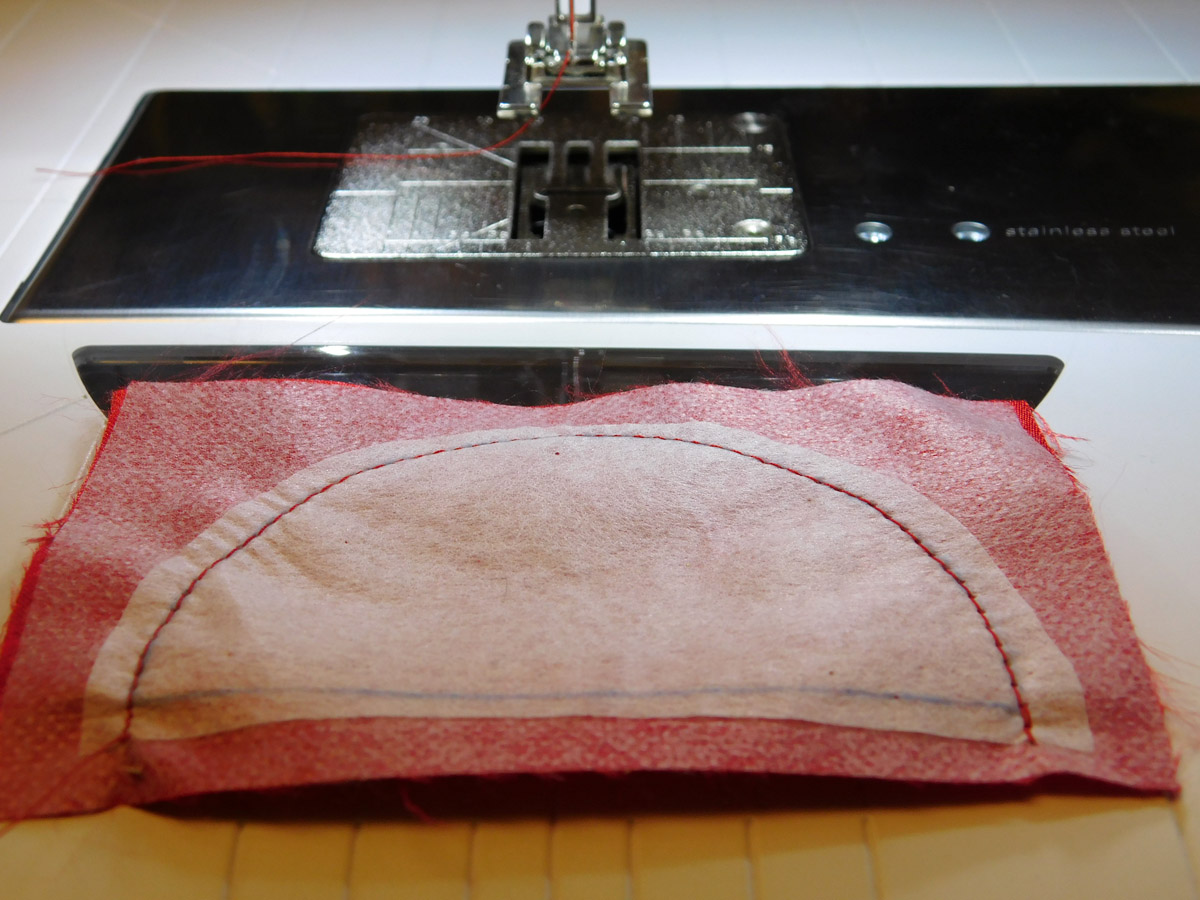
Trim seam allowance to a scant ¼”. Notch out the curve.
Turn the piece outside in and press.
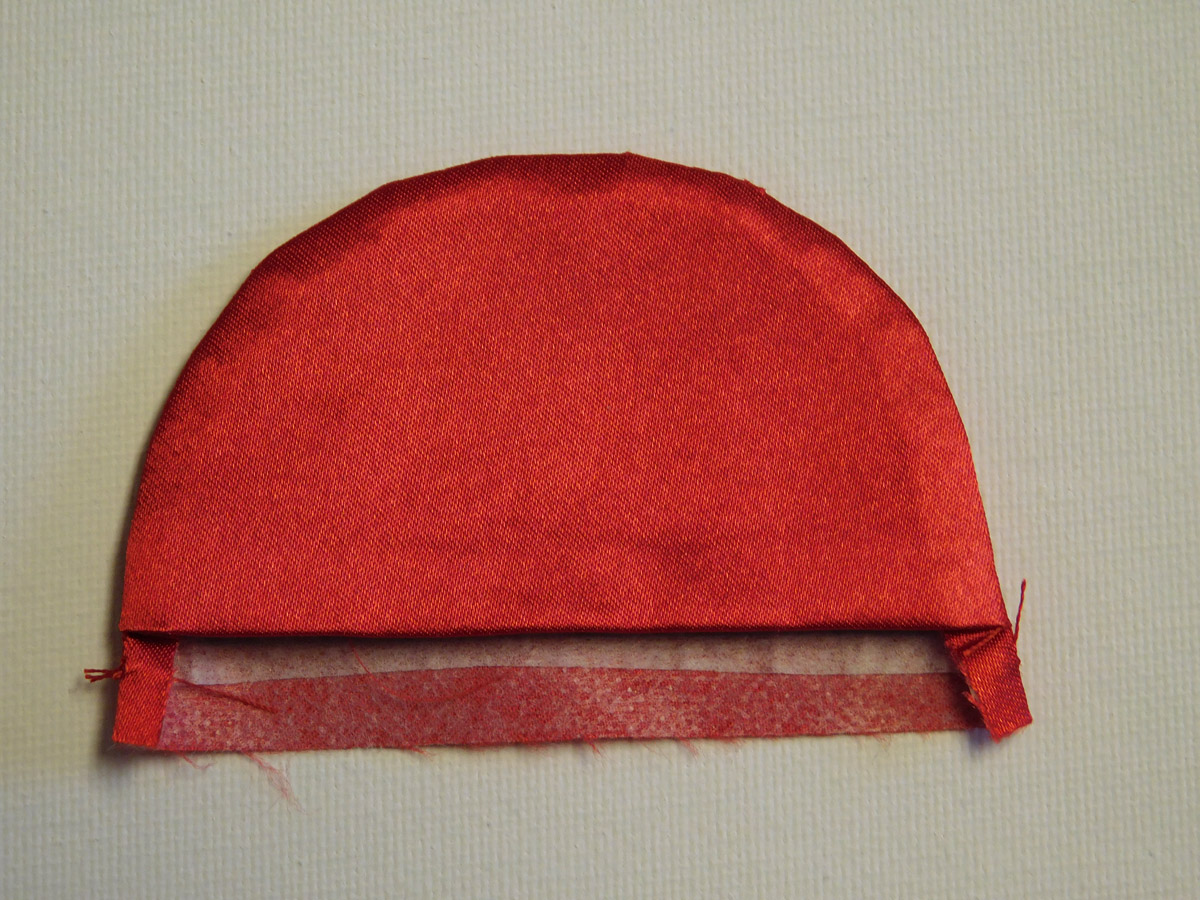
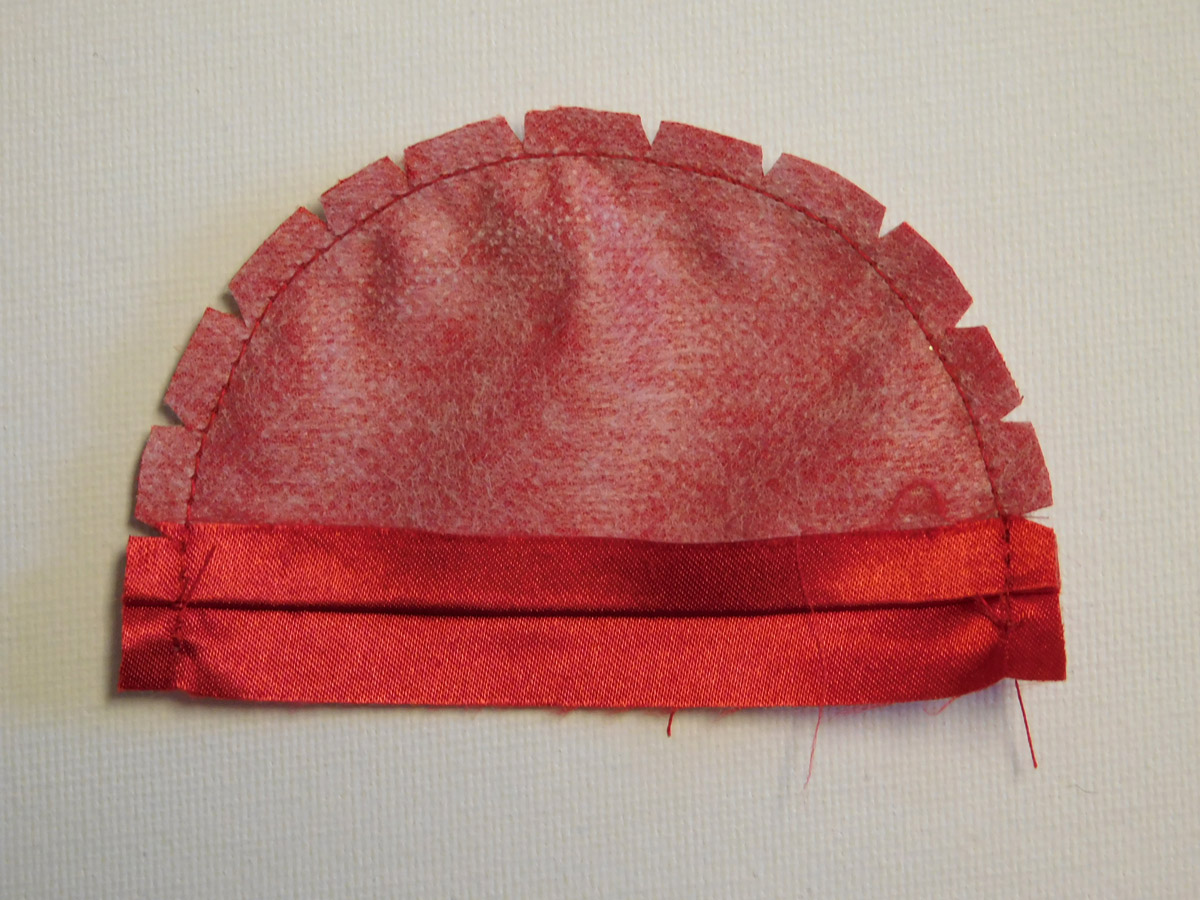
This is what each side looks like.
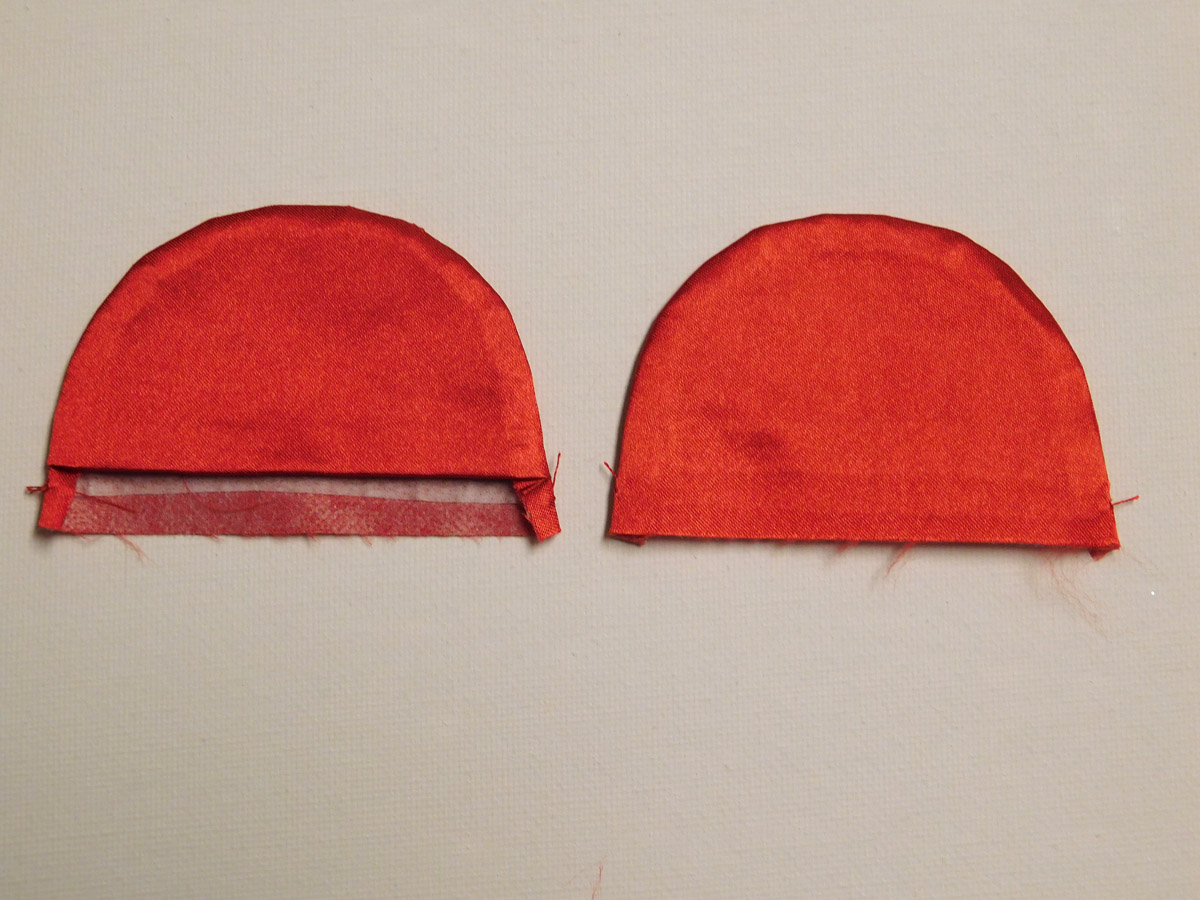
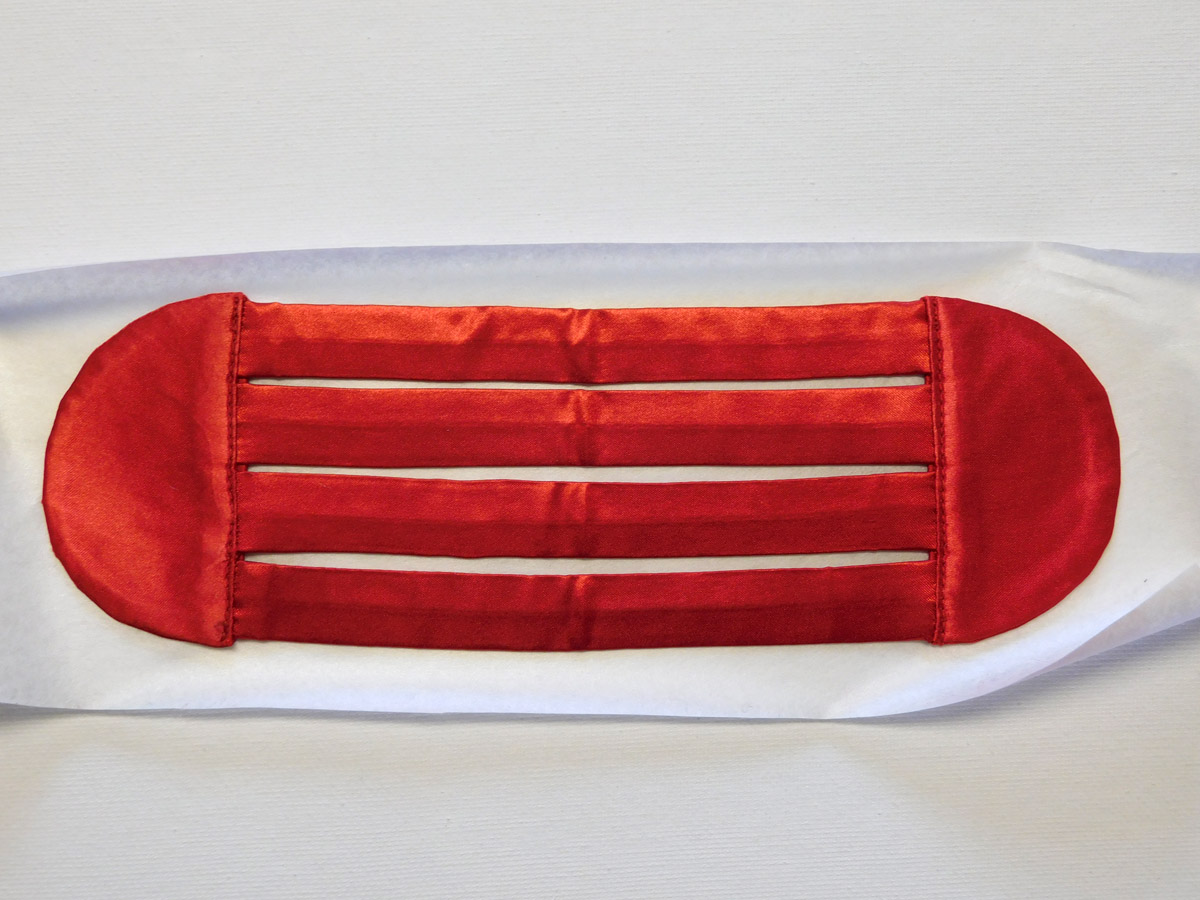
Set these aside for now. Cut a strip of the red satin 2″ x 28″. Fold this strip in half. Place the edges on the ¼” mark on the throat plate of the machine. Move the needle position one click to the left. This will make the finished strip slightly less than ¾” wide.
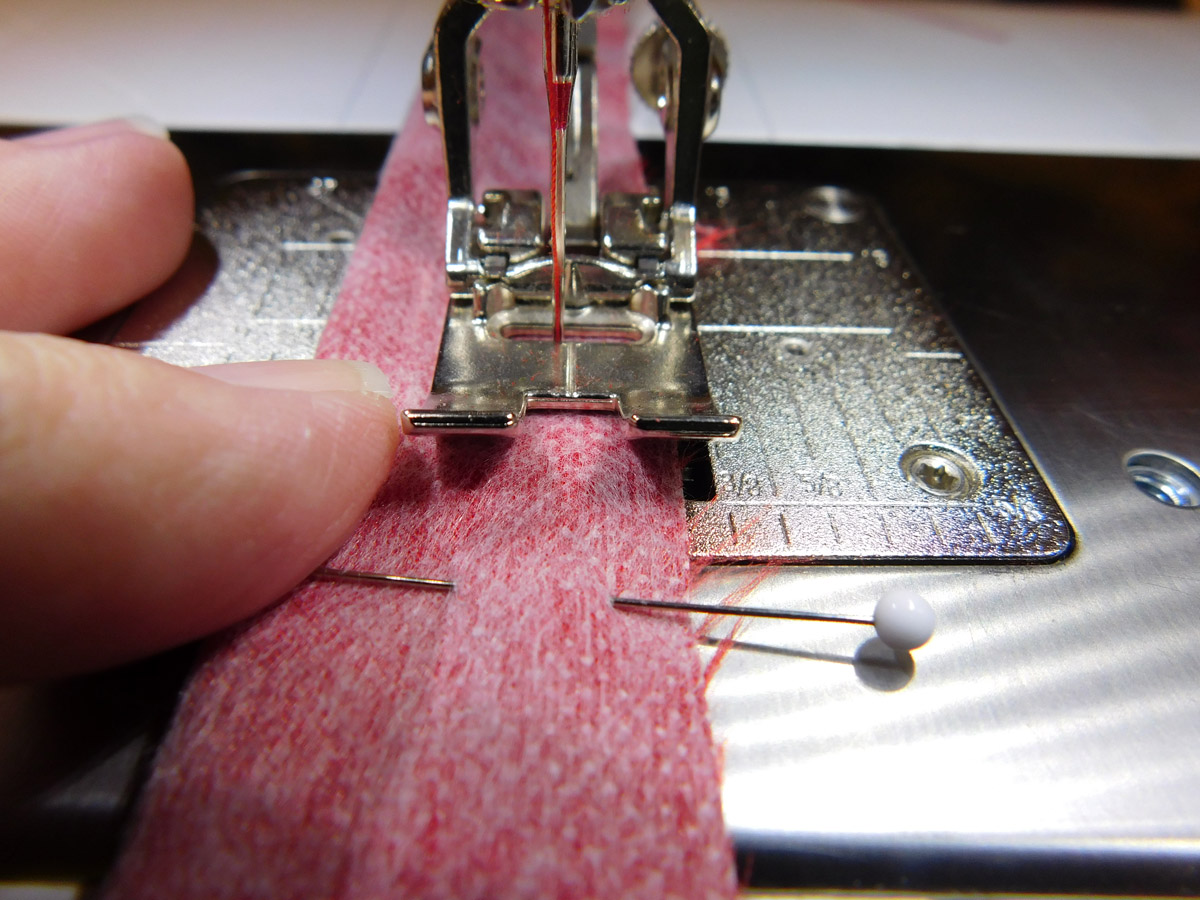
Stitch down the length of the strip. This creates a tube that will need to be turned. Before turning, it is desirable to have the seam pressed open.
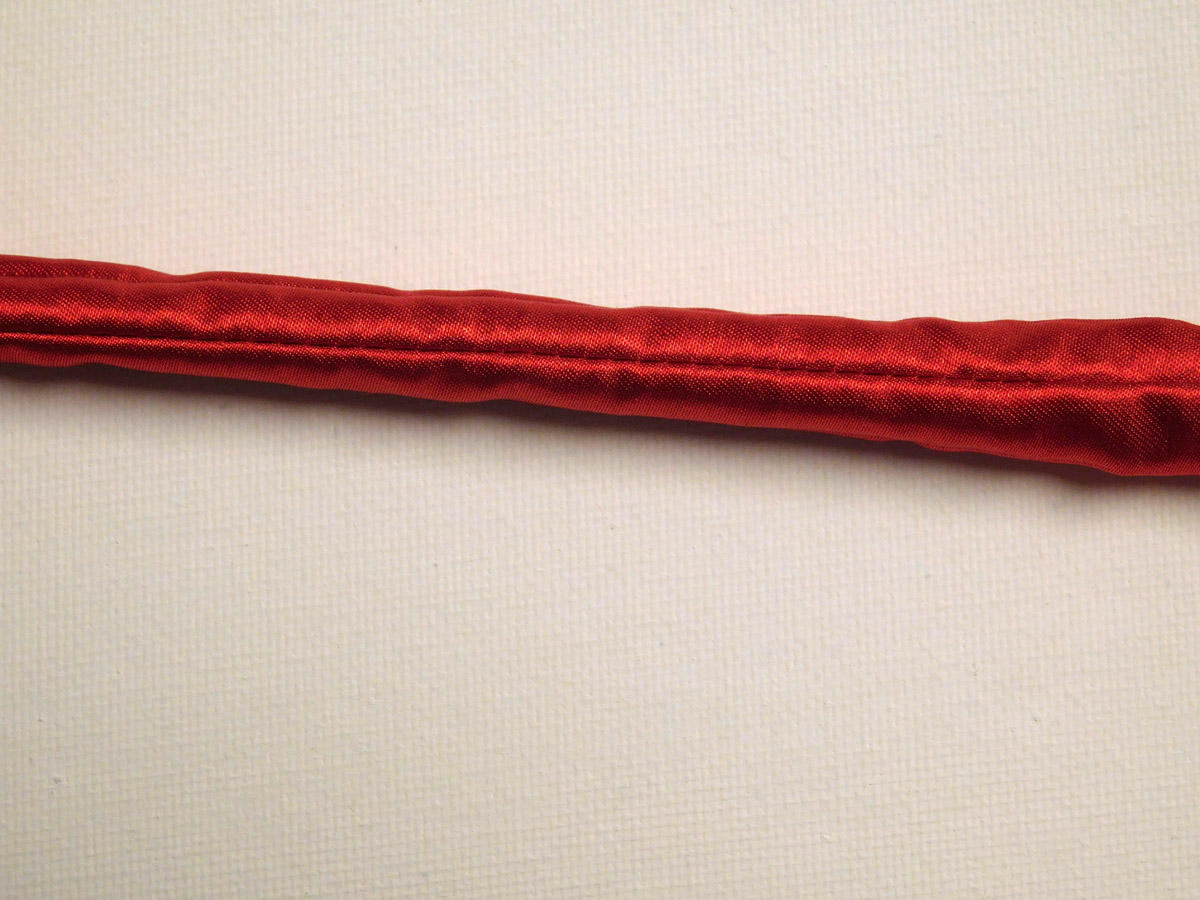
Once turned the tube will need to be pressed flat.

Cut this strip into four 6 1/2″ pieces.
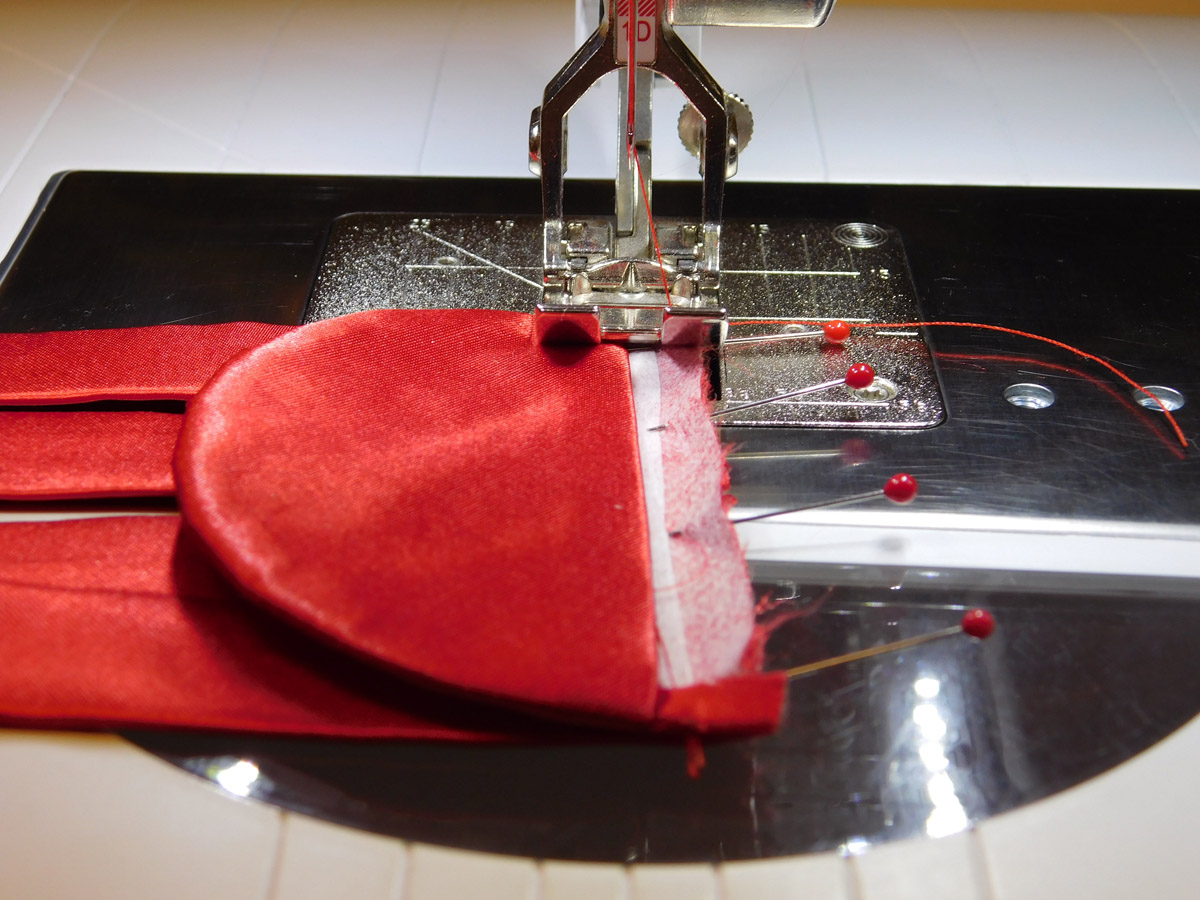
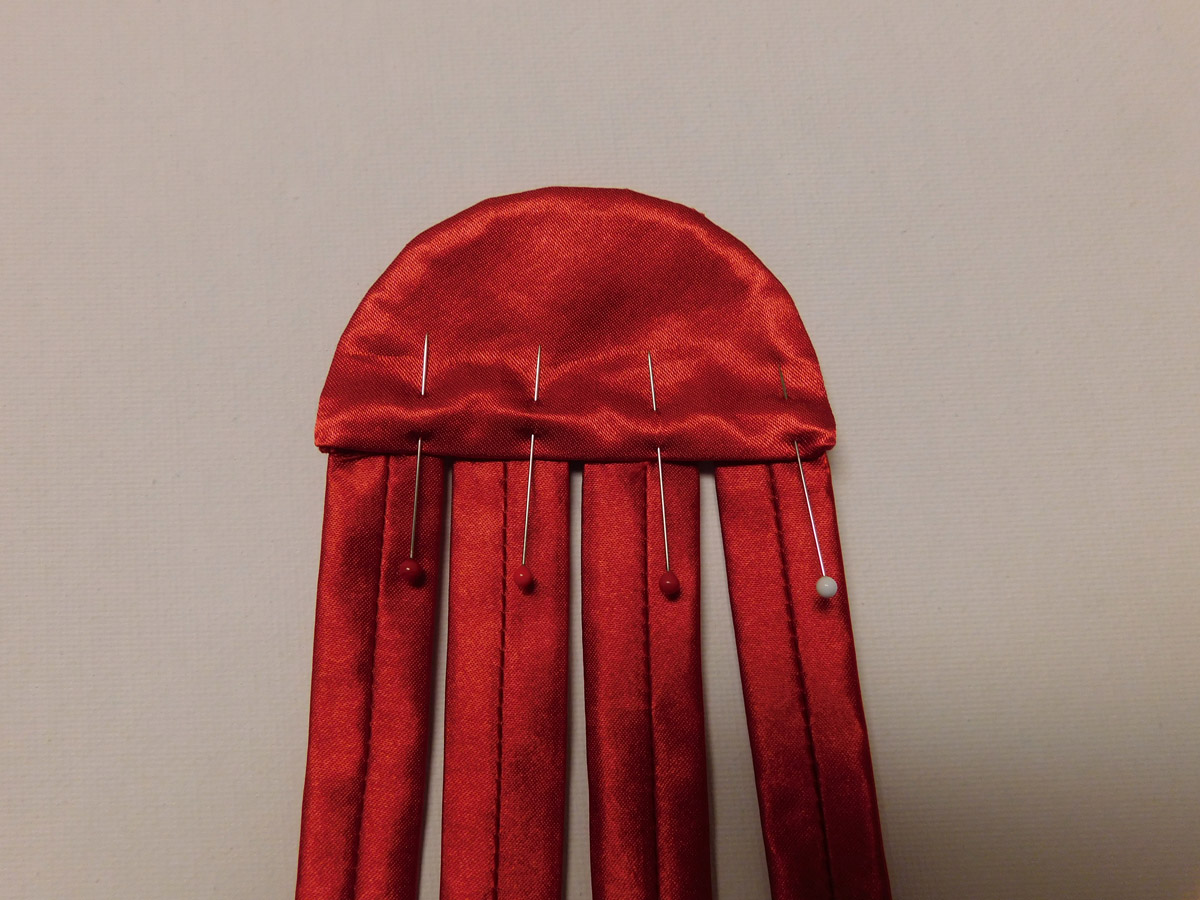
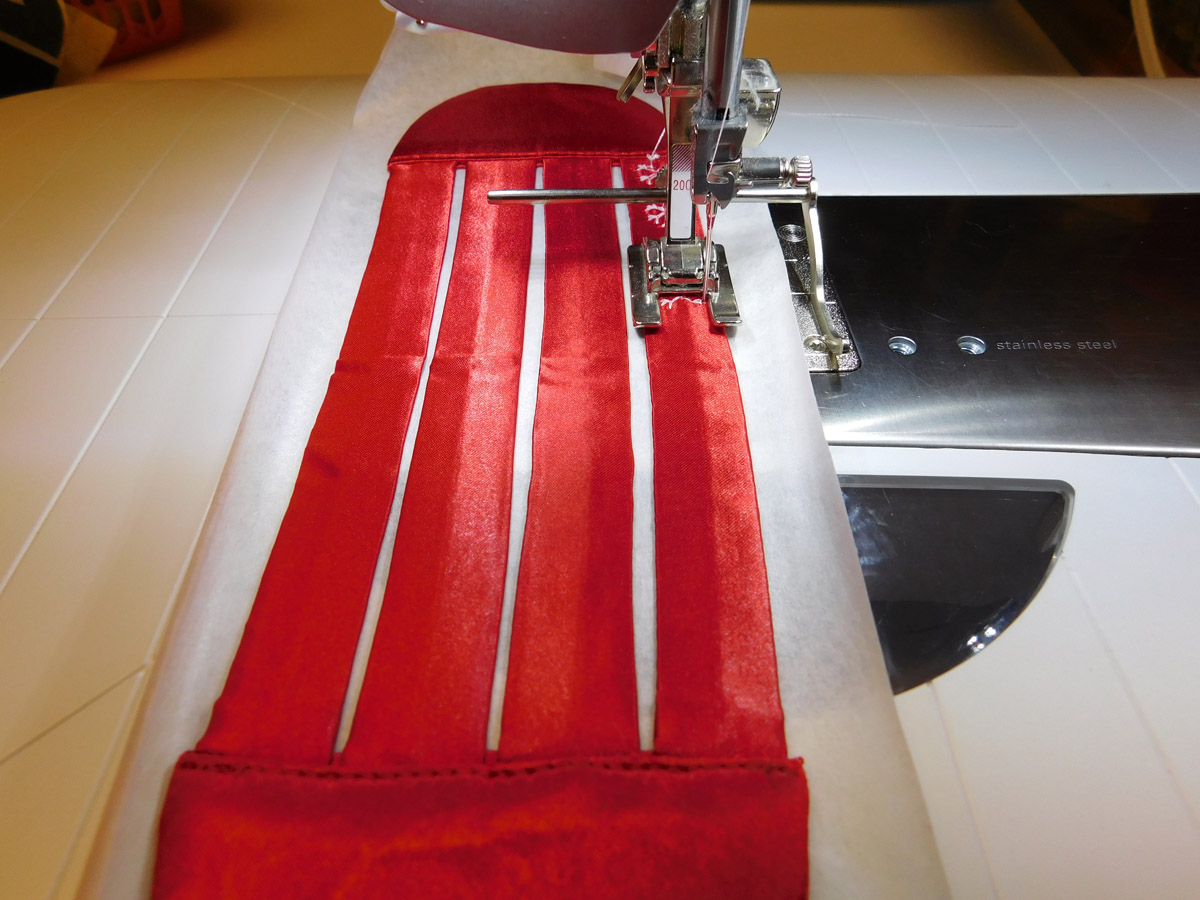
Pin these 4 strips to the extending seam allowance of the half circle.
The photo shows one pin in each strip. (It’s better to stabilize the strips with 2 pins.) Place 2 strips on the outside corners with a pin so that the edges of 2 strips touch the corner seam, then space the remaining 2 strips evenly across the seam allowance. Then place the second pin in each strip.
Sew the strips on to the half circle next to the fold taking caution not to stitch on the edge of the fold.
Trim off the corners of this seam.
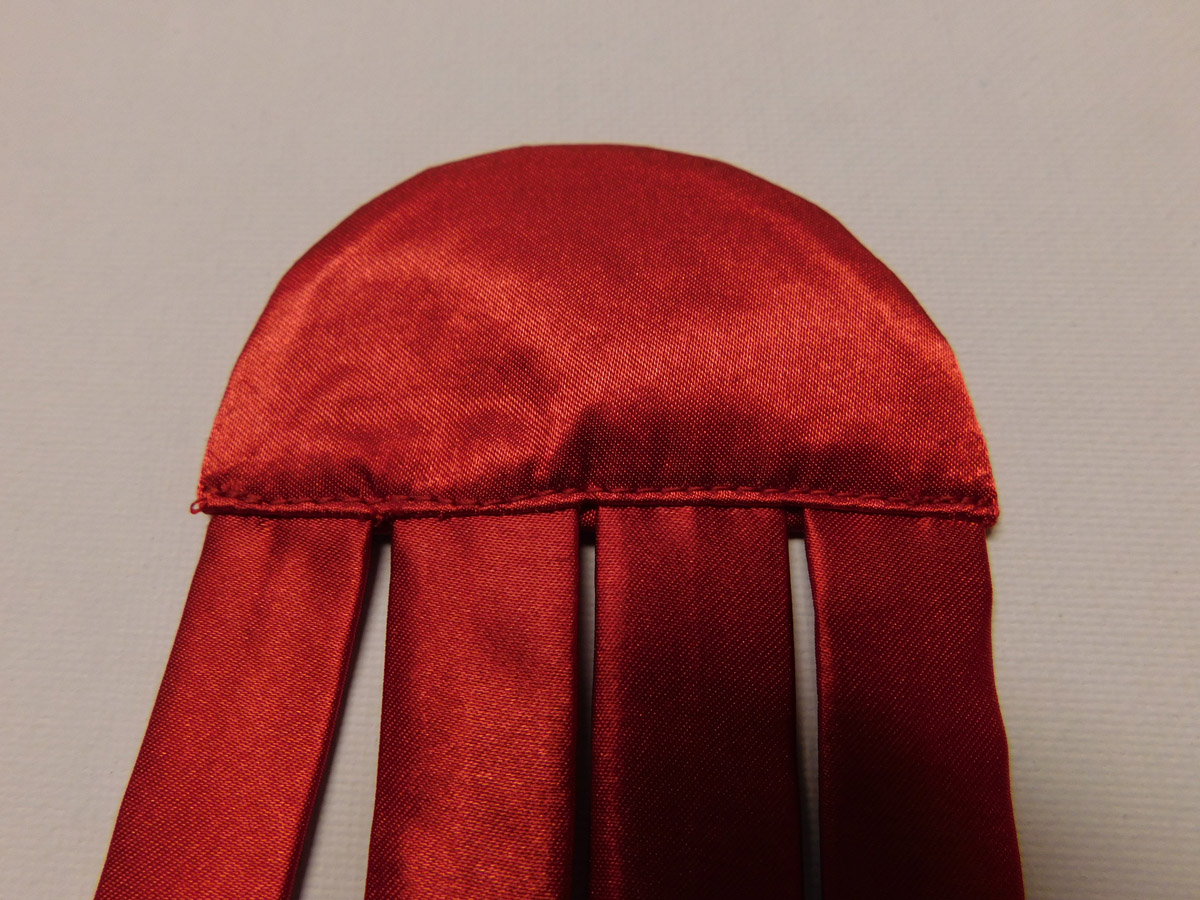
Bring the folded over the ends of the strips and pin in place. The fold should cover the last stitching line.
Topstitch 1/16″ inside the seam line. (Pins are underneath)

It should look like this after stitching.
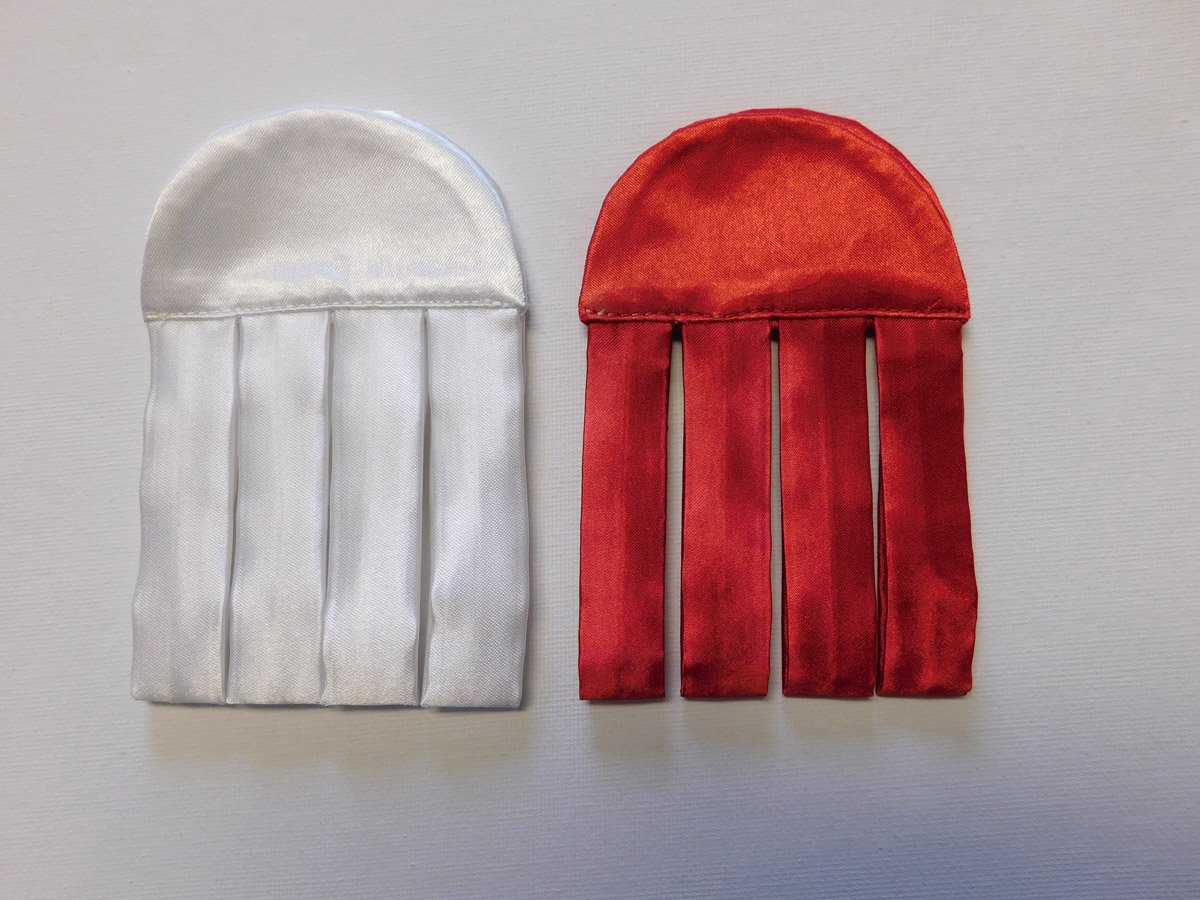
Repeat for second half circle at the other end of the strips. Then make the white section repeating these instructions.
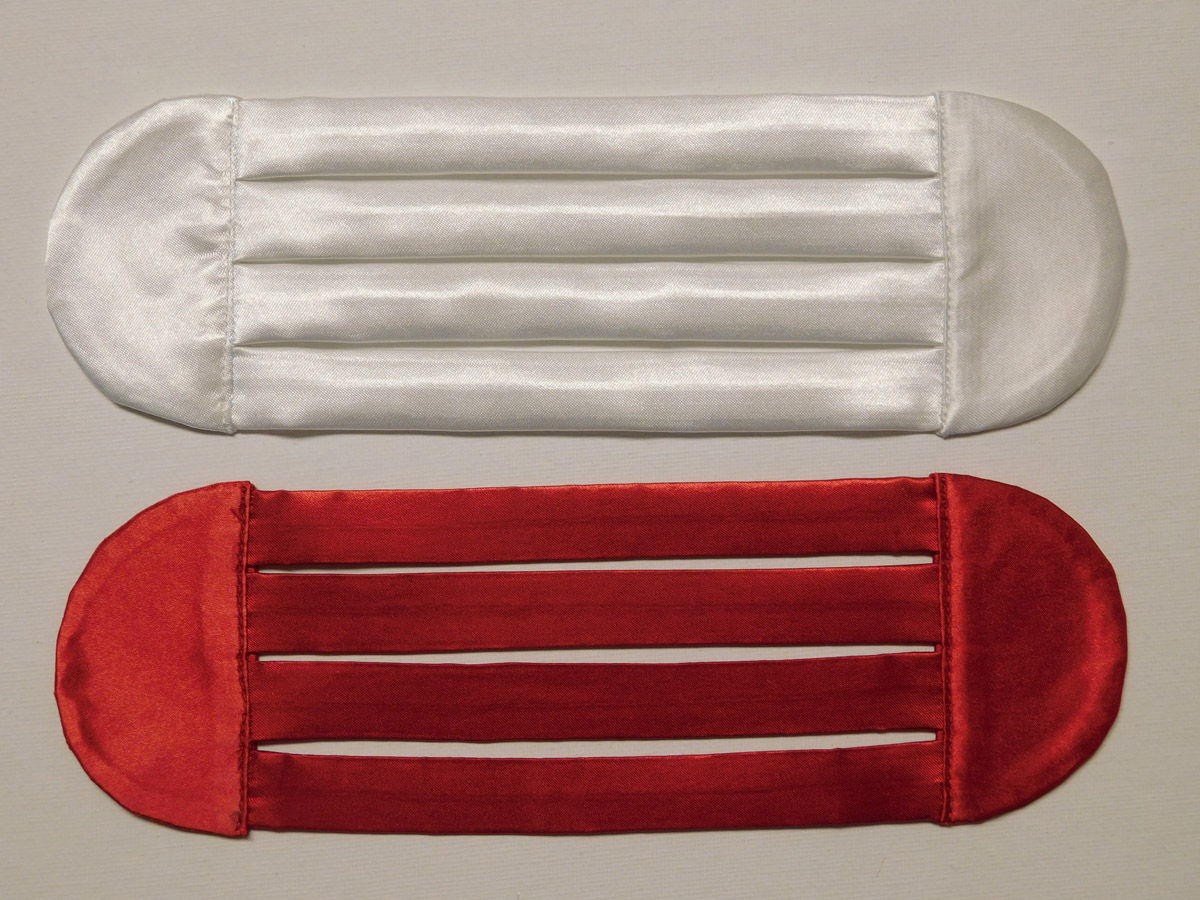
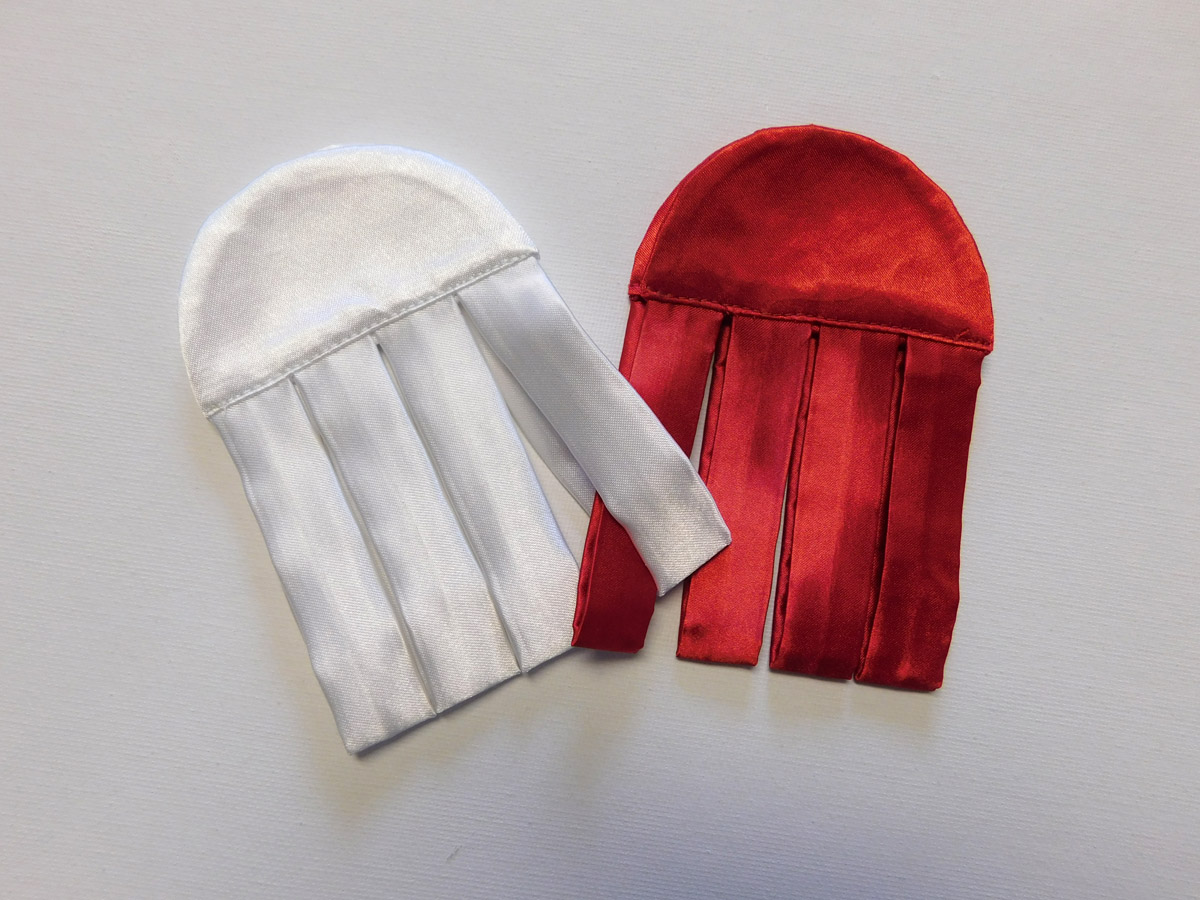
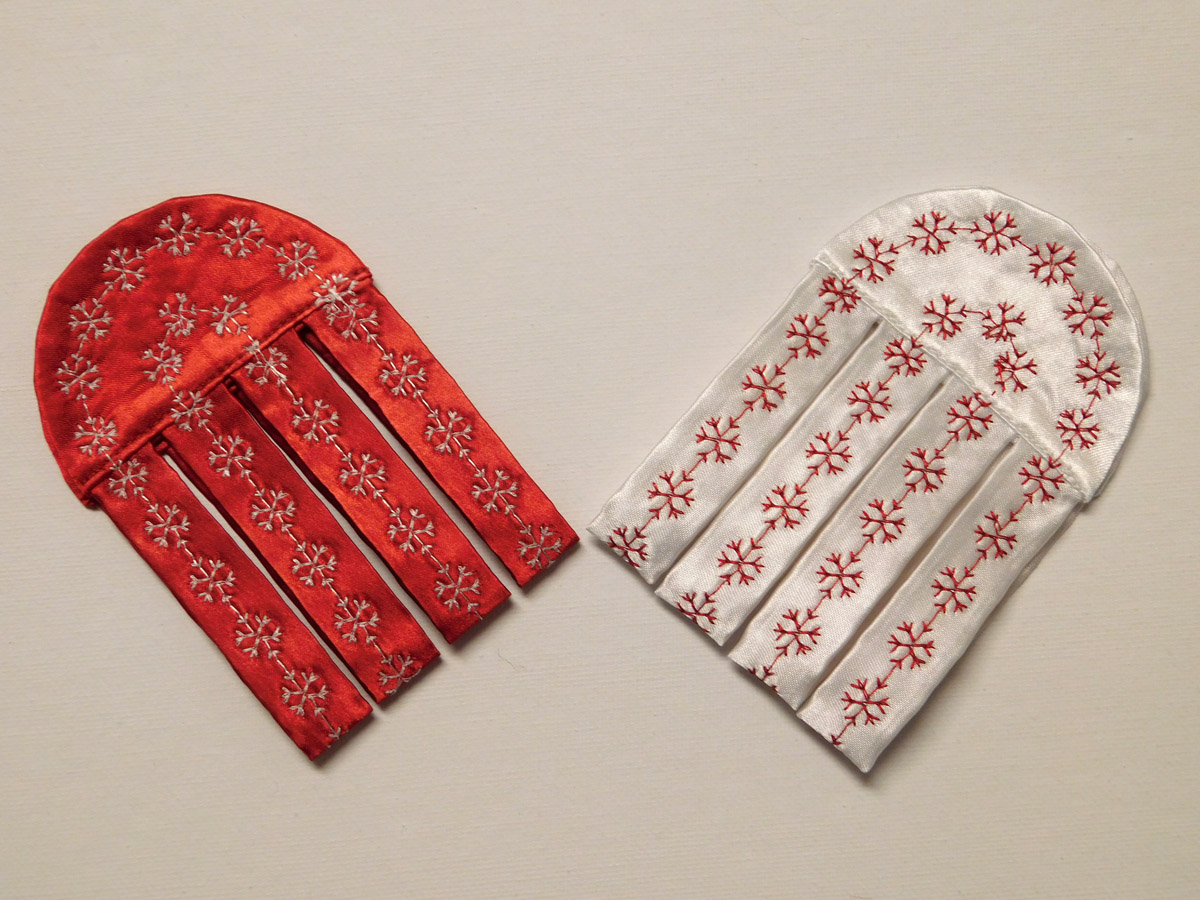
Fold the 2 sections in half and press, forming loops.
Begin to weave the 2 sections together.
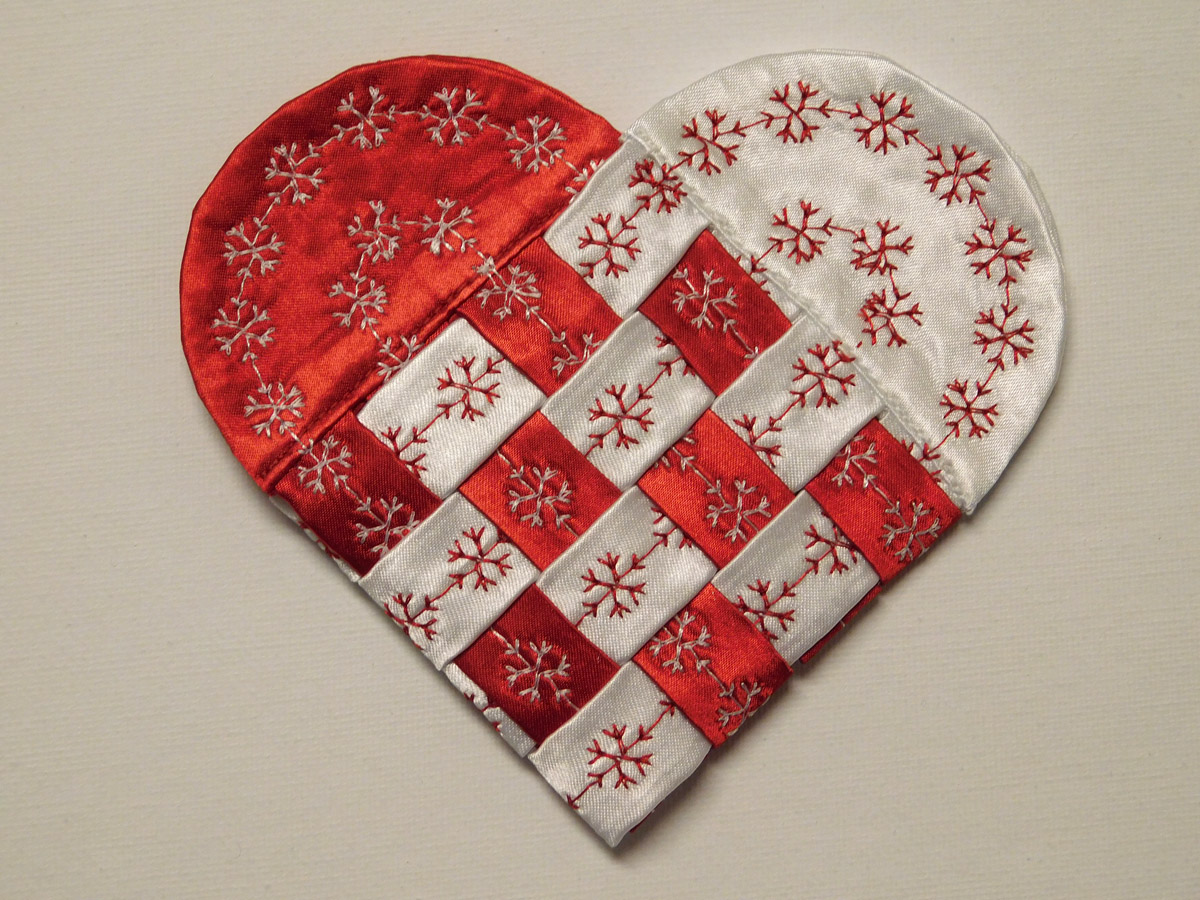
The purpose is to form a checkerboard pattern. Run the first red loop on the inside of the first white loop. Then the first red loop goes around the outside of the second white loop.
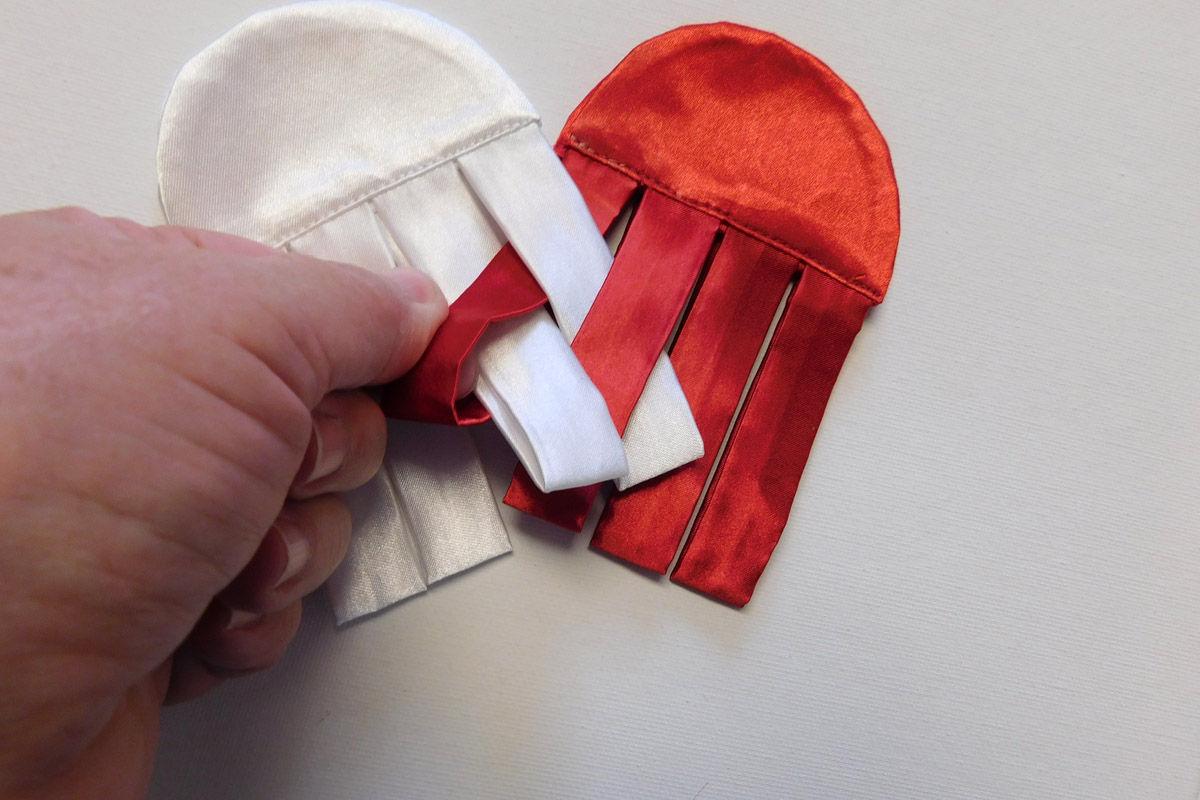
Do the opposite with the second loop. Proceed with weaving as shown in photos.
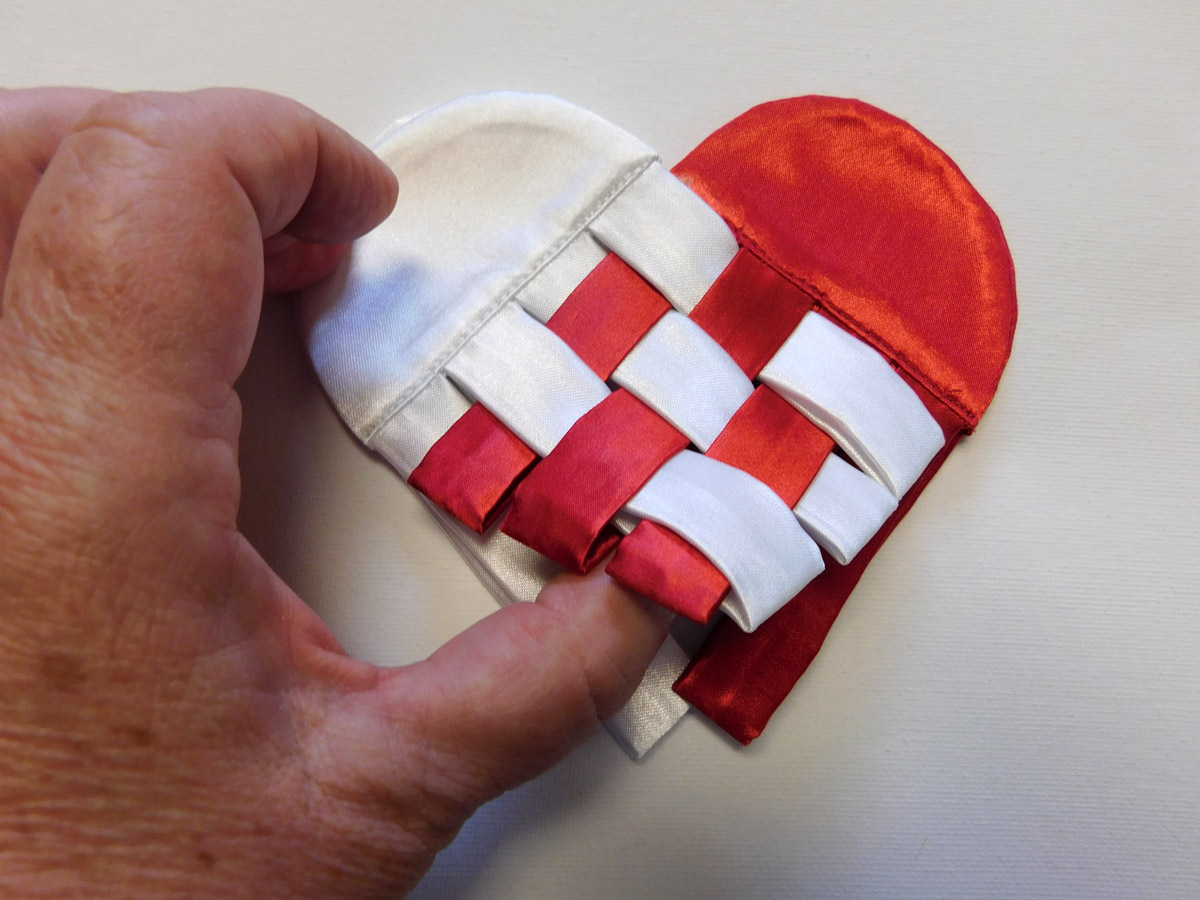
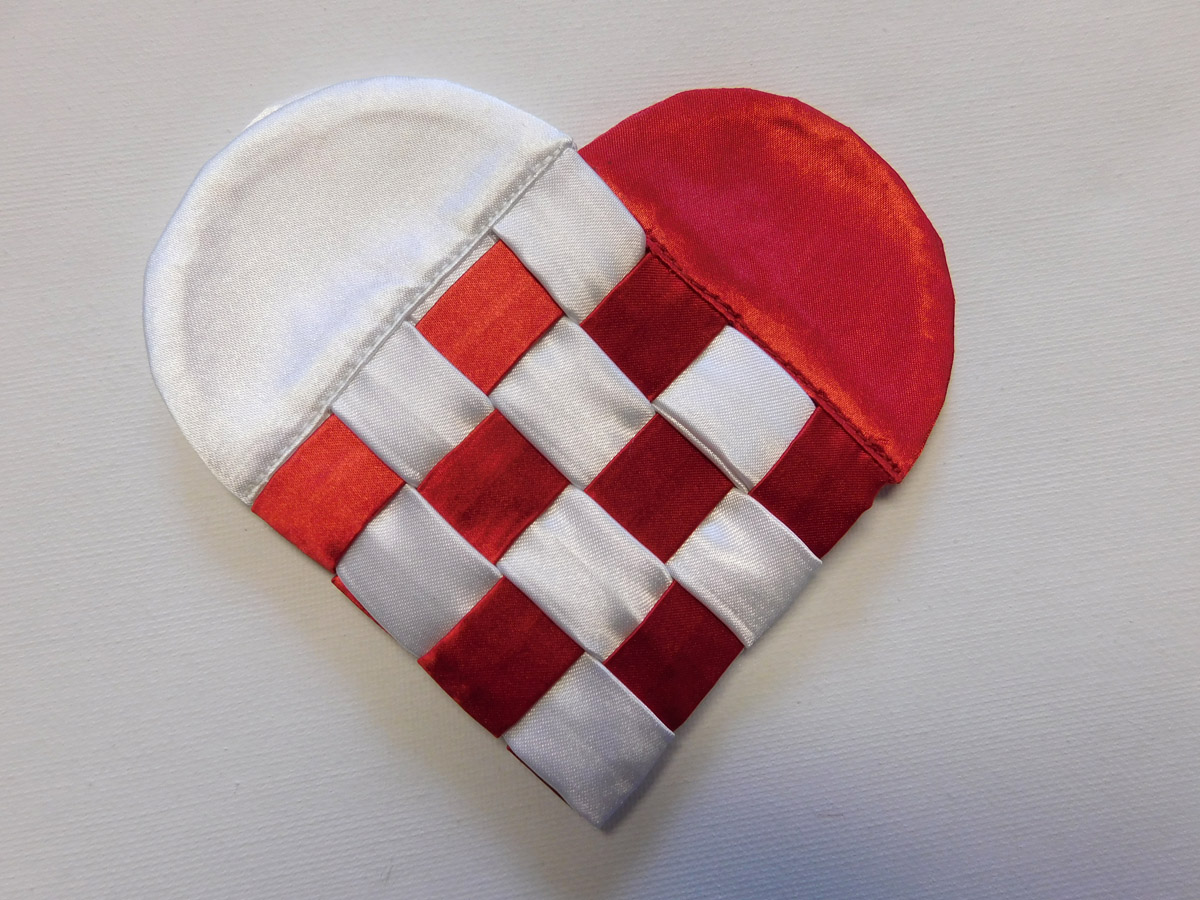
The last photo looks like it is correctly done. But when I turn it over on the opposite side I see I have made a mistake.
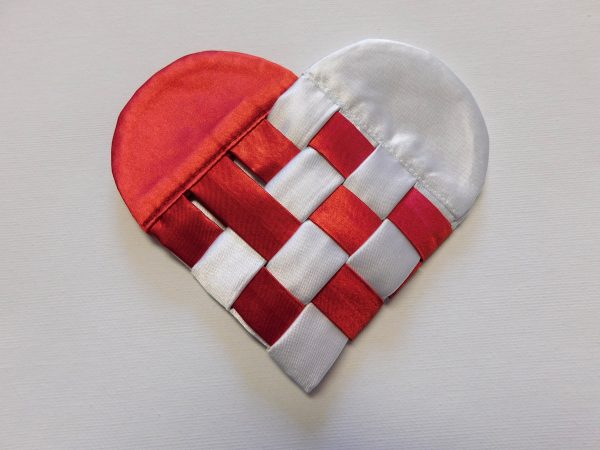
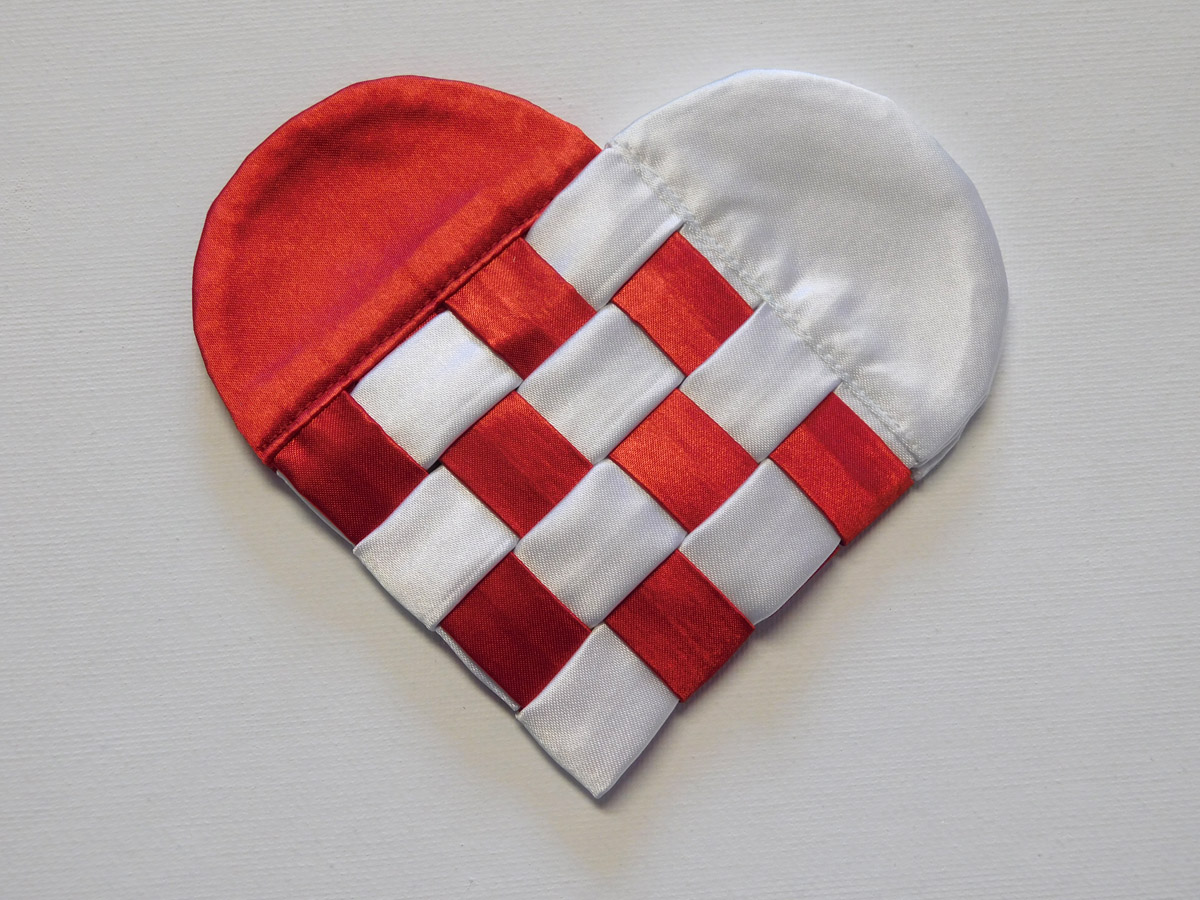
Since I made the error on the first row I need to unweave the sections and begin again. Once the heart is rewoven it looks like this on either side; front and back sides are mirror images of each other.

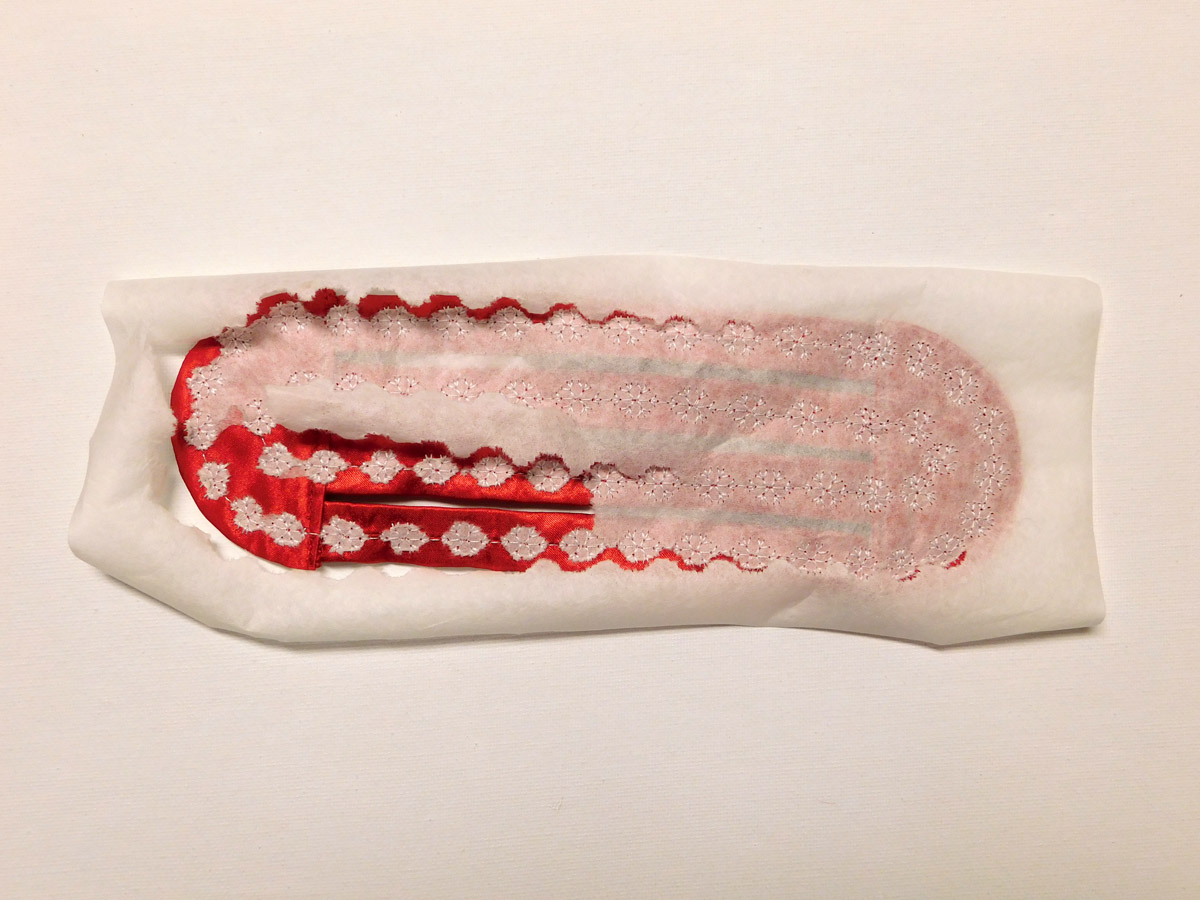
This heart is attractive but is it keepsake worthy? Let’s do a little more work and make it even more special. Before weaving together the red and white sections, lay the 2 pieces flat and apply an iron-on tear-away stabilizer to the wrong side of each section. (The side that has seam lines in the middle of the strips.)
Choose a contrasting thread for each section. Use Open embroidery foot #20/#20C/#20D. The seam guide is loaded on the back of the foot to use for stitching the inside round. Pick a fitting decorative stitch. I picked #642. Center the presser foot at the top of the outside strip and begin stitching.
Continue stitching around the shape until the line meets the beginning to create an oval. (You can choose to go to the effort to make the decorative stitch match perfectly at the join. I did not feel the need to.) Repeat for stitching of the inside oval using the seam guide to aid in keeping the line straight.
Once the decorative stitching is complete tear away the stabilizer.
Remove as much of the stabilizer as you can. Stitch the white section. Both sections are completed in reversed colors.
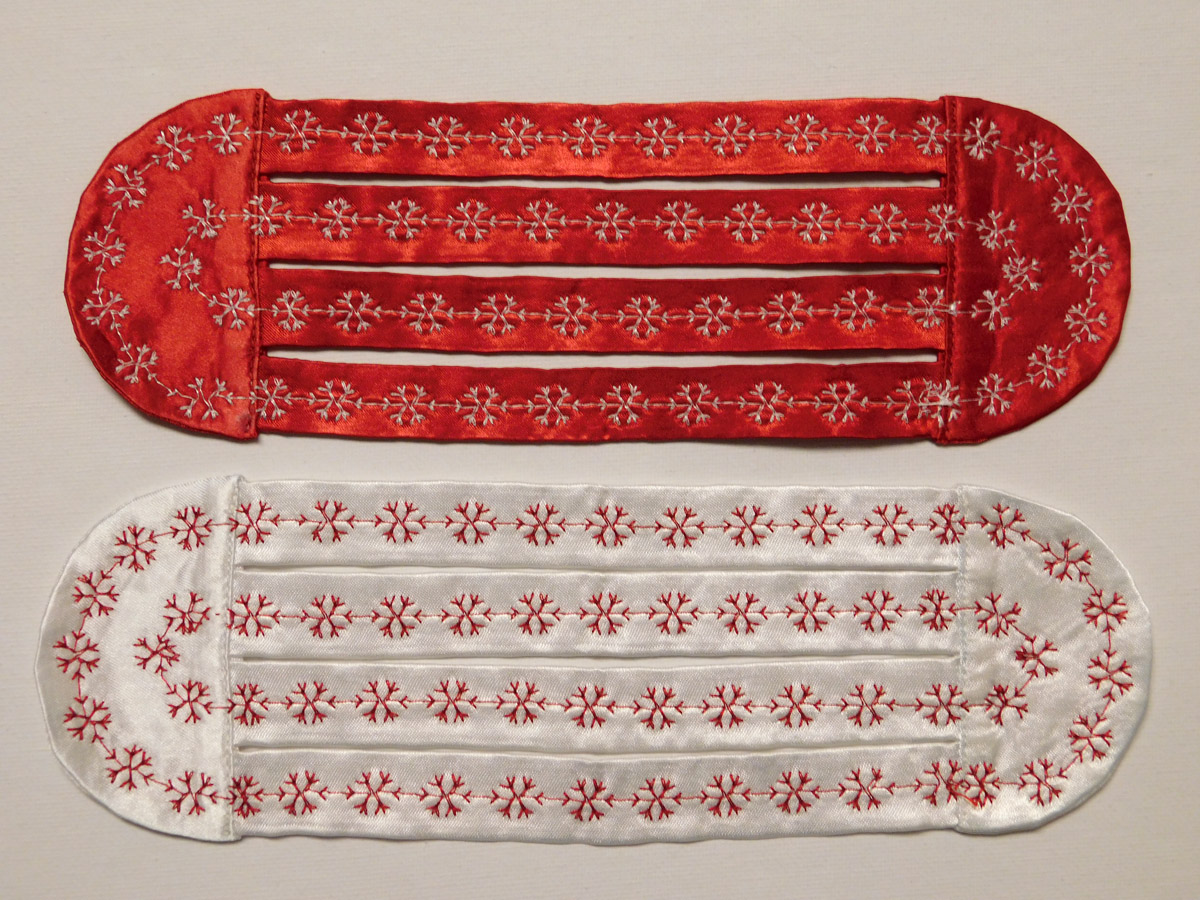
Fold the 2 sections in half and press.
Weave as previously instructed.
Hand stitch the corners of the heart where the half circle joins the outside strip.
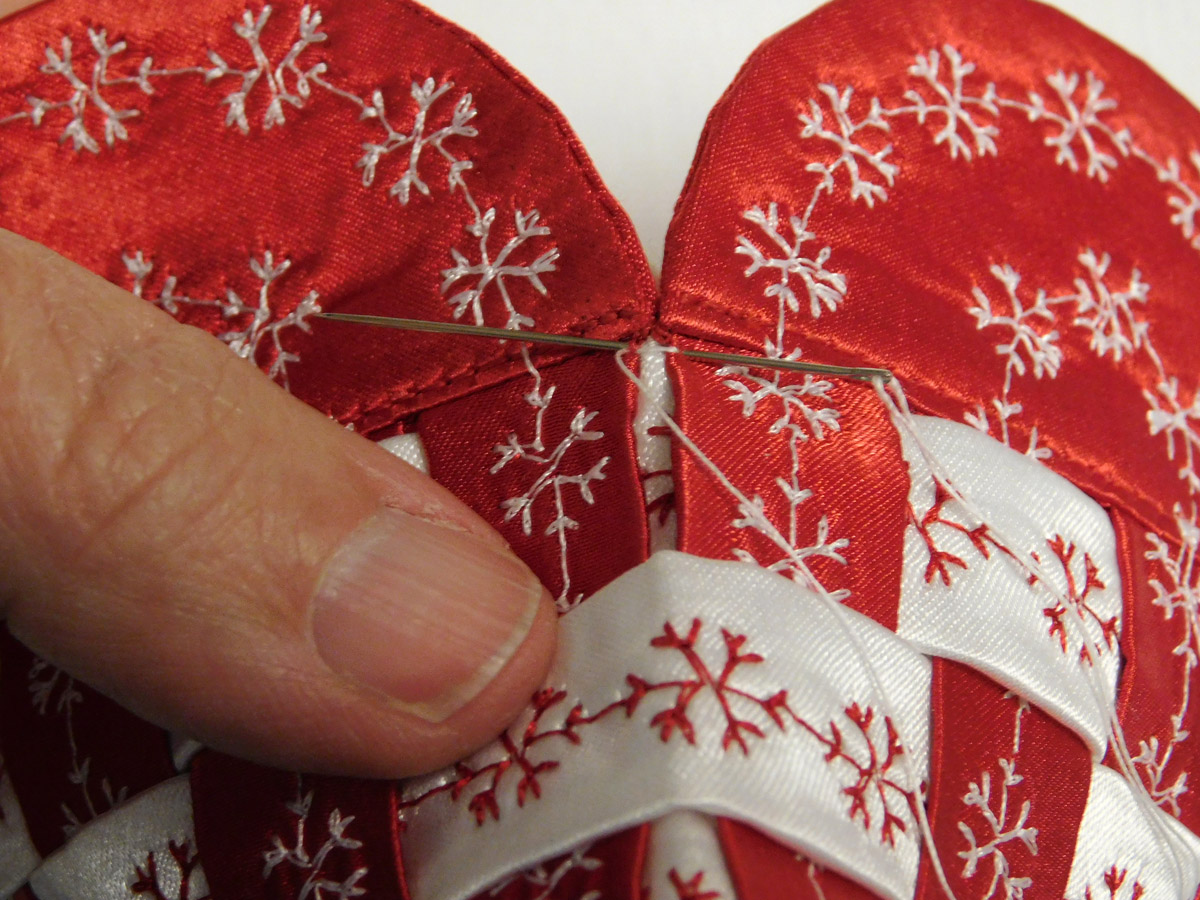
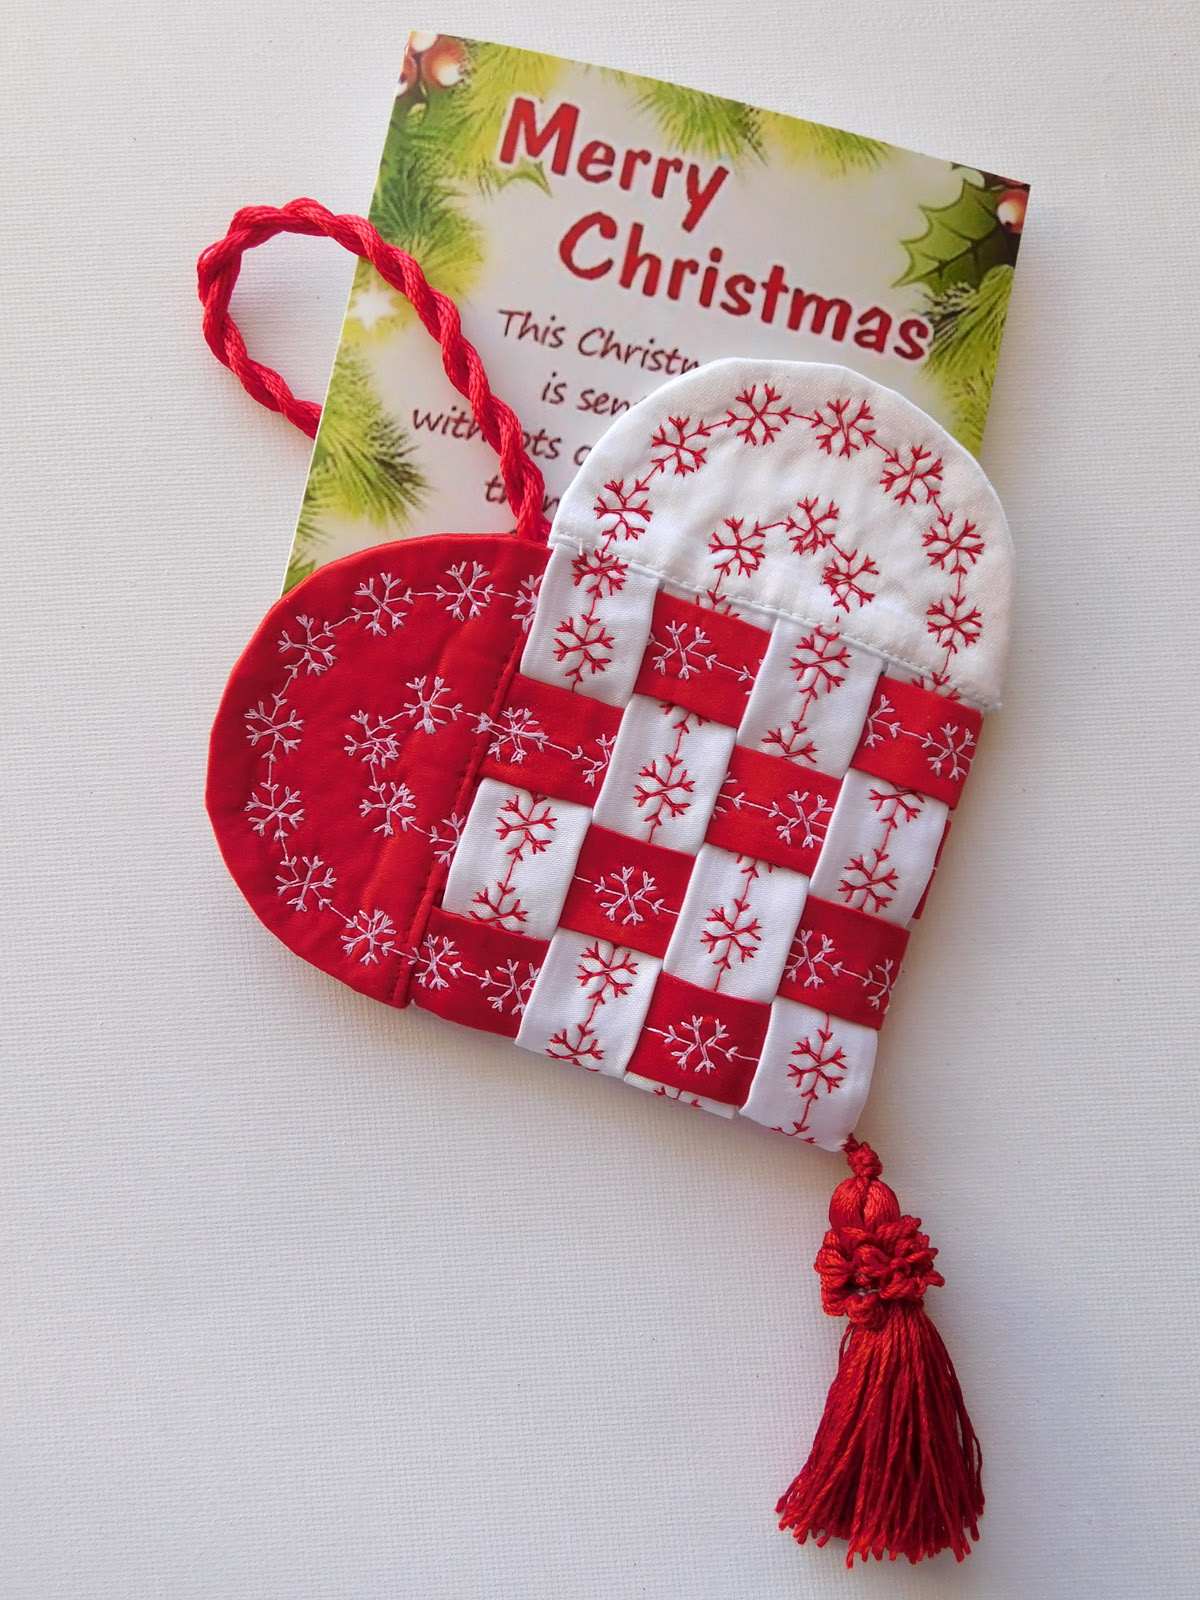
This will permanently join the sections. Two more items are needed to finish this keepsake: a tassel at the bottom of the heart a cord or braid for the handle.

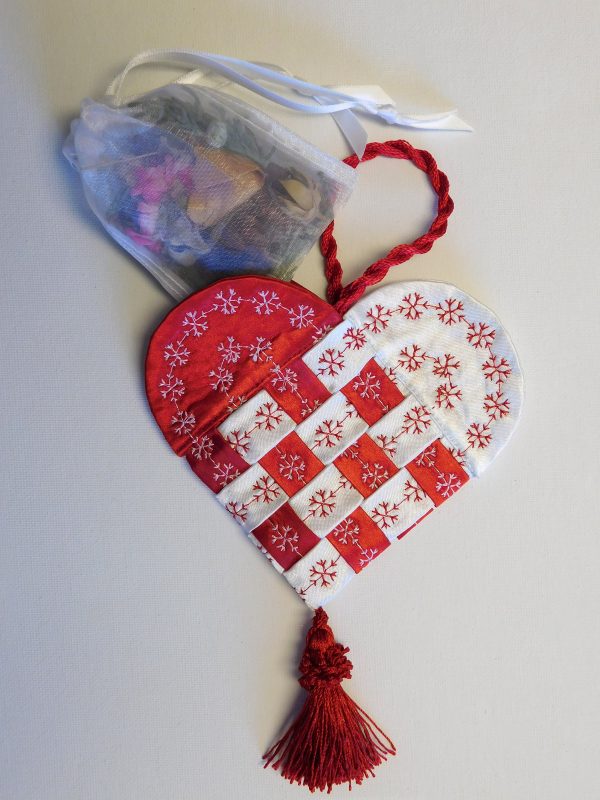
This makes a lovely ornament.
Here are some ideas for personalizing the heart. Place a small card inside, a photograph fits nicely in the pocket, or it can be the perfect place for a pouch of potpourri.
Your friends and loved ones will appreciate the extra effort and cherish this memento.
Used Products


What you might also like


25 comments on “How To Make A Fabric Scandinavian Heart”
-
-
Thank you. I knew how to make those years ago. Lost the directions – so Thank You!
-
Love this! I think it will be the basis of Valentine’s Day gifts for my Swedish-American daughters.
-
This is GREAT! I am going to make them as Valentines.
-
Can this be gotten as a pdf file
-
Hello imajqultr, while we don’t offer the tutorial as a PDF download, you can save it for later from your computer. Depending on your computer system configuration, you may be able to print the article to a word document or directly to a PDF file to save for later.
-
What works for me, is I click on the PRINT THIS PAGE icon and then when my print screen comes up, I’m able to select PDF at the bottom of the screen, and then SAVE AS PDF. I have a MAC, so I’m not sure if this works the same with Windows or not.
-
-
Very pretty. I’ll make one, too.
-
Can’t wait to make for Valentines Day for my granddaughters!
-
Very Creative and beautiful!
-
Thank you for the fabulous tutorial! I won’t make one now but probably will in the future when I have more time for fun projects like this. Love it!
-
I really have to correct you.
This is NOT a swedish heart – this i a DANISH heart.
The very first one was made by the danish author Hans Christian Andersen and it is used at christmas time.how you got it to be swedish, I do not know, but this is incorrect.

-
You are correct that Hans Christian Andersen made the first one. I have only ever heard this called a Swedish Heart. Forgive my ignorance because had I known it was truly a Danish Heart I would have called it that since my husband’s parents immigrated from Denmark to America. I Googled “make a Danish Heart” and got 64,100,000 results and then Googled “make a Swedish Heart” and only got 2,790,000. I am not the first one to make the error, it seems. I sincerely apologize and thank you for educating me. Sincerely, Charlotte Warr Andersen
-
You are welcome.
He made it over a hundred years ago, and every christmas, these are everywhere, and as Mathilda wrote, they are traditionally red and white as our flag.Yeah, I see your last name is a common danish last name.
-
-
Hans Christian Andersen started the tradition – at the HCA museum they have samples from 1850.
The traditional colours, red and white, are the colours of the Danish flag. All Danish children know how to braid the hearts – make then for Christmas tree ornaments and decorations around the house in December.
I think that Jenny Dan from MSQC mistakenly called them Swedish – reflecting on the grandmother’s Swedish heritage – and that started the misconception, continuing on Pinterest etc.
Thank you for the correction.-
To add even more confusion-I think both are correct since Sweden was formerly Danish, and this quote from Hans Christian Anderson suggests to me we should simply call it a Scandinavian woven heart..my heritage is Swedish by the way and these are a part of Christmas for us as well. “As a political term, Scandinavia was first used by students agitating for pan-Scandinavianism in the 1830s.[7] The popular usage of the term in Sweden, Denmark and Norway as a unifying concept became established in the nineteenth century through poems such as Hans Christian Andersen’s “I am a Scandinavian” of 1839. After a visit to Sweden, Andersen became a supporter of early political Scandinavism. In a letter describing the poem to a friend, he wrote: “All at once I understood how related the Swedes, the Danes and the Norwegians are, and with this feeling I wrote the poem immediately after my return: ‘We are one people, we are called Scandinavians!'”
-
-
-
Well, I tackled this project and have a few comments. First, you really only need 4″ or 4 1/2″ strip, not 6″. You can just cut the 2″ wide strip 26″, not 28″. For the half circle pattern, add the 1/4″ seam allowance and then trace onto something stiff, like a piece of manila file folder. I was using scrap fabric for this project and found it wasn’t necessary to cut fabric rectangles to then cut the half circle shapes. My fabrics were multi shade of red thin stripe, and white on white snowflakes.
This will now be sent to my Danish-ancestry friend instead of my Swedish-ancestry friend!
-
I did tackle this project too. I printed the pattern of the half circle and added the quarter inch all around and made a new pattern out of cardstock. I do not think you need the rectangles either. I just traced around my pattern piece with the seam allowances. I did not use satin, but a thicker cotton. I should have made the strips slightly narrower than the 2″ to compensate for the thicker cotton. Next time I will. I also did not need to interface my fabric. I did need the strips to be 6 1/4″ long. I chose to add some twine at the top for the handle and whipped stitched by hand the opening on the top of the heart closed, encasing the twine (on which I tied a knot on the bottom). Finally, I omitted the tassle.
-
I tried more than once to weave this into the checkered pattern with no luck. It’s a beautiful project but I didn’t have success with it. Thank you though!
-
Hi. I’m so happy to find your blog and this project on Pinterest. Just want to personally thank you and let you know that I featured this project on my blog in my “10 Awesome Valentine’s Day Craft Tutorials” post.
Here it is, http://sewingmadesimple.net/valentines-day-craft-tutorials-2017/
Please let me know if I missed something or if you want to change and add information about your blog and project.
Xoxo,
Amber -
I love this! Definitely plan to try this one!
-
These hearts are beautiful. Thanks for showing how to make them! Look forward to making several.
-
That is a lovely Danish heart and worthy of becoming an heirloom. Thanks for the clear tutorial.
-
What size is the finished heart and the heart openings?
-
I am playing a gnome at an evening old world Yuletide Village event this year. I used your tutorial to make a Danish heart basket from quilter’s cotton to hide the battery pack to a string of LED lights decorating my walking stick (which is might lighter than carrying a lantern.) I’ve get a lot of compliments on it and questions about it, which I love because it is one more Danish Christmas tradition I get to share with my fellow performers and patrons
Leave a Reply
You must be logged in to post a comment.

I will definitely make one!