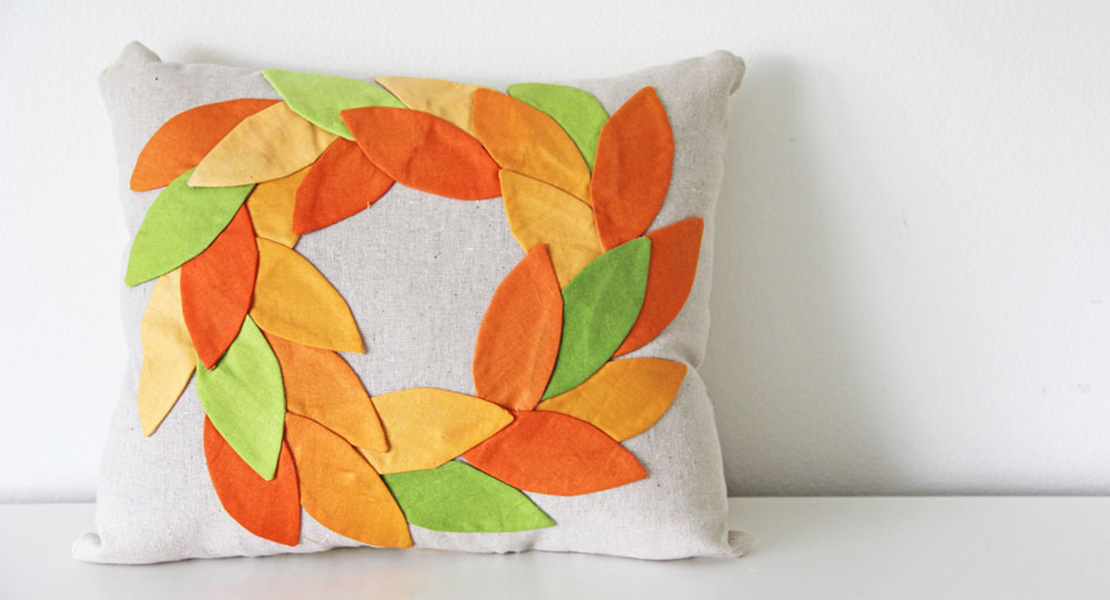
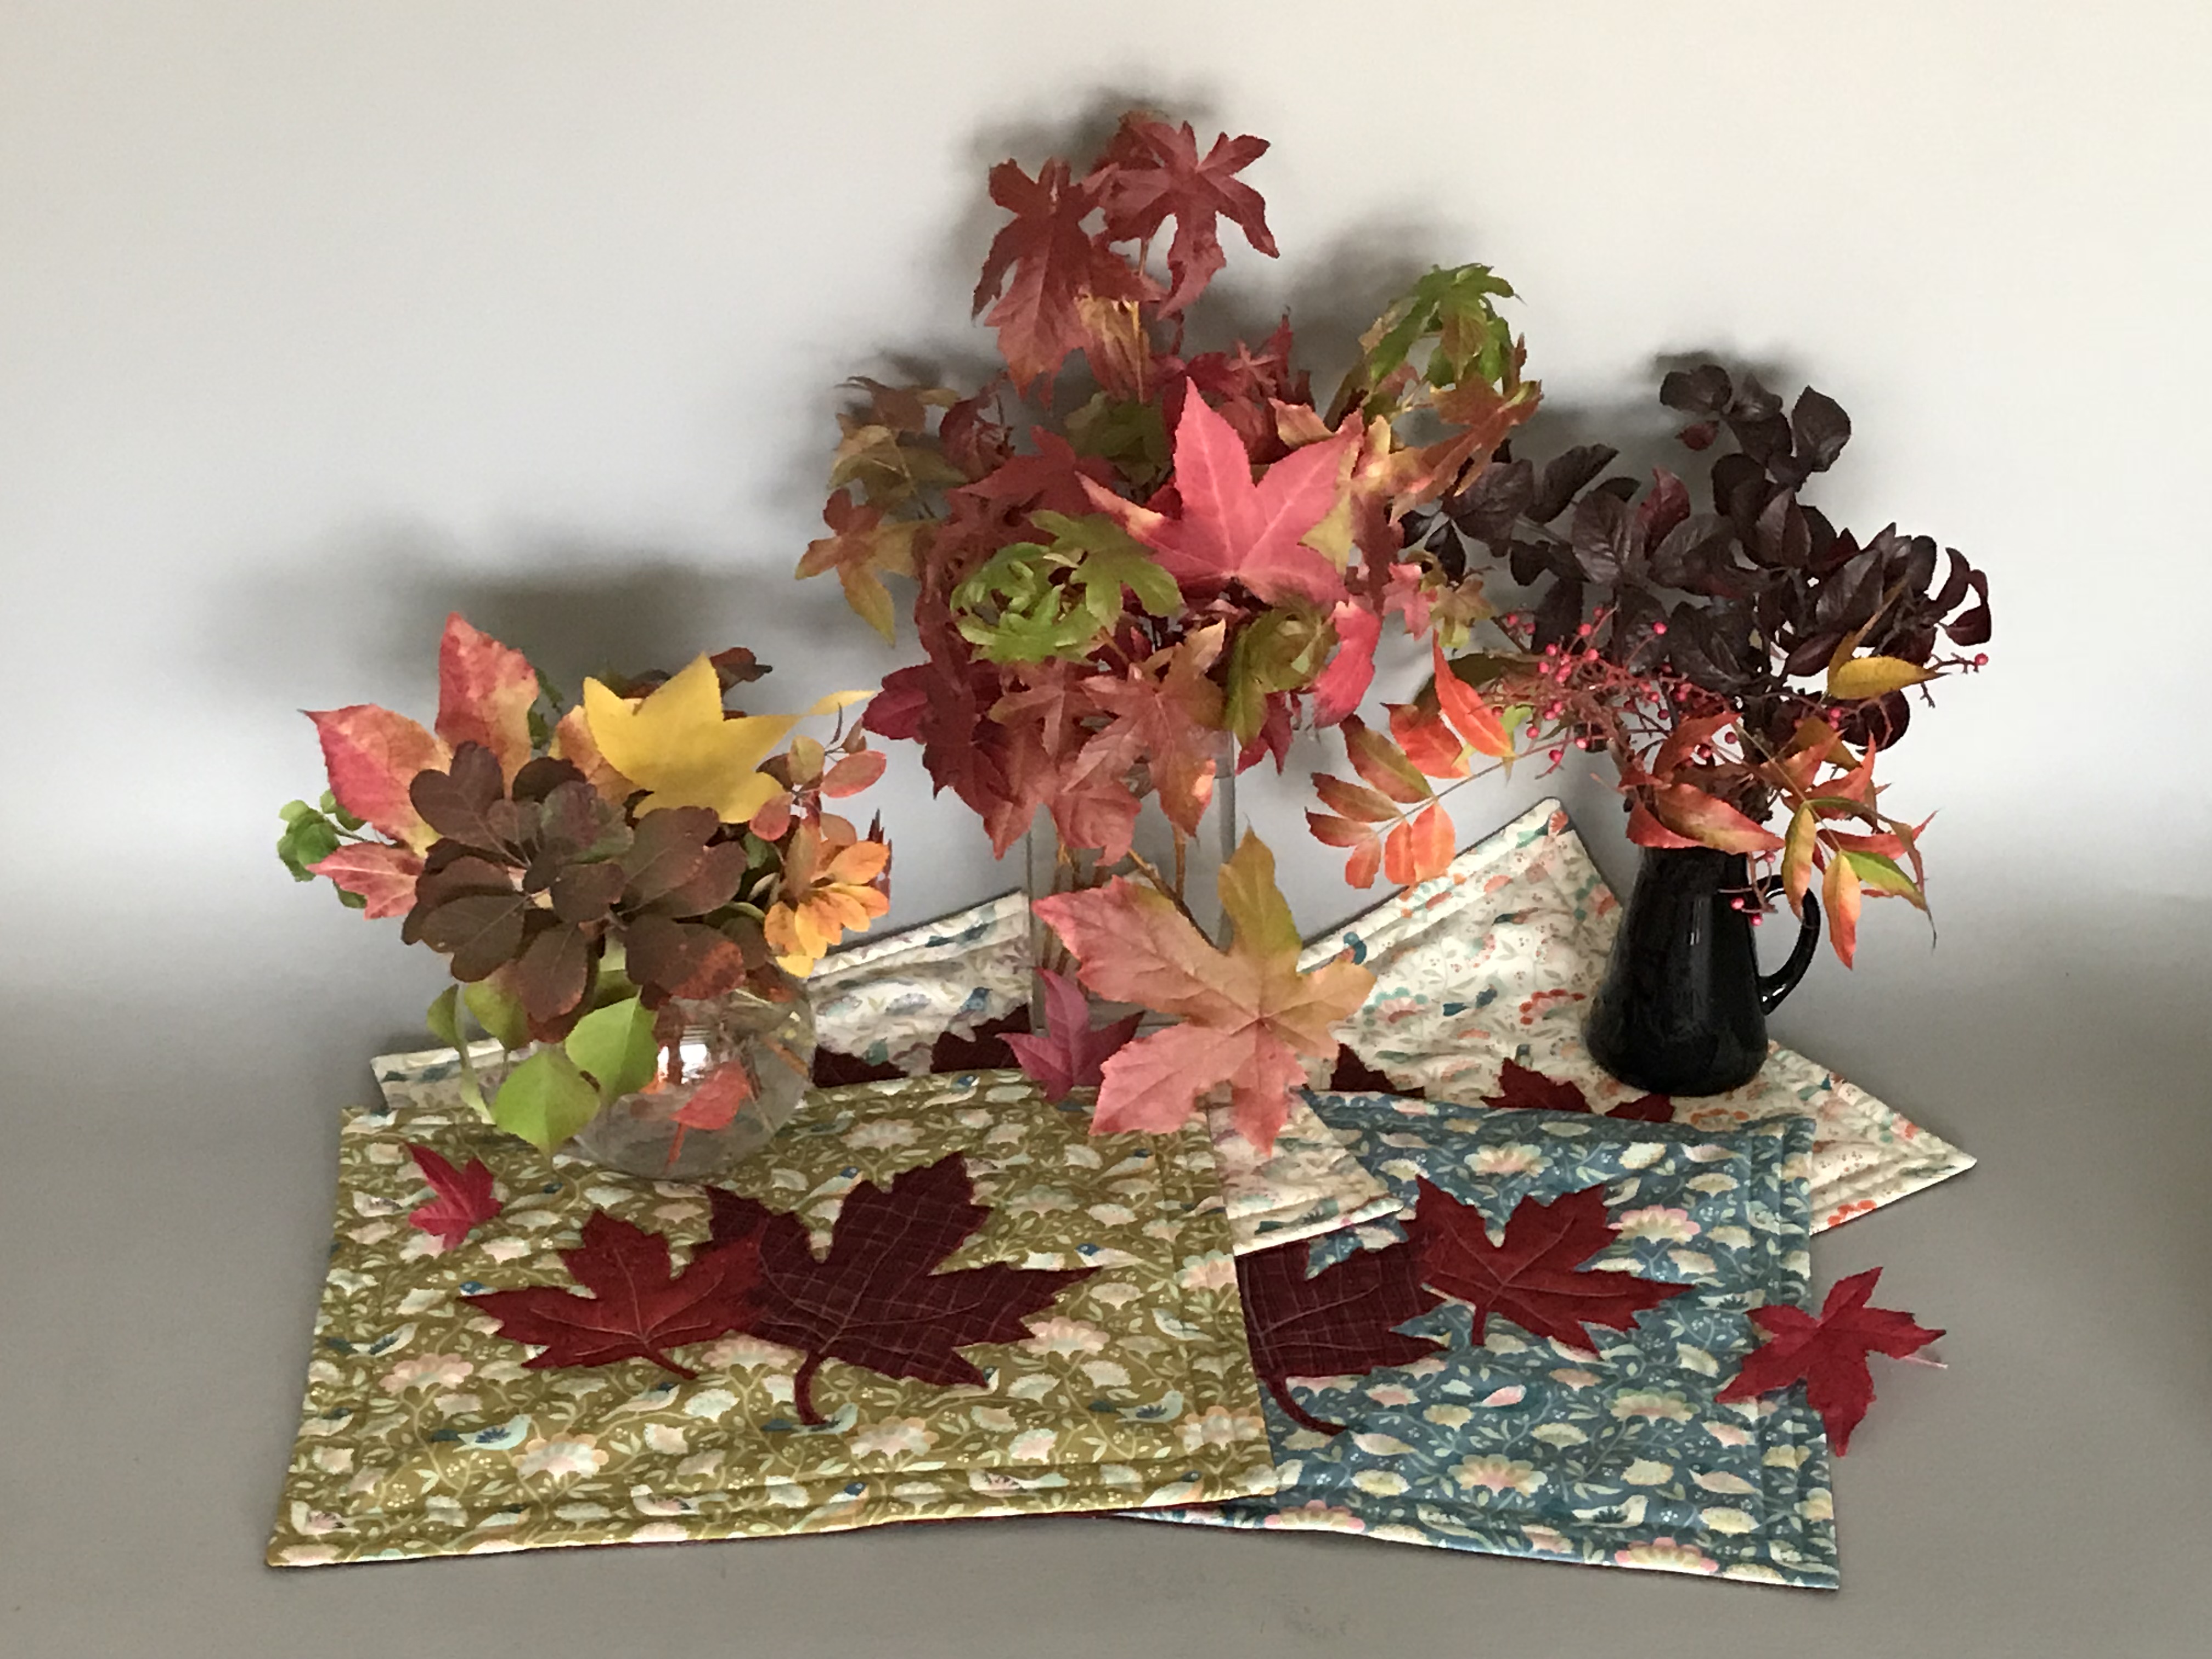
Autumn Wall Hanging Quilt
Fall is finally here so let’s celebrate the crisp weather and all the activities that go with it. This is a simple quilt top, as I wanted to highlight the quilting, but also add a little fun interest with applique. I will be using our Q 16 machine to do the quilting.


Supplies Needed for This Project
Machines:
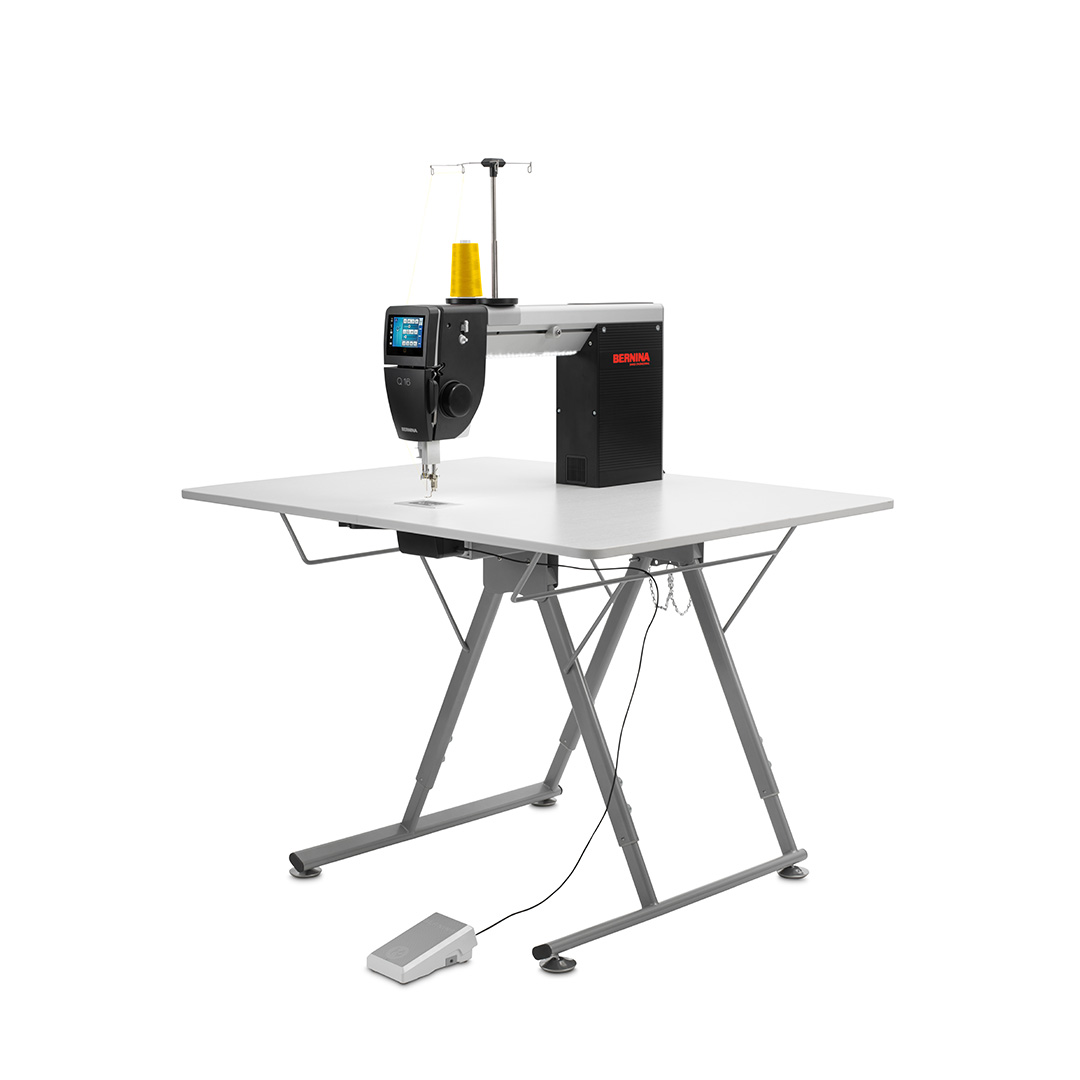
- BERNINA Q 16 Table Model
- Any BERNINA Sewing Machine to piece the top
- Other BERNINA models that may be used for this project include:
Feet and Accessories:
- Darning Foot #9
- Ruler Foot #96
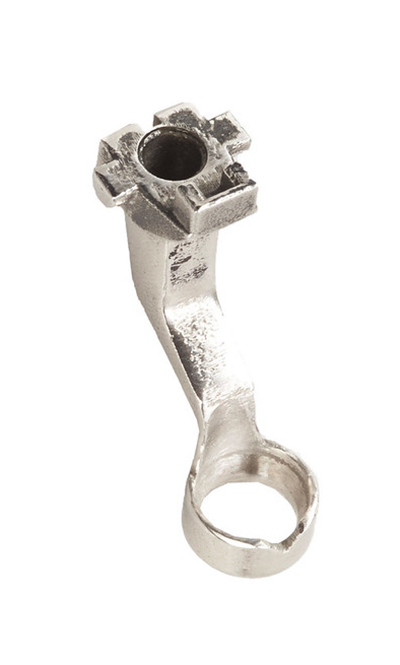
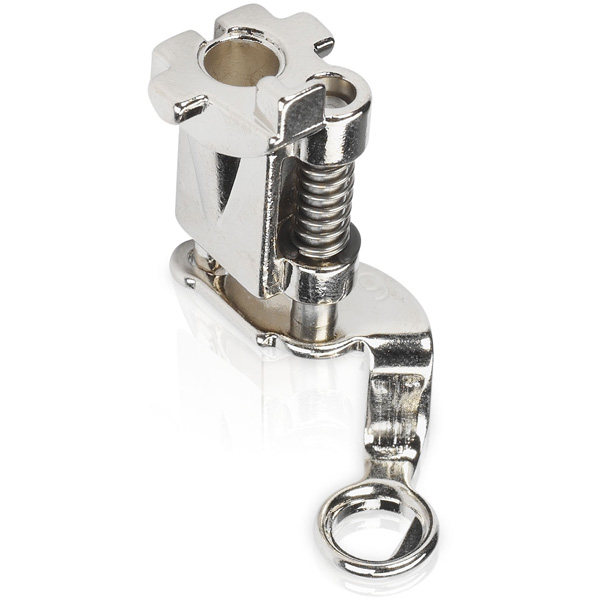
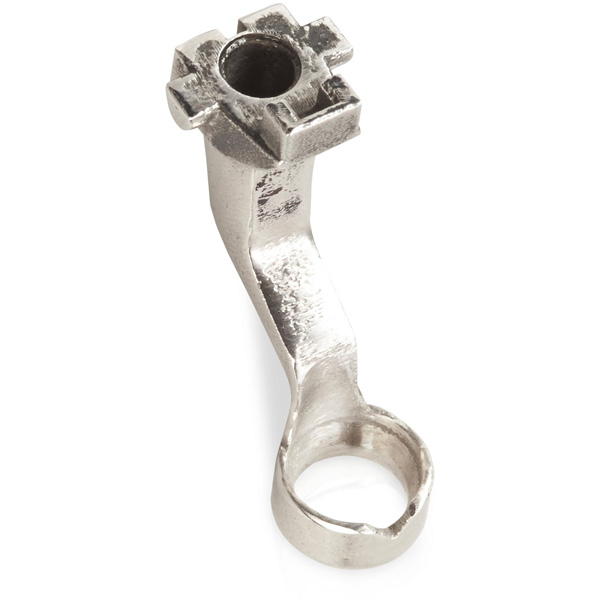
- BERNINA Gripper Rings (set of 2)
- Needle Point Laser
- Rulerwork Quilting Rulers
- Echo Quilting Clips
Notions:
- Thread snips
- Quilting Gloves
- Quilting design inspiration
Fabric Requirements:
- 1/2 yard Benartex Burlap Solids #757-71 (Straw)
- 1/4 yard Benartex Burlap Brights #757-19 (Dark Red)
- 1/4 yard Benartex Burlap Brights #757-30 (Gold)
- 1/4 yard Benartex Burlap Brights #757-22 (Orange)
- 1/4 yard Benartex Burlap Brights #757-33 (Daffodil)
- 1/4 yard Benartex Superior Solid #3000B-12 (Black)
- 1/8 yard Benartex Burlap Brights #757-15 (Red)
- 1/8 yard Benartex Burlap Solid #757-7 (Vanilla)
- 1 1/4 yards backing fabric
- 1/3 yard binding fabric
- 1 yard fusible web (i.e. OESD Soft Web)
- Crib size batting
Cutting Instructions
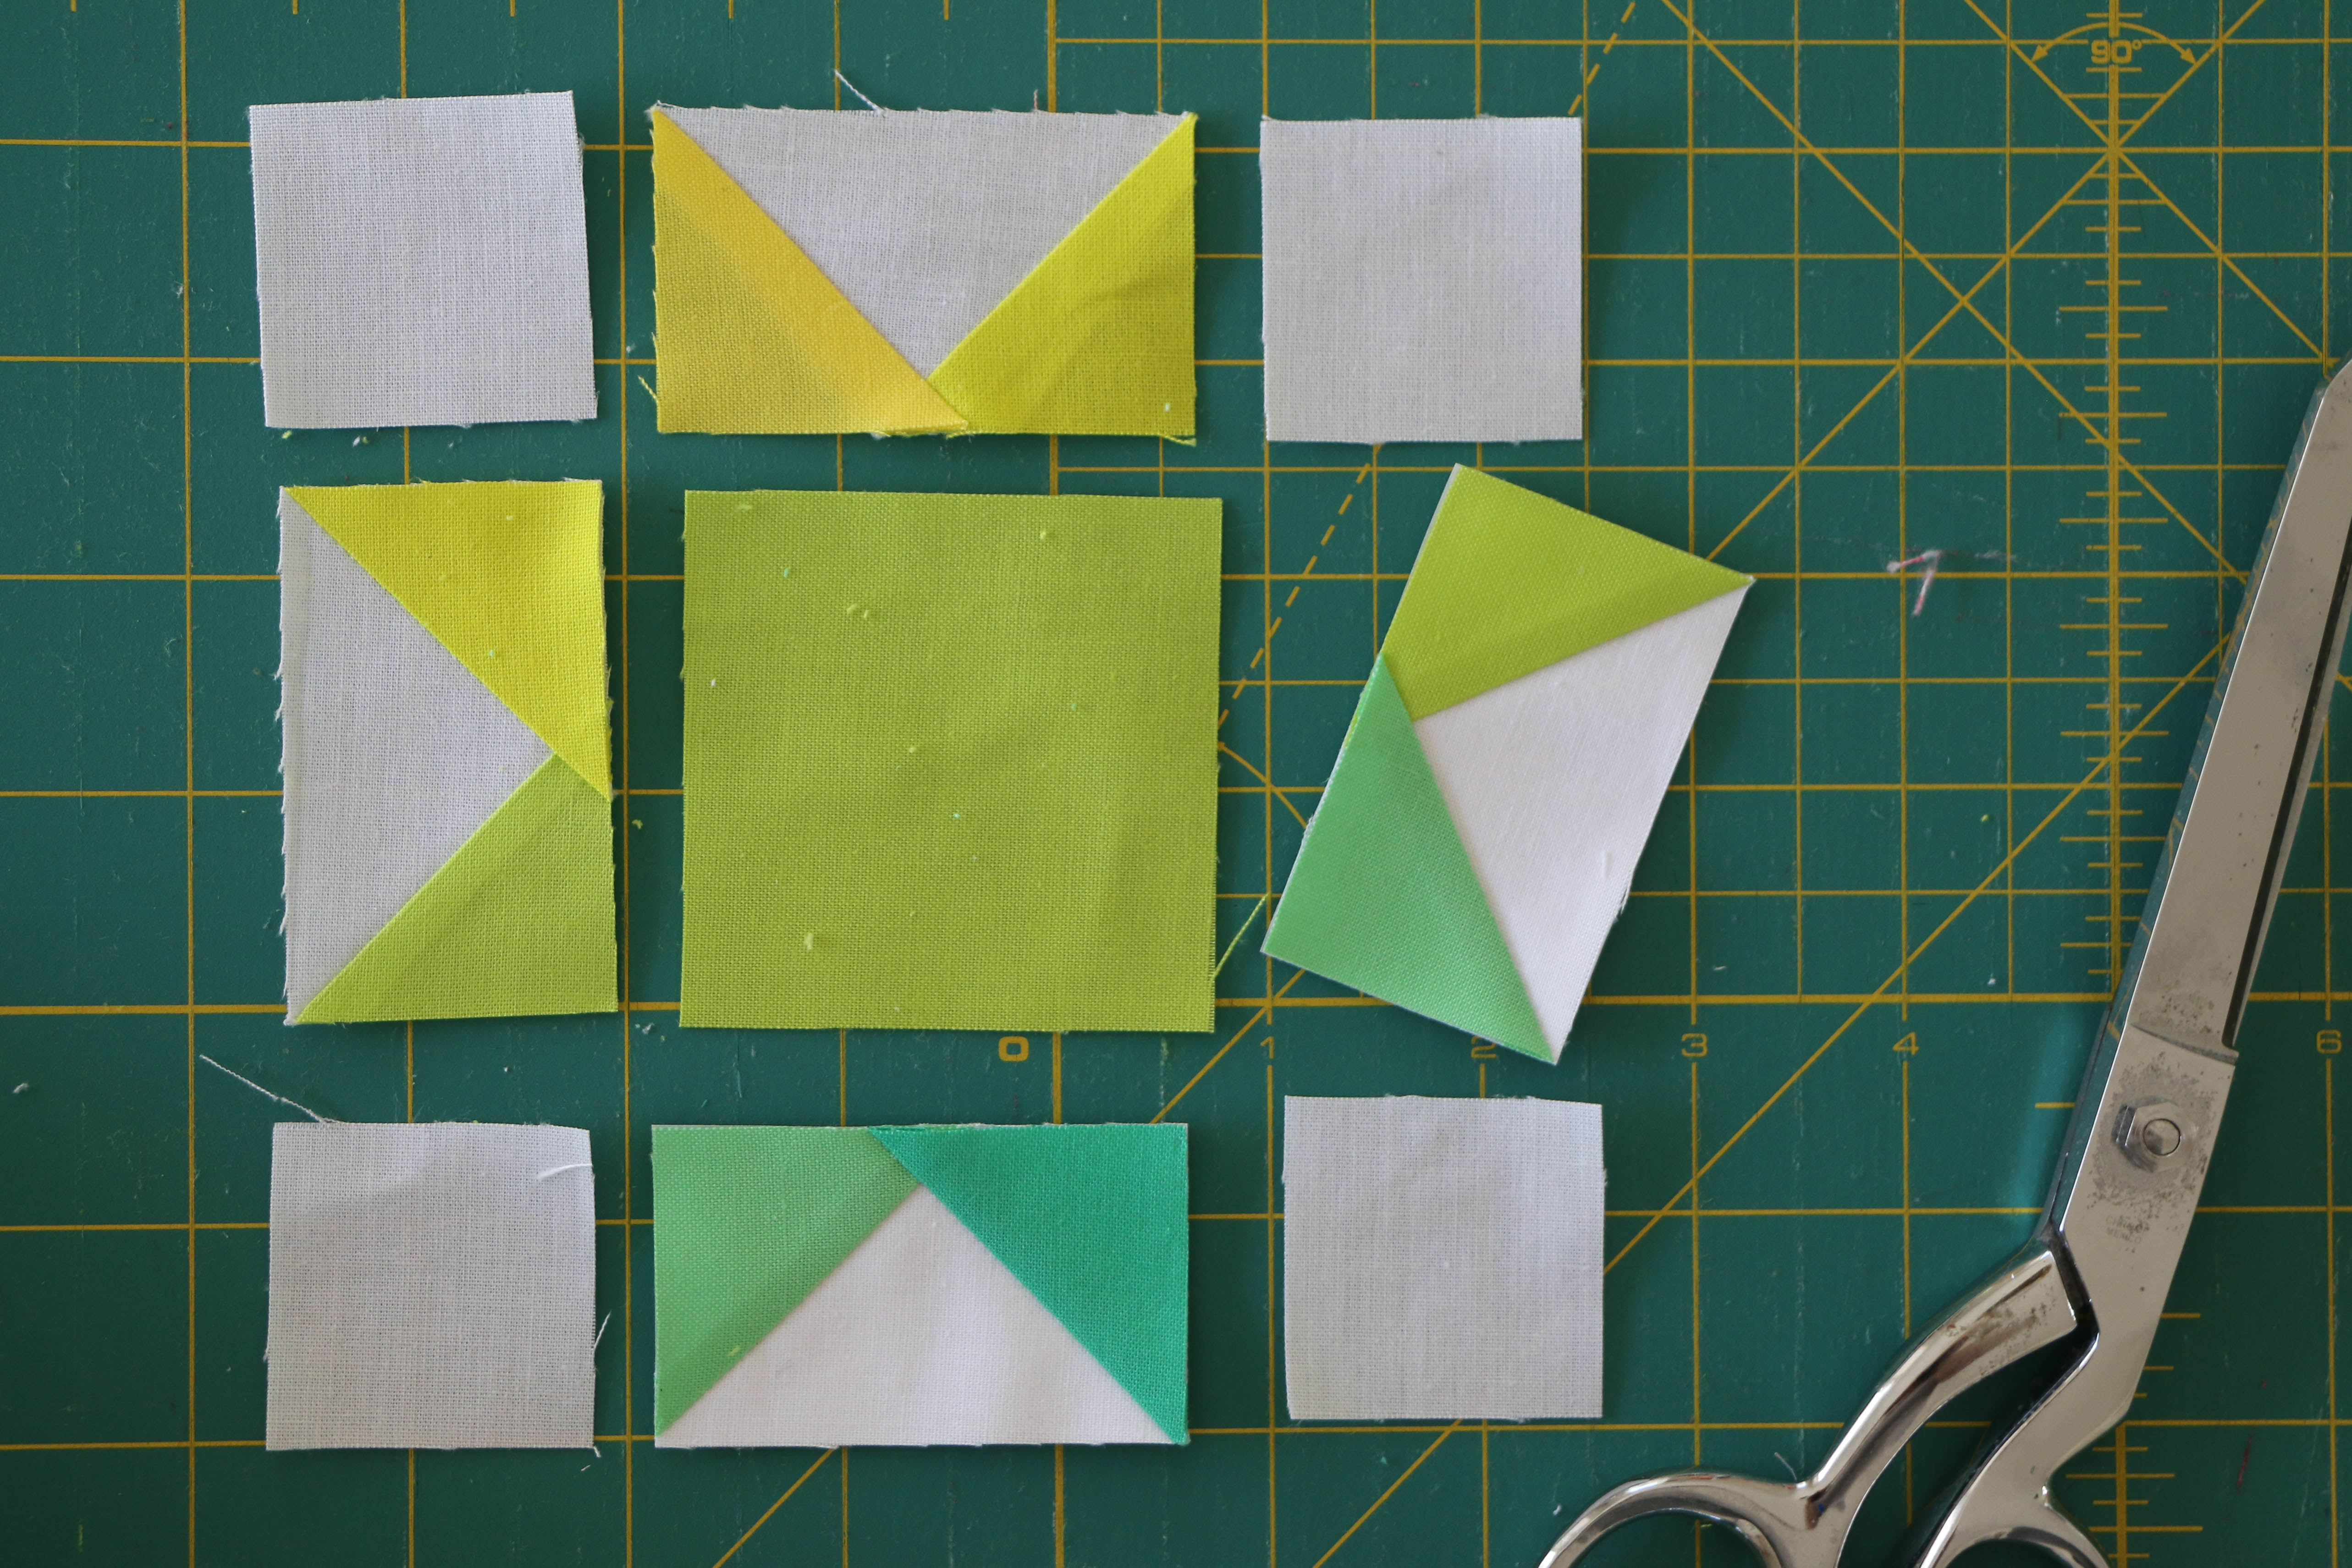
From #757-7 (Vanilla) and #757-15 (Red):
- Cut eight 4 1/2” squares
From fabric #757-71 (Straw):
- Cut eight 8 1/2” squares
From fabric #757-19 (Dark Red) and #757-33 (Daffodil):
- Cut two 3” strips
From binding fabric:
- Cut four 2 1/2” strips
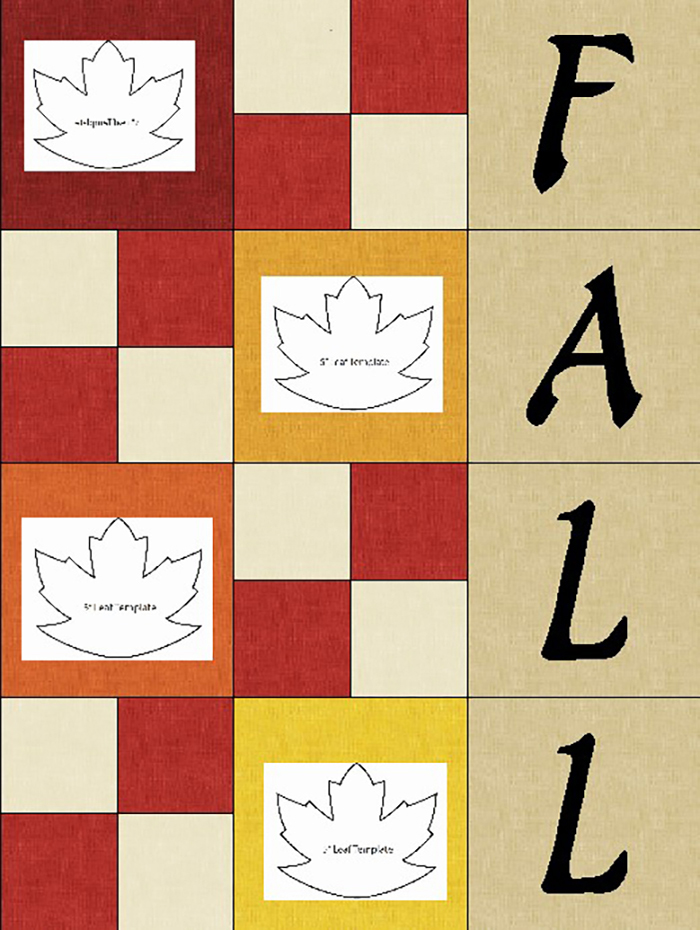
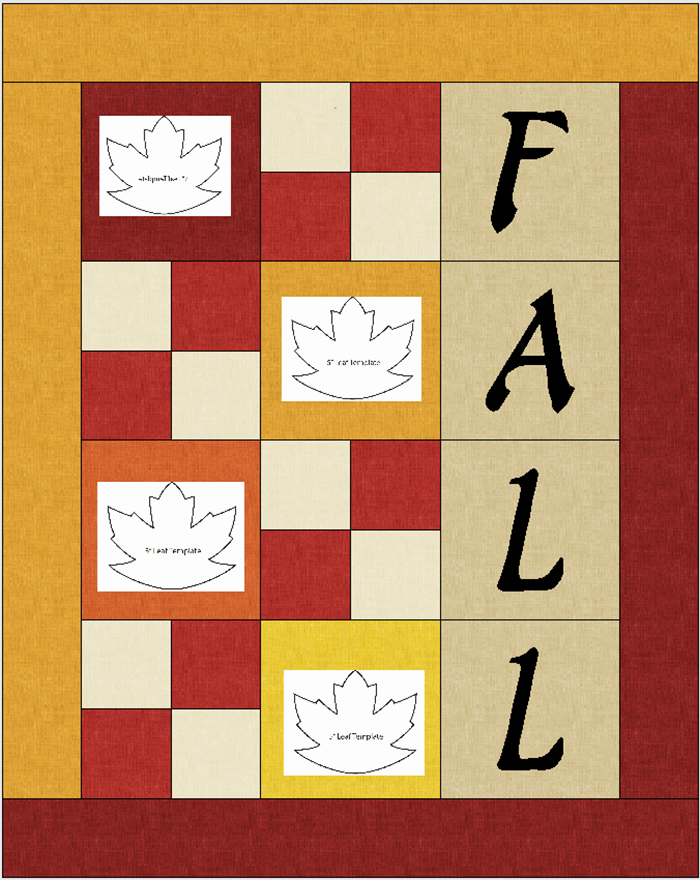
For appliques, download and trace the onto fusible web and then fuse to the wrong side of leaf fabric per manufacturer’s instructions. The following fabrics are used for leaf appliques:
- #757-22 (Orange)
- #757-30 (Gold)
- #757-33 (Daffodil)
- #757-19 (Dark Red)
Trace the “FALL” letter applique templates onto fusible web and fuse to the wrong side of the Superior Solid black fabric.
NOTE: Be sure to reverse the letters prior to tracing onto the fusible and trace/cut two letter L’s
Piecing the Quilt
- Take the 4 1/2” squares and piece them together, pairing one dark with one light, making a four patch block. Press towards the dark fabric.
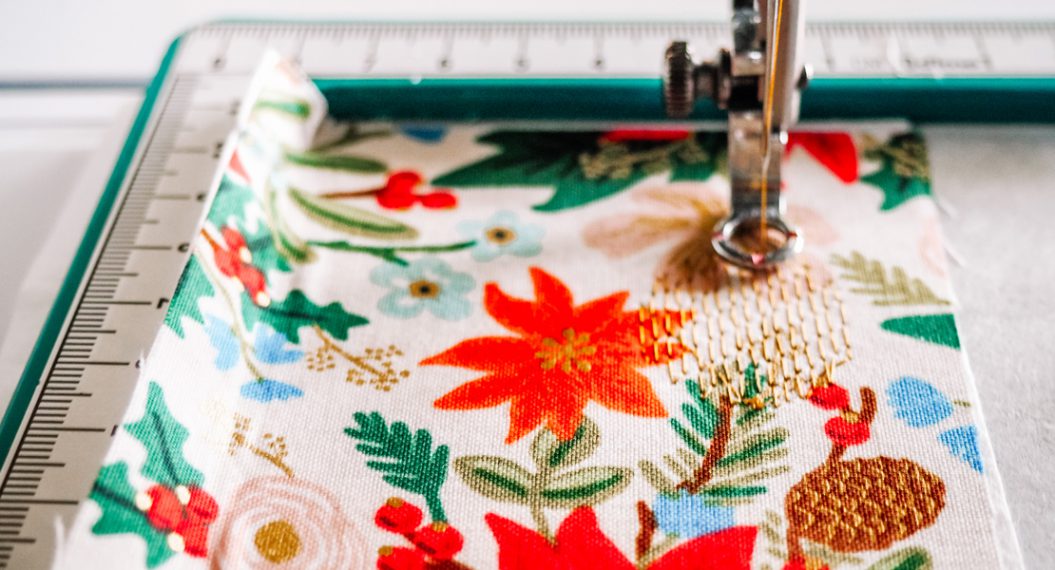
Fuse and then stitch the leaf and FALL letter appliques onto their respective background fabric squares. With the applique letters, you will need to be sure and reverse your letters before tracing them on the fusible.
- I fused all of my applique pieces down to the blocks, then I blanket stitched them on my BERNINA 790 PLUS. For my blanket stitch, I like to increase my Stitch Width and Stitch Length to 3.0. I just prefer that look. For this project, I chose a matching thread to the fabric for the blanket stitches. I did use a tear away stabilizer behind each block to help support the fabric and the stitching for my blanket stitch.
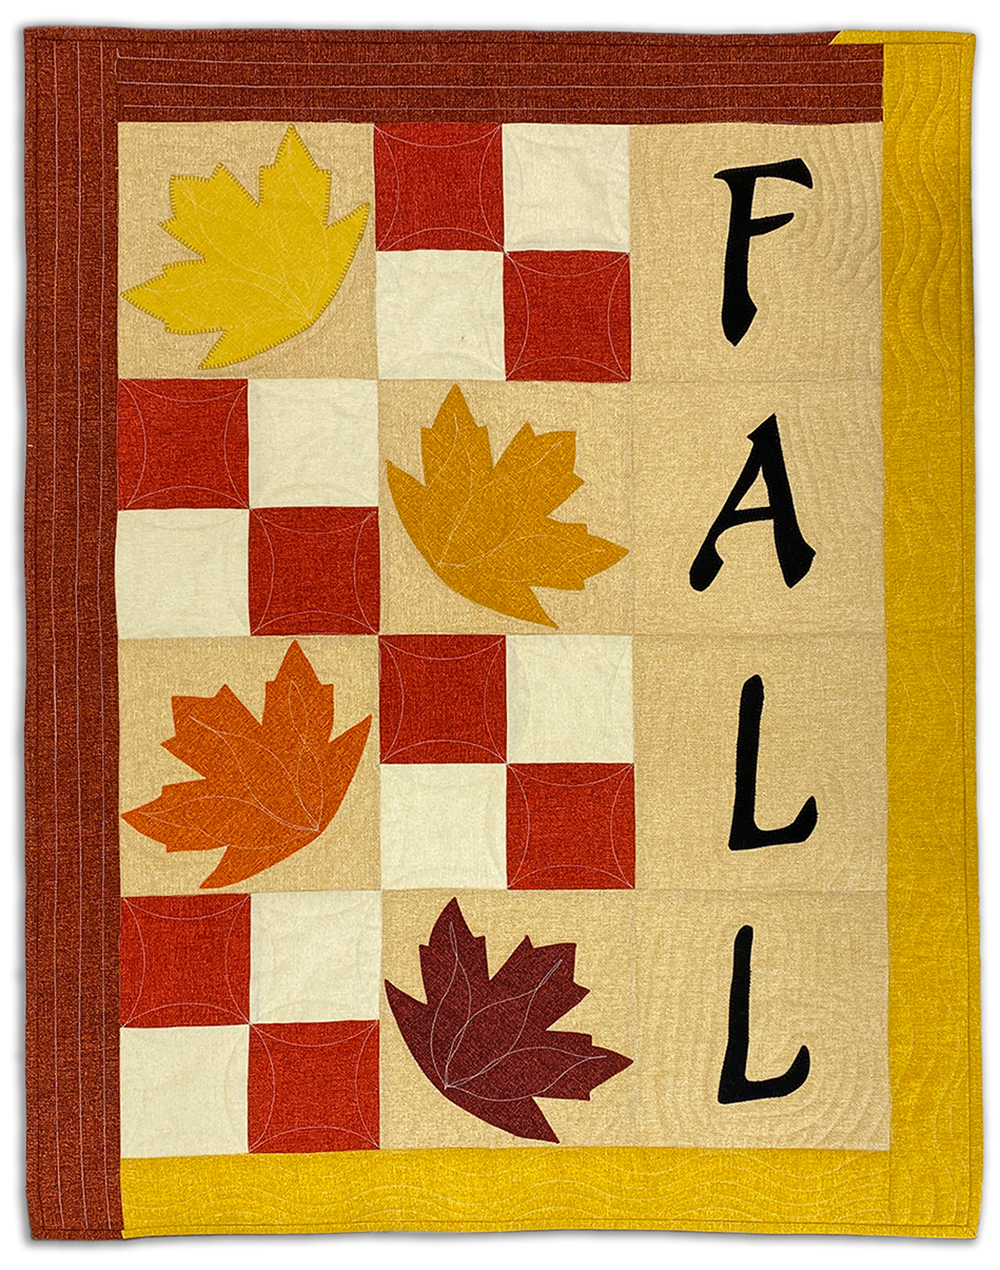
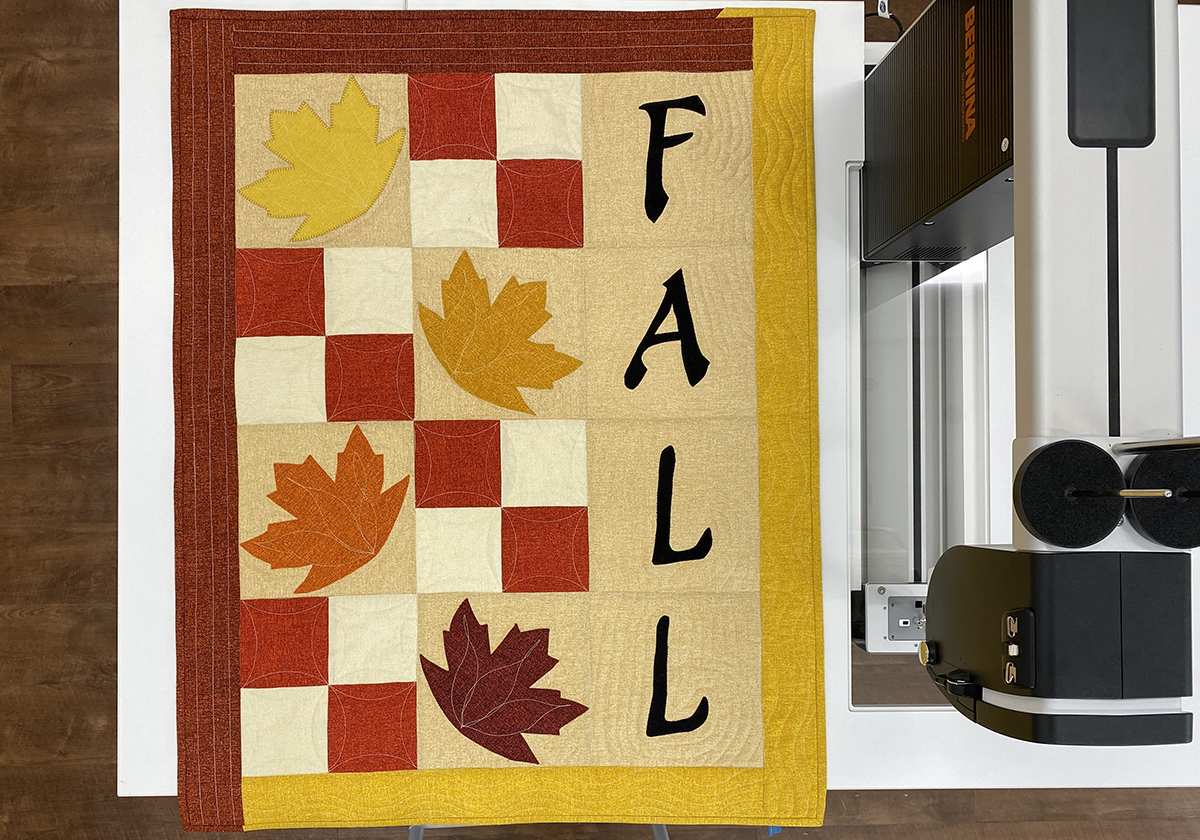
Piece together the leaf applique blocks, four-patch blocks, and FALL letter blocks in the following order:
Row 1 – Leaf applique, four-patch, “F” applique
Row 2 – Four-patch, leaf applique, “A” applique
Row 3 – Leaf applique, four-patch, “L” applique
Row 4 – Four-patch, leaf applique, “L” applique
Adding Borders
Add one top border of #757-19 (Dark Red) and one bottom border of #757-33 (Daffodil). Press seams toward borders. Then add the side border strips. Your quilt top will now have two different fabrics for the outer borders.
Baste your quilt top and batting together, then join me at your machine to get started.
Quilting Your Wall Hanging
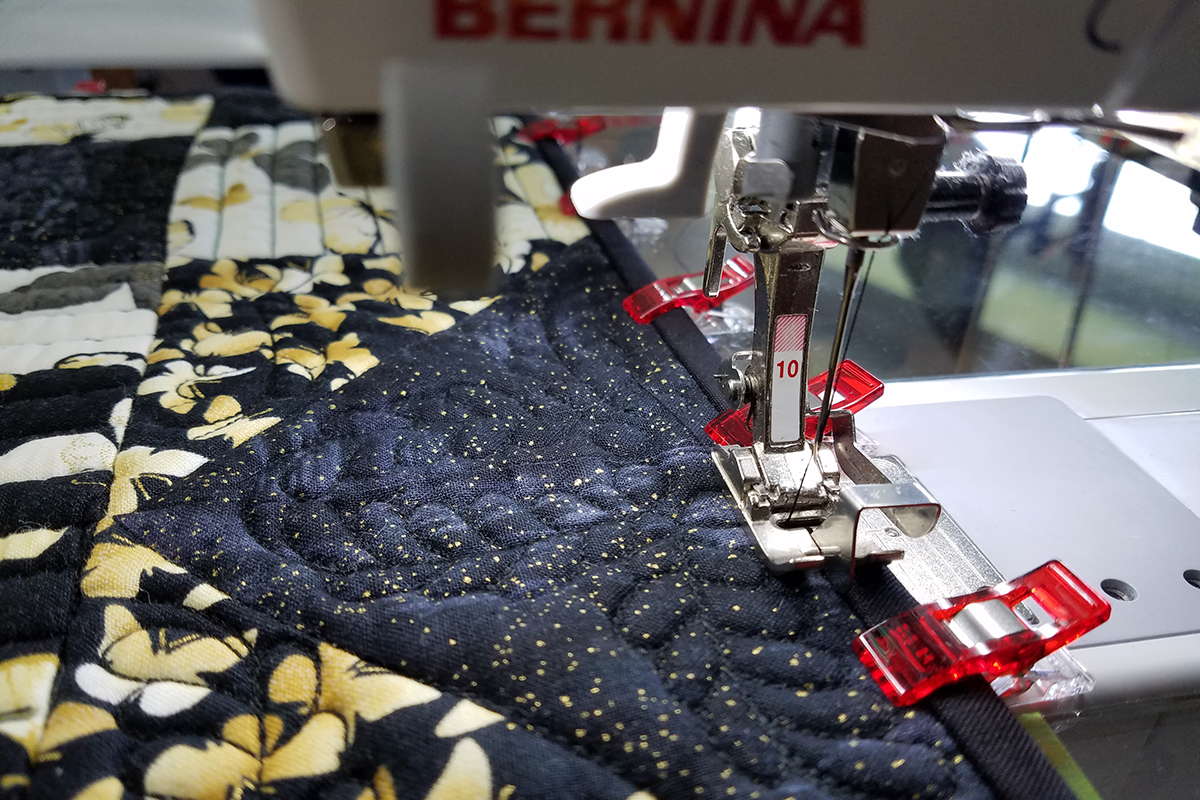
I am using the BERNINA Q 16 Table Model Longarm Machine today for my quilting. There are a couple of settings on the machine that I like to use when I am free-motion quilting.
The first is Needle Stop Down. I set this so that the machine will stop with the needle down in the fabric.

I am going to use my machine to quickly baste my quilt layers together. Using BSR 3, the Basting Mode, I will baste a couple of horizontal and vertical lines of stitching. With BSR 3 you have the option of 1, 2 or 4 stitches per inch.
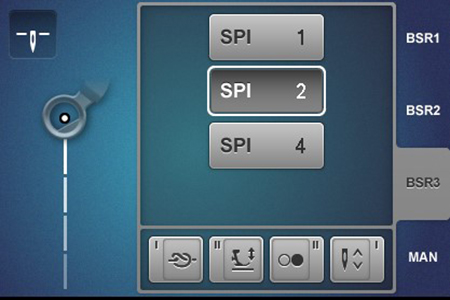
I like to use the 2 or 4 stitch setting, depending on how dense my quilting designs will be. I like to use the basting feature instead of pins or spray basting. This feature allows me to quickly baste my quilt layers together, then as I am quilting, I do not have to be interrupted by removing pins.
After basting, select either Mode 1 or Mode 2.
Part of this will depend on what BSR mode you prefer and part will depend on what design you will be quilting. I will give you suggestions as to which mode to use as we move through the exercises.
Now that the machine is set up, we are ready to quilt. First, we must decide what type of quilting designs we want on our project. For the majority of this project, we are going to use rulerwork quilting techniques. I did mix a little free-motion quilting in on a couple of the blocks.
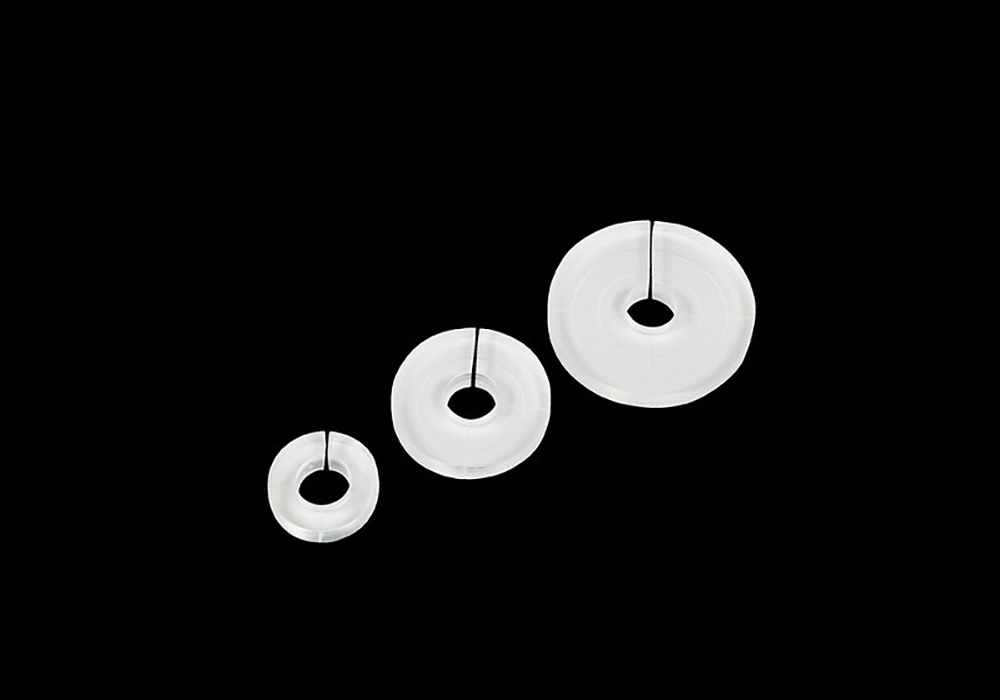
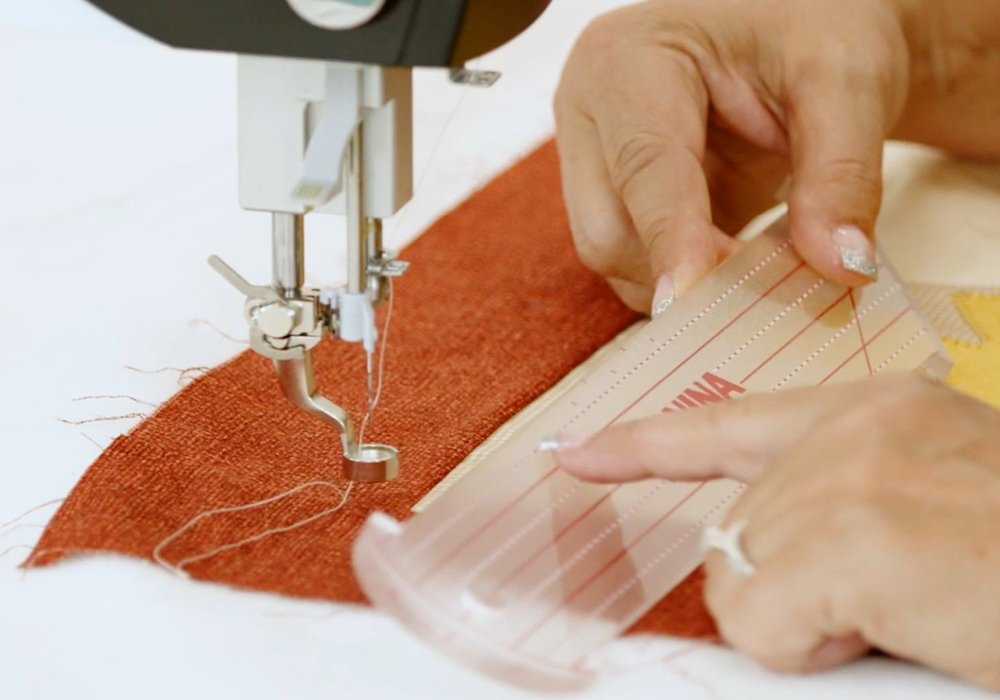
I am going to use the Echo Quilting Clips and attach them to the Ruler Foot #96.
To correctly attach the Echo Quilting Clips, make sure that the grooved edge is towards the bottom, then snap the foot into the clip. There are three different sizes of clips, ranging from 1/4″ to 3/4″ of quilting space. Our presser foot is 1/4″, so if we add the 1/4″ Clip, we end up with 1/2″ quilting spacing, and so on with the larger Clips.
The first thing I want to do is take my securing stitches.

By using the Securing feature, the machine will take one complete stitch, bring up my presser foot, and when I move the machine back, while holding the top thread, I can then pull up my bobbin thread. By holding both threads and then holding the button for Securing Stitches, the machine will take the preprogrammed amount of securing stitches.
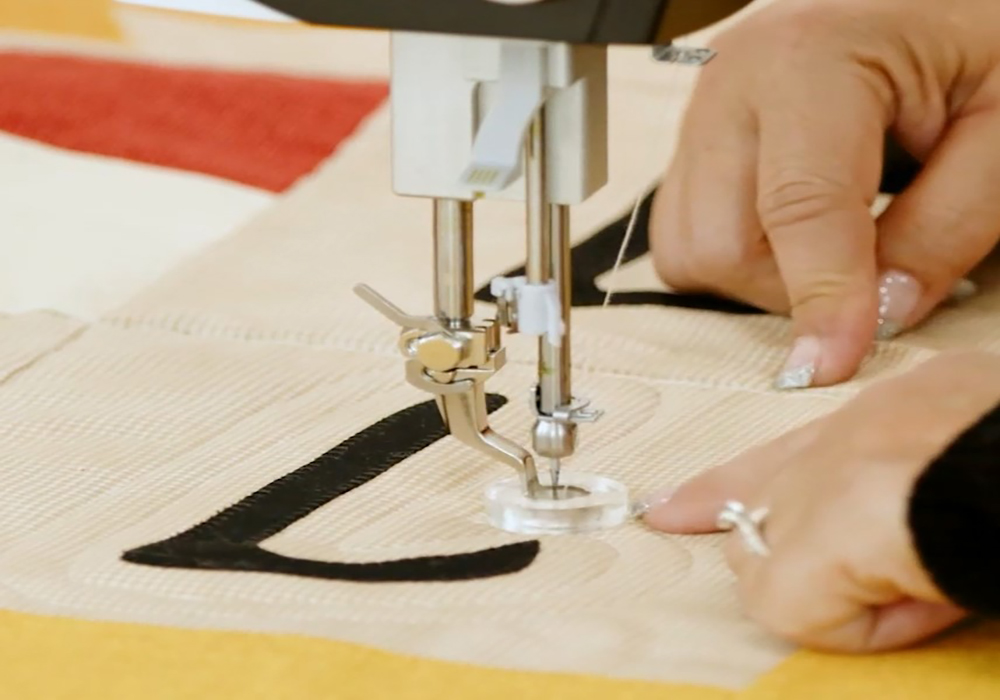
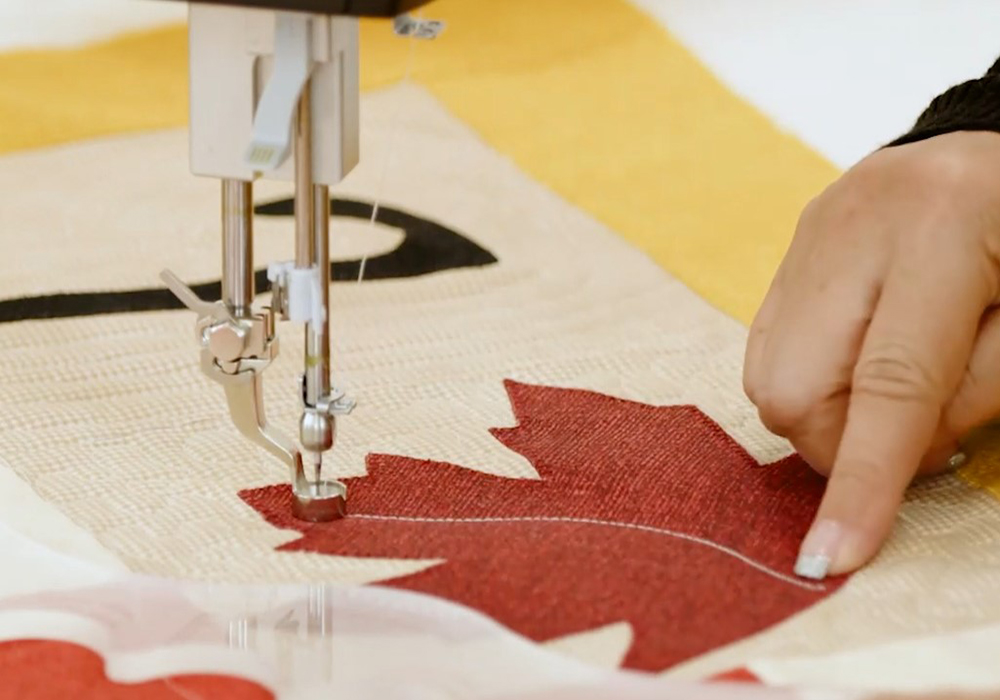
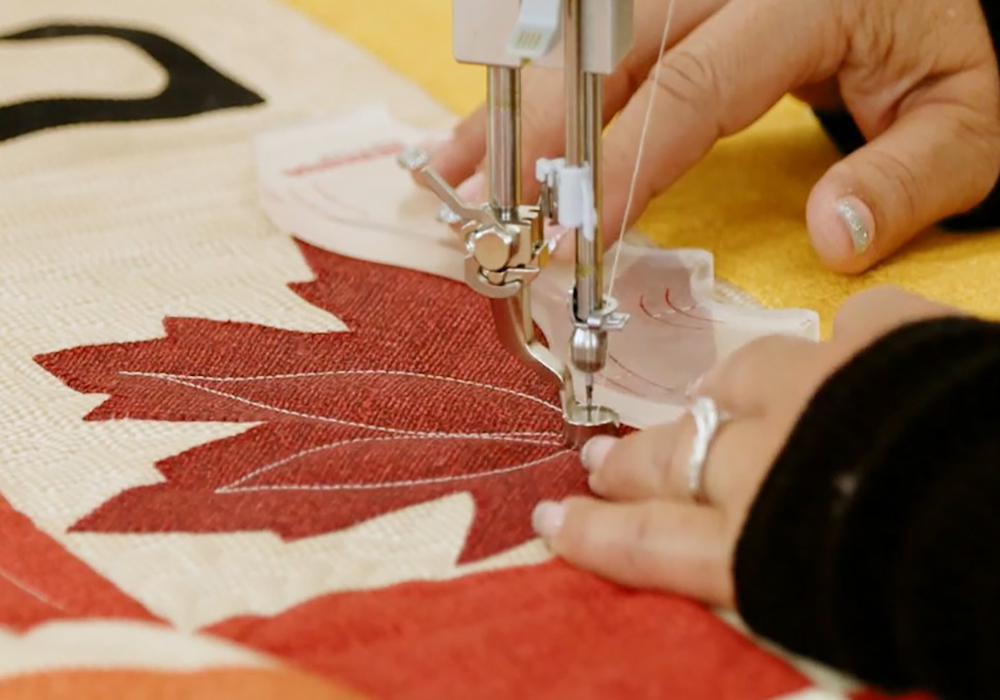
To use the Echo Clips to quilt around your area, align the clips along the outside edge of the applique letter and free-motion quilt following the letters shape.
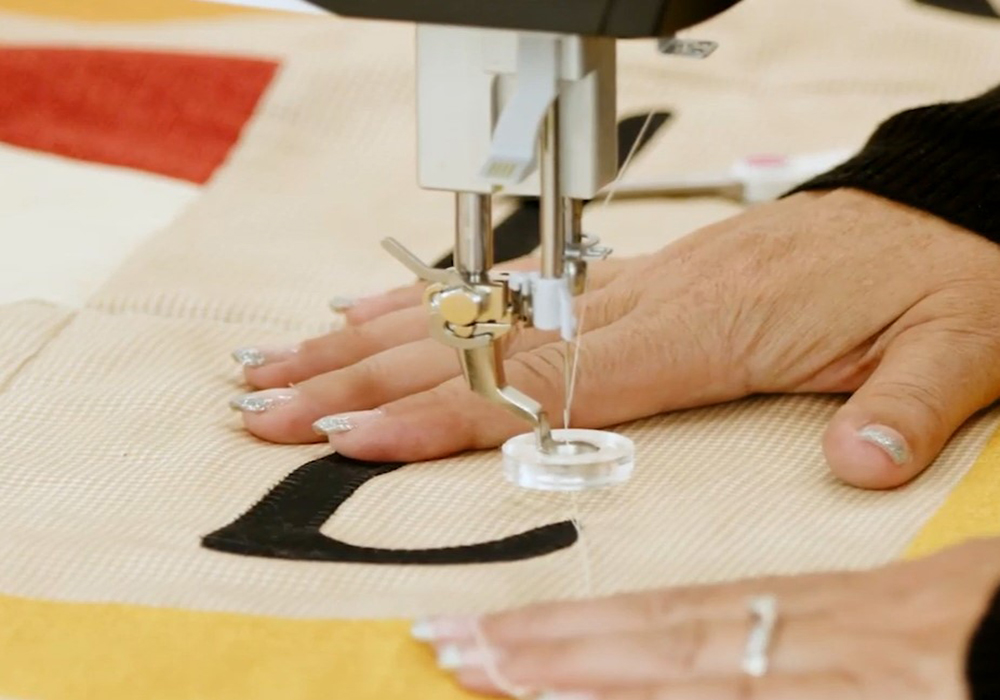
Once you have quilted completely around the edge, you can either decide to stitch over or tie off your stitching. I am going to tie off, then start again, realigning my Echo Clip to the previous stitching line. Continue this method until you have all the letters outline-quilted.
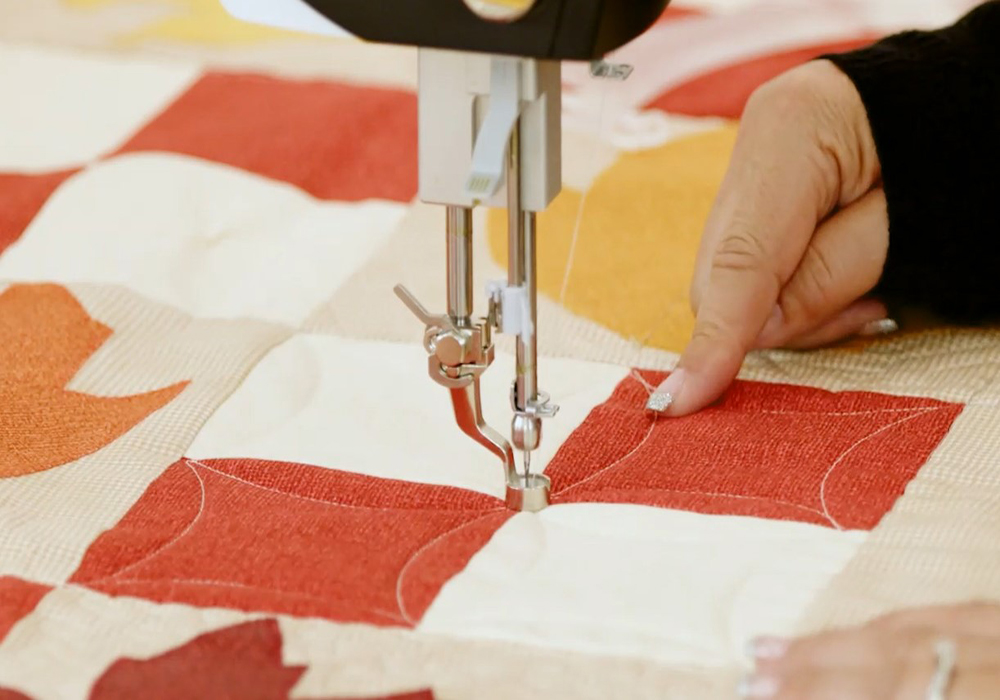
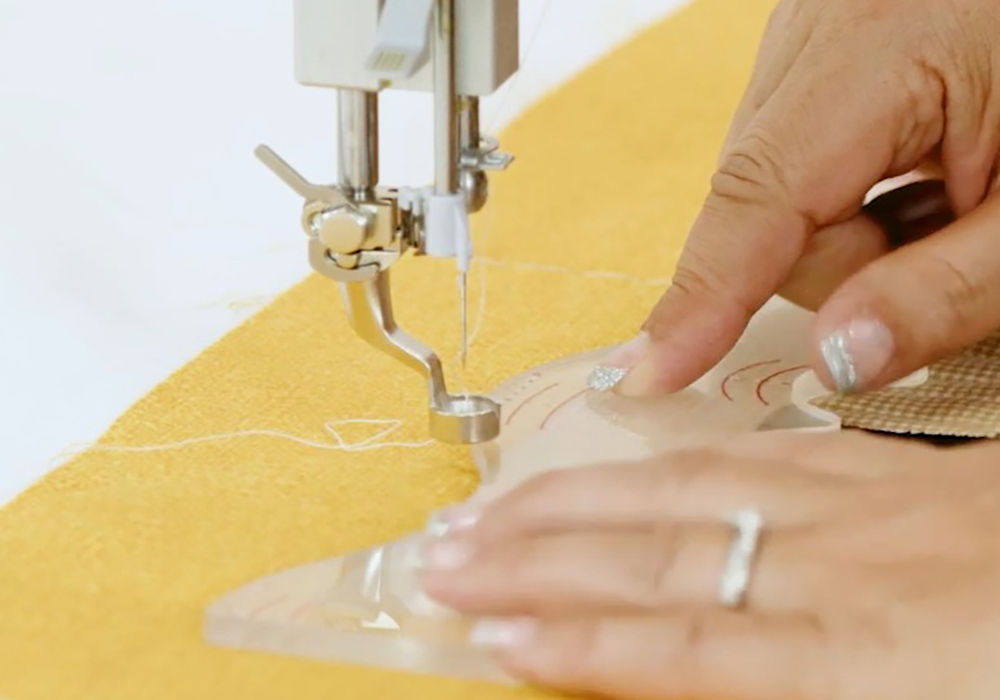
For this next section, we are going to quilt the pieced blocks. I am using one of the rulers from the new BERNINA Borders Ruler Kit. The ruler I used is named the Pointed Leaf & Ovals ruler.
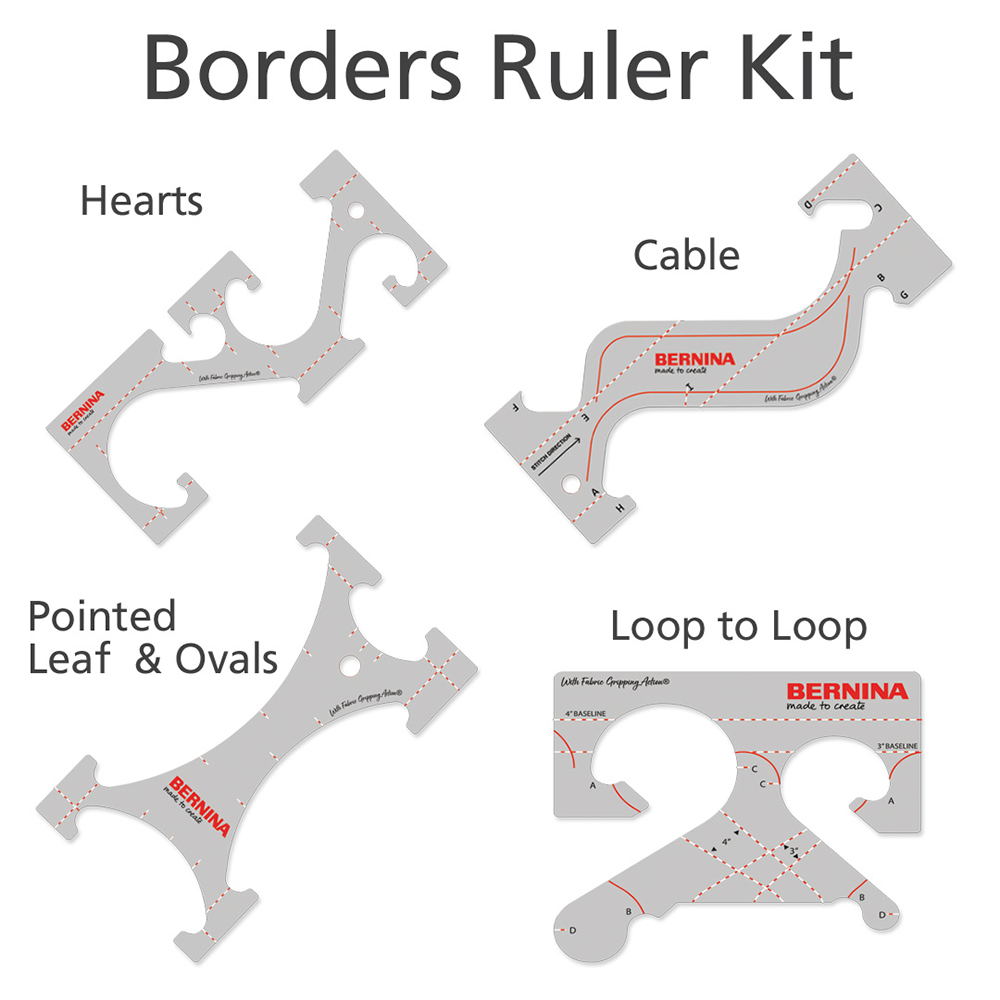
I am going to quilt an orange peel-type design using that ruler. I like to start in the center of the block and work my way out and around.

The completed four patches will look like this.
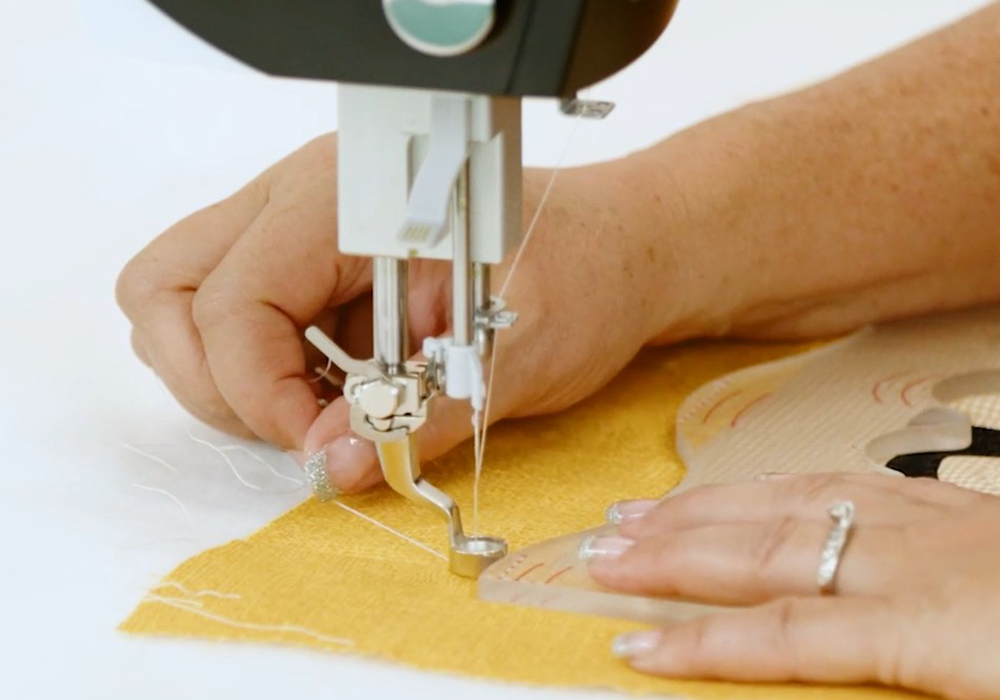
For the leaves, I used the Waves ruler from the new BERNINA Basic Essentials Ruler Kit.
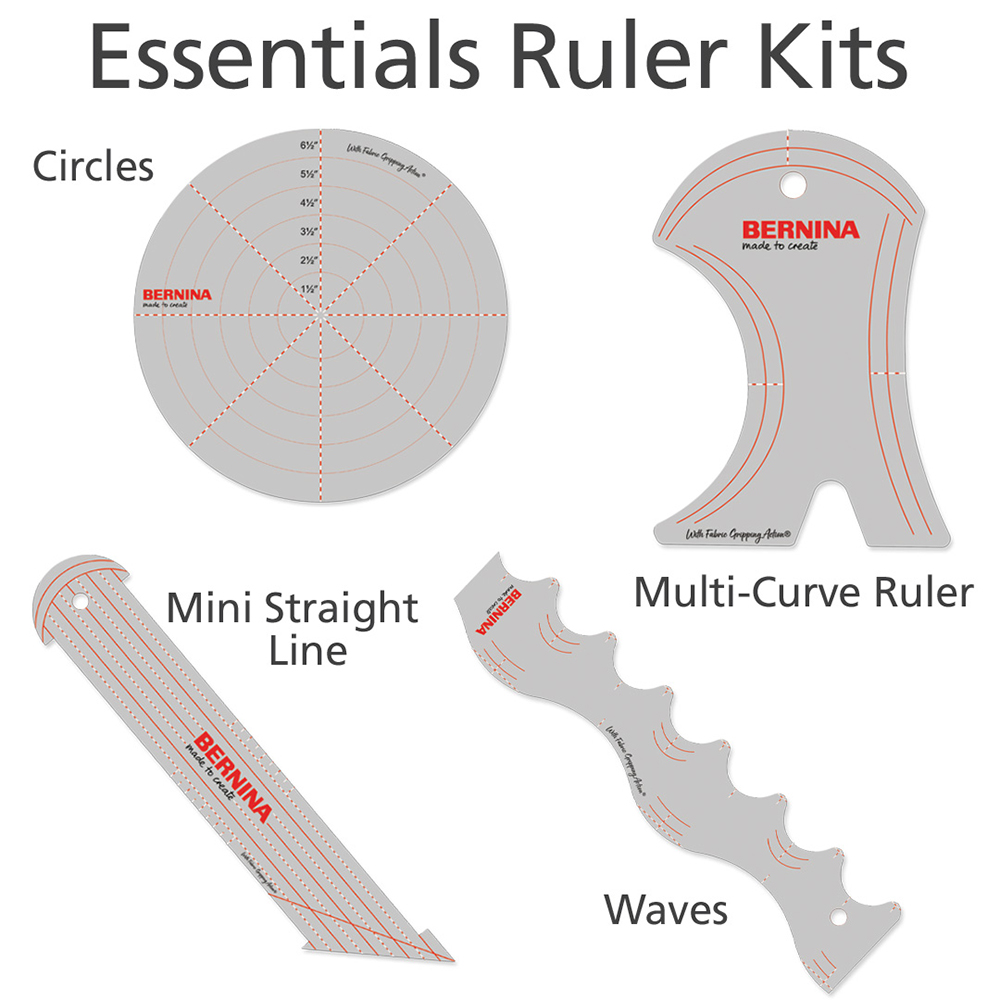
I’m using the ruler to create the stem of the leaf applique.
Next, I used the same ruler and added in some veins to either side of my stem.
Next, I quilted the background area of the leaves. For a couple of them, I did echo quilting with the Echo Quilting Clips, and for a couple, I did a simple stipple quilting.
Borders
Now that the center of the quilt is quilted, move on to the borders. In the gold borders, I used the Waves ruler to give the wave effect. Lining up this ruler was very easy using the new reference lines. I decided that the second reference mark will give me the design I want without going outside the border.
I lined the ruler up with the seam line of my side and top border to hide my starting stitch.
I used the end of the ruler to stitch up to continue on to the second row, realigned with the markings on the ruler and continued on until the border was finished.
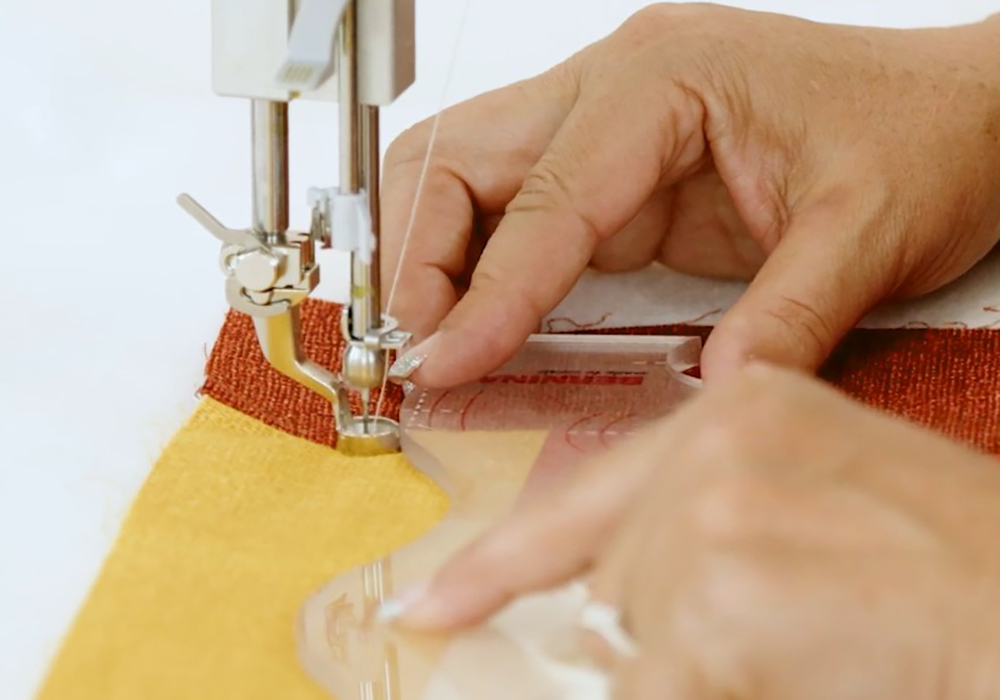
For the other rust-colored border, I used the Mini Straight Line ruler and just quilted straight lines.

To get started, I used the first reference line (the dashed one) and aligned with my seam line.
Again, I aligned the ruler mark with the seam line and continued to quilt the border.
When I came to the end of my ruler, I stopped to reposition my hands and continued on and stopped at the seam line.
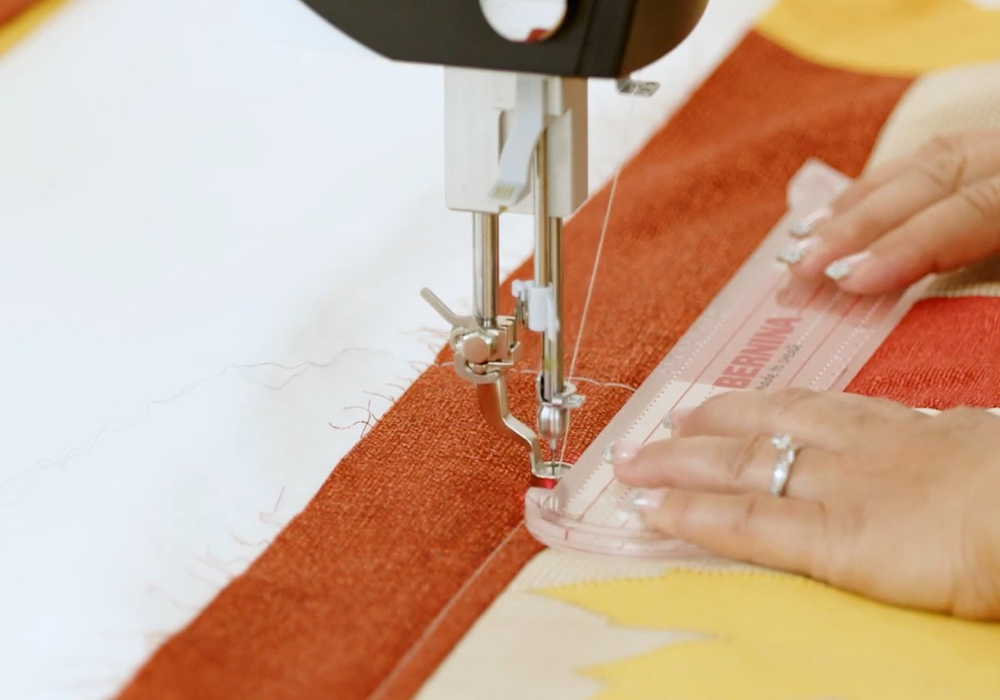
I used the new reference lines on the ruler to stitch up a quarter of an inch to begin my next row.

If you have been following along, then congratulations, you have finished your quilting! The last step is to add the binding and the hanging sleeve of your choice.


Excellent video demonstrating all the quilting steps!